You do not have to have a garage full of fancy tools to build your own cabinets.
You can build beautiful kitchen cabinets with some inexpensive basic tools. See how we built an entire kitchen full of custom cabinets with only $600 in tools. Then make sure to check out our post for how to build cabinets for all details on building your own!
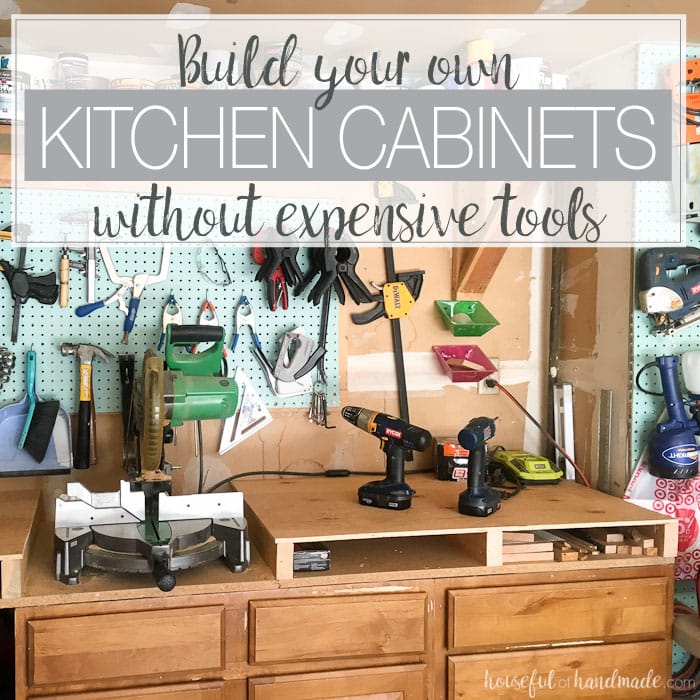
Have you ever wanted to build your own cabinets but thought you would need thousands of dollars in tools to do it? Well I am here to show you how to build kitchen cabinets with just a few inexpensive tools.
You can build your own cabinets with these simple tools and save thousands of dollars, even after buying the tools you might not already have.
This post may contain affiliate links. As an Amazon Associate I earn from qualifying purchases. Click here to read my full disclosure policy.
Cost Savings of Building your Own Cabinets
Kitchen cabinets are the biggest expense when remodeling the kitchen. I thought about just painting our old cabinets to save so much money, but they were not in great condition after 30 years. And I really wanted to add storage by having kitchen cabinets that go all the way to the ceiling.
I started looking at buying kitchen cabinets and was shocked. It would cost over $10,000 for what I wanted. Instead I looked at Ikea cabinets. For our kitchen it would cost around $6000 for the cabinets I wanted and the sizes I would be limited to would leave me with wasted storage space.
Then on a whim, I started looking at what it would take to build them instead. Looking at the actual cabinets I realized, these are easy to build. They are just simple boxes.
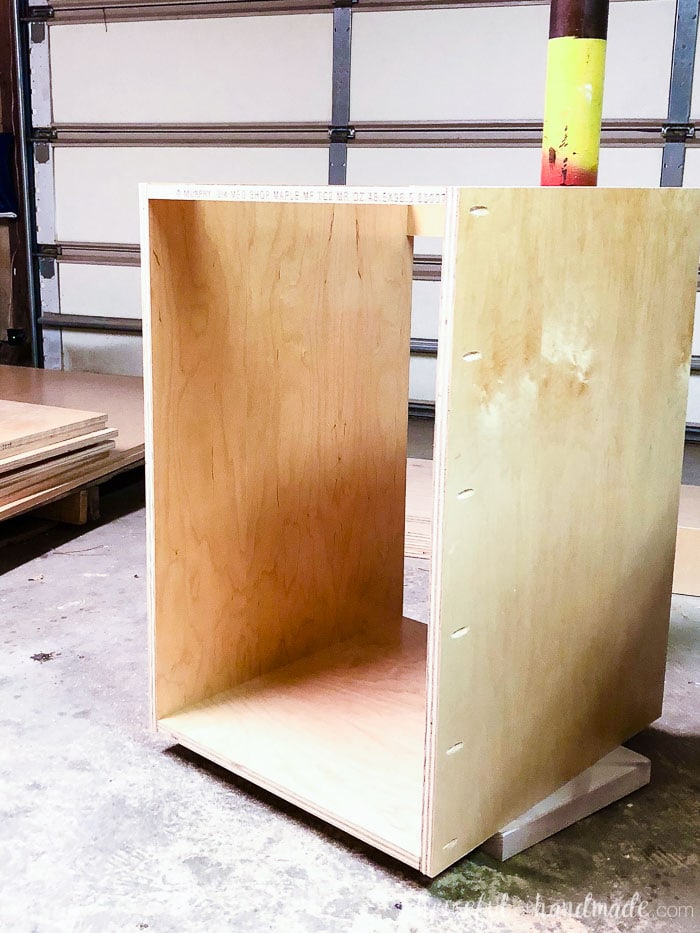
After a little planning to see how much wood it would take to make my own kitchen cabinets, I realized I could build exactly what I wanted, and utilize every inch of my kitchen, for less than $2000 in supplies. Holy cow that is a big savings!
And I knew I could build the boxes and face frames easily. The more I researched, the more I was convinced this was the best option for our budget farmhouse kitchen.
Now that I am almost done with building all our kitchen cabinet boxes and face frames, I want to share with you what I have learned. First is that you do not need lots of expensive tools to build your own cabinets. You can build everything you need with around $600 in tools. And when you consider the cost savings of even buying Ikea cabinets (which you still have to assemble), those $600 in tools are totally worth it.
Before Building your own Cabinets
But before you jump into this, you need to know that you should have some experience in woodworking before taking on this big project. And you have to know how to measure and cut accurately so you can get square boxes and face frames. Even thought the cabinets are basic boxes, accuracy is very important.
I go into detail on building cabinets in my How to Build Cabinets series. Make sure to read all the tips and suggestions so you are armed with the information you need to build your own kitchen cabinets.
I also have detailed posts on these specific types of cabinets and am adding more regularly. Make sure to subscribe so you don’t miss any new ones!
- How to Build Base Cabinets
- How to Build Wall Cabinets
- How to Build a Farmhouse Sink Base Cabinet
- DIY Cabinet Doors {3 Ways}
And make sure to check out our finished kitchen remodel here!
Tools Needed Build Kitchen Cabinets
This post is not sponsored, I am just sharing the tools I use in my own shop. I have worked with Kreg Jig on other projects but only because I truly love their tools and jigs.
I built all my cabinet boxes and face frames with just the following tools. And I do not have the fancy expensive brands either.
- Circular saw with Rip-Cut and Accu-Cut guide tracks
- Miter saw
- Kreg jig
- Impact drive
- Drill
- Squares
- Clamps
- Vacuum
- Optional: table saw
But how much would all these tools cost? You can of course spend thousands of dollars by buying the most high-end options for each of these tools, but I promise you you can get great results without the top of the line products because that is what I did.
Also, check out all my tips for how to build a woodshop on a budget to see how to get tools for cheap!
Circular Saw
Circular saws are very budget friendly. You can easily find one for around $50-$60. To make an inexpensive circular saw even better, spend another $20ish and get a new blade with more teeth like this Diablo 60 tooth one. The more teeth, the finer cut, which makes it great ripping down plywood for kitchen cabinets.

This is the circular saw I have been using for a few years now and it is has been great for cutting plywood for projects like this handmade dollhouse and cutting large 2xs for our patio pergola. And now I am using it for building all my kitchen cabinets.![]()
Circular Saw Guide Tracks
Once I invested in my circular saw guide tracks, I really fell in love with the circular saw. There are ways to make straight cuts without them and I have used many of those tricks.
When building the plywood closet organizers I cut straight lines by clamping a 4′ level to the wood to get a straight cut. But that involves measuring the distance from the edge of the saw plate and subtracting it from the measurement needed. I messed up a few cuts by miscalculating. The Accu-Cut and Rip-Cut are much more fool-proof solutions.
The Rip-Cut is great for ripping the full 8′ length of the plywood into widths up to 24″. However, if I need a 30″ wide piece (like I did for my new pantry cabinet) I can easily rip off the remixing 18″ to be left with 30″.

Then you can use the Accu-Cut to make precise cross-cuts in the plywood up to 4′ long. The two together means I can completely break down a 3/4″ sheet of plywood by myself which was impossible on the table saw. And you can buy both for just over $100.![]()
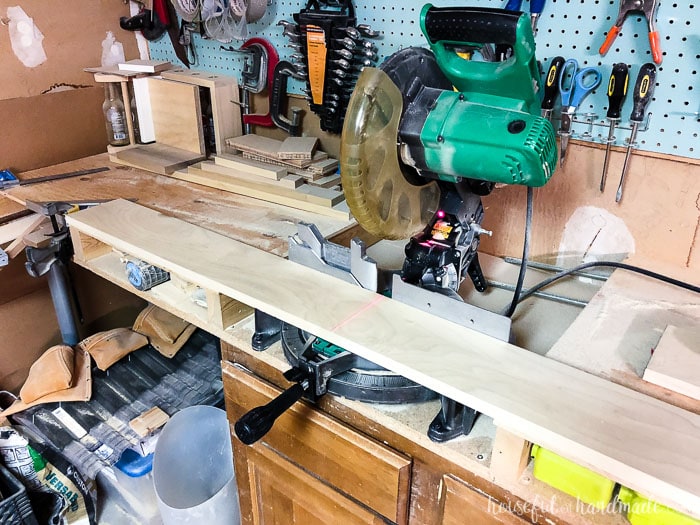
Miter Saw
The miter saw is probably my most used saw. It’s also the one I have had for the longest time. When I wanted to start woodworking, it was the first thing I bought.
But of course I didn’t have a lot of money, and wasn’t sure if this was something that I would love and continue doing, so I went with a very basic saw. Lucky for me, it has been a great saw and I am still using the same one today (almost a decade later)!

Someday I will upgrade to a sliding compound miter saw, but for now this Hitachi 10″ saw is perfect. It usually runs around $100 and I used it right out of the box for years. When I was ready to really up my game, I upgraded the blade to this Makita 80 tooth one. This alone made a huge difference. Now I get very clean cross cuts.
I also took the time to learn how to properly true up the blade and fence so I can get super accurate cuts. This makes all the difference when building things like cabinet face frames. Those perfect 90 degree cuts are going together so nicely and giving me perfectly square frames.
To do it, I found this video from John Heisz super easy to follow. Now it is secured to my homemade miter saw table (old kitchen cabinets with an MDF table top and raised surfaces on either side to be level with the miter saw bed) and ready for cabinet making.
Kreg Jig
The Kreg Jig is definitely a work horse in my garage. It is used in almost every build project. It makes it super easy to get super strong joints. I cannot believe how strong my slatted outdoor sofa is, even with angled joints.
So when making kitchen cabinets, I knew I could use the Kreg Jig to make them super strong to withstand all those dishes and gadgets I have been accumulating over the years. And it is easier than cutting rabbets and dados in your cabinet boxes.

You can get a basic Kreg Jig for around $50, but I recommend the K4 system that is around $100, especially for a large project like kitchen cabinets. You only have to set up the jig once, they you can just keep drilling the perfect pocket holes over and over and over and over (which you will be doing when building kitchen cabinets). The extra money is well spent I promise.
Impact Driver & Drill
You can definitely use a drill to drive your screws and drill your pocket holes. But having a separate impact driver, instead of switching bits out all the time, is so much better. The impact driver is my favorite tool for driving in screws. Usually you can buy the two in a set with a battery and charger.
I bought my Ryobi drill and impact driver in a set so, so many years ago. This was before Lithium batteries, even before Ryobi changed their tools to their signature green color. But I am still using those same two tools today (just with new Lithium batteries for better battery life).

You can buy a similar set for around $140, but if you watch, the sets are usually the ones that go on sale for even better prices.
Squares
Even though kitchen cabinets are really quite simple to build, it is important that you spend the extra time to make sure things are square and precise. This means measuring exactly and using squares in your building. I have a speed square and a carpenters square and use them all the time. Both are very inexpensive (less than $10 each).

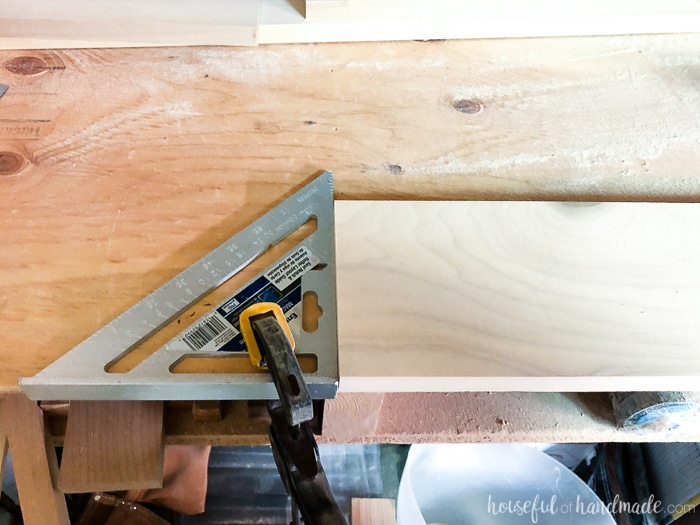
I use my speed square to mark cuts before taking them to the miter saw. And it also works great as a miter saw guide track by clamping it to my homemade miter saw table.
Clamping it to the miter saw table allows me to make lots of the exact same cut over and over quickly. This way I know all the face frame stiles are exactly the same length and each pair of rails are exact too.
The carpenters square is great for squaring up cabinet boxes and the corners of my face frames. I also love using it to get a 90 degree cut line when cutting plywood with the Accu-Cut. It is larger than the speed square so you get even more accuracy.

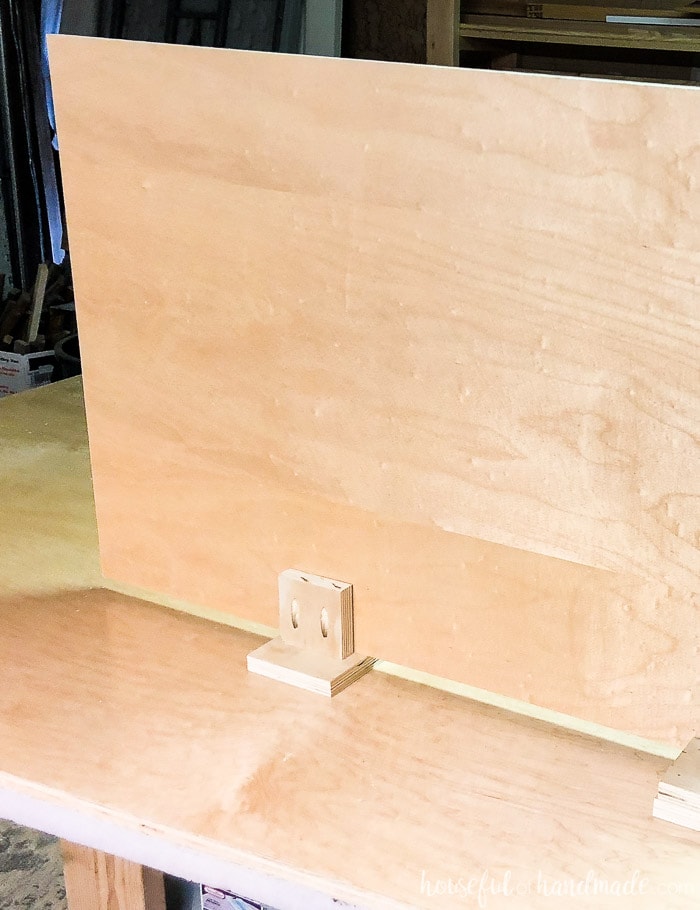
I also made a homemade square to help even more with the kitchen cabinet build. This helped to ensure the cabinet boxes went together at 90 degree angles. It made the job so much easier and I am sure I will find many more ways to use them in the future.
How to Make a Right Angle Guide
- Cut pieces of scrap 3/4″ plywood into 6 3/4″ squares.
- Cut (4) 3″ squares. Make sure these are super square by using your nicely trued up miter saw.
- Glue the 4 smaller squares on top of the larger square so that a piece of 3/4″ plywood fits snugly (but not too snugly) in between them.
- Use a speed square to make sure the squares are straight and square to each other.
- Secure with a few finishing nails while the glue dries.
This simple square jig will help hold your large cabinet box pieces while you work and help everything stay square!

Clamps
Do not try to attempt a large scale project like kitchen cabinets without clamps! They are a life-saver in the shop and give you an extra set of hands, or two.
Specialty clamps are so useful for getting strong pocket hole joints or flat face frames. You can really never have too many clamps, but I would suggest at least these two when doing kitchen cabinets: the Kreg Face Frame clamp and the Kreg Automax Right Angle clamp.


While clamps can be pricey, they are worth their weight in gold. I only own one of each of the above mentioned clamps, and built all our kitchen cabinets with just them and some homemade helping hands.
So start with what you can afford and then add a few more when you can. Clamps make great presents and I always ask for one at Christmas or birthday time.


I also made a set of helping hands from scrap wood. These combined with the the other clamps made my work so much easier.
How to Make Helping Hand for Cabinet Building
- Cut (1) 4″ square from scraps of 3/4″ plywood.
- Cut (2) 3″ squares from scraps of 3/4″ plywood.
- Attach the two 3″ pieces onto the 4″ piece with glue and nails or screws (I used pocket holes) so that the 3/4″ piece of plywood fits in between them.
Now you can use them to hold your large pieces of plywood when you need a hand. It also keeps your plywood ends at the same height as the homemade square jig, ensuring very square boxes.
Vacuum
All this cutting and drilling pocket holes is super messy. I cannot tell you how much nicer it is to work in the garage now that I finally bought a wet/dry vacuum.
Shop vacuums are not super expensive (we bought ours for around $60) but totally worth it when you are making so many cuts at once.
Also, I would highly recommend hooking it up to your Kreg k4 pocket hole system when drilling all those pocket holes. The openings can sometimes get plugged up with sawdust and the vacuum kept them clean so the holes were easier to drill (and I didn’t have to clean up when I was done drilling too).
Table Saw
A table saw is the most expensive of all these tools, but they are very versatile. If you plan on building a lot, I would recommend getting one.
But for the kitchen cabinets, you can build them without one. And you do not have to go buy a new one, I am using my dad’s hand-me-down saw that I bought for $150. It works great for all the projects I need.
If you do not have any corner cabinets in your kitchen, you can absolutely build your own cabinets without a table saw. However, the upper corner cabinet required the plywood be cut at a 45 degree angle along one edge. Could you do it with the circular saw? Yes, but I find it easier on the table saw and since I have one I used it.
You could also build a blind cabinet that is not angled on the front and then you wouldn’t have to worry about it. Also, if you know someone with a table saw, maybe you can take your few boards that need the angle to their house. Easy as that!
For our kitchen cabinets I also used the table saw to rip down the boards for my face frames because they didn’t have 1×2 and 1×3 widths available at the lumber store I like. You can buy the boards for the face frames already to size though and would not need to worry about this extra step. The wood will cost slightly more to buy precut too, but definitely not so much more that it would cover the cost of a saw.

![]() And that is it! For around $600 in tools (minus the table saw) I was able to build all the kitchen cabinets for our 15′ x 9′ kitchen. I already owned all these tools from other projects so the savings were huge! But even if you had to buy a few tools (or even all of them), a custom kitchen for only a couple thousand dollars is craziness!
And that is it! For around $600 in tools (minus the table saw) I was able to build all the kitchen cabinets for our 15′ x 9′ kitchen. I already owned all these tools from other projects so the savings were huge! But even if you had to buy a few tools (or even all of them), a custom kitchen for only a couple thousand dollars is craziness!
Of course, if you want to make your own cabinet doors, you will need a few more tools (like a router and router table). But you can also buy unfinished cabinet doors for pretty inexpensive and just add those to your beautiful cabinets.
I will be sharing the plans for all the different kitchen cabinets that we are building, as well as lots of other budget kitchen remodel DIYs, so make sure you subscribe so you don’t miss a thing. And check out the rest of my woodworking tutorials for more fun projects.
