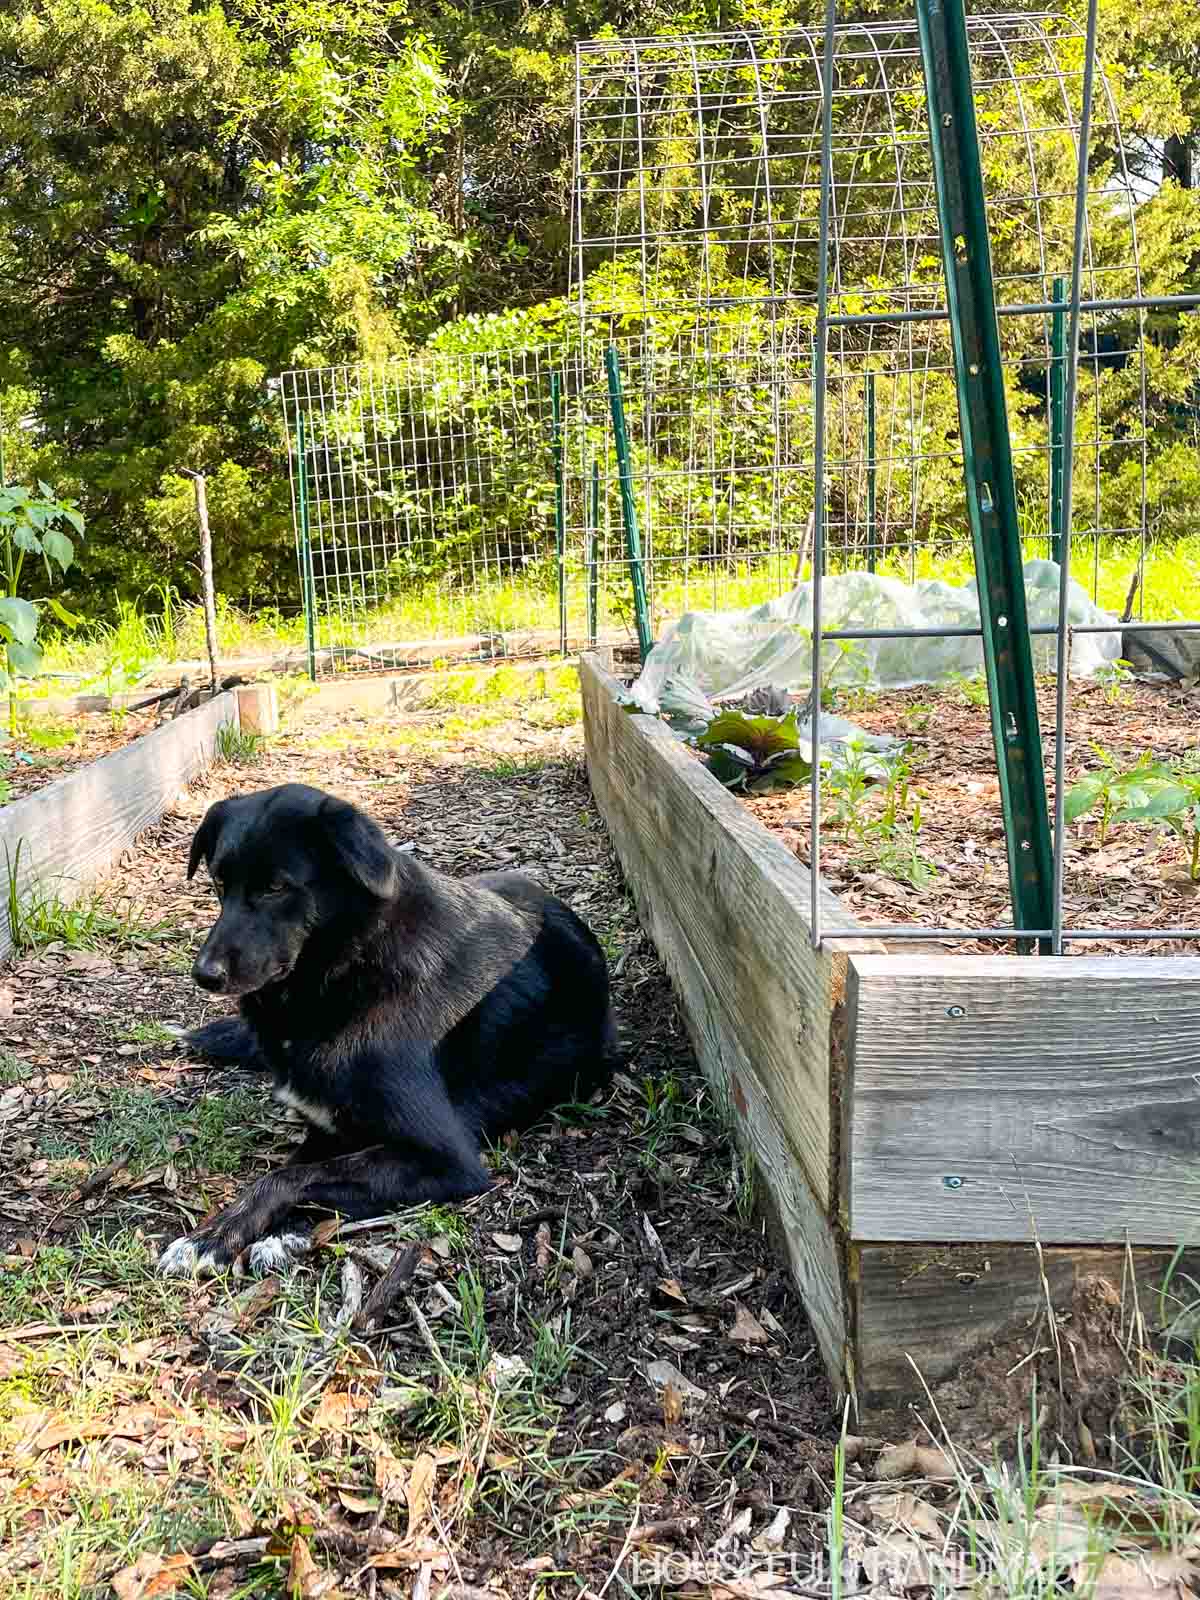
I love my new DIY raised garden beds. What I do not love is keeping them watered all summer long.
I learned the best way for me to be successful in the garden is to set up a drip irrigation system. That way, even when I am busy, the garden gets the water it needs.
In our last home, I had an in-ground garden with a drip watering system. But in our new home, I built raised garden beds and they require a slightly different drip irrigation system.
This post may contain affiliate links. As an Amazon Associate I earn from qualifying purchases. Click here to read my full disclosure policy.
Why Drip Irrigation?
There are so many reasons why I prefer to use drip irrigation when watering my vegetable garden:
- Reduce hands-on watering time
- Can schedule watering with a timer
- Delivers water deep into the soil
- Prevents leaves from getting wet
- Set it up once and use for years
After having a watering system set up in my garden, I can never go back.
Now all I have to do is regularly check the plants to see if I need to increase or decrease the water they are getting. Then sit back and let the system do the hard work.

Easy to Use Year after Year
For my in-ground garden, I used a combination of inline drippers (to put water right next to the plants) and soaker hose.
Every year I would rearrange things to match the new garden layout. It only took a day, but it was not the most fun to redo every year.
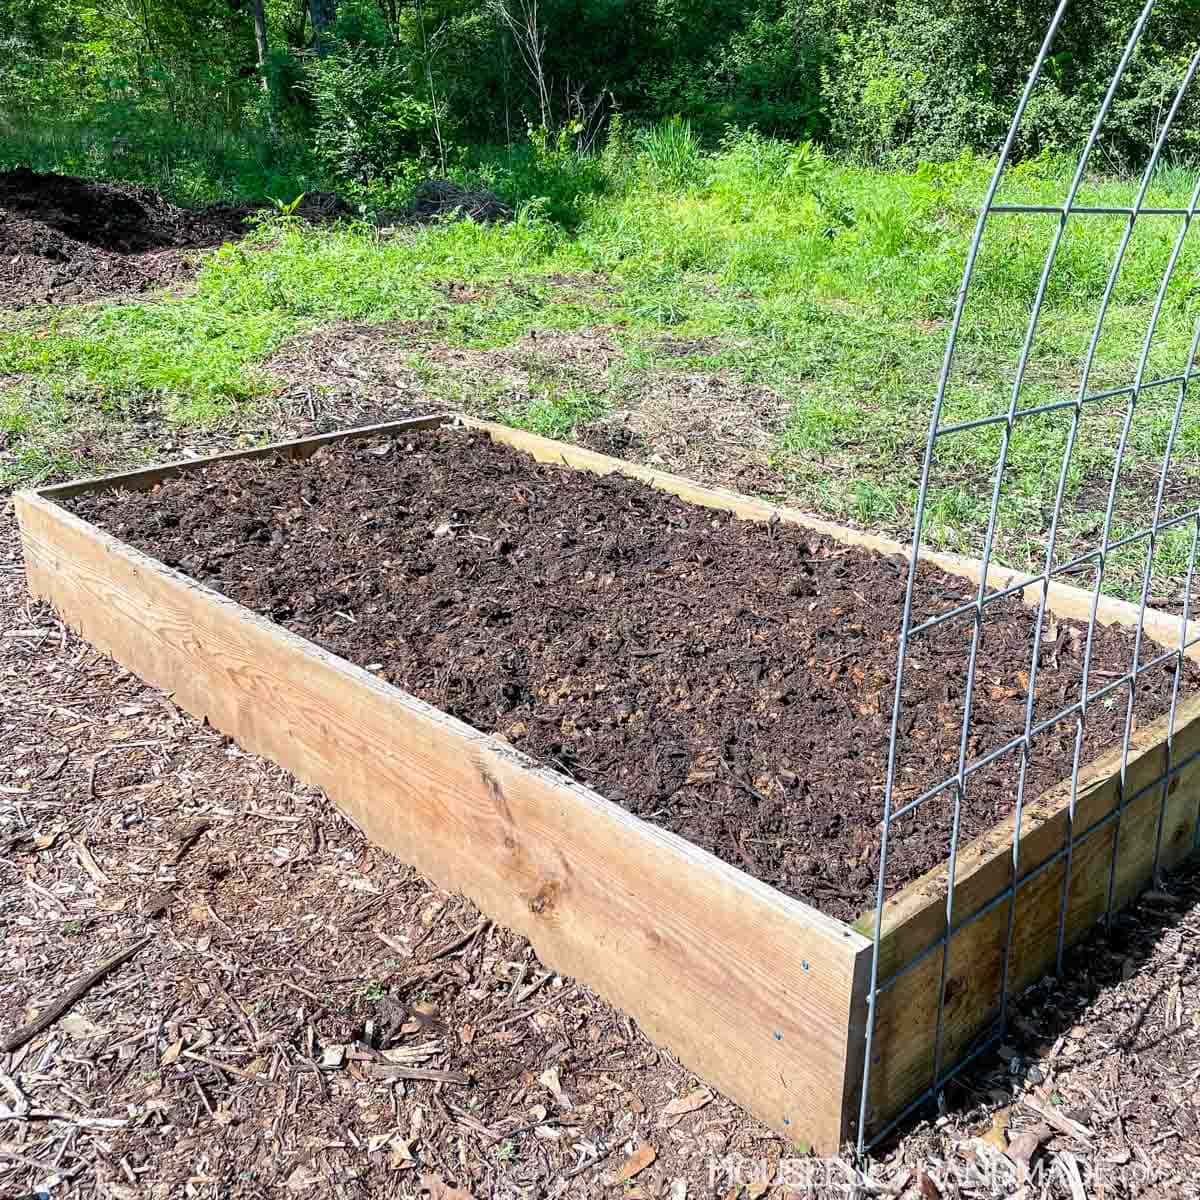
For my raised garden beds I have eliminated the need to update it yearly!
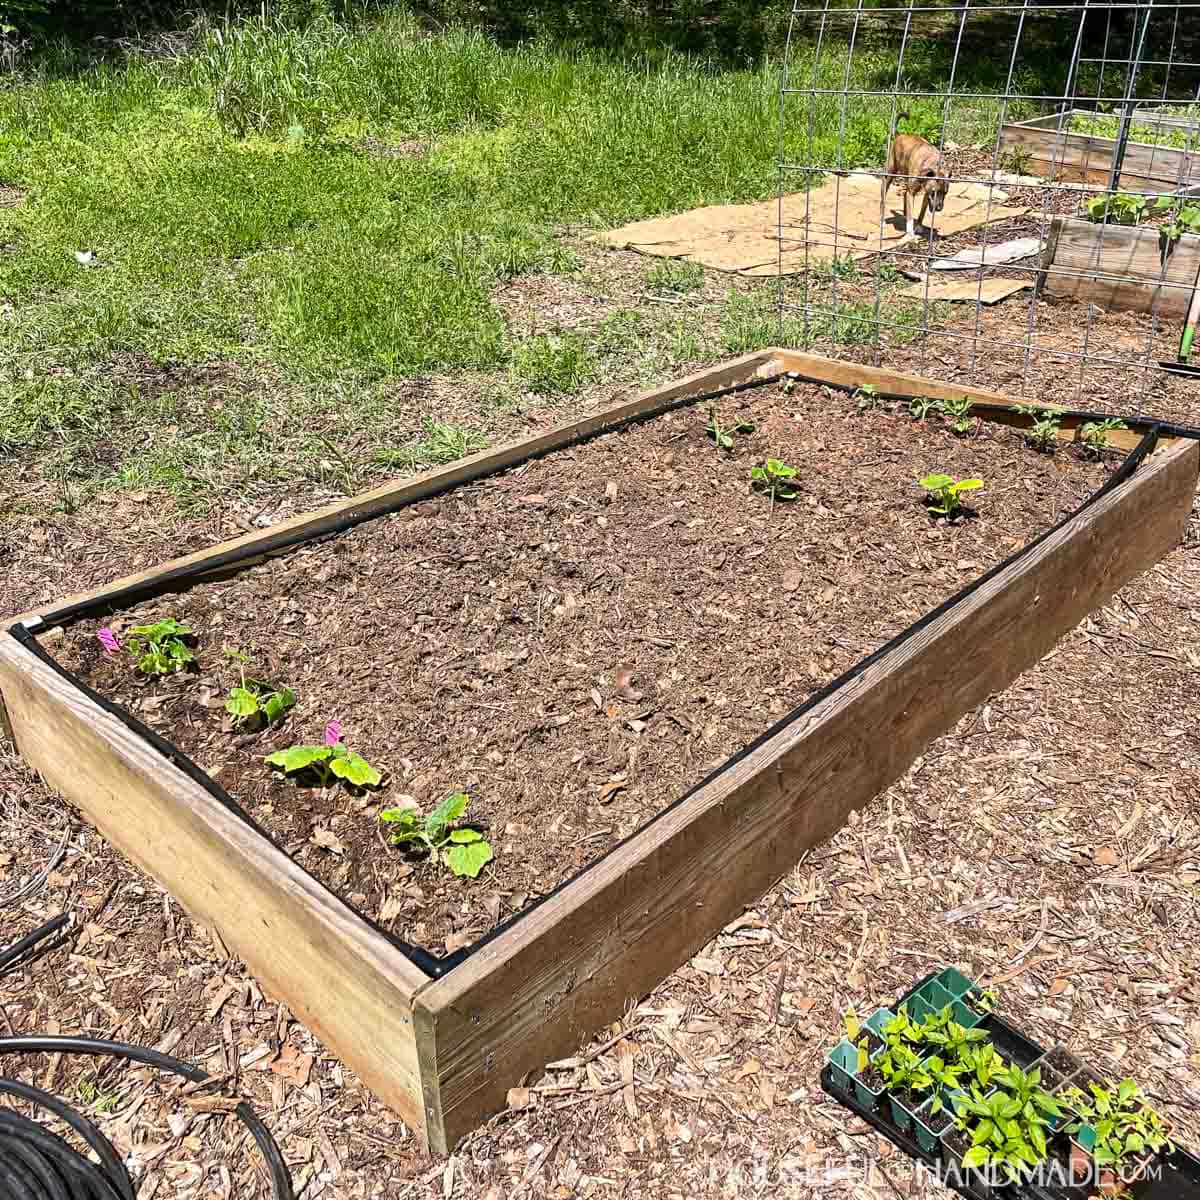
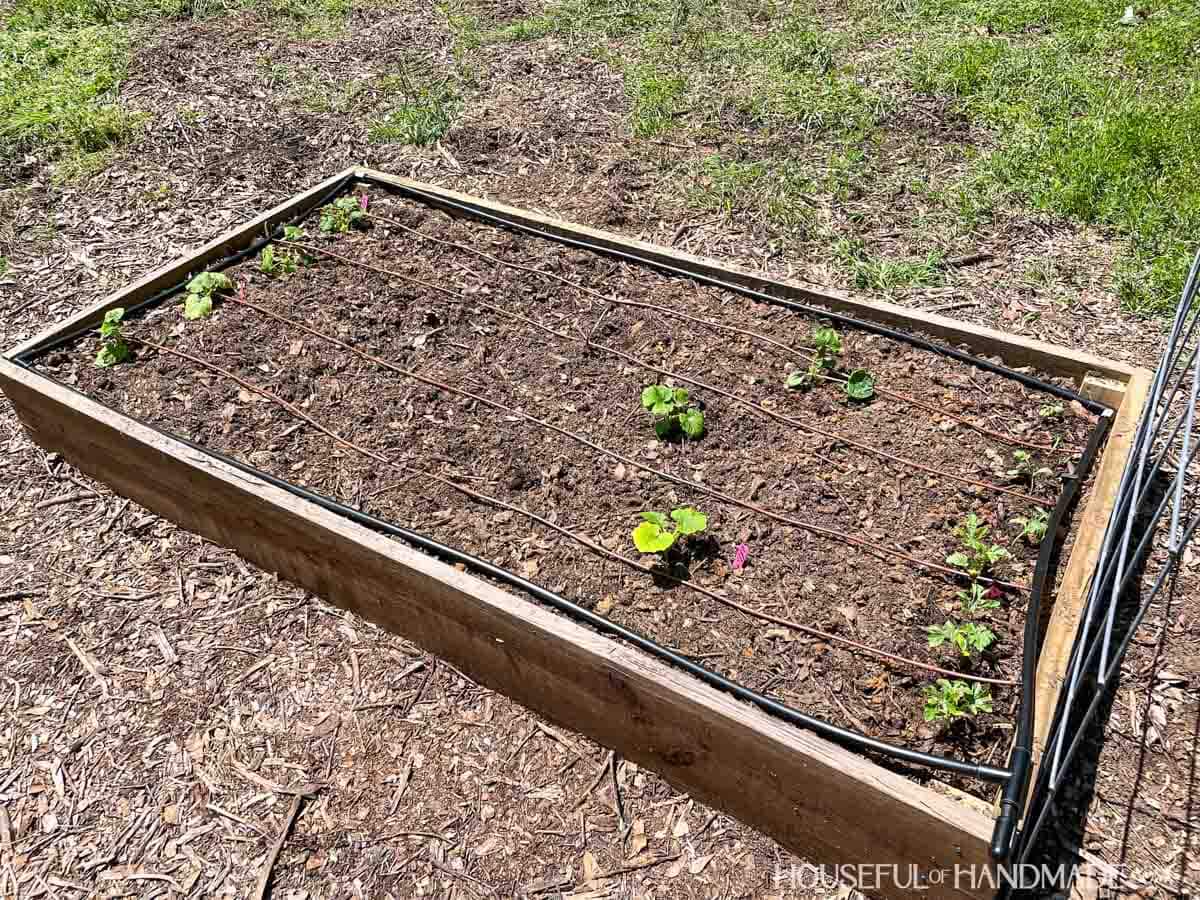
Instead, I used only 1/4″ dripline. The lines are run through the entire bed and stay there year after year.
The dripline adds water all across the bed. Not perfectly even, but the plants roots can reach down and find the deep water and I can rest easy knowing they are happy and thriving.
More DIY Gardening Ideas
Get dirt under your finger nails with these other fun gardening DIY projects.
How to Build a Drip System for Raised Beds
Tools & Materials
Recommended Tools:
- PVC cutter
- Scissors
- Drip tubing hole punch
- Measuring tape
STEP 1- Determine the layout between beds
If you only have 1 garden bed, you can skip this step.
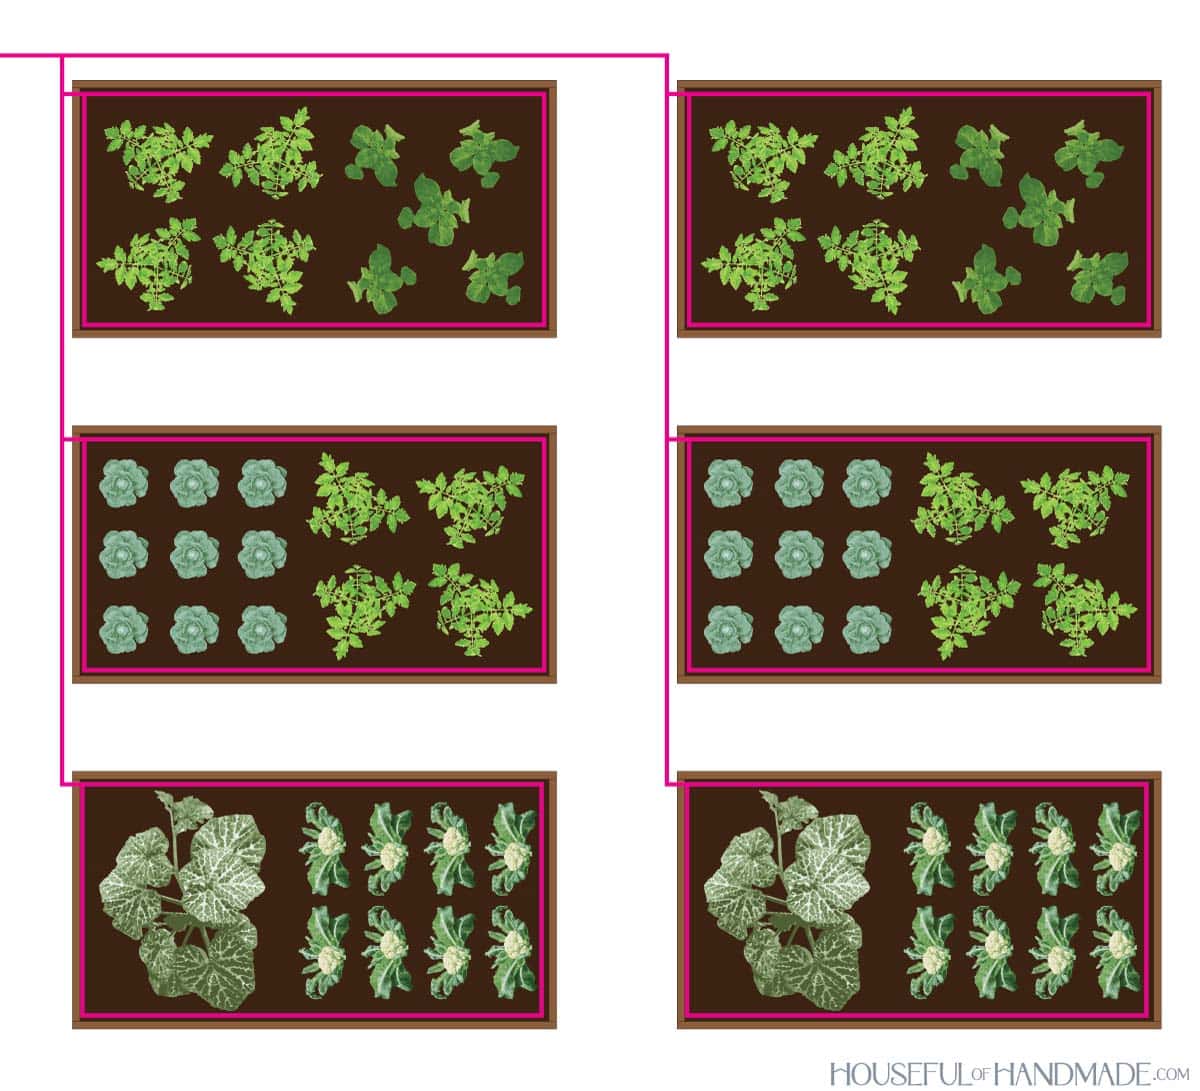
For 2 or more raised beds (I have a total of 12 now), you want to plan out a path for them all to connect together.
Start with the bed closest to the water source. If your beds are all in a row, just run a line along the side closest to the water source and conned them from there.
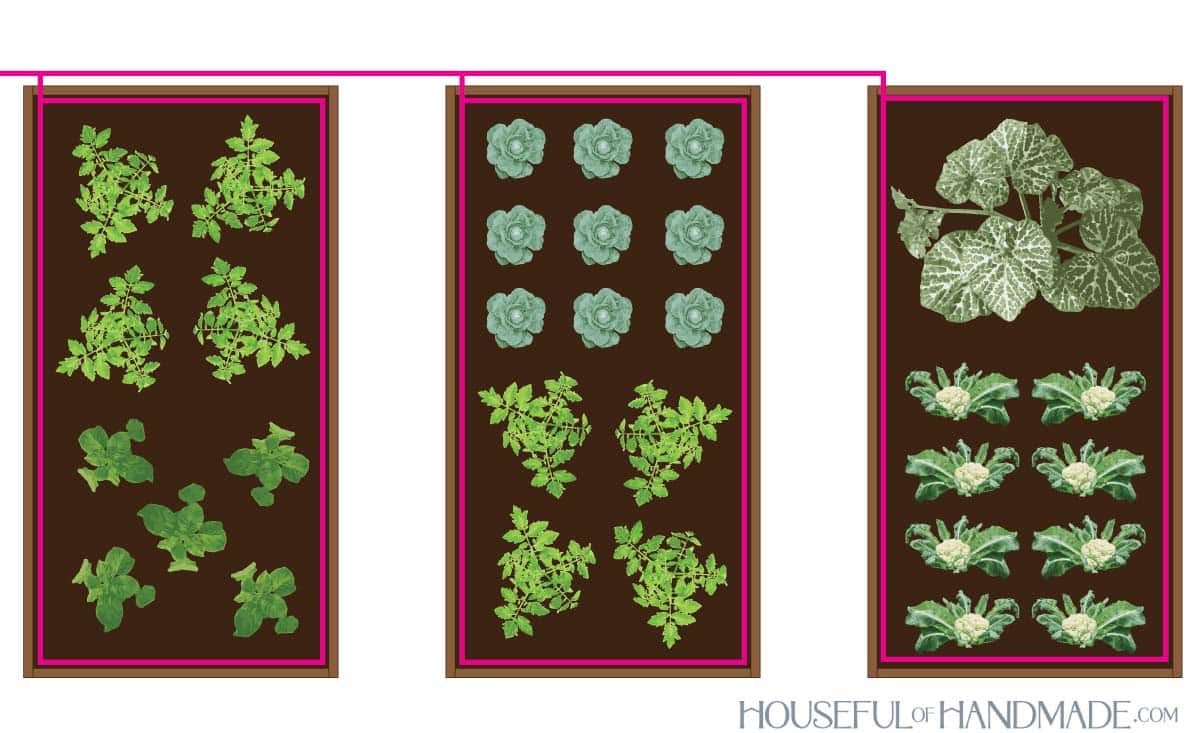
If you have multiple rows of beds, you will want to run the line down one side of the bed to connect the rows.
Then run another line down the rows of beds to connect them all.
Since your water is pressurized coming from the hose, you can easily water a lot of beds on one line.
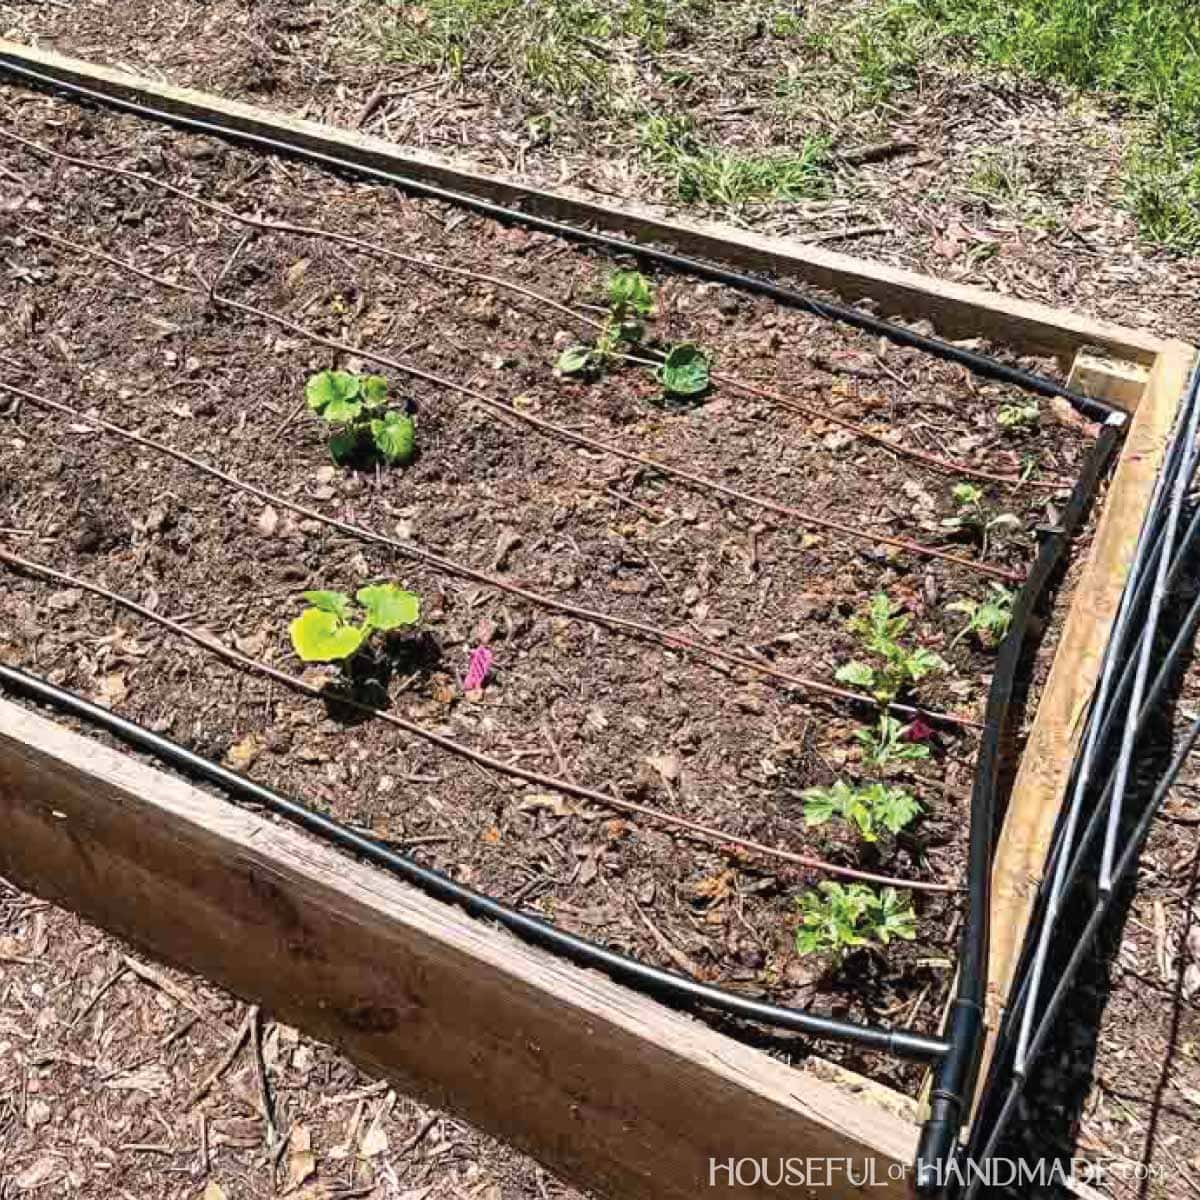
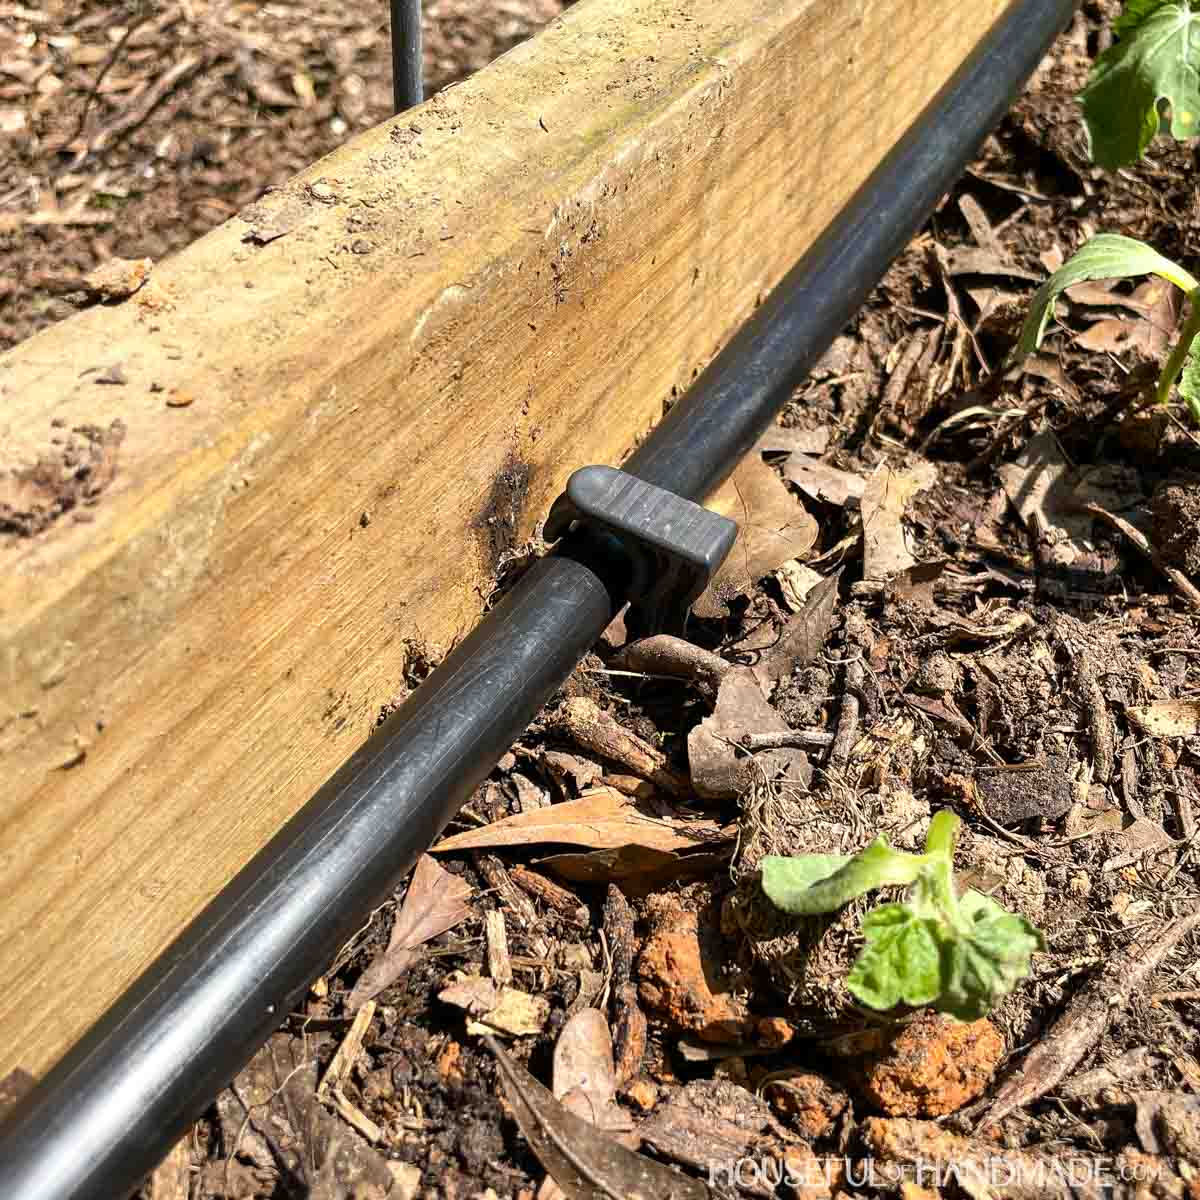
STEP 2- Add tubing to perimeter of each bed
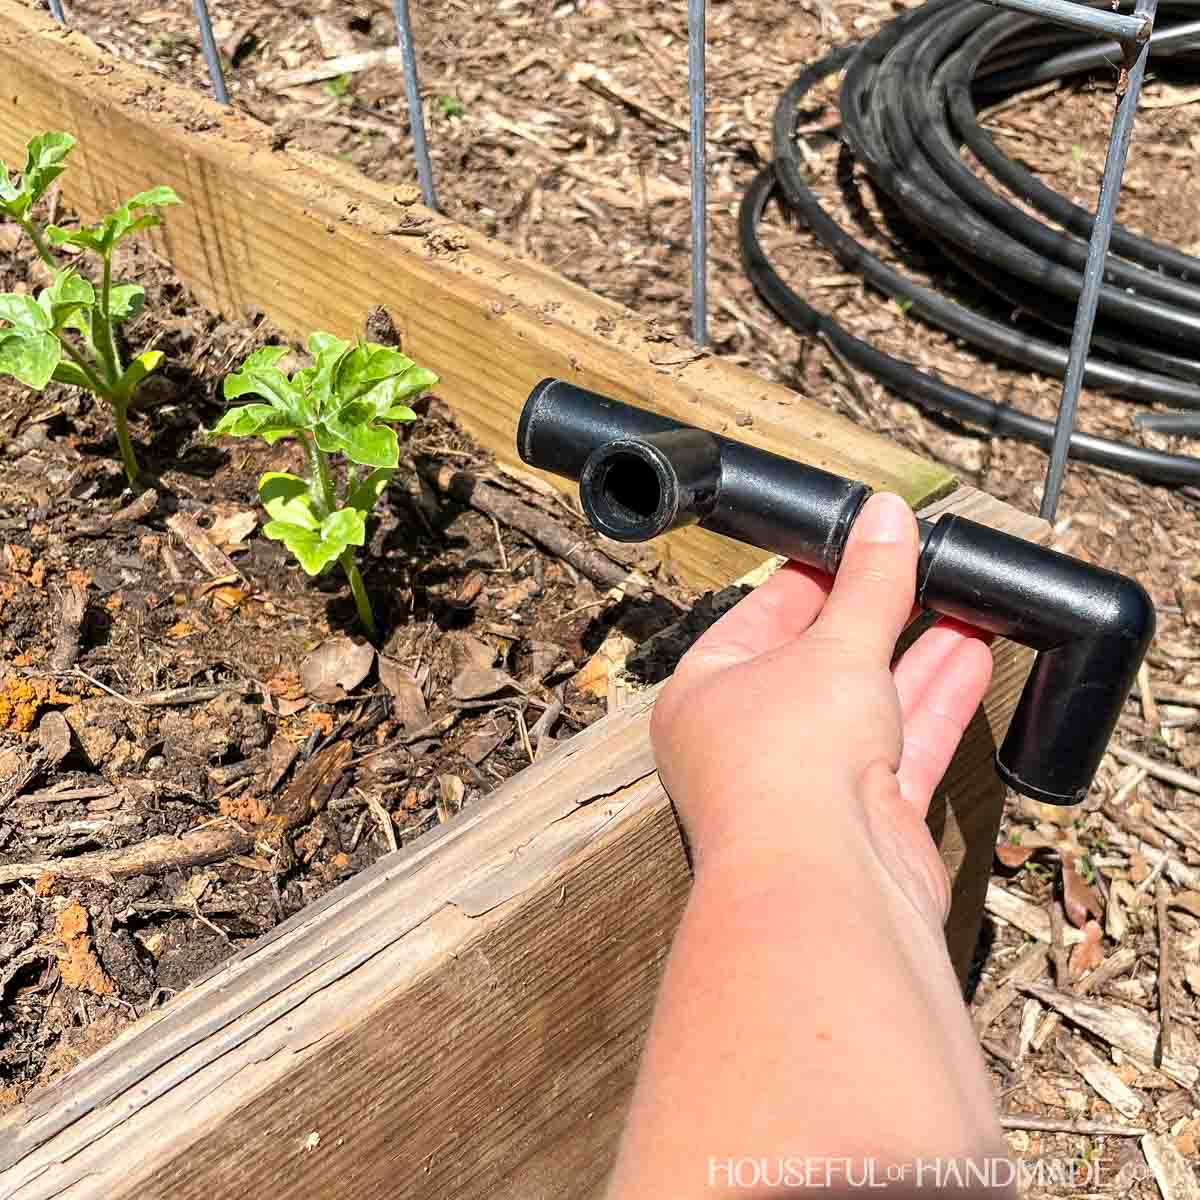
It’s important to have a plan before you start laying tubing in the bed because you want to know where the water will come into the bed.
At this corner, you will connect an elbow to a tee with just a little piece of 1/2″ tubing.
You want the elbow to sit on the outside of the bed and the edge of the tee on the inside of the bed.
Make sure to press the tubing all the way inside the compression fittings. That is what holds them in place.
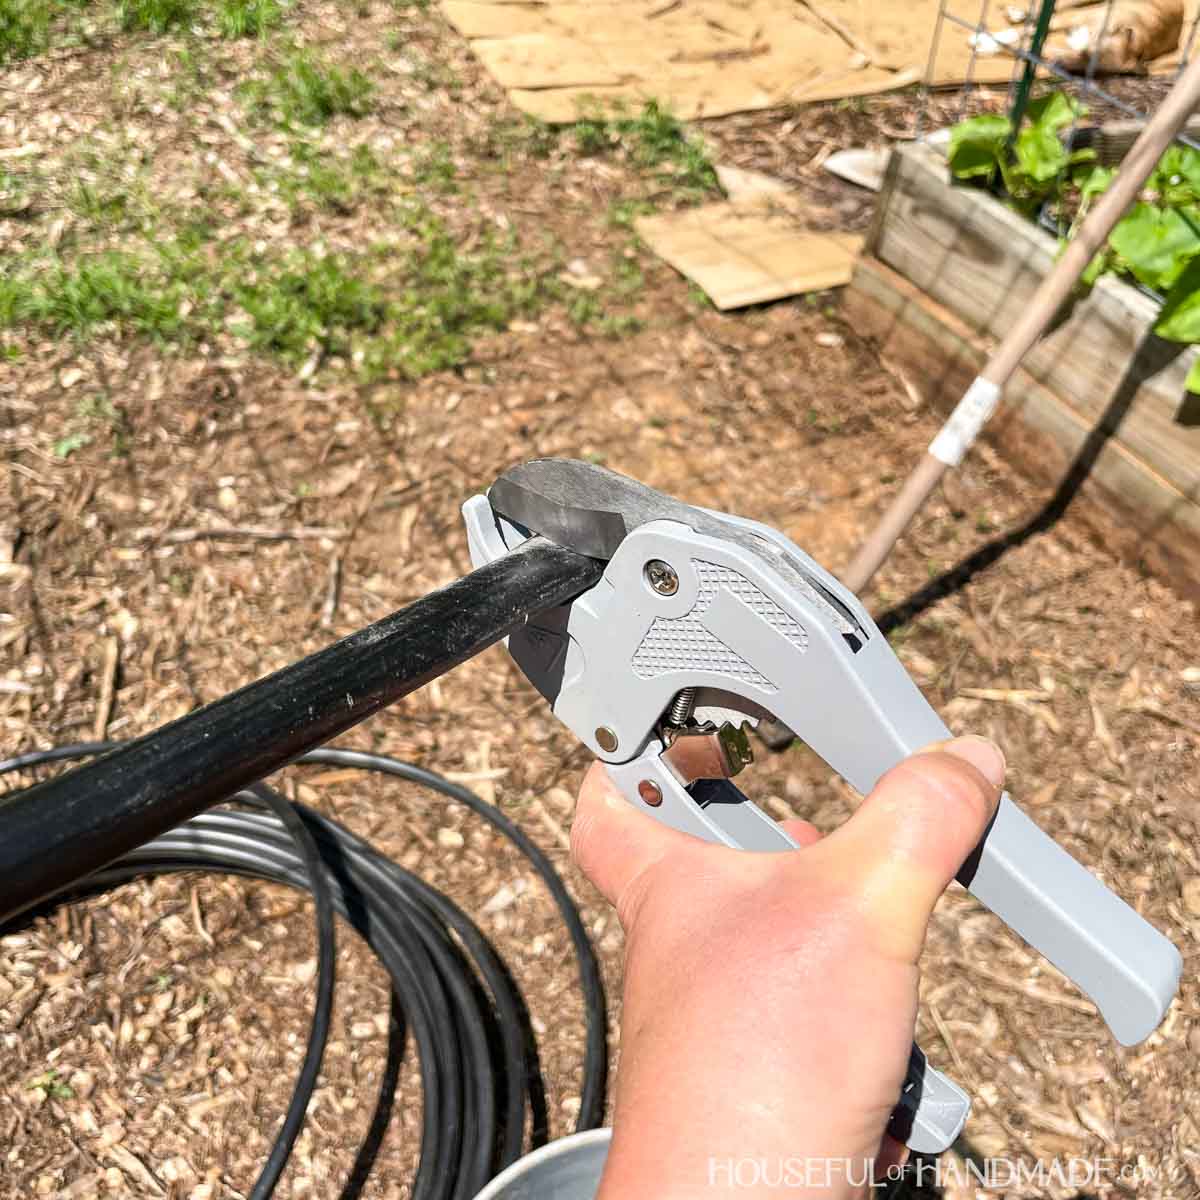
To cut the tubing, I used my PVC pipe cutter. It cut it easily with a nice straight edge.
The tubing comes rolled up in a coil. You will want to straighten it out as much as you can to make laying it out in the bed easier.
If it is a hot day, the sun will help to soften it so it will stay straight faster.
Next you want to run the tubing down the side of you raised bed and add elbows to the corners.
Do this for the other 3 corners of the bed so they create a box.
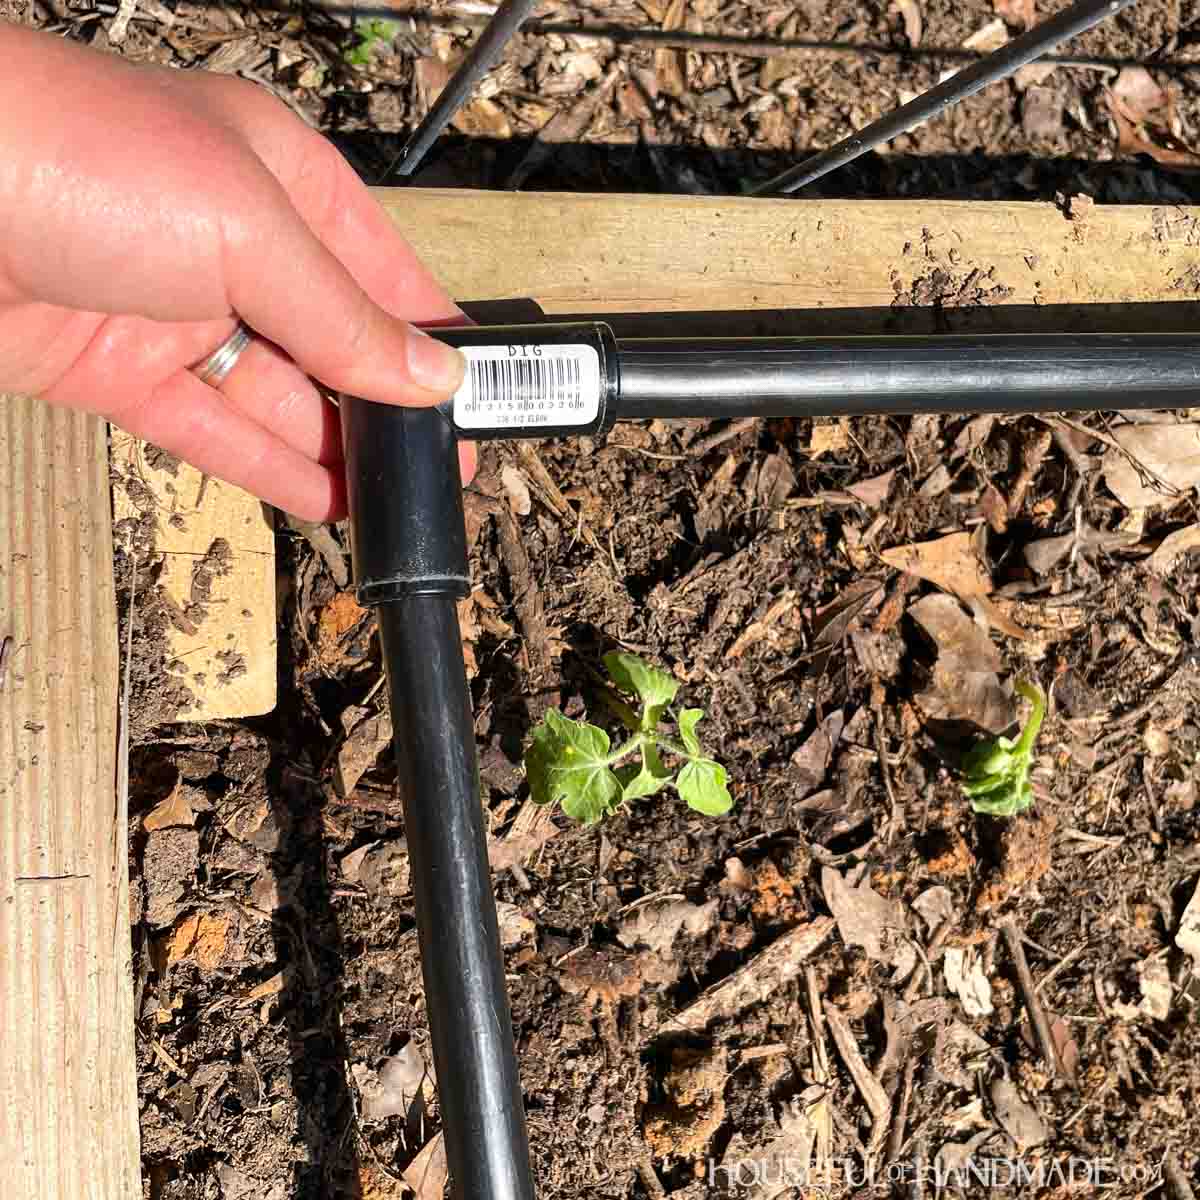
Then you will connect the tubing back to the tee at the beginning.
If the tubing is trying to curl up on itself, you can use stakes to hold it down.
You can even use things like rocks to hold it in place. Once the sun warms it, it will relax into a straight line.
After a couple days, I can remove the stakes and use them elsewhere in the garden.
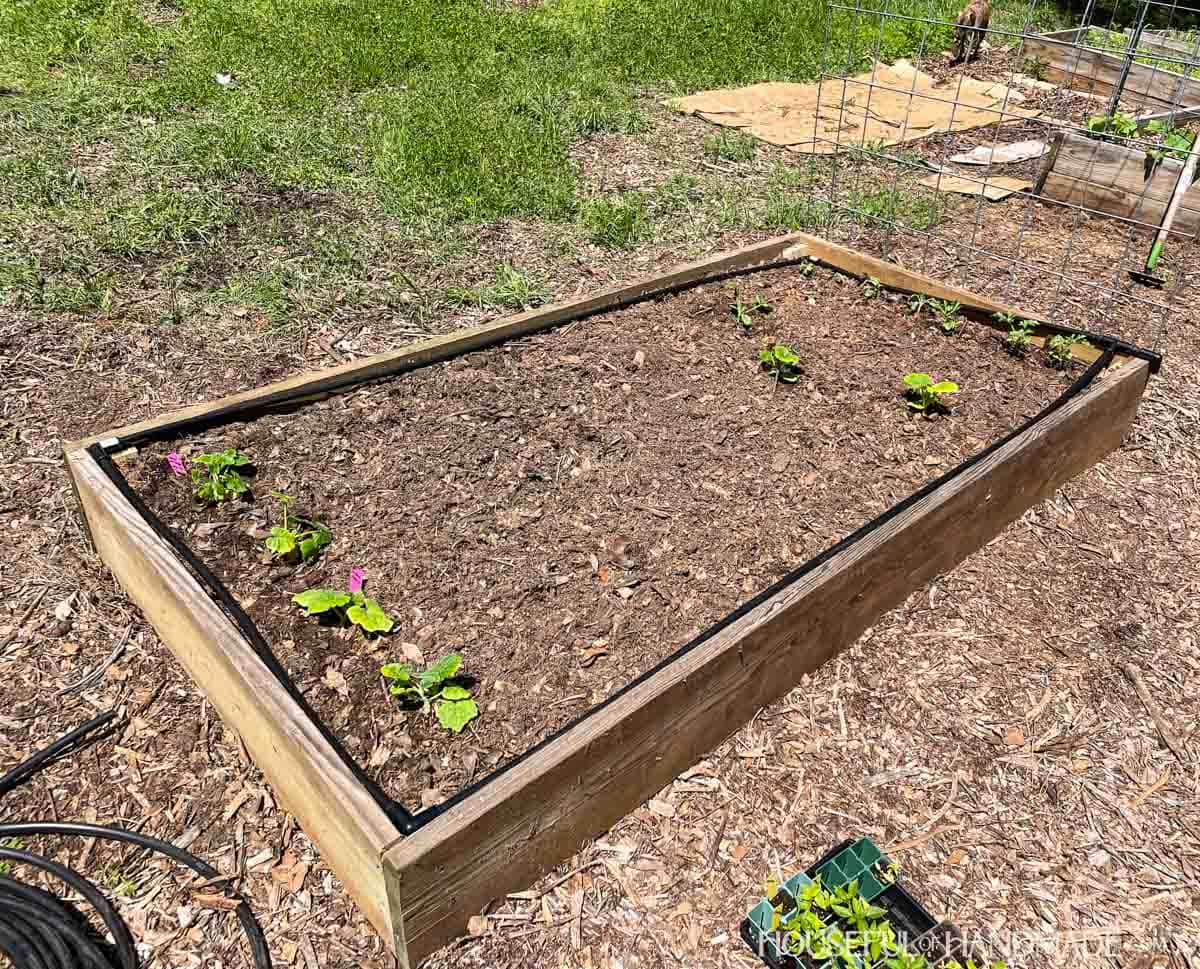
Now you will have enclosed system all around the perimeter of the bed.
Repeat for all the beds in your garden.
STEP 3- Add drip lines to the bed
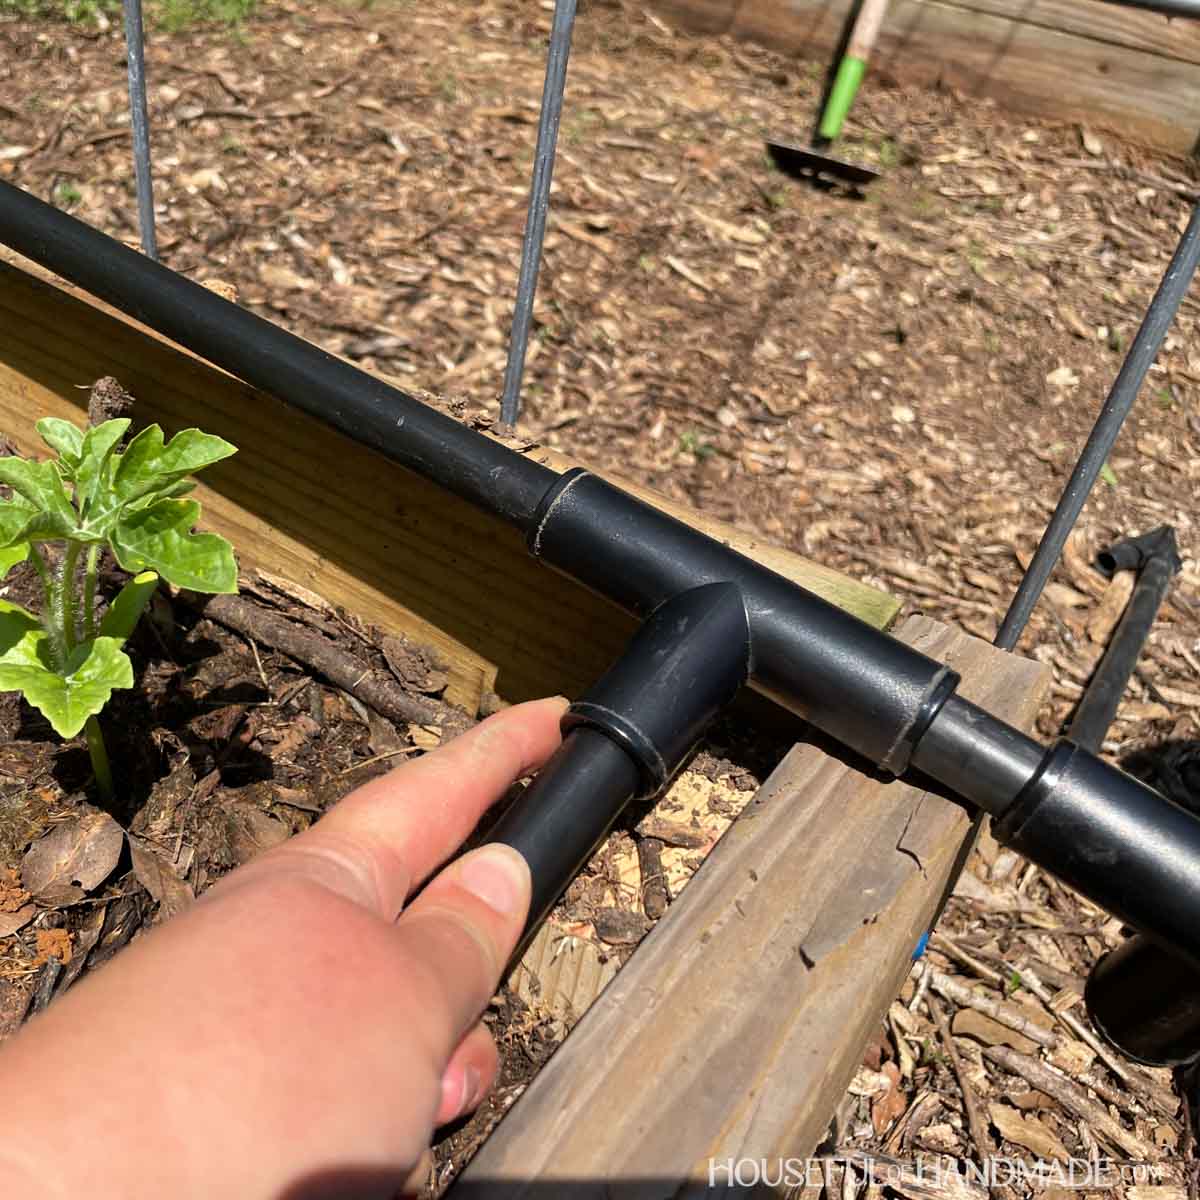
In order to get the water out of the tubing and to the plants, we need to add the 1/4″ drip lines.
This is different from soaker hoses. Instead, there is an emitter every so often that releases water in a slow drip. Perfect for watering deep into the soil.
You can get dripline with emitters every 6″, 9″ or 12″ along the tube.
To attach it to the perimeter tubing, pop a hole in the side of the tube with the hole punch. I run the tubing the long way in the bed.
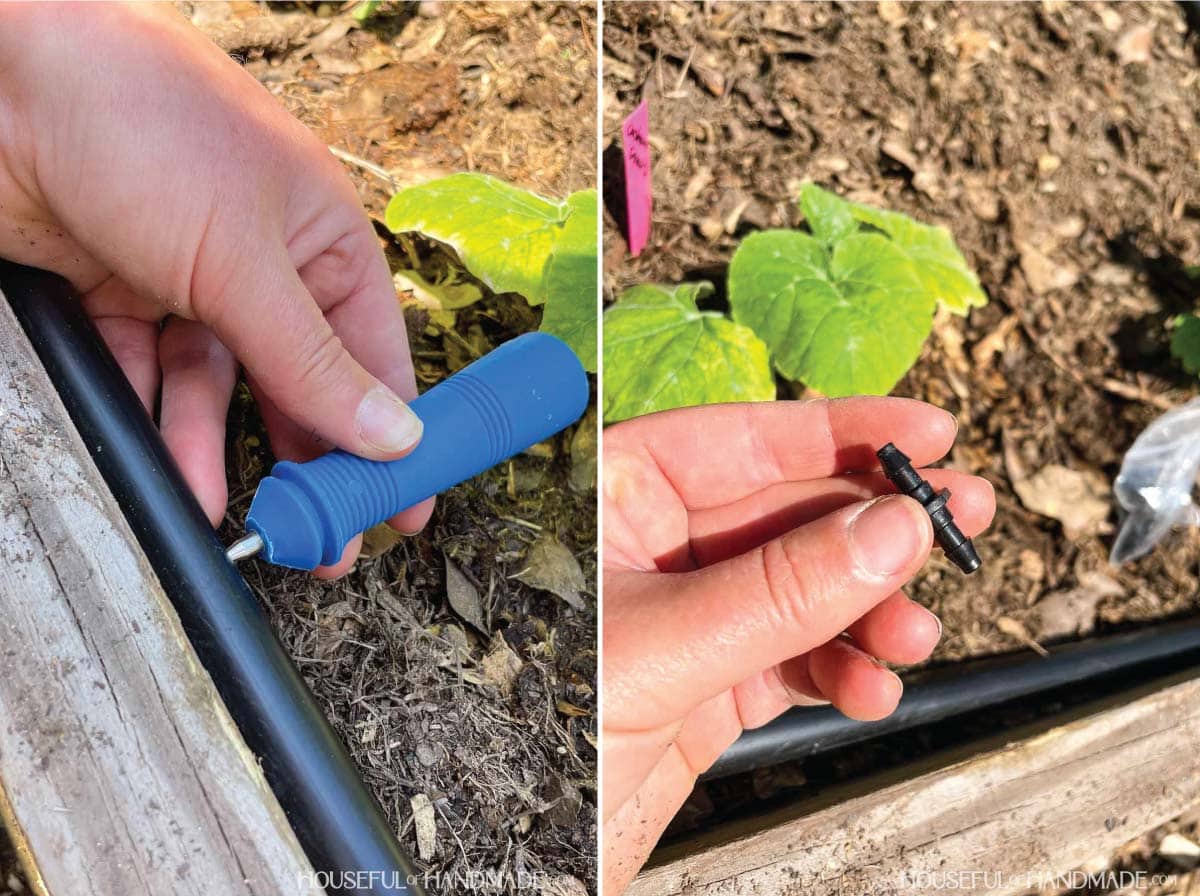
Twist a barbed connector into the hole till it clicks.
Then press the 1/4″ tubing onto the open end of the barbed connector. Press it all the way down.
I like to twist it to get it all the way on the connector.
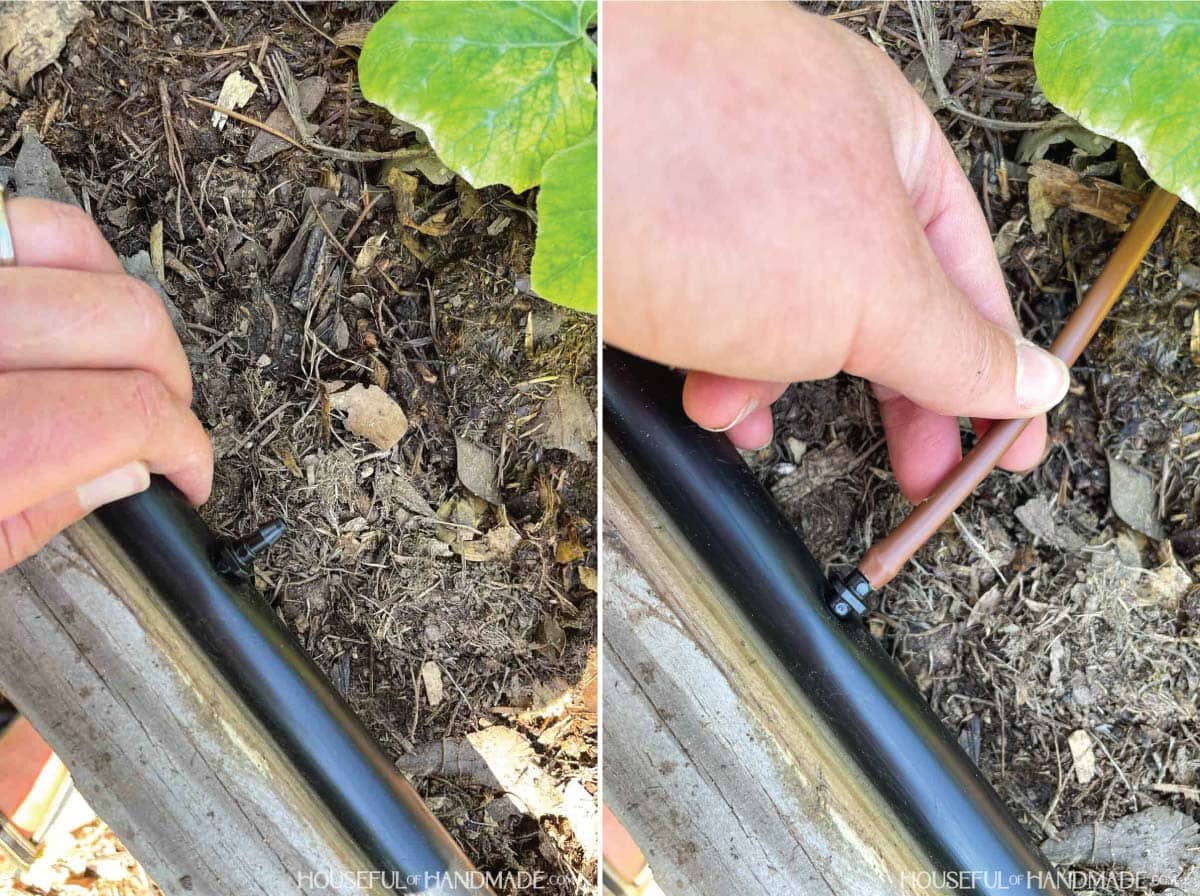
Attach the other end of the dripline to the tubing on the other side of the bed the same way: poke a hole, add barbed connector, twist tubing on.
Repeat until you have all the the lines you want. For my 4×8 beds I add 4 lines evenly spaced.
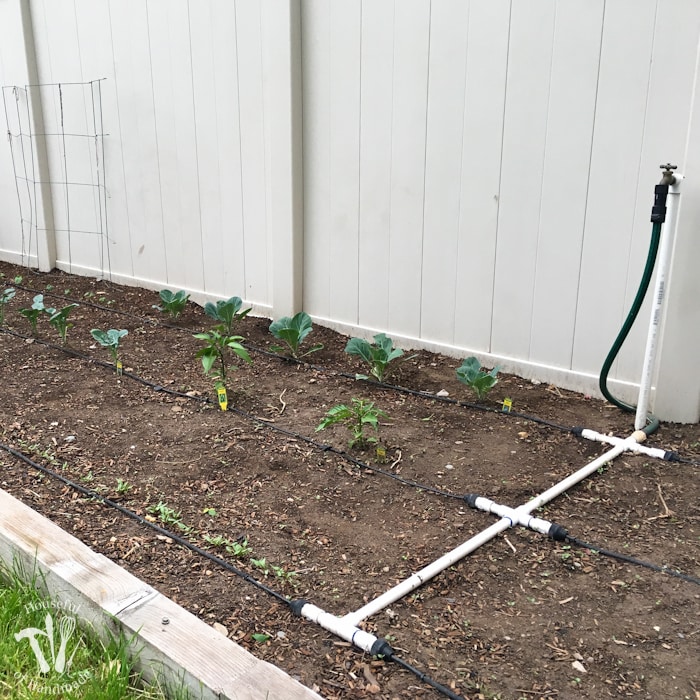
STEP 4- Attach the beds together
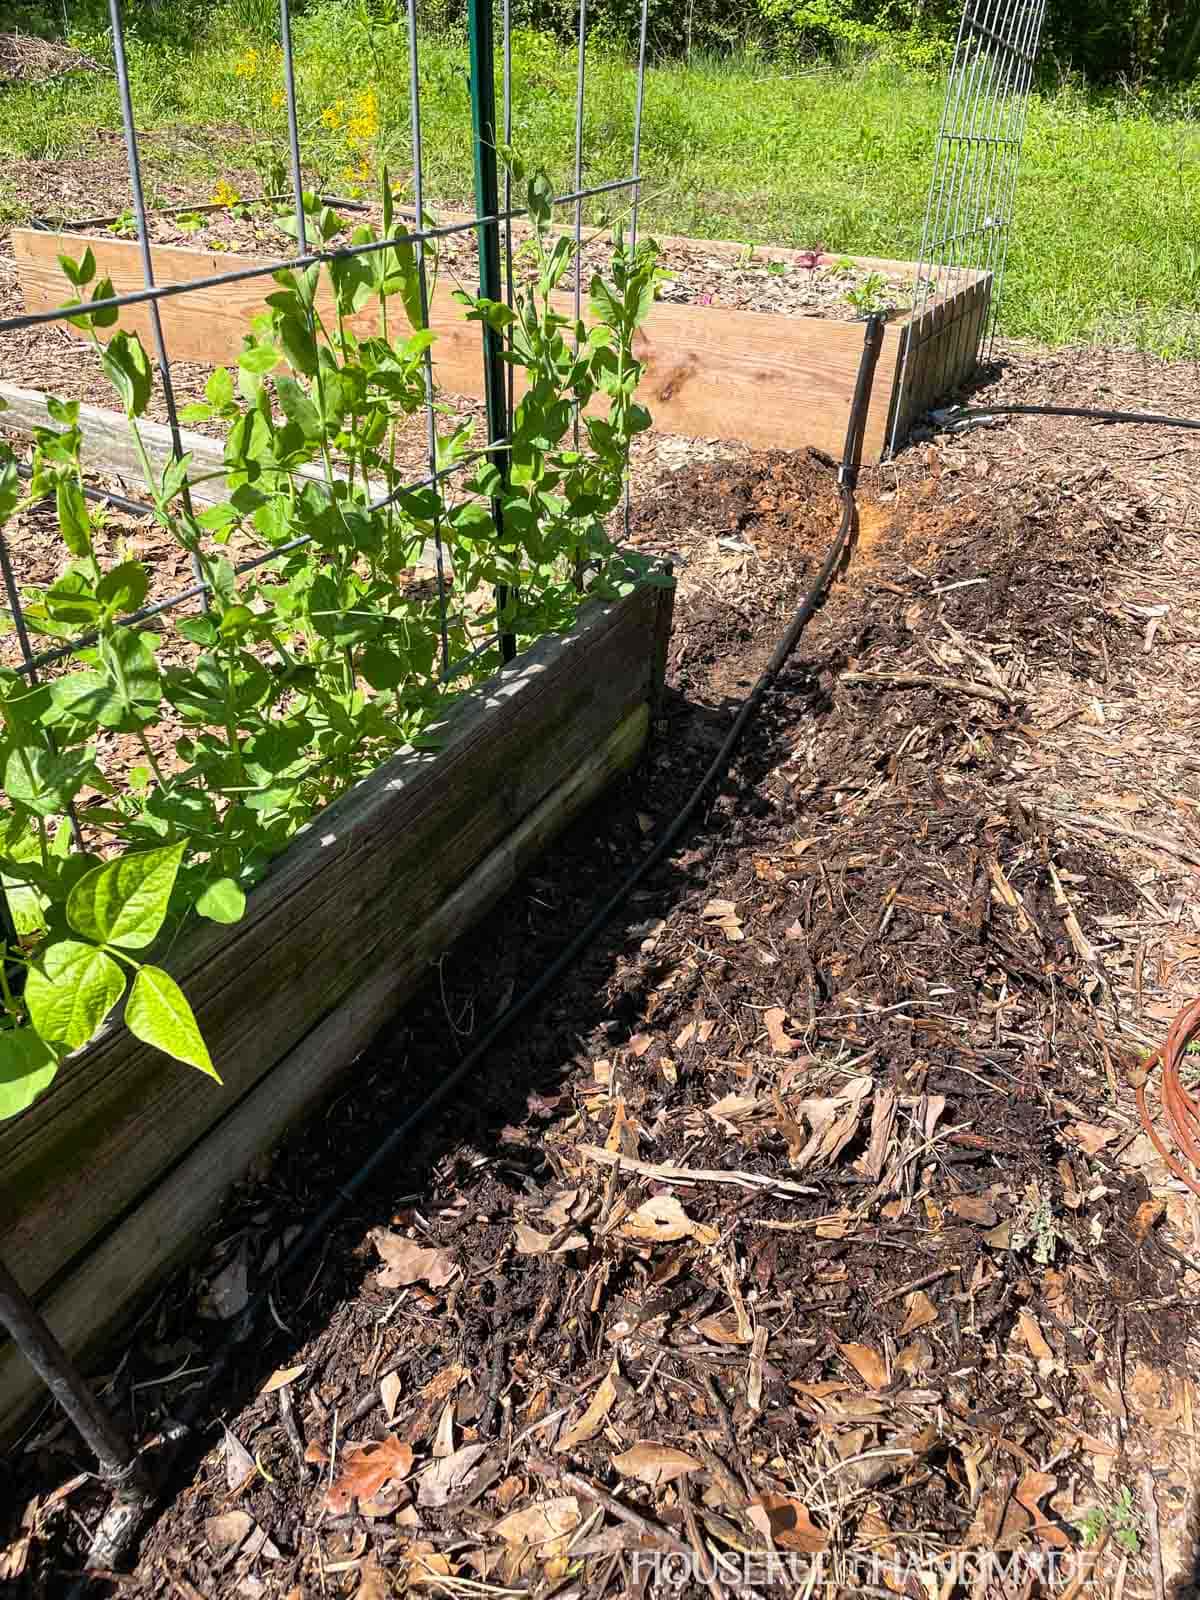
To attach the bed to the main line, attach tubing to the elbow coming out of the bed.
Run it to the ground along the outside of the bed. I like to bury the line slightly so it doesn’t get in the way when I am working in the garden.
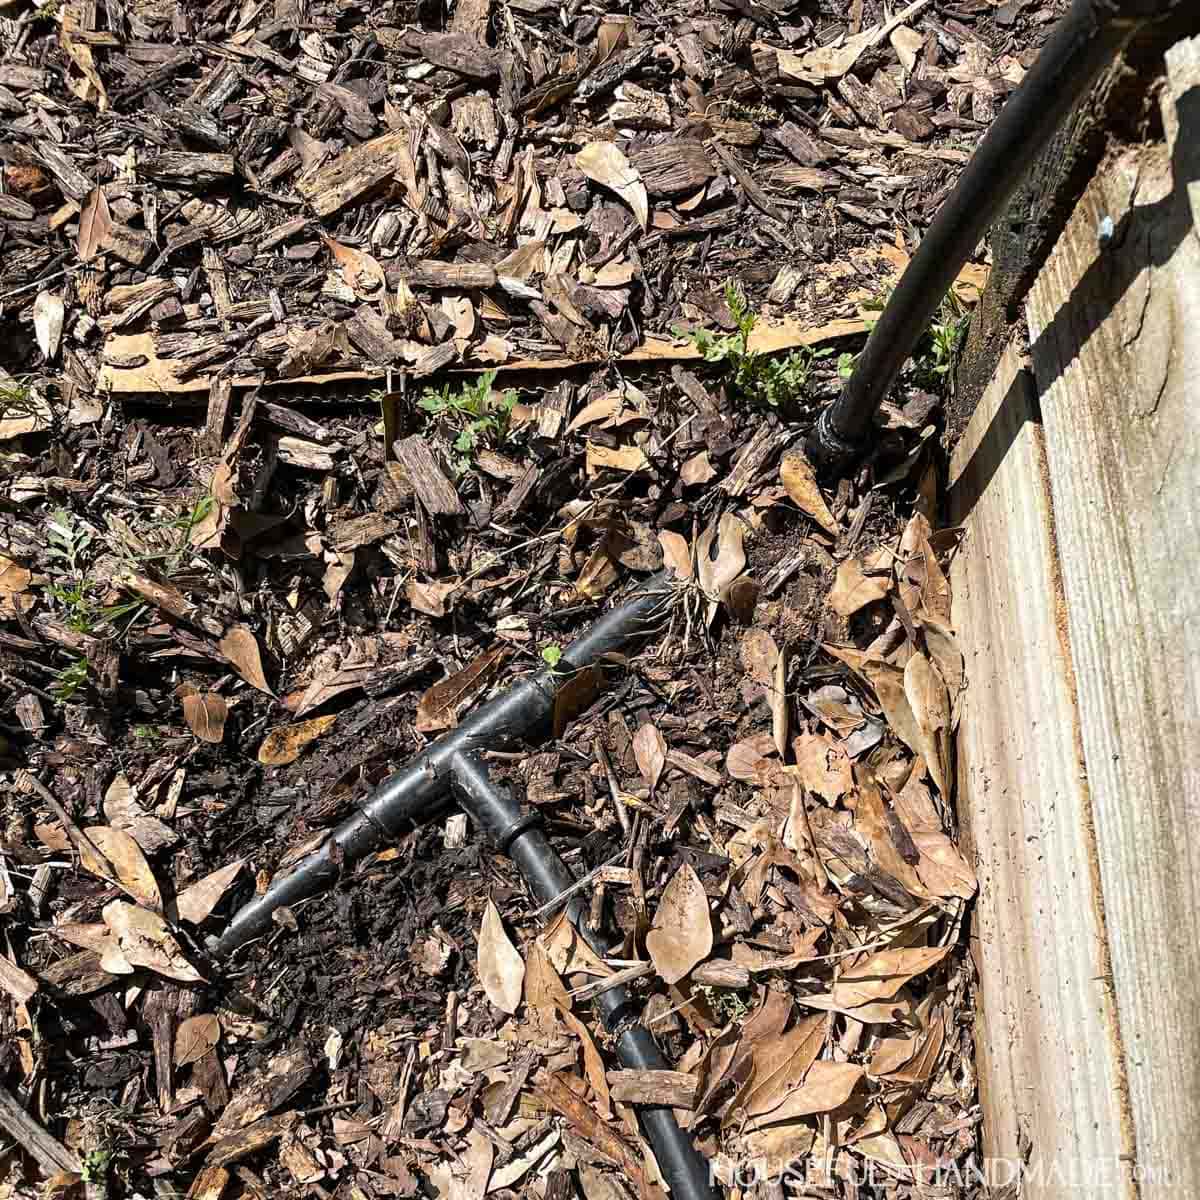
For beds at the end of the line, use an elbow at the bottom to connect it to the main line.
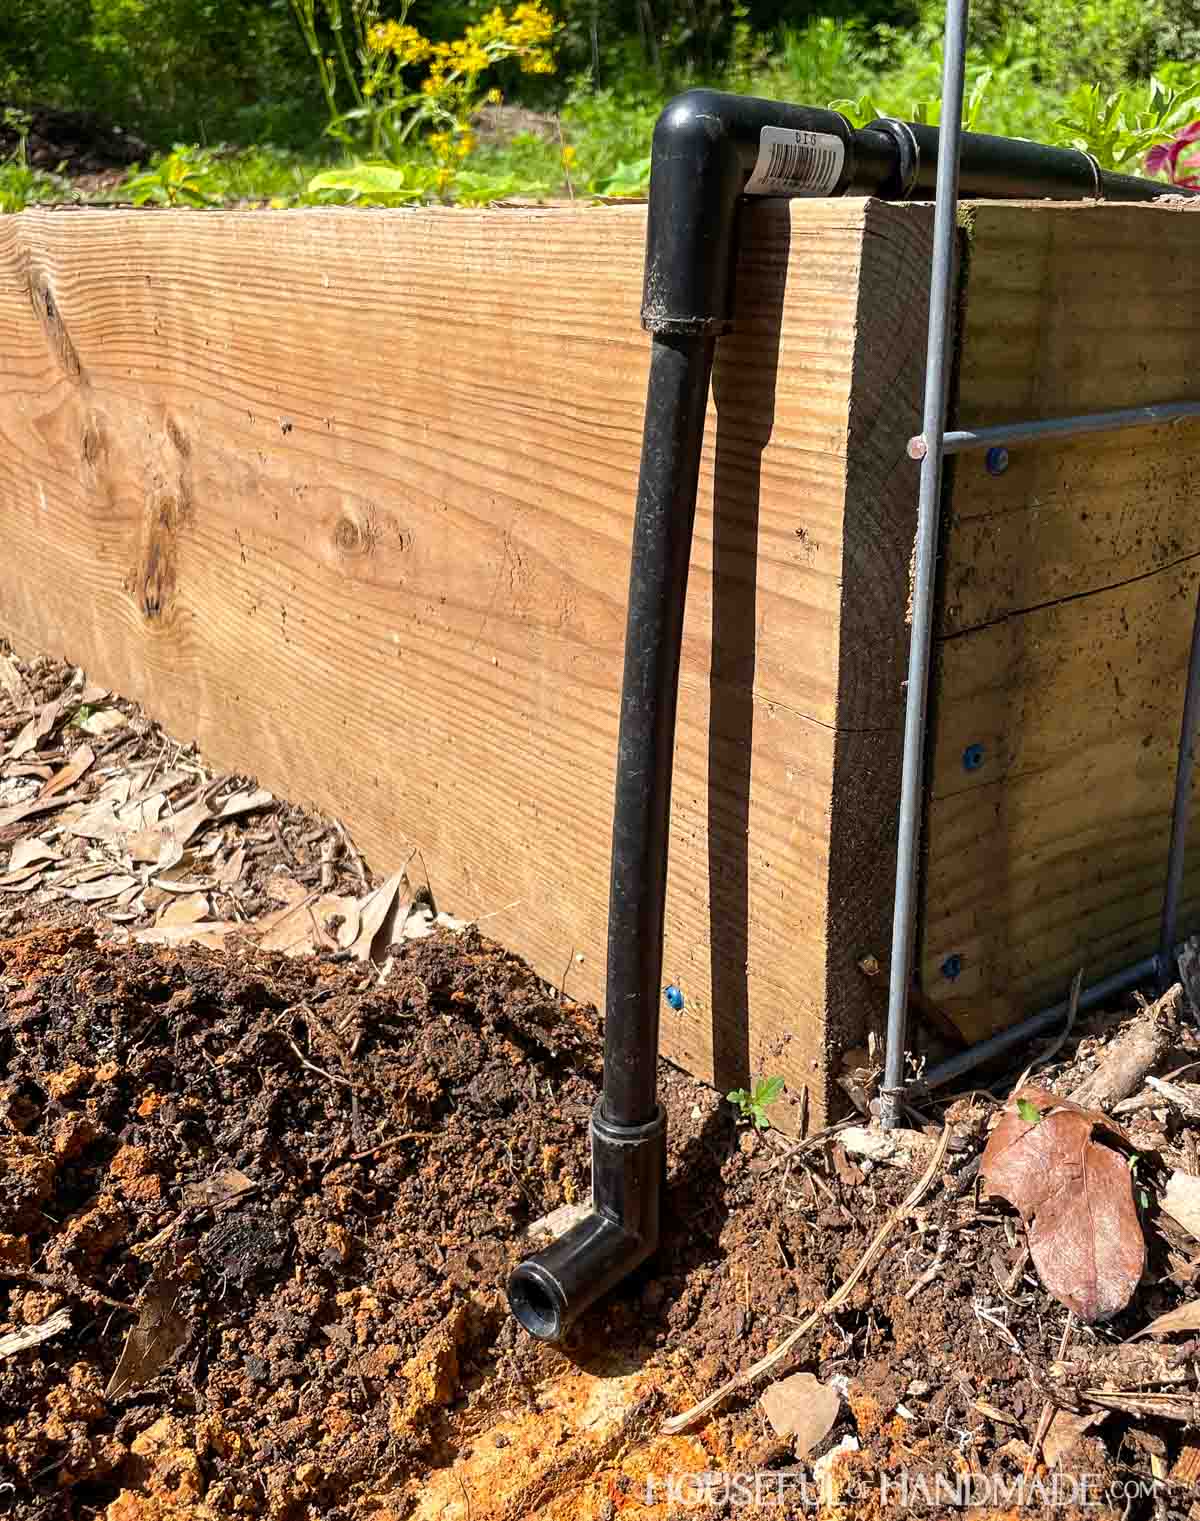
Or if you plan to add additional beds later, you can use a tee at the bottom.
Then run a piece of tubing at the end and cap it with a figure 8 end clamp.
Use tees to connect beds to the main line in the row. This will keep the water flowing to each bed in the line.
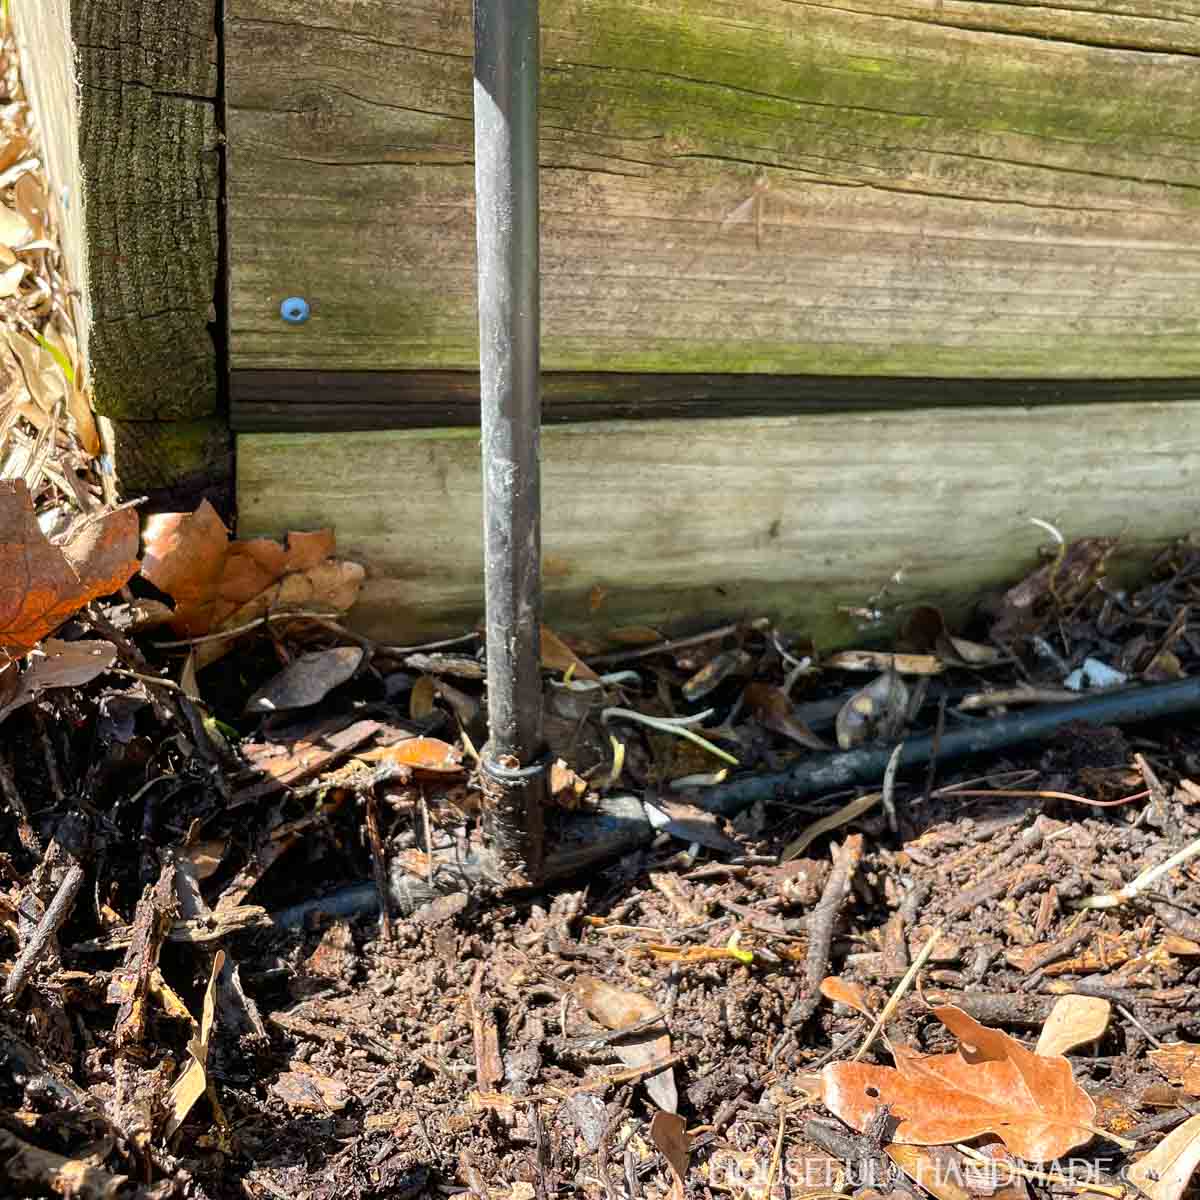
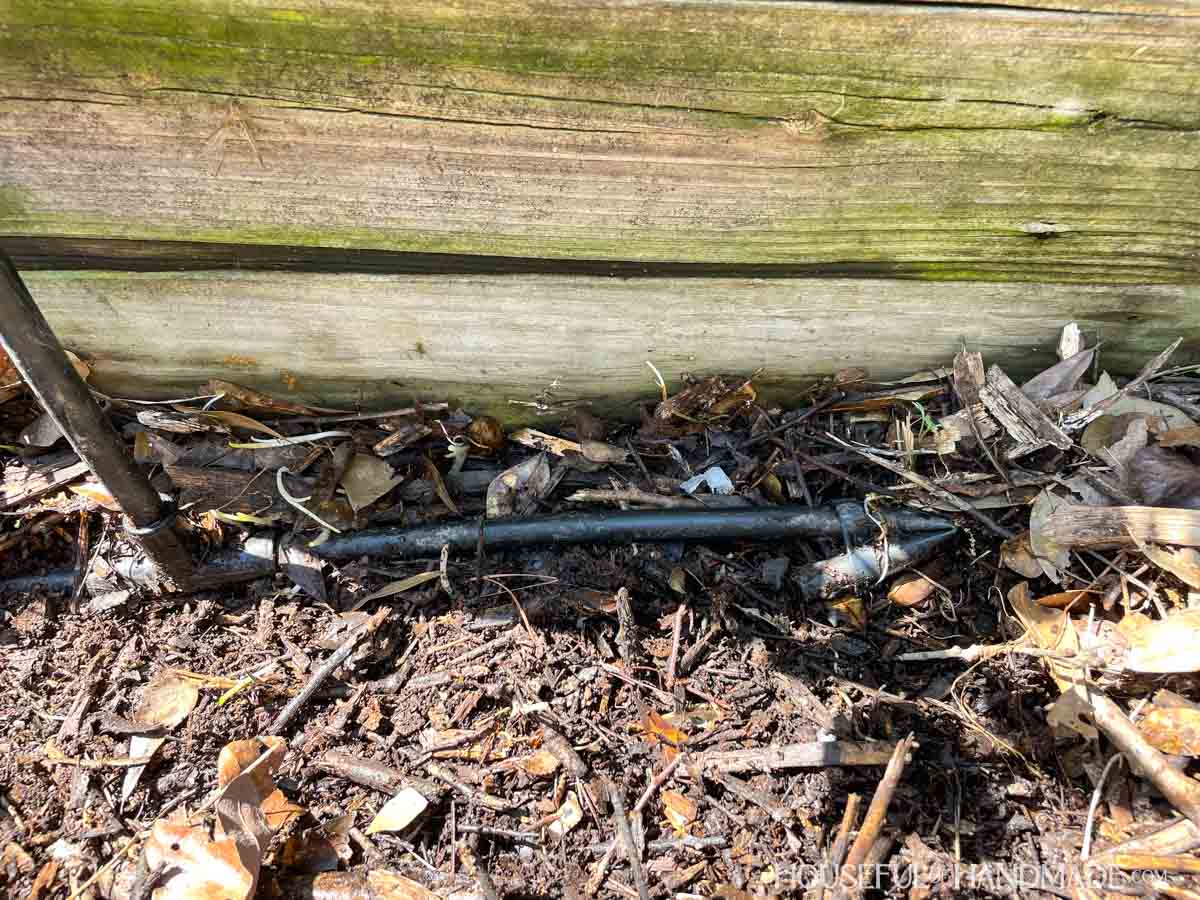
Once you get all the beds attached to the main line, you can bury the line.
Mine is under a bunch of mulch we got for free from our local tree cutting service when they were cutting branches away from power lines by our house.
If your garden beds aren’t in neat rows, you might have to get creative with the irrigation tubing. But it is easy because they are flexible.
I have a tee here to connect 2 beds at the end of a run. These beds are perpendicular to the rest of the row so they could not connect the same way.
STEP 5- Attach the lines to the hose
Now all that is left is to connect the tubing to your water source.
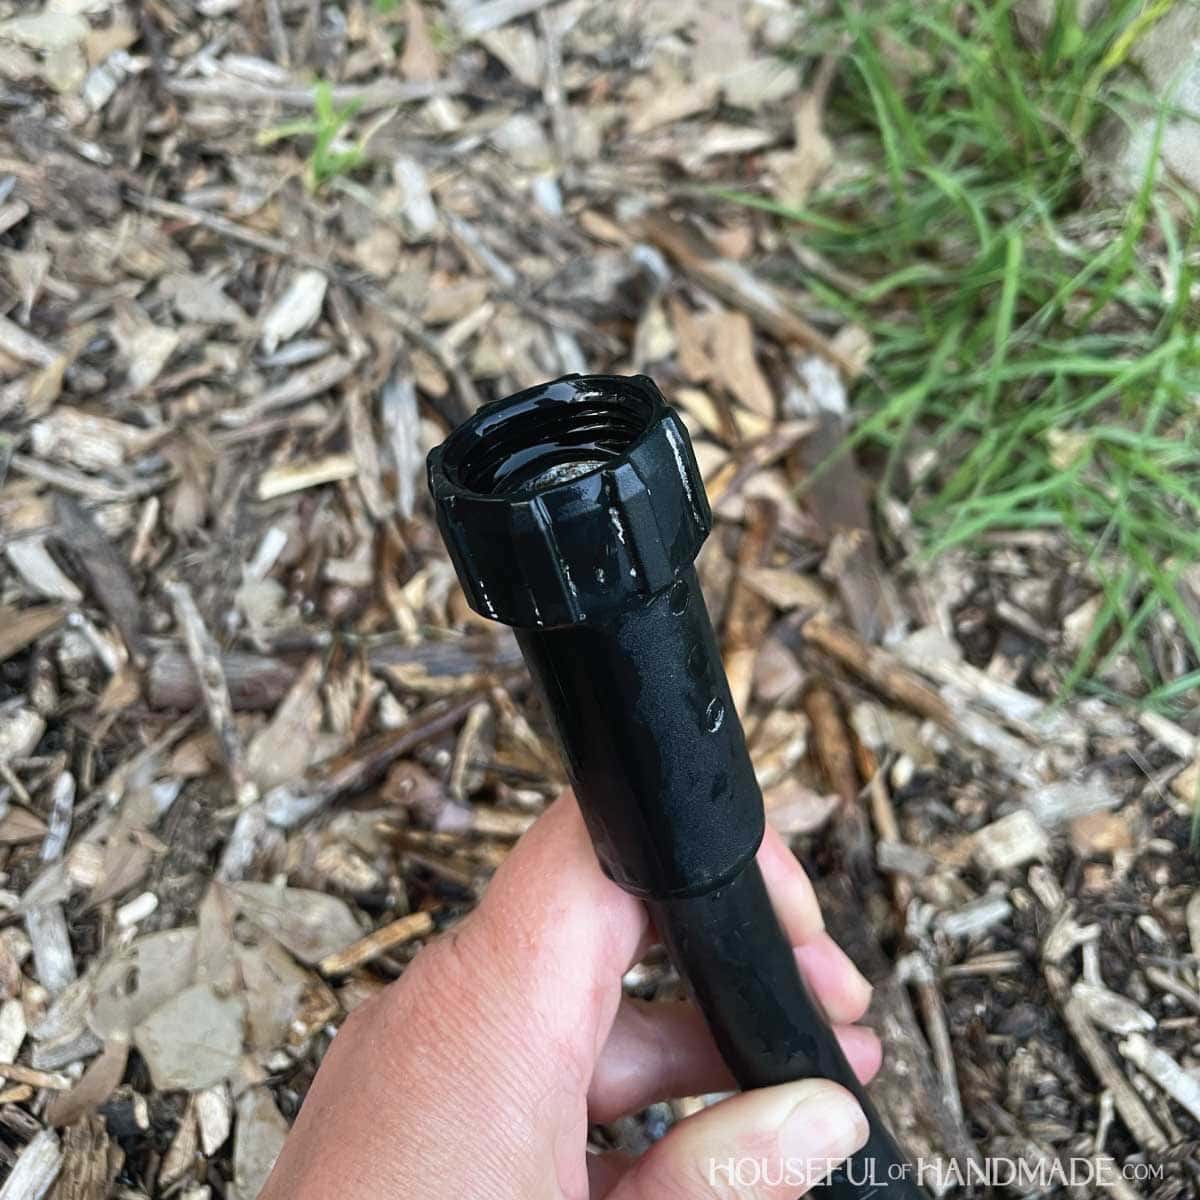
At the end of the line, cut the tubing and add a compression to female hole adapter. Now your drip irrigation can be attached to any garden hose or spigot.
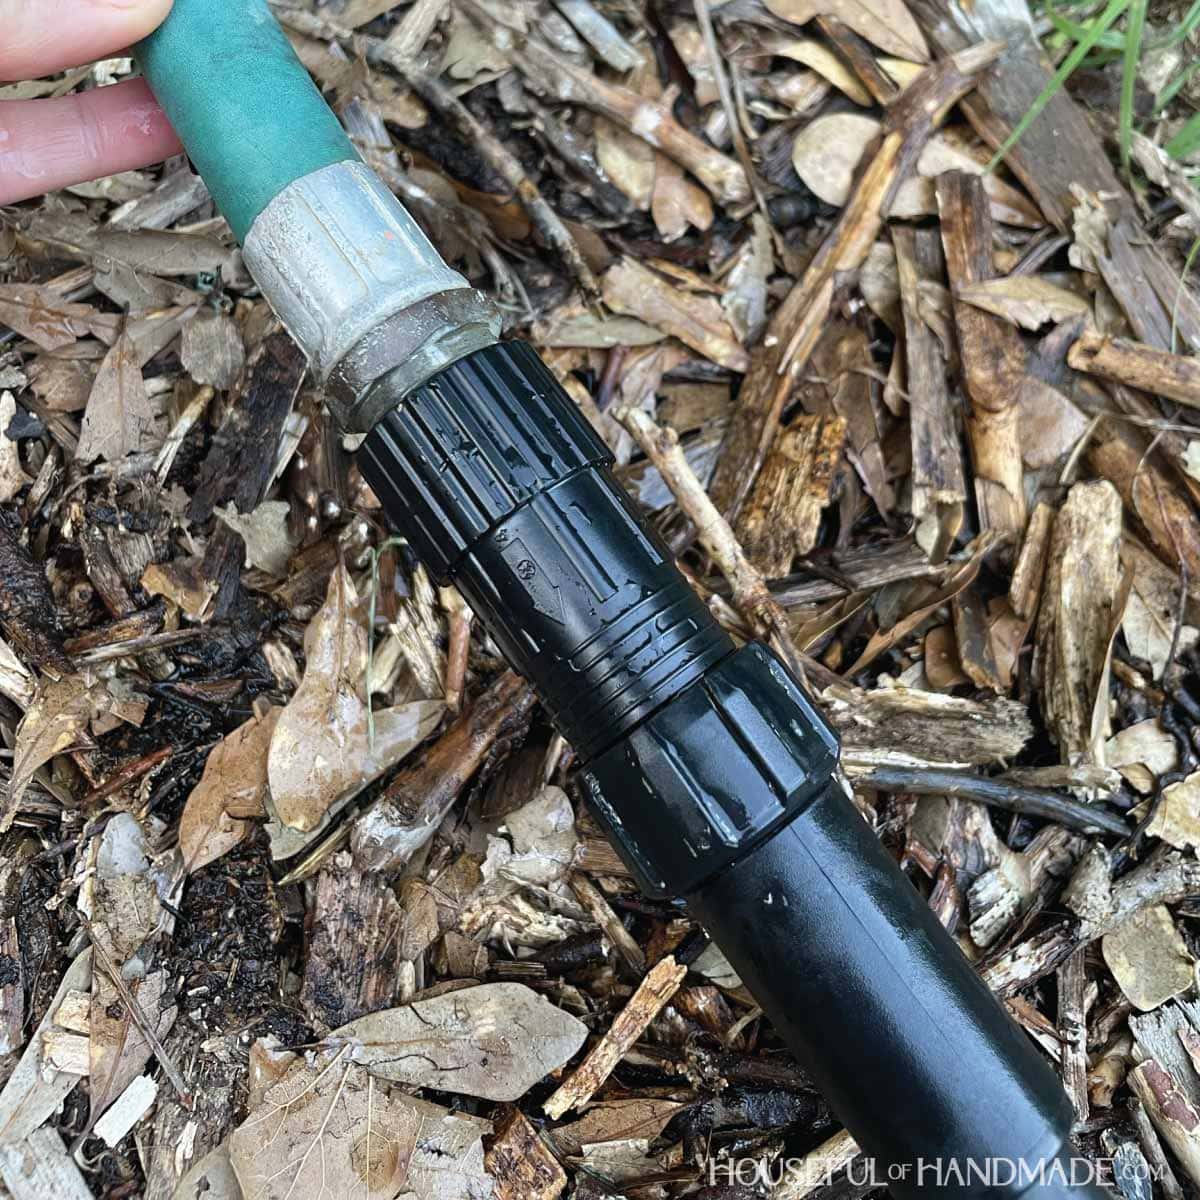
Before attaching it to the spigot/hose, I also recommend a pressure reducer.
This will just screw onto the hose adapter and then connect directly to your garden hose or spigot. It will help prevent your drip lines and tubing from blowing out due to high water pressure.
You can also attach a filter and/or a timer to the line before attaching it to the water source.
We are working to set up our rain collection system to the garden drip system and will add those when we do. Until then, I have to manually turn on the water because it is connected to the house spigot (which is already filtered).
You did it!
Now you can sit back and relax cause your raised garden beds will be watered all summer long with practically zero effort on your part.
Even without a timer, I only have to go attach the hose to the spigot and turn it on. Then I set a timer on my phone to remind me to turn it off and the watering is done!
Happy gardening!
