See our complete plan for a budget DIY kitchen remodel with tips to save money.
We have moved into our new home and the first big project is a new kitchen! I cannot wait to share our DIY kitchen remodel with you including how we are doing this one even cheaper than the last (and why).
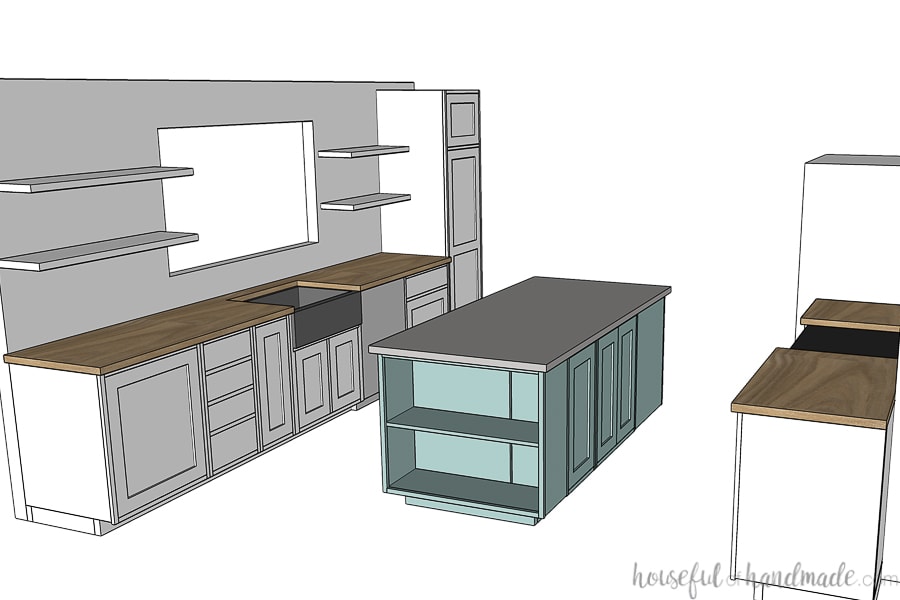
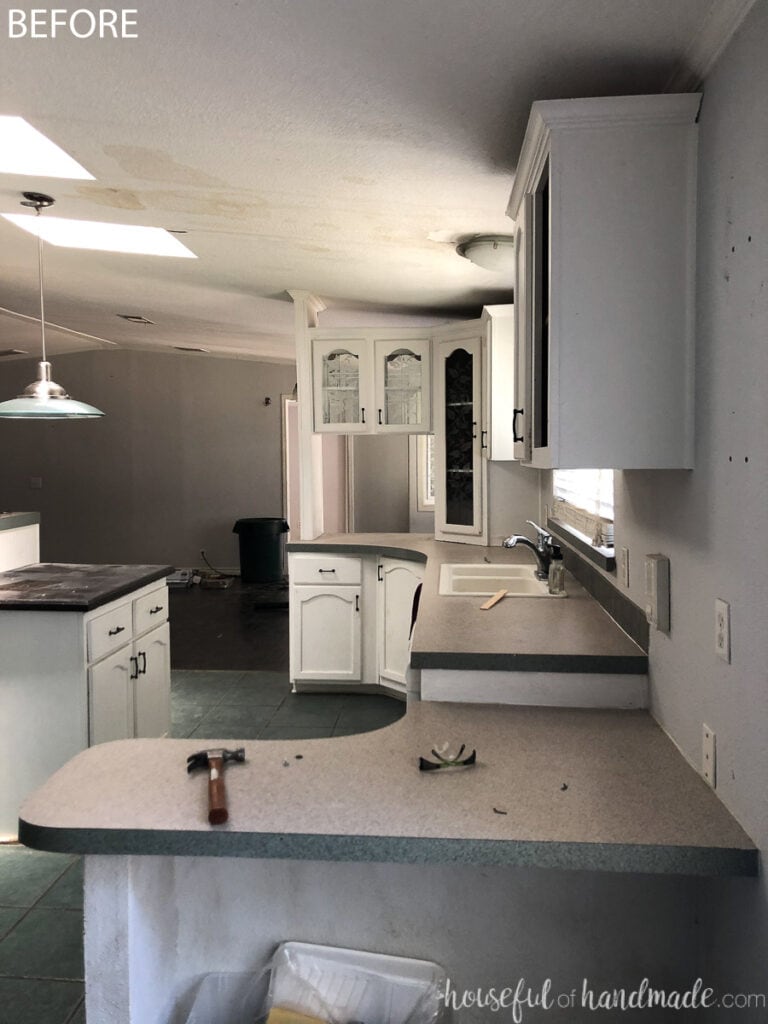
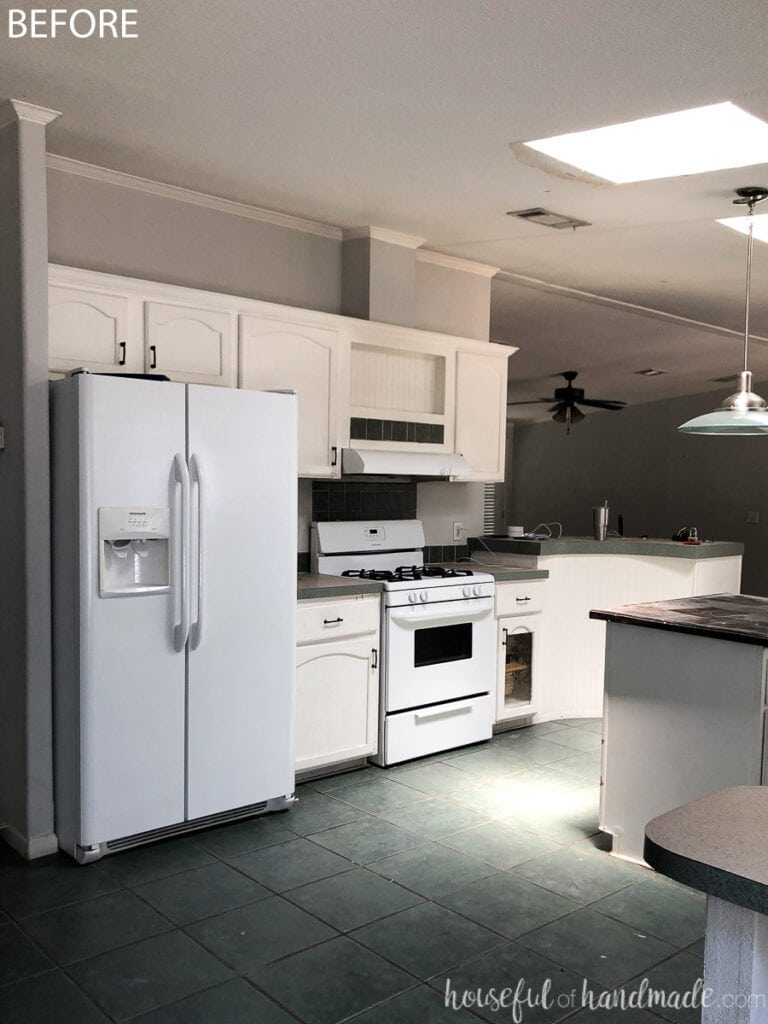
We moved into our new home the first week of June, but before we even moved in we knew we needed a new kitchen. The old kitchen was not functional and was starting to fall apart.
So before we even moved in, we demoed the kitchen! How’s that for making sure you get around to a project fast?
This post may contain affiliate links. As an Amazon Associate I earn from qualifying purchases. Click here to read my full disclosure policy.
After living with a kitchen I hated in our old house for 13 years (and only living in our beautiful dream kitchen for 2 years before selling), I knew this time I would get the kitchen done first.
And a functional, beautiful, well organized kitchen really is what makes a home. You can live with other weird quirks if the kitchen works for your family.
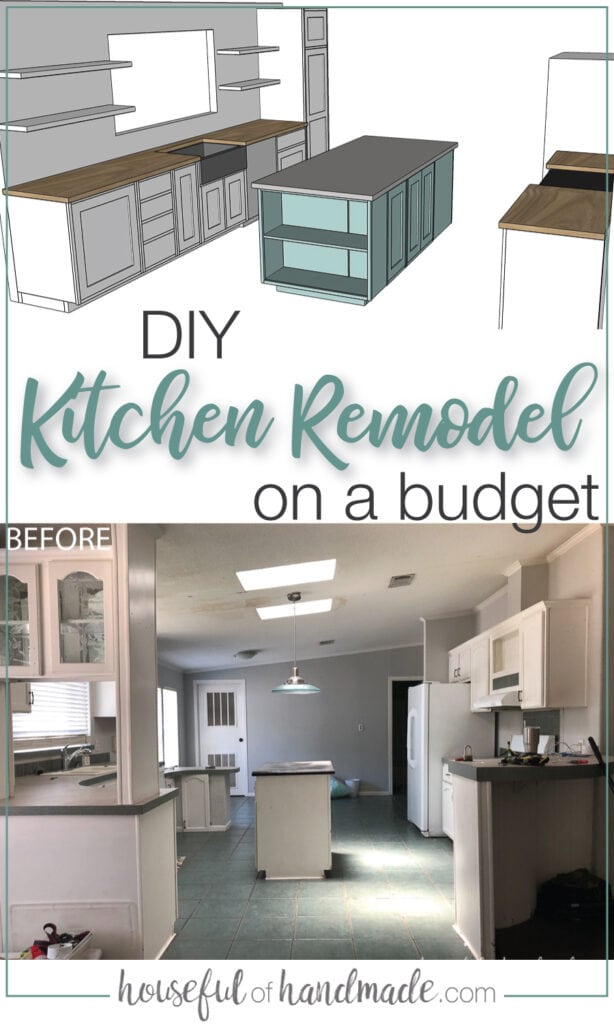
Kitchen Design Plan
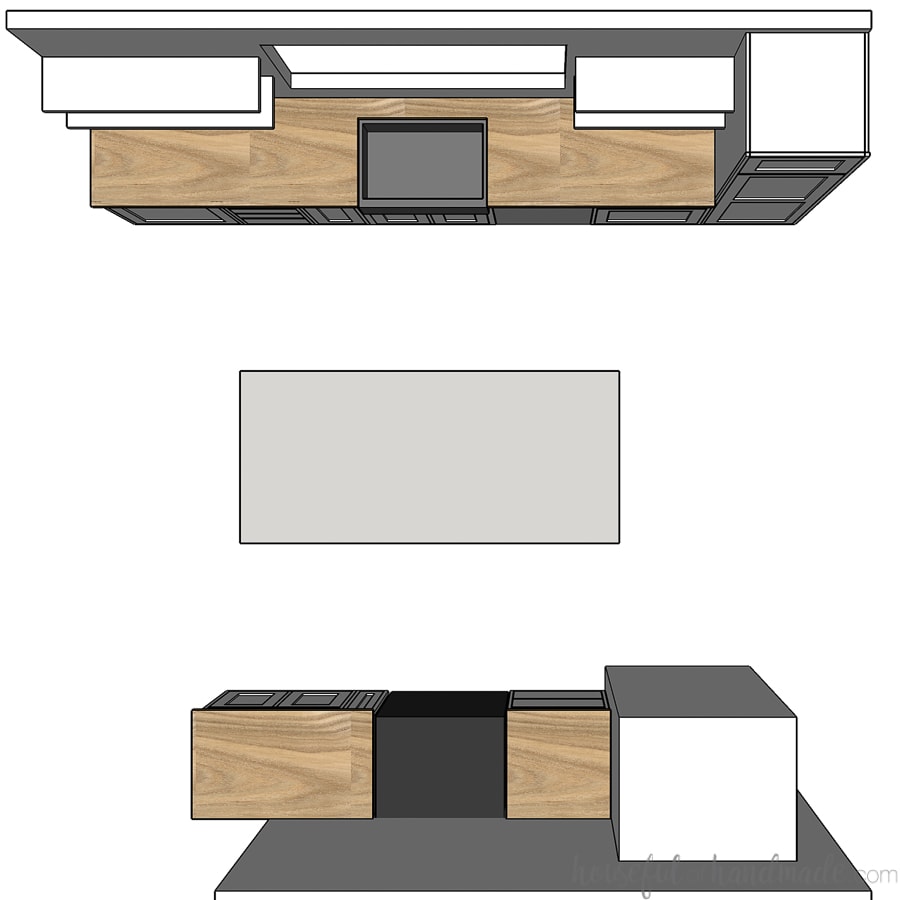
We are not going to be moving any appliances/plumbing in our kitchen remodel. The working triangle is great and it will save so much money not opening up the walls.
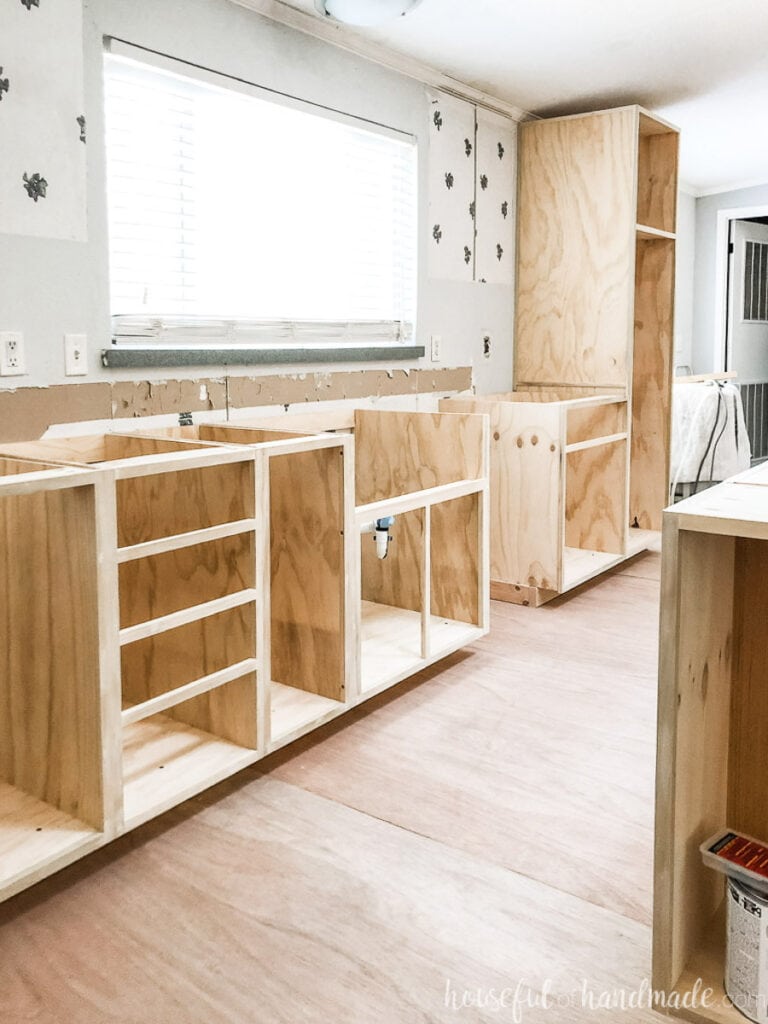
Instead, we are focusing our lower cabinet layout to make the kitchen more functional.
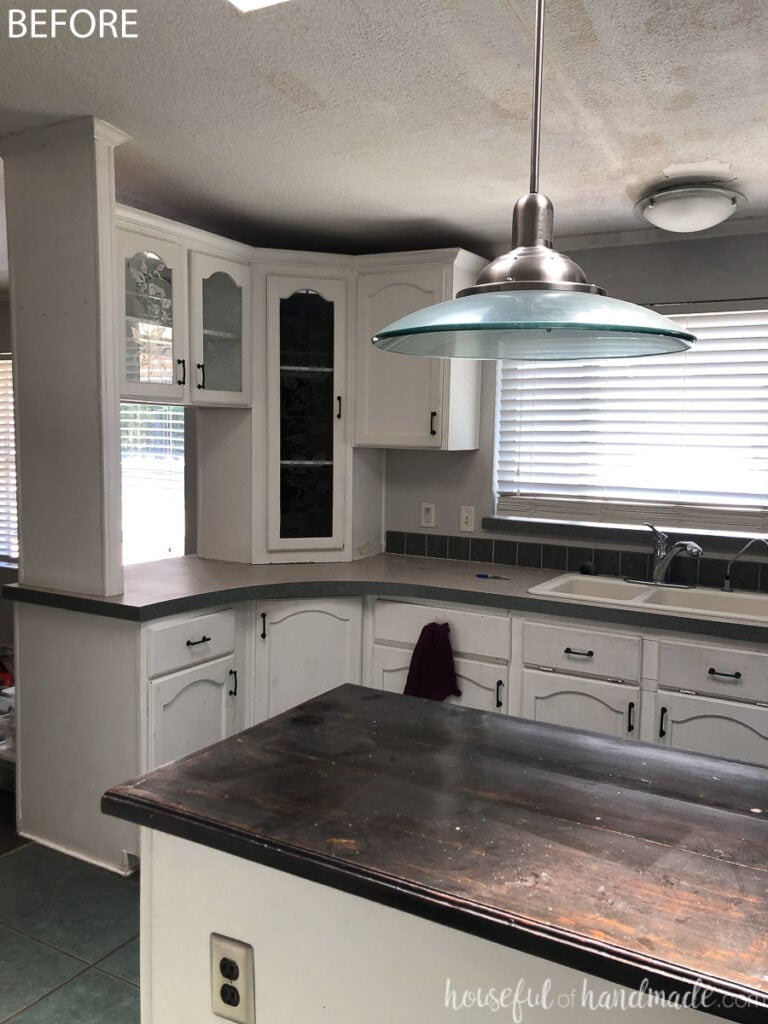
The before kitchen had lots of odd levels to the lower cabinets. There is a raised countertop for a bar area (but it sticks into the living room). Plus a lower countertop for what I am guessing is a desk area.
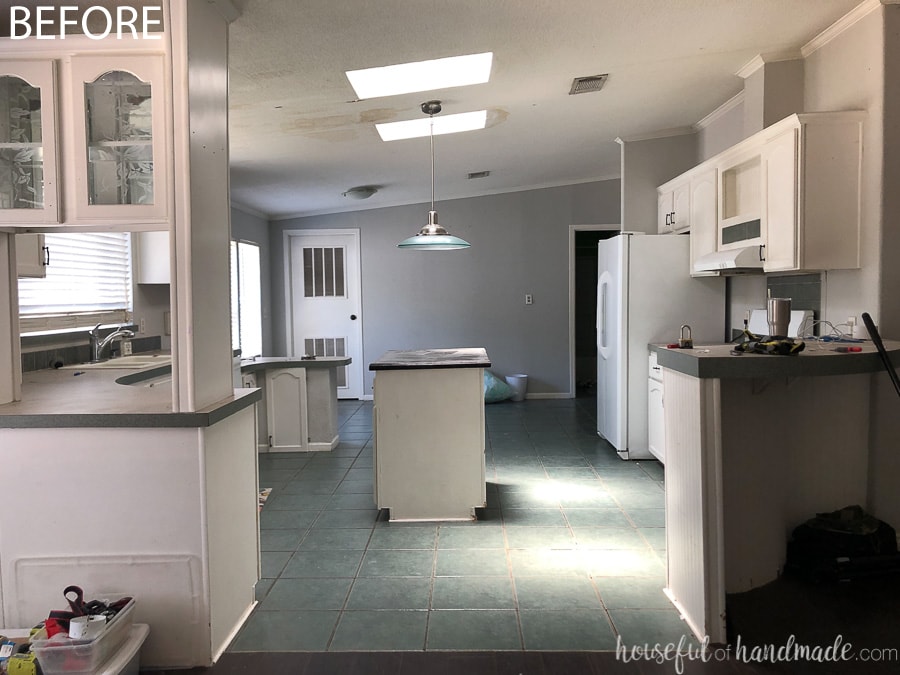
These odd areas make the useable countertop space feel cramped and small.
Also, these areas jut out into the walk way through the kitchen, as well as a third jut out with a decorative glass door upper cabinet. Because the kitchen closed around the center, it made the kitchen island so tiny.
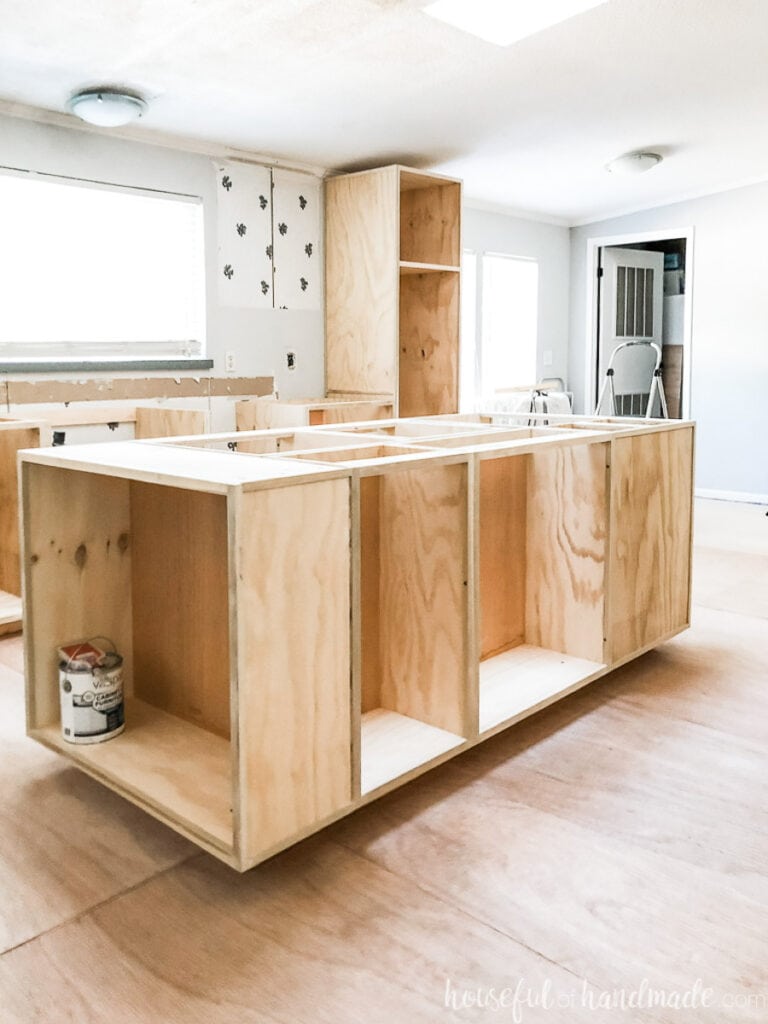
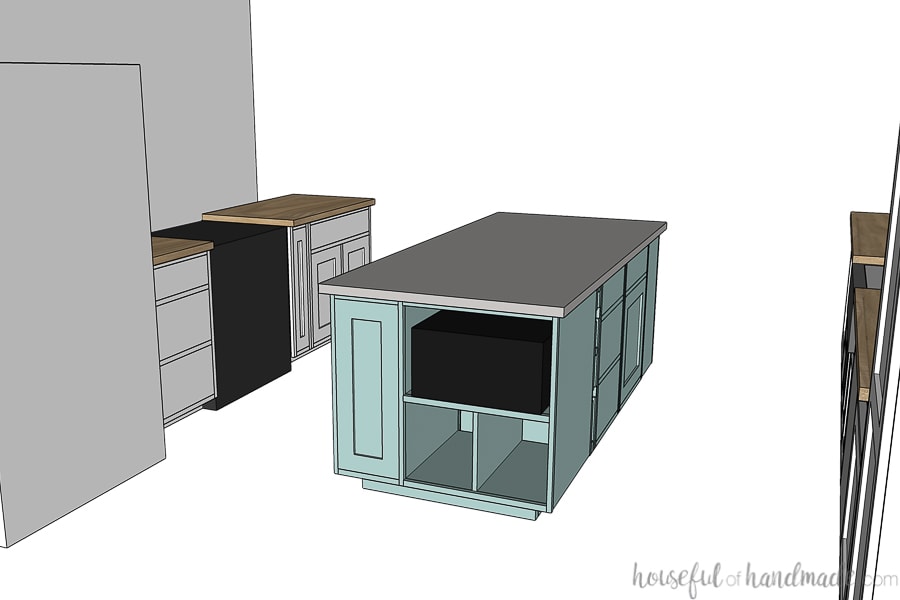
By opening up the kitchen and keeping the cabinets only against the walls, we can create giant kitchen island! The new island will be 40″ X 7′. It will not only include tons of counter space, but also tons of storage underneath.
Since we have no pantry in the kitchen, we are adding a tall pantry cabinet to our design. The 24″ wide cabinet will go to the ceiling with pull-out drawers to make it easy to access all the pantry items.
And to further open up the space, we are eliminating the upper cabinets next to the window. Instead of heavy cabinets, we will use open shelves on each side.
I loved the couple open shelves we had in our last home and am excited to put the most used items in full view and easy reach again.
How to Save Lots of Money on a Kitchen Remodel
Our last kitchen remodel was done on a budget! What would have cost $30,000+ to hire out, we DIYed for less than $10,000.
For this house, we only plan to live in it for 3-5 years. Why? Because it is a double-wide trailer on our dream property. Our plan is to build our dream home someday soon. But until then, we will make this our home.
And for a home you will only live in for 3-5 years, which has no resell value, we do not want to spend a lot of money on this kitchen remodel! But we need a functional kitchen for our family. So we are cutting costs on our DIY kitchen even more.
Where we are cutting costs
Appliances:
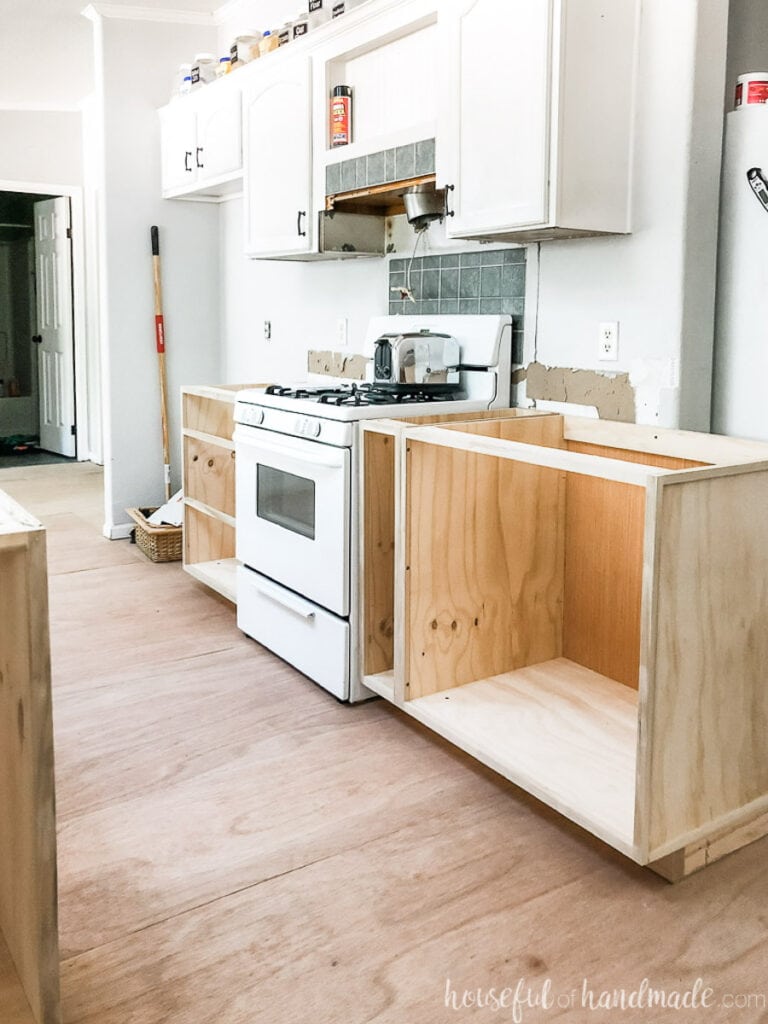
We are keeping all the existing appliances. The fridge, dishwasher and stove are all white and we will make it work in our new design.
We did have purchase a microwave since it is not built into the kitchen. Also we will be purchasing a new range hood because the one in the kitchen did not work. We will keep it cheap by buying a basic range hood.
Cabinets:
Of course I am building the cabinets again! Building your own cabinets saves so much money.
If you’ve ever considered building your own cabinets (for your kitchen, bath or other built-ins) make sure to check out my How to Build Cabinets series of posts.
Wood Choice:
For our last kitchen, we save thousands of dollars on our cabinets, but we used high-end wood to build them. This time we are taking an even more budget friendly approach.
Instead of maple, pre-finished plywood for the cabinet boxes (at $90 a sheet), I found a nice pine plywood that I will paint for only $32 a sheet.
And for the face frames, I am only doing 1″ face frame (instead of a thicker 1 1/2″ or more) to save money on the poplar that I need. I am also doing this for another reason and will talk about it in a different post about our cabinets.
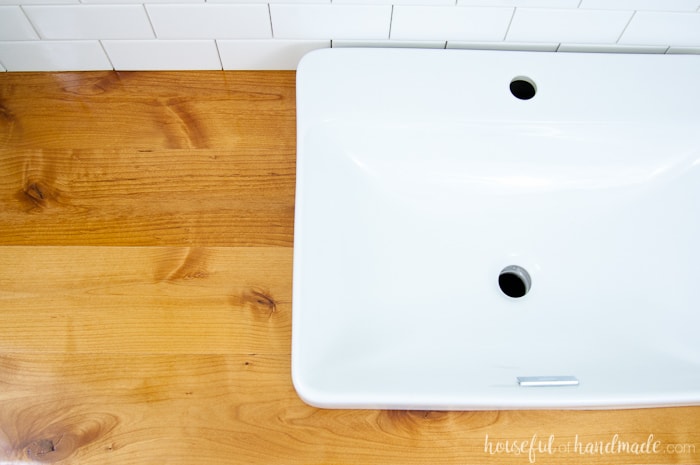
Kitchen Sink:
I adored our farmhouse sink in our last kitchen. The large single basin sink was a dream for washing large pots & pans, canning, and just everyday use.
After living for a couple months with my in-laws and their normal divided sink, I knew I couldn’t live without a farmhouse sink in our new kitchen. But at $500+ for the sink, it was out of the budget.
So instead of a white fire-clay farmhouse sink, I found a stainless steel option for only $200. It was still a splurge for this temporary kitchen, but will make it super functional for the way I cook. And I can take it with use to the dream house for a washroom sink.
If you’ve been dreaming about a farmhouse sink, make sure to read this post about everything you need to know before buying a farmhouse sink first!

Flooring:
The old floor was tile that was coming off the floor with broken tiles in many places. And we would need to remove a bunch to make room for the new cabinet arrangement so it had to go (and it was not pretty so I didn’t feel bad).
To replace the flooring on a budget, we are using inexpensive vinyl tiles. These peel & stick tiles are super easy to install and the styles have come a long way. We will share the whole process and our thoughts soon!
Countertops:
This is another place you can spend so much money in a kitchen. Of course, there will be no quartz or granite in this budget kitchen, but that doesn’t mean we have to sacrifice style.
Instead we are using 2 other budget countertop ideas. For the kitchen island we will DIY a concrete countertop! We will be able to make a large (40″ x 7′) island for just a couple hundred dollars.
And for the rest of the countertops I am so excited to DIY another beautiful wood countertop (like this wood vanity I miss from our master bathroom).
Upper Cabinets:
We removed the upper cabinets on the window side because they were connected to the weird jut-outs that closed in the room. Instead of replacing them with new cabinets, we are replacing them with open shelving.
Open shelves are way cheaper than cabinets. I bought iron brackets for $15 each and will use 2×12 Douglas fir boards for the shelving material.
For the wall around the stove, I am reusing the wall cabinets there. I will replace the cabinet doors (and maybe the face frames) and paint them to match. Reusing cabinets that are functional is a great option to save loads of money!
So with a couple months of work, we will be able to transform this kitchen on a tight budget. And we will be sharing it all with you!
Make sure to subscribe to the newsletter so you see all the DIY kitchen remodel updates and more!