Replacing cabinet doors will give any room an instant facelift!
Whether you are remodeling a kitchen, bathroom, laundry room, or any room with built in cabinets, you can build your own cabinet doors to make your space look like new again.
Even if you are a beginner woodworker you can make your own cabinet doors. These 3 different ways to make cabinet doors are perfect for getting you started and then taking your DIY cabinet doors to the next level.
This post may contain affiliate links. As an Amazon Associate I earn from qualifying purchases. Click here to read my full disclosure policy.
Start with what you have and enjoy transforming your own cabinets into beautiful new cabinet with new doors!
Need new cabinets too? I detailed everything you need to know for how to build cabinets here.
Parts of a Cabinet Door:
Each door is made up of 2 stiles, 2 rails, and a center panel.
The exact measurement of each piece depends on the final size of the cabinet door and the final method of building your cabinet doors.
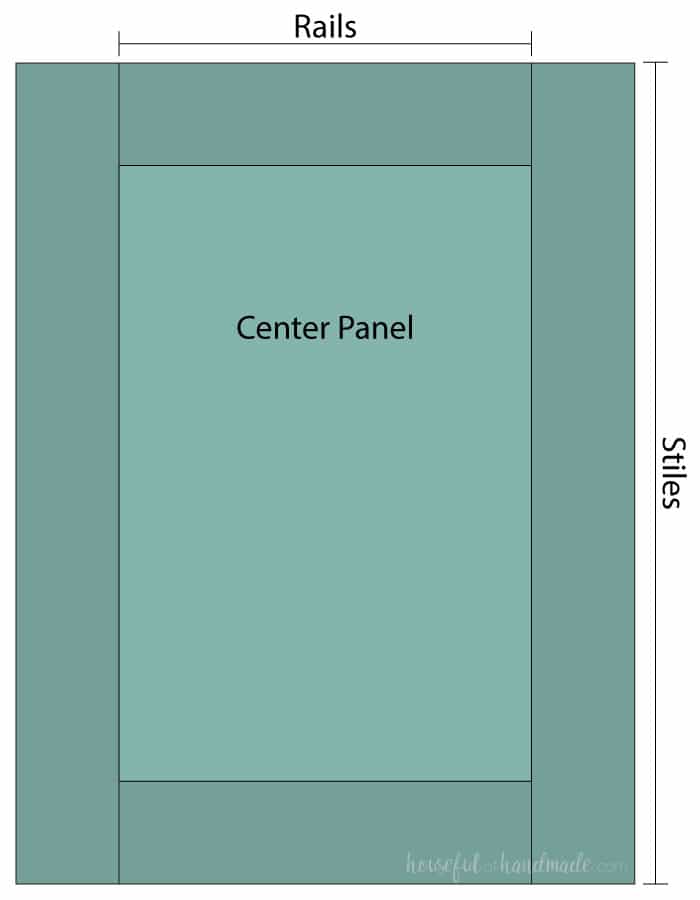
You can pick any width you want for your cabinet door rails and stiles. I typically use 1×3 boards for mine so they are 2 1/2″ wide.
For center panels, use plywood for stained cabinet or MDF for painted cabinets. Or learn how to build cabinet doors with glass panels here.
Tips for Building Beautiful Cabinet Doors
Make sure your wood is straight. Twisted and warped boards will give you twisted and warped cabinet doors (which will not lay flat against your cabinet). Take some extra time to check all your boards for straight. Check out these tips on buying lumber to ensure you start your DIY cabinets on the right foot.
Pick hardwood for strong doors that will last. Hardwood is not the least expensive option, but will be worth it in the end.
Budget Friendly Hardwood Options:
- Poplar is great budget friendly wood and easy to work with wood for DIY cabinet doors. It can have a slight greenish tint to the wood so most people use it for projects that are to be painted. However, I used stained poplar for this rustic TV stand with concrete top and love the way it turned out.
- Alder is also quite inexpensive for a hardwood and if you get knotty alder it is even less expensive. Be aware that the knots can sometimes be in the wrong spots so you may loose some board length to prevent this. And if you do not like the look of knots, go for the non-knotty option.
Make sure the two rails and two stiles are cut to the exact same length. Even a difference of 1/16th of an inch can cause problems. I like to cut both pieces together to ensure they are the same length.
Take time to true up your blades so you get straight cuts. This will ensure straight and square cabinet doors. Here is a great video to help you square up your miter saw. Use a speed square to ensure your table saw blade is square to the table.
Printable PDF Woodworking Plans
Save over 60% with the bundle of all 3 cabinet door building PDF guides.
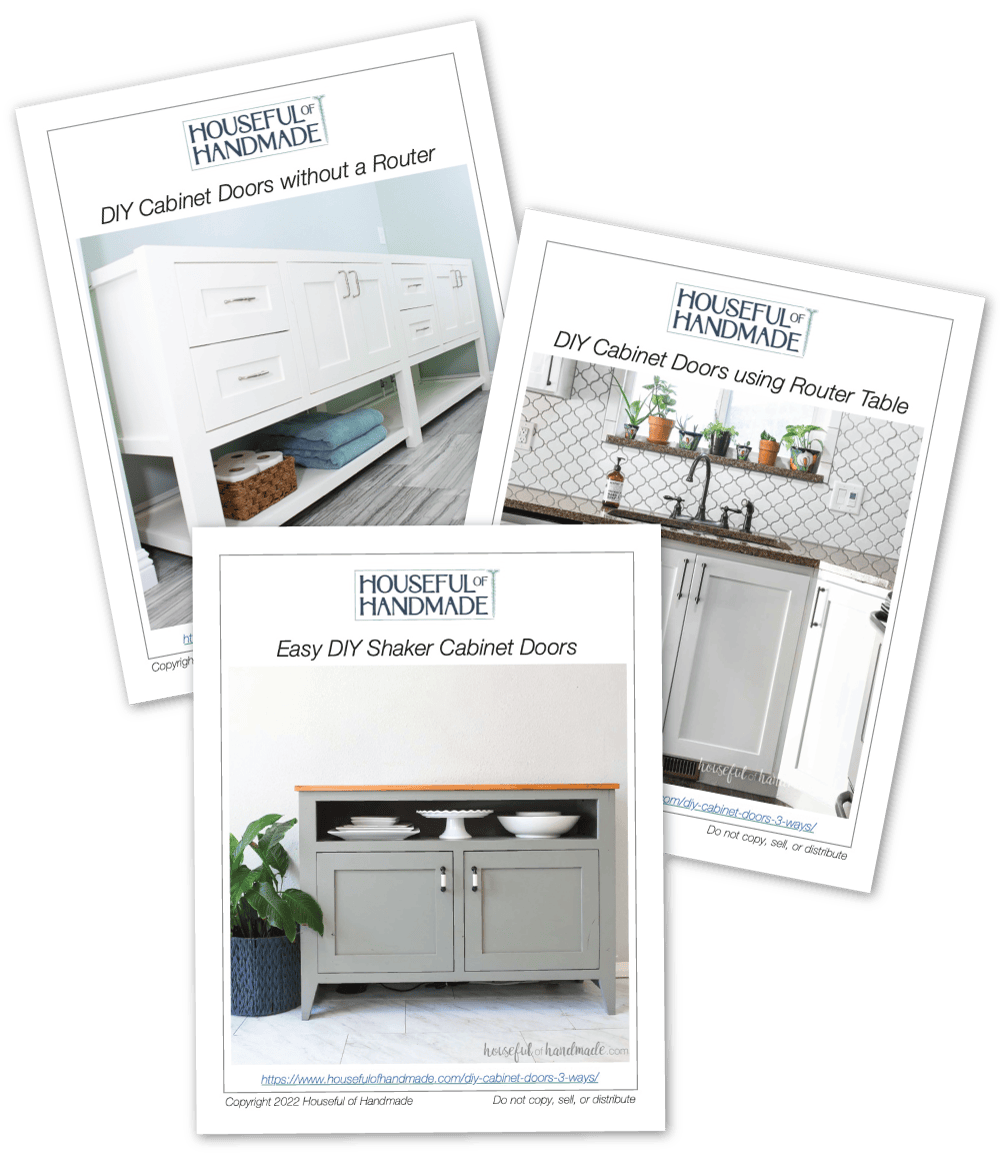
How to Build Cabinet Doors without a Router
Not having a router does not mean you cannot build amazing cabinet doors.
The cabinet doors on the mission style open shelf bathroom vanity were built with just a saw and Kreg Jig. I used a miter saw to cut accurate rails & stiles and a circular saw with guide track to cut the plywood center panel.
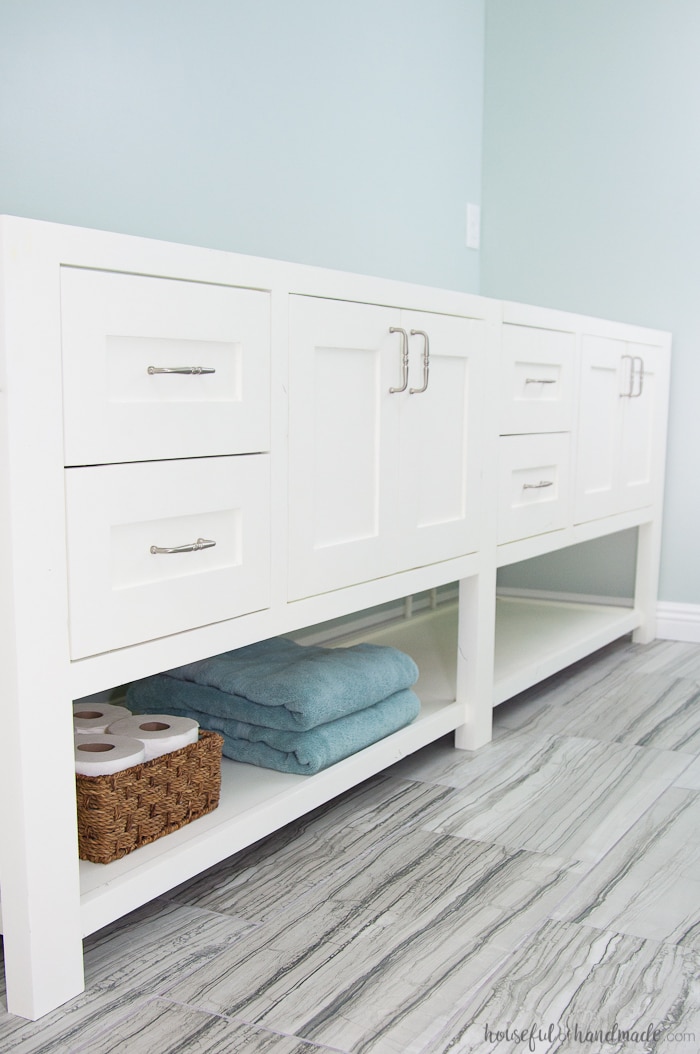
These simple shaker style doors are a perfect solution for the beginner woodworker.
The center panel of these cabinet doors are made of 1/2″ plywood to give you space to join the panel to the rails and stiles without a center groove, therefor no router is needed!
Premium plans include:
- Recommended Tools
- Materials list
- Lumber recommendations/tips
- How to figure cabinet door size
- How to figure cut list for any size door
- Step-by-step instructions with 3D renderings
- Door building tips & techniques
- Helpful resources
- BONUS: 3D SketchUp file
Cut List Calculations
Decide on the final dimension of the cabinet door, then calculate the size of your stiles, rails and center panel as follows:
- Cut stiles to the final height of the cabinet door
- Cut rails to the final width of the cabinet door minus the stiles width (x2)
- Cut center panel to the final height of the cabinet door minus the rails width (x2) and the width of the cabinet door minus the stiles width (x2)
Steps to Build Doors
Step 1: Cut your rails and styles to length. Cut your center panel out of 1/2″ plywood. Use a circular saw with guide track to make cutting plywood quick and easy.
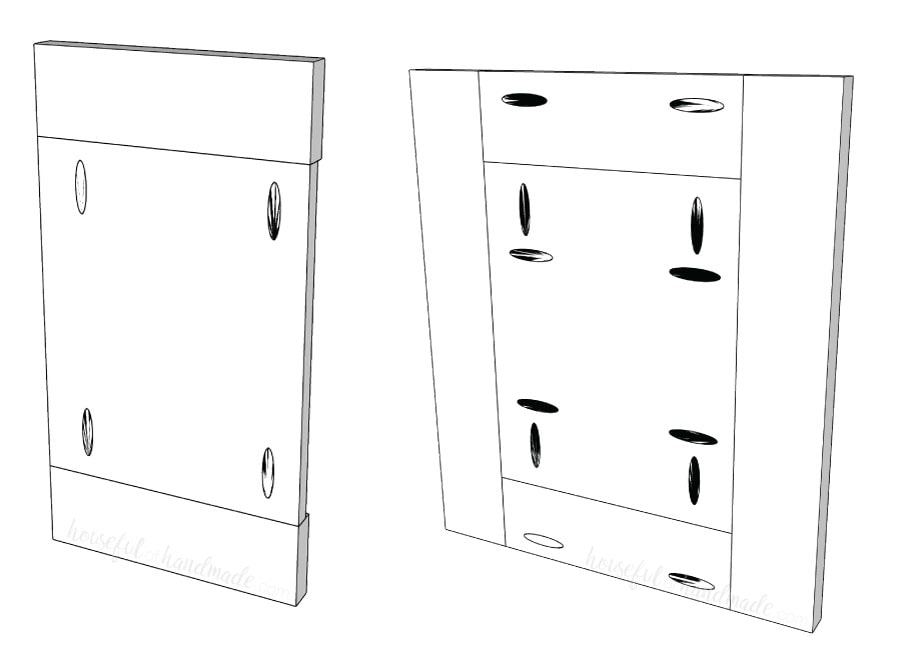
Step 2: Drill pocket holes set for 1/2″ thick material in the top and bottom of the center panel (the sides that will touch the rails). The number of pocket holes will depend on the size of the cabinet door. You will want the pocket holes no further than 6″ apart (4-5″ apart are best).
Not sure what pocket hole jig to buy? See the Kreg pocket hole jig comparison here.
Step 3: Attach the rails to each end of the center panel with 1″ pocket hole screws and wood glue. You want the center panel to be flush with the rails on the back of the cabinet door, leaving the center panel set 1/4″ back from the front.
Step 4: Drill 1 pocket holes set for 3/4″ thick material in each end of the cabinet door rails and pocket holes set for 1/2″ material in the sides of the center panel. The number of pocket holes will depend on the size of the cabinet door. You will want the pocket holes no further than 6″ apart (4-5″ apart are best).
Step 5: Attach the stiles to each side of the center panel with 1″ pocket hole screws and use 1 1/4″ pocket hole screws to attach the rails to the stiles.
Step 6: If desired, fill the pocket holes with plugs. Sand and finish your new DIY cabinet doors and they are ready to be installed!
How to Build Cabinet Doors with Simple Routing
Not ready to make full routed cabinet doors? You can still make beautiful DIY cabinet doors with floating center panels.
These doors are easy to join together with pocket holes on the rails. And you can cut your groove with either a 1/4″ straight router bit or a table saw.
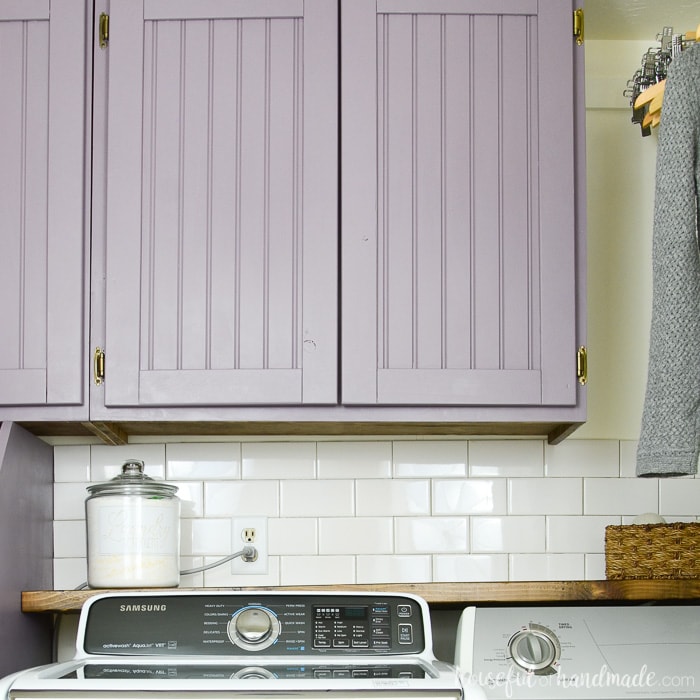
These easy routed cabinet doors use a 1/4″ thick center panel.
You can use plywood, MDF, or even beadboard (like I did when I needed to build cabinet doors cheap for our $100 laundry room makeover).
Premium plans include:
- Recommended Tools
- Materials list
- Lumber recommendations/tips
- How to figure cabinet door size
- How to figure cut list for any size door
- Step-by-step instructions with 3D renderings
- Door building tips & techniques
- Helpful resources
- BONUS: 3D SketchUp file
Cut List Calculations
Decide on the final dimension of the cabinet door, then calculate the size of your stiles, rails and center panel as follows:
- Cut stiles to the final height of the cabinet door
- Cut rails to the final width of the cabinet door minus the stiles width (x2)
- Cut center panel to the final height of the cabinet door minus the rails width (x2) plus the depth of the groove (x2) and the width of the cabinet door minus the stiles width (x2) plus the depth of the groove (x2). Also, I like to minus 1/4″ from the calculated width and height of the center panel and use cabinet door space balls to ensure a tight fitting center panel with no rattling.
Steps to Build Doors
Step 1: Cut your rails and styles to length. Cut your center panel out of 1/4″ plywood, MDF, or beadboard. Use a circular saw with guide track to make cutting plywood quick and easy.
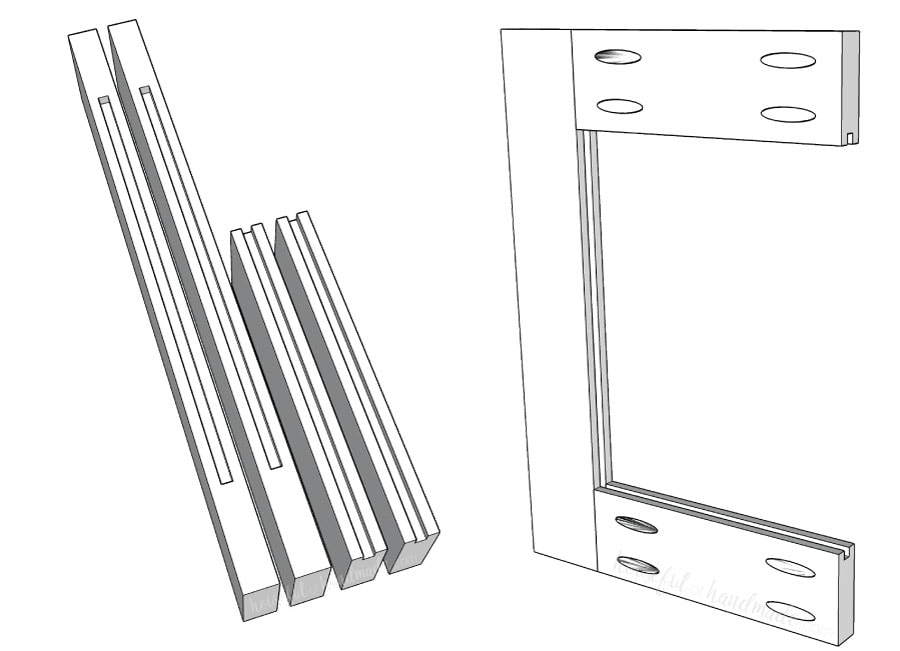
Step 2: Measure in from each end of the stiles the width of your rails minus 1/2″ and mark with a pencil. This will be where you start/stop your center groove so that there is no groove where you will be joining the boards to make sure the boards join properly.
Step 3: Set your router bit with a 1/4″ wide straight bit so that it will take out a 1/4″ deep groove (typically, you can do a larger groove if you want). Cut the groove in the stiles from mark to mark. Cut the groove in the rails the entire length of the boards.
Step 4: Drill 2 pocket holes set for 3/4″ thick material in each end of the cabinet door rails. Using wood glue and 1 1/4″ pocket hole screws, attach both the rails to one of the stiles so that the groove in the center lines up and the top/bottom of the stiles are flush with the outer edge of the rails.
Find the best Kreg pocket hole jig for you here.
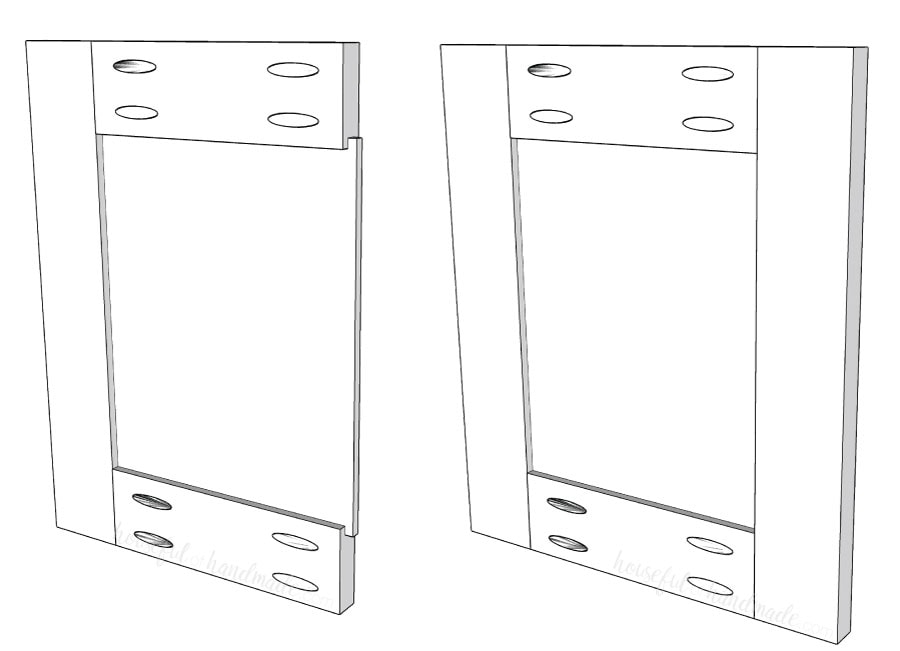
Step 5: If using space balls, place 2 in the groove of each rail and stile. Then slide the center panel into place.
Step 6: Using wood glue and 1 1/4″ pocket hole screws, attach the other stile to the side of your cabinet door. Making sure the rails line up and the cabinet door is square.
Step 7: If desired, fill the pocket holes with plugs. Sand and finish your new DIY cabinet doors and they are ready to be installed!
How to Build Routed Cabinet Doors
To make beautiful cabinet doors with no visible joinery, you need to router the rails to fit inside the stiles. These cabinet doors are held together with just glue and they look amazing.
While it seems like DIY routed cabinet doors are more complicated, they are actually just as easy to assemble as the other cabinet doors.
The hard part is taking the time to line up the cabinet door router bits perfectly so the rails and stiles fit together nicely. For a DIY shaker cabinet door I used these cabinet router bits.

A router table is a must to make DIY routed cabinet doors.
And while a router lift on your table would make it easier to adjust the bit height, it can be done without it (I know because I did it).
Premium plans include:
- Recommended Tools
- Materials list
- Lumber recommendations/tips
- How to figure cabinet door size
- How to figure cut list for any size door
- Step-by-step instructions with 3D renderings
- Door building tips & techniques
- Helpful resources
- BONUS: 3D SketchUp file
Cut List Calculations
Decide on the final dimension of the cabinet door, then calculate the size of your stiles, rails and center panel as follows:
- Cut stiles to the final height of the cabinet door
- Cut rails to the final width of the cabinet door minus the stiles width (x2) plus the depth of the groove
- Cut center panel to the final height of the cabinet door minus the rails width (x2) plus the depth of the groove (x2) and the width of the cabinet door minus the stiles width (x2) plus the depth of the groove (x2). Also, I like to minus 1/4″ from the calculated width and height of the center panel and use cabinet door space balls to ensure a tight fitting center panel with no rattling.
Steps to Build Doors
Step 1: Cut your rails and styles to length. Cut your center panel out of 1/4″ plywood, MDF, or beadboard. Learn how to cut plywood easy & accurately using a circular saw with guide track here.
Step 2: Set the router bit that cuts the rabbet from the rails up in your router. Adjust the height of the bit so that the rabbet is where you want it on the board. When cutting the rabbet, you will want to use a scrap board at the back of the rail to prevent it from splitting out the wood as the bit leaves the rail. This is common with end grain cuts.
Step 3: Cut the rabbet in both ends of both rails. Make sure you keep the top of the board facing down when you router (this will actually be the front of the cabinet door).
Step 4: Switch out the router bit to the one that cuts the groove. Take the time to adjust the height of the router bit until it lines up perfectly with the rabbet that was already cut in the rails. Cut a test piece from a scrap and test fit it. Tweak and adjust until it fits tightly and the front of the cabinet door is flush from the rails to the stiles.
Step 5: Lay out the rails and stiles so you can easily identify which edge is the center edge that you will be routing. Also make sure you note which side is the top to make sure when you take it to the router you place the top flat down on the router table so the groove will line up properly with the rabbet you cut in the rails.
Step 6: Router the groove in all center edges of the rails and stiles. This will cut off part of the rabbet on the edges of the stiles so don’t fret about that.
Step 7: If using space balls, place 2 in the groove of each rail and stile.
Step 8: Add a generous amount of glue to the rabbet on one end of each of the rails and slide them into the groove on the stiles. Make sure the edge of the rails are flush with the edge of the stile.
Step 9: Slide the center panel into the groove. Add glue to the rabbet on the open end of the rails and then place the second stile on them. Make sure everything is flush. It may take a little pressure to get the center panel to fit with the space balls.
Step 10: Clamp the cabinet door together. Place a clamp at each end of the rails to hold the glue together and a clamp at each end of the stiles where it meets the rails so the center panel does not push the rails out. Tighten the clamps so the joints are secure but do not over tighten to cause the cabinet doors to bow.
Step 11: Leave clamped for at least 30 minutes for the glue to dry, then release and you are done. Sand and finish your new DIY cabinet doors and they are ready to be installed!
Whatever way you choose to make your own DIY cabinet doors, you will love the updated look of your kitchen, bathroom, or space. And it really is a great budget option, even if you have to buy a new tool or two!
