We have been having a lot of fun putting together my son’s room. His room is starting to look like a room he would never want to leave! I started by making him his own wall-mounted desk with a few floating shelves to hold his encyclopedias and other favorite books and toys. Then this month I made this awesome toy storage unit to corral all his legos and action figures. Lastly, we added a little style to his room with this DIY plaid wall.

This post may contain affiliate links. As an Amazon Associate I earn from qualifying purchases. Click here to read my full disclosure policy.
I wasn’t planning on painting his room. We put a fresh coat of soft cream paint on the walls right before he moved in a year ago. However, we are in the planning stages of building a second bedroom in the basement for our daughter to move into, and to make her more excited to move into her new room we told her she can pick the paint color. Unfortunately this meant my son was sad about not getting the chance to pick his paint color. He really wants something fun (apparently more fun than a fancy new desk and toy storage console). So we decided on a painted focal wall.
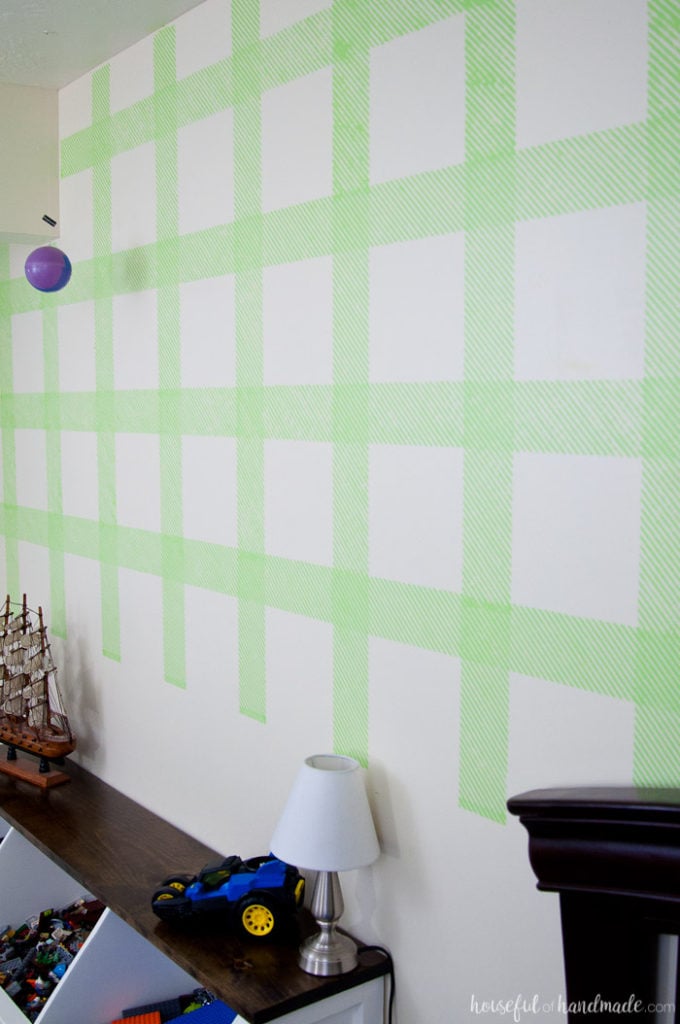
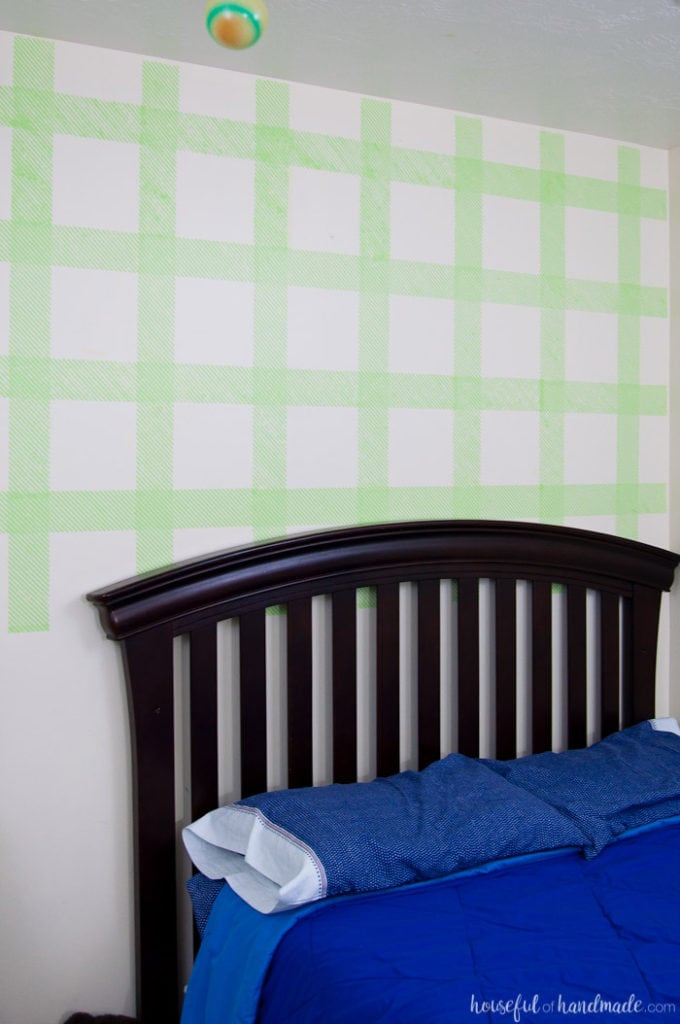
My son is 7, almost 8, so I wanted to figure out a fun wall treatment that he wouldn’t outgrow in a couple years. As much as I love decorating our house, I would maybe like it to be finished someday. And surprisingly painting is my least favorite thing to do (aside from mudding drywall). Since I have been having so much fun playing with plaids this month, I figured a plaid wall would be a perfect option for a boys room. He loved the idea so I got to work!

Of course, I could have bought a stencil, but why buy one when you can DIY it for just a few bucks and create anything you can think of. I shared how I made my wall stencil over at Silhouette School blog today. After I created my own stencil with my Silhouette machine, it was time to actually stencil the wall. Since this was my very first time stenciling a wall, I learned a lot and can’t wait to share it with you!
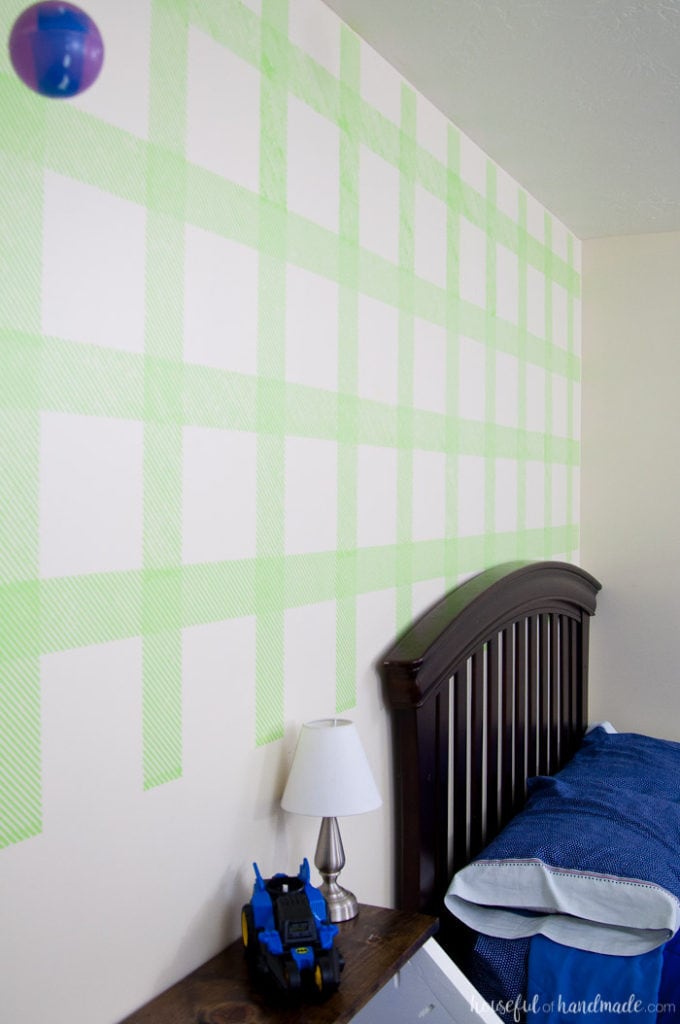
The first thing I learned, it takes a little more time than I planned to stencil a wall! Ha ha, story of my life. But seriously, I thought I could do the green layer one day and the navy layer the second day. I was wrong. I guess if I didn’t have anything else to do I could have managed, but we had things to do. So I get to share with you lots of things I learned while painting the first layer of my stencil. Then next week layer two is going on and I will share how awesome it looks when I am all done.
This post contains some affiliate links for your convenience. Clicking these links will help support this blog so I can keep creating things to share with you, but you will never pay more by using an affiliate link. Click here to read my full disclosure policy.
How to Stencil a DIY Plaid Wall
Supplies:
- Plaid wall stencil
- I am sharing the cut files for my DIY stencil in my library of free printables & downloads. Click here to subscribe to my weekly newsletter and gain access to all the freebies.
- .007 mil plastic sheets
- Silhouette cutting machine
- Repositionable spray adhesive
- Wall paint
- Foam pouncer
- Blue painters tape
- Level
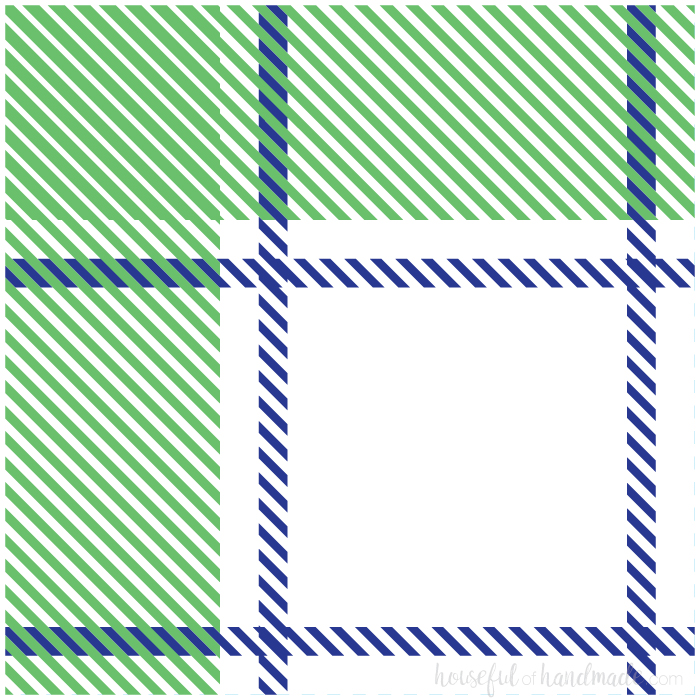
Start by making your wall stencil. The plaid I created uses two colors so I made two stencils, one for each color. But with registration marks for the first stencil on the second one to make sure it all lines up beautifully. I shared how I created my own wall stencil today at Silhouette School, you can use the tutorial to make any stencil you can dream up!
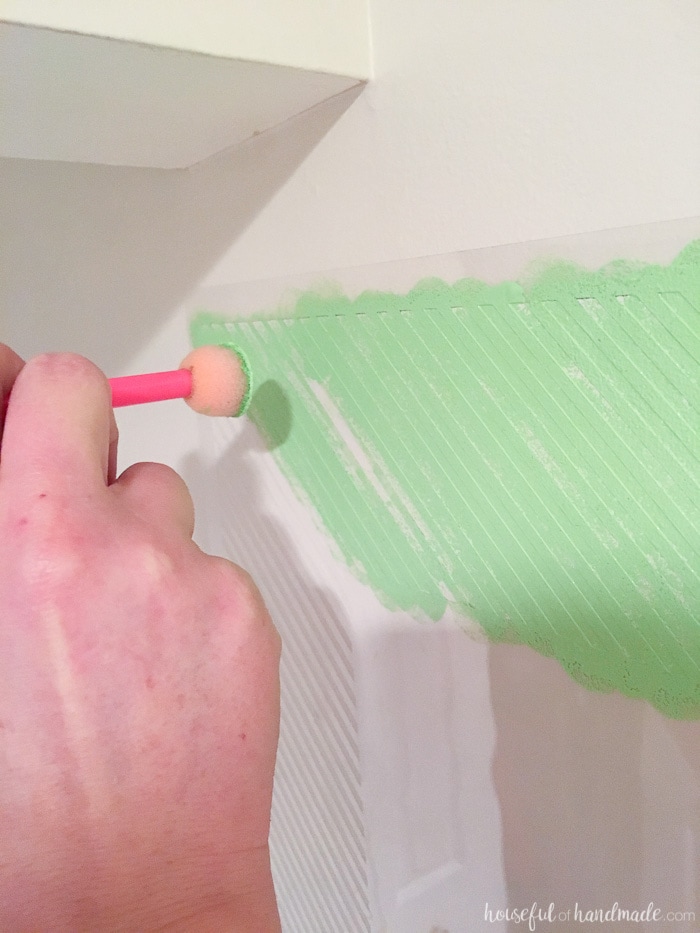
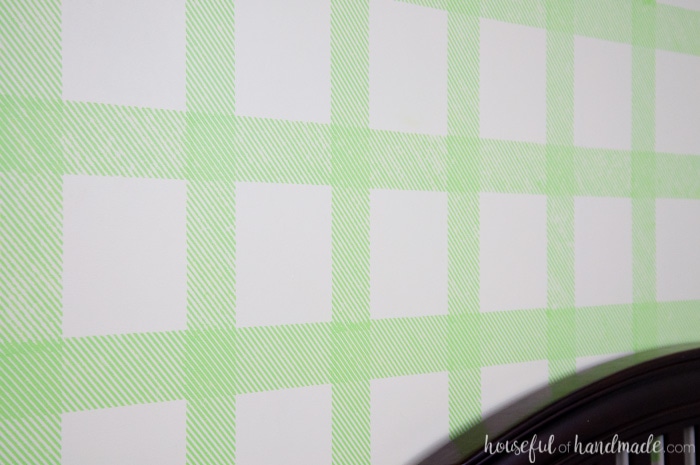
Once the stencil was all cut out, I sprayed the back of it with a repositionable spray adhesive. Now it was time to start stenciling! I did a test stencil and learned that my slightly textured walls means I need to use the pouncer instead of a foam roller to put the paint on the stencil. The roller pushed a lot of paint under the stencil, but the pouncer gave me cleaner lines.
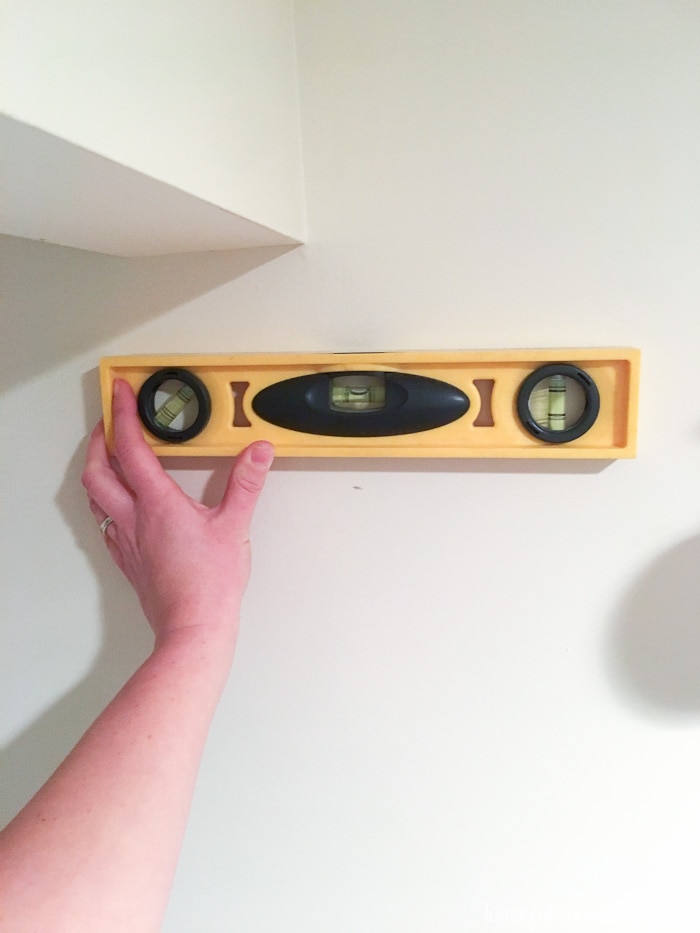
Draw a level line on the wall with a pencil using the level. Line your stencil (the design and not the stencil in case the stencil is not perfectly level on the plastic) up with the level line. The repositionable adhesive spray makes it easy to hold the stencil on the wall, especially if you have lots of little pieces on your stencil like these lines on plaid.
Once the stencil is all lined up it’s time for paint. Dip your pouncer in the paint, then dab off the excess. Too much paint on your brush will make your stencil lines less neat. Now stipple the paint onto the wall over the whole stencil (including registration shapes). Try to only dap the paint onto the wall instead of rub so you don’t push it under the stencil.
When the whole stencil area is covered with paint, carefully remove the stencil without smudging the paint.
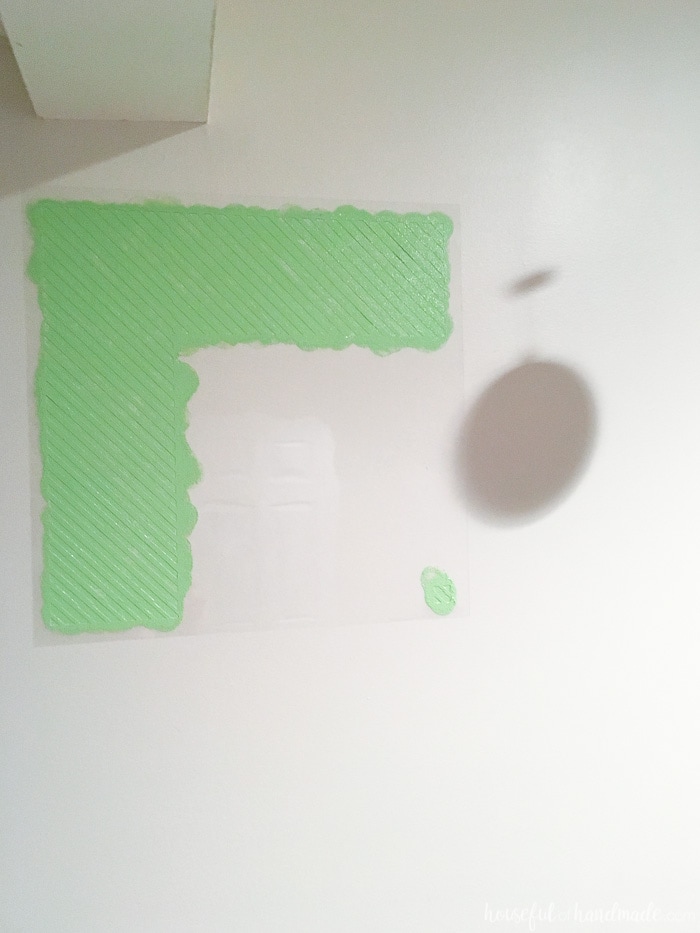
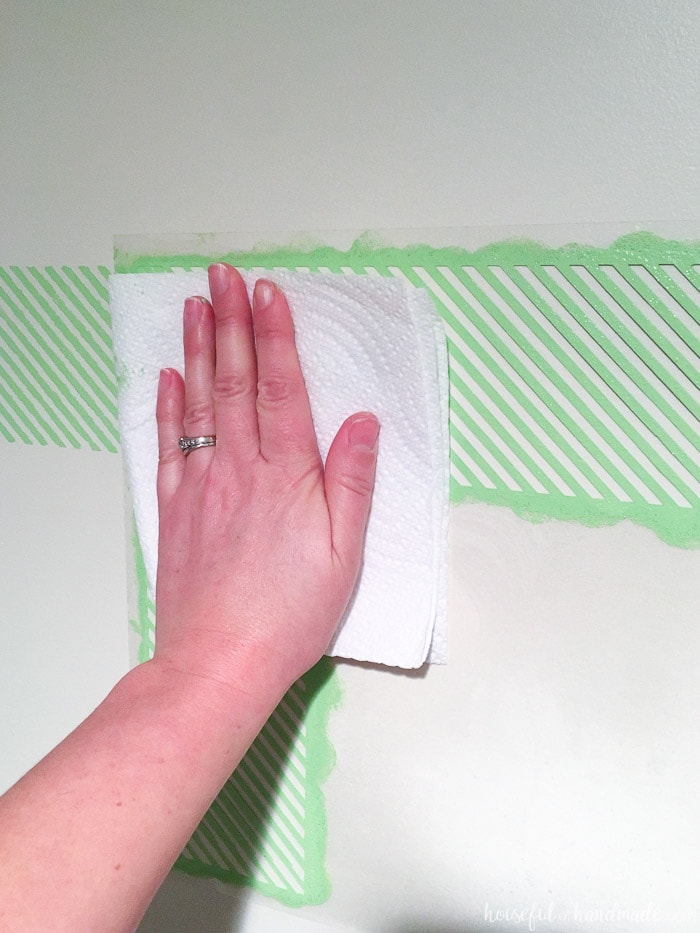
Now line the registration marks up with the original stencil (I let it dry a minute so I didn’t smudge the original stencil). To secure the painted part of the stencil, you may want to use a paper towel to press it firmly against the wall so you don’t end up with paint all over your hands. Add paint to the stencil.
Now repeat. Over and over and over.
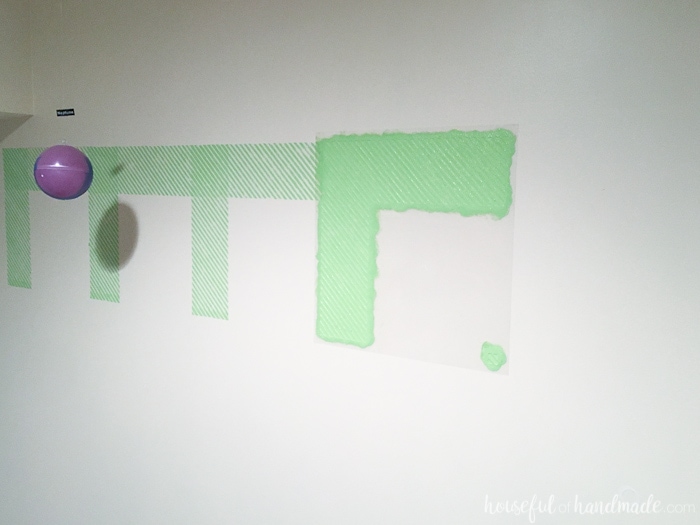
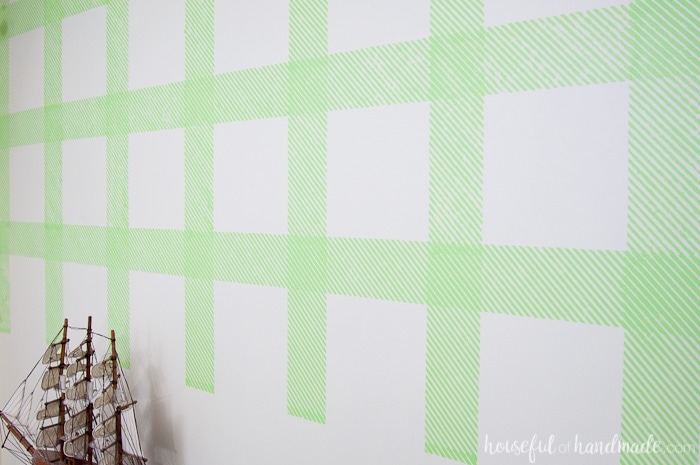
But don’t get too carried away. You will start to notice the paint building up on your stencil which will make your lines less crisp and beautiful. I learned that you do not want to wait for this problem before you clean your stencil. If you stay on top of the stencil it will clean off quickly and you will not loose quality (don’t look too close at the top right side of our wall). I learned it was best for me to rinse off my stencil after every 4-5 times. This didn’t allow the paint to dry completely.
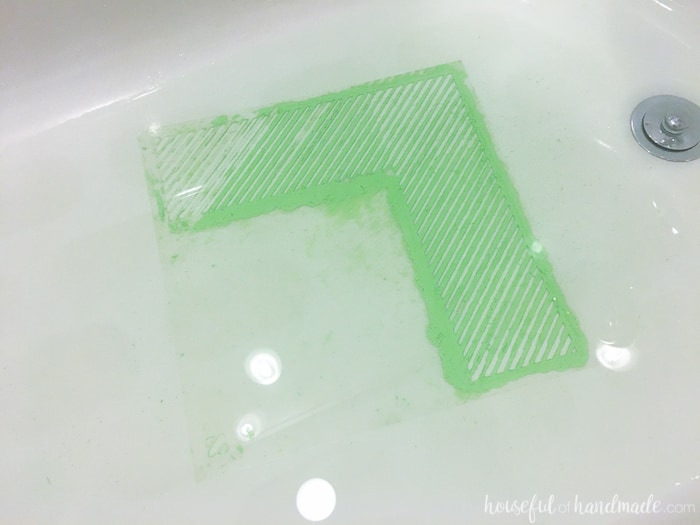
Clean your stencil by carefully rubbing it with your fingers in the bathtub. Be careful as I learned the plastic can be very sharp (I had 3 bandaids by the time I was done). Pat it dry with an old towel. Then reapply a light coat of adhesive spray and you are ready to paint again. It only takes a couple minutes to clean up the stencil if the paint hasn’t had a chance to dry and gum things up. If you wait (like I did at the beginning) it is much harder so I had to make a new stencil.
Once you get the hang of things, you will be stenciling quickly. Grab and audiobook and enjoy the process.
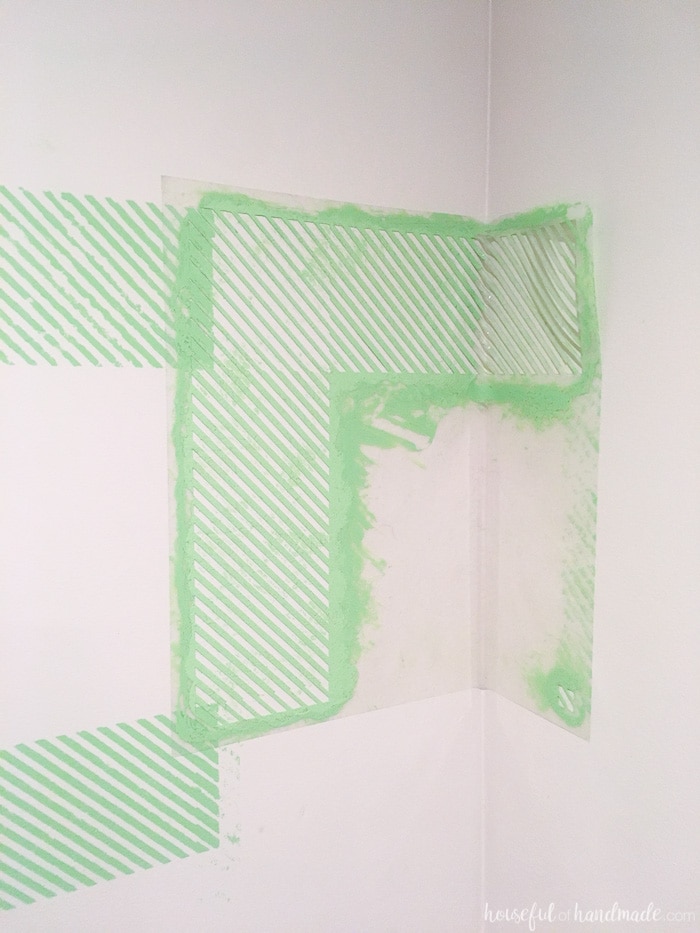
After you’ve painted all the sections of the wall that are full stencils, it’s time to talk about the edges. The stencil will not fold flat into the corners but you can press them into the corner as much as you can. Then carefully paint the stencil. If you are worried about keeping things within the lines and not getting any on the wall you can tape off the side.
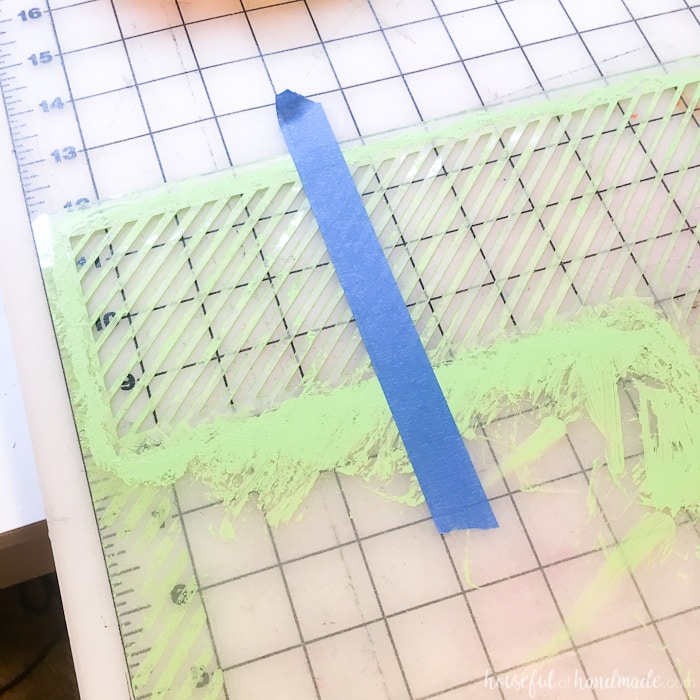
For the top of the wall, I cut my stencil so it would be easier. I made sure to do all the sides and parts I needed the whole stencil first. Then I put a piece of blue tape about the area I needed to cut. Measured my line and cut right on through. The blue tape even held up through 2 cleanings for me (which is all I needed so it might even hold up through more but I didn’t have to test it).
It looks so good, but it’s not done. I need to add the second layer, which is going to be navy blue to match all the blue we already have in his room. I am sure the second coat of stenciling will be able to be done in one day with all the tips & tricks I learned. Then I will be finishing off the bottom of the wall with green paint and a chair rail.
After this, I only have to redo my son’s closet and I will finally be able to put his room on the done list! Just in time to start on my daughters. The life of a DIYer 🙂
Now it’s time to finish this project, make sure to come back to see how it turns out!

And don’t forget to sign up for the weekly newsletter so you never miss out on anything!
[mc4wp_form id=”4975″]