


A sideboard, also called a buffet, is a great piece for any entertaining space.
They not only add storage to your space, but the large top is perfect for serving food.
Typically sideboards are found in the dining room, but you can use them in any room in the house. Especially if you love to entertain.
This post may contain affiliate links. As an Amazon Associate I earn from qualifying purchases. Click here to read my full disclosure policy.
A buffet table would come in handy in a living space, entry or patio area for both storage and a helpful surface!
Serving Dish Storage
My favorite thing to store in a sideboard are the dishes I use for serving and entertaining. These large dishes can be awkward to store in standard kitchen cabinets.
They are usually too deep for upper cabinets, but are short so they take up a lot of space in deeper base cabinets.
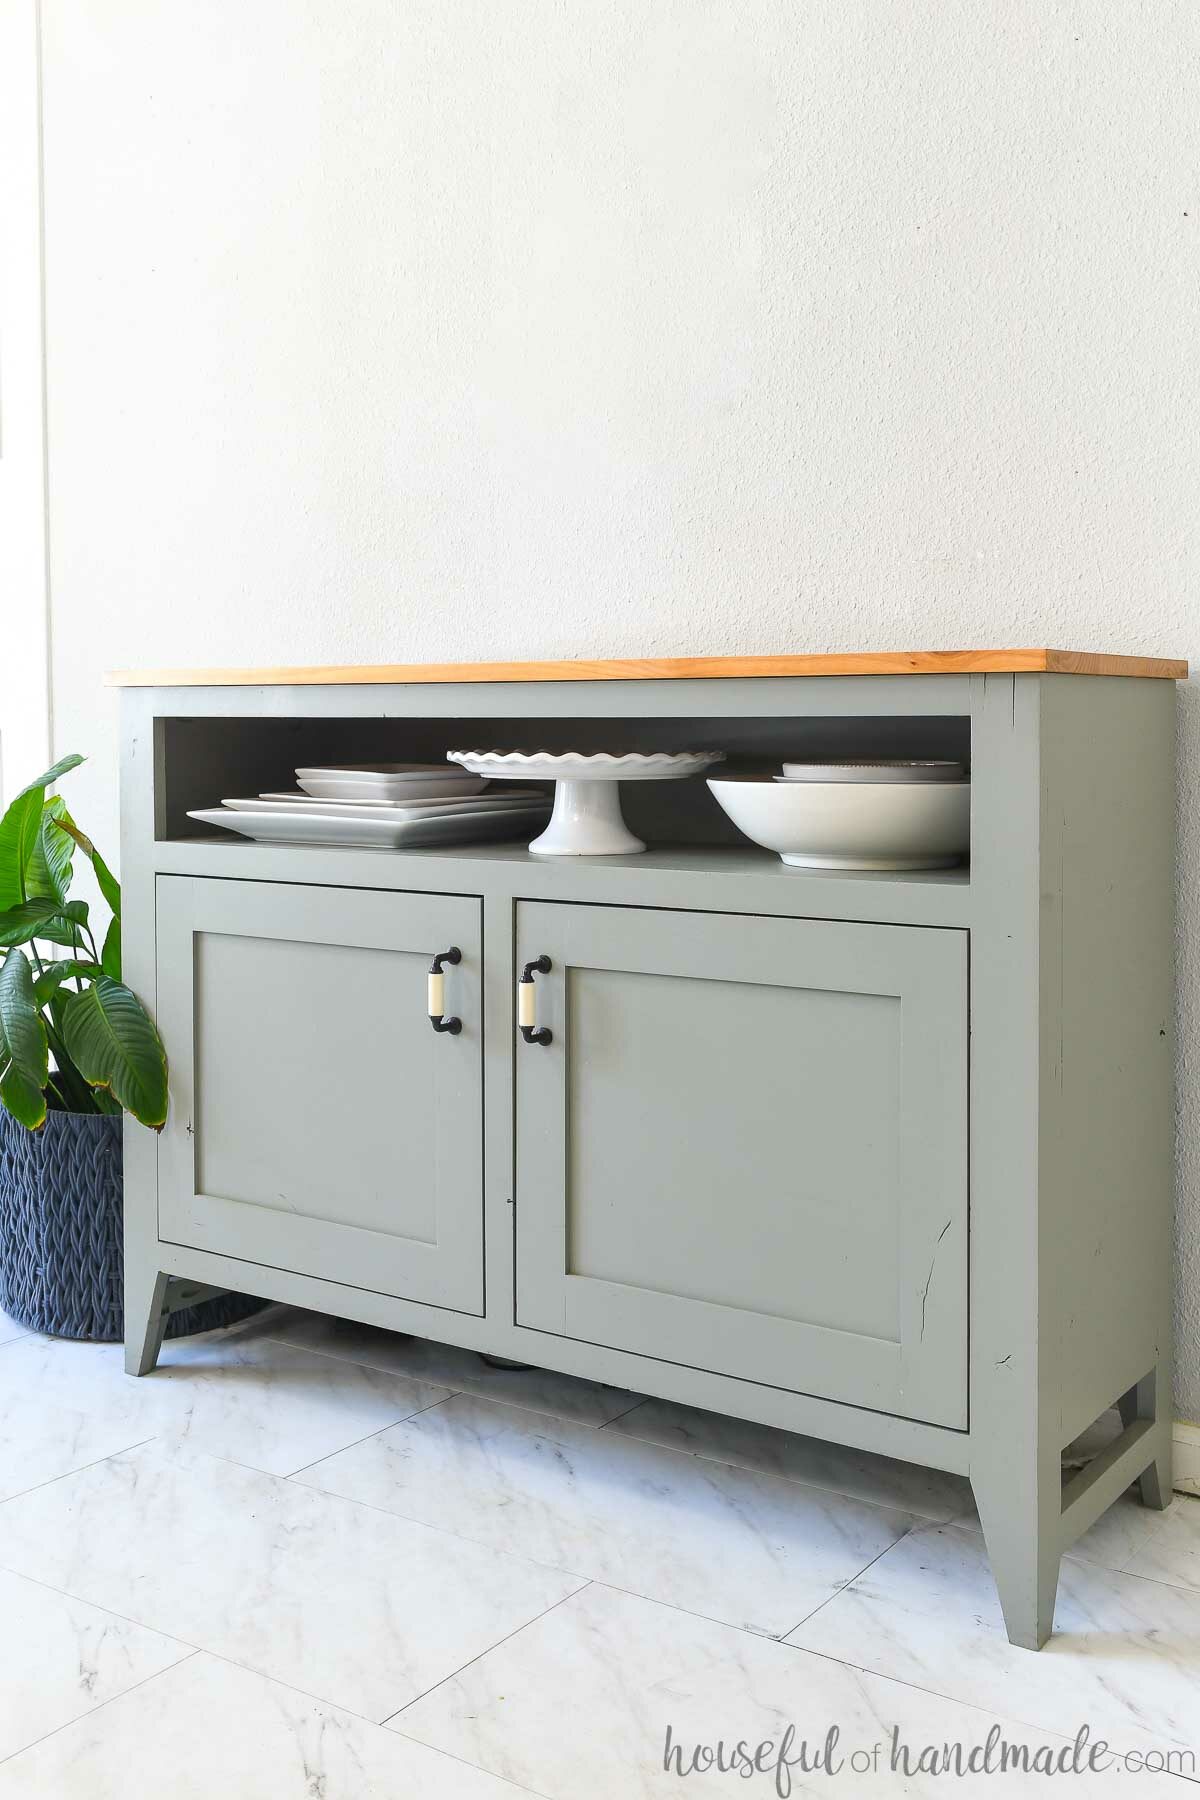
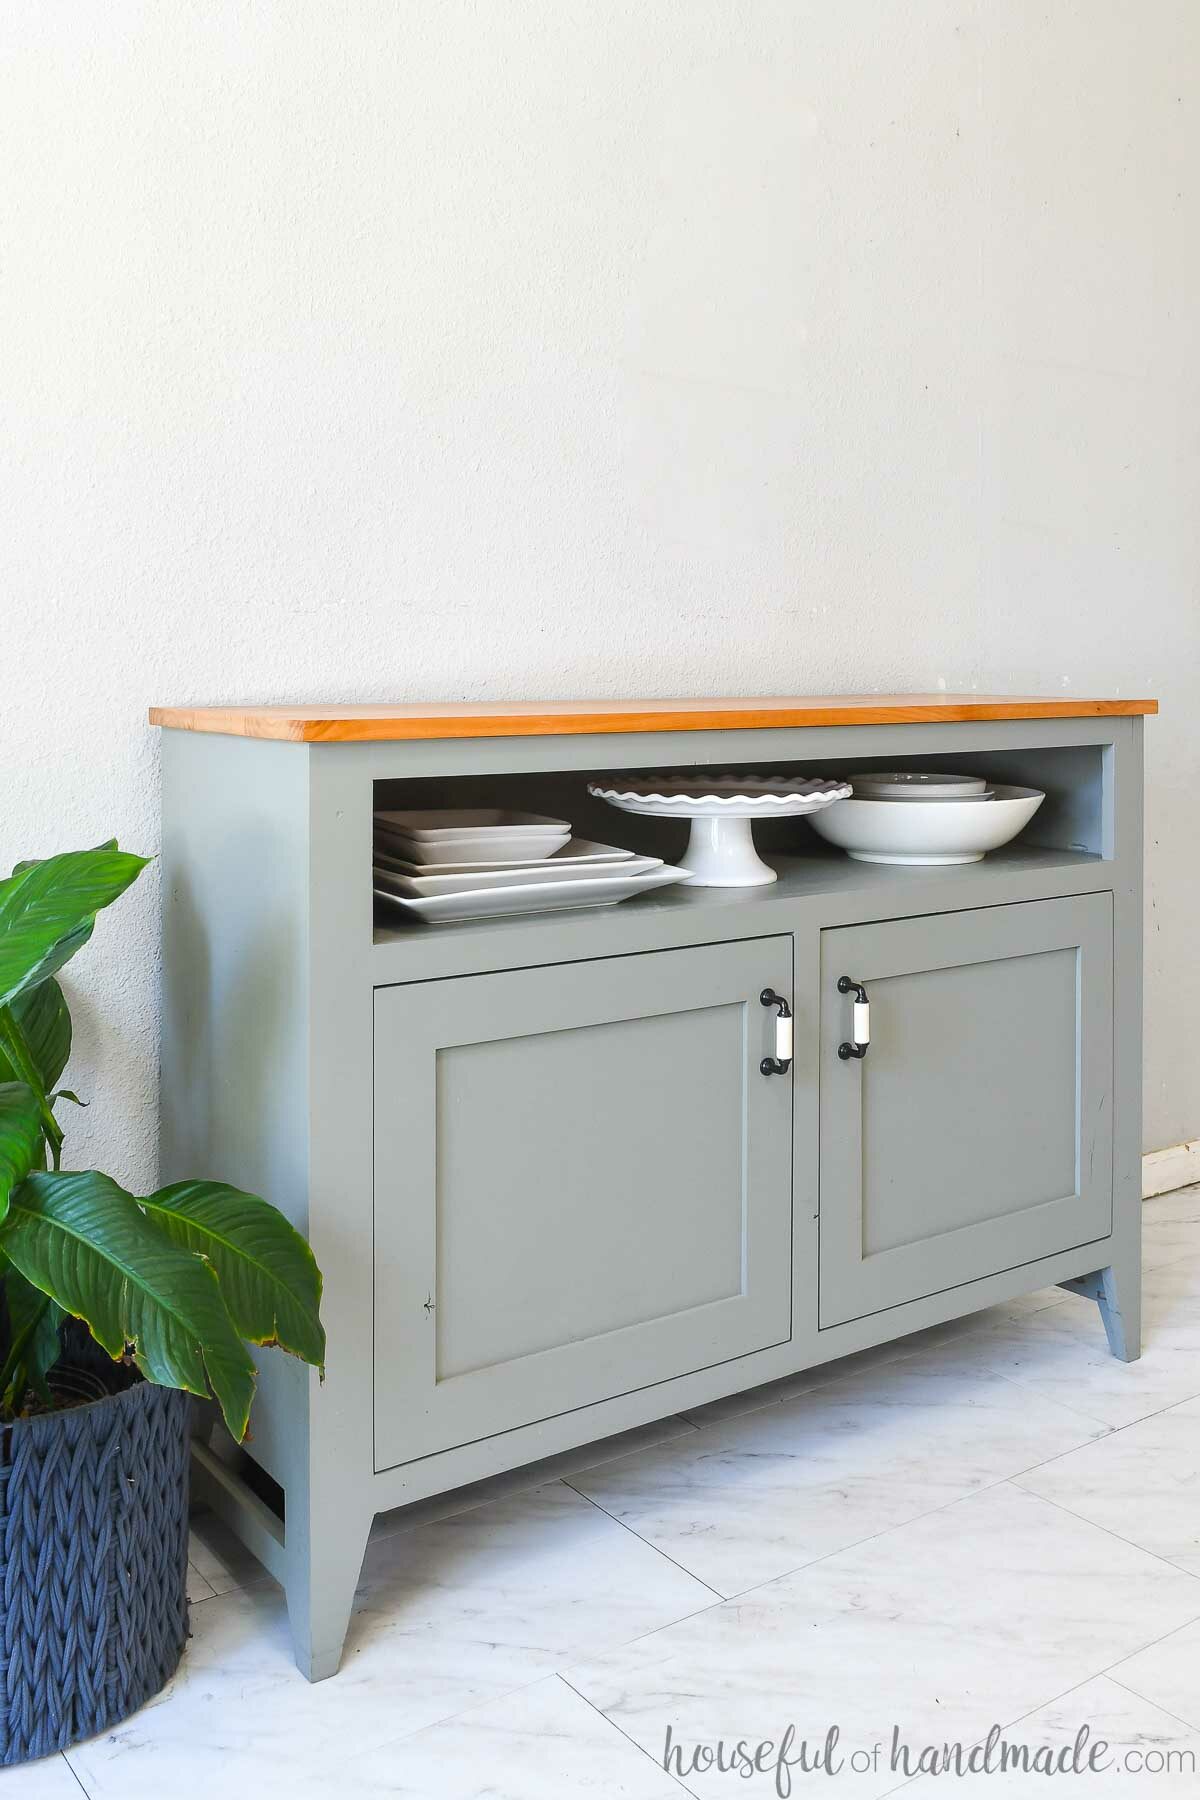
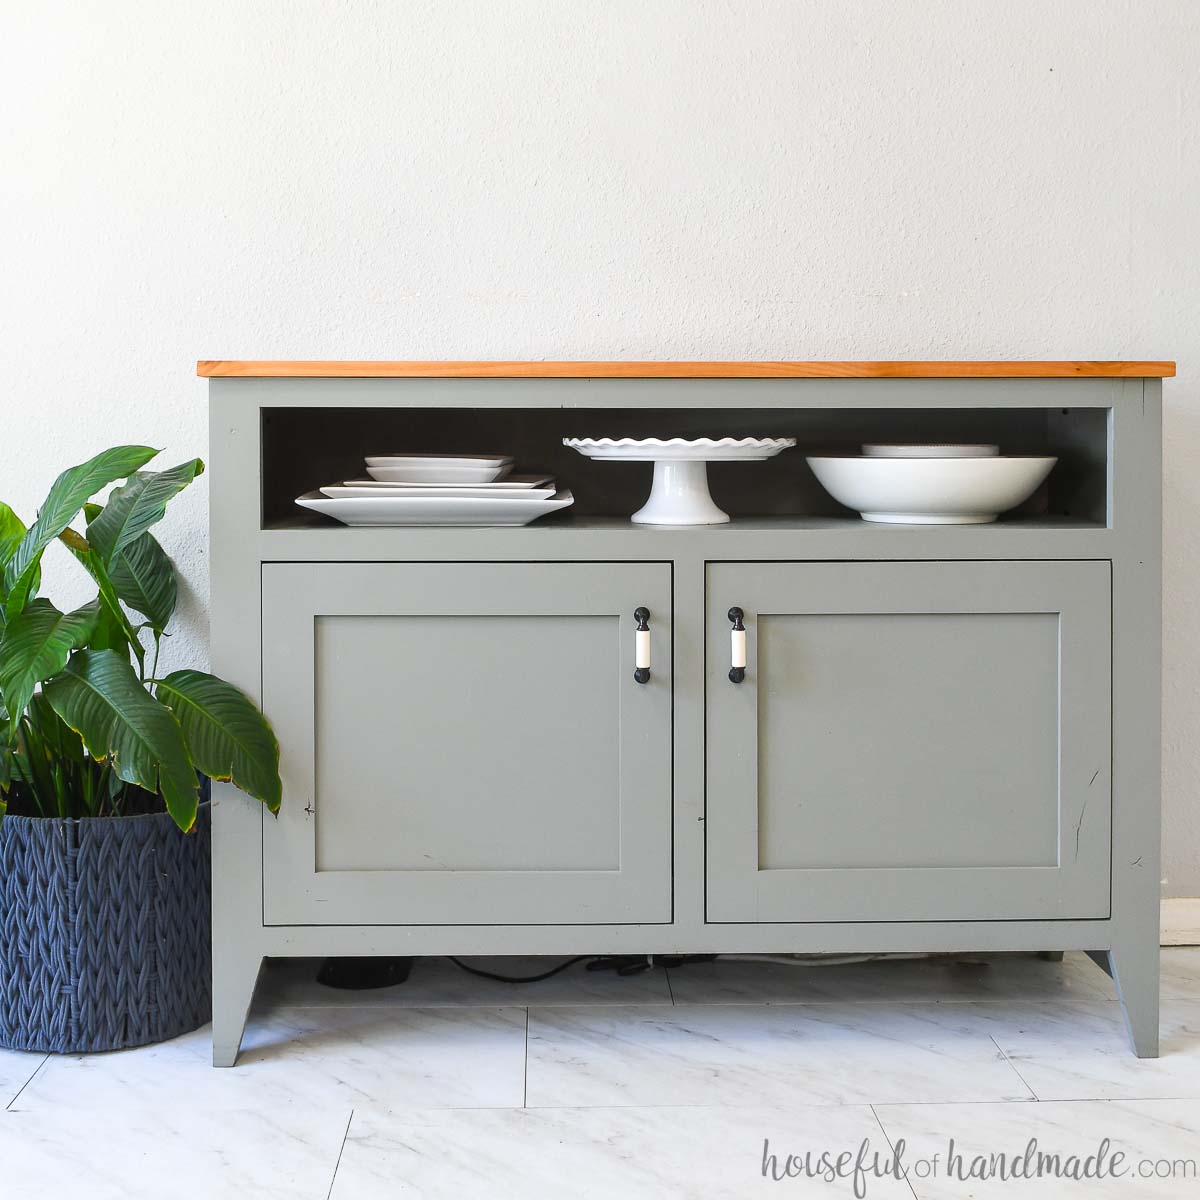
This sideboard buffet is the goldilocks of cabinets for serving dishes. It is just right!
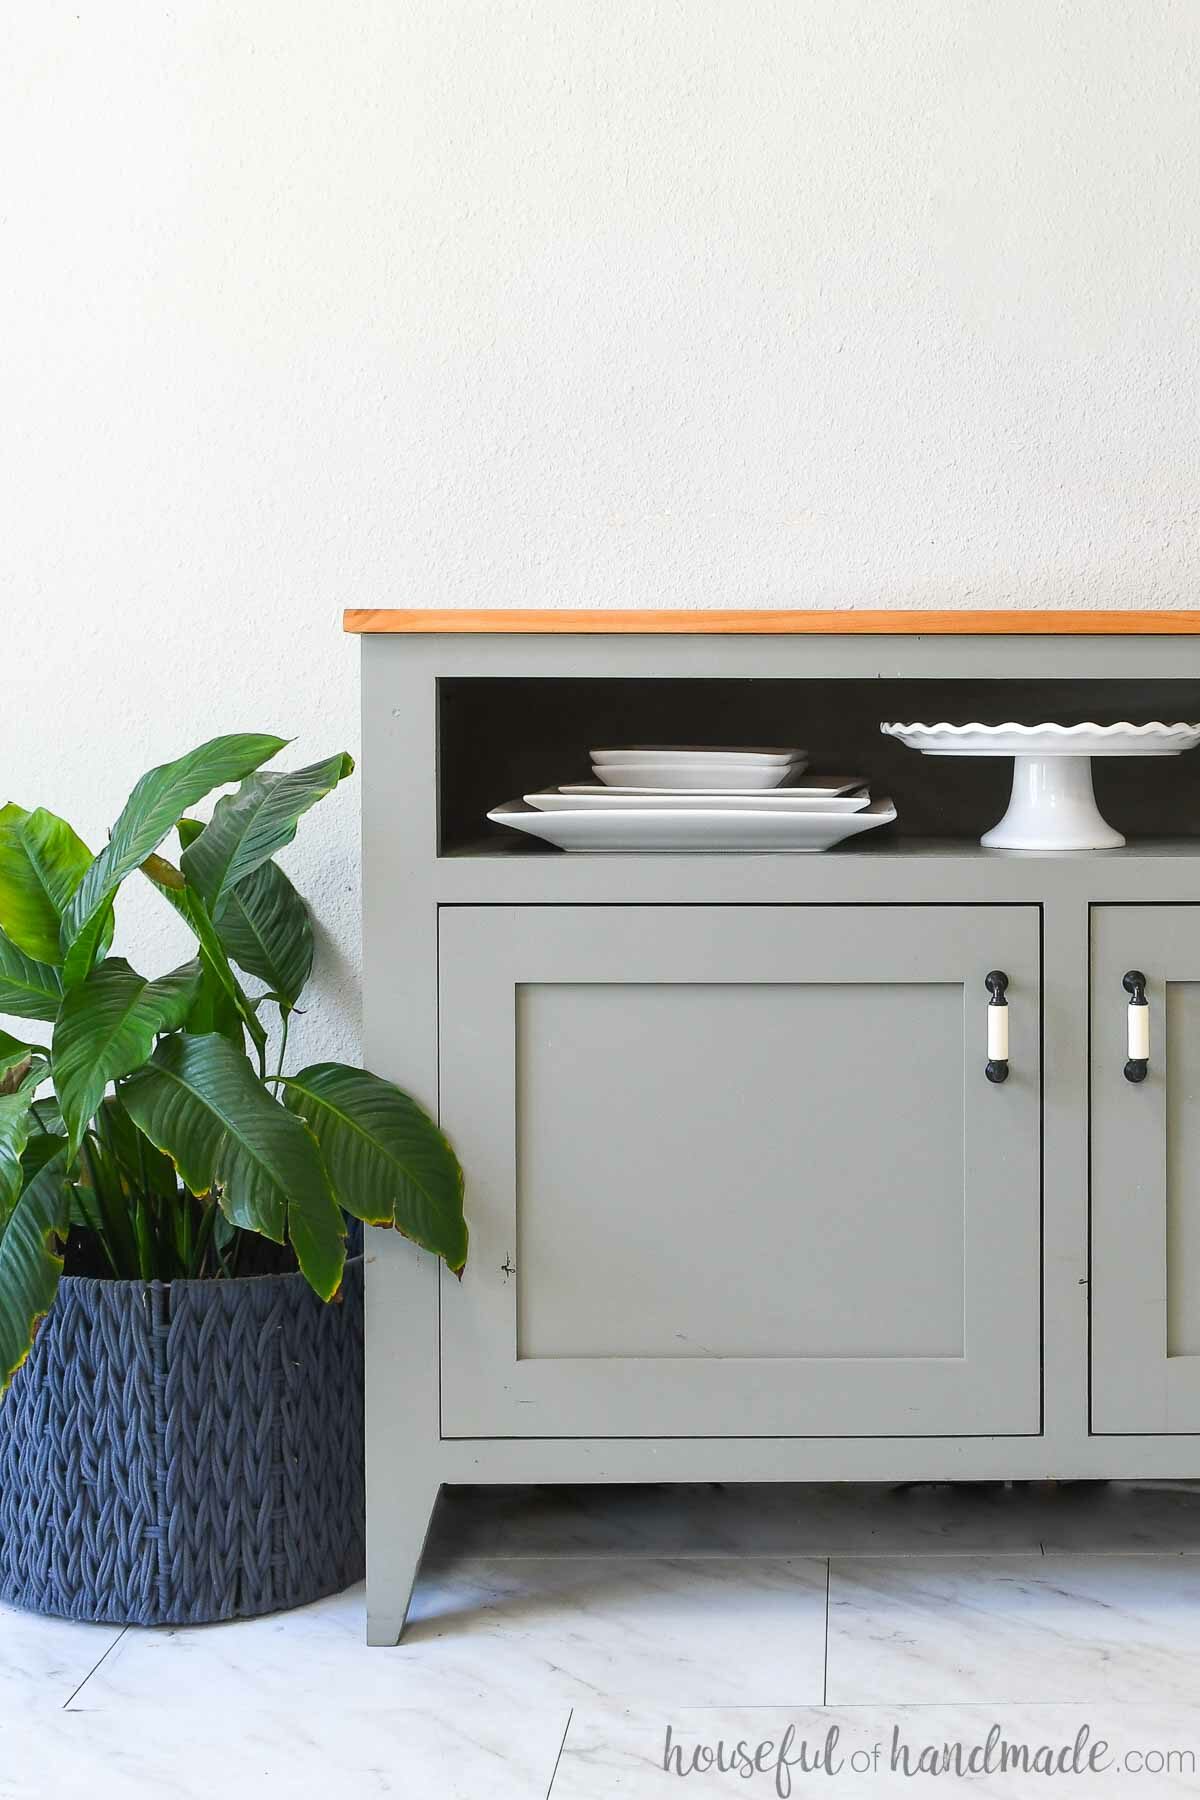
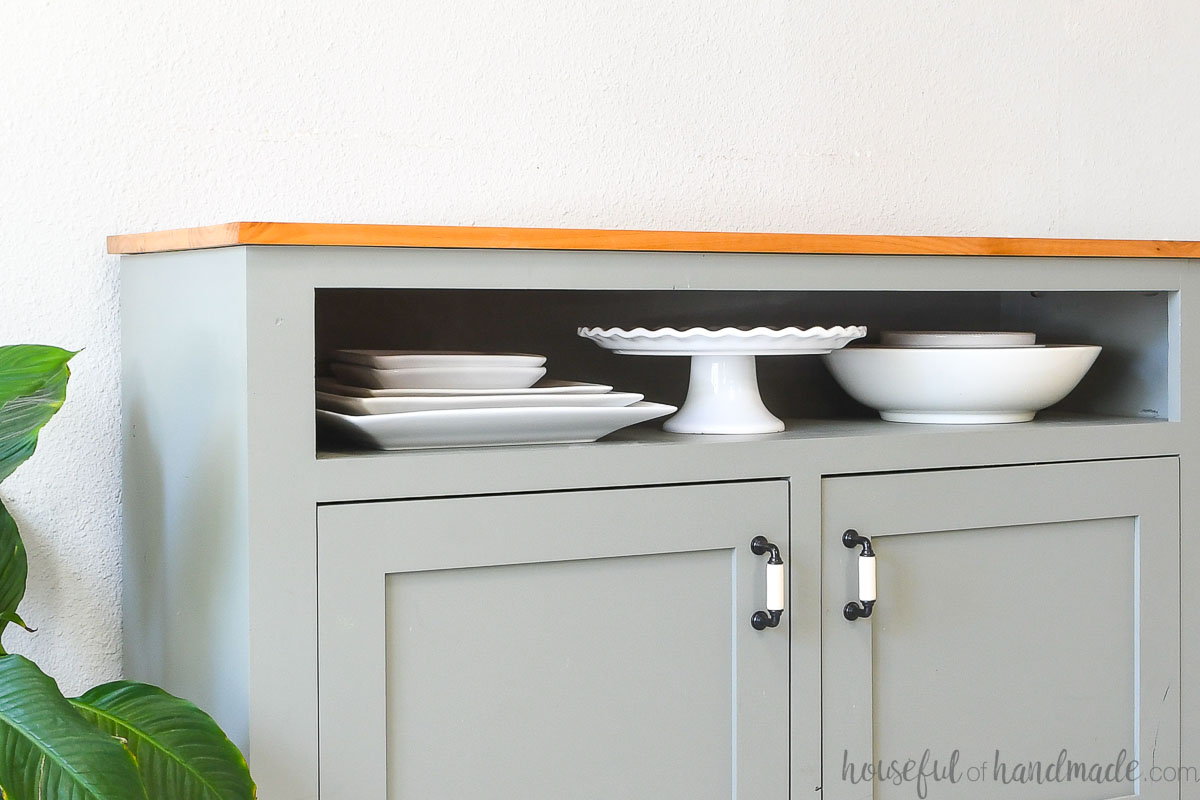
But the best part of this sideboard is the beautiful upper shelf designed to perfectly display and store those dishes.
It maximizes the space by creating a short, but deep area for large platters. You will love having them on display and in reach.
How to Make Sideboard Buffet
Tools & Materials
Tools needed:
- Miter saw
- I recently upgraded to this larger sliding miter saw (watch for it to go on sale), but all my projects before were built with this inexpensive miter saw that I loved.
- Table saw or circular saw with guide track
- Pocket hole jig
- Drill
- Impact driver (optional, but I love not having to switch bits with the drill)
- Face frame clamps
- 90 degree drill adapter
- Router with router table
- The router is used to build the doors for the sideboard. If you do not have a router, check out the easy cabinet door tutorial without a router in this post.
- Sander
Supplies:
- Wood products
- (3) 1×3 boards, 8′ long
- (4) 1×2 boards, 8′ long
- (1 1/2) 1×6 boards, 8′ long
- (1) 3/4″ plywood, 4×8 sheet
- (1) 1/4″ plywood, 2×4 sheet
- 1 1/4″ pocket hole screws
- 1″ corner braces or figure 8 fasteners
- (4) inset face frame hinges
- (2) cabinet knobs
- Shelf pins
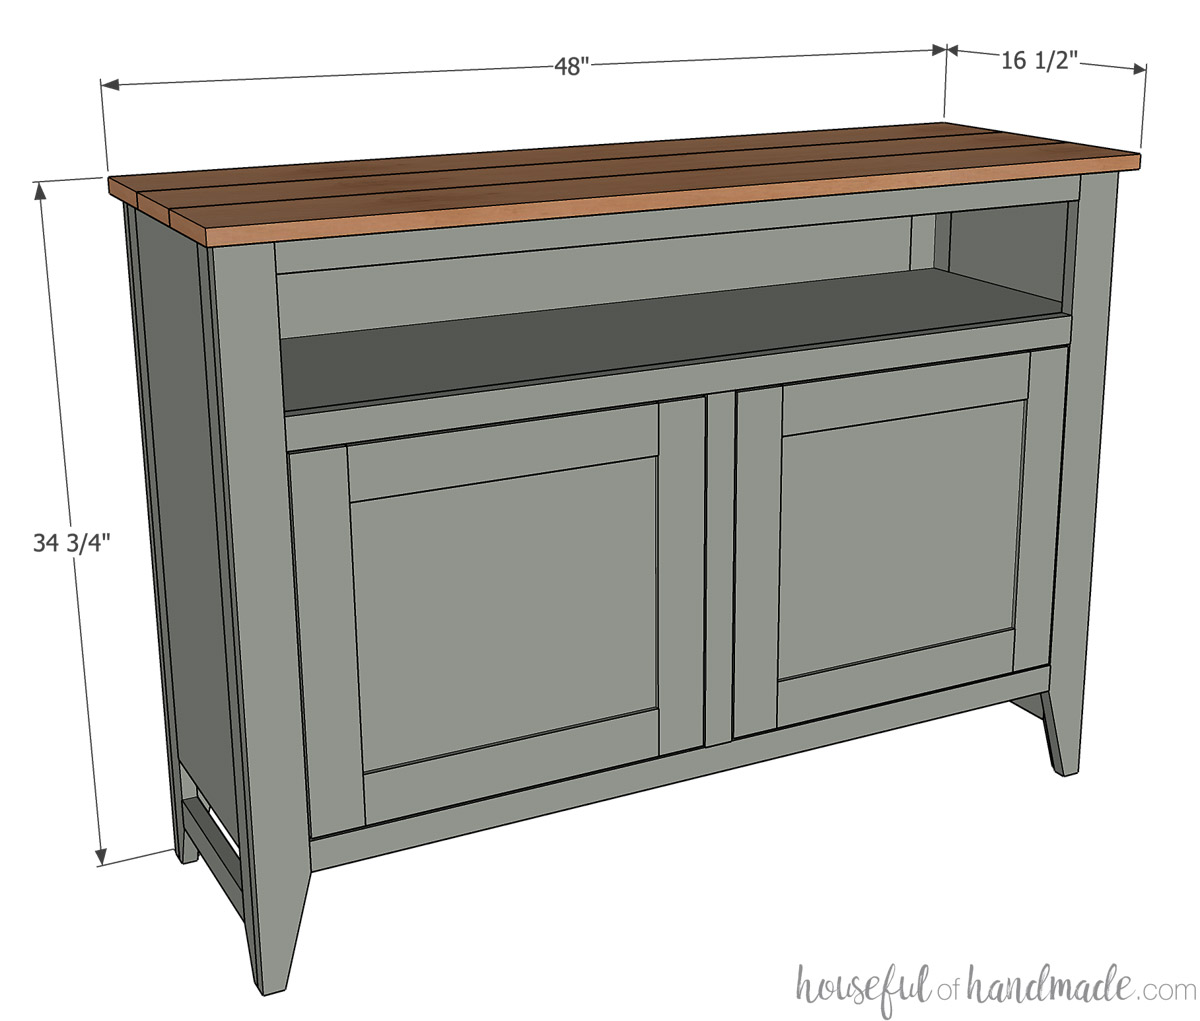
Overall Dimensions
The final sideboard is 48″ wide, 16 1/2″ deep and 34 3/4″ tall.
The platter storage shelf is 42″ wide and 6″ tall. Perfect for large serving dishes.
Need a larger sideboard? I also have build plans for this sideboard table in 60″ wide here.
Cut List
Cut the pieces according to the easy to read cut table in the PDF build plans.

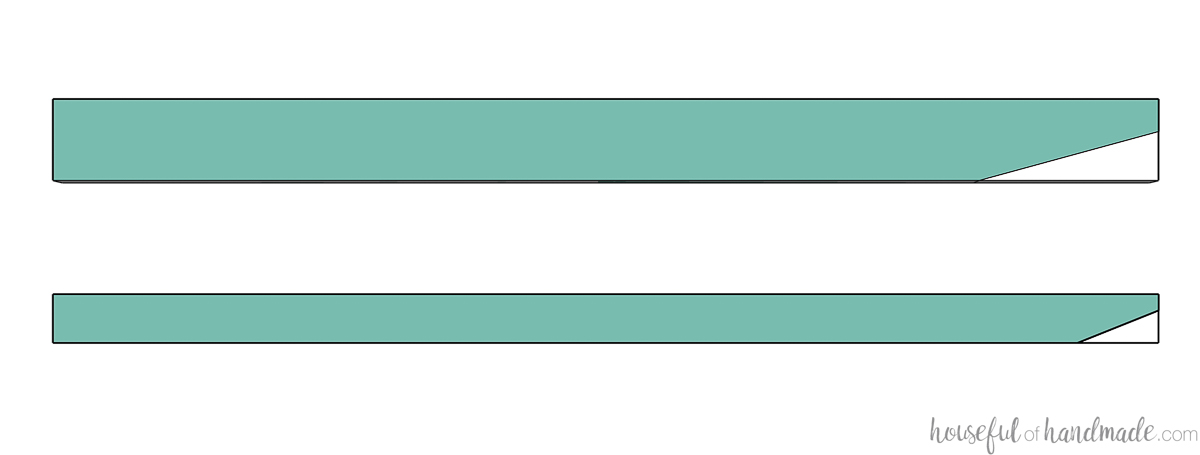
On the leg front pieces, measure up 5 1/2″ from the bottom and 1 1/2″ in from bottom edge and draw an angled line.
And for the leg side pieces, measure up 2 1/2″ from the bottom and 1″ in from the bottom edge and draw an angled lined.
Cut along the lines to create a taper on the bottom of the legs. Repeat for all 4 leg pieces.
EXPERT TIP:
Use a simple tapered cutting jig for a table saw or circular saw with a guide track to get accurate angled cuts on the legs.
STEP 1- Build the sides
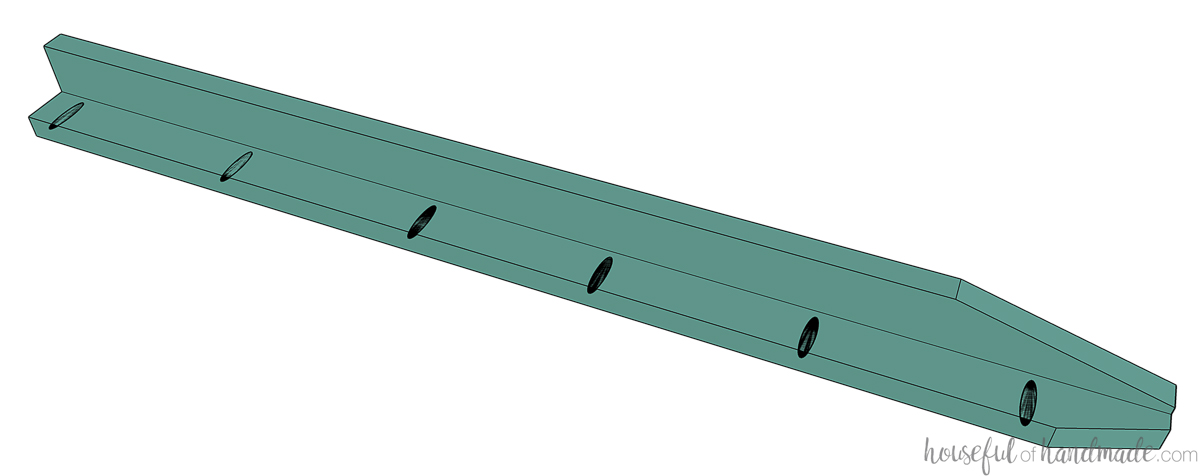
Create four L shaped legs with one side piece and one front piece. Lay them out so they are mirrored and mark the inside of the side pieces.
Drill pocket holes set for 3/4″ thick material along the inside long edge of the side leg pieces. Attach them to the edge of the front legs with wood glue and 1 1/4″ pocket hole screws.
Repeat for all 4 legs. Make sure to mirror the legs so they will fit together properly later.
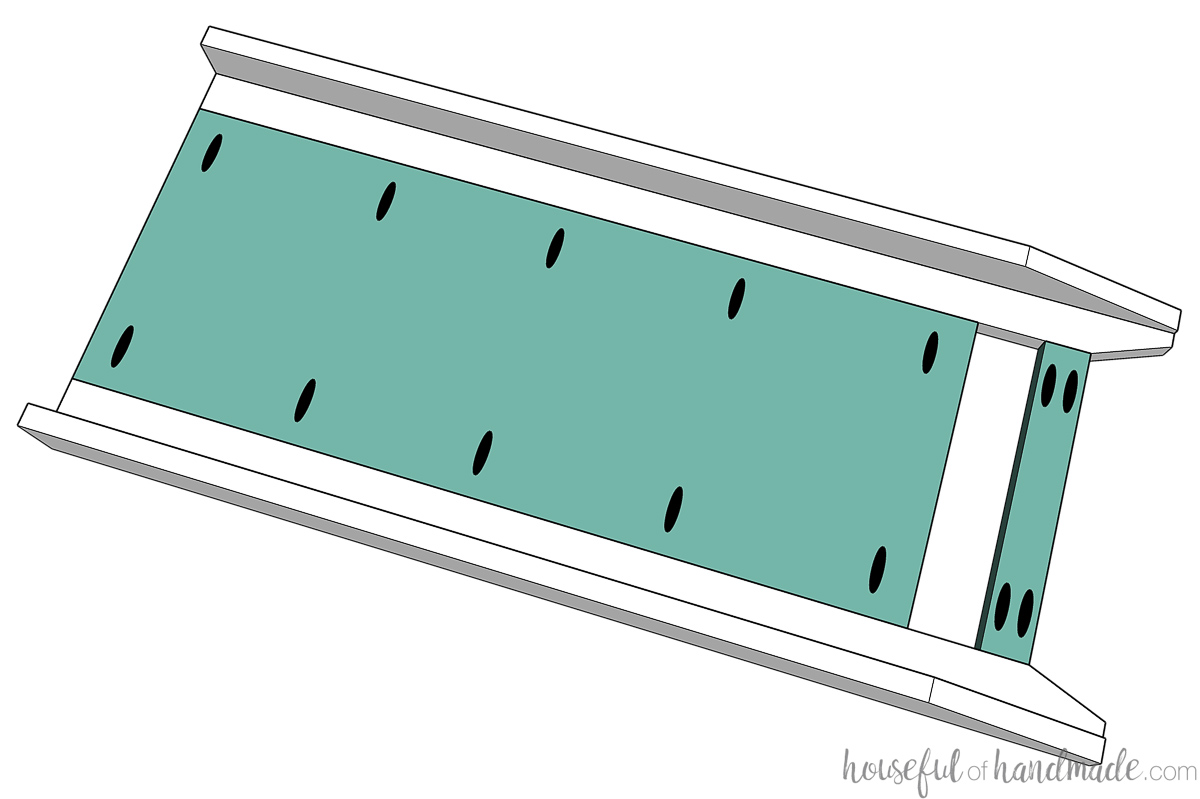
Cut the 10 1/2″ x 27 3/4″ plywood side pieces according to the cut diagram in the plans.
Drill pocket holes set for 3/4″ thick material in both ends of the plywood side pieces and side detail pieces.
Attach the plywood piece between two finished leg pieces so they are flush to the top. Attach the side detail pieces so they are flush with the top of the leg angle.
Secure with wood glue and 1 1/4″ pocket hole screws.
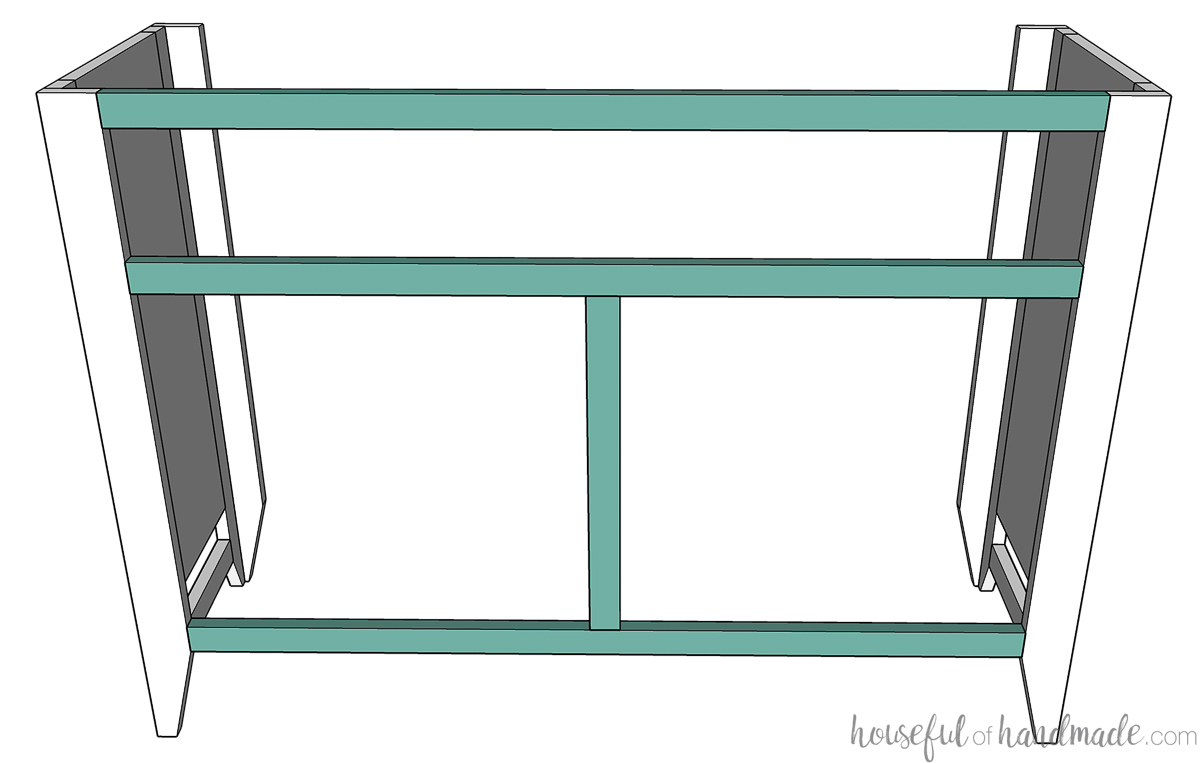
STEP 2- Connect the sides
Drill pocket holes set for 3/4″ material in both ends of the face frame pieces.
Attach the rails so the top one is flush with the top of the legs, the middle is 6″ below that, and the bottom one is flush with the top of the taper on the front of the leg.
Cut and attach the face frame stile so that it is centered in the sideboard between the bottom and middle rail.
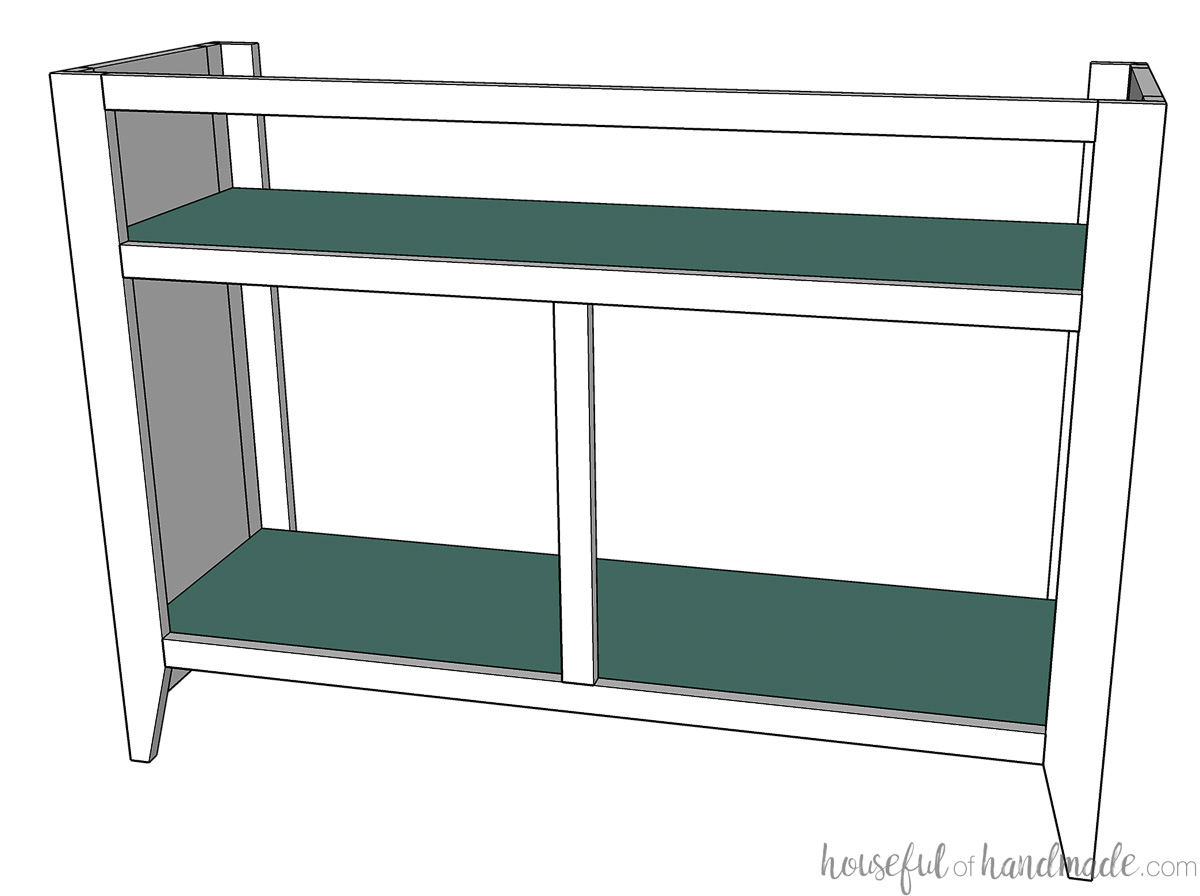
Cut the bottom for the buffet and display shelf to fit between the sides and front/back according to the plywood cut diagram in the PDF plans.
Drill pocket holes set for 3/4″ thick material in the bottom of the buffet shelves on all sides.
Attach the bottom to the buffet so it is flush with the top of the bottom face frame rail. Attach the bottom to the display shelf so it is flush with the top of the middle rail.
Secure with wood glue and 1 1/4″ pocket hole screws into the sides and face frame.
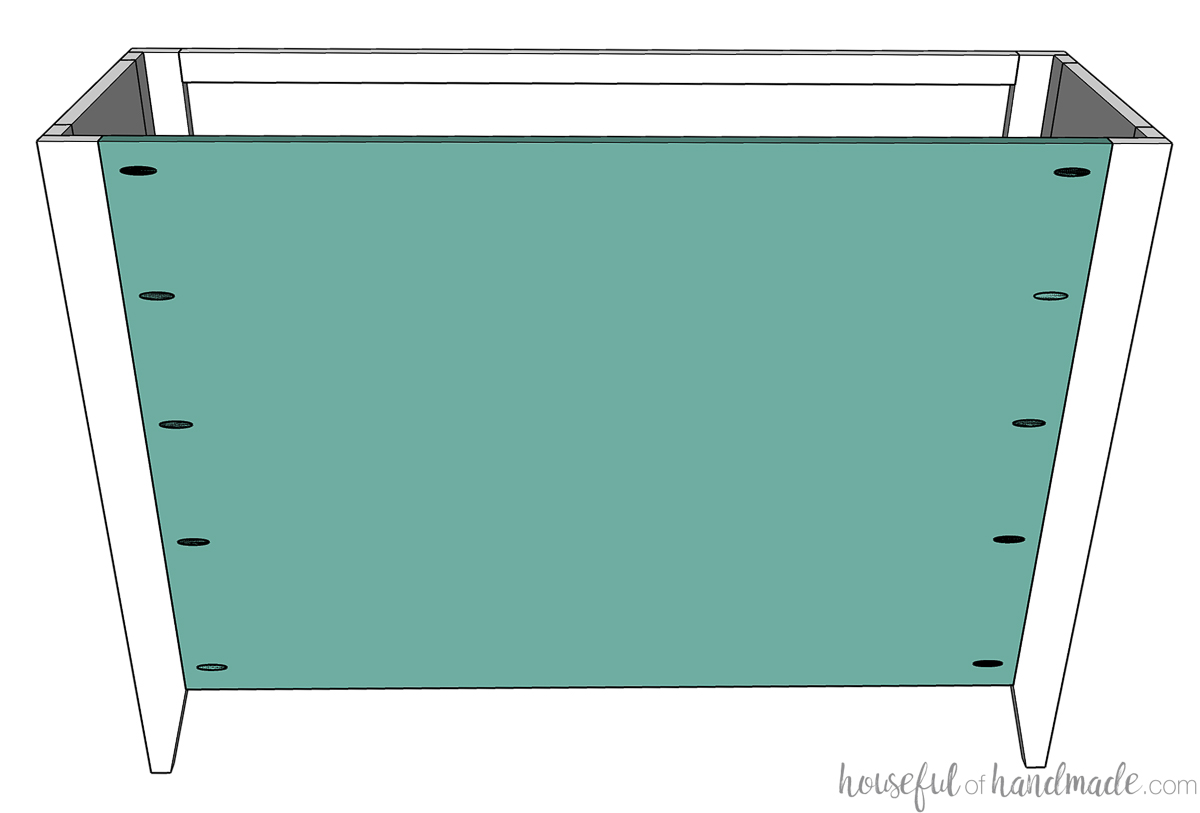
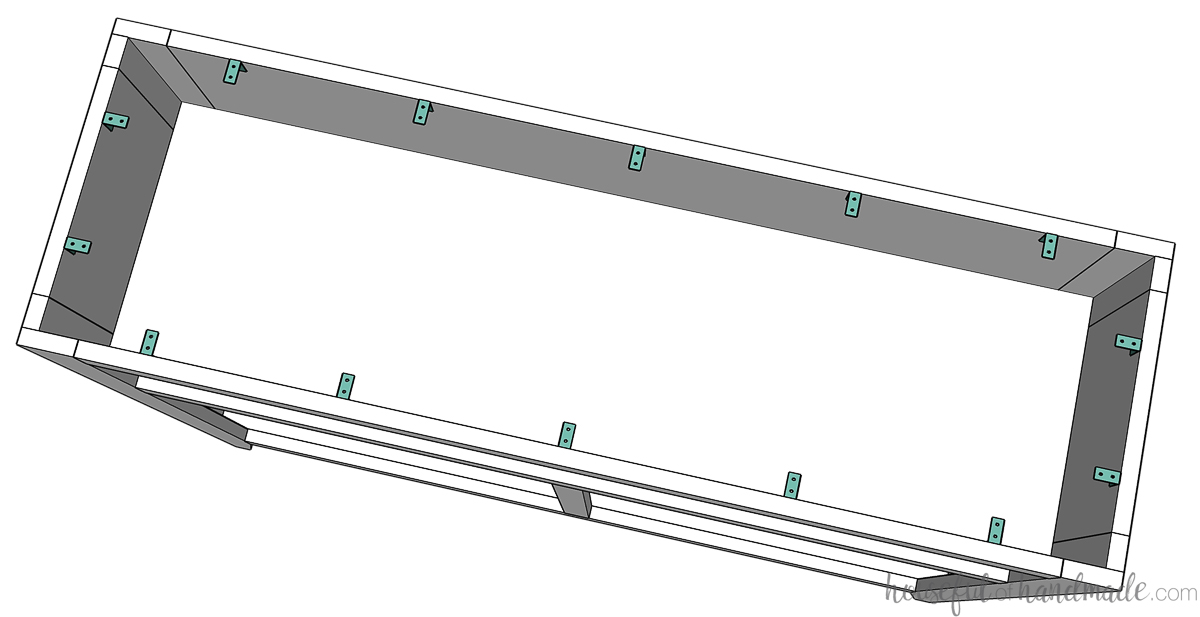
Cut the sideboard back to fit from the plywood.
Drill pocket holes in both sides of the back piece. Attach it to the back legs with wood glue and 1 1/4″ pocket hole screws.
Then secure the bottom pieces with the back piece with 1 1/4″ pocket hole screws with the pocket holes previously drilled.
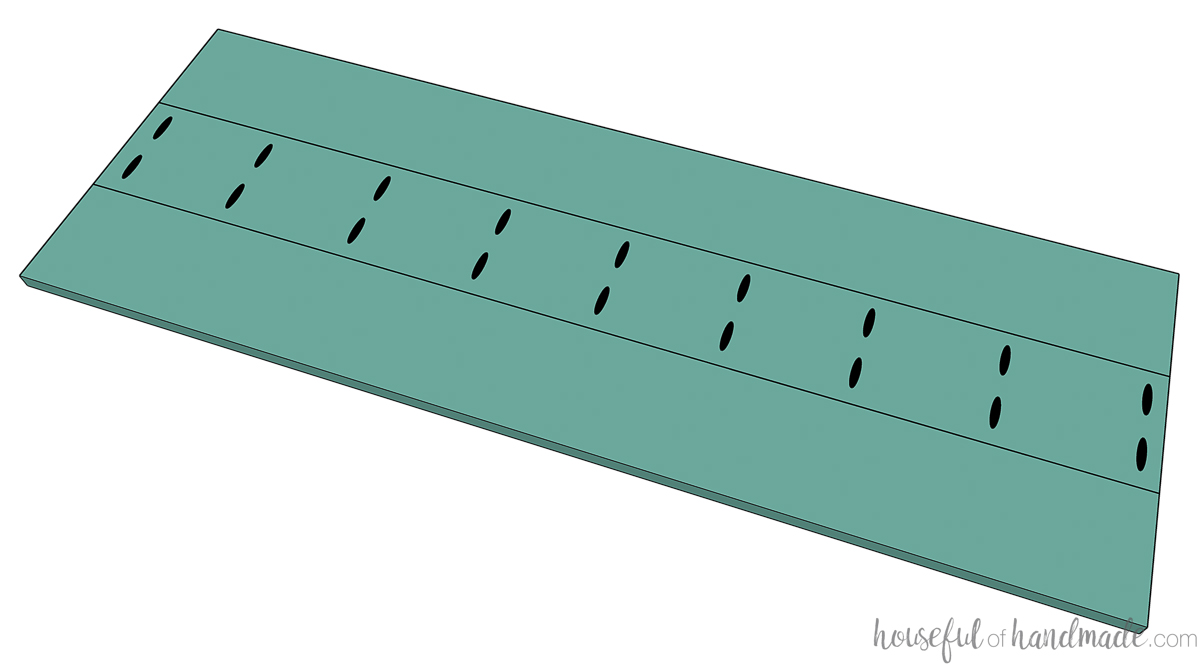
STEP 3- Build and attach the top
Cut three 48″ pieces from the 1×6 boards for the sideboard top.
Lay out the boards so they fit together nicely and the grain looks good.
EXPERT TIP:
Look at the ends of the boards to see the direction of the growth rings. Alternate the growth rings to help prevent your top from cupping over time.
Drill pocket holes set for 3/4″ thick material in both sides of the center board every 5-6 inches. Attach the other top pieces on either side of it with wood glue and 1 1/4″ pocket hole screws.
Use face clamps to ensure the top of all the boards stay flush as you secure them.
To attach the buffet top, use 1″ corner braces. Attach the braces to the inside of the display shelf around the perimeter with 5/8″ wood screws.
Center the assembled top on the sideboard. Attach with 5/8″ screws from underneath into the corner braces.
Since the opening is tight (only 6″), you will need to use a right angle drill or drill adapter to secure the screws.
Alternately, you could also use figure 8 fasteners to attach the top like I did with this DIY dining table build.
STEP 4- Build the doors
Router a 1/4″ x 1/4″ groove in one side of the rails.
For the stiles, router the 1/4″ x 1/4″ groove starting 2 1/4″ in from the edge and stopping 2 1/4″ in from the other edge.
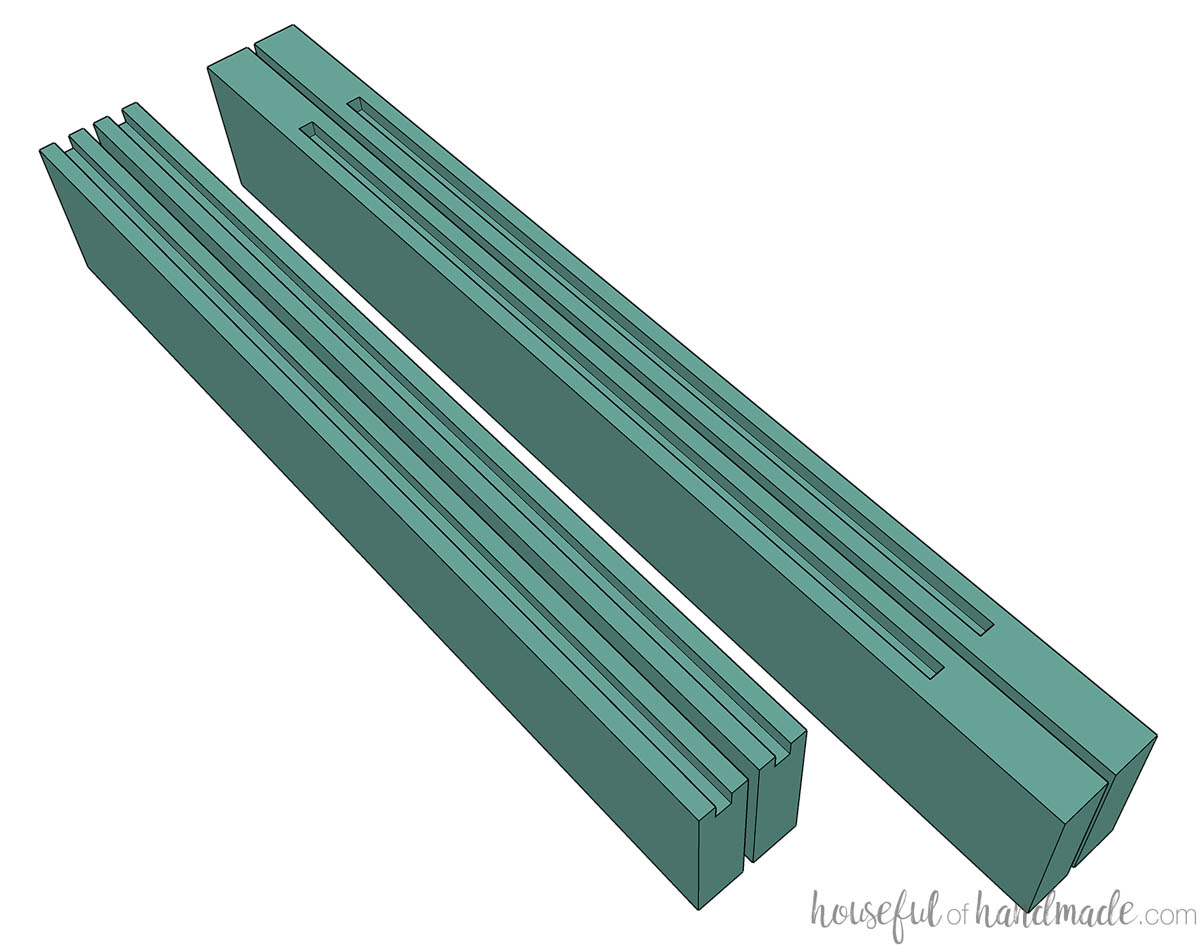
Drill pocket holes set for 3/4″ thick material in the ends of the door rails.
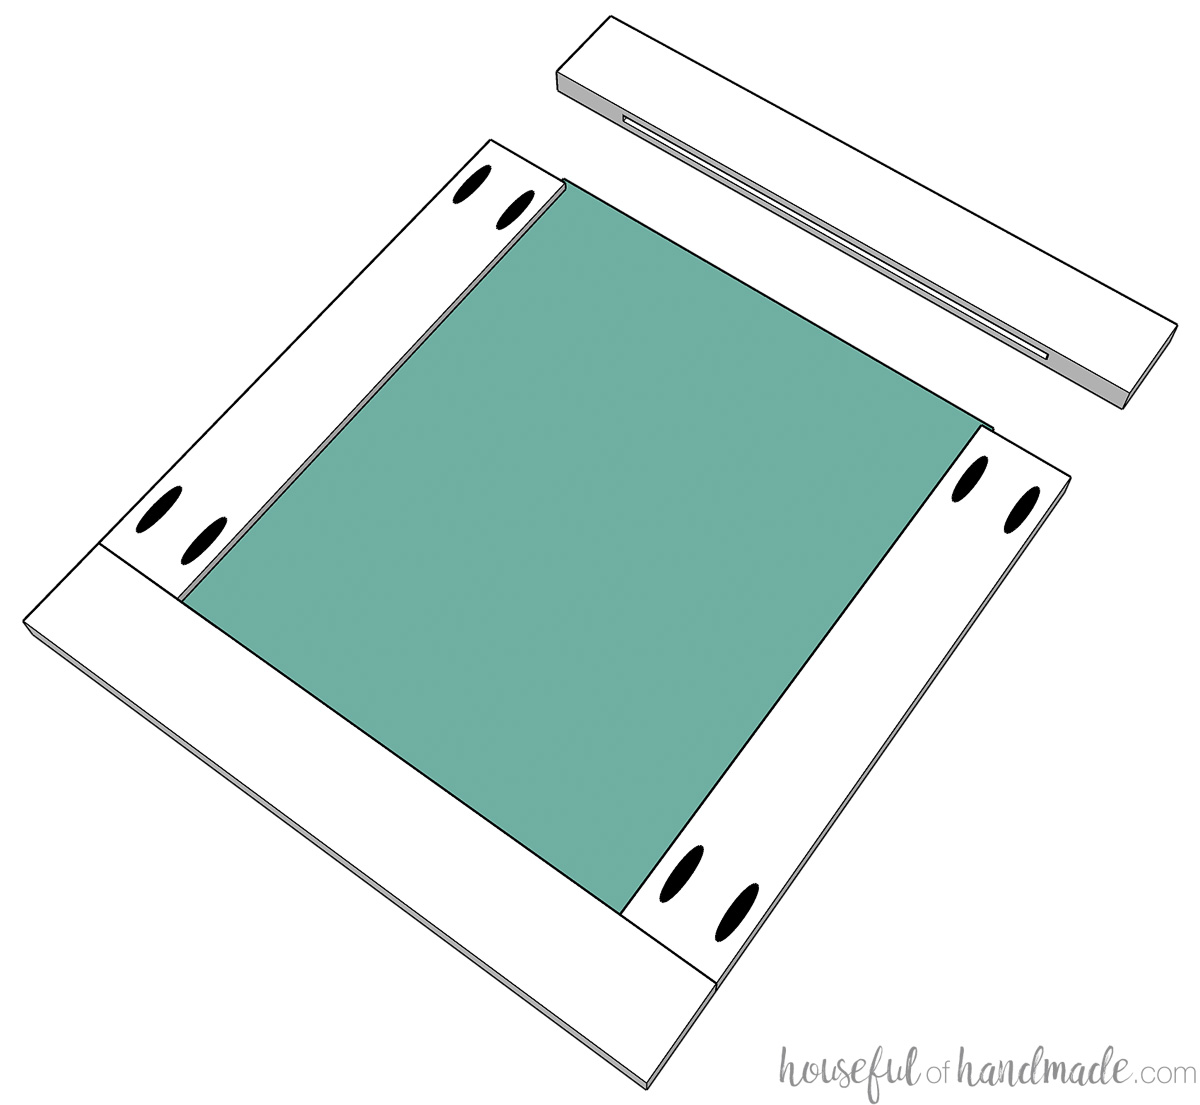
Attach both rails to one door stile with wood glue and 1 1/4″ pocket hole screws making sure the routed groove is in the center and the outsides of the boards are flush.
EXPERT TIP:
Use face frame clamps to keep the pieces for the doors flat while attaching with screws. This will ensure the groove is lined up and reduce sanding.
Slide the 1/4″ thick doors panel inside the groove. Then attach the other stile to the end with wood glue and pocket hole screws.
STEP 5- Sand & Finish
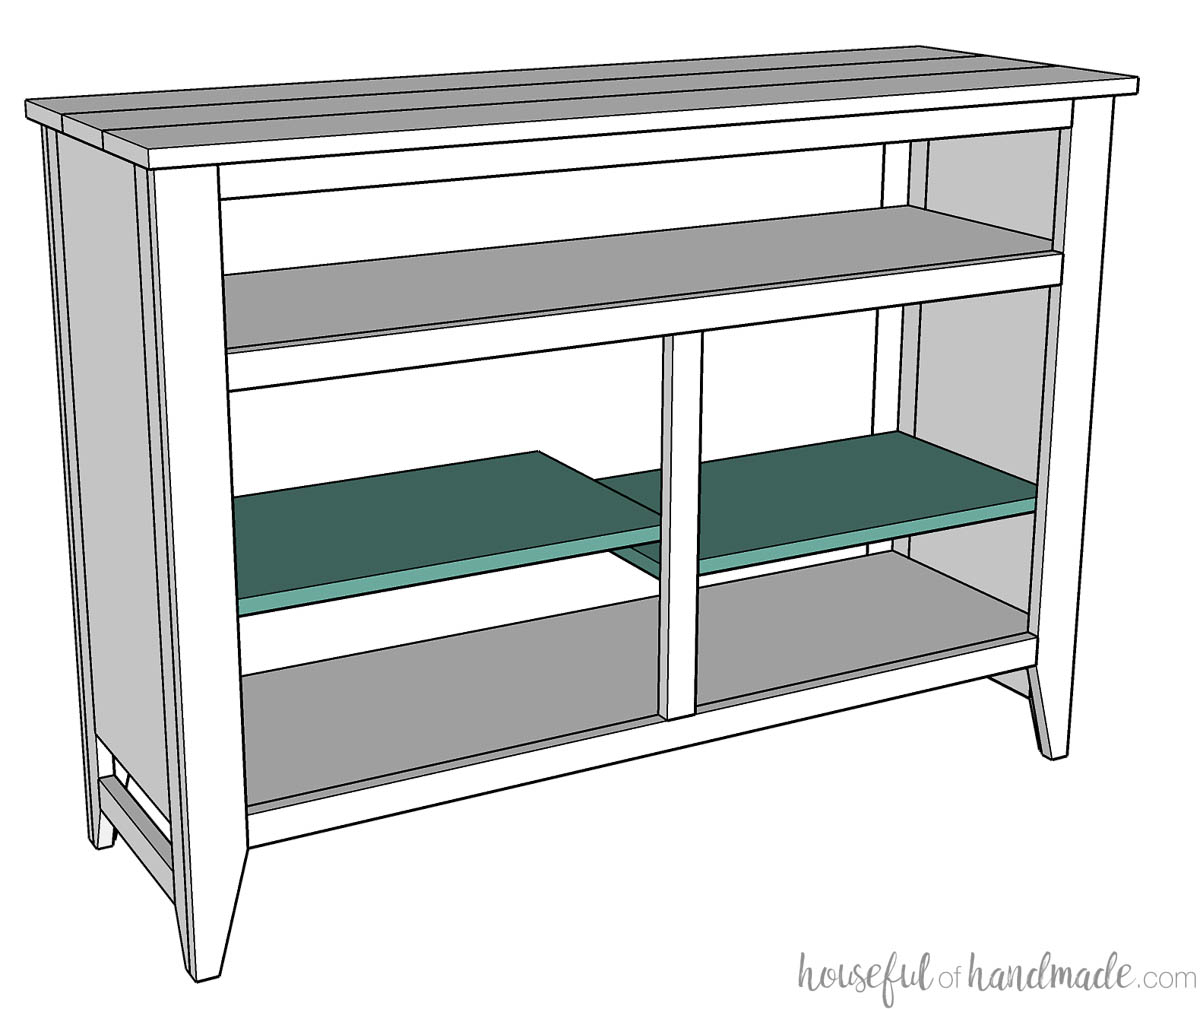
If you want to add shelves to the inside of your sideboard, drill shelf pin holes in the sides, the center back, and in the center face frame stile.
Since the buffet has a large open area with a center frame post, one large shelf will not fit inside. Instead, you will have two independent shelves on either side.
Cut the shelves slightly larger than 1/2″ the width of the opening so they rest over the shelf pin holes in the center.
When you add your shelves, they will need to be offset since they share the center shelf pin holes.
Fill pocket holes if desired. Sand stain and/or paint the buffet.
For my sideboard buffet, I built it with alder wood. The top is not-stained, just sealed with 4 coats of wipe-on polyurethane. The base is painted with Behr Incognito paint in matte.
Install the buffet doors with inset face-frame cabinet hinges. Then add your door knob.
And you are done!
Premium plans include:
- Recommended Tools
- Shopping list
- Easy to read cut list table
- Cut diagrams
- Step-by-step instructions with 3D renderings
- Helpful resources
- BONUS: 3D SketchUp file
Now you are ready to load up your sideboard with all your beautiful serving dishes.
Looks like it's time for a party!
Happy building!
