Now that my daughter is a teenager, I feel like I am always looking for ways to store and organize jewelry.
She does not have a place to put a jewelry box, but she has room on her walls to store things. So I designed a beautiful new wall-mounted jewelry organizer for her.
This super fun build has a place to store earrings, bracelets, studs, rings and necklaces. And it looks stunning, so it is both storage and wall art!
This post may contain affiliate links. As an Amazon Associate I earn from qualifying purchases. Click here to read my full disclosure policy.

This is the 3rd project for DIY Gift week! All week I am sharing new easy DIY gifts ideas along with 2 other amazing builders.
Check out their DIY gift ideas to help you create a DIY Christmas this year.
Solid Wood Jewelry Holder
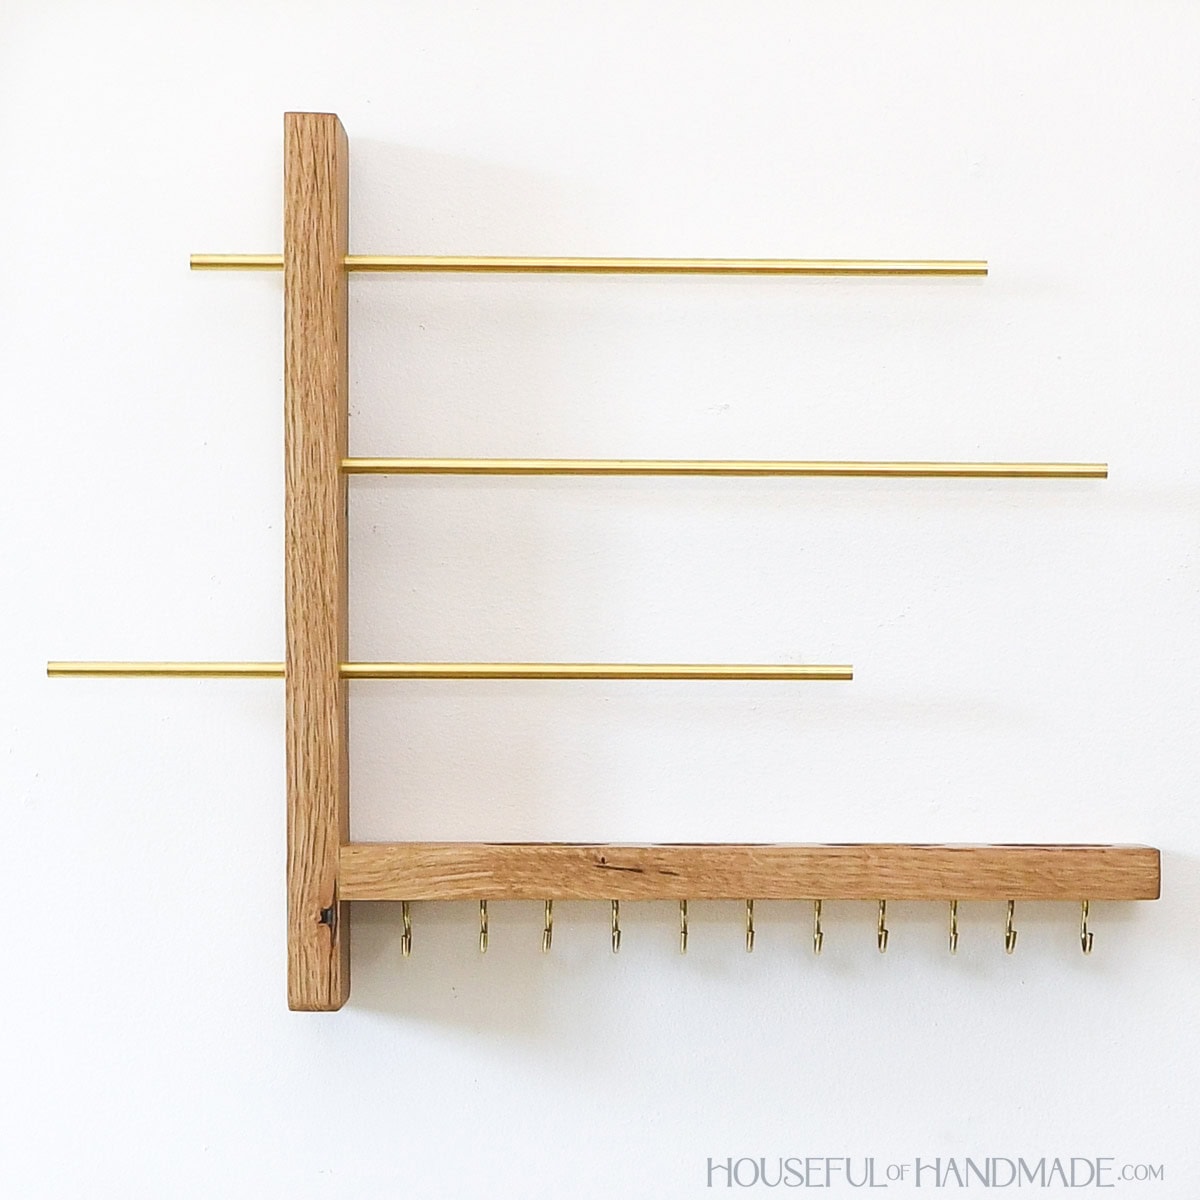
This simple to build jewelry organizer may be small, but there is a lot of room to store lots of jewelry.
The brass rods are both beautiful and useful. They are perfect for hanging earrings and bracelets on. You can also use them for necklaces.
And there are 4 small holes in the base of the organizer to store rings and stud earrings.
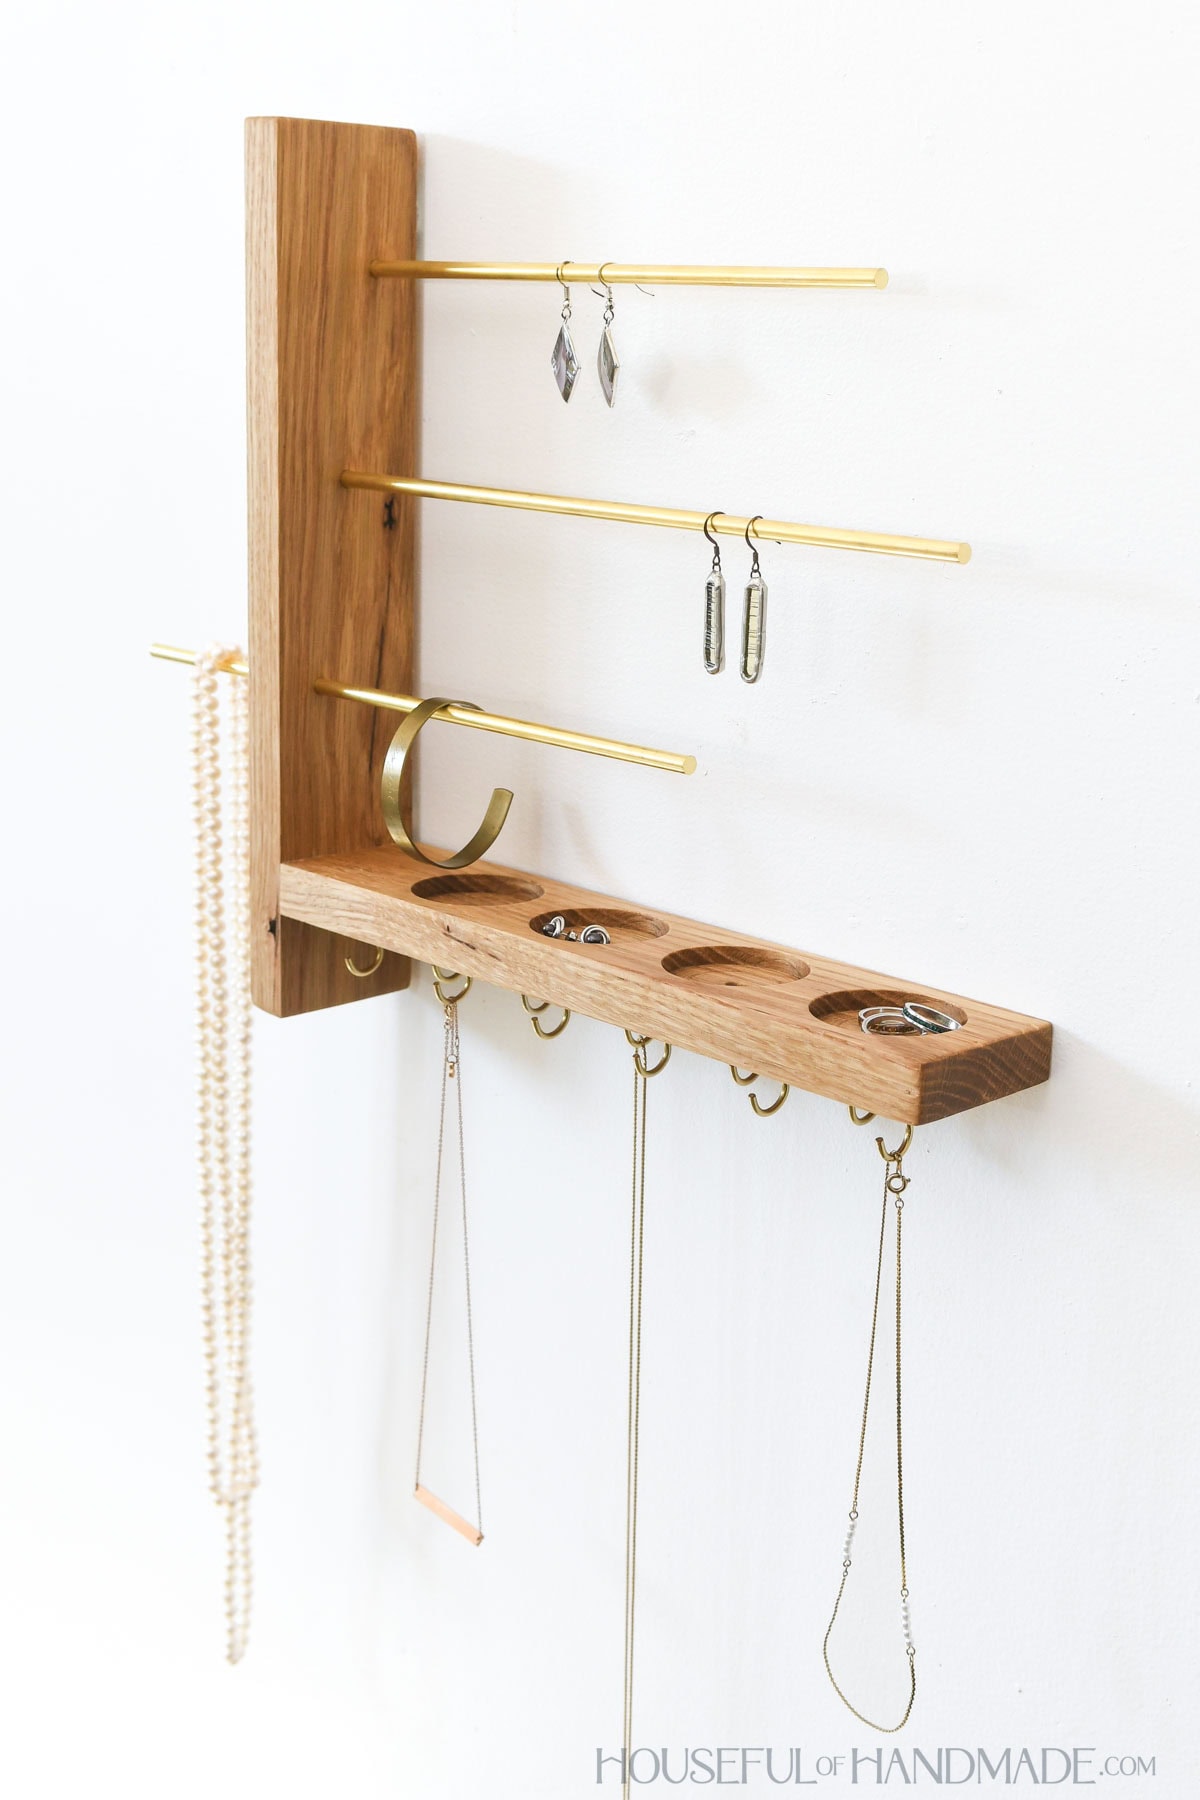
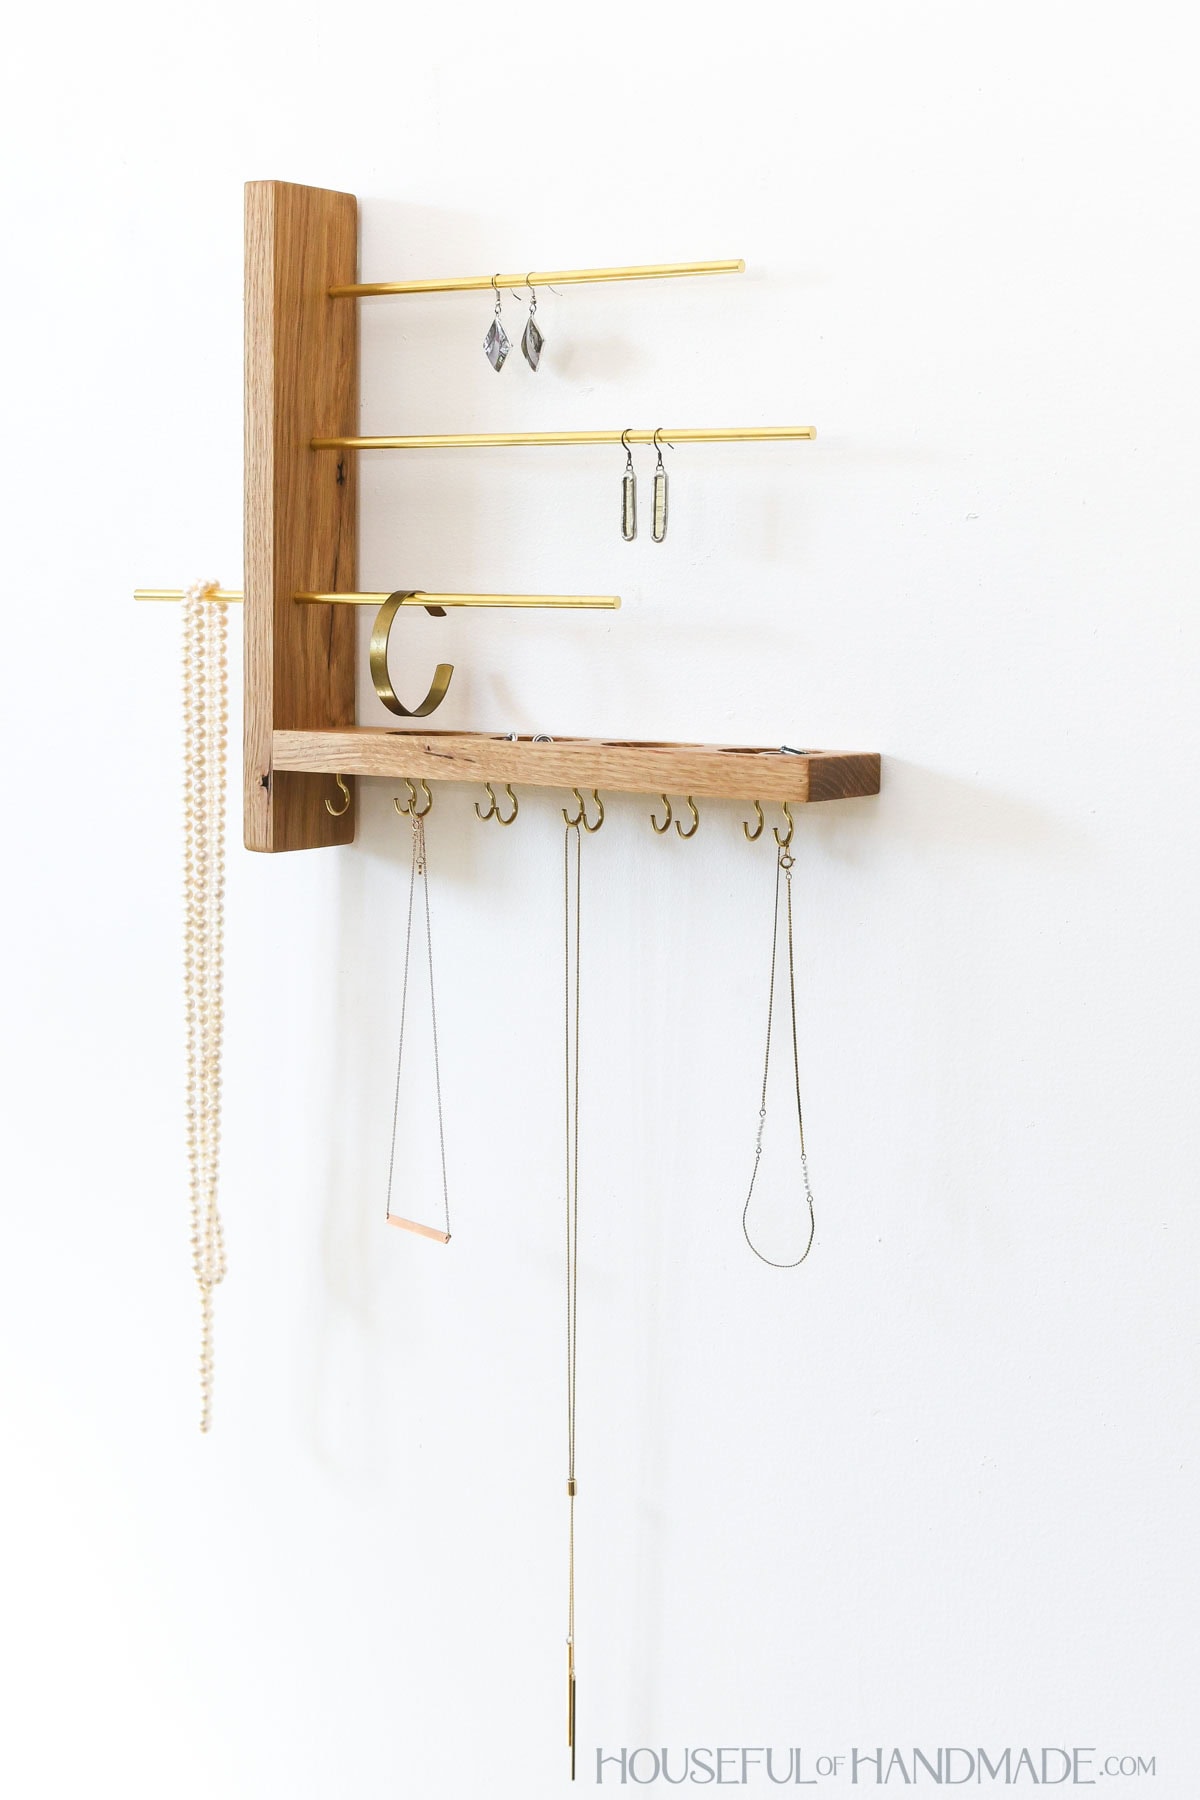
Lastly, on the very bottom are 11 hooks for holding necklaces. I love that there is nothing below them so you can hang even the longest necklaces here.
This beautiful jewelry holder can easily be hung in a bedroom, bathroom or closet.
And it only takes a couple boards to make so you can probably build it from scraps you have laying around!
You are going to love all the storage you have from such a simple DIY.
More DIY Gift Ideas
This fun project is shared for Day 3 of DIY Gift week. There are still 2 more new DIY gift ideas coming, plus the gifts my friends from WoodShop Diaries and Anika’s DIY Life are sharing.
Check out their DIY gift ideas for Day 3 below along with a couple more ideas from me.


How to Build a Simple Jewelry Organizer
Tools & Materials
Recommended Tools:
- Miter saw
- I recently upgraded to this sliding miter saw (watch for it to go on sale), but previously used this inexpensive miter saw that I loved.
- Dowel jig
- Drill press or Drill guide
- Drill
- 1 3/4″ Forstner bit
- Multi-mark measuring tool
- Clamps
- Sander
Supplies:
- Wood products
- (1) 1×3 boards, 3′ long
- 3/8” x 1 1/4” dowel pins
- (3) 1/4” x 12” brass rods
- (11) 7/8” brass cup hooks
- (2) keyhole brackets
- Wood glue
- Super glue gel
Cut List
Cut out the pieces according to the easy-to-read table in the PDF plans.
STEP 1- Drill holes
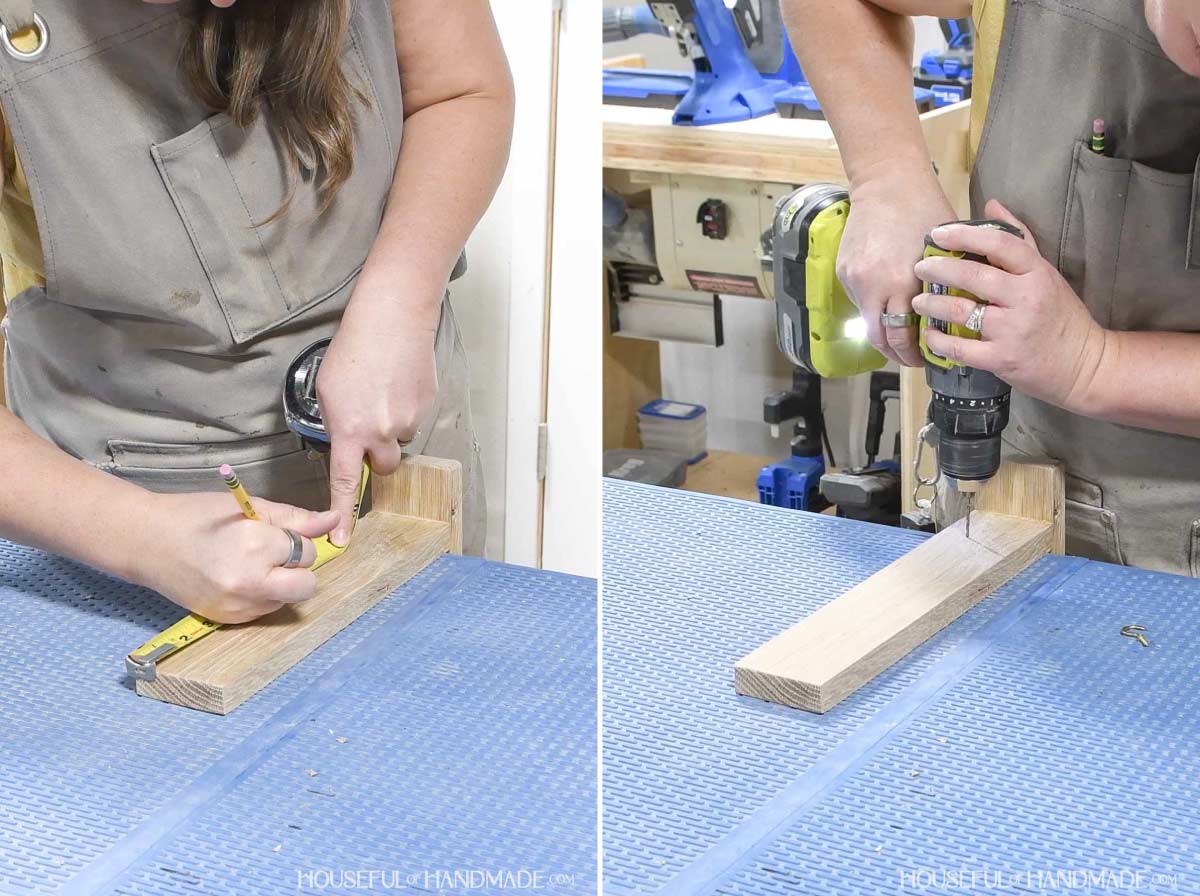
On the side board, measure and mark out the center of the holes for the brass rods. according to the diagram in the plans.
Use a drill bit the same size as your brass rods. Drill the middle brass rod hole only 5/8” deep, the top and bottom drill them all the way through.
Use a drill press or drill guide to keep the holes straight so the rods will be straight when inserted.
EXPERT TIP:
Clamp a scrap board under the hole when you drill to prevent it from chipping out the back when it breaks through.

On the top of the base piece, measure out the center of the holes for the ring/stud trays. Using the forstener bit, drill the four 1/4” deep holes.
The forstner bit will give you a flat bottomed hole to use a tray for small jewelry.

On the bottom of the base piece, measure out the center of the pilot holes for the cup hooks. Drill a hole slightly smaller than the threads of the hooks.
Make sure not to drill too deep or risk putting holes into the ring/stud trays.
I did this after the boards were assembled, but it would have been way easier to do before attaching them together.
STEP 2- Attach boards together
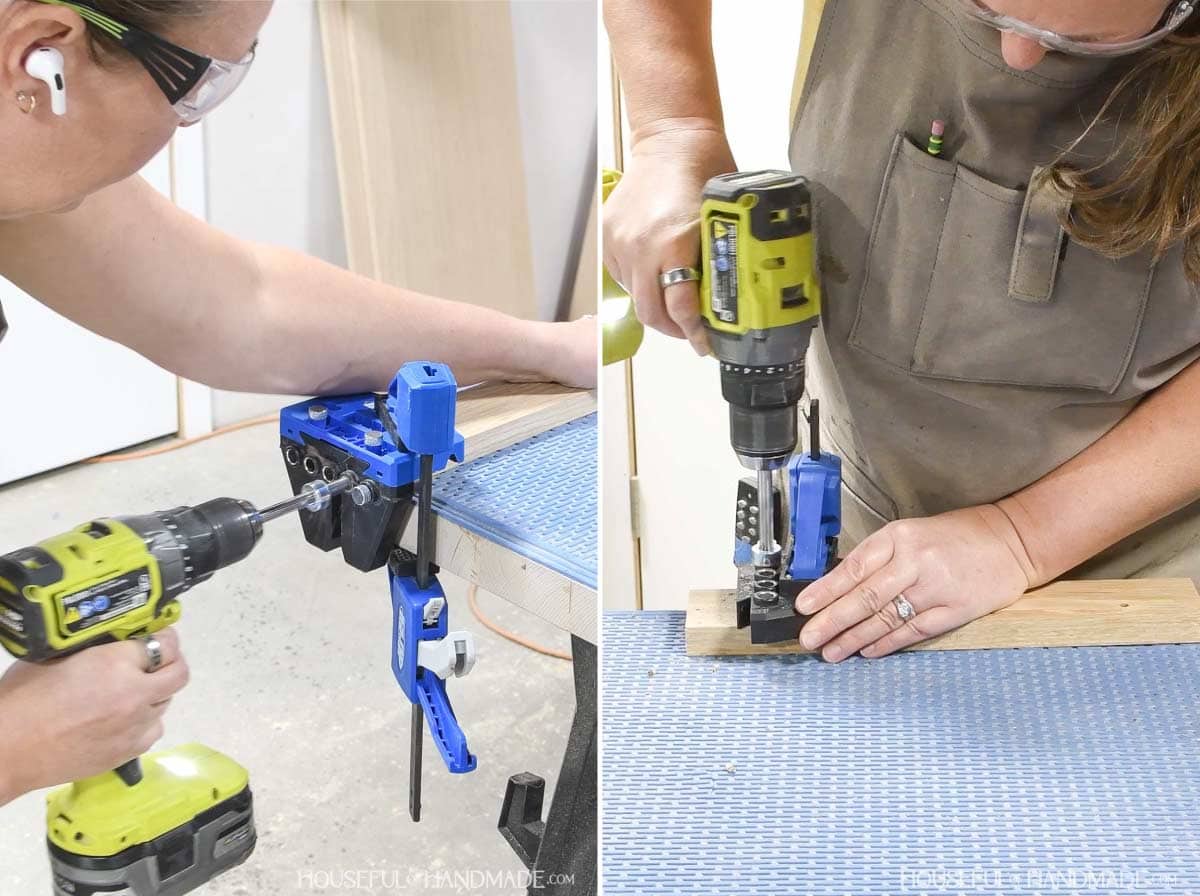
Drill two 5/8” deep holes with the dowel jig in the end of the base piece.
Then drill coordinating 5/8” deep holes in the inside of the side so that the base will be 1 1/2” up from the bottom.
Learn how to use the Kreg dowel jig here.
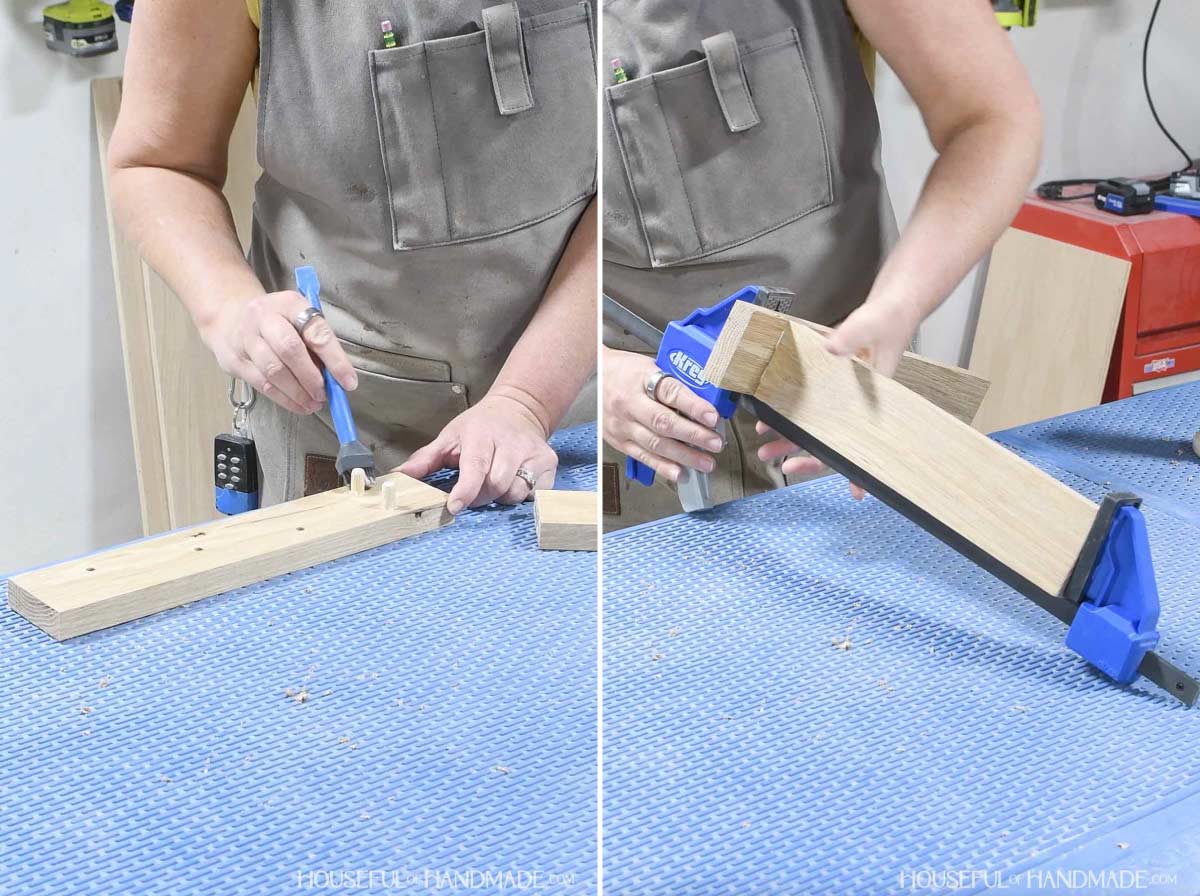
Dry fit the two pieces with the dowel pins and adjust as needed.
Then add glue to the pins and edge of the base piece. Clamp together until the glue dries.
EXPERT TIP:
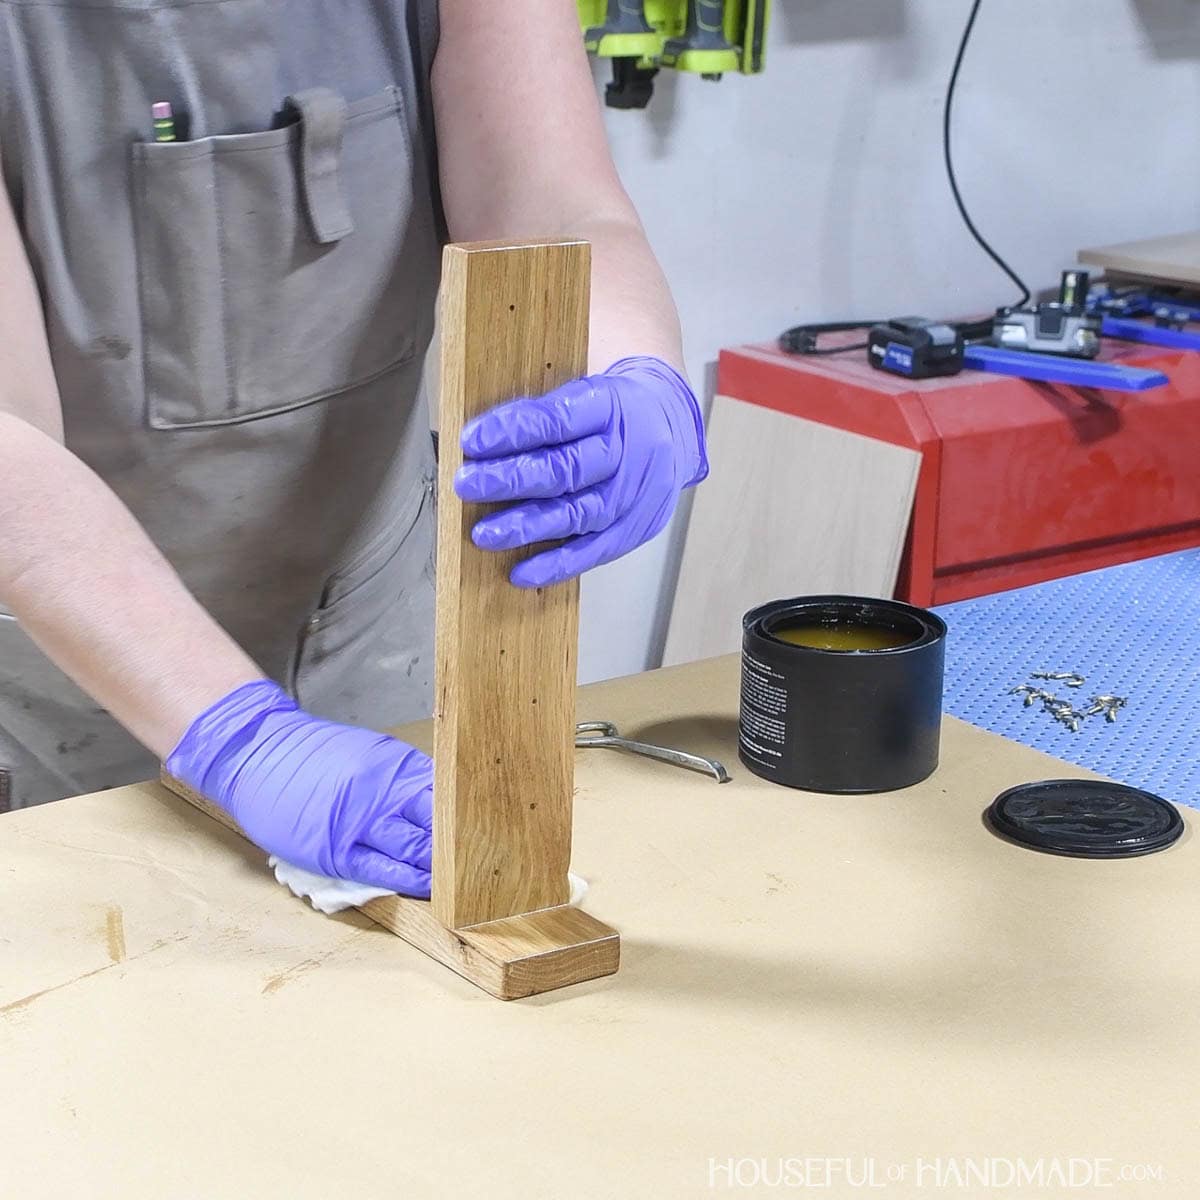
Sand and seal the assembled wood organizer before attaching the metal pieces so you don’t have to worry about getting sealer on them.
I built my jewelry organizer from white oak boards and sealed it with Furniture Butter. Let it dry completely.
STEP 3- Install metal accessories
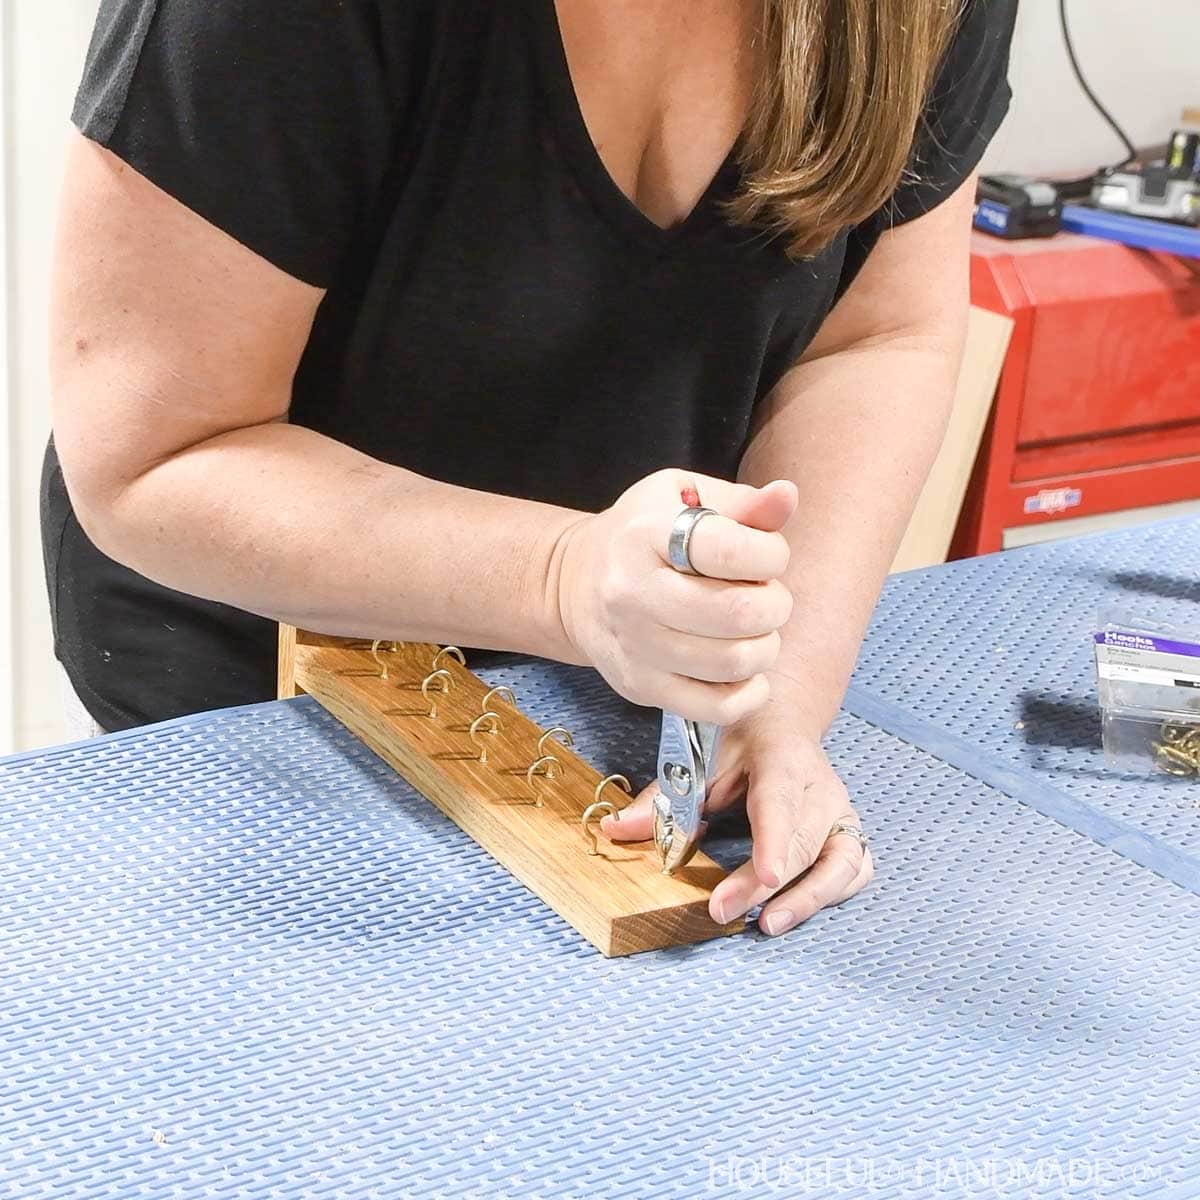
Twist the cup hooks into the bottom into each of the pre-drilled holes. Use pliers to get them flush with the underside of the board.
Make sure all the hooks are perpendicular to the front of the board and are all facing forward.
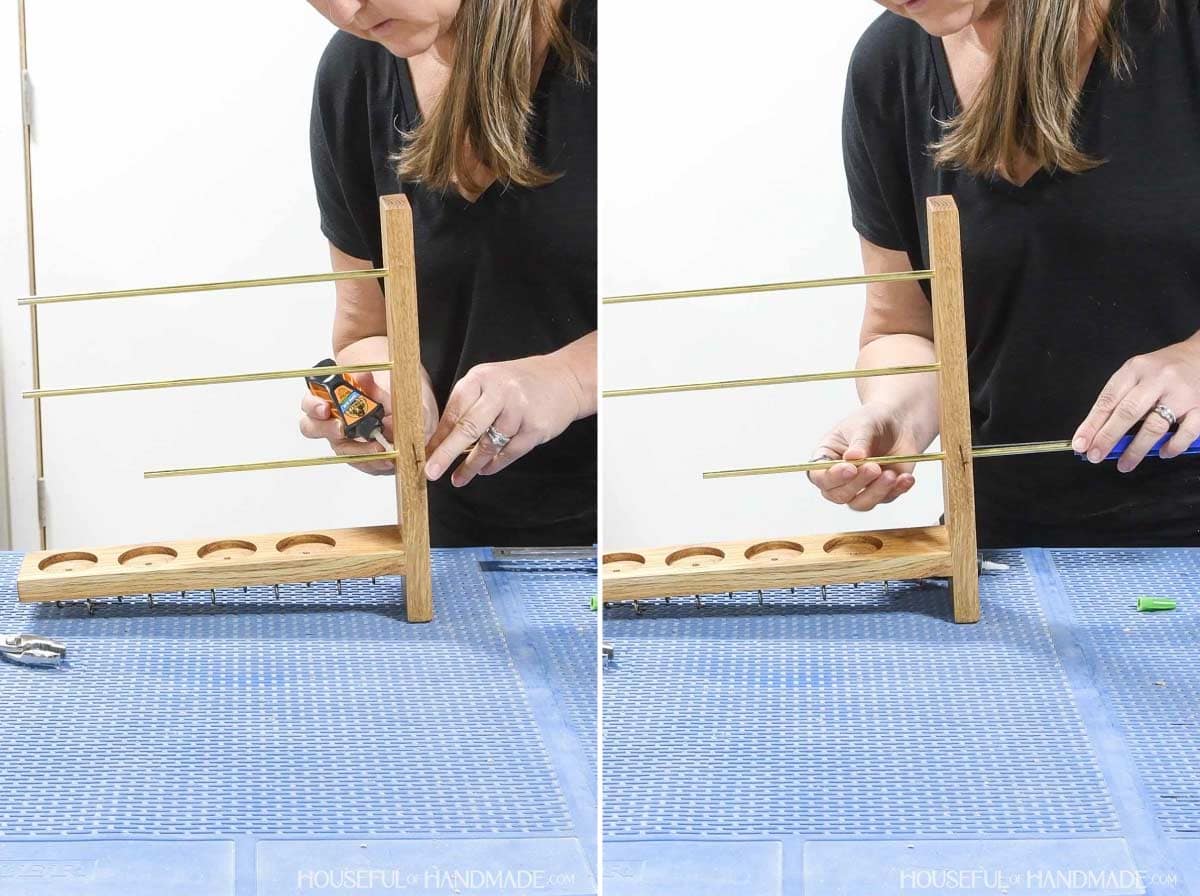
Press the brass rods into the holes on the side of the organizer.
The top rod should stick out the left side 1 1/2” and the bottom one should stick out the left 3 1/2”.
Once the rods are in place, slightly move them to expose the section that is inside the board and apply a couple drops of super glue gel to it. Then slide it back into place until the glue dries.
For the center one, add glue inside the hole and press the rod in till it’s secure.
Wipe away any super glue squeeze out immediately.
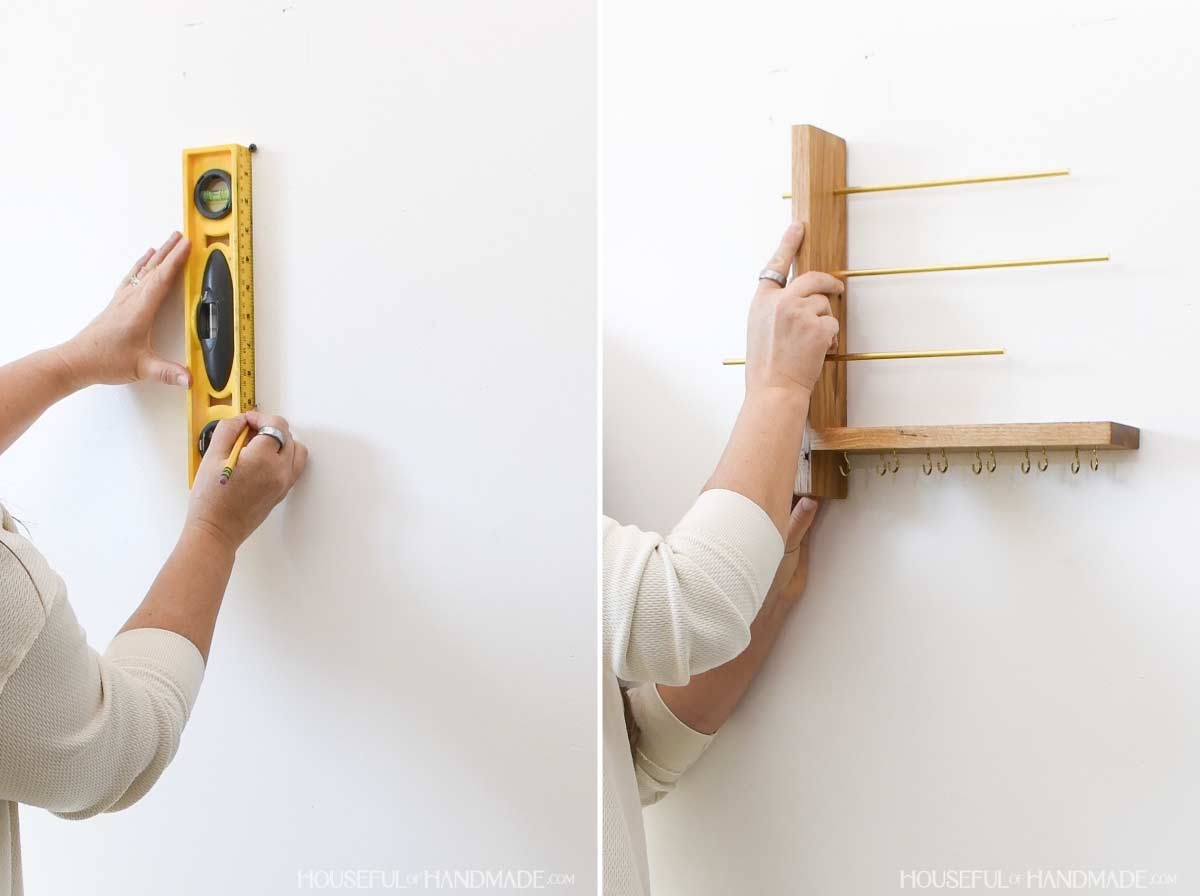
STEP 4- Hang on the wall
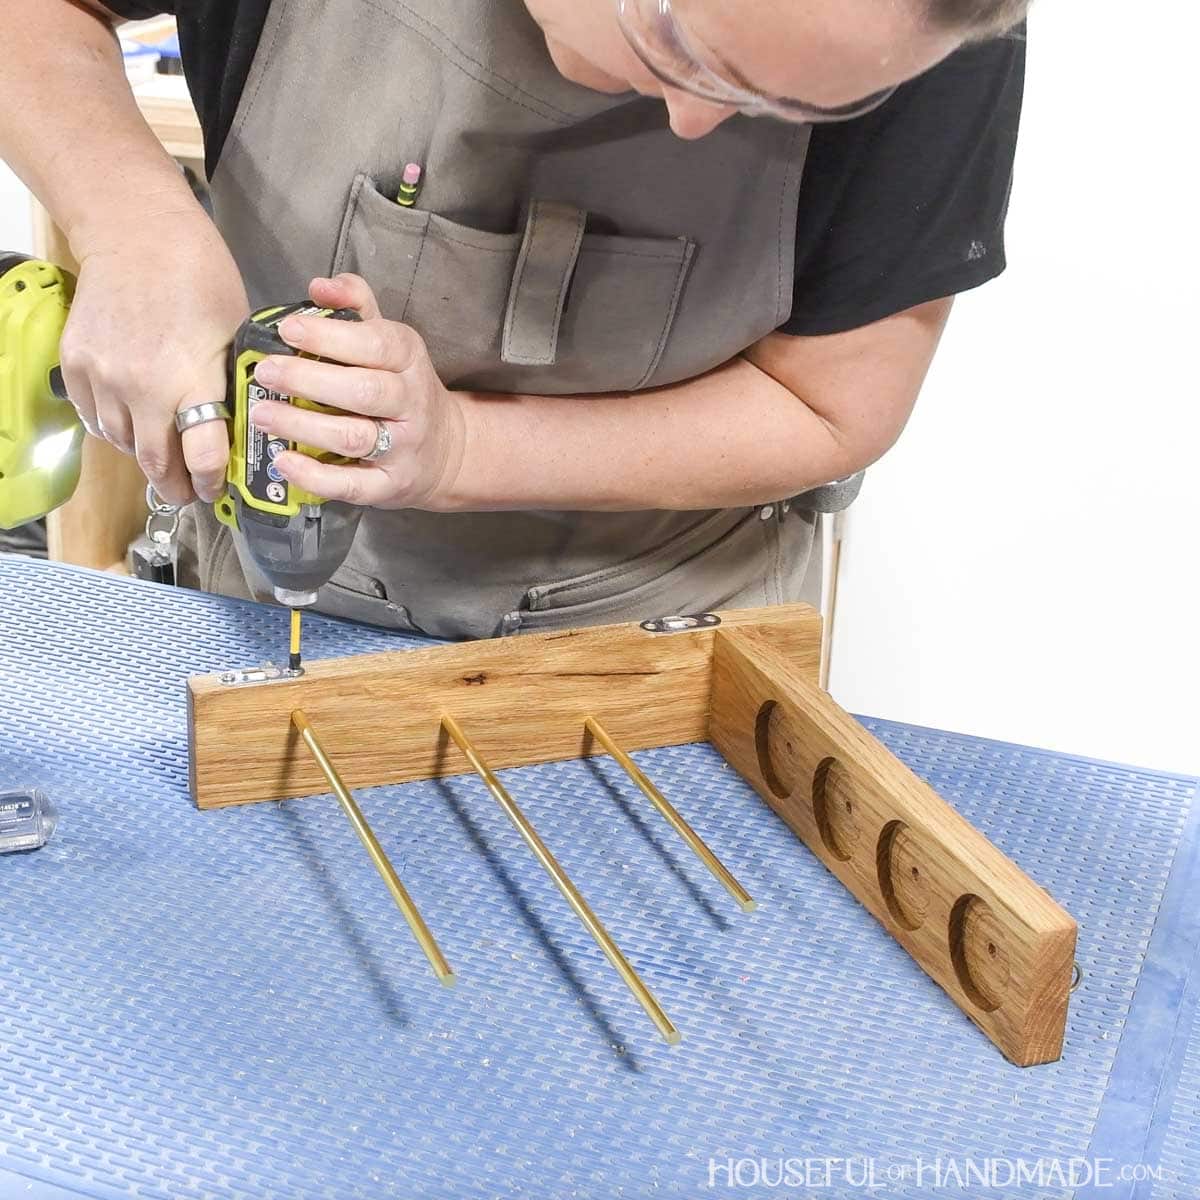
On the back of the side board, attach the two keyhole brackets so they are 9” apart.
This will make it easier to hang on the wall because you can just attach your two screws 9” apart on a level line then slide the organizer on top of them.
Secure with the screws included so they are flush with the bracket.
Attach your screws to the wall where you want to hang your jewelry organizer. If you cannot attach them into a stud, use self-drilling wall anchors.
Then slide the keyhole brackets over the head of the screws to secure.
Premium plans include:
- Recommended Tools
- Shopping list
- Easy to read cut list table
- Cut diagrams
- Step-by-step instructions with 3D renderings
- Helpful resources
- BONUS: 3D SketchUp file
You did it!
Now you can organize all your favorite earrings, necklaces, bracelets, rings and more.
Or wrap it up for the perfect gift for someone who needs a little organization for their sparkle.
Happy building!
