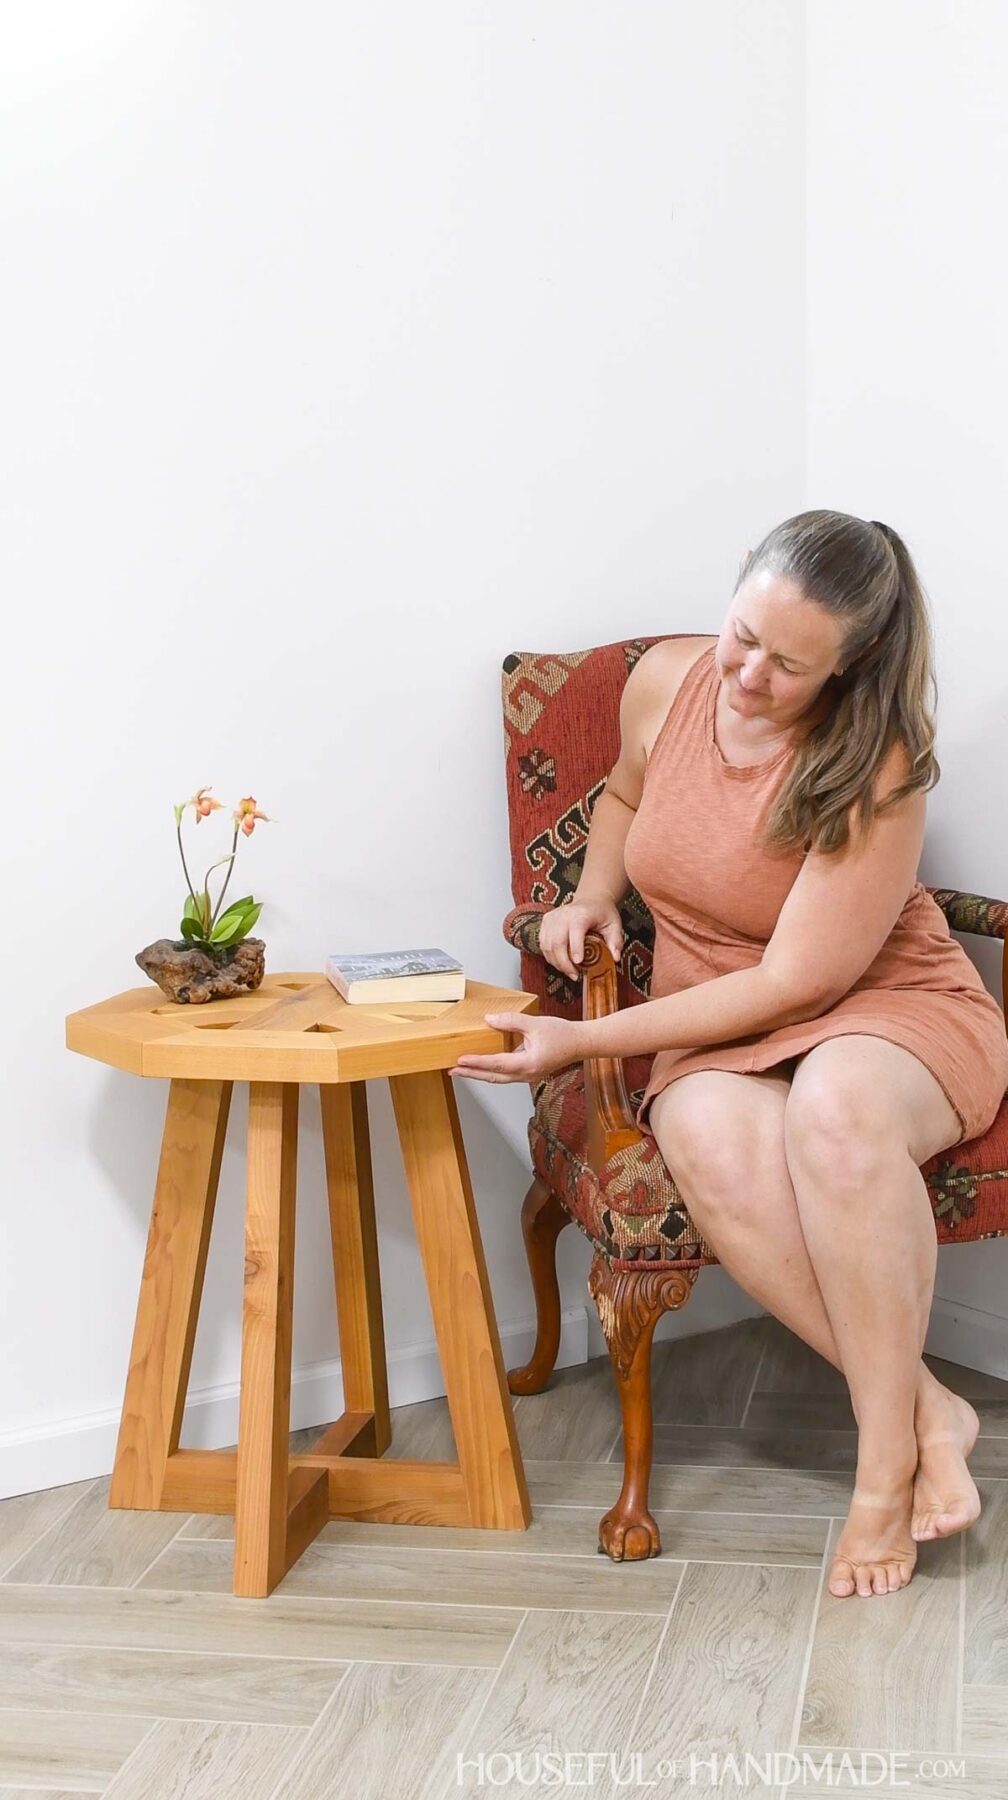
You can never have too many side tables! They are perfect for putting on the end of the sofa and next to every chair.
And they are a fun and easy build! You can quickly build 1 or 2 ends tables in a weekend to add to your home.
I built my side table with cedar 2×4 and 2×3 boards because I planned to use it as an outdoor side table. But it looks so pretty, I might just keep it inside.
This post may contain affiliate links. As an Amazon Associate I earn from qualifying purchases. Click here to read my full disclosure policy.
So whether you are looking for an indoor or outdoor table, this one should fit the bill.
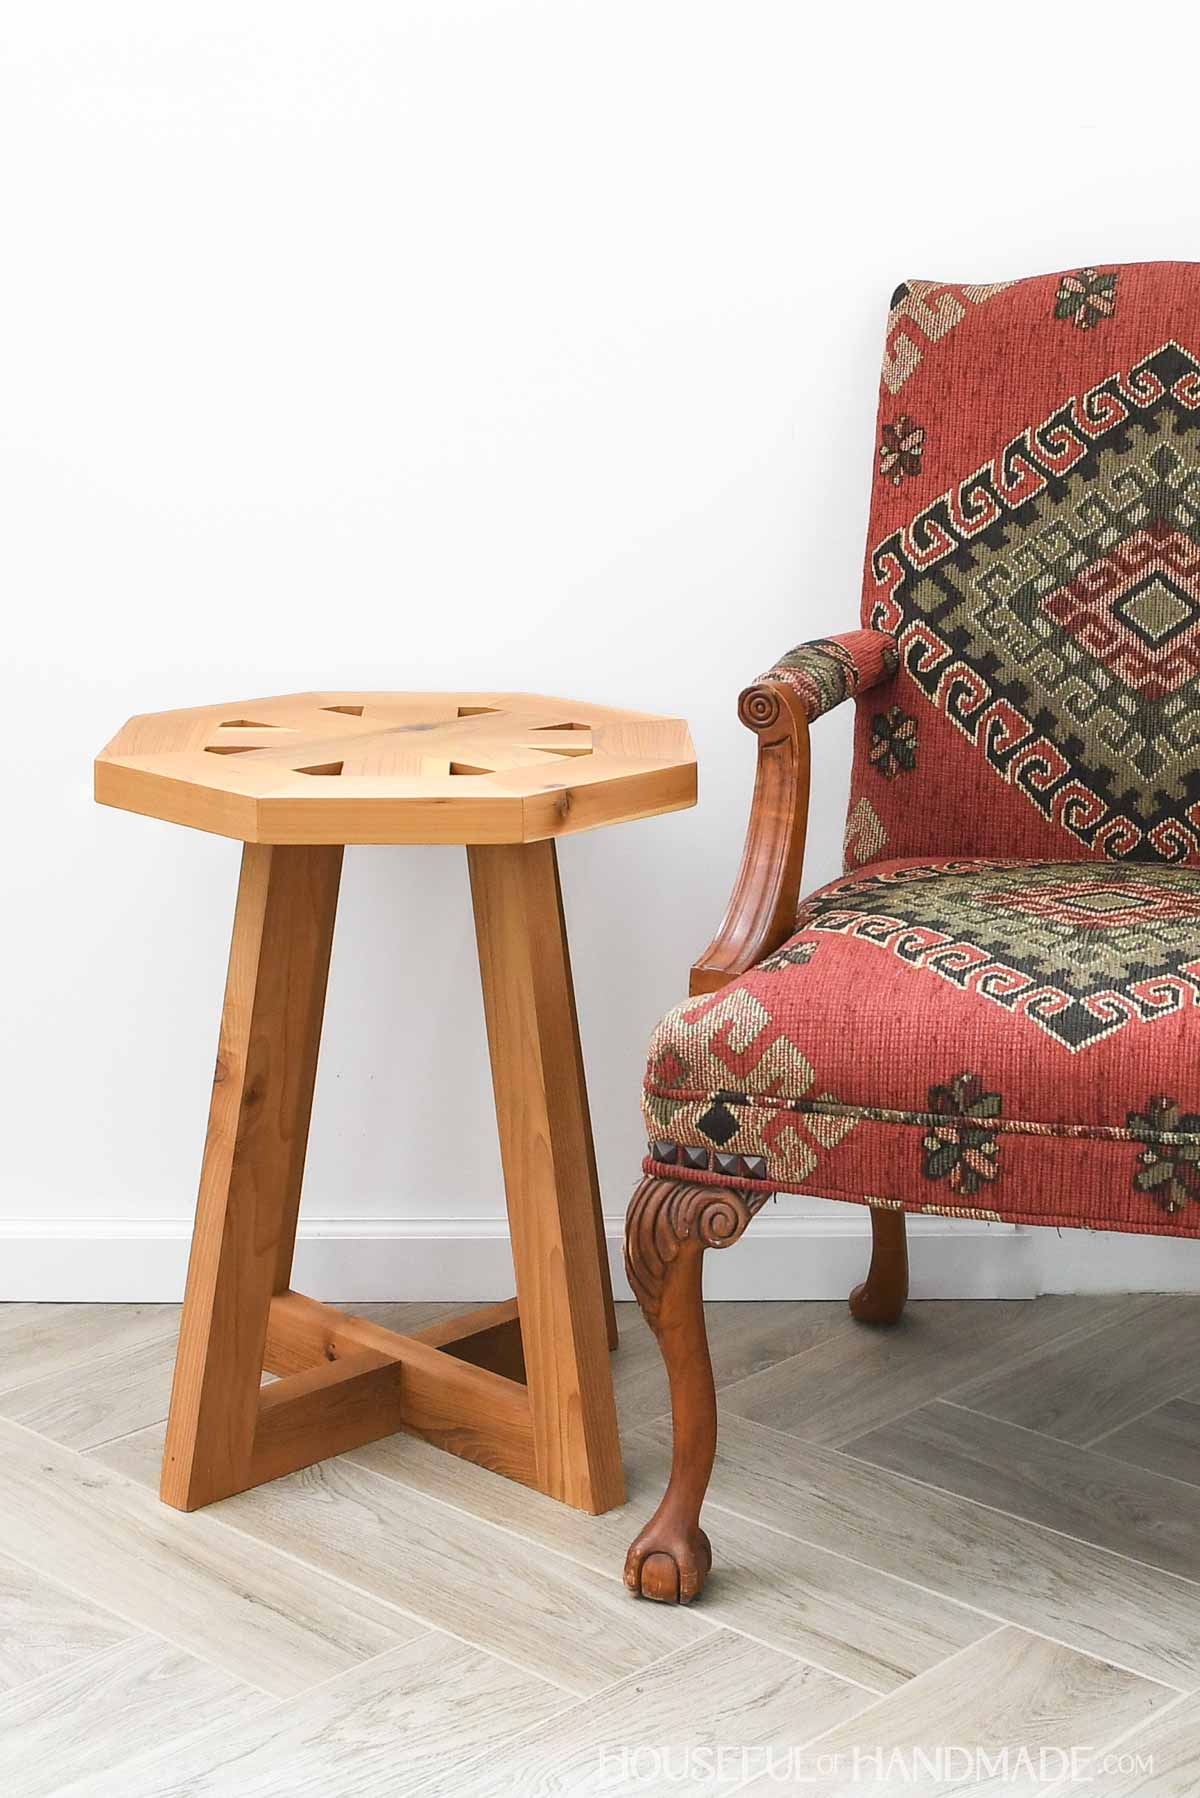
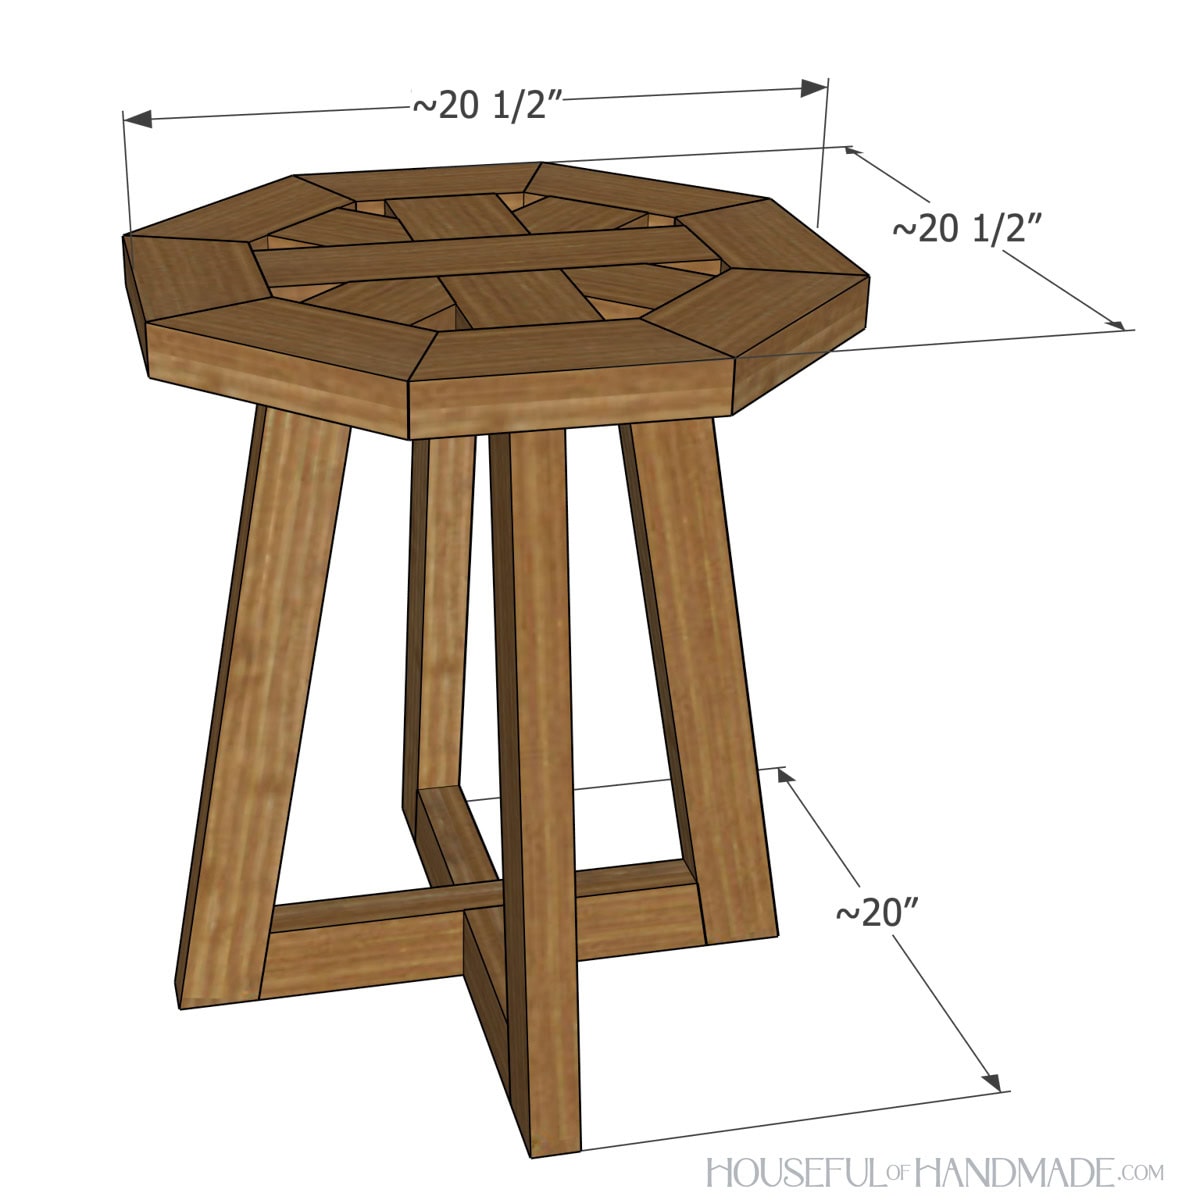
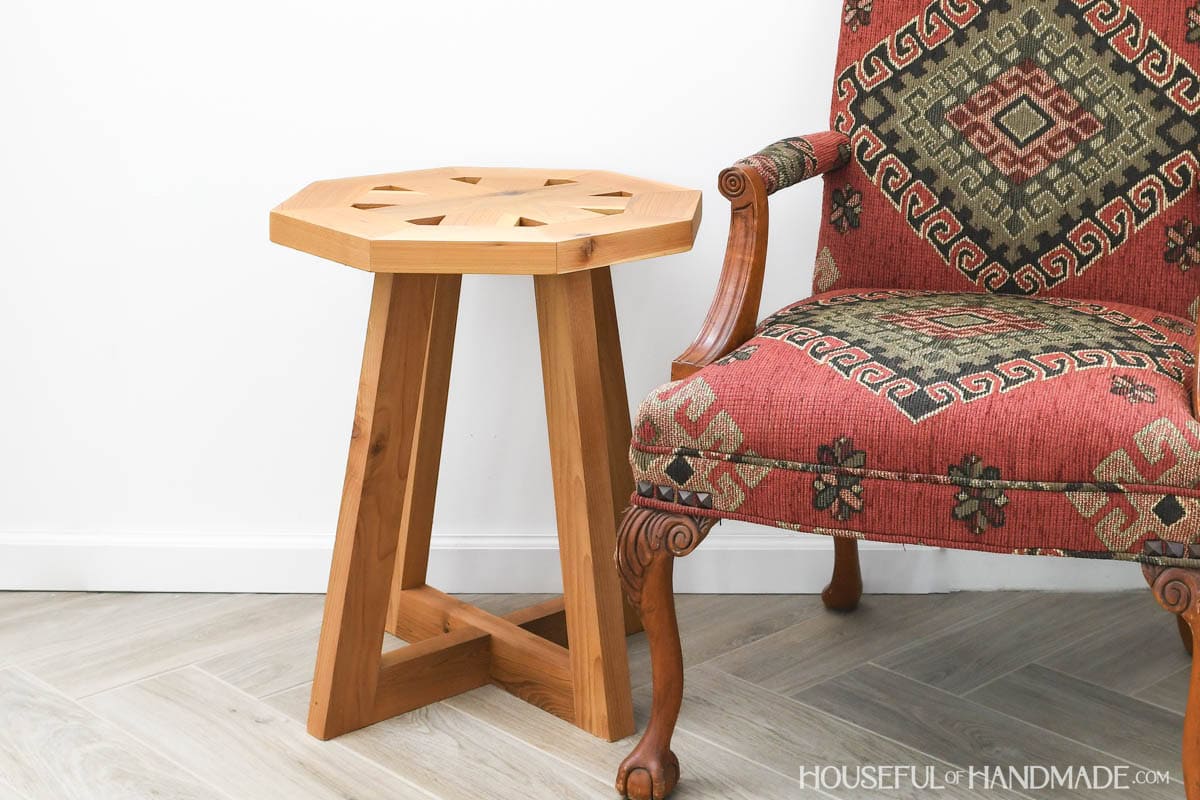
Wood Pedestal Side Table
The legs of the side table are tapered creating an open pedestal.
These legs give a unique modern look to the end table and are easy to build with a simple angled cut.
Plus all the fasteners are easily hidden on the bottom making this a sleek base for a beautiful table top.
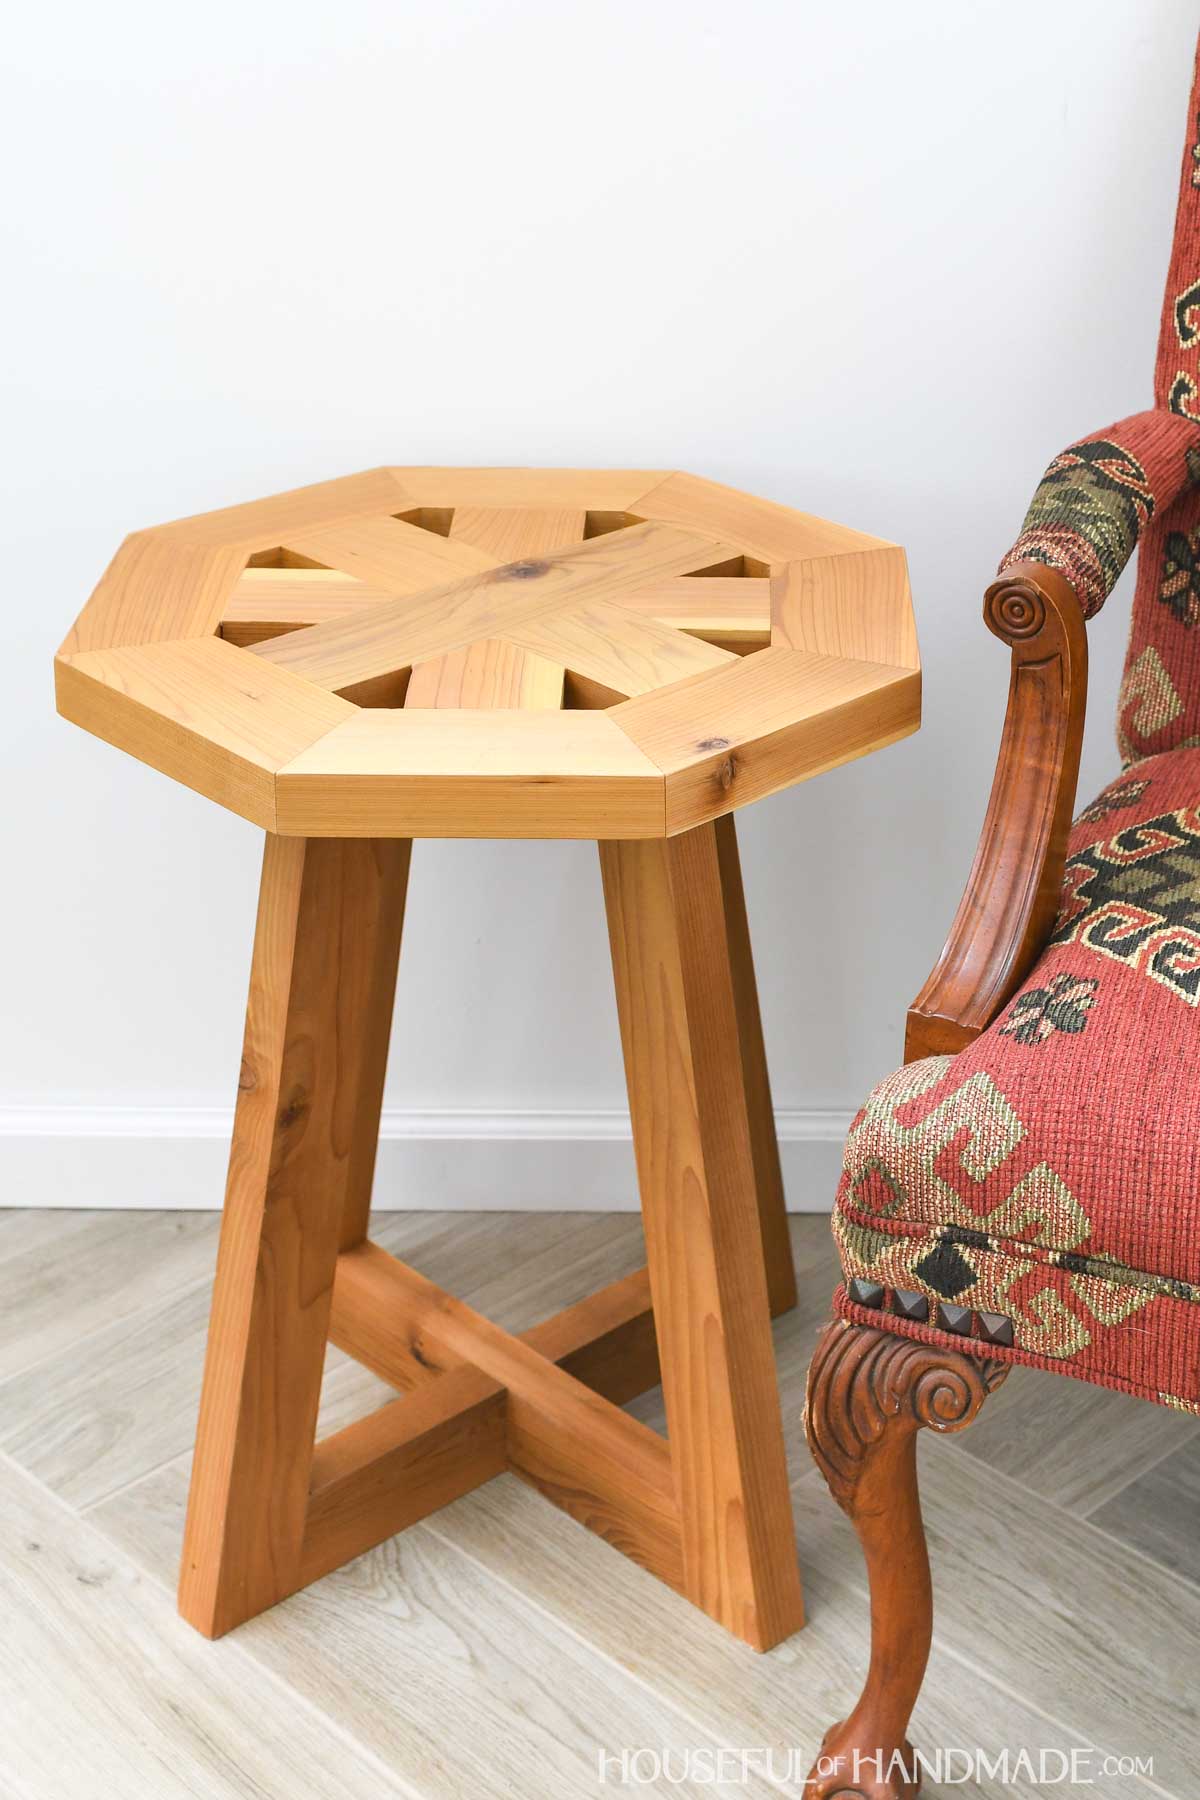
The table top for this unique end table is an octagon with a starburst inside.
The starburst leaves small holes in the table top. This makes it perfect for an outdoor side table since water can easily drain away.
But the holes are small enough you can still use the entire top.
So grab some boards and let’s get building!
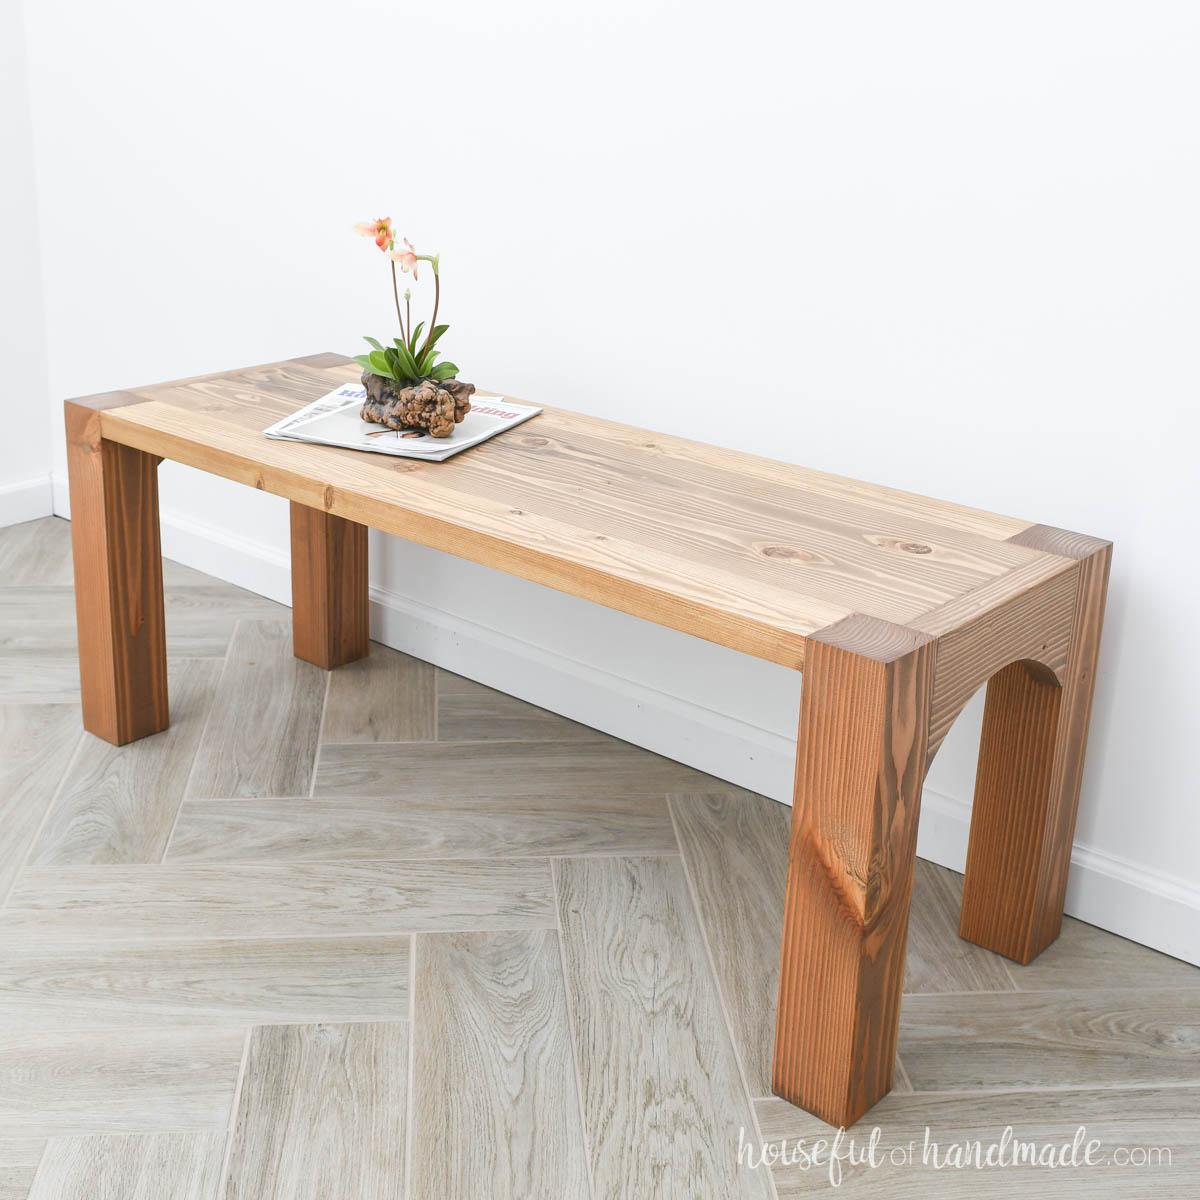
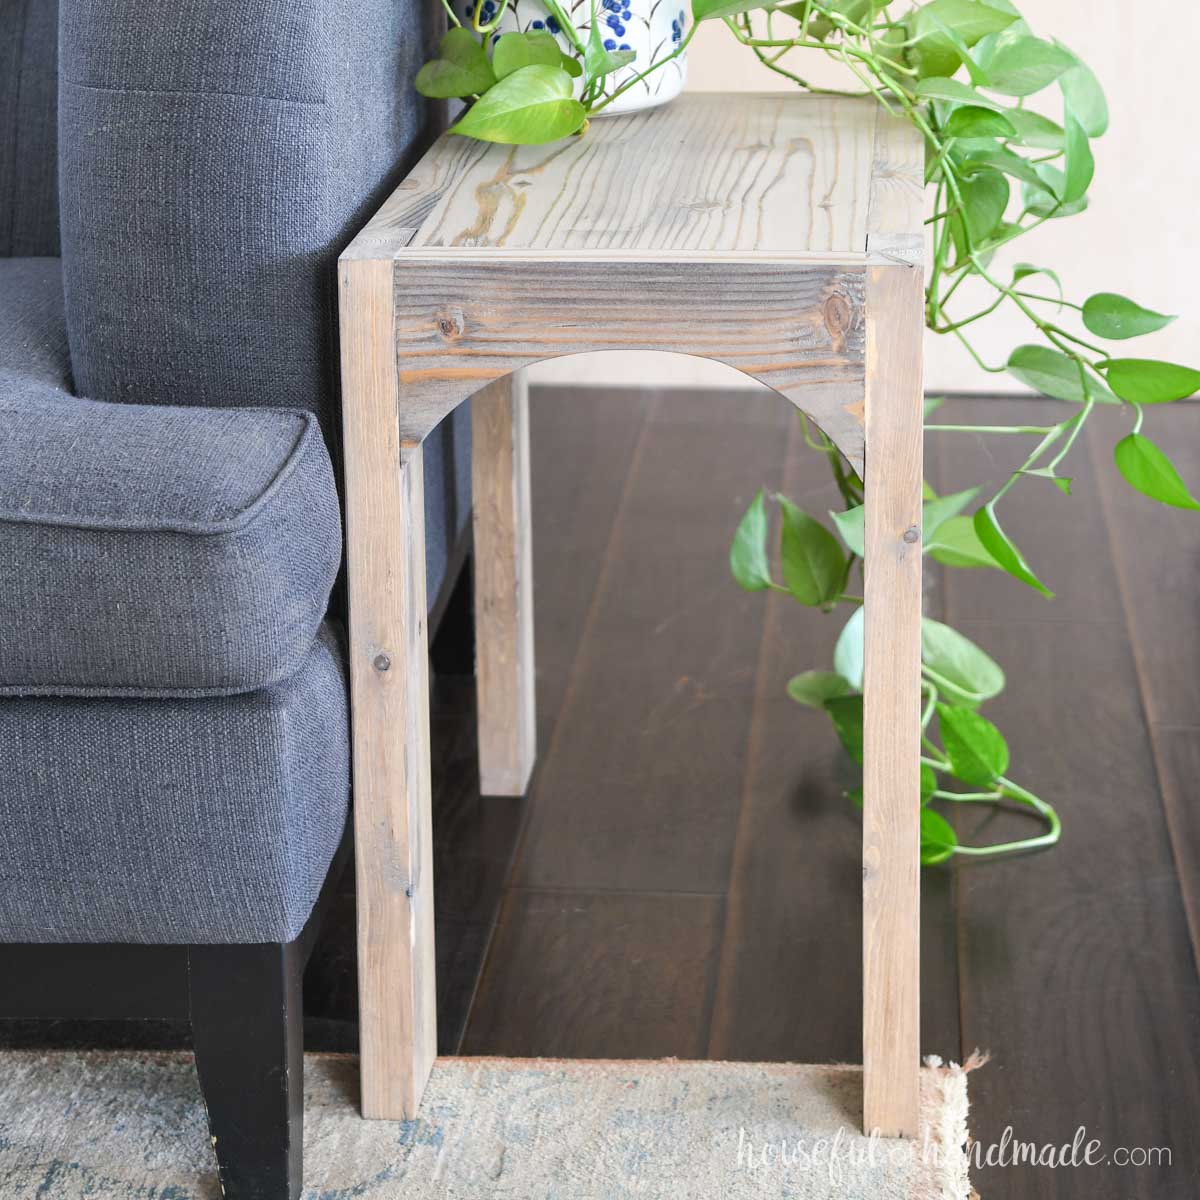
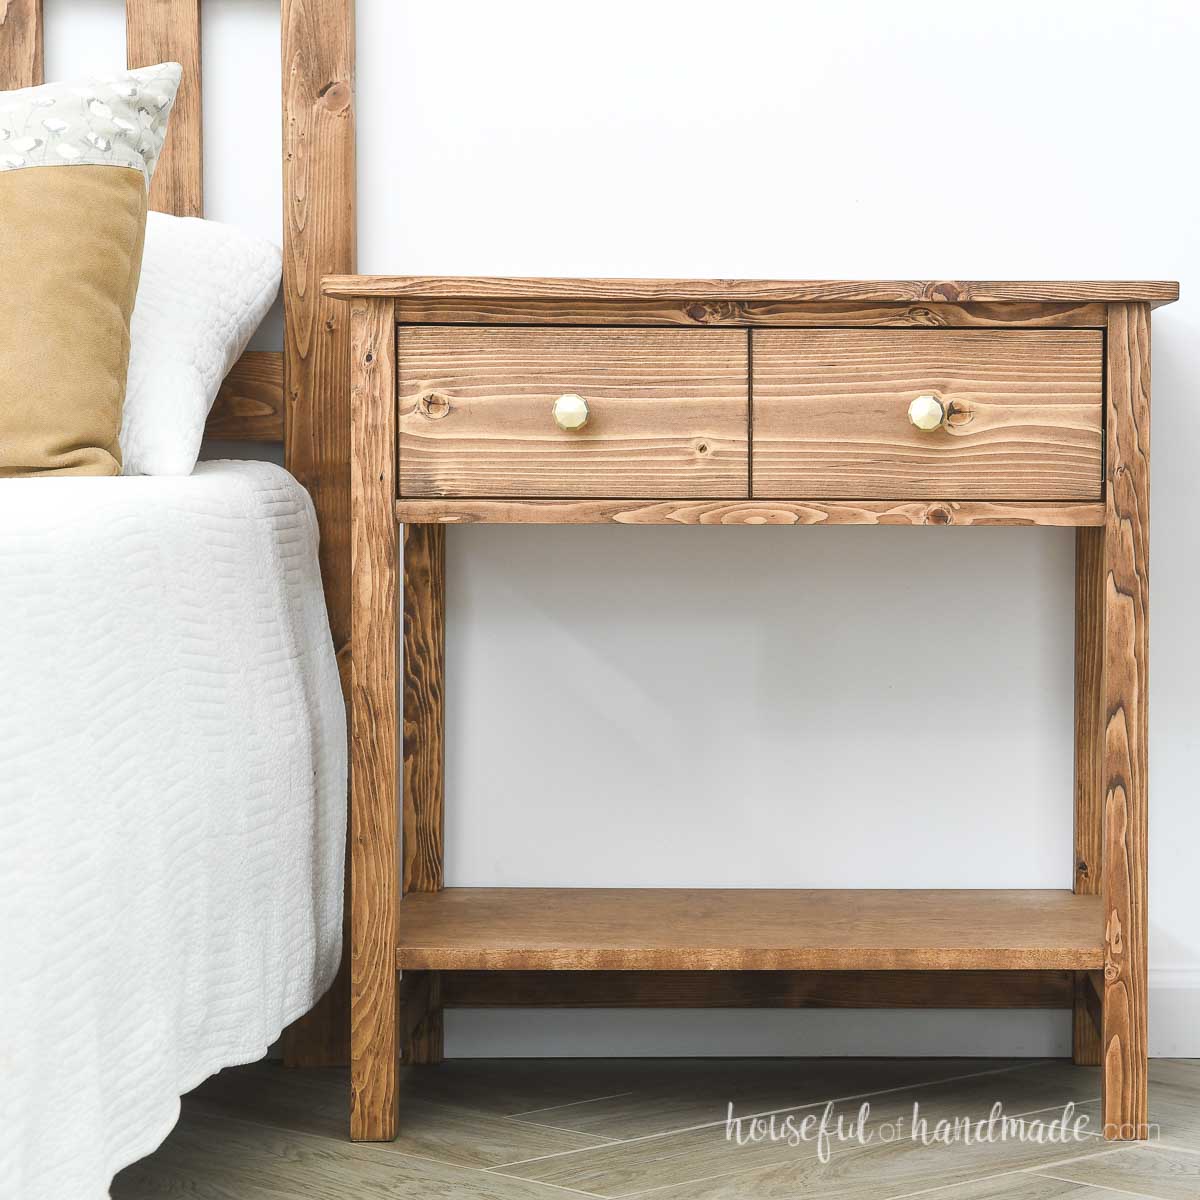
More DIY Small Table Ideas
Make your home beautiful and functional with little tables for every room.
How to Build an Octagon End Table
Tools & Materials
Recommended Tools:
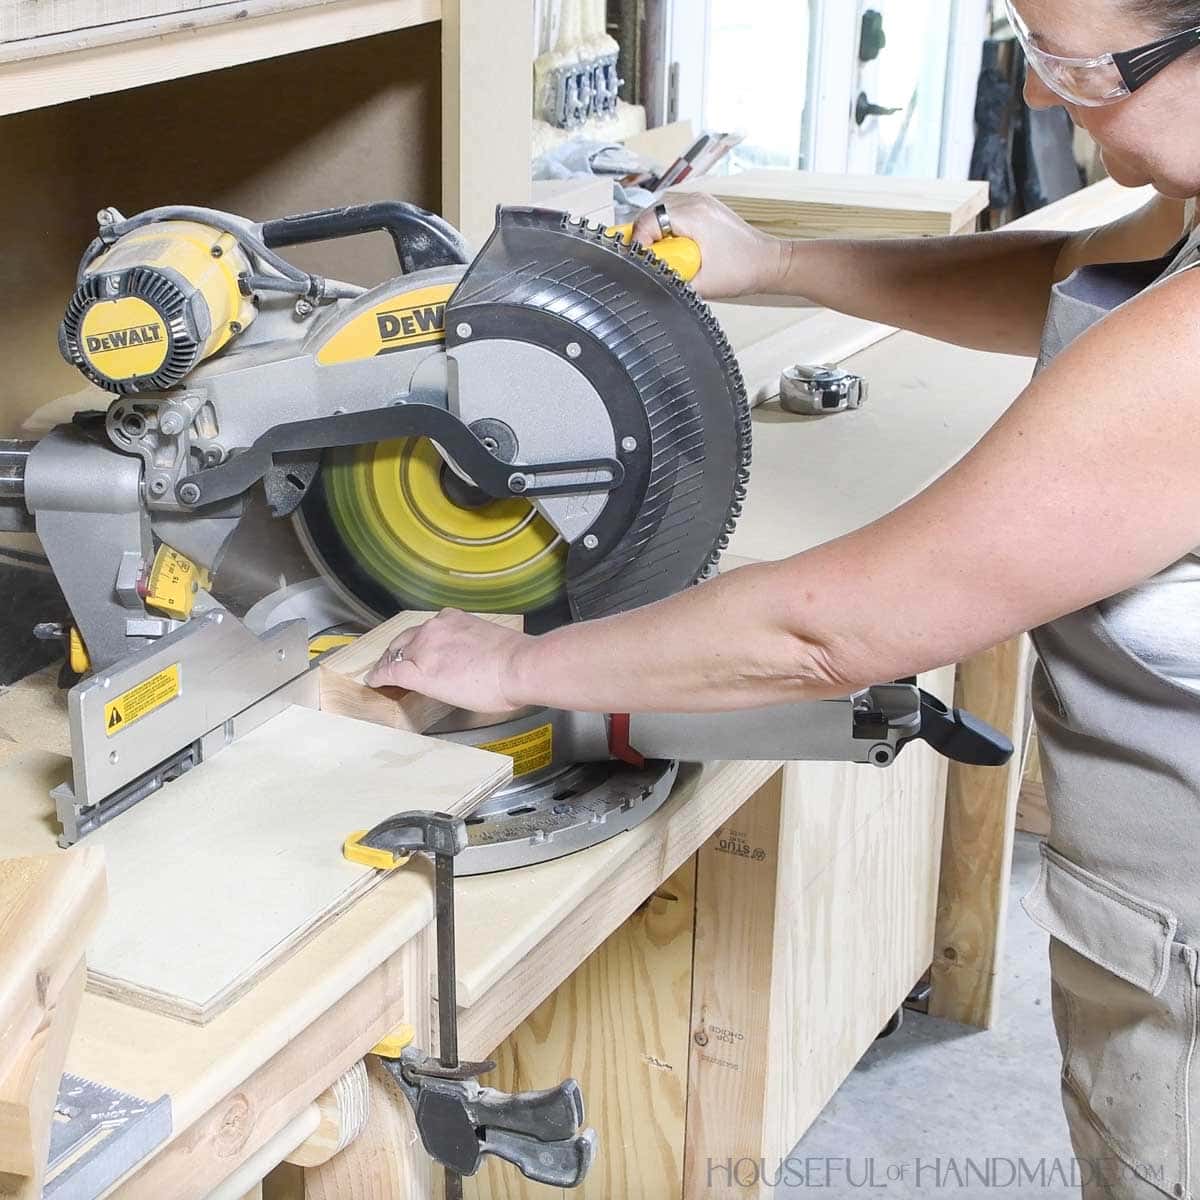
- Miter saw
- I recently upgraded to this sliding miter saw (watch for it to go on sale), but previously used this inexpensive miter saw that I love.
- Pocket hole jig
- Drill
- Impact driver (optional, but I love not having to switch bits with the drill)
- Speed square
- Multi-mark measuring tool
- Face clamps
- Brad nailer
- Sander
Supplies:
- Lumber
- (1) 2×4 board, 8′ long
- (1) 2×3 board, 8′ long
- (1) 2×3 board, 3′ long
- 2 1/2″ pocket hole screws
- 1 1/4″ brad nails
- Figure 8 fasteners
Overall Dimensions
The finished side table top is 20 1/2″ wide by 20 1/2″ deep. The table is 25 1/2″ tall and the base is approximately 20″ wide.
Cut List
Cut out the pieces according to the easy-to-read table in the PDF plans.
The top octagon and leg pieces are cut at an angle as follows. Refer to the cut diagram in the plans for pictures of the angled cuts.
- Top octagon pieces: both ends cut at a 22.5 degree angle so they angle toward each other.
- Leg pieces: both ends cut at a 10 degree angle so they are parallel.
- Bottom center piece: both ends cut at a 10 degree angle so they are angled towards each other.
- Bottom side pieces: one end cut at a 10 degree angle.
EXPERT TIP:
I like to set up a stop on my miter saw when I need to cut a lot of pieces the same length. This can be as simple as clamping a speed square or scrap board next to saw.
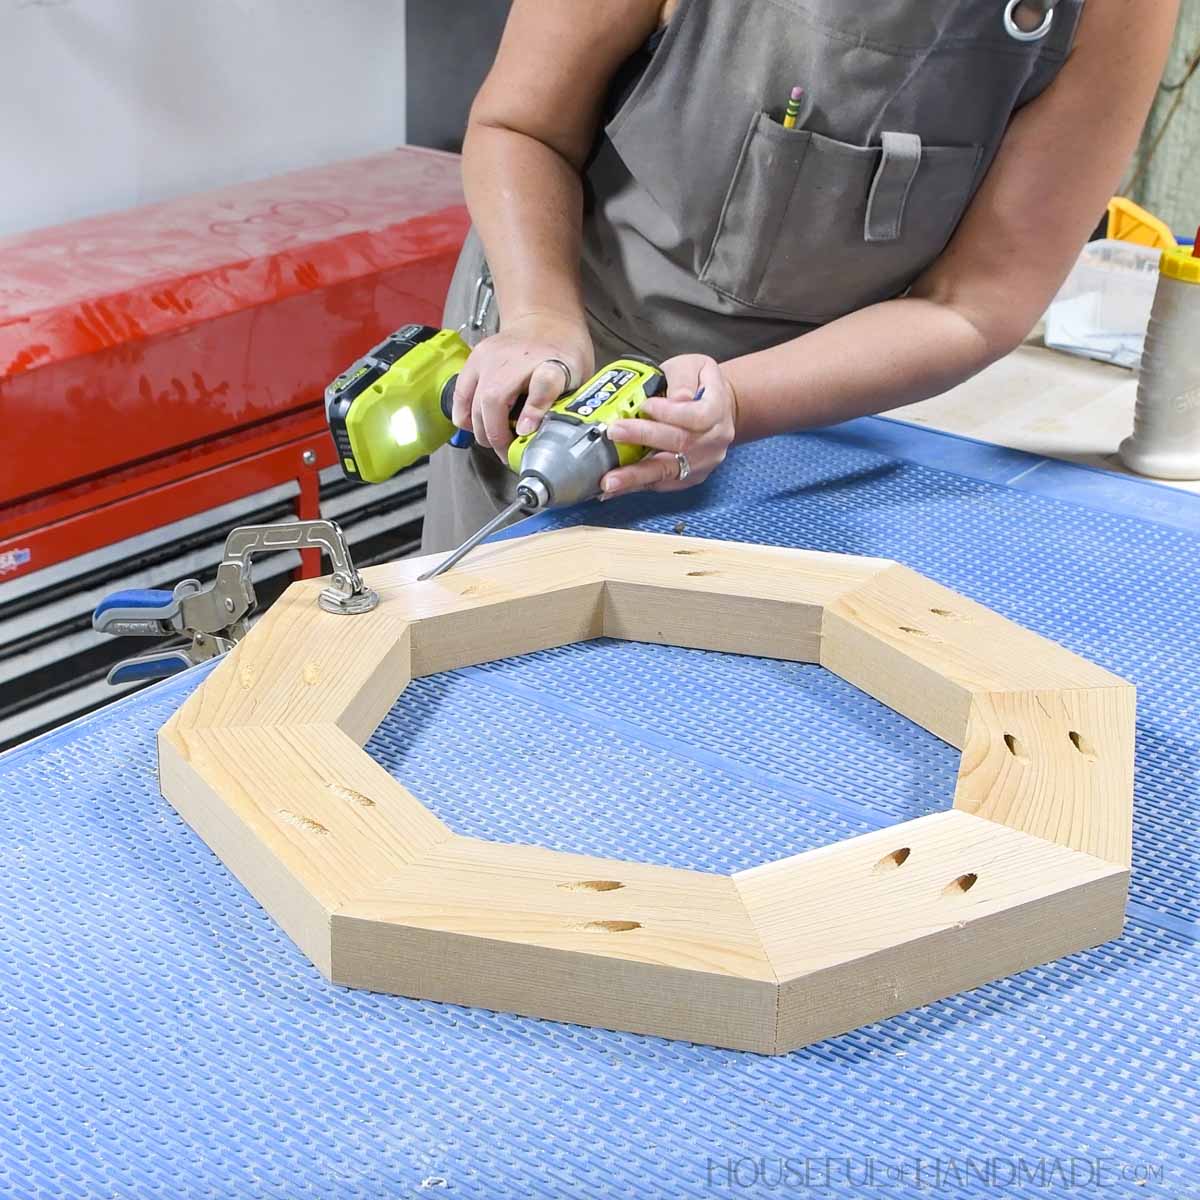
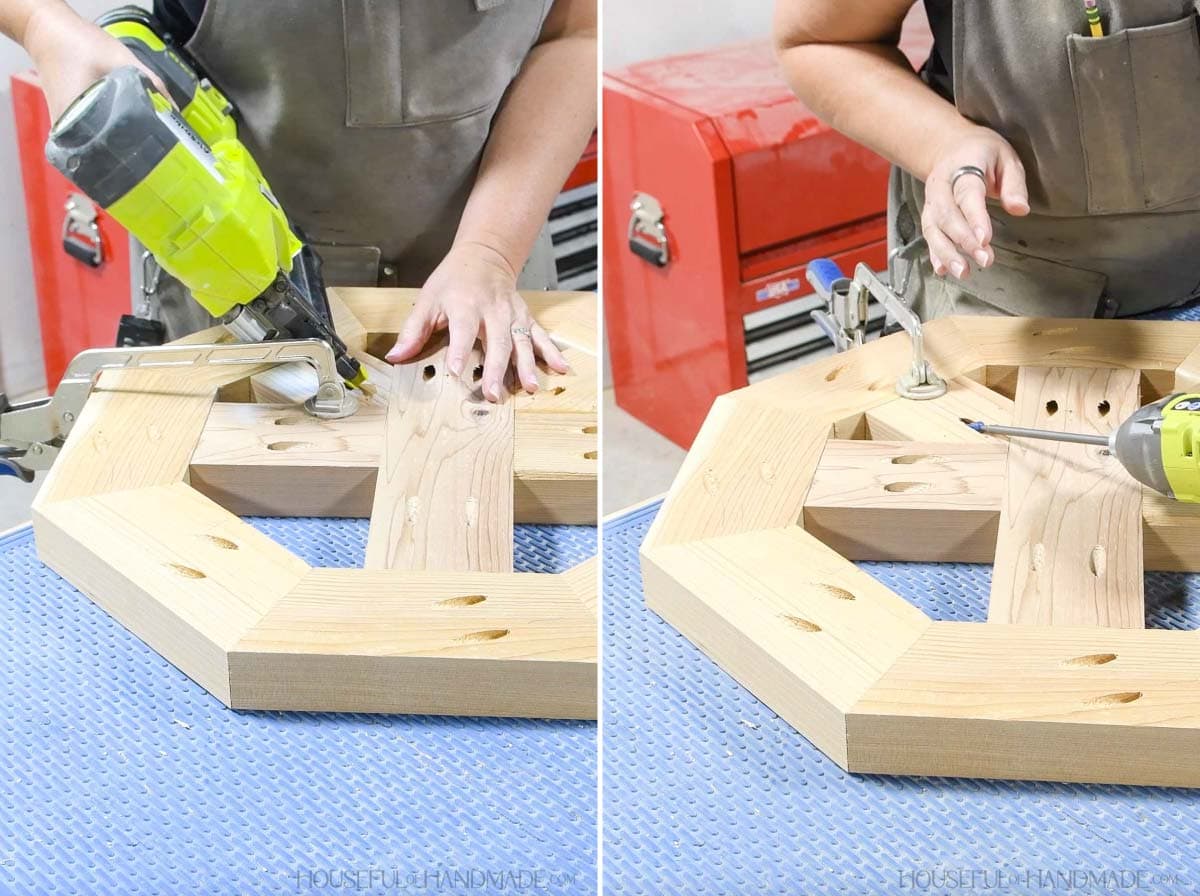
STEP 1- Build the octagon
Set your pocket hole jig to drill holes in 1 1/2″ thick material.
Drill 2 pocket holes on one side of each top octagon board. Make sure it is the same side on all the boards.

Add glue to the seam of two boards.
Use a face clamp to hold it in place while you secure them together with 2 1/2″ pocket holes screws.
Repeat all the way around until 7 pieces are attached to each other.
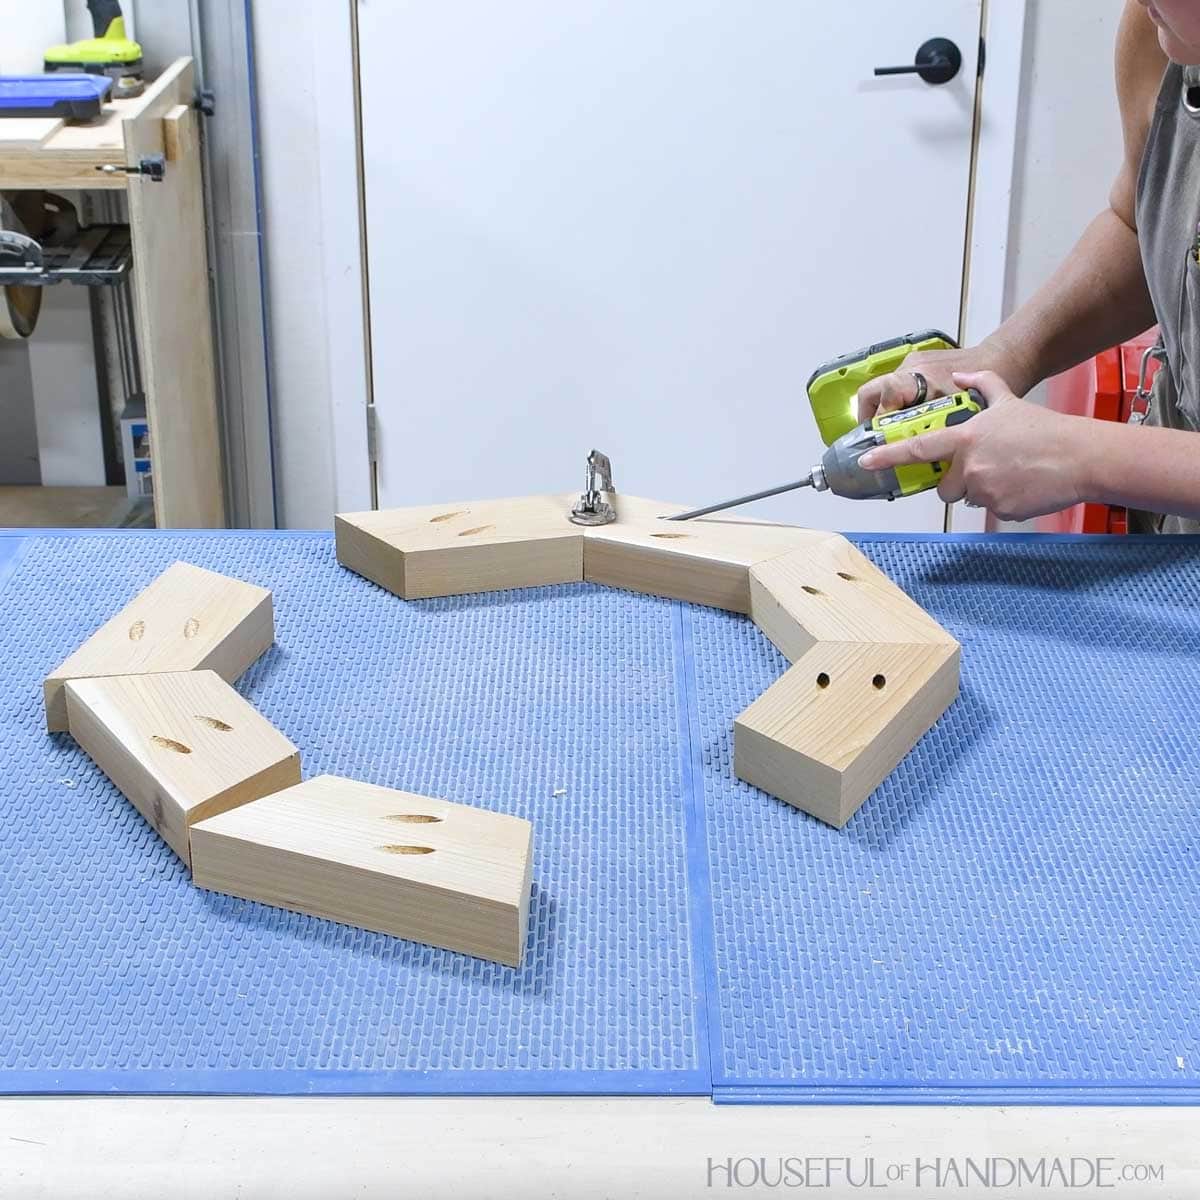
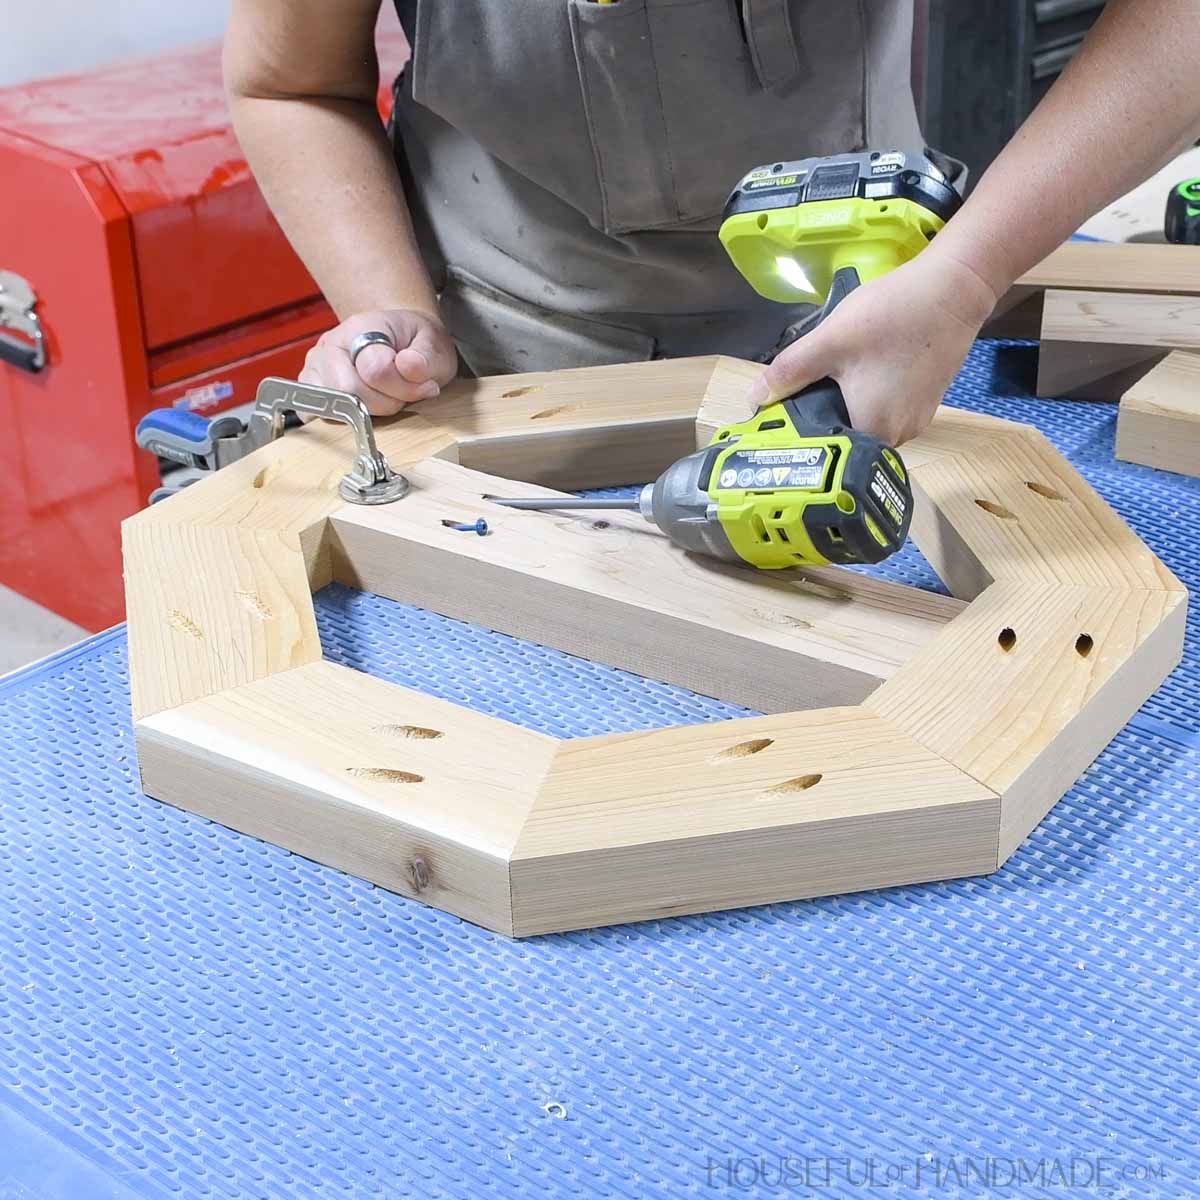
To get a perfect fit without any gaps, I recommend only cutting and attaching the first 7 octagon pieces first.
Then lay the remaining 2×4 piece under the octagon where the 8th piece will go. Trace the edges of the boards next to the opening.
Use a speed square to figure out what angle to set your miter saw to.
Now you can cut this piece.
Add pocket holes to the 8th piece and secure it to both sides for a perfect fit.
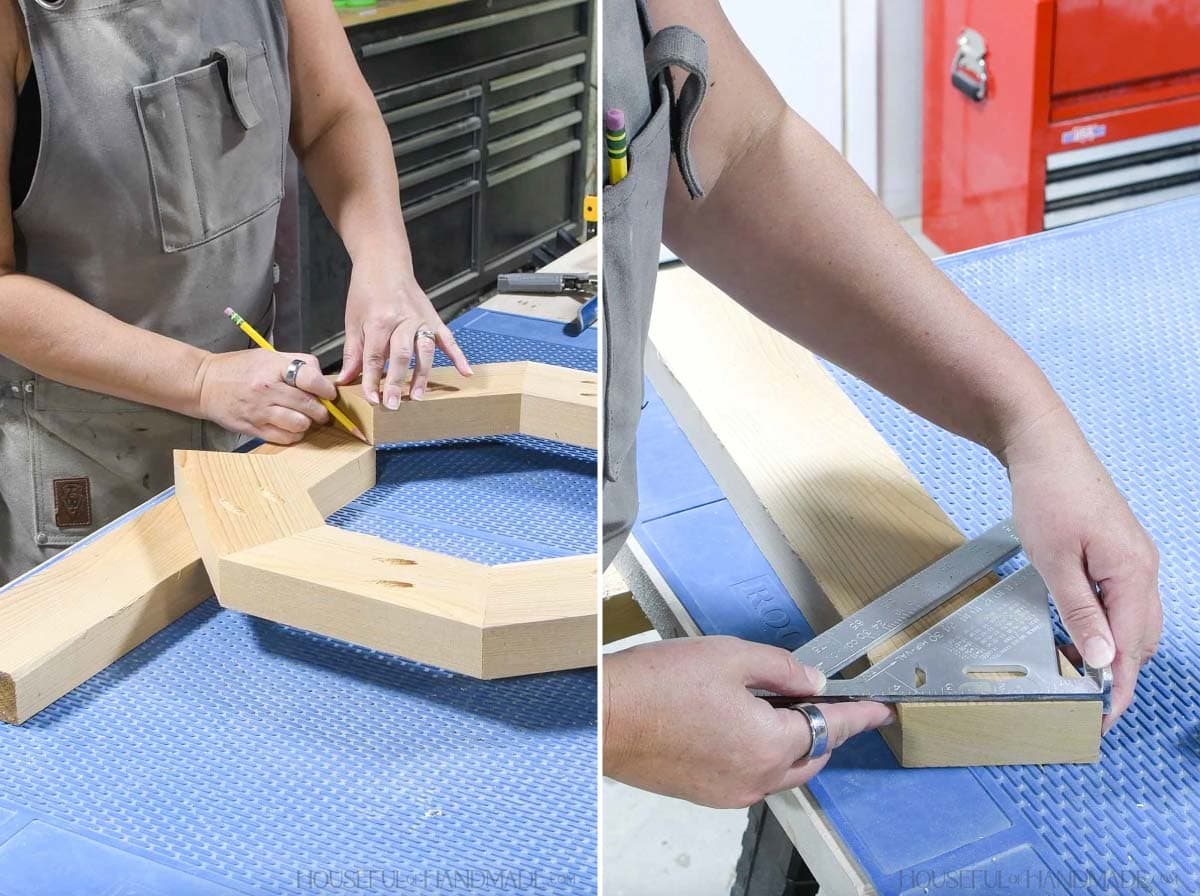
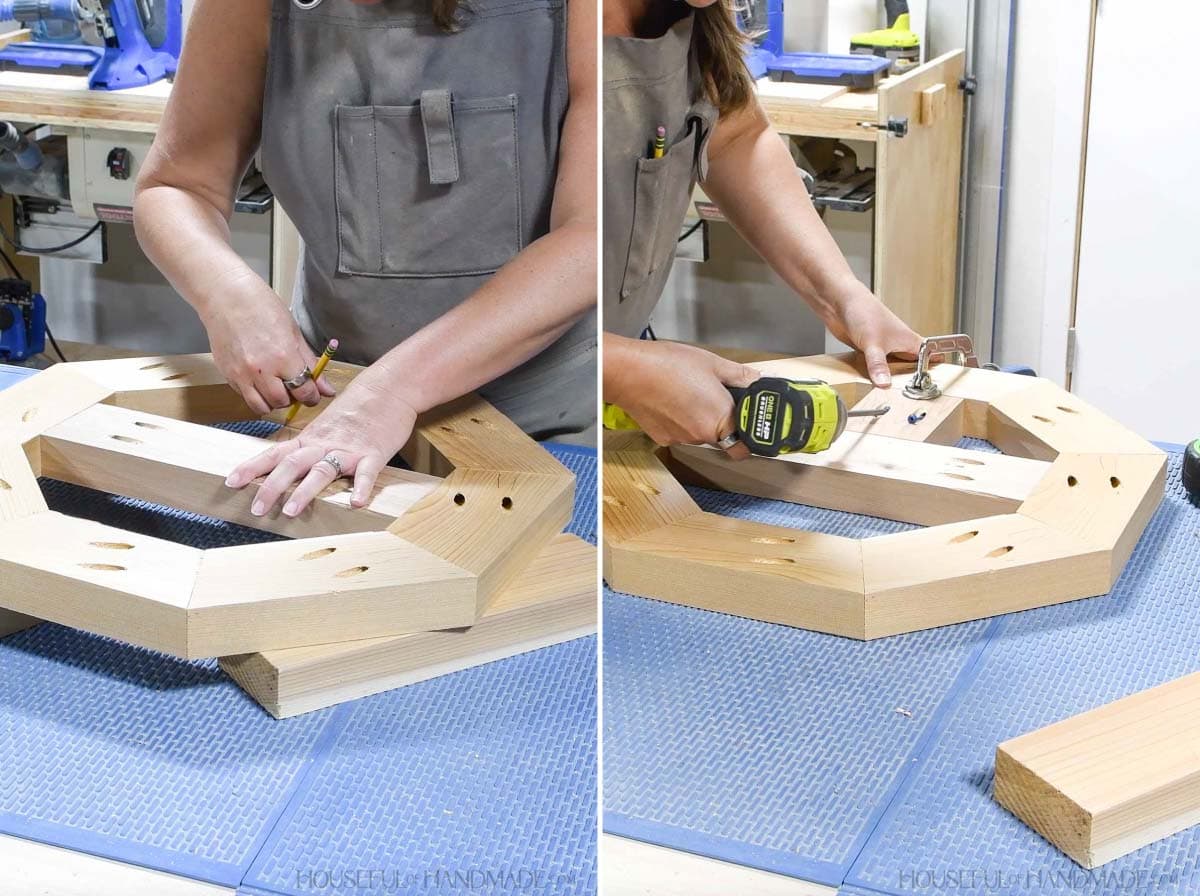
STEP 2- Add the center pieces to the top
Measure the inside of the octagon and cut the top long center piece to fit.
Drill pocket holes set for 1 1/2” thick material in both sides. Place the center piece inside the octagon so it is centered.
Attach with 2 1/2” pocket hole screws and glue.
Measure from the center piece to the edge of the octagon on each side and cut the top short center pieces to fit.
EXPERT TIP: Place scraps of 2×4 under the top to raise it up, then place a piece where you need to measure for your cut. Trace the edges of the board to get a tight fit.
Drill pocket holes in both ends of the pieces.
Attach the short center pieces so they are centered. Secure with wood glue and 2 1/2” pocket hole screws.
Place the remaining 2×4 under the corner of the cross. Center it in the opening and trace the shape onto the board.
Cut the house shape out. Start a little big and carefully cut the edge back till it fits.
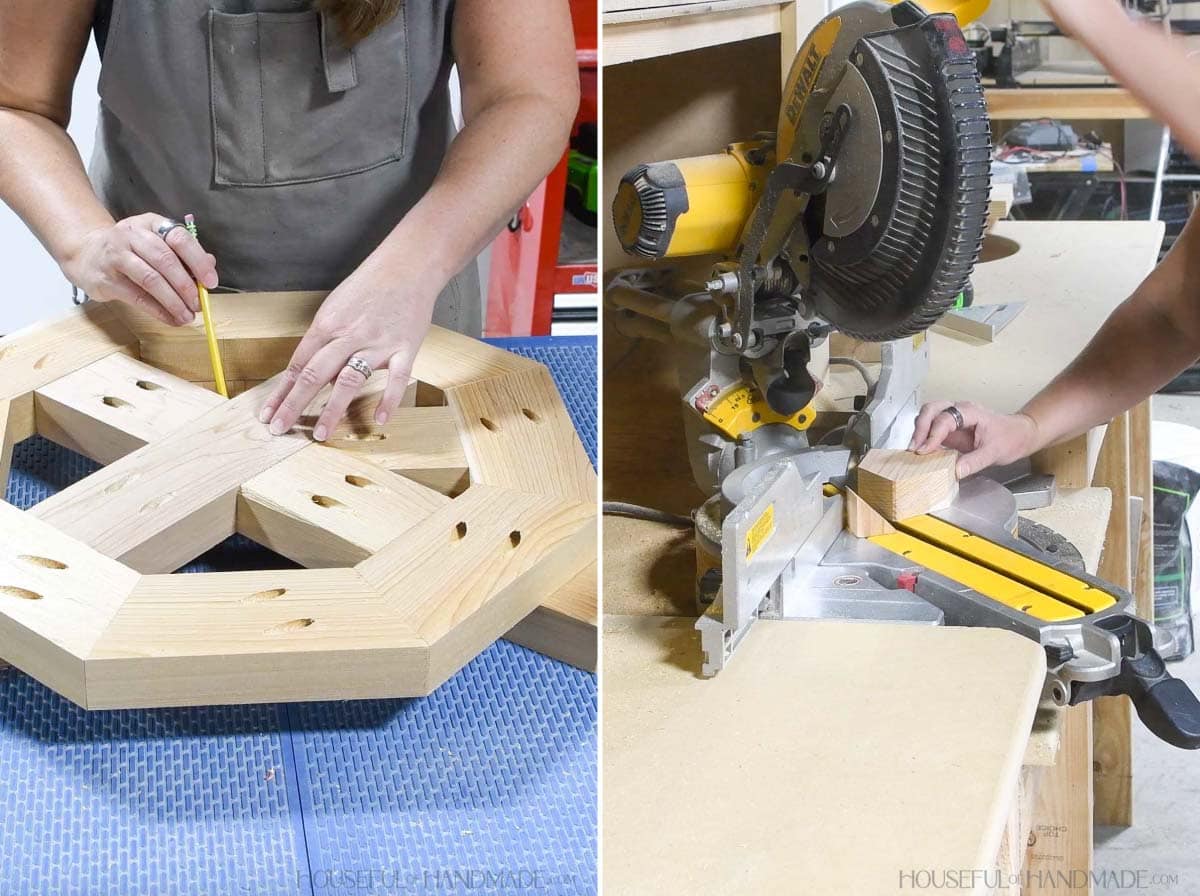
Drill a pocket hole in the center of the flat edge. Add glue to the two angles edges and tap the piece in place.
Secure the flat edge with a 2 1/2” pocket hole screw and secure the angled edges with 1 1/4” brad nails nailed in at an angle.
Repeat for all four corners of the cross.
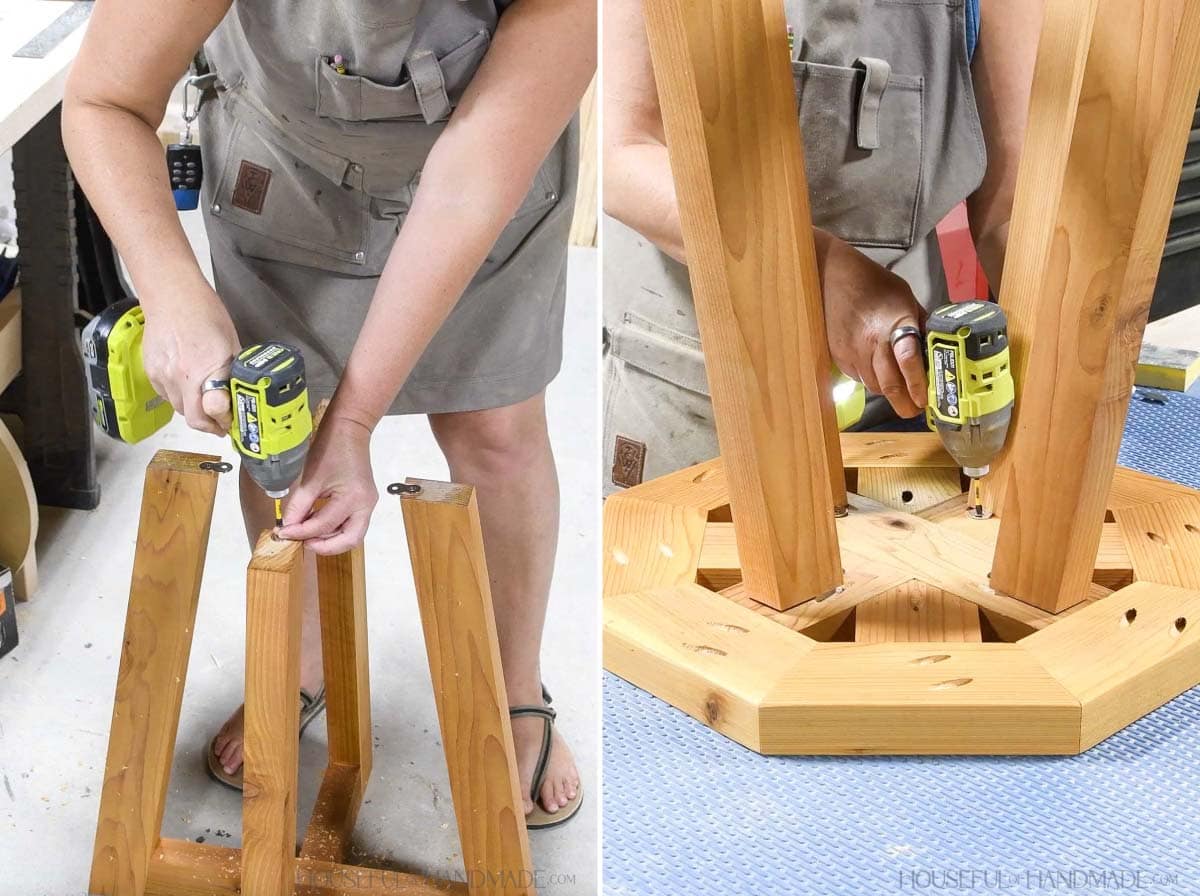
STEP 3- Build the legs
On the 1 1/2″ wide underside of the 2×3 bottom pieces, drill pocket holes set for 1 1/2″ thick material in both ends of the boards.
EXPERT TIP:
You cannot use the Kreg 720 or 520 jigs to add pocket holes to these boards because they are too thick (2 1/2″). This is where the 320 comes in so handy in my shop! It can be clamped to any size board.
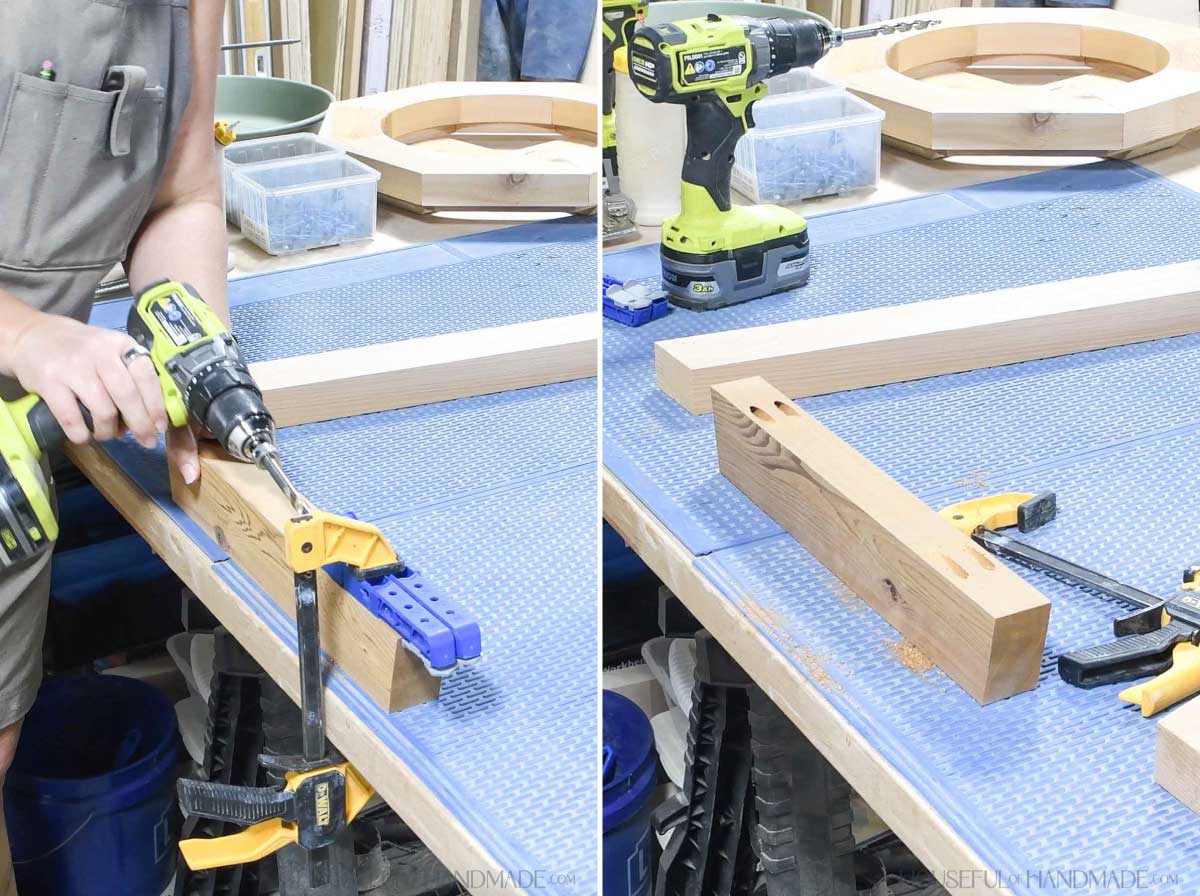
Attach the bottoms to the legs so the center is between 2 leg boards and the angled edge of the sides are attached to 1 leg board.
Secure with wood glue and 2 1/2″ pocket hole screws.
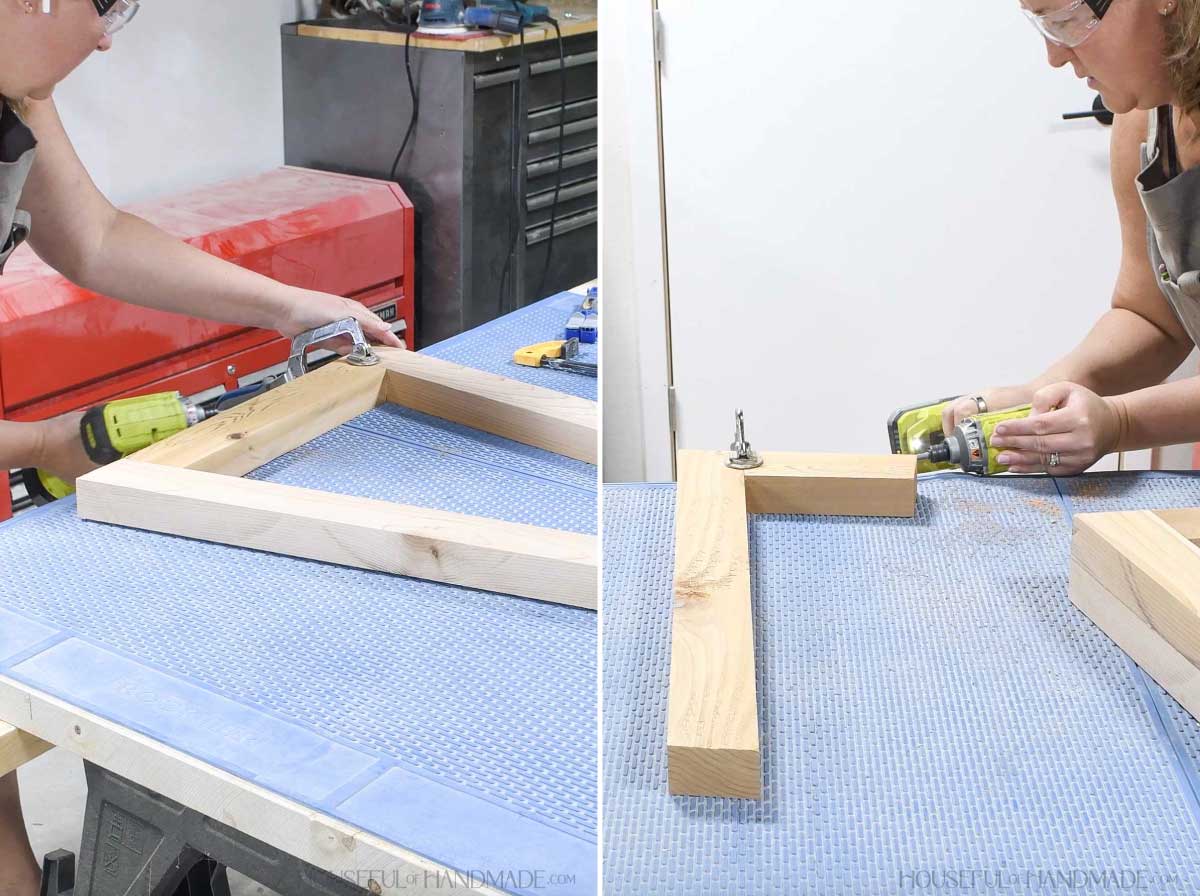
Attach the 4 legs together at the bottom boards so the two sides are centered on the bottom center board.
Secure with 2 1/2″ pocket hole screws and wood glue.

STEP 4- Attach legs to top
I chose to sand and finish the top and legs separately before attaching the legs.
Sand the table. If your table top has any gaps, fill them with wood putty.
Then finish the new side table. I liked using a cloth to apply sealer so it was easy to get into the holes in the top.

Drill holes in the top of the legs for the figure 8 fasteners to sit into.
If the holes are not flat to the edge of the leg, use a chisel to make room for the fasteners to fit.
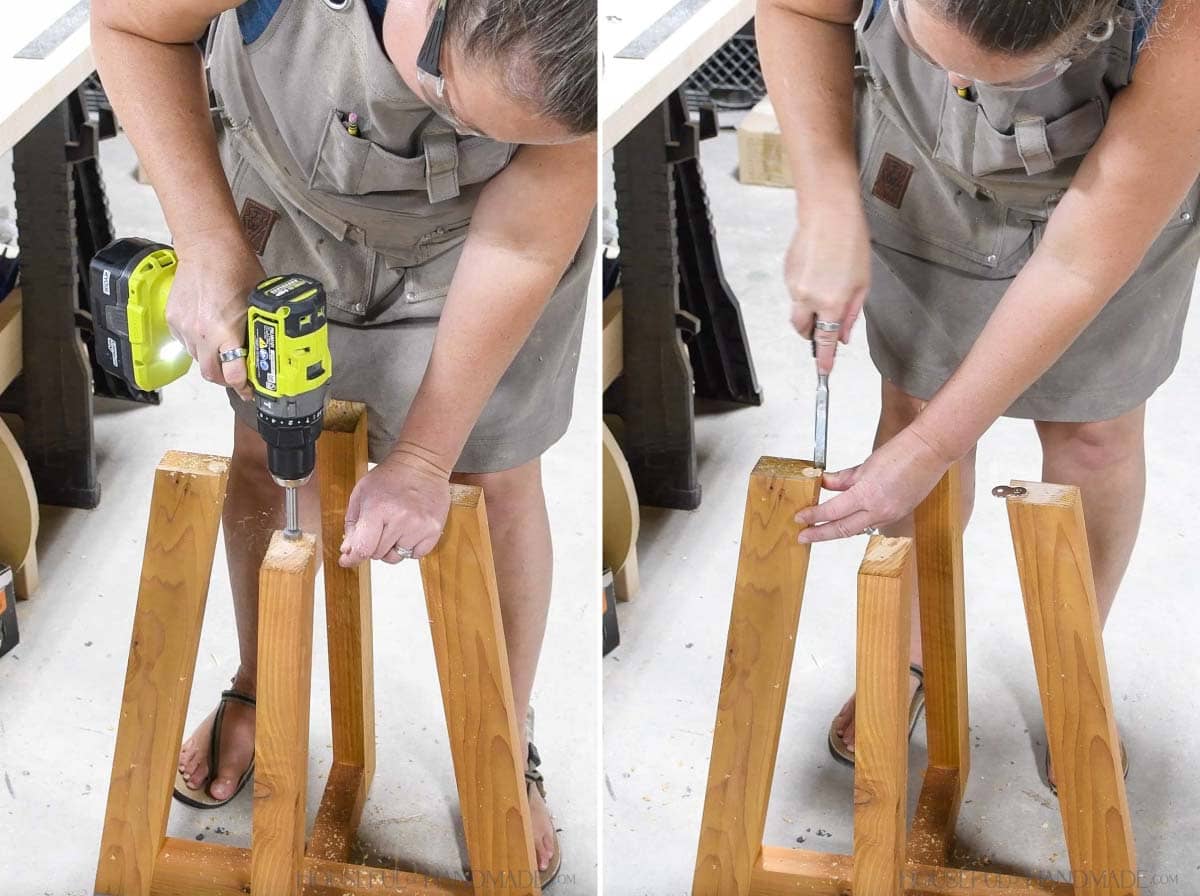
Secure the fasteners with the included screws.
Place the top face down and center the legs on the center cross pieces. Secure the top by adding a screw into the exposed side of each fastener.
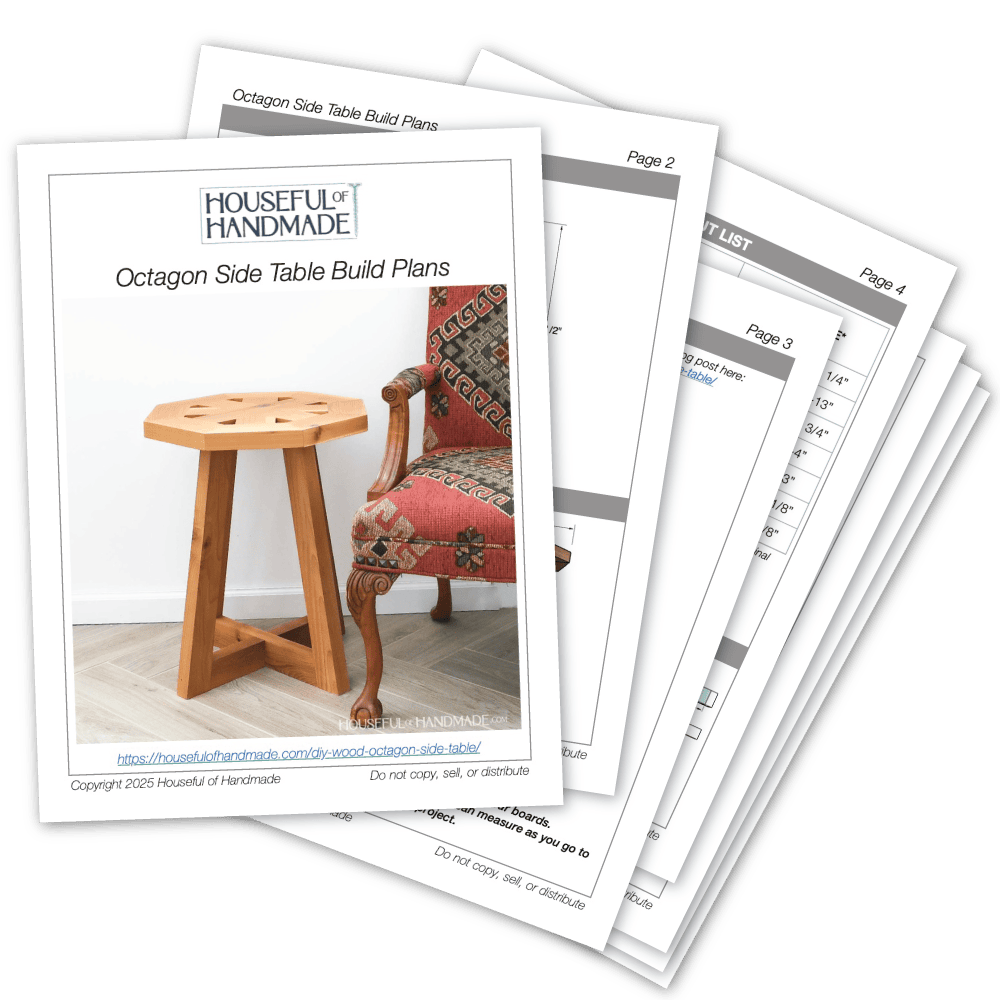
Premium plans include:
- Recommended Tools
- Shopping list
- Easy to read cut list table
- Cut diagrams
- Step-by-step instructions with 3D renderings
- Helpful resources
- BONUS: 3D SketchUp file
You did it!
Now you can sit back and relax with the perfect new table to set down your drink and book.
Happy building!
