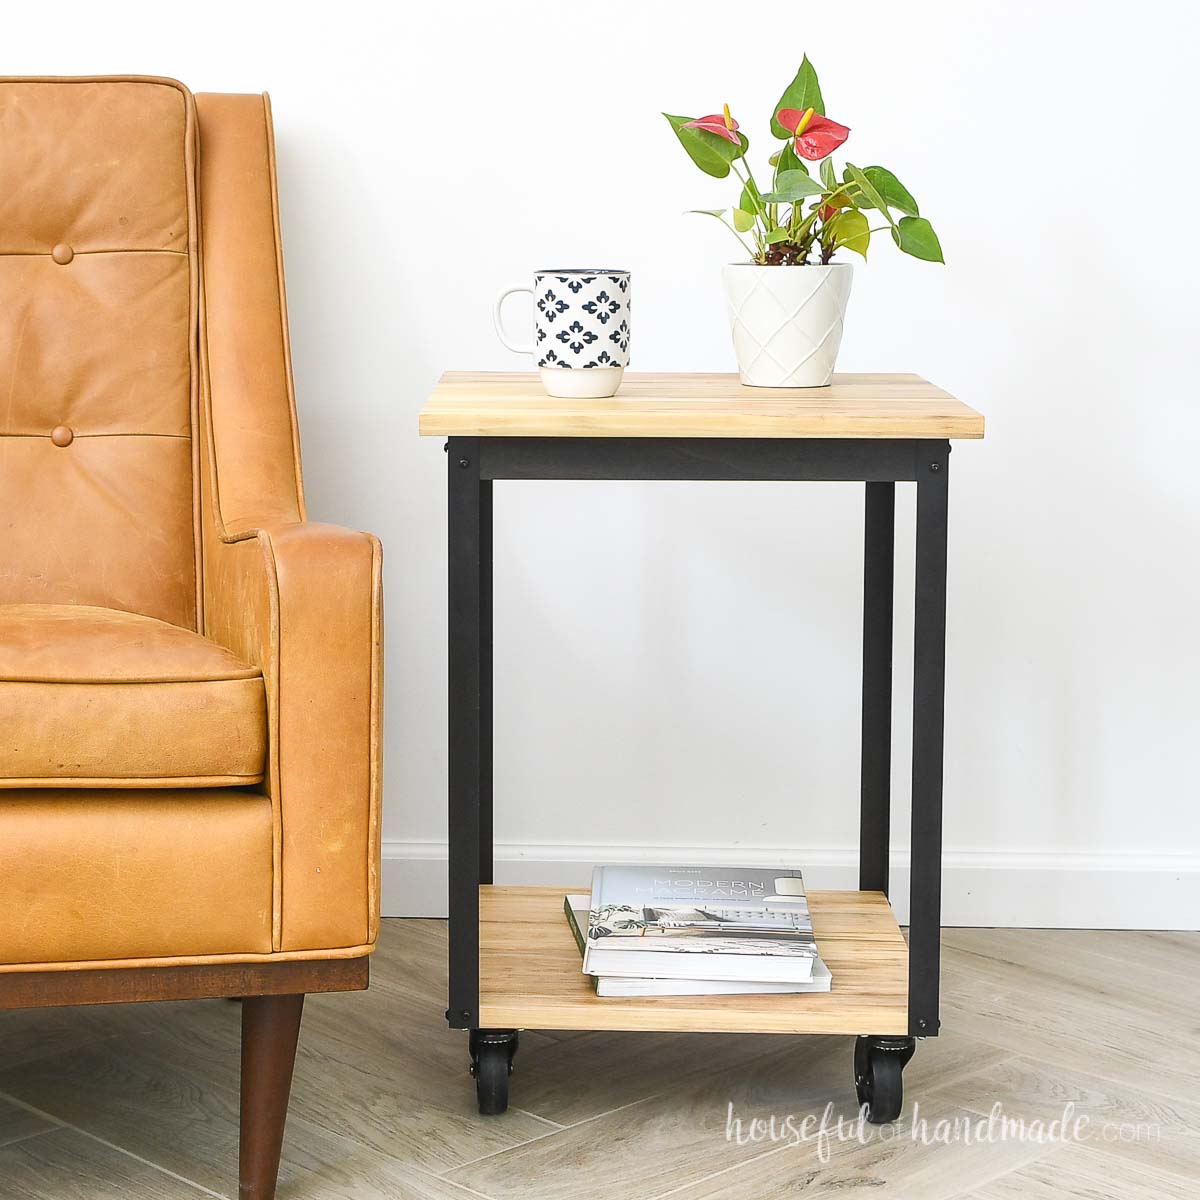
Side tables are super useful and really bring a room together. But more importantly, they are fun to make!
Since end tables are small, they do not require a lot of lumber to build. You might even have everything you need to build this one in your scrap pile.
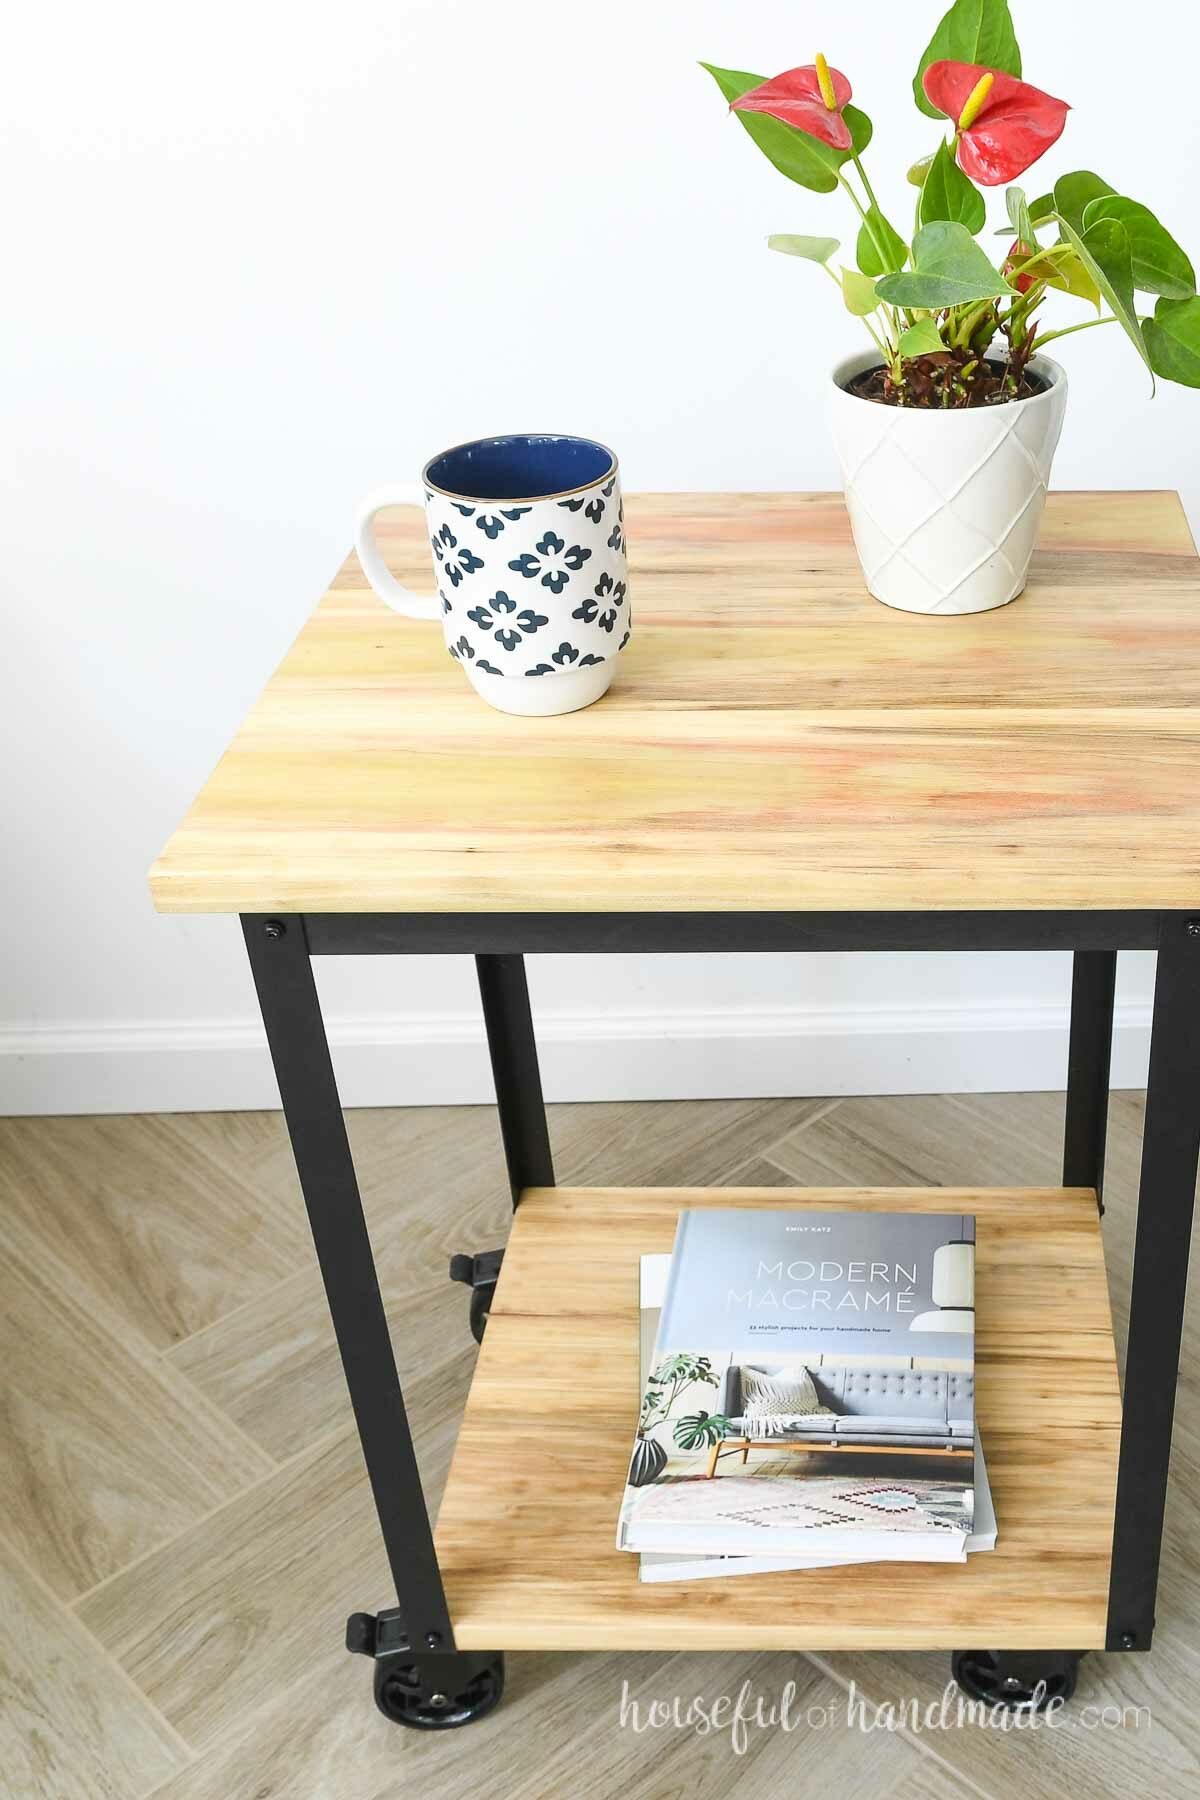
I had a left over 1×8 poplar board. It was not used for the last project because it had some vibrant colors in the grain.
This post may contain affiliate links. As an Amazon Associate I earn from qualifying purchases. Click here to read my full disclosure policy.
Those colors did not work for the last project, but this simple side table with wheels was the perfect place to let the unique grain pattern shine.
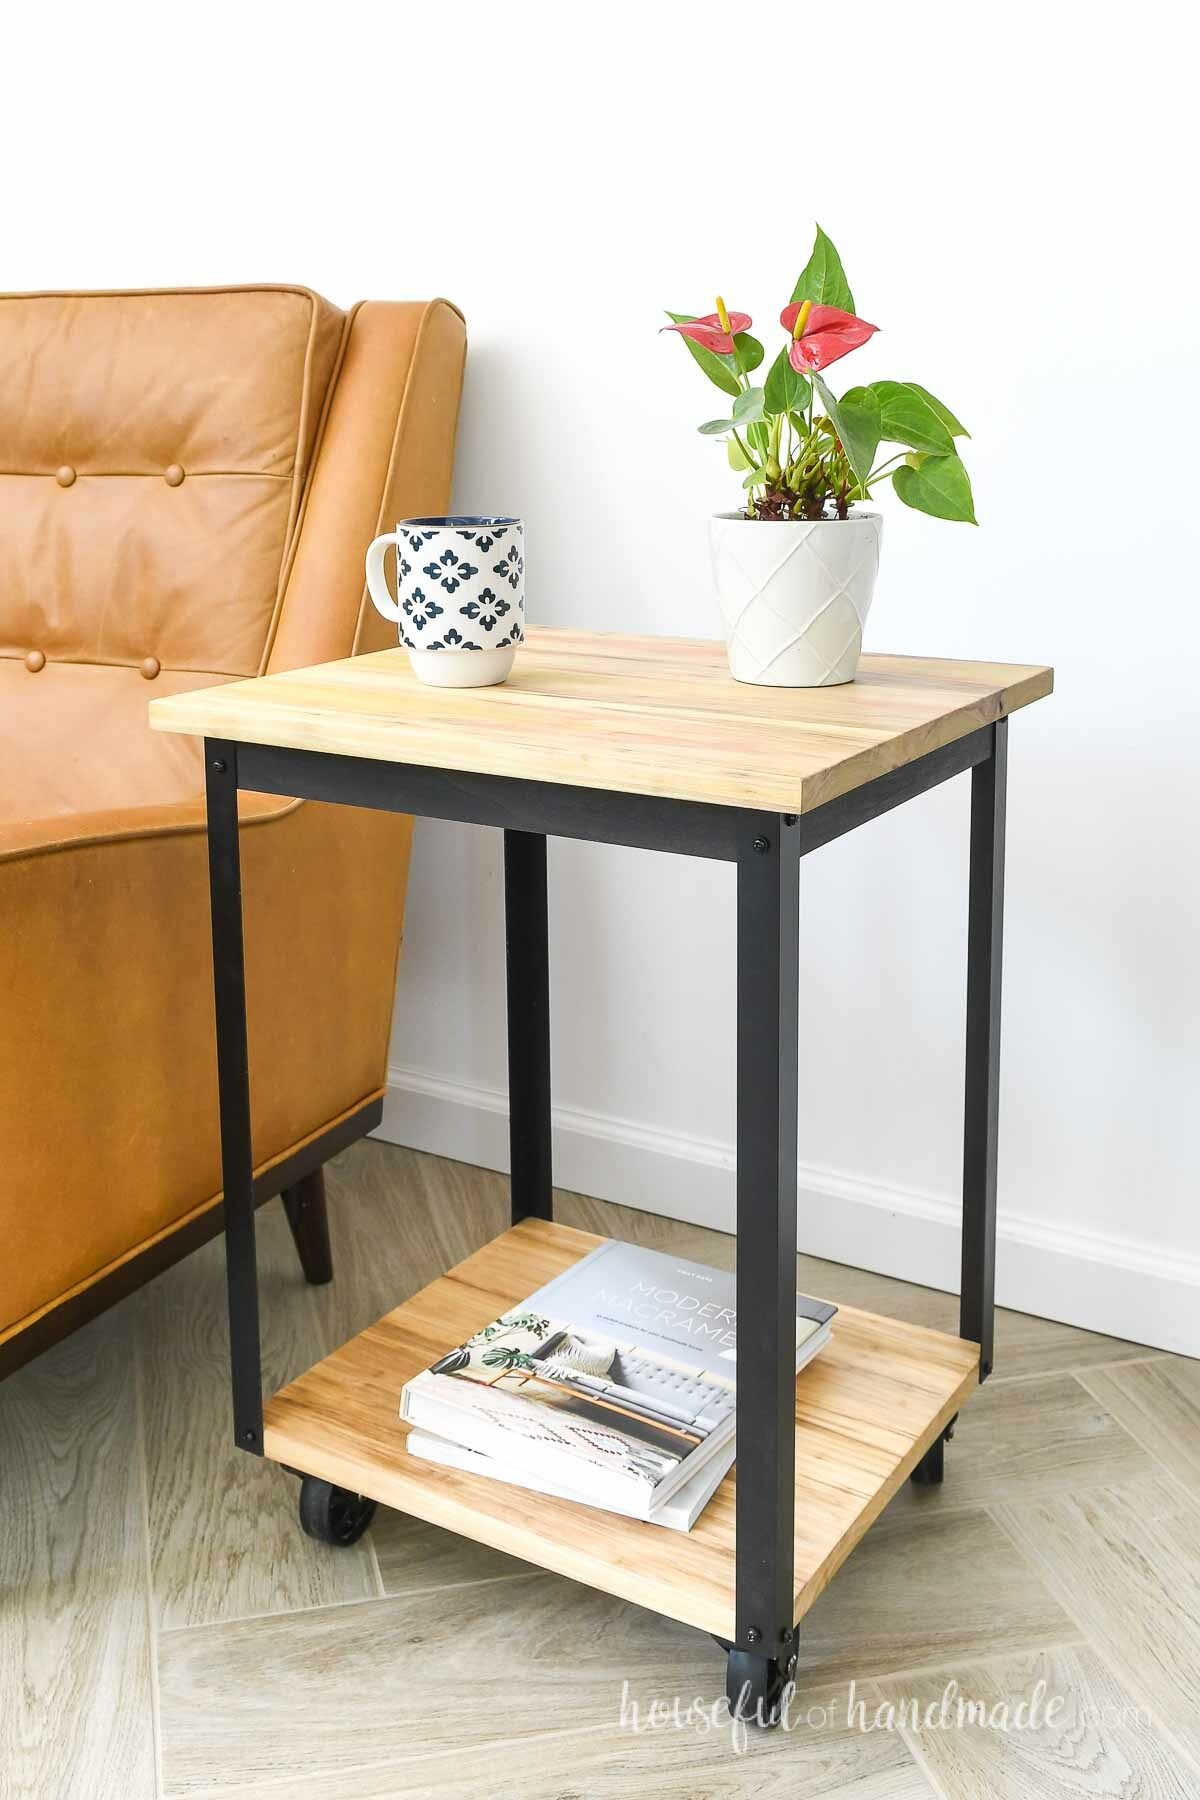
The style of this side table was inspired by another project I made (and love), an amazing kitchen cart.
Since I had a couple pieces of aluminum angle iron left over, it was the perfect reason to create a coordinating table.
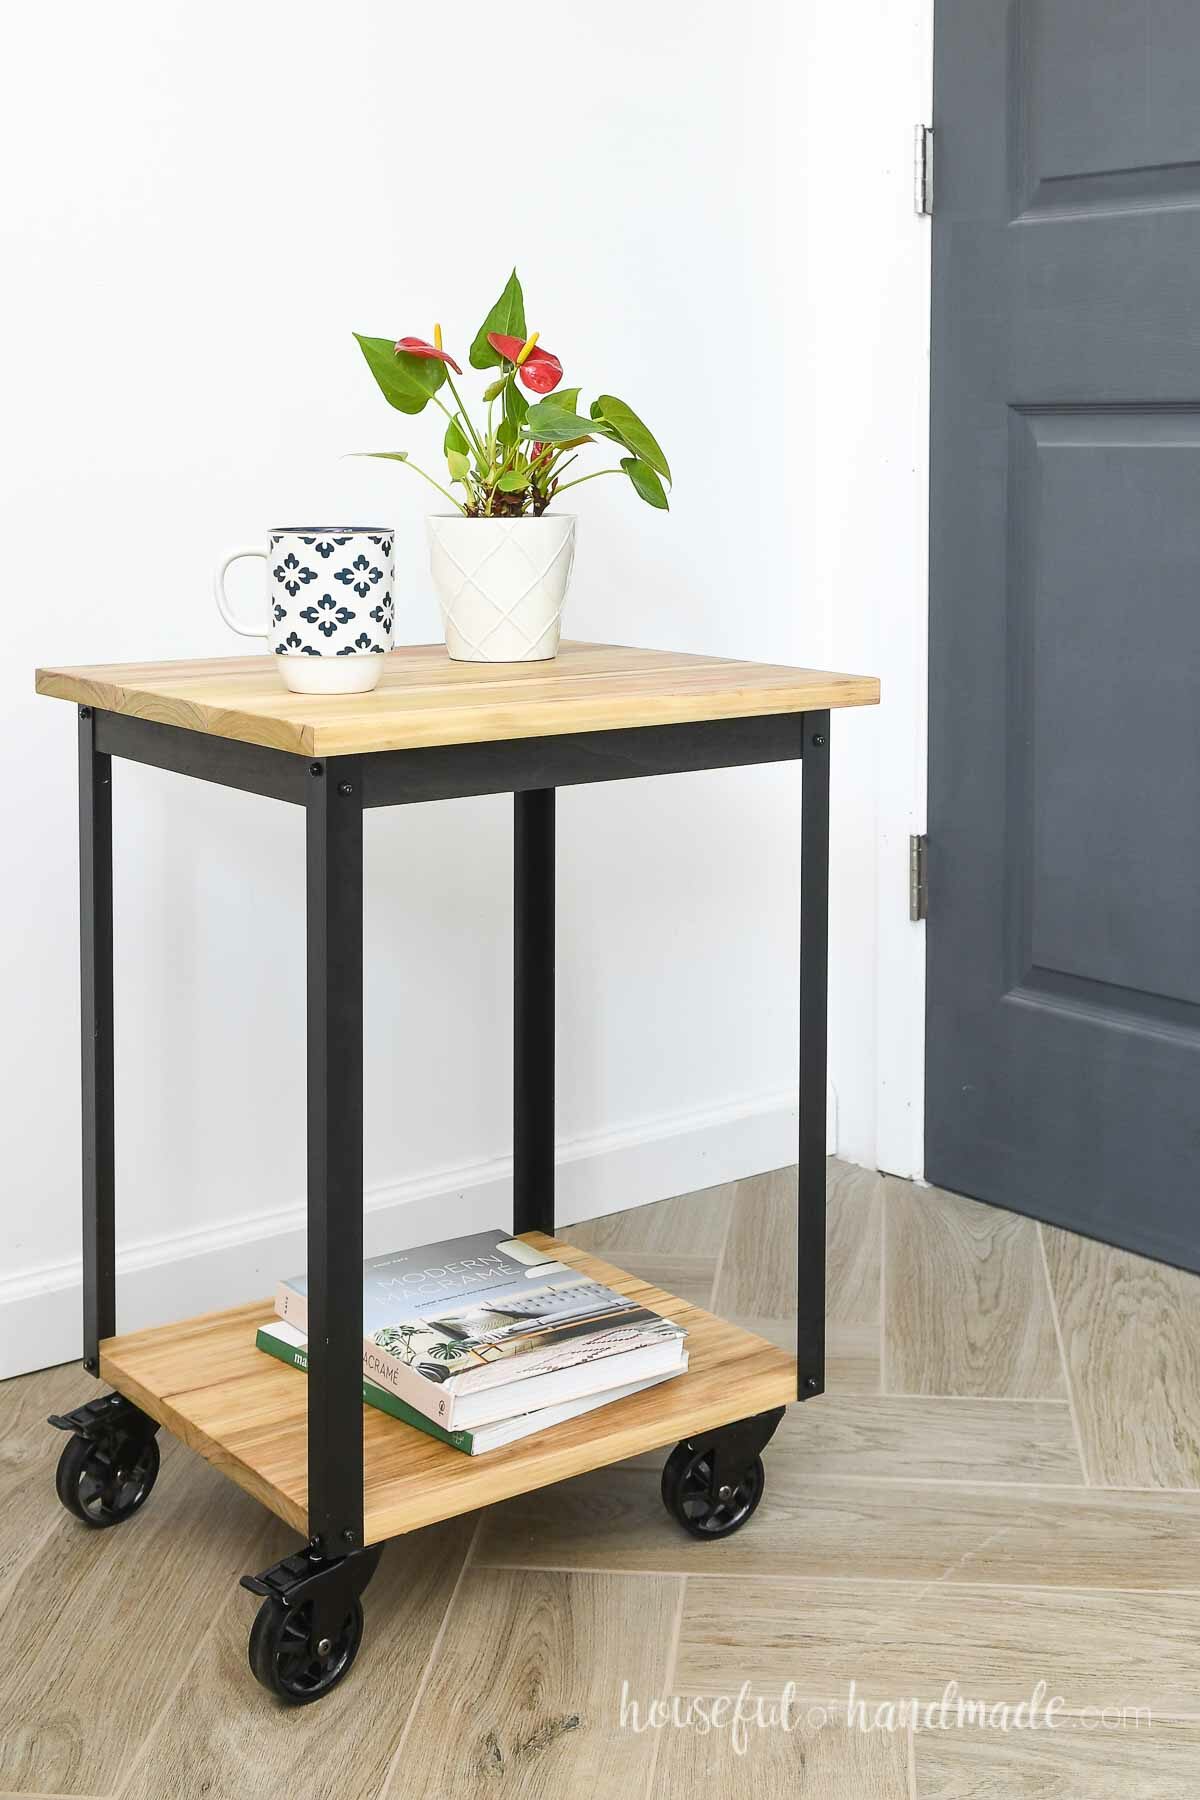
This simple rolling side table is great DIY project for beginners. With just a few basic tools you will love what you can create!
One Board Project
This side table was built from one 1×8 board left over from building our DIY built-in desk! There is nothing better than creating something amazing from scrap wood.
To get all the pieces from 1 board, first you cut the 1×8 pieces needed. Then the remaining piece is ripped into a 1×2 (1 1/2″ wide) and 1×6 (5 1/2″ wide) board.
If you do not have a way to rip down the board, you can still make this fun side table from scraps of 1×8, 1×6 and 1×2. You only need a few small pieces of each.
Or feel free to buy the boards you need. This beautiful end table is worth it!
How to Build a Side Table
Tools & Materials
Recommended Tools:
- Miter saw
- I recently upgraded to this larger sliding miter saw (watch for it to go on sale), but all my projects before were built with this inexpensive miter saw that I loved.
- Pocket hole jig
- Drill
- Impact driver (optional, but I love not having to switch bits with the drill)
- Right angle clamp
- Face clamps
- Sander
- Chisel or utility knife
Supplies:
- Wood products
- (1) 1×8 board, 8′ long or scraps of 1×8, 1×6 and 1×2 boards
- 1″ aluminum angle iron, 8′ long
- 1 1/4″ pocket hole screws
- (4) figure 8 fasteners
- Self etching primer & spray paint
- (4) castor wheels
- 3/4″ wood screws
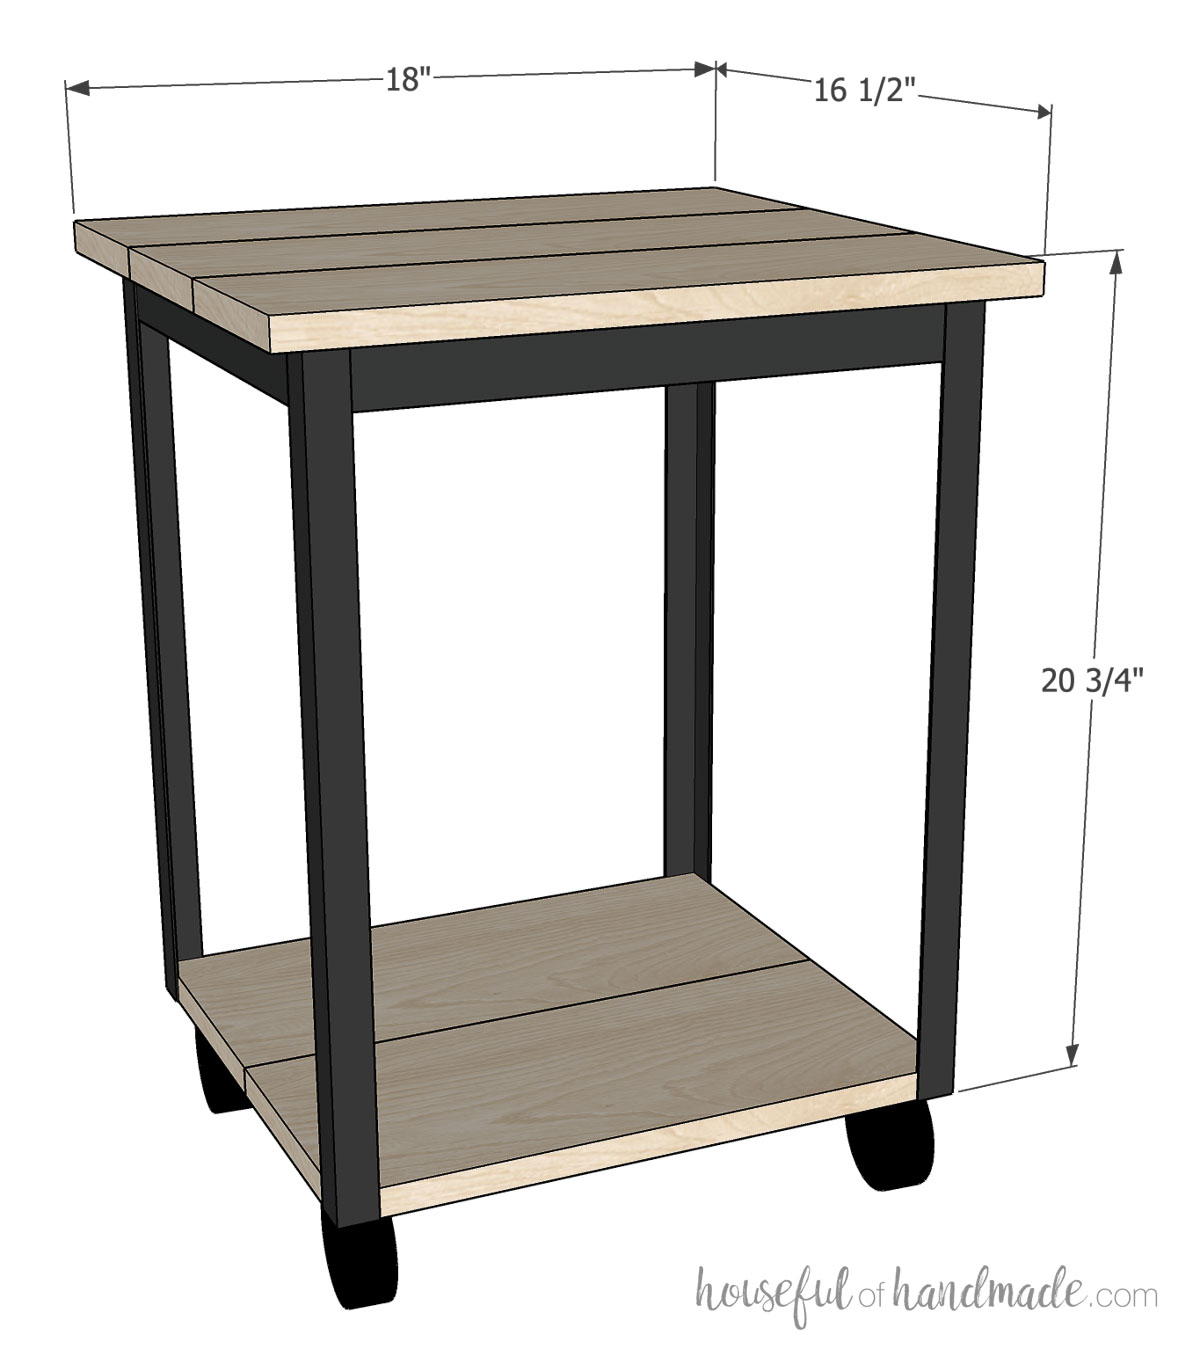
Overall Dimensions
The finished side table is 18″ x 16 1/2″ and 20 3/4″ tall without the wheels. With 3″ castor wheels, it makes the side table just under 24″ tall.
You can easily adjust the height of your own DIY side table by cutting the leg pieces longer or shorter as desired.
Cut List
Cut out the pieces according to the diagram in the PDF plans.

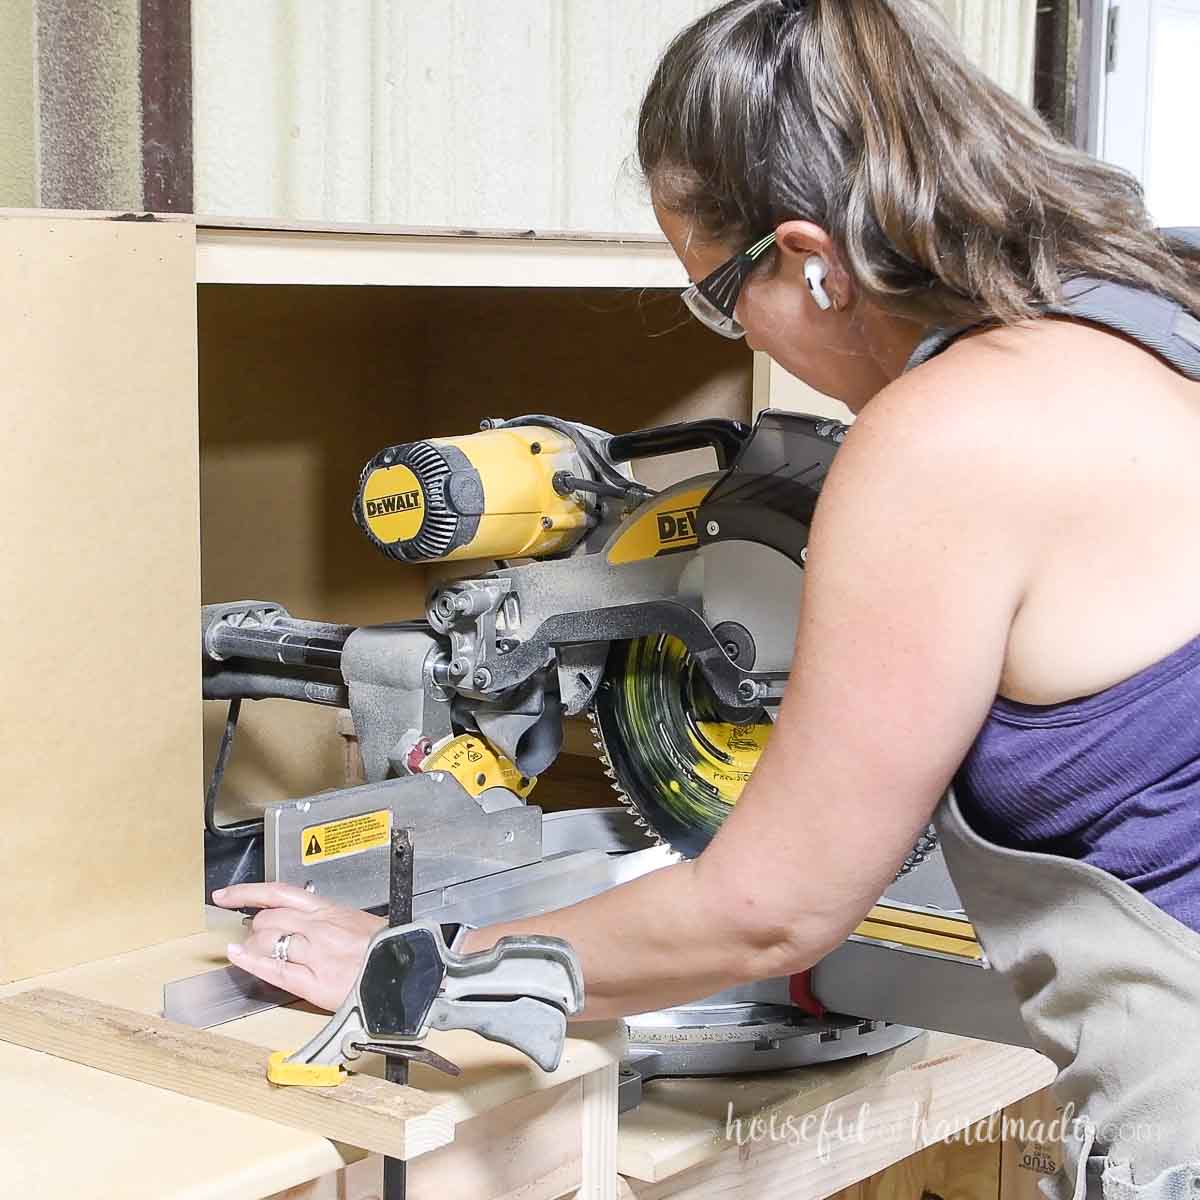
To make sure all the pieces are cut the same length. I like to clamp a scrap piece of wood to my miter saw table as a stop.
This is a simple way to ensure accuracy in all your cuts which means a more square and professional looking finished piece.
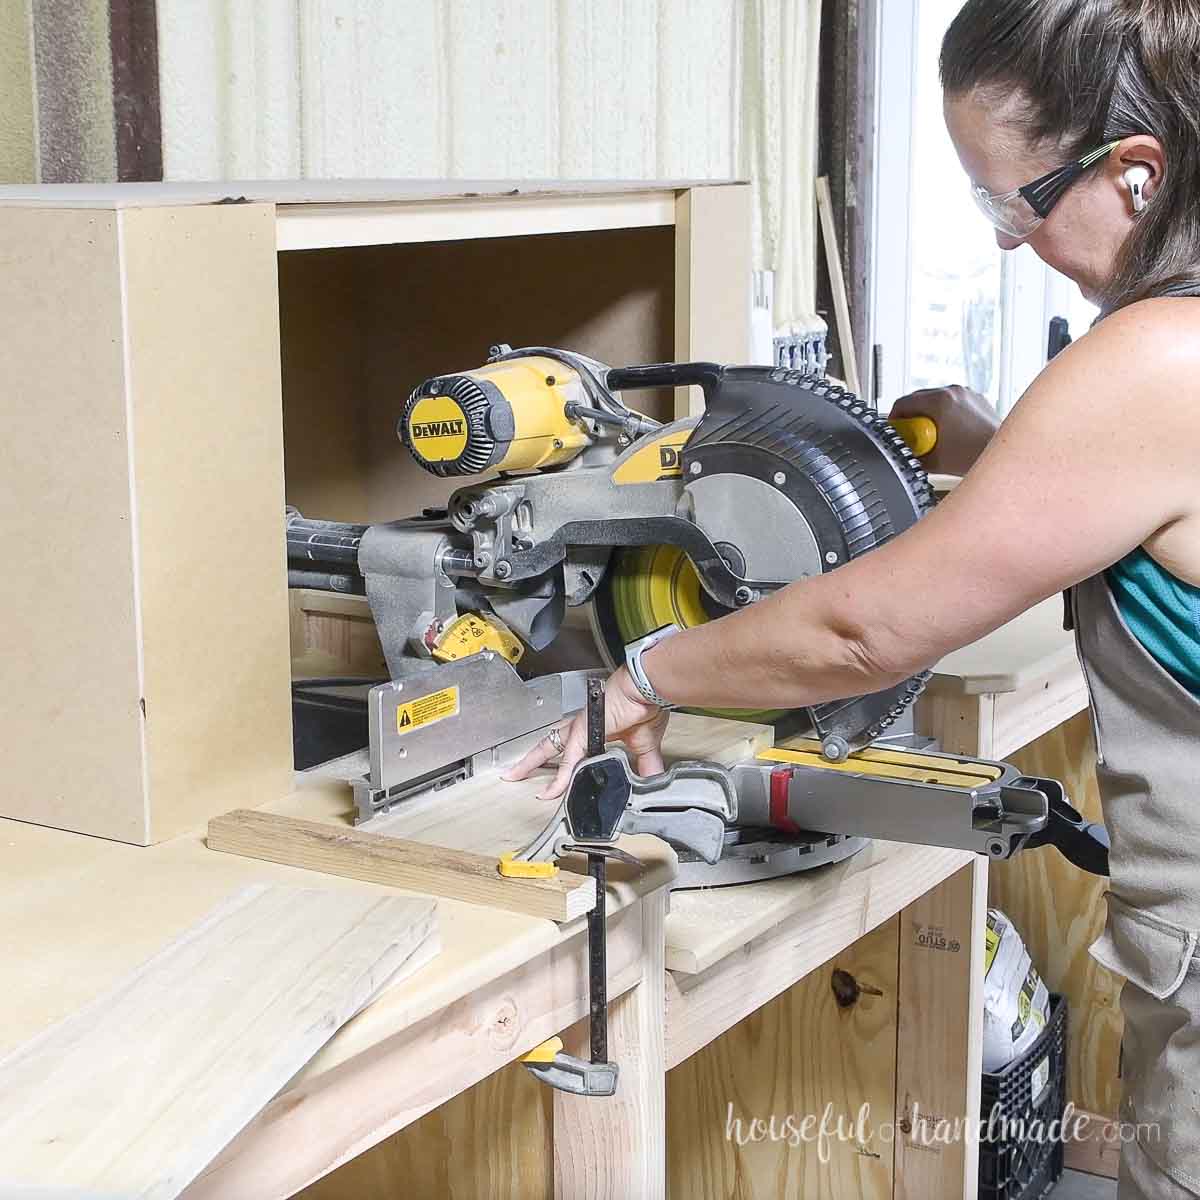
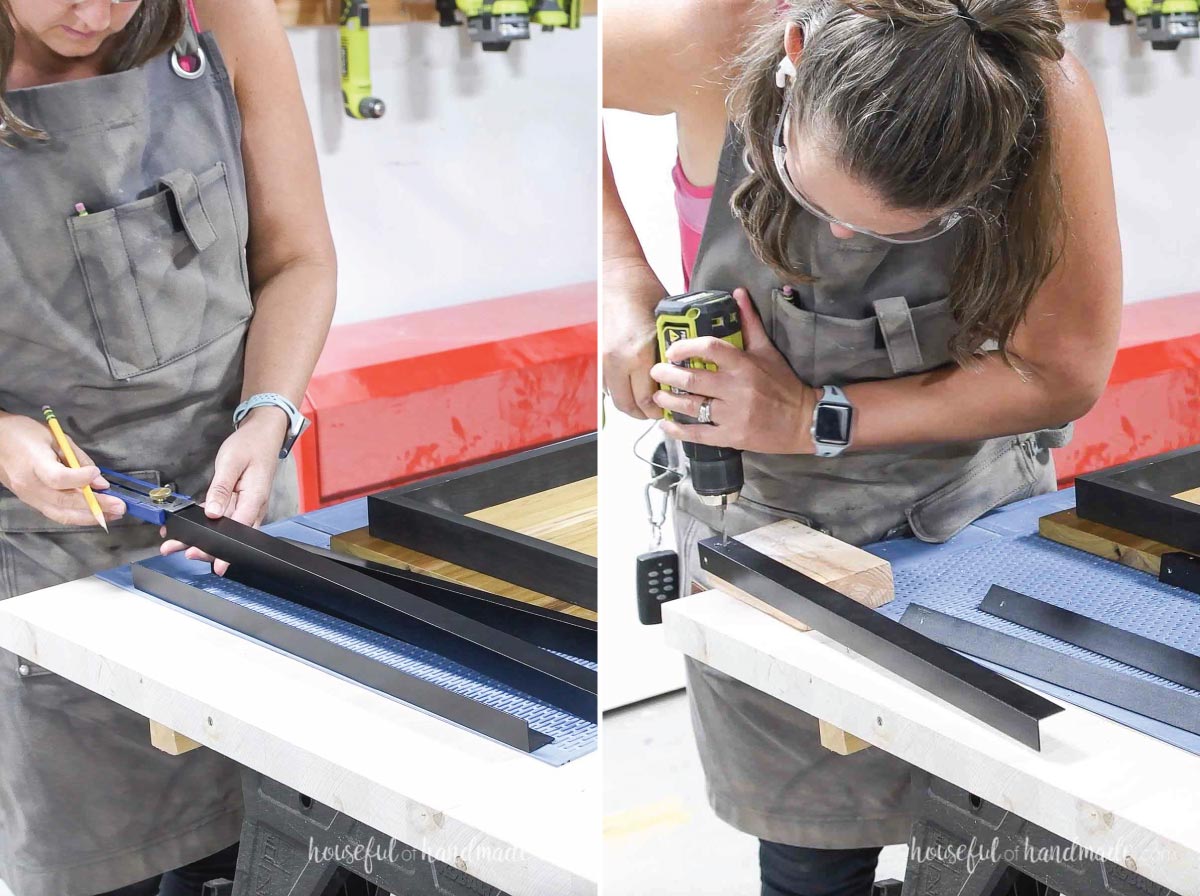
Also, cut the aluminum angle iron pieces for the legs. This can easily be cut with regular wood working tools because it is aluminum.
I used a scrap wood stop again to ensure all 4 legs were the exact same length.
STEP 1- Assemble the table top
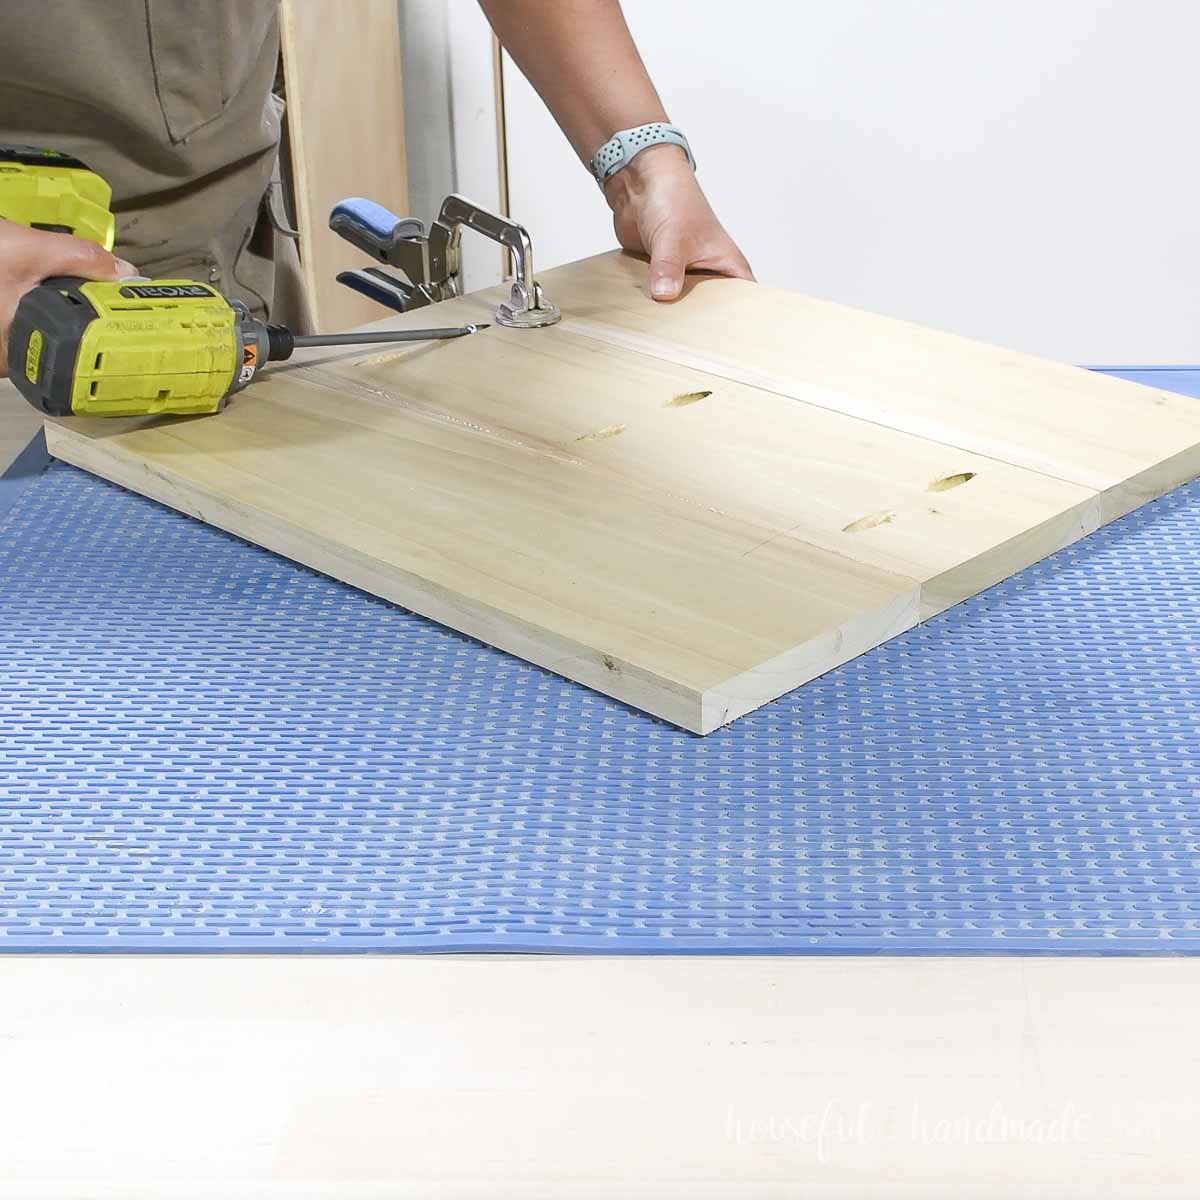
Line up all 3 of the table top pieces. Look at the grain and coloring and decide how you want them lined up to make the table top.
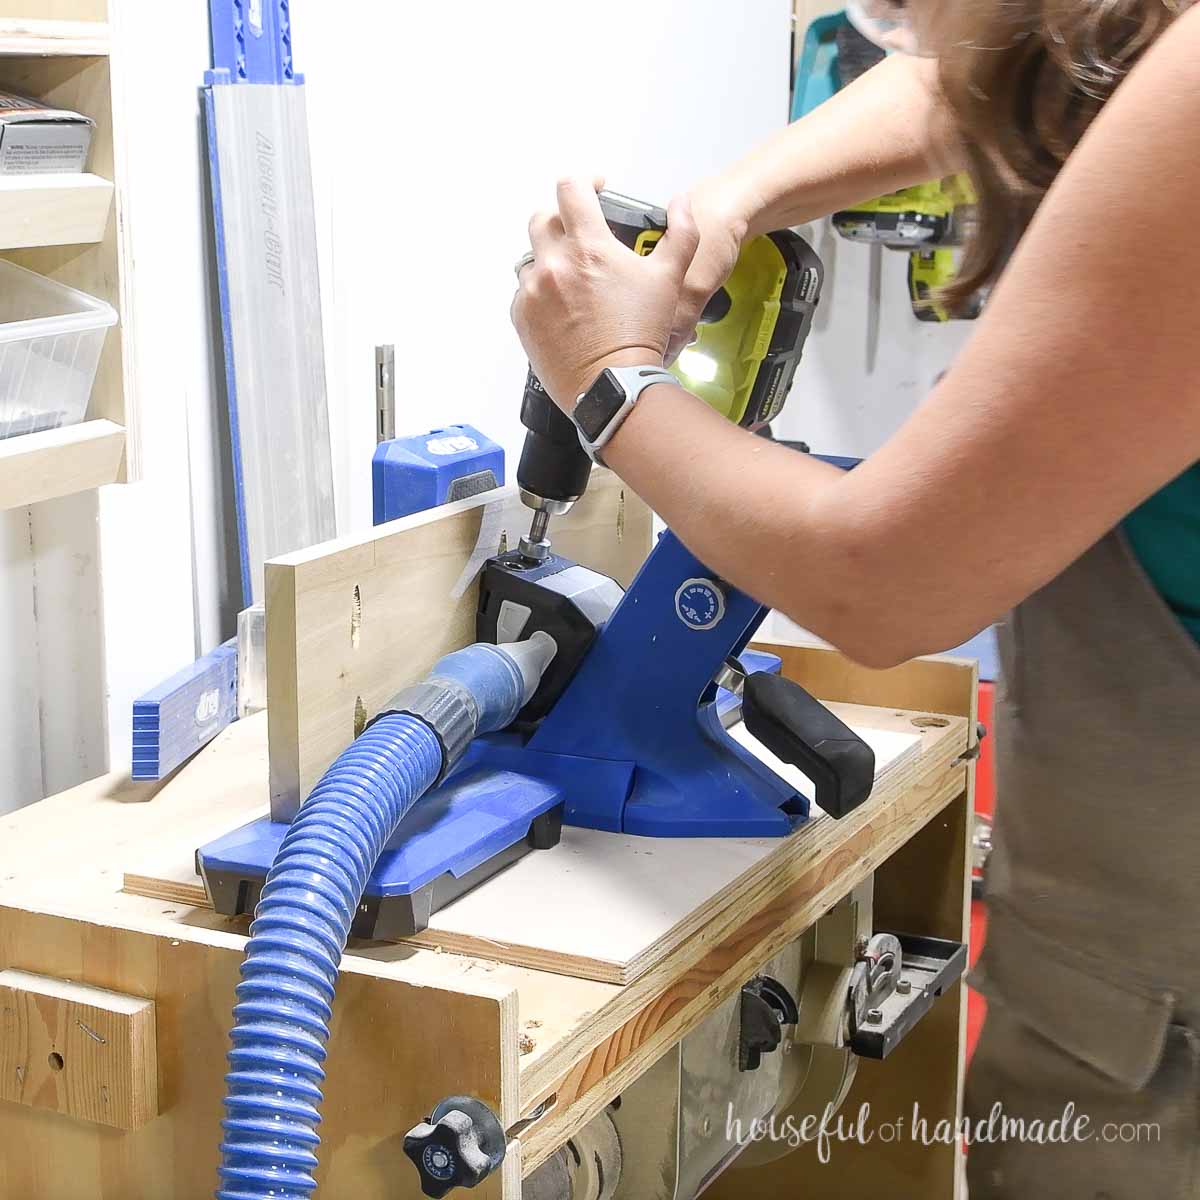
Set your pocket hole jig to drill holes in 3/4″ thick material. Drill pocket holes in the back on both sides of the center board.
Add wood glue to the edges of the board. Attach the outer boards to it with 1 1/4″ pocket hole screws.
Use face clamps to keep the pieces aligned as you secure them.
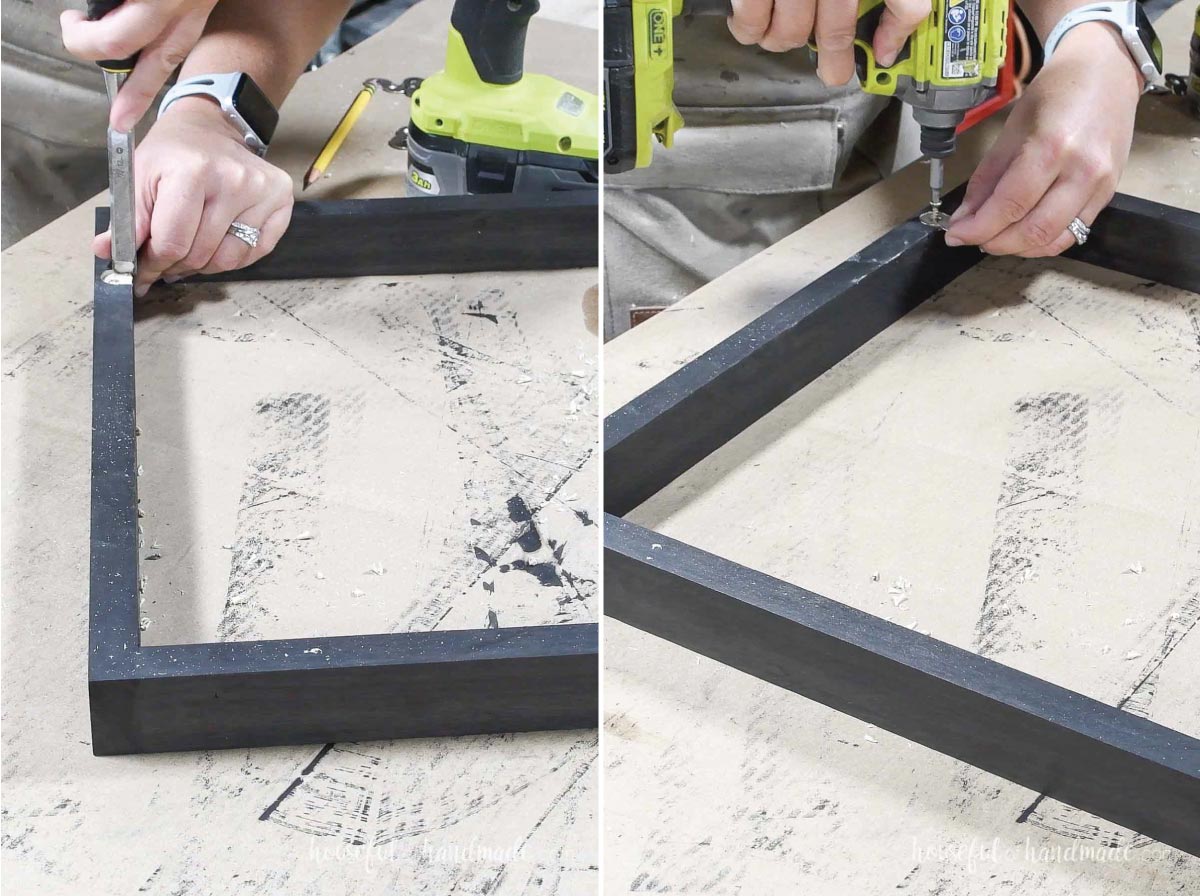
STEP 2- Build the apron
Add pocket holes (still set for 3/4″ material) to both ends of the smaller apron boards.
Attach them between the longer boards to create a box. Use a corner clamp to hold the boards as you secure them.
Secure with wood glue and 1 1/4″ pocket hole screws.

STEP 3- Assemble the lower shelf
Lay out the lower shelf boards and decide which direction they will go.
Drill pocket holes set for 3/4″ material in the center edge of one of the boards.
Attach the two boards together with wood glue and 1 1/4″ pocket hole screws.
STEP 4- Finish the pieces
Now that all the pieces are cut and assembled, it is time to finish them.
For my table top and shelf, I just sealed the wood to let the unique grain and colors shine.
I stained the table apron black to match the legs.
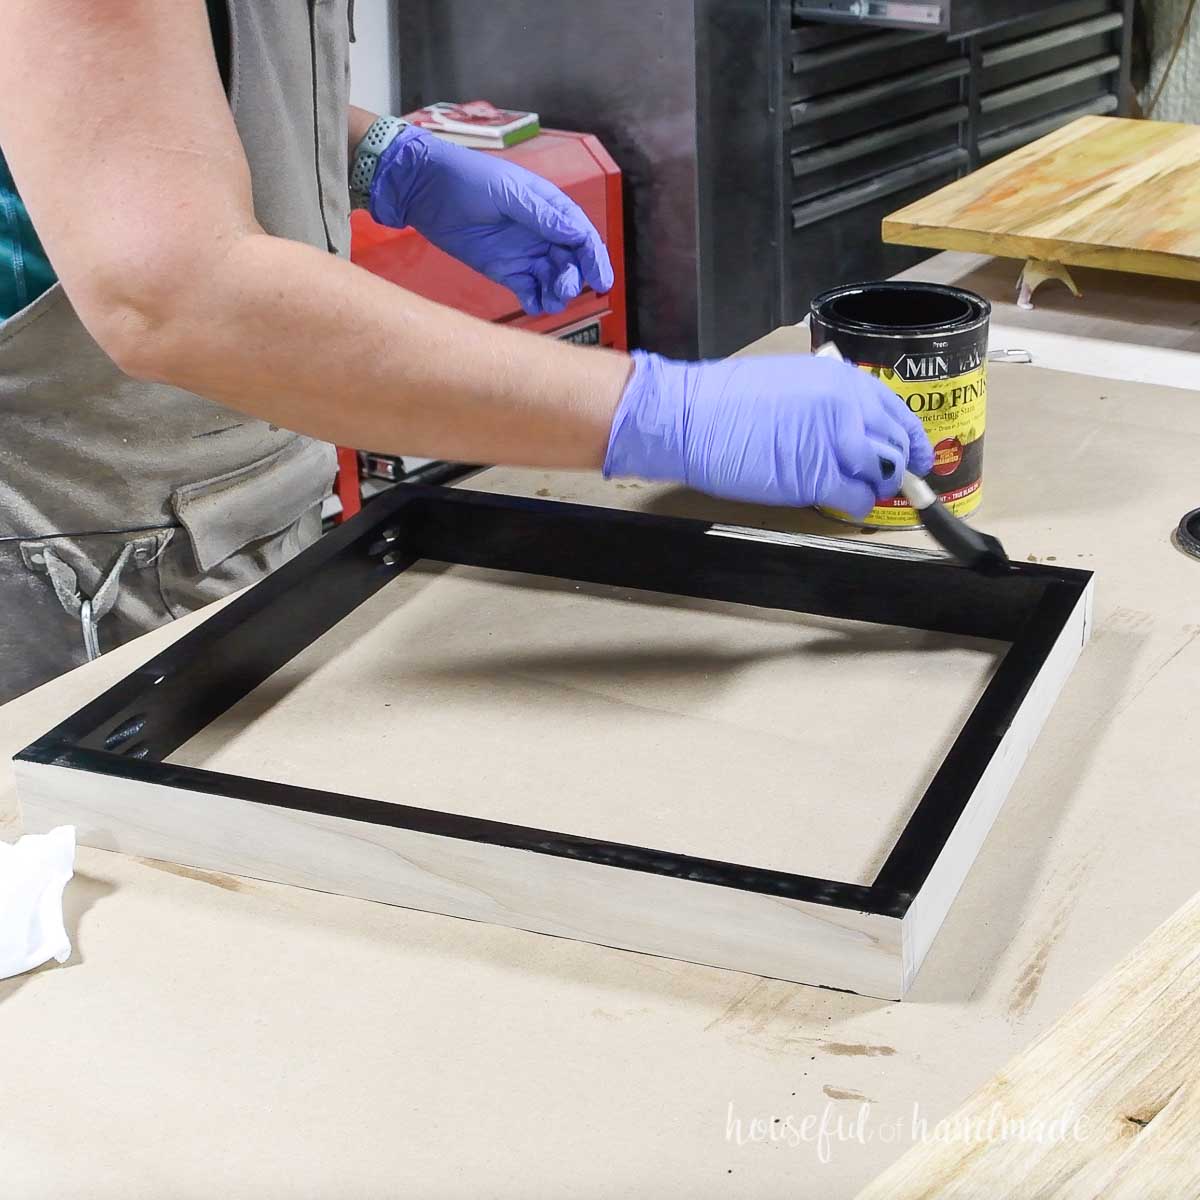
To paint the aluminum legs, you first need to prime them with an etching primer.
Then paint them (I used a satin black) with 3 light coats of spray paint.
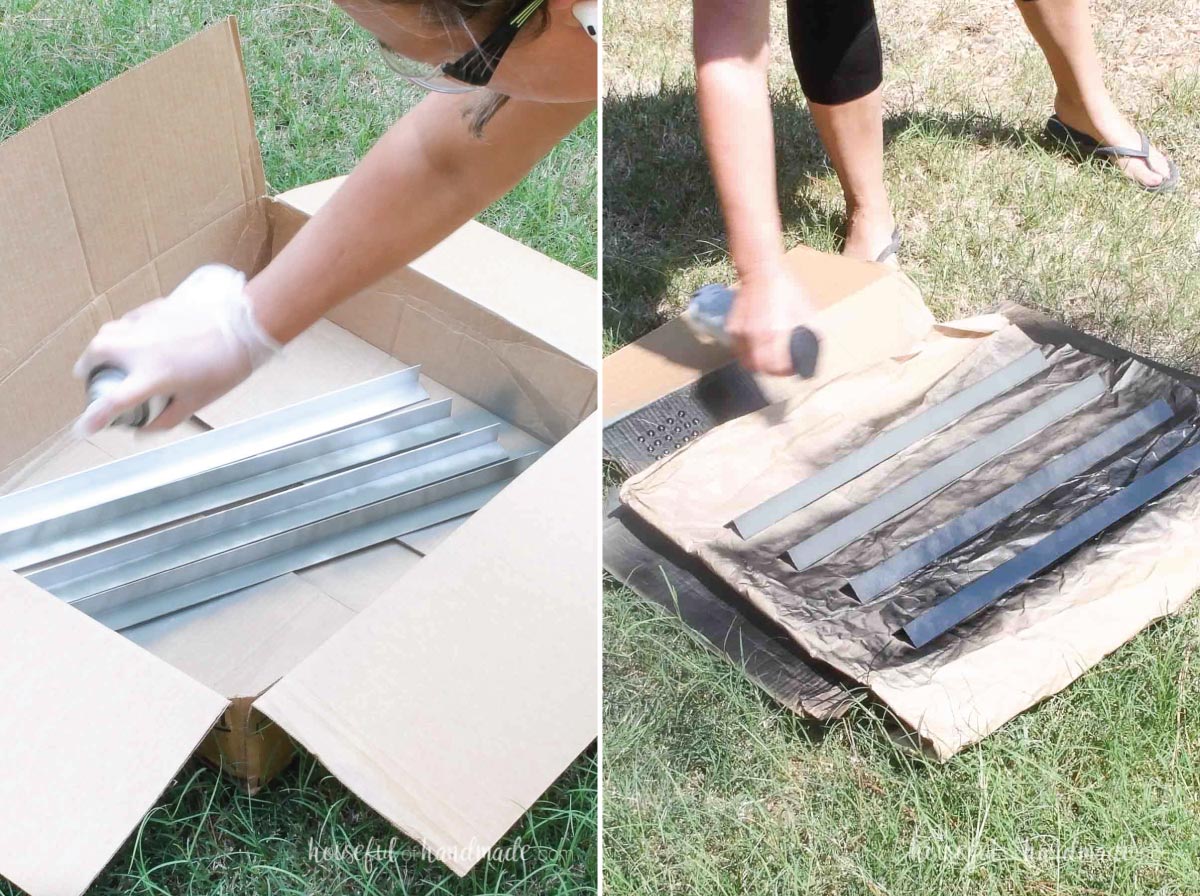
I also spray painted the heads of 16 pocket hole screws to use to attach the legs later on.
You need a pan head screw to attach the aluminum angle so the pocket hole screws work great!
STEP 5- Assemble the side table
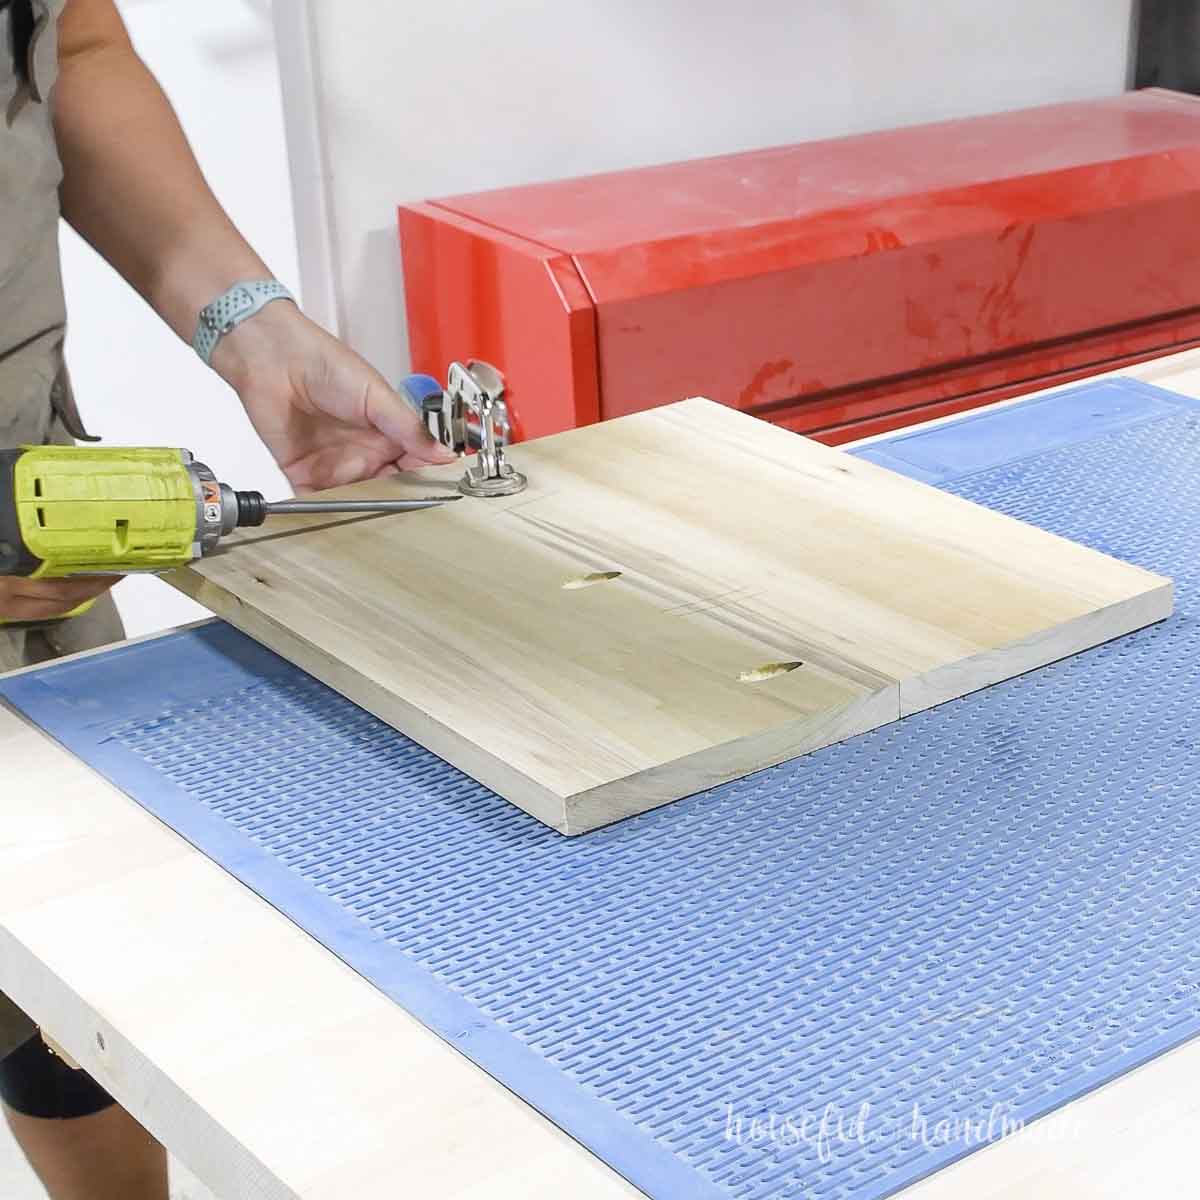
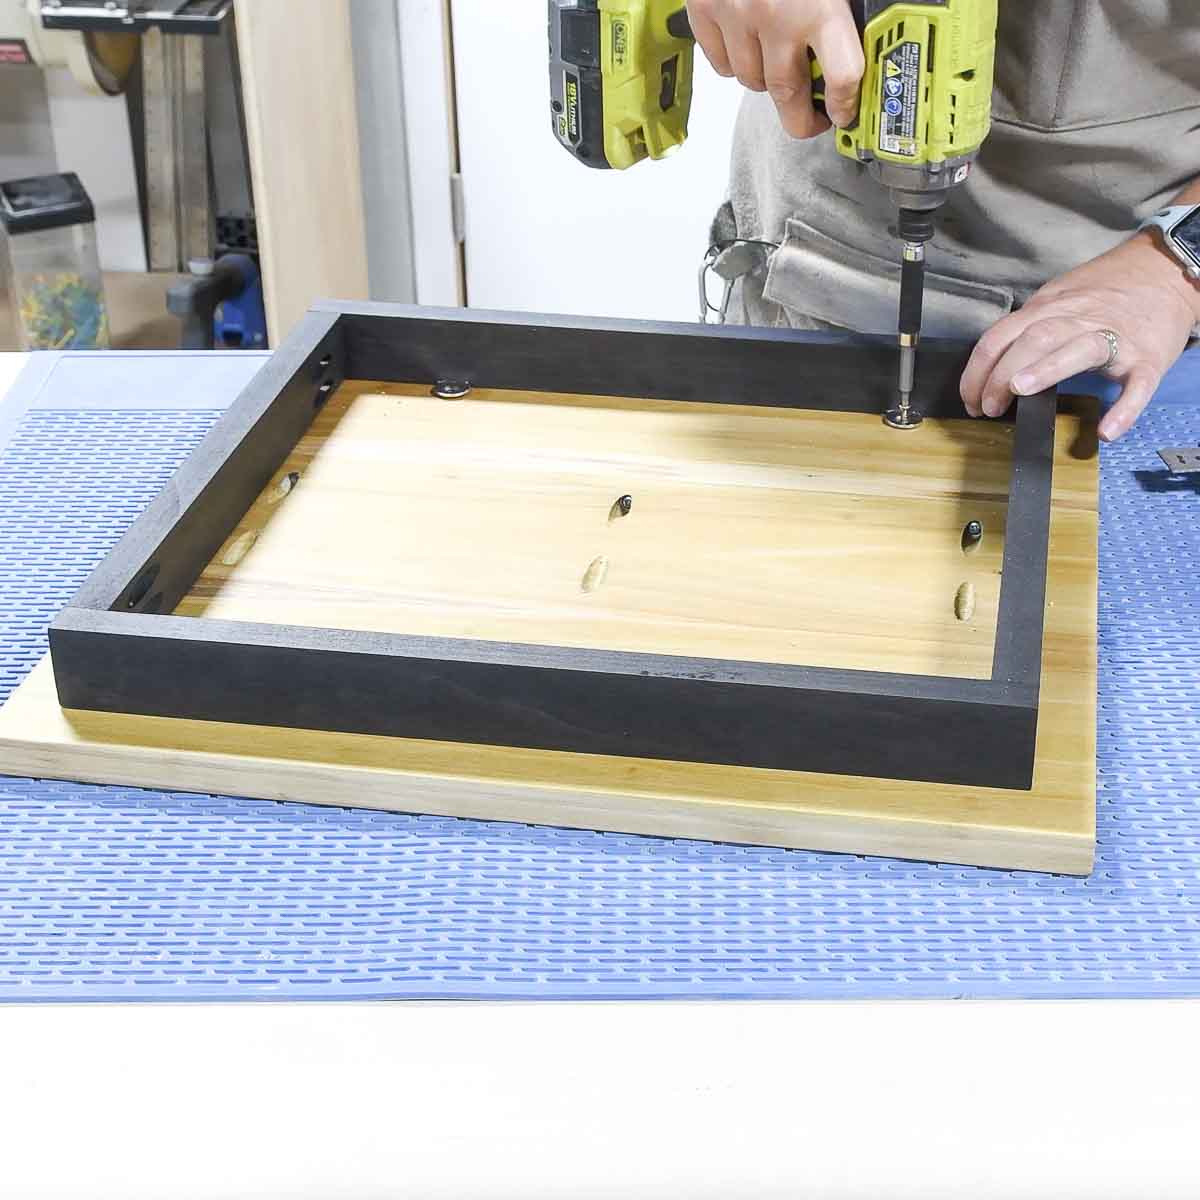
Drill holes big enough for your figure 8 fasteners to go in the top inner edges of the apron.
Use a chisel or utility knife to remove the material on the side of the hole making room for the fastener.
Attach the fasteners with a wood screw.
Lay the apron on the underside of the table top. Center it.
Then attach the apron with 3/4″ long wood screws through the figure 8 fastener into the table top.
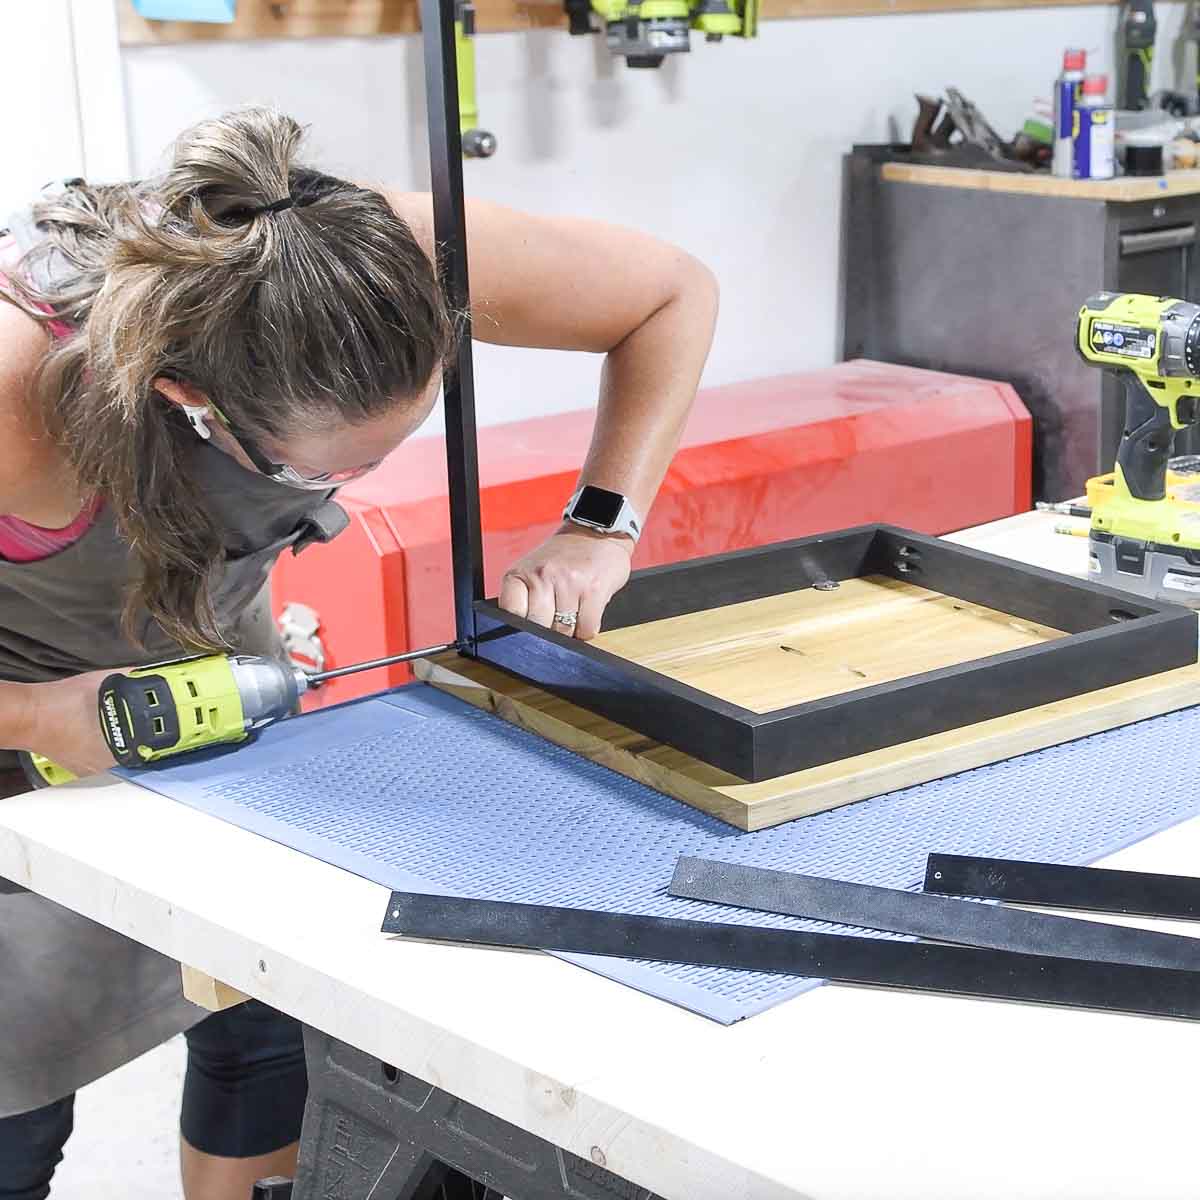
To attach the legs, first you will need to pre-drill holes for the screws.
Measure where the screws will go according to the diagram in the printable plans. You want to make sure the screws are offset.
Place the angle piece on the edge of a scrap of wood. With a metal bit in your drill, drill a hole big enough for the screws to go through.
Attach the leg pieces to the apron. Make sure they are flush to the underside of the table top.
Secure with the painted head screws.
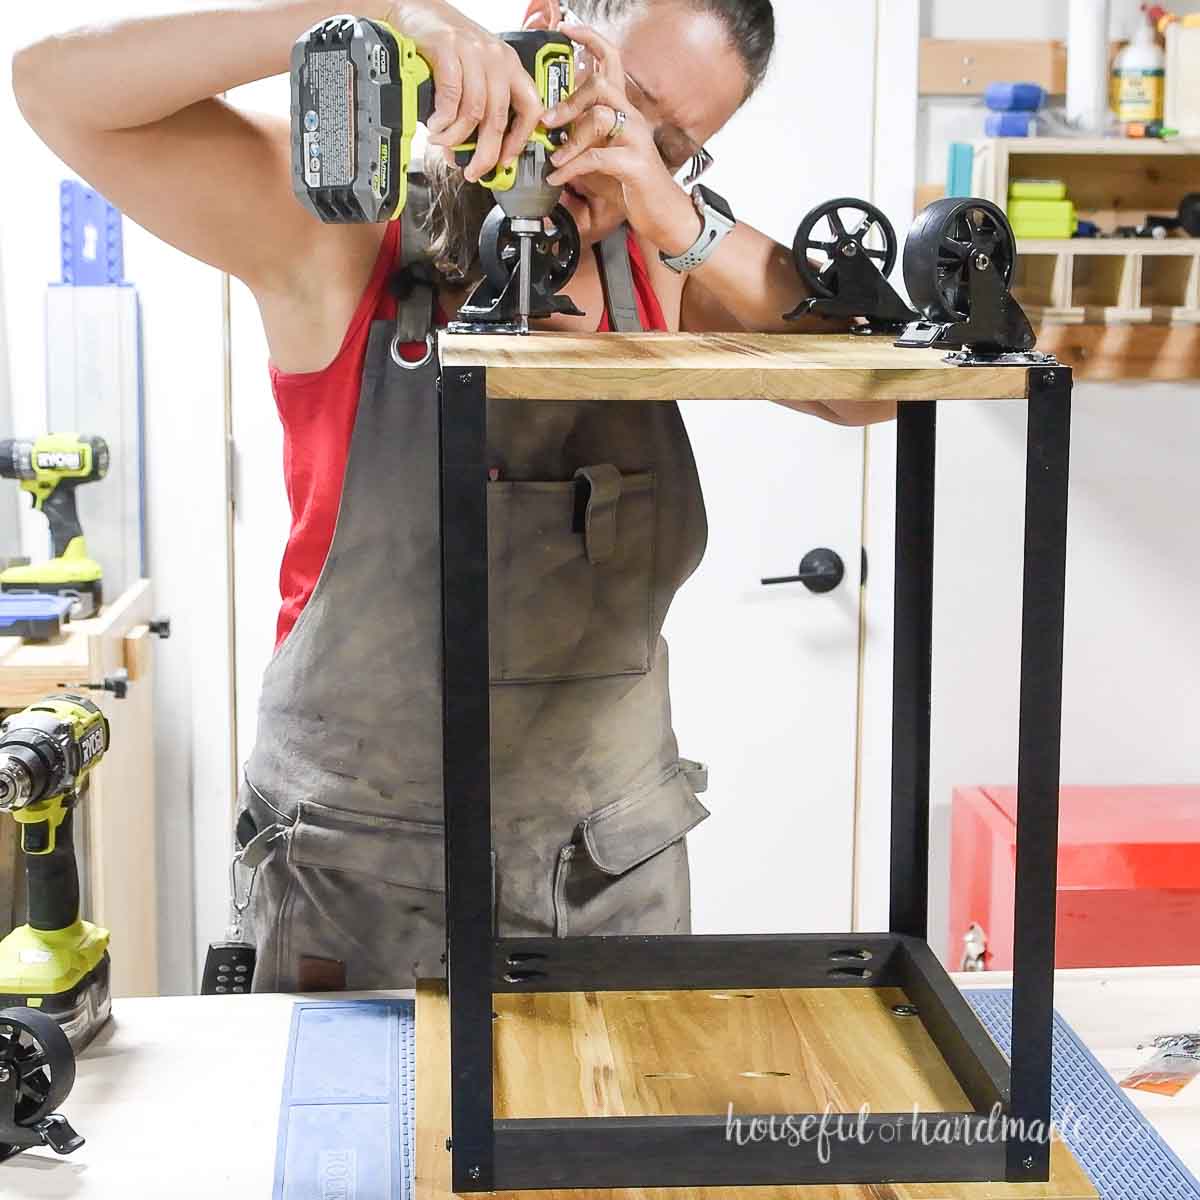
Then flip the table over and insert the shelf in between the legs. Attach it with more painted screws so it is flush with the underside of the shelf.
Attach the wheels to the bottom of the lower shelf.
Secure with 3/4″ pan head screws.
And you’re done!
Premium plans include:
- Recommended Tools
- Shopping list
- Easy to read cut list table
- Cut diagrams
- Step-by-step instructions with 3D renderings
- Helpful resources
- BONUS: 3D SketchUp file
Flip your new side table over and admire your work. This fun table is perfect to add to any room you need a little table.
And the wheels make is super useful for moving to where you need it most!
More Scrap Wood Projects:
This project is part of Scrap Wood Summer series!
Each week during August, Woodshop Diaries and I will share a new scrap wood project. Save money and build with your scraps instead.
Check out any projects you may have missed below and come back next Tuesday for new builds.


Happy building!
