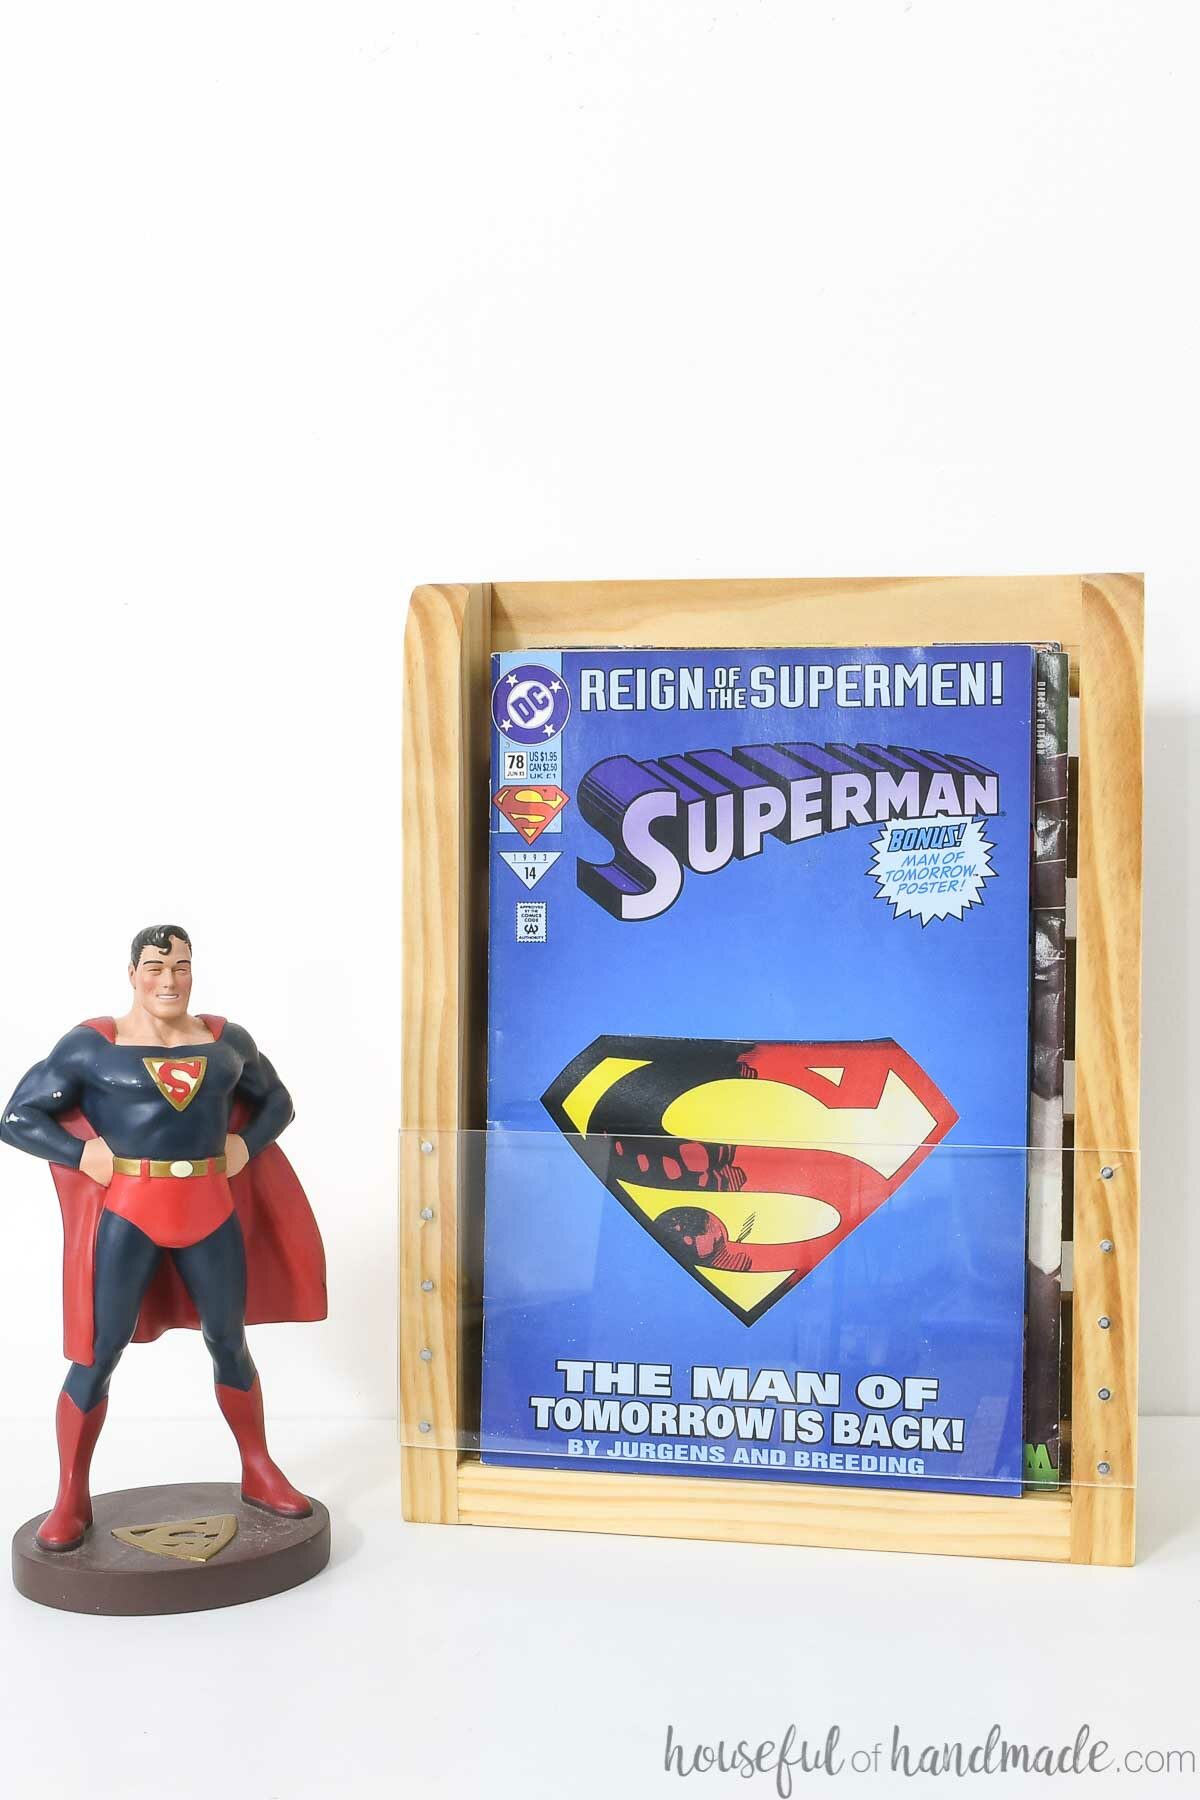
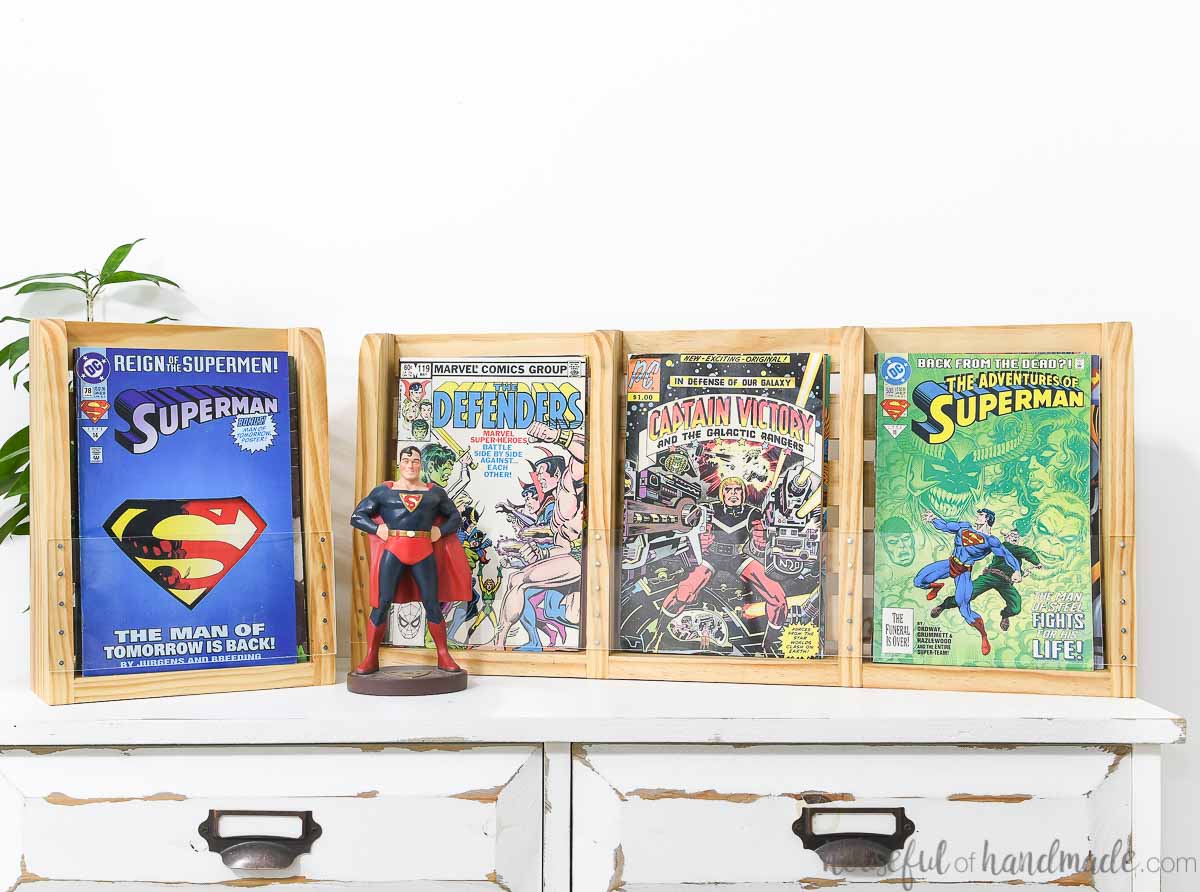
Create the perfect place to highlight your comic books with this comic book display shelf.
Last year for Christmas my son received a large grab-bag of comics. He has loved reading all the different comics. But I have not loved the mess they have made.
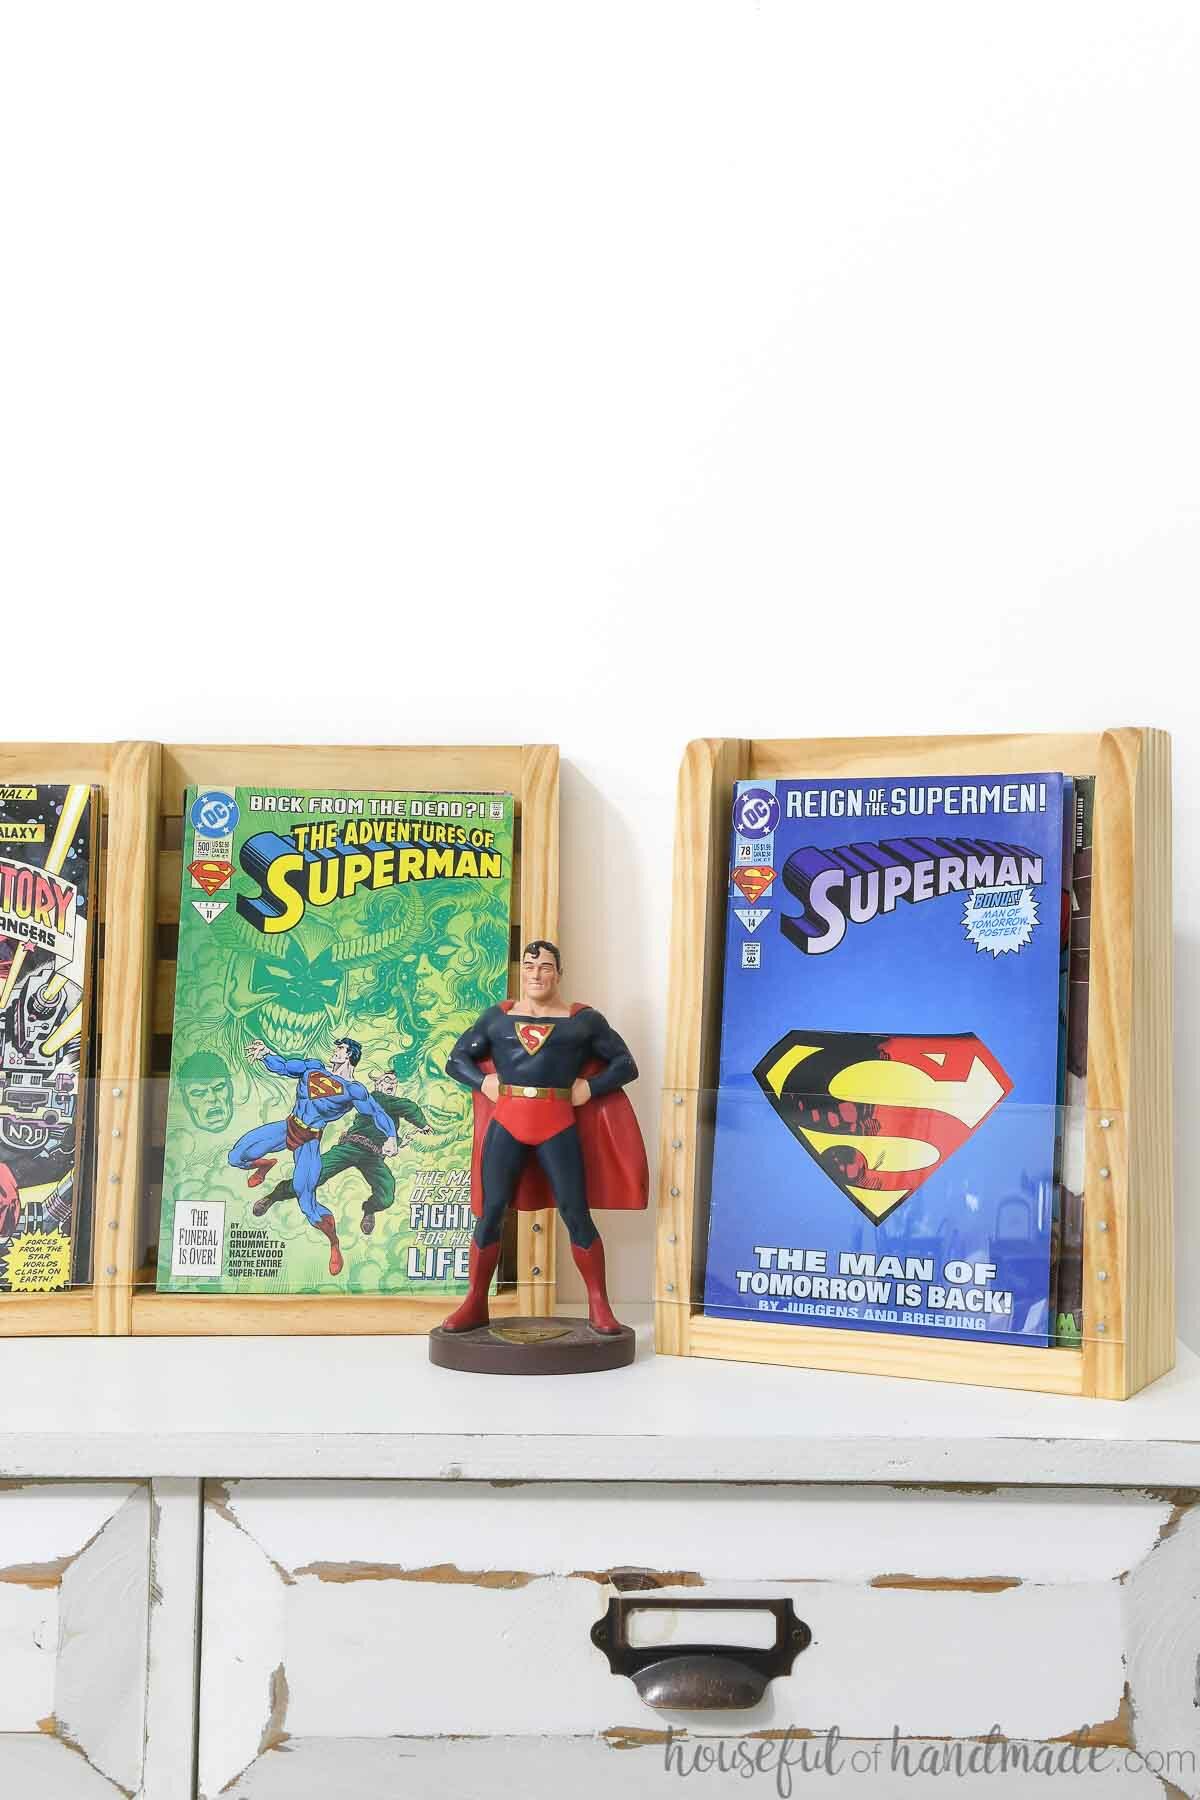
Comic books do not store well on a normal bookshelf. They are too thin to stand on their own and, without a spine, are hard to find what you want to read. The best way to store comics is to display them facing forward.
So I partnered with Kreg tools to use the newly designed Kreg Jig 720Pro to build the an easy comic book display shelf for the perfect DIY gift. Now the comics are stored on display like they were meant to be!
This post may contain affiliate links. As an Amazon Associate I earn from qualifying purchases. Click here to read my full disclosure policy.
And right now you can get the 720Pro pocket hole jig in a bundle with my favorite AutoMaxx face clamp and screws (through Jan 31, 2022 or while supplies last).
It’s the perfect pre-Christmas present for yourself that you can use to make presents for Christmas with!
Comic Book Storage
These easy to build comic book shelves are great for more than just showing off your favorite comic books. They are also the perfect comic book storage!
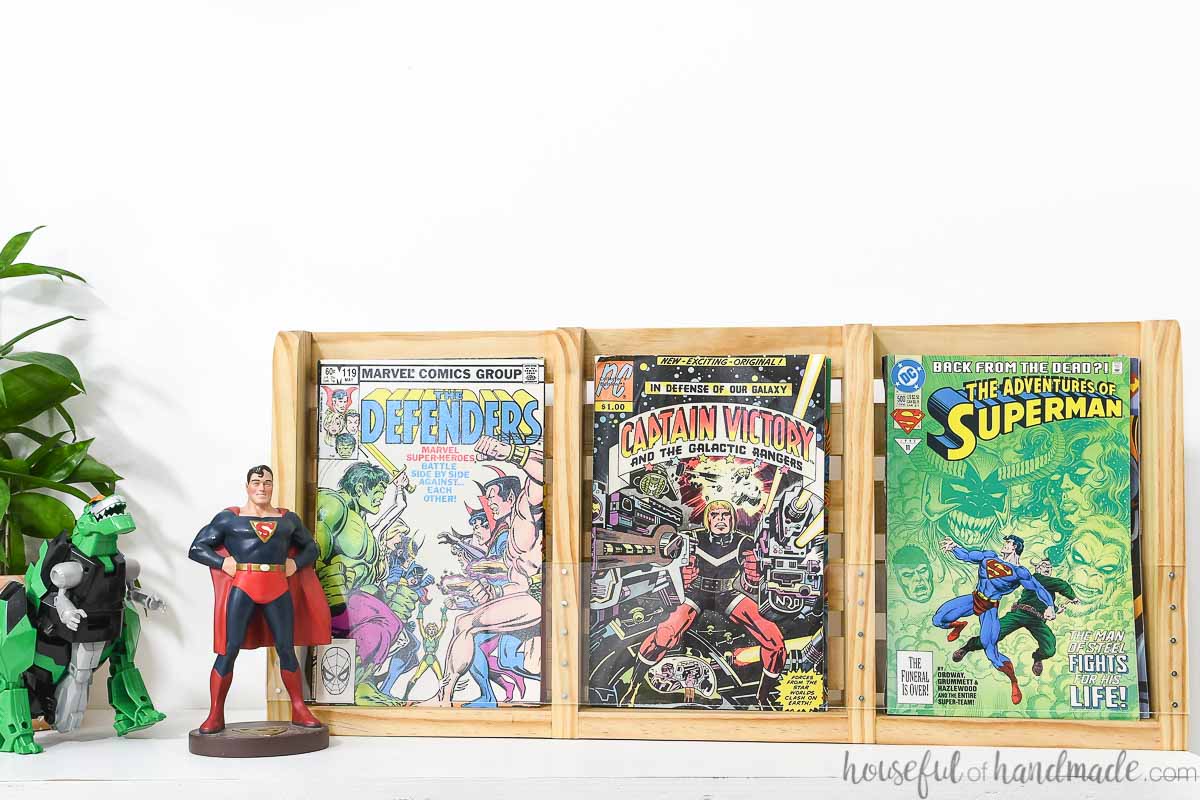
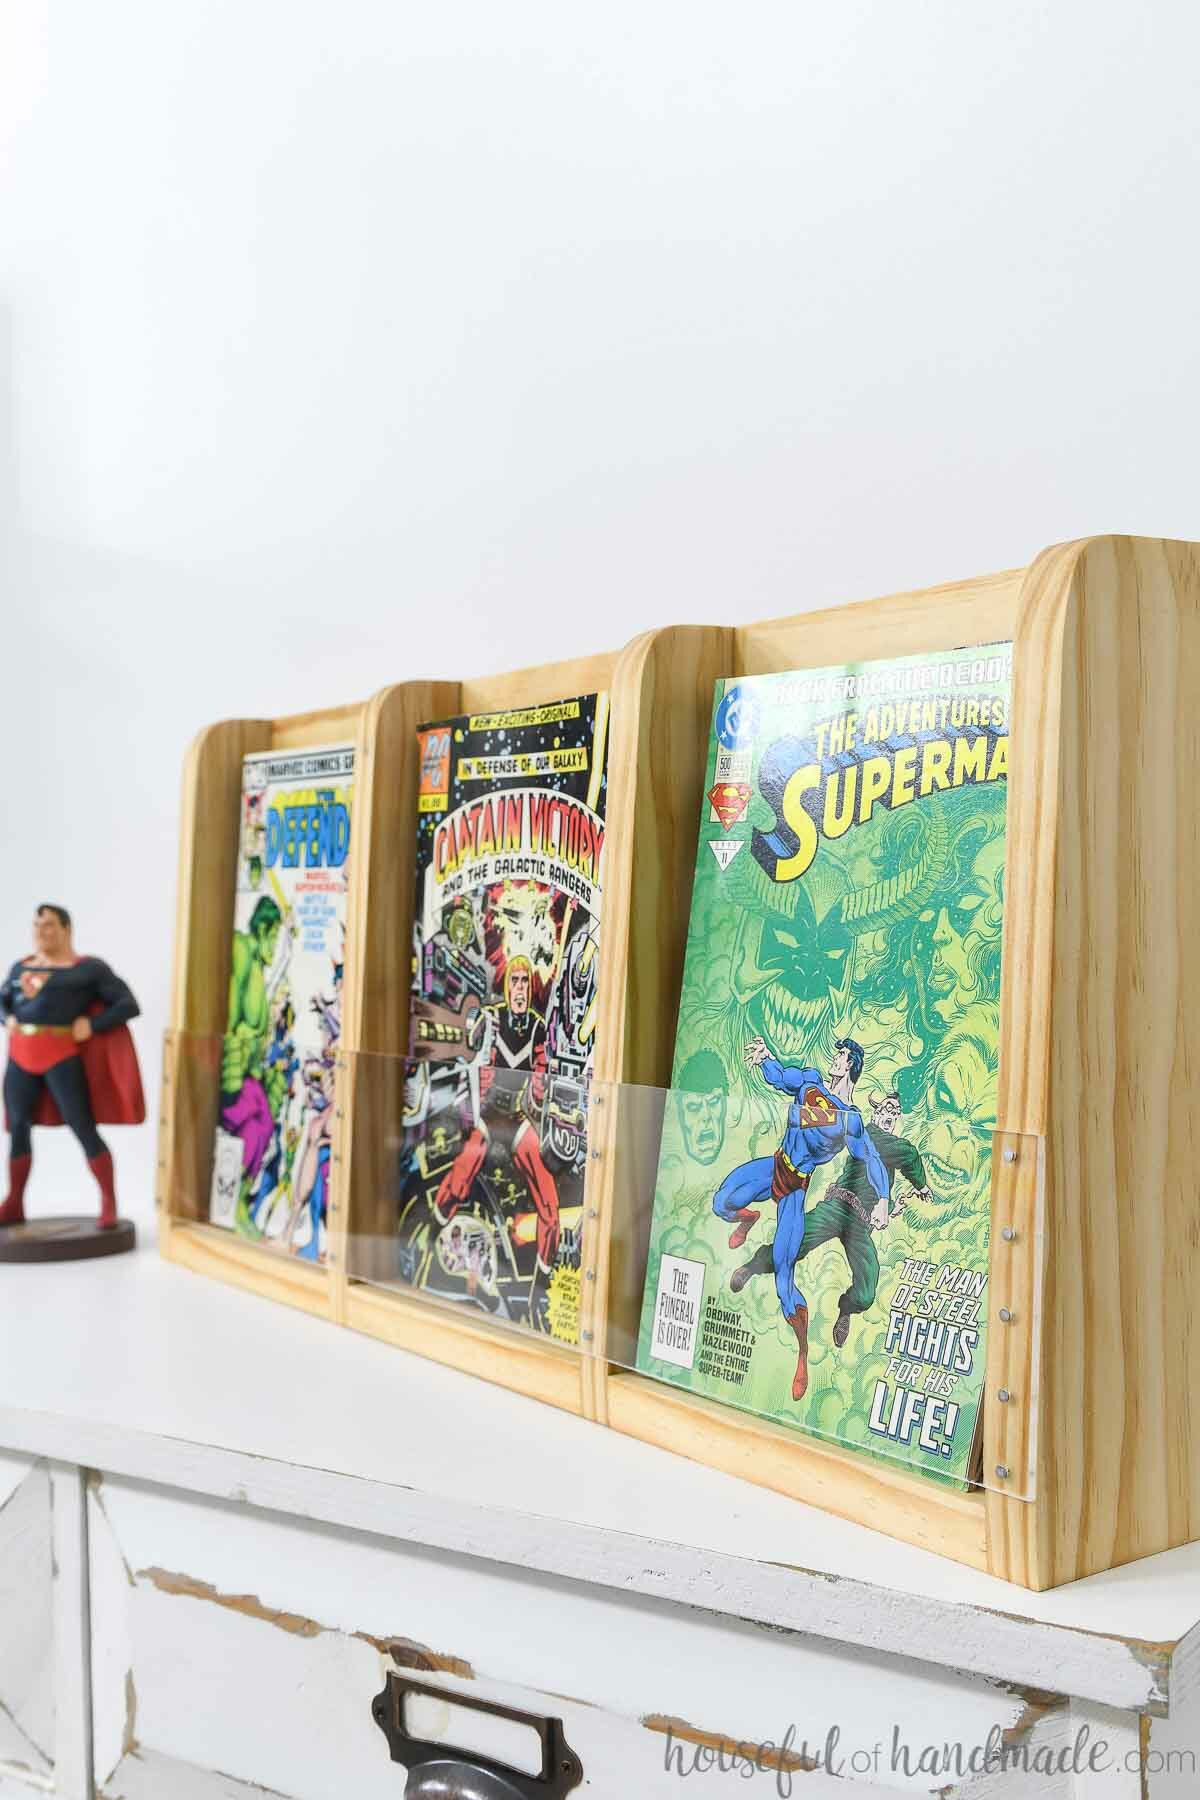
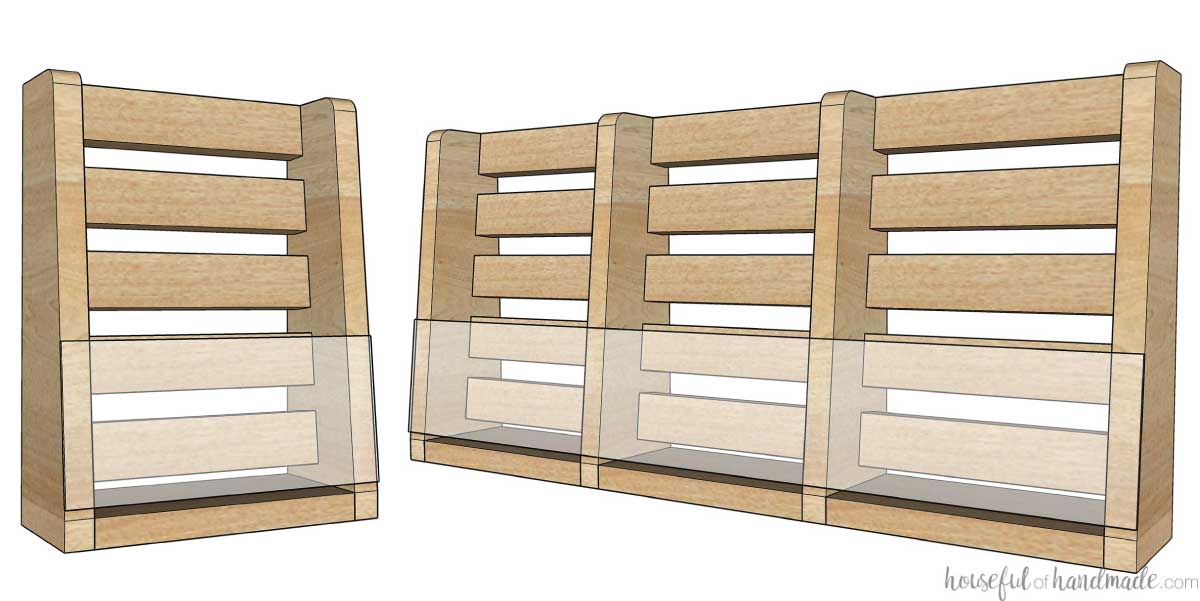
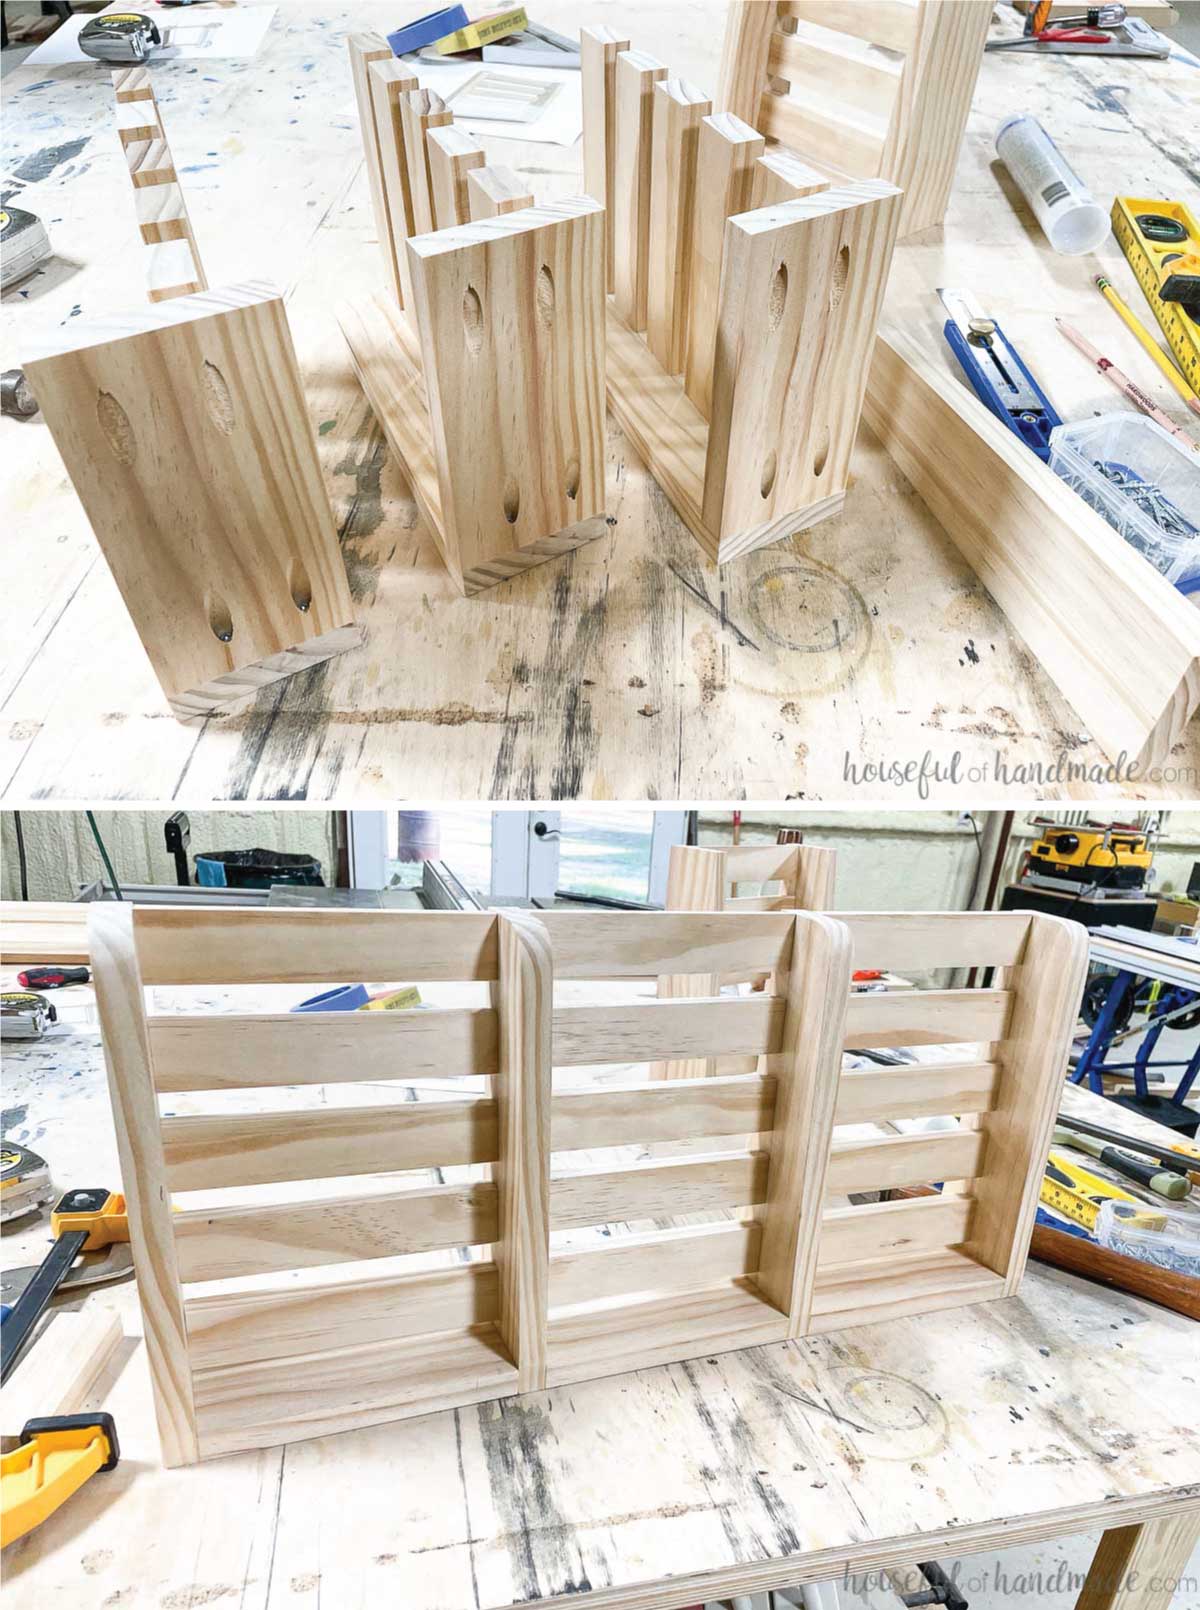
Each shelf can hold 15-20 comic books. To make extra storage for all my son’s comic books, I also created a comic book shelf with 3 sections.
Since each self can hold 15-20 comic books, the triple shelf can hold up to 60!
Plus these comic book storage shelves are made from inexpensive 1x2s and 1x4s. Each one only costs a few dollars to make.
You can make a bunch of shelves to create a wall feature to store and display all your comic books!
Just imagine how many comic books you could store with a few triple comic book shelves and a couple singles. And you can organize them by comic with your favorites in the front.
Easy to Build Shelves
These comic book display shelves are so easy to make. Each shelf can be made in just an hour or two.
And because they are made with pocket holes, your shelves will be super sturdy. You can feel confident that your favorite comic books are safe while on display.
Stain or paint your comic book display shelf any color you want. You can color code them to match your comics.
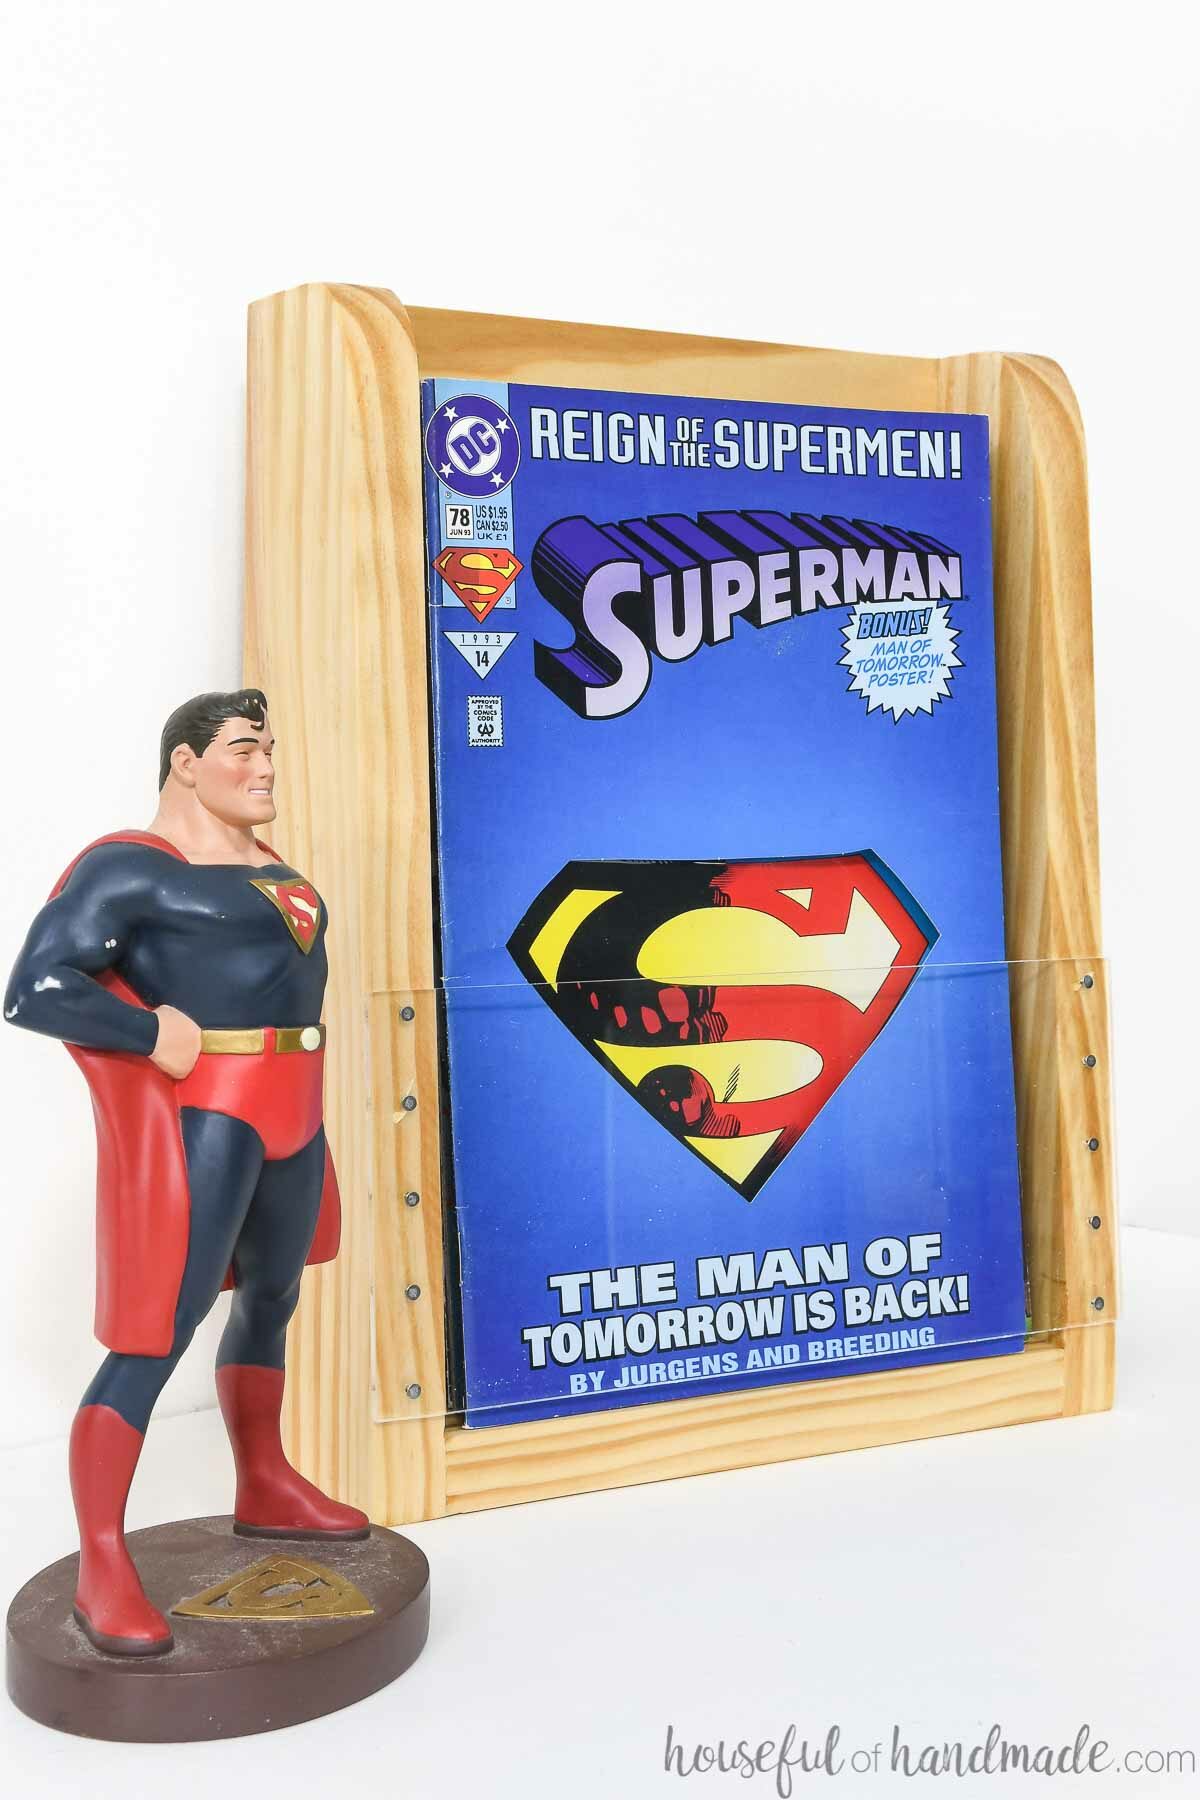
Or leave them natural like I did so the comics can be the star of the show.
More gifts to build for boys
Need more easy gift ideas for the boys in your life? Check out these other ideas:
How to Build a Comic Book Shelf
Tools needed:
- Pocket hole jig
- Get the Kreg 720Pro with a free clamp and screw now through January 31, 2022.
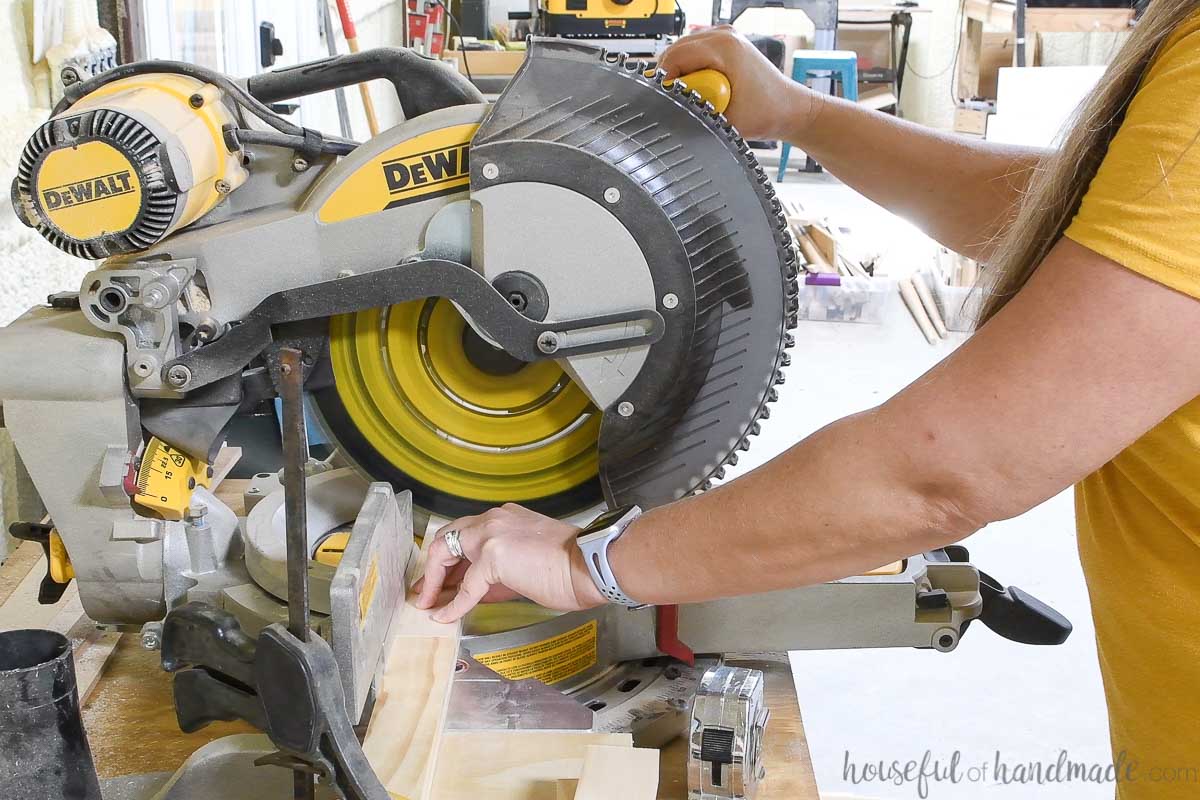
- Miter saw
- I recently upgraded to this larger sliding miter saw (watch for it to go on sale), but all my projects before were built with this inexpensive miter saw that I loved.
- Circular saw
- Drill
- Impact driver (optional, but I love not having to switch bits with the drill)
- Clamps
- Sander
- Hammer
Supplies:
- Wood for single shelf
- (1) 32″ long 1×4 board
- (1) 38″ long 1×2 board
- Wood for triple shelf
- (1) 72″ long 1×4 board
- (1) 8′ long + (1) 24″ long 1×2 boards
- 4″ x 9″ (single shelf) or 4″ x 25 1/2″ (triple shelf) plexiglass
- 1 1/4″ pocket hole screws
- 1″ long wire nails
- Keyhole hangers
Cut out the pieces
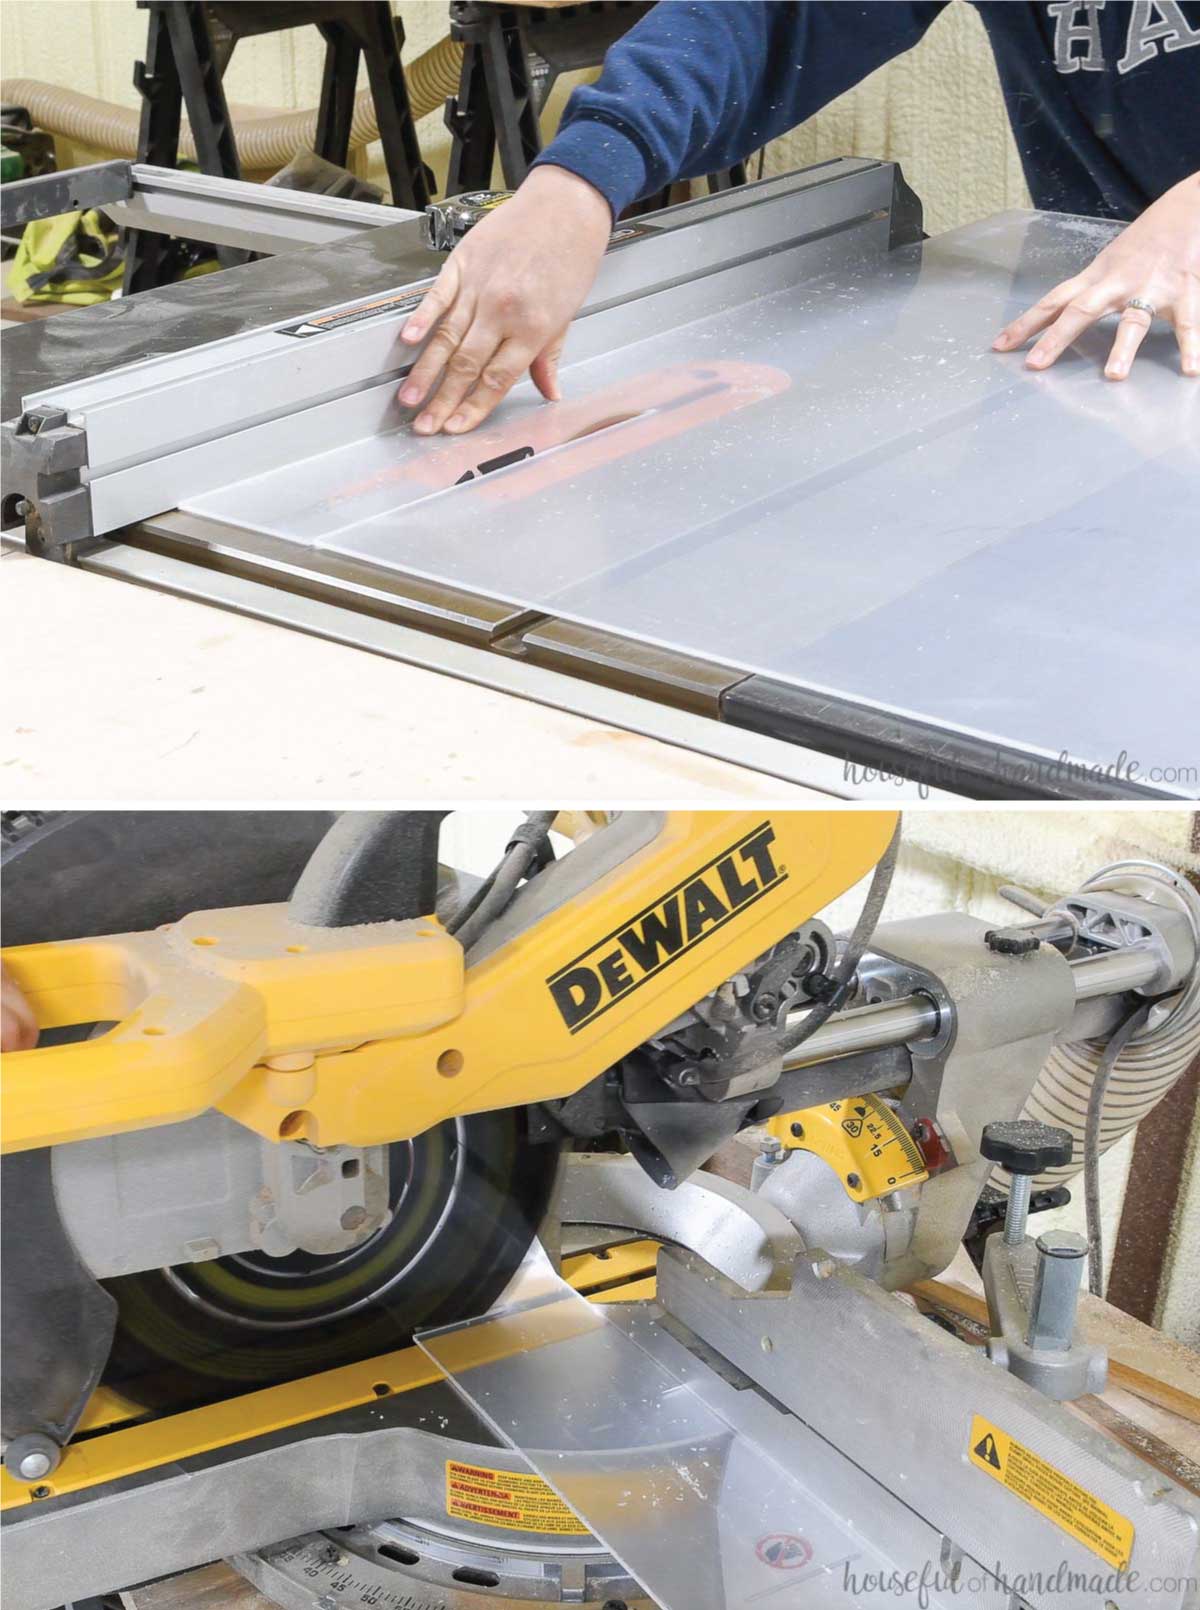
Use your miter saw to cut all the pieces.
For a single shelf cut the following:
- (2) 11 3/4″ 1×4 board
- (1) 7 1/2″ 1×4 board
- (5) 7 1/2″ 1×2 boards
For a triple shelf cut the following:
- (4) 11 3/4″ 1×4 board
- (3) 7 1/2″ 1×4 board
- (15) 7 1/2″ 1×2 boards
On the 11 3/4″ 1×4 pieces, measure 2 1/2″ in from the back at the top and 3/4″ up from the bottom in the front. Draw a line between the two marks.
Cut along the line to create a taper on the pieces. Repeat for all the 11 3/4″ side pieces.
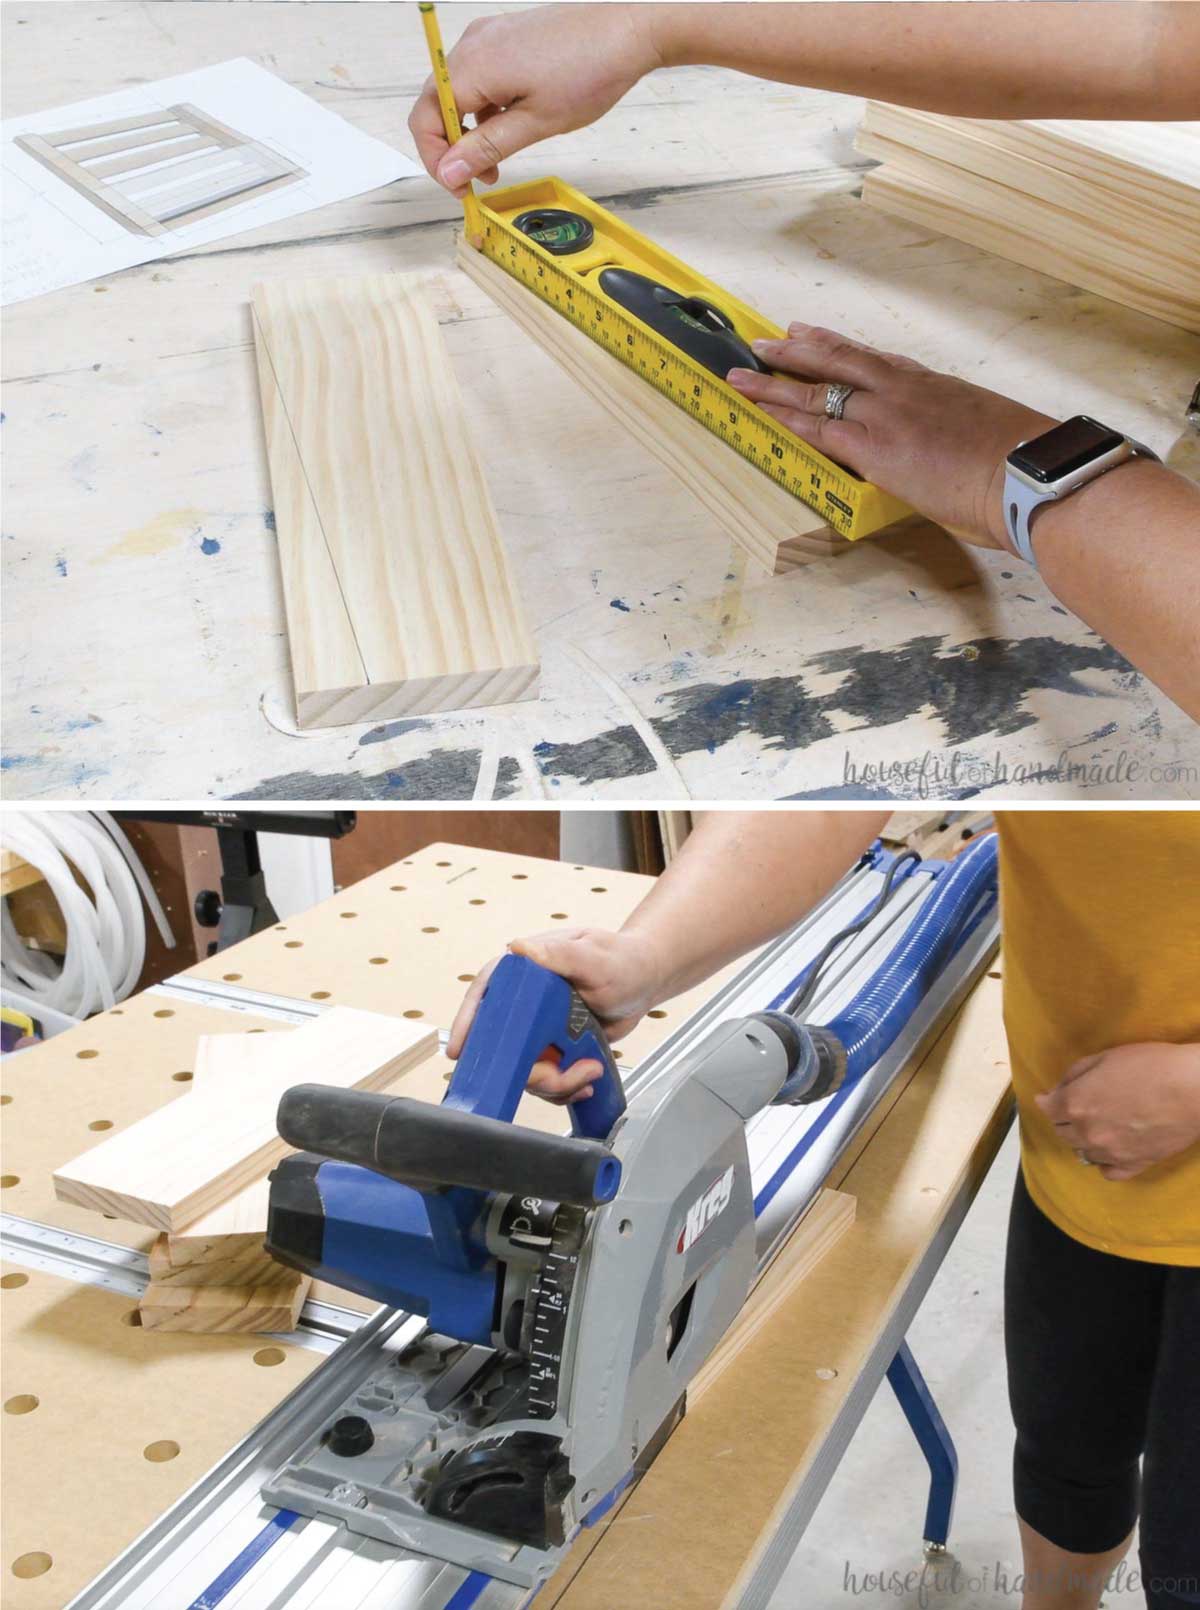
Cut out the plexiglass. You can cut it with regular wood cutting tools or score it with a utility knife and snap it across the line.
Do not remove the backing from the plexi while cutting or after. Wait until the very end to protect it from scratches.
Lightly sand the cut sides with 220 grit sandpaper to remove sharp edges.
Assemble the shelf
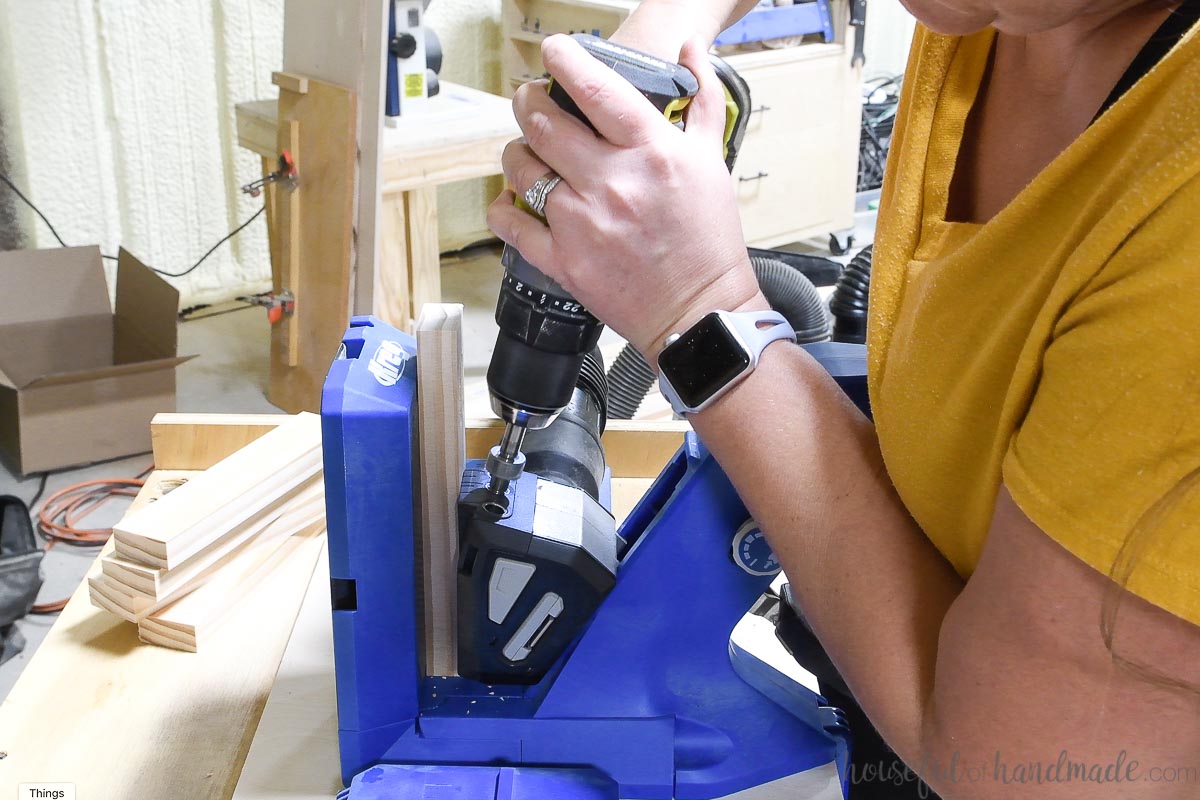
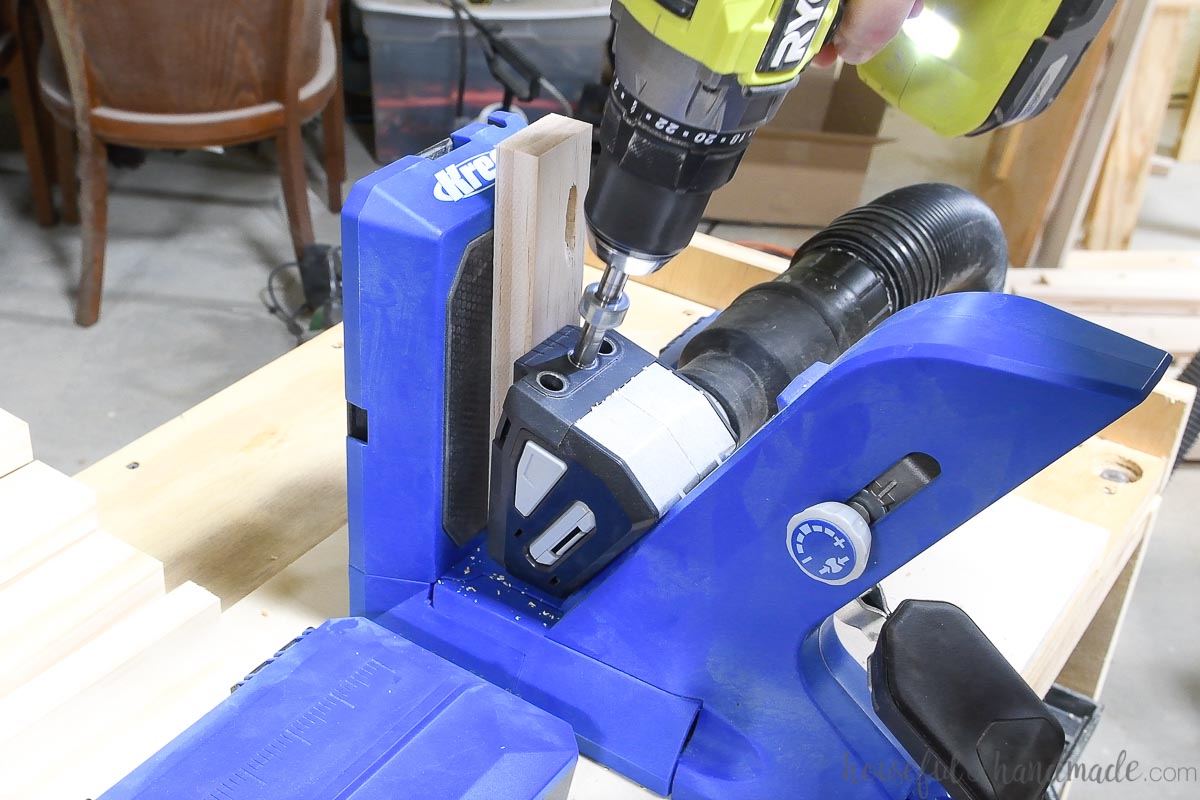
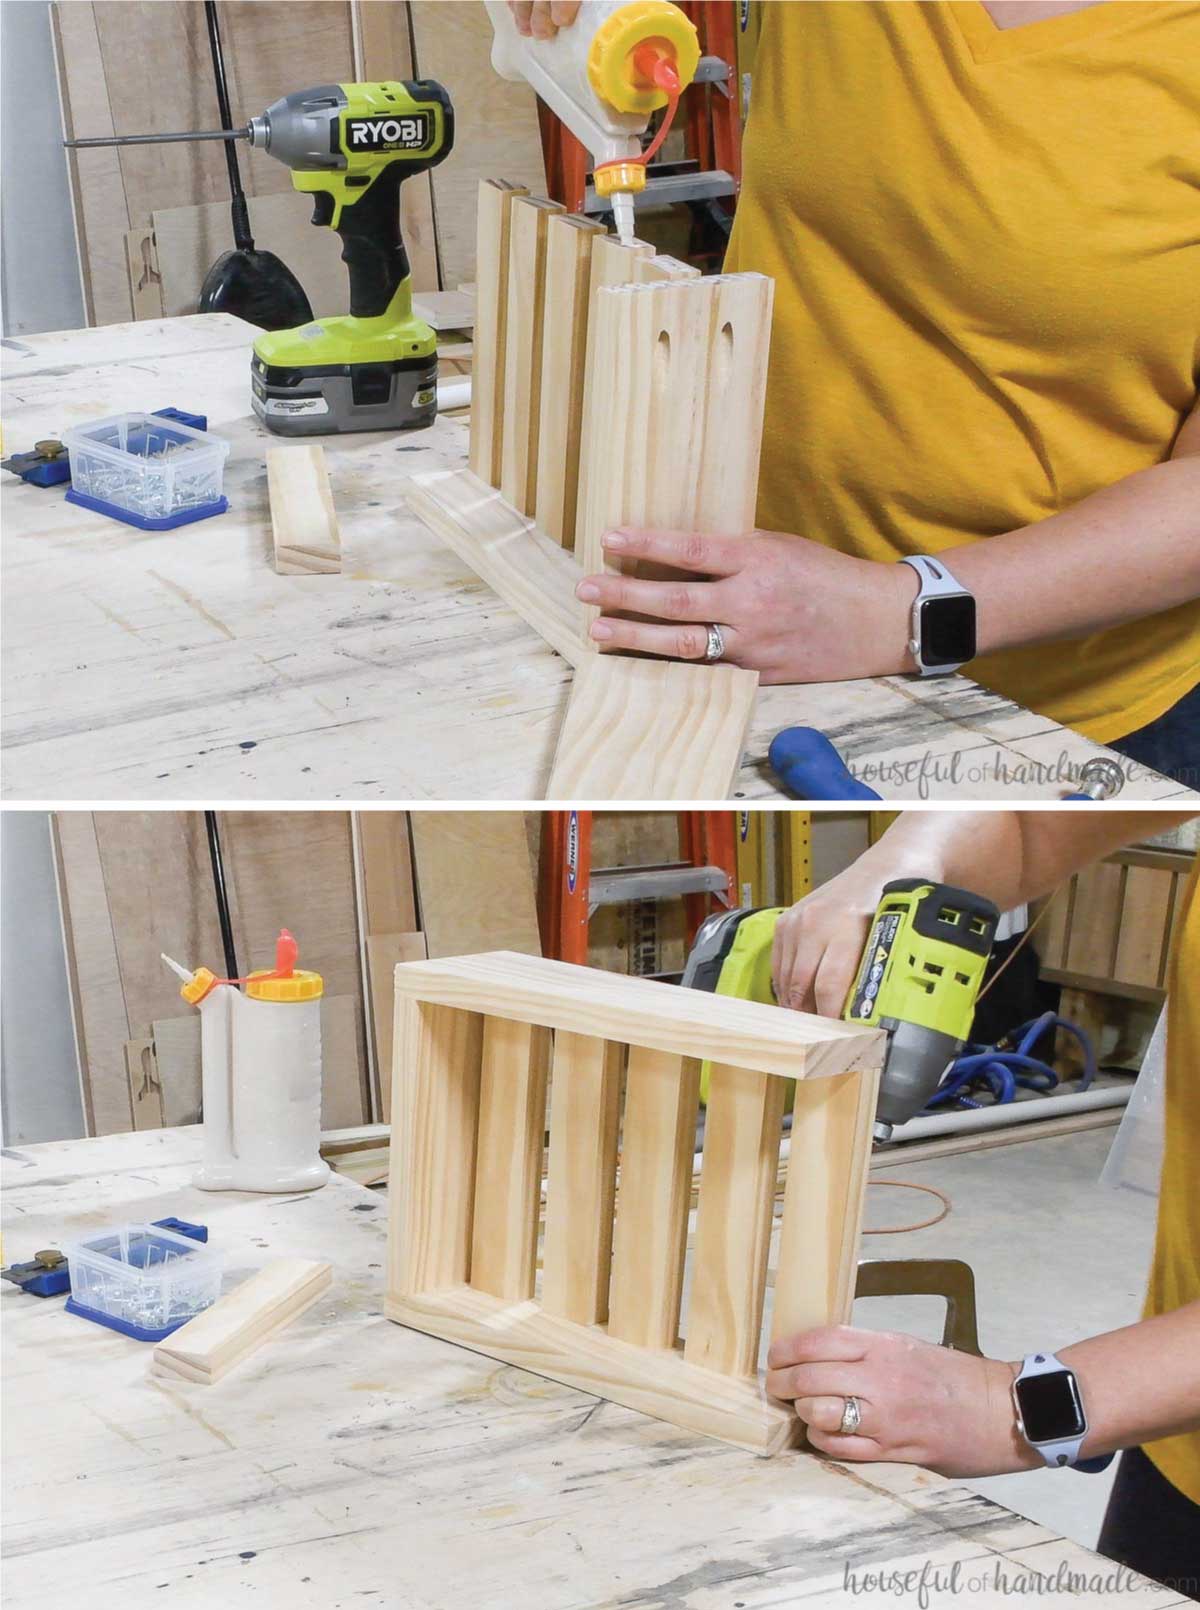
Set the bit for the Kreg 720Pro pocket hole jig to 3/4″ thick material. No need to set the jig, just clamp the material in the jig and it will automatically adjust to the material thickness.
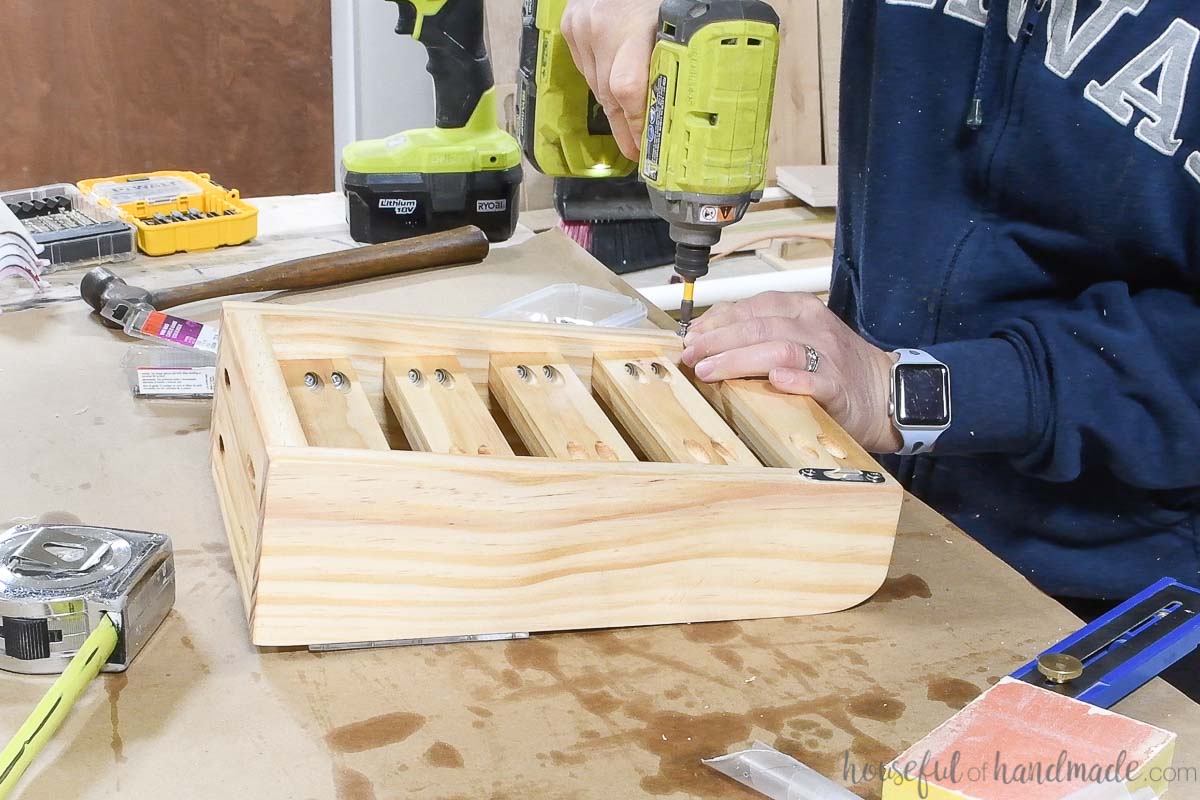
Center the 1×2 back pieces on the two closest holes on the jig and clamp it down. If building a single shelf, drill 2 pocket holes in both ends of all 5 1×2 pieces.
If building a triple shelf, only drill 1 pocket hole in each 1×2 board. But make sure the pocket hole is offset.
If the pocket holes are centered, the screws will hit each other in the center divider when assembling the shelf.
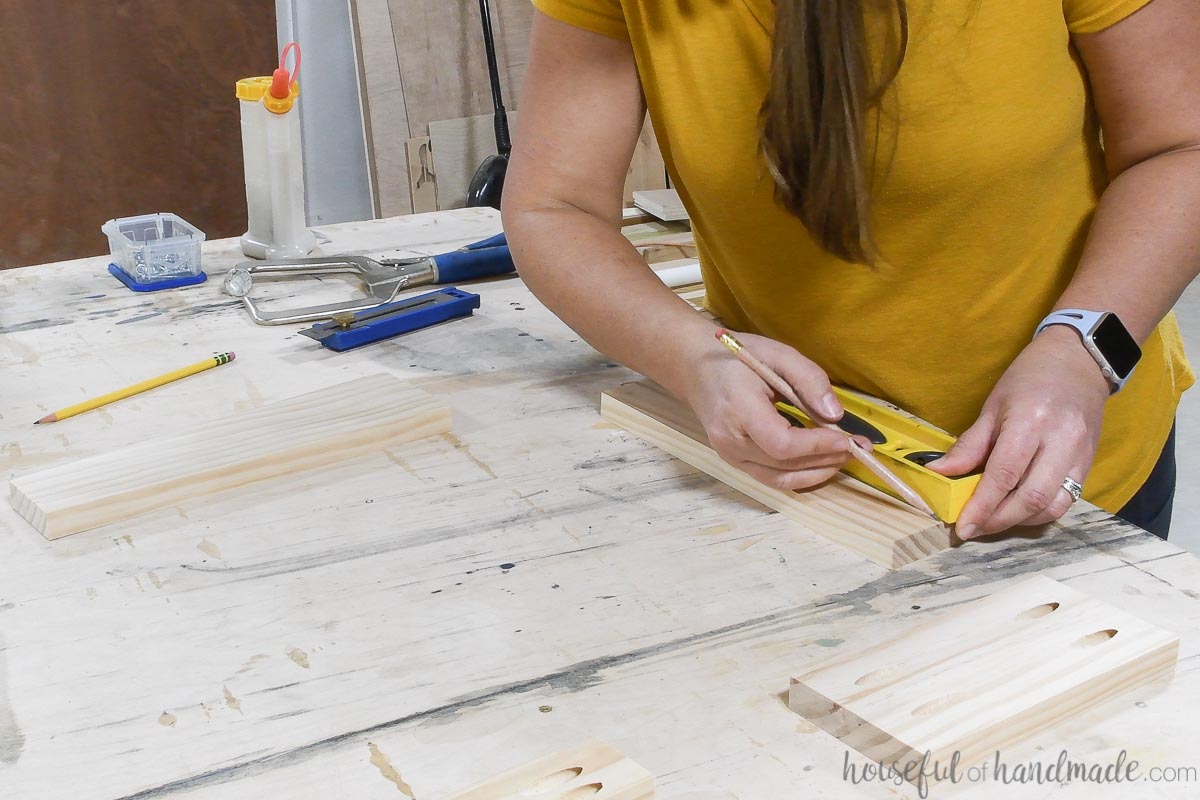
Measure 3/4″ in from the back on the top and measure 1 3/4″ from the back on the bottom. Draw a line between these two marks.
The line should mimic the taper cut on the front of the side pieces earlier.
Line the first 1×2 piece up so it is flush with the top of the side and the front is flush with the line. Secure with wood glue and 1 1/4″ pocket hole screws.
Attach the rest of the 1×2 pieces so they are flush with the line and spaced 3/4″ apart from the previous piece.
Then add the bottom piece so it is flush with the bottom, front and back.
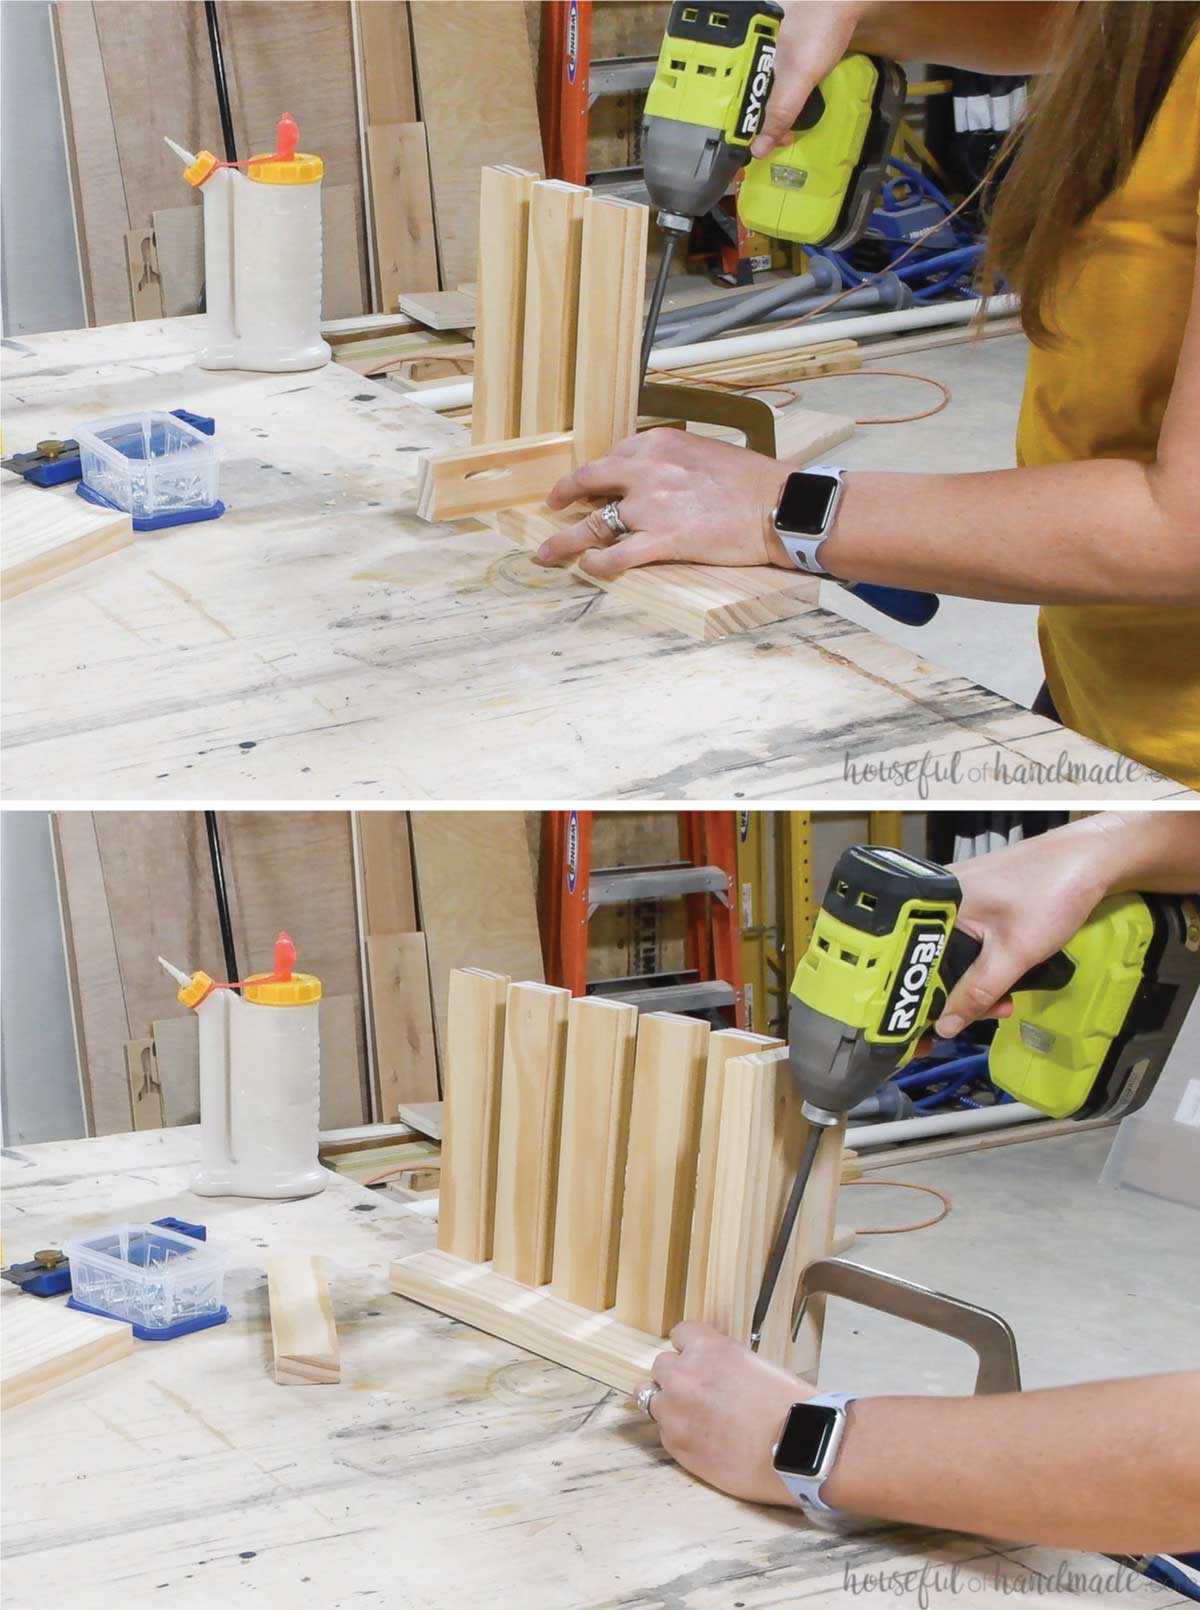
Add glue to the other ends of all the back pieces and the bottom piece. Then attach it to the other side piece.
Make sure to line up the back pieces with the line drawn earlier and separate them by 3/4″.
Secure with wood glue and 1 1/4″ pocket hole screws.
If you are making a triple shelf, attach all the pieces to one side piece. Then attach them all together.
Finish the comic book shelf
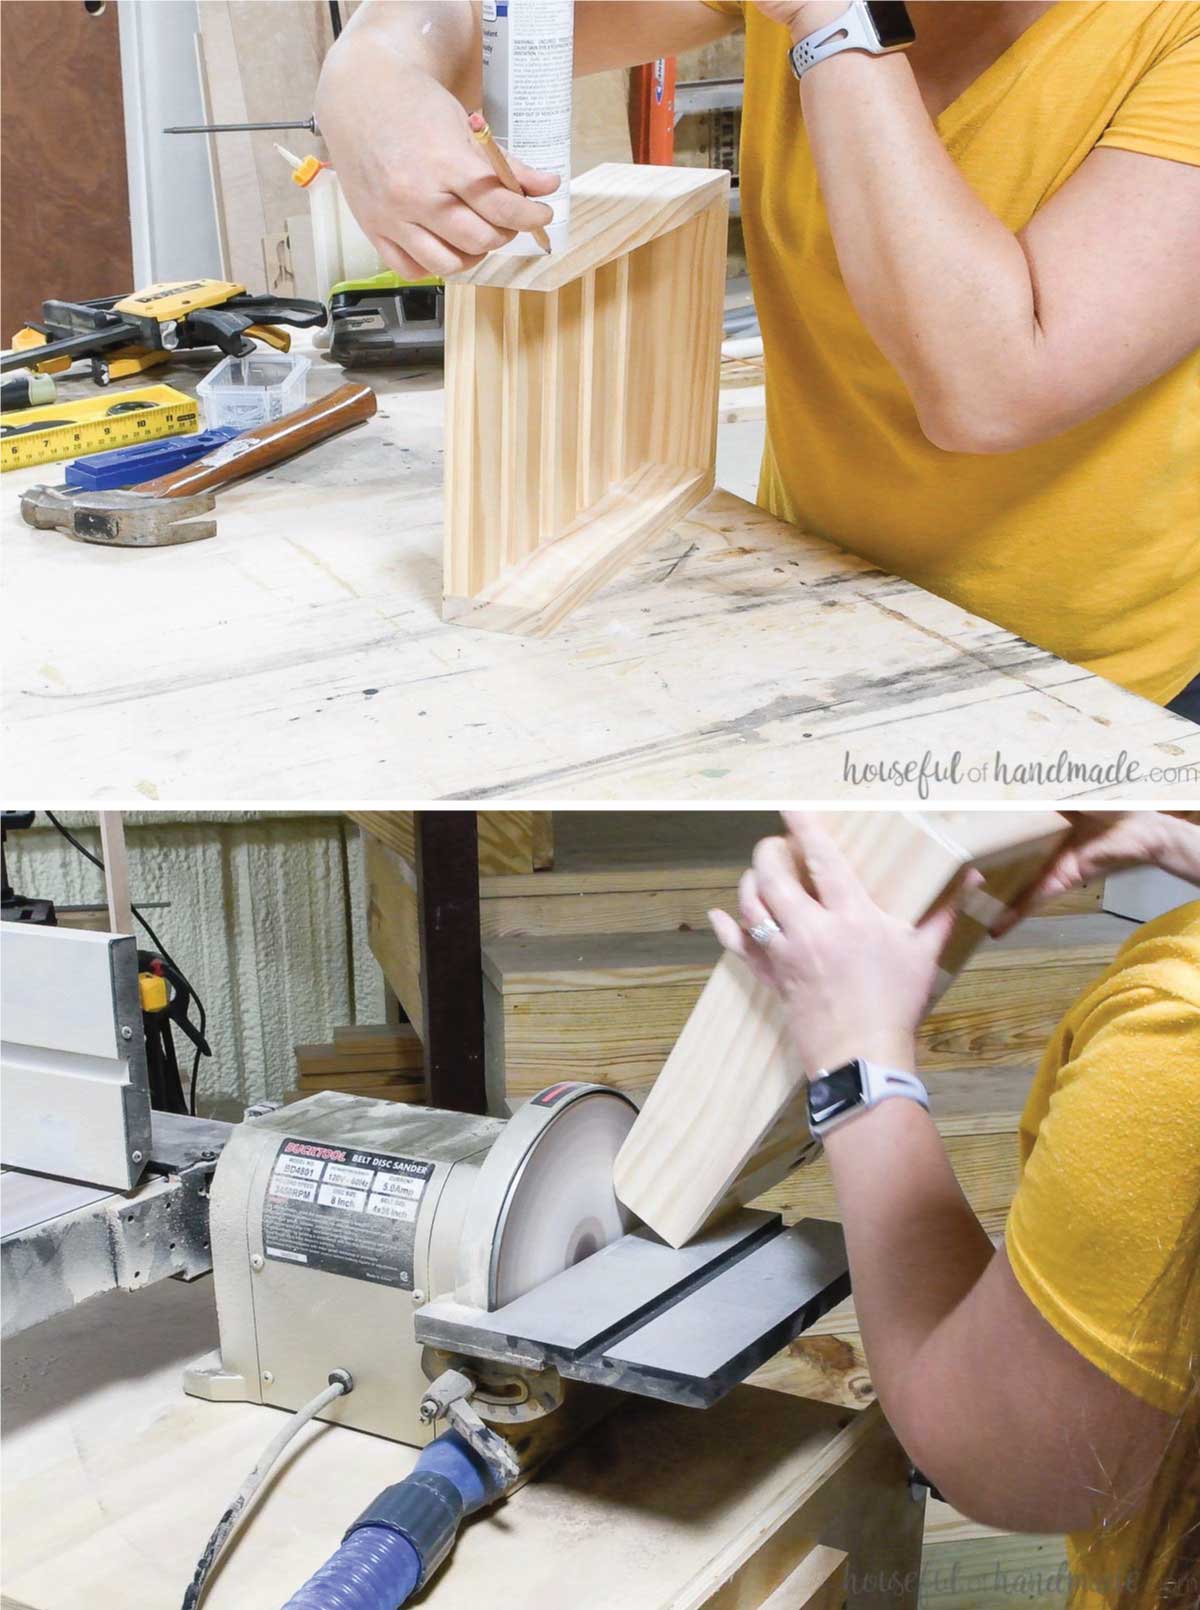
Draw a curve on the top corner of the shelf sides. To easily draw a curve, grab something in your shop or garage that is a circle and trace it onto the edge.
Then sand it off to create a curved top.
Sand your shelf and finish it however you want. I chose to leave them natural and just added a sealer.
Line up the plexiglass piece so it is flush with the sides and 1″ up from the bottom. Clamp it into place.
Draw lines on the center of the side pieces. Then mark where you want to put the nails.
Pre-drill the hoes through the plexi.
Remove the protective backing then attach the plexi with the nails.
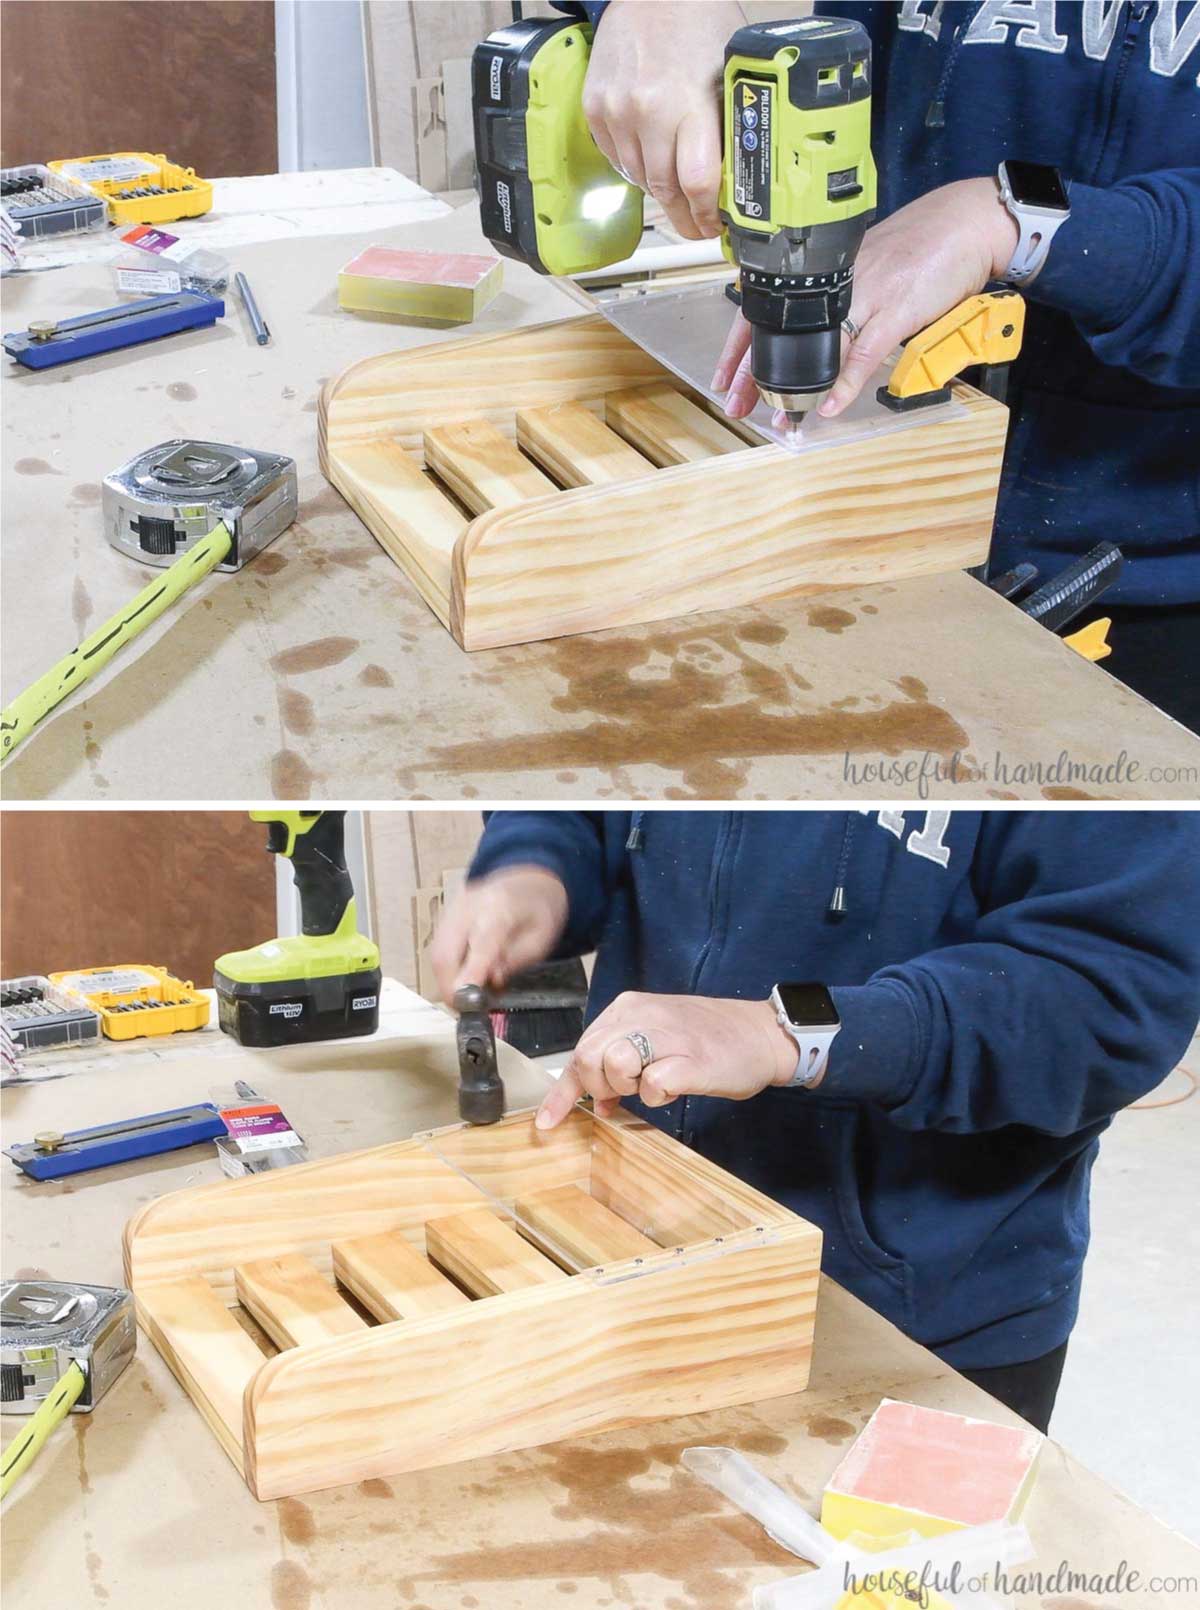
Attach the keyhole hangers to the back of the shelf.
And now your comic book storage shelf is all done!
Hang it up on your wall and fill it up with favorite comic books.
I plan on hanging the single shelf next to my son’s bed so he has easy access to his stories before bed.
The triple comic book display shelf will be perfect hung over his book shelf. I love that it holds so many comic books and shows them off all at the same time.
And don’t forget to grab your Kreg 720Pro while it is on sale and have fun hand making everyone’s Christmas gifts this year!
Happy Building!

Thank you to Kreg Tools for sponsoring this post. I only recommend products that I use and love and all opinions are 100% my own. Click here to read my full disclosure policy.