
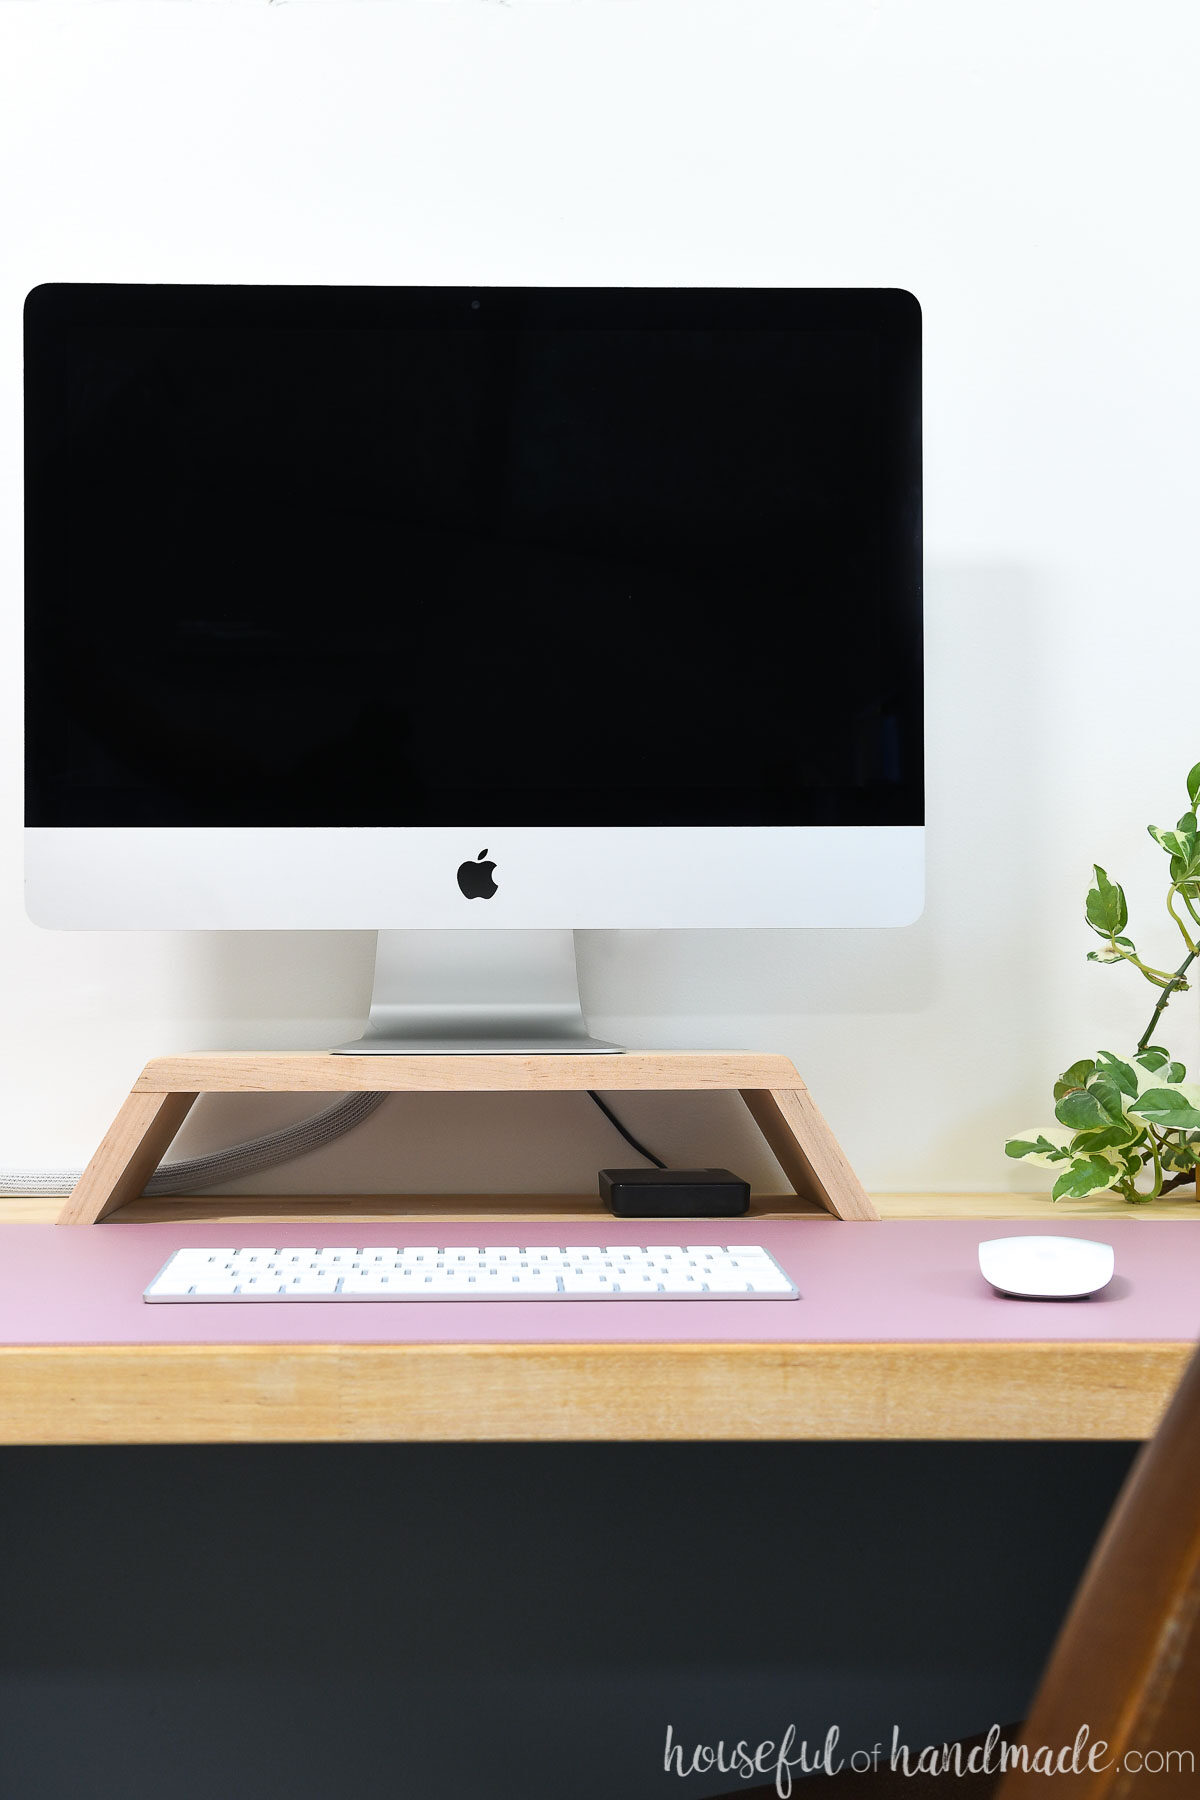
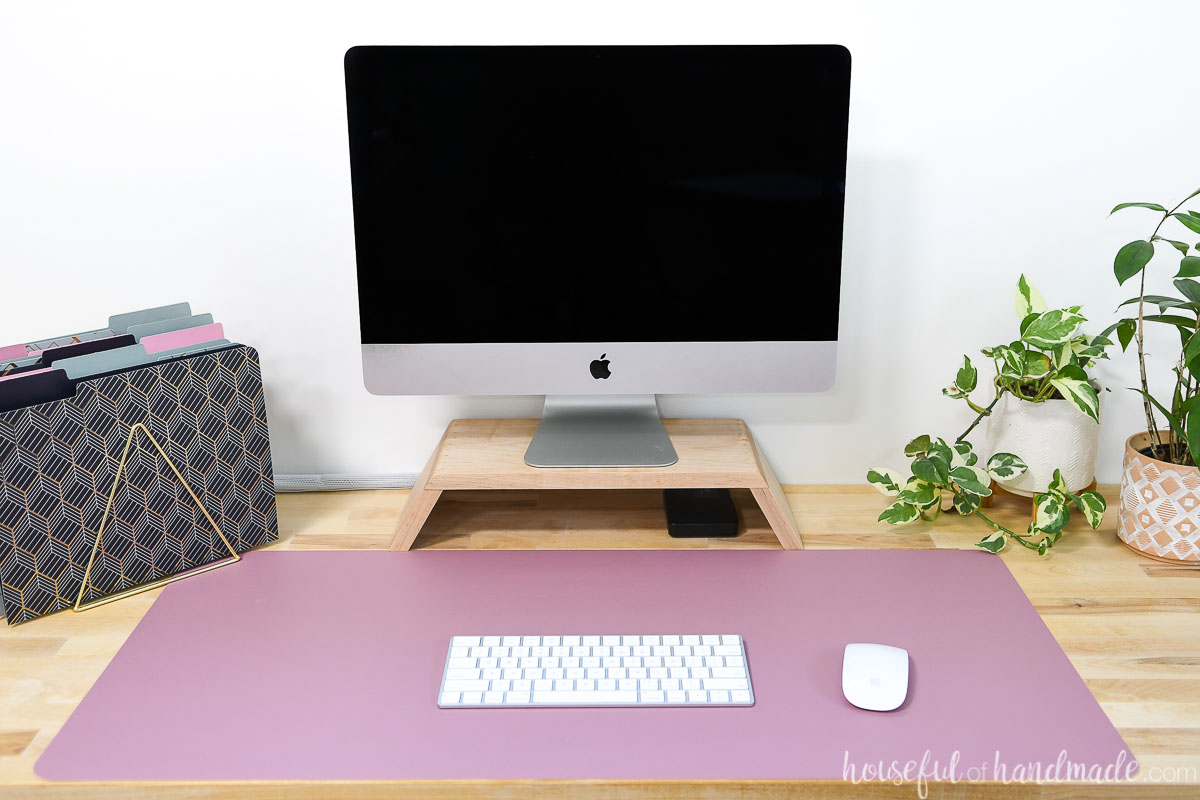
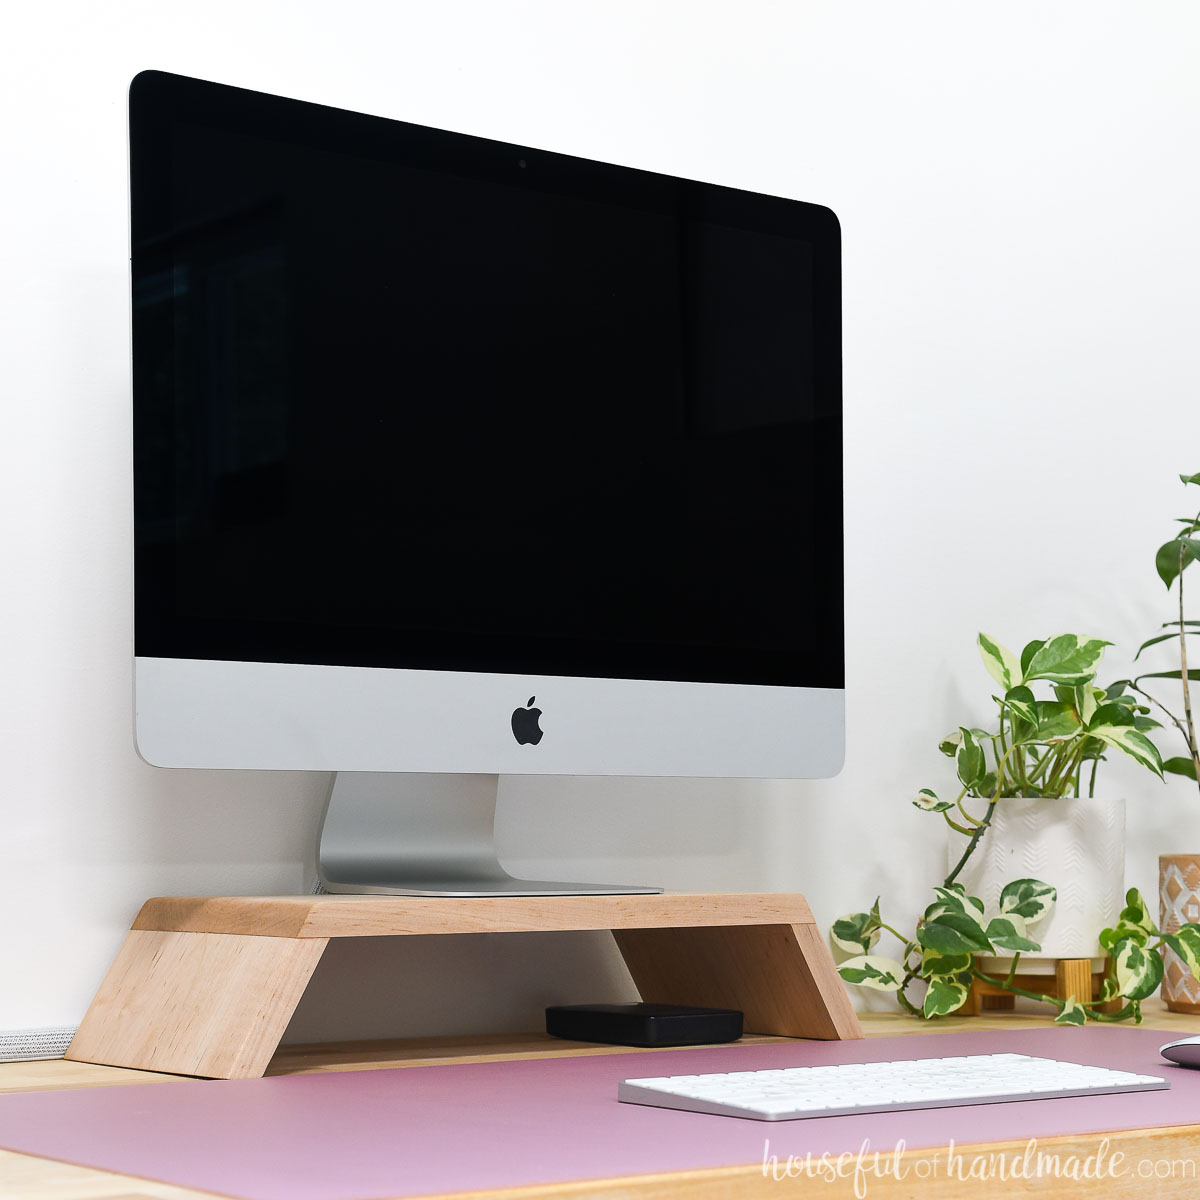
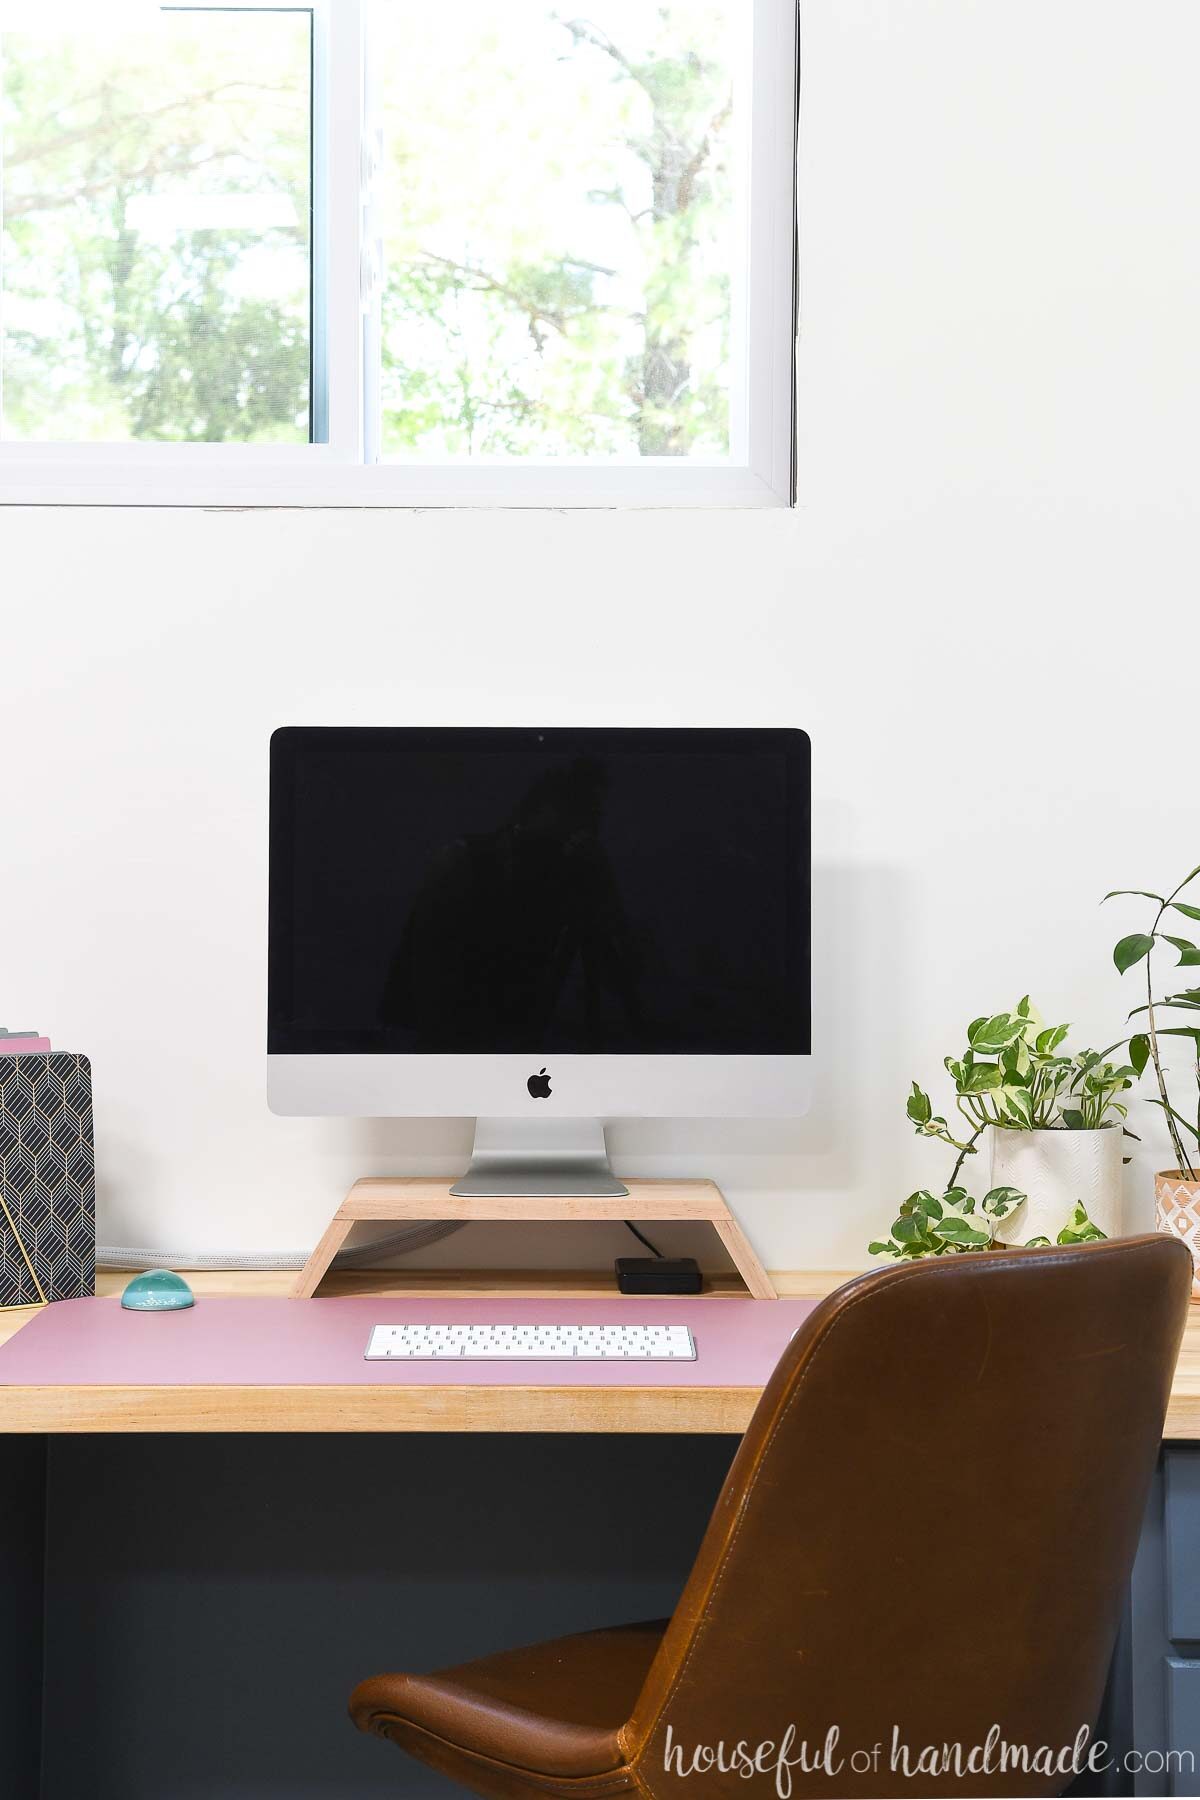
Raise your monitor to the right height with this simple wood monitor stand.
Monitor stands are more than just a pretty desk accessory. Having your monitor at the right height is better for ergonomics and that is better for you!
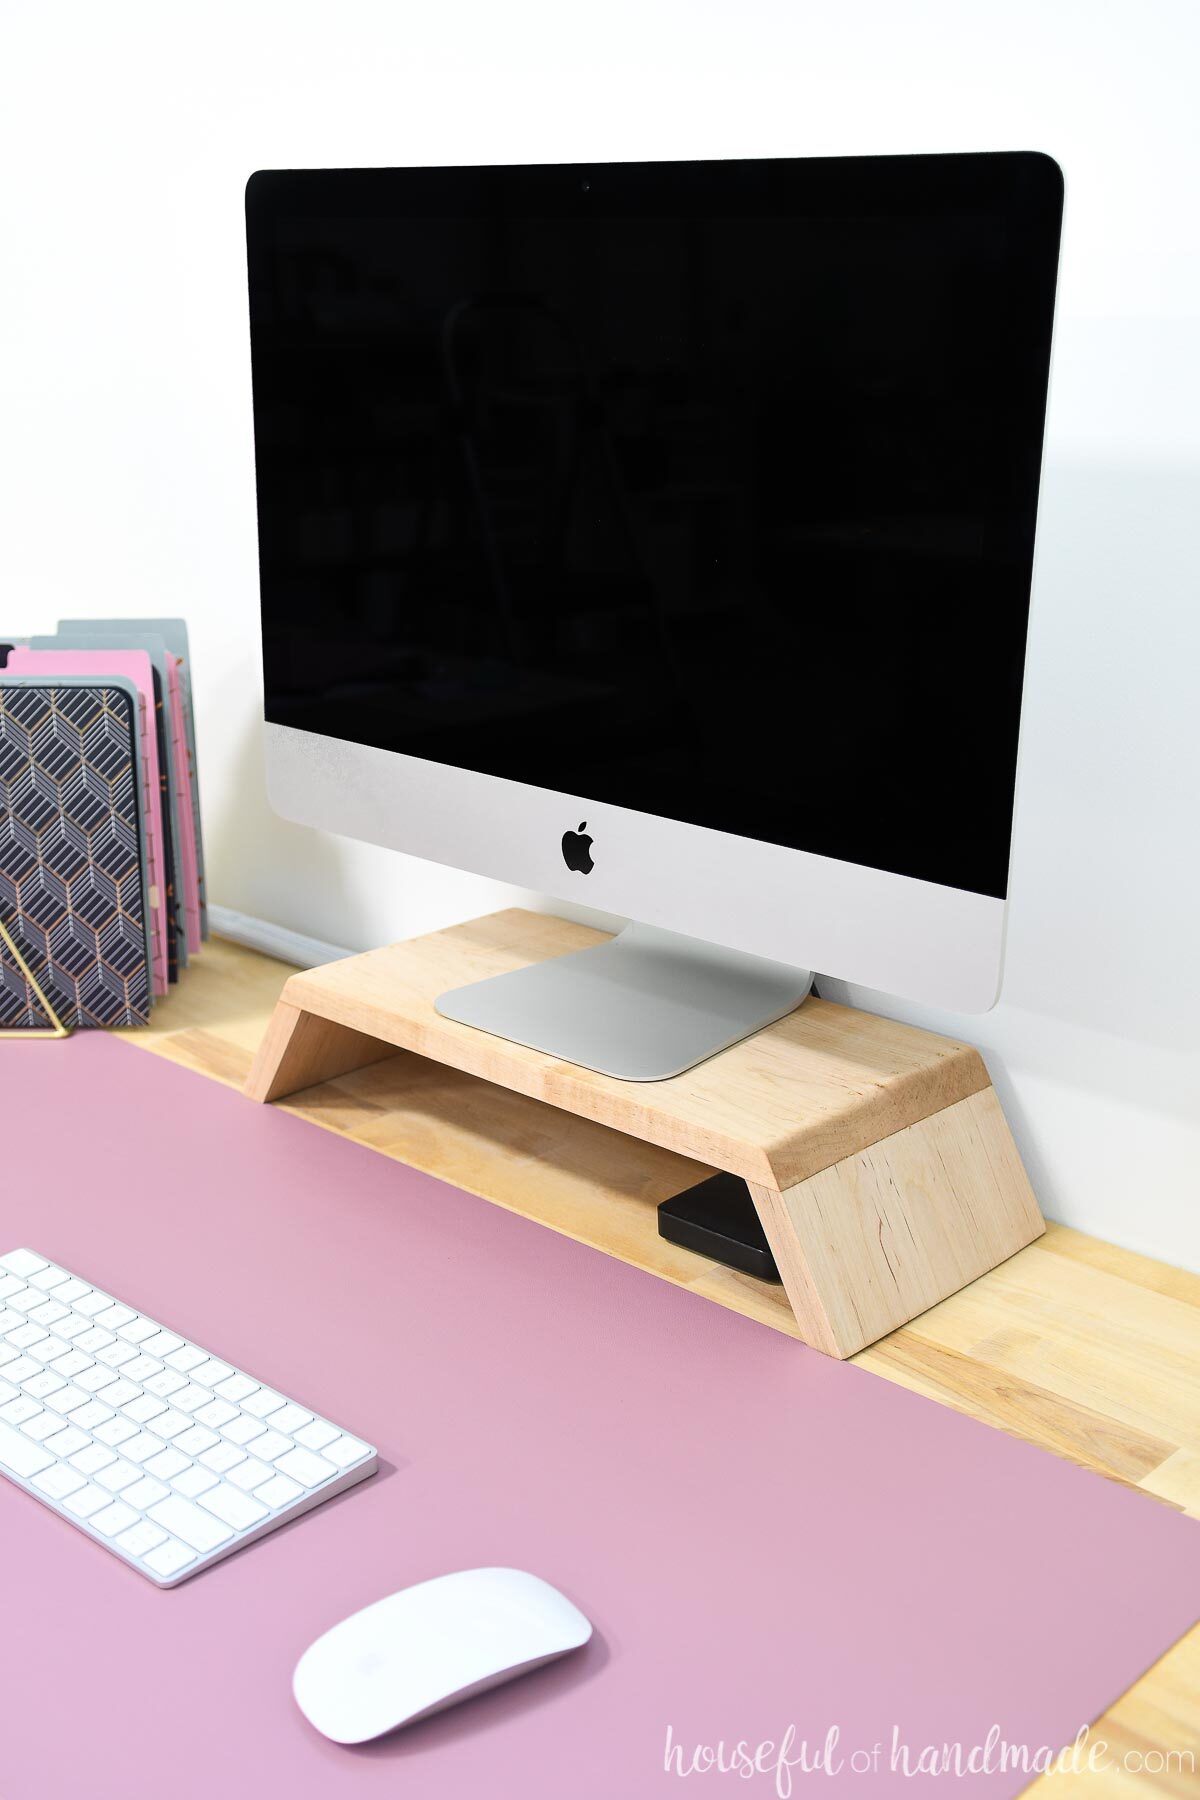
Plus this DIY monitor stand creates a super handy shelf on your desktop. You can use the space under the monitor to store backup drives, cords, and more so your desk stays cleaner.
And this easy to make monitor stand is made from just a few small pieces of wood. Check your scrap wood pile, you might already have what you need to make it!
This post may contain affiliate links. As an Amazon Associate I earn from qualifying purchases. Click here to read my full disclosure policy.
Why do you need a Monitor Stand?
Most computer monitors are too low, especially if you are working on a laptop! You want the upper third of your monitor level at eye level when sitting at your desk.
If you spend too much time bending at your neck staring at a too low monitor, you can permanently curve the back of your neck. It can cause poor posture and neck pain.
Luckily it’s easy to raise your monitor to a better height with this simple DIY monitor stand. You can adjust the height of the stand to fit your needs.
To raise or lower the height of your monitor stand while building, just increase or decrease the length you cut the leg pieces.
DIY Laptop Stand
You can use this monitor riser for your laptop too! You just may need to make a few adjustments.
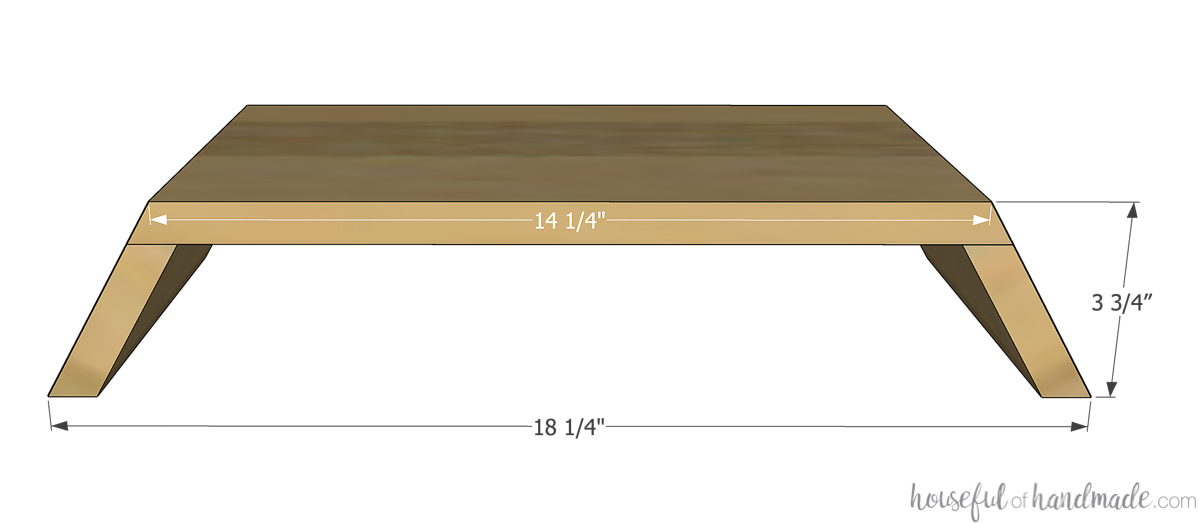
This monitor stand is made using a scrap piece of 1×8 lumber. A 1×8 board is actually 7 1/4″ wide making this monitor stand 7 1/4″ deep.
If your laptop is deeper than that, you will need to use a wider board so that your laptop stand is deep enough for it. See the actual measurements for different nominal board sizes here.
Also, this monitor stand is 3 3/4″ tall as built. If you want need it taller for your laptop stand, you just need to cut the leg pieces longer.
EXPERT TIP:
For every 1″ longer you make the legs, you will gain 7/8″ in height on your stand.
How to make a Monitor Stand
Tools Needed:
- Sliding miter saw
- You need to be able to cut the depth of your board. You could also make the angled cut with a circular saw or table saw.
- Brad nail gun
- Sander
- Clamps
Supplies:
- 24″ of 1×8 board
- 5/8″ brad nails
- 1 1/4″ brad nails
- Sand paper
- Sealer
STEP 1- Cut Boards
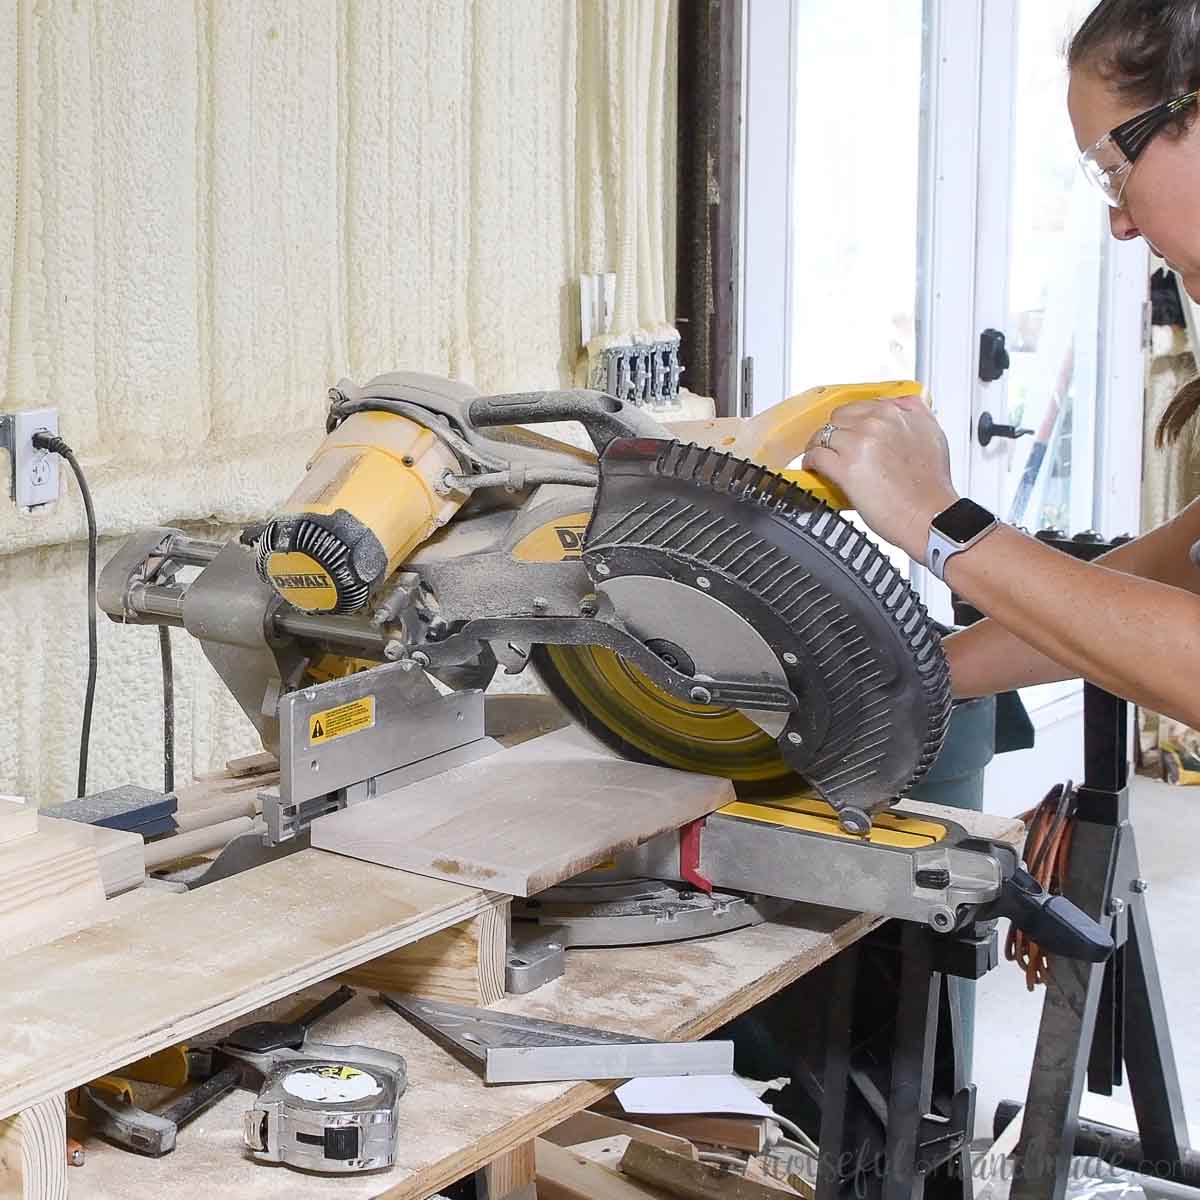
Set your miter saw to cut at a 30 degree angle.
If you do not have a sliding miter saw that can cut at least 8″ long (or longer if you are using a wider board), you can make the angled cuts on a table saw or with a circular saw with a guide track.
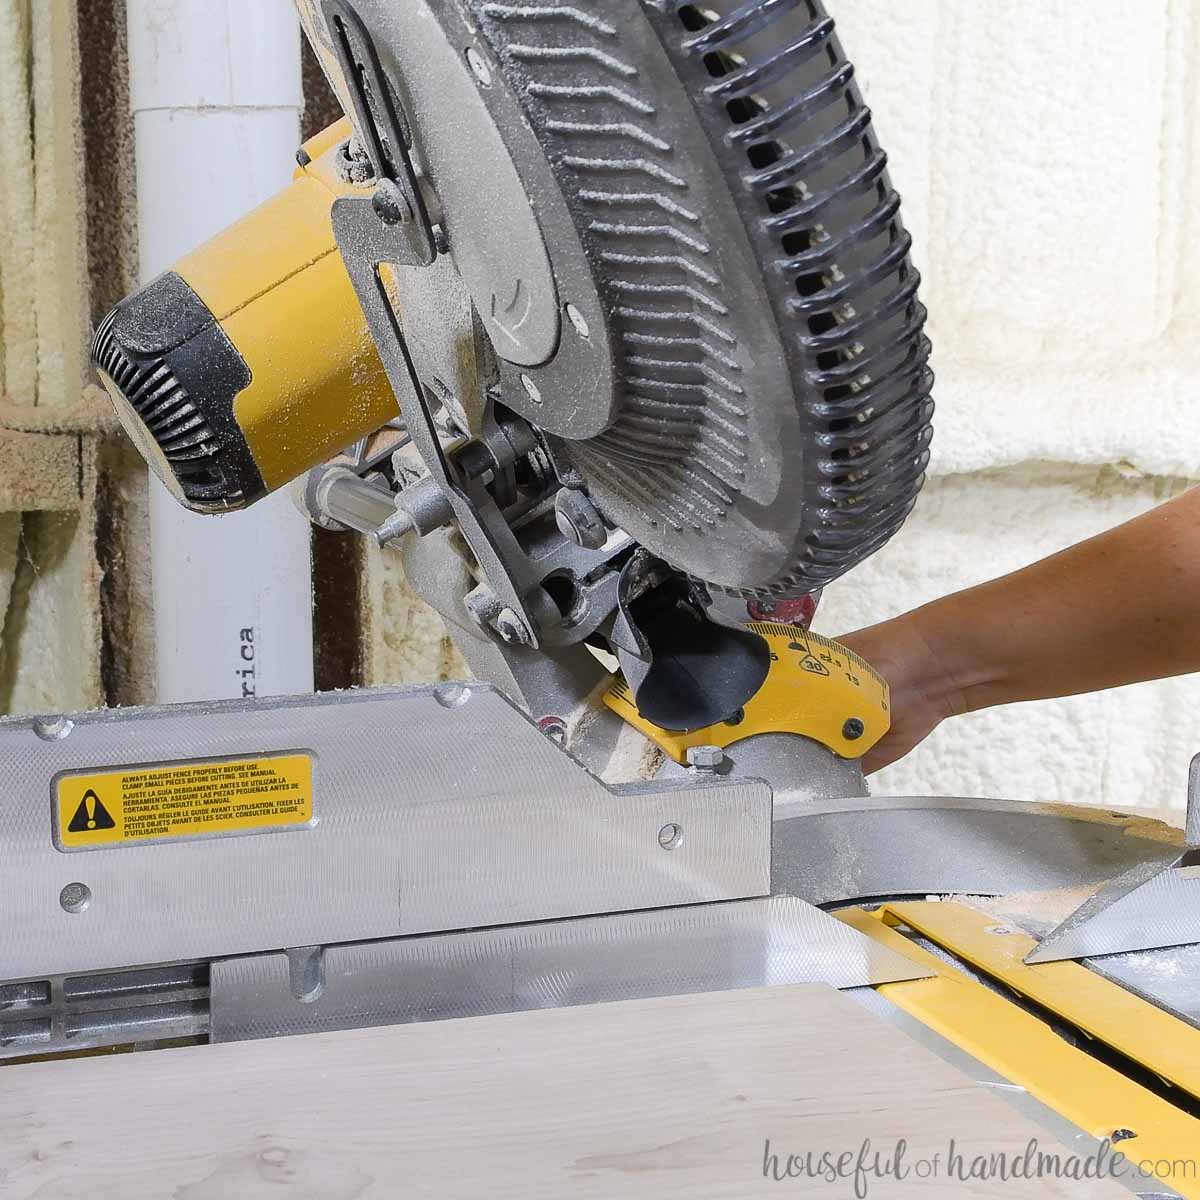
Cut the edge of the 1×8 board at the angle.
Take care to keep the blade straight as you cut.
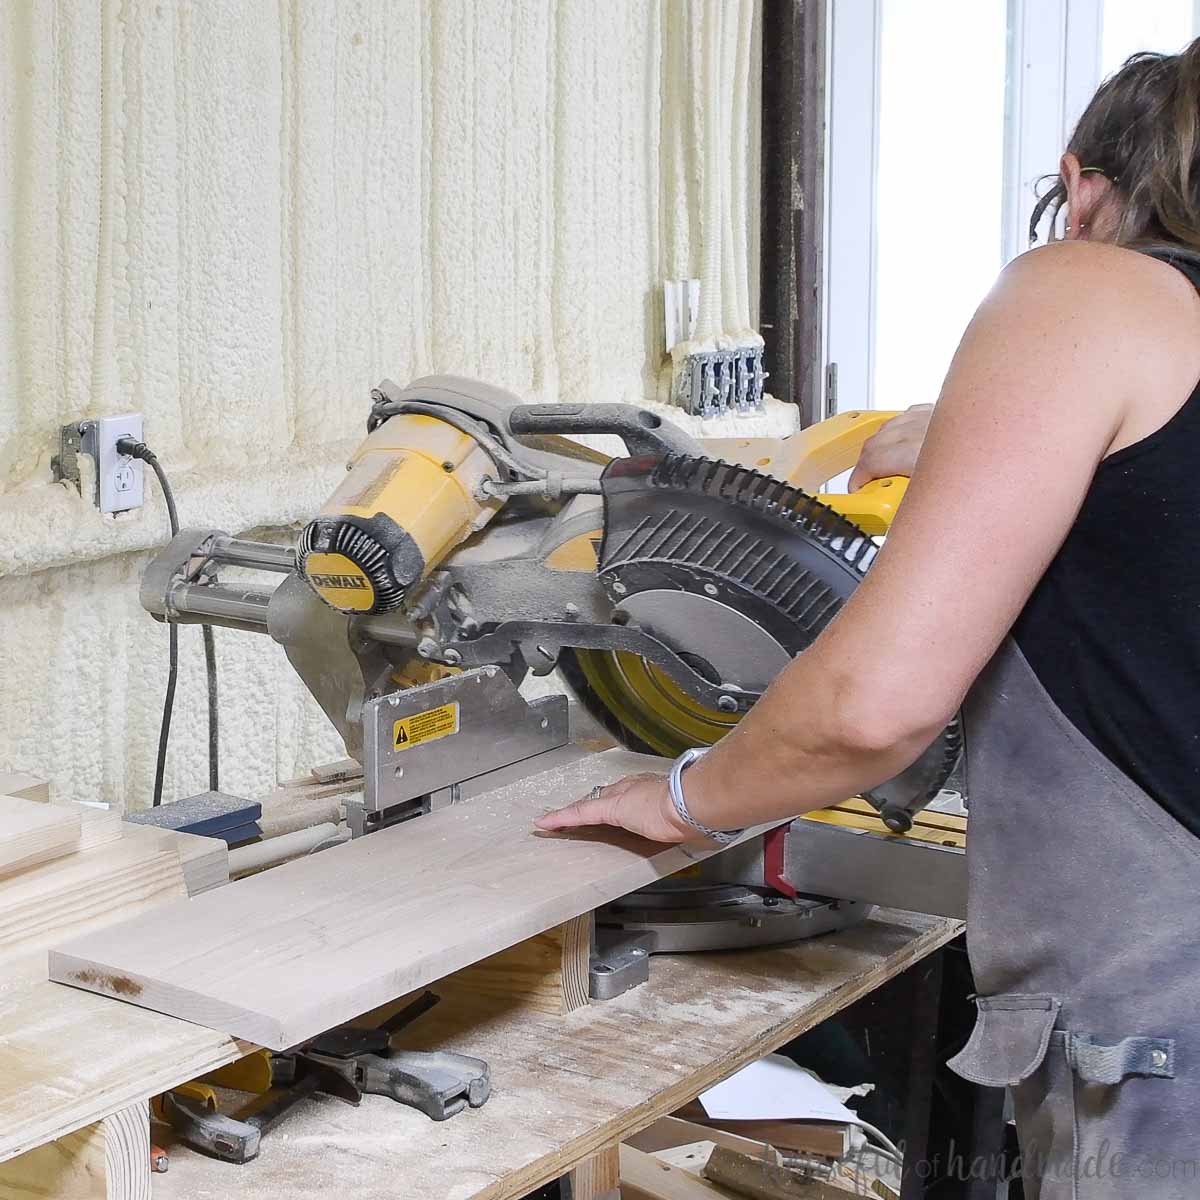
Measure from the long end of the angle 15″ and make a mark.
Draw a line perpendicular to the edge of the board.
Flip the board over so you can see your line. This will ensure the two cuts are now angled towards each other.
Line up the blade with your line and make the cut.
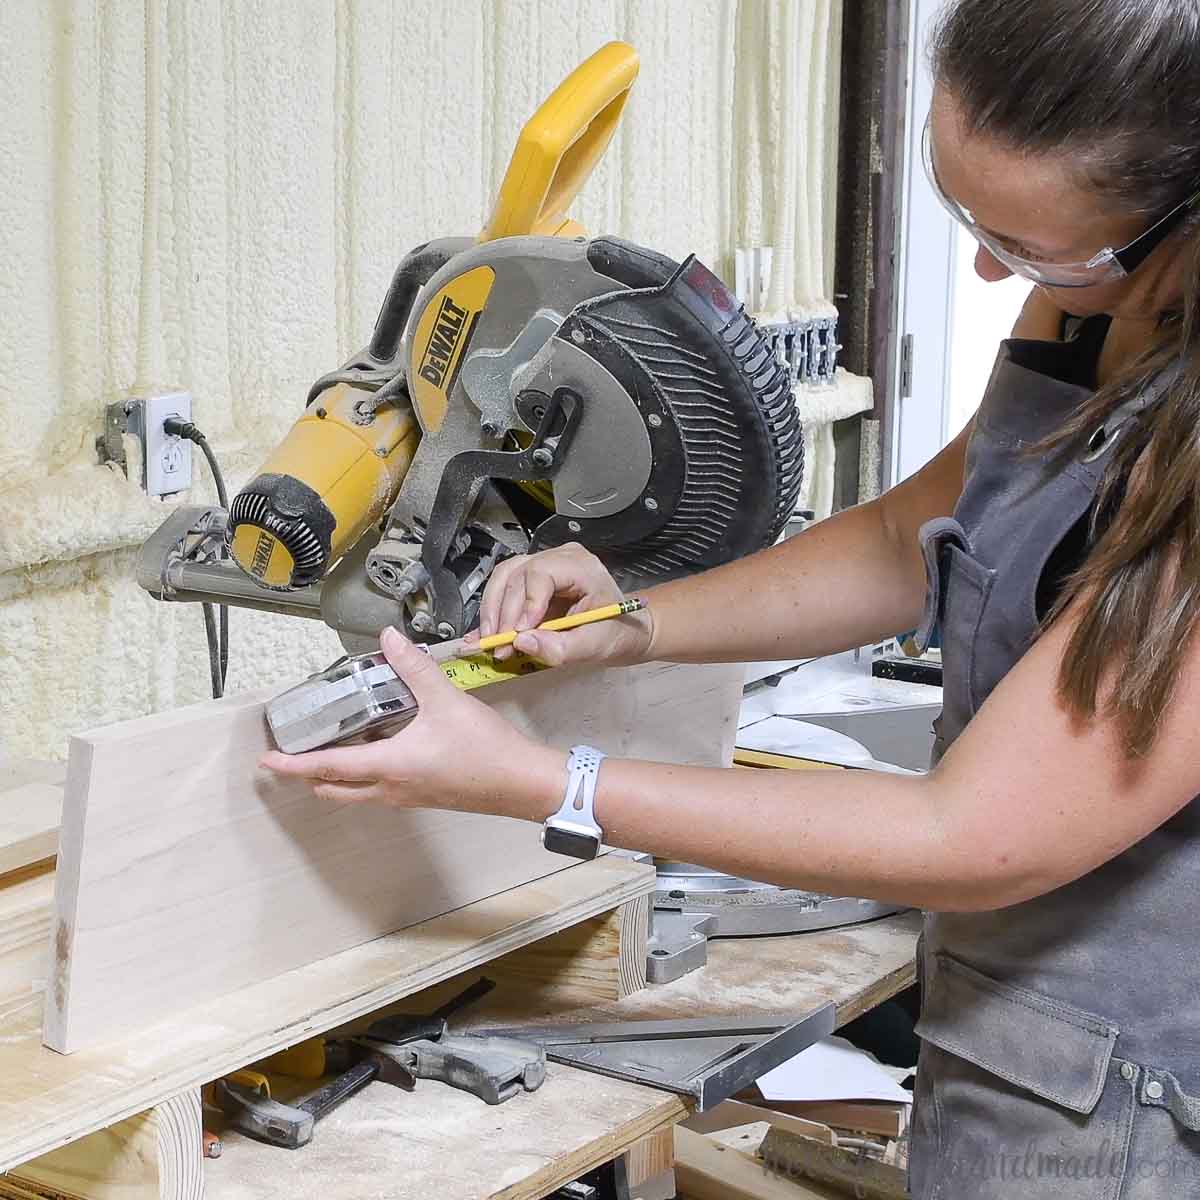
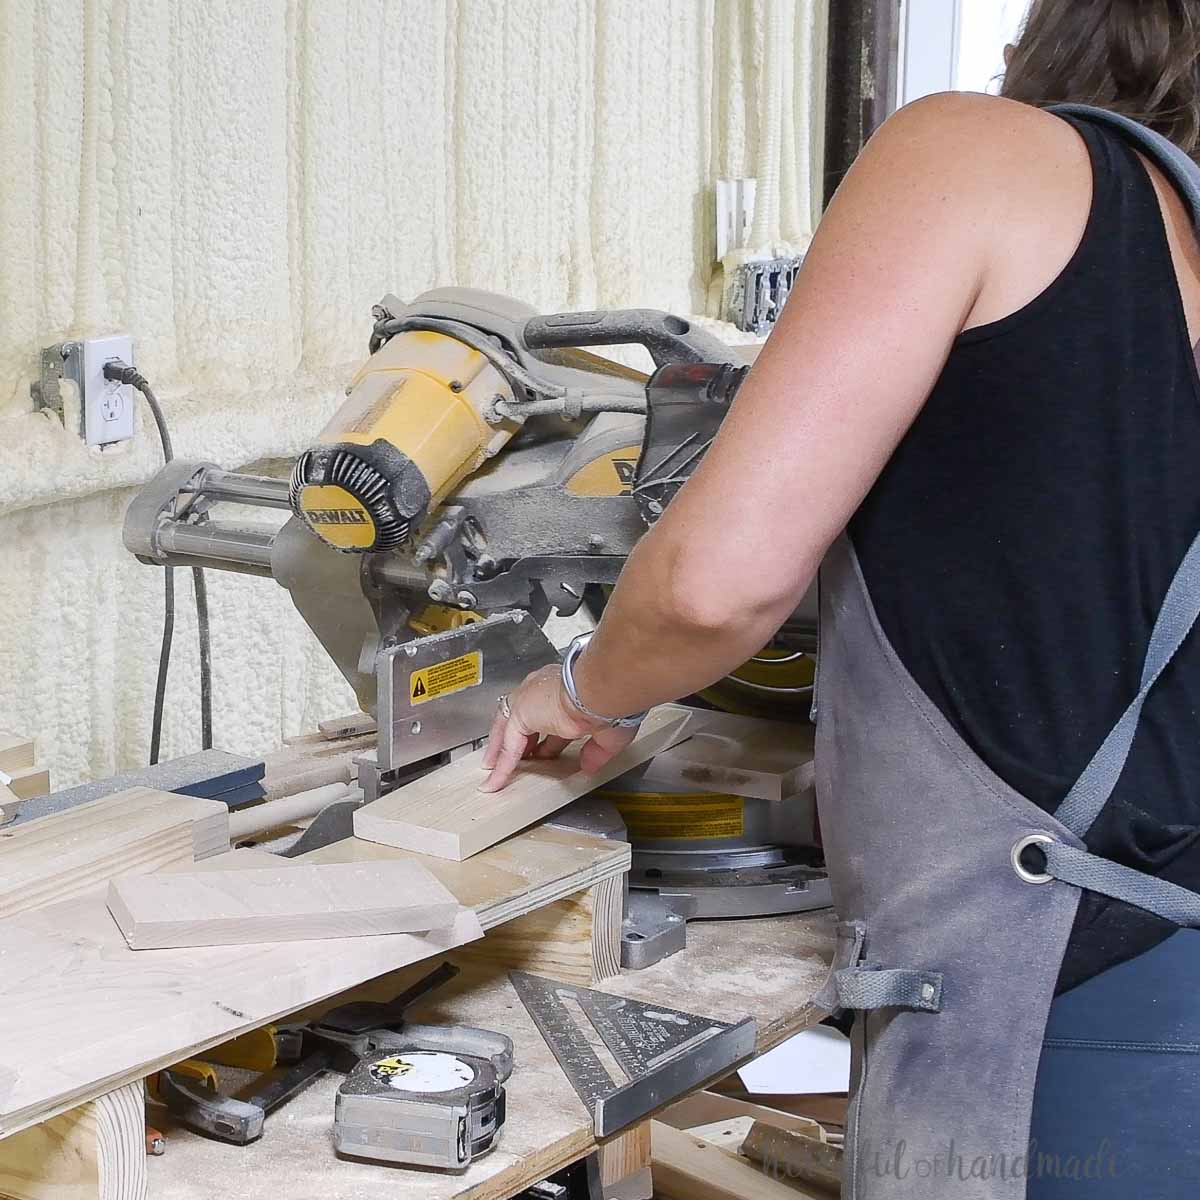
To cut the legs, measure from the short side of the angle 3 1/4″ and draw a line.
Cut along this line. But this time, do not flip the board. You want these angled cuts parallel to each other.
Repeat for a second leg piece.
EXPERT TIP:
To keep your fingers safe when cutting small pieces on the miter saw, use a longer scrap piece of wood and press it down on the wood to hold it while cutting.
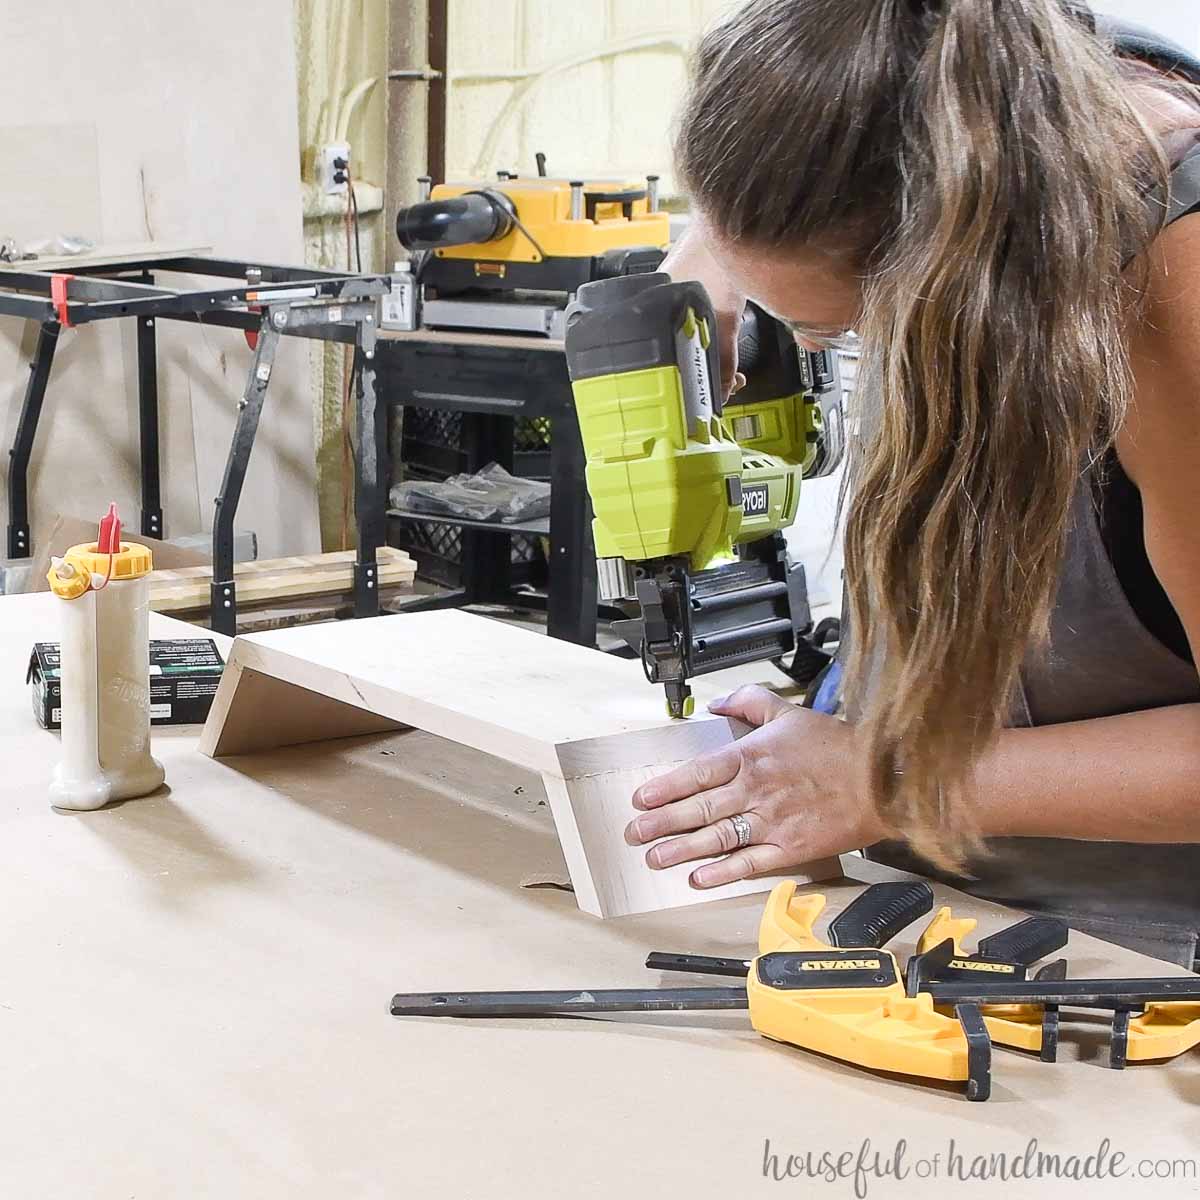
STEP 2- Attach Legs to Riser
Add a good amount of wood glue to the top of the leg pieces.
The glue is where most of the strength is coming from so you want it to squeeze out of the seams as you attach the legs.
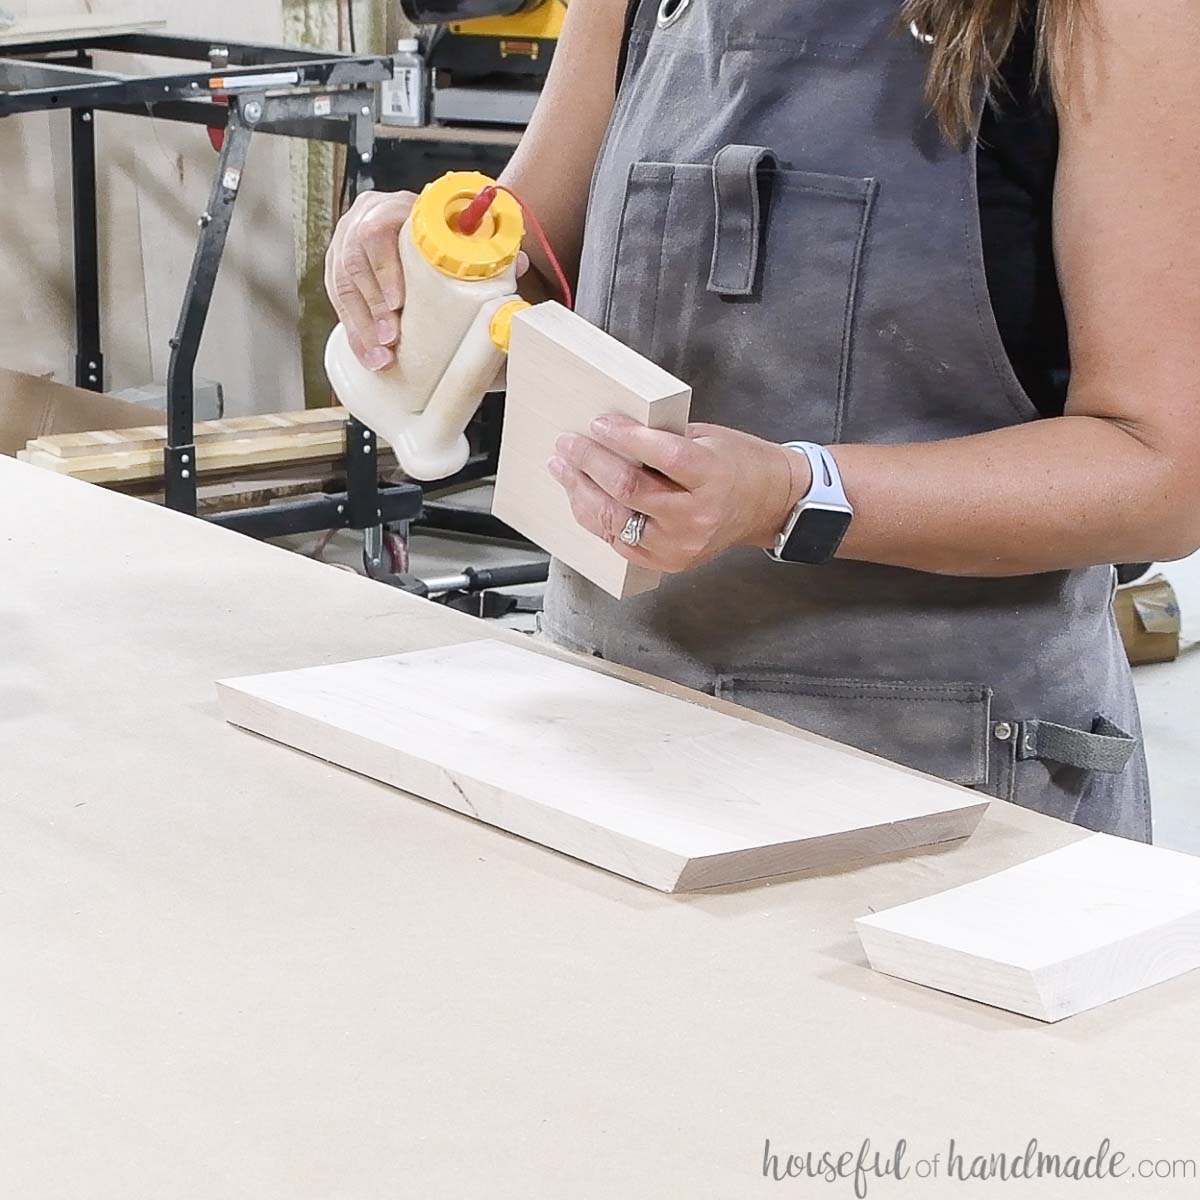
Line the leg piece up with the side of the top so the outside of the leg is flush with the edge.
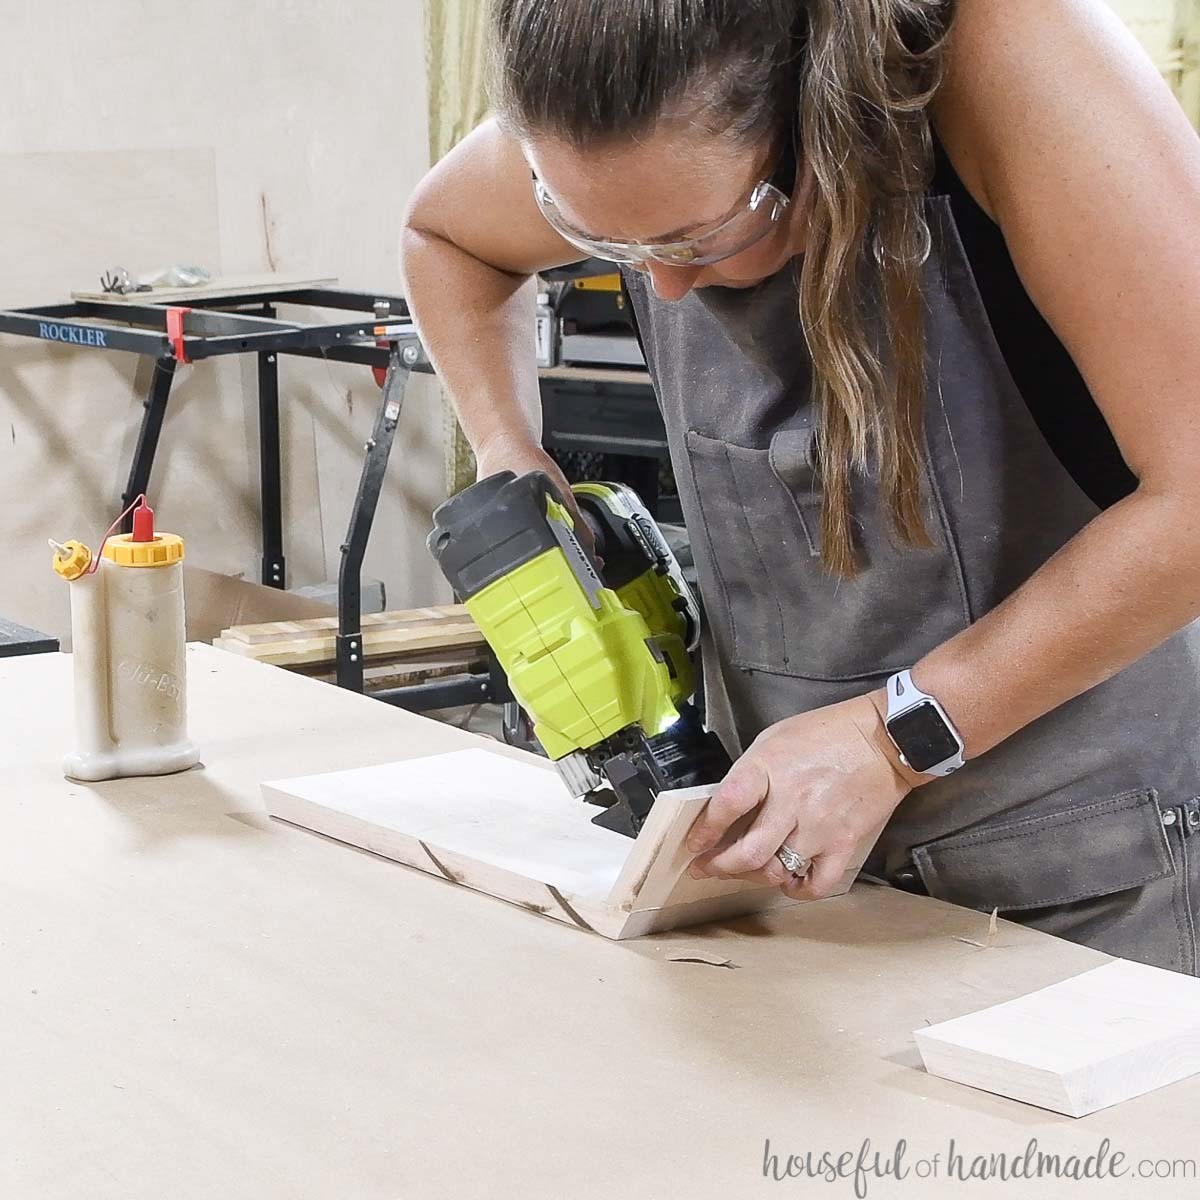
Hold it tight and secure it with the 5/8″ brad nails.
You need the smaller nails so you don’t blast them through the side as you attach them.
Repeat for the other leg.
Then flip the monitor stand over and using the 1 1/4″ nails, attach the legs from the top.
Make sure to angle the nail gun in the direction of the legs so that the nails go into the leg pieces.
I ended up using 9 nails (spaced about 1/2″ apart) along each leg. It was probably overkill, but I figured more was better than not enough.
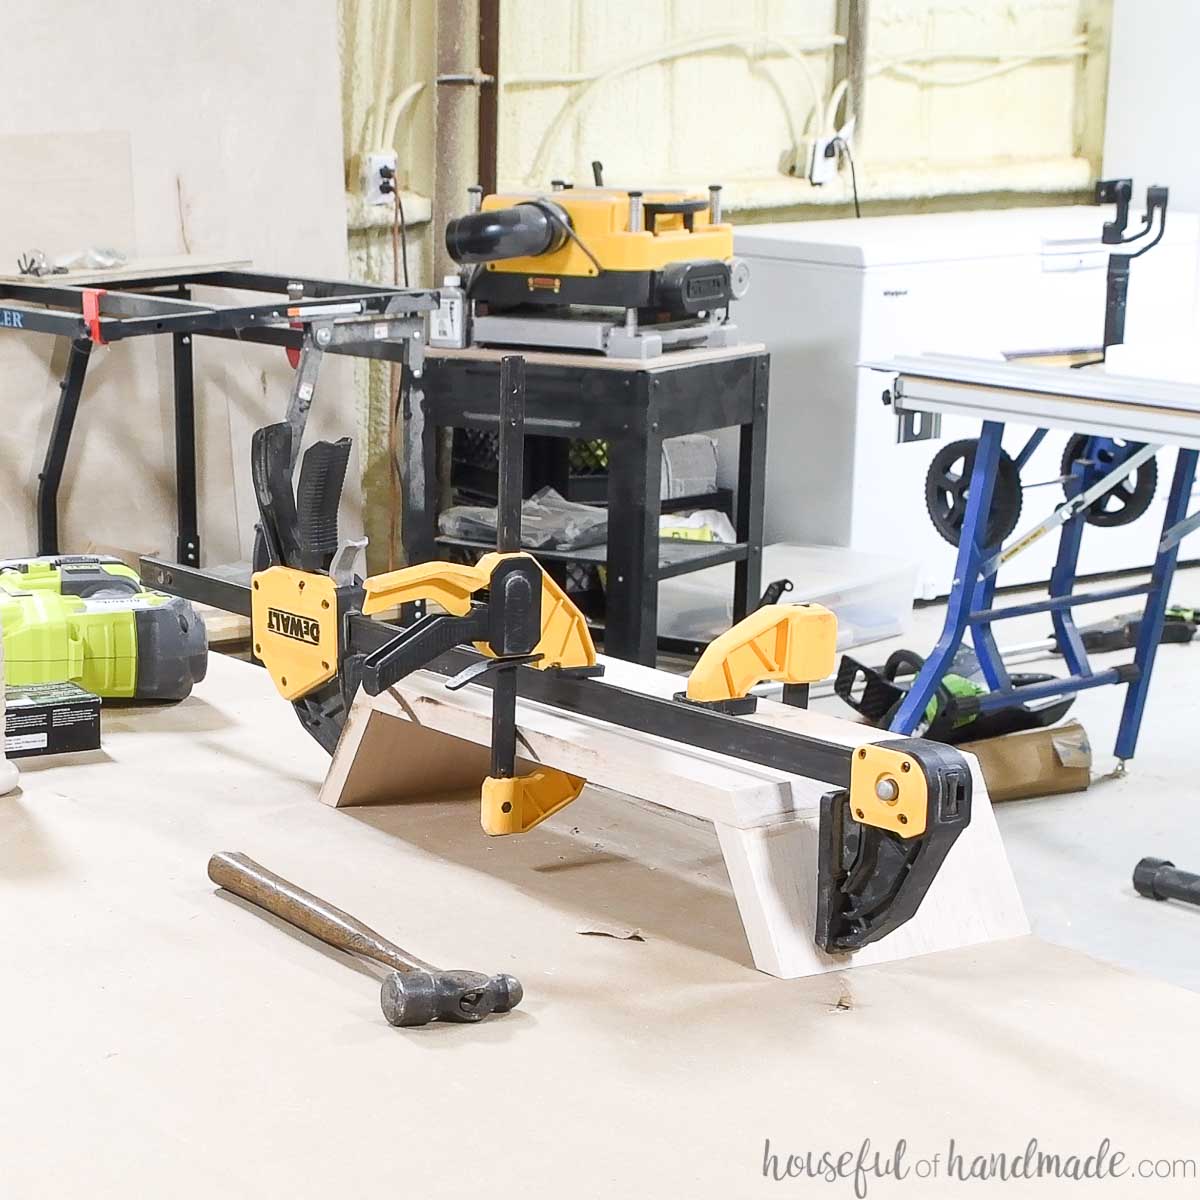
STEP 3- Clamp While Glue Dries
You will need to clamp your new monitor stand while the glue dries to help hold everything nice and tight.
But, this shape can be hard to clamp.
I figured the easiest way to clamp it was to clamp one longer clamp to the top, then use the longer clamp to keep the legs from splaying.
Then I clamped the entire thing firmly to the table.
Keep a close eye on the seams as you tighten the clamps to make sure they stay nice and flush.
STEP 4- Sand and Finish
Once the glue is dry, remove the clamps. Fill the nail holes with wood filler to hide them.
Then you are ready to sand everything smooth.
I used my orbital sander to also round over the top edge while sanding.
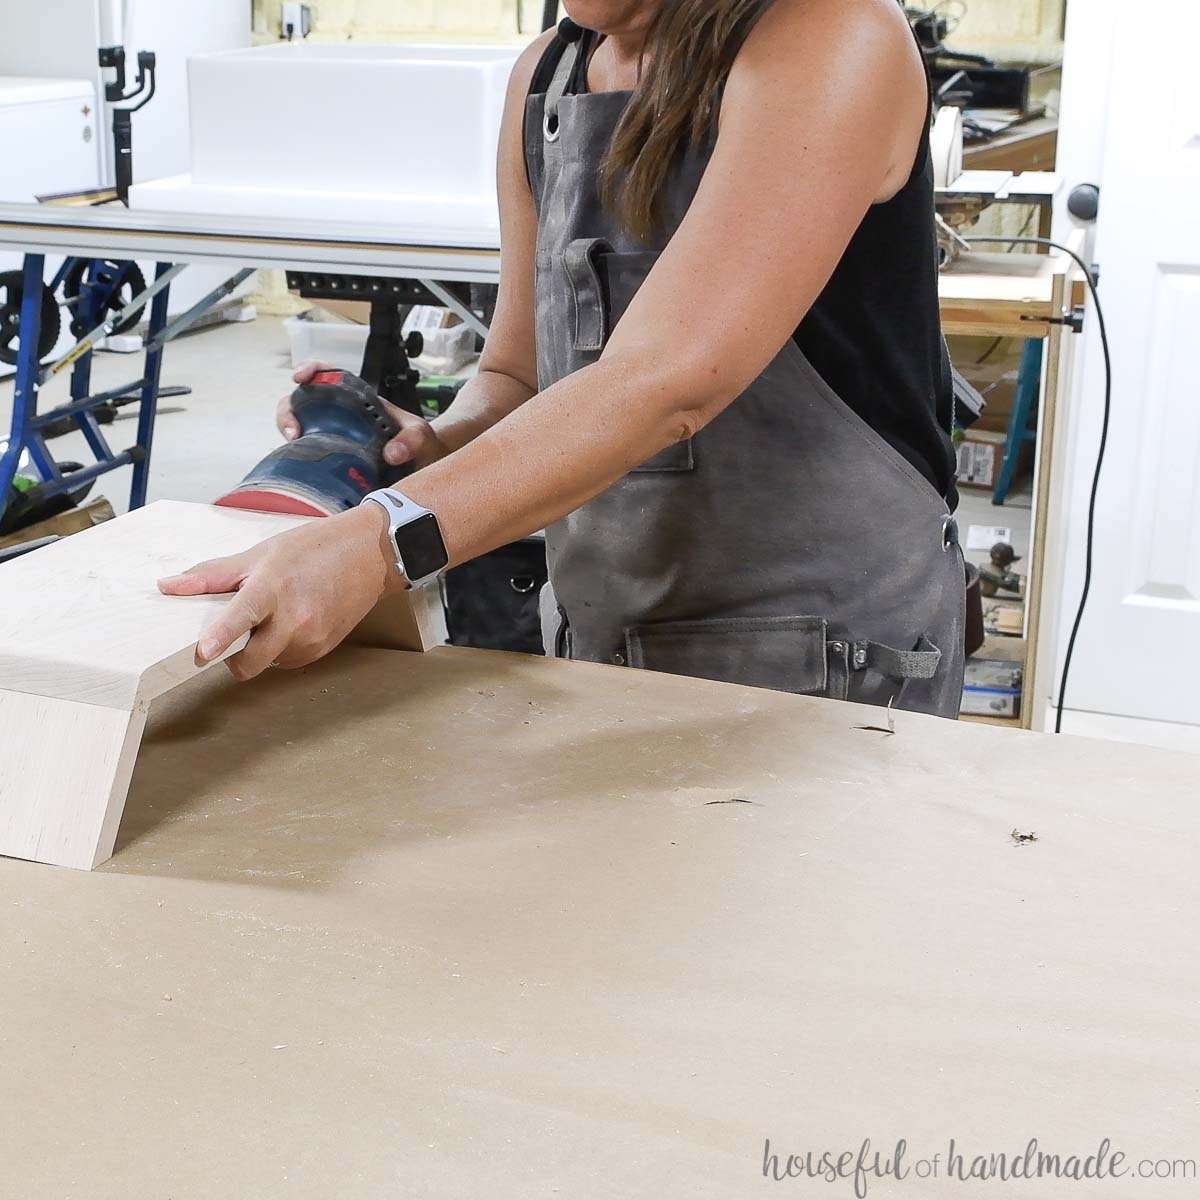
Apply a coat of sealer or paint to you new monitor stand. I used a scrap of maple for my stand so all it needed was some sealer to bring out the beautiful wood.
Then enjoy using your computer at the right height from now on!
More Scrap Wood Projects
Scrap pile getting out of hand?
Now is the best time to create some amazing projects with all those scraps! I have teamed up with my friend Shara from Woodshop Diaries to share a new scrap wood projects every Tuesday this August (#scrapwoodsummer).
Check out all the amazing scrap wood projects. I will update as we add more this month!


Have fun building with scraps!
