Organize your bookshelf with some fun new DIY bookends.
Bookends make your bookcase look so fancy.
They make it easy to stage areas with books, trinkets, photos and more. But what do you do if you don’t have any?
You make your own DIY bookends from scraps of wood!
This post may contain affiliate links. As an Amazon Associate I earn from qualifying purchases. Click here to read my full disclosure policy.
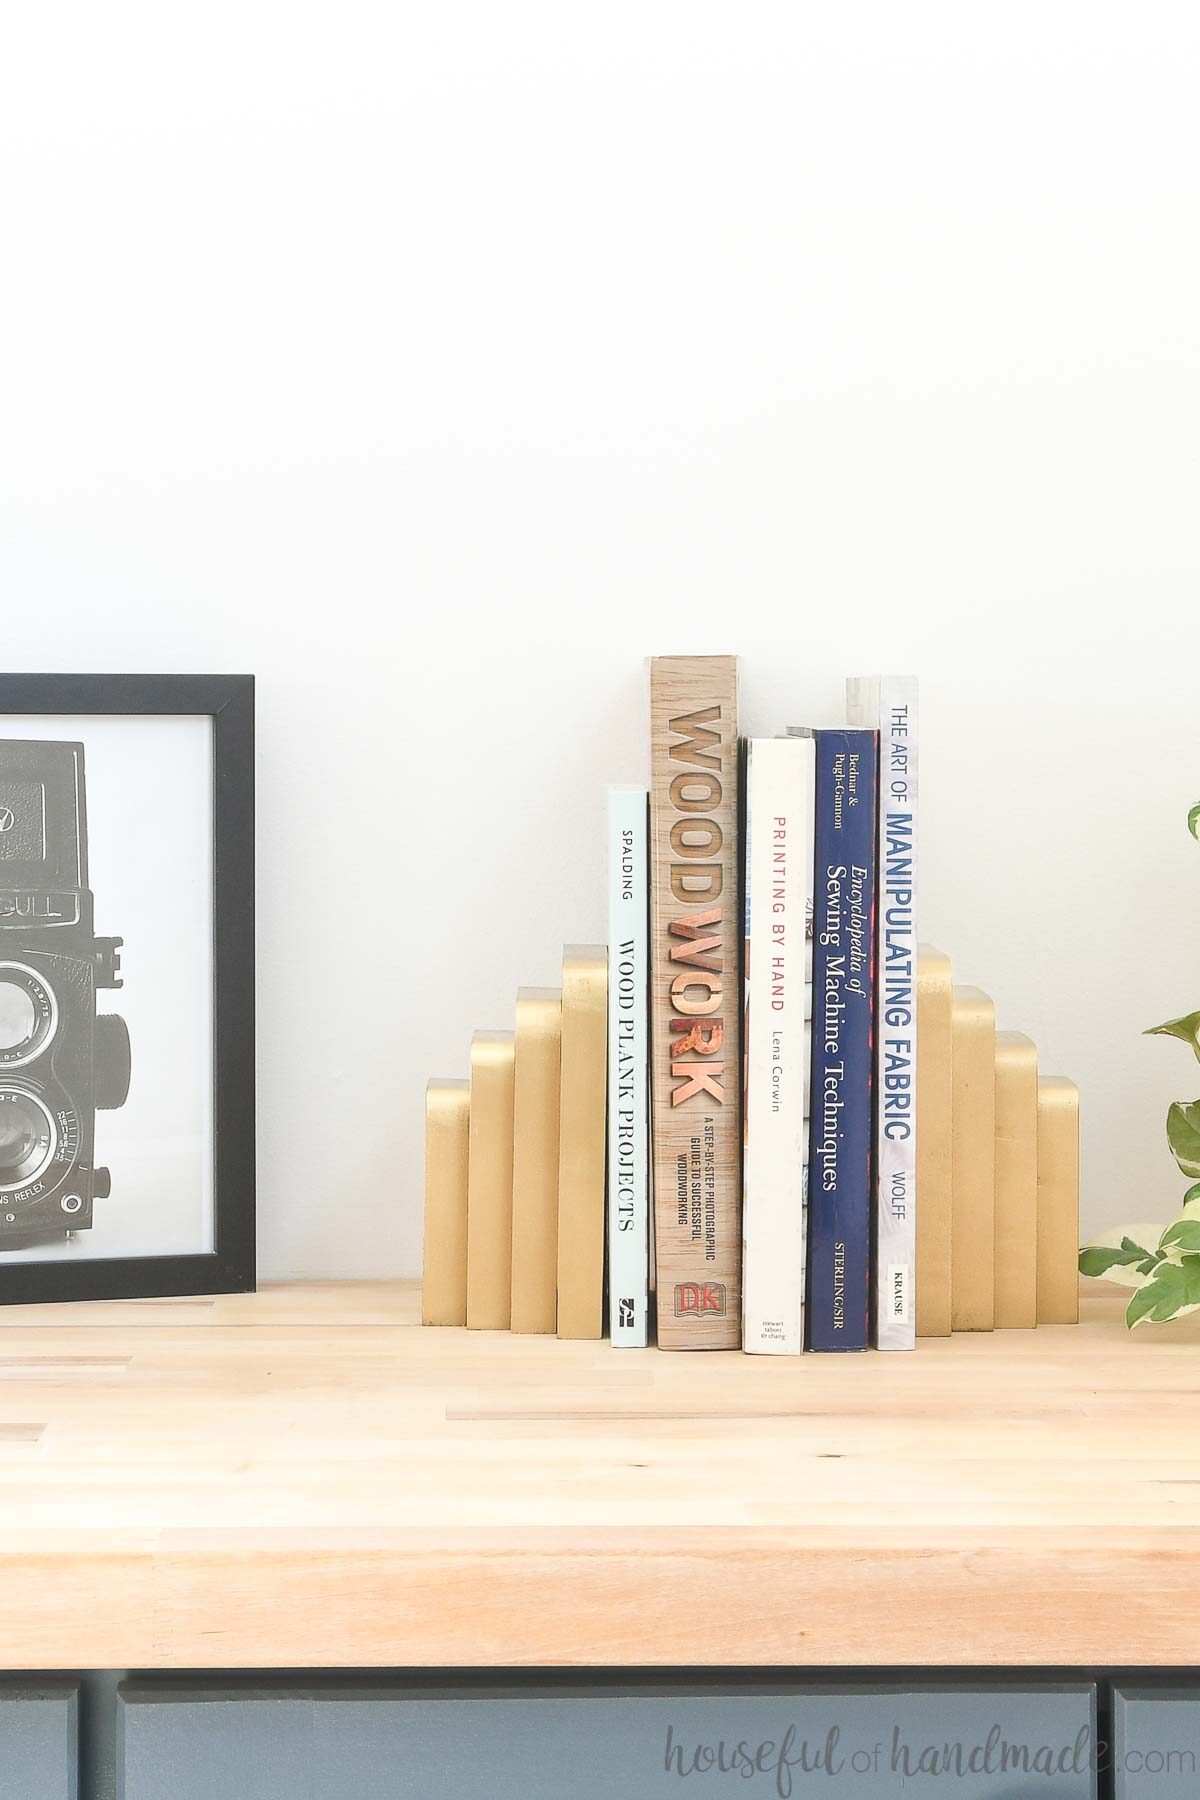
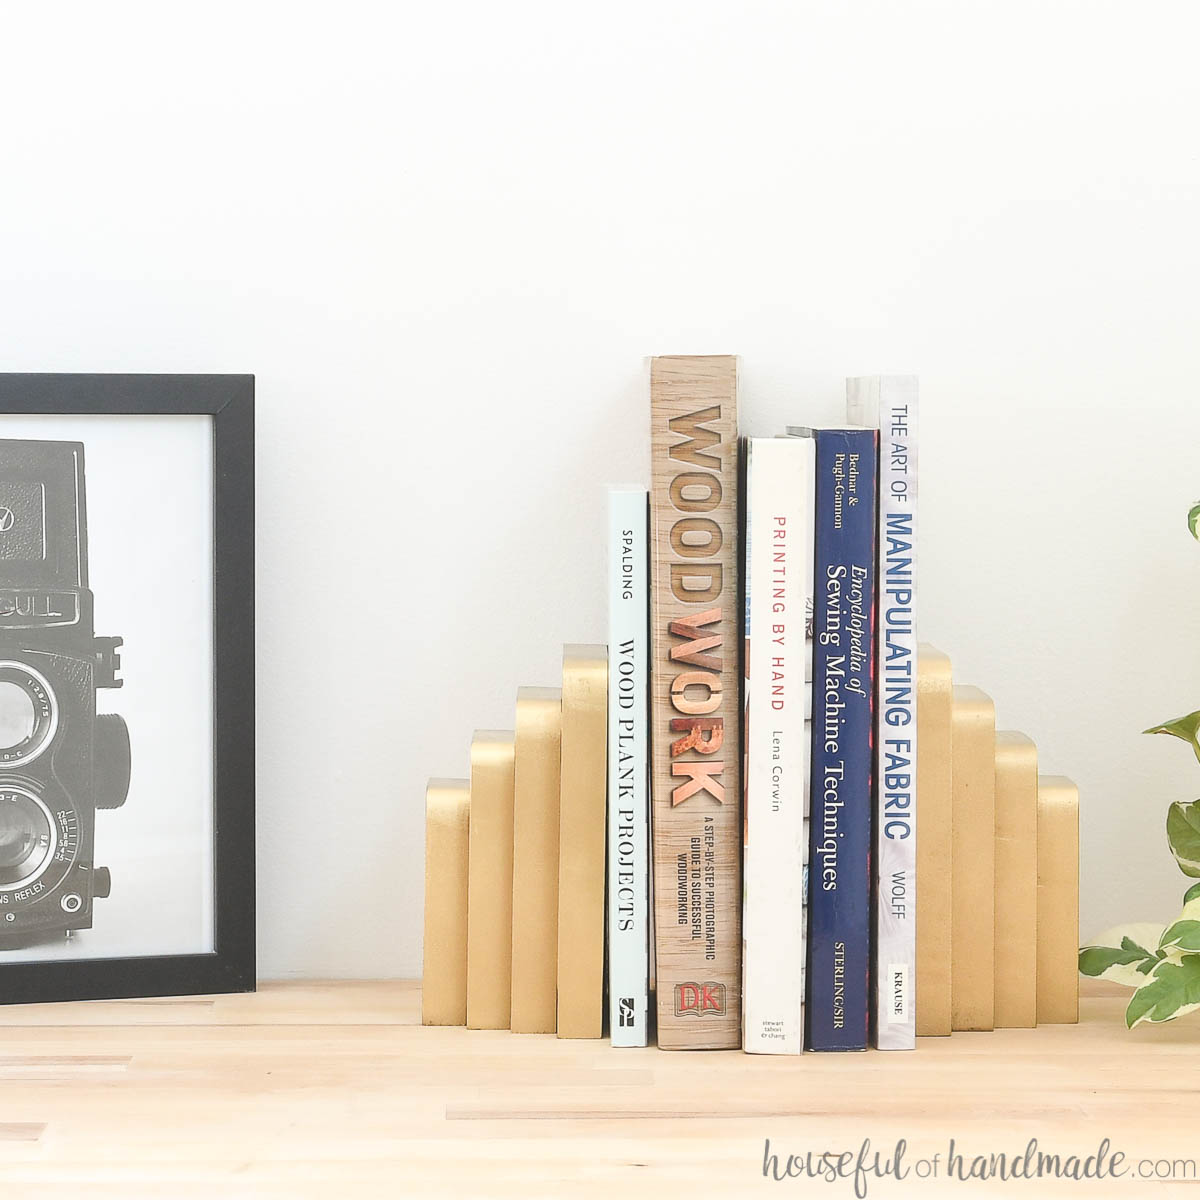
Simple Wooden Bookends
These simple to make bookends are a great beginner DIY. They come together quickly and look amazing!
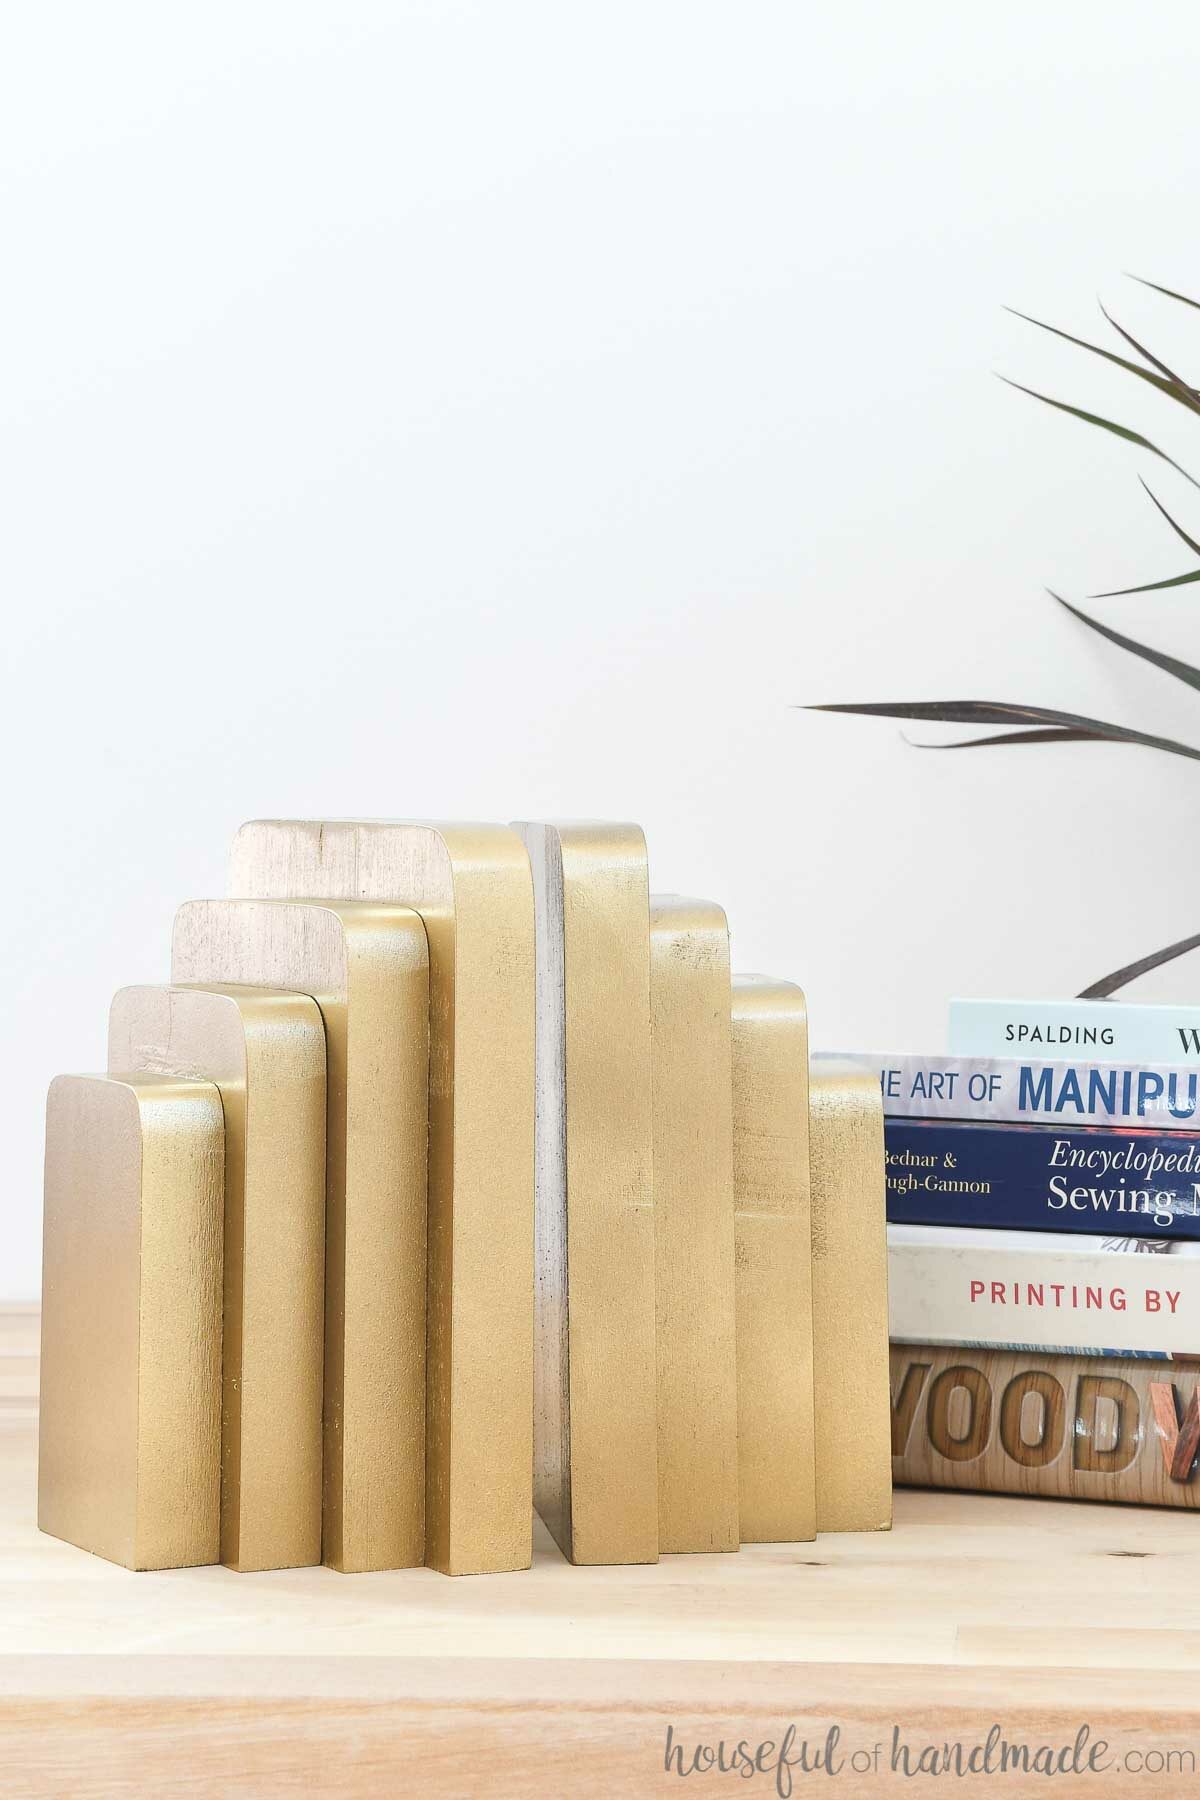
You can have fun with the finish of you bookends. Spray paint them any variety of colors, or leave them natural wood.
I chose to spray paint mine to look like brass. And they look amazing on my new DIY built-in desk with a butcher block countertop.
Bookends are a great DIY because they are so handy.
You can use them lots of places to help organize your books. And they add tons of style while you do it.
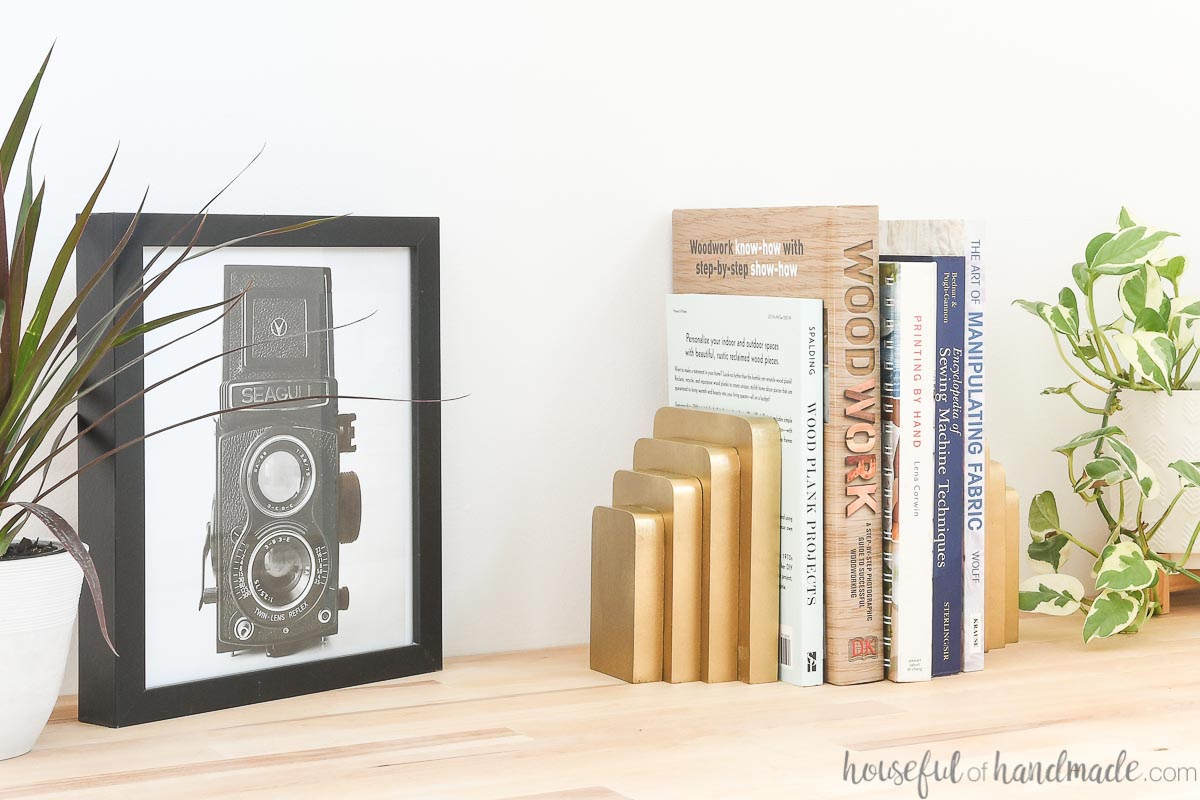
Here are just a few ways you can use your DIY bookends:
- Group together books in a bookcase to display things next to them
- Display books on a shelf
- Organize books on your desk
- Store cookbooks on a kitchen countertop
- Display DVDs on your TV console
And many more. So have fun cleaning out the scrap pile and making lots of these easy bookends. Then organize all the books!
How to Make Wood Bookends
Tools needed:
- Miter saw
- I recently upgraded to this larger sliding miter saw (watch for it to go on sale), but all my projects before were built with this inexpensive miter saw that I loved.
- Sander
- Brad nail gun
Supplies:
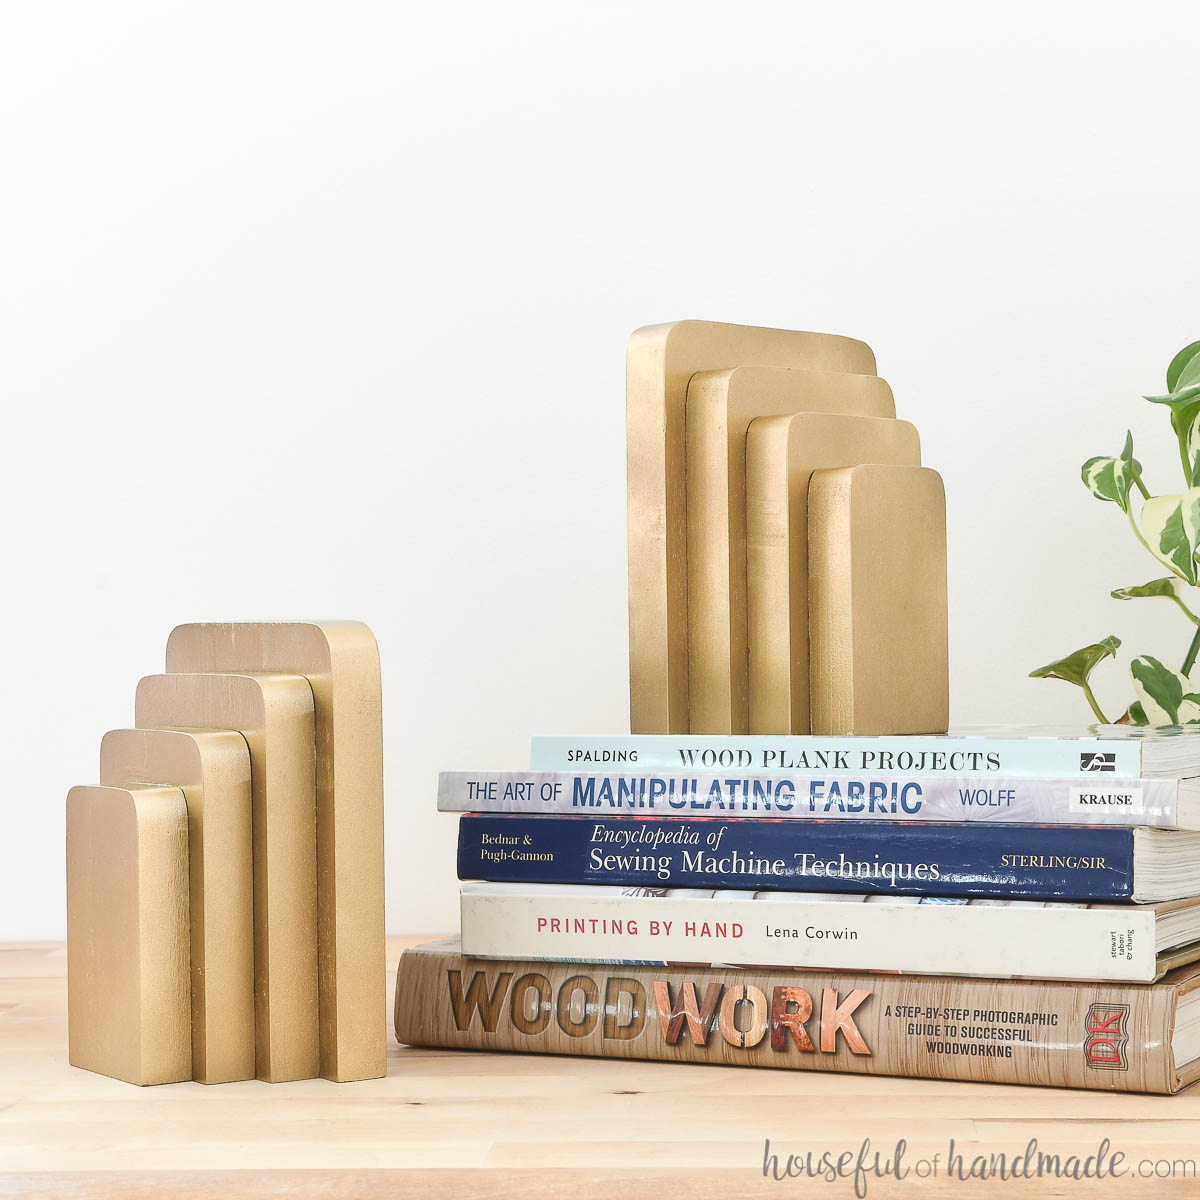
- (2) 5 1/2″ wide by 6 1/4″ long scraps
- (2) 4 1/2″ wide by 5 1/2″ long scraps
- (2) 3 1/2″ wide by 4 3/4″ long scraps
- (2) 2 1/2″ wide by 4″ long scraps
- 1 1/4″ brad nails
- Wood glue
- Spray paint
- To get the brass look I used two different gold paints, one flatter and on the other super shiny.
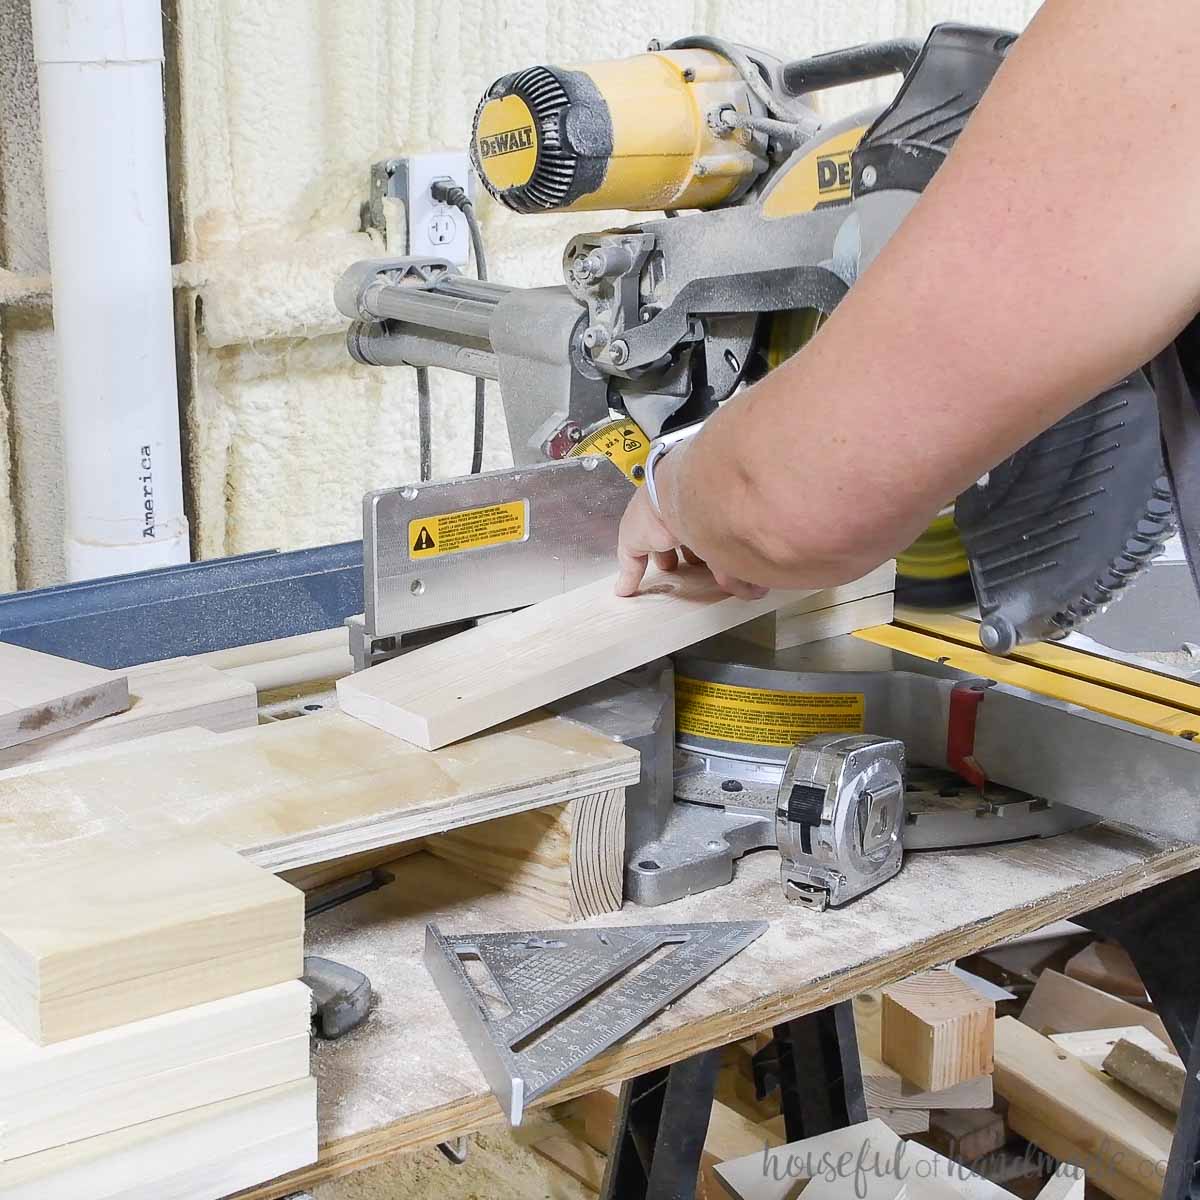
STEP 1- Cut Pieces
Cut your scraps so you have the pieces noted above.
You can use 1×6 for the 5 1/2″ pieces, 1×4 for the 3 1/2″ pieces, and 1×3 for the 2 1/2″ pieces. You will need to cut 1×6 boards 1″ thinner to get the 4 1/2″ pieces.
EXPERT TIP:
Use a scrap piece of wood to help hold the small pieces as you cut them to protect your fingers.
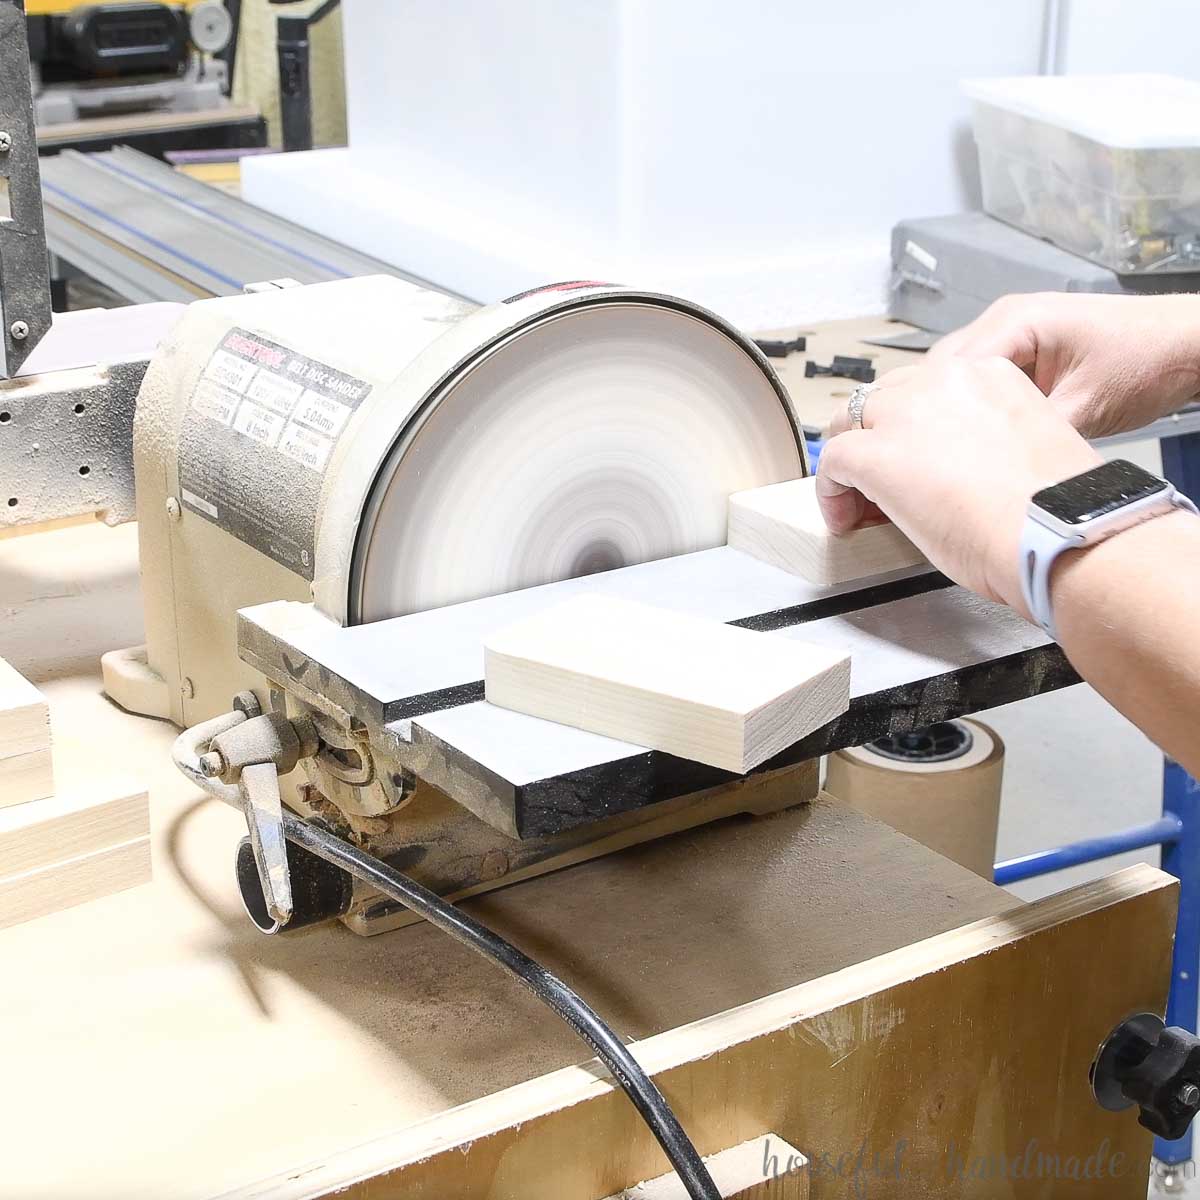
STEP 2- Sand and Shape Pieces
Thoroughly sand all the pieces before assembly.
Once they are assembled they will be much harder to sand smooth.
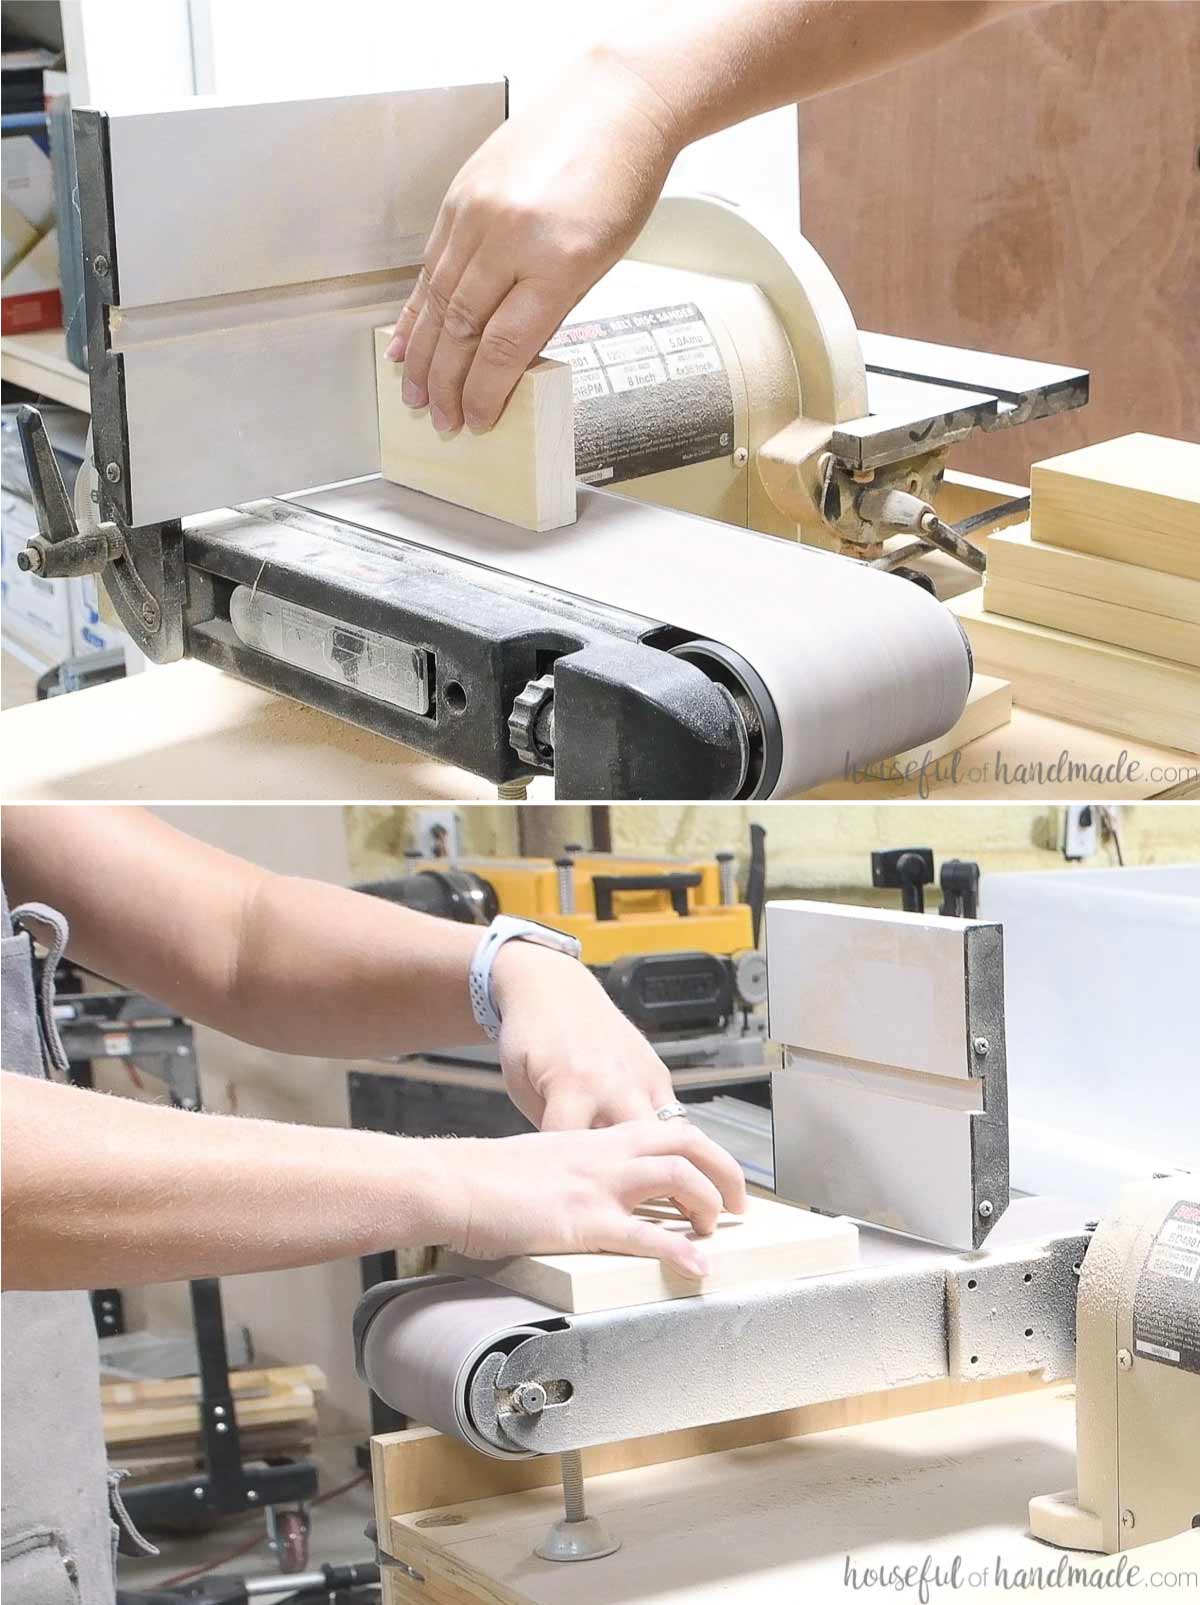
If desired, curve the top two edges of all the boards.
I used a disk sander to quickly curve the boards, but you can use whatever you have. Even a hand sander can be used to round over the edges.
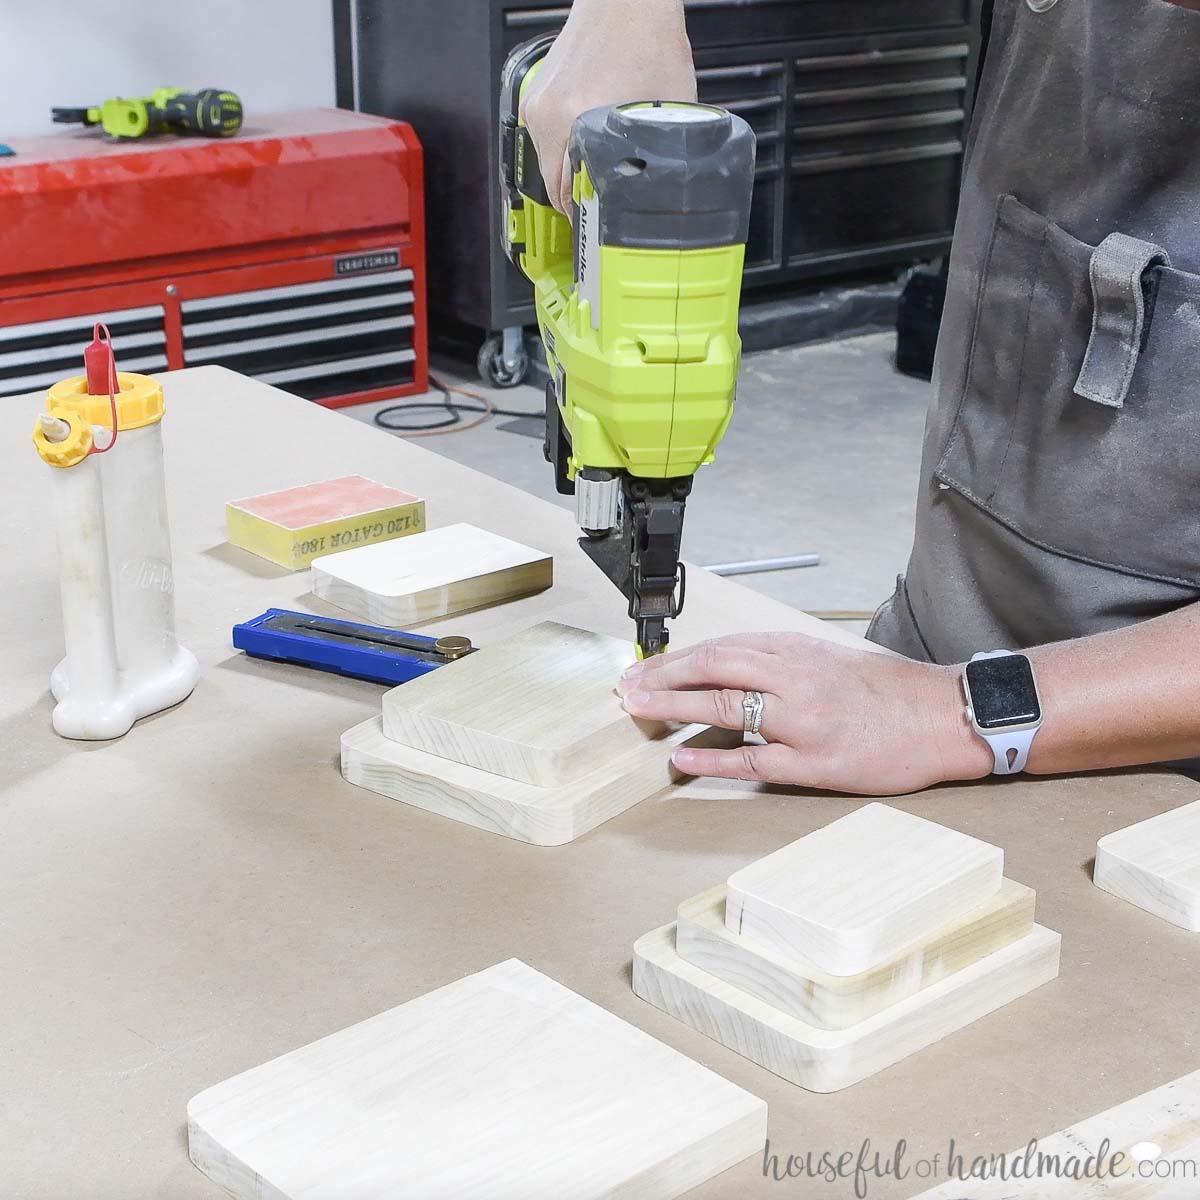
STEP 3- Assemble Bookends
Apply a decent amount of wood glue to the back of a 4 1/2″ wide piece.
EXPERT TIP:
Do not place the wood glue close to the edge to prevent squeeze out when assembling.
Line the board up on the 5 1/2″ wide piece so it is centered side to side and flush with the bottom.
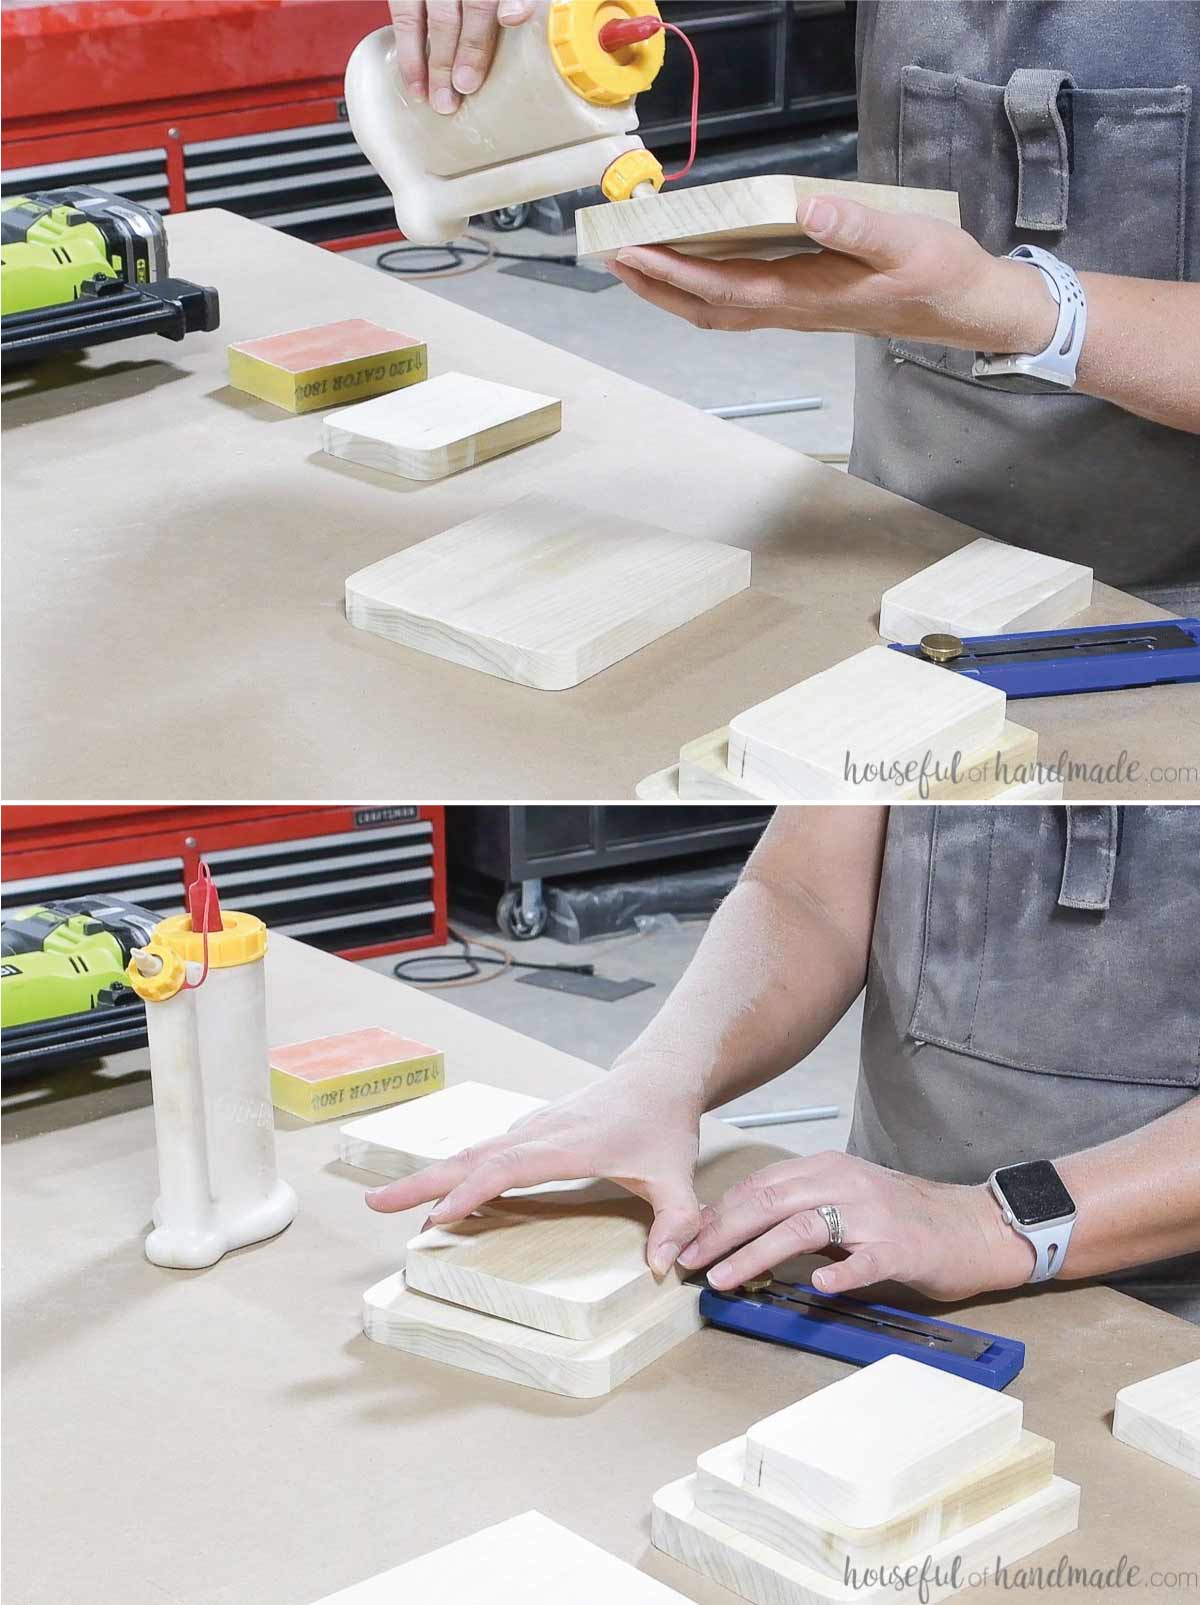
Attach the board with brand nails.
Make sure the nails are at least 3/4″ in from the edges and 1″ down from the top so they will be hidden by the next piece.
Attach the 3 1/2″ piece the same way as the first.
Then apply glue to the smallest (2 1/2″ wide piece) and align on the stack.
Clamp it together until the wood glue dries. Do not use nails on the top piece or you will have to fill the nail holes.
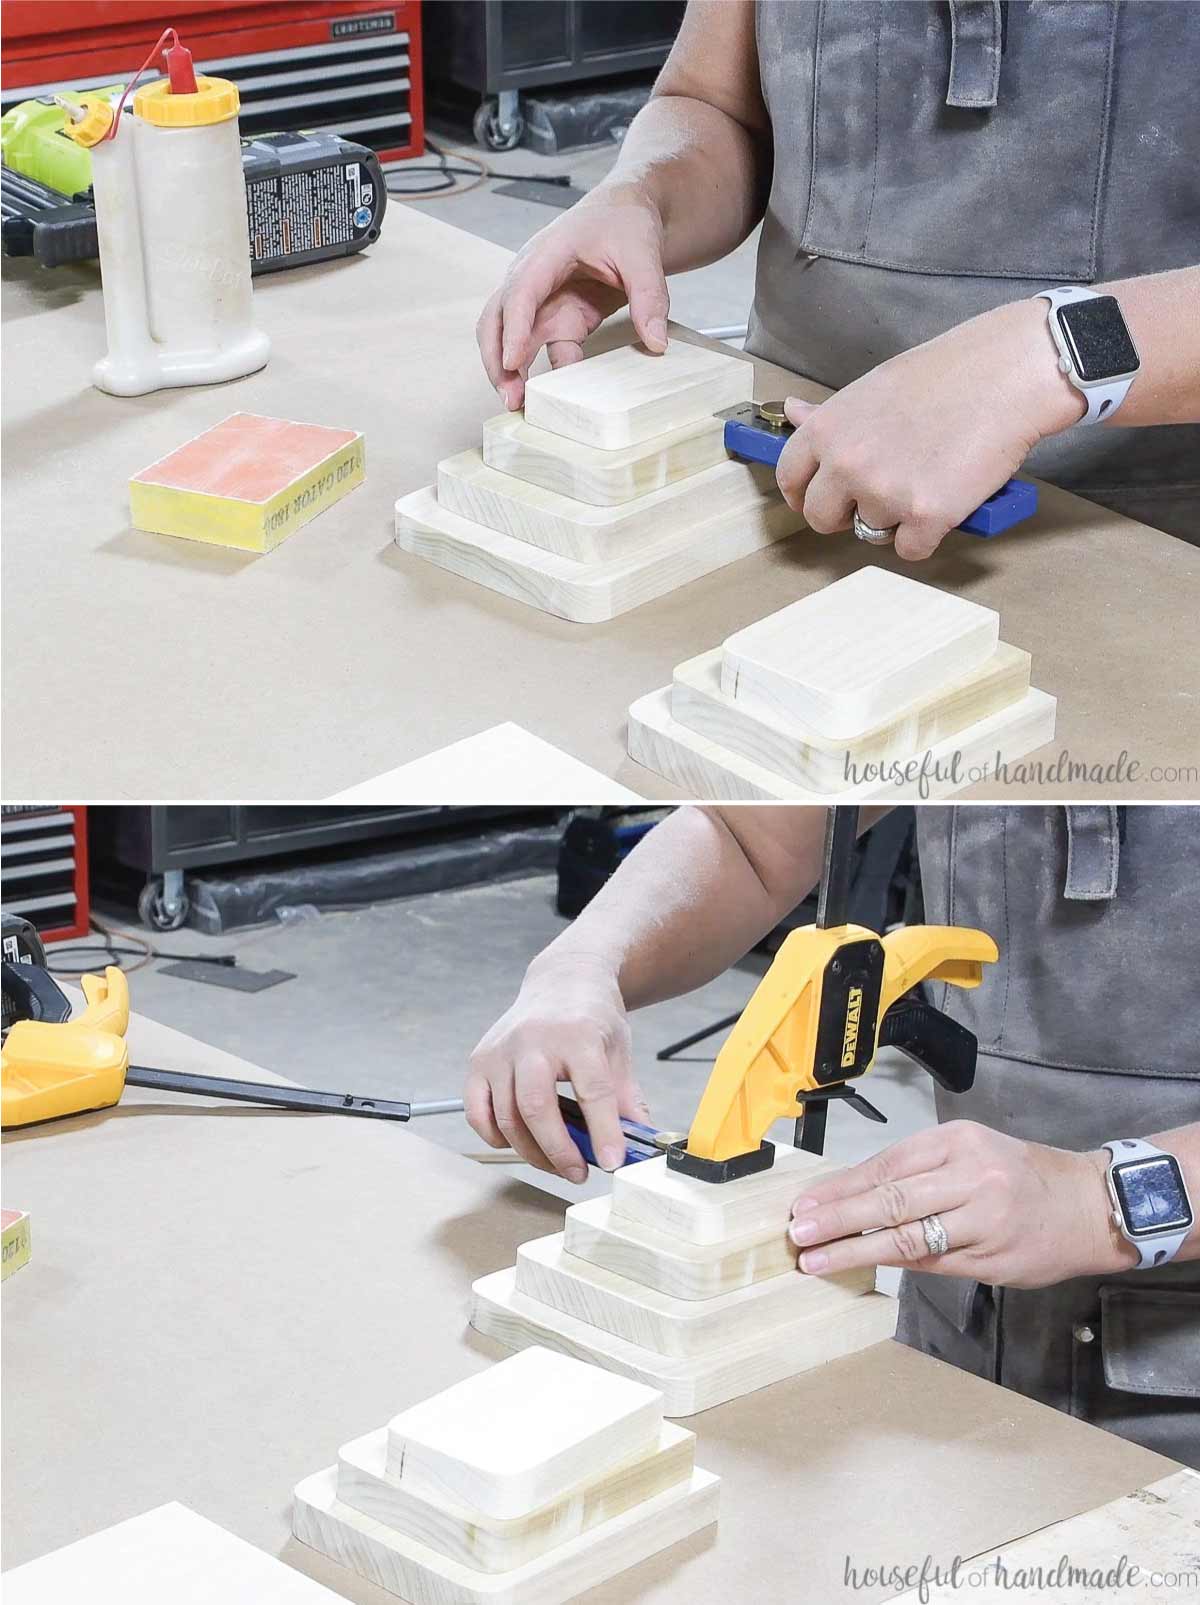
Repeat for the second bookend to create a set.
STEP 4- Paint
Touch up any sanding you may have, then wipe the dust off the bookends.
Spray paint them any color you want.
To paint them to look like shiny brass, start with the Champagne Bronze spray paint. Completely cover the bookends with 2-3 coats.
Then finish it off with a light coat of Bright Gold to give the bookends a bit of sparkle.
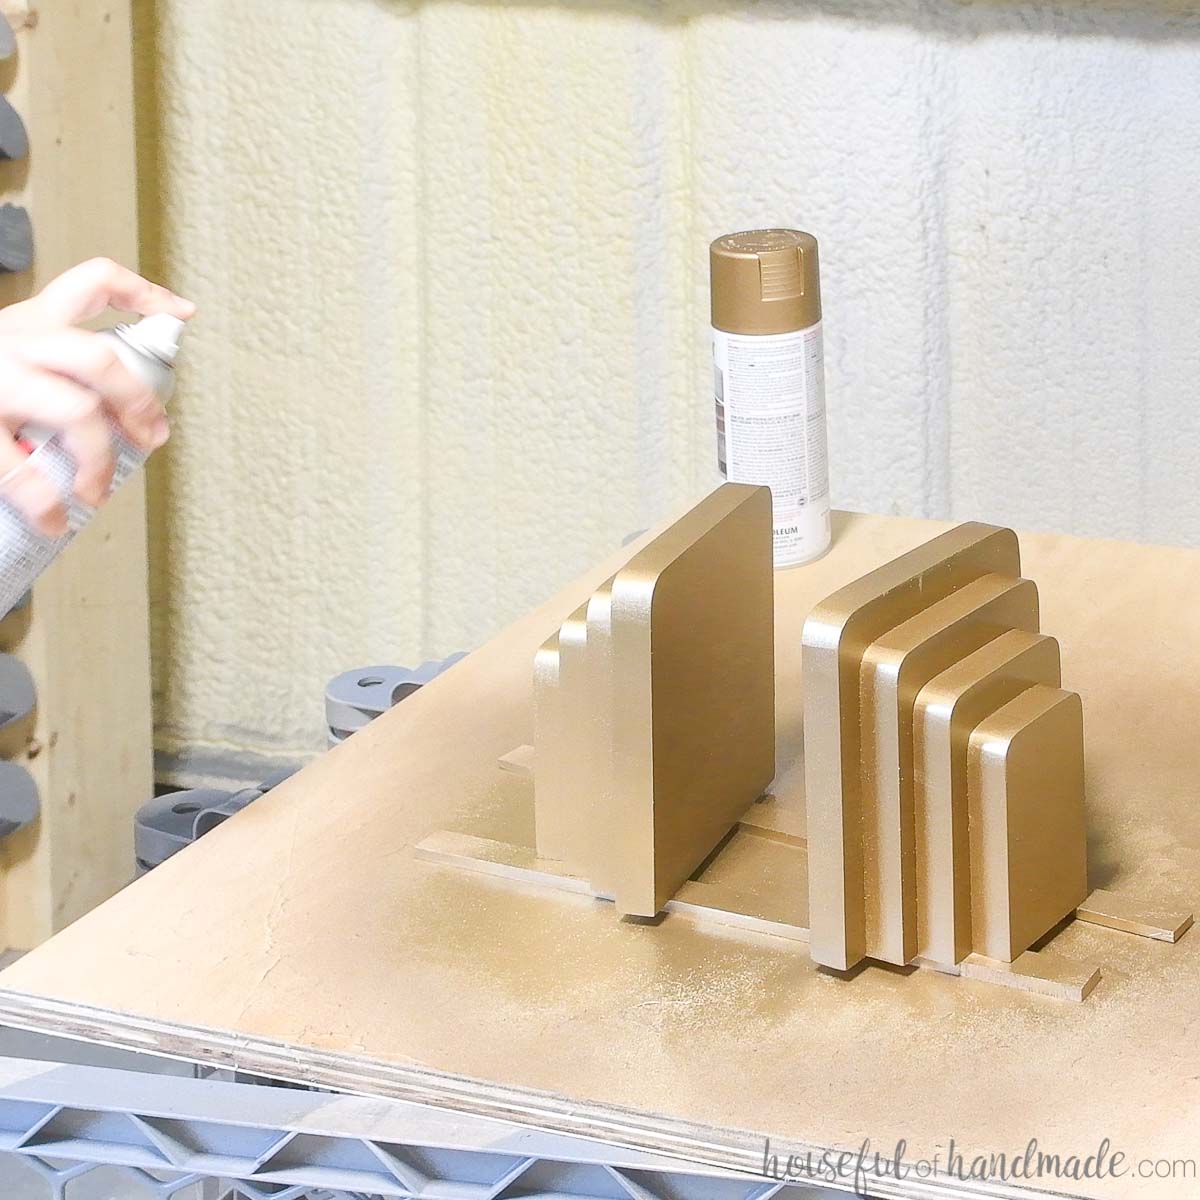
The two colors together give the paint a bit more depth so they look like metal!
Once the paint is dry, you are ready to use your new DIY bookends to display your favorite books.
More Scrap Wood Projects
Still have piles of wood scraps?
My friend Shara from Woodshop Diaries and I are sharing even more scrap wood projects to help you clear out those piles! Ever Tuesday this August we are sharing a new project for Scrap Wood Summer.
Check out even more fun scrap wood tutorial below:


Happy Building!
