No one ever says “I have too much storage space.” In fact, one of the most requested things is adding more storage to your home.
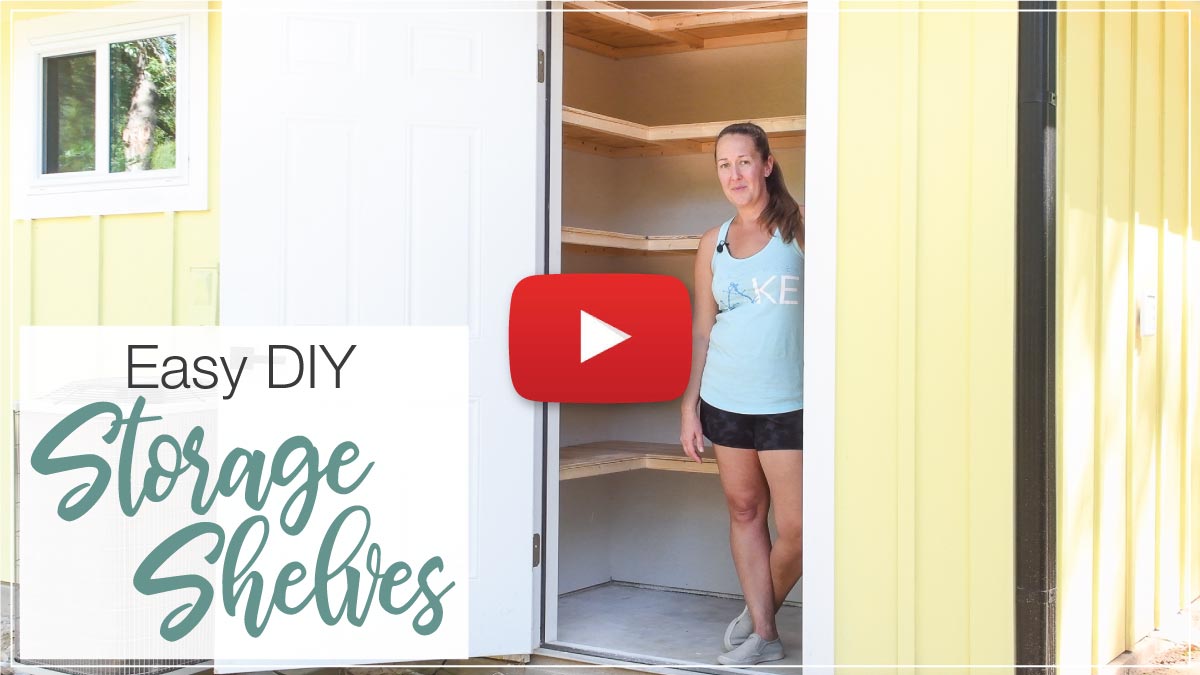
If you have a closet or garage, making the storage space more useful is important. And you can do that with these easy DIY storage shelves. They will increase your storage in any space!
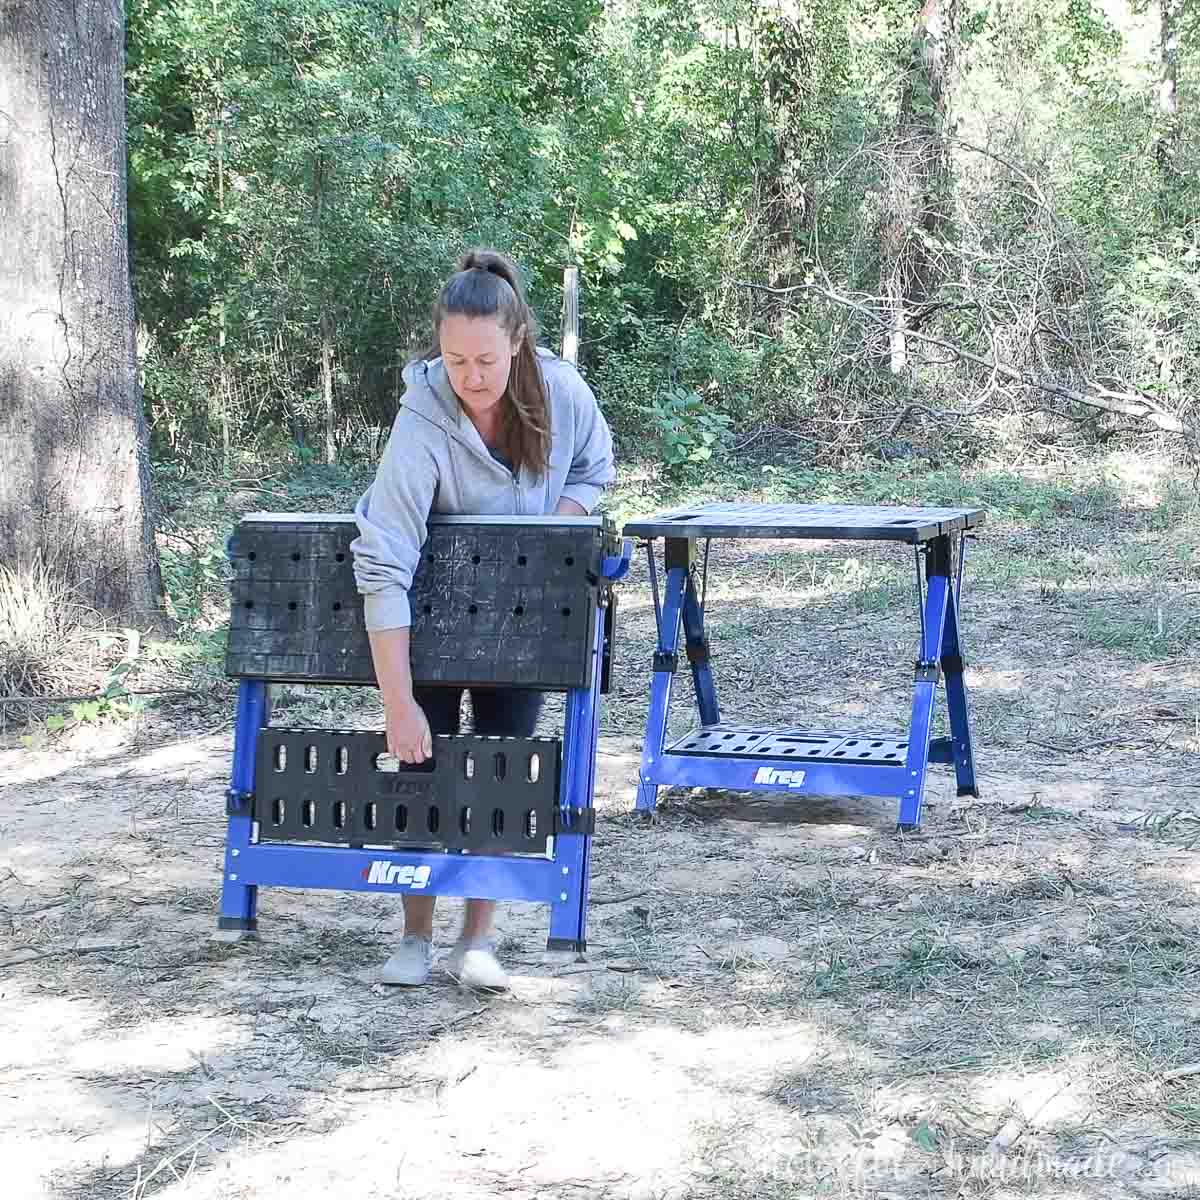
But sometimes working on a project away from your shop can be a pain. So I partnered with Kreg Tools to use their Mobile Project Centers to create a workspace close to the area where we are adding our shelves.
This post may contain affiliate links. As an Amazon Associate I earn from qualifying purchases. Click here to read my full disclosure policy.
It makes it faster and easy to build custom storage shelves instead of having to walk back and forth for each cut. And the Mobile Project Centers have a new lower price! There is no better time to add a couple to your shop or garage.
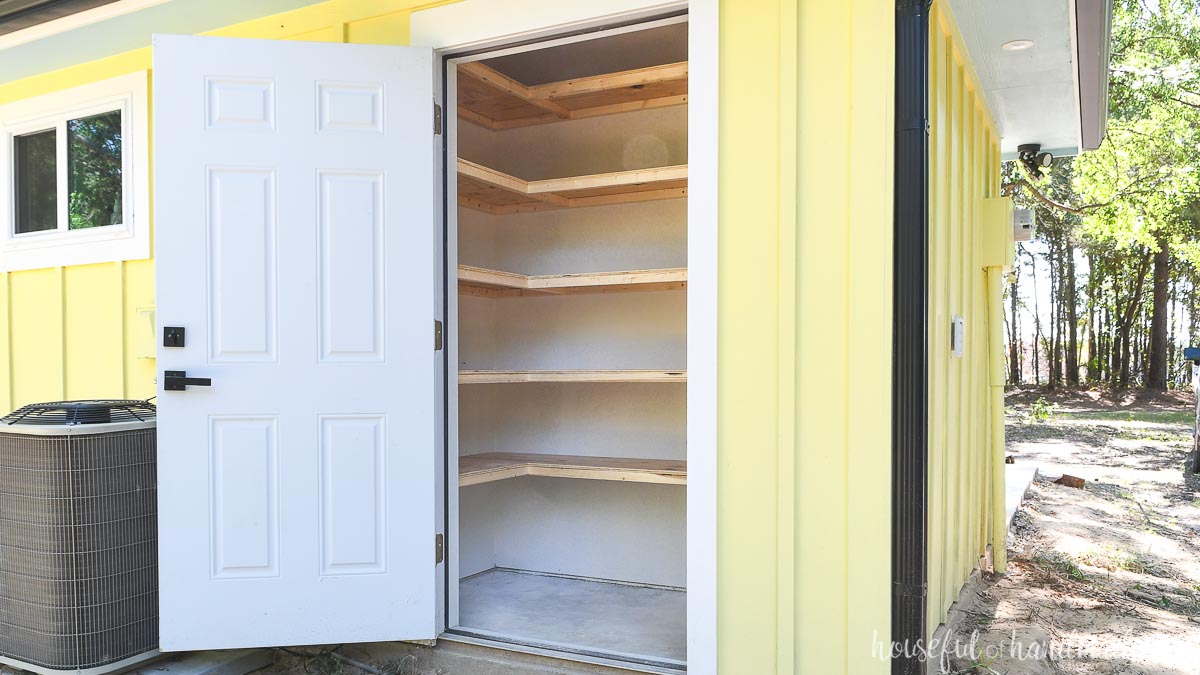
These DIY storage shelves can be built in a closet, garage, basement. Really anywhere you need more storage.
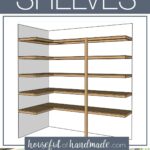
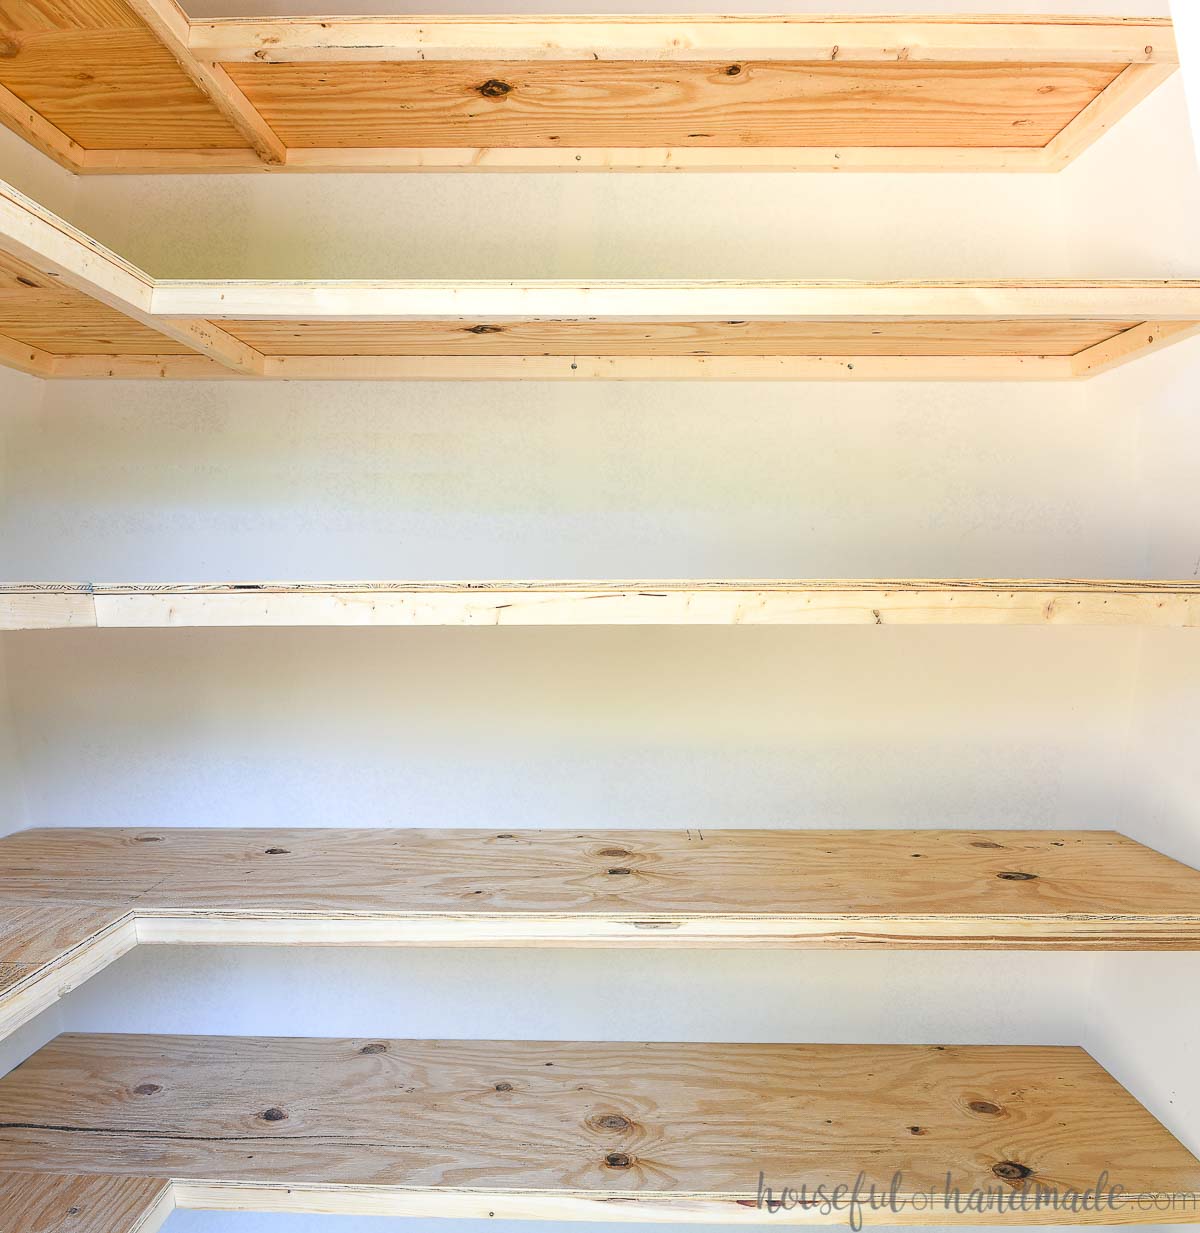
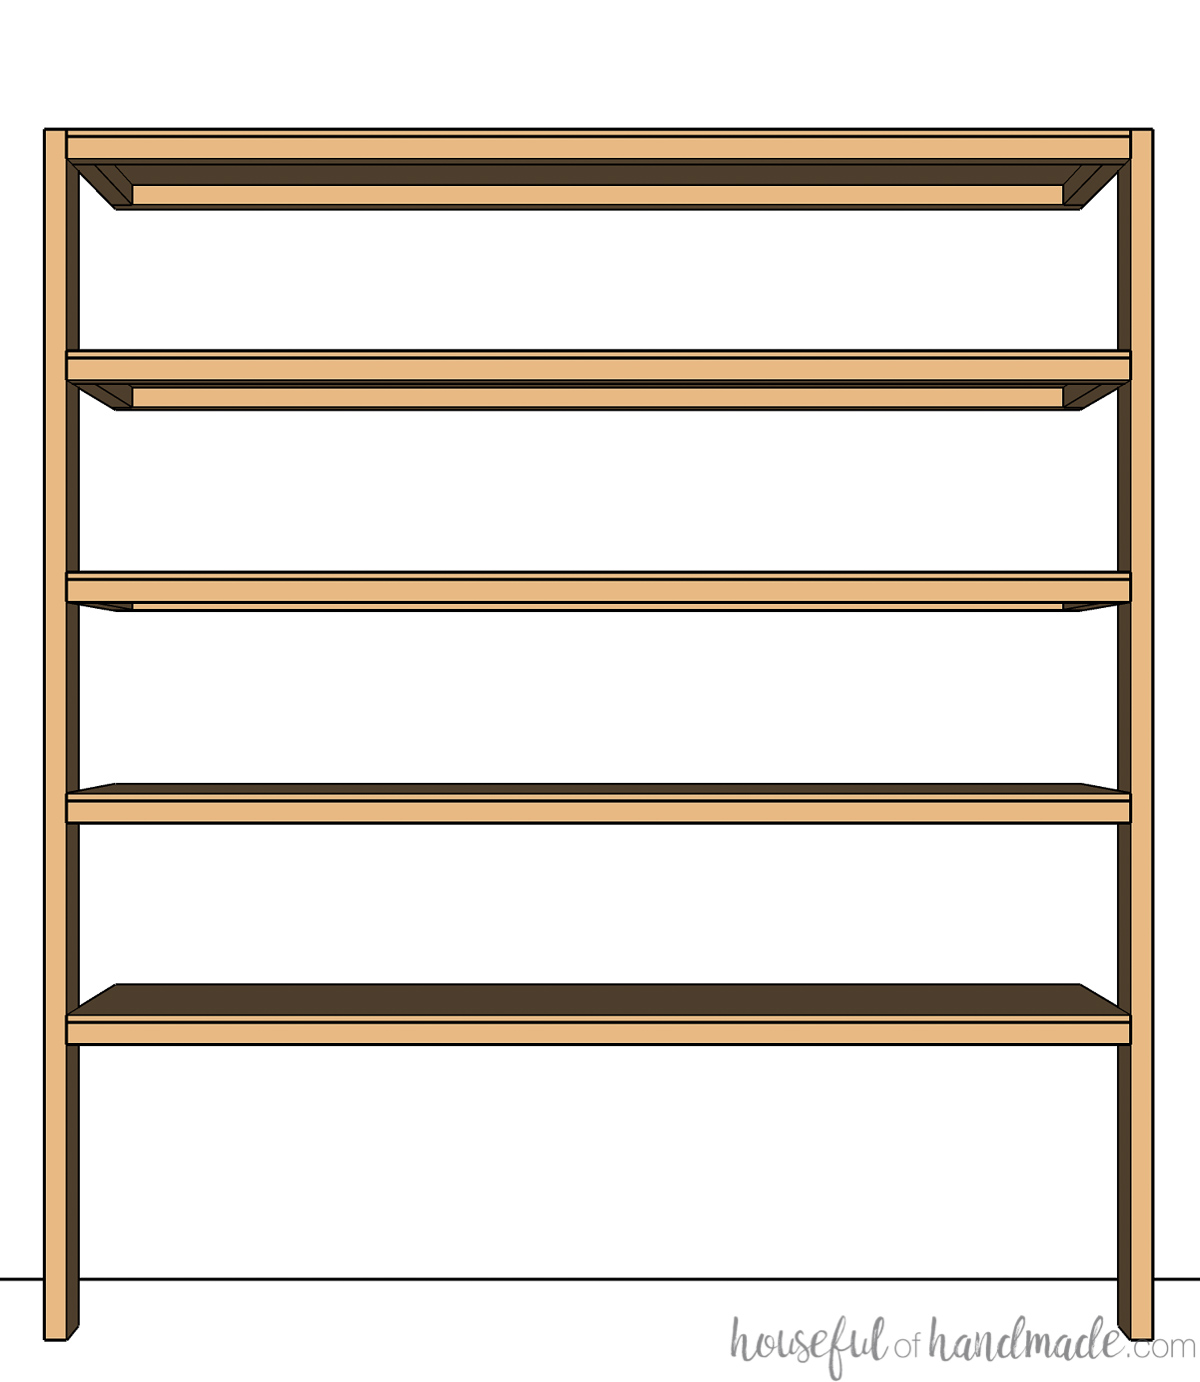
The frame of the shelves is made from 2×2 boards. This gives support to the plywood one top.
I prefer using 2×2 boards because they are inexpensive and only 1 1/2″ thick. This allows me to get even more storage space in a small space.
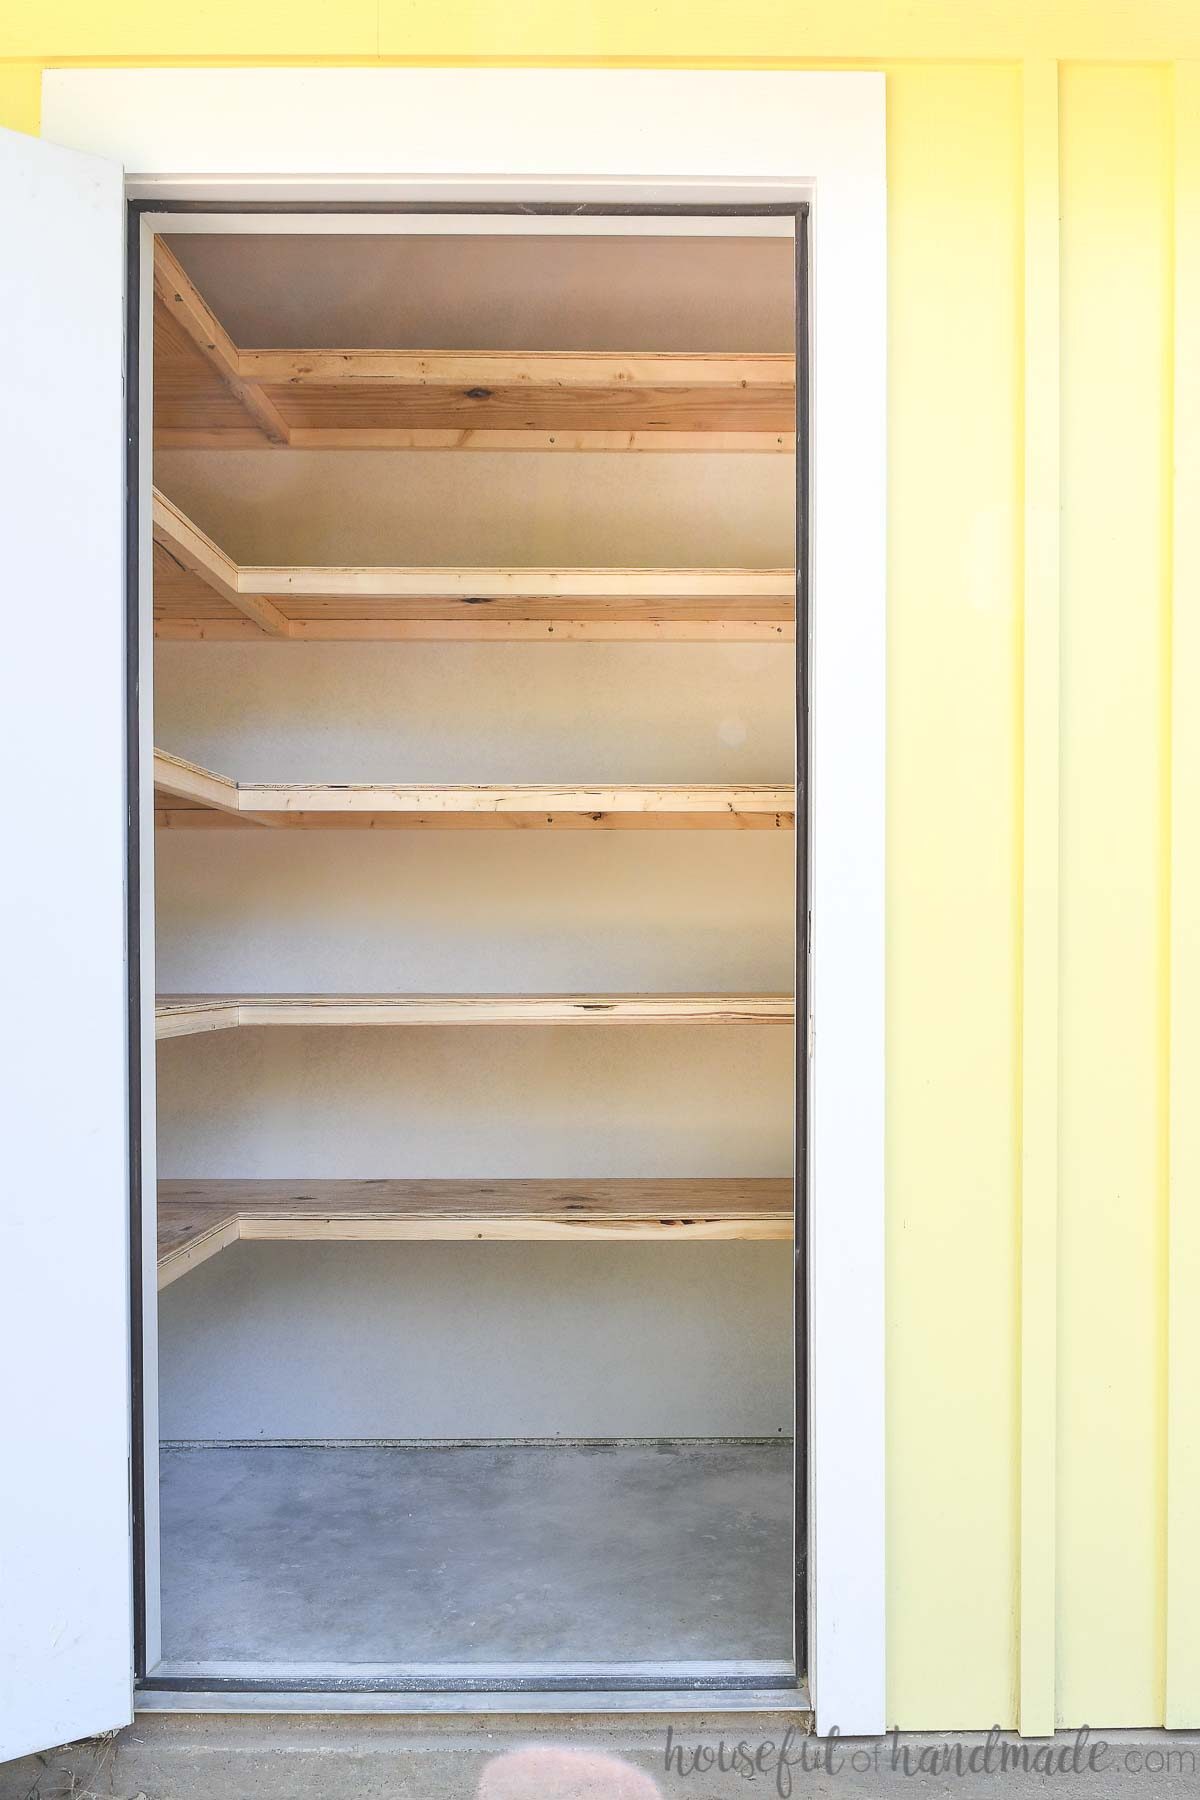
Since I was adding 5 shelves to our closet, that was 10″ less of space (1 1/2″ for the 2×2 and 1/2″ for the plywood on each shelf).
If you are building shelves to hold very heavy items, you could build your frame out of 2×4 boards. This thicker frame will be sturdier, but you will loose more storage space (40″ for 5 shelves).
Since these are storage shelves, I used 2×2 furring strips to save even more money. You will have to pick through a lot of boards to find the straightest ones possible.
Also to save money, I used inexpensive 1/2″sheathing instead of nicer plywood. This saved me almost $50 per sheet (I used 2). And the shelves just need to be sturdy, not pretty.
Total for our 6′ wide by 40″ deep closet with L shaped shelves, we spent $125.
You cannot buy the same amount of storage shelves for anywhere near that price!
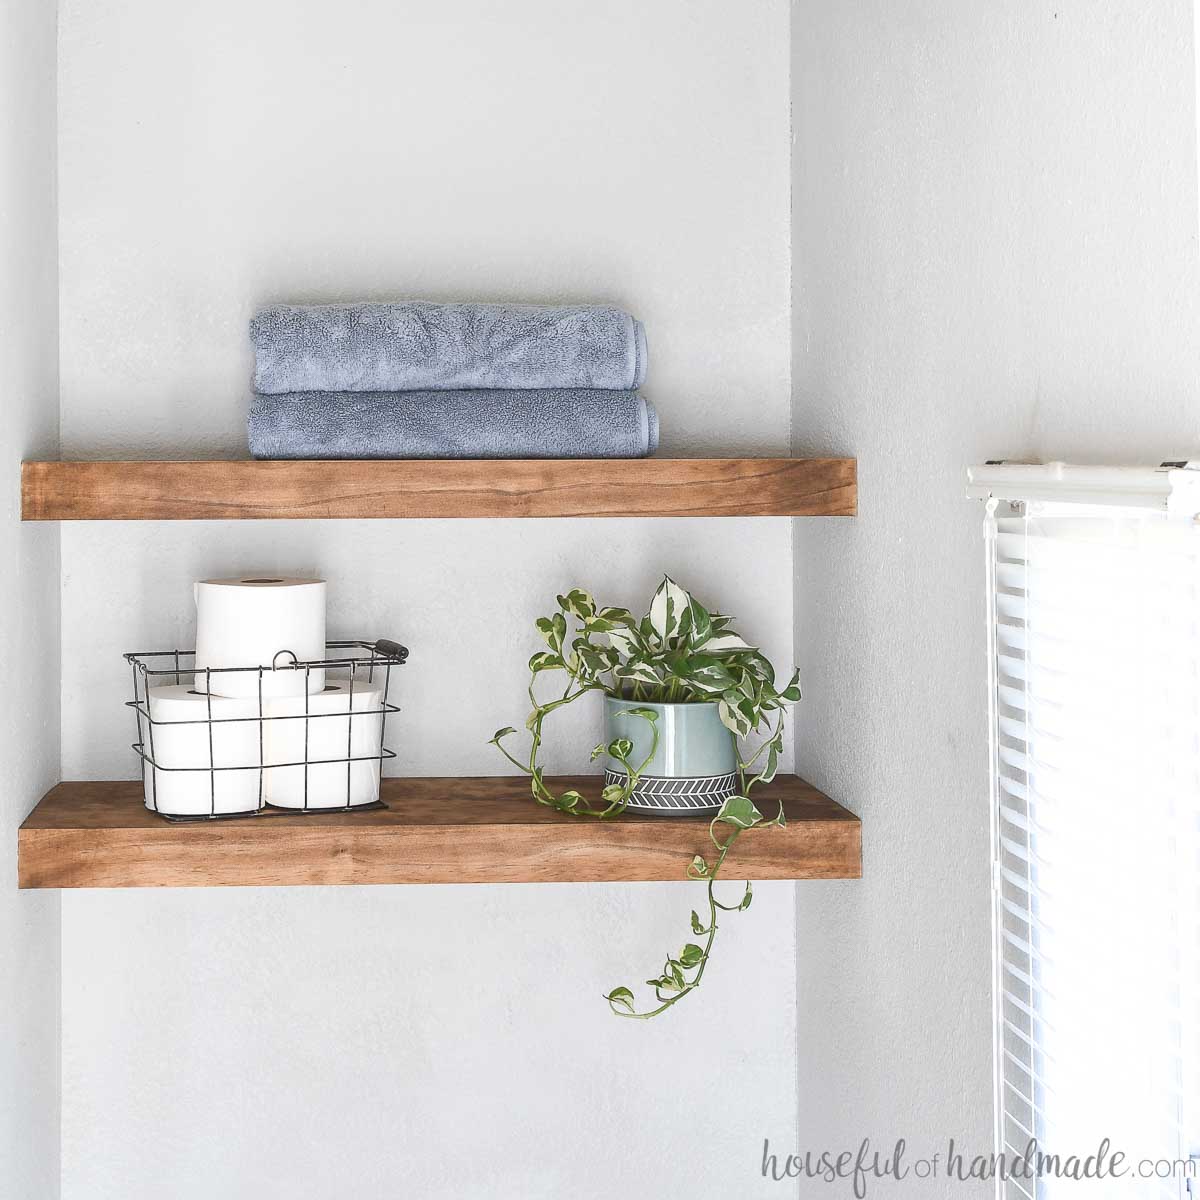
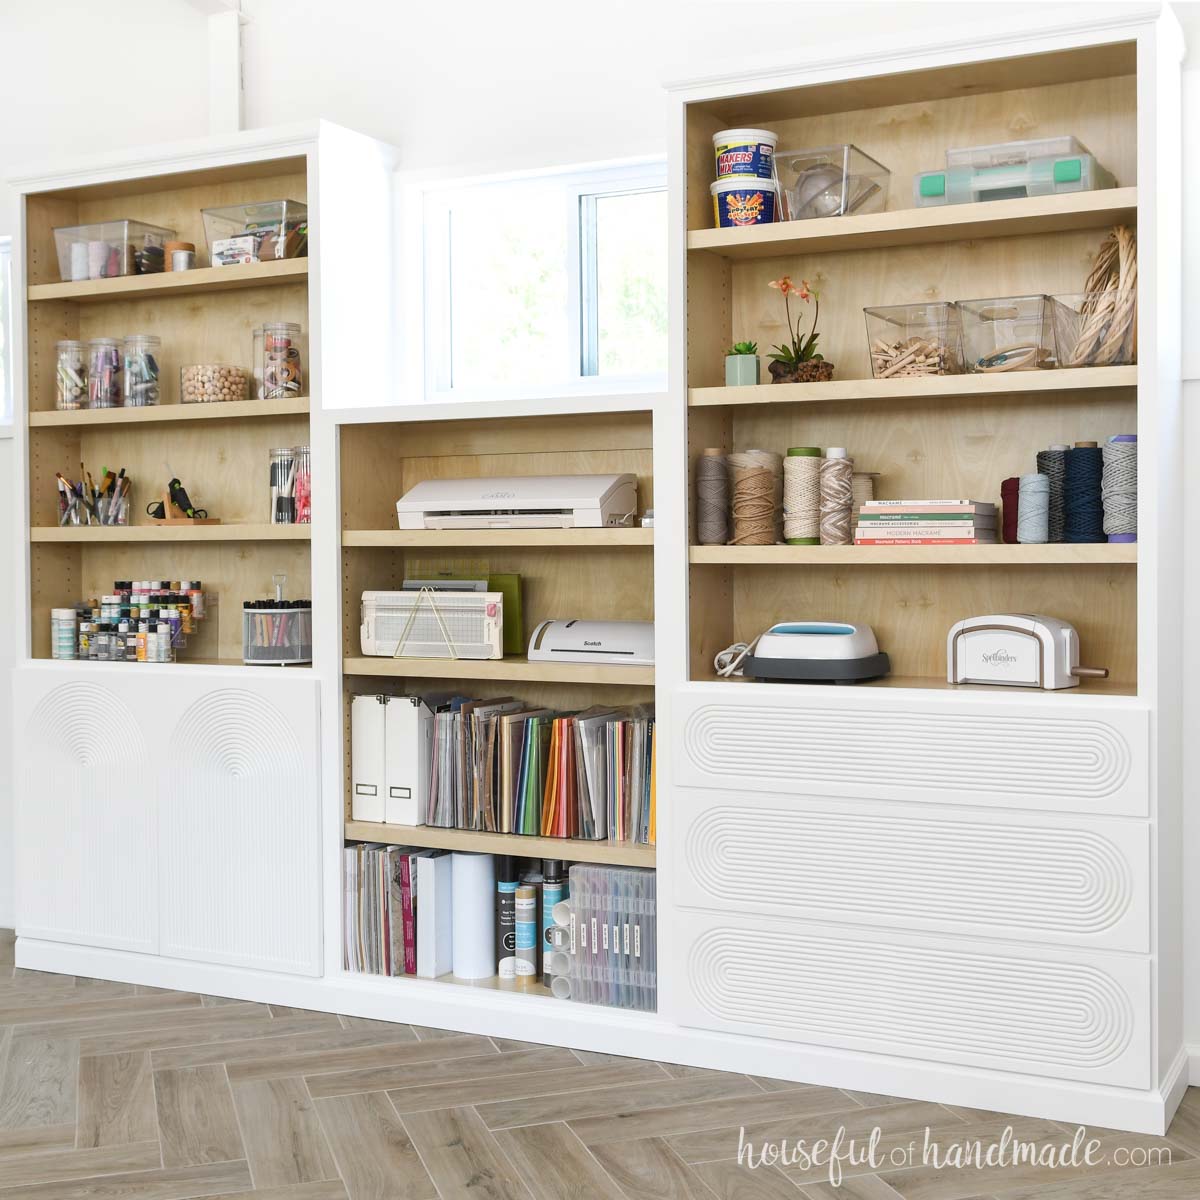
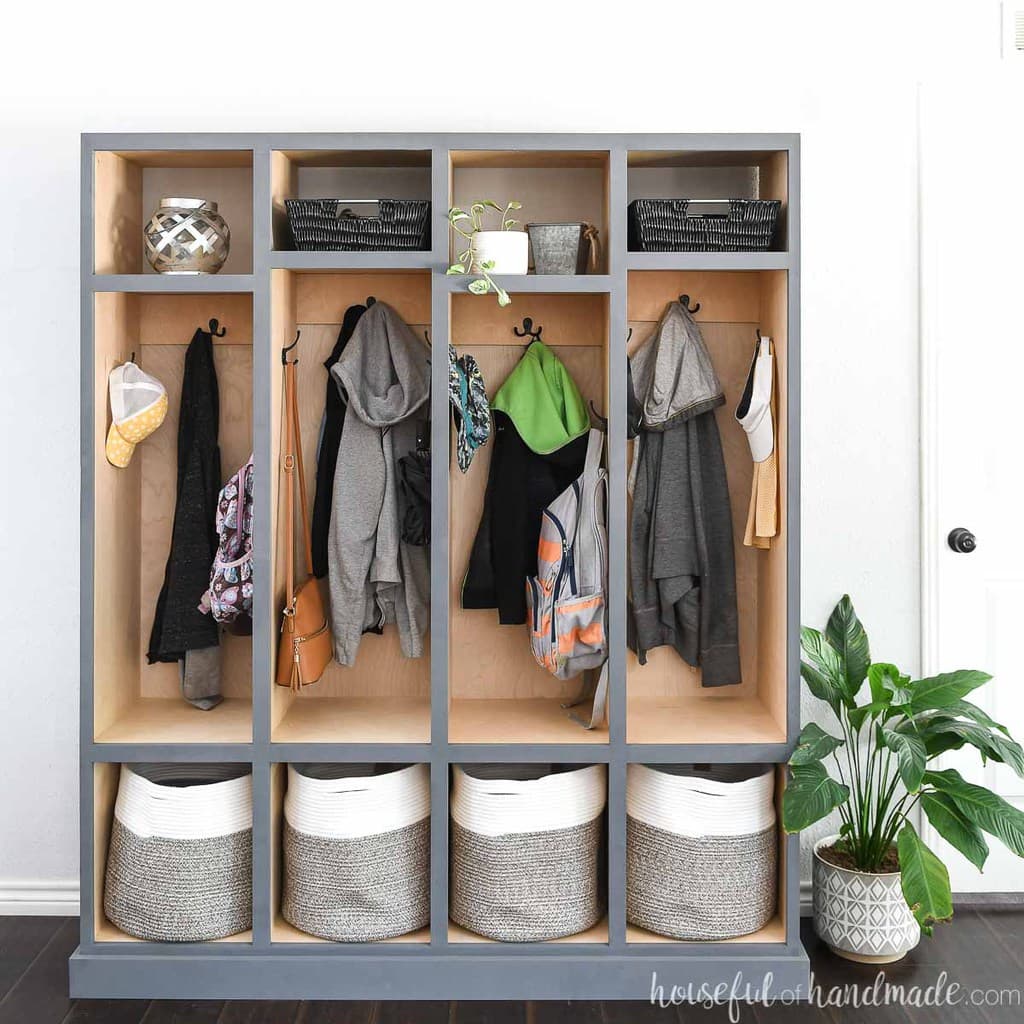
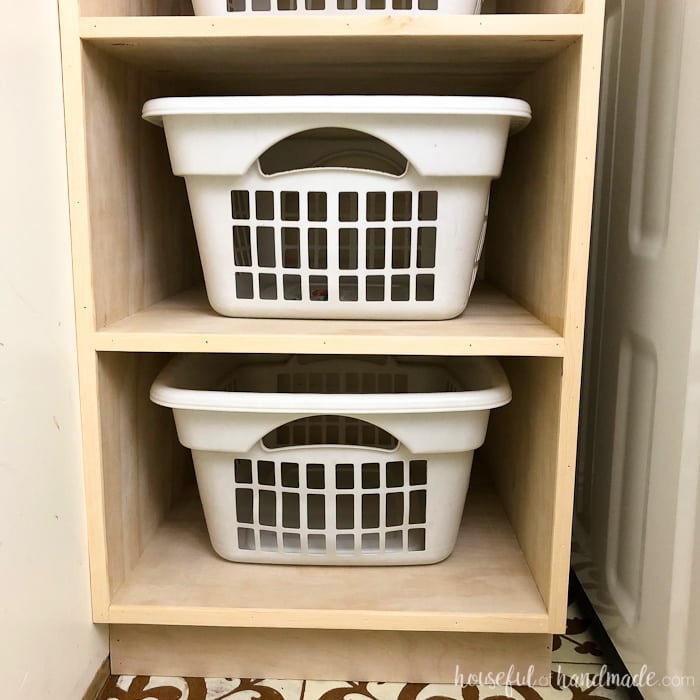
More DIY Shelves & Storage
You can never have enough storage. Check out these other DIYs to organize your home and life.
How to Build Storage Shelves
Tools & Materials
Recommended Tools:
- Kreg Mobile Project Center
- Circular saw with straight edge guide
- Pocket hole jig
- Drill
- Impact driver (optional, but I love not having to switch bits with the drill)
- Brad nailer
- Level
- Stud finder
- Kreg Quick Flip
- Kreg Face clamps
- Speed square
Supplies:
- 2×2 boards
- Optional- 2×4 boards (for shelves not up against a side wall)
- 1/2″ thick plywood
- 2 1/2″ Kreg pocket hole screws
- 1 1/4″ brad nails
Prefer to watch?
STEP 1- Plan your shelf layout
To plan the layout of your shelves, answer the following questions:
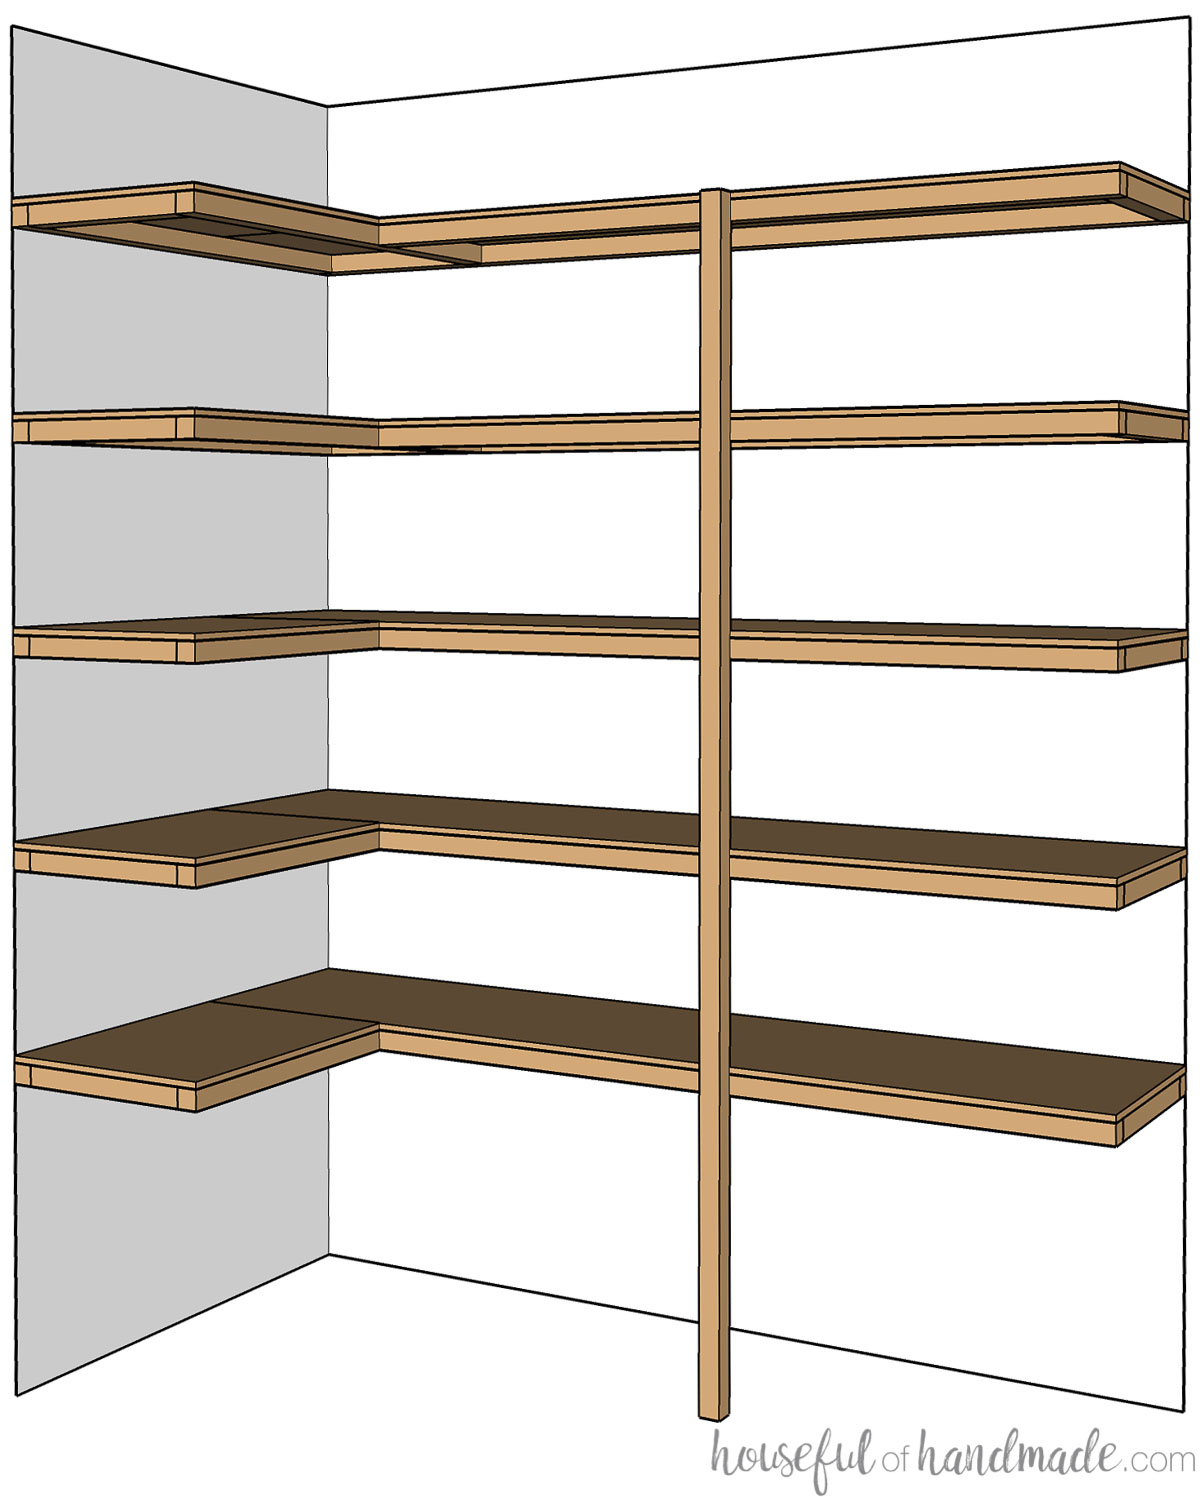
- If you are building shelves in a closet, will the shelves create an L, a U or just go along the back wall?
- How much space do you need between your shelves for bins/boxes/items?
- How far off the floor will the first shelf be for larger bins/items?
- How high do you want the top shelf? What will you store up there; how easily accessible does it have to be?
- How deep do your shelves need to be? Make sure you have enough space in front of the shelves to load and unload bins/boxes.
When planning the distance between the shelves, make sure to plan 2″ of space for each shelf (1 1/2″ for the 2×2 and 1/2″ for the plywood).
Our storage shelves are holding 12″ tall bins so I planned for 13″ of space between the shelves. The bottom shelf needed to be 20″ off the floor.
My shelves were built with the frame being attached to the walls on all sides. You can build these easy DIY storage shelves without a wall on the sides, you will just need to add a 2×4 to the front corners to hold the weight in the front.
STEP 2- Build the frame for the shelves
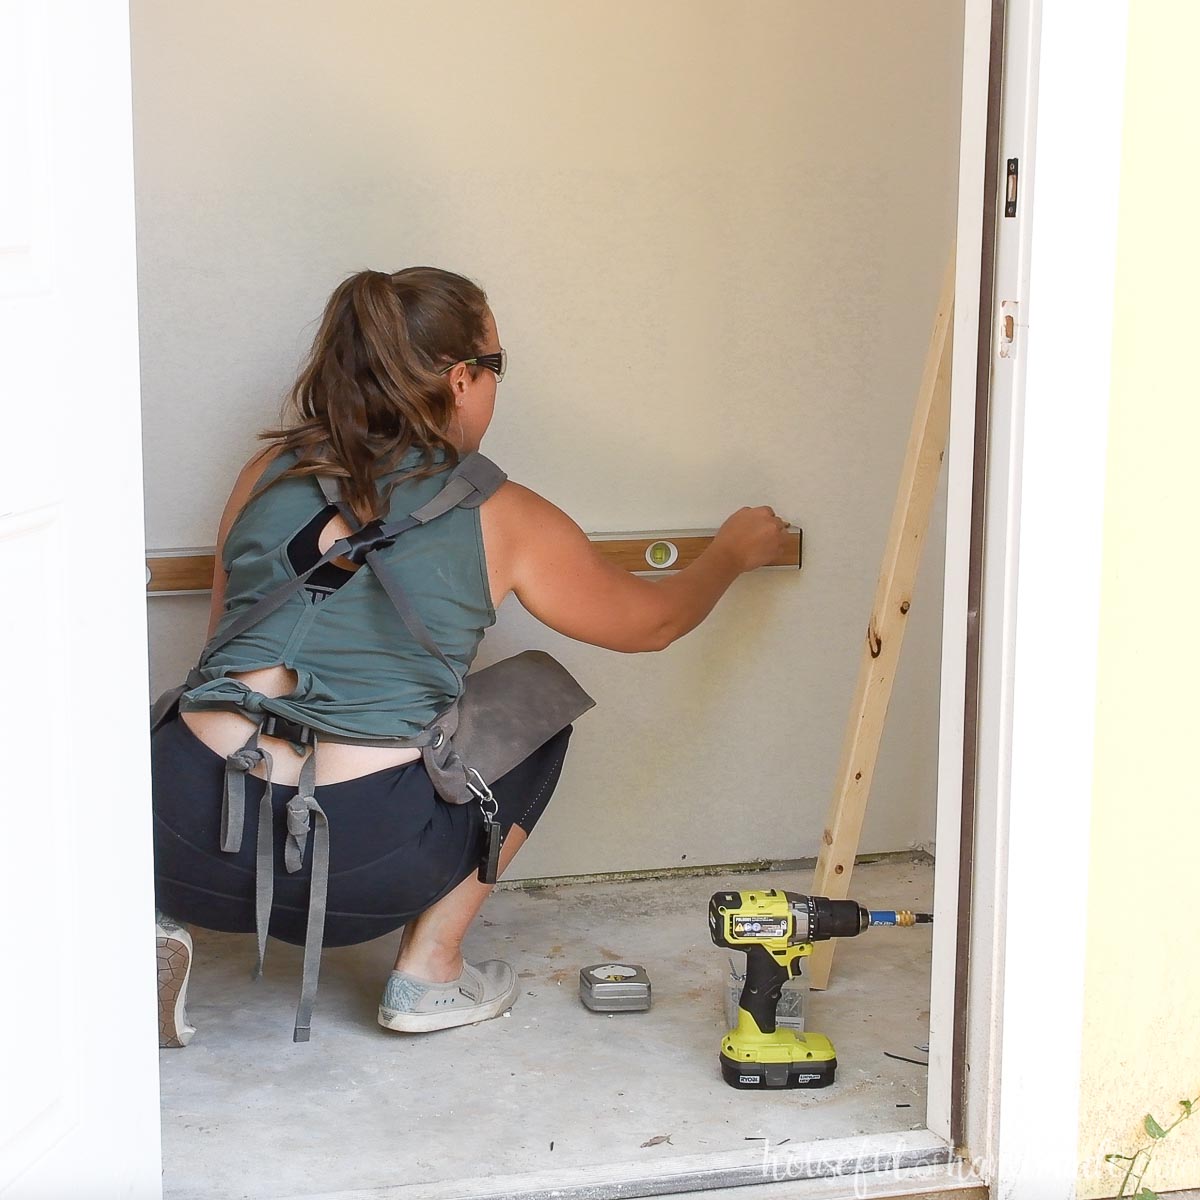
Draw a level line for the top of the 2×2 frame on the wall. For our shelves, the first line was 20″ + 1 1/2″ off the floor.
Make sure you have the space needed at the highest point since your floor might not be level.
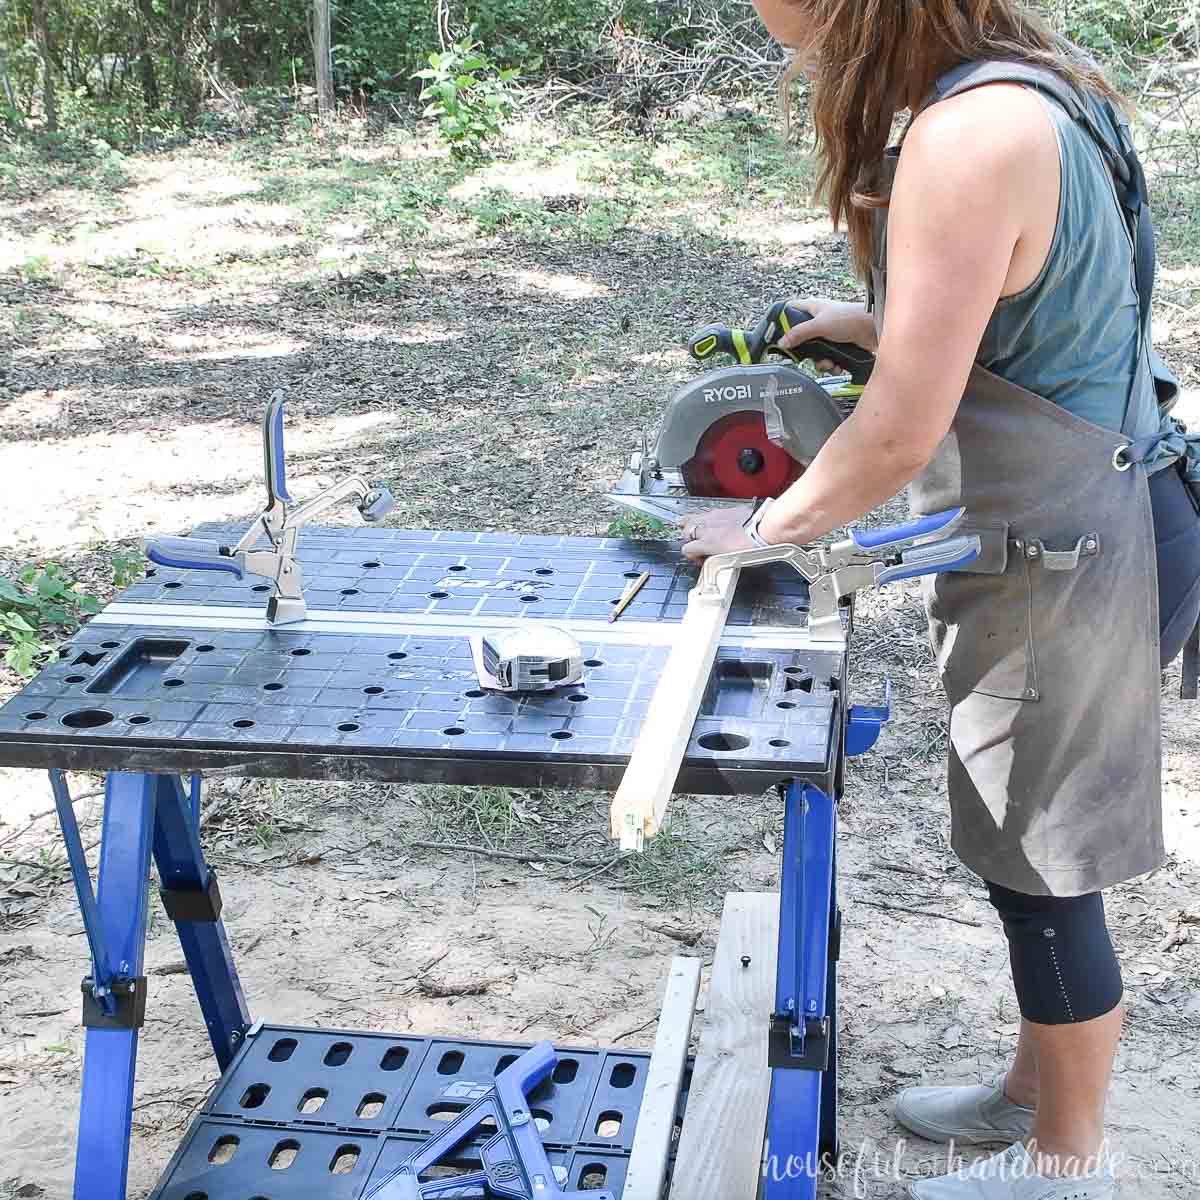
Cut a 2×2 the length of the back wall or back of your shelves.
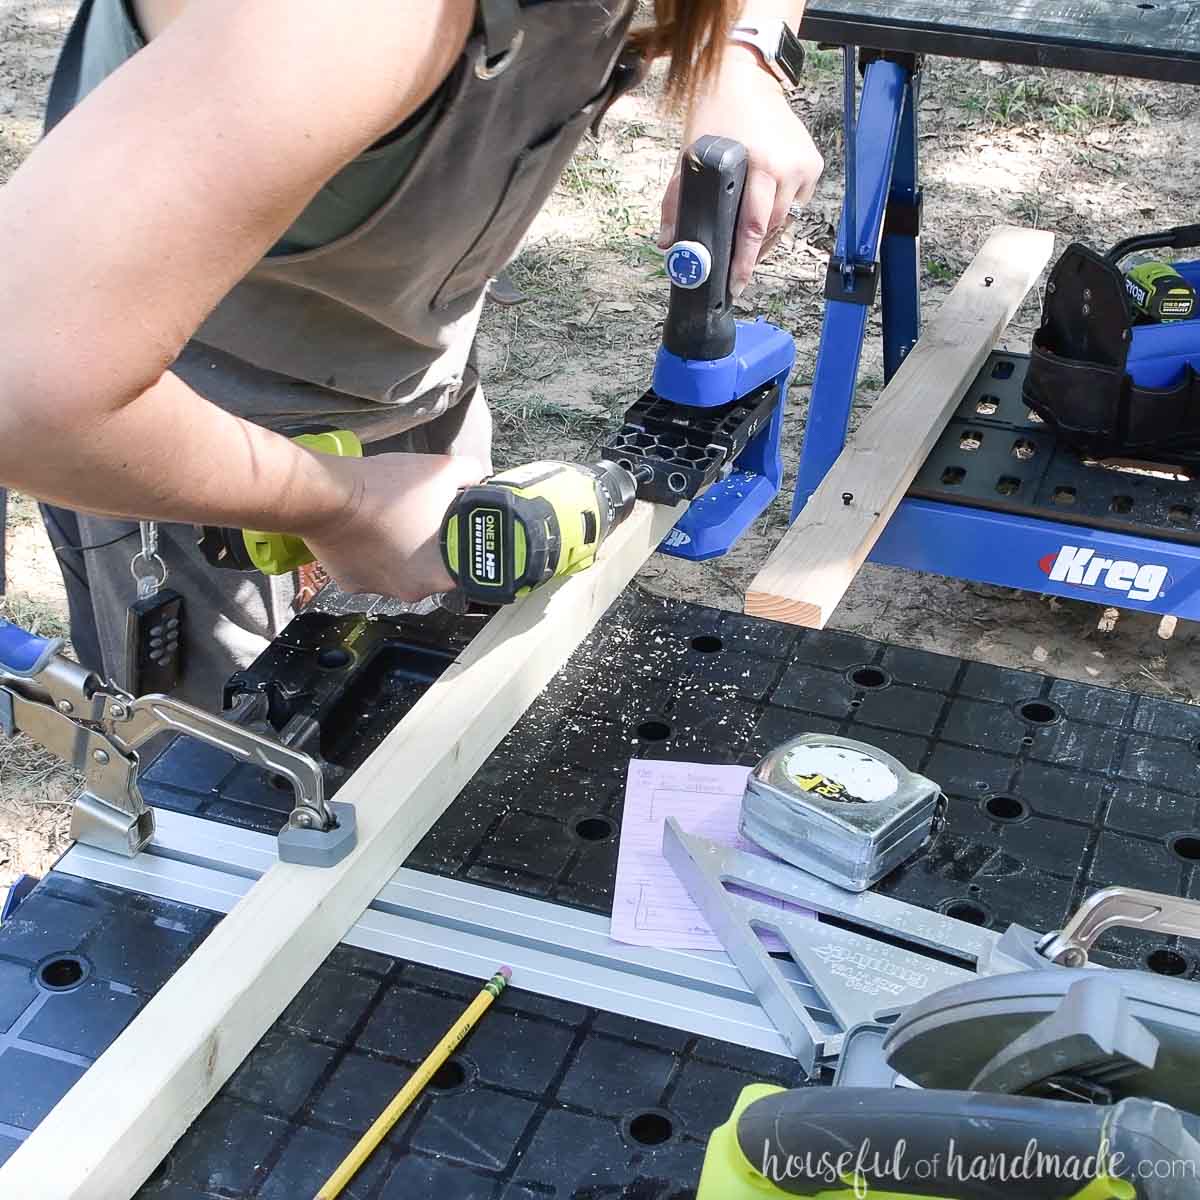
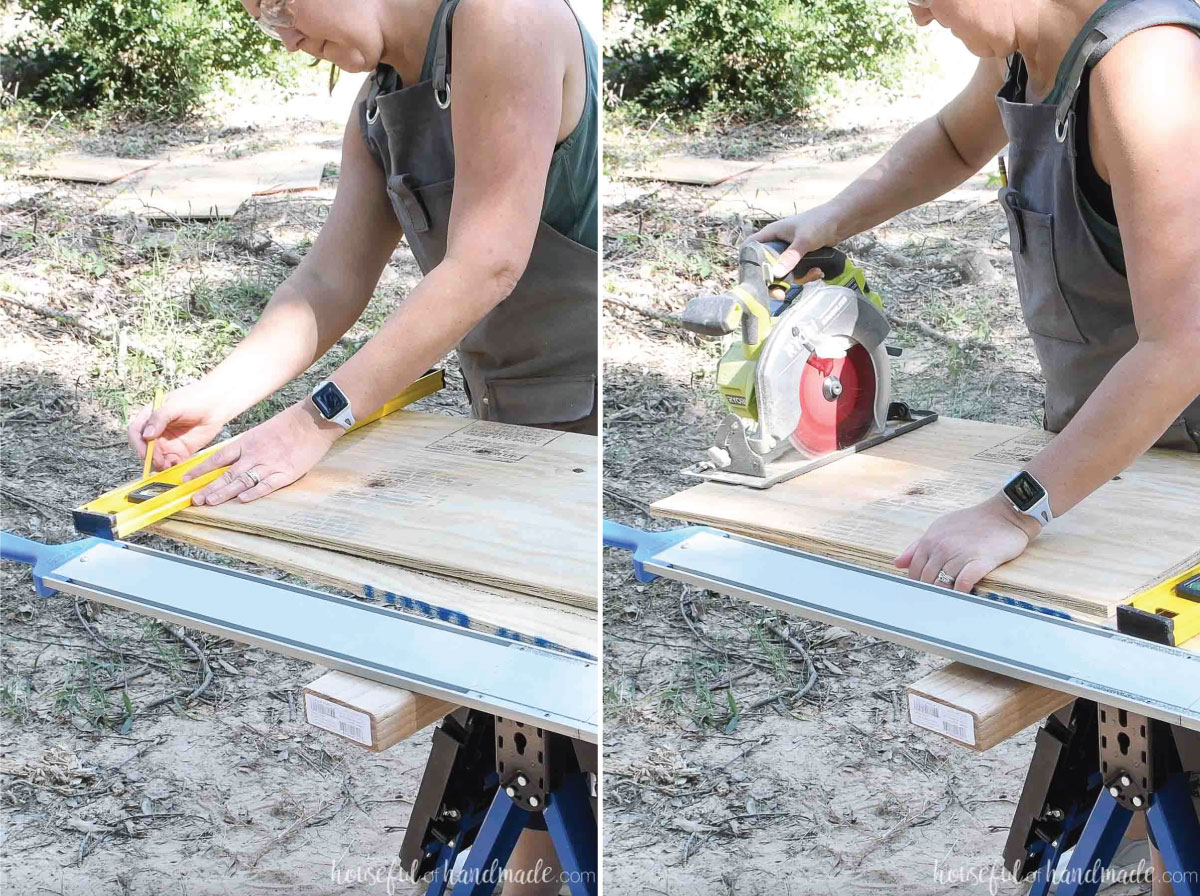
To cut the boards easily on site, I used the Kreg Mobile Project Center and a battery powered circular saw.
Clamp the board to the table with the Bench Clamp so the cut line is slightly over the edge. Use a speed square to keep your saw square as you cut.
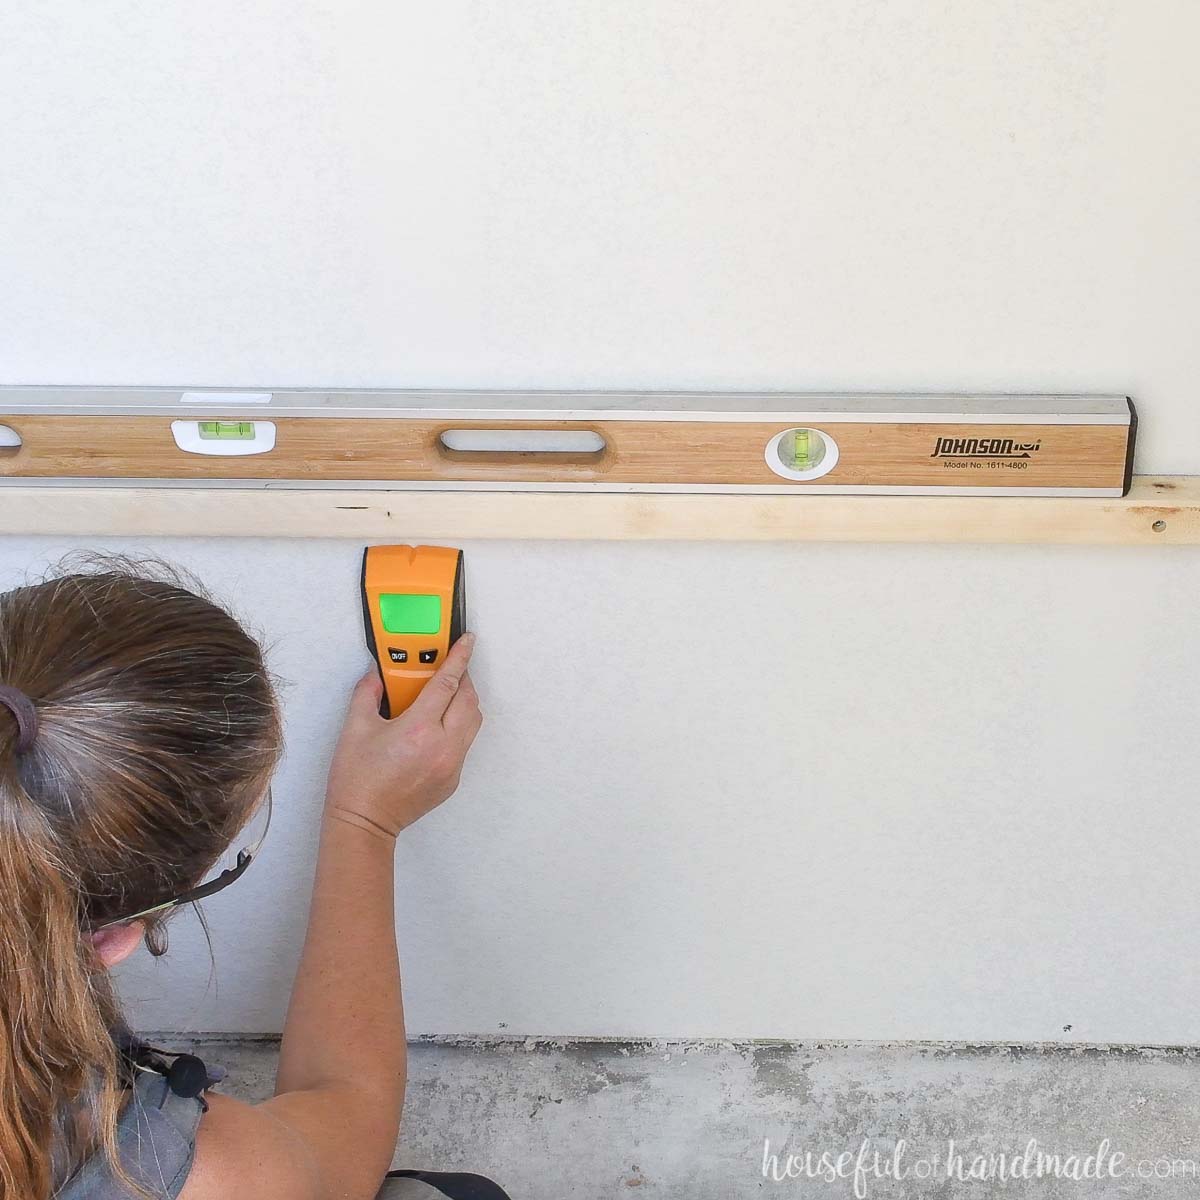
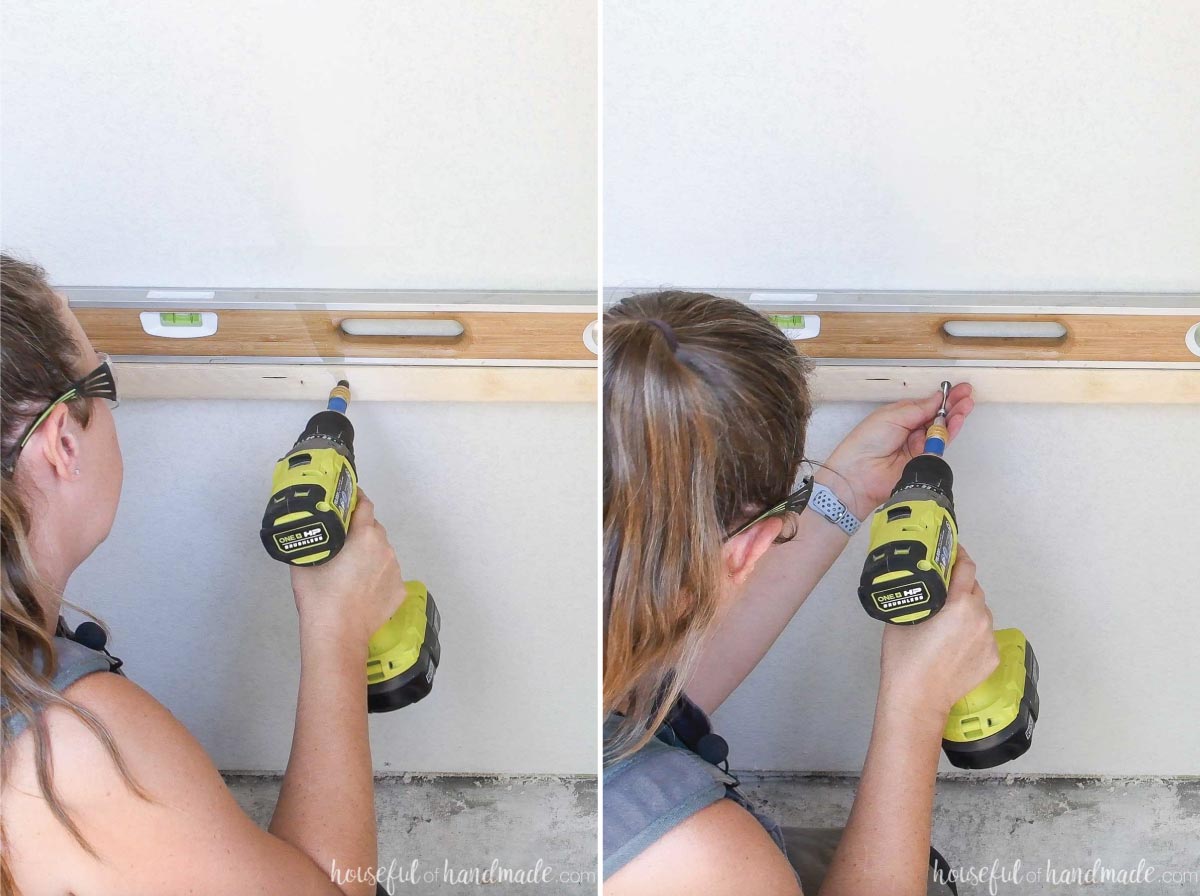
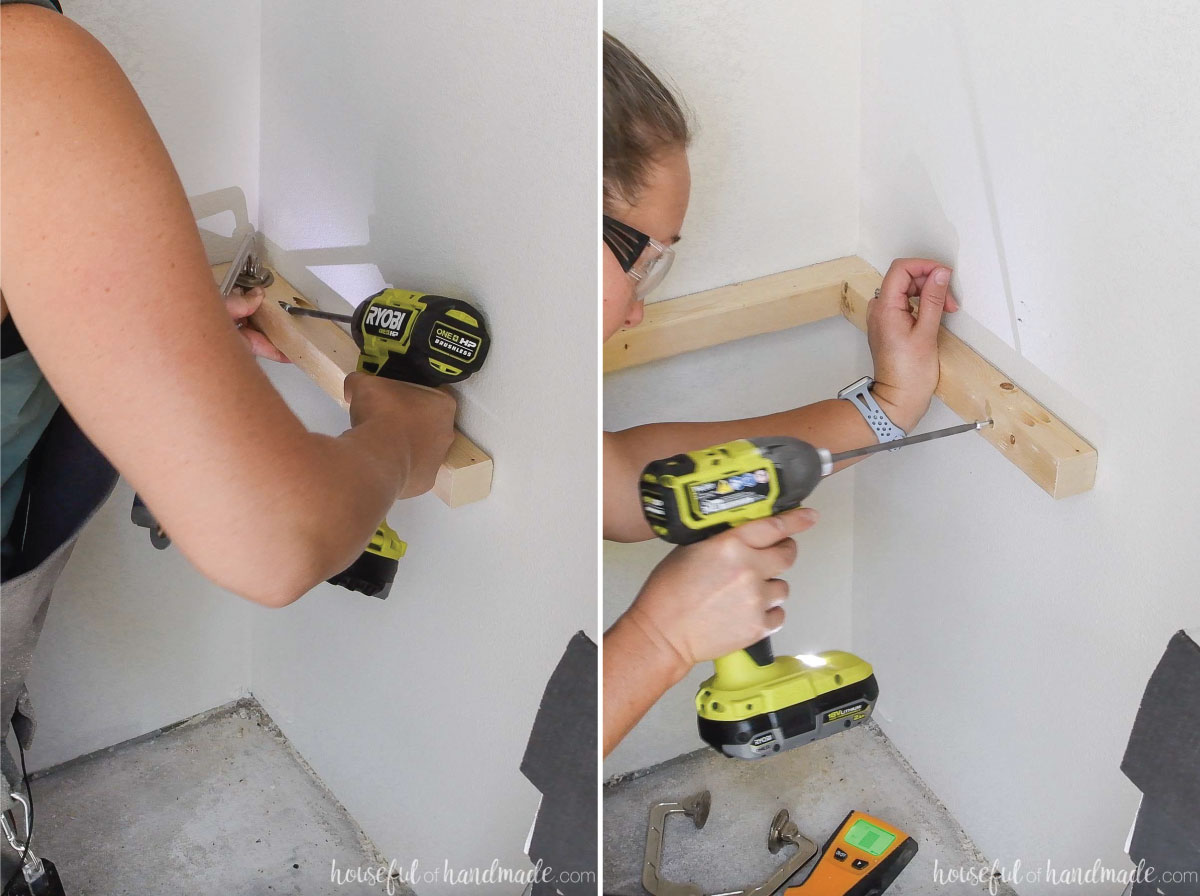
Line the board up on the back wall so the top is at the level line you drew. Double check you are level.
My board was slightly snug so I tapped it into place and it held it nicely while I secured it to the wall.
Locate and mark the studs in the wall.
EXPERT TIP:
Studs are typically 16″ on center. Once you locate one stud, you can measure 16″ to either side to find the remaining studs.
Using the Kreg Quick Flip, predrill a hole in the 2×2 at the stud. You want the screw countersunk 1/2″ into the board.
Then flip the bit and drive in the 2 1/2″ screw into the stud to secure the board to the wall.
Add a screw to every stud along the length of your shelves.
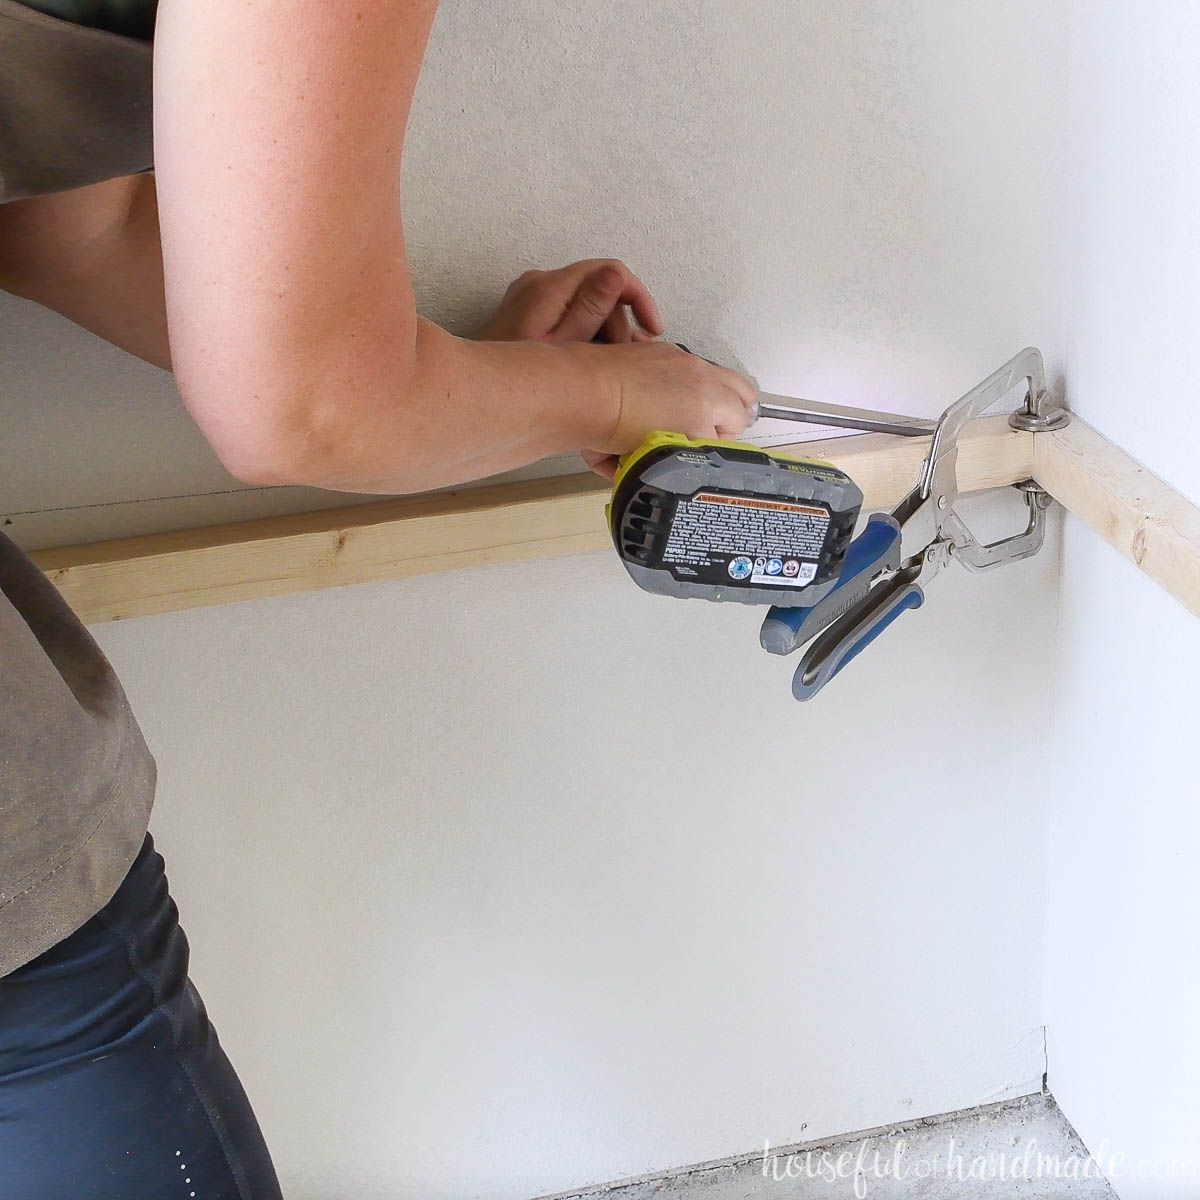
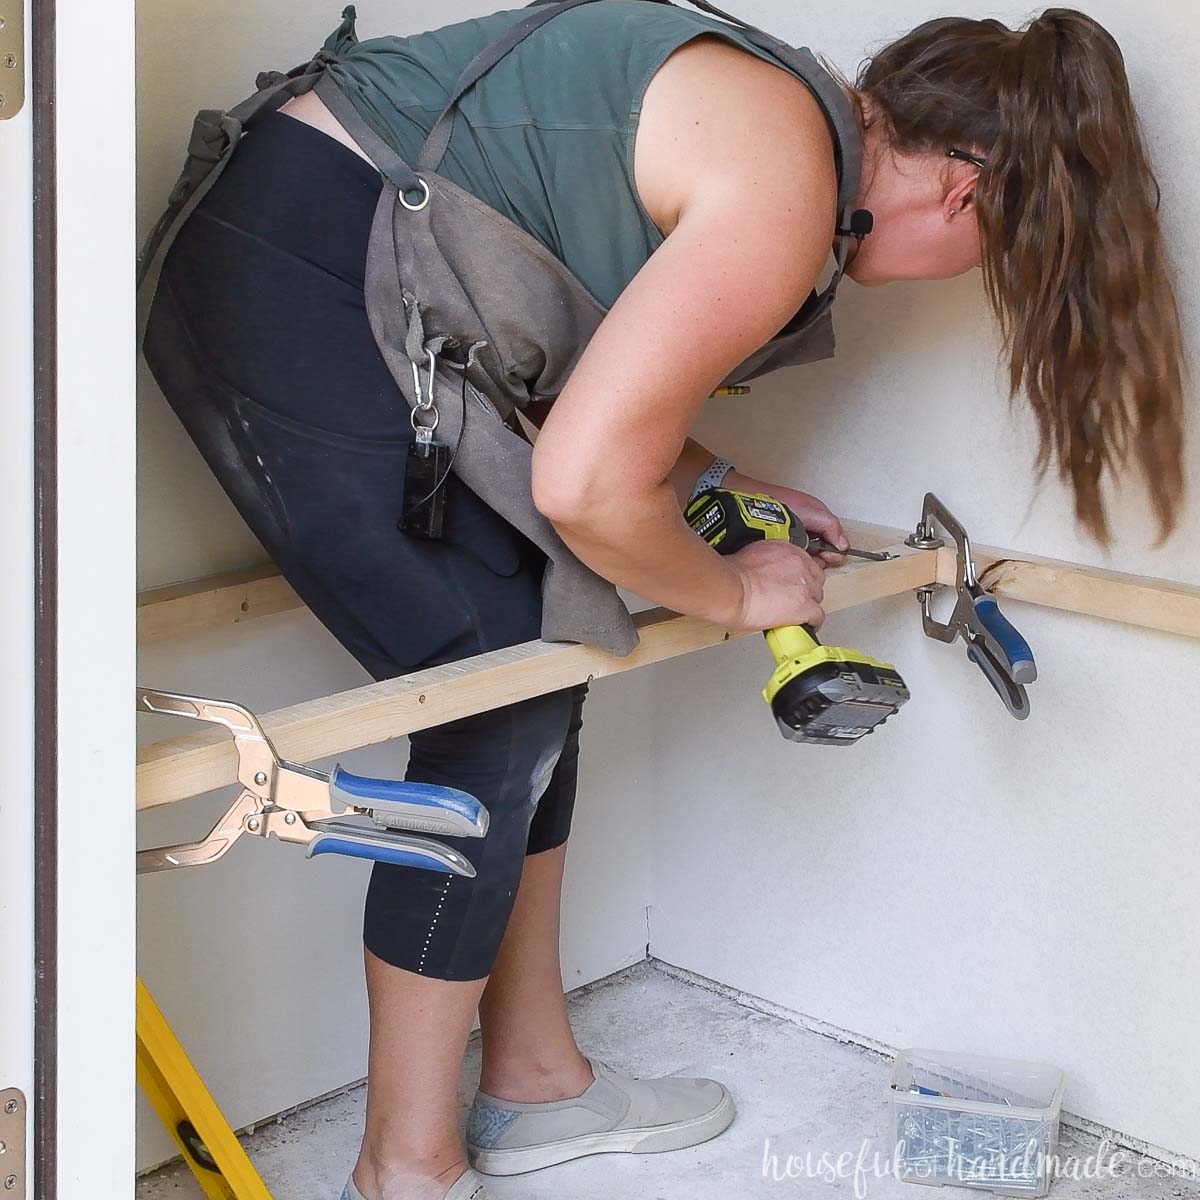
For an L or U shaped shelf, measure the back area for the side shelves. It will meet the already attached back piece in the corner.
Cut the board to length.
Add pocket holes set for 1 1/2″ thick material in one end of the board.
Clamp the side of the board with the pocket holes to the attached back board with a face clamp. This will ensure the frame is flush and level.
Secure the board to the back with 2 1/2″ pocket hole screws.
EXPERT TIP:
Face your pocket holes up to make securing the boards easier. Plus the pocket hole will be hidden under the plywood giving you a cleaner look.
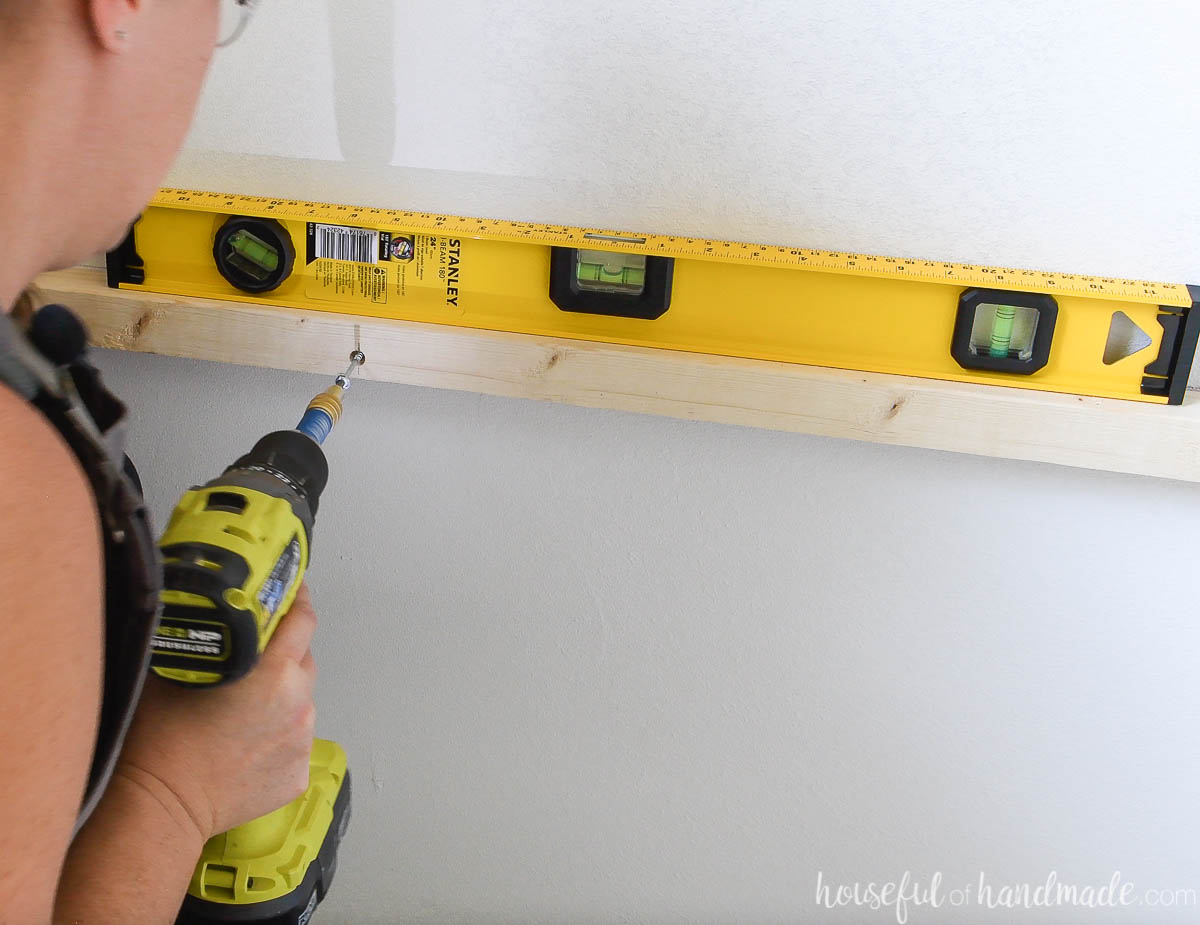
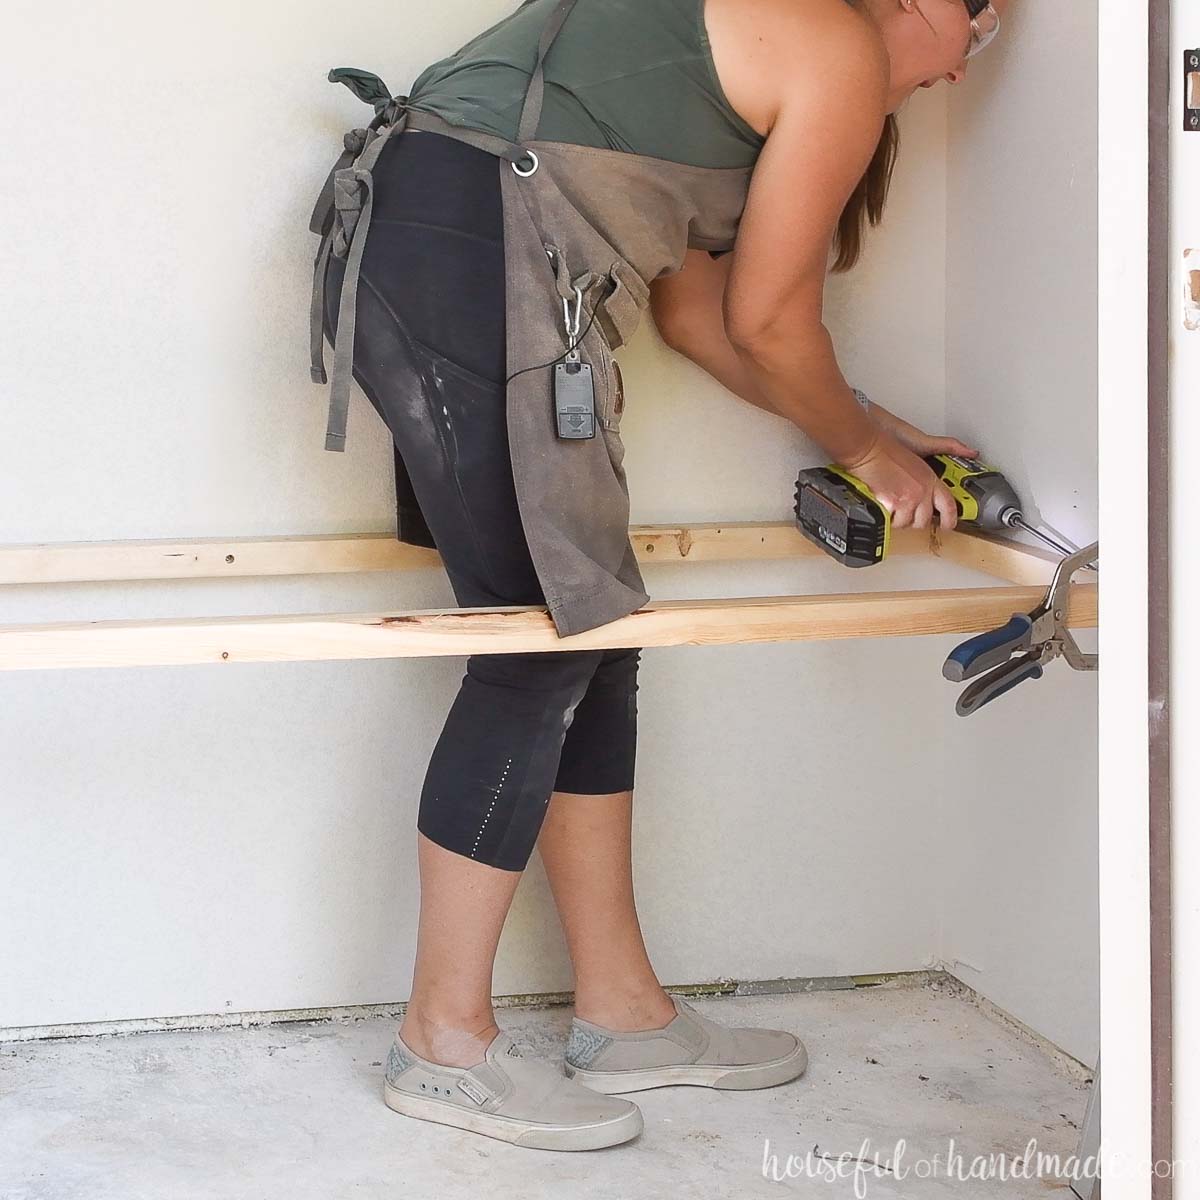
Then level off the board and secure it to the side wall into the wall studs.
Secure it the same way you did the other board with the screws countersunk 1/2″ into the 2×2.
Now cut your side pieces. The length of these will depend on the depth of your shelves using the following formula:
Side Piece = Shelf Depth – 3″
The 3″ is subtracted to account for the thickness of the back and front 2×2 boards. For our 16″ deep shelves, I cut the side boards 13″ long.
Cut the pieces and drill pocket holes in both ends of the side boards.
Secure them to the sides of your back shelf board with 2 1/2″ pocket hole screws.
Then level the side boards and secure them according to your configuration below:
- If your sides are up against a wall, secure the side boards to the wall studs.
- If you are not putting shelves up against a wall on the sides, attach the frame sides to a 2×4 board at the front corners.
For L or U shaped shelves, measure and cut the board for the front of the frame on the short sides first.
Add pocket holes to one side of the board. Use these to attach the edge of the frame to the back board.
To attach the front to the side board, use the pocket holes already in the side boards.
Then measure and cut the front frame board for the long section.
Add pocket holes to one end. This will be the end that attaches to the front frame of the short side.
For straight shelves, you will only have 1 frame front. It will not need any pocket holes because you already have pocket holes attached in both side boards to attach it to.
Now that the first frame is done, repeat for all the remaining shelves.
STEP 3- Cut and add plywood to frames
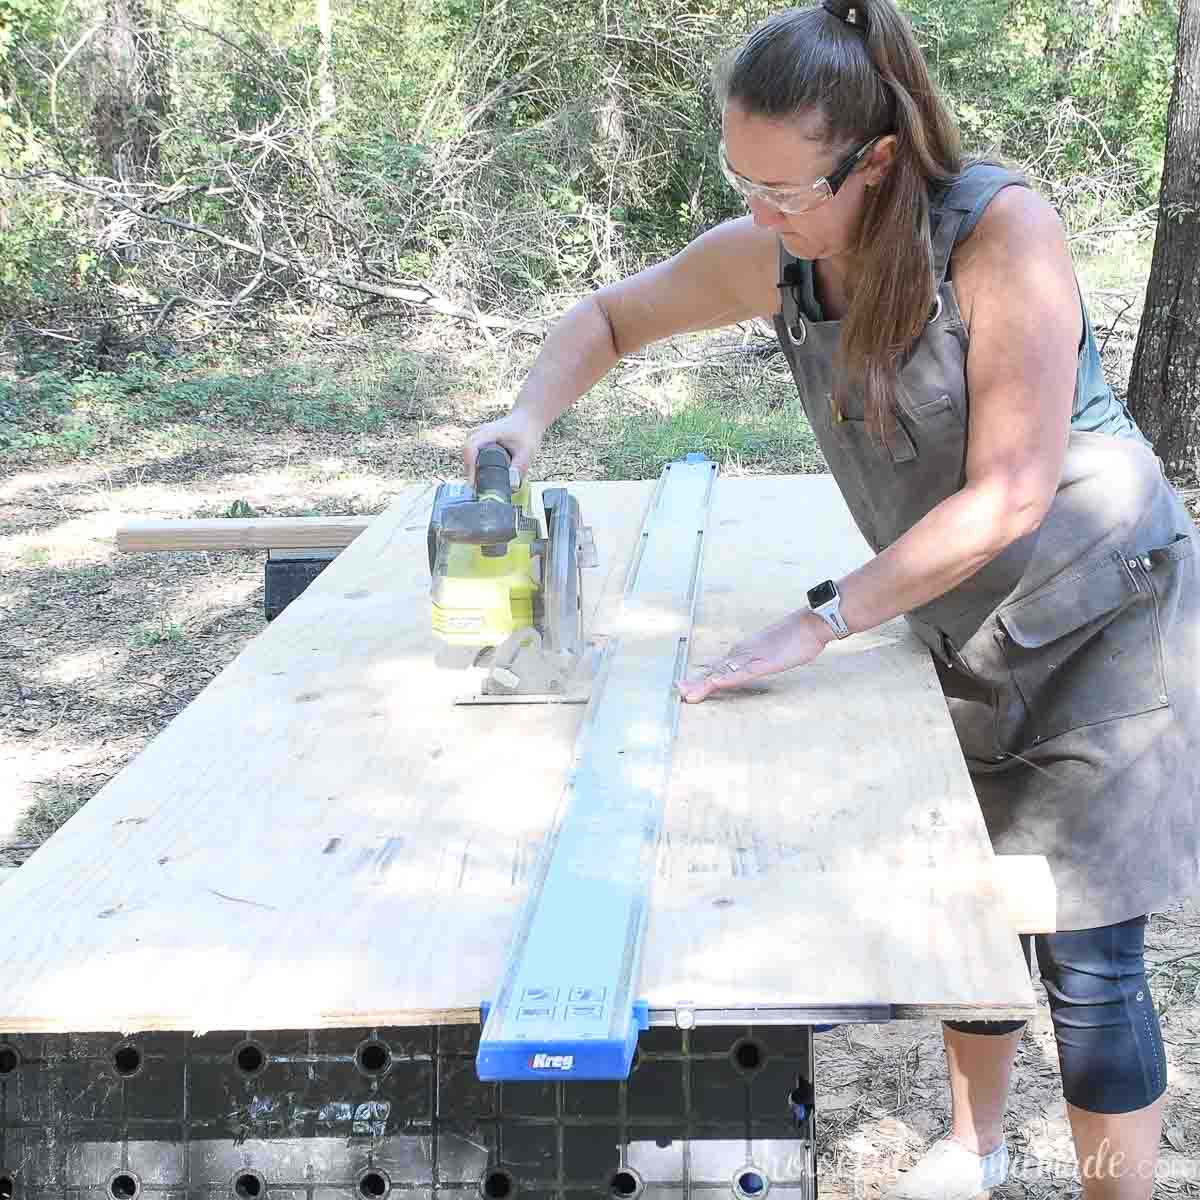
Rip the 1/2″ plywood into strips the width of your shelf depth. Use the Kreg Straight Edge Guide to keep the shelves straight.
To cut the plywood on site, use a sacrificial 2×4 board and the Trak Bushings that come with the Mobile project center.
Drop the table sides. Attach the bushings to the bottom of the 2×4 and slide it into the track. This will hold your plywood and allow you to cut it without cutting into the Mobile Project Center.
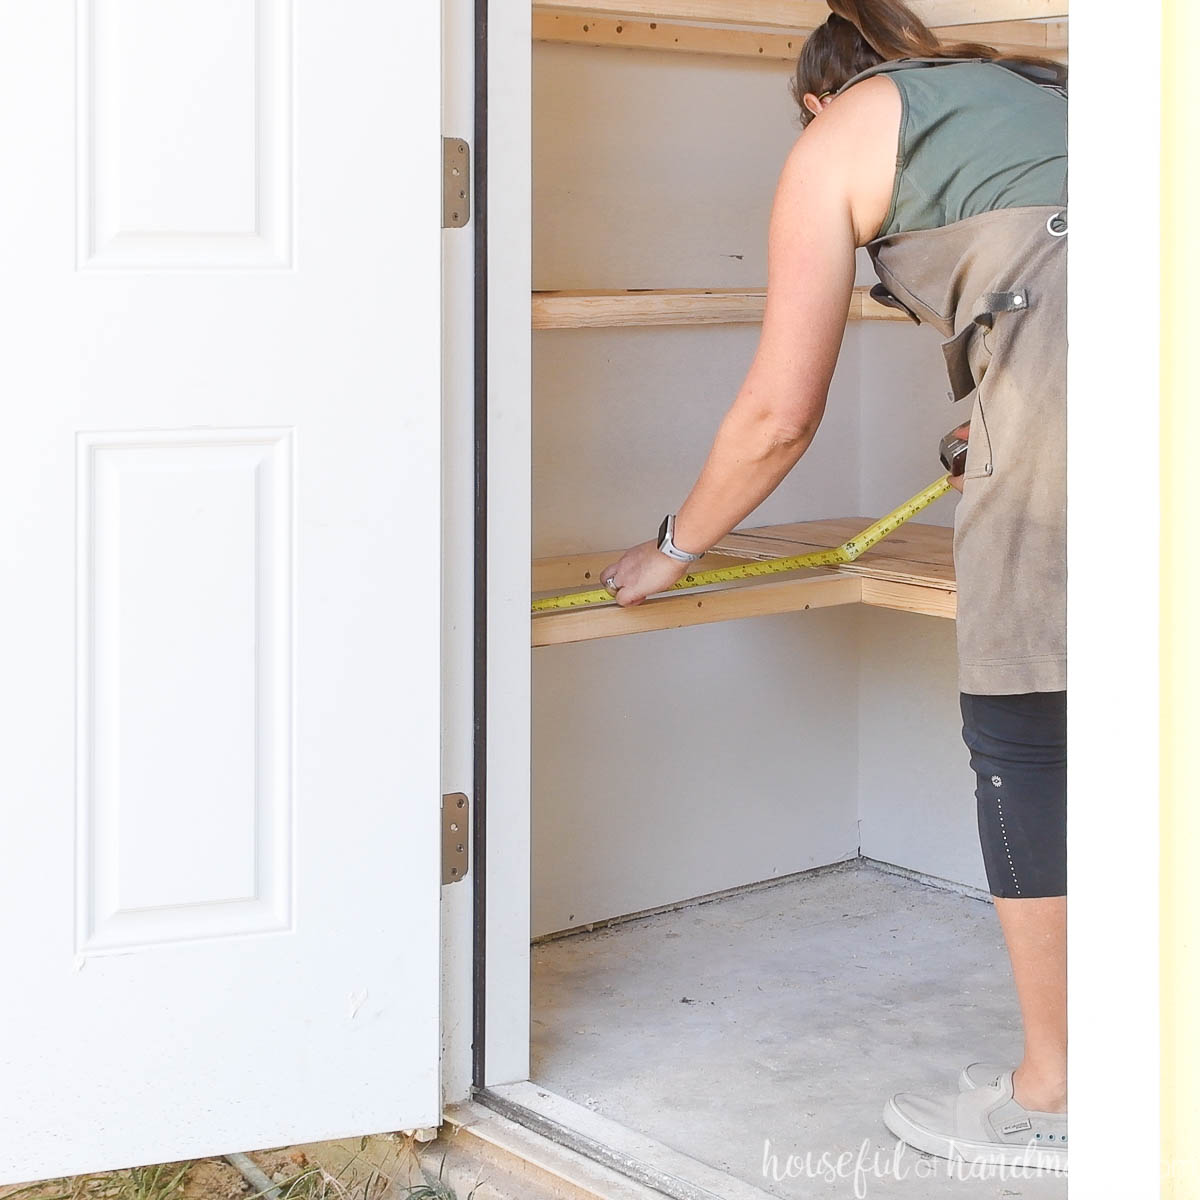
Measure your shelf frames for the length of your plywood.
For L or U shaped shelves, cut the back into one long piece so that it goes over the frames of the sides.
For shelves that are have walls on the sides, measure the length in multiple spots (including the very back) since walls are not straight. And walls are typically narrowest at the corners where more drywall mud is needed.
Cut the strips of plywood to length.
Test the measurement by placing your plywood on top of the frame. Adjust if needed.
You may have to carefully maneuver the plywood to get it into the shelves in tight spaces.
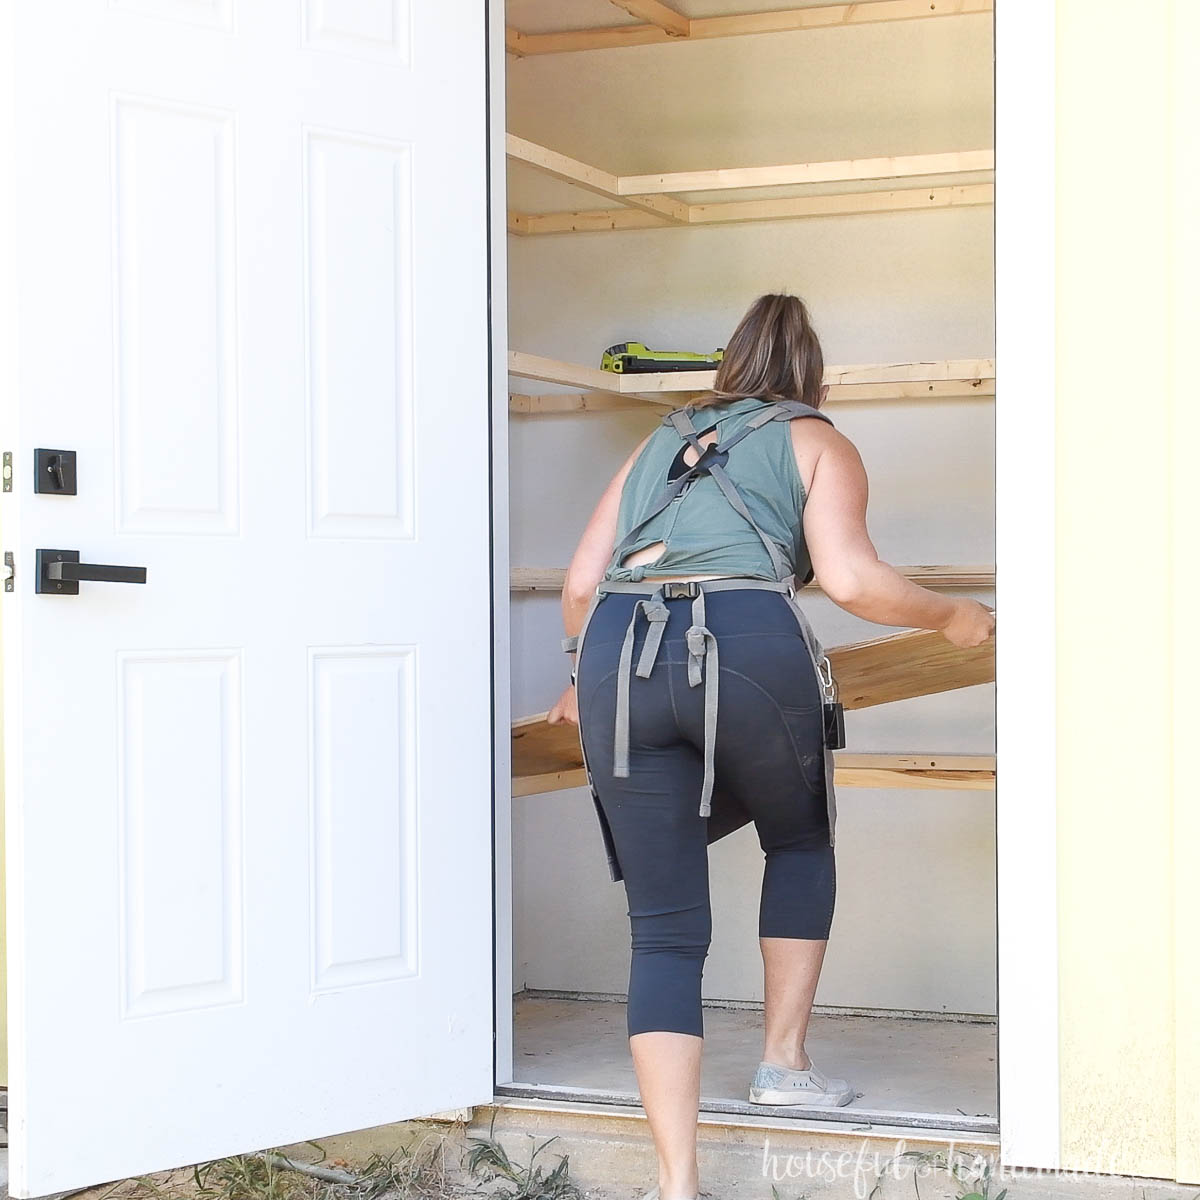
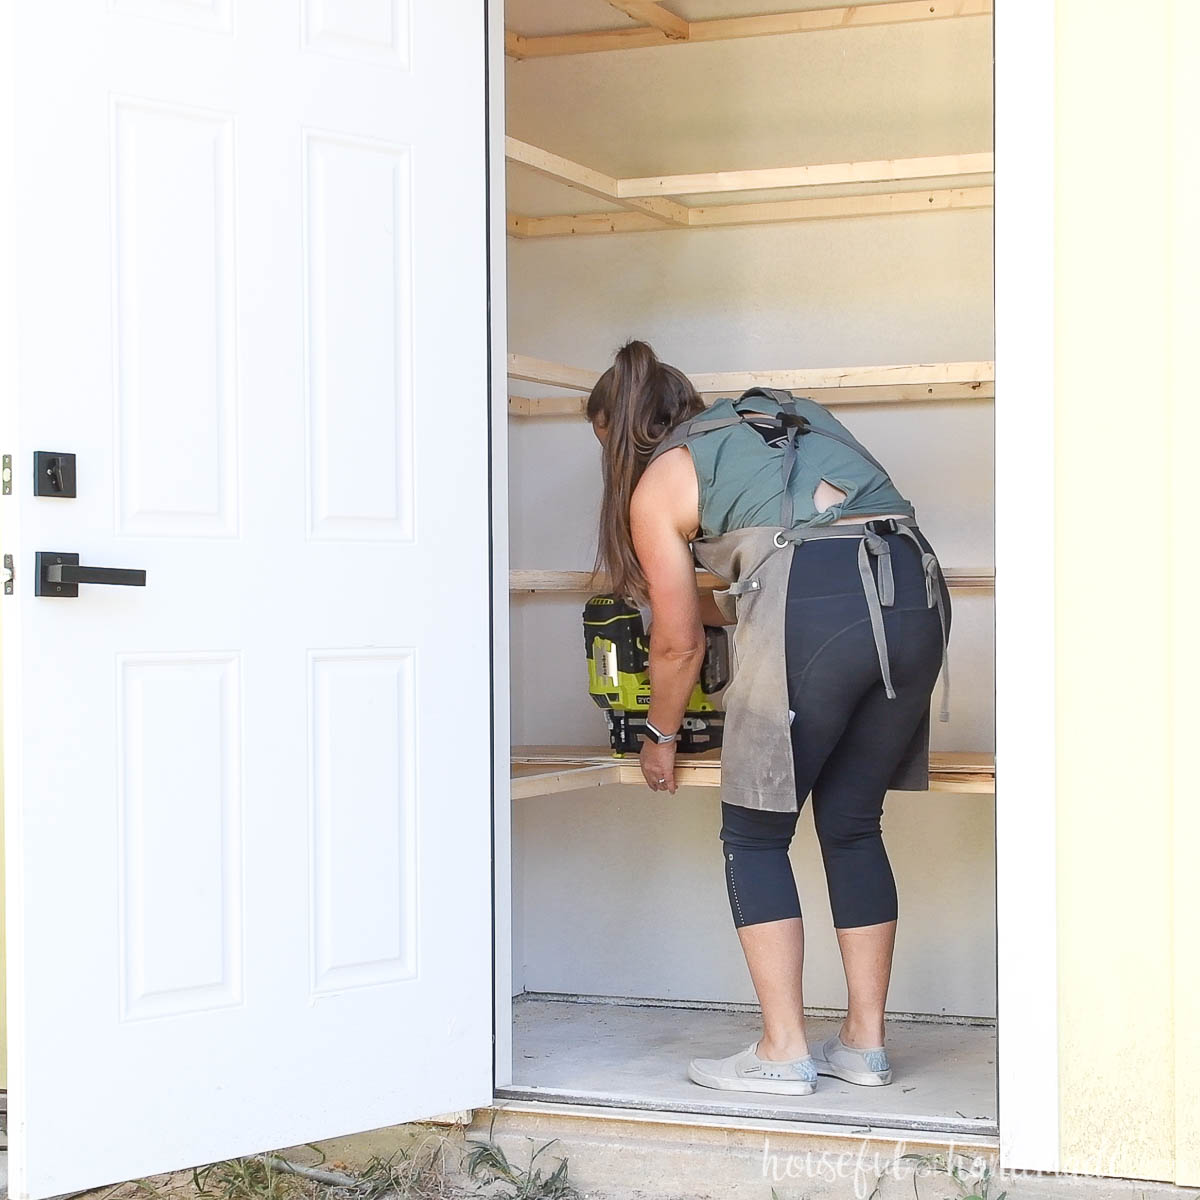
Secure the plywood to the top of the frame with the brad nailer.
You do not need a lot of nails, just a few to hold the plywood in place.
For L or U shaped shelves, measure the side pieces.
Again, measure in multiple spots and cut the shelves to the smallest measurement.
Insert and nail the plywood into place.
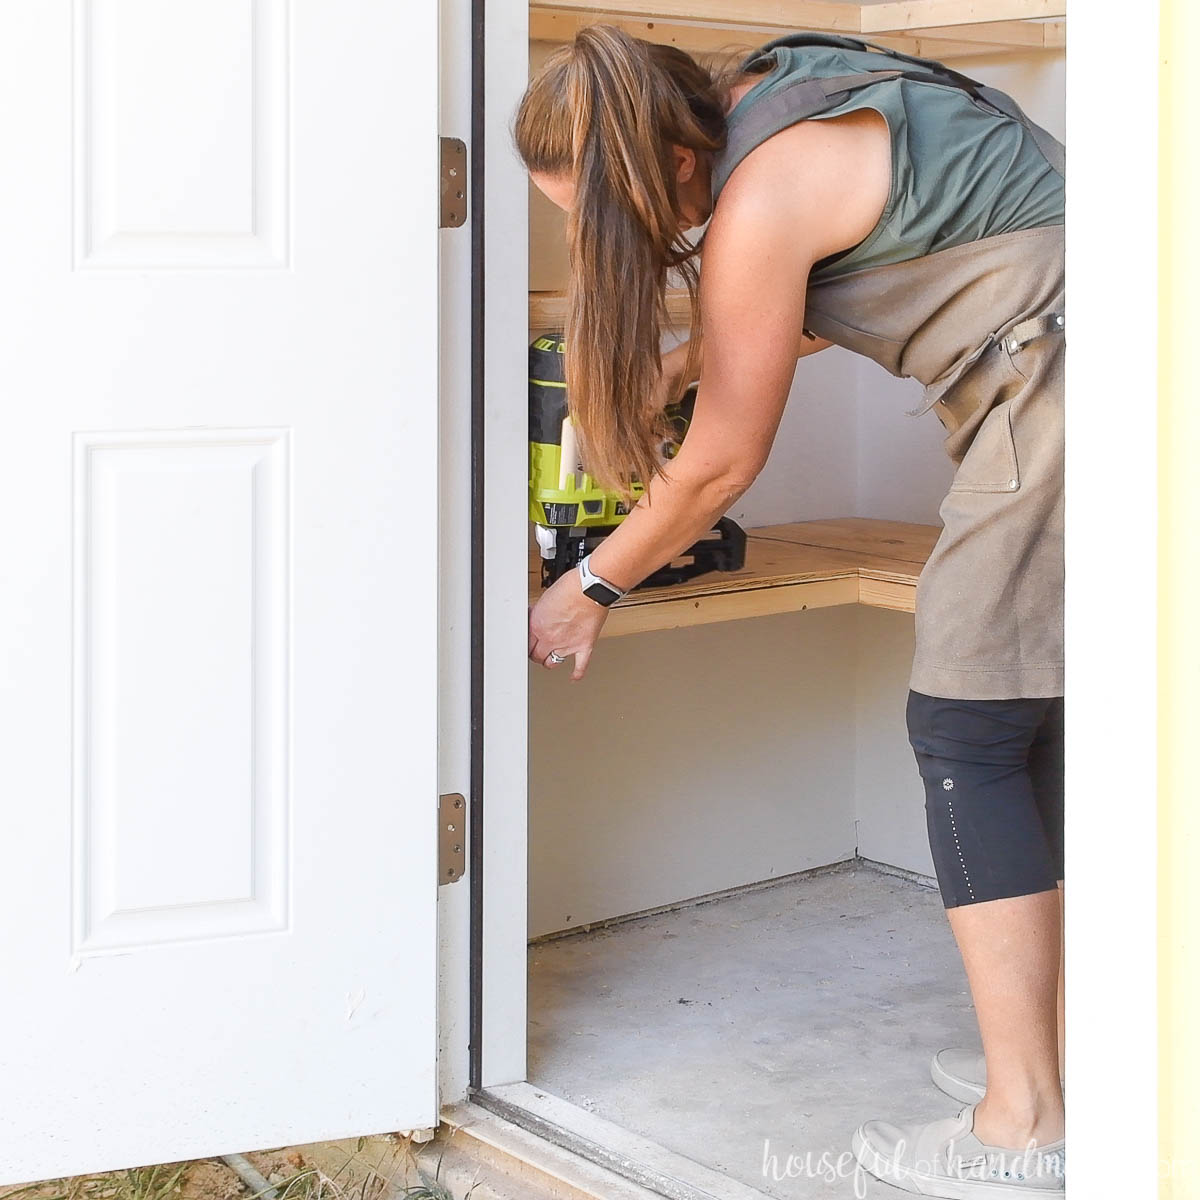
Repeat for the remaining shelves.
If you are storing very heavy items or have long shelves, you may want to add an additional 2×2 board to the front in the weakest spot to prevent sagging.
Now you are ready to load up your storage shelves with all the things! This small closet will be able to store so much more.
And the shelves were all completed in one afternoon. I can’t wait to organize everything in here.

Happy building & organizing!

Thank you to Kreg Tools for sponsoring this post. I only recommend products that I use and love and all opinions are 100% my own. Click here to read my full disclosure policy.