Turn your kitchen island into a centerpiece of your farmhouse kitchen with this easy makeover.
I have always loved those farmhouse kitchen islands that look like a piece of furniture in the middle of the kitchen. Mine was not that way.
Nope, it looked just like 3 base cabinets stuck in the middle of the floor with a top on it.
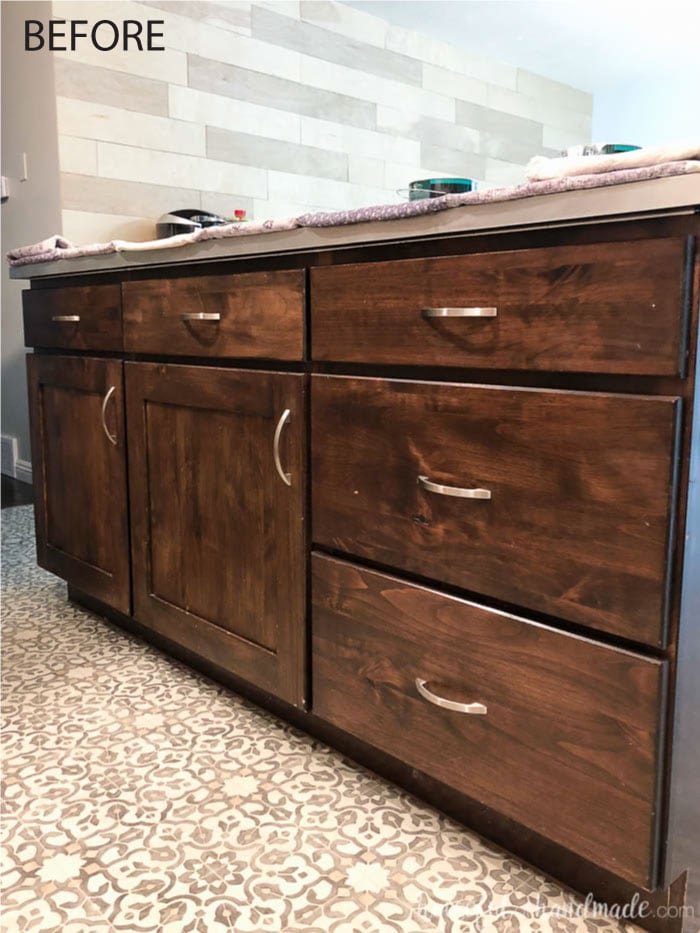
Don’t get me wrong, I love the functionality of my kitchen island. And it was the newest thing in the kitchen until we started the kitchen remodel.
This post may contain affiliate links. As an Amazon Associate I earn from qualifying purchases. Click here to read my full disclosure policy.
But I knew I wanted to do a kitchen island makeover as part of our kitchen remodel.
One of the things I disliked about our kitchen island was this super long overhang. It is great for pushing a bar stool under an there is so much room to cook together as a family. But it also was a huge problem for little kids.
They didn’t notice the edge of the island top because it was so far out there and usually ran right into it.
One weekend when my sister was visiting, we had to tape handkerchiefs to the corners so her son would stop hitting it with his head.
He seriously ran into it 3 times in the first hour they were there. So of course I wanted to fix that with this kitchen island makeover.
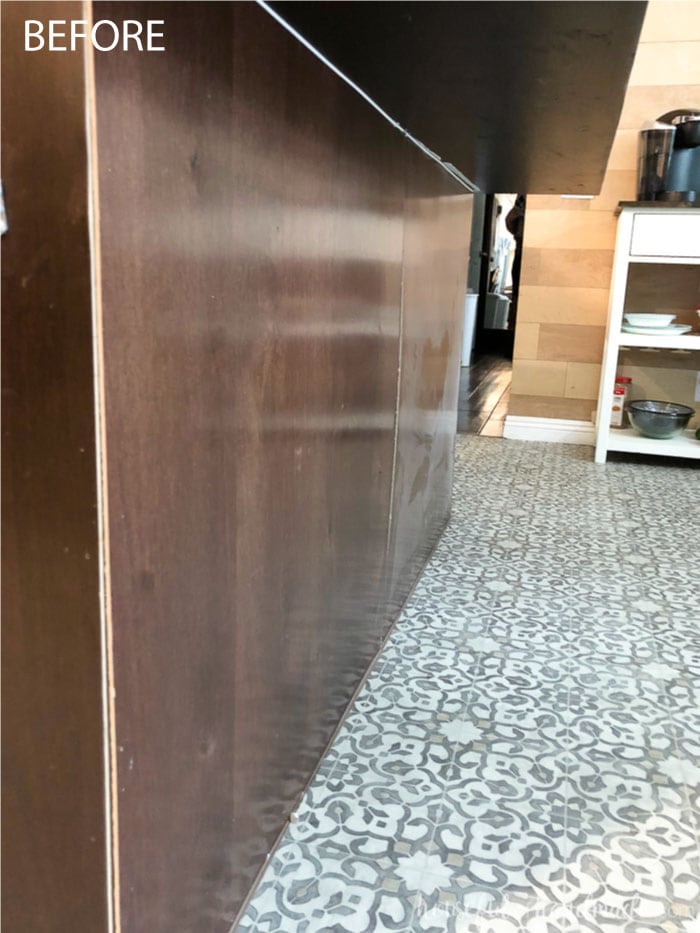
I went through many different ideas. One was to build out the sides completely.
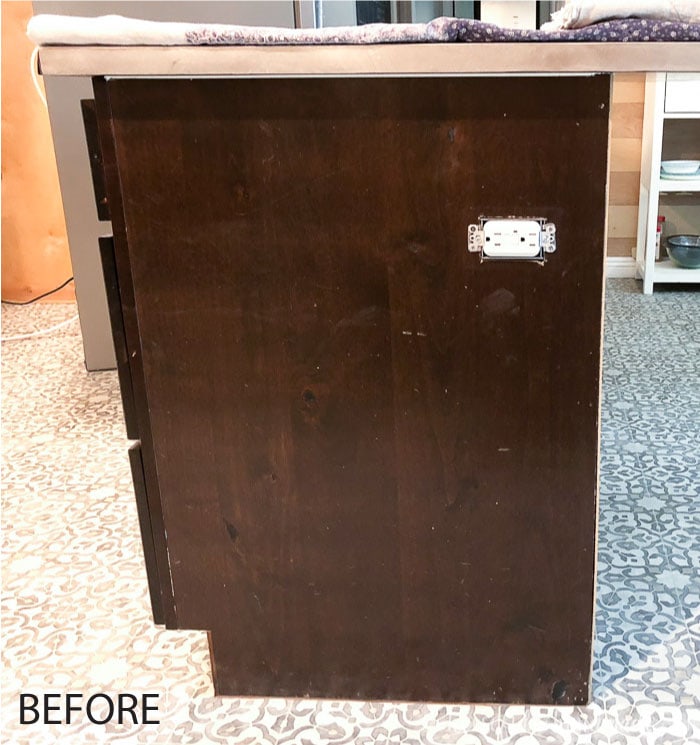
But the seam of the current cabinets and the placement of the electrical outlets was making it hard to get things centered and even.
Next I thought about just trimming out the island like wainscoting and then add a post at the outer corners of the overhang. But it seemed they were too disjointed.
When I started looking for counter posts to use in the kitchen island makeover, I was a little taken at their price. It would cost me $120+ for 2 posts.
Yikes! I have updated 3 rooms in my house for less than that with the $100 Room Challenge.
I was just too cheap for that option. So on a trip to the Home Depot I looked at stair rails and table legs to see if something would work. And what do you know, I found these country table legs for only $20 a piece that were 29″ tall.
If I put those on top of a 5 1/2″ base (which is the width of a 1×6 board), it would be perfect for the 34 1/2″ counter height!
With my decision made it was time to get to work. The weather was really wet and cold so staying inside and working on the kitchen island makeover was a good option.
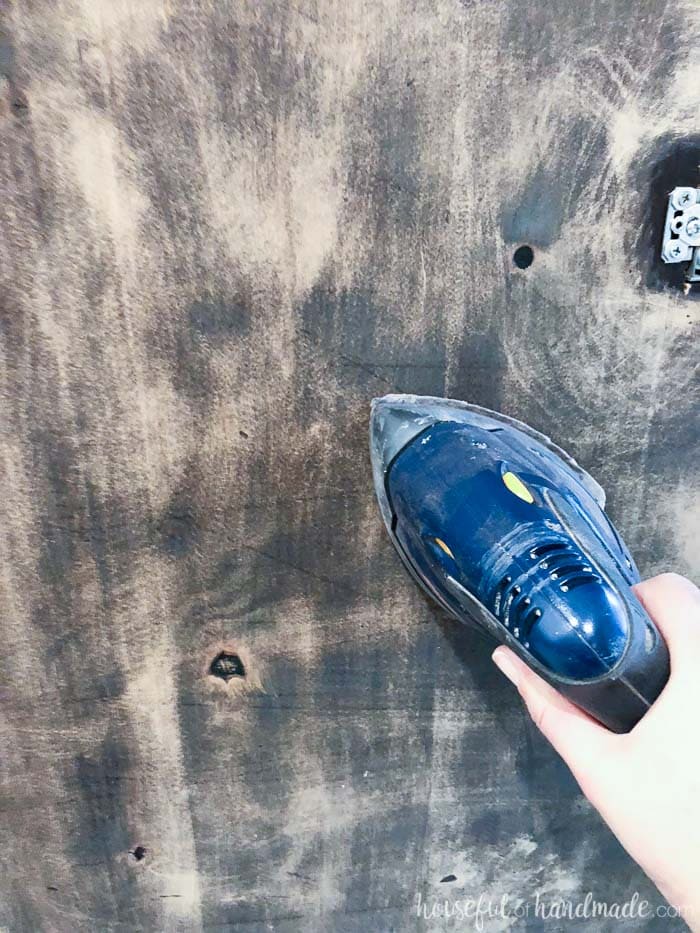
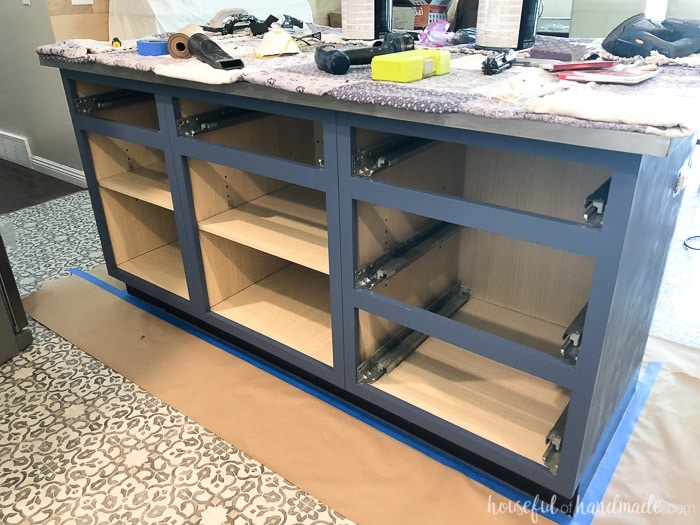
I started by pulling off the cabinet doors and drawer fronts. Then I gave everything a good sanding with my corner cat sander. I love this thing for getting into corners on furniture pieces like this.
After a good vacuuming, I cleaned the entire surface with a tack cloth to remove the rest of the dust. Then it was time for paint.
To paint the kitchen island I used a foam roller and paint brush. The paint brush is great for cutting in at the top and around the face frames.
The roller made quick work of the sides and back. I didn’t bother painting all the way to the floor because I knew I would cover it up with my wood base later (and it was easier to protect my new flooring).
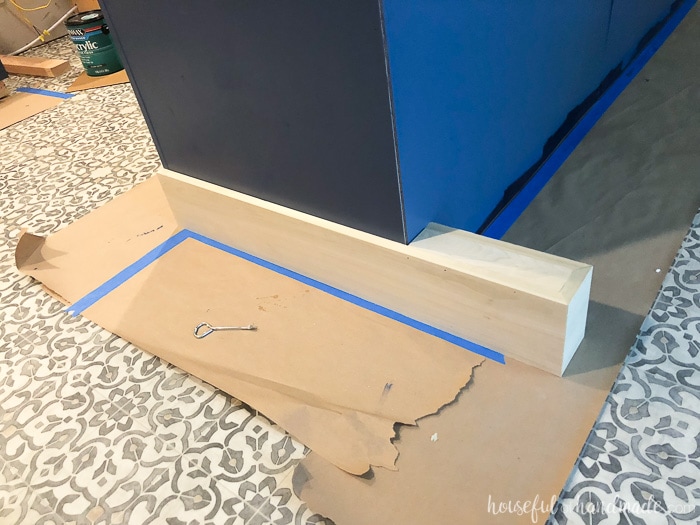
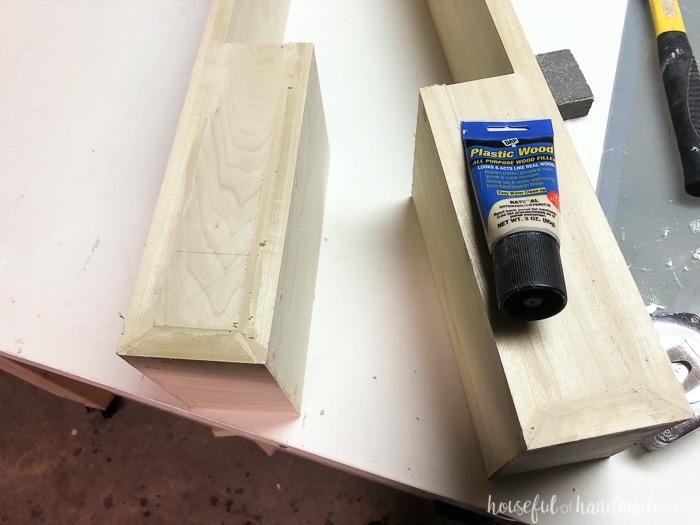
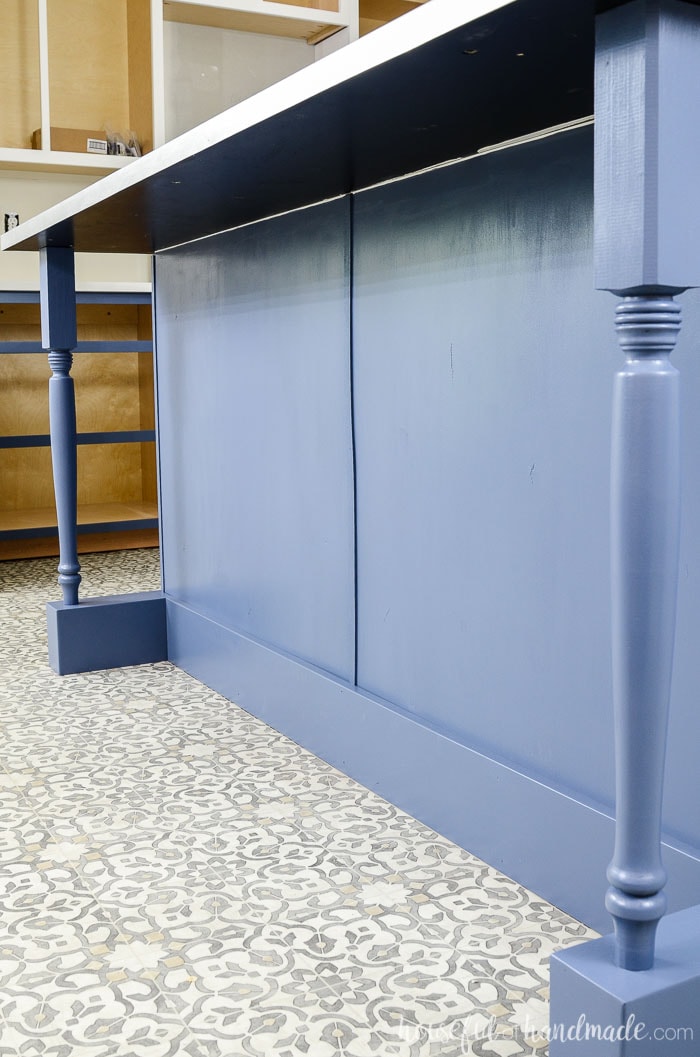
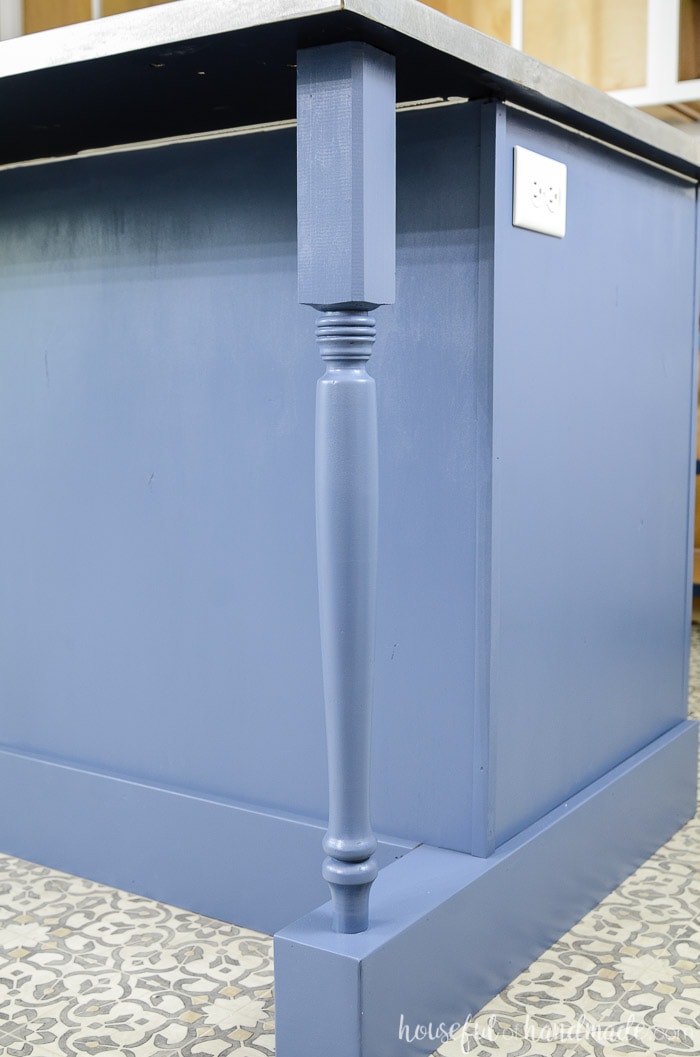
To build the base, I used 1×6 poplar boards (the same wood I used to build our new kitchen cabinets). I decided to build the base out 10″ past the edge of the current cabinets. That left a few inches of overhang still.
I cut a 1 piece of wood to the desired length with a 45 degree angle on one end, 1 piece the desired width (3 1/2″) with 45 degree angles on both ends, 1 piece 10″ with a 45 degree angle on one end, and 1 2″ x 10″ (for the top of the base).

Using wood glue and my Ryobi battery powered nail gun, I created the base/feet of the new kitchen island. Then it was time for a dry fit (super scary). Luckily it worked perfectly!!!!
So I hurried and whipped up the second base making sure to mirror it for the other side of the island.
Because my mitered angles kinda suck (I’m still learning), I had to fill some spots with wood filler.
I also gave the nail holes a little filler too. I let this dry and then sanded it all smooth.
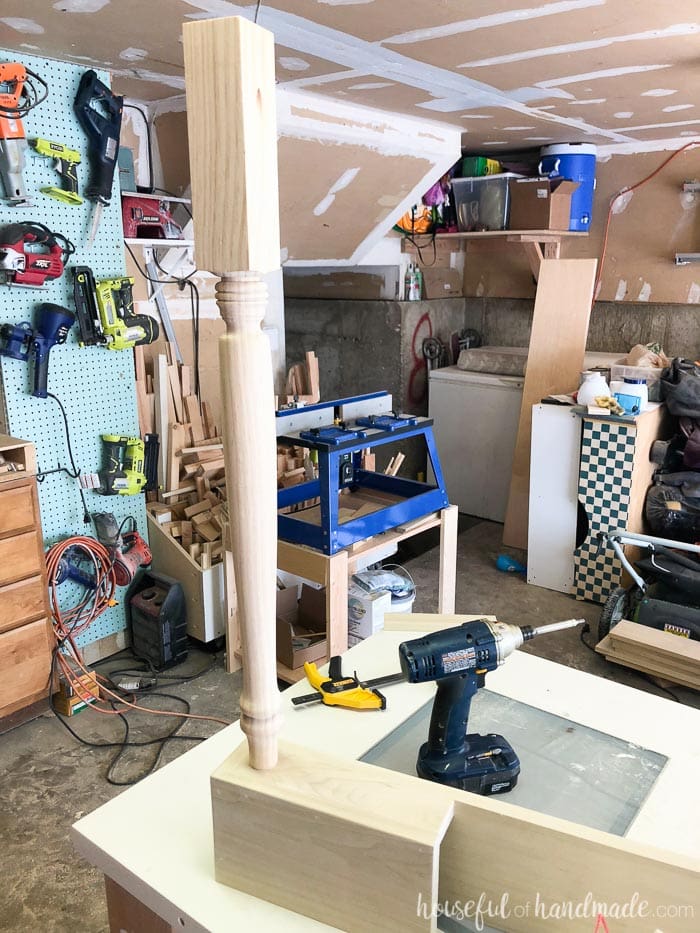
Next was attaching the table legs. I was worried this would be a pain, but it was so easy. Mark the area you want to attach the leg to and drill a pilot hole all the way through. Try to keep the drill super straight.
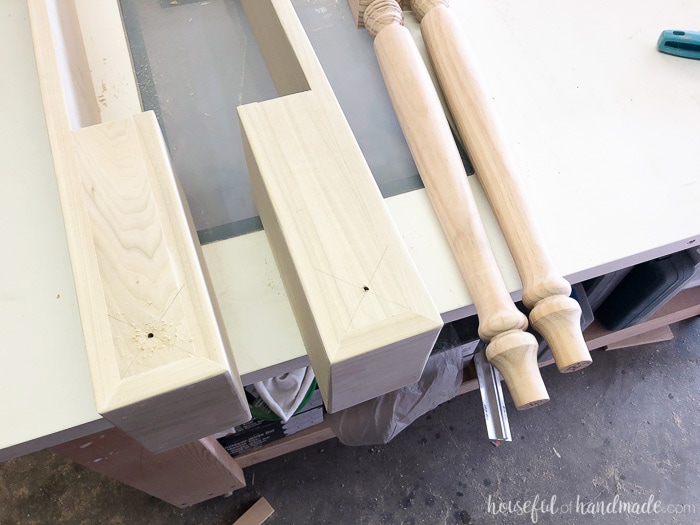
Apply a good amount of wood glue to the bottom of the turned leg and then carefully start the 2″ wood screw in from the underside of the base. Once it is barely poking out, center the leg on it and secure.
You might have to twist the leg to make it square to the base, but I couldn’t believe how secure it was with just 1 wood screw (and I knew it would be even better once the wood glue dried.
I did another dry fit and had to trim the top of the leg about 1/4″ to fit snuggly under our kitchen island. I couldn’t believe how beautiful it looked!!!
what While the sides were in place, I made a quick measurement for the base I needed to go between the two pieces and cut it to prepare for paint too.

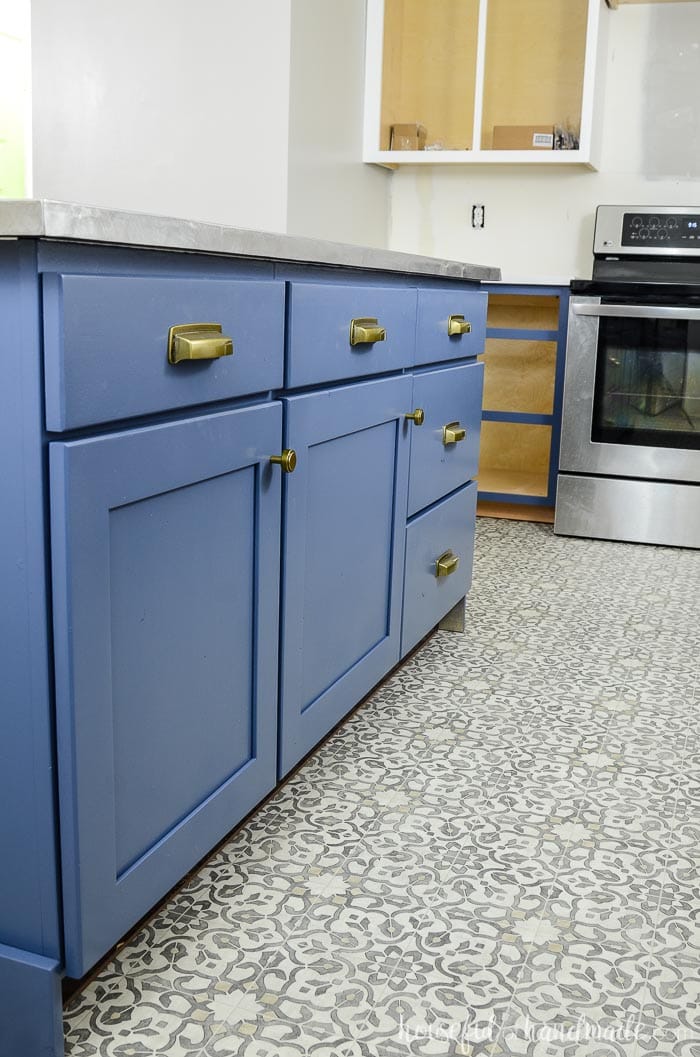
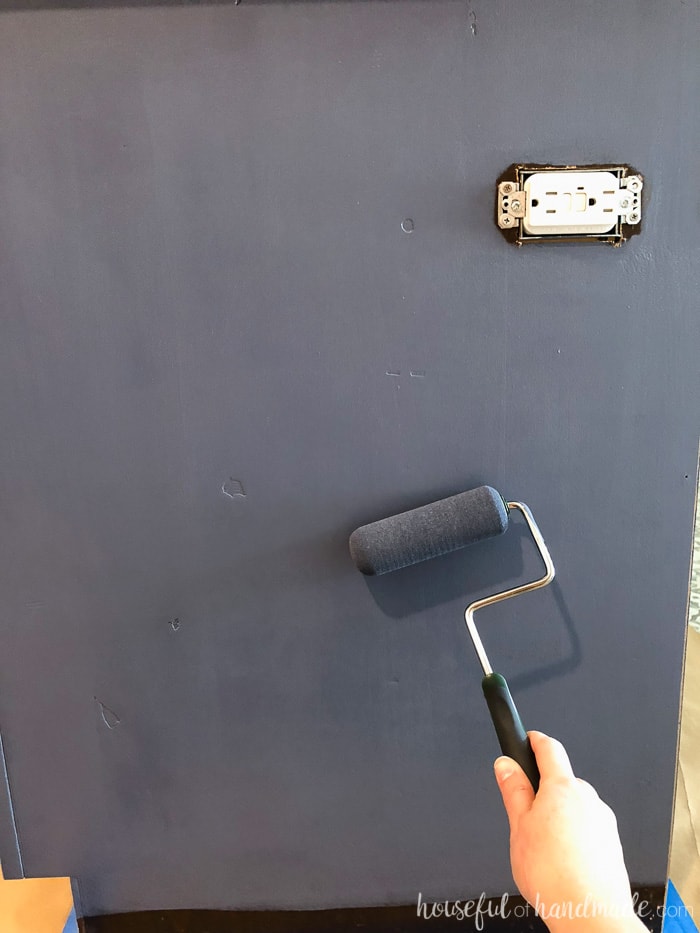
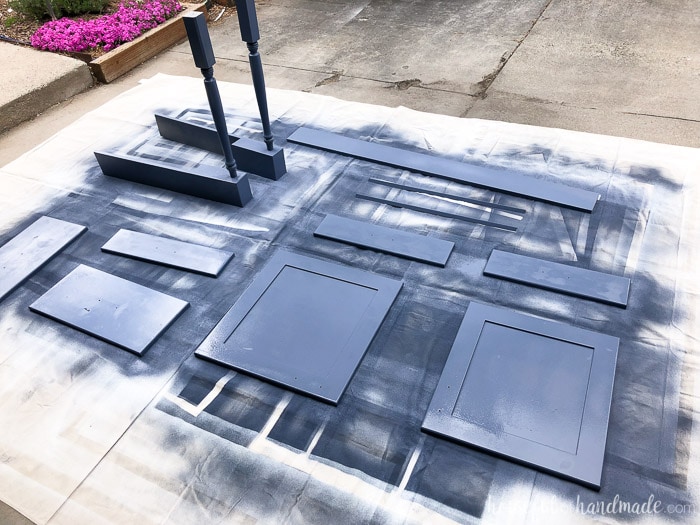
Next it was time for painting. I gave everything a couple coats of Durango Blue by Behr with my HomeRight Super FinishMax sprayer. Check out all my tips for how to paint unfinished cabinets with the sprayer.
The weather was turning bad and I could see the dark gray rain clouds moving in so I was working quick. Luckily the paint sprayer made quick work of it and I was able to get 2 coats on everything in just a couple hours.
After everything was dry, it was time for the magic to happen. It was so quick to place the painted base with post under the kitchen island and nail it into place.
It was instant how the new build out totally transformed the kitchen island from boring and basic to a piece of furniture in the center of my beautiful new kitchen!

I still plan on adding a polycrylic coating to the paint to protect it further from wear and tear, but it is good to wait a few days to let the paint dry fully. I just was so excited I couldn’t wait.
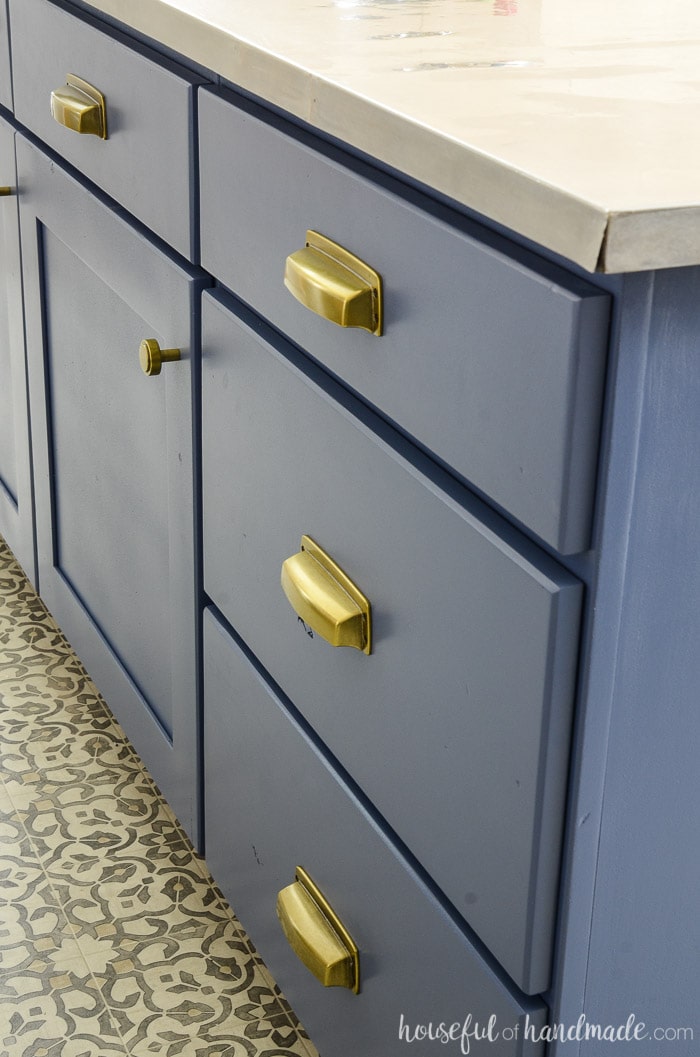
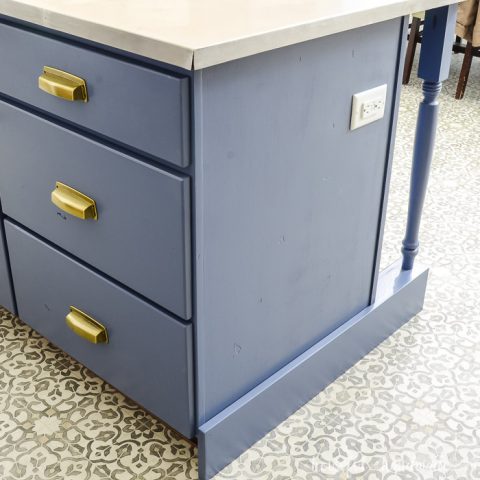
And I even got the new hardware that I partnered with Liberty Hardware for on the island.
The brass cup pulls and knobs are so pretty and I love the mixed metal with the stainless steel island top.
You can see the hardware I chose here and here. It’s all turning out so perfect!
Farmhouse Kitchen Island Makeover
Materials
- 2 Country Table Legs 29"
- 1x6 Poplar Boards
- Behr Durango Blue Paint
- Polycrylic Coating
- Brass Cup Pulls and Knob Handles
Tools
- Corner Cat Sander
- Tack Cloth
- Foam Roller
- Paint Brush
- Nail Gun
- Wood Filler
- Drill
- Wood Screws
- HomeRight Finish Max Paint Sprayer
Instructions
- Remove cabinet doors and drawer fronts.
- Sand with a corner cat sander.
- Clean everything with a tack cloth
- Paint the kitchen island with paint brush and foam rollers.
- Cut 4 pieces of wood the desired length and width with a 45 degree angle on one end.
- Using wood glue and your Ryobi battery powered nail gun, create the base/feet of the new kitchen island.
- Fill any spots with wood filler and sand.
- Attach the table legs by marking the area you want to attach the leg to and drill a pilot hole all the way through.
- Apply a good amount of wood glue to the bottom of the turned leg and then carefully start the 2″ wood screw in from the underside of the base.
- Measure a piece of wood for the base to go between the two pieces and cut it to prepare for paint too.
- Use the paint sprayer to paint everything with two coats of paint.
- Place the painted base with post under the kitchen island and nail it into place.
- Add the drawer fronts with hardware.
- Finish with a polycrylic clear coat.
Recommended Products
As an Amazon Associate and member of other affiliate programs, I earn from qualifying purchases.


And don’t forget to check out these other amazing Furniture Flippers. It might be time to take a look at your home or visit the thrift store and have some fun this summer!
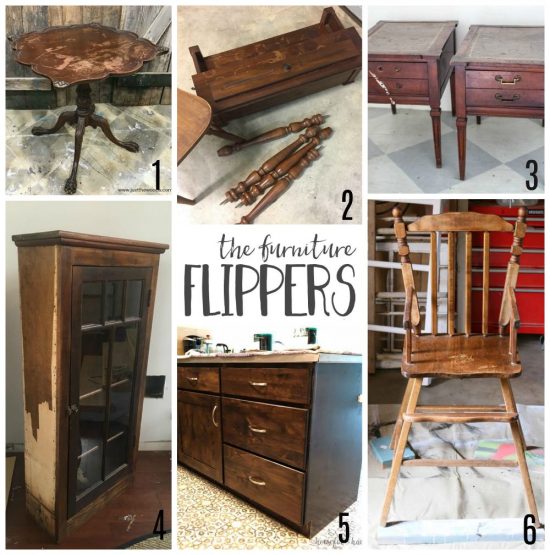
1- How to Get Beautiful Results with Black Furniture Wax – Just the Woods
2- A Beachy Desk Makeover with Chalk Paint – Repurpose and Upcycle
3- How to Make a Herringbone Table Top with Paint Sticks – Lovely Etc.
4- Refinished Antique Cabinet with Black and White Decorative Paper – Refresh Living
5- Farmhouse Kitchen Island Makeover – Houseful of Handmade
6- 5 of the Best Furniture Pieces to Buy and Flip – A Fresh Squeezed Life
