
Cut perfect circles easily with this router circle guide.
You can cut circles may ways, but none are as perfect as cutting a circle with a router!
A router on a circle cutting jig will give you beautiful circles with clean sides. And you can router out circles as big as you need without needed a bigger tool
That is why cutting circles with a router jig is my preferred method!
This post may contain affiliate links. As an Amazon Associate I earn from qualifying purchases. Click here to read my full disclosure policy.
You can buy a circle router jig, but why, when you can make one in just a few minutes from scraps you probably already have in your shop.
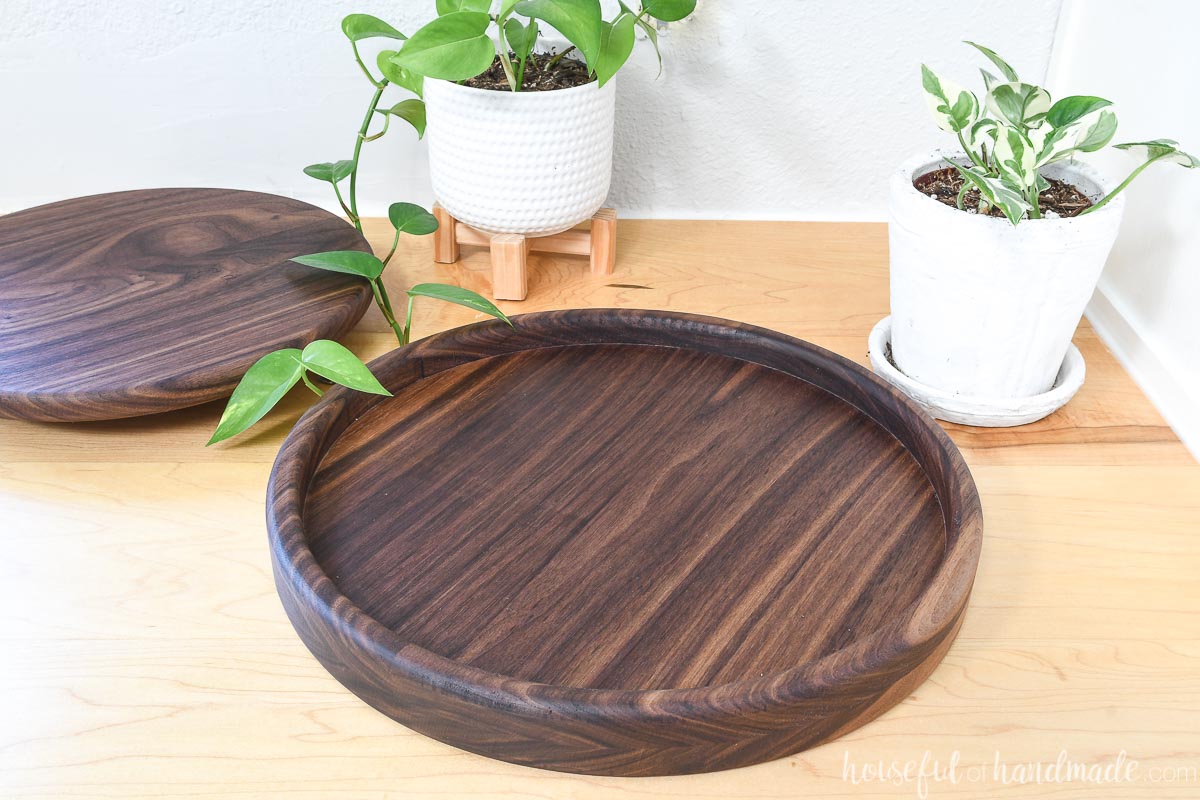
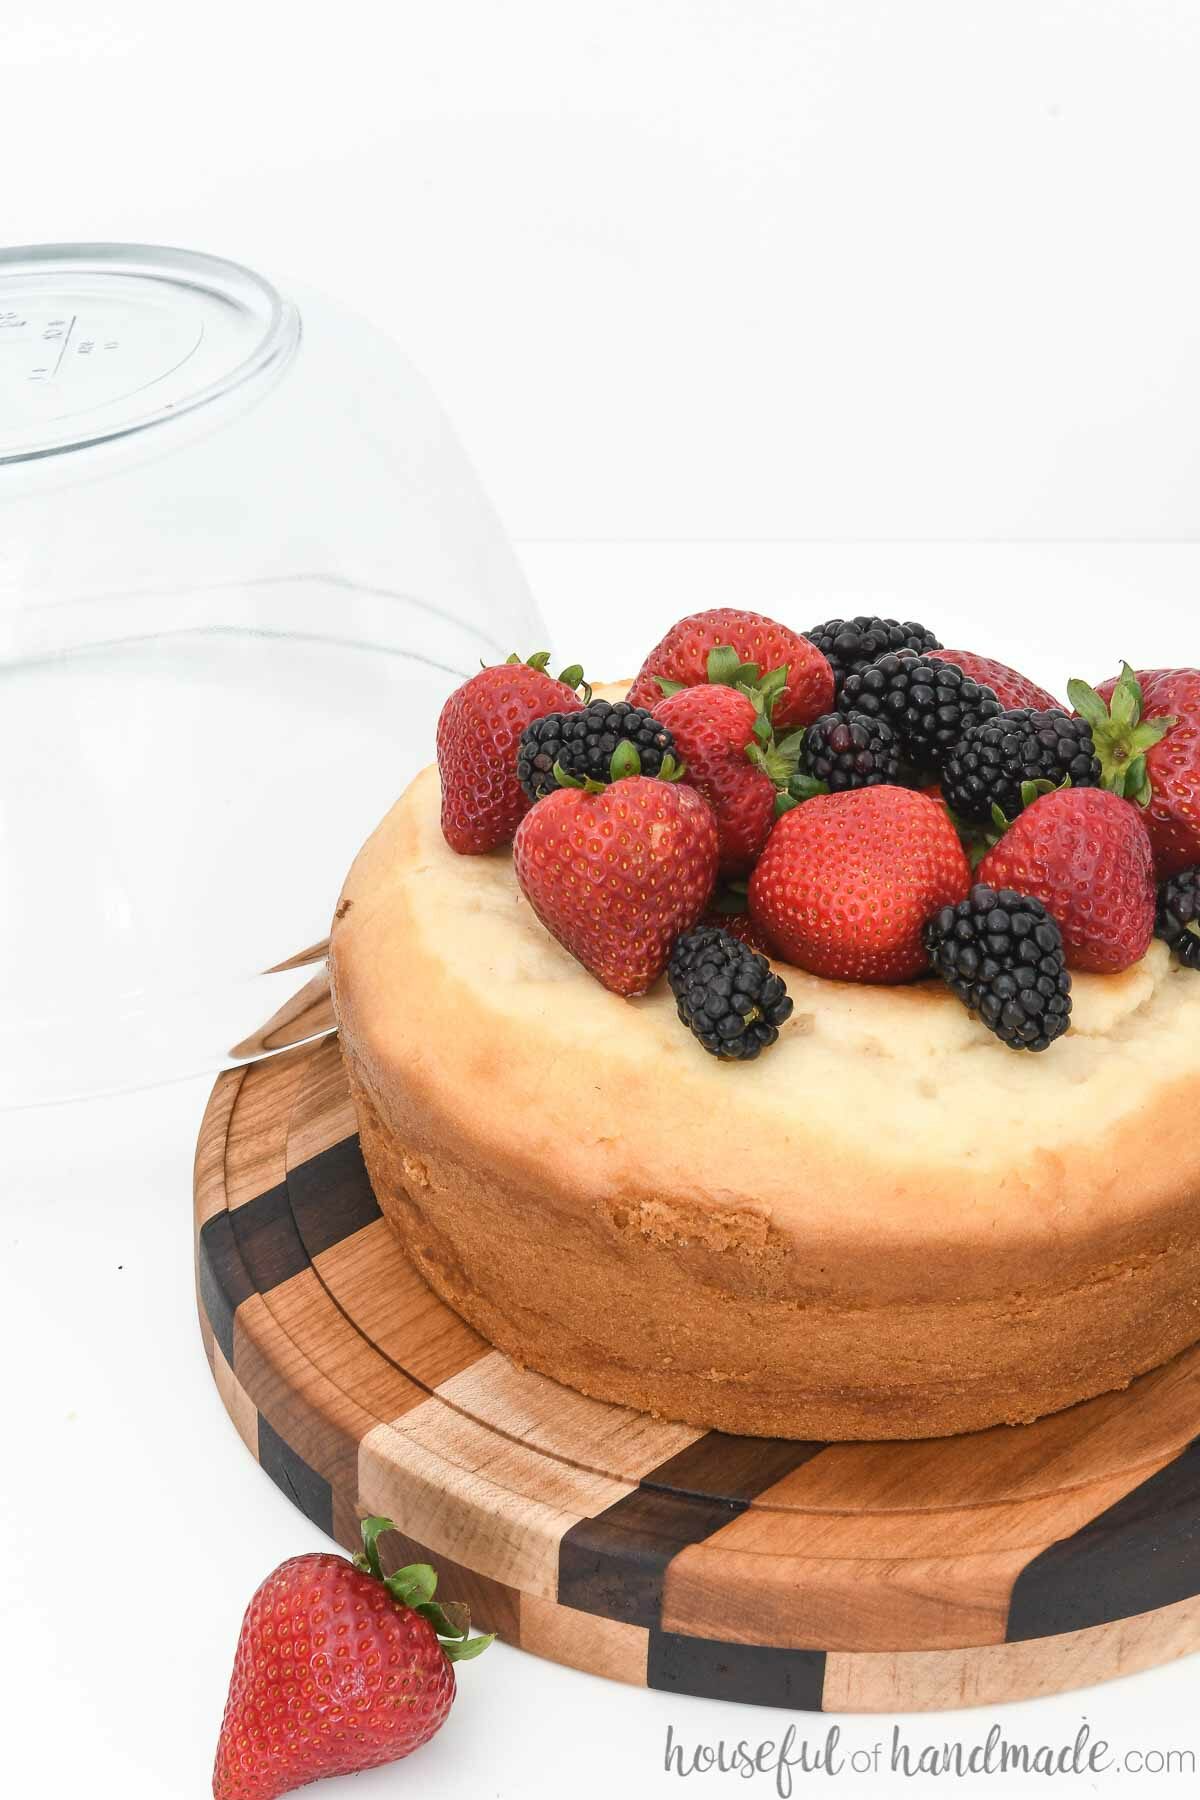
This easy circle cutting jig is super useful in the shop. You can use it to make things like this beautiful wood tray and this scrap wood cake plate.
How to Make a Circle Cutting Jig for a Router
Tools needed:
- Trim router
- Saw
- You will need to cut your wood to size, I used a table saw.
- Drill
- Measuring tape
- Screw driver
Supplies:
- 1/4″ MDF or plywood
- 5mm shelf pin
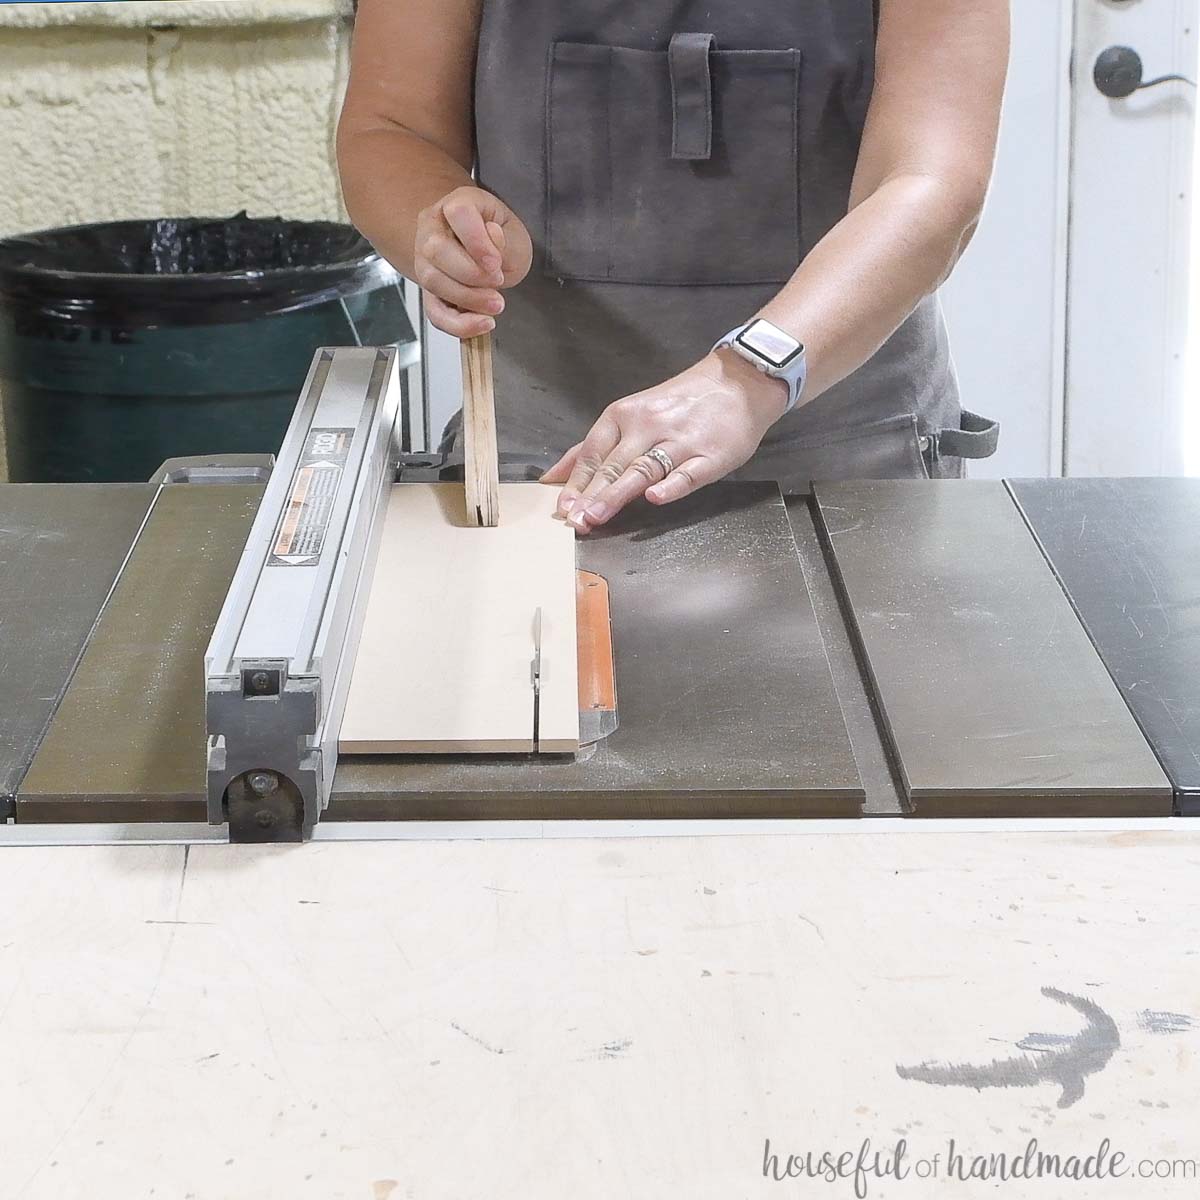
STEP 1- Cut your Board
Cut a piece of 1/4″ MDF or plywood. You could also use a 1x board if you have a router bit is long enough.
The piece of wood needs to be the same width as your router plate. It needs to be 1-2″ longer than the radius (1/2″ the diameter) of the largest circle you want to cut + the router plate.
You can make your jig as long as you need to cut your circle!
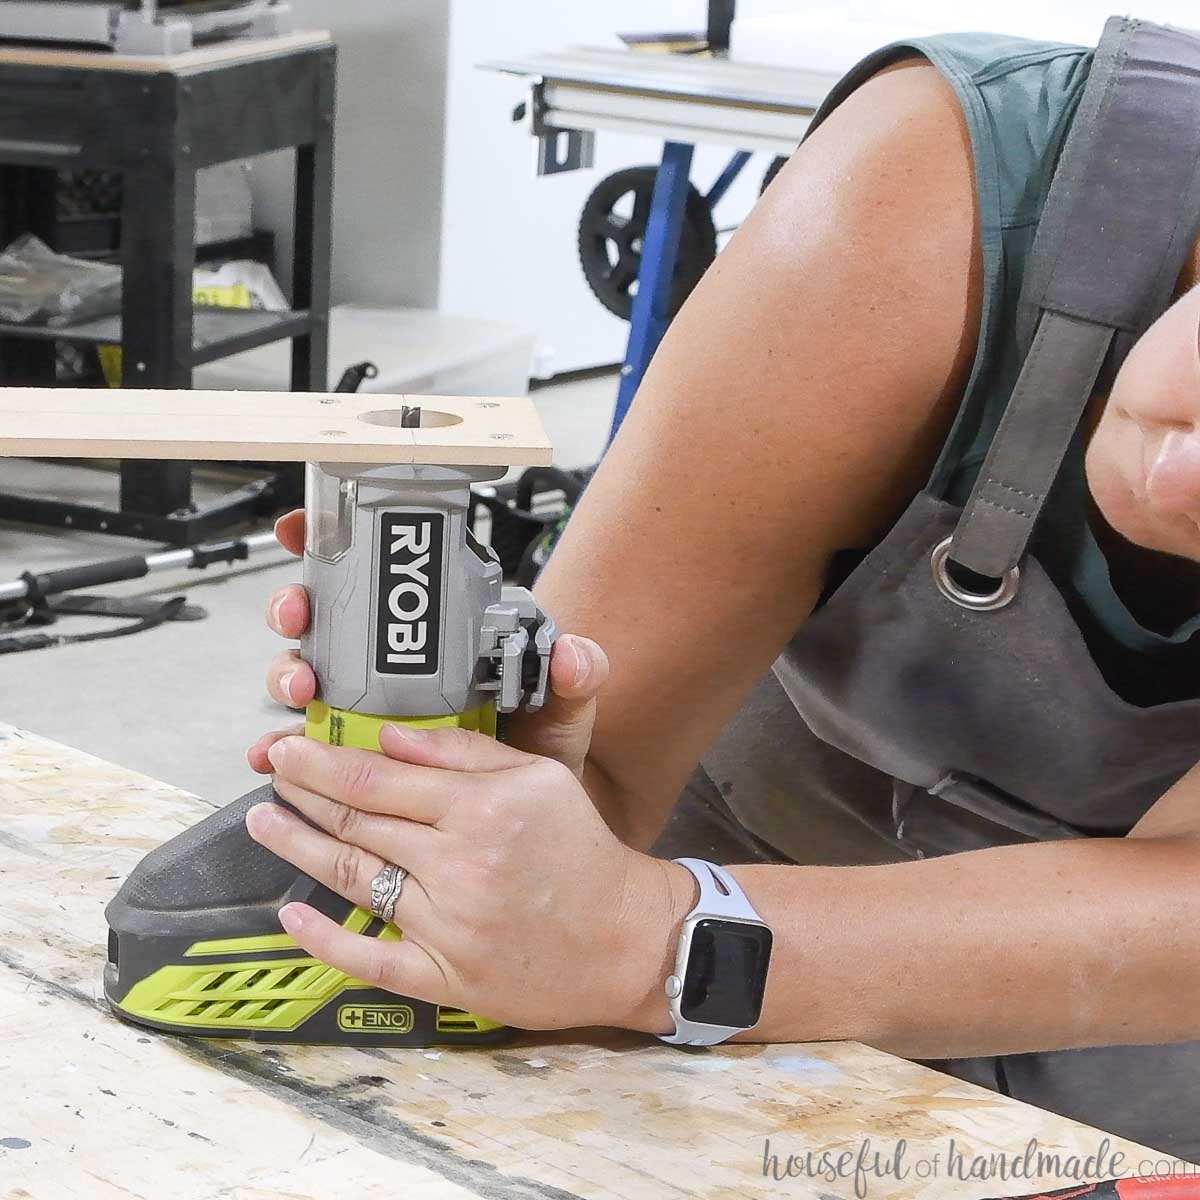
STEP 2- Create the Router Side
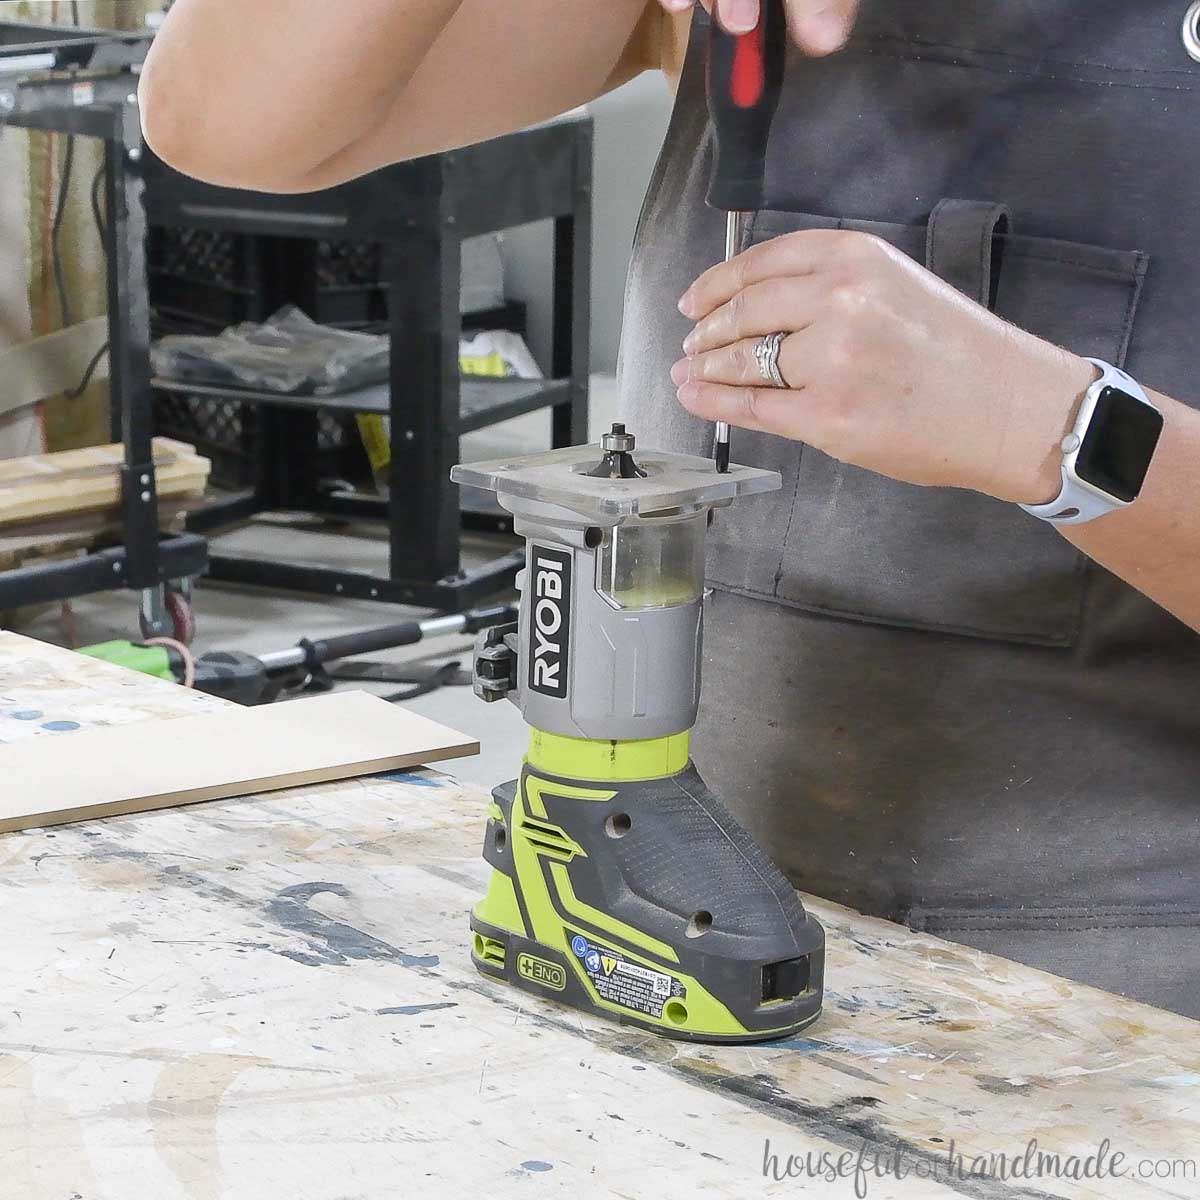
Remove your router plate from your router.
This is easy to do with a screw driver. You probably do not want to use a drill or impact driver so that you do not strip your screws.
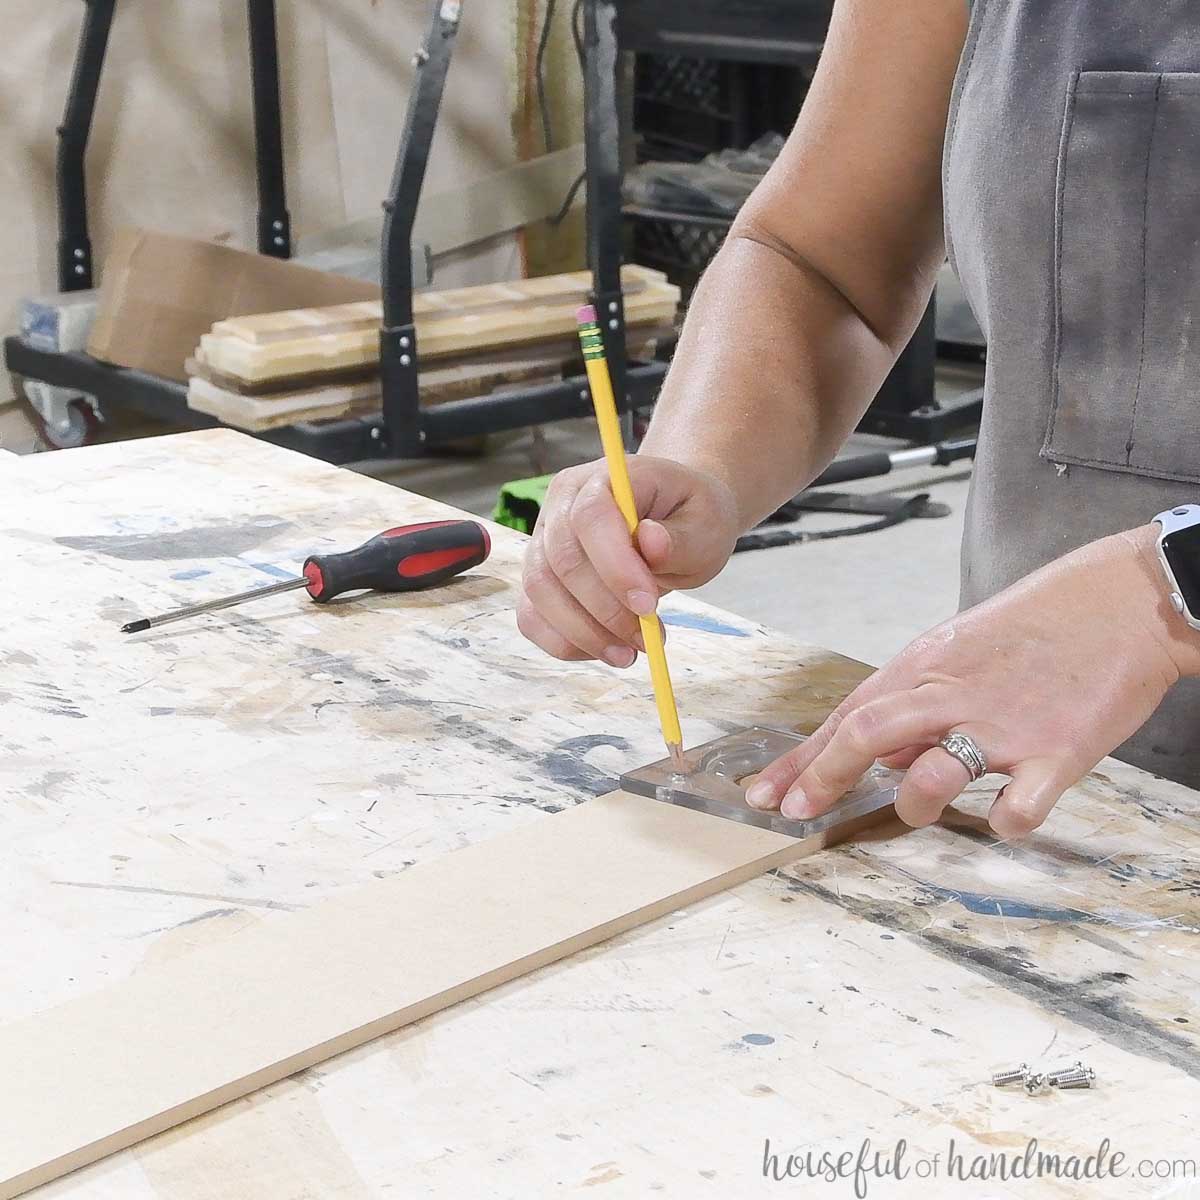
Place the router plate on one edge of your board.
Transfer the location of the screws and center hole onto your MDF piece.
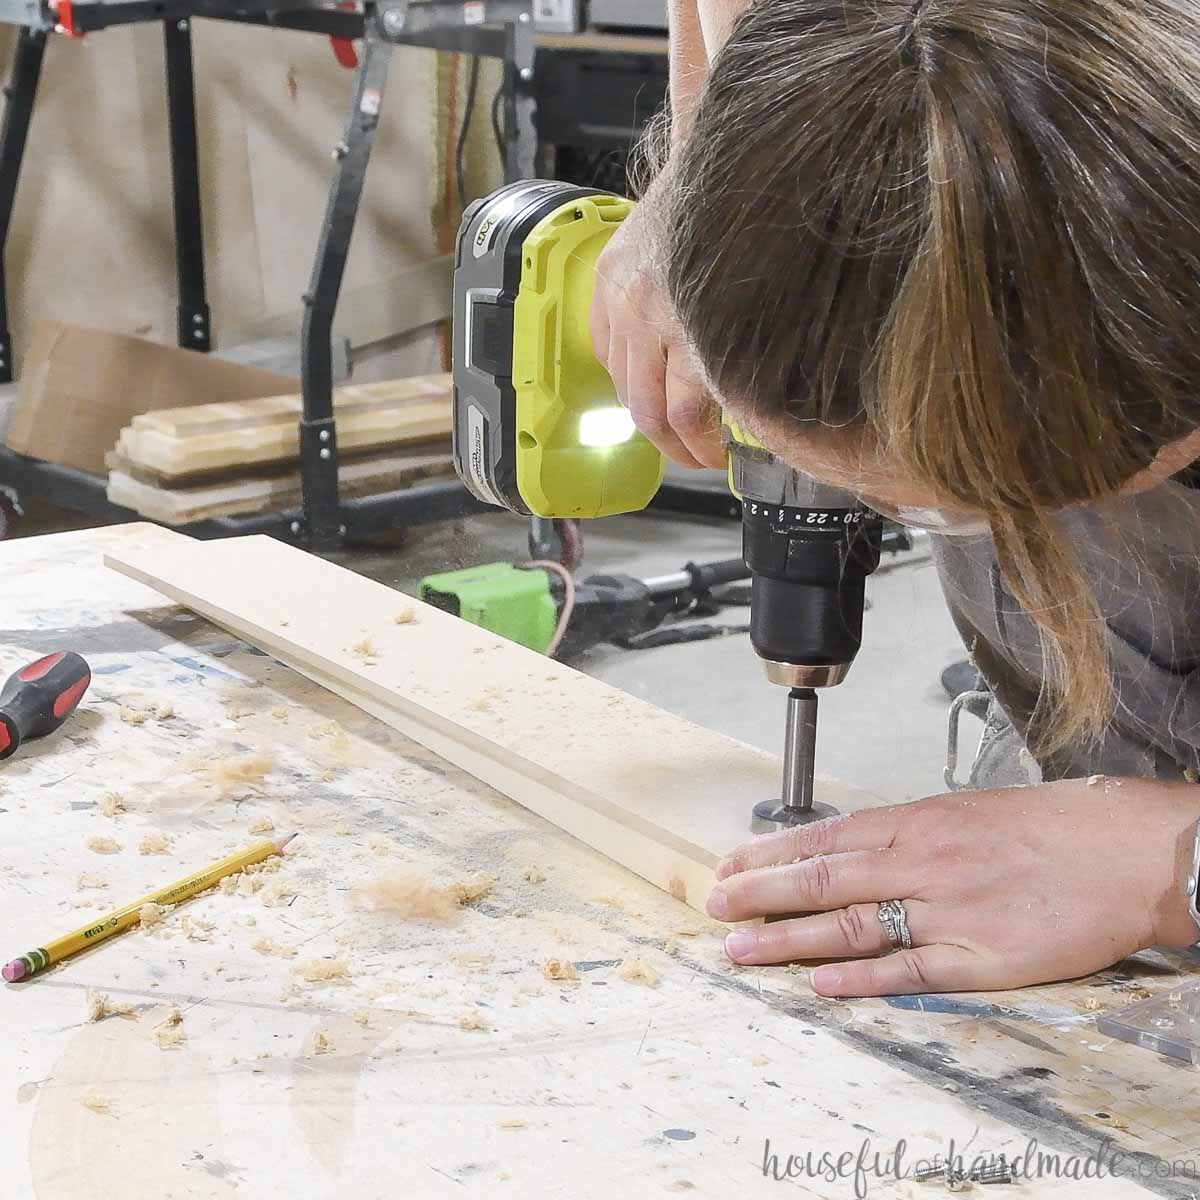
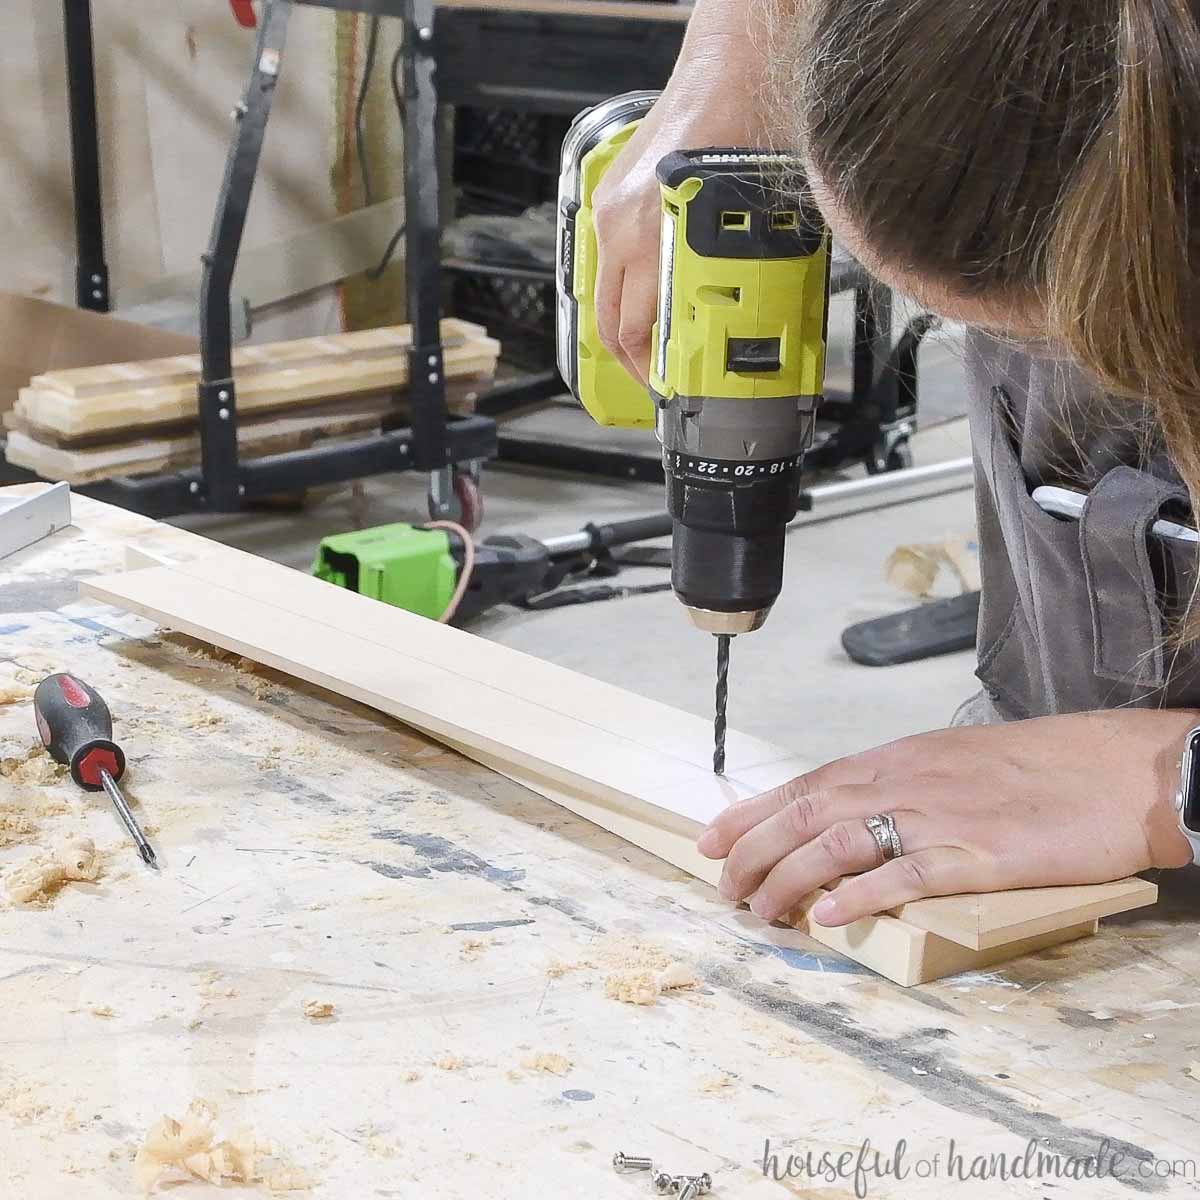
Use a drill to drill out the center area.
You do not have to drill out the entire hole, but it does need to be big enough for your 1/4″ straight cut router bit.
I used a Forstner bit to get a nice clean hole.
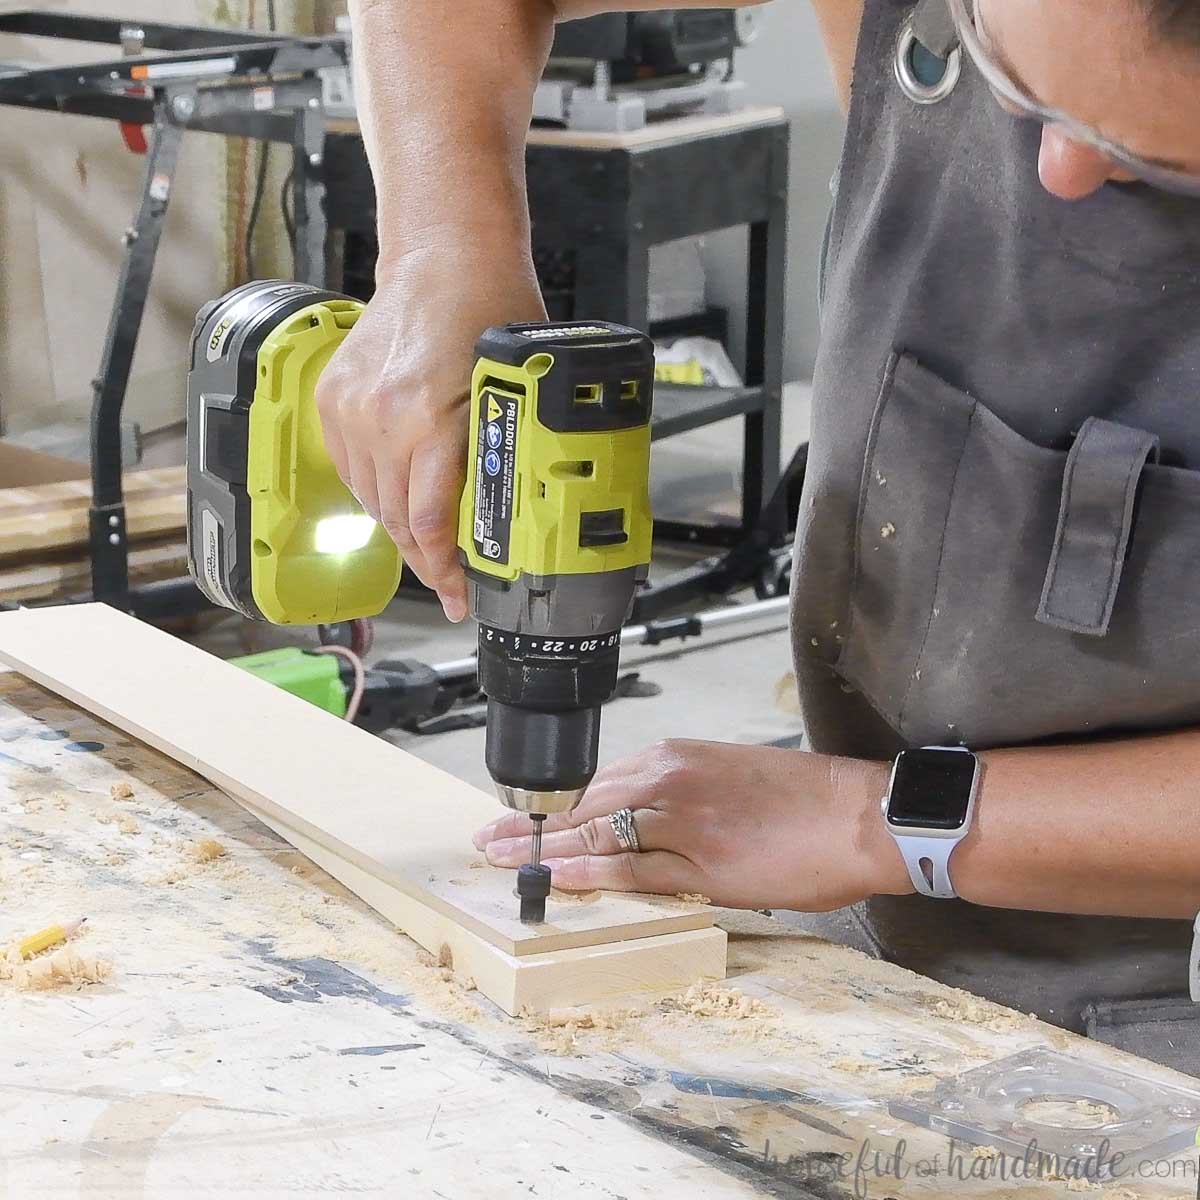
Dill countersunk holes in the screw hole marks.
These holes need to be deep enough that the screw heads are completely below the surface of your board. Otherwise they will scratch the wood you are cutting a circle in.
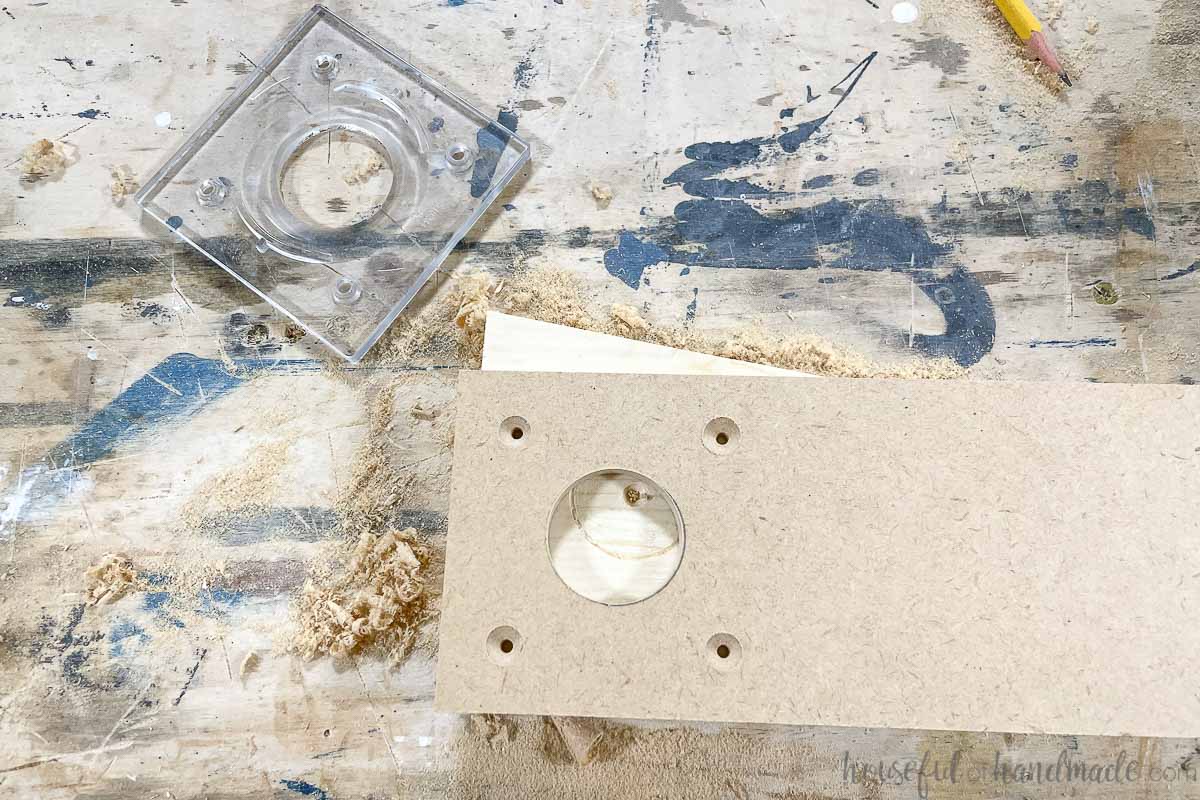
One side of your jig will look like this:
STEP 3- Create the Pivot Point
Mark out the center of you router plate on the side. This will indicate the center of your router bit.
When you add new pivot points to your circle cutting jig, you will use this center line to set them up.
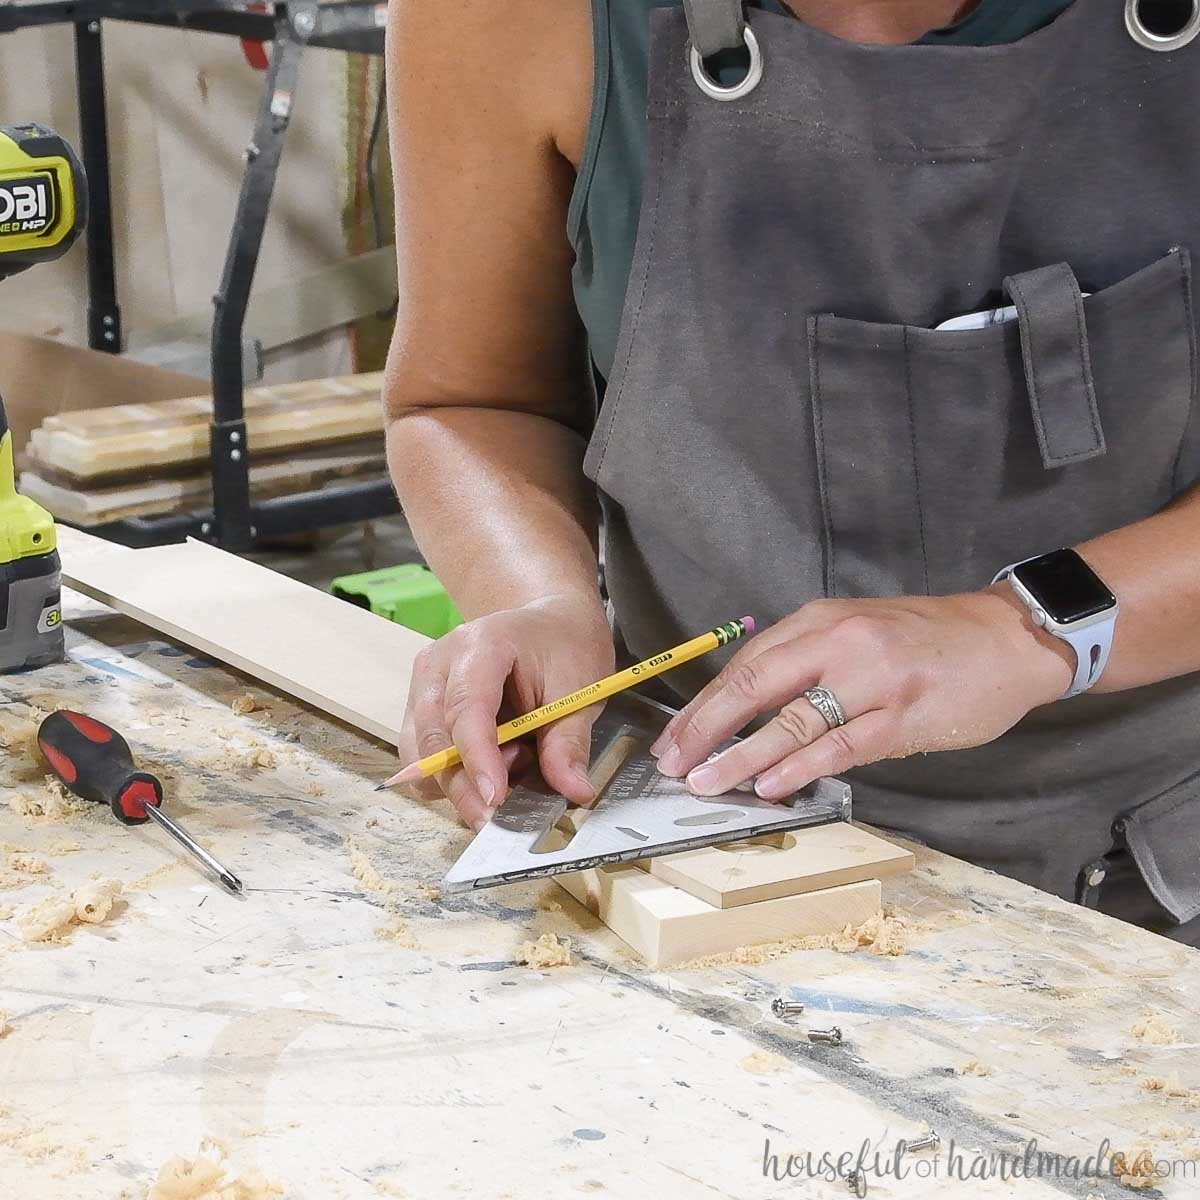
Measure and mark out where you want your pivot points. The measurement will be the radius (1/2 the diameter) of your circle.
Make sure to take into account the thickness of your router blade when making your measurement.
If you have a 1/4″ router bit and want to cut a 10 1/2″ diameter circle, you want 5 1/4″ between the edge of the router bit and the pivot point. So add 1/8″ to make up for the mark at the center of your router bit.
If you are only going to cut out 1 circle right now, just create 1 pivot point. Then you can add more the next time you need to cut a circle.
Otherwise you will be locked into the measurements you choose today.

Drill a 3/16″ hole at this pivot point.
The hole should snuggly fit a 5 mm shelf pin.
Repeat for more pivot points if needed.
How to add Pivot Points Close to Others
If you want to router a circle that is close to the same size as another one, you cannot drill the second hole right on the center line.
Too many holes for the shelf pin too close together could cause them the jig to break and your circle will get messed up.
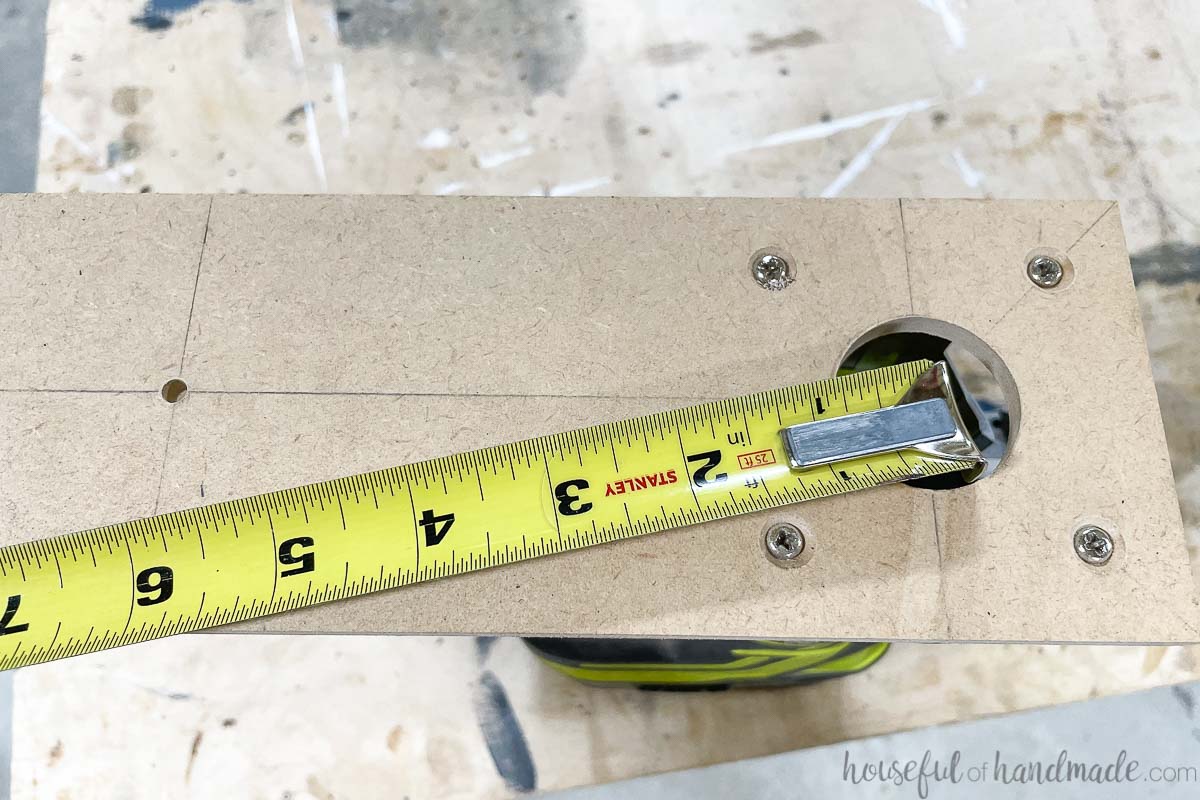
Instead, hook your measuring tape on your router jig and measure it off to the side.
Make sure to adjust your measurement so it is coming from the center of the bit. So if you have a 1/4″ bi in here, subtract 1/8″ from the pivot point measurement.
It does not matter that your pivot point is not perfectly centered on your jig, it only matters that the pivot point is the right distance from the center of the router bit.
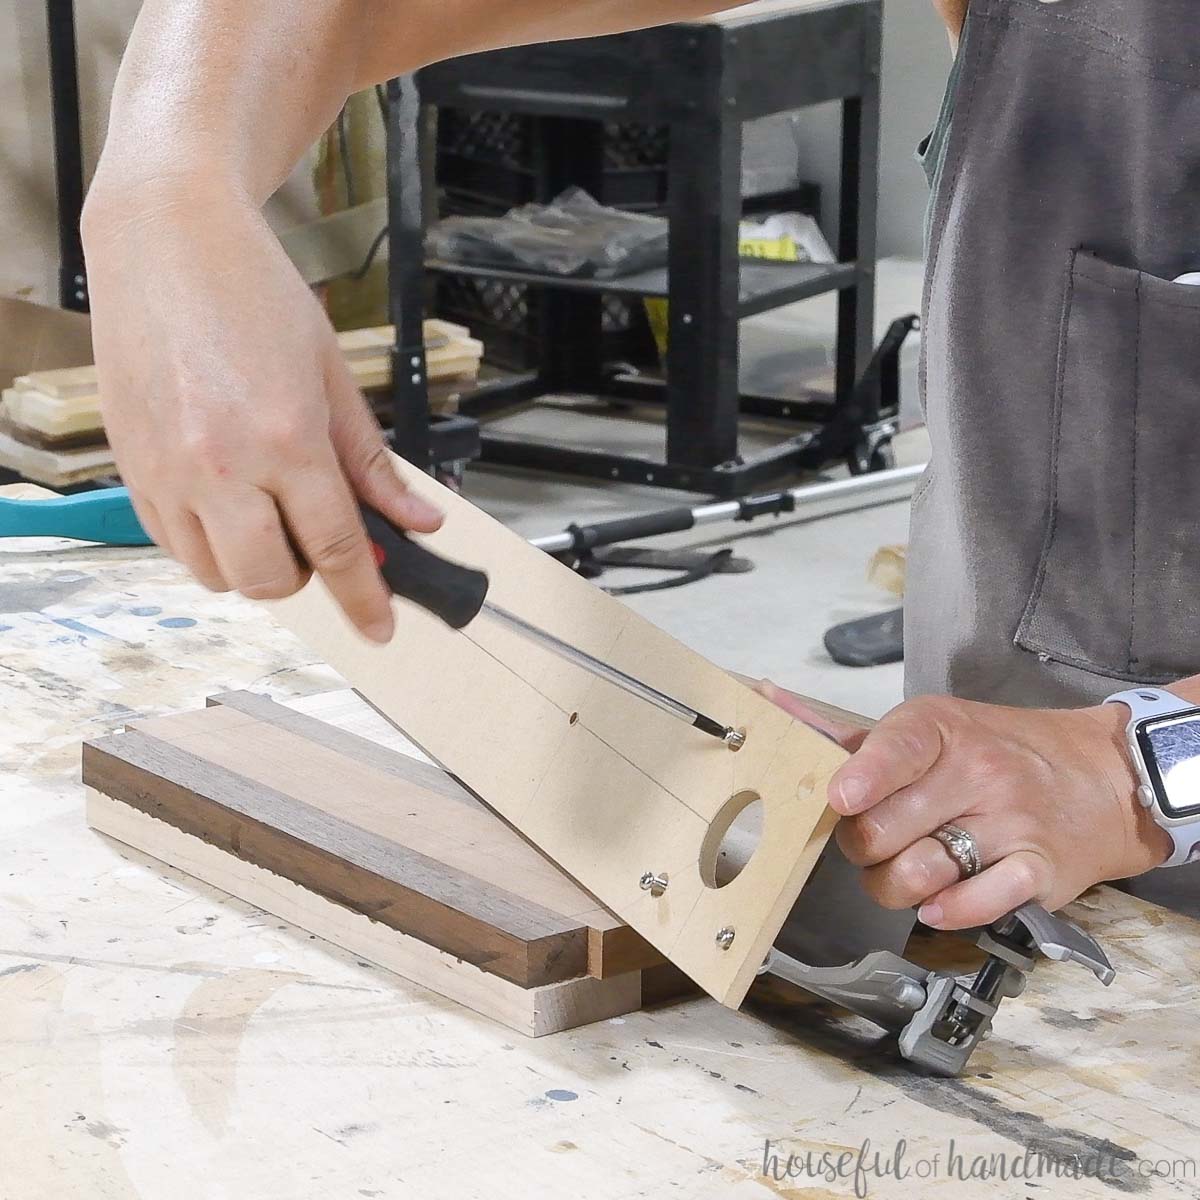
STEP 4- Attach your Circle Jig to the Router
Using the screws that hold your router plate on, attach your new circle cutting jig.
Make sure the screws are completely below the surface of the jig or you will scratch your project.
Add your 1/4″ straight cut router bit to your router.
Slide the sleeve back onto it and line it up so the router bit just barely clears he jig (by around 1/16″).
Running your first pass with such a shallow cut will help prevent tear out as the blade hits new wood grain directions or gets close to the end.
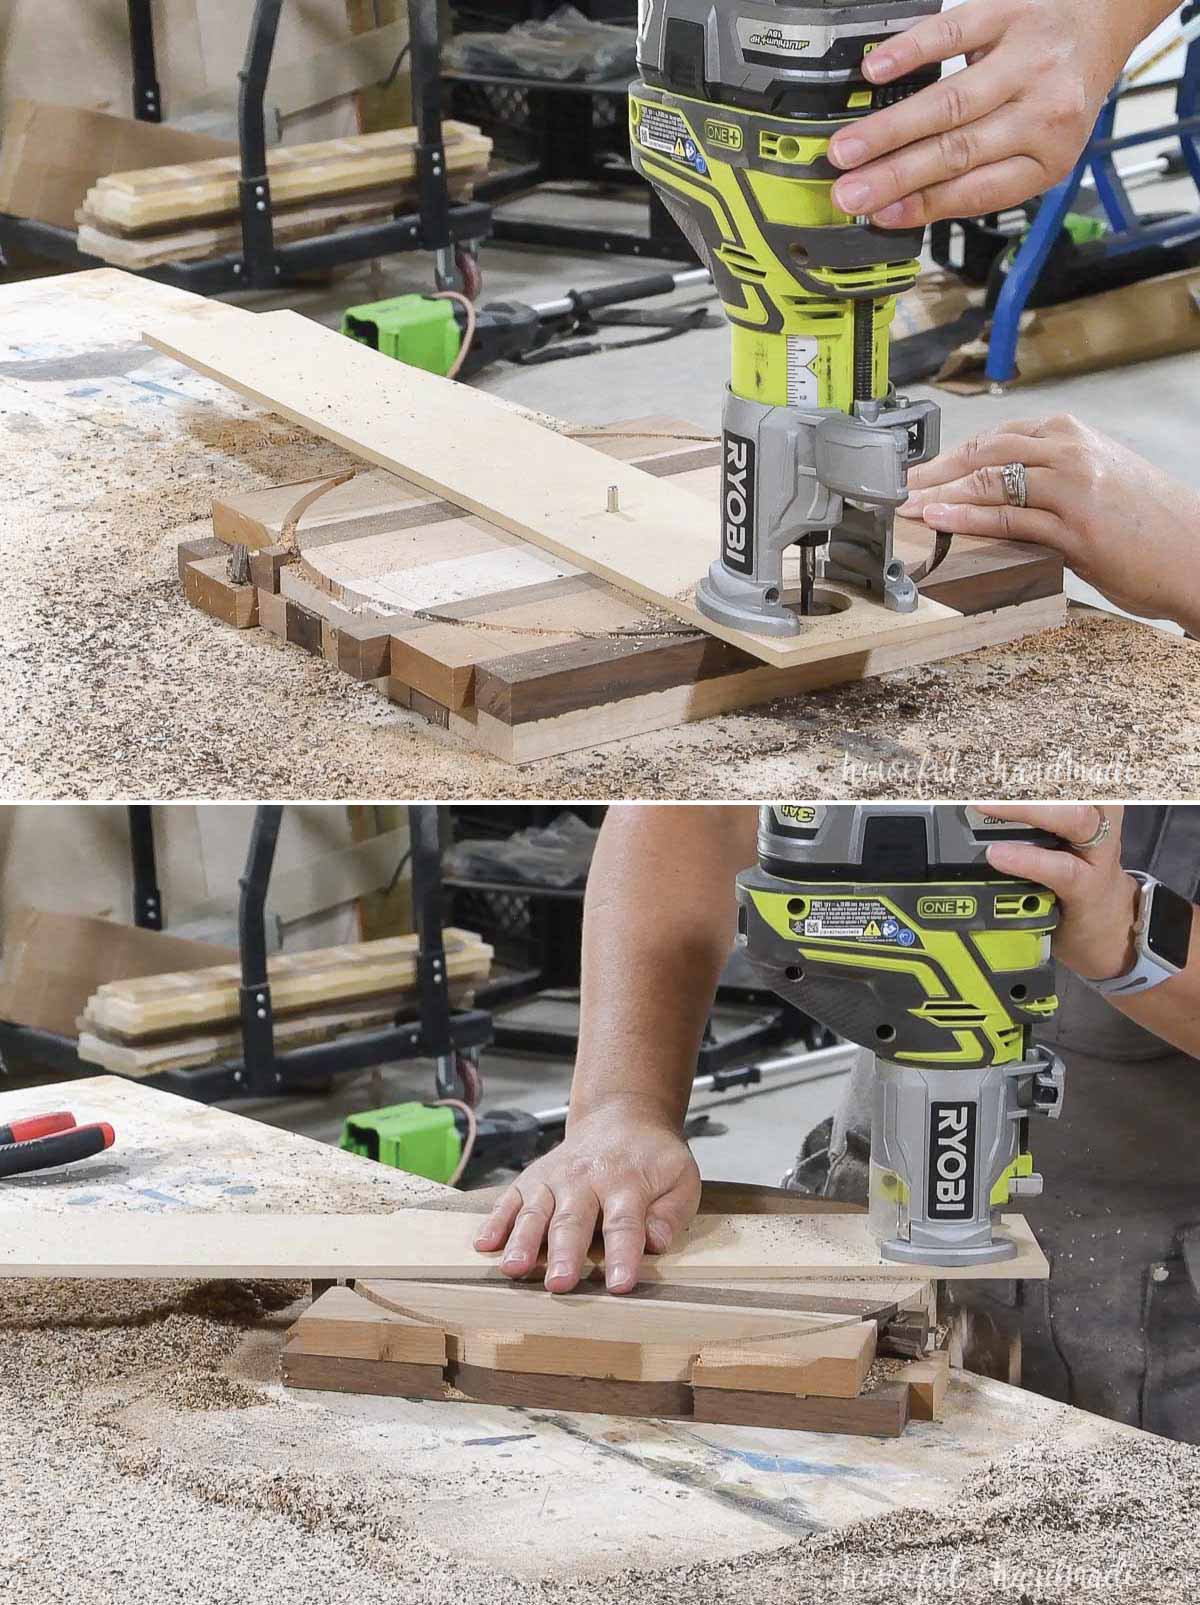
STEP 5 – Cut out your Circle
Now you can drill a 3/16″ hole in the center of the wood you are cutting into a circle.
Place the 5mm shelf pin in this hole and slide the router on top of it.

Turn on the router and carefully move it in a circle. Make sure the pin stays in your pivot point.
Deepen the router blade slightly (around 1/18″) and continue to cut deeper until you have cut your your entire circle.
On your last pass, move the part you are cutting off the edge of your worktable so you do not cut through it with the router.
You can fill the hole in the center or use it as the back of your board.
Your router cut circle will need a little bit of edge sanding, but not a lot. And it should be a perfectly round shape!
Now go have fun cutting out more circles!
