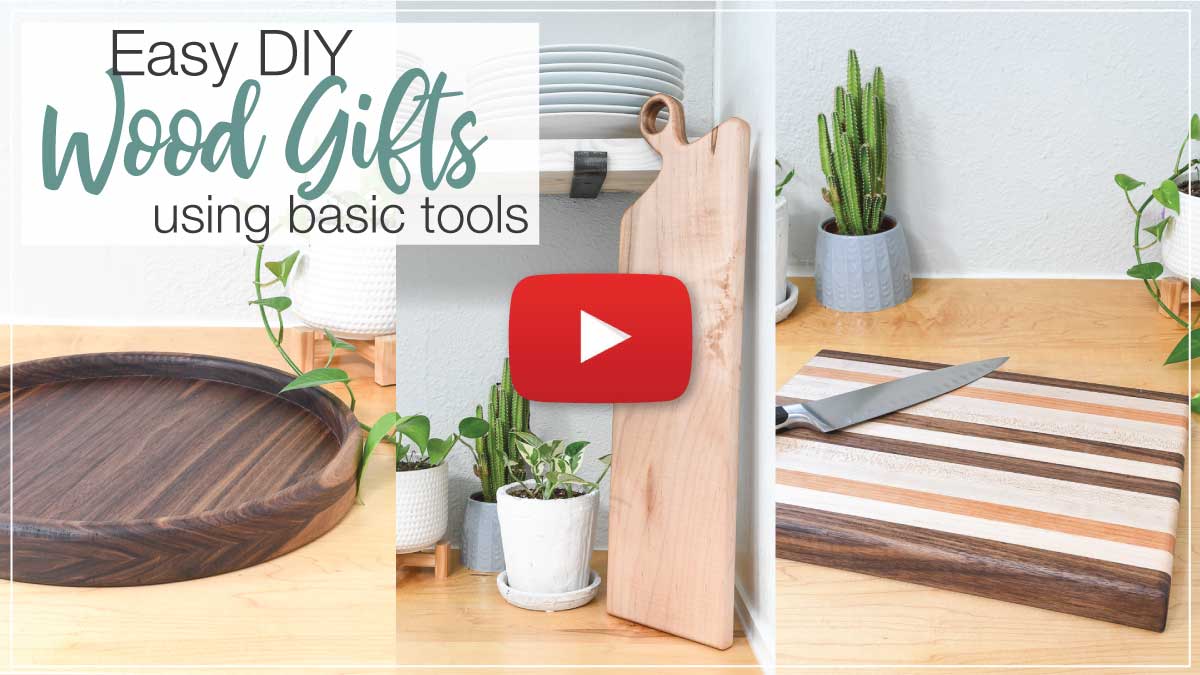
You don’t need fancy tools to make these 3 handmade woodworking gifts.
This time of year I love thinking about all the DIY gifts I can make. Giving a handmade gift is more than the thought, it is also the time you spent to make something special.
And with Christmas around the corner, it was time to start making! So I partnered with Waterlox to share these 3 easy woodworking gift ideas you can make without expensive tools.
Yep, I have simplified the process of making these DIY wood gifts so anyone can make them. Even if you don’ have a garage full of expensive woodworking tools!
This post may contain affiliate links. As an Amazon Associate I earn from qualifying purchases. Click here to read my full disclosure policy.
Then they are beautifully sealed with Waterlox’s 100% pure tung oil. The tung oil protects the wood and really makes it the star of these amazing handmade gifts.
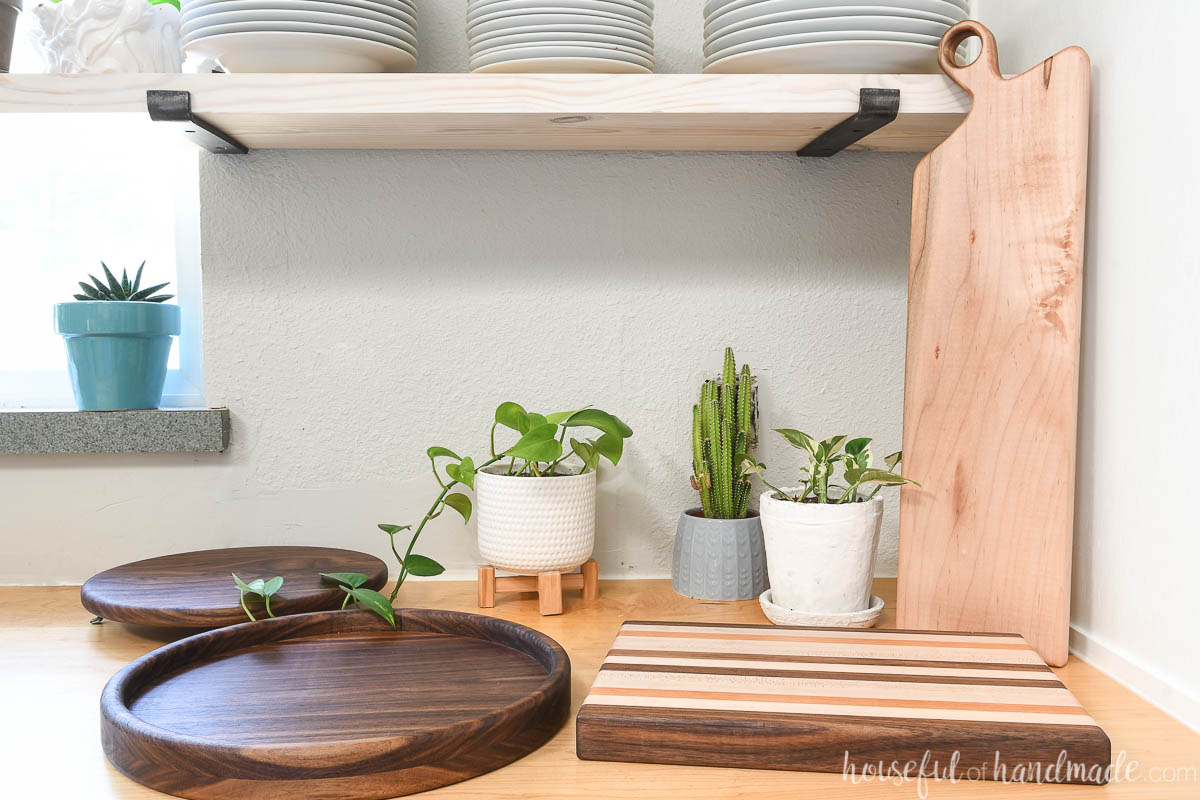
Table of contents
Small Woodworking Projects for Gifts
While I am not against building something large and amazing for a DIY wood gift (I have done it before with these x-leg benches and this 4′ dollhouse), it can be harder to do.
And if you want the gift to be a surprise, building a custom piece of furniture usually doesn’t work.
Instead, smaller woodworking projects make the best gifts. You know the receiver will have room for the gift you took the time to make.
And these small handmade woodworking gifts are useful for anyone! Because today’s projects include:
- A breadboard or charcuterie board
- A cutting board
- A serving tray
All three of these DIY wood gifts are perfect for anyone who cooks, entertains or eats 😉
Wood gifts made from Basic Tools
You may have seen people make versions of these handmade gifts, but they had a shop full of expensive tools. I am here to show you that you don’t need them to make these 3 easy gift ideas.
Instead, I made all three projects with a miter saw (but you could use a circular saw instead), jig saw, trim router, orbital sander, and some good ol’ fashion elbow grease.
Of course, if you have access to a planer you can save lots of time on sanding. And if you have a table saw you can rip down large scraps of wood to make the 1x2s needed for the cutting board.
But neither of these are necessary. Instead, use a little bit of time to create your handmade woodworking gifts and save yourself a lot of money on tools!

Selecting Wood for your DIY gifts
All three of these DIY woodworking gifts are made to be used around or with food. So you need to choose the right wood species to make them out of.
You will need to use hardwoods for all these projects (unless you make your tray specifically for non-food use). And the best part is, the beautiful colors of your hardwoods will make your handmade woodworking gifts really beautiful!
When selecting hardwoods for cutting boards or other food surfaces, you want a hardwood with a tight grain. More open grains, like ash, oak and hickory, are more porous and could be harder to keep clean.
Select woods like hard maple, cherry, pecan or walnut for food safe gifts. Also, more exotic woods like purple heart or bubinga can offer some fun colors to your wood gifts, but can be more expensive.
To find the right hardwoods for your projects, you can sometimes find standard 1x lumber at a home improvement store. I know my local Home Depot has a selection of cherry and walnut boards.
These boards are purchased by the linear foot so you can buy just what you need for your DIY gift. This is a great option for purchasing the 1×2 boards needed for the cutting board project.
The other option for finding hardwoods for your project is to visit a local lumber yard. There you will find so many different wood species that you may have never heard of.
When you visit the lumber yard, you can ask them to plane and joint the edge for you, usually for an additional fee. And check out their scrap bins for off-cuts for these small woodworking projects.
Prefer to Watch? Check out the Video Below
How to Make 3 Handmade Woodworking Gifts
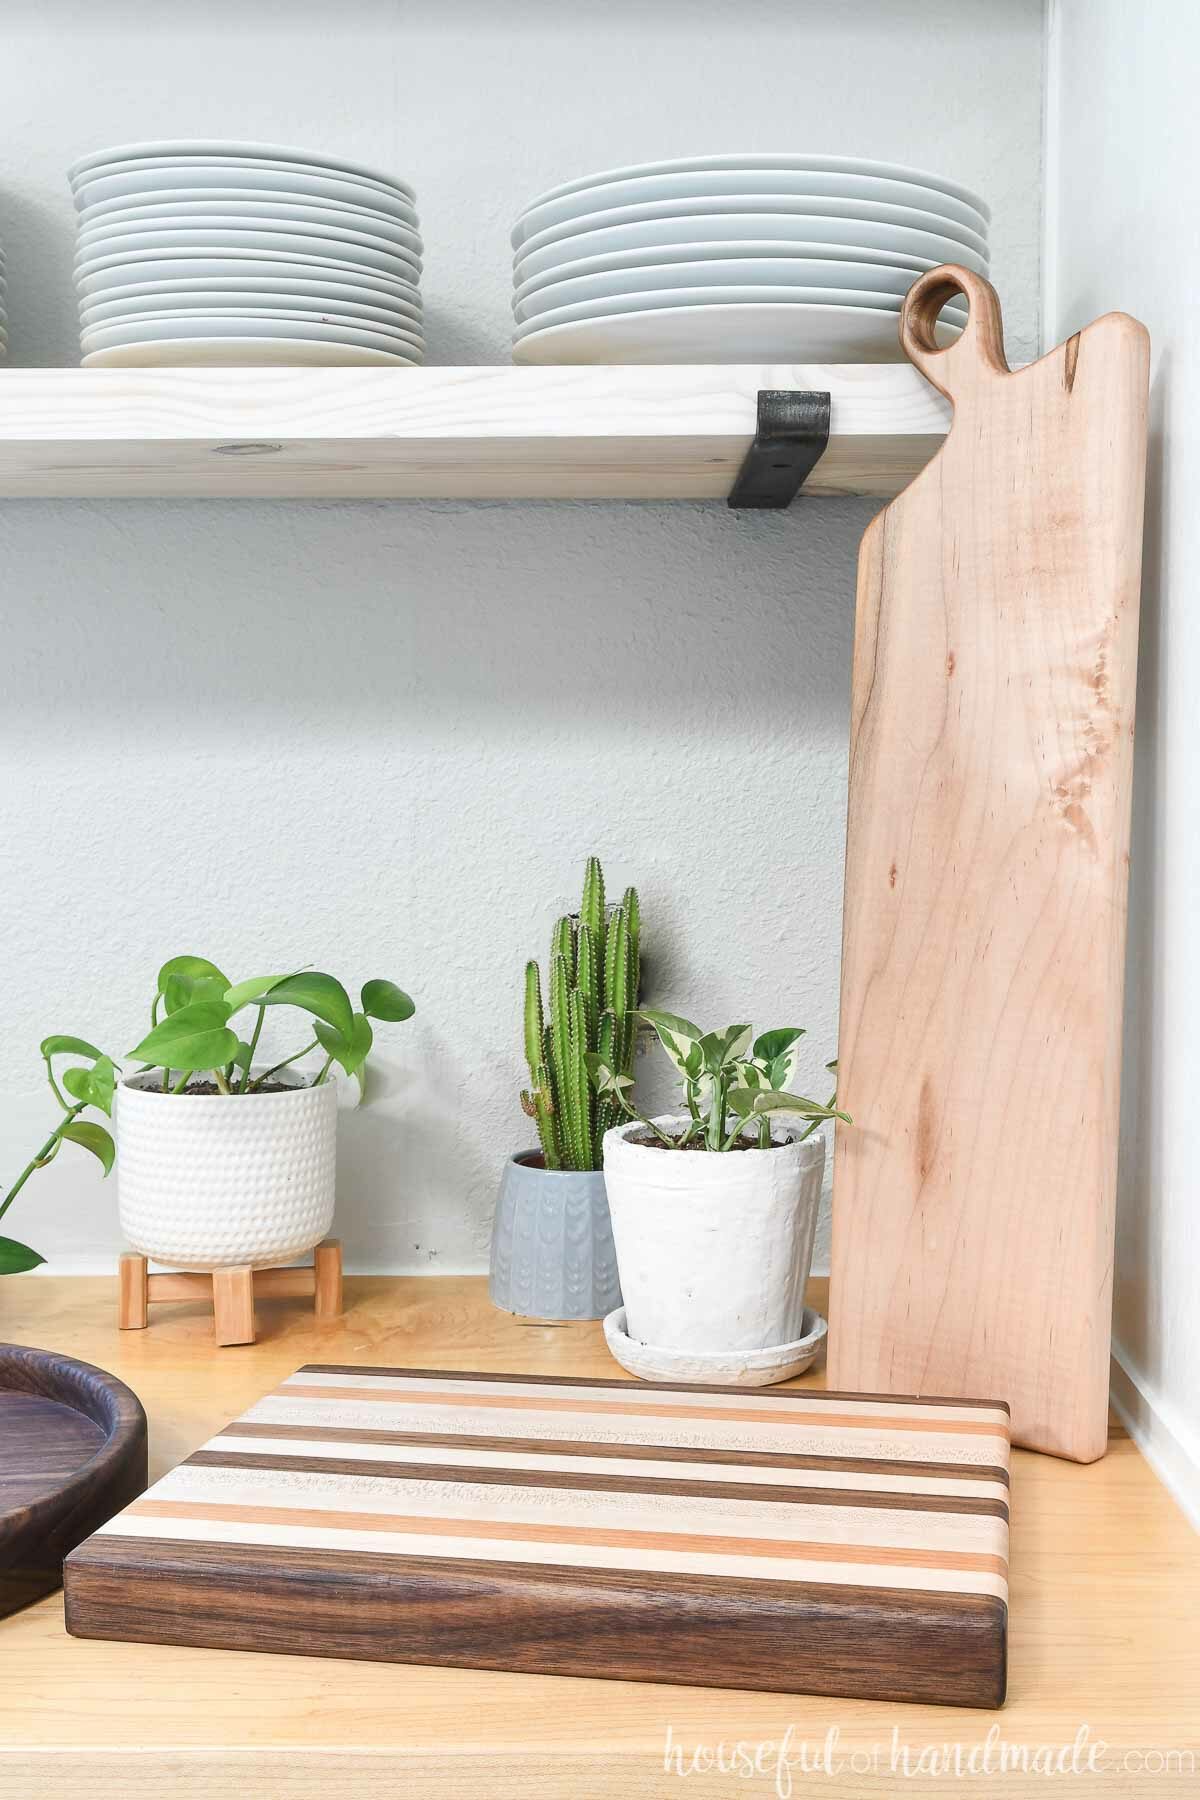
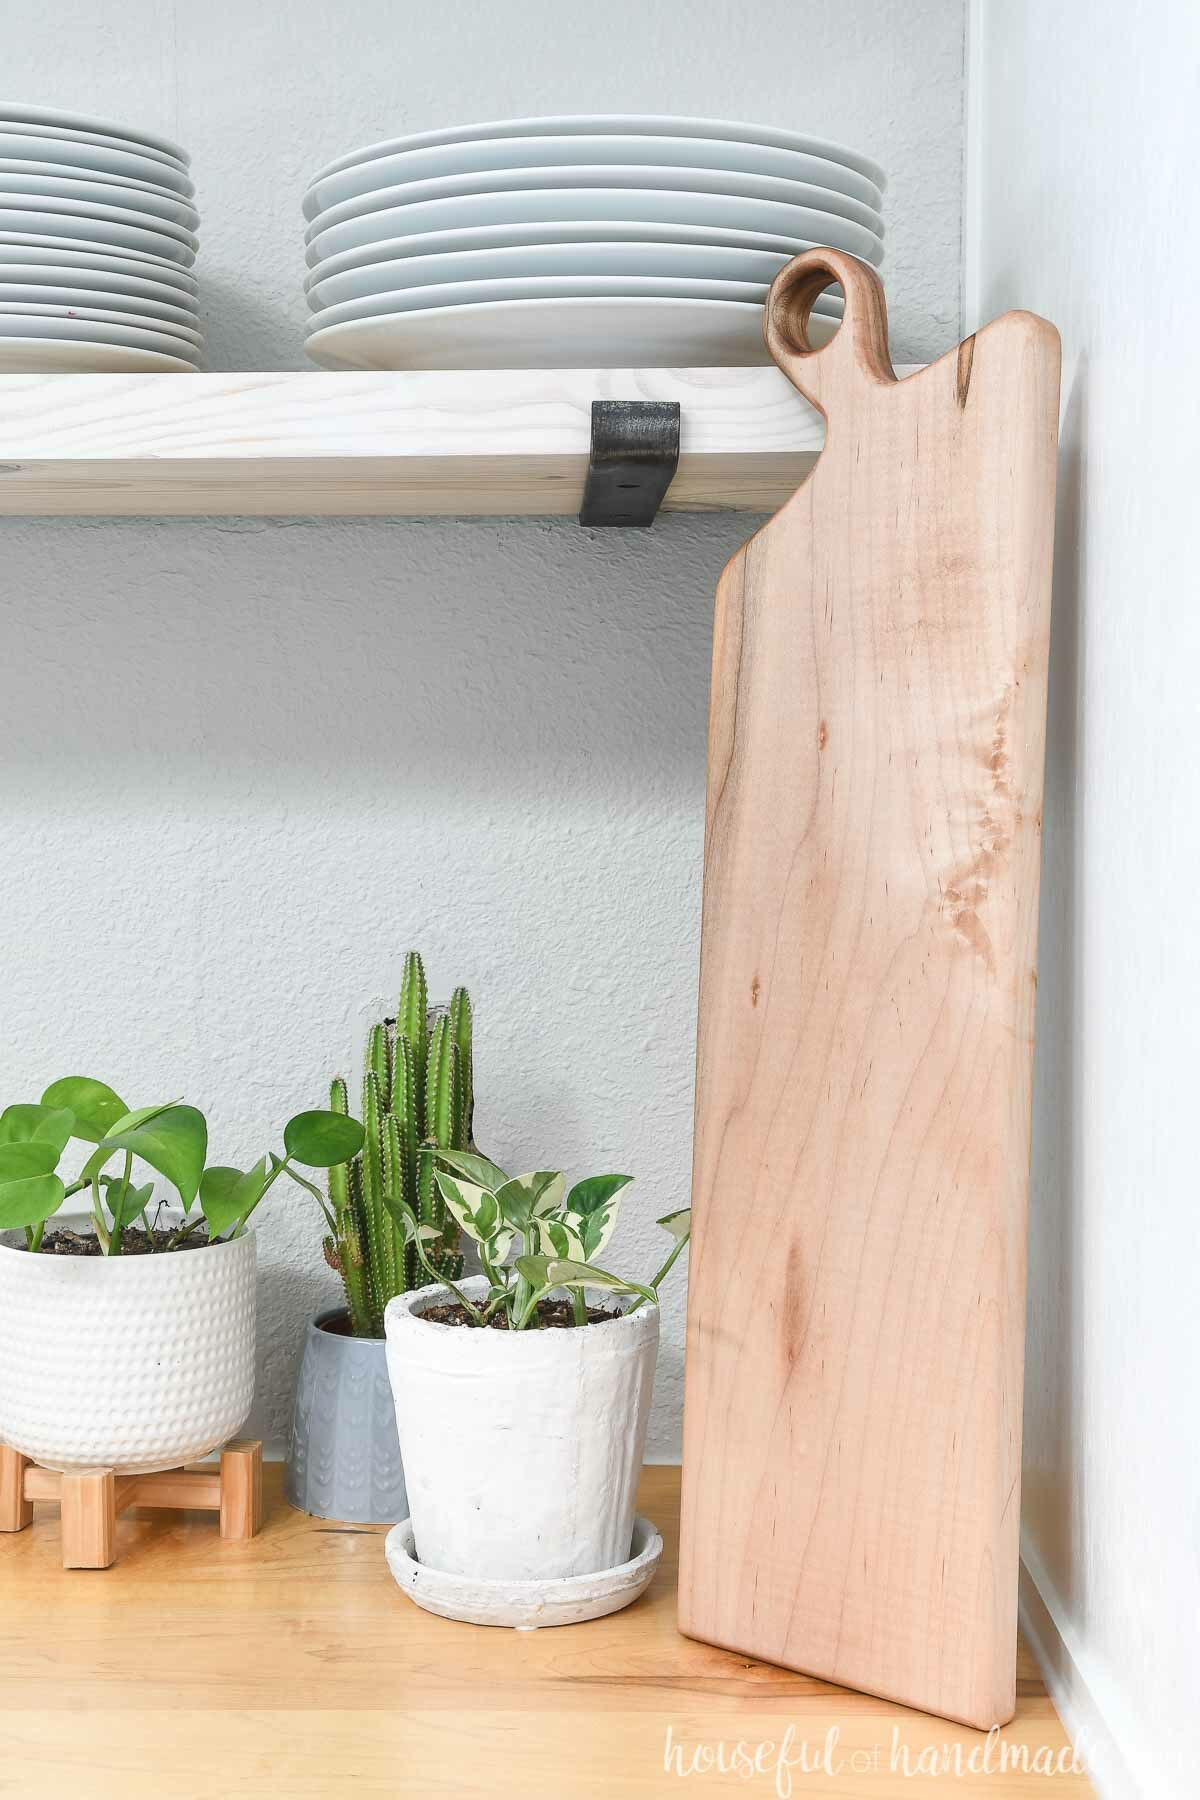
Gift #1- Quick Breadboard or Charcuterie Board
Breadboards are seen so much these days as decor in the kitchen, but they are also very useful. The large paddle of hardwood works as a cutting board for your loaf of bread.
You can also serve up a smorgasbord of things on a bread board. Including a collection of meats, cheese, crackers, and fruit known as a charcuterie.
Tools needed to make a DIY breadboard
- Jigsaw
- Measuring tape
- Clamps
- Drill
- Sander
- Optional- drum sanding attachment for drill
- Optional- trim router
Supplies needed to make a breadboard
- Piece of hardwood (maple, walnut or cherry are great options)
- Sandpaper
- Waterlox 100% pure tung oil
Cut your wood
There is no standard size for a breadboard. You can make it long and narrow or short and wide. Start by picking out a beautiful piece of wood and going from there.
My bread board was made from a piece of 6″ wide hard maple. I cut it to 22″ one one side and 18″ on the other to give it an angled handle.
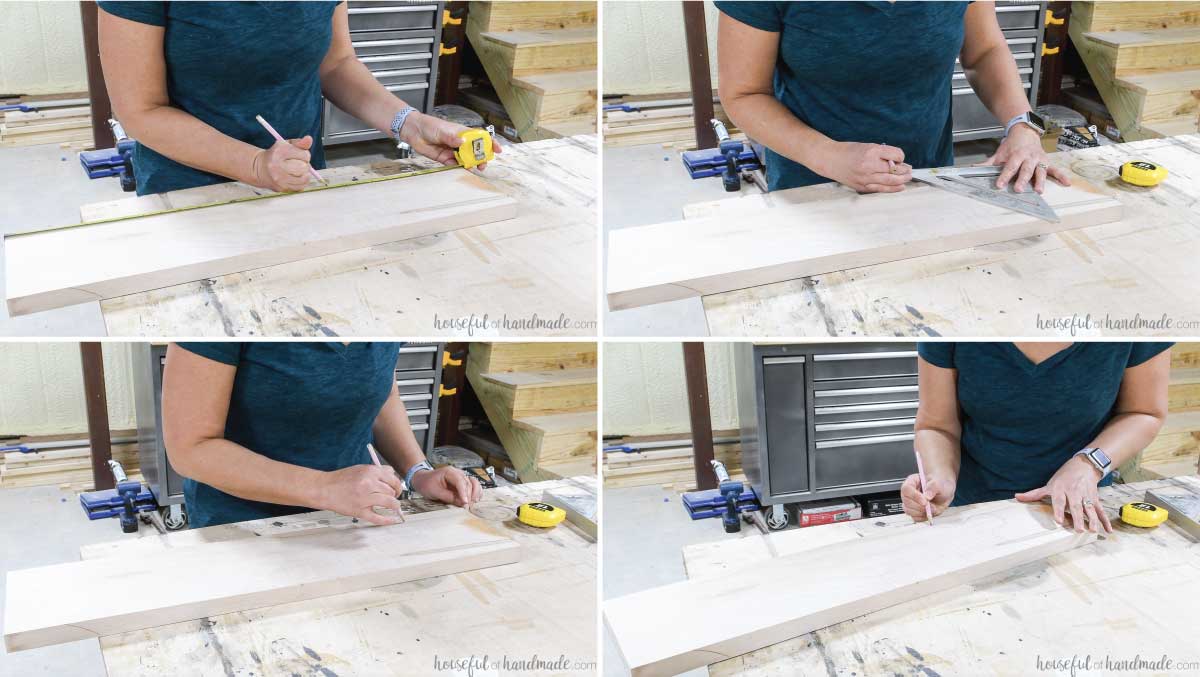
Sketch out the design of you handle with a pencil. Again, there is no rule for where or how big your handle should be. Have fun with your design.
Create a round shape for the end of the handle then blend that into the sides of the board to create the top of your breadboard.
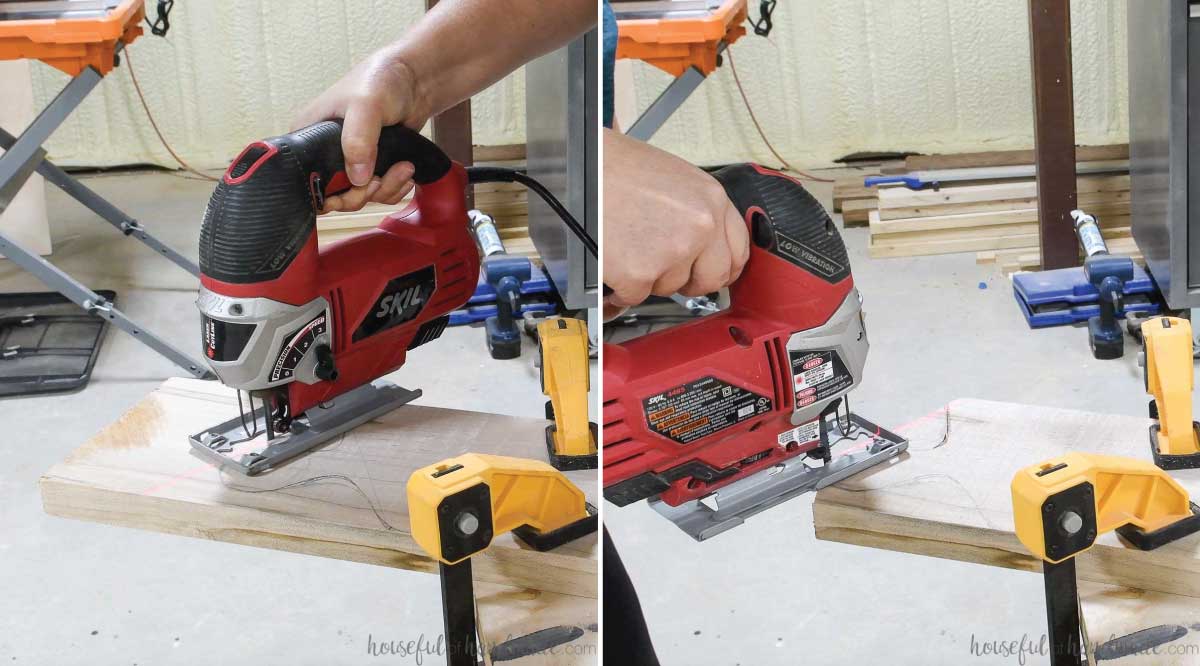
Clamp the board to a surface and cut out the handle design with your jigsaw.
Cutting around the tight curves of the handle can be a challenge. Only go half way in from one direction, then come the rest of the way from the other direction. This prevents the blade from getting pinched and not cutting the curve properly.
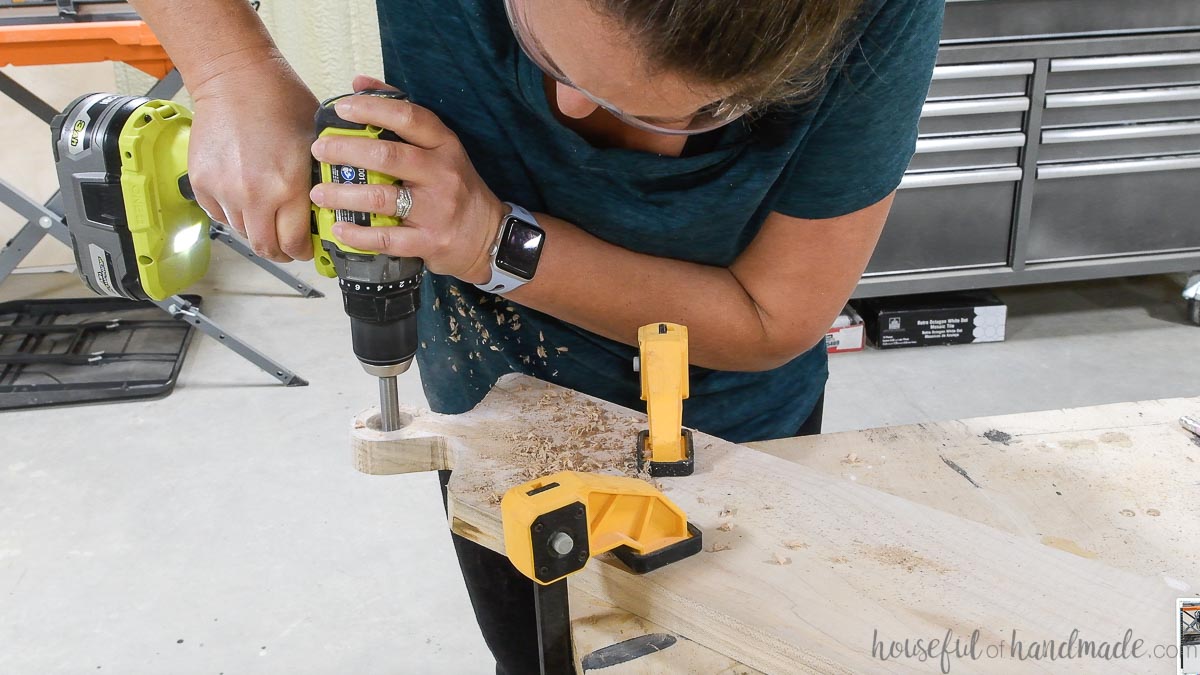
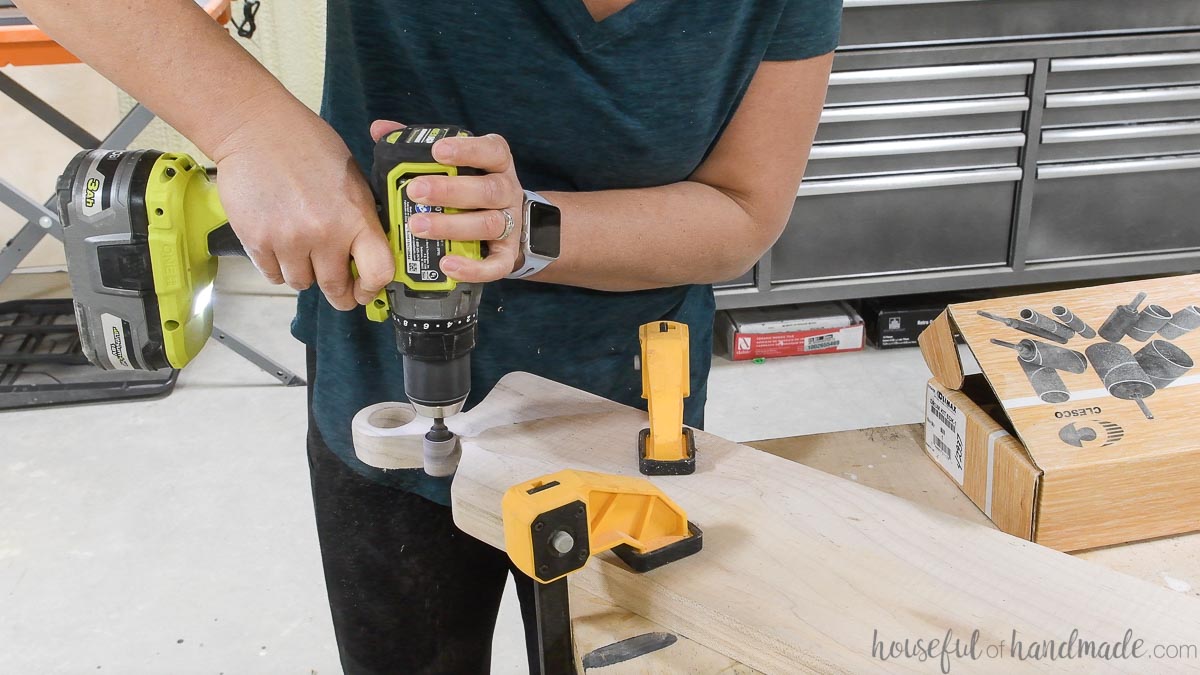
Use your drill to drill a hole in the handle of the breadboard. I used a forstner bit because they drill a very clean hole, but you can use what you have.
Sand the breadboard
If the sides of your breadboard and handle are a little rough, start your sanding out with a low grit (very coarse) sandpaper. This will remove a lot of wood quickly and smooth out the rough surface fast.
I used an orbital sander with 40 grit sandpaper to start. Make sure to hold your sander perpendicular to the bread board to keep the sides of your board straight.
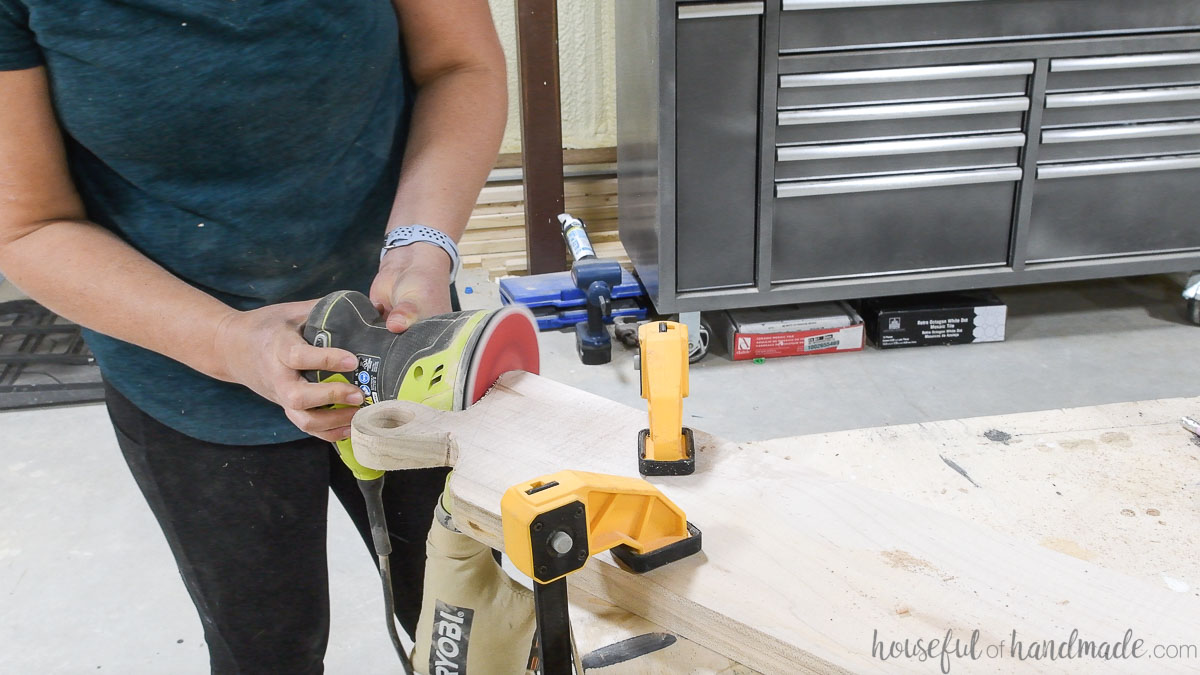
To get in and around the handle and inside the hole, this inexpensive drill attachment turns your drill into a drum sander. This will help you shape the handle and get it super smooth.
Or you can sand the tight spots that your sander cannot get into by hand.
After your have finished shaping the breadboard with the coarse sandpaper, step down to a higher grit sandpaper (80-100) and sand again.
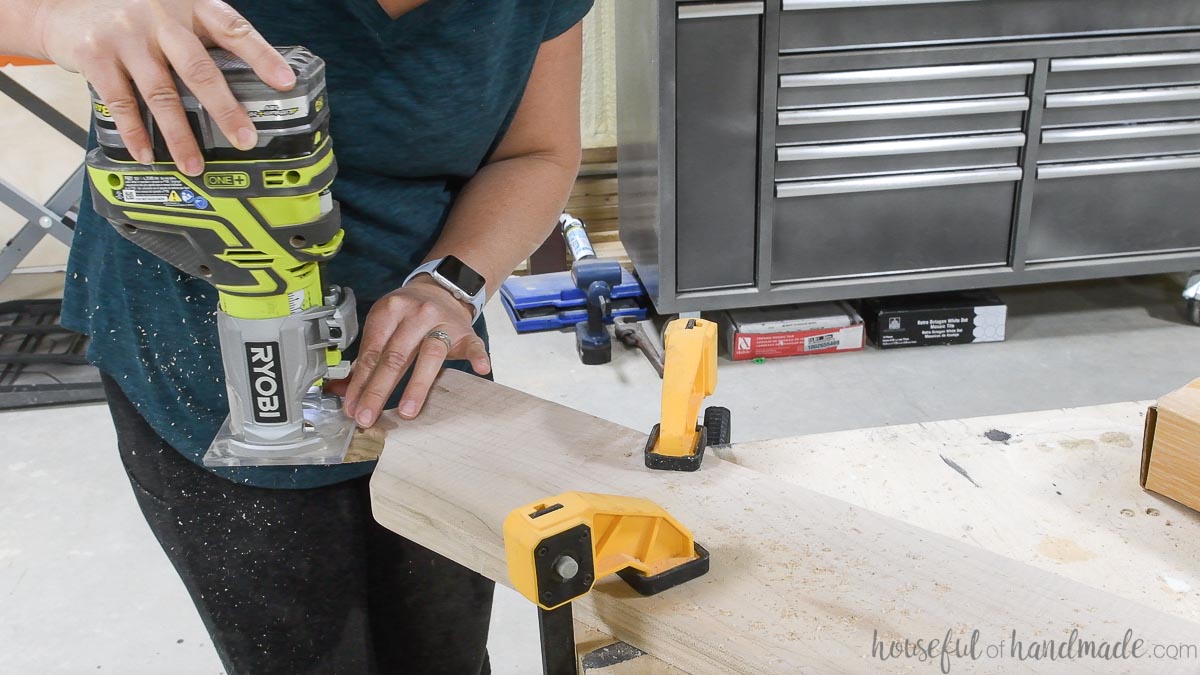
At this point you can use your sander to round over the edges of your breadboard or you can use a trim router to round over the edges.
Then step down the sandpaper grit again. I usually go from 100 to 220 because those are the most common sandpaper grits I can find at my local store.
Finish sanding your bread board with the 220 grit sandpaper over the entire thing. It should feel very smooth to the touch.
Seal your DIY breadboard
Pour a generous puddle of Waterlox 100% Pure Tung oil on your breadboard. Using a lint free cloth, rub it into the wood.
Make sure to add oil to the entire breadboard: top, bottom, sides, ends and inside the handle.
Let the oil sit on the breadboard for 10-20 minutes to soak into the wood as much as possible. Then buff away any excess with a clean lint free rag.

Dry the tung oil for 24 hours. Let it cure for 7 days before introducing it to water. So make sure to seal your gifts a week before gifting them so they are ready to use!
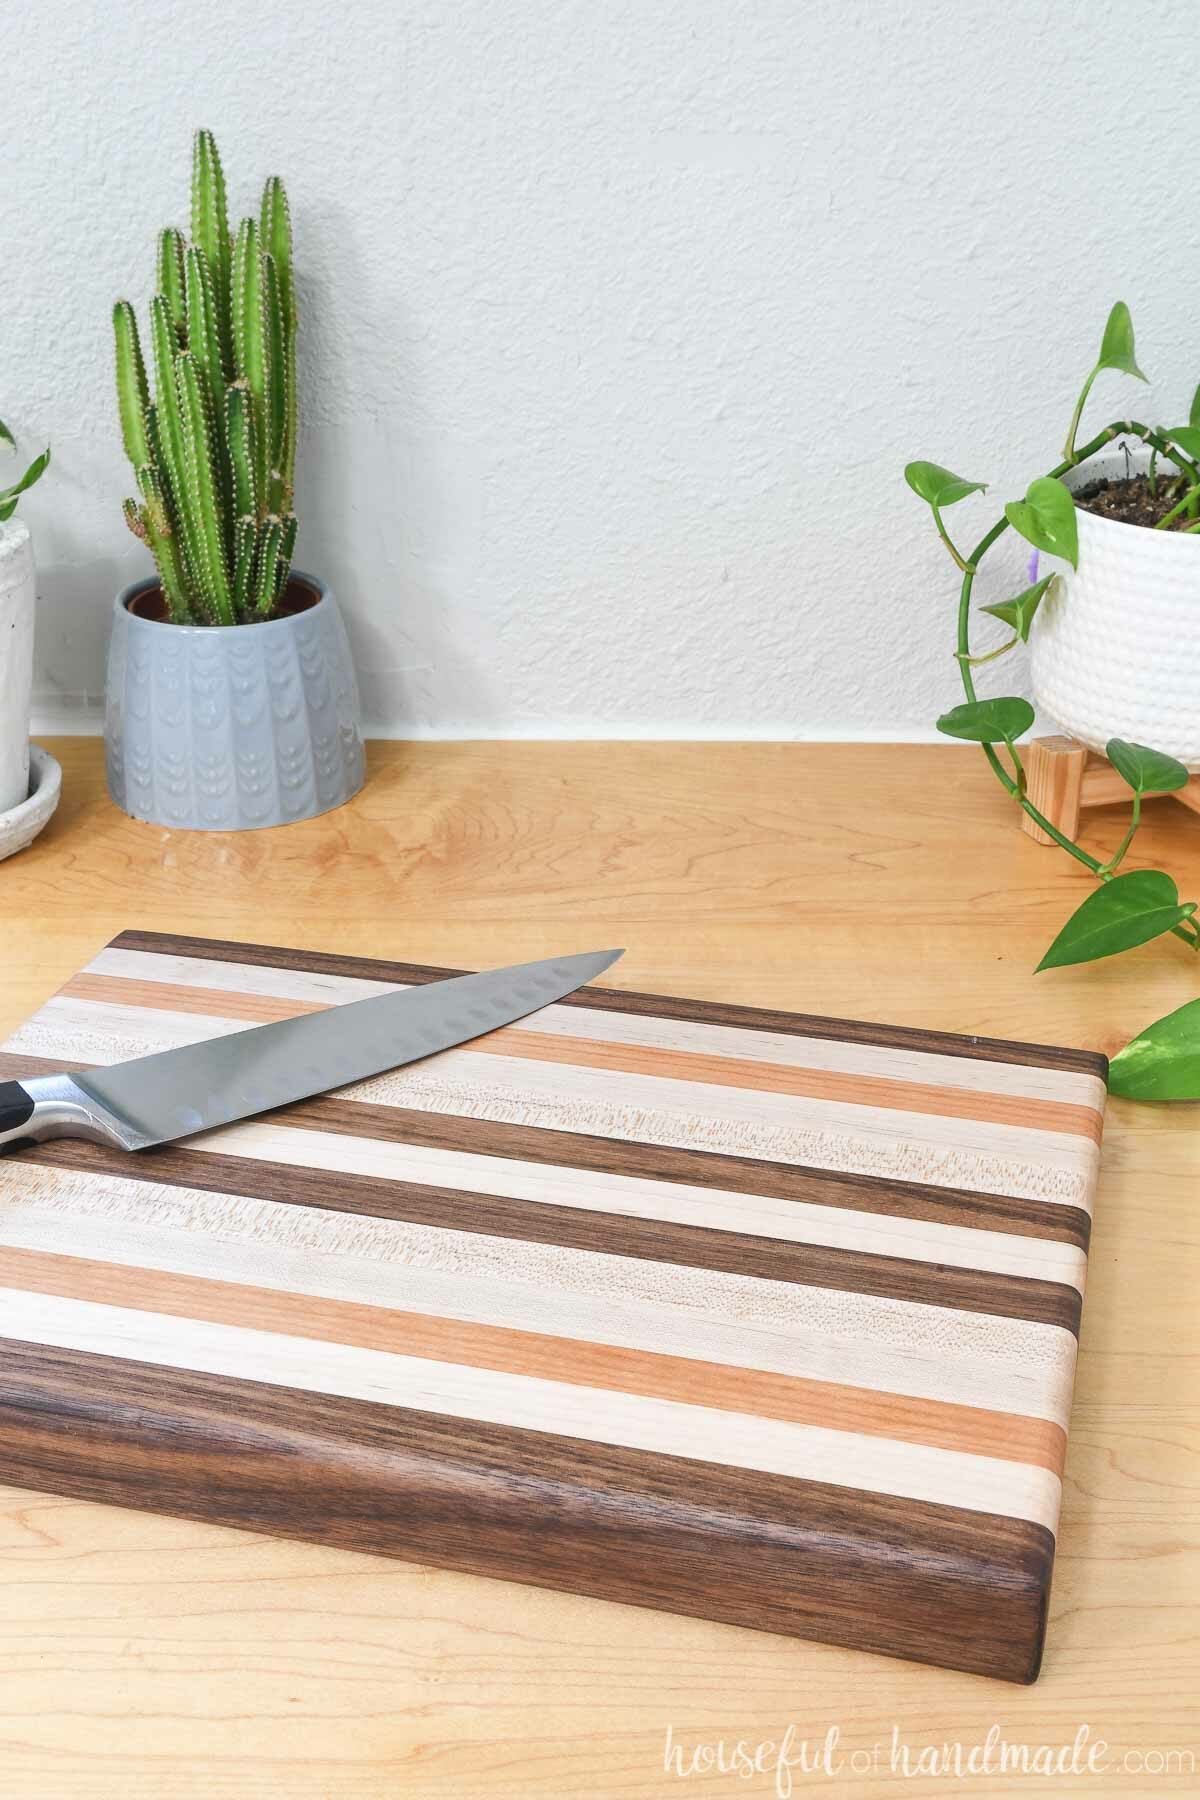
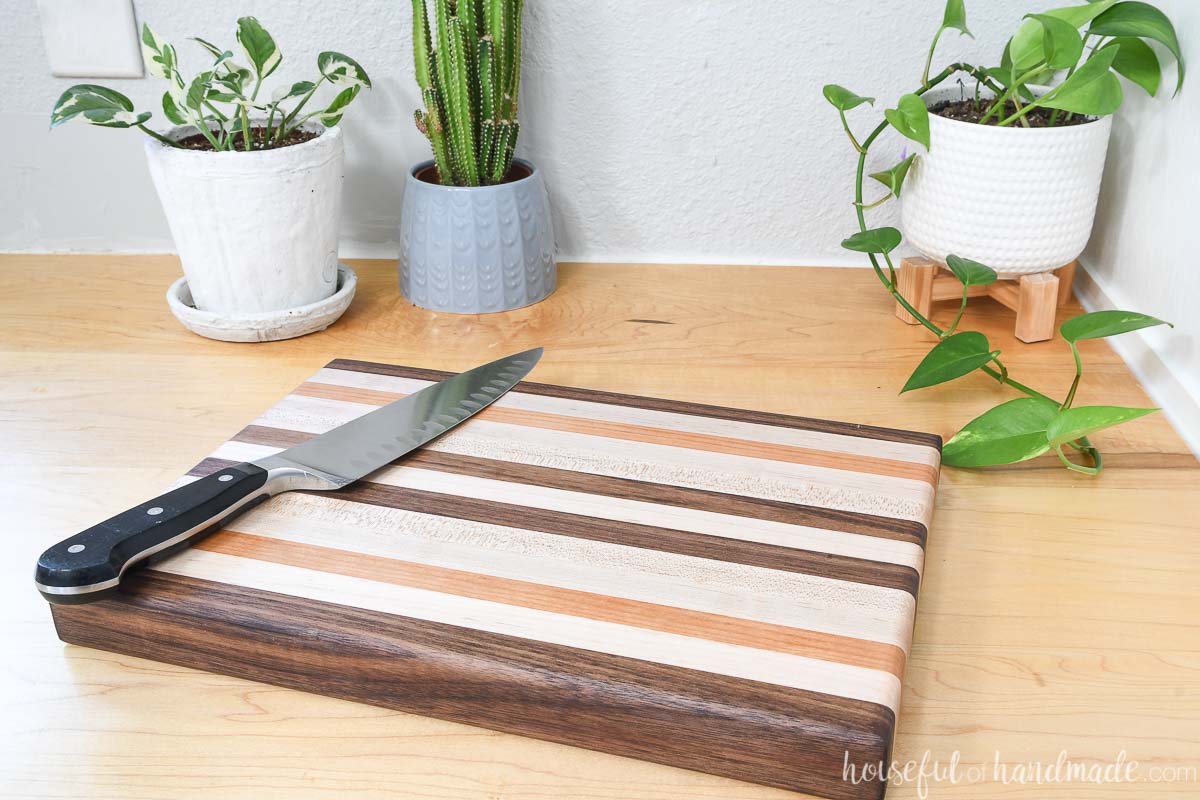
Gift #2- Easy Edge Grain Cutting Board
You don’t need a table saw, jointer, and planer to make a thick custom cutting board. Instead, all you need is a selection of hardwood 1×2 boards.
The 1 1/2″ wide 1×2 boards will create a thick edge grain cutting board without lots of work. This thick cutting board will be able to be sanded down over and over creating a DIY gift that will last forever.
And who can’t use another cutting board! I have about 8 of them and always need 1 more.
Tools needed to make an easy cutting board
- Saw
- Measuring tape
- Clamps
- Drill
- Sander
- Optional- trim router
Supplies needed to make an edge grain cutting board
- 1×2 piece of hardwood (maple, walnut or cherry are great options)
- Waterproof wood glue
- Sandpaper
- Waterlox 100% pure tung oil
Cut your boards
Determine the length and width you want your cutting board.
The width you want will determine how many boards you need. Each 1×2 board is 3/4″ thick. Divide the width you want by 0.75 to get the number of boards you need.
If you want a 10″ wide cutting board, you will divide 10 by 0.75 (3/4). This leaves you needing 13.33 boards to get 10″. You can round down to 13 boards and end up with a 9 3/4″ wide cutting board or round up to 14 boards for a 10 1/2″ wide cutting board.
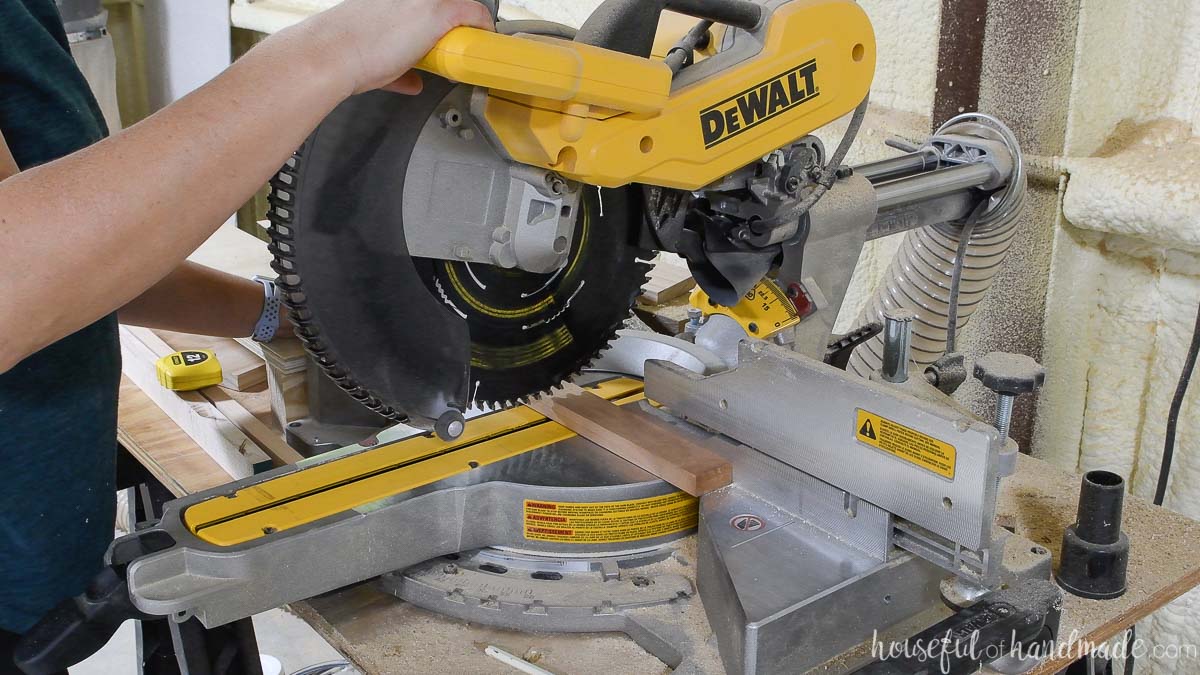
The length of the cutting board is determined by the length you cut your boards. Cut them ~1/2″ longer than needed so you have extra to square off the board after it is glued together.
Cut all the 1×2 boards to length on a miter saw or your saw of choice.
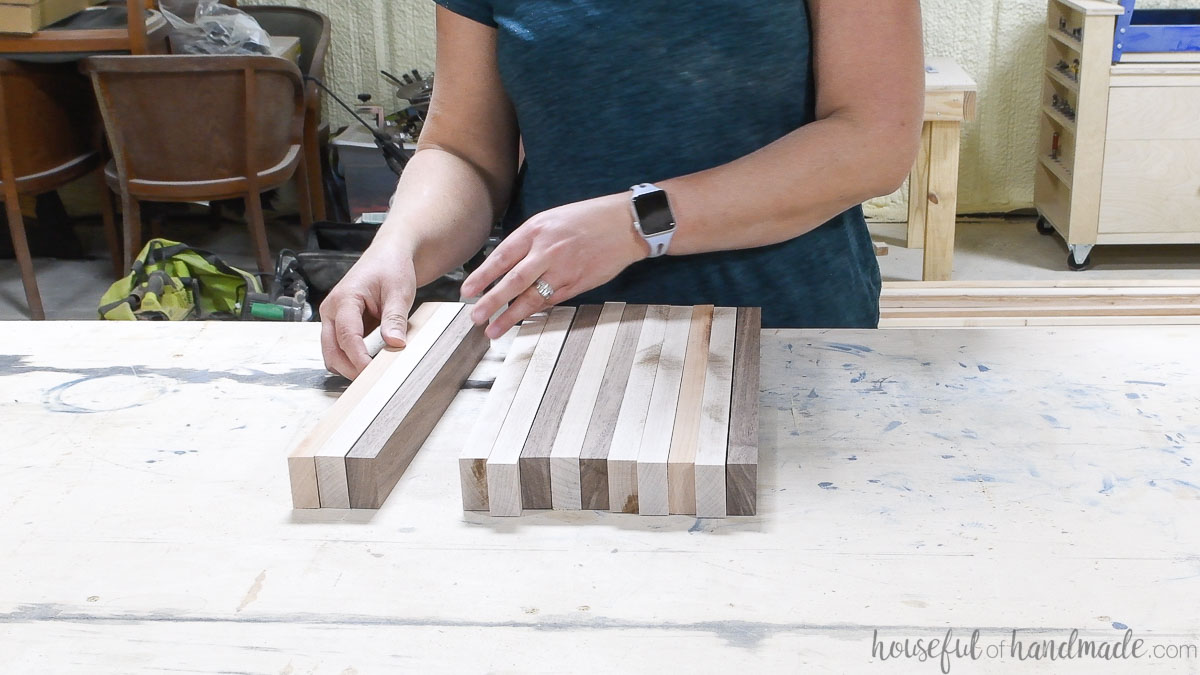
Glue together boards
Play around with the design of your cutting board by arranging and rearranging the 1x2s until you have a design you like.
Or you can use all the same species of 1x2s for a solid look cutting board.
Once you have your design, flip the boards flat so the face grain is up. Add a good amount of waterproof wood glue to the top of all the boards, except the last one.
Spread the glue out so it covers every part of the face of the boards.
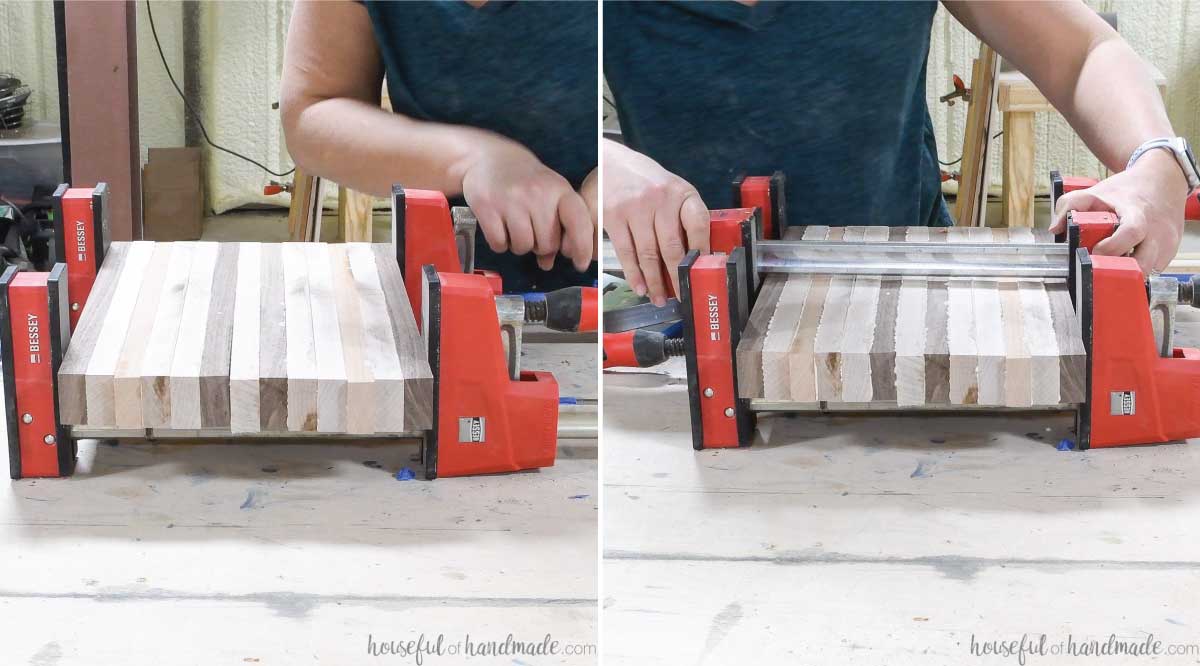
Flip them back on their sides so there is a side with glue in between all the boards. Slide them next to each other and try to line up the ends as best you can.
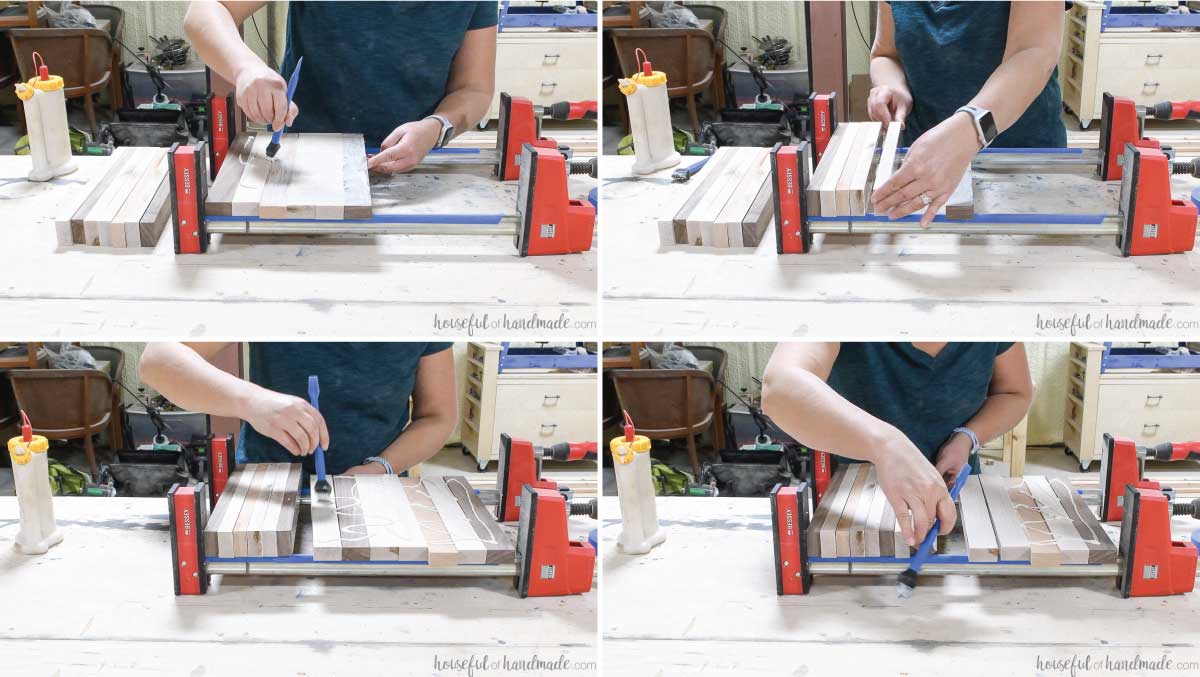
Clamp the snuggly board inside your clamps. You will want to see little glue bubbles come out from all the seams in the cutting board.
Use alternating clamps to help prevent the board from curving in the clamps.
Let the glue dry for a few hours or overnight.
Sand and shape the DIY cutting board
Use a chisel or sharp edge to remove all the glue squeeze out. It is way faster than trying to sand it with your sander. And it can gum up the sandpaper.

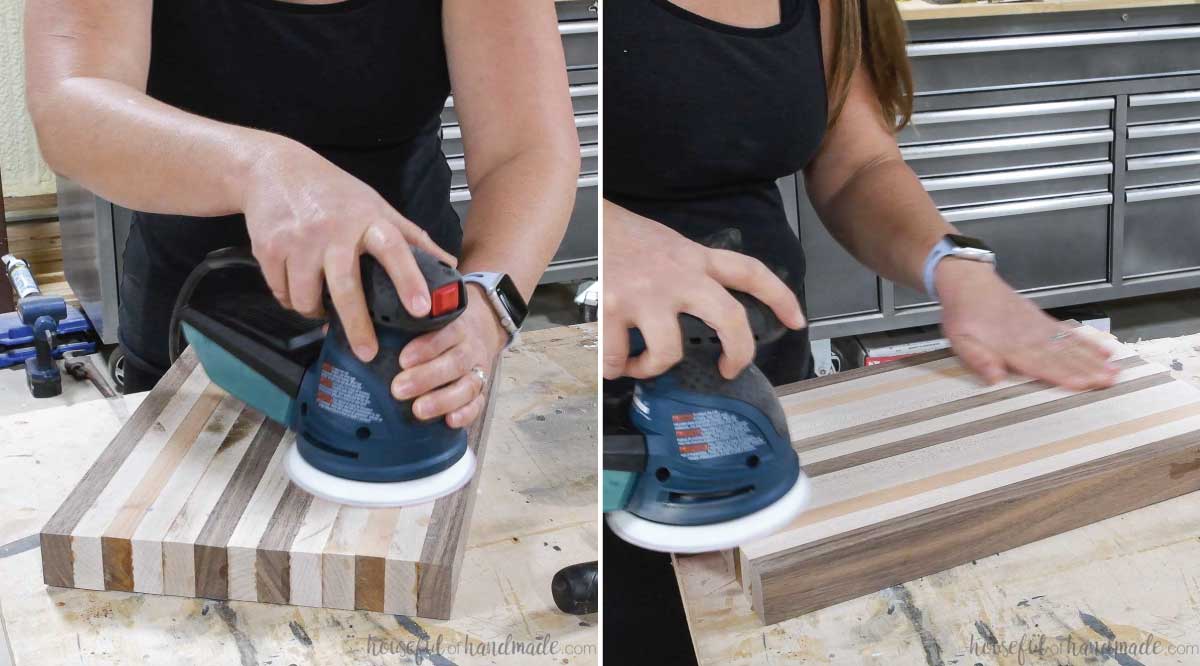
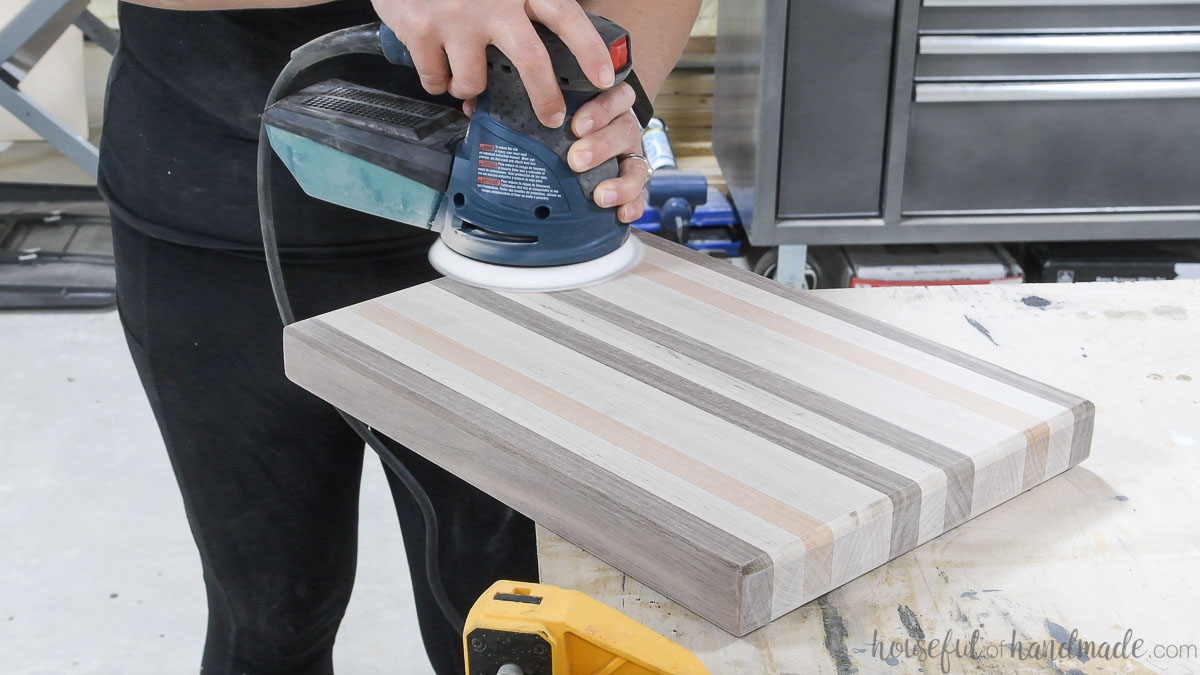
Use a coarse sandpaper (I used 40 grit) on your sander. I used an orbital sander, but a belt sander would also be a good option.
Keep consistent pressure on your sander and try to keep it flat while you sand the entire surface with the coarse sandpaper.
It can take some time to sand the entire surface smooth depending on how uneven your boards were. So find something fun to listen to and enjoy watching the beauty of your cutting board be revealed.
Run your hand over the surface to check for smooth. If there are still any ridges, you will be able to feel them even if you cannot see them.
Once the first side is smooth, flip it over and repeat on the other.
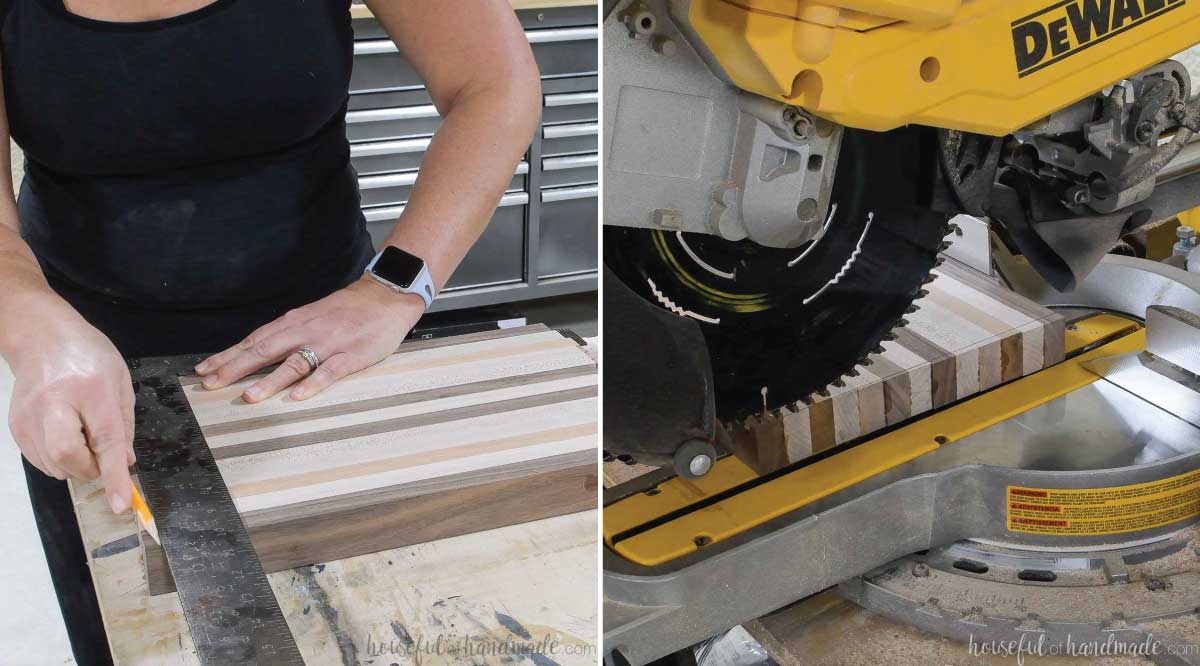
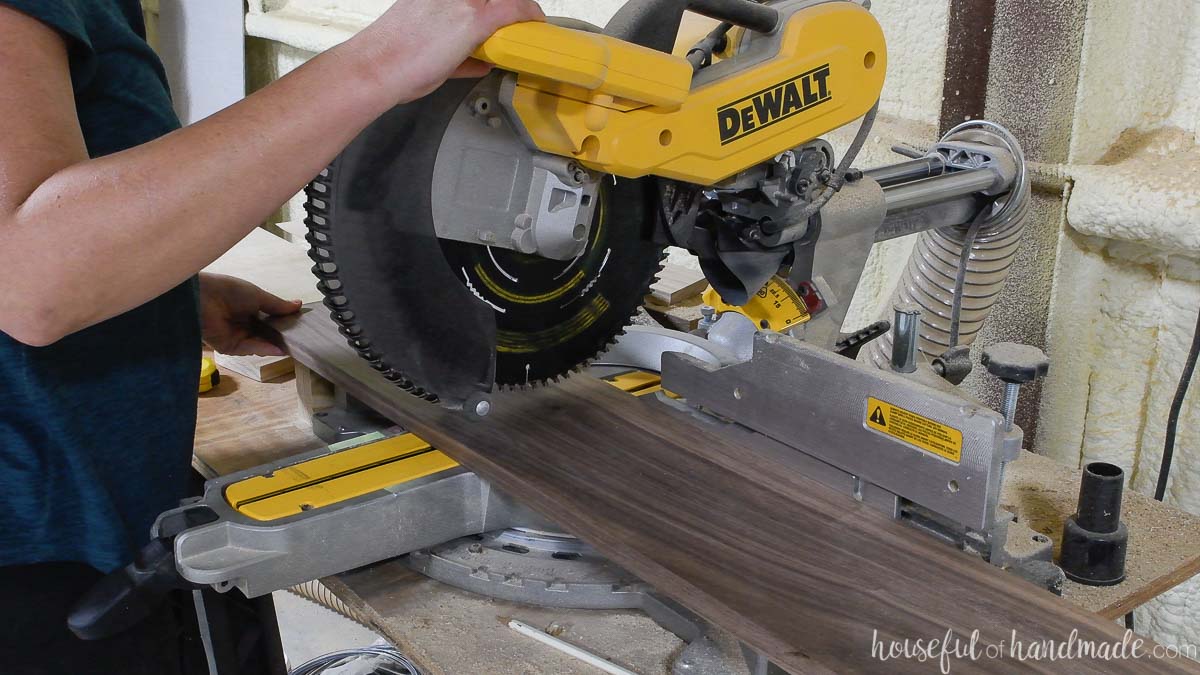
After sanding the entire cutting board smooth with your coarse sandpaper, square off the edges.
To do this, draw a line on both sides of the board perpendicular to the edge of the board. Make sure you cut off all the uneven parts of the ends.
Use a saw to cut along this line. If you do not have a sliding miter saw, you can cut it on a regular miter saw. Just cut half of the first side, then flip over the cutting board and reline up the saw blade before cutting the other half.
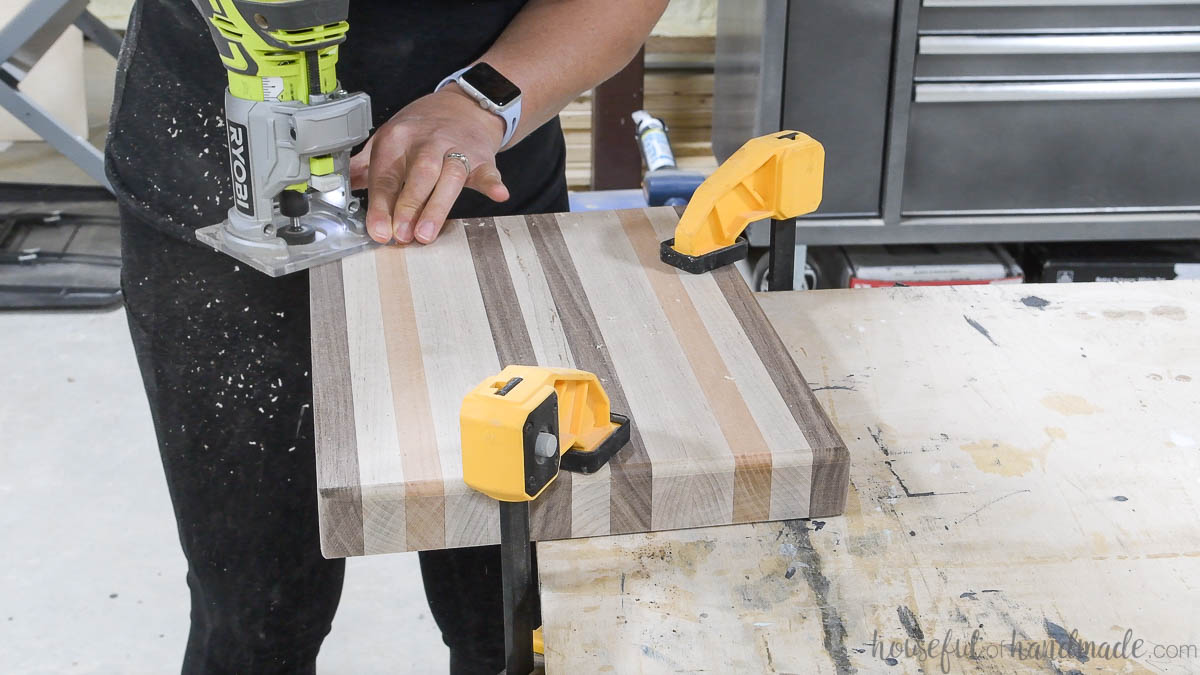
If you have a trim router, you can use it to round over the edges of the cutting board for a nice finish.
If not, you can round over the edges with your sander.
Now step down your sandpaper to a less coarse one. I used 100 grit next. Sand the entire cutting board, including the sides and round over.
Then step down the sandpaper again to a 220 grit sandpaper. Sand the entire cutting board again for the final sanding.
Seal your edge grain cutting board
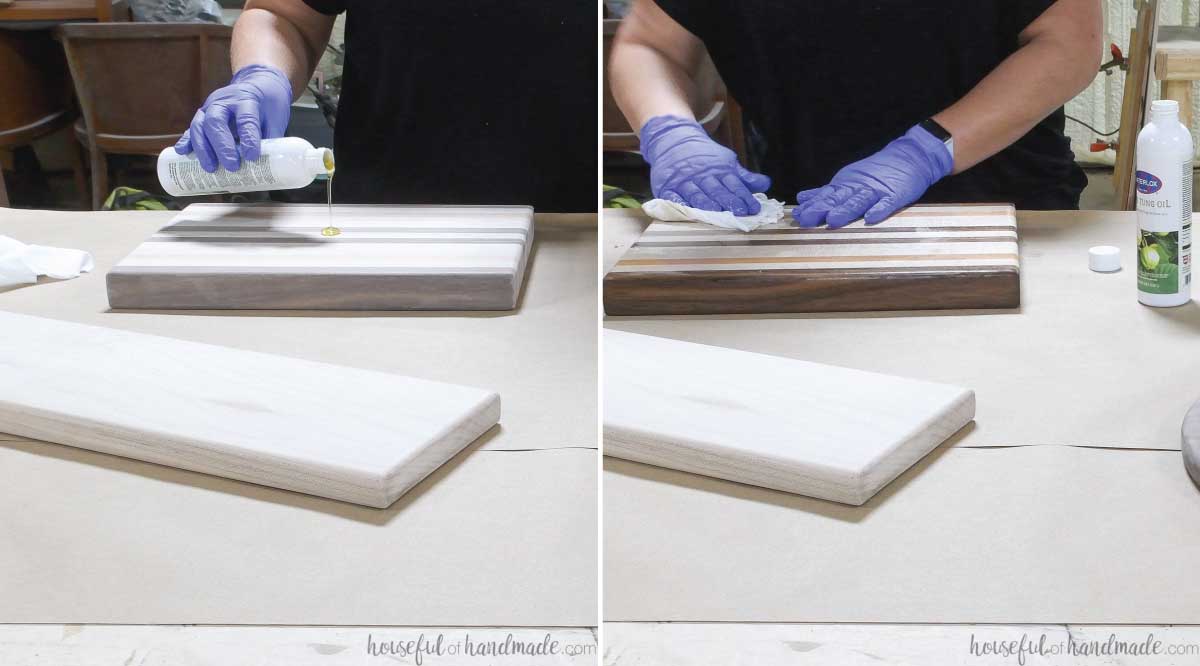
Use a generous amount of Waterlox 100% Pure Tung oil on your DIY cutting board. Rub it into the wood with a lint free cloth.
Make sure to add oil to the entire cutting board, including the sides.
Let the oil sit on the cutting board for 10-20 minutes to soak into the wood as much as possible. Then rub it again with a clean lint free rag to buff away any excess.
Let the tung oil cure for 7 days before letting your cutting board get wet.
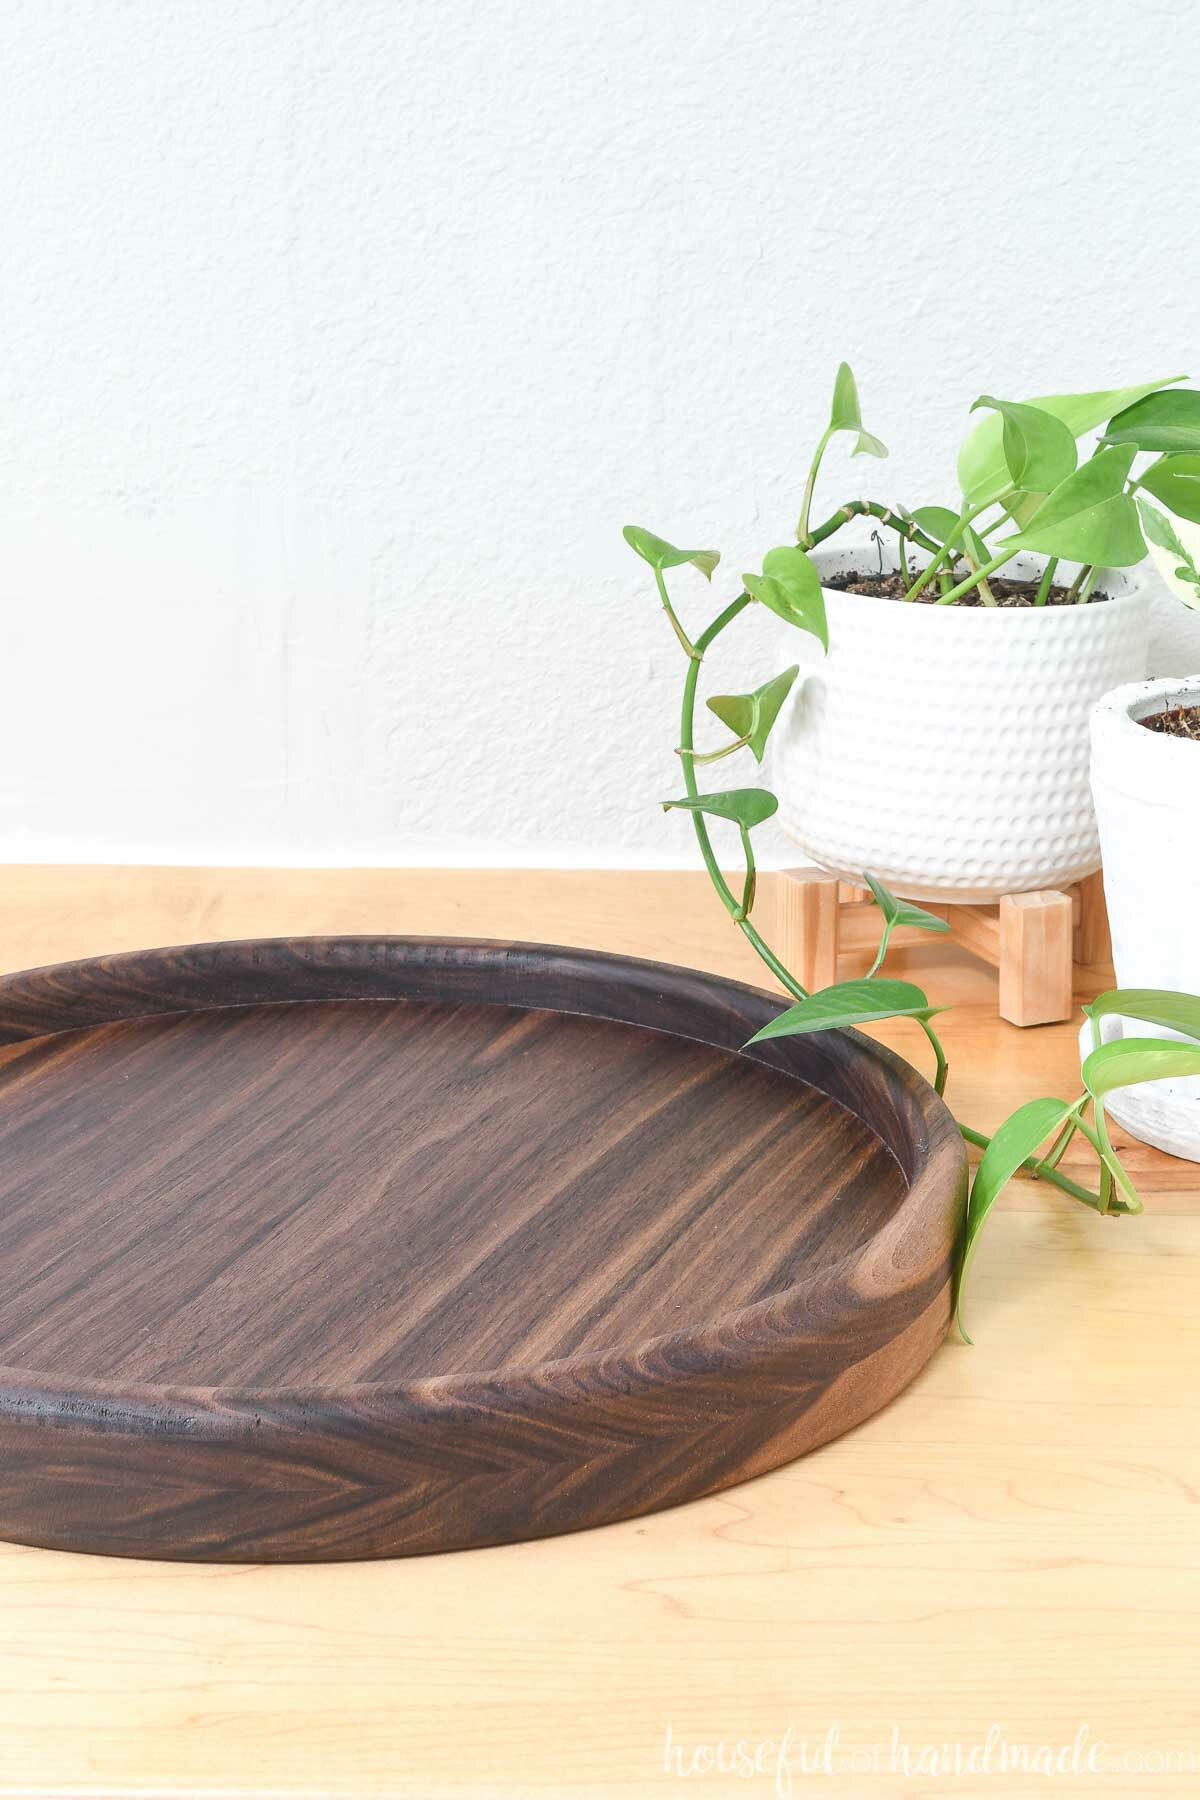
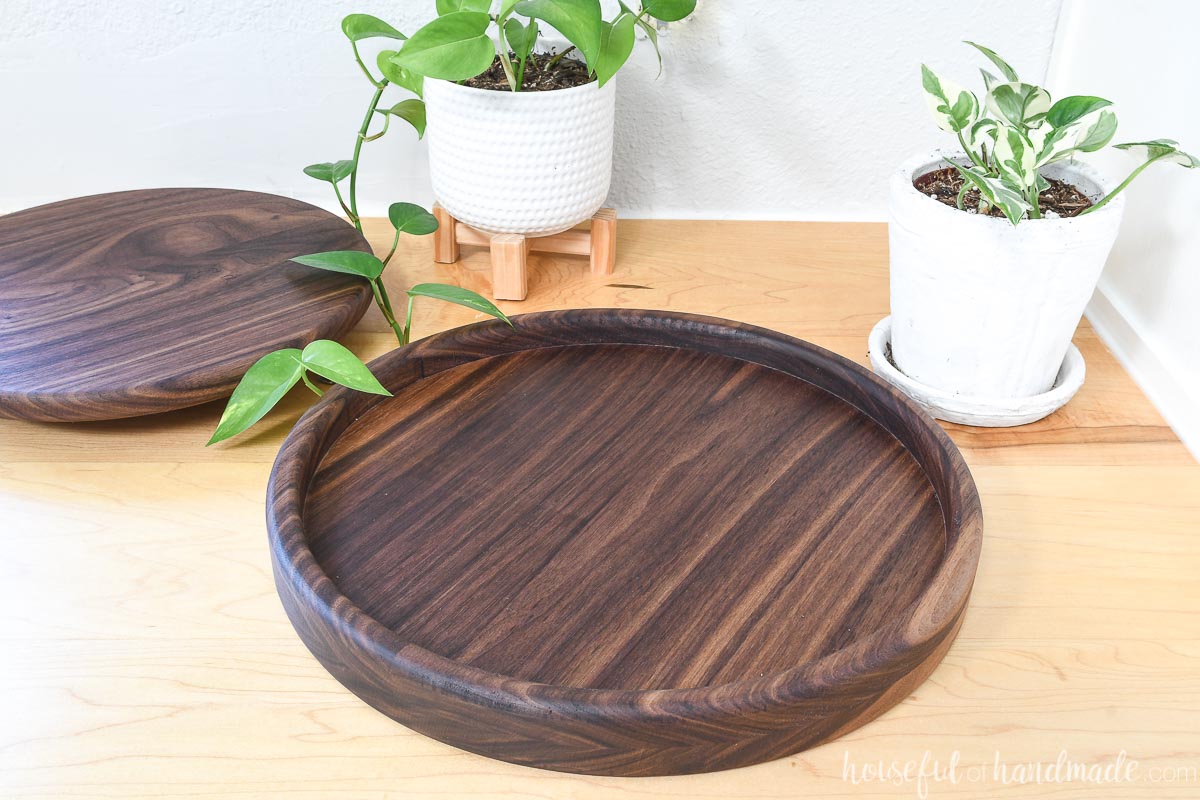
Gift #3- Stunning Round Tray
Cutting a perfect circle seems hard, but with a simple homemade router jig, you can cut lots and lots of perfect circles.
Cutting repeatable perfect circles is the key to making this beautiful round tray. The identical two circles are needed. Then a third smaller circle is cut out of one of them to create a raised lip on the tray.
And best of all the smaller circle cut out of the center can also be used as a round serving tray. Add feet to the bottom and get 2 gifts from 1!
Tools needed to make a round tray
- Trim router
- 1/4″ straight cut router bit
- Optional- round-over or chamfer bit
- Measuring tape
- Clamps
- Drill
- Sander
Supplies needed to make a serving tray
- Piece of hardwood (maple, walnut or cherry are great options)
- Scrap of 1/4″ thick MDF or plywood
- Waterproof wood glue
- Sandpaper
- Waterlox 100% pure tung oil
Cut your boards
Determine the size of tray you want to make. You will need to glue together some boards to get a wider board for a big tray.
Once you decide on a size, cut the boards you need to that length + 1/2″.
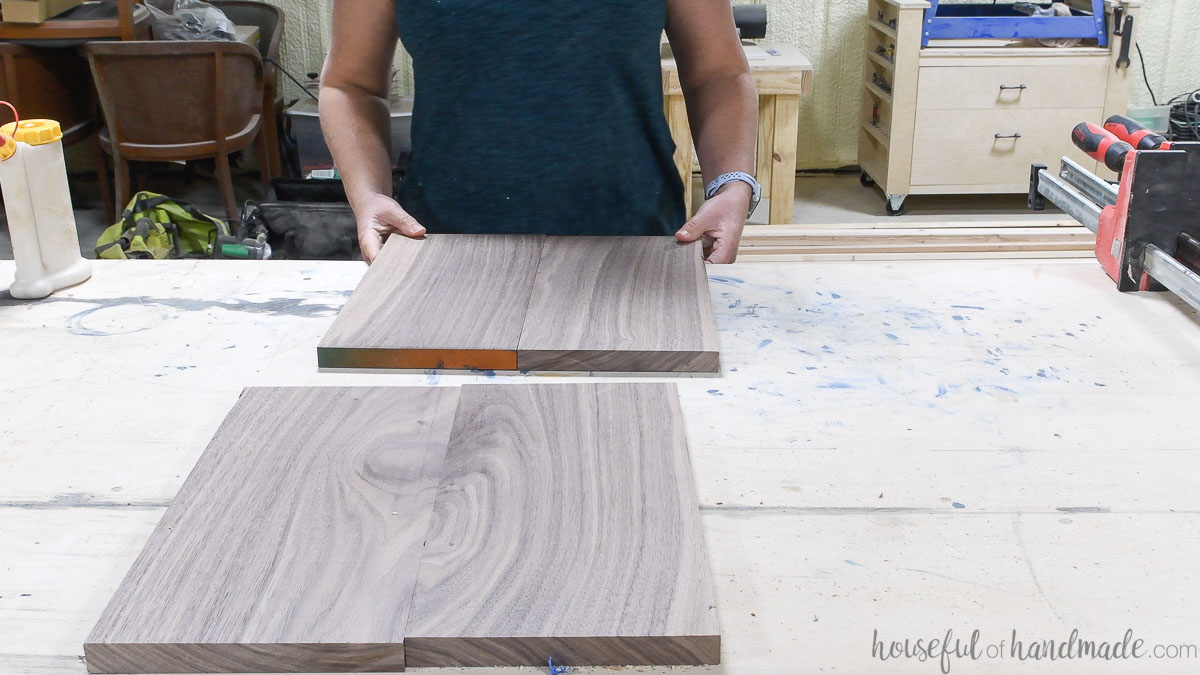
I was using a 7″ wide piece of walnut so I decided to make a 14″ round tray. I cut (4) 14 1/2″ pieces.
If you have a narrower board (like a 5 1/2″ wide 1×6) you will beed 3 pieces to glue together to get a larger tray. So you will need to cut (6) boards for your tray.
Glue together boards
Line up you boards so the seams dissappear as much as possible. I like to try to match the grain pattern so you can’t immediately see the seam.
Also, make sure to alternate the curve in the end grain on your boards to help them stay nice and flat.
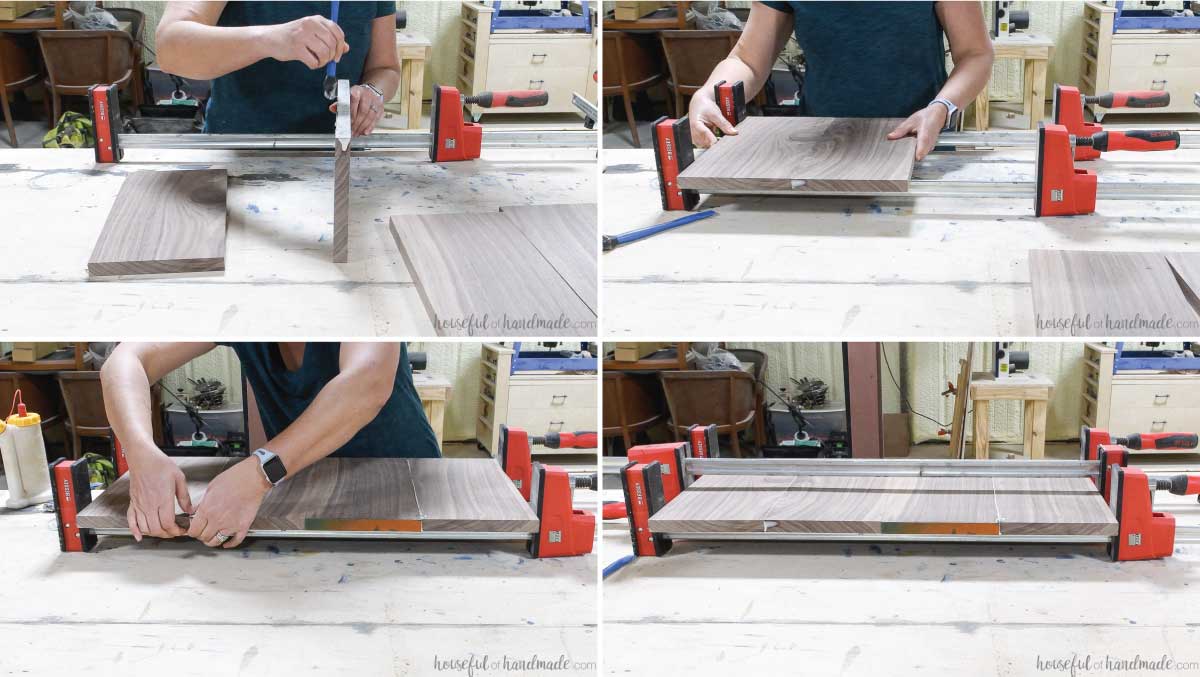
Add a nice amount of glue to the seams of you boards and clamp them together.
I used the same clamps for both glue ups, but only added glue to the one seam so I was left with (2) 14″ wide boards, not (1) 28″ wide one.
Make sure to keep the seams flat as you tighten your clamps. And alternate the clamps to prevent the boards from bowing under the pressure.
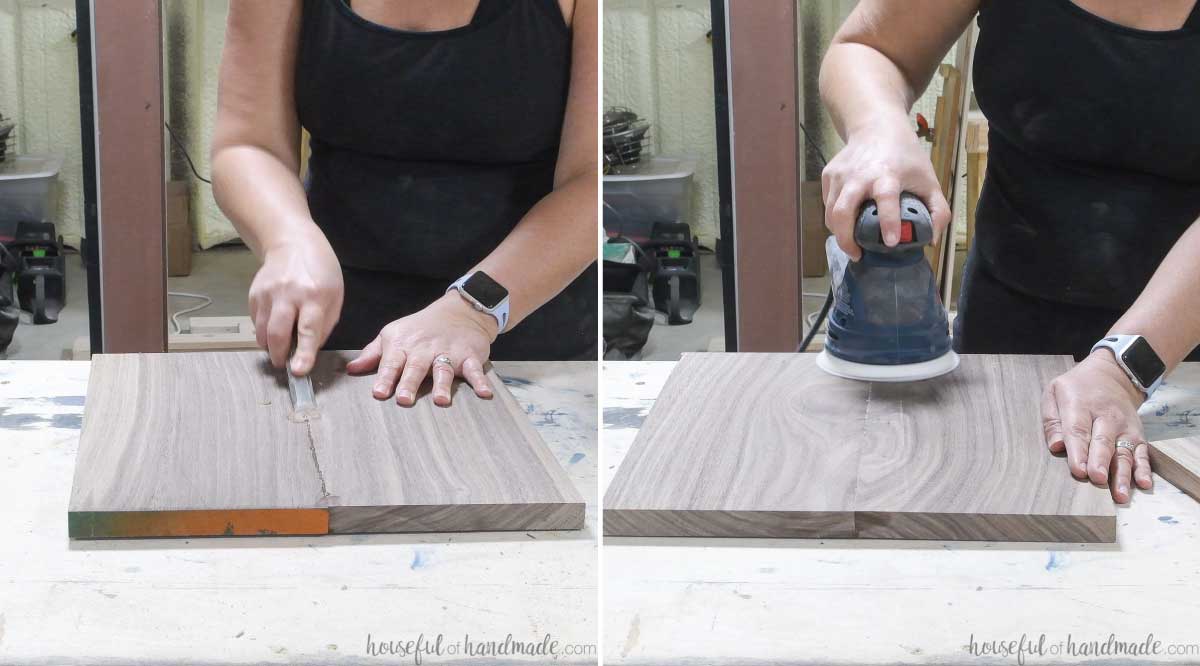
After the glue is dry, remove your boards from the clamps. Remove your glue drips with a chisel or sharp edge.
Sand your both sides of your boards with a sander with a coarse grit sandpaper to get the entire surface flat and smooth.
Repeat for both boards.
Make a simple router circle jig
Using a scrap piece of 1/4″ MDF or plywood make a fast & easy router circle cutting jig.
The piece of wood needs to be the same width or wider of your trim router plate. It also needs to be longer than 1/2 the router plate + the radius of your tray size + 1-2″.
I accidentally forgot to add the extra 1-2″ and was able to make it work, but my pivot point was very close to the edge of my jig which is not the best for maneuverability.
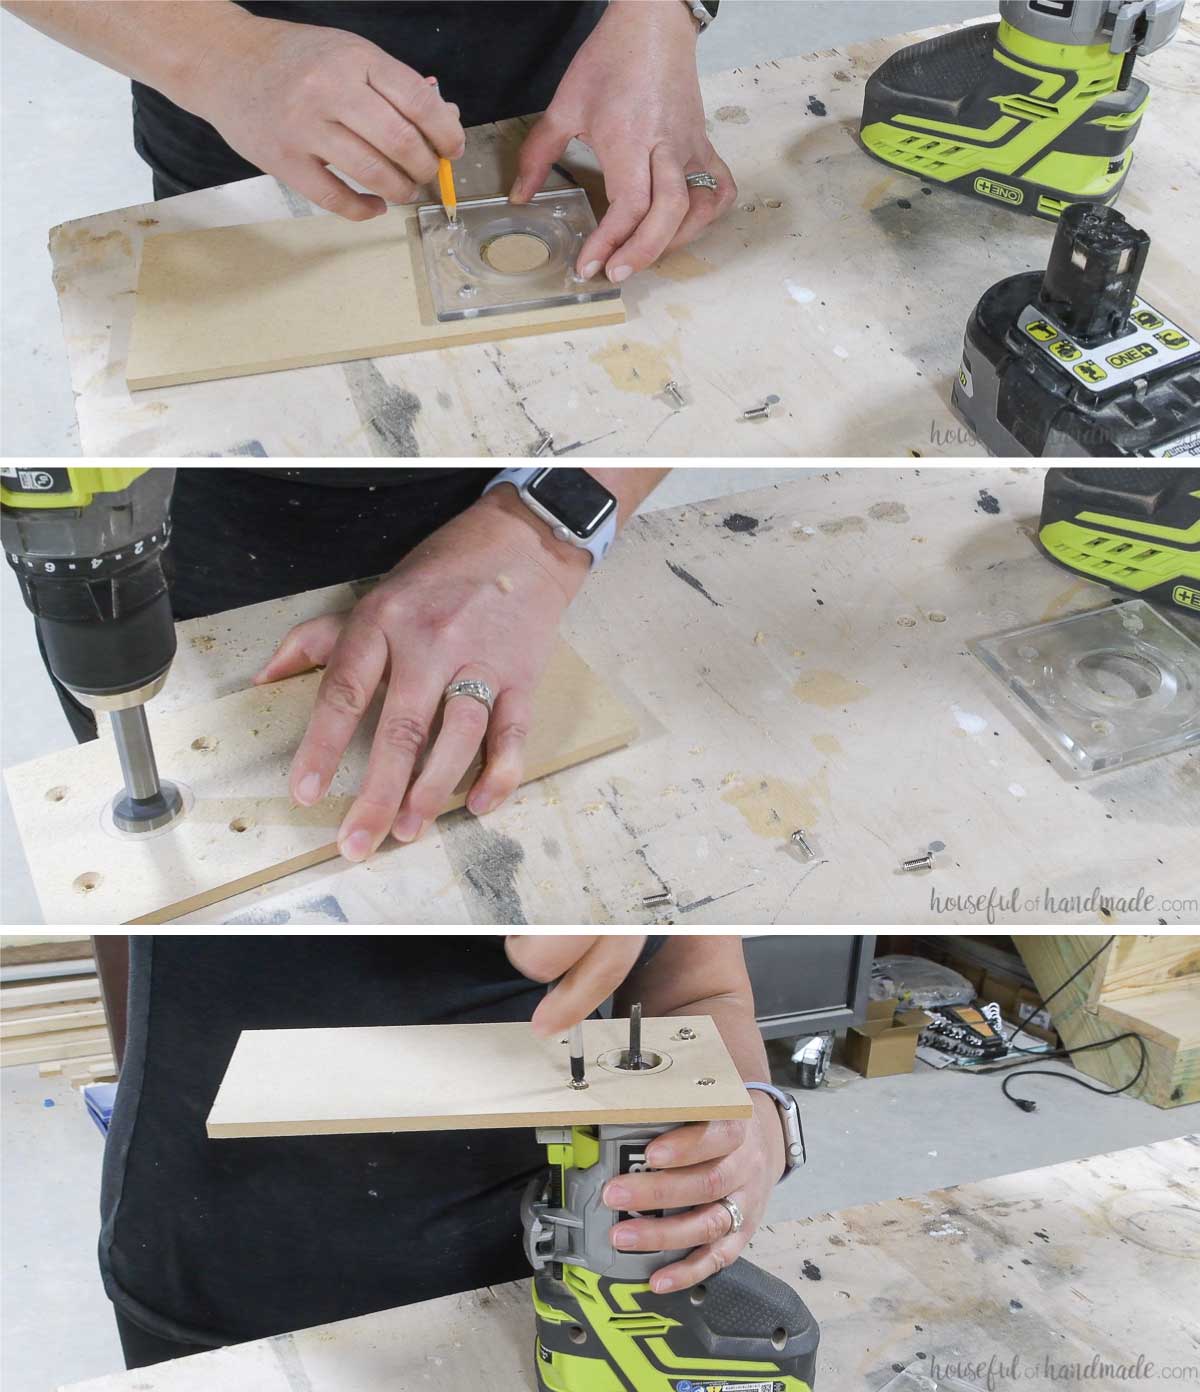
Attach this new jig to your router as the plate with the screws included.
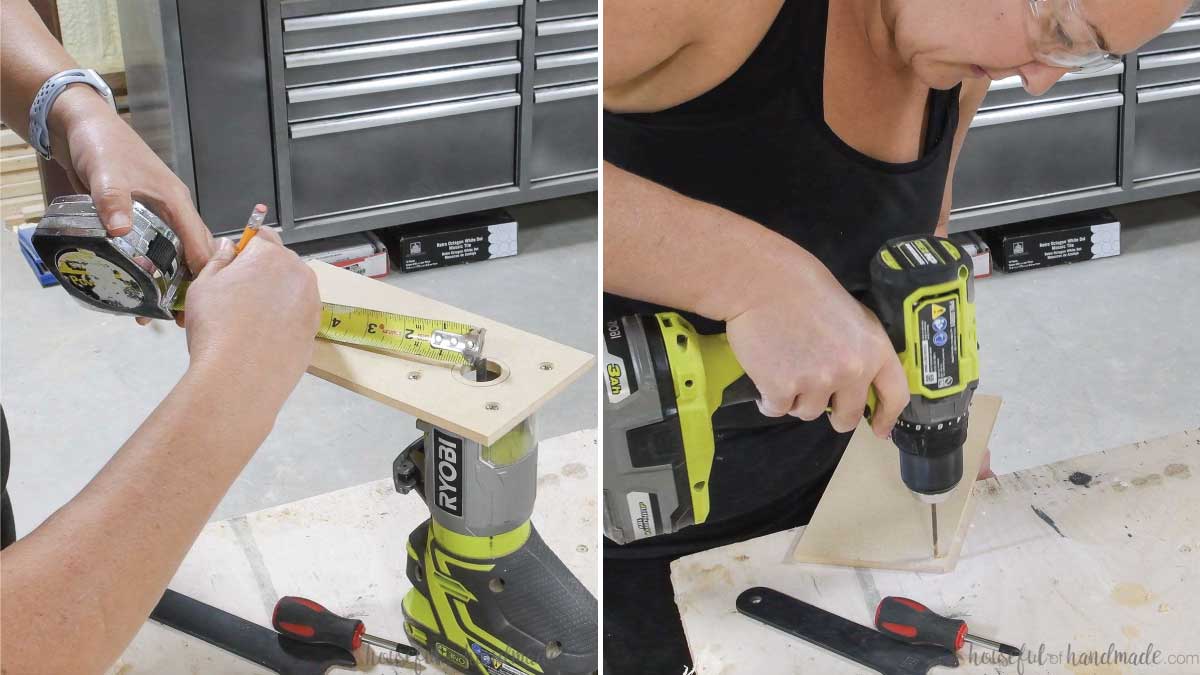
Measure from the edge of your router bit the radius (1/2 the diameter) of you circle. Make a mark.
Drill a small hole here to insert a screw as your pivot point.
Router a circle with your jig
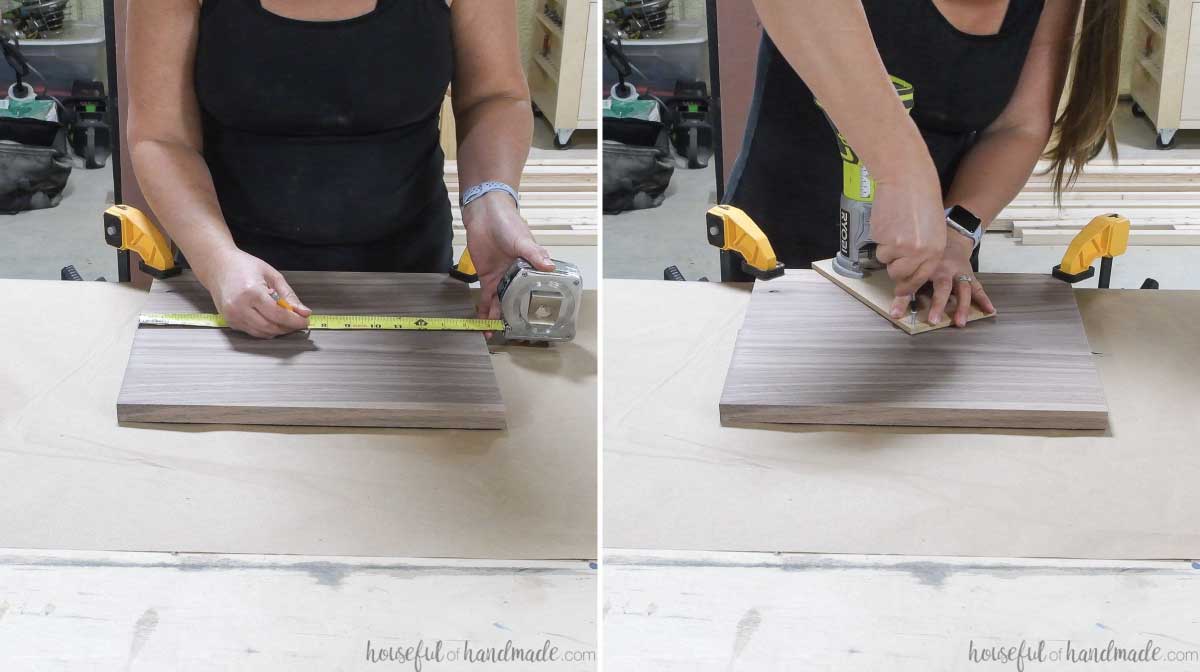
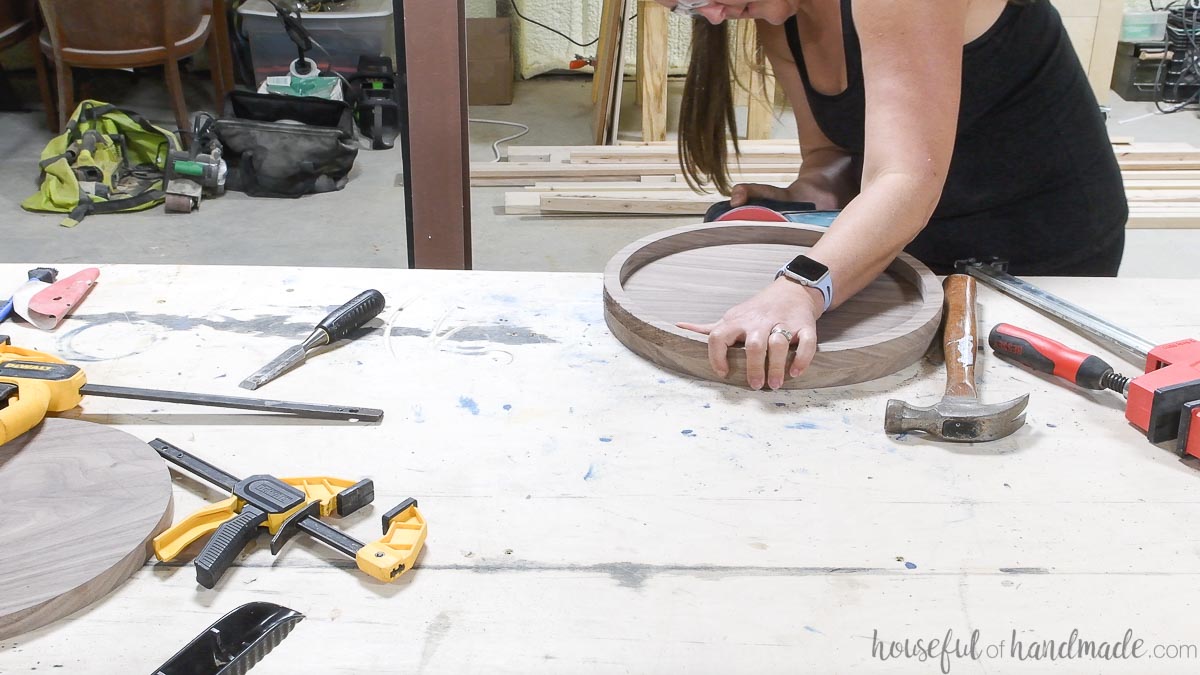
Find the center on your boards that you glued together. Make a mark.
Screw a wood screw into the pivot point on your jig and secure it to the board on the center mark. Just screw it into the boards a little bit, no need to go all the way through.
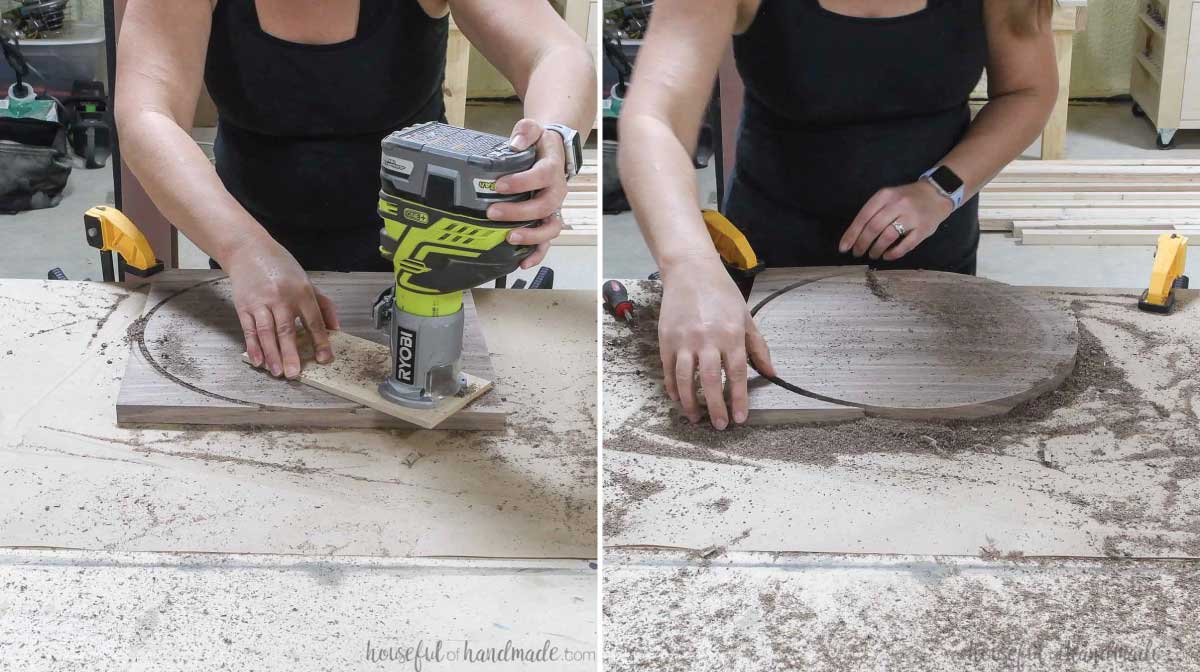
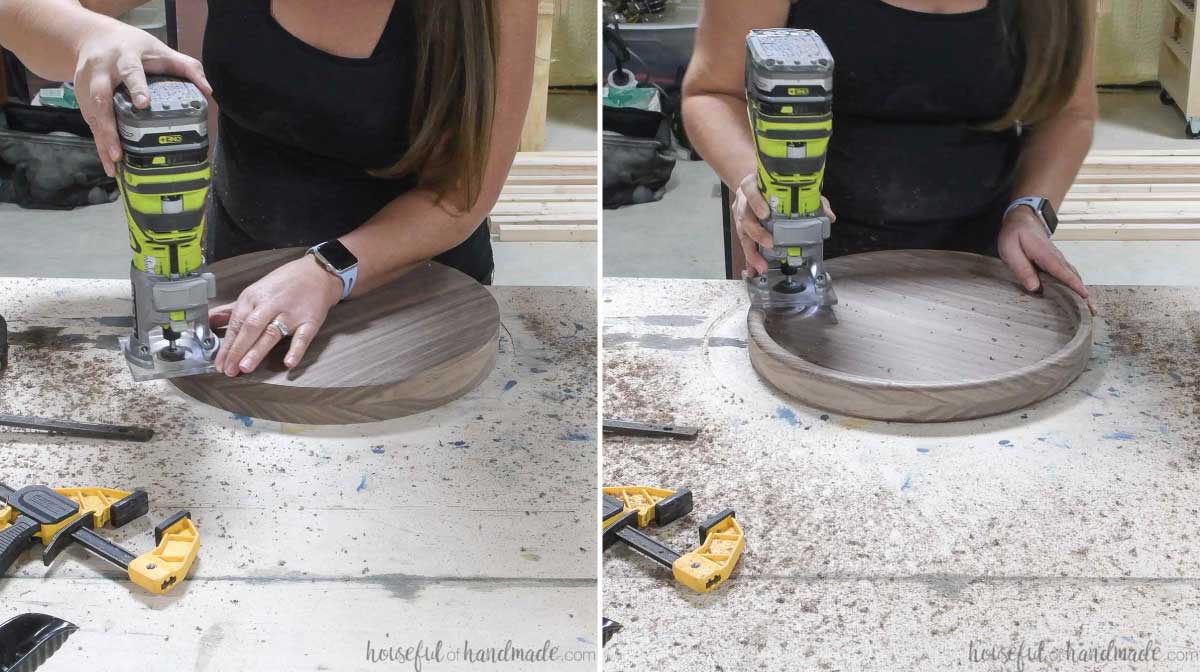
Set your router so it is only a small amount over the plate. Turn it on and carefully pivot it around the boards to create a perfect circle.
Turn off your router and lower the bit a little bit more. Then start the router again and take a second pass at the circle.
Repeat again and again until you have completely routed through the boards. I took about 3/16 off with each pass.
Repeat for the second board so you have two identical circle boards.
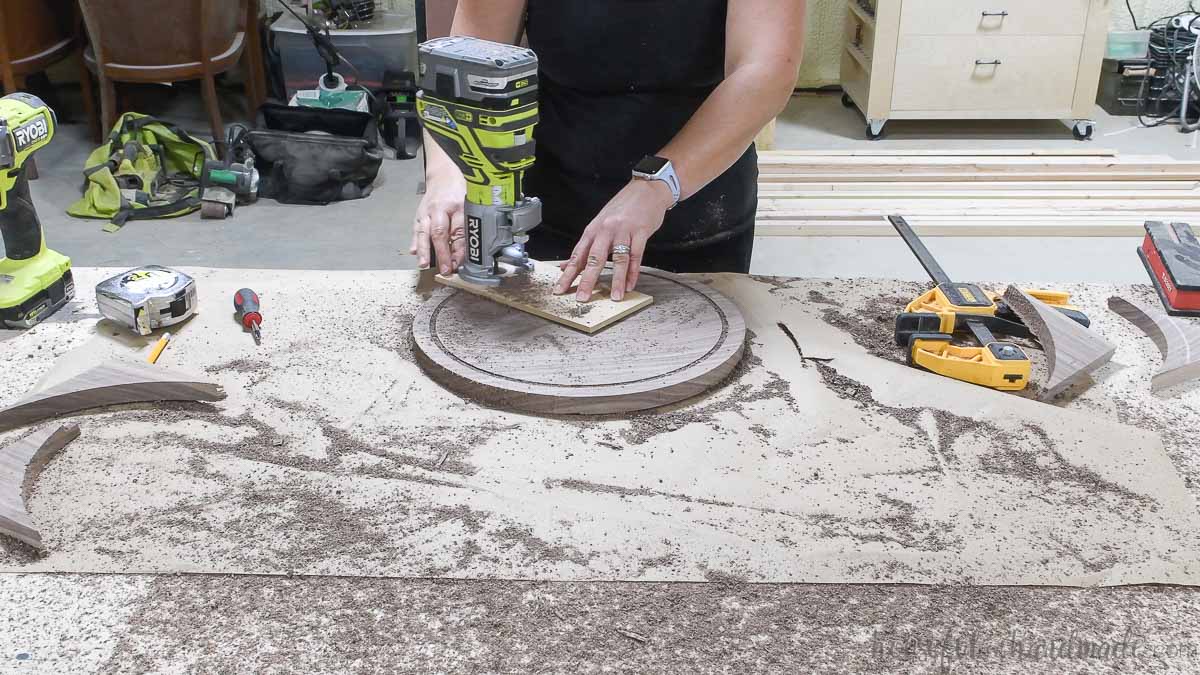
Then measure and mark a second pivot point on your circle jig. This will create the lip around the serving tray.
I made my lip 1/2″ thick so I marked the second point to give me a 1/2″ ring inside the first.
Put the screw in the new pivot point and place that in the same center mark. Repeat the routing again, taking a little bit off with each pass.
Be careful as you get to the end of this center circle. As it comes loose from the outside circle it can bump into the router bit and cause a dent (ask me how I know).
Glue together your round tray
Before glueing the top to your tray, sand the inside smooth. This is easy to do by hand.
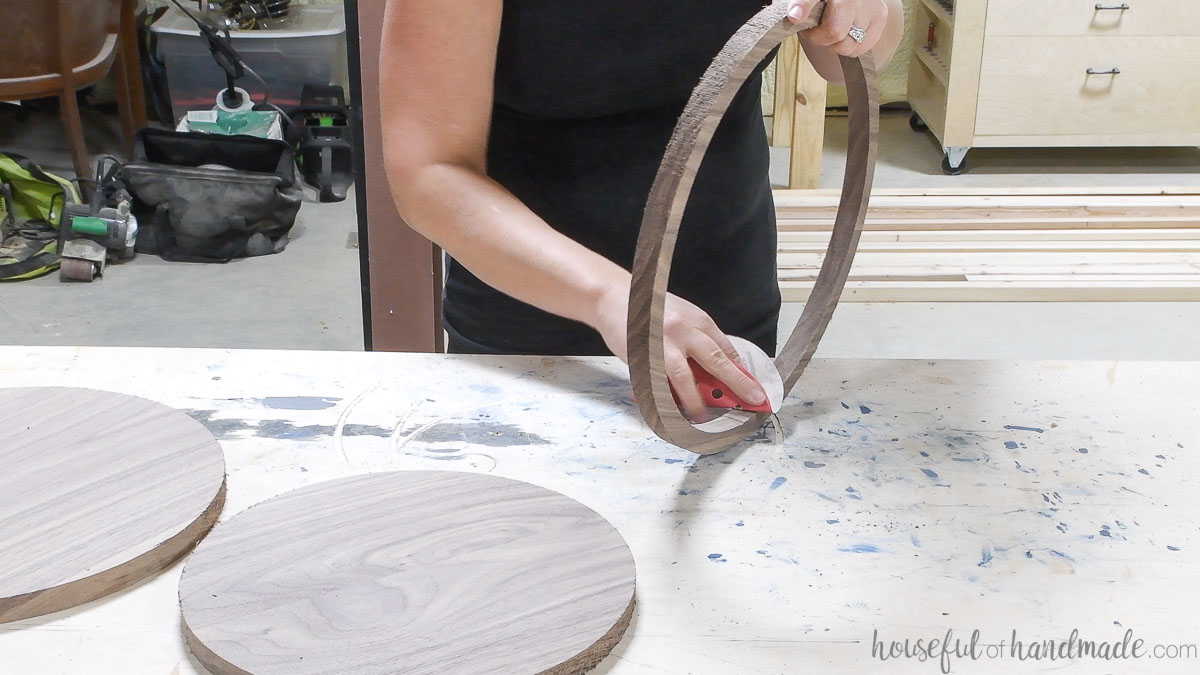
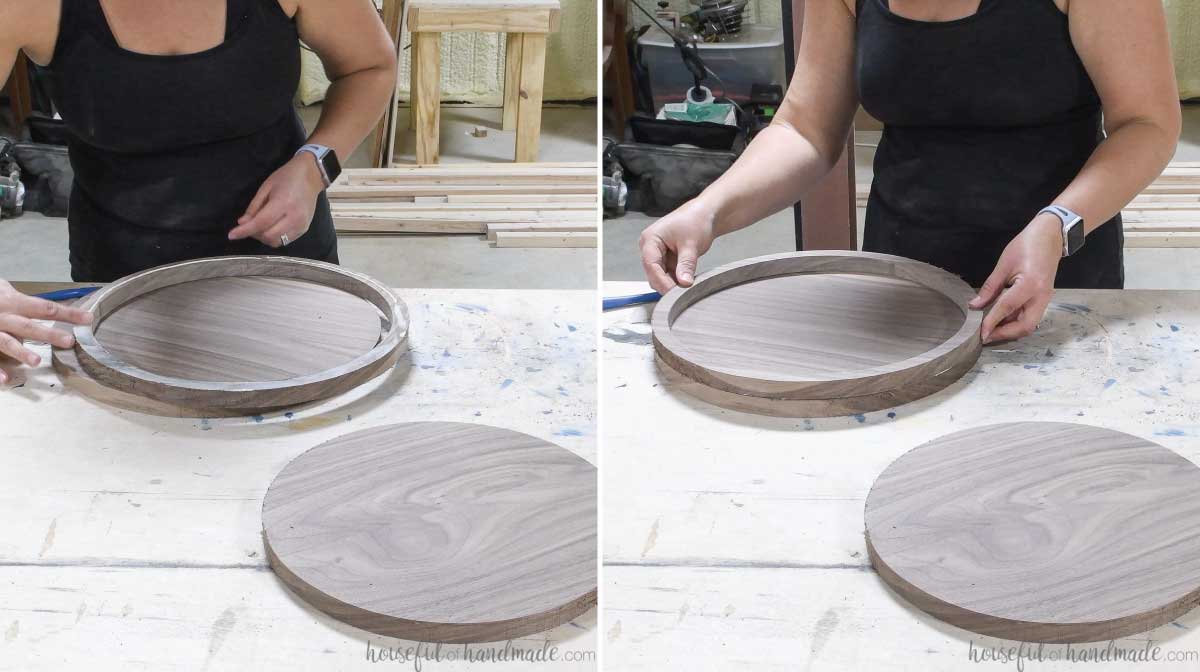
Line up the top piece so the glued together seams line up. This will keep the grain lined up on the tray. If your grain is not lined up it can look weird on the edge.
Add glue to the underside of the lip and reline it up on the tray.
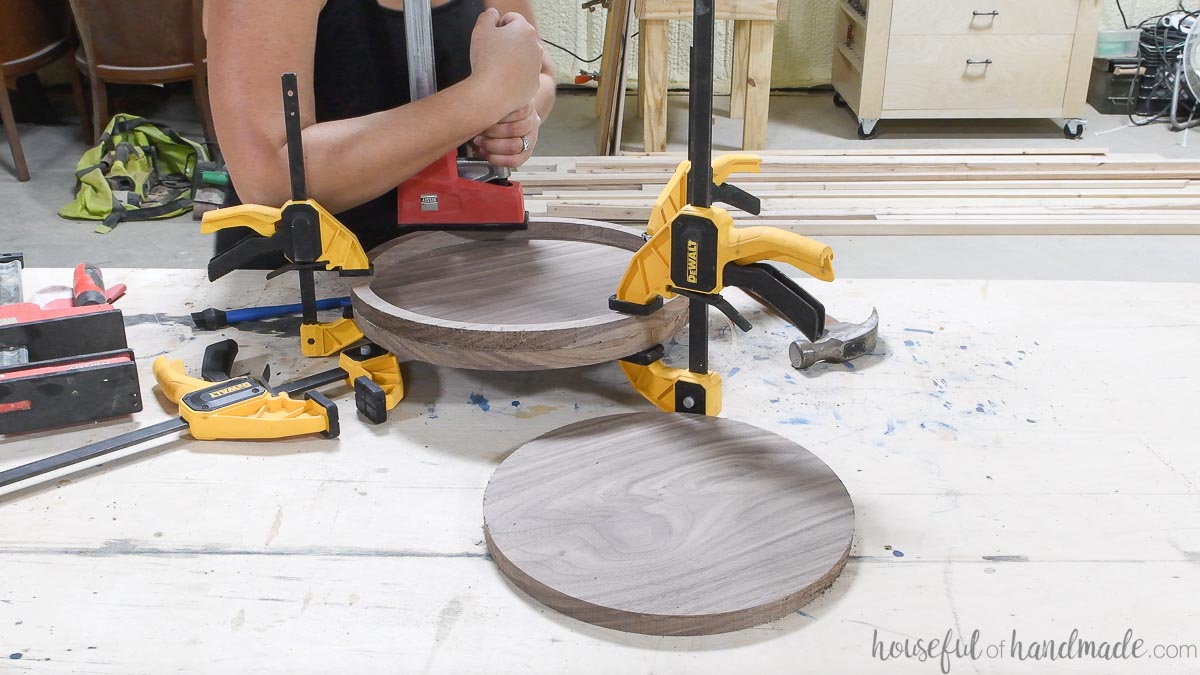
Clamp it down all around the edge.
When tightening the clamps, the top can move around, especially if you have a lot of glue. Pay attention and move it back as you clamp it down.
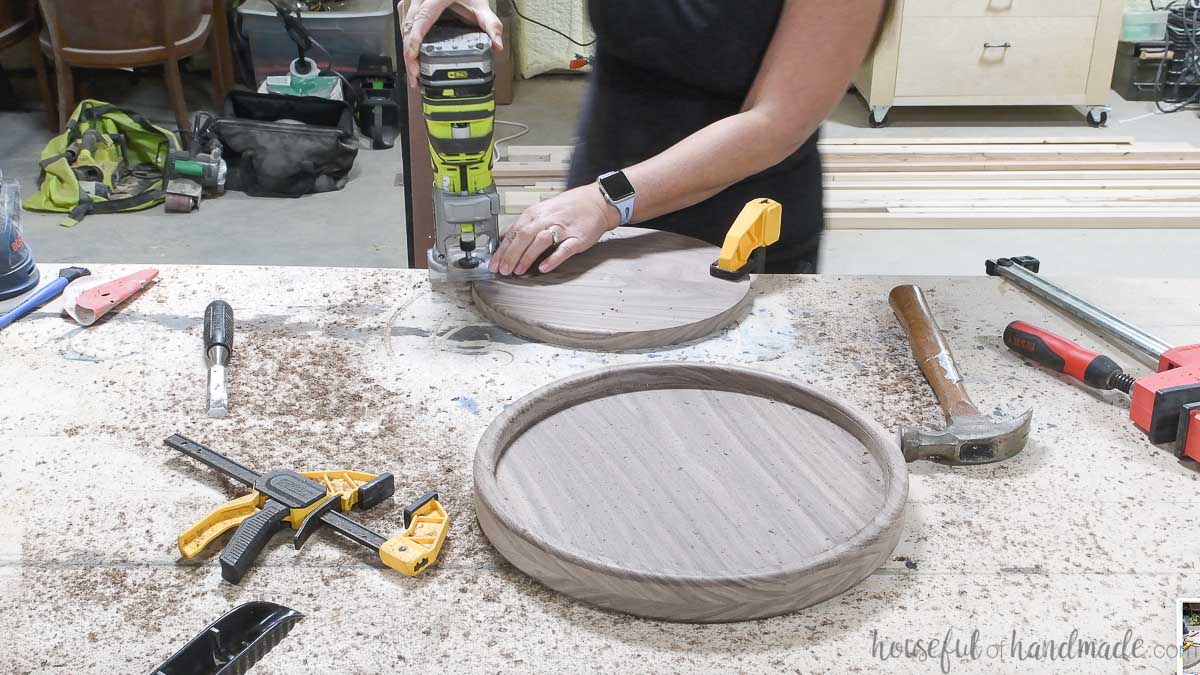
Let the glue dry, then remove the clamps. Use your chisel to remove the glue squeeze out on the outside and inside of the round tray.
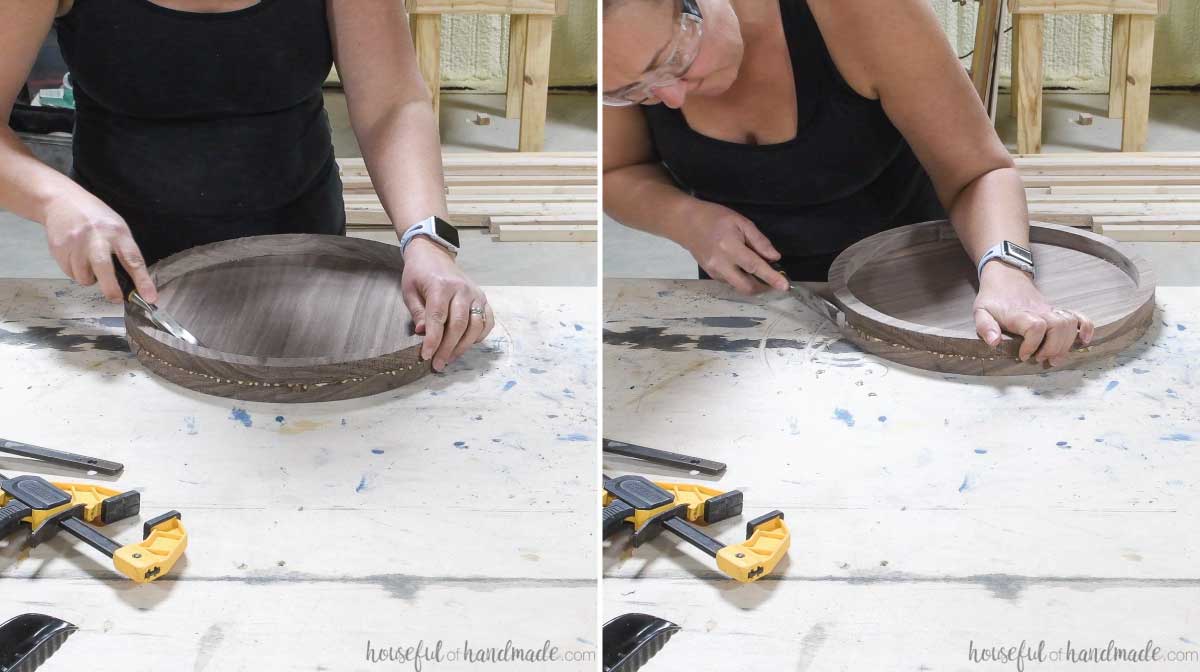
Use your sander with a coarse sandpaper on it smooth the outside of the tray. This will smooth out the outside even if the top was not lined up perfectly.
Continue all around until you are happy with the outside edge of the tray.
Then step down the sandpaper to a medium grit and sand again.
Add a round over bit to your trim router and round over the inside and outside edge on the top of the the tray. Then flip it over and round over the bottom edge too.
Of if you want a more modern look to your tray, you could use a chamfer edge instead of a router edge.
Sand everything smooth with a 220 grit sandpaper.
You can also add a round over to the circle from the center of the top piece. This smaller circle will make a great tray or serving board on it’s own.
Seal your serving tray
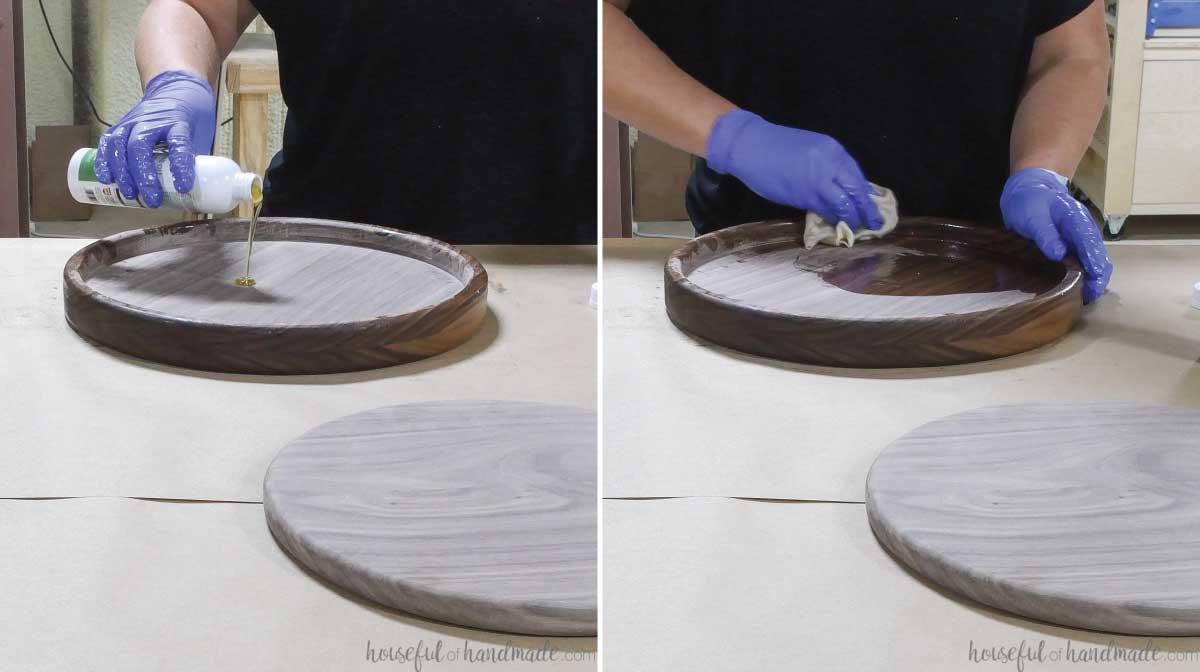
Pour your Waterlox 100% Pure Tung oil on on the DIY serving tray. Rub it into the wood with a lint free cloth.
Make sure to add oil to the entire tray, including the sides and bottom.
Let the oil sit on the tray for 10-20 minutes to soak into the wood as much as possible. Then remove any excess by rubbing it down with a clean lint free rag.
And make sure to let the Waterlox tung oil cure for 7 days before washing. So get your handmade woodworking gifts done early so they are ready to use when you gift them!
Don’t you just love how these three projects turned out?
I was able to make all 3 (or technically 4) DIY wood gifts in just 2 afternoons. And that was without using any fancy tools.
And I am sure anyone would be happy to receive any of these amazing DIY gifts for Christmas, a house warming, birthday, or any other reason you need to give something beautiful.

Happy building!
