
I have been obsessed with all the beautiful woven wall hangings I have seen all over the internet lately. They are such a fun way to add some texture and style to otherwise boring walls. I am trying to get more creative with my wall art so I decided to give it a shot and try my hand at weaving.
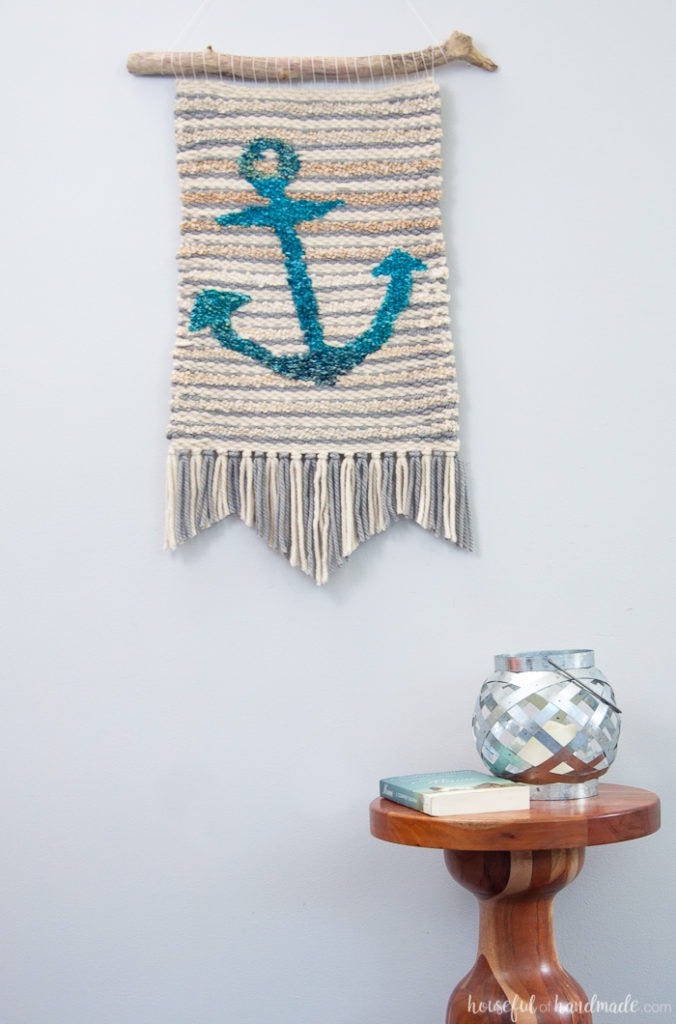
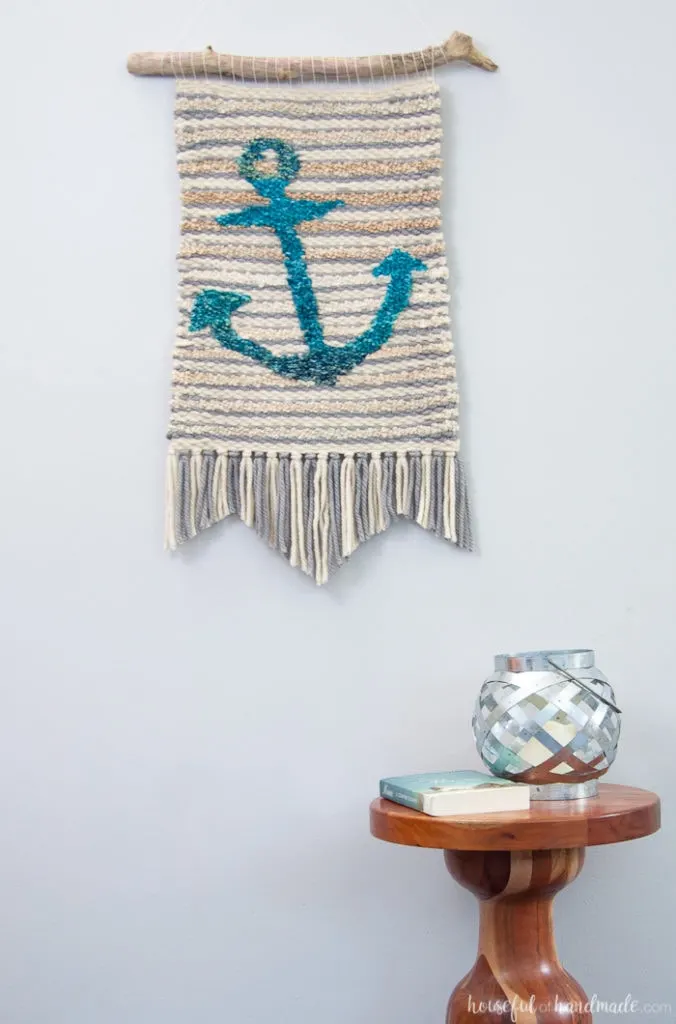
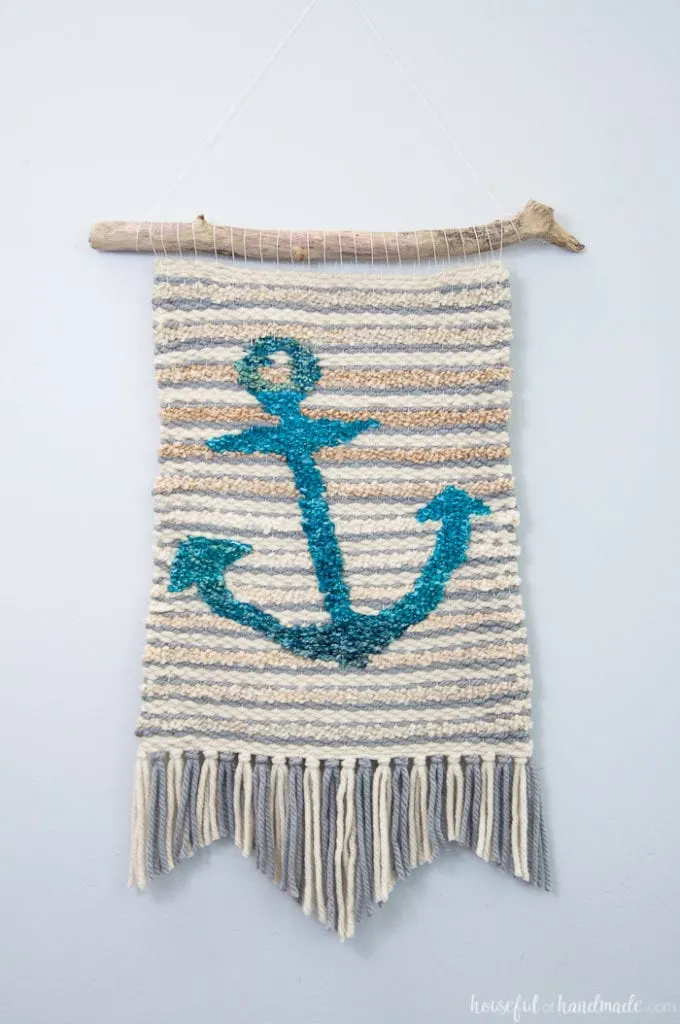
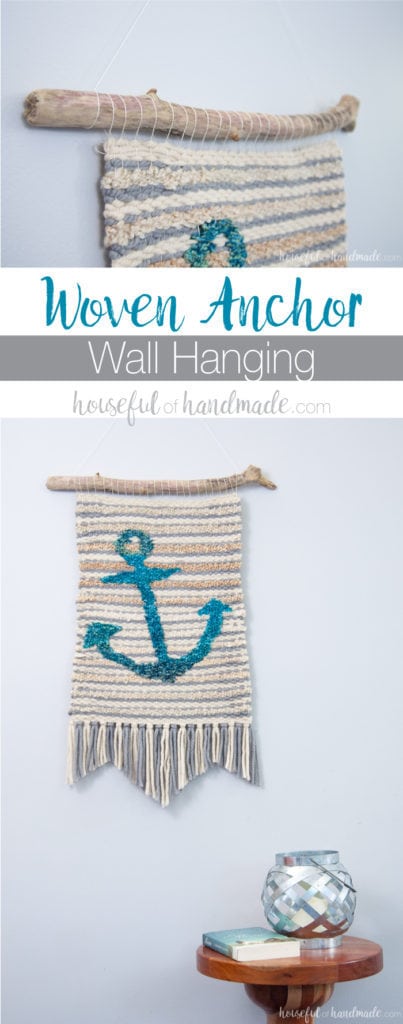
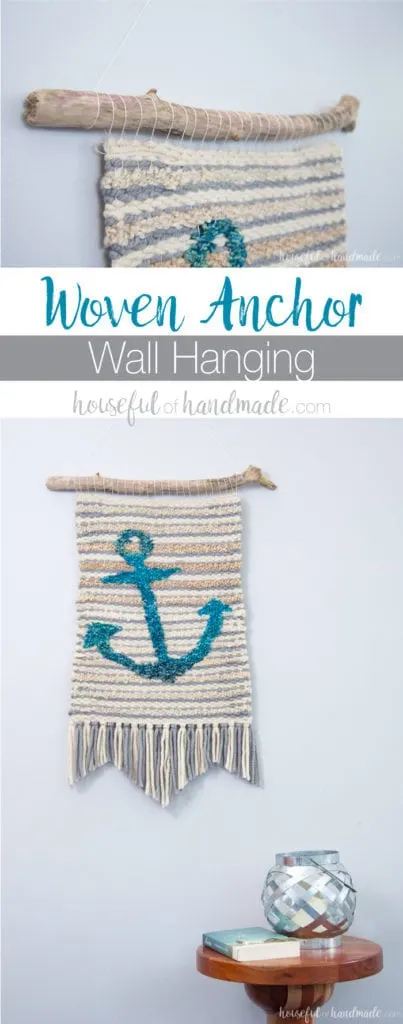
Since I am still on a coastal kick for summer, I decided to start with a woven anchor wall hanging. My first weaving isn’t perfect (actually very far from it), but it was fun and I learned a lot so my next project will be better. And I am sharing what I learned with you today!
This post may contain affiliate links. As an Amazon Associate I earn from qualifying purchases. Click here to read my full disclosure policy.
Since I studied fashion design in college I already had a general knowledge of weaving. We even did a very basic project (5″x5″ squares of the basic fabric weaves), but that was such a long time ago. Then I found this post from A Pretty Fix where she gives a great introduction to weaving (and even shows how to make a basic loom), and I knew it was time to give it a try.
As with any project, I never start out with something quick and easy. I really should know better by now, but I just get so excited and jump in head first. This time was no different. I should have started my weaving adventures with a basic pattern or something small so I could work through it quickly and then move on to bigger and more complex ideas.
I did not! If you want to try weaving for the first time, I would suggest starting small or simple (or even both!). Then when you get a hang of the technique and they way the materials react to it, you can try something more complex.

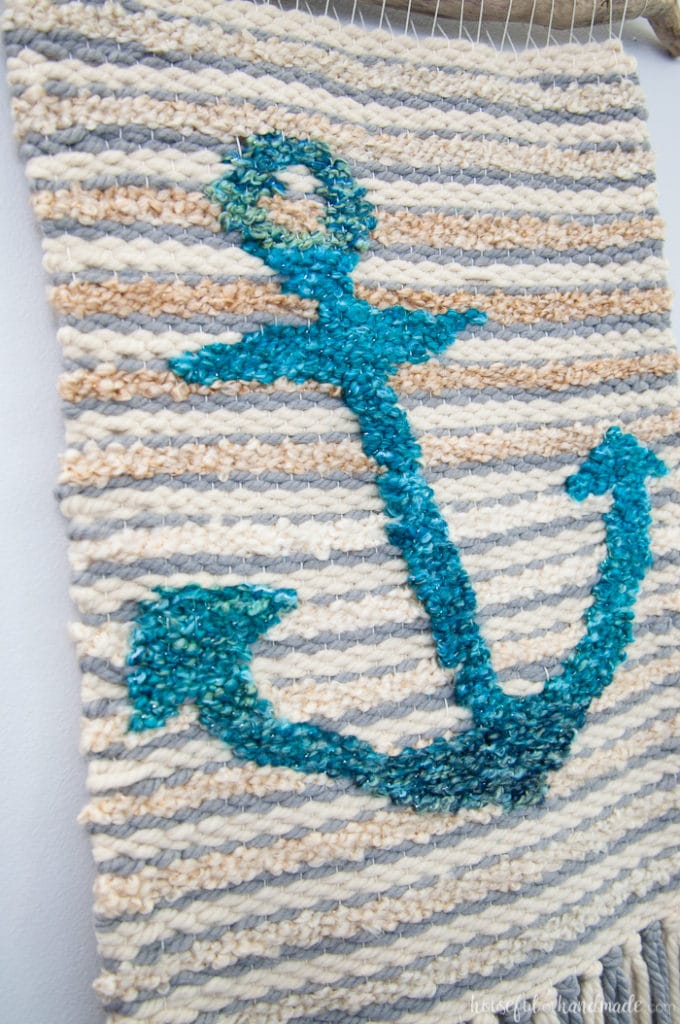
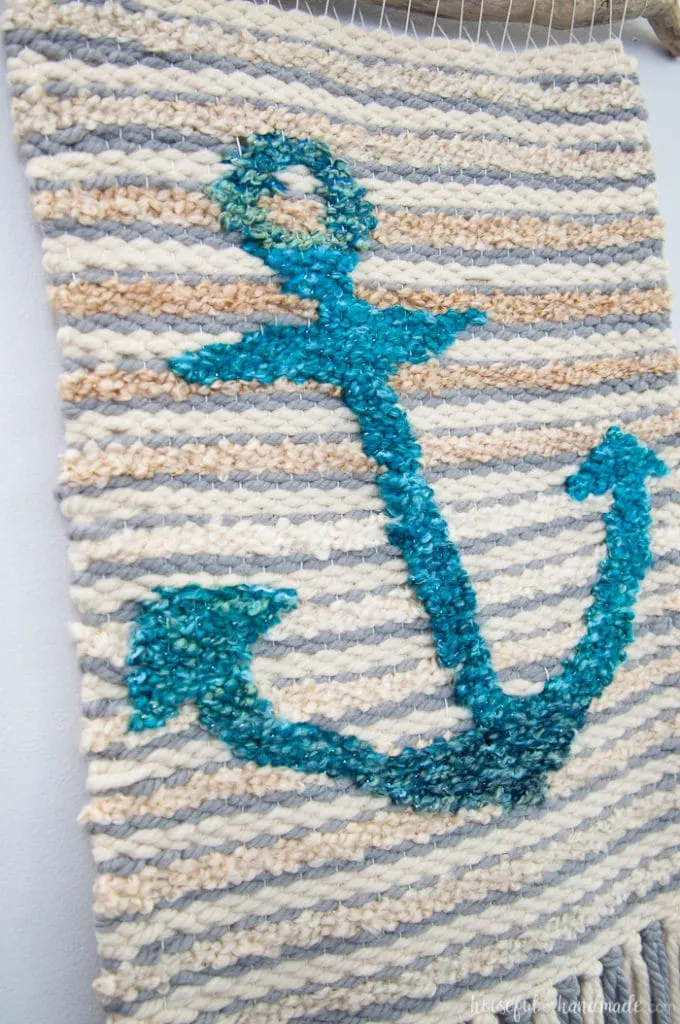
Instead of a pattern or design, I decided I wanted to create a weave with an actual picture. Something that would need to be able to be identified. This was my first mistake because that is much harder to weave into a wall hanging. I don’t even know if I did it right, but the technique I used did work. Then to make it even worse, I wanted to add a background pattern to the entire weaving. Mistake #2!
So here I am trying to make sure my background pattern is staying consistent while I am also trying to weave an anchor into it and make it actually look like an anchor. It got really complex in parts and I got a little frustrated.
Then we went on vacation, then another vacation, then a funeral, and then I came back to my project and had to remind my brain what I was doing all over again! So if you do decide to weave something more complex, maybe do it at a time when you will be home so you don’t forget what you are actually doing.

But even with all these mistakes, I am still super happy with the end result. There are a few other things I learned (and I will point them out to you in my tutorial below), but I am proudly displaying my new woven anchor wall art and showing it off to anyone that stops by for a visit!
I decided I didn’t want to start with a small piece, cause I have big empty walls so I figured I needed to fill it up. I made my own basic loom according to this tutorial from Jelica at A Pretty Fix. While I was at it, I decided to use some scrap wood to make my own shed stick.
I ripped a 3/4″ piece of wood to 1/4″ thick and cut one end into a soft point. I made sure to sand it well so there would be no places to snag my yarns and strings on. It worked like a charm and I love that it big enough for my large lap loom. If you don’t want to make your own loom, you can find a kit to get you started like this one for pretty cheap.
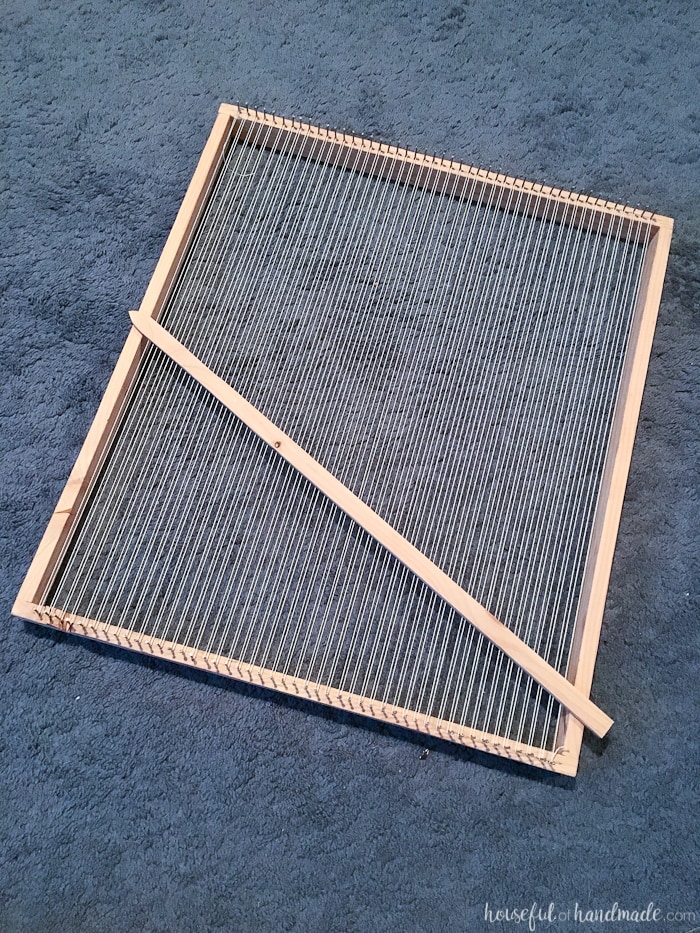

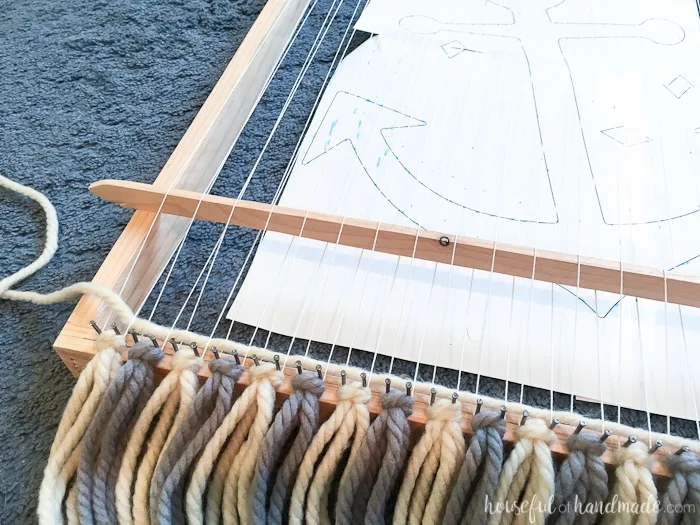
You can see in the above picture that the first time I strung my loom, I did the warp threads very close together (up and down every nail that were 1/2″ apart). I realized this would have taken me forever and since I was using chunky textured yarn, I didn’t need my warp so close together. So I redid it (as you can see in the picture below) and it worked out beautifully. I do love that I have this option with my loom for future projects.
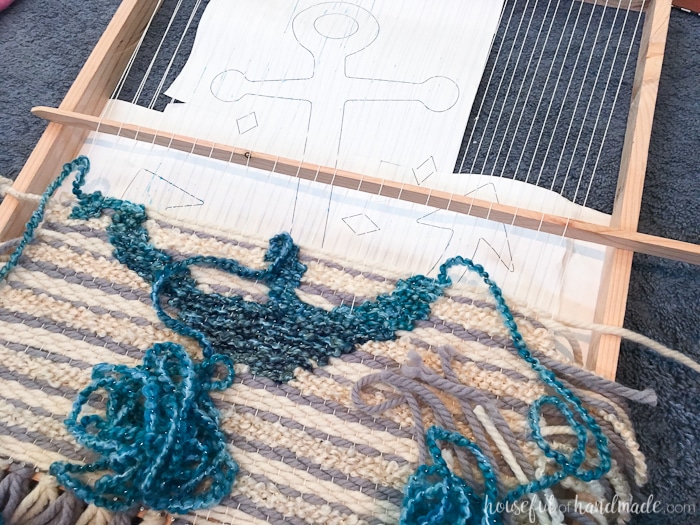
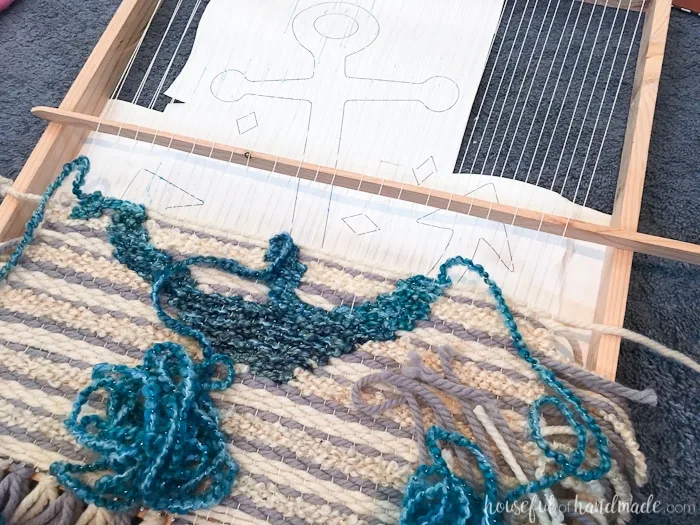
To add my anchor into the weaving, I found a design that I liked and that was simple, then printed it out in the size I wanted. It actually took 3 sheets of printer paper (yeah I should have started small) so I pieced it together with some tape. Then I centered it under my loom.
My first idea was to just mark my warp threads with the design of the anchor, then I would have an easy reference of the design as I was weaving. This turned out to not be a good idea. The warp threads move as you add tassels and start weaving.
It took no time at all to have all those carefully drawn on lines all over the place (thankfully I used a fabric marker that disappears with water so it was easy to remove in the end). So you can feel free to ignore the blue markings in the pictures below.
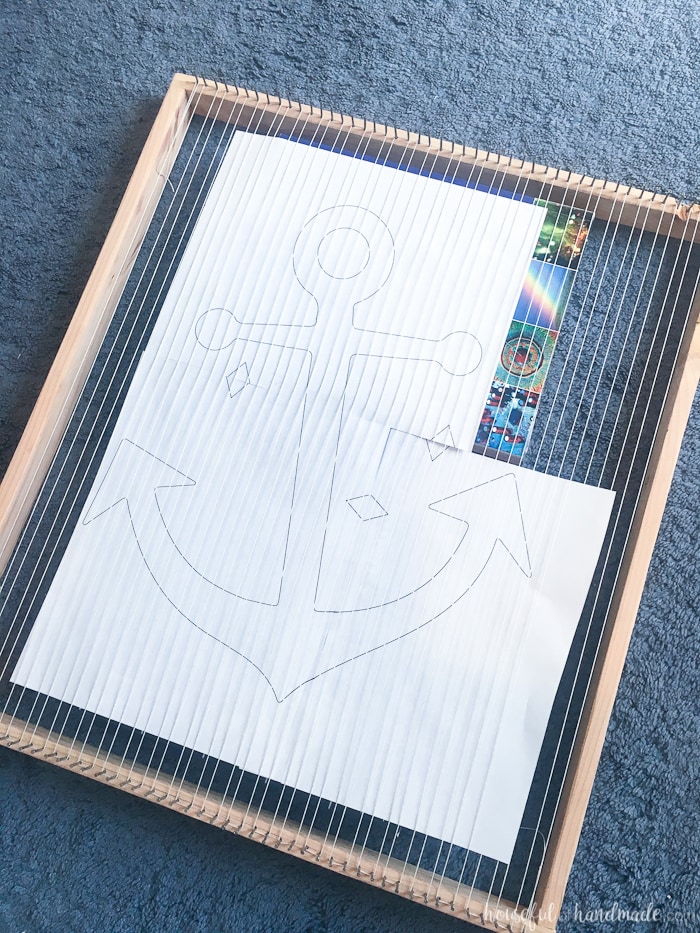
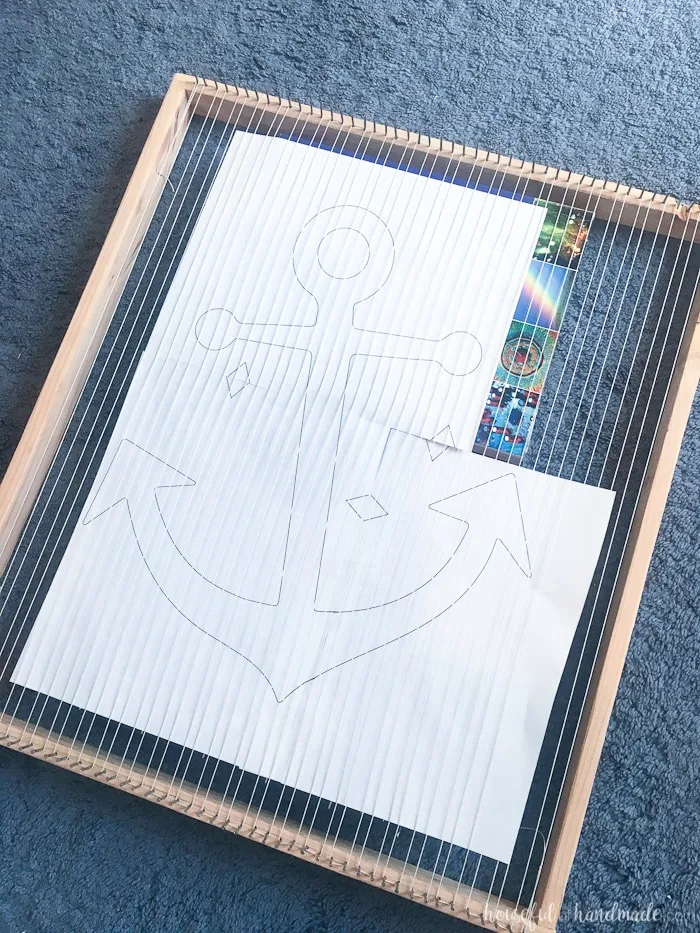
What ended up working was to secure the picture of the anchor to the back of my loom. This did make it challenging to move the loom without ripping the paper, but my black and white printout of the shape was easy enough for me to follow as I was weaving.
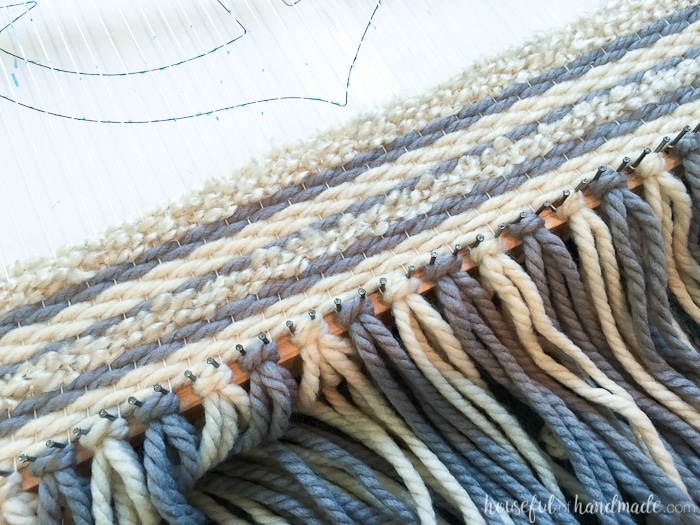
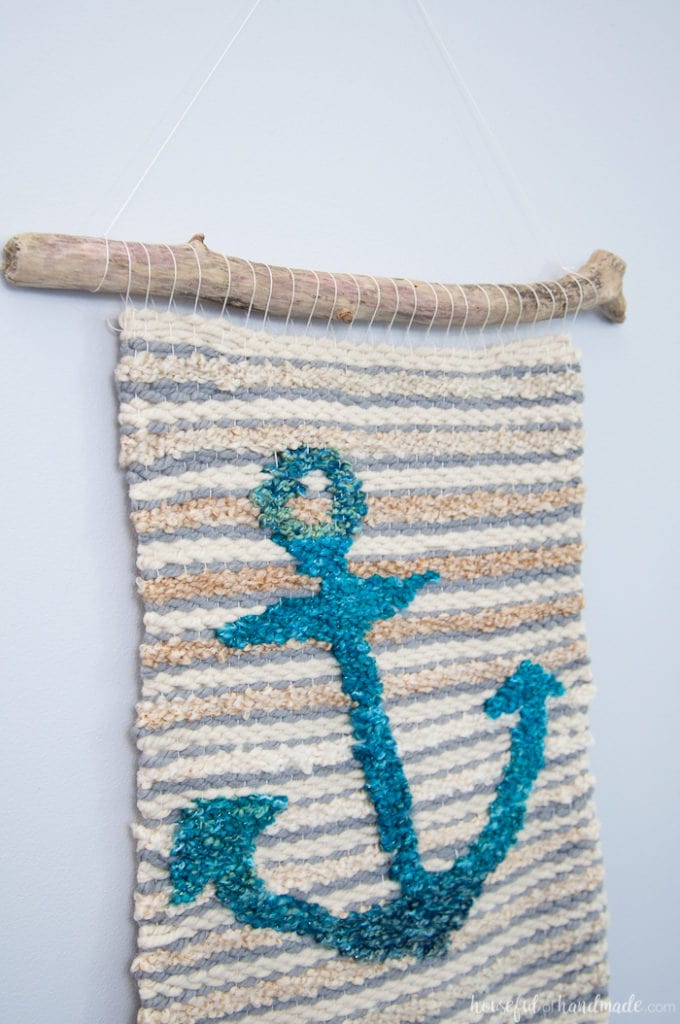
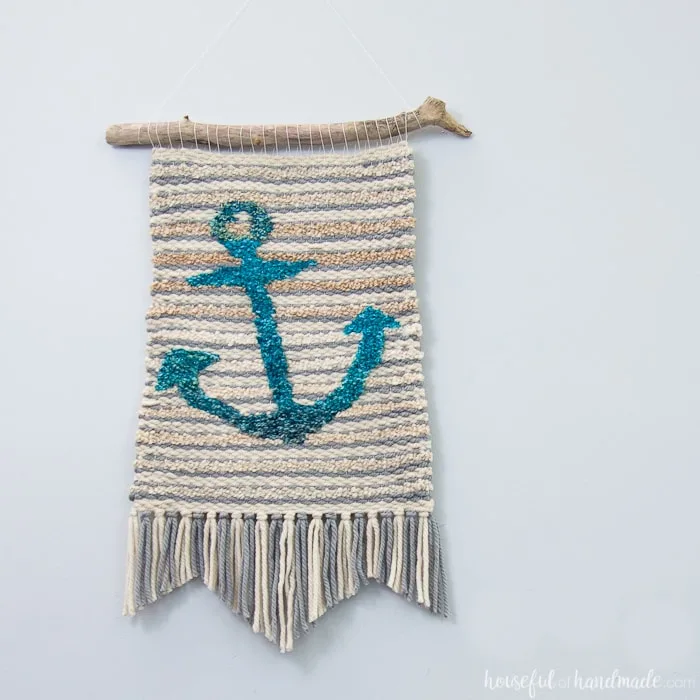
After getting my loom ready and finding my design, it was time for yarn! I knew I wanted to add chunky textures to the weaving. The sweater-like texture is my favorite part of the DIY woven wall hangings I’ve seen. I ended up using Red Heart yarn. I used a gray and cream solid from the Mix-ol-o-gy Solids line and a turquoise and cream from the Stellar line.
I used about half a skein of each to make my woven anchor wall hanging. The Stellar yarn is a multi-color and has a kind of ombre effect to it. This did make me a little annoyed with how the color changed and where.
When knitting it is a much smoother transition so it ended up being much more obvious in my pattern than I had hoped. But I would definitely use it again because I love the texture, I would just use it in a different pattern than I did here.
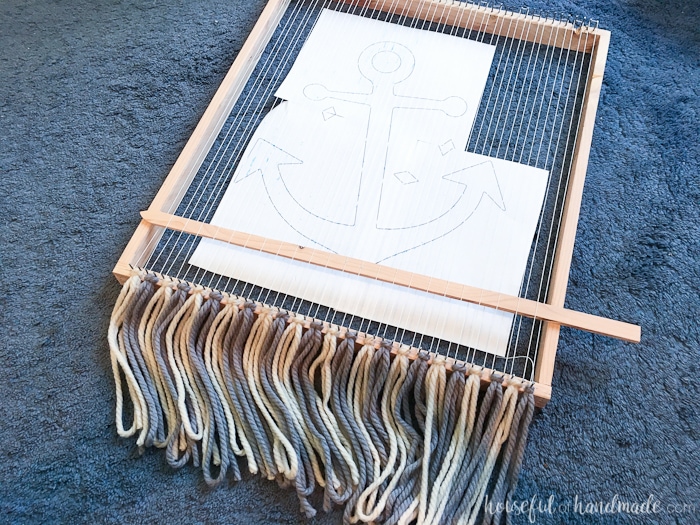
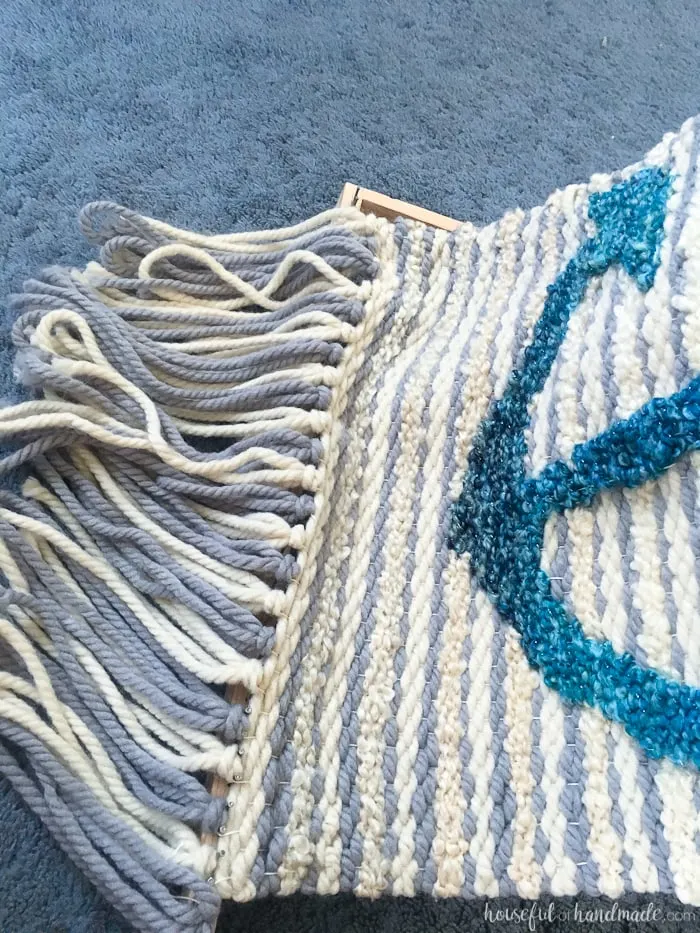
I started by adding tassels to the bottom of my loom. I made sure to leave these long because I wanted to be able to cut them into a fun shape at the end. But just leave them alone for now and try not to get them tangled on the nails in your loom.

Now it was time to weave. There are many different ways to weave but I did start with the basic over-under (yeah, I did that one right!). I used my homemade shed stick to easily separate the warp threads. Then once it was all the way to the other side, you can stand it up on it’s side and rest it on the edges of the loom. Now there is extra space between the warp threads for you to weave your yarn through (which are called the weft).

I did not have a brilliant way to get my yarn through. The Stellar yarn did unravel easily as I used my fingers to push it through all those strings so I ended up putting a piece of tape around the end to prevent this.
Then I started using a large plastic needle and it made feeding the yarn through a lot easier, sadly I could only locate one needle (until the day I finished and then I found the rest of my 10 pack) so I had to switch it between the 4 yarns I was using and since I made an intricate pattern in my background there was a lot of switching back and forth.
I decided to make my background a striped pattern. I did 3 rows of the solid cream, 2 rows of the gray, 5 rows of the Stellar cream, 1 row of the gray, then repeat. I love the way this looks, but it did mean a lot of cutting and starting again for my yarn.
Would you like to save this tutorial?
This is also where I had the issues with the ombre coloring because I didn’t have smooth transitions of the color. But it ended up making a really great textured wall hanging!

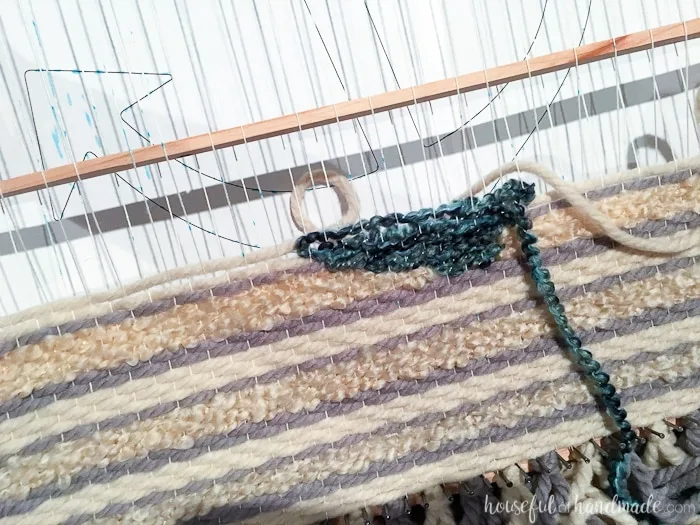
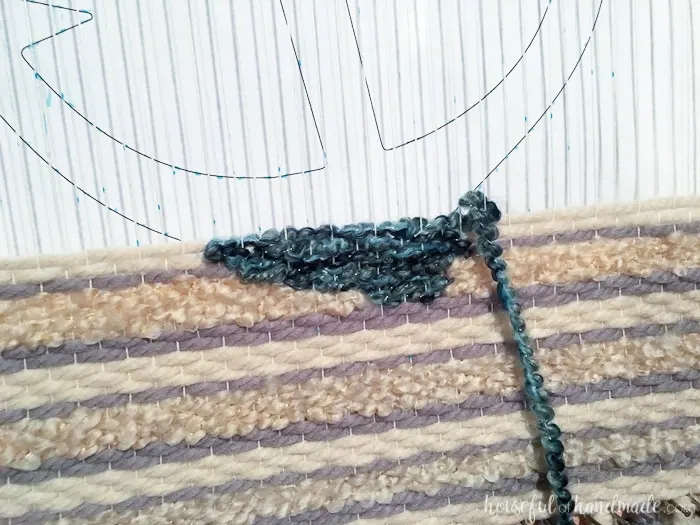
It was quite fun and relaxing to do these stripes, until it was time to weave in the anchor. This is where things got more challenging. I started by stopping the stripes on either side of the anchor and then just going back to the other side, this turned out to be quite a pain because the stripes were going to have to start and stop many times as I moved up the anchor.
My solution, that turned out nicely, was to use my shed stick to separate my warp threads, then I would use the turquoise yarn and weave the section of the anchor for that line, as the anchor split into 3 sections, I ended up with 3 pieces of yarn that I kept weaving up the loom.
Then I would weave my stripe up to the turquoise yarn, then drop it behind the woven anchor section and come up again on the other side. So when I had multiple parts of the anchor on one line I would drop my background yarn behind, come back up and keep weaving, drop behind, come back up, etc.

Then when I used the shed stick to press the yarn together snuggly, it helped to hide the background stripes that were just sitting behind the design. This technique is nothing new and you can actually see it in lots of woven fabrics. It does add a little bit of bulk behind the weaving, but it is unnoticeable because I hung it on a large piece of driftwood that keeps it slightly out from the wall.
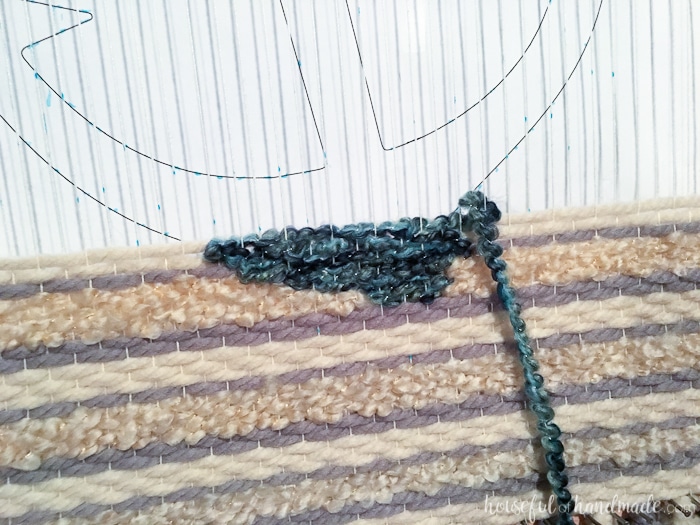
I really hope this is making sense. I promise, when you start doing it, it will be easier than reading it. I never did cut my turquoise yarn, until I reached the end of the line for that part of the design. You can see in the picture below that I was managing 3 pieces of turquoise yarn and kept dropping the stripes behind the anchor as it started taking shape. This was definitely the hardest part of the weaving, managing all the pieces of the shape I chose.
Because our July ended up being absolute craziness, the weaving took me a month to complete. In all actuality, I probably only put in 10 hours of work on it (and that is probably a high estimate). I did take it with us on our first out of town trip, but that turned out to be a big mistake.
The size of the loom and the paper with the anchor shape taped to the back made it hard to safely transport without messing things up a bit. A simpler project on a smaller loom would however be the perfect project to keep your hands busy on a trip though.
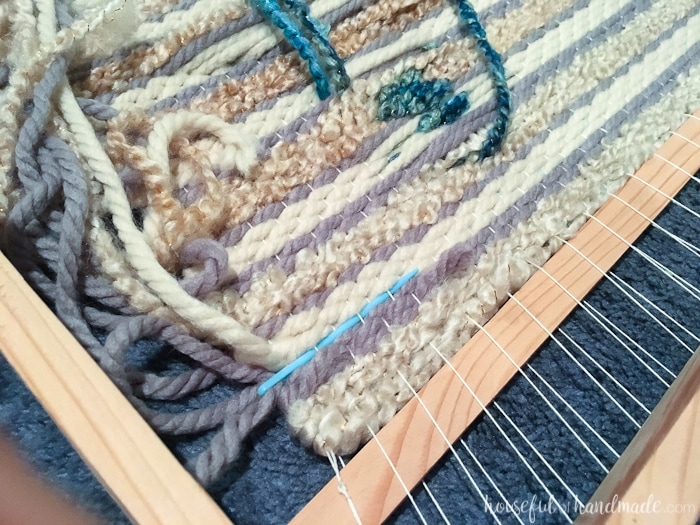
After I was finally able to work my way all the way to the top of my loom, shocked that it actually looked like an anchor (maybe a little crooked and wonky but an anchor non-the-less) and some relatively straight stripes, it was time to finish things off. I started by removing the paper taped to the back then I had to tuck all the edges of the yarn into the back.
I used the plastic needle to weave the ends into the back of the project. I was surprised at how secure the ends were by just weaving them in a couple inches. Then I trimmed off the excess and moved on. There were a lot of ends because of the striped pattern.

Once all the ends were tucked and the weave was almost all the way to the top, it was time to pull it off the loom. I’m not going to lie, I was scared to pull it off. I had nightmares of it falling apart as soon as I pulled it off. It was so pretty on the loom, I considered just hanging it up on it! But I put on my big girl pants, took a deep breath, and got ready to pull it off.

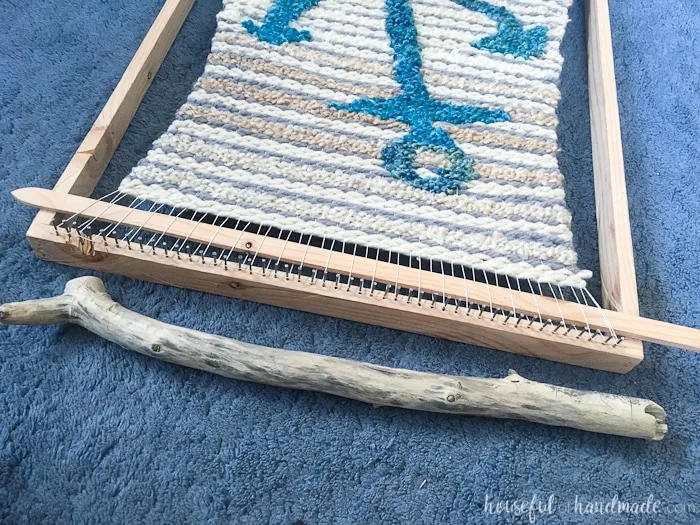
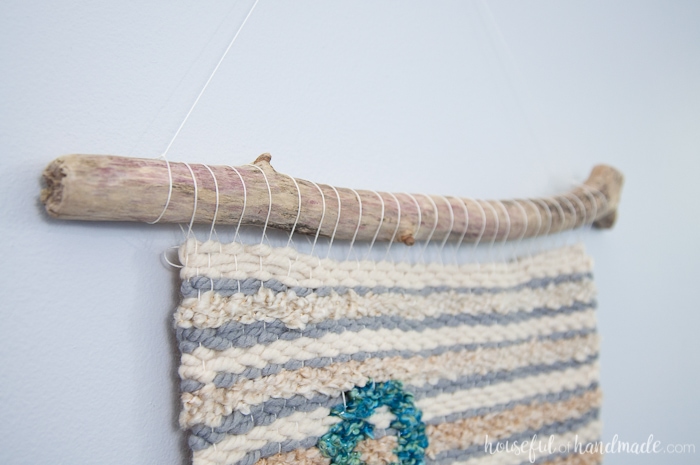
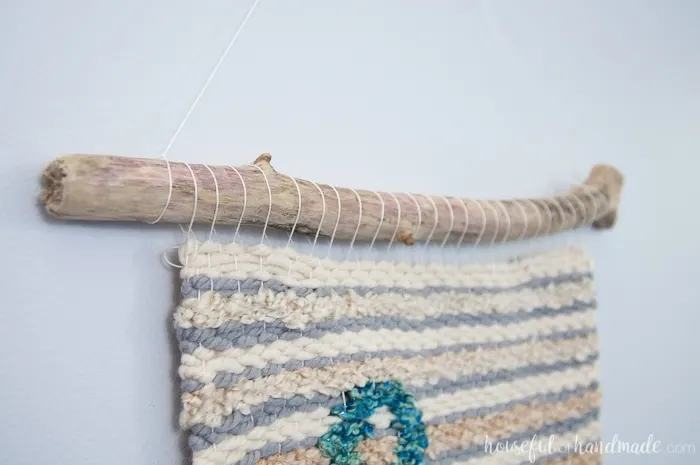
I had two pieces of driftwood from our mountain adventure. I used one to make my driftwood sailboat and kept the other to hang my woven wall art on. I used my shed stick to separate the warp threads opposite of the last weft yarns (just like I would be adding another row). Then I left it in the threads and started pulling them off the nails and sliding them onto my driftwood. It was not super tight, but the weight of the wall hanging holds it nicely.

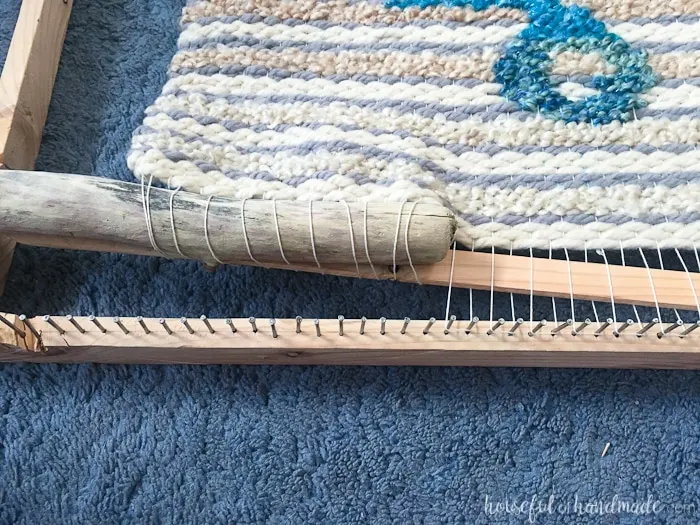
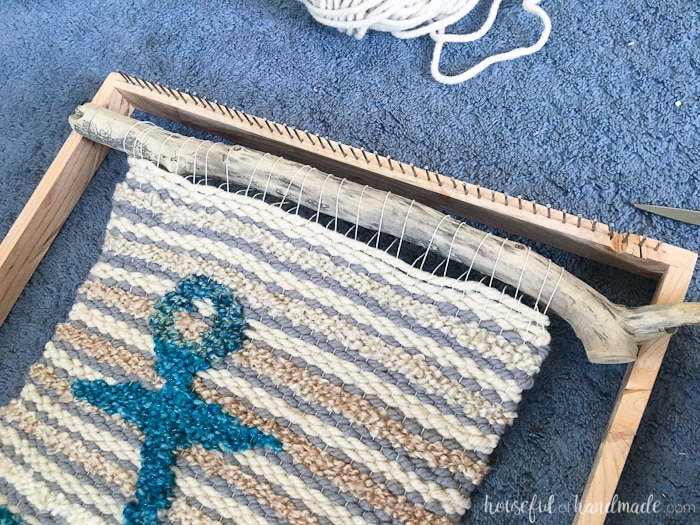

Once the top was off and secure on the driftwood, I was able to quickly pop the bottom warp threads with the tassels off the nails. I did a little stretching and squishing to make sure everything looked smooth off the loom and then tied a bit of string to the top of the driftwood and hung it up on the wall! But it wasn’t done just yet.
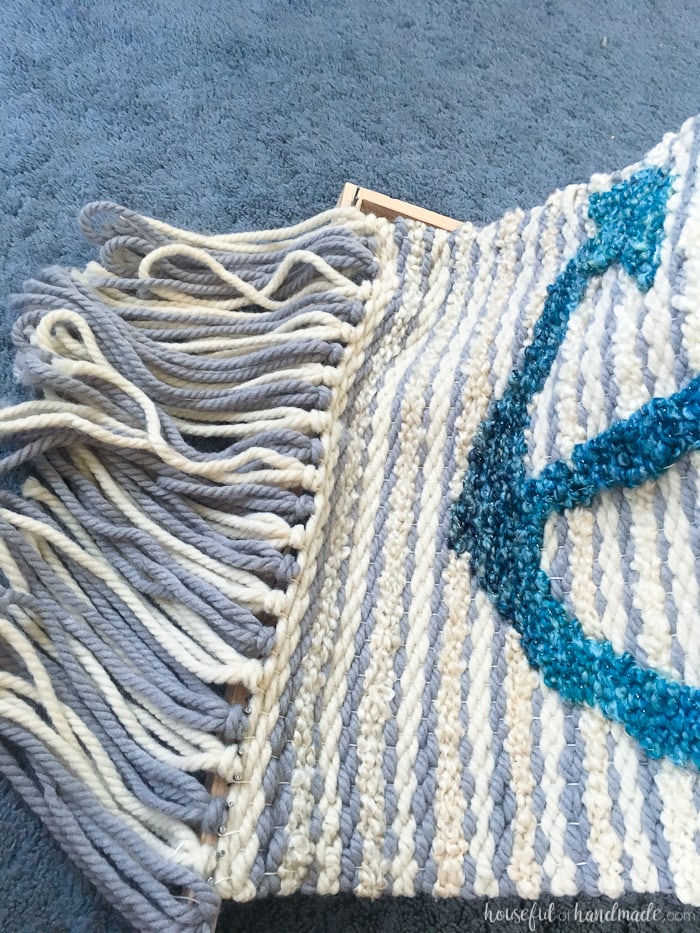
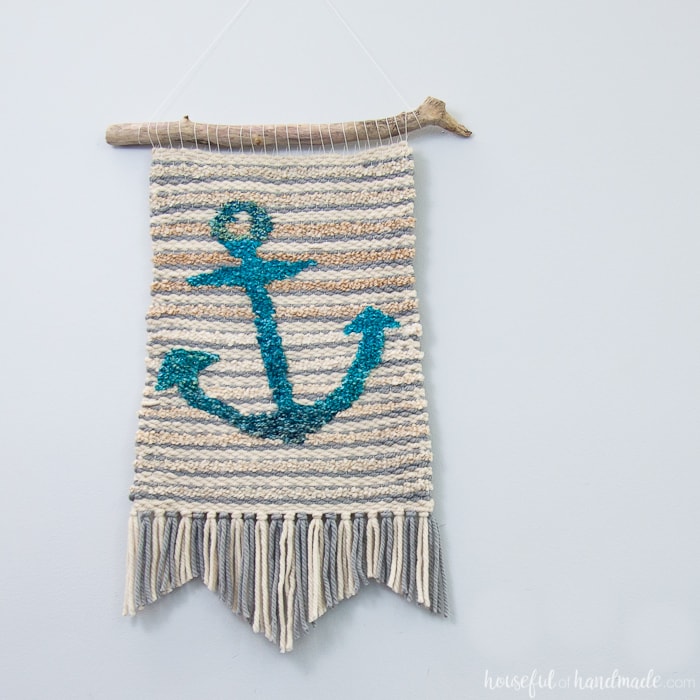
After hanging it on the wall, I trimmed the tassels on the bottom to the shape I wanted. It took a few times of finger combing the tassels and trimming the yarn to get the tassels straight and beautiful. Then it was done!
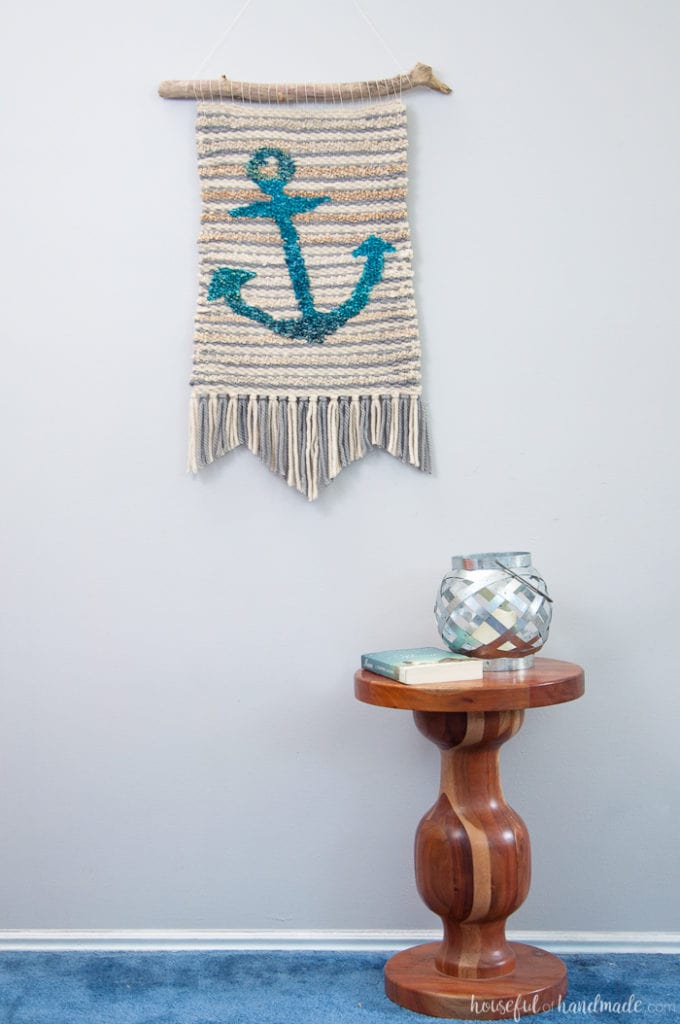

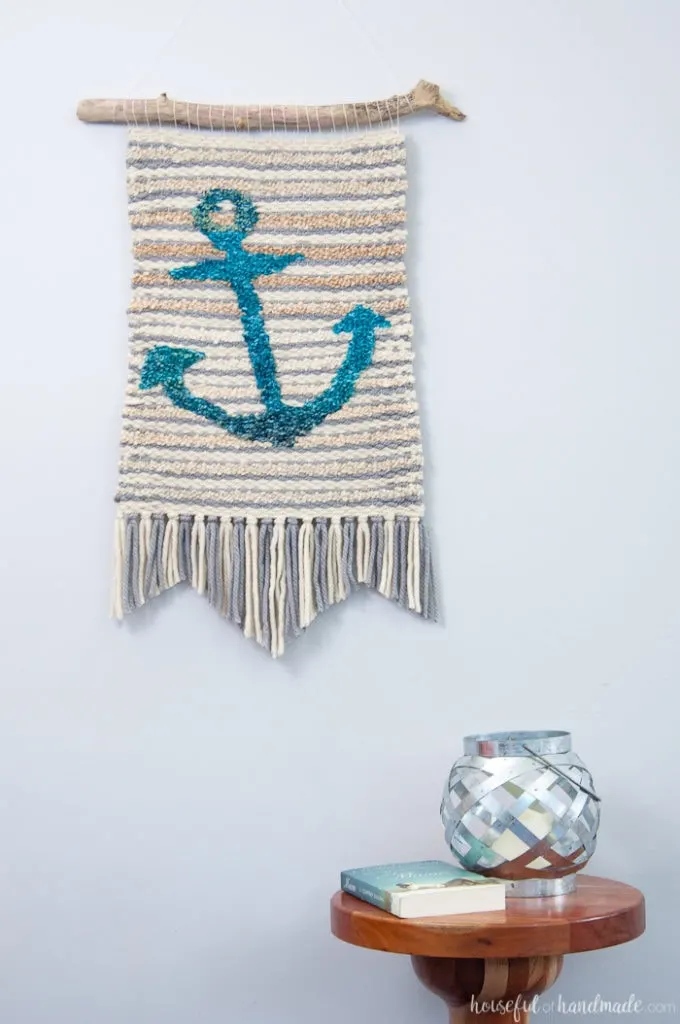
I am really loving the texture and different shape it adds to our living room. And it matches the coastal vibe we have going on right now with all our summer decor.

So have you tried weaving yet? Because yarn is inexpensive, and if you make your own loom, it can be a really budget friendly way of adding art to your home. And you can learn a new technique in case you are ever in a situation where you have to make your own clothes.


Disclosure: I was given yarn from Red Hearts for this project. Even though the product was free, all opinions are 100% my own. This post contains affiliate links. I receive a small commission on products purchased through these links at no additional cost to you. I am only sharing products that I use and believe in.
Vicki Stone
Friday 21st of September 2018
I'm a beginner, working on my first. I never thought or read about going UNDER a pattern and kept tapestry weaving the thing with four colors going each row, going, stopping, switching color, and so on. this is such a good idea! Thank you!!
Kati
Tuesday 9th of October 2018
I'm so glad it was helpful! Good luck on your weavings. It is such a fun art!
kg
Tuesday 6th of June 2017
Holy Moses, your first weaving... don't mind me; I'll just be sitting over here feeling very inadequate. My first weaving was nowhere near display-worthy.
Very nicely done.
Kati
Wednesday 7th of June 2017
Ha h! Thank you. But I took it very slowly (it took over a month and a lot of Netflix). It was so traumatic I haven't attempted another one, but I think I might be ready to try.
Rebecca
Tuesday 24th of January 2017
I can't believe that was your first attempt at weaving. It looks awesome! I've been wanting to try weaving for a while, but I wasn't quite sure how to go about it. Thanks for the great tutorial.
Kati
Monday 6th of February 2017
Thanks Rebecca! It is time consuming, but so much fun and really not too hard especially once you get the hang of it.
Marie
Tuesday 9th of August 2016
Omgosh, I absolutely love this! It turned out beautiful! I think you have converted me. I need to try out weaving now. Thanks for sharing your project with us at Merry Monday this week!
Kati
Wednesday 10th of August 2016
You should definitely try it! It is so much fun.
Melanie - Bellenza
Saturday 6th of August 2016
What a pretty piece! Love the driftwood--you never know what you can find during a mountain trip!
Kati
Wednesday 10th of August 2016
I know right! I love mountain adventures and even better that I can find free crafting supplies.