Growing up the swings were always my favorite at the playground. And I still love them as an adult. The simple back-and-forth is so relaxing.
So I partnered with Kreg Tools to use their new Pocket Hole Jig XL to build a sturdy hammock chair stand for me to swing in.
The new XL pocket hole jig allows you to make pocket holes in 4×4 and 2×4 lumber. Perfect for large outdoor projects like this one.
This post may contain affiliate links. As an Amazon Associate I earn from qualifying purchases. Click here to read my full disclosure policy.
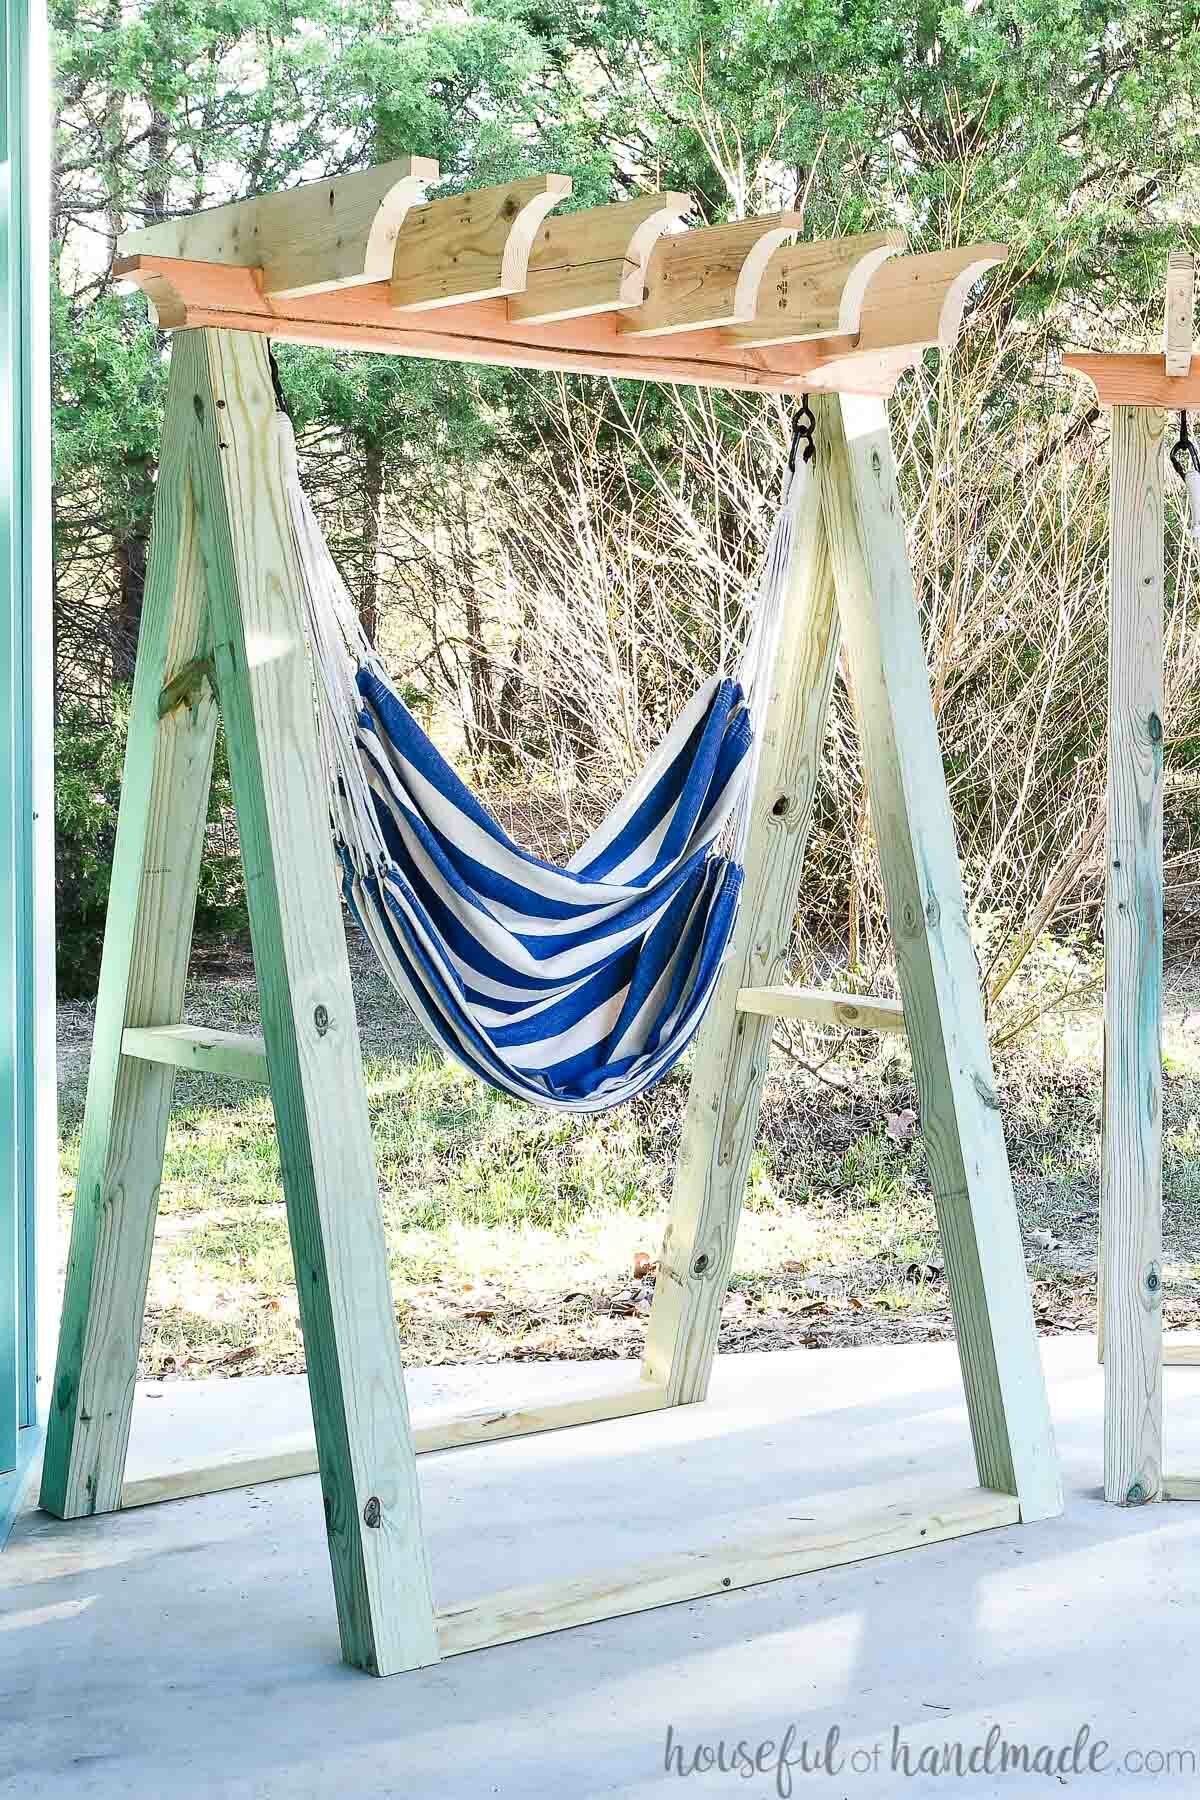
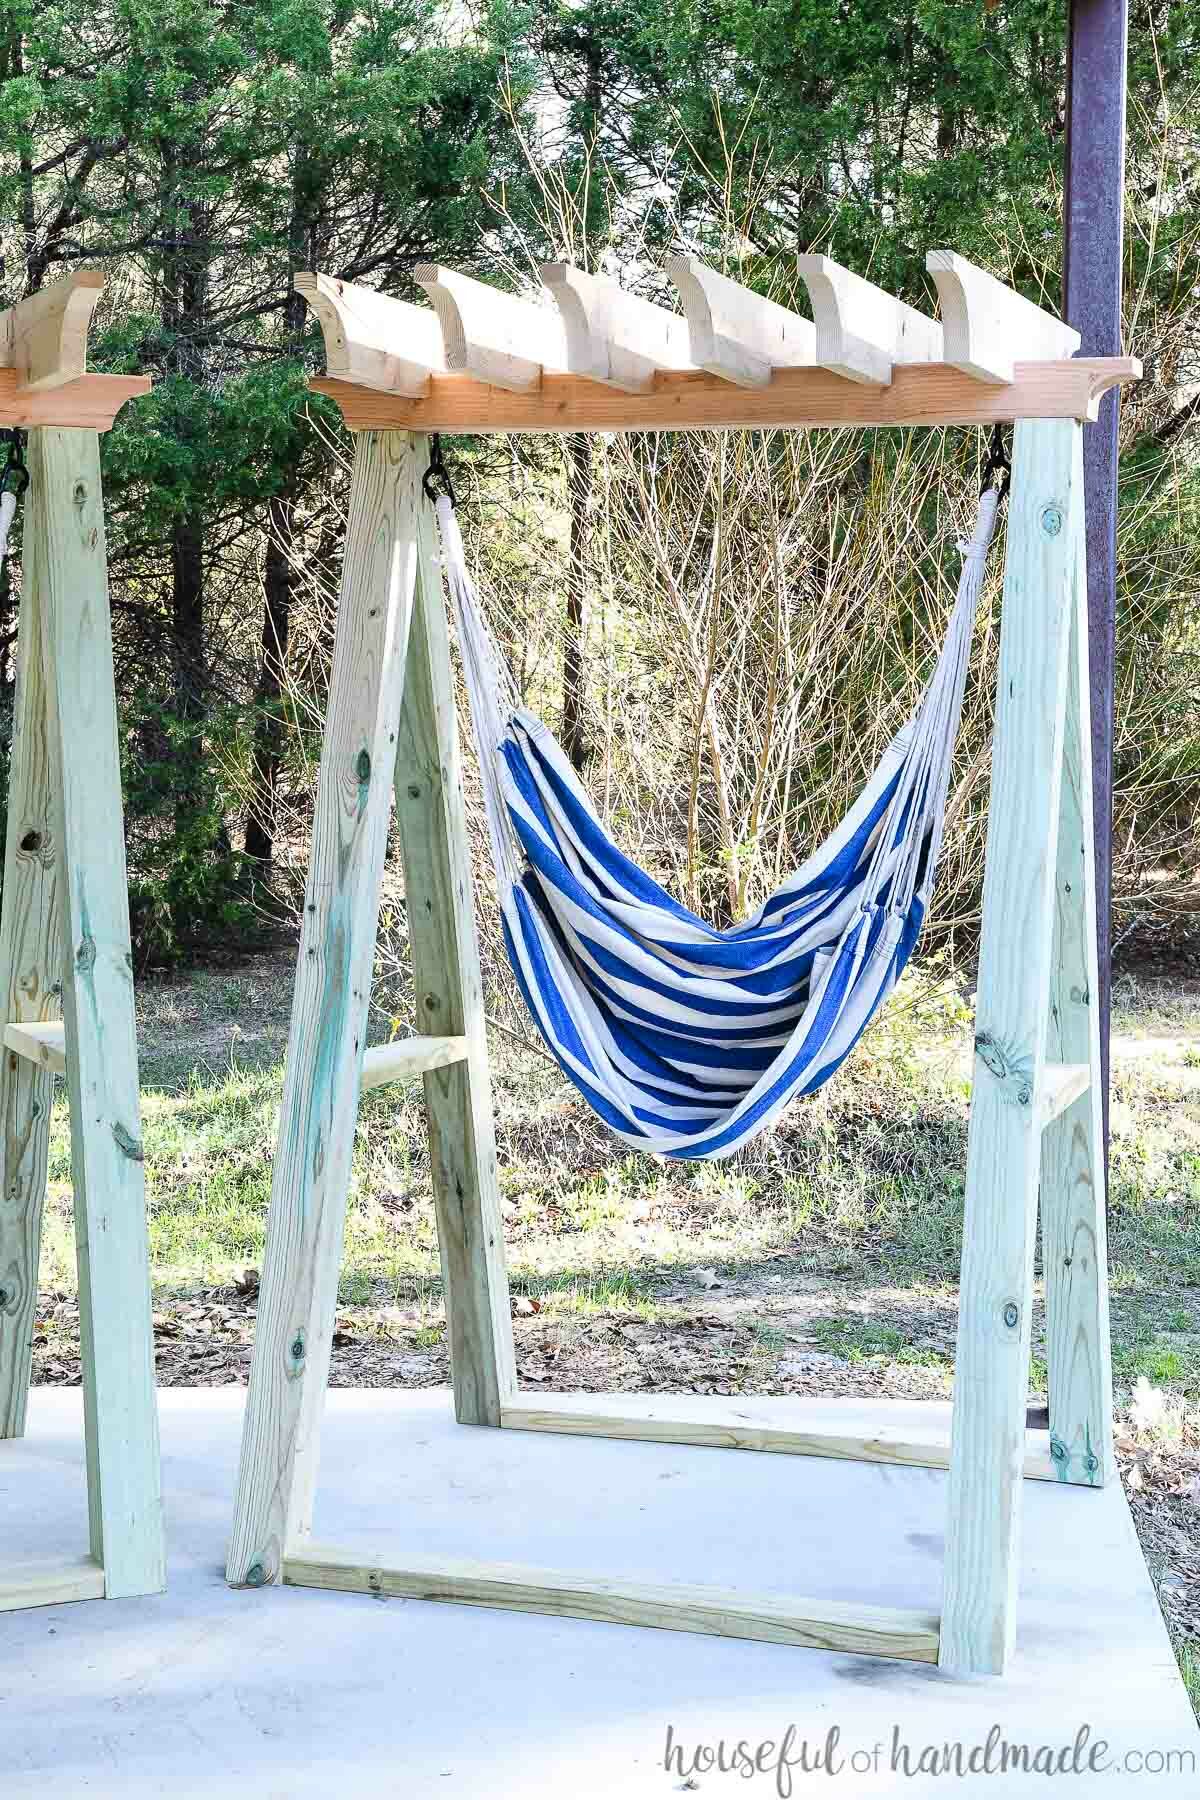
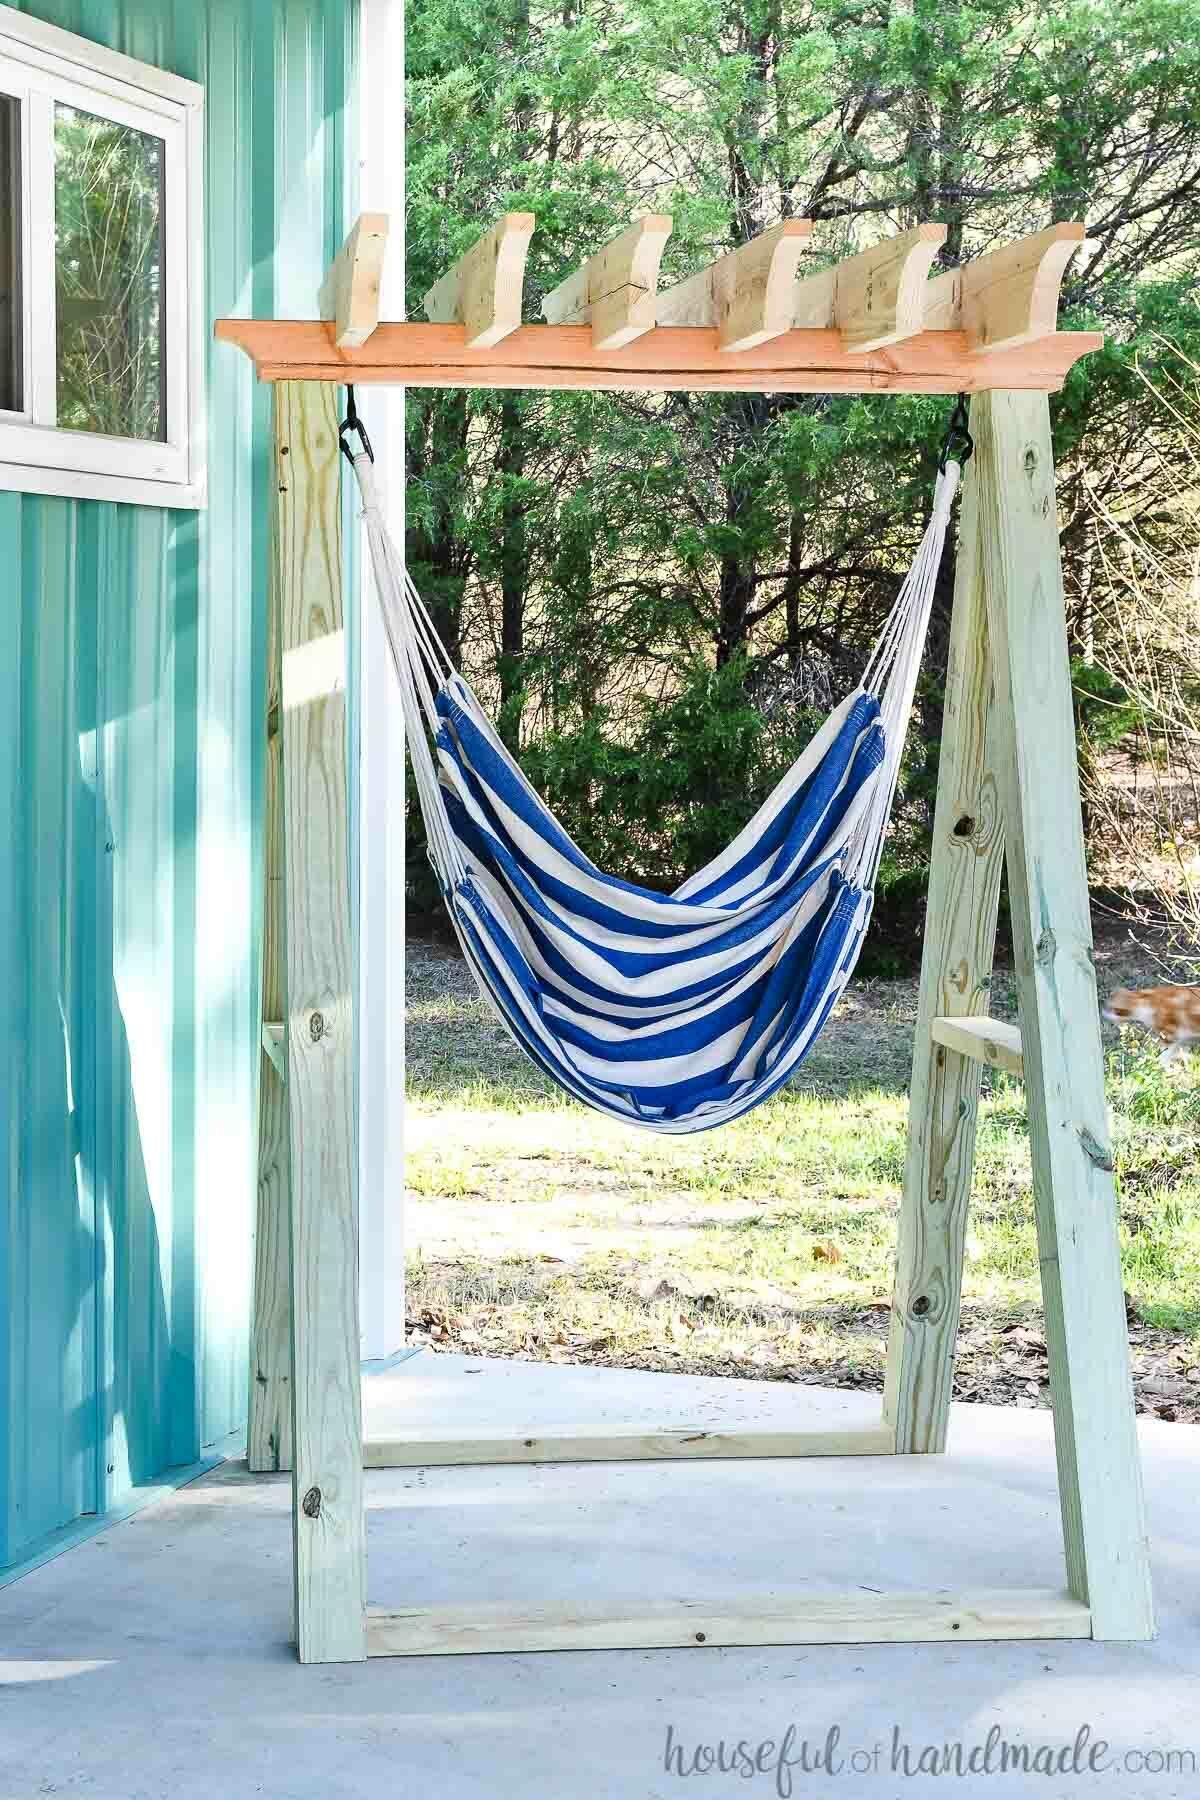
And to make my hammock swing stand even more perfect for summer, I added a pergola top for shade on those hot days. If you need me, you will find me swinging!
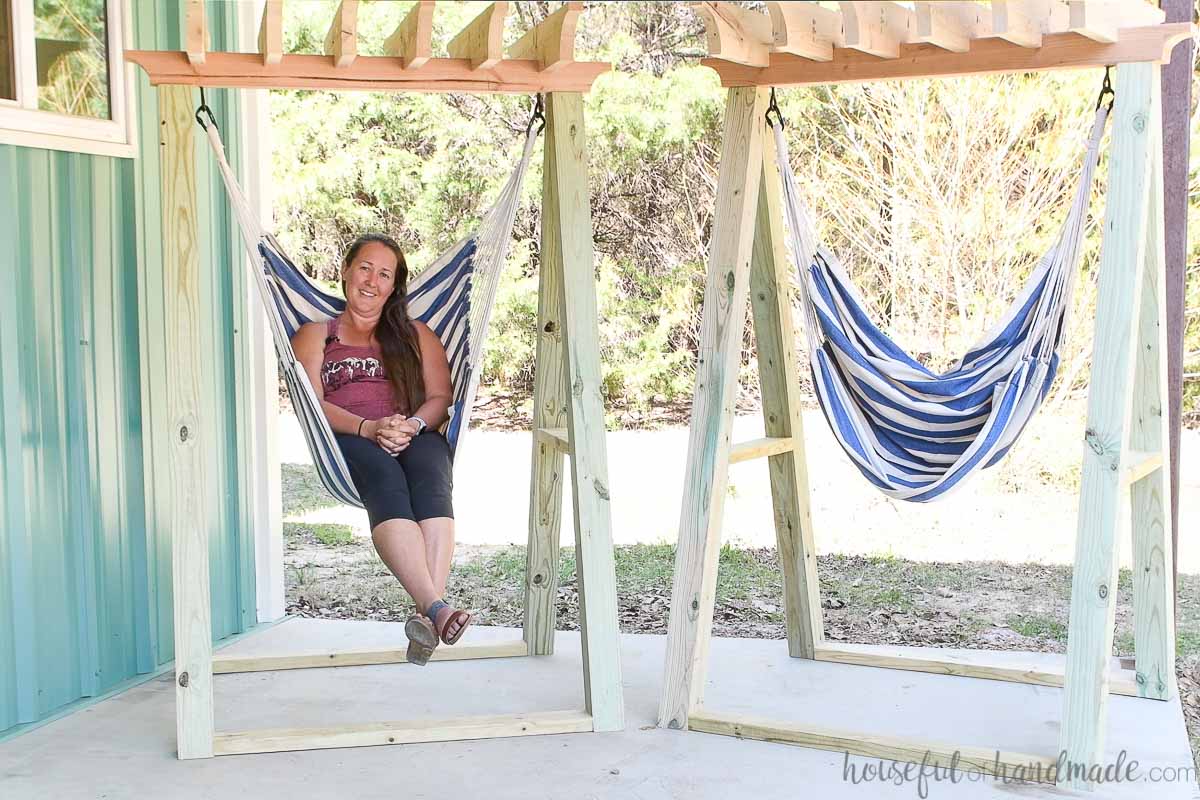
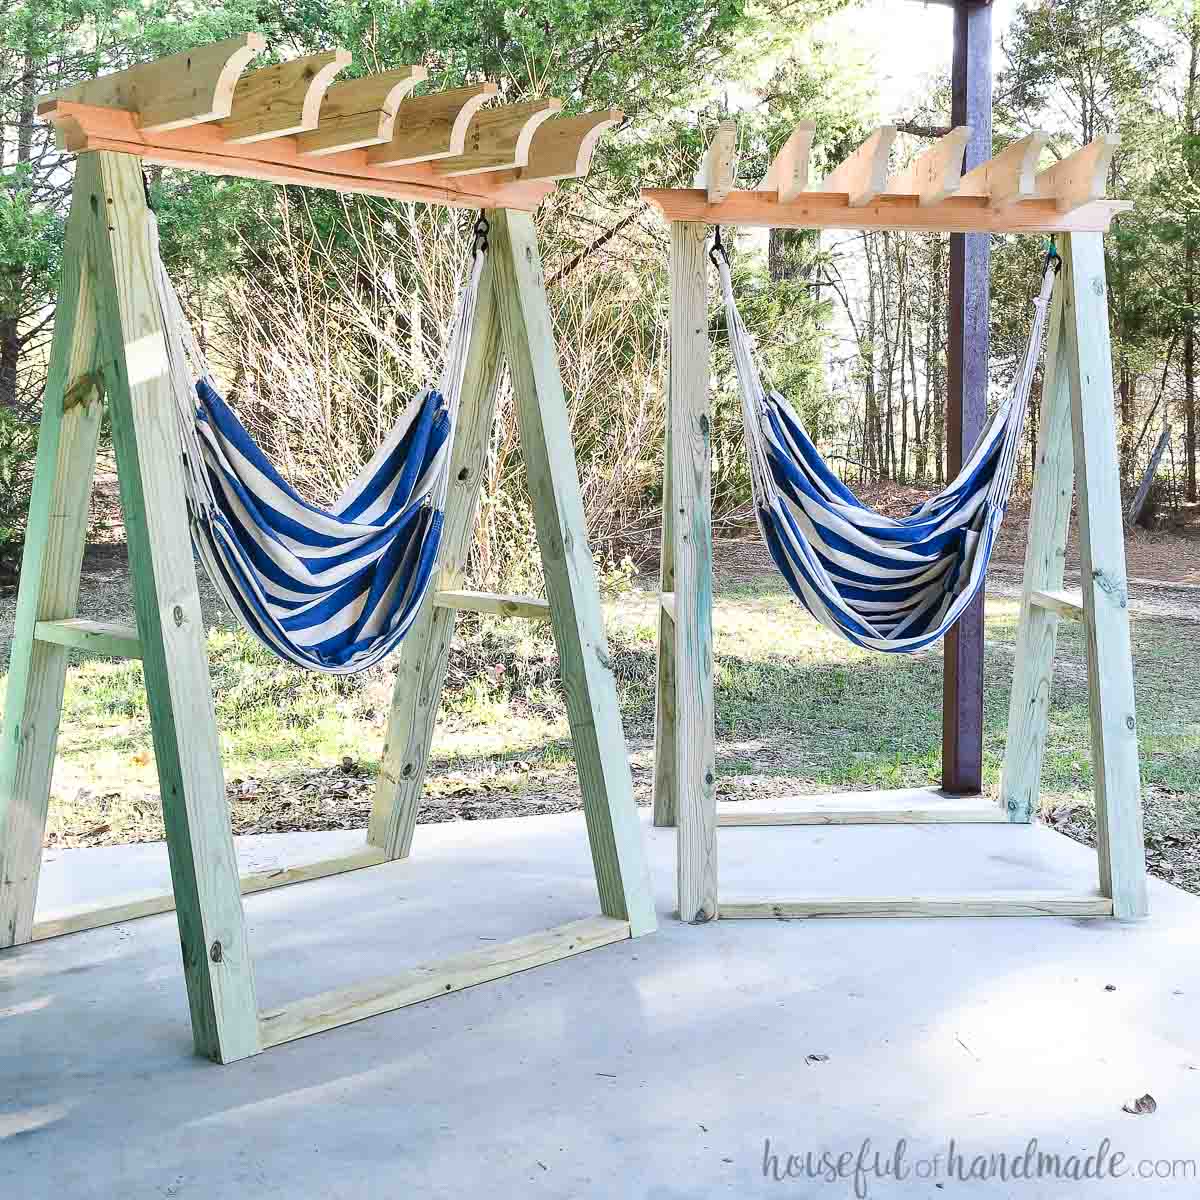
Hanging Chair with Stand
This hanging chair stand has a 39″ wide opening. You can use it with any hammock chair that has loops on both side and can be removed from the pole (if there is one). This is the inexpensive (but sturdy) hammock I used.
The hanging chair is then hung on the A-frame stand at two points so it does not twist or spin. Instead it creates a cozy swing.
It’s great because you can place your hanging chair facing the direction you want and enjoy the view. Just sit back and relax instead of fighting it from twisting and turning.
Free standing hammock chair
The hammock chair stand creates a free standing hammock chair you can use anywhere. Place one on your porch or build them for the yard.
No need for a tree branch or roof rafters in the exact spot you want to swing!
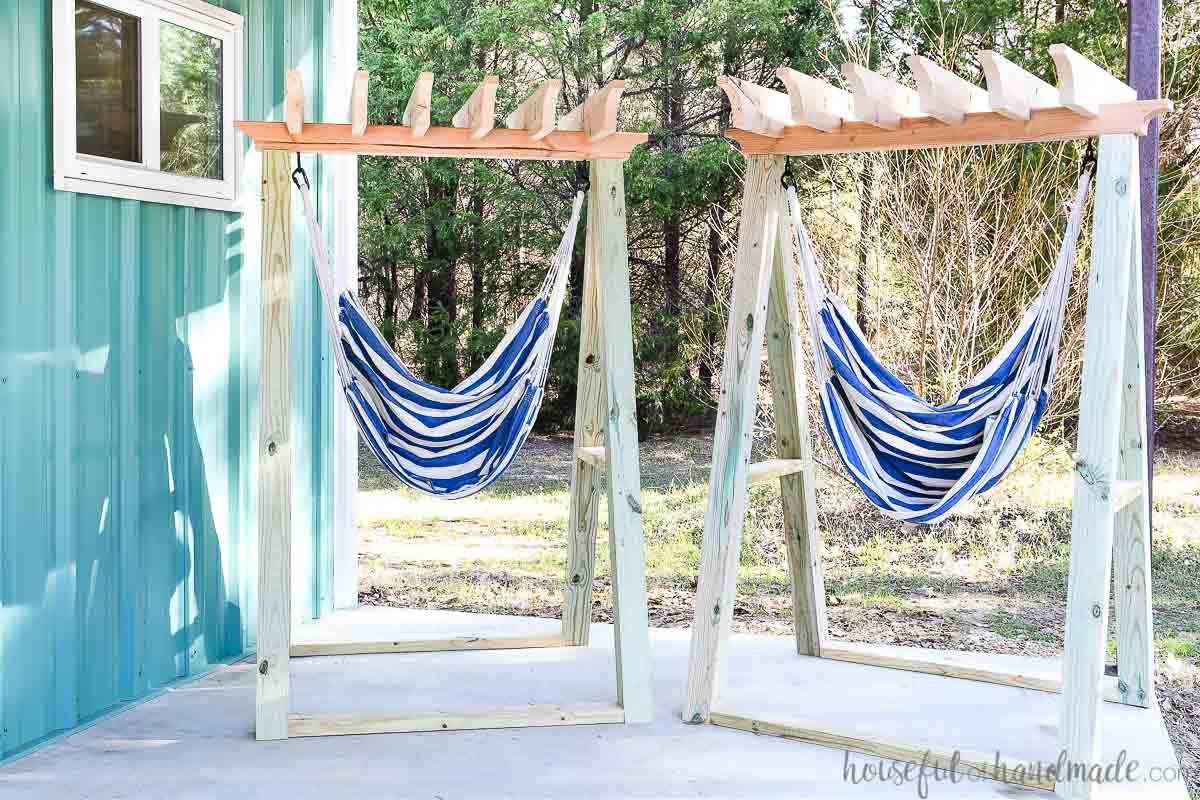
And since the hammock chair is free standing anywhere you place it, the addition of the pergola rafters makes it even better.
The pergola rafters create shade throughout the day as the sun moves around the sky. The only time you won’t have too much shade is when it’s directly above you, but you will still have some.
The pergola top also creates symmetry in the design of the free standing hammock chair stand. It balances the top with the A-frame base.
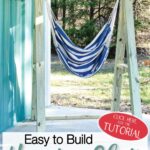
Easy to Build Stand
This gorgeous hammock swing stand is easy to build thanks to the new Kreg Pocket Hole Jig XL.
Being able to create sturdy joints in 4×4 lumber makes is easy to build strong outdoor furniture.
The Pocket Hole Jig XL looks just like the Pocket Hole Jig 310 or 320, but bigger! You can see how to use the Kreg 300 Series Pocket Hole Jig here. It’s super easy.
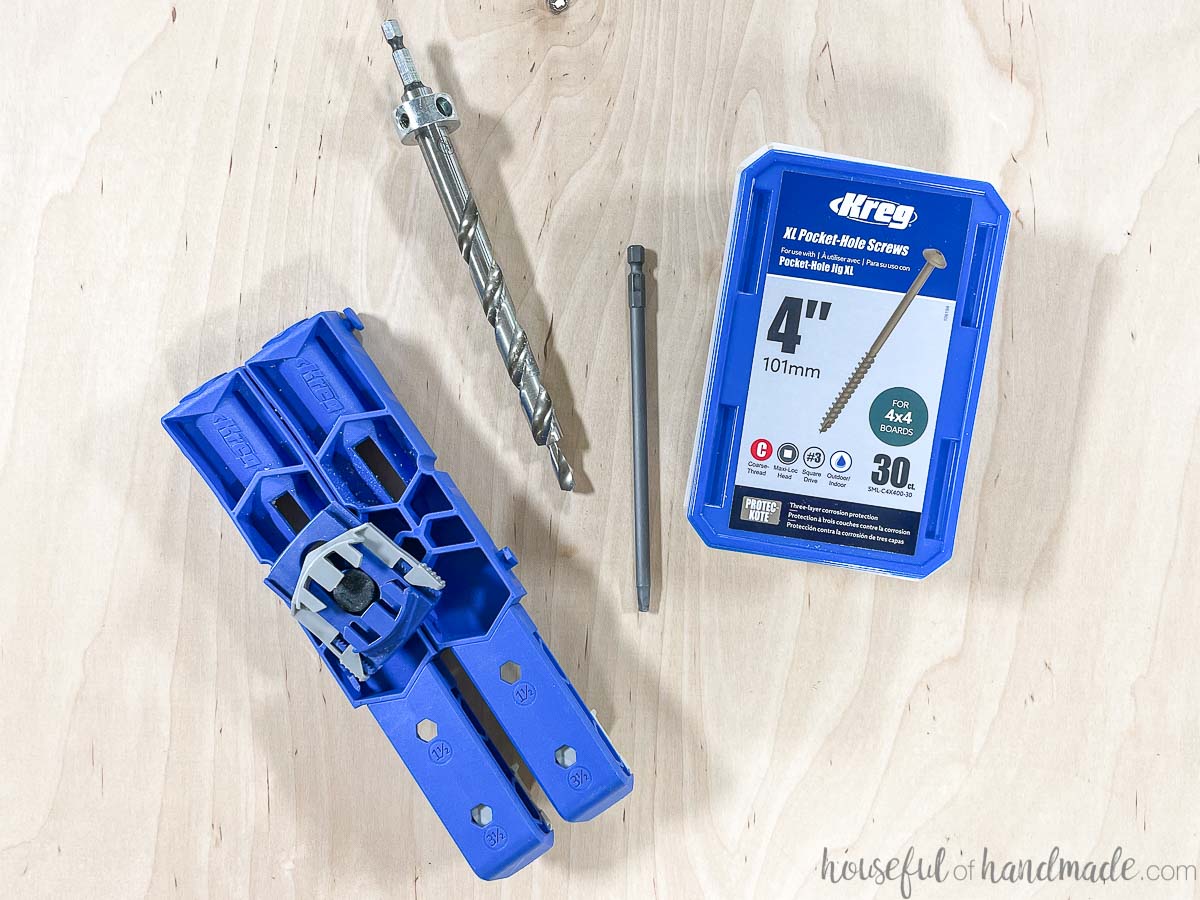
With the 4×4 boards, you will use 4″ pocket hole screws (also just released from Kreg).
If using the XL jig with 2×4 boards you will want to choose the 2 1/2″ long XL screws.
The screws are extra big to hold together larger lumber. This created a sturdy hammock chair stand so I don’t have to worry about it’s strength. Instead I can just enjoy it!
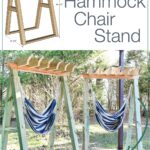
How to Build a Hammock Chair Stand
Tools & Materials
Recommend Tools:
- Pocket hole jig XL
- You can use the XL jig for all the pocket holes in this project, but I also used standard sized 320 jig for the 2×4 lumber.
- Miter saw
- I recently upgraded to this larger sliding miter saw (watch for it to go on sale), but all my projects before were built with this inexpensive miter saw that I loved.
- Circular saw
- Hand saw
- Flush cut saw
- Drill
- Impact driver (optional, but I love not having to switch bits with the drill)
- Jig saw or Bandsaw
- Chisel
- Clamps
Supplies:
- Printable PDF Woodworking Plans
- Lumber-
- (4) 4×4 boards (for ground contact if putting on the grass), 6′ long
- (1) 4×4 board, 6′ long
- (1 1/2) 2×4 boards (for ground contact if putting on the grass), 8′ long
- (2) 2×6 boards, 8′ long
- 4″ long XL pocket hole screws
- 2 1/2″ long pocket hole screws
- Heavy duty eye screws
- Heavy duty carabiners
- Hammock chair
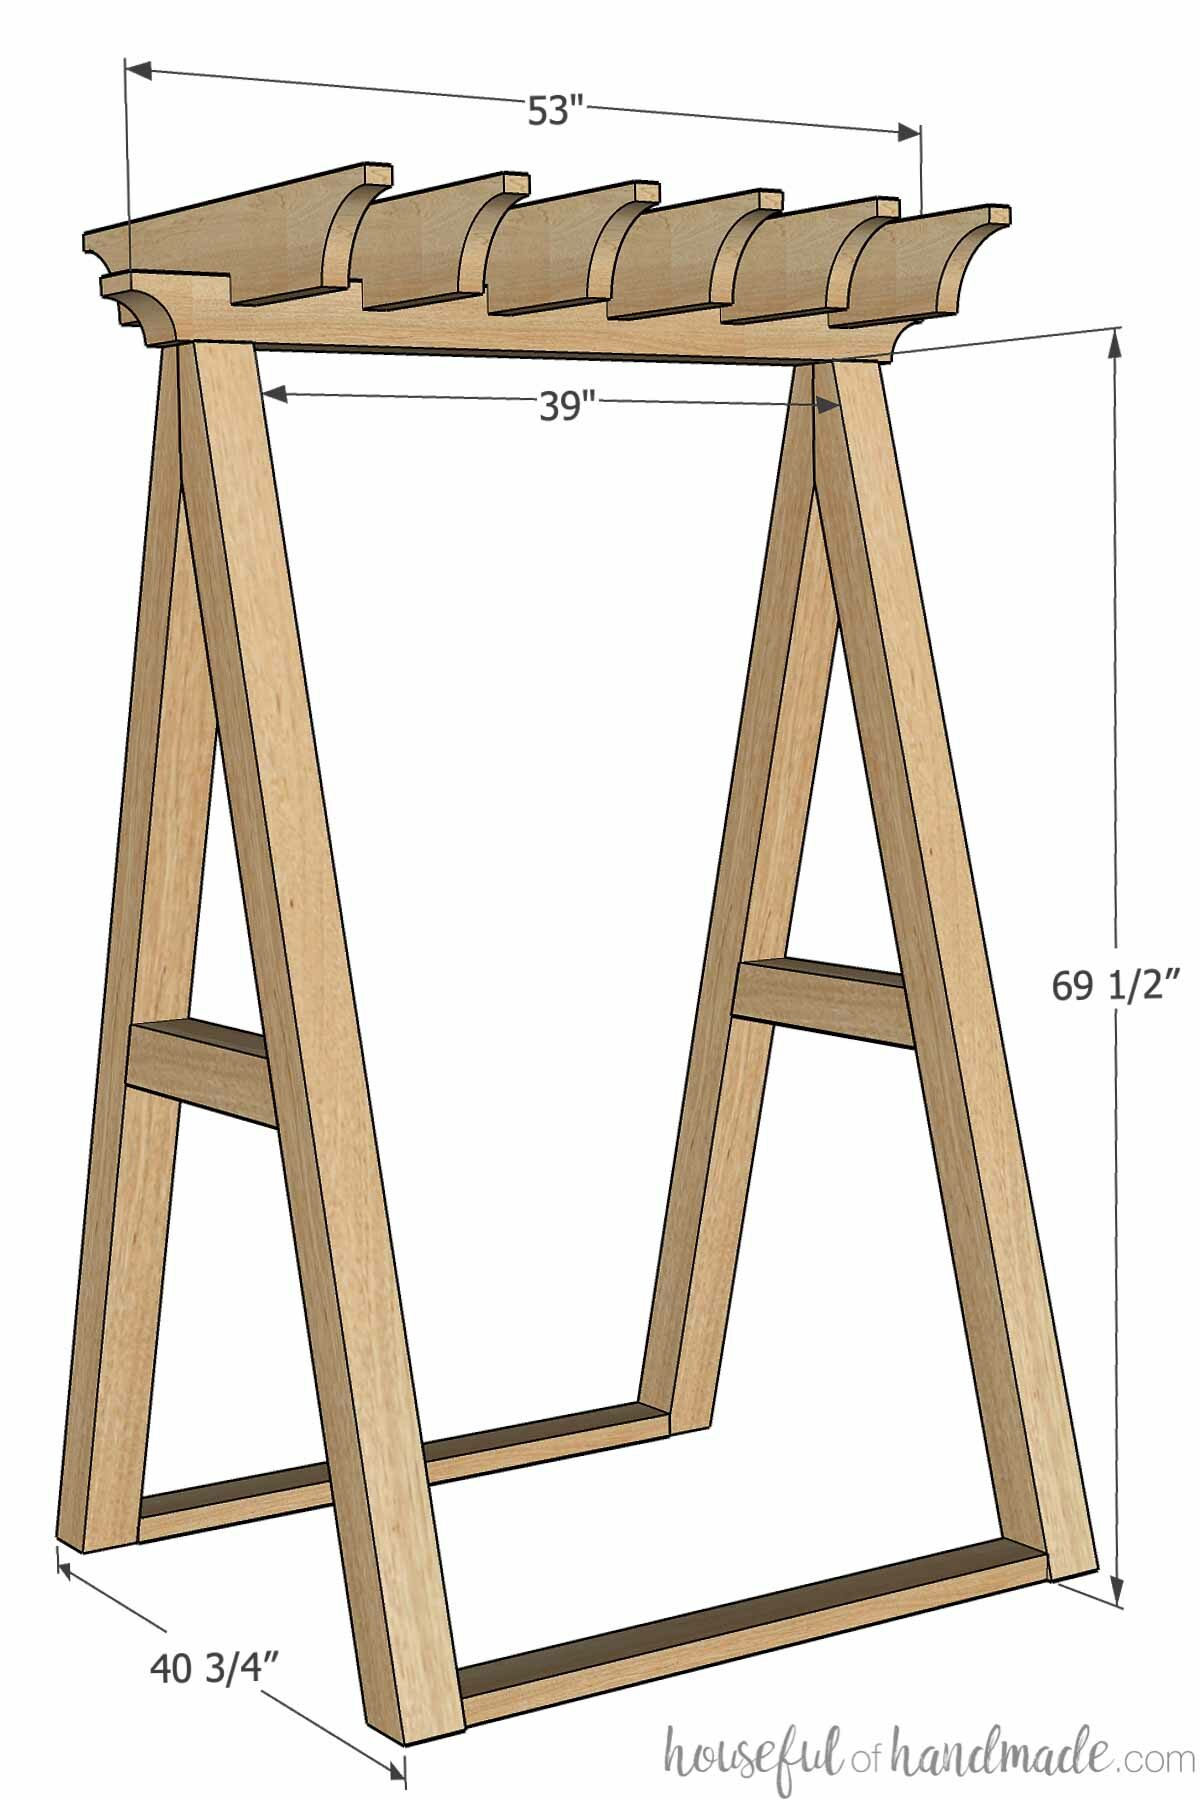
Overall Dimensions
The finished hammock chair stand is 53″ wide by ~40″ deep and 77″ tall.
The area for the hammock to fit inside is 39″ wide and 69 1/2″ tall.
Cut List
Cut out the pieces according to the easy-to-read table in the PDF plans.

STEP 1- Cut angles in leg boards
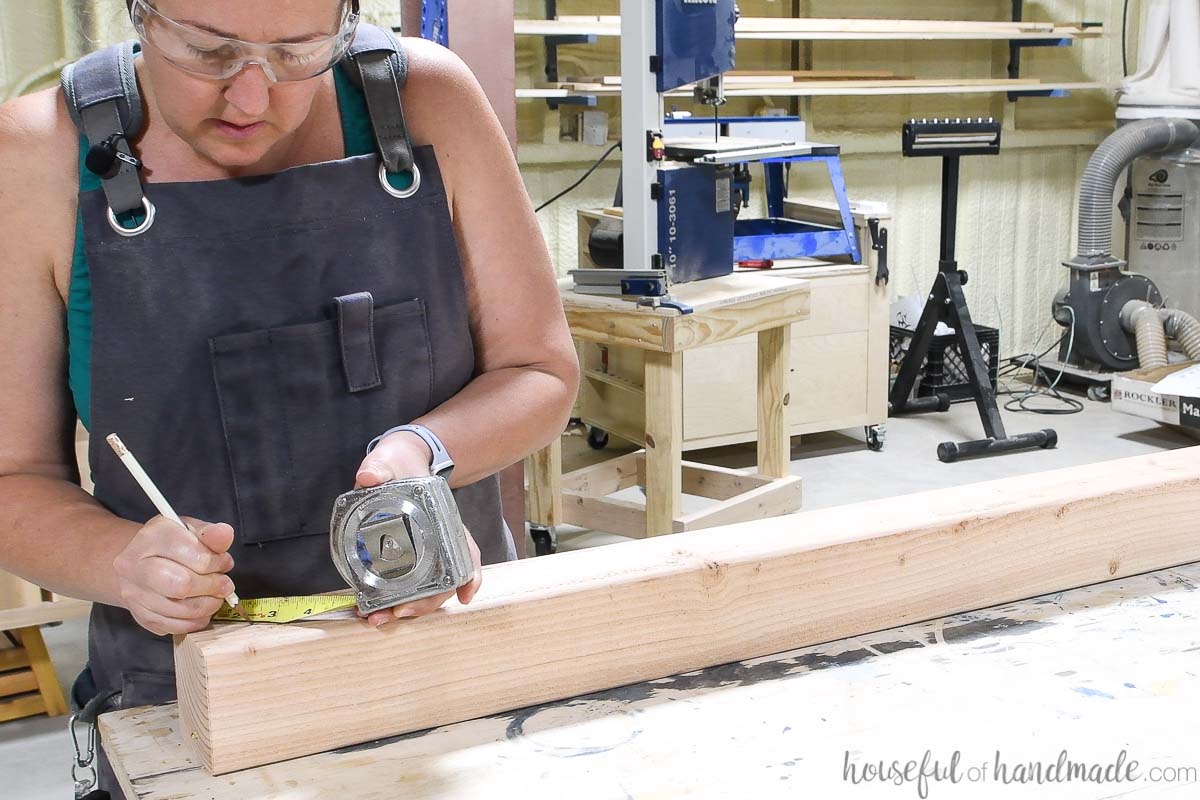
Cut the leg posts at a 15 degree angle.
Make sure all the leg boards are the exact same size when you cut the angles.

Place two legs on your workbench so they mirrored and the angle is correct at the bottom to lay flat on the ground in an A shape.
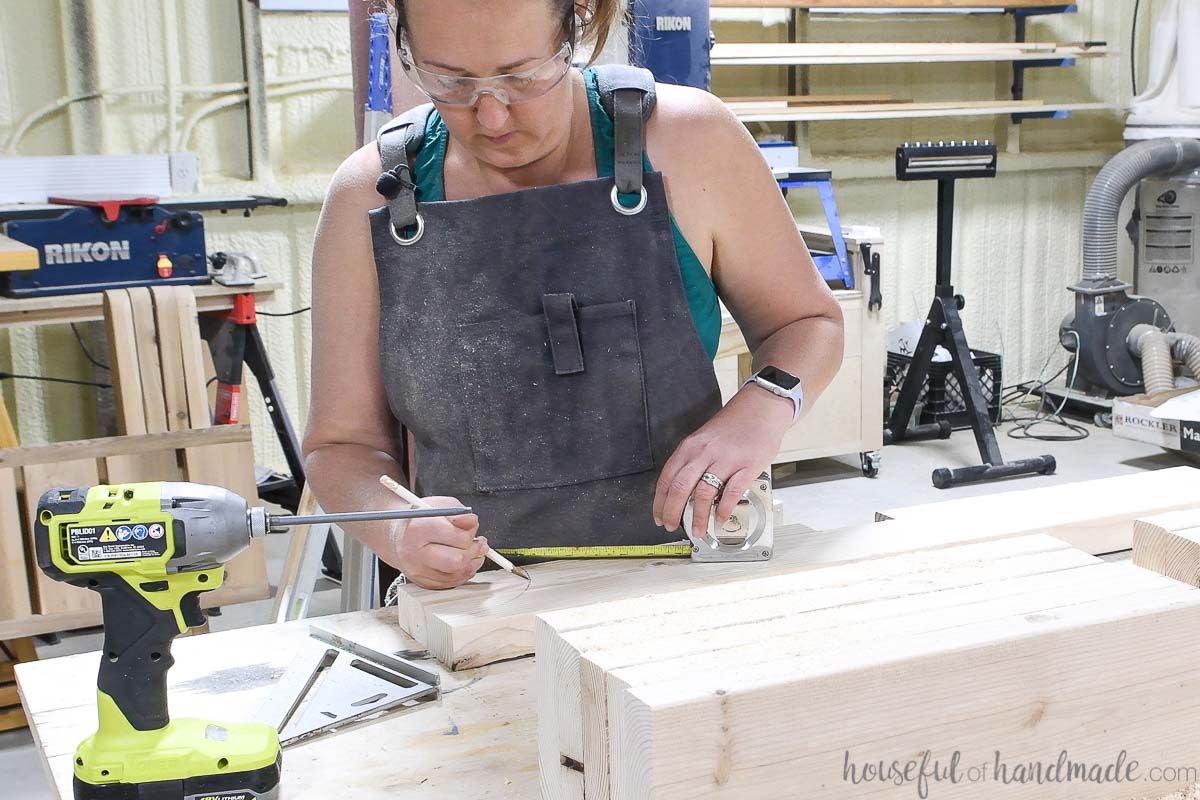
On the top of each board, measure in from the outside 1 3/4″. Using a square, draw a line from this point at a 90 degree angle from the 15 degree angle to the edge of the board.
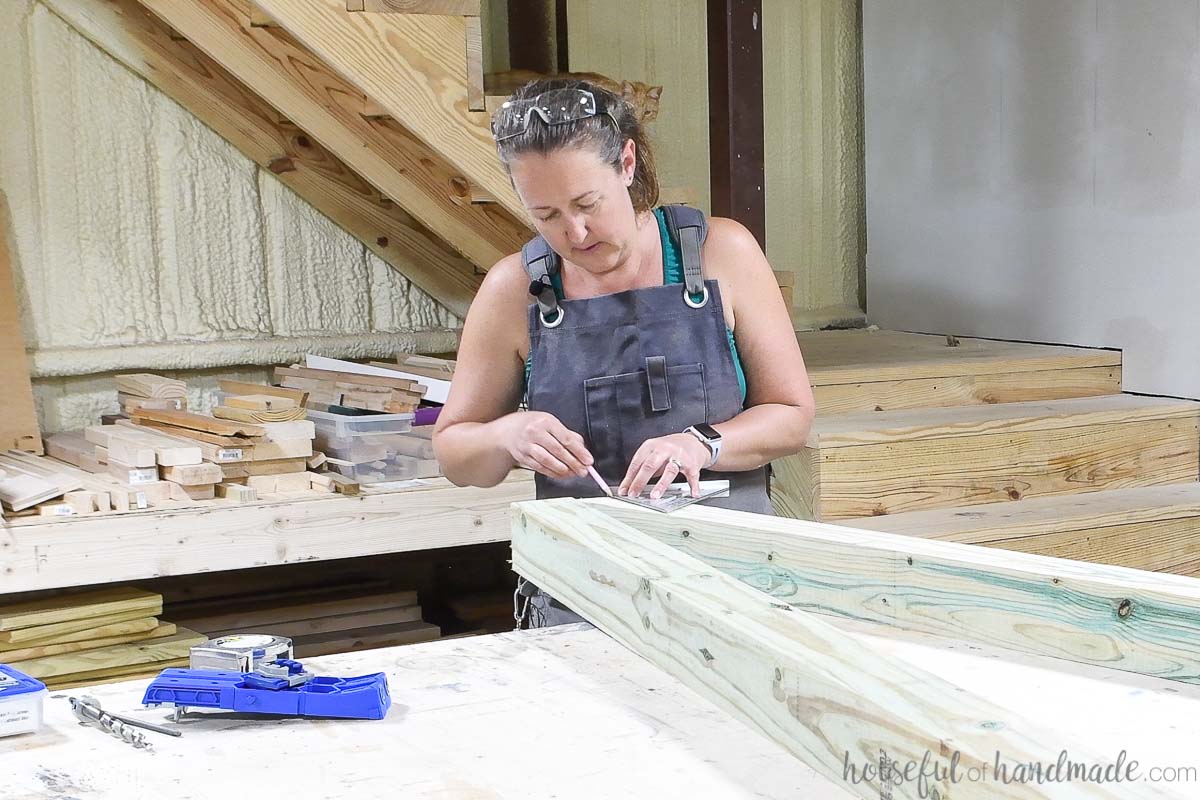
Set your circular saw to cut as deep as it can (it will not cut all the way through). Cut along the line.
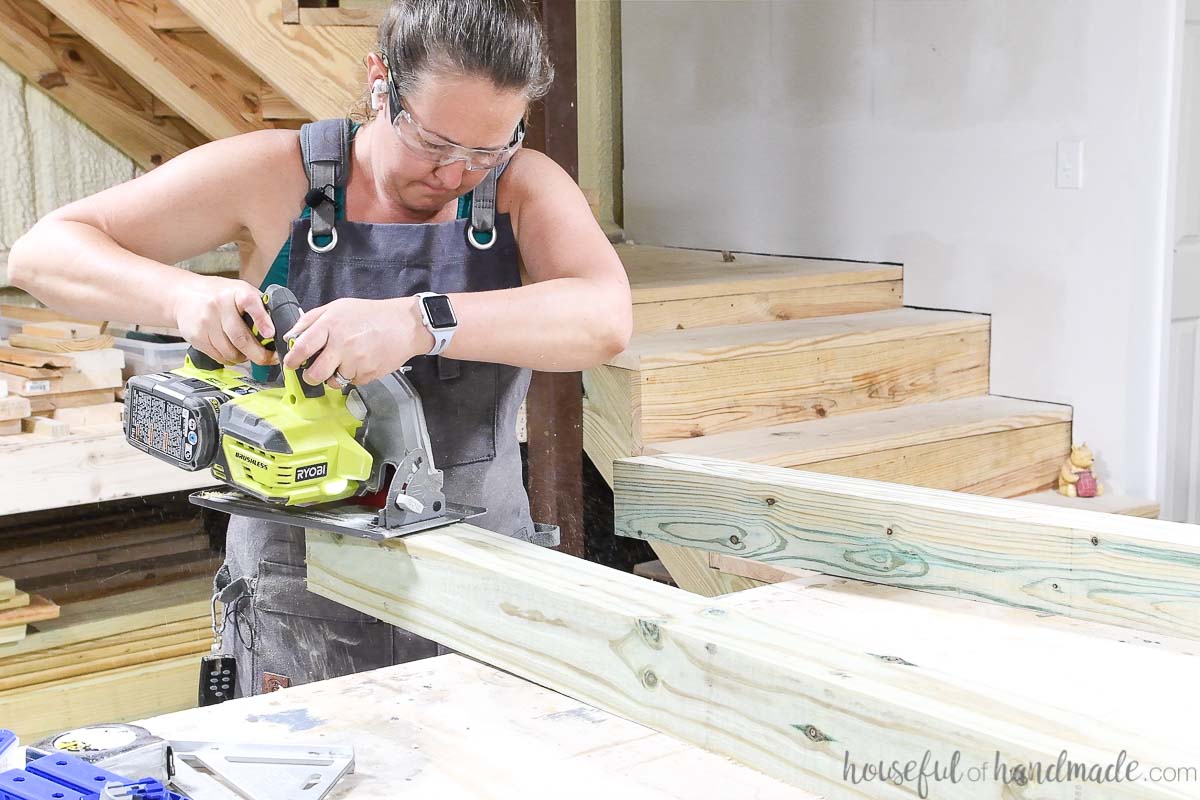
Then finish cutting through the rest of the board with a hand saw.
I used a saw that came from a miter box as deep as it would go. Then finished it off with a flush cut saw.
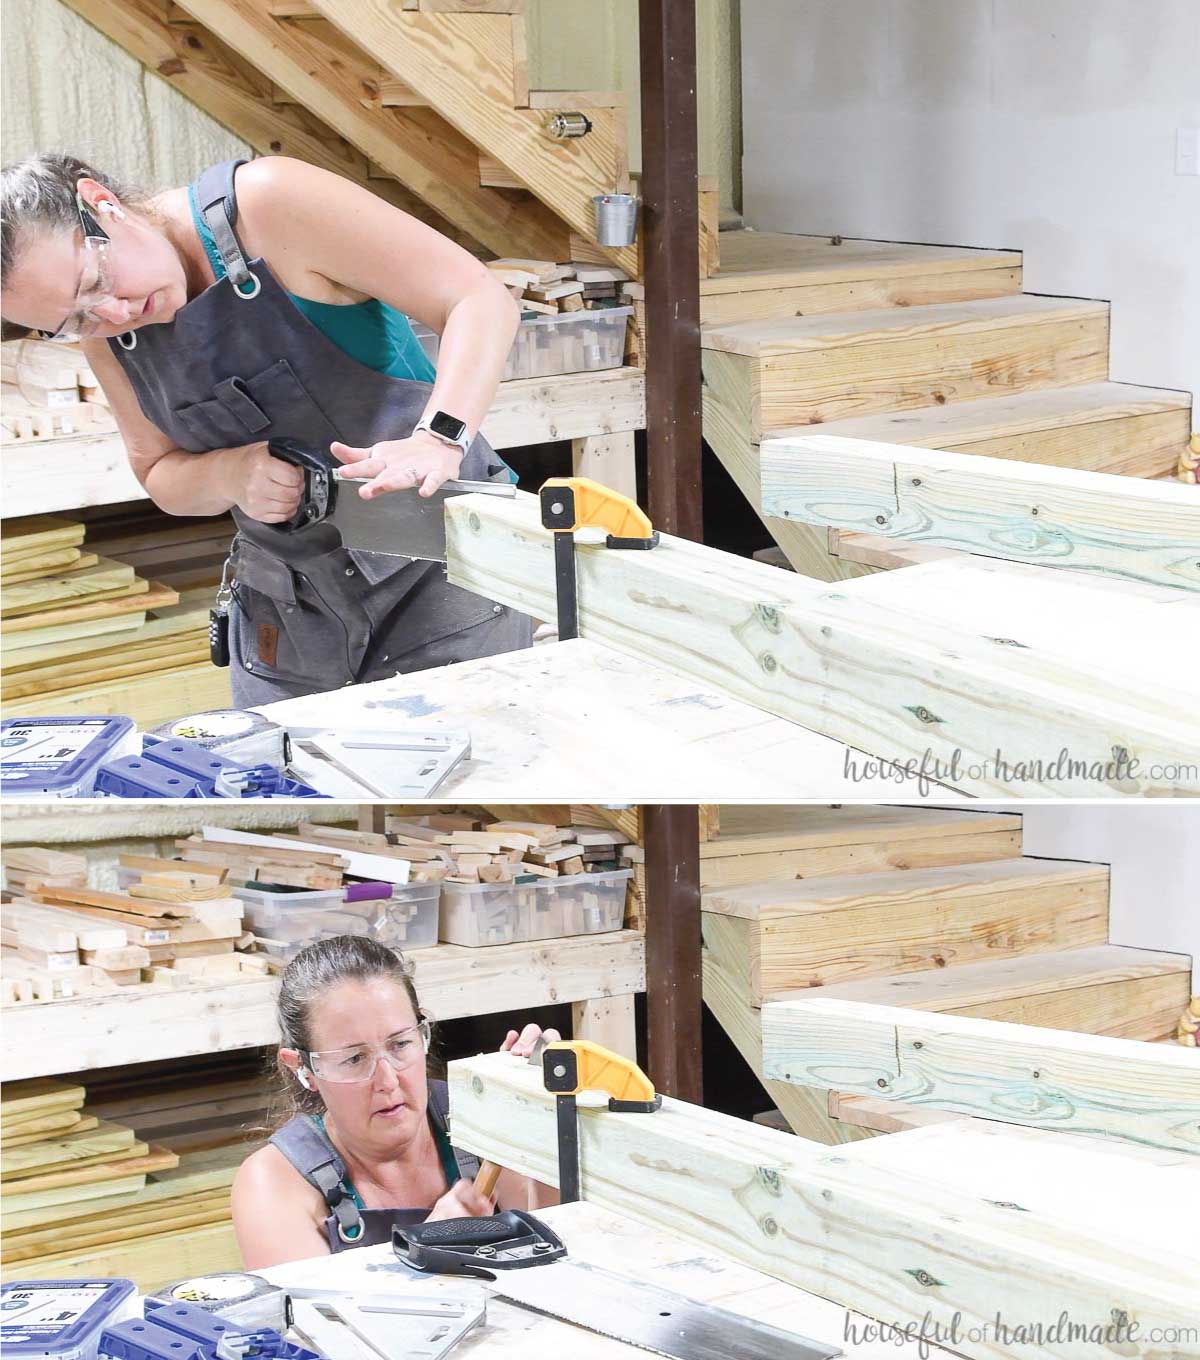
Repeat for the rest of the legs. Make sure to mirror the legs before cutting so your angles are correct.
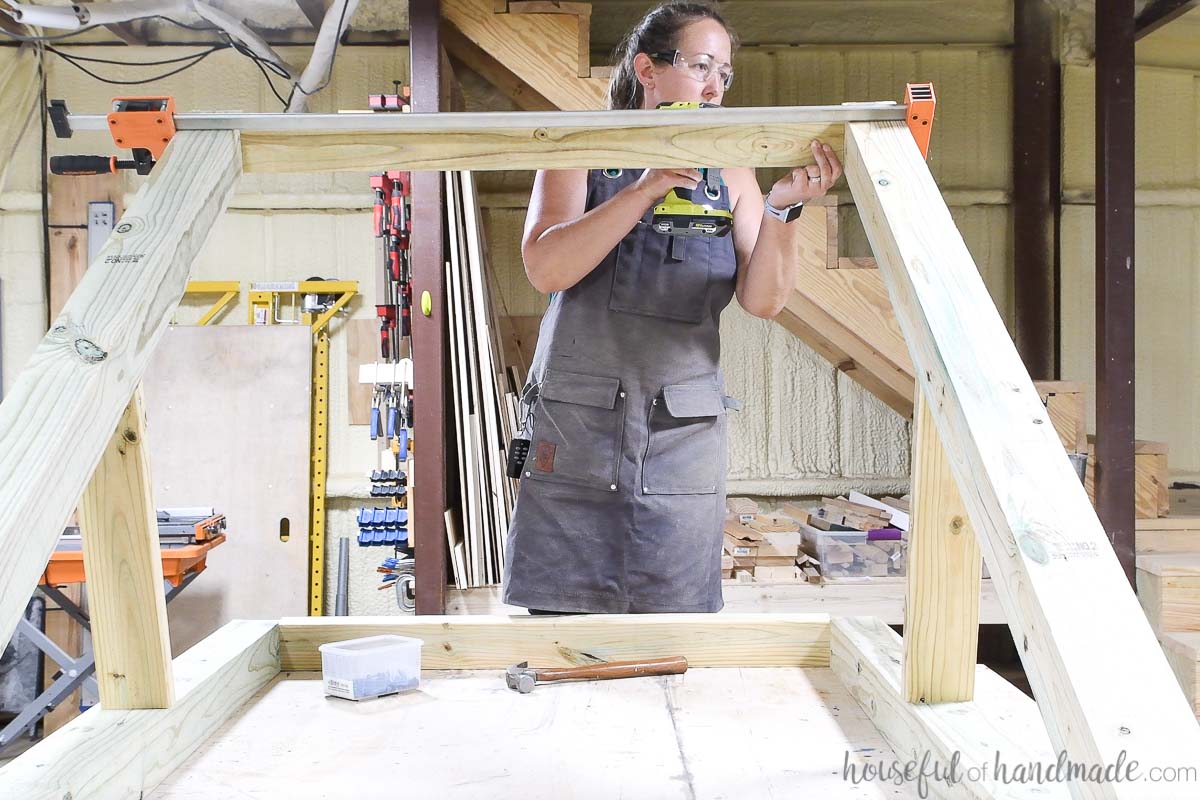
STEP 2- Build the sides
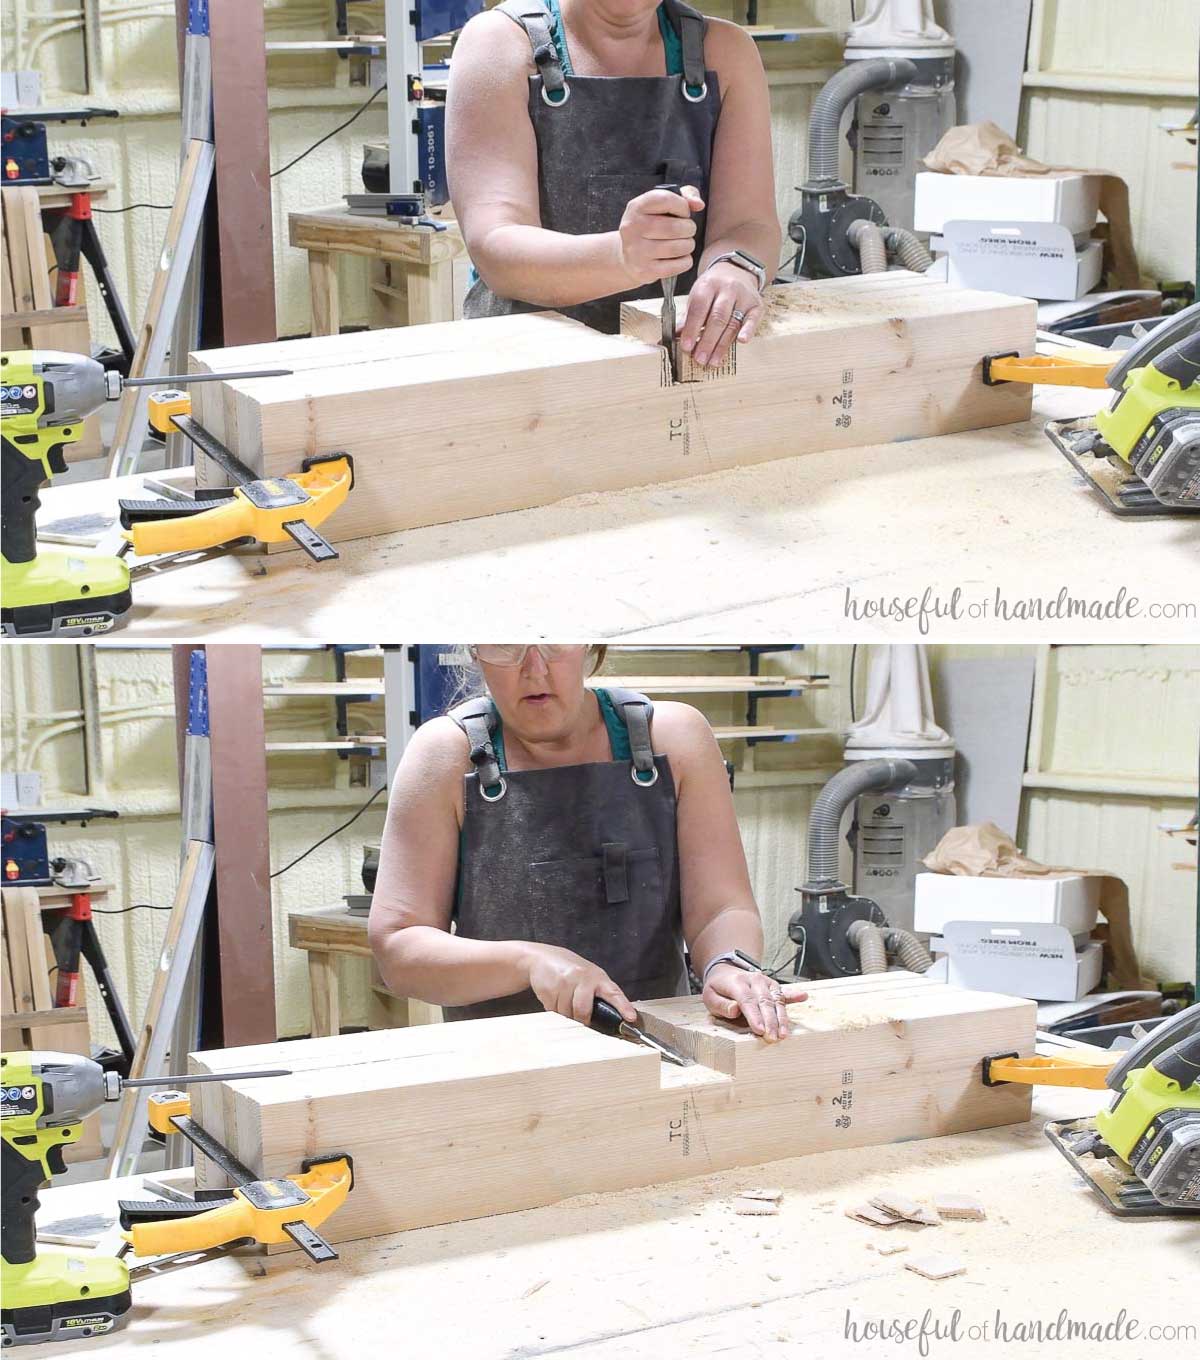
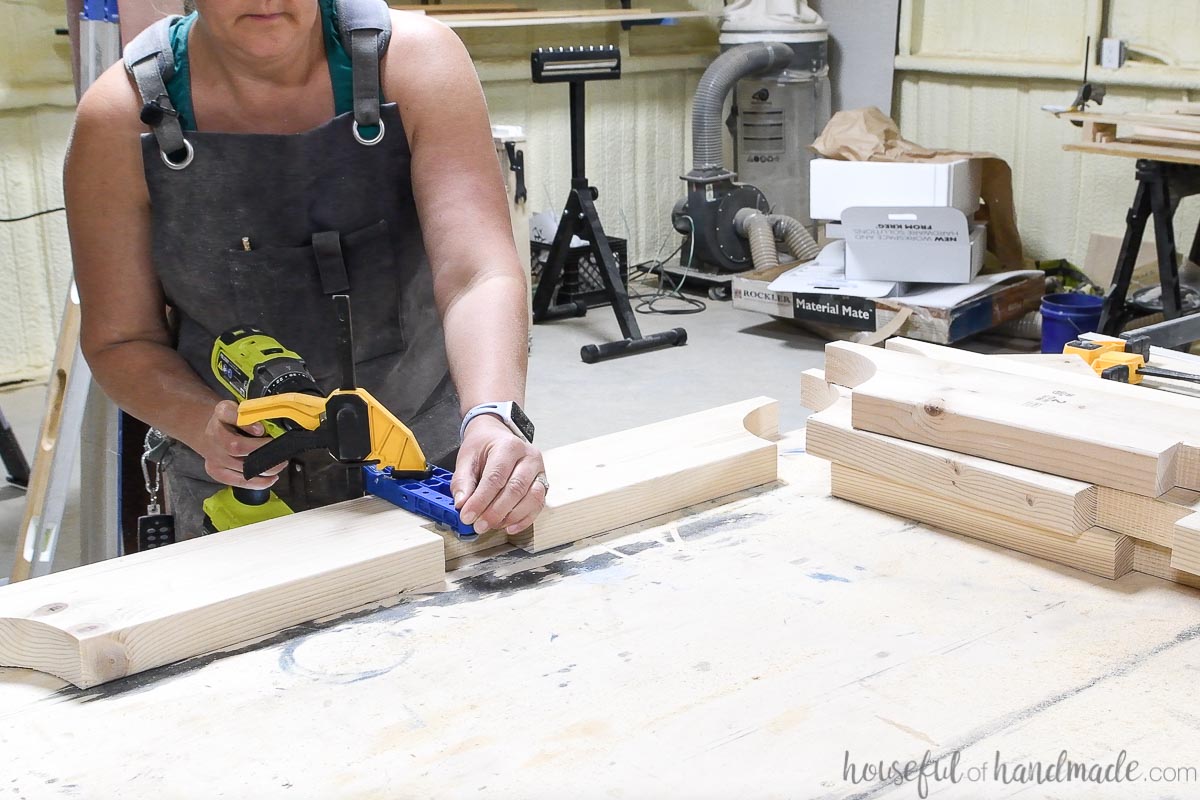
Using the Kreg Pocket hold jig XL, drill two pocket holes on one of the angled cuts. Position the pocket holes so one is close to the bottom of the angle and the other toward the center.
Make sure to use the XL pocket hole jig drill bit. The regular drill bit is too small to use with the XL jig.

Clamp the two leg boards together secure with 4″ pocket hole screws.
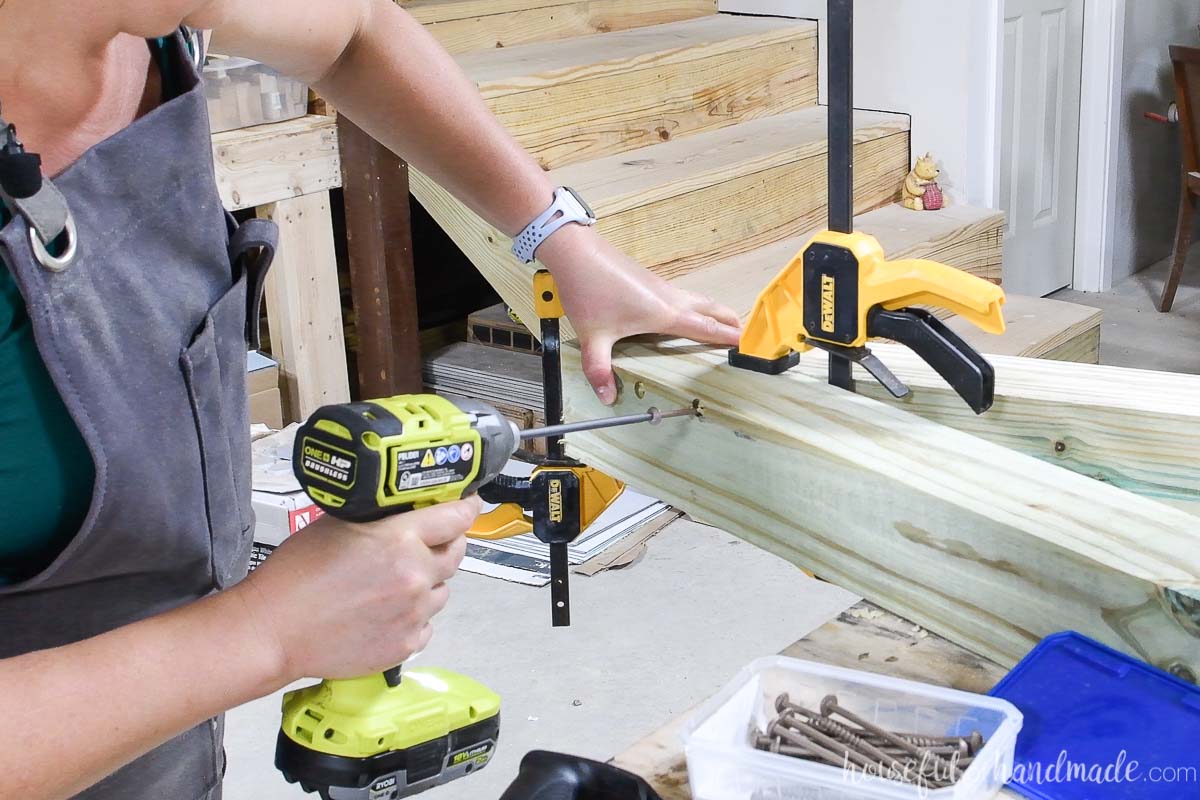
Flip the assembled legs over and drill 2 XL pocket holes facing toward the top.
You need to drill the second set of pocket holes on the other side of the legs to prevent the first pocket hole screws from being in the way.
Repeat for the other side. The XL pocket holes start on the back of the 4×4 instead of the side because of the angled cut.
If you drilled the holes in the right side of the first legs set, drill it in the left on the other. This keeps all holes to the back of the finished hammock swing stand.
Cut the pieces for the side supports with 15 degree angles on both ends (so the angles point toward each other) according to the build plans.

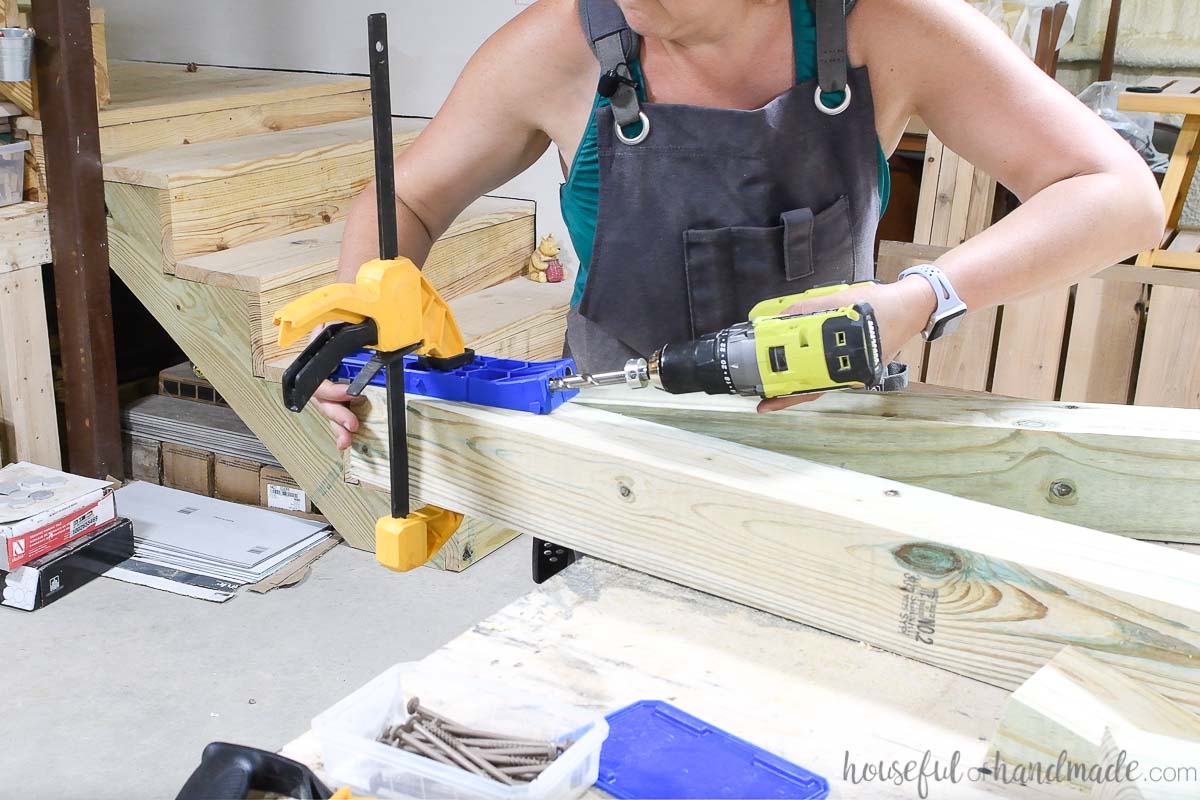
Drill pocket holes set for 1 1/2″ thick material in both ends of the long end of the boards.
You can drill pocket holes in 2x material with the new Pocket hole jig XL, but it does have a larger hole to it. Also, you need the 2 1/2″ XL screw to use with it.
I used my regular Kreg Pocket Hole jig since I had 2 1/2″ blue-kote screws already in my shop.
Measure up from the bottom of the legs 29″ and draw a line. This point is a starting point for where you will attach the braces.
If your circular saw cut wasn’t a perfect 90 degree angle to the top, your A-frame will be slightly different than mine. Mine were slightly different on each hammock stand I made.
Place the brace boards in the leg at this point and adjust as necessary to secure into the legs. Make sure the brace is at the same point on both sides so the bottom is even when done.
Secure with 2 1/2″ pocket hole screws (use XL if using the XL jig and regular if using the regular jig).
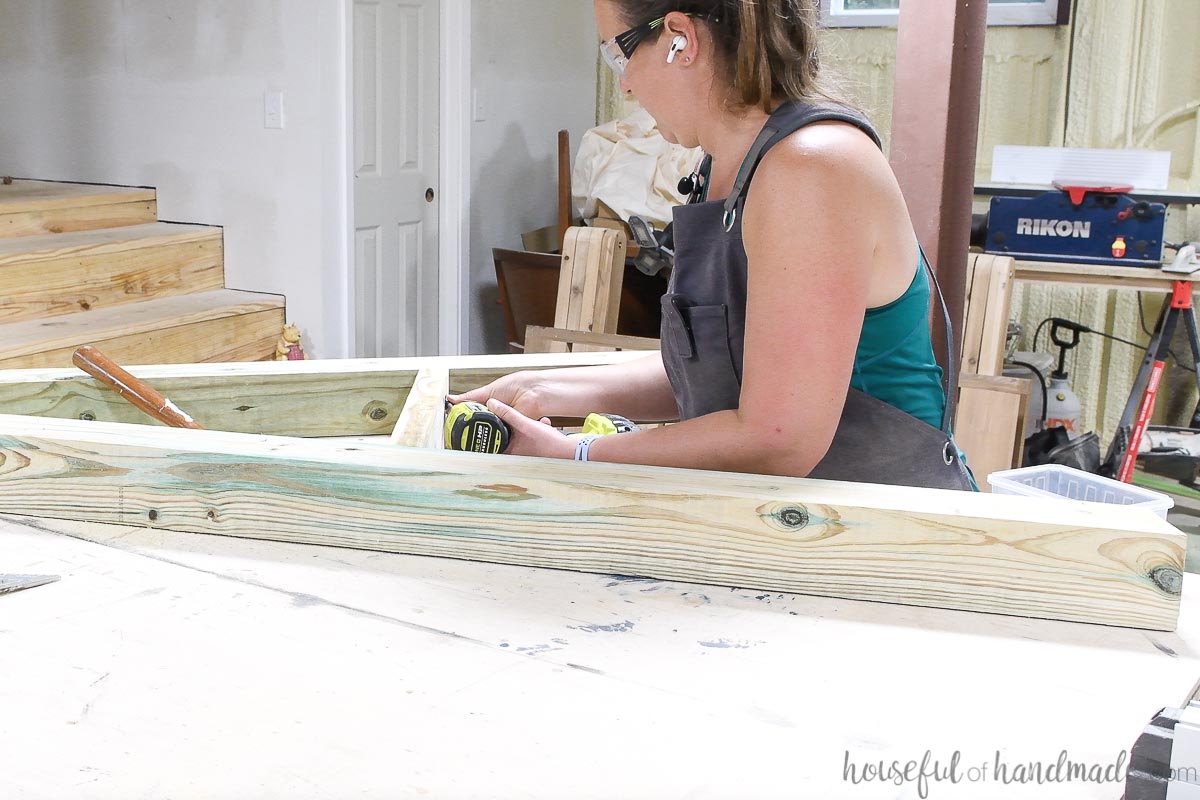
STEP 3- Attach sides together
Cut the bottom braces according. Drill pocket holes in both sides of the boards on the bottom.
Position the boards between the two sides according to the diagram in the plans. You can do this on the floor if you do not have a table large enough.
Secure the boards to the legs with 2 1/2″ pocket hole screws.
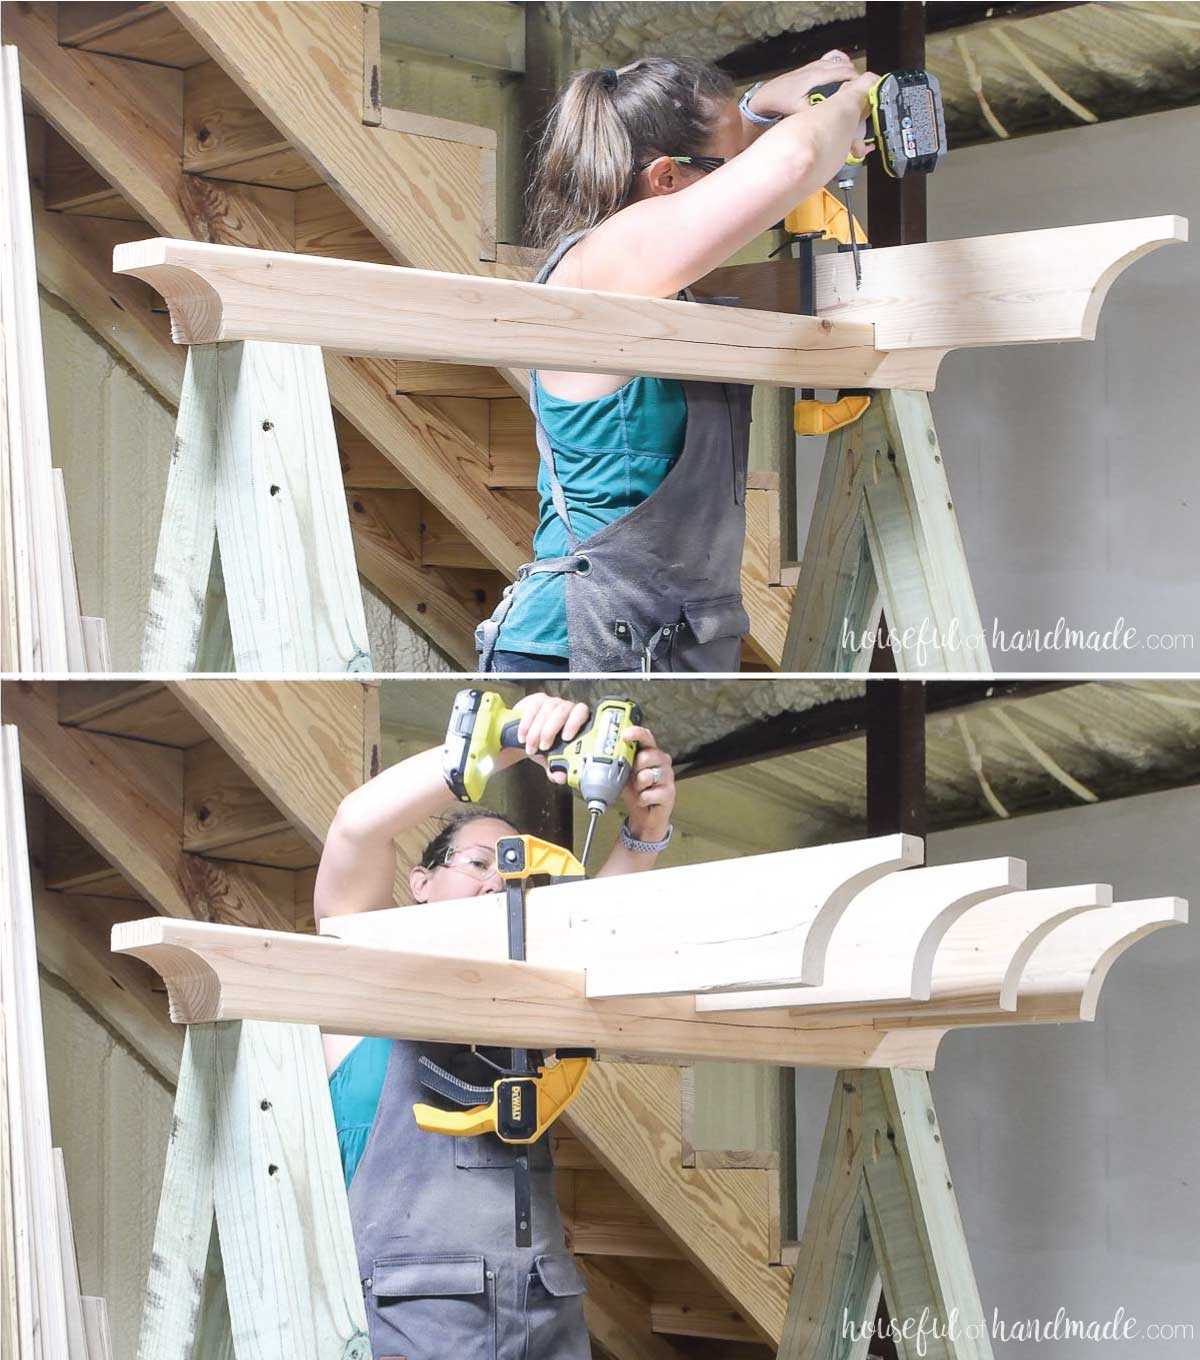
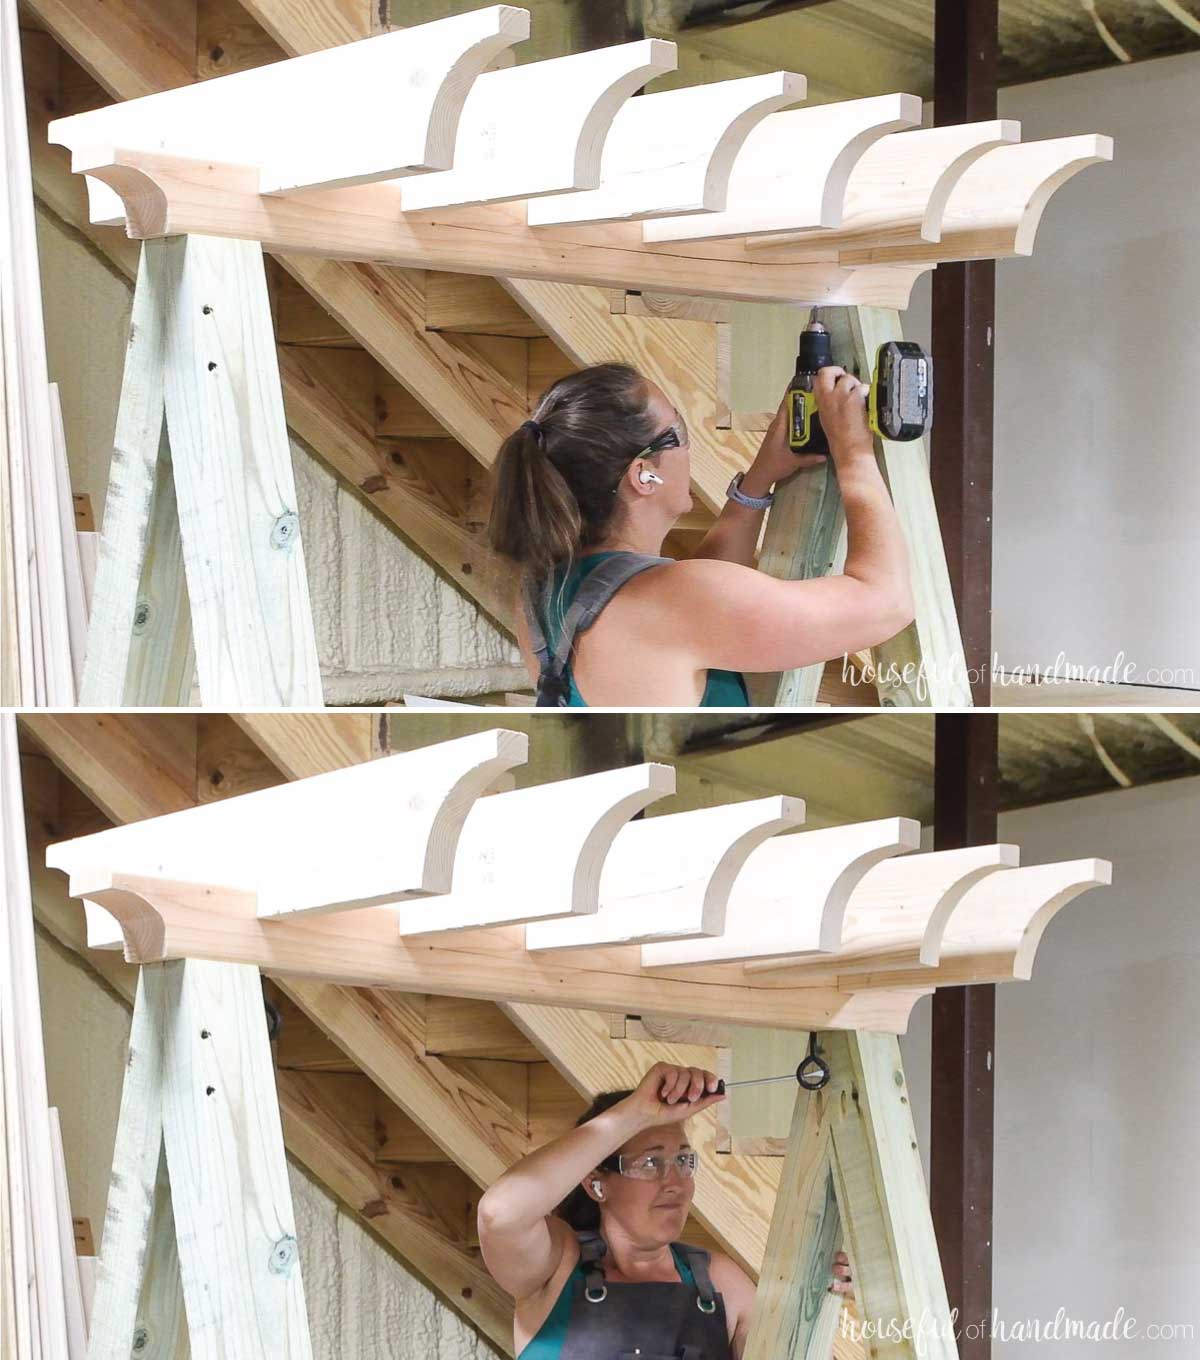
Cut the top piece according to the PDF plans (does not need to be treated).
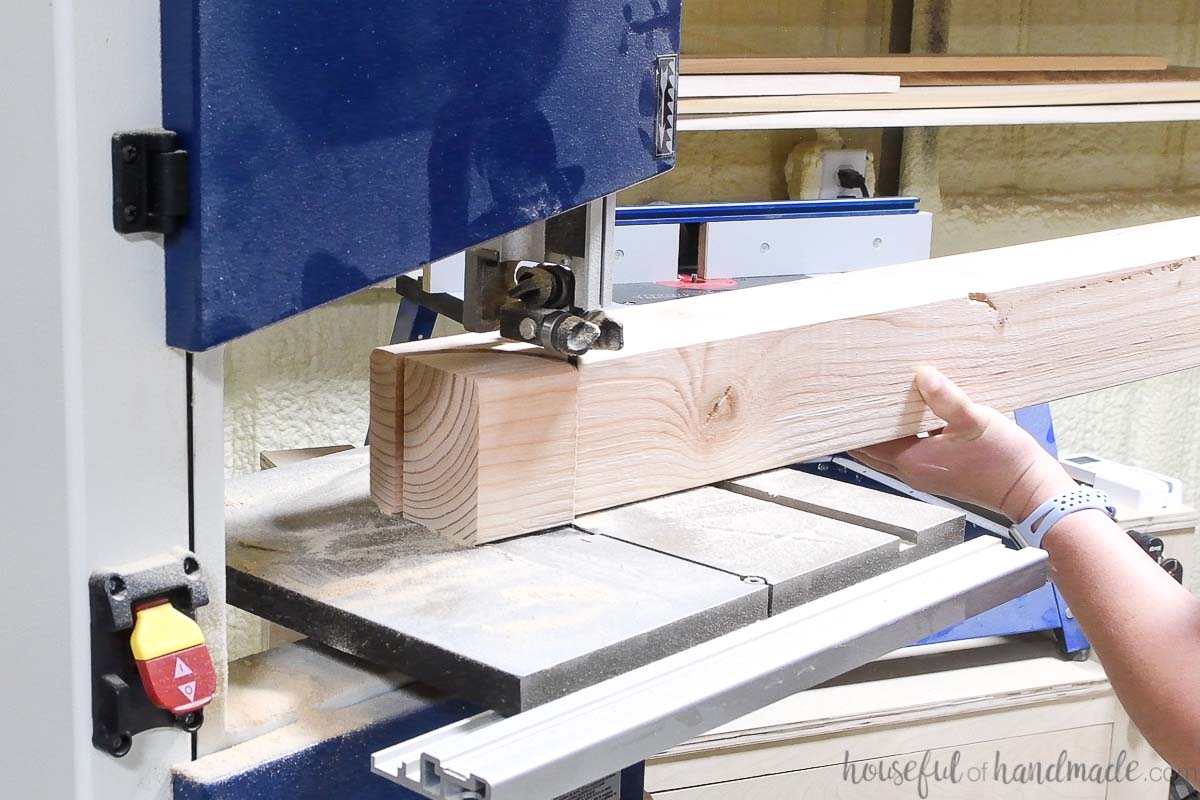
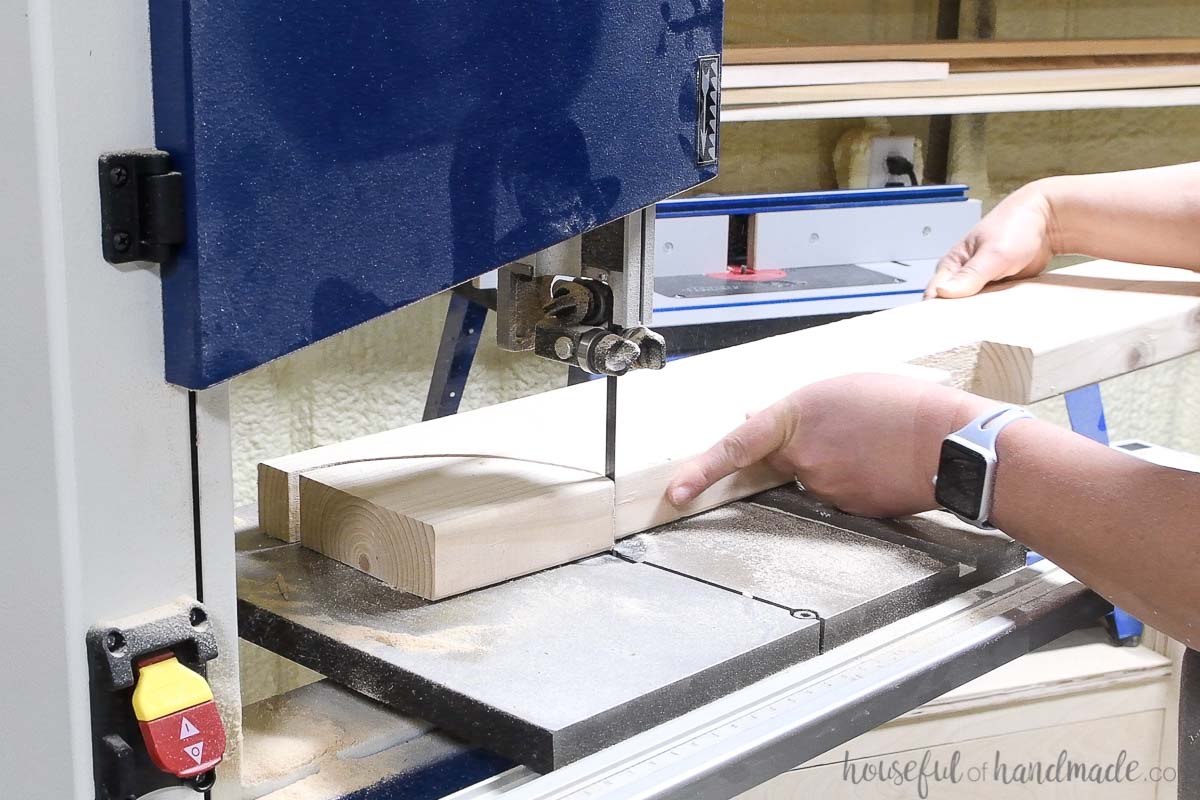
Draw a 2 1/2″ curve in each end to give it a pergola look.
To cut the curve in the 3 1/2″ thick material, I used a bandsaw. I have not found jigsaw blades long enough to cut through 4x material.
If you do not have a bandsaw to cut through the 3 1/2″ thick material. You can just cut a straight angle on the board instead using your miter saw or circular saw.
Position the top post on top of the legs. There should be 1″ overhang from the curves on each side (3 1/2″ in from the edge). This will leave 39″ in between the sides.
Secure with 4″ pocket hole screws through the holes already drilled in the sides.

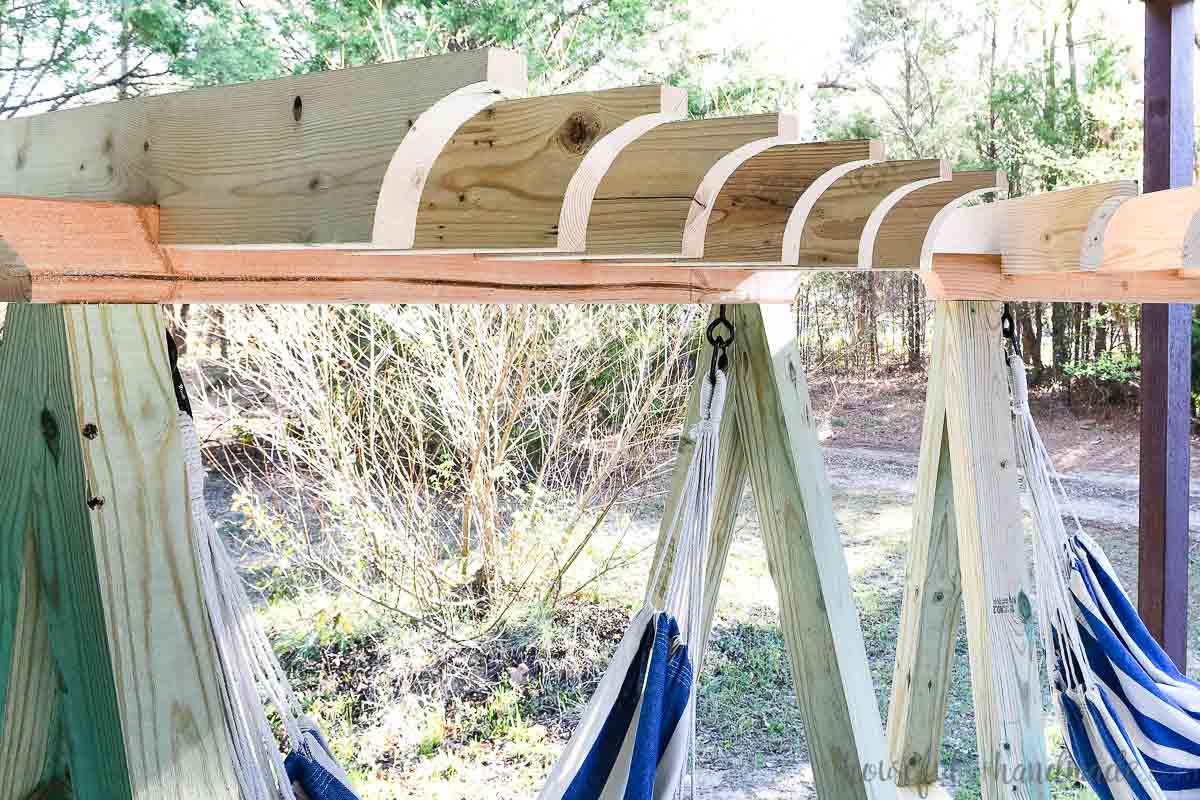
STEP 4- Add the pergola rafters
Cut the pergola rafter pieces according to the build plans.
I used off-cut left over from a previous project so I cut my rafters 36″ long. If you want the longer rafters you can buy 10′ long boards and that way you can still get 3 pieces from 1 board.
Clamp the boards together. Then measure and mark a 3 1/2″ section in the center of the boards.
Set your circular saw blade to 1 1/2″ deep. Carefully cut along the inside of the lines. Then make lots of cuts between them leaving no more than 1/4″ of material.
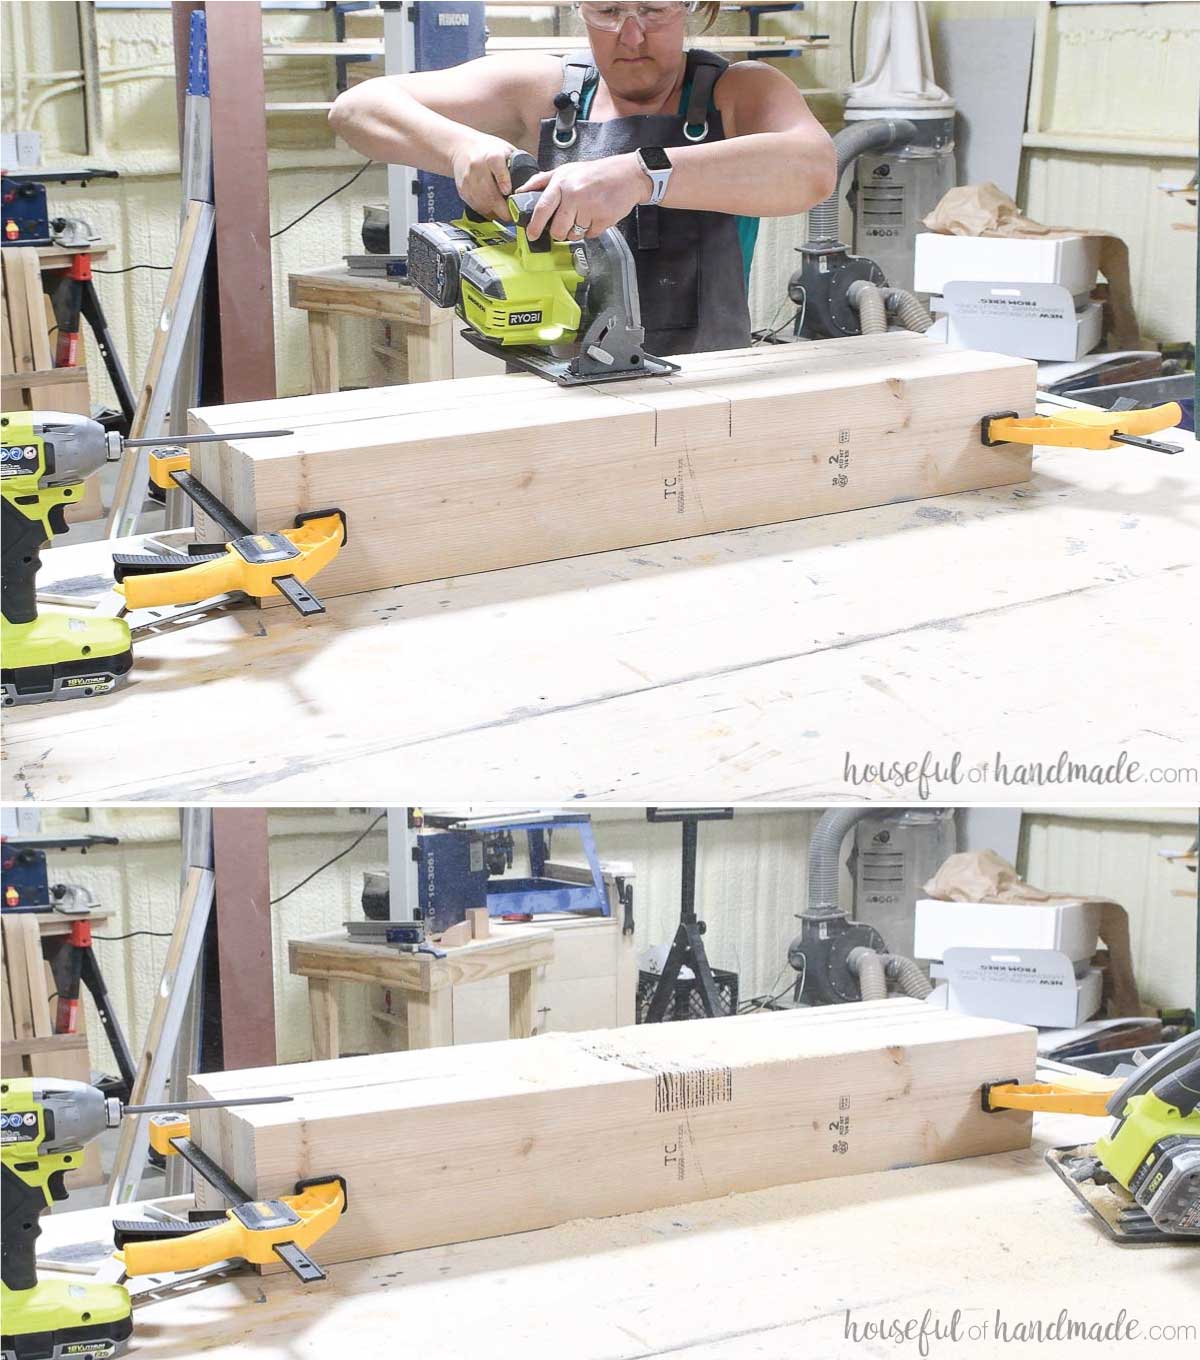
Use a chisel to break off the left over material.
Then use the chisel to clean up the bottom of the notch. Check that it fits snuggly over the 4×4 post and adjust if needed.
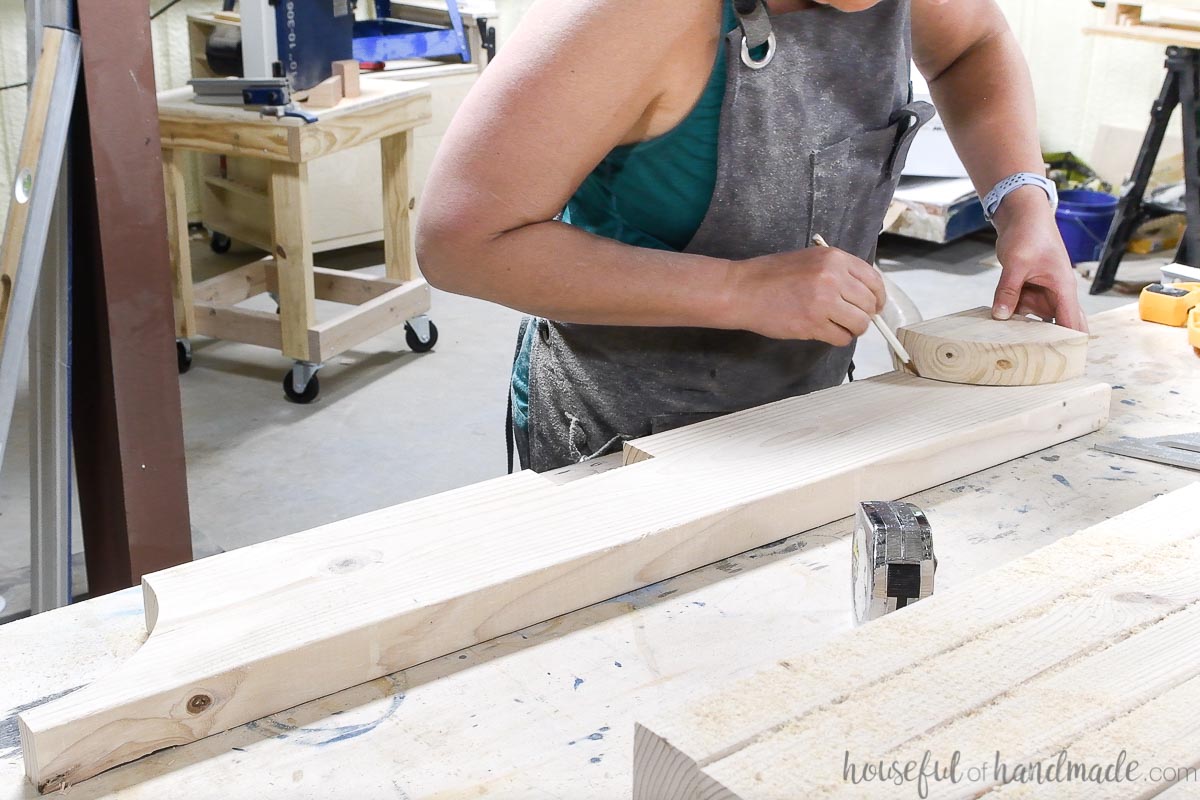
Draw a 4 1/2″ curve in the end of one of the boards. This leaves a 1″ point on the top.
Carefully cut out the curve.
This curve can easily be cut out on the jigsaw. Or if you cut the top post just at an angle, you can also cut these at the angle as well to match.
Use the cut out piece to trace the same curve on the remaining boards.
Then cut out the curve on all 6 rafters.
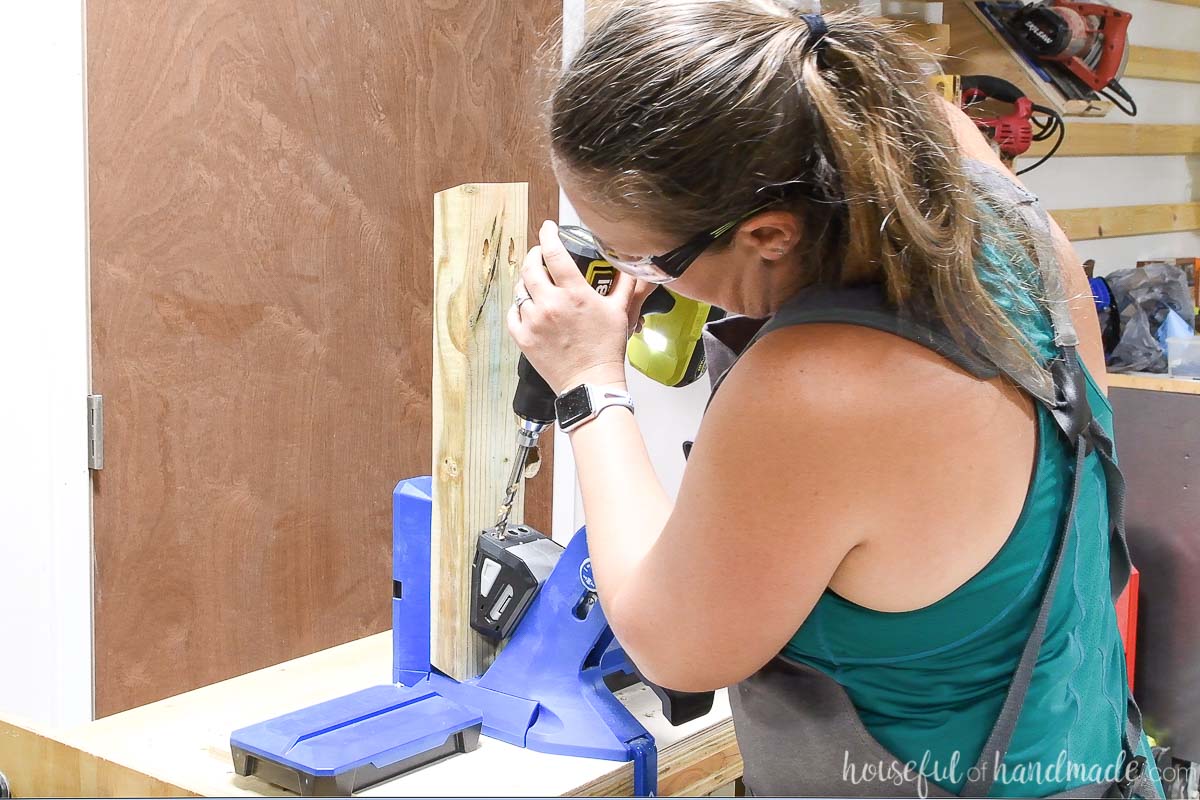
Pick out the two prettiest boards for the outside ends of the rafters. On these boards, drill 2 pockets holes for 1 1/2″ thick material above the notch on one side.
On the rest of the boards, drill 1 pocket hole on each side of the board above the notch. Make sure the pocket holes are on alternating ends of the notch.
Place the first rafter so it is just over the inside of the legs. Secure with 2 1/2″ pocket hole screws.
Space the rest of the rafters evenly across the top. Secure with pocket hole screws.
STEP 5- Attach the hammock swing
Predrill a hole for the screw eye according to the direction. Mine said to use an 11/64″ drill bit. It is quite a bit smaller than the actual screw eye, but if you use too big of a hole, it will not have the same strength.
Then screw the screw eye into the hole. It requires quite a bit of strength to get the heavy duty eye into the post.
I started with a pair of pliers to help me get it started. Then used a strong, flat-head screwdriver to give me leverage to finish twisting it in.
Even with that I could only get it in 3/4 of the way and had to have my husband help with the last 1/4. But now I am confident these are not going anywhere!
To hang my hammock chair, I removed the chair from the pole that is used to keep it open.
Then I added two heavy duty carabiners to the loops on the sides.
And you are done!
Premium plans include:
- Recommended Tools
- Shopping list
- Easy to read cut list table
- Cut diagrams
- Step-by-step instructions with 3D renderings
- Helpful resources
- BONUS: 3D SketchUp file
These carabiners make is easy to clip the hanging chair into the stand when we are enjoying the outside.
But they are easy to remove when we are not to keep the chair clean and bug free!
Because I used treated lumber, I need to wait for it to dry out for a few weeks (6-8 is recommended) until I add an outdoor sealer to the wood.
So for now, we are enjoying the hammock chairs on the porch to my workshop! I makes it a little harder for me to be productive knowing the comfy chair is just outside waiting for me.
And we have tested out these chairs all week! My husband, who is 6' 2" and around 240 lbs, loves them. Only problem is making sure he doesn't bump his head when getting out of the swing.
The kids love to read their books in the chairs. It is the perfect cozy swing.
And I love to just sit back and watch the clouds move across the sky. It's the perfect way to enjoy my hard work!
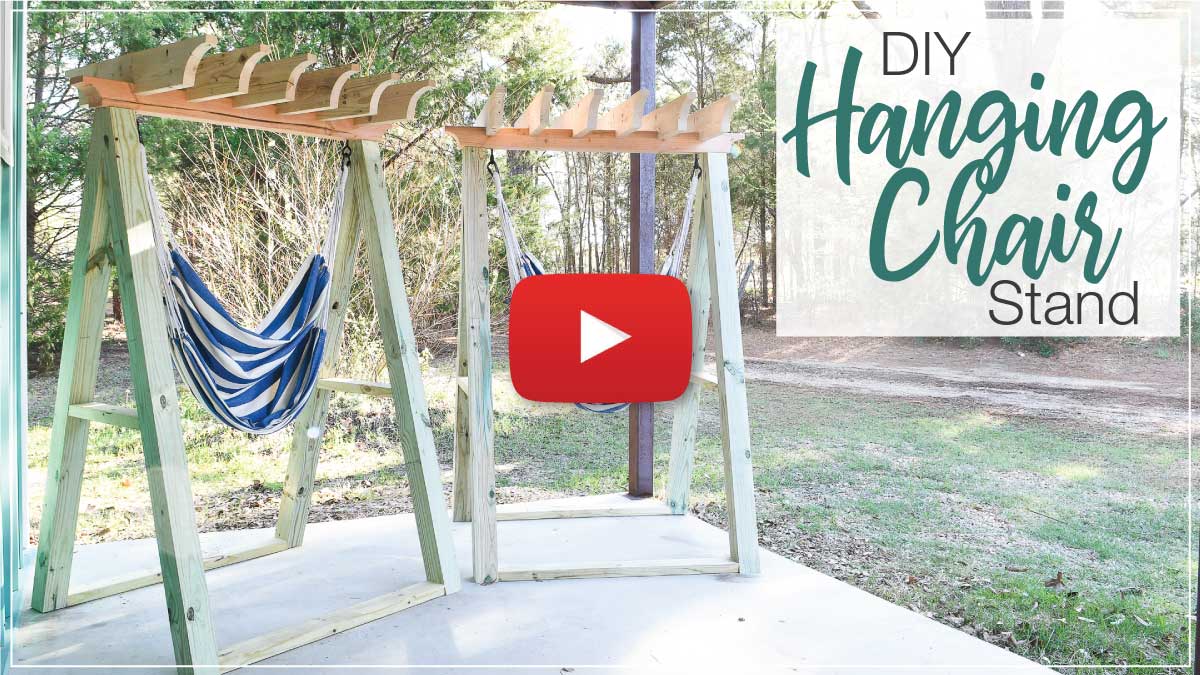
Prefer to Watch? Check out the Video Below
I am sure you will love them too...
Happy Building!

Thank you to Kreg Tools for sponsoring this post. I only recommend products that I use and love and all opinions are 100% my own. Click here to read my full disclosure policy.