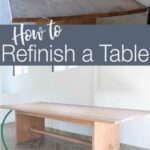
Learn how to restore a wooden table so you can turn an outdated oak table into a beautiful modern table.
Normally I like to build furniture from scratch. But when you find a great deal on a piece of furniture, it is worth it to refinish it. Plus you can give new life to an unloved piece by knowing how to refinish furniture.
This post is going to share everything you need to know about how to refinish a wood table. Not just paint it, but to reveal the gorgeous wood underneath. Then you can reseal it with a modern finish.
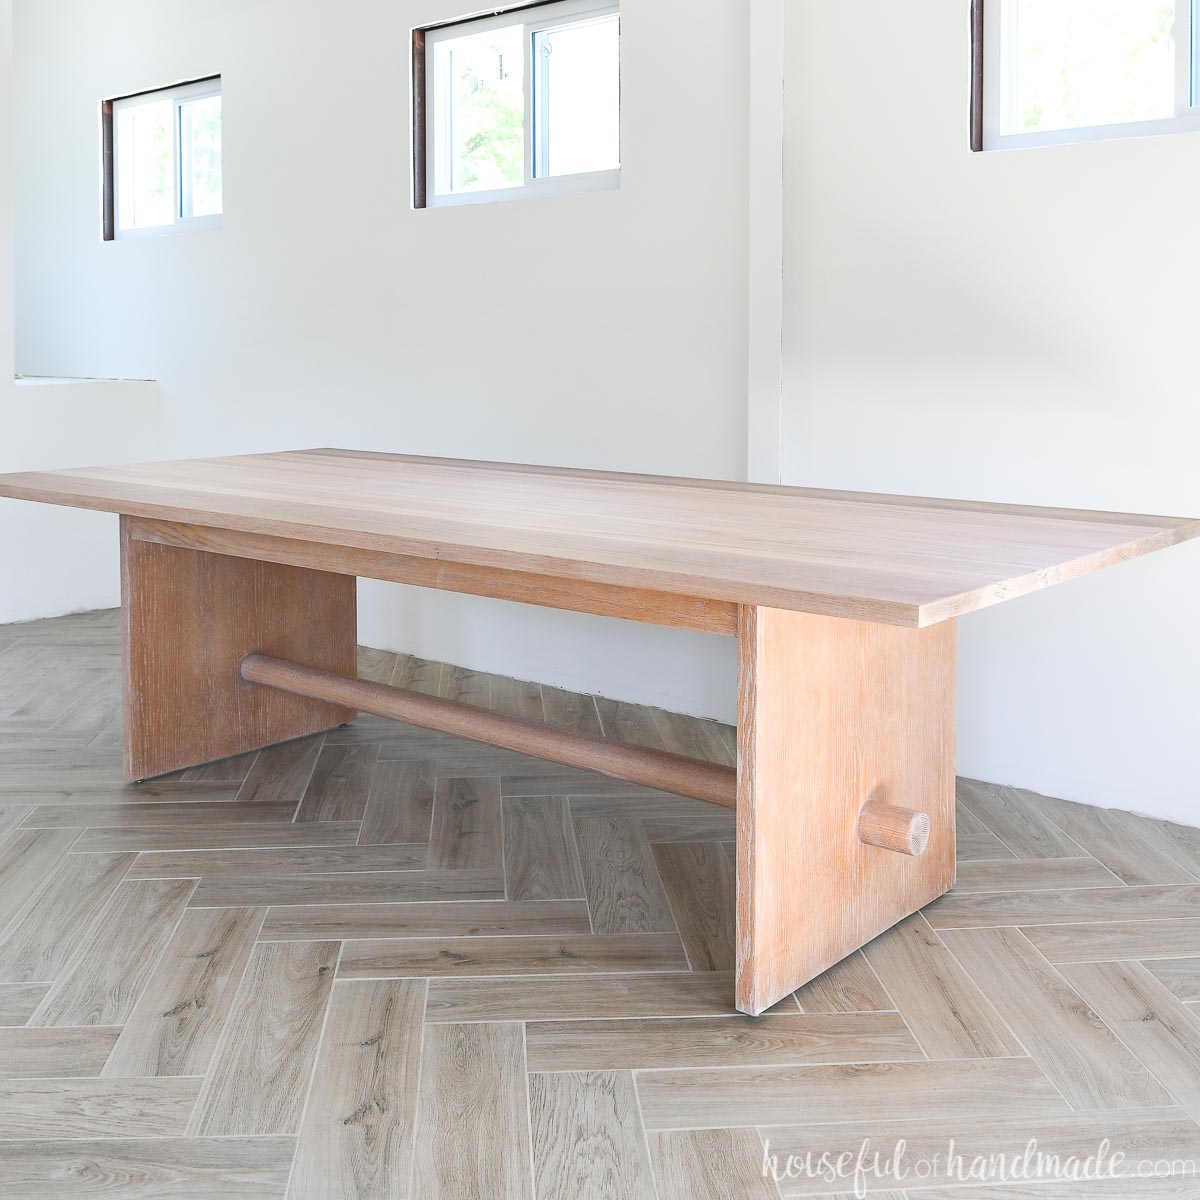
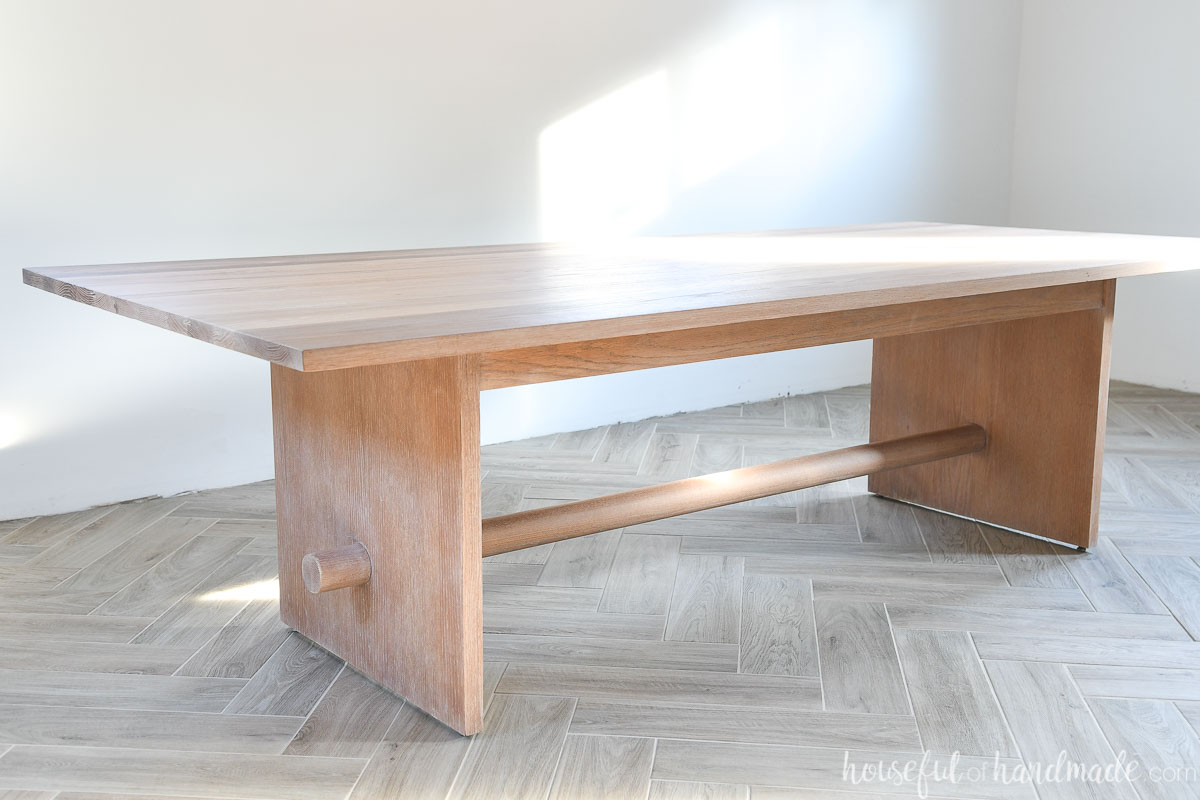
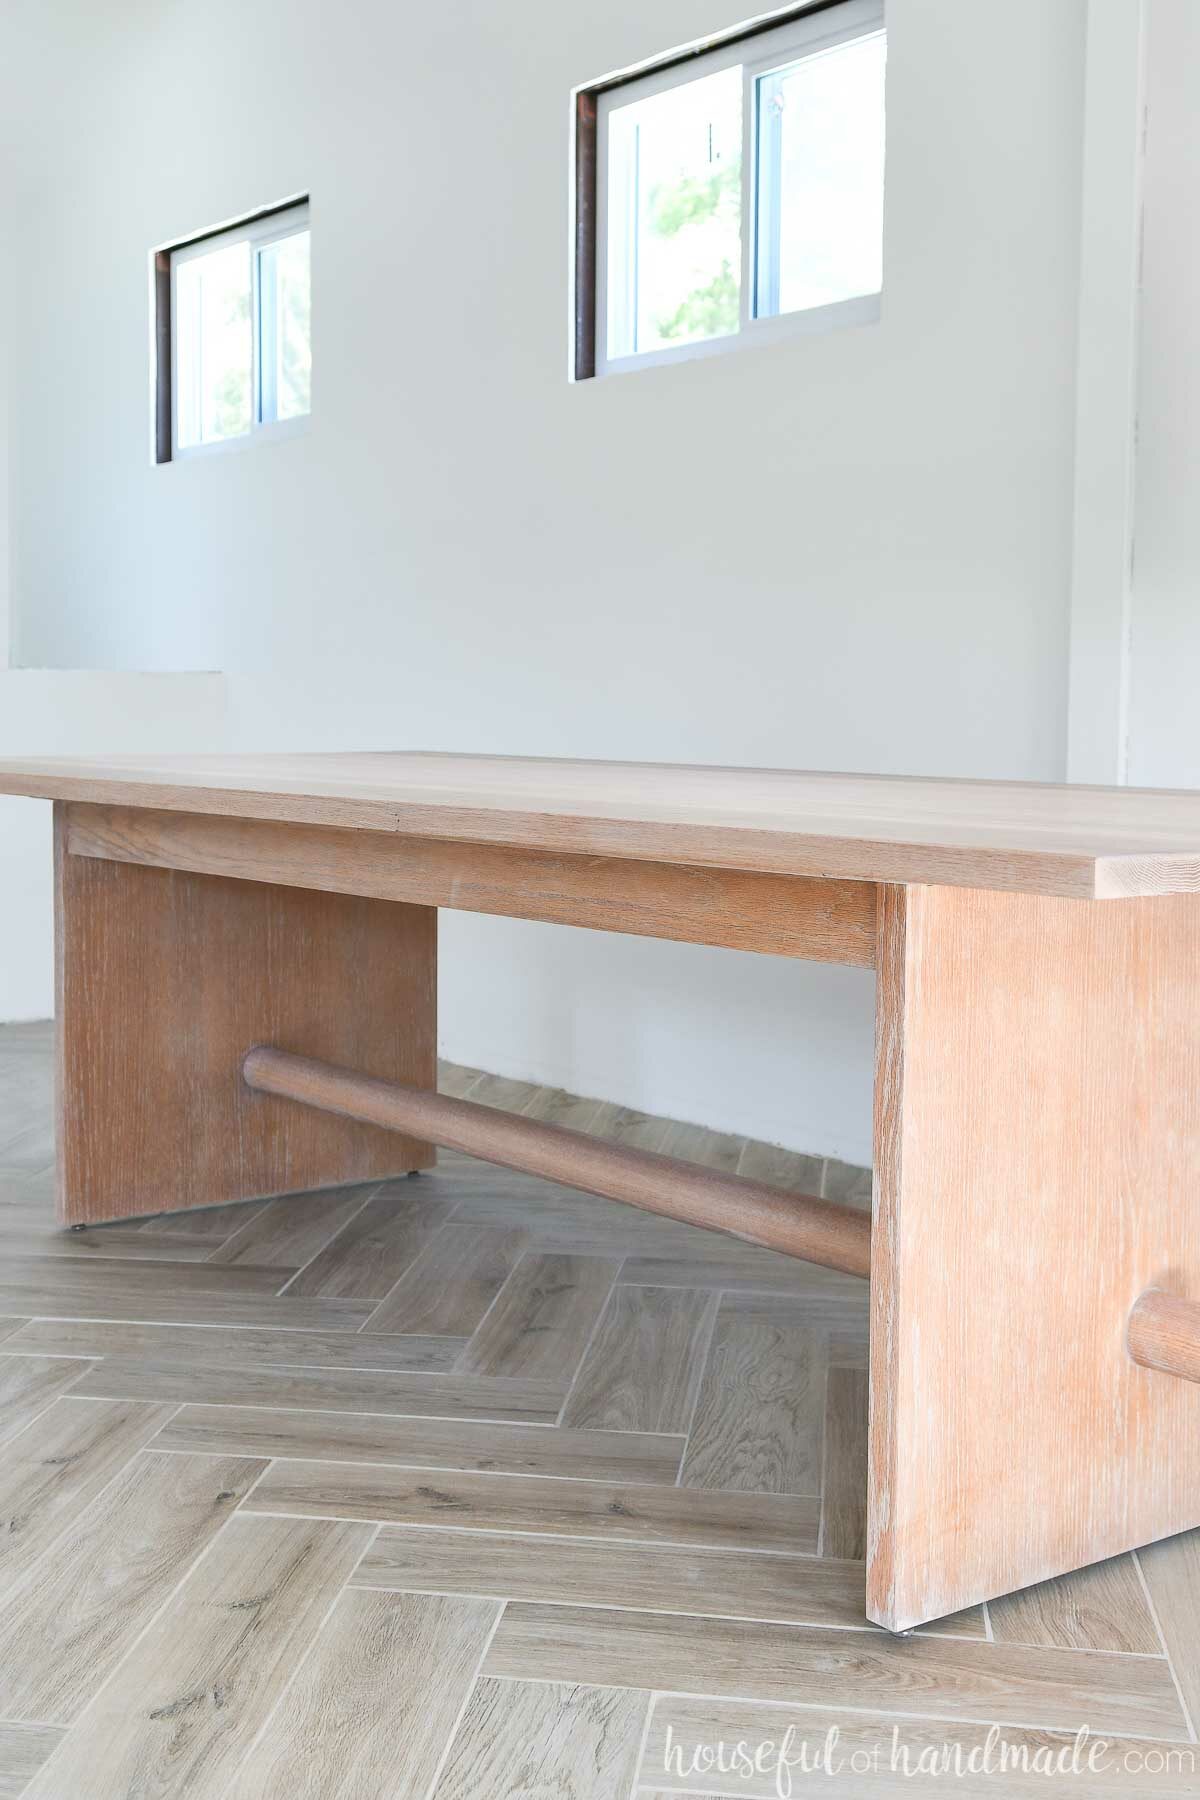
I have partnered with Waterlox to refinish an oak table with their TrueTone Color Infused tung oil stains that gives the wood a gorgeous color then seals it with a matte, unfinished look. It has been my new favorite finish since testing out all the TrueTone colors in this post.
This post may contain affiliate links. As an Amazon Associate I earn from qualifying purchases. Click here to read my full disclosure policy.
Why Should you Refinish a Dining Table?
Refinishing furniture means you repair or reapply a finish to the furniture. This is different from painting. You need to remove some or all of the old finish to be repaired or remove it completely to reapply a new one.
Refinishing wood furniture is not a quick or super easy project. It requires tools and strength. But the results are amazing and totally worth it!
Top reasons to refinish a table:
- Can save you money from buying or building a new piece.
- Prevents an unwanted item from ending up in the landfill.
- Gives an old piece a new life.
Tables can be very large pieces of furniture. Which means a lot of wood is needed to make them, which can be expensive.
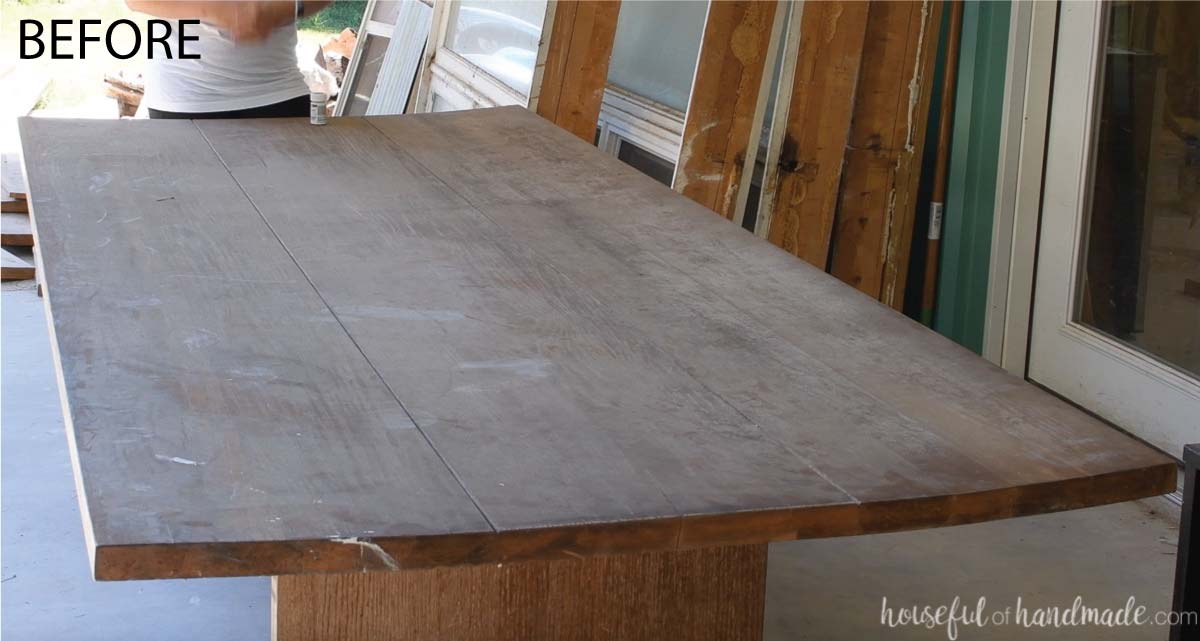
Refinishing my oak table saved me a lot of money over building a new one. To build a new large table top of solid oak, the wood alone would have cost me $400+. But I purchased the entire table with 6 upholstered arm chairs for only $200.
Knowing that chairs like that run $100+ each, I saved over $800 by taking the time to refinish the oak table. And my time was well rewarded because I have an amazing new table and 6 chairs for a project later!
Can you Refinish Wood Without Stripping?
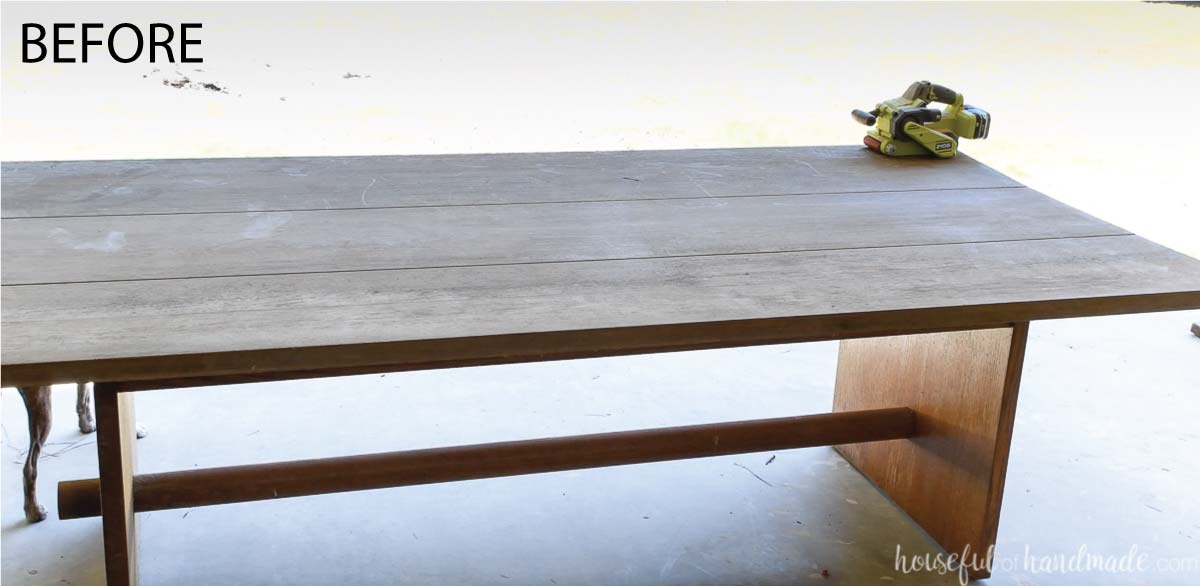
It is totally possible to refinish wood furniture without using a paint or varnish stripper. Instead, you can sand the entire surface until the previous finish is removed.
When refinishing a table, sanding the entire surface is a lot easier than you think. The table top is flat and easy to sand with a belt sander. The base and legs are usually a small amount of wood that can also be sanded.
The trick is to start with a very coarse sandpaper. Starting out with a 40 grit sandpaper and a belt sander will make quick work of removing stain, varnish or paint.

Make sure to use proper protection when sanding unknown sealers/paints. Protect your lungs with a respirator (I love this one).
After the old finish is removed with 40 grit sandpaper, you will step down the coarseness and sand the entire surface with 80 grit sandpaper. Then again with 100-120 grit.
Depending on your desired finish you can continue the sanding with higher grit sandpaper. The Waterlox TrueTone color infused tung oil finish only requires sanding to 100-150 grit before applying the color and sealer.
With a couple days of work you can completely transform an old, outdated piece of wood furniture into a beautiful modern one!
Steps for Refinishing a Wood Table
Tools Needed:
- Belt sander
- I recommend a corded belt sander over a battery powered since you will be doing a lot of sanding.
- Orbital sander
- Corner sander
- Respirator
- Drill
- Optional: if your table top is bowed like mine was, you will need the following tools to flatten it out properly
- Planer
- Circular saw with rip guide
- Clamps (as wide as your table top)
- Biscuit joiner (not necessary but helpful for aligning boards during glue up)
Supplies:
- Old table
- Sandpaper in 40 grit, 80 grit and 100-120 grit
- Waterlox TrueTone color infused stain
- Waterlox TrueTone Tung oil finish
- Lint free rags
- Tack cloth

Prep the table for sanding
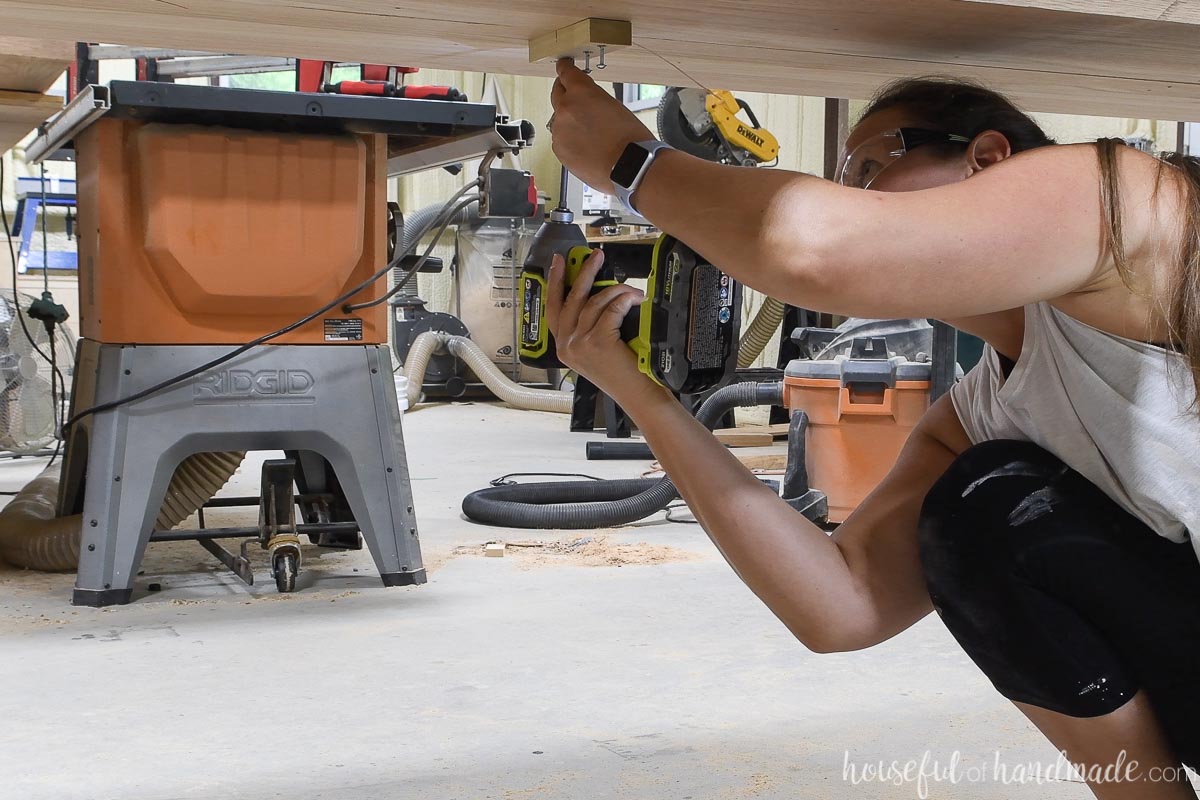
Start by removing the table top from the base. Climb up under the table and use the drill to remove screws.
PRO TIP: Make sure to save all the hardware in a zip top bag. If there are clips or latches it can be helpful to take a picture of them before removing.
Move the table to a place that can get very dirty, you will create a lot of dust with the sander. I moved mine to a covered patio to work on.
Sand the table and base
Make sure to use proper protective gear. A respirator is recommended especially since you may not know what kind of dust is on the furniture or what kind of finish is on it.
Start by sanding the entire surface with 40 grit sandpaper. Sand using this coarse sandpaper until you no longer see any of the previous finish.
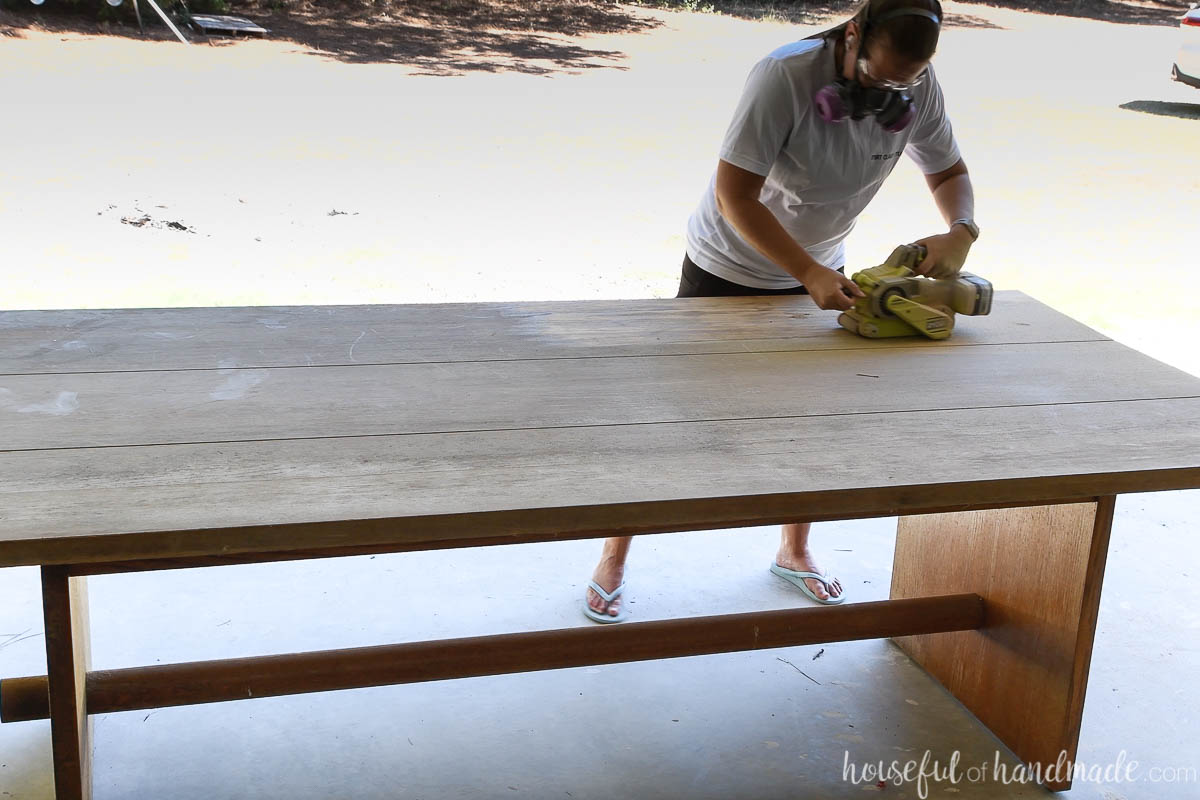
Then step down the sandpaper grit to 80 grit and sand everything again.
Finish with a final sanding with 100-120 grit sandpaper. This is all that is needed to get a gorgeous finish with the Waterlox TrueTone finish.
Run your hand over the surface of your table. If you feel any coarse areas or dents from the belt sander, use the orbital sander to sand them smooth.
PRO TIP: Poor sanding is highlighted by the buff in finish so take plenty of time on the last sanding to ensure a professional looking finish.

Tips for sanding the table top
The table top is fairly easy to sand because it is flat. Use a belt sander for the first few rounds of sanding to make quick work of removing the previous finish. Use an orbital sander for the last round of sanding for a perfect finish.
Belt sanders can be tricky to use. They are very powerful and can take off a lot of wood in a short amount of time. You need to pay attention when using them to prevent nicks and dents in your table top.
- Hold the belt sander with both hands.
- Start the sander before placing the sander on the surface to be sanded.
- Always sand in the direction of the grain.
- Let the sander move forward, then carefully pull it back to the beginning, and repeat to the side of the first pass.
- Move in consistent slow speed to remove the previous finish.
- Don’t hold the sander still on any spot, keep it moving.
The belt sander uses a lot of upper body strength to keep the sander from taking off over the surface of your table. So take plenty of breaks and enjoy the process!
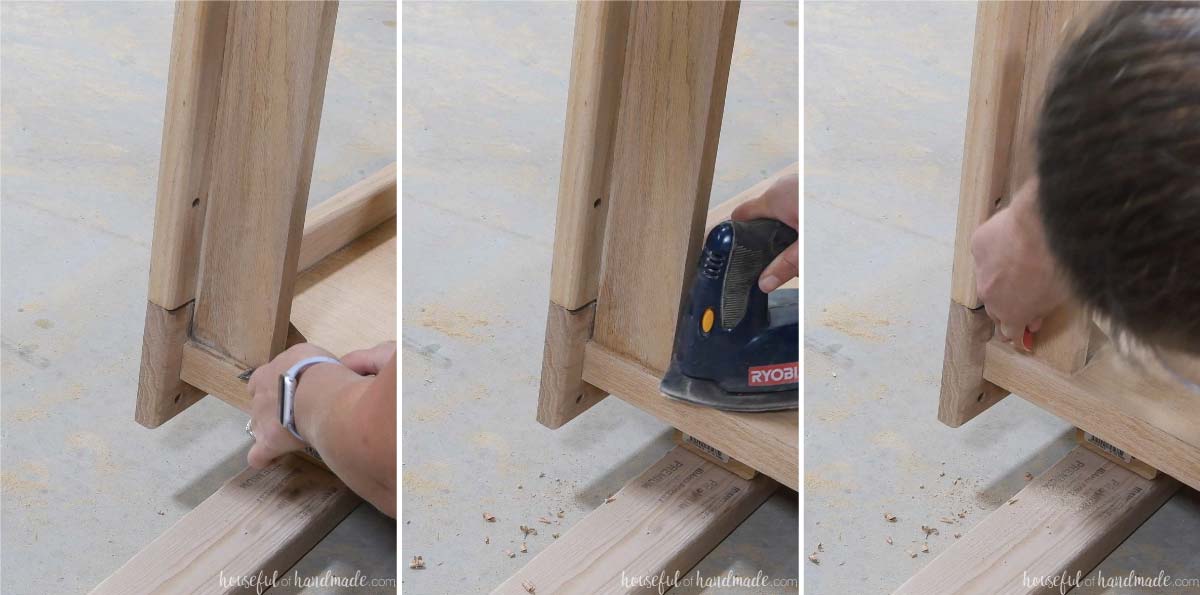
Tips for sanding the base
The base can be trickier to sand because there are corners and edges and possibly decorative parts.
You will need to use a variety of sanders as well as hand sanding. I also used a chisel to get into some of the corners, but it is not necessary.
- Use the belt sander for any large flat surfaces.
- Use an orbital sander for the majority of the smaller areas.
- Use a corner sander to get close into corners.
- Use a chisel and hand sanding to get tight into corners and details.
- Always sand in the direction of the grain.
- Make sure the sander is flat with the surface you are sanding so it does not create dips or dents.
How to Flatten a Bowed Table Top
One problem that can be frustrating when refinishing table tops is a bowed surface. This is caused when the table top is not stored properly (usually on it’s side).
To fix a bow, the best option is to cut the table top into pieces that can easily be flattened again. Then you will put the table top back together like you were assembling a new one.
Rip the table top into boards
The size of the pieces to be cut will be determined by the size you can fit into your router and the size that you can handle. If you can see the seams from the original table top glue up you can try to cut along those lines to prevent additional seams.
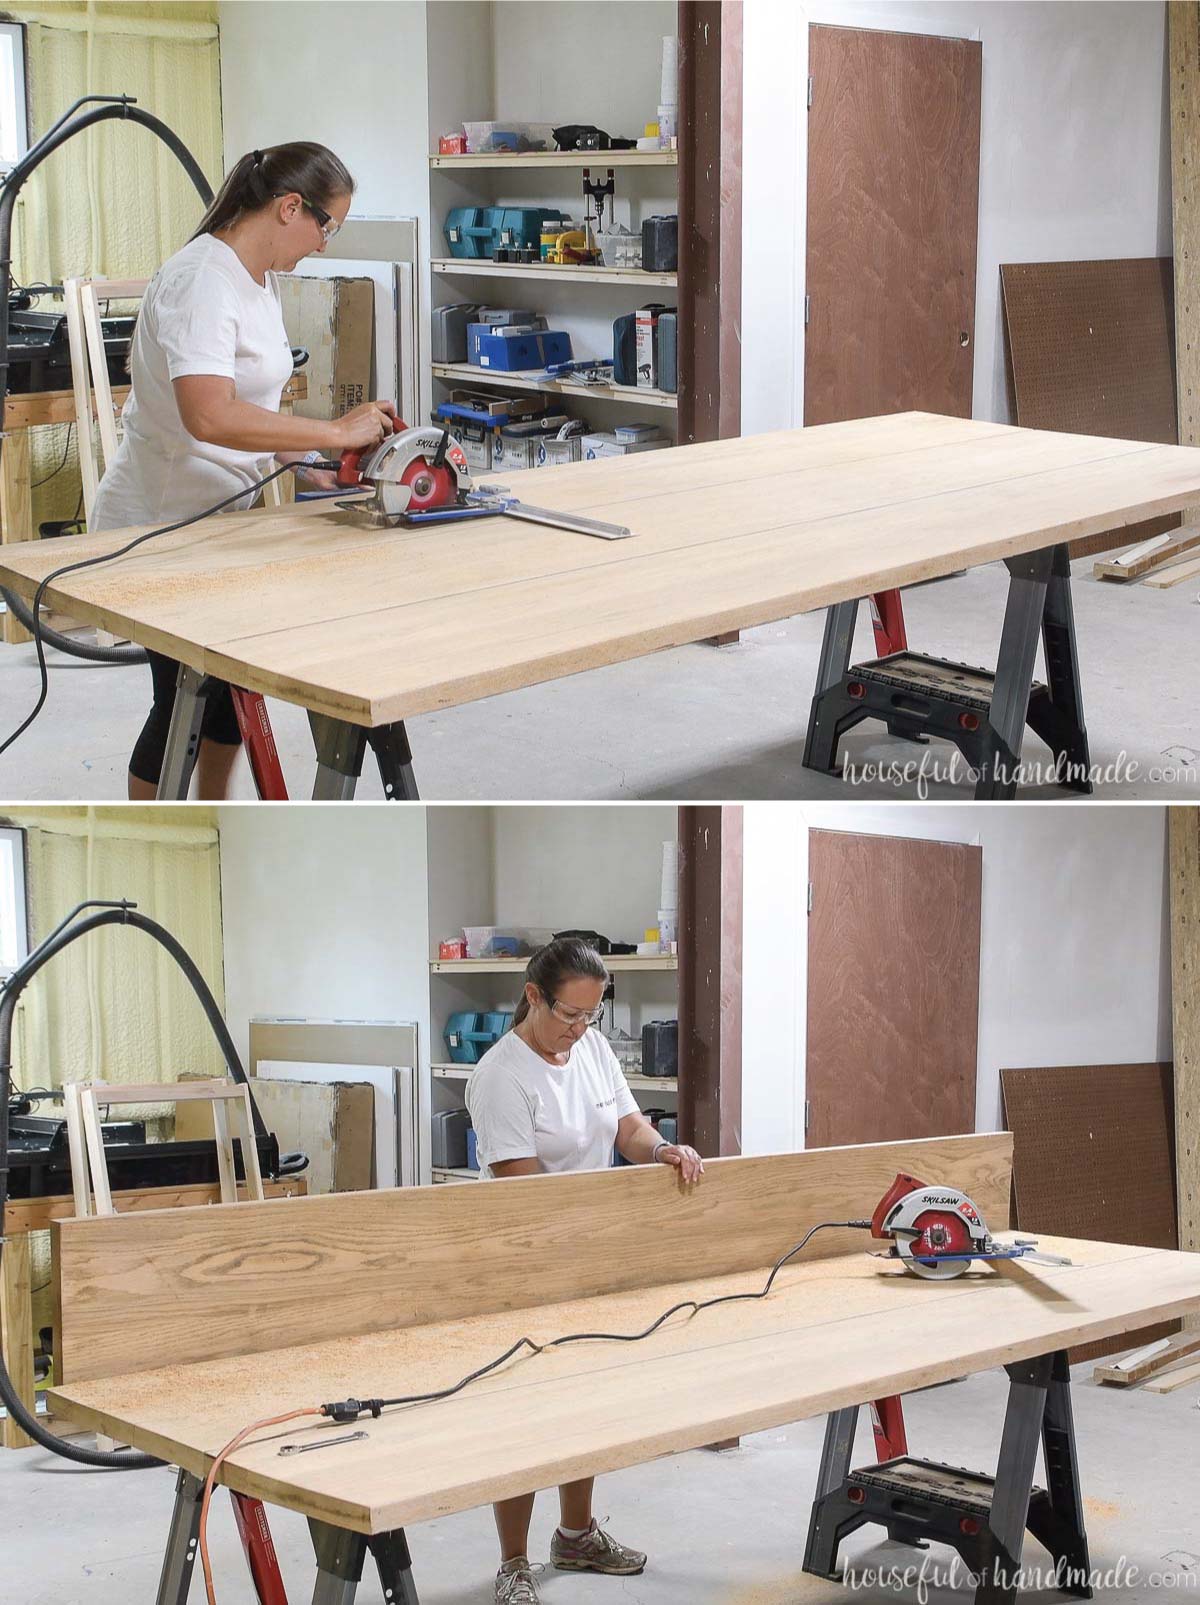
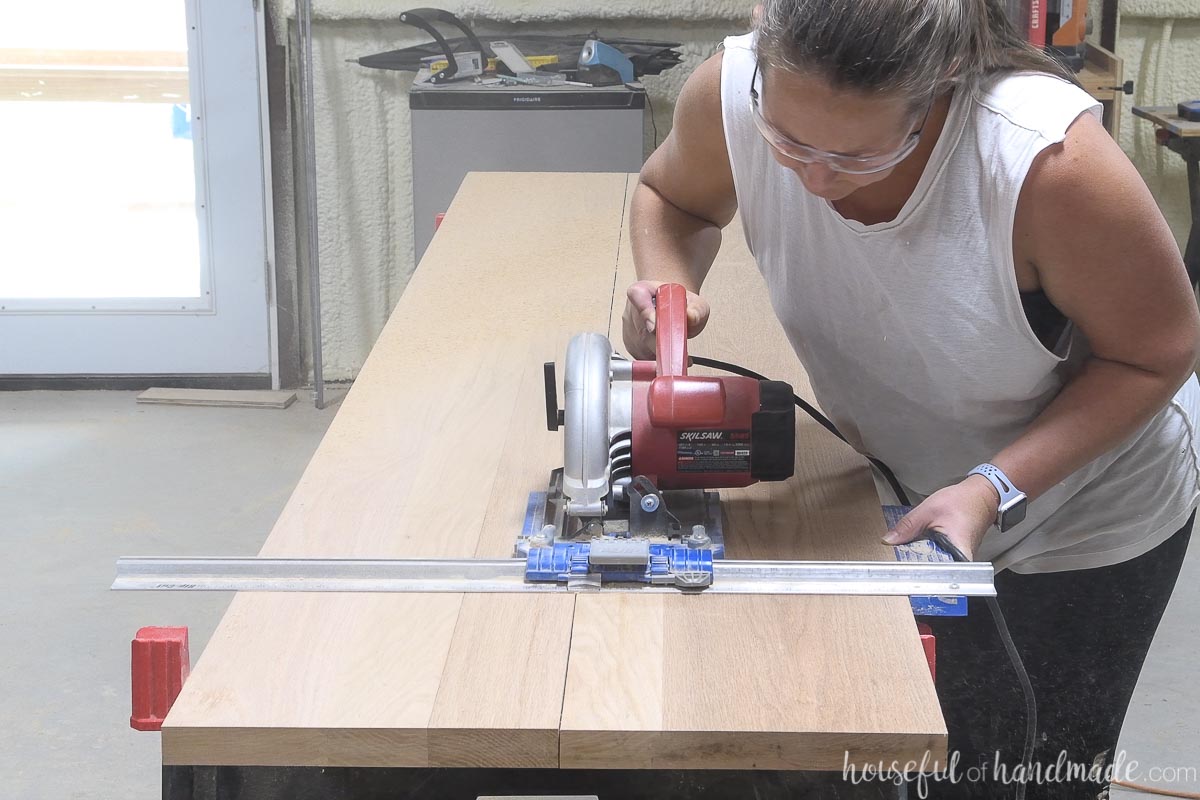
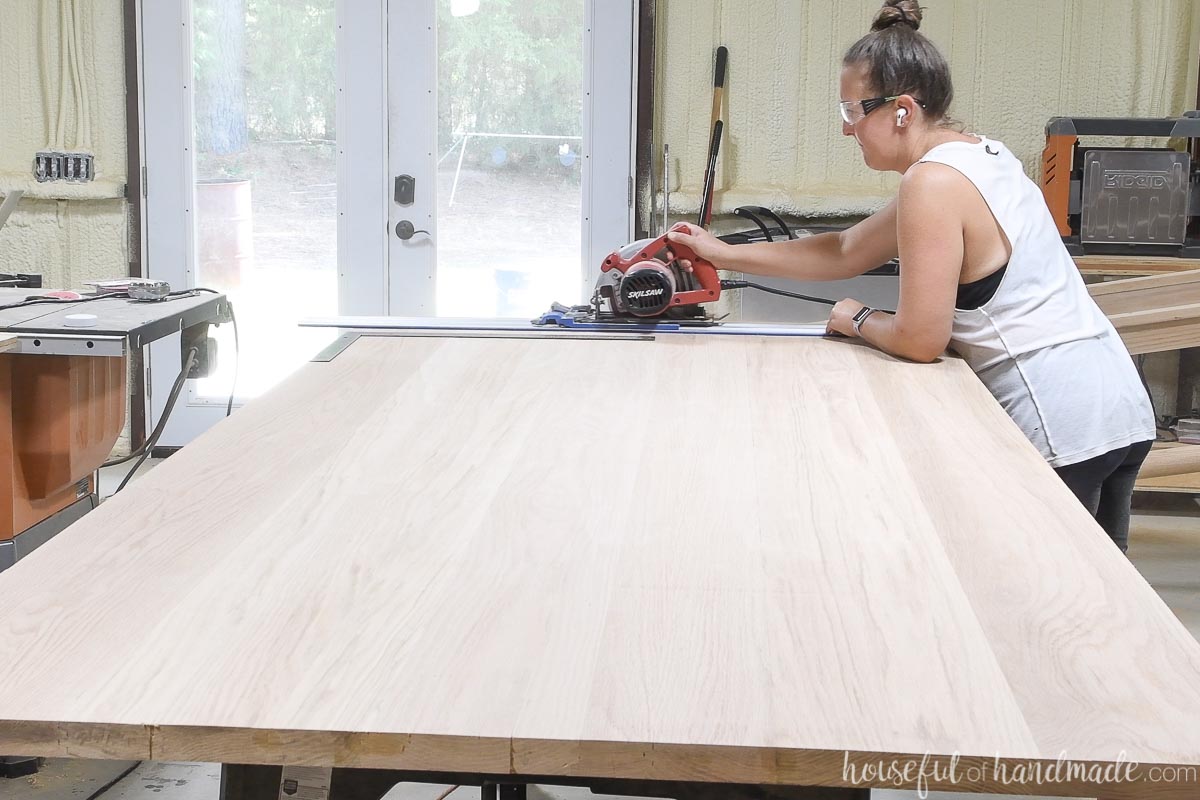
Rip the table along the long side into the determined widths with a circular saw. I used a Kreg RipCut guide track to keep the circular saw parallel to the side of the table.
My planer can cut boards up to 13″ and my table top was 48 inches wide so I cut it into four 12 inch pieces for flattening.
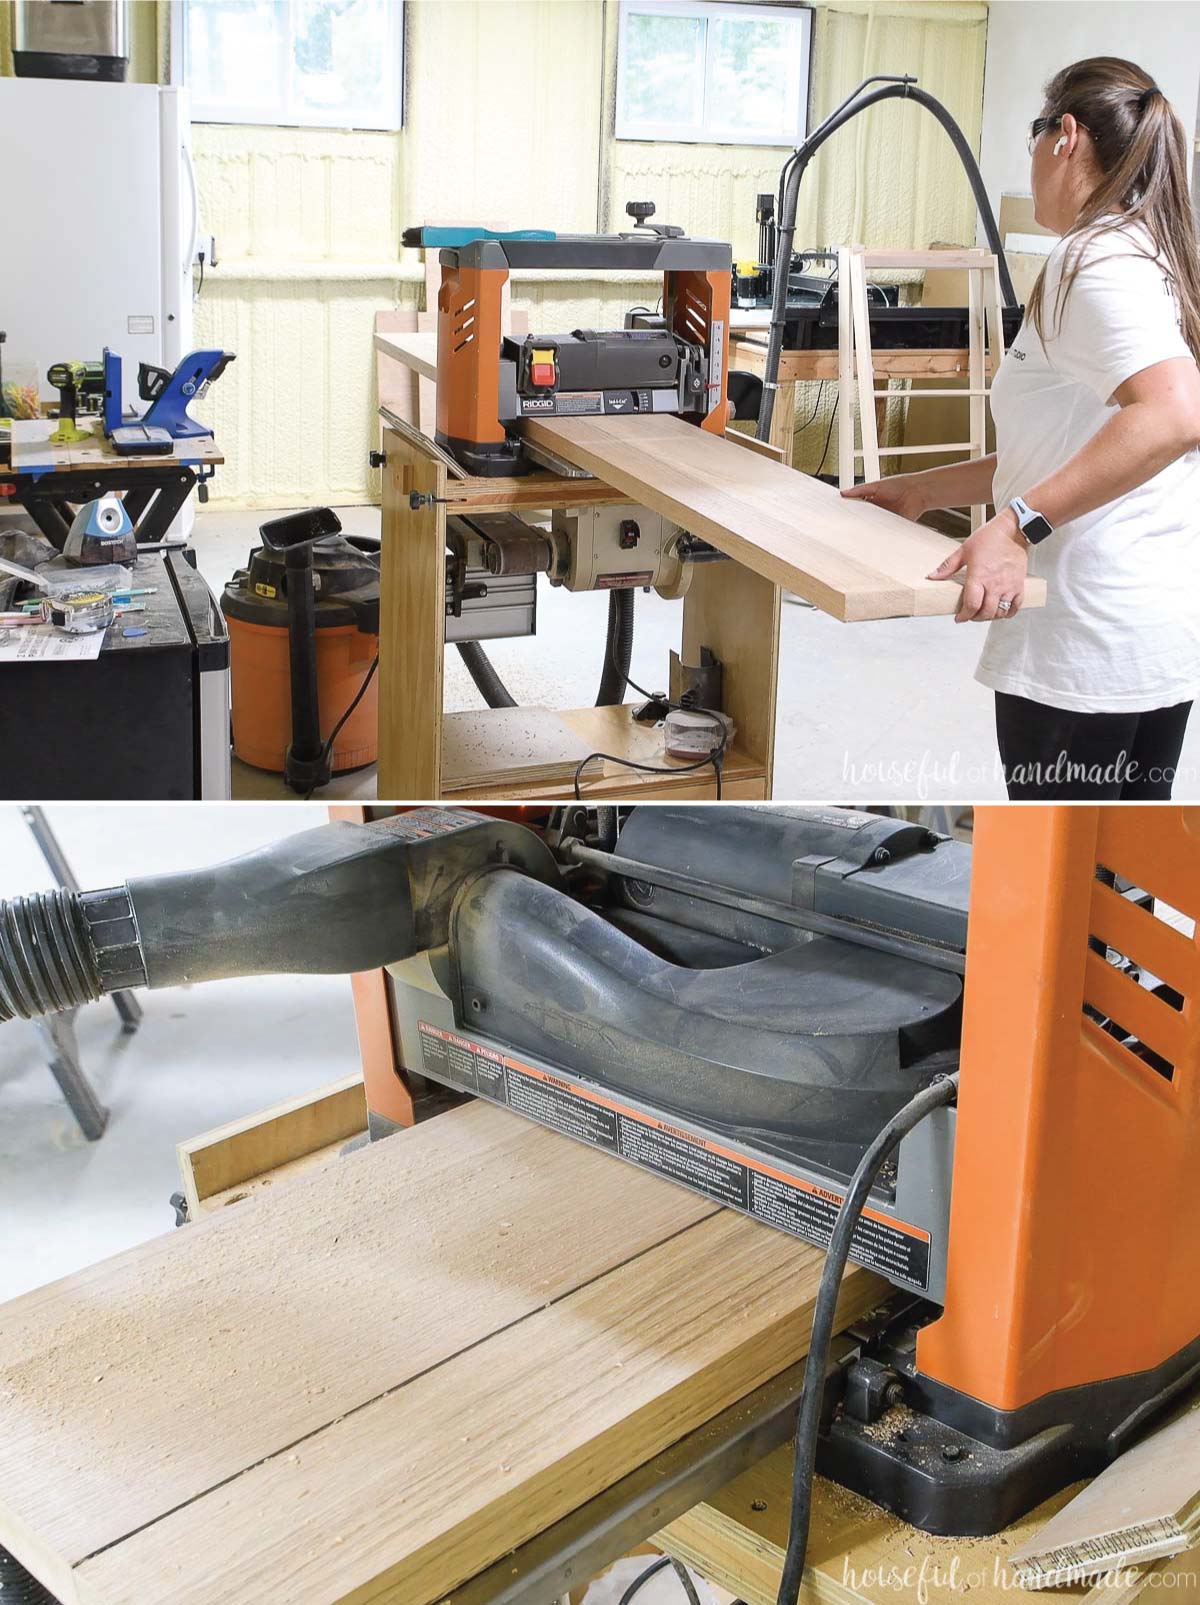
Use a planer to flatten the boards
When adding boards into the planer start with the back of the curved side facing up. Run the boards through the planer taking off as much as you would like and tell the board on the top is flat.
Then flip the board over. The flat side will be your guide to flatten the top curves off of the board. Continue running the board through the planer taking off as much as you would like in each pass until the board is completely flat.
Square off the edges of the boards
You will need to square off the sides of your boards to the new flat top and bottom before reassembling at the table top or you will have bowing again.
If your table top is small enough you can easily create flat jointed edges with a table saw or a jointer. My table top was 9 feet long and I was unable to get good flat sides for jointing.
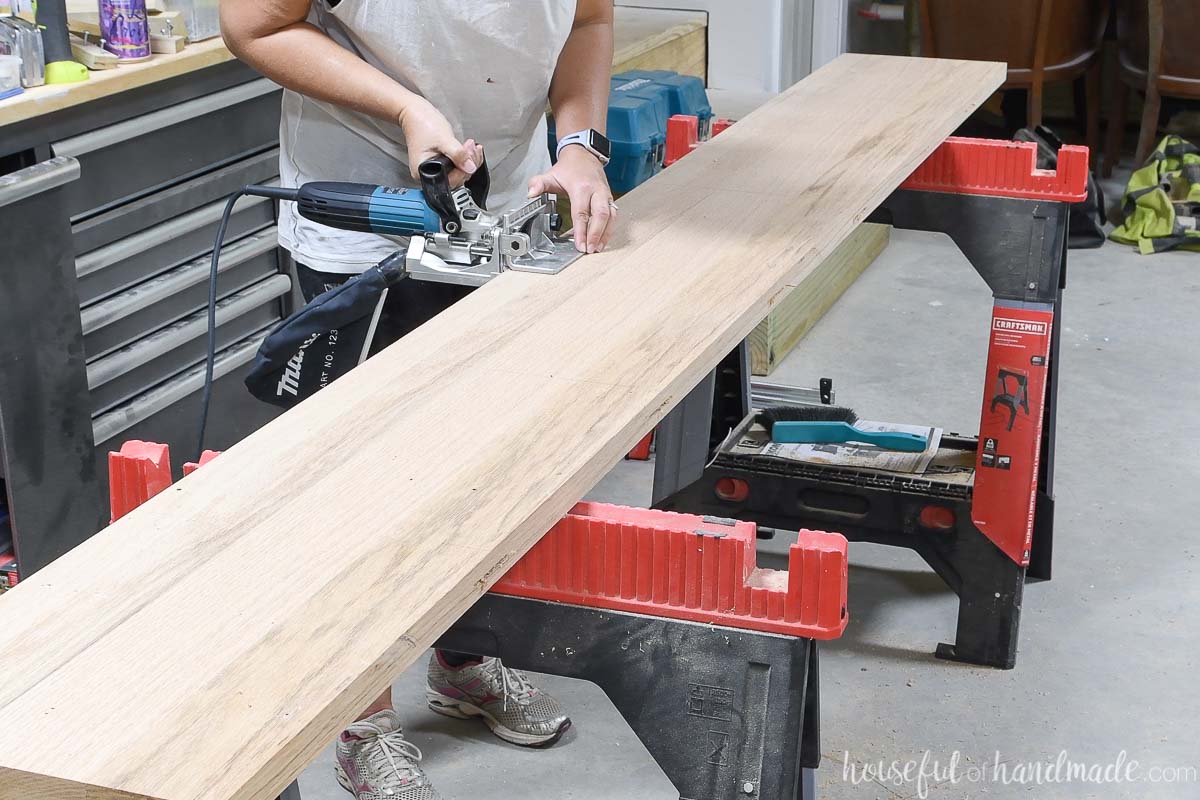
How to Joint Boards with a Circular Saw
But I was able to come up with a solution to create perfectly jointed sides between my boards using my circular saw and the Kreg RipCut.
To do this I first you need to get a close-to-straight edge on your boards. Use a straight edge (I used 2 pieces of plywood attached at the ends to get a 10′ long mostly straight edge) and your circular saw to trim the edges flat.
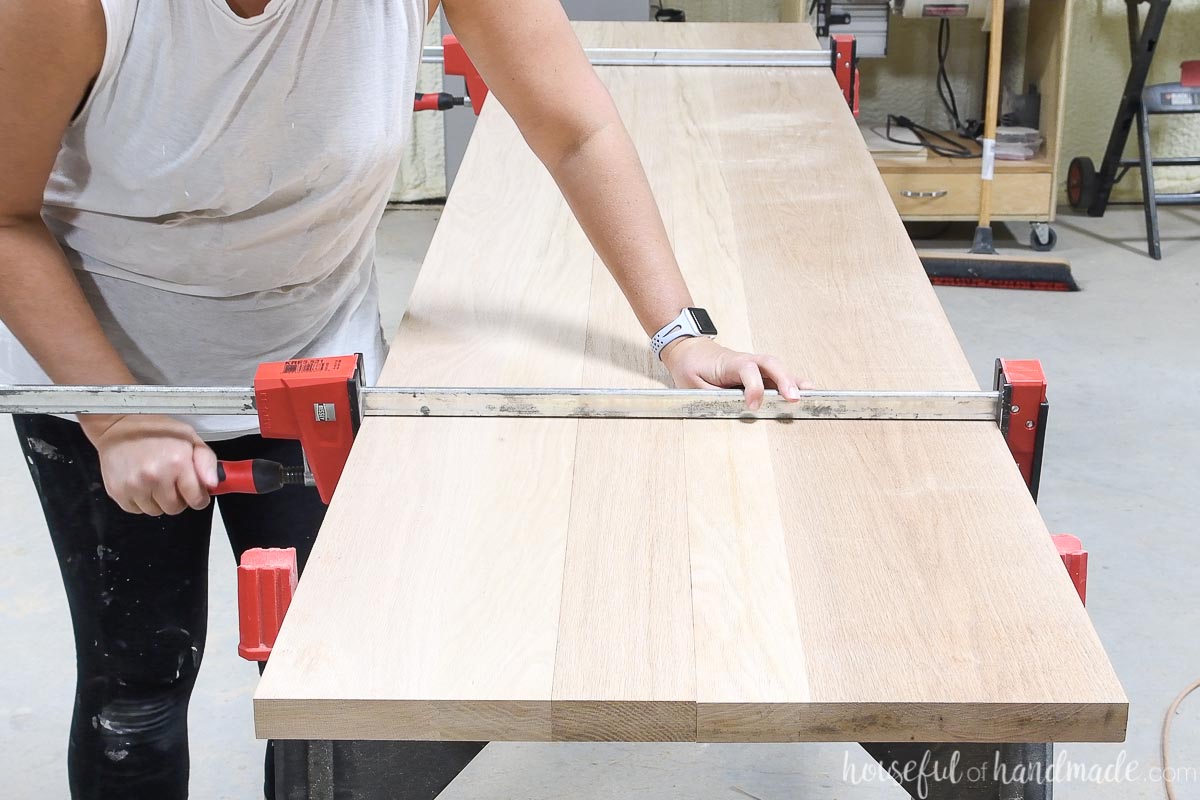
Then clamp the boards together so the two sides you want jointed are clamped tightly while staying flat. Attached scraps of wood across the seam every couple feet.
The scraps of wood were attached to the underside of the boards that were being jointed and attached with wood screws. I was not worried about the holes from the wood screws being visible after the table top was reattached to the table base.
Remove the clamps and flip the boards over on top of some sawhorses or a place you can cut. Set up the circular saw with the RipCut to cut right down the seam between the two boards.
After cutting down the seam remove the scraps of wood from the underside of the boards.
Now you can press the two boards together and admire your beautiful seam!
If you still have a little bit of seam visible because the seam was larger than the kerf of your circular saw blade, repeat to remove additional material. I had to do this on two of my 3 seams to get the perfect seams I wanted.
The reason this method works is not because you’re getting a perfectly straight edge that is 90° to the surface (which is normally needed for jointing). It is because the two sides of the cut are perfectly mirrored so they fit together like one.
Repeat for all the seams in your table top.
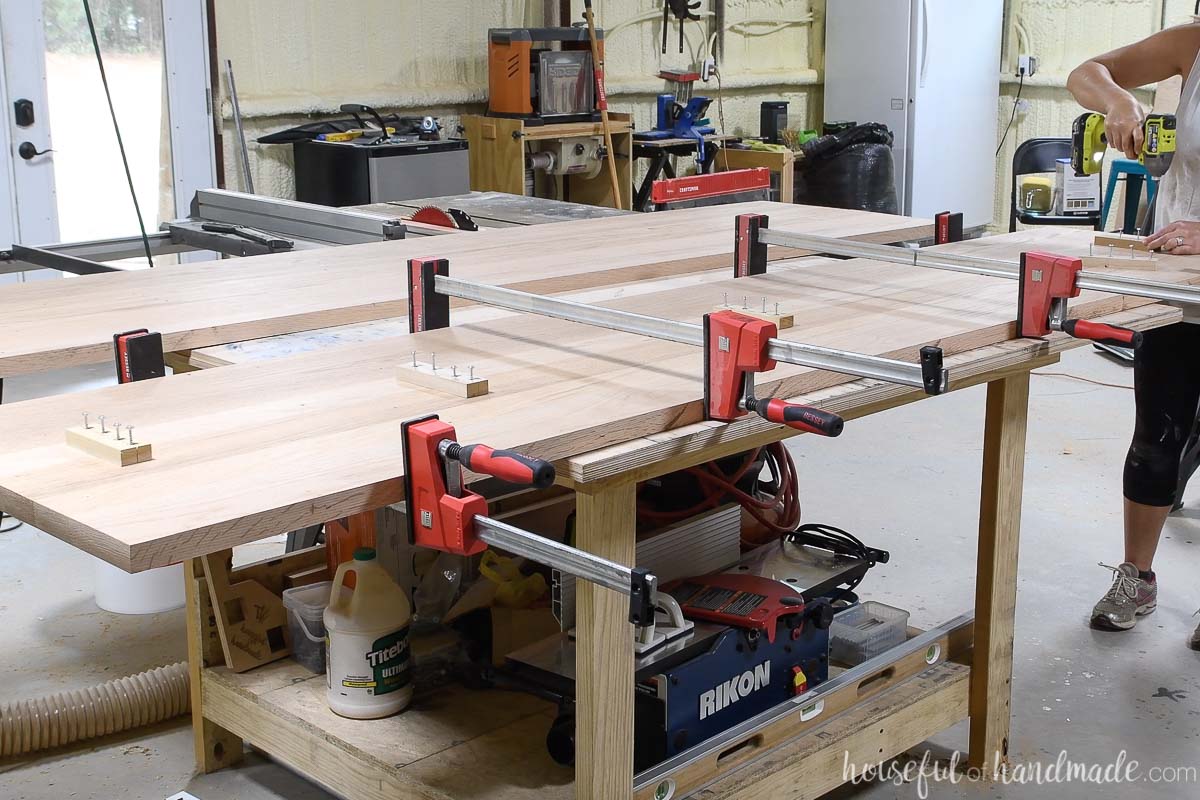
Glue table top back together
To glue the table top back together, first add biscuits if using along all of the seams. The biscuits help when aligning a long table top and will help keep things flush on the top and bottom.
Next apply a large amount of glue all along the jointed edges of the table top. Make sure to apply glue to both sides.
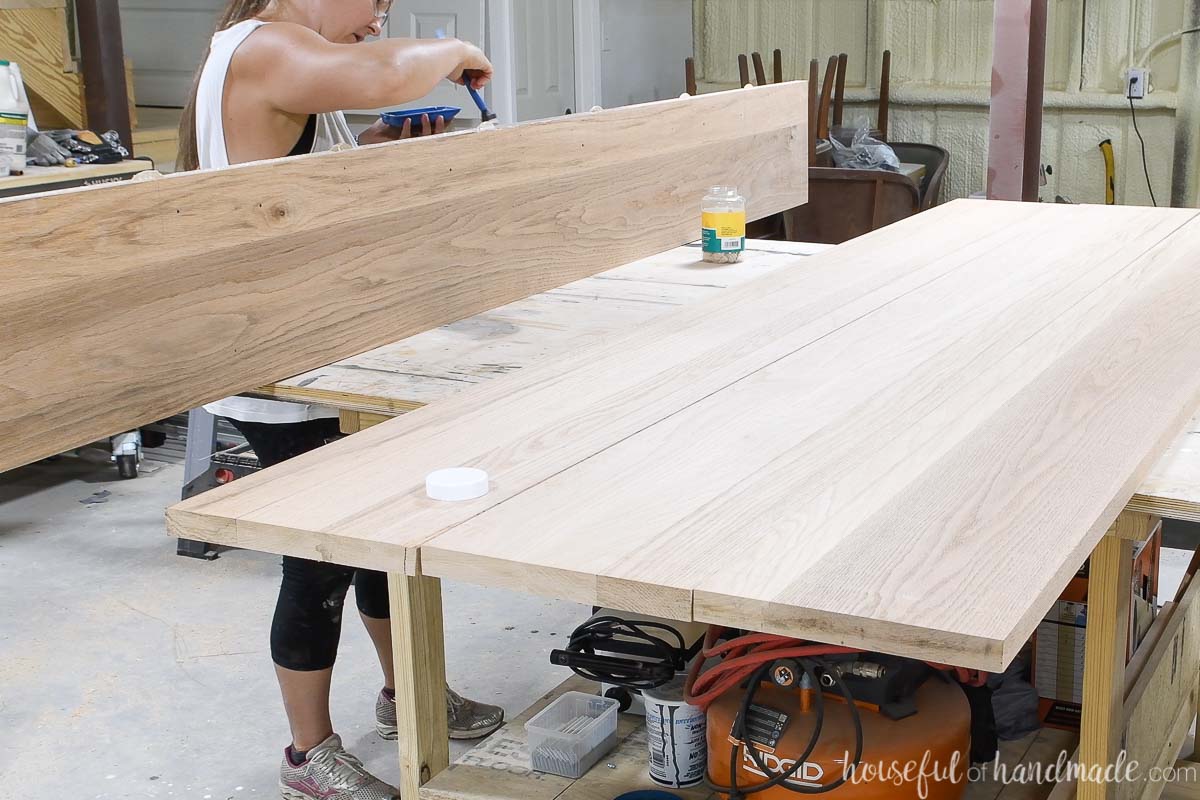
Then press the two sides together and clamp. Alternate the clamps on the top and bottom to prevent bowing.
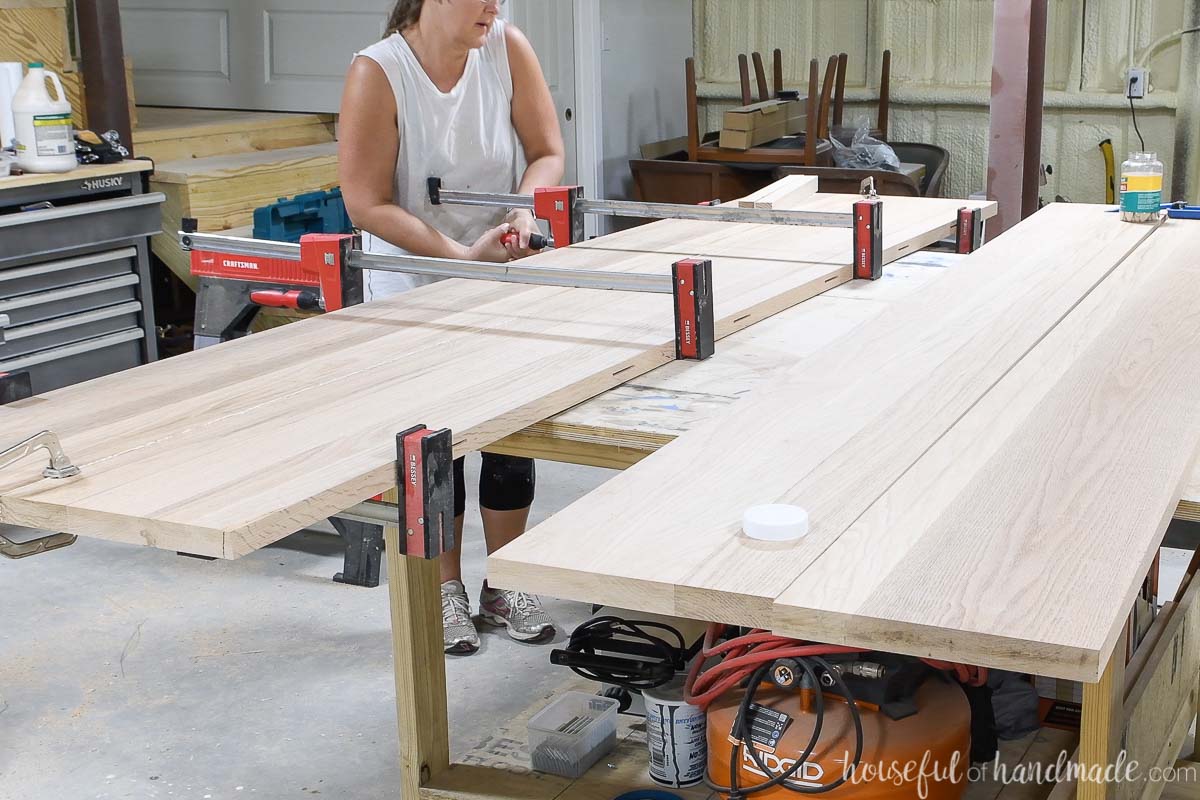
For my table top I glued and clamped two pieces together and then the other two pieces together.
I needed an extra set of hands to glue the two larger glued up pieces together so I had to wait until my husband was home from work. Each 12″ solid oak section weighed over 100 lbs.

Let the glue dry overnight then replace the table top from the clamps. Use a chisel to remove any glue squeeze out.
Use the circular saw and a straight edge to trim off the ends of the table making it straight and square.
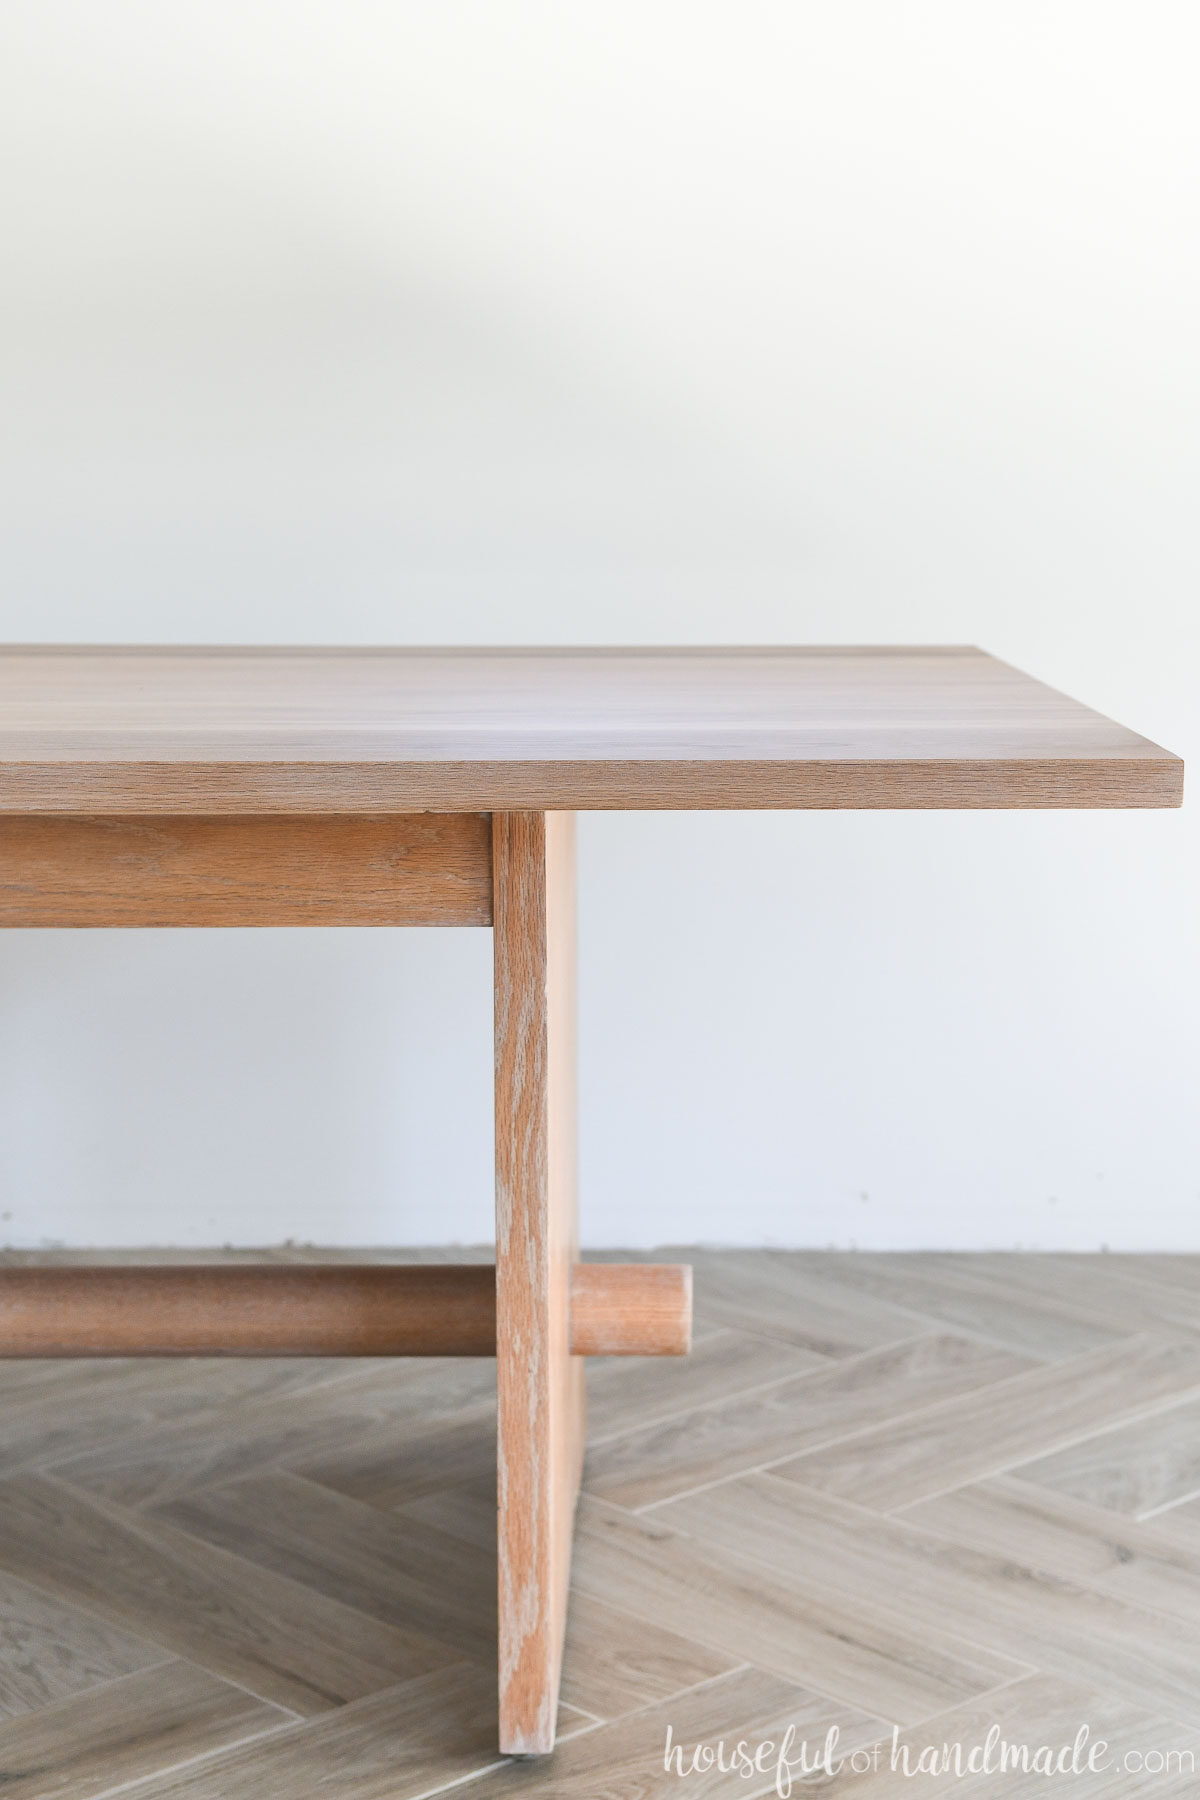
If desired, use can use a palm router to add a detail to the edges of the table. I added a small chamfer egde to mine and it gives it just a little something special.
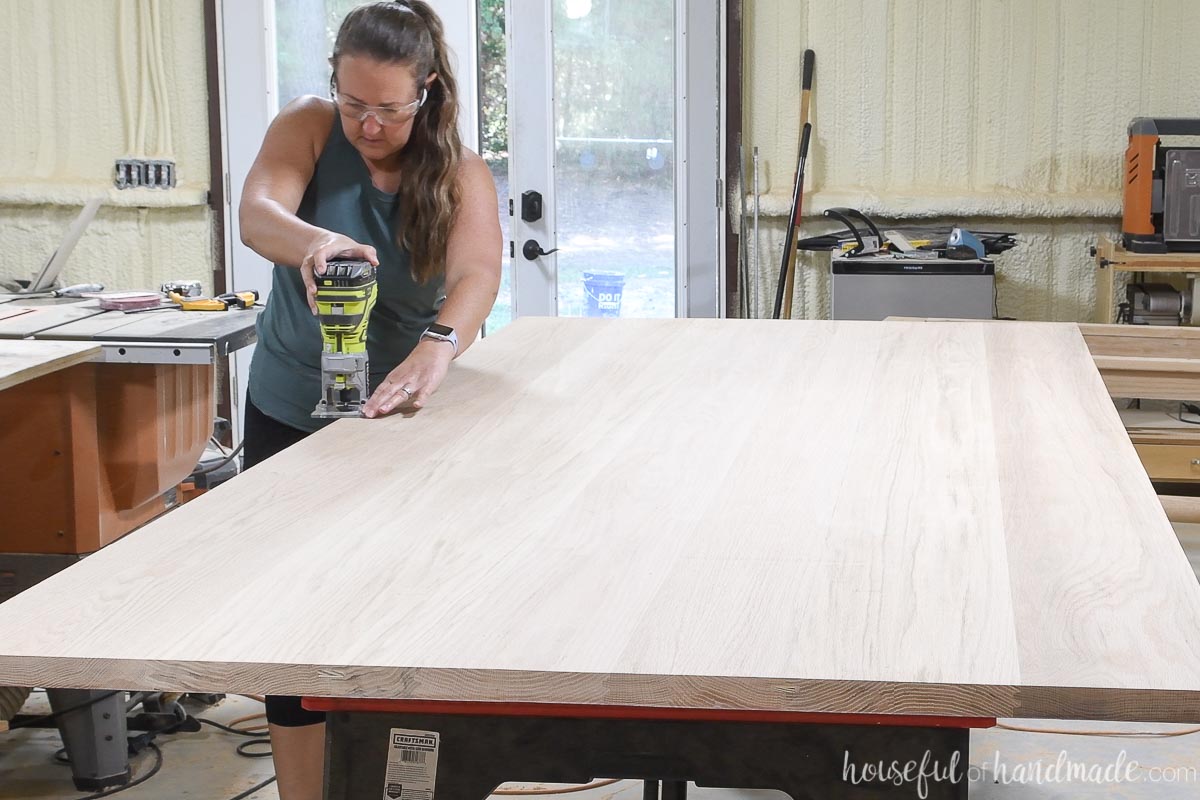
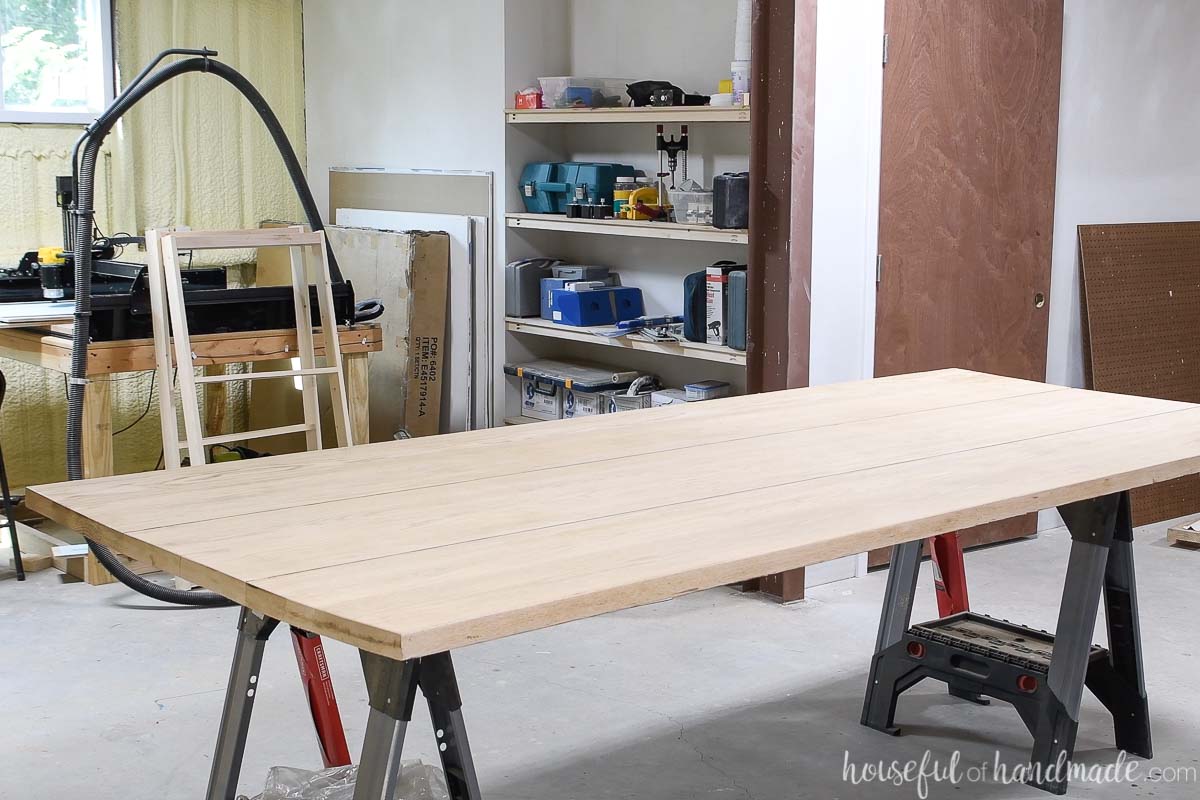
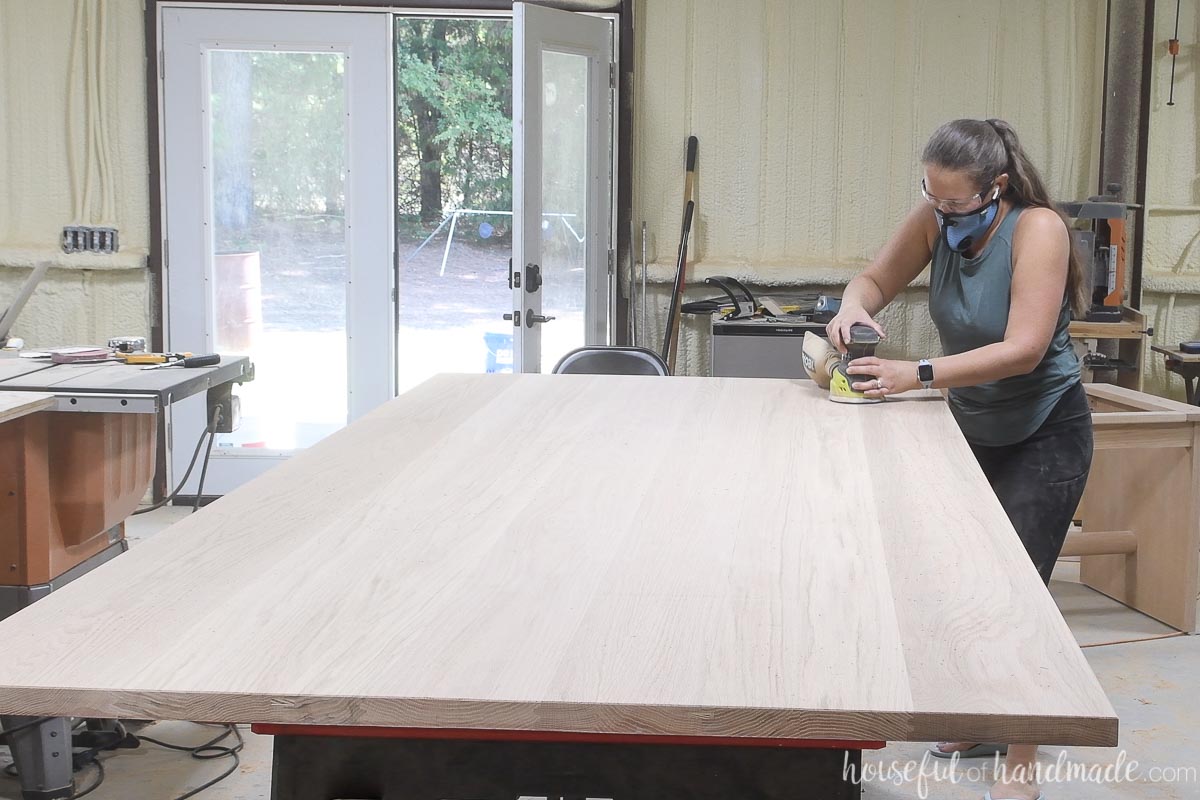
Now you are ready to continue the sanding process with your beautifully flattened table top. I only sanded my table top with 40 grit sandpaper before flattening it.
So I finished sanding with 80 grit sandpaper and then 120 grit sandpaper. I used the orbital sander for my final sanding to get a perfect finish ready for the Waterlox sealer.
Apply the new finish
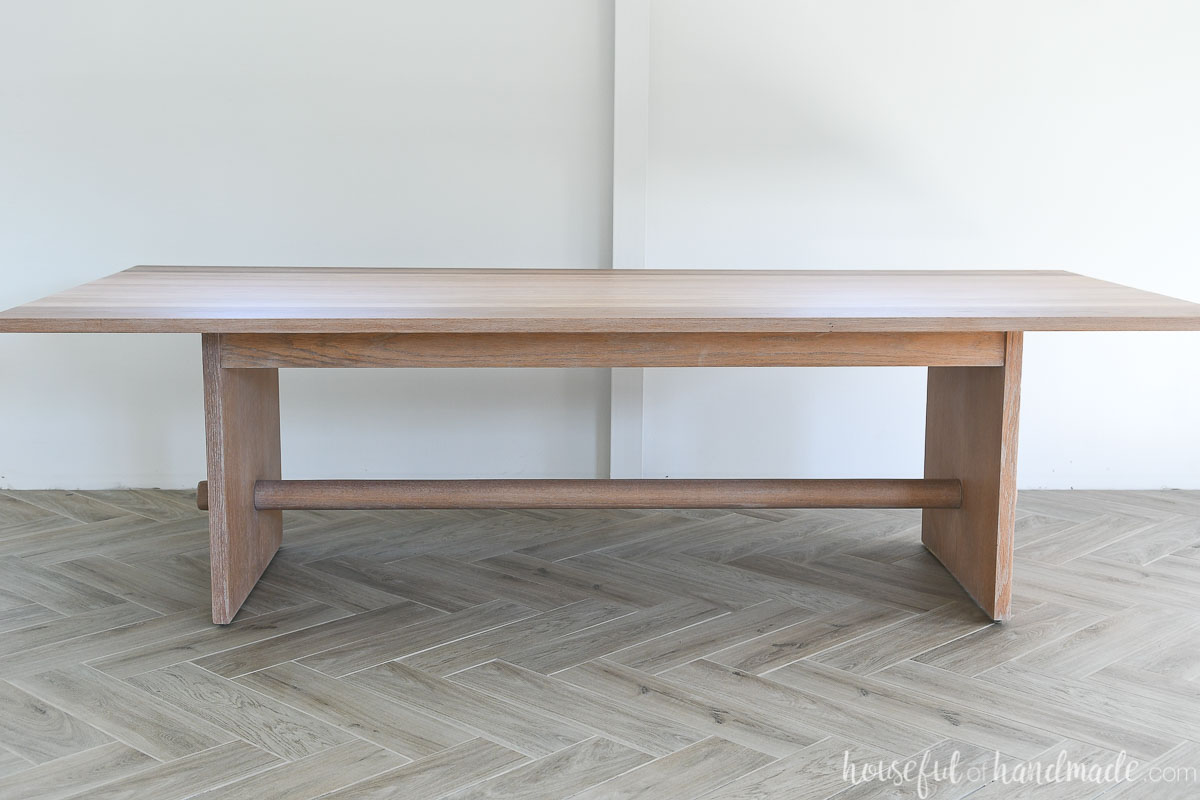
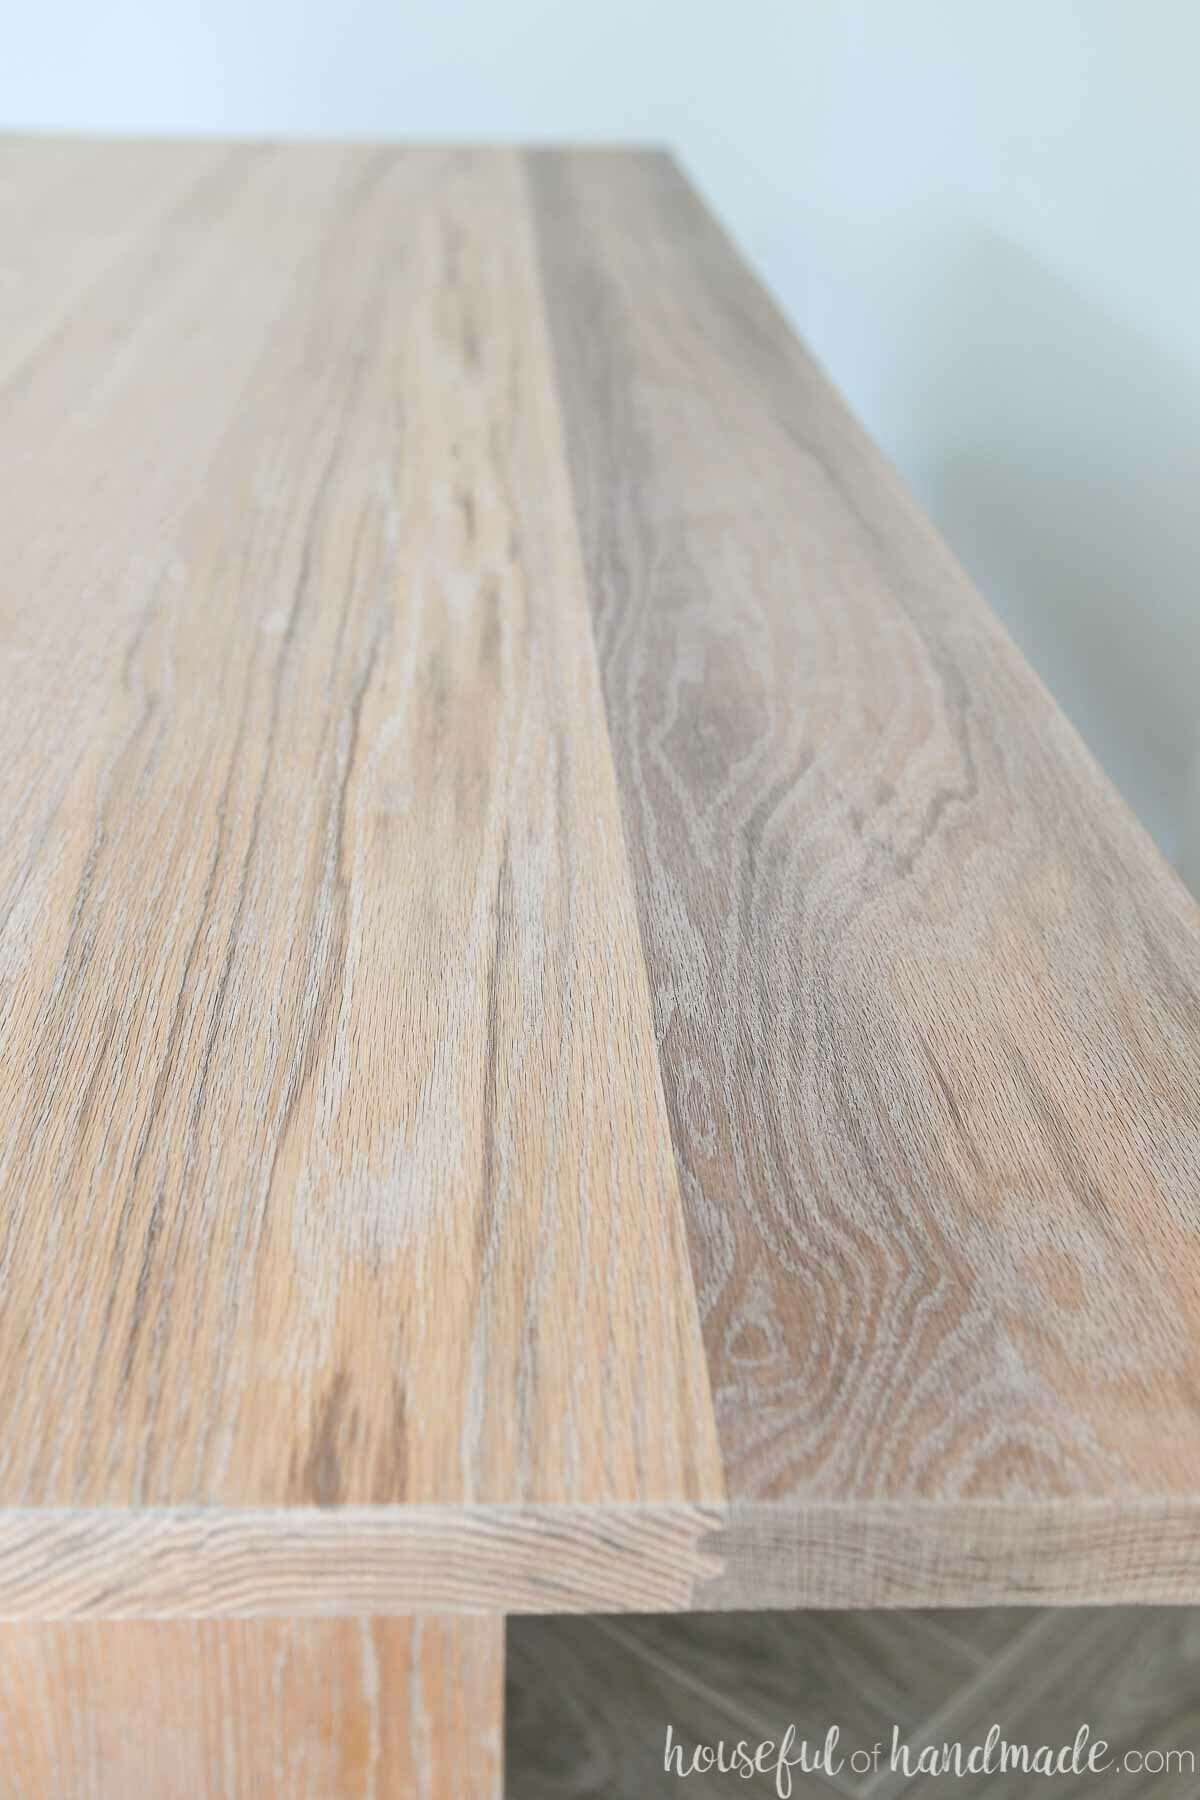
Once your entire table is completely sanded to 120 grit, you are ready to move onto adding the new finish. I love the Waterlox TrueTone finish because it’s a very modern finish the offers a matte, unfinished look without sacrificing the water protection that Waterlox is known for.
The finish is easy to apply also. It is a buff in finish meaning all you need are lint free rags to apply.
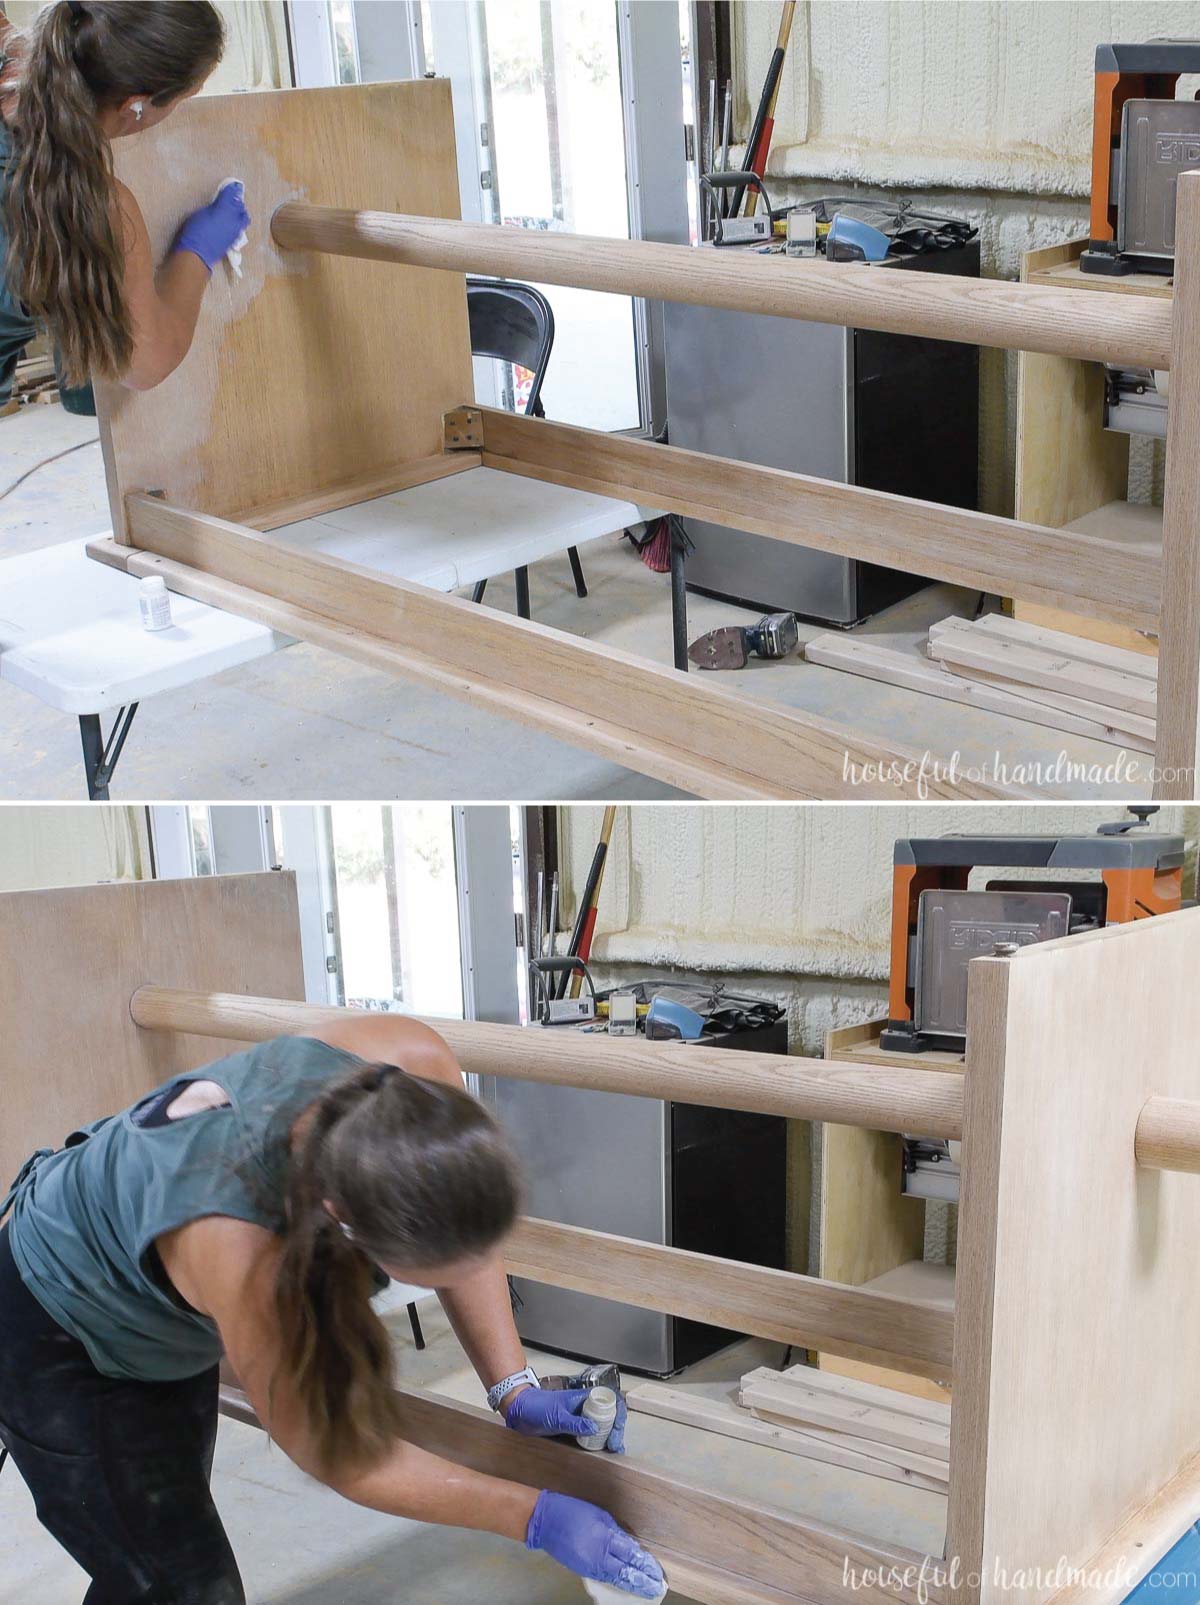
PRO TIP: Clean the entire area to be finished with tack cloth to remove any dust before applying the finish.
Pour a tiny puddle of the TrueTone color onto the surface of your table, then rub it in with your cloth in a circular motion. Repeat until you have covered the entire surface with the color.

I find I need a bit more stain at the beginning because my rag soaks it up, then after my rag is damp, the stain goes a long way. Buff until you are not seeing the color then add more.
The TrueTone finish goes a lot further than you might think. Use the following to estimate how much you need for your project:
- One 2 ounce sample covers 25-30 square feet per coat
- One pint covers 300-400 square feet per coat
- One quart covers 600-800 square feet per coat
To figure the square footage of a dining table, multiply the width of your table top (in feet) by the length (in feet). Times that by 2 for the top and bottom. Then estimate the square footage of each leg and any skirts the same way.
Let the color dry for 24 hours. Make sure you have proper ventilation and lots of air flow while it cures.
Then its time to apply the TrueTone finish. This is applied the same way as the color. Buff it into the surface with a lint free cloth.
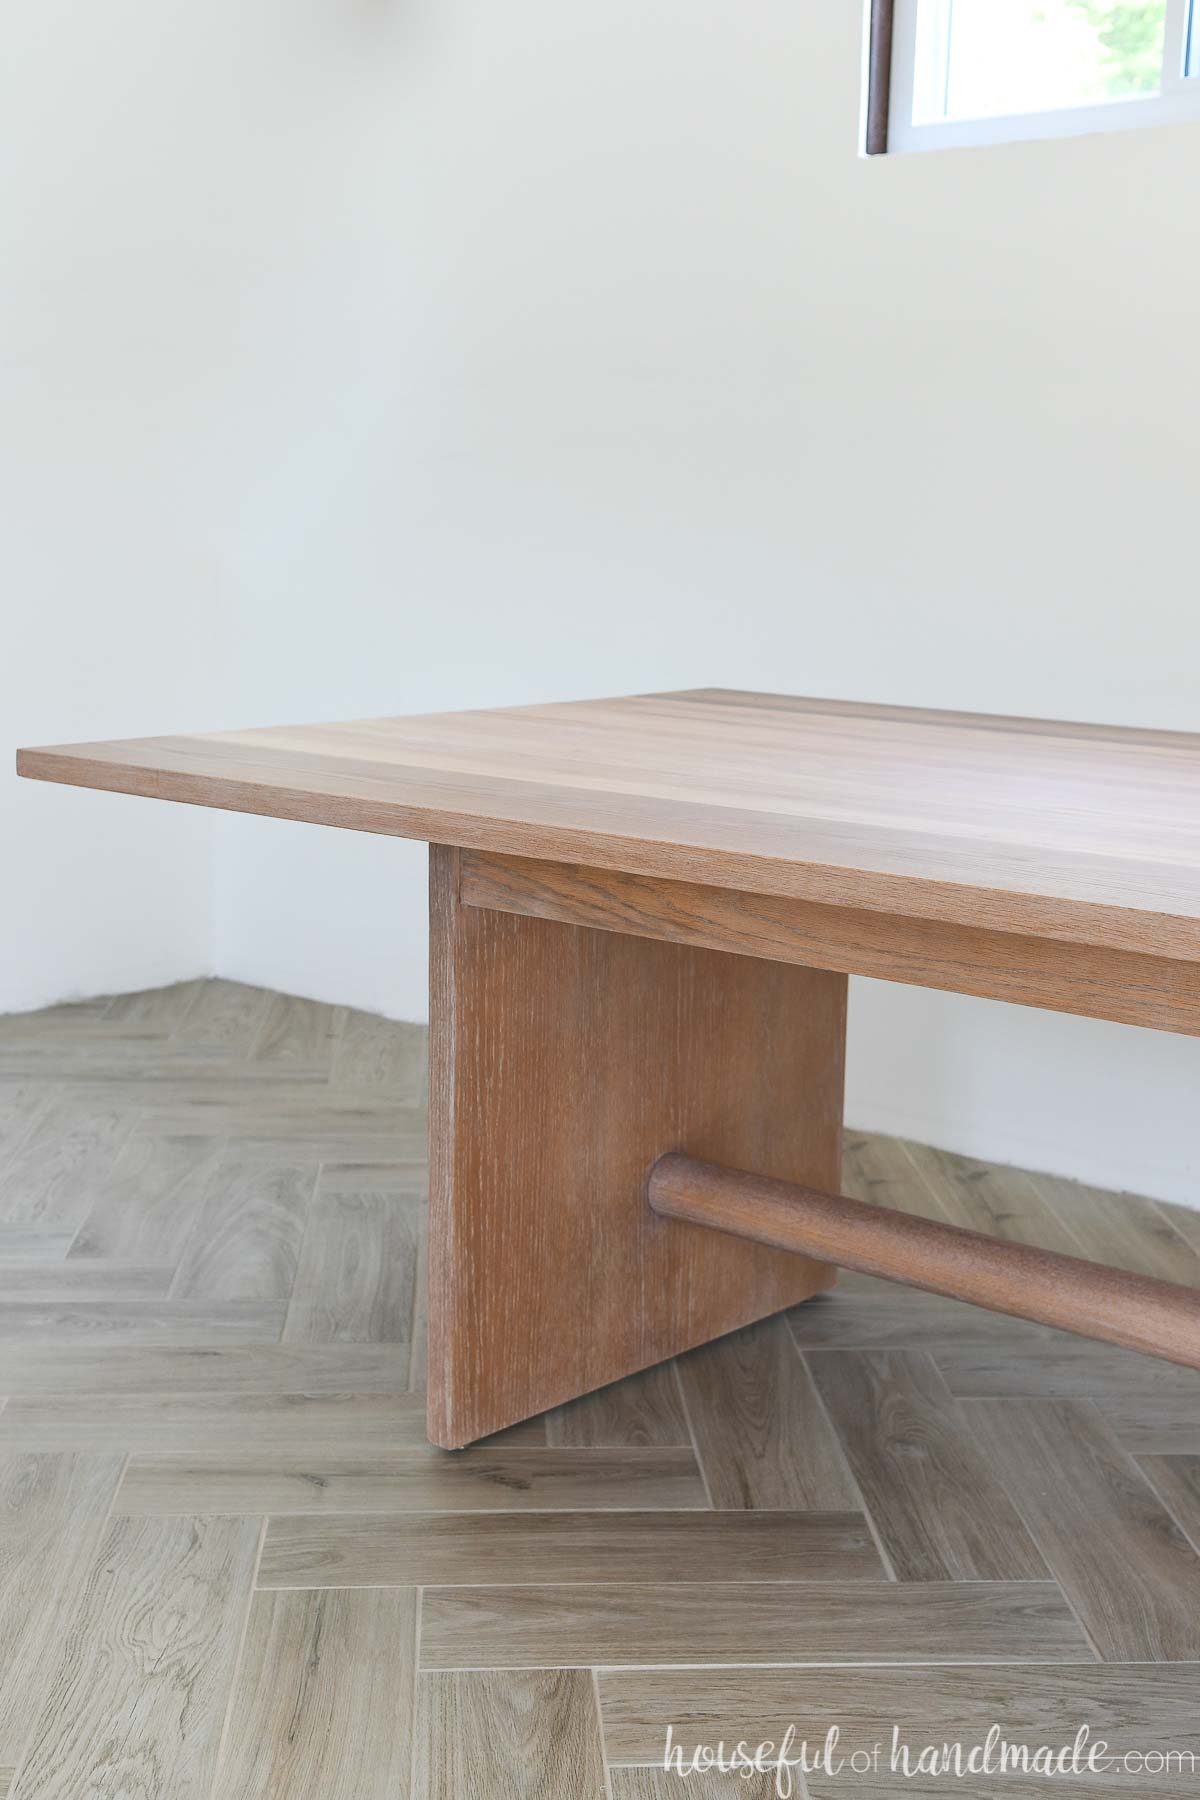
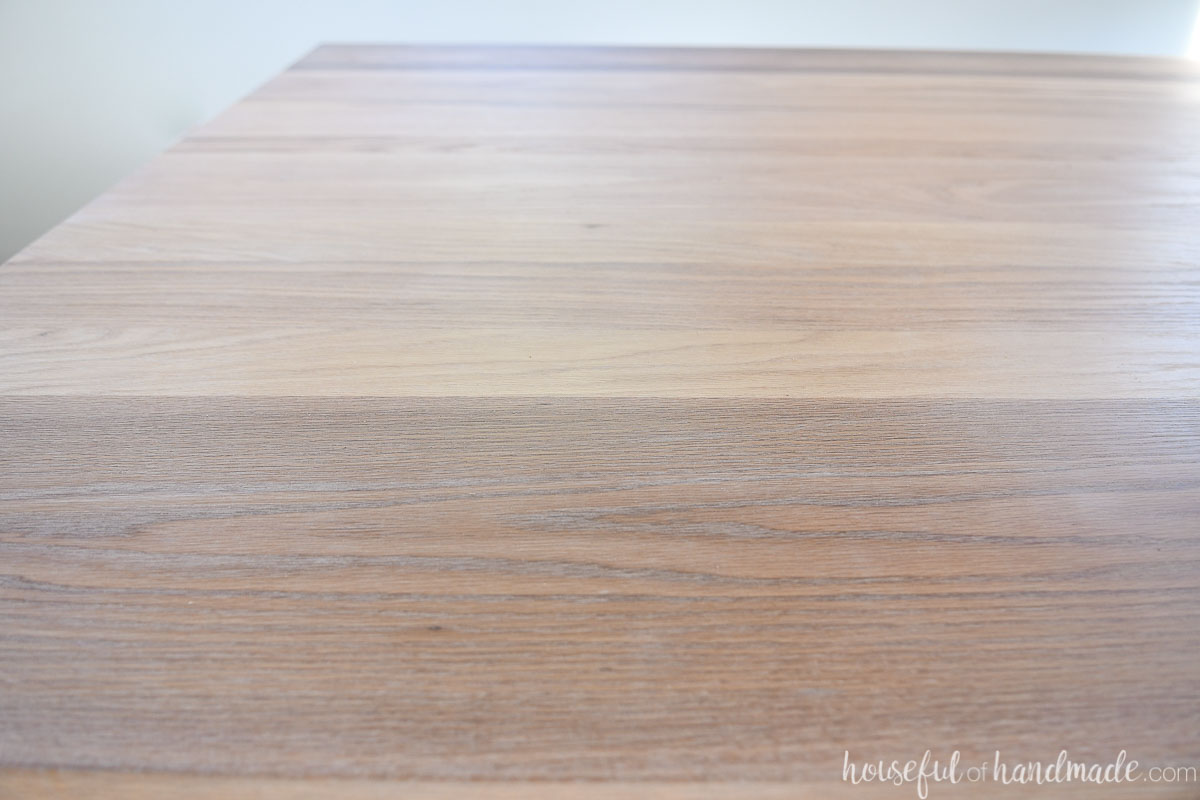
Immediately you will see the wood shine! The beautiful rich wood will be highlighted by the amazing color.

I absolutely love the Pickled White stain on the refinished oak table. The white lightens the oak and fills up the open grain. It leaves you with a limewaxed look.
It’s my newest obsession!

Let the finish dry 24 hours again and then finish with a final coat to give your project the protection it needs.

And now you are all done. Reattach your table top to the base and sit back and admire your work.
The Waterlox TrueTone finish will fully cure after 7 days so keep the surface protected from water and stains for one week.
Then it is time to enjoy your new dining table! I used the same Waterlox TrueTone color infused finish on my dining table with leaves and absolutely love it.
I cannot wait to use this new refinished table in my office as a craft table/work table. The large table top will have plenty of space for lots of projects and it will be protected from all the craft supplies with the TrueTone finish.
Happy refinishing!
