

Tile backsplashes are more than just beautiful. They also make it easier to clean the walls that can get really messy.
Plus, a DIY tile backsplash is the perfect beginner tile project. It is typically a small area to tile and doesn’t need to be water-tight.
So if you are ready to DIY your own tile backsplash, I have partnered with CTS Rapid Set to show you how to tile with their new All Tile Mortar. It’s easy and perfect for all types of tiles!
This post may contain affiliate links. As an Amazon Associate I earn from qualifying purchases. Click here to read my full disclosure policy.
What type of tile adhesive do I need?
It can be confusing to know what product you need to tile a backsplash. With words like thinset, mortar, and grout, how do you know if you have the right product.
That is why the All Tile Mortar from CTS is so great. It is a multi-purpose tile setting mortar for ceramic, mosaic, porcelain, quarry, glass, veneer, cement and natural tiles. It works for all tiles!
You can use it for large to small tiles and use it on the floor or on the walls. So you don’t have to worry if you have the right tile adhesive.
The All Tile Mortar is a fast set product. Meaning you can tile and grout the same day instead of having to wait 24 hours.
You only need to let it it cure for 5 hours after finishing your tile before light traffic or grout. It makes it perfect for a weekend project like a new tile backsplash.
Because it is a faster set, I like to mix smaller batches. Which is great for tiling a backsplash.
I share all the math below for how to mix up smaller batches so you will be prepared for your next tile project.
After your tile is done and the mortar is cured. It is time for grout to fills in the gaps between the tiles.
Use a non-sanded grout for small (less than 1/8″) grout joints. Also, use it if you have a tile that is easily scratched. Use sanded grout for larger grout lines.
How to Tile a Backsplash
Tools & Materials
Recommended Tools:
- Tile saw or tile cutter
- I have had great success with this inexpensive tile saw.
- Drill
- Drill mixing attachment
- Level
- Trowel
- Buckets
- Kitchen scale
- Rubber float
- Sponge
Supplies:
- CTS All Tile Mortar
- Tile
- Calculate how much square footage your backsplash is then buy 10-20% more. This allows for waste due to cuts and errors.
- Tile spacers
- Grout
Prefer to Watch? Check out the Video Below
STEP 1- Lay Out the Tiles
Decide what pattern you want for your tiles. I used a classic 50% offset subway tile for my backsplash.
Check out this post for more subway tile pattern ideas.
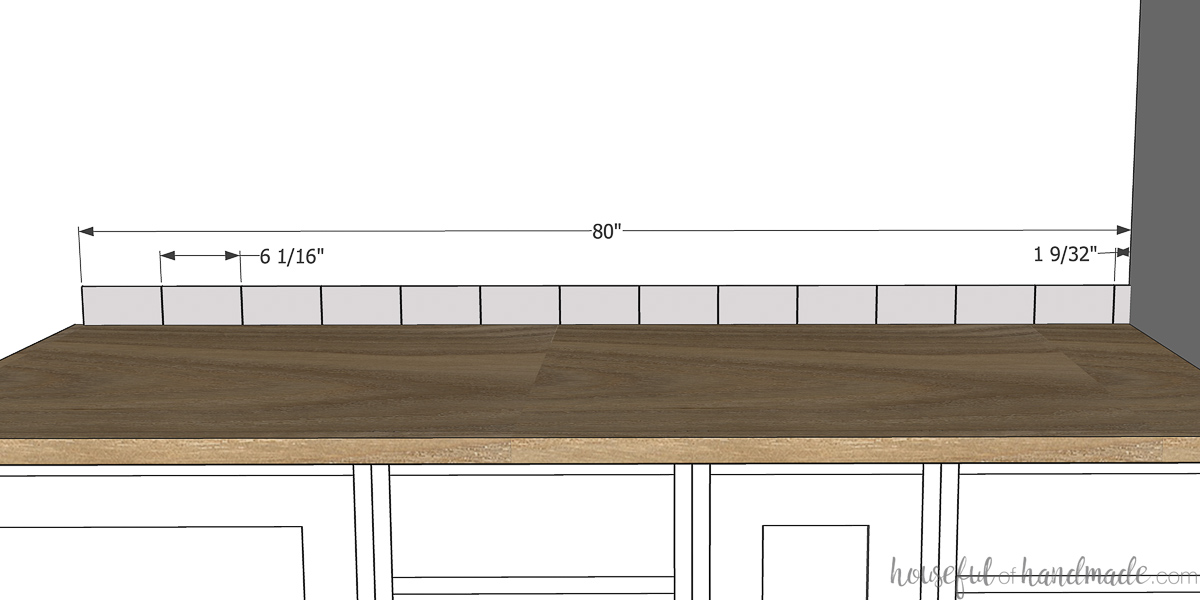
Next you need to measure the entire backsplash area to make sure you do not have any tiny cuts of tile left on the edges.
To figure out how many tiles will be needed to cover the entire space, measure the width of the tile and add the width of your spacer.
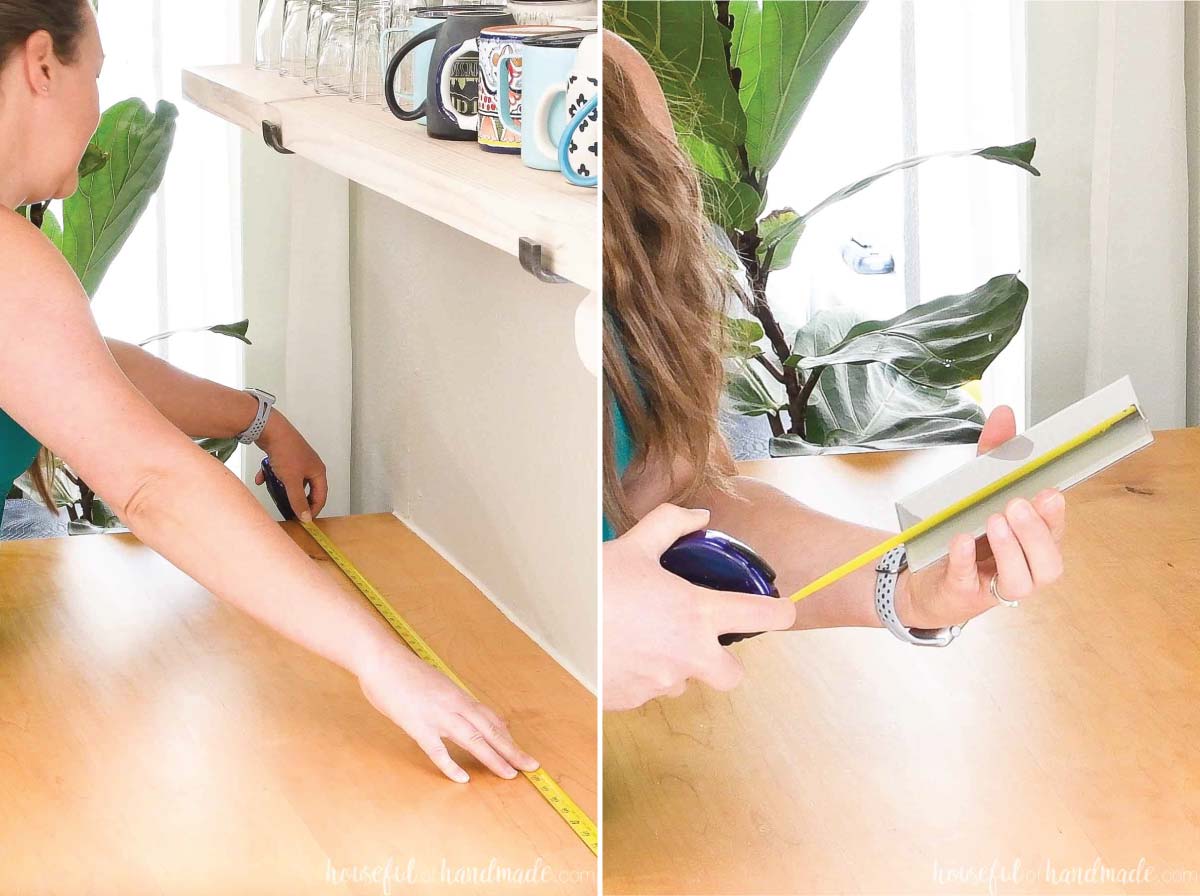
Then divide the total length of your backsplash by the tile (plus spacer) number.
TOTAL LENGTH / (TILE WIDTH + SPACER WIDTH)
- If you get a total number, you hit the jackpot and your tiles will fit perfectly across the wall.
- If the decimal on the end of the number is greater than .5, you will be left with over 1/2 of a tile on the end.
- If the decimal on the end of the number is less than .5, you will have less than 1/2 a tile on the end. The small the decimal, the smaller the piece of tile.

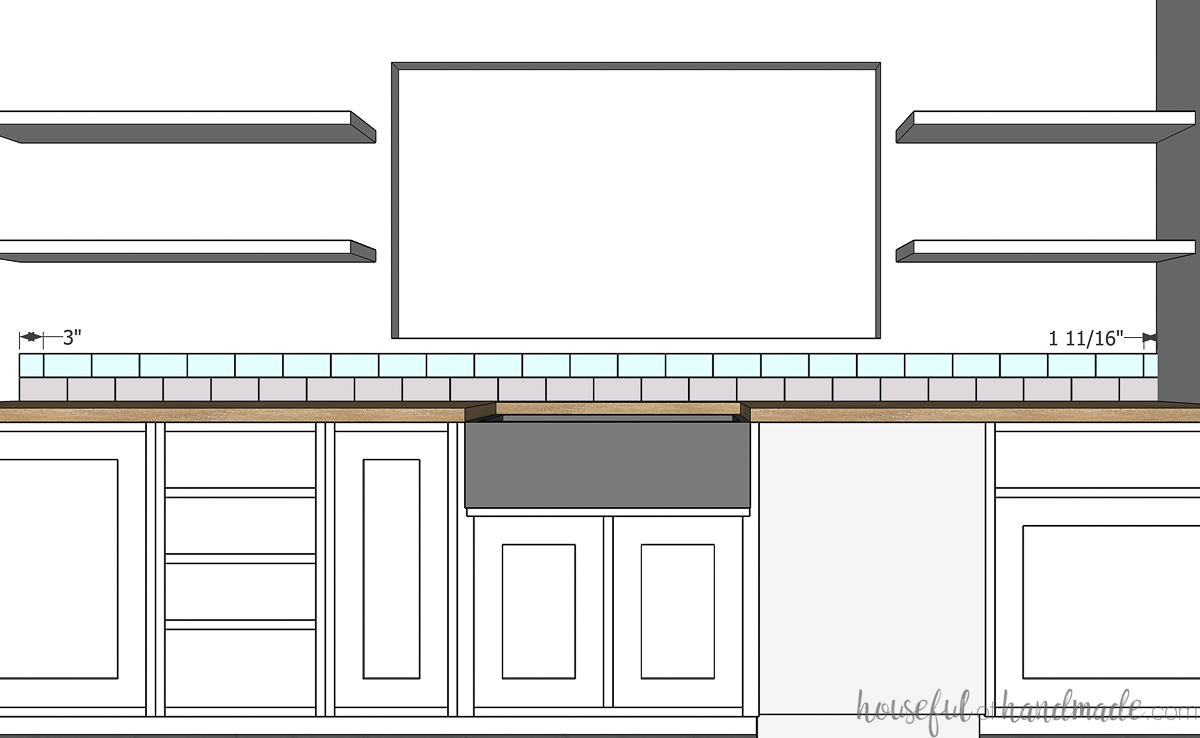
Then make sure to do this for every variation of row. For my 50% offset subway tile pattern, the second row would start with a half tile.
So deduct the measurement for the cut tile off the total length of your backsplash, then divide that amount by the tile width + spacer width.
Make sure you do not end up with a small fraction of tile left over for this row.
If all the numbers leave you will a piece of tile you are okay with, go ahead with the pattern with a full tile at the starting point.
How to adjust if you get a small decimal
If you are left with too small a number (and therefore a small cut off piece of tile). Try the formula starting with a cut tile. See what you are left with if your first tile is 0.75 of the original tile.
For example, you are tiling an 80″ long backsplash with a 6″ tile and a 1/16″ spacer. So you divide 80 by 6.0625 and get 13.195. That is too small for my liking.
To see if starting with a cut tile would be better, subtract 4.5″ (6 x 0.75) from 80″ to get 755″. Divide that by 6.0625 and you get 12.45.
That means you will have almost a half tile left over (approximately 2 3/4″ piece). So it would be a nice size to end on.

Centering the pattern
If you prefer to split the difference in the tiles so your pattern is centered, you can take 1 + the decimal left over and divide that by 2.
This will tell you how big each end tile will be to have equal amounts on each end.
So in the example, take 1.195 divided by 2 to get 0.5975. Times that by the tile length (6) and you will have a 3.585″ tile on each end.
I would round to 3 1/2″ to make it easy to start and no one should notice the slight difference on the other side.

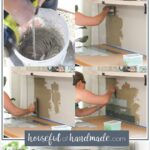
STEP 2- Prep for Tile
Pull out or move any appliances that might be in the way of your tile. Clear everything off the countertop.
Cover your countertop with paper and tape it close to the wall. Make sure to leave the tape the thickness of the tile away from the wall so it doesn’t get stuck under the tiles.
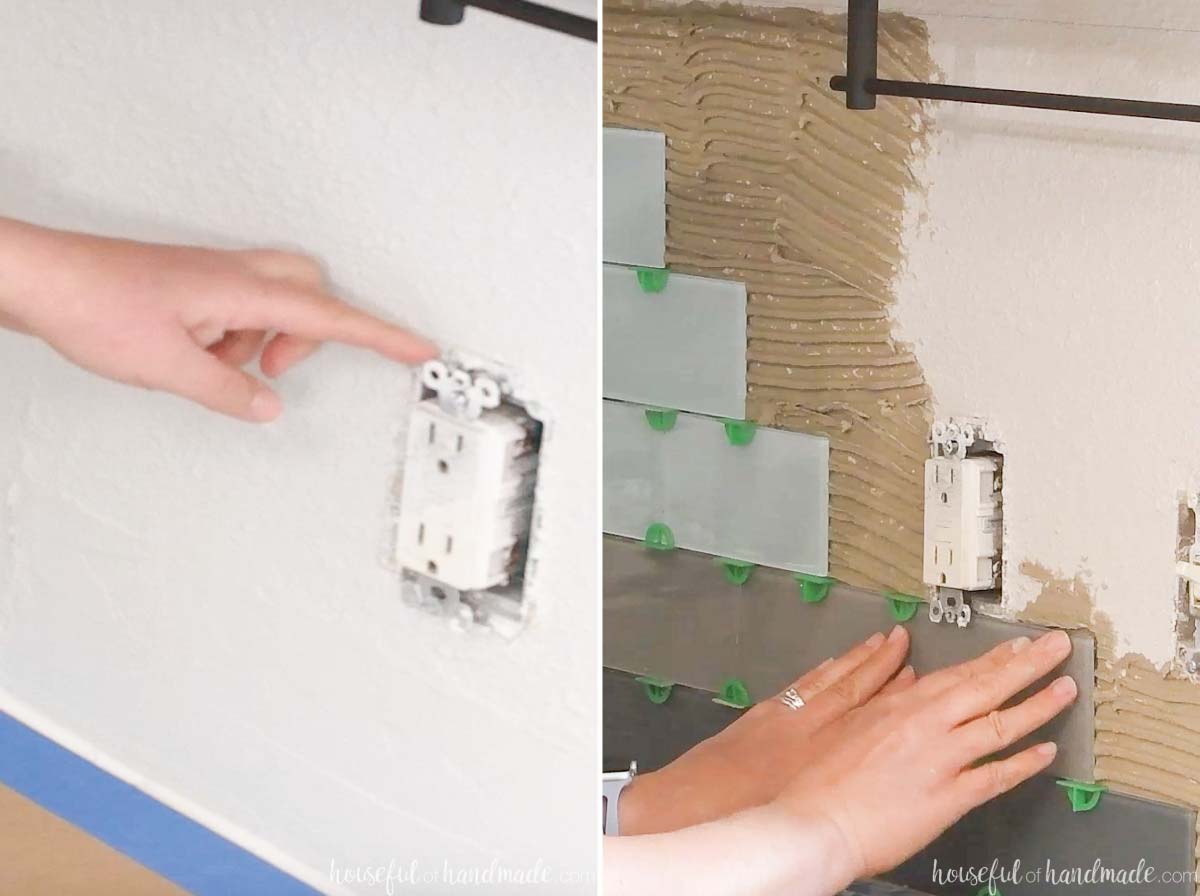
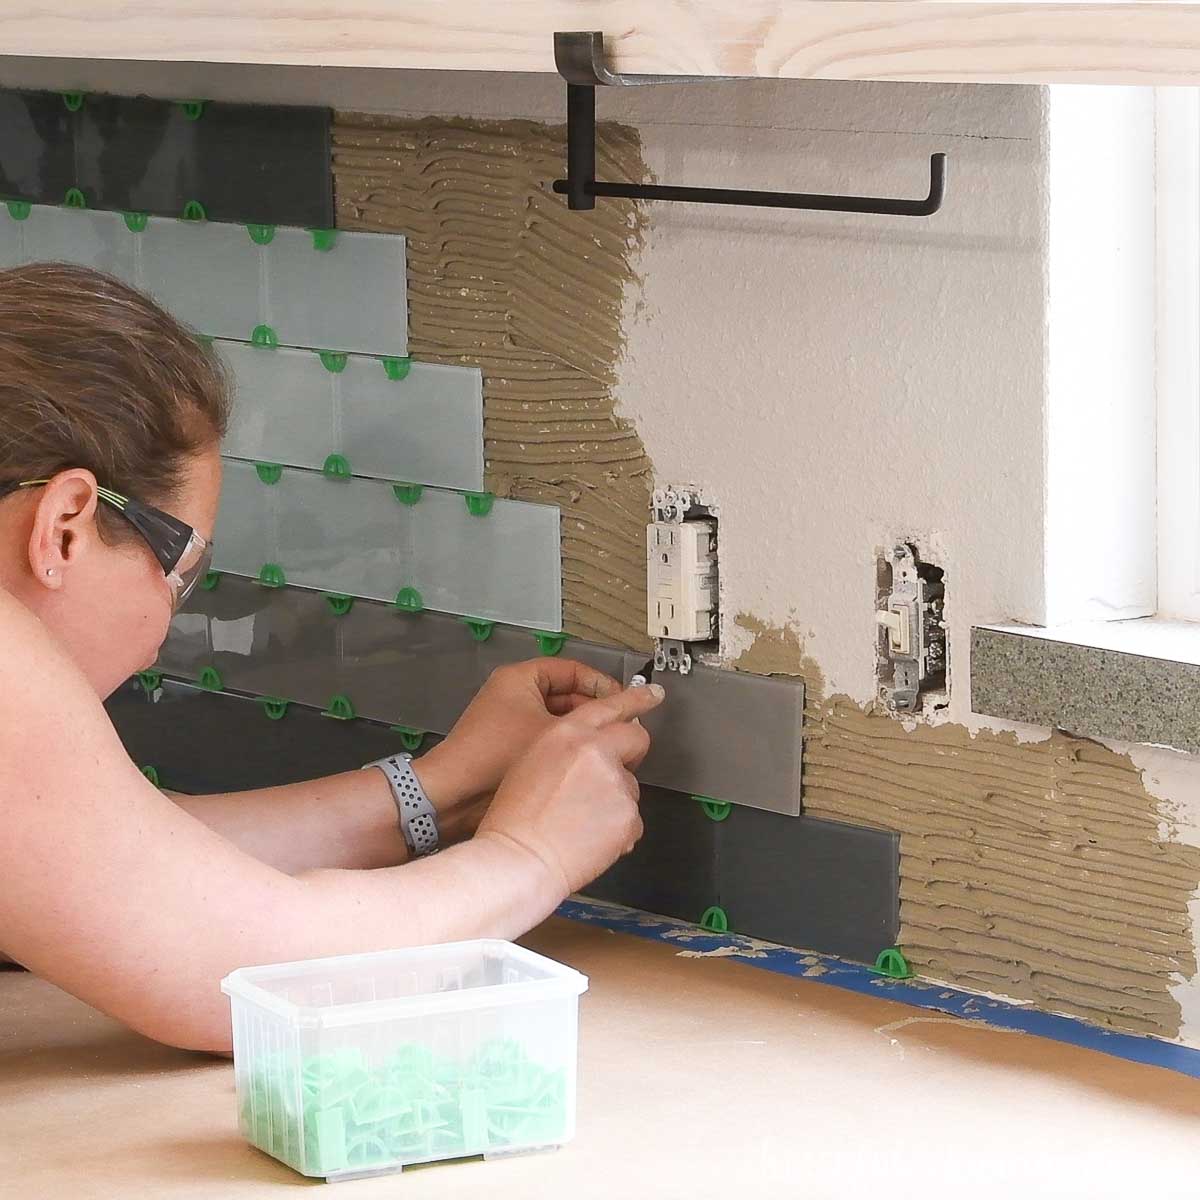
Remove any outlet covers. Also, loosen the outlets in the boxes so that you can tile behind them.
This will bring the outlets flush with the new tile wall.
If you have an open edge to the backsplash on one or both sides (no up against a cabinet or wall), draw a straight line using a level so it is plum (straight up and down).
Also, if your backsplash is going behind a stove, screw in a small scrap of wood level with the countertops on either side. You will remove this after the tiles is set.
Before mixing up the mortar, cut any tiles you can so you are ready to lay as many tiles as possible once you have the mortar mixed up.
I cut all the half tiles needed on the starting side of my subway tile pattern.
STEP 3- Mix the Tile Mortar
A backsplash will probably not use a full bag. And mixing a large amount can cause it to harden in the bucket before you are get a chance to use it all.
I prefer to mix up small batches when tiling. The All Tile Mortar has a 1 1/2 hour pot life (the amount of usable time in the bucket before hardening).
If you have a lot of cuts to make in your tiles to go around outlets, windows, etc., it will take longer to tile a smaller section. So plan an even smaller batch for these areas.
To mix a full 50 lb bag, you add 6-7 quarts of water. So to mix a smaller bag, you just need to divide the both measurements by the same number.
I found mixing 1/4 to 1/5 of the bag to be a good amount for tiling an area that was easy with minimal cuts. For areas with more cuts, mix 1/6-1/8 of the bag.
Use the table below to find the right mixing ratio:
| For a 50 Lb Bag | LBS of Mortar | Water |
|---|---|---|
| 1/2 Bag | 25 | 3 to 3 1/2 Quarts |
| 1/3 Bag | 16.67 | 2 to 2 1/3 Quarts |
| 1/4 Bag | 12.5 | 1 1/2 to 1 3/4 Quarts |
| 1/5 Bag | 10 | 4 3/4 to 5 1/2 Cups |
| 1/6 Bag | 8.33 | 4 to 4 3/4 Cups |
| 1/8 Bag | 6.25 | 3 to 3 1/2 Cups |
| 1/10 Bag | 5 | 2 1/2 to 2 3/4 Cups |
When mixing smaller amounts, make sure to mix your mortar in a smaller container.
- A 5 gallon bucket is great for mixing a full, 1/2 or even 1/3 of the bag
- Use a 2 gallon bucket for mixing 1/4 to 1/6 of a bag.
- Repurpose large cottage cheese or yogurt containers for mixing 1/8 or 1/10 of a bag.
Measure out the amount of mortar mix needed in a dry container. Use a kitchen scale to get the right amount of mortar.
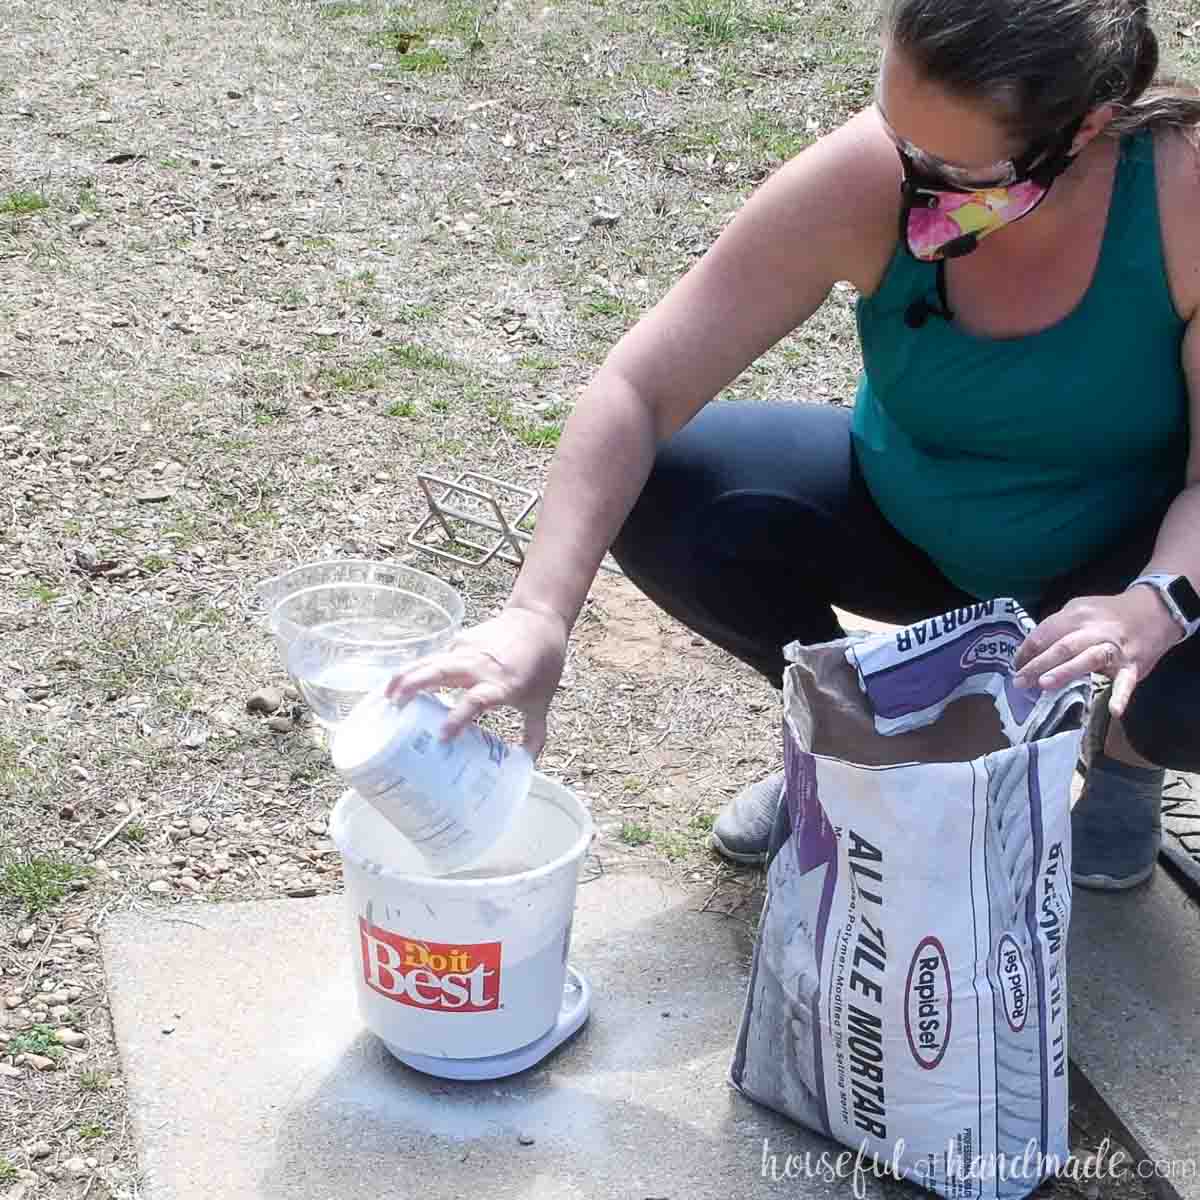
Always add the water to the bottom of the container first. Start with the lowest amount of water needed.
Use cold water when mixing your tile mortar. Hot water will reduce the pot time and make it harden faster.
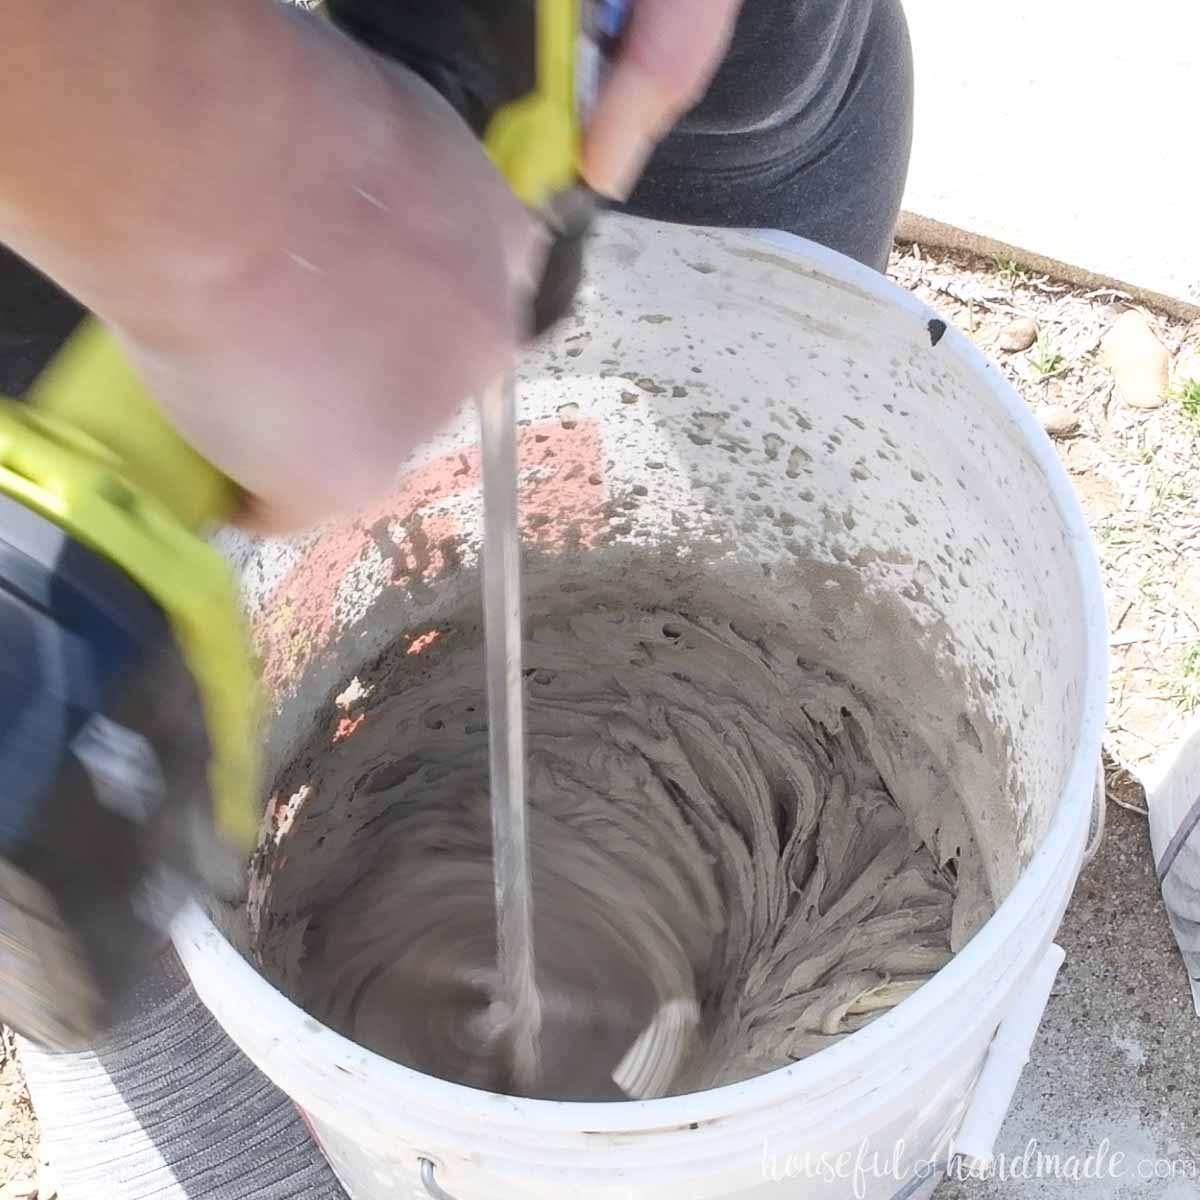
Pour the mortar into the water while you are mixing. Continue mixing until there is no more dry mortar and the mortar is a peanut butter or frosting consistency.
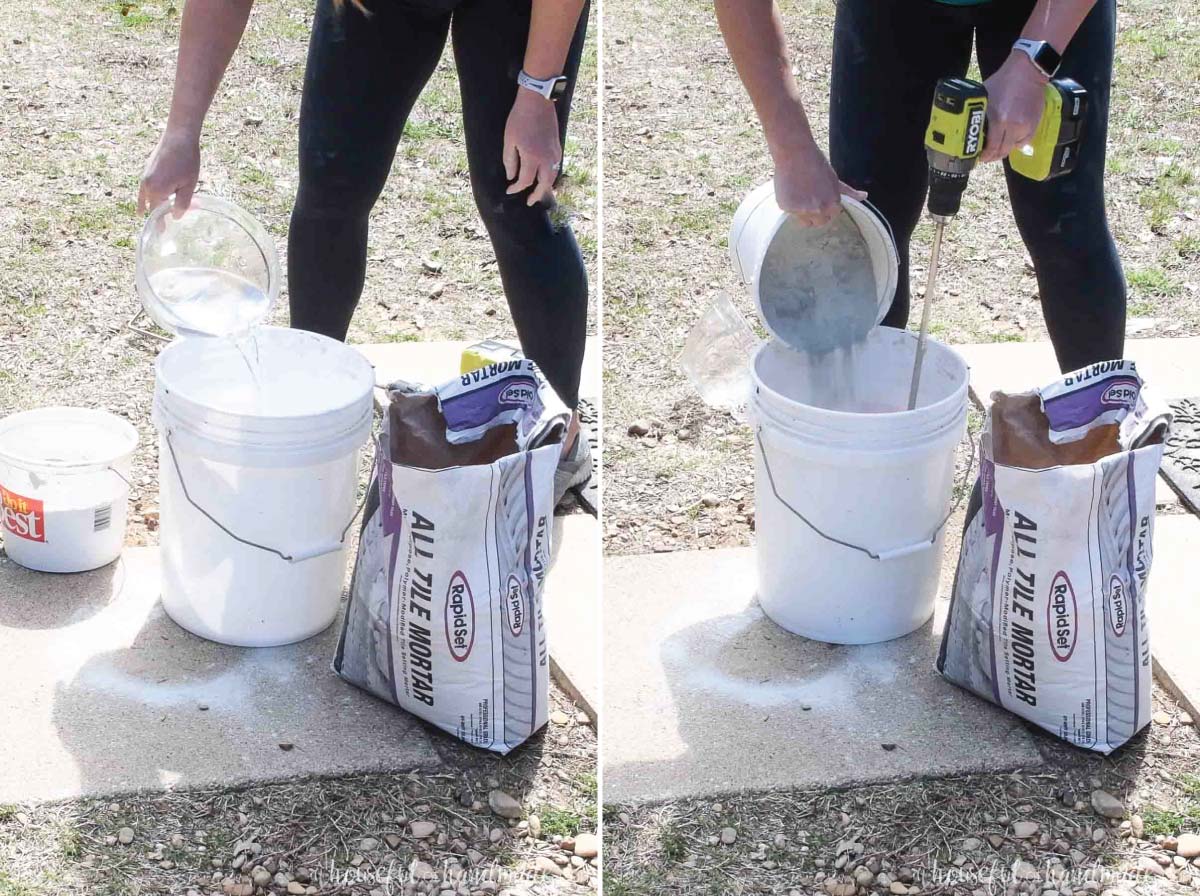
It may feel dry at first, but resist the urger to immediately add more water. Give it a few minutes to allow the dry mortar to absorb all the water. Then only add more water if needed.
It is worth investing in a mixing attachment for your drill. It works for mixing the mortar and the grout.
STEP 4- Apply the Tiles
Use a trowel the right size for the tiles you are using:
| Tile Size | Trowel Size |
|---|---|
| Longest side less than 8″ | 1/4″ x 1/4″ x 1/4″ square notch |
| Longest side 8″ to 15″ | 1/4″ x 3/8″ x 1/4″ square notch |
| Longest side more that 15″ | 1/2″ x 1/2″ x 1/2″ square notch |
Spread the mortar onto the wall with the flat side of the trowel. If it is too runny to scoop and spread, let the mortar sit a few minutes.
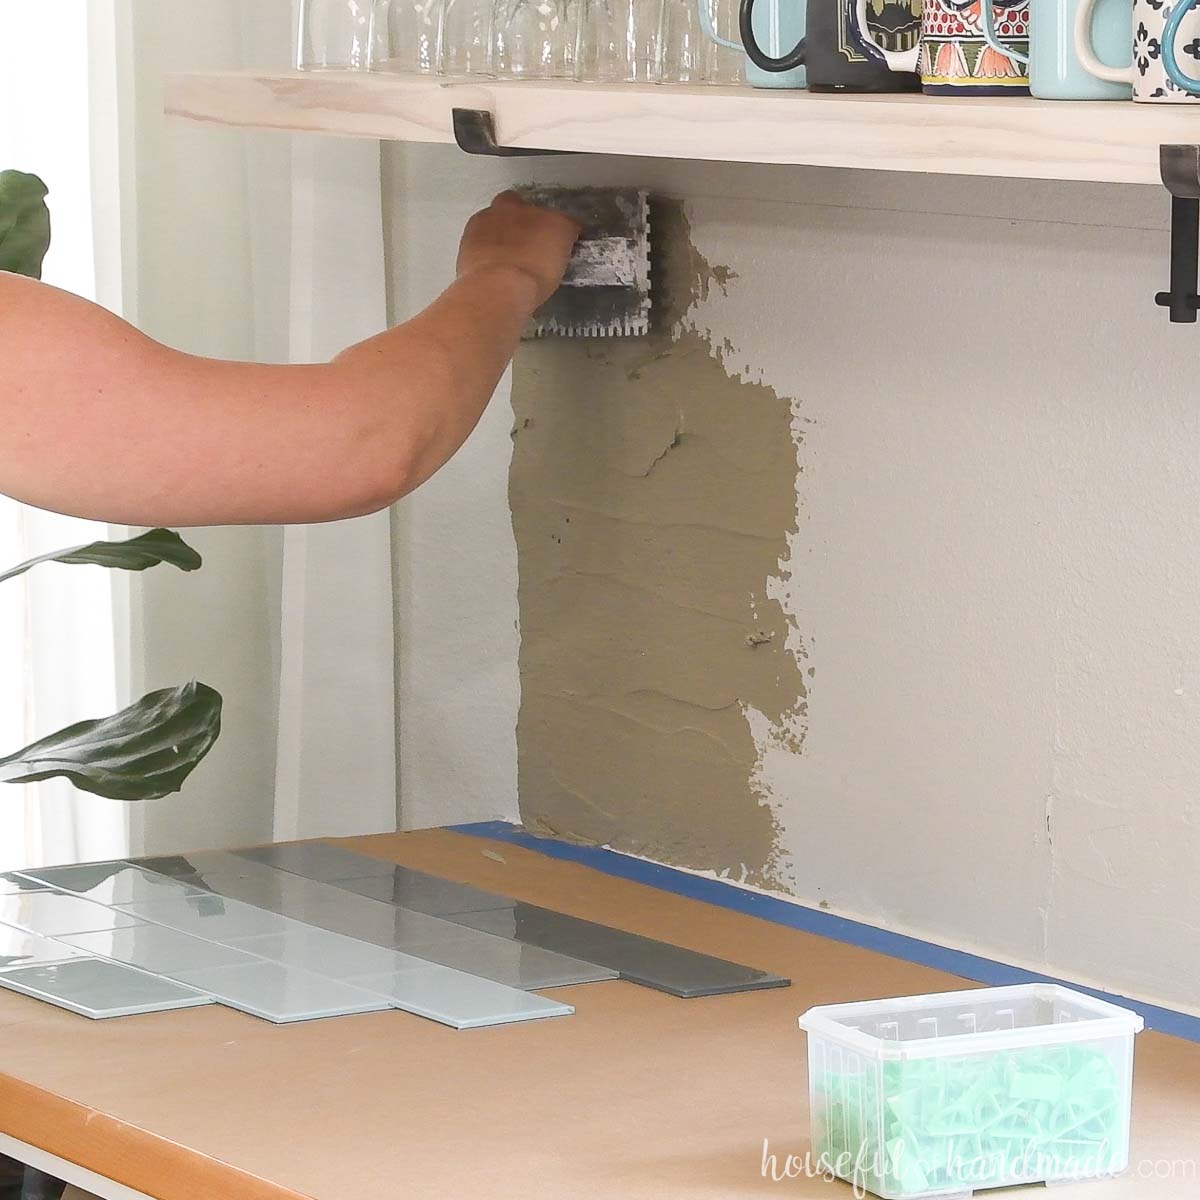
Once you have covered an area with mortar, use the notched side to scrape the grooves into the mortar. Hold the trowel at approximately a 45 degree angle to do this.
Just spread out small sections of the mortar at a time to prevent it from drying on the wall before you can add tiles.
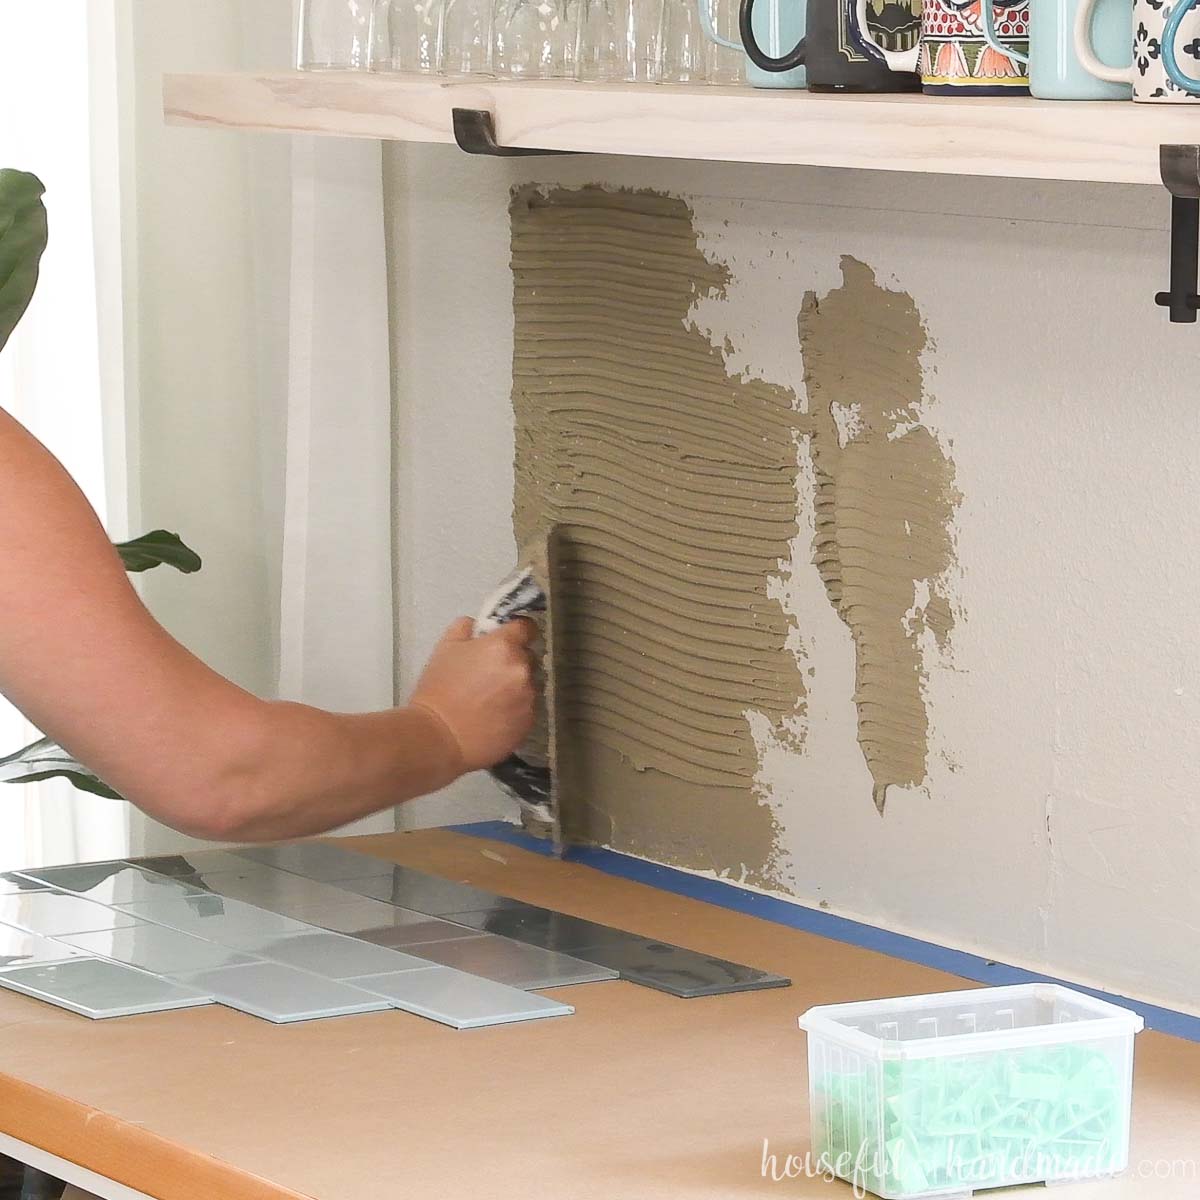
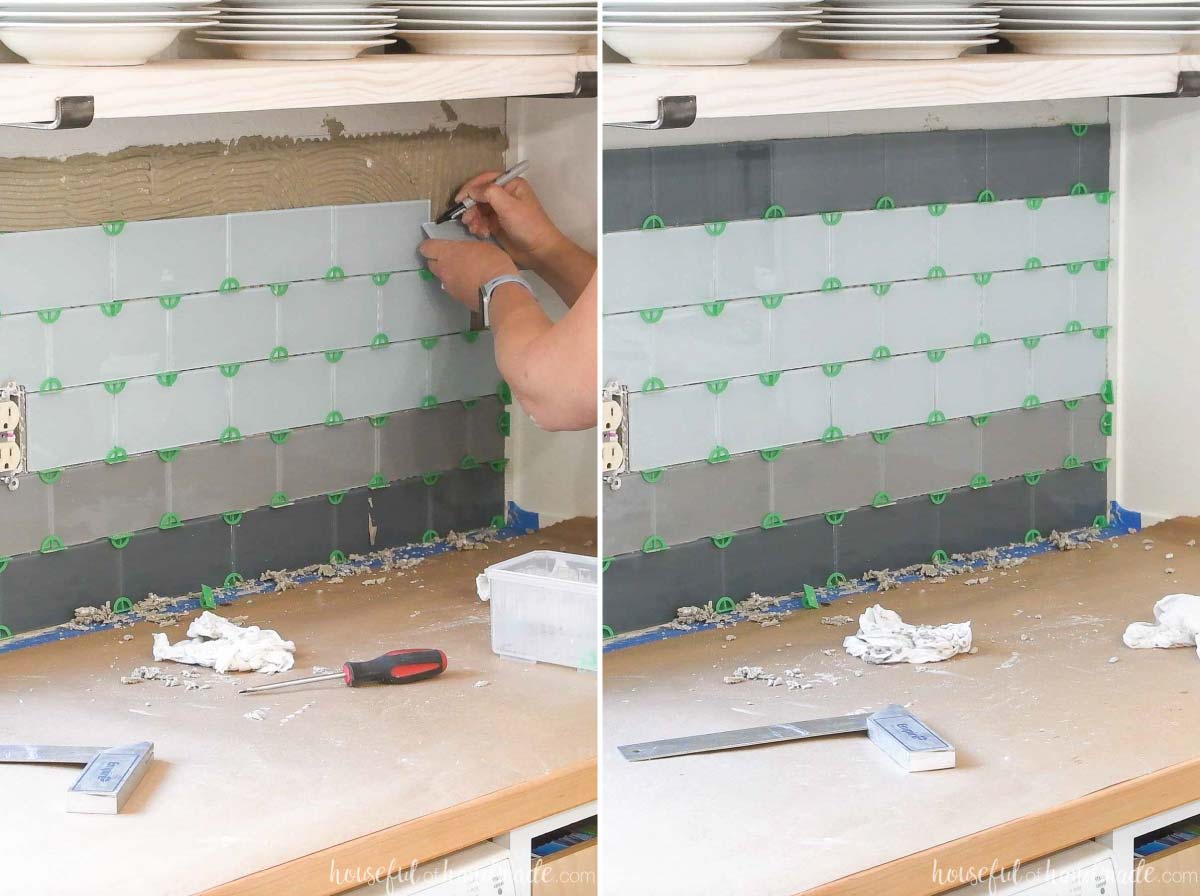
Start placing your tiles. Press the tile firmly into the mortar to stick it to the wall.
Make sure it is lined up on the side and level on the surface.
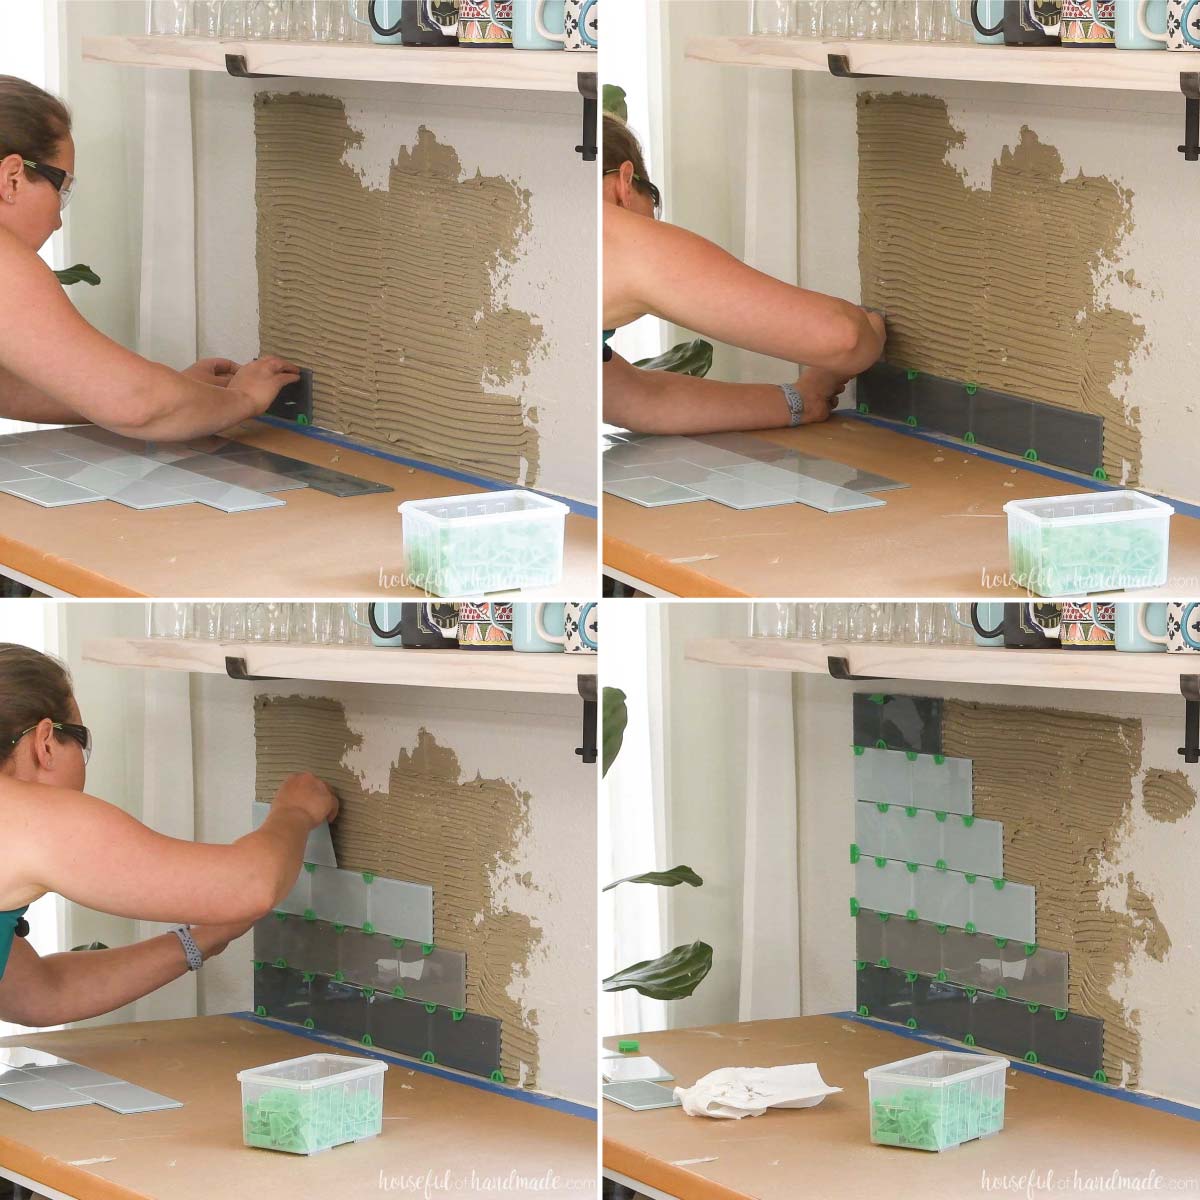
Use spacers (if using) between all the tiles to ensure even grout joints. I like the T spacer for subway tile patterns or X spacers for patterns where 4 corners align.
Even if not using spacers between tiles, I recommend using a spacer under the bottom row to keep the tiles slightly off the countertop.
Make sure to tuck the tile under the metal tabs on the top and bottom of any outlets or switches.
How to Cut Tiles
You can cut tiles with a wet tile saw or manual tile cutter.
I prefer to use a tile saw. My cuts are more accurate and I can make L or U shaped cuts that are not possible with a tile cutter.
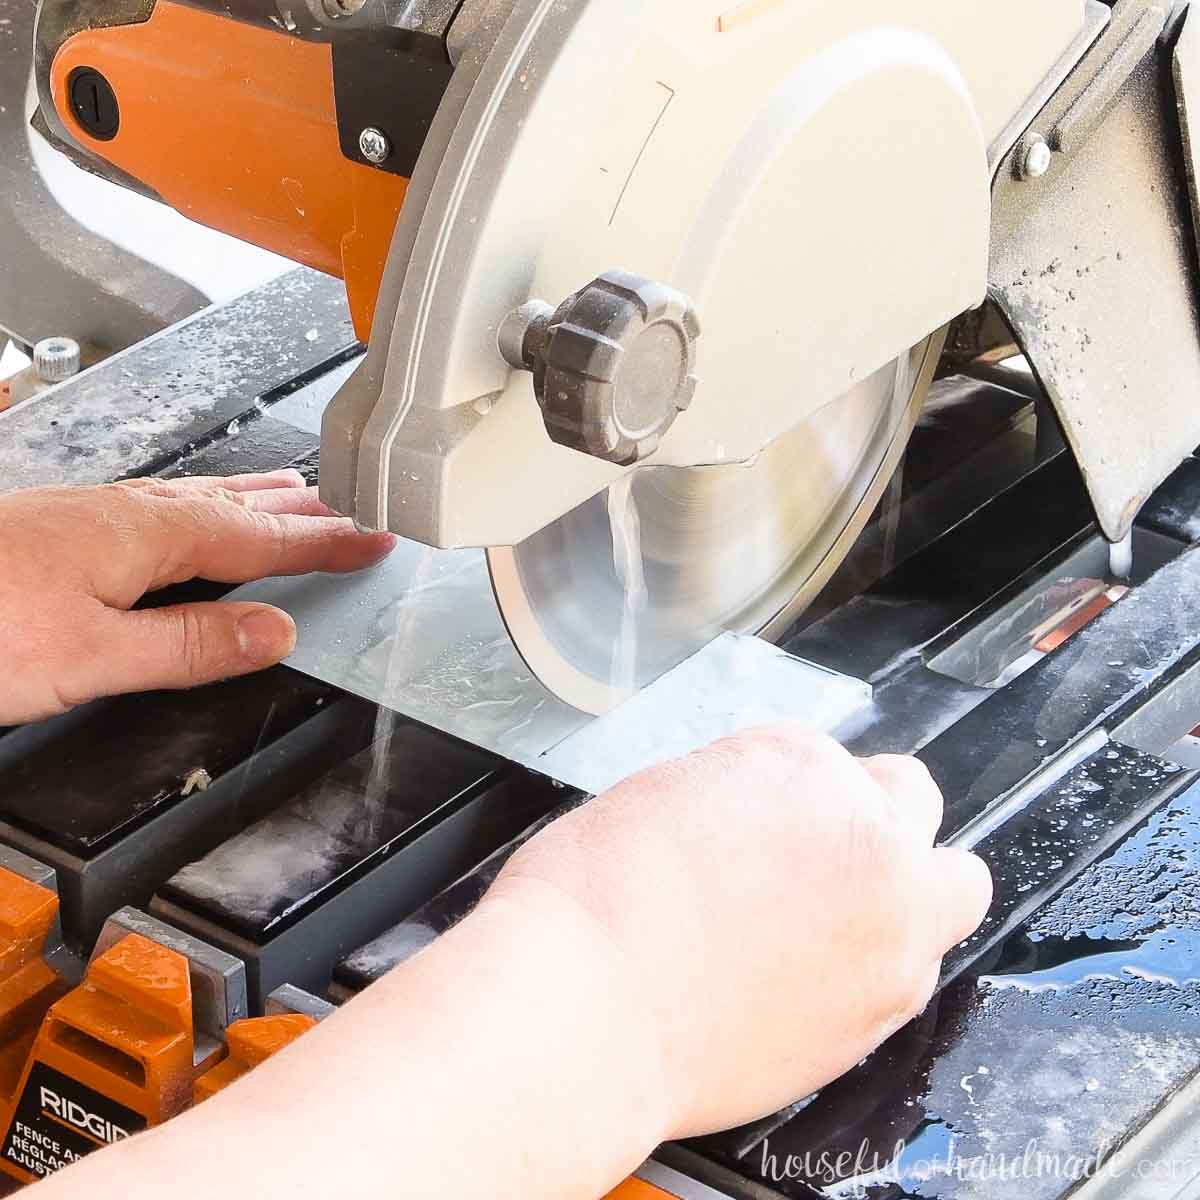
Mark where you need to cut your tile. I use a sharpie for any glazed tiles because it wipes right off. They also make wax pencils for marking tiles.
Line up the cut with the side of the blade. If you just cut it down the middle, your tile will be slightly smaller than the measurement because of the blade kerf.
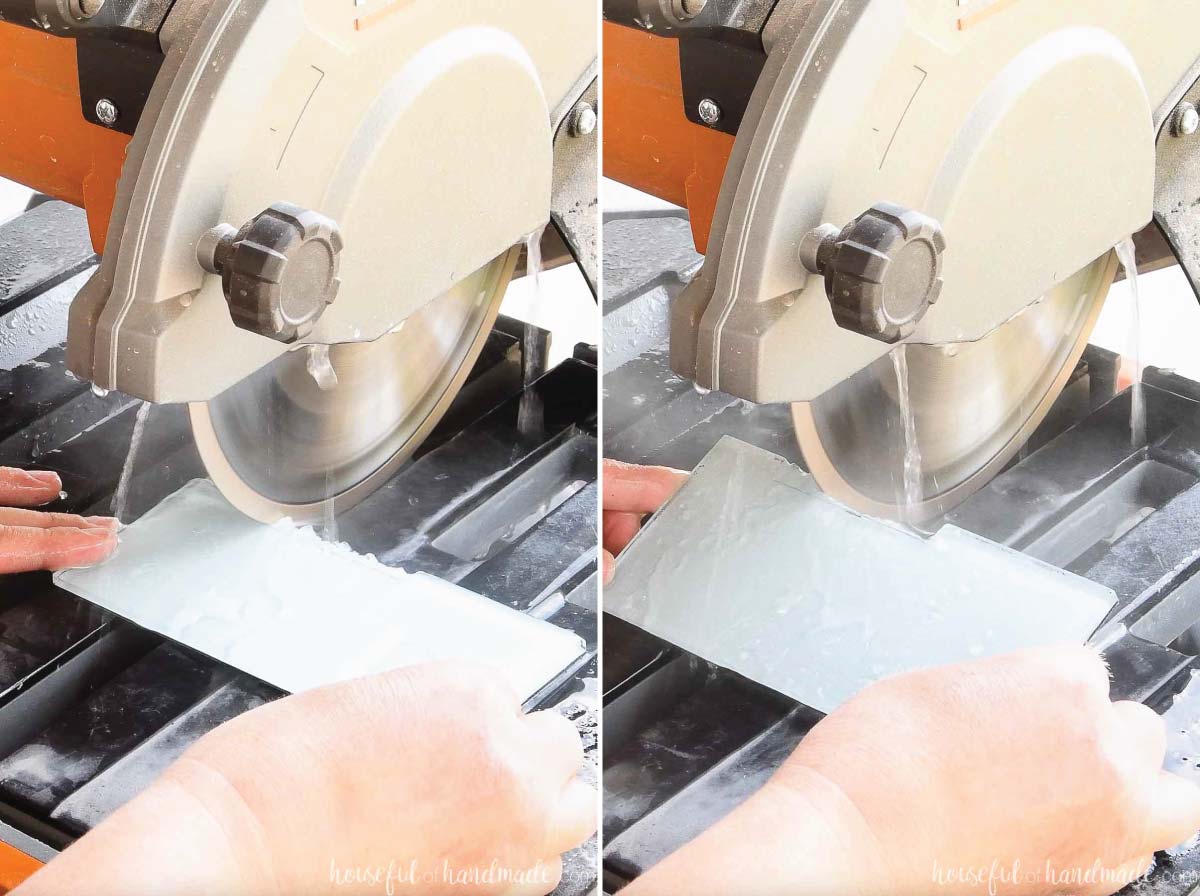
Carefully slide the tile through the saw to cut it. Go slow to prevent chip out at the end of the cut.
For L, cut up to the end of the line then pull the tile back out. Rotate and line up the blade on the other side. Cut to the previous mark.
For U cuts, make lots of straight cuts right next to each other to the line to clear out the U. Then lift the tile and run it back and forth along the blade to clean up the bottom of the U.
Continue cutting, adding mortar, and placing tiles until the backsplash is all installed.
STEP 5- Grout
Let the mortar cure for 5 hours. Then remove all the spacers and clean off the tiles.
Mix up your grout according to the package directions.
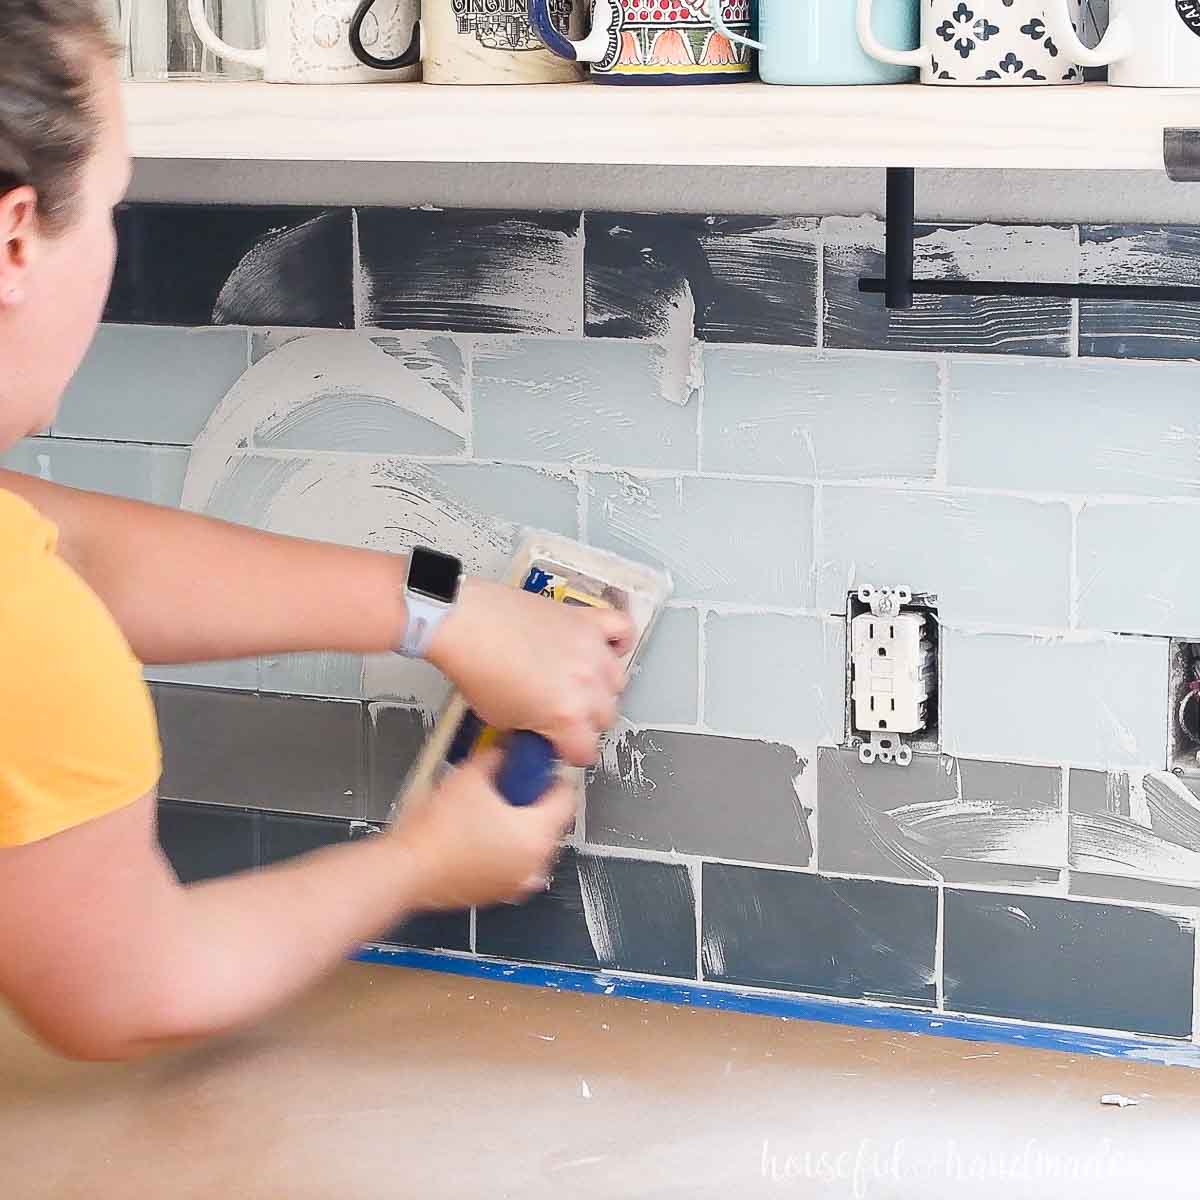
Use a rubber float to press the grout into the tile joints. Press it into all the joints in a section of the backsplash, then scrape off any excess with the float at a 90 degree angle to the surface.
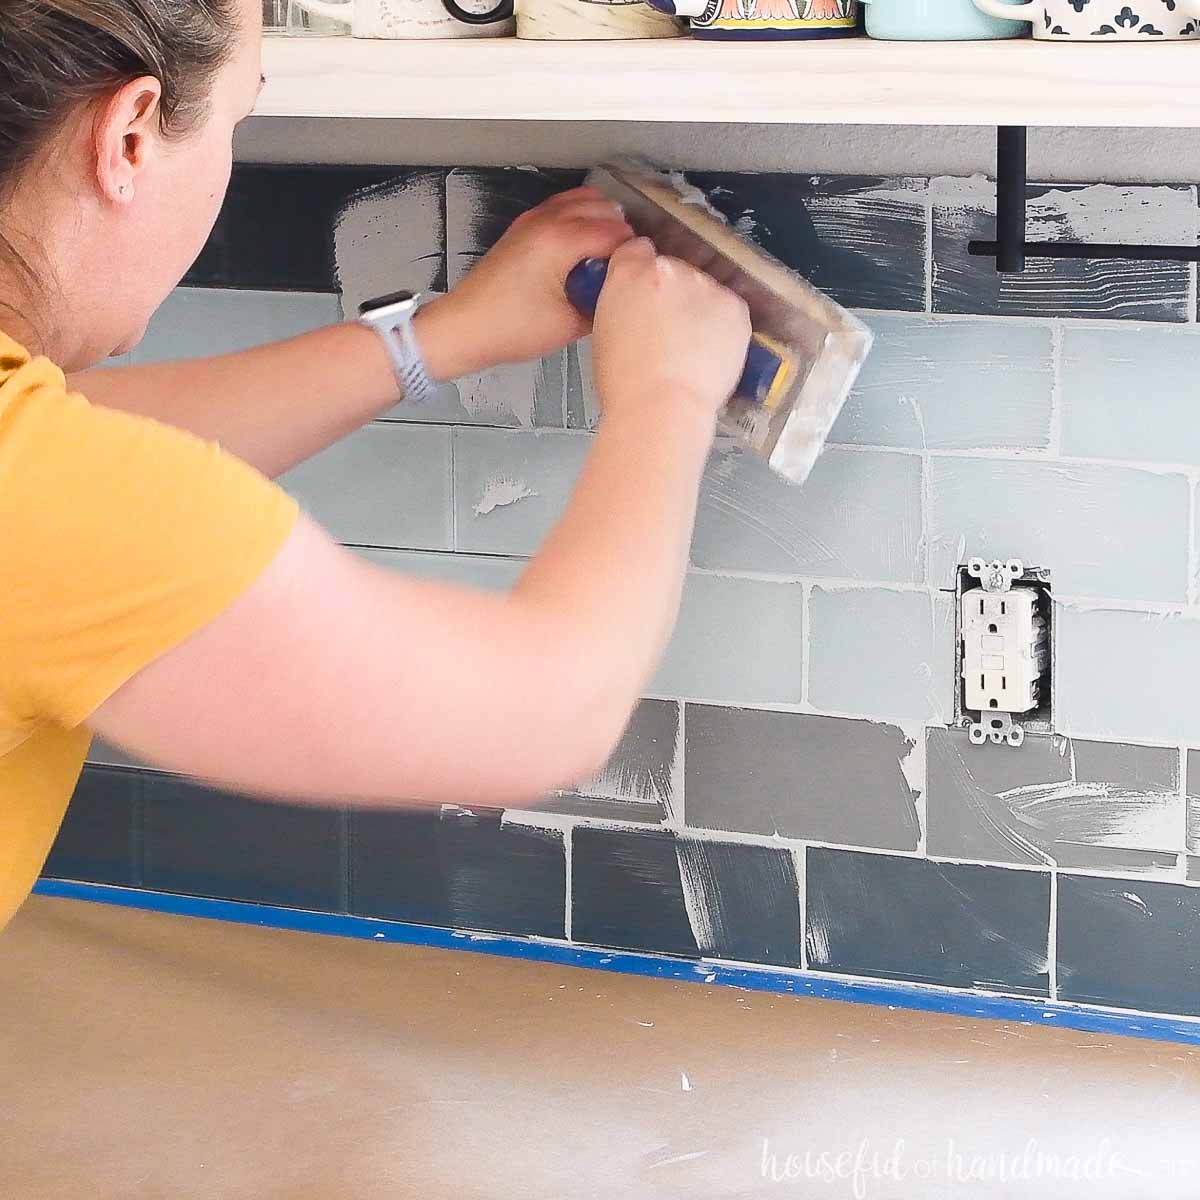
Remove the excess grout at a 45 degree angle to joint lines too. This prevents the float from digging into the joint lines and keeps it flush with the top of the tiles.
Do not spread more grout than can be clean up 30 minutes or it will harden and you will not be able to clean it.
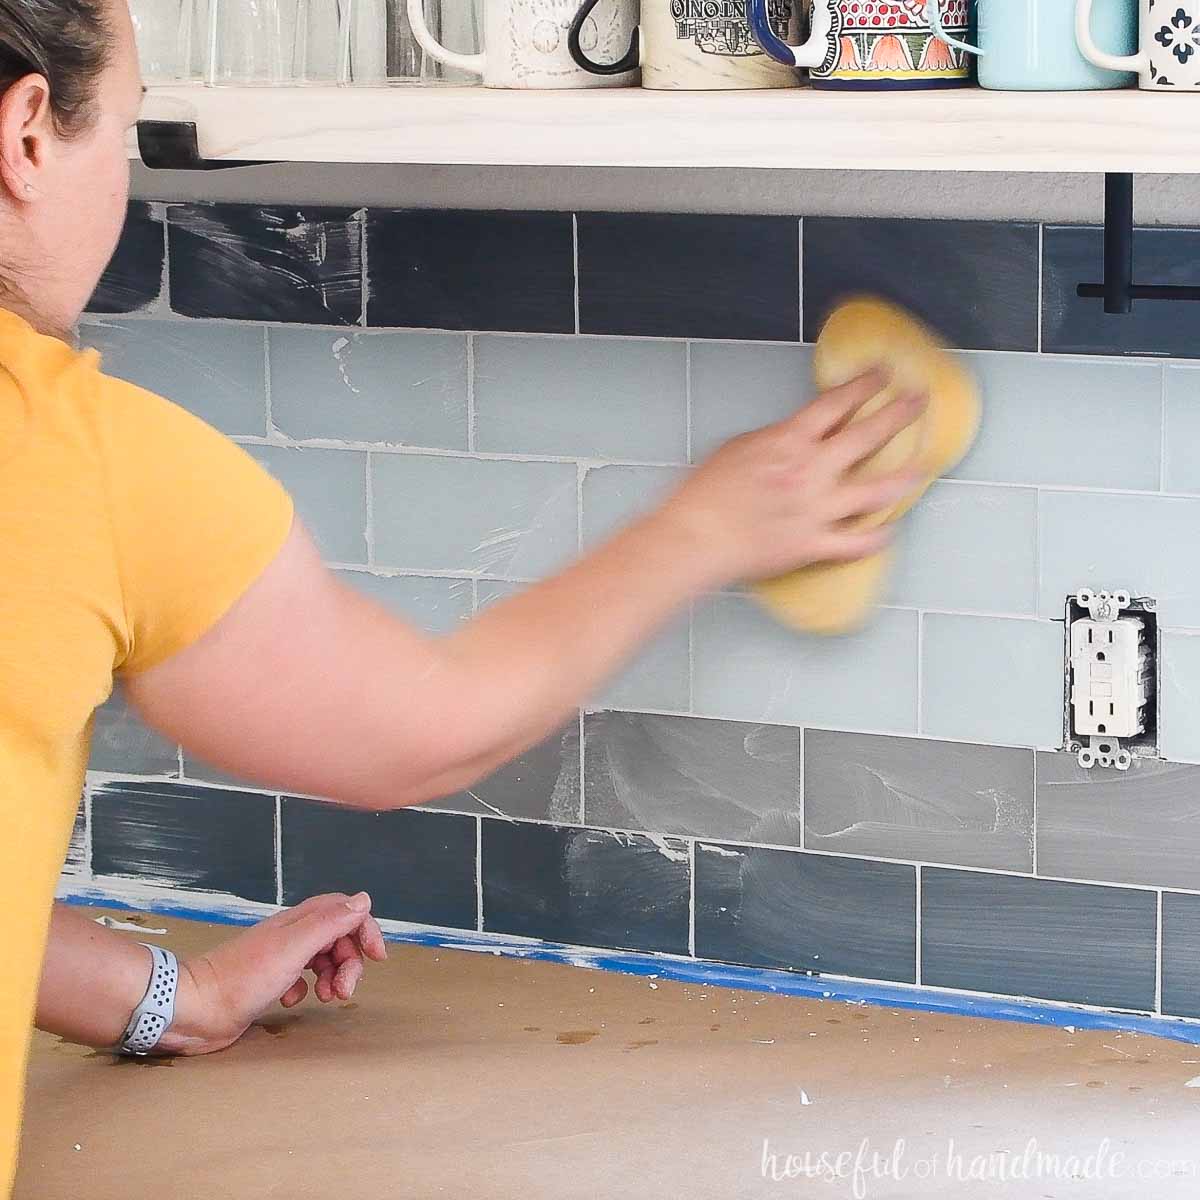
After 30 minutes, use a damp sponge in a circular motion to smooth the grout and remove any excess.
Frequently rinse the sponge as you clean up the grout. Do not worry about a slight haze on the tile while working with the sponge or you may overwork the grout.
Wait about 3 hours, then remove the haze with a clean, barely moist, sponge once the grout is harder.
Now you can remove the paper and tape and clean up your countertops.

Let the grout cure according to the directions. Then I recommend sealing your grout (especially in a kitchen) to make it easier to clean.
Tighten the screws in the tabs of the outlets and switches to snug them up against the new tile wall. Then reattach the covers.
I also recommend adding a bead of caulk in the following places:
- To the bottom of the backsplash where it meets your countertop
- To the edge of the backsplash up against a cabinet or wood trim
- To the edge of the tiles where they stop
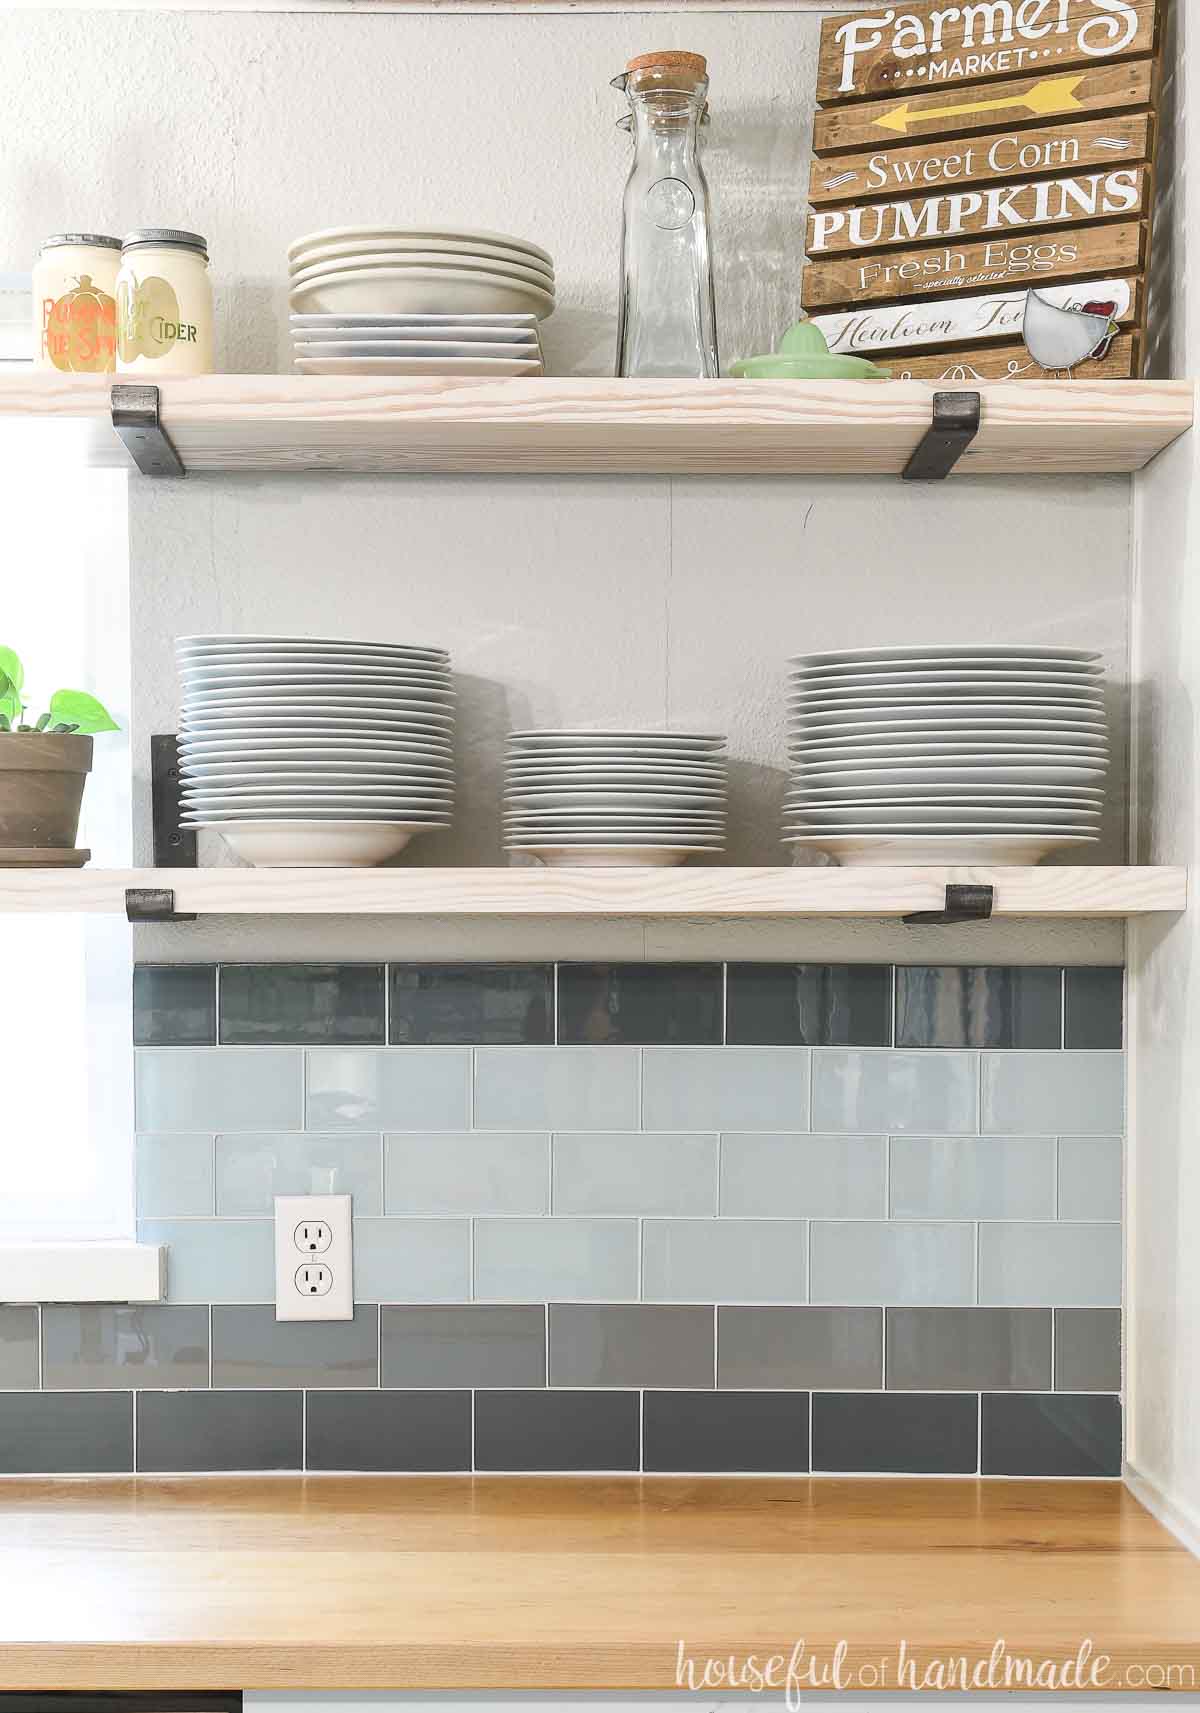
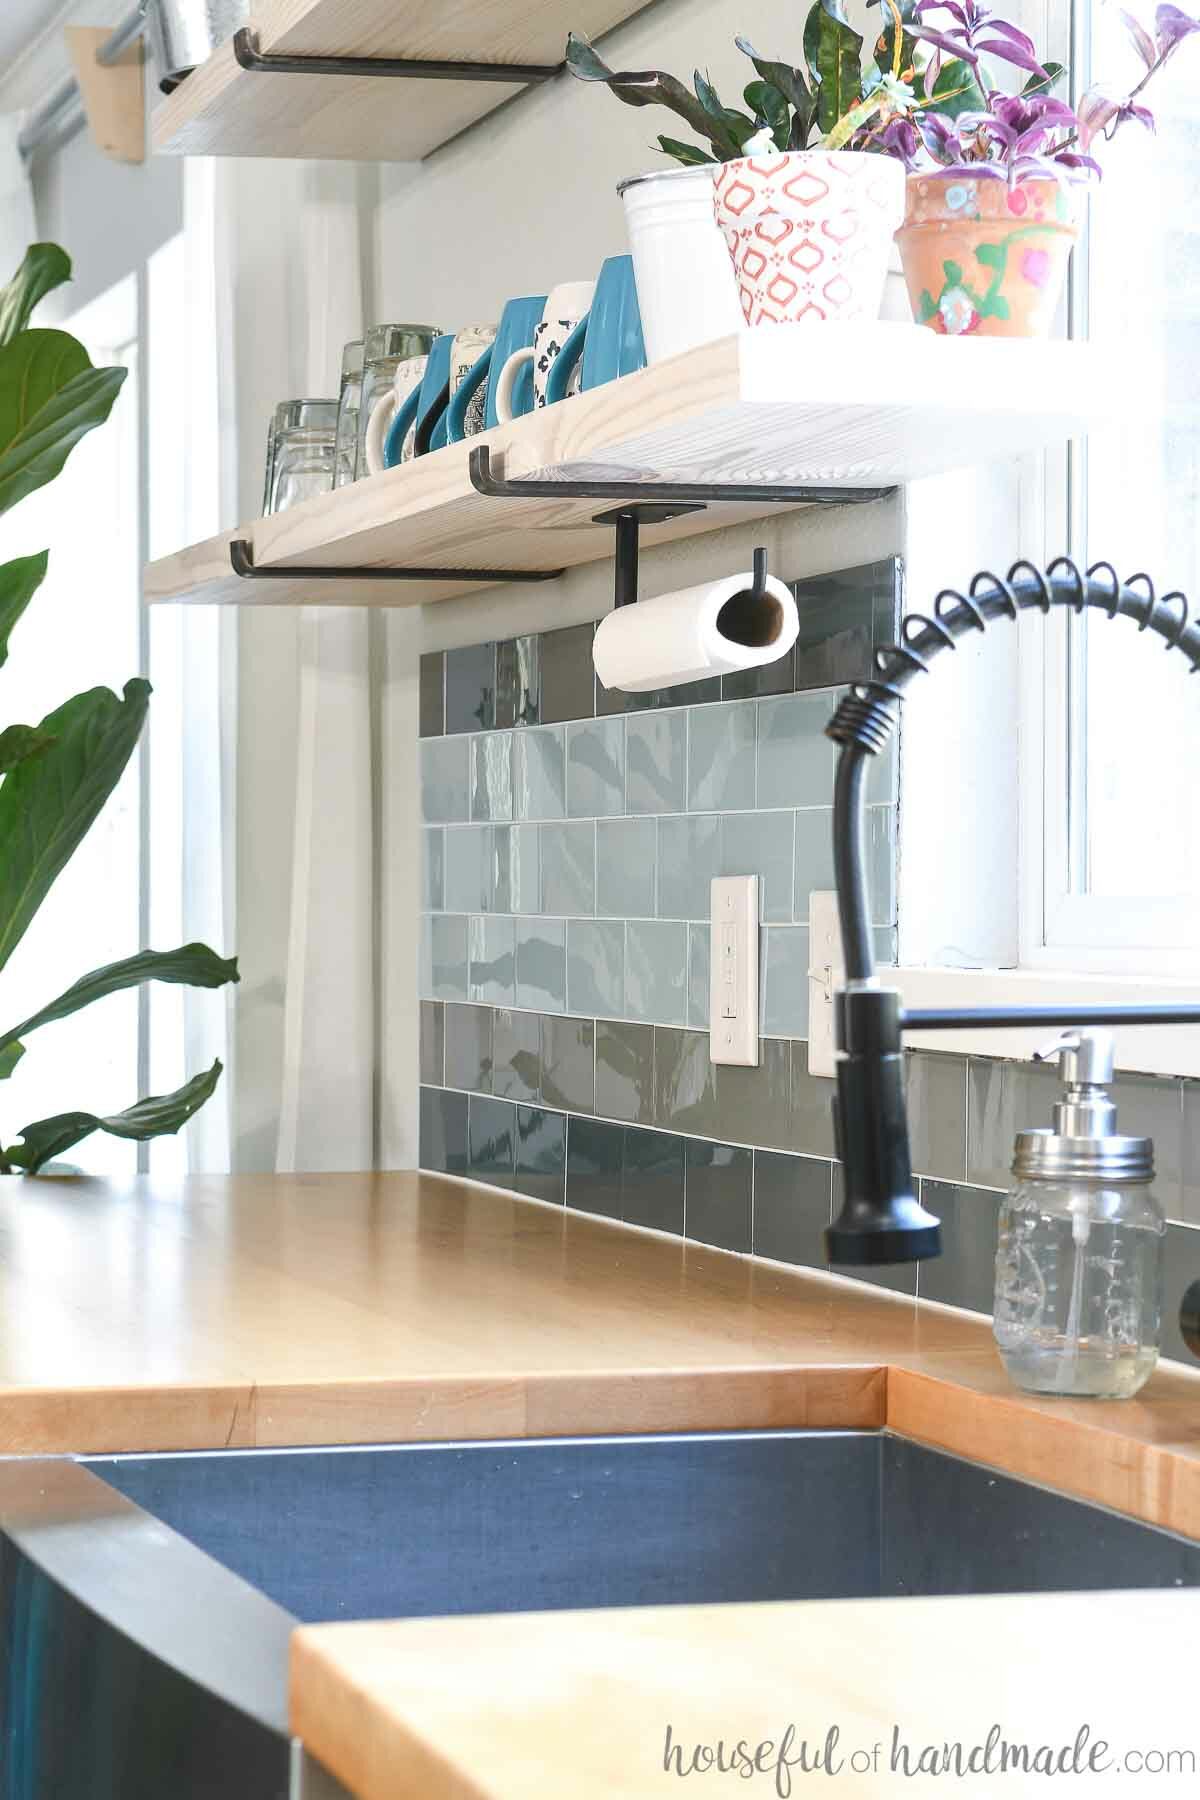
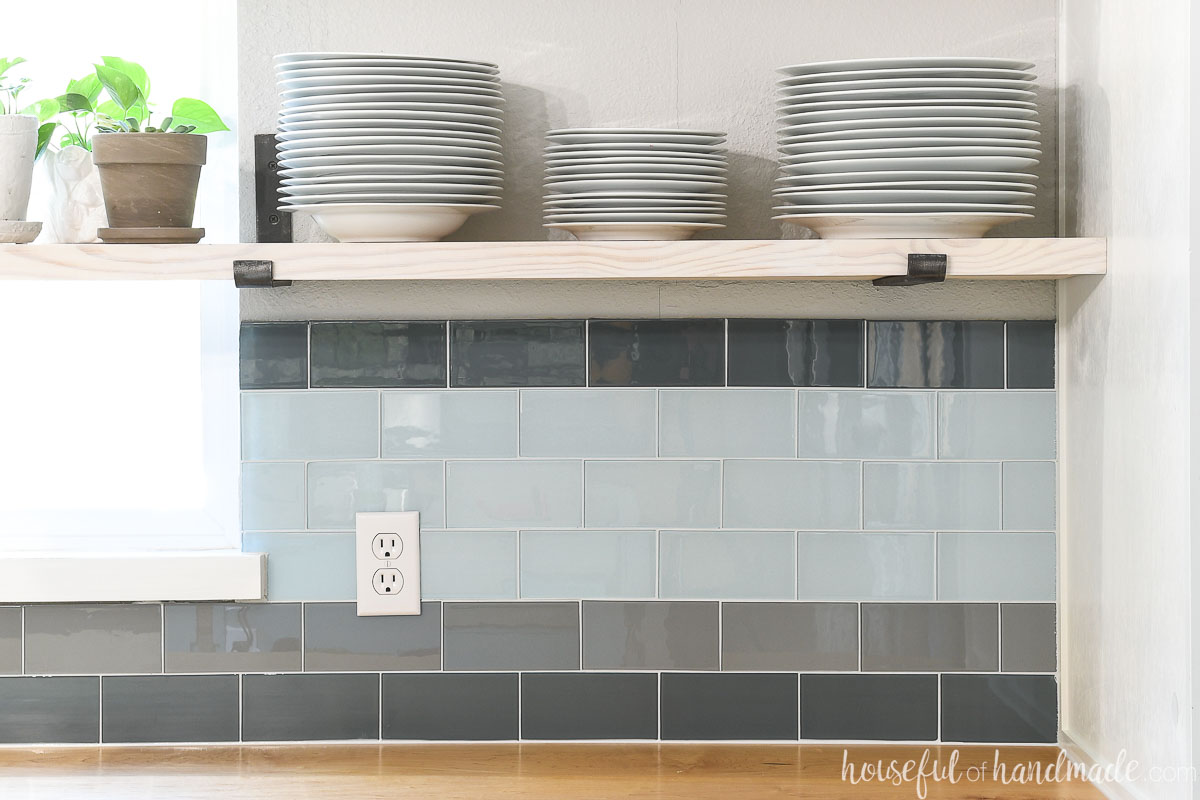
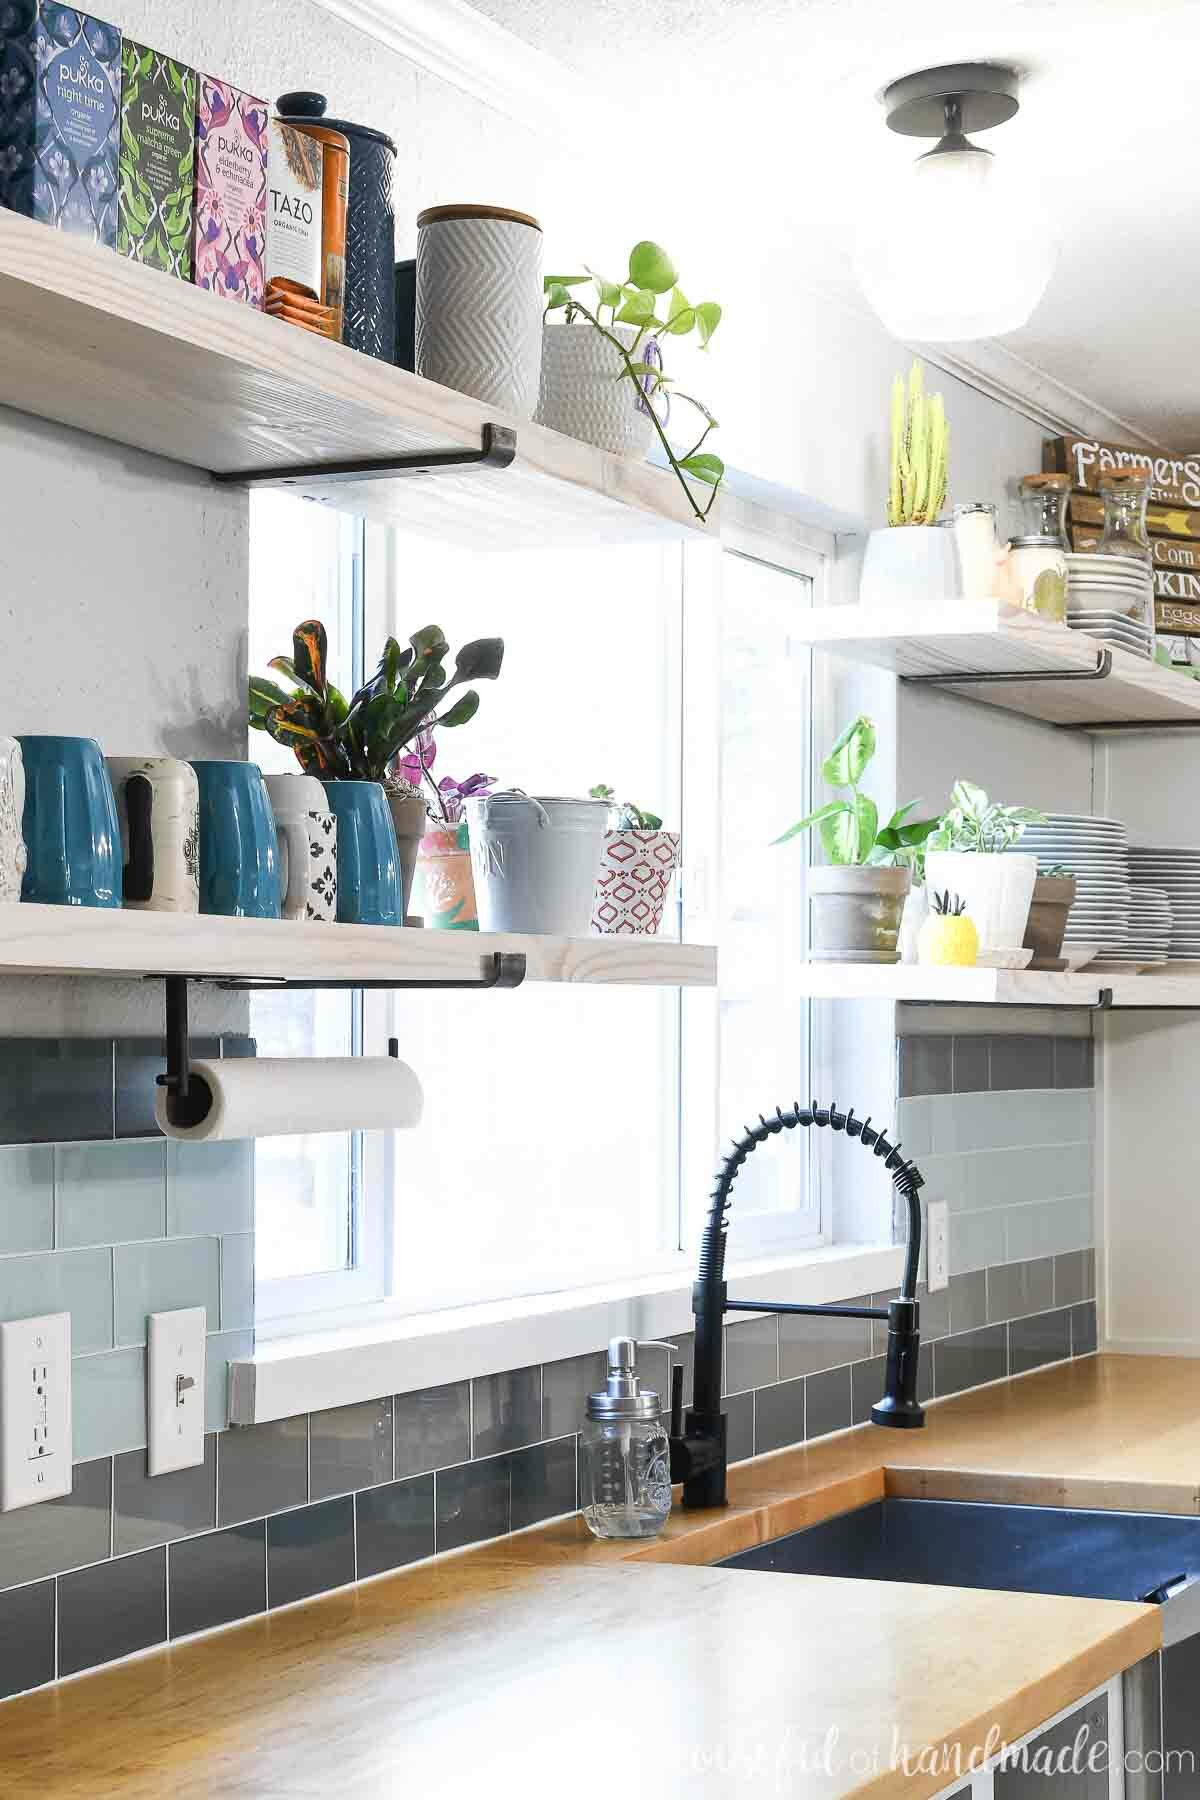
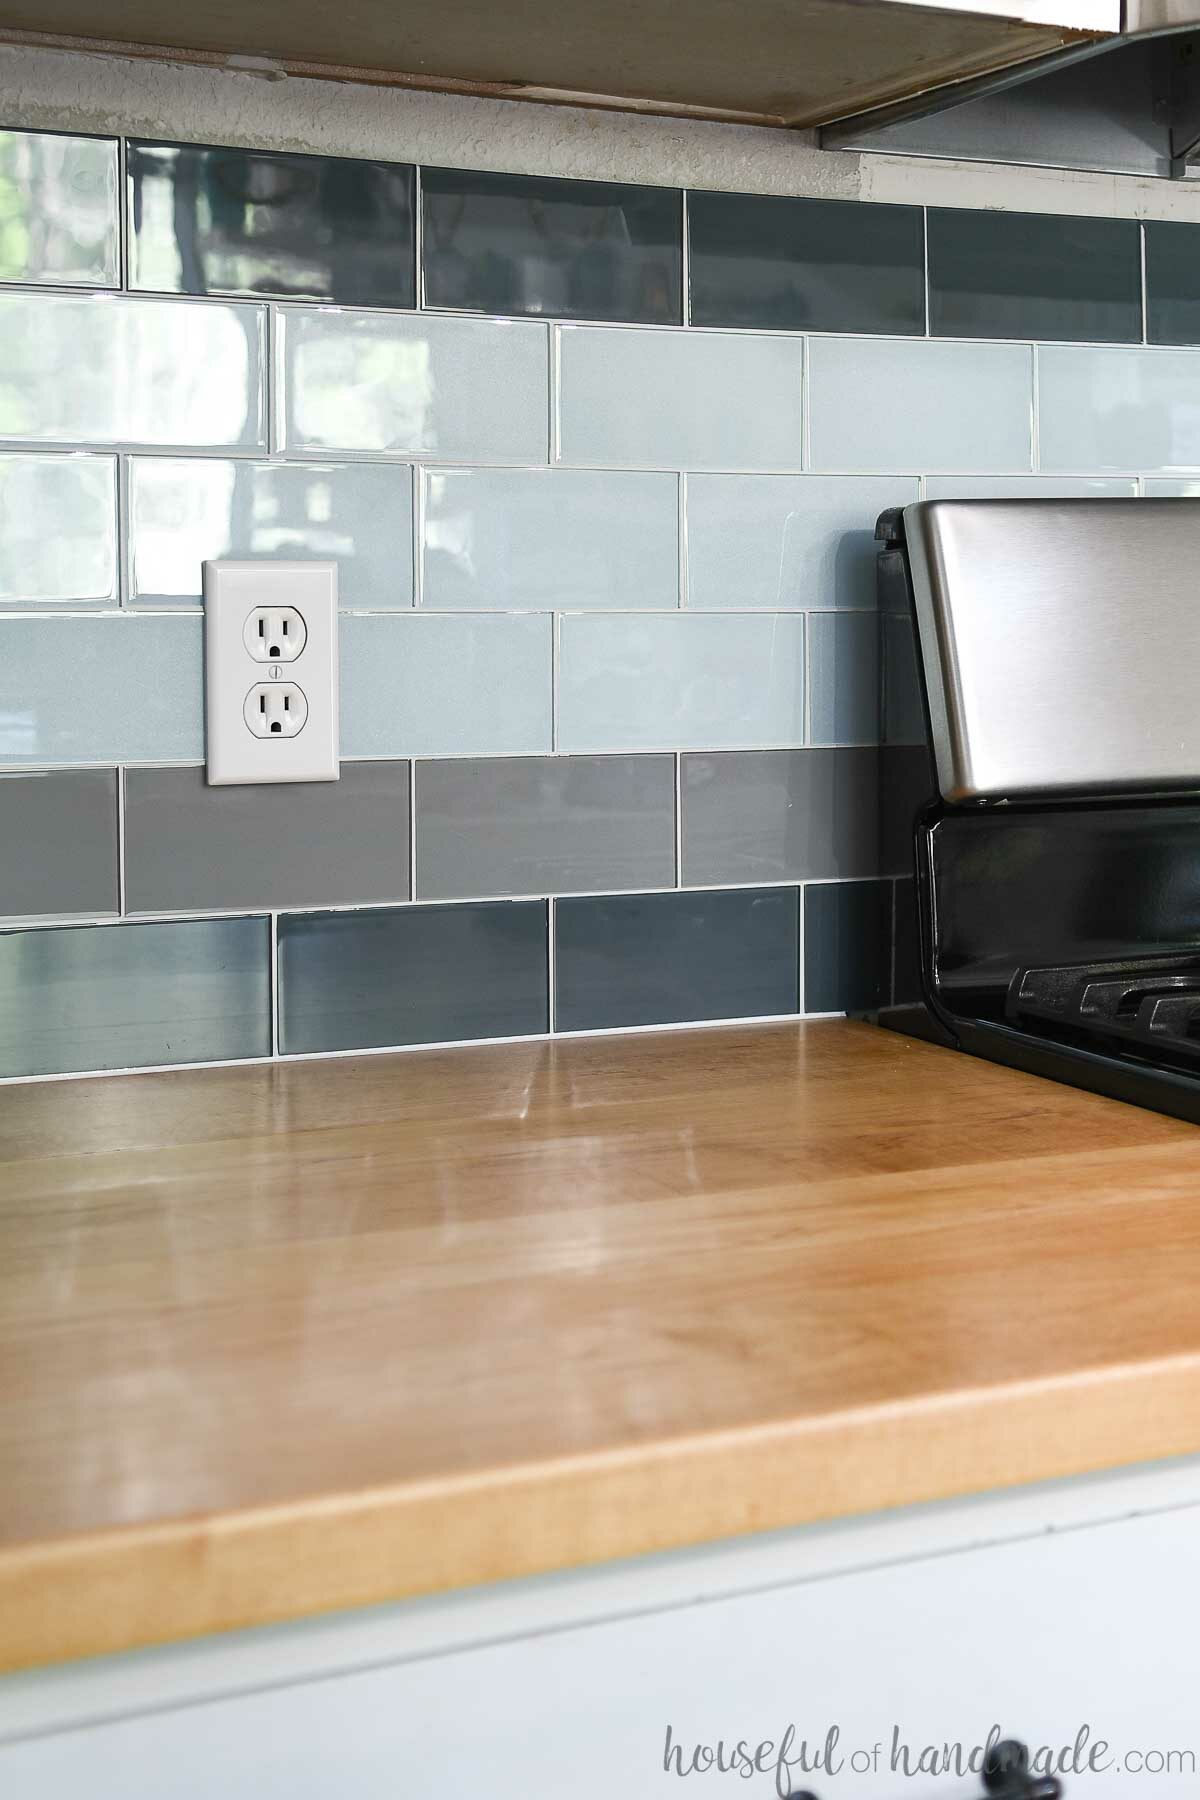
And your new backsplash is all done! Sit back and enjoy the amazing job you did tiling it yourself.
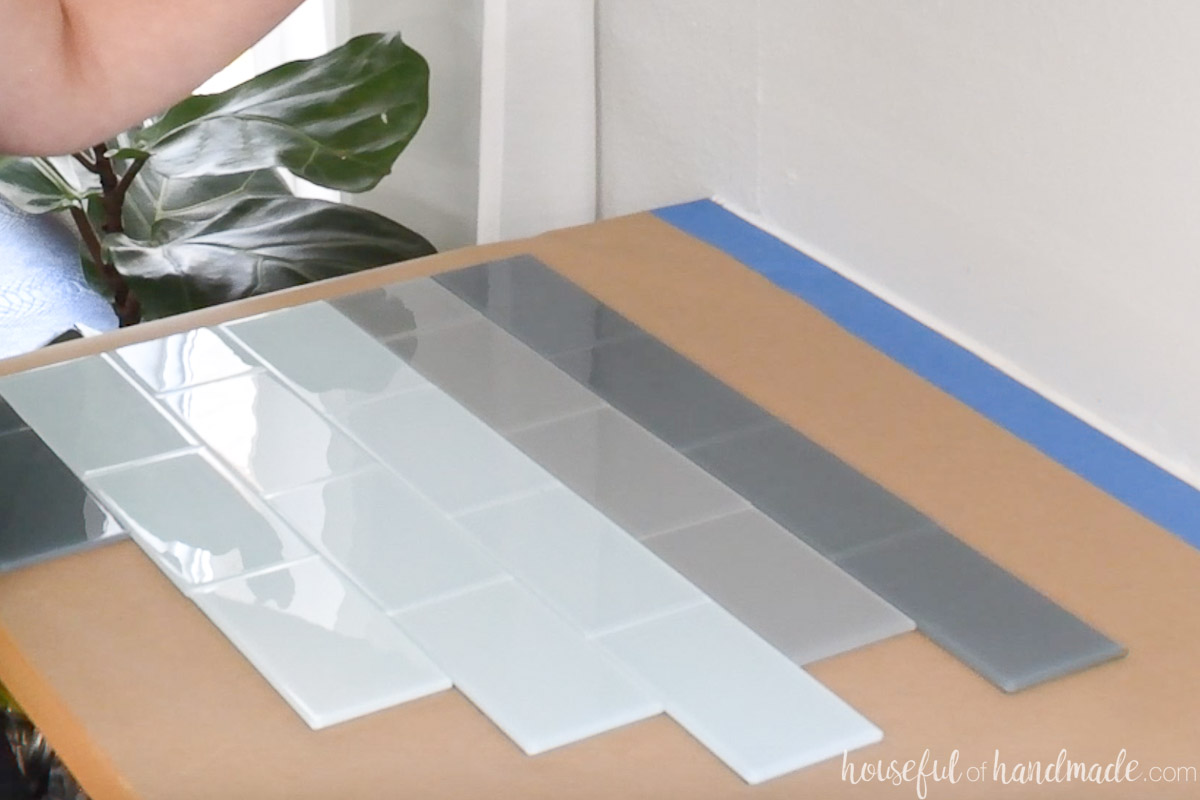
I absolutely love the modern color-blocking design in our kitchen. And the glass tiles are super easy to clean.
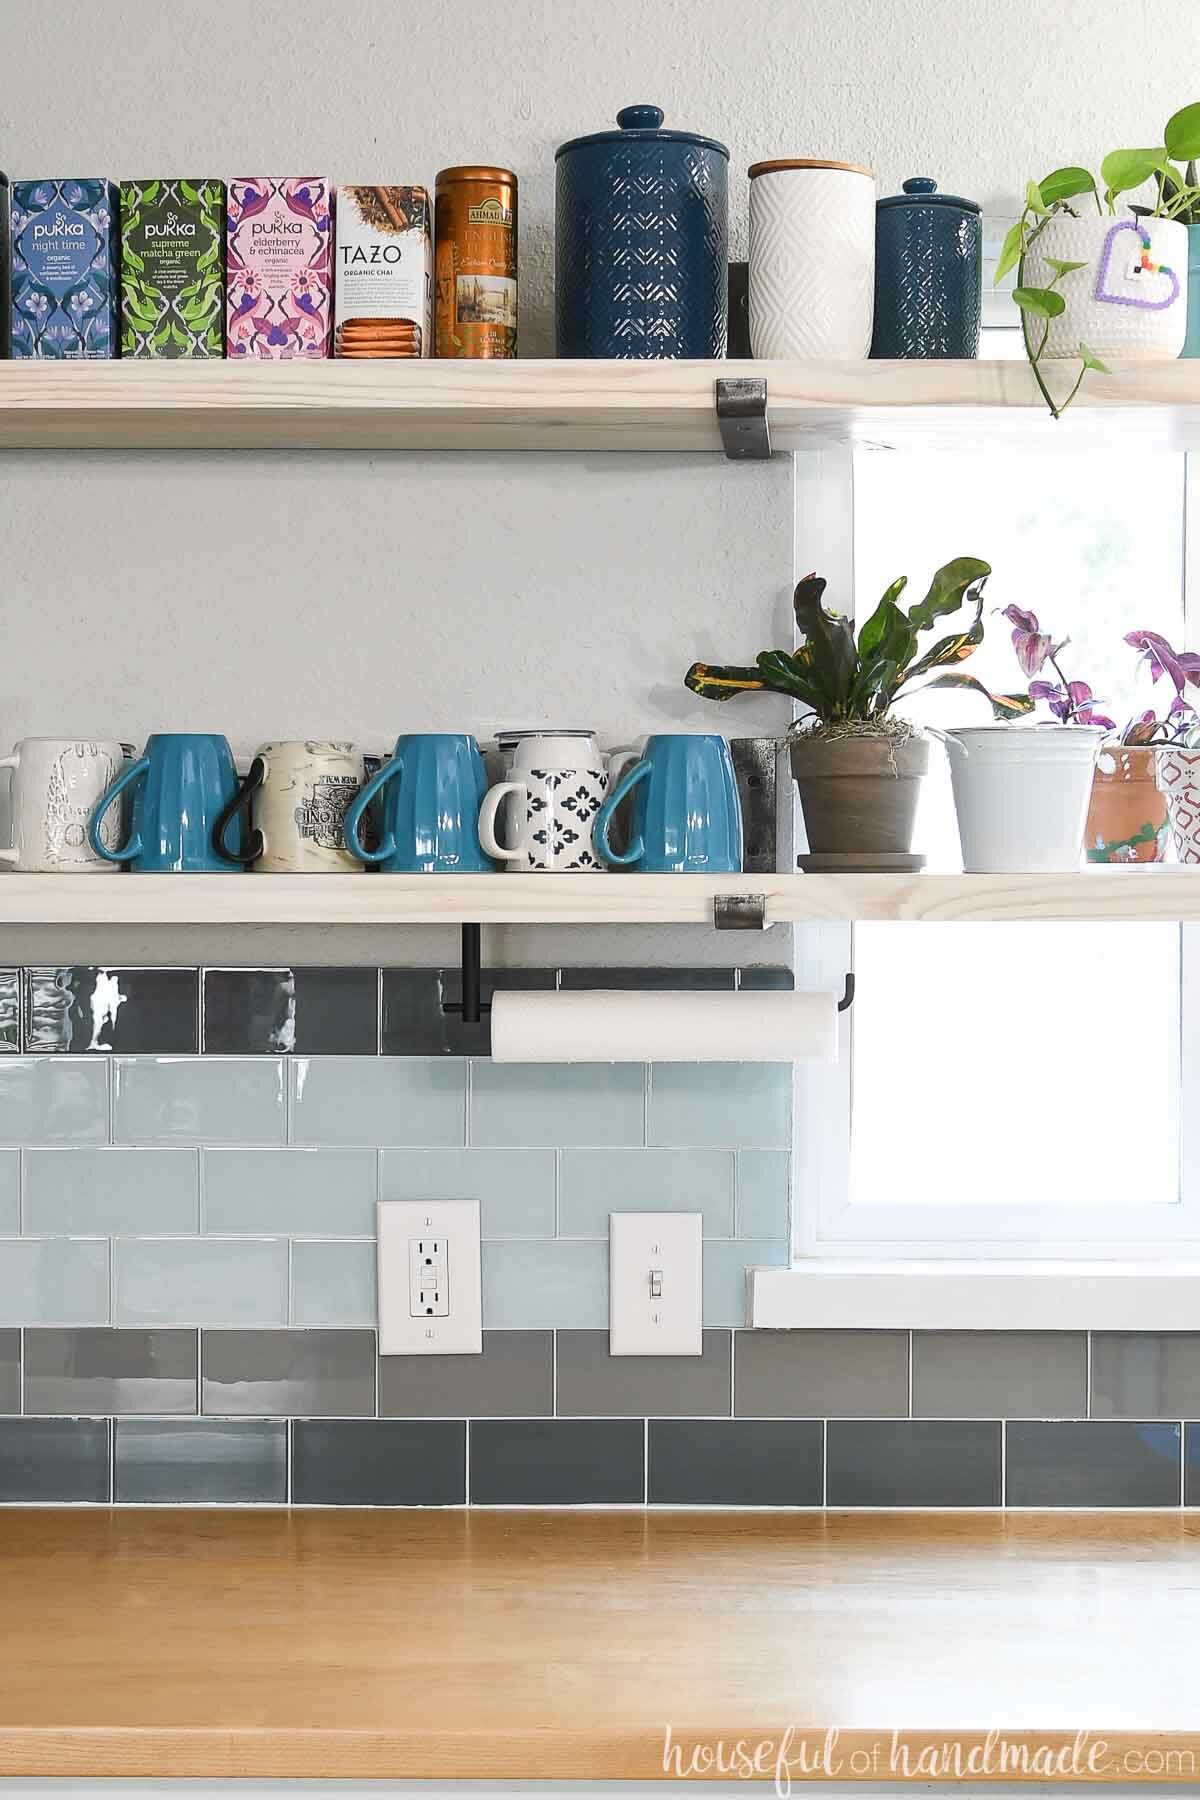
Happy tiling!

Thank you to CTS for sponsoring this post. I only recommend products that I use and love and all opinions are 100% my own. Click here to read my full disclosure policy.