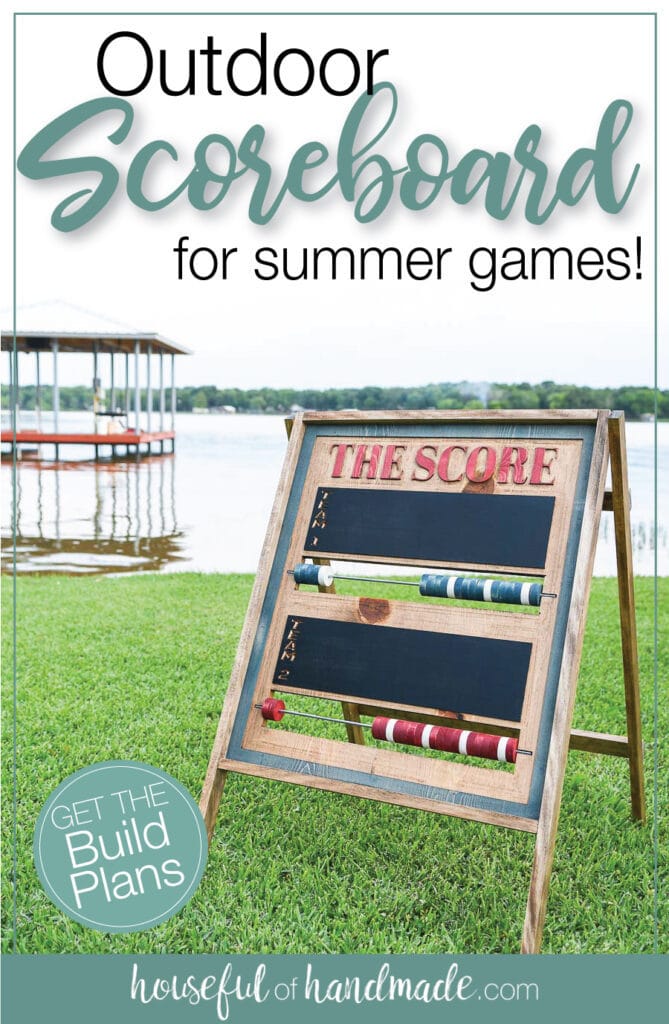
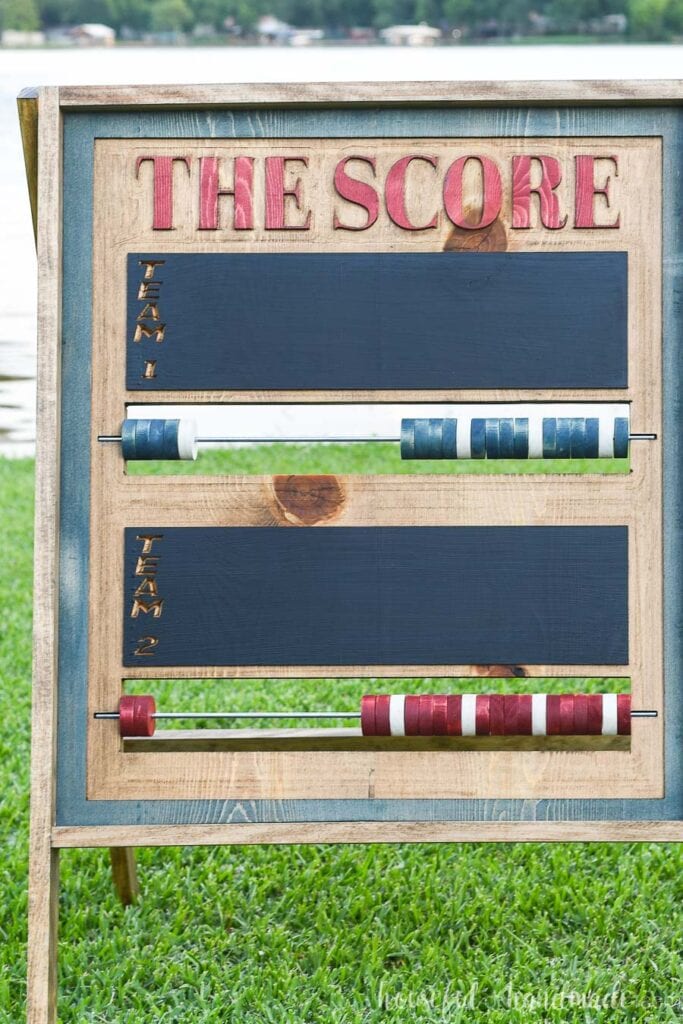
Make this beautiful scoreboard to keep score during summer get-togethers.
I am so ready for summer parties! And that means playing my favorite outdoor games. So I partnered with Inventables to make keeping score easier with this amazing carved outdoor scoreboard with the X-Carve.
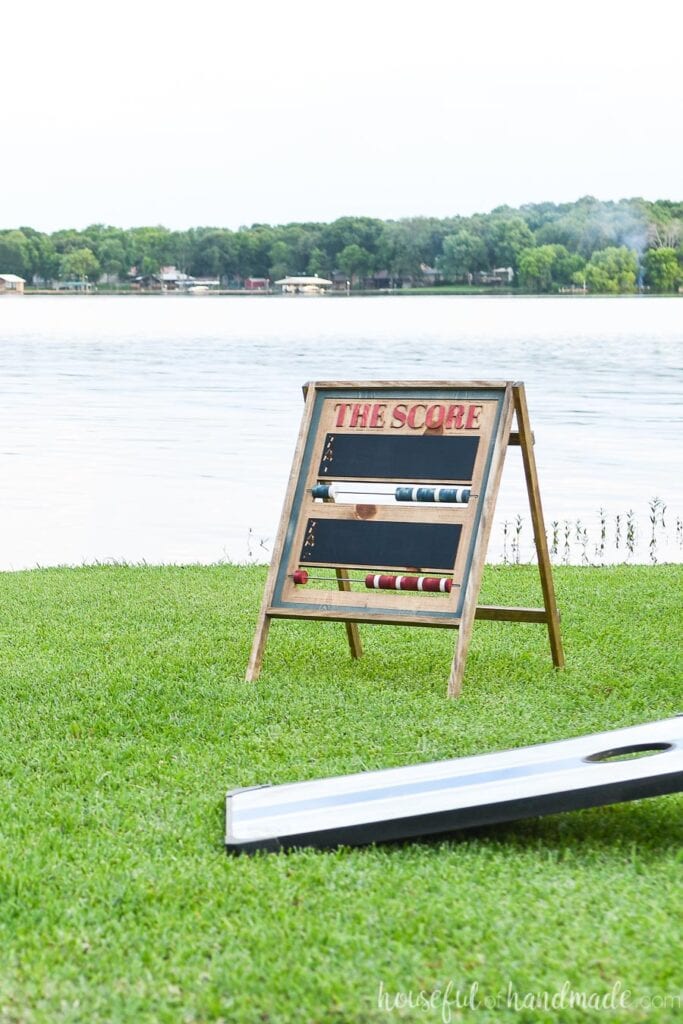
I used the X-Carve to carve out the center of the board. But I left the words “The Score”, a border, and boxes for team names to be written. It really elevates the look of the scoreboard. And all the hard work is done by the X-Carve.
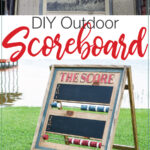
However, the best part of this score keeper, you can customize it anyway you want. I set ours up to count to 21. It’s perfect for keeping score for corn hole, which we love playing on the yard in the summer.
This post may contain affiliate links. As an Amazon Associate I earn from qualifying purchases. Click here to read my full disclosure policy.
But you can use it for any DIY outdoor games your family likes to play. And you can use it for multiple types of games, just make sure you have enough wood beads to count the highest number you need.
Designing the Score Keeper
The outdoor scoreboard is quite large at 36″ tall and 25 1/2″ wide. I wanted something that would be easily seen as you were outside playing. But it folds flat for storage.
The board is made from 2 pieces from a 1×12 board, that were glued together to make a 22 1/2″ wide board. And the folding frame was quick to make out of 1×2 lumber.
I used whitewood 1×12 and pine 1×2 boards to make my scoreboard. Then sealed it with leftover outdoor sealer from the outdoor lounge chairs I made.
We do not plan on the scoreboard staying outside all the time. But it might get stuck in a summer storm every once in a while, so the waterproofing sealer is a good idea. And easy to apply.
Since we are carving out a large amount, the softer wood also made the carving process quicker. I was able to use a higher depth-per-pass to complete the carving in less time. Otherwise it would have taken over 8 hours for just the score board.
And to save even more carving time, I made sure the area that was being cut out of the scoreboard for the wood beads was not being carved.
I put a box around that area with a 0 cut depth and then a second box with the cut line. That way I didn’t waste time carving the box that was going to be removed.

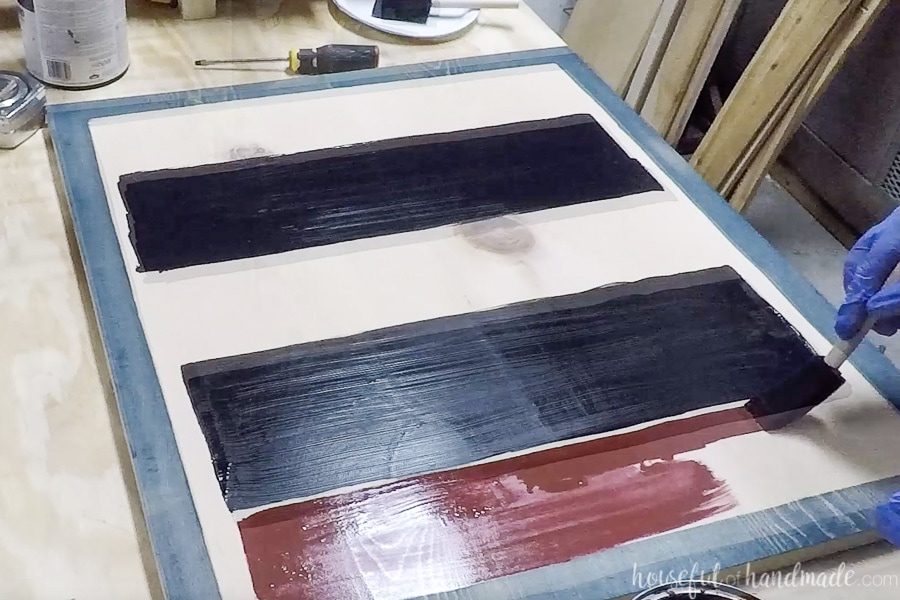
One of my favorite things about carving around the design is that you can stain/paint the wood before carving. Then you have a super clean paint lines around the words.
I mapped out where the chalkboard, and different colored stains would be on the uncarved board. Then applied the colors and let them dry before carving.
It was amazing to watch the X-carve cut out around the colors. It made the design come to life right before my eyes.

WHAT IF I DON’T HAVE AN X-CARVE?
If you don’t have an X-Carve (yet), you can still make yourself an amazing scoreboard.
- Some high schools, libraries, and maker spaces have X-Carves you can use. Use this link to find a location near you.
- You could use a jigsaw to cut out the opening for the score beads, and then paint the rest of the elements instead of carving them.
- Save up and get yourself an X-carve. There are so many fun things you can make with it. Plus you can always use it to make items to sell!
How to make a Folding Score Board
Tools Needed:
- X-Carve
- If you do not have an x-carve, find a location near you where you can use one.
- 1/8″ straight cut bit
- 60 degree v-carving bit
- Digital Calipers
- Circular saw (or table saw)
- Miter saw
- Finish nail gun
- Jigsaw with metal cutting blade
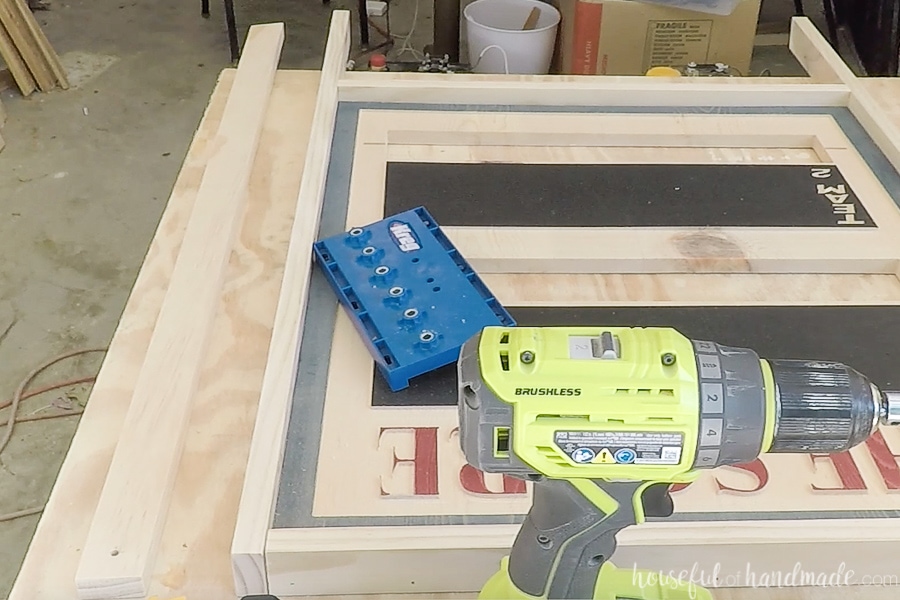
- Drill
- Clamps
- Carpenters square
Supplies:
- (1) 1 x 12 board, 5′ long
- (3) 1 x 2 boards, 8′ long
- (2) 1/2 x 6 boards, 2′ long
- (2) 3/16″ metal rod, 20″ long
- Wood glue
- 1 1/4″ finish nails
- (2) straight shelf pins
- Stain
- I used navy and red colored stains.
- Chalkboard paint
- Outdoor sealer
- I used a walnut colored outdoor deck sealer.
- Super glue gel
Preparing up the 1×12 board
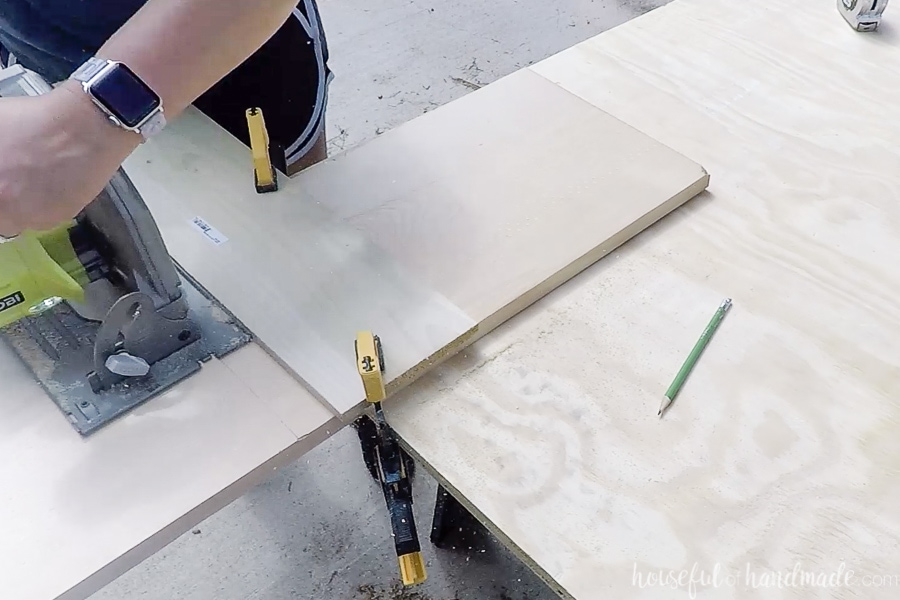
Cut the 1×12 board so you have (2) 26″ long pieces.
I used my circular saw and one of the 1/2 x 6 boards clamped down as a straight edge to do this. But you could also use a circular saw guide track or table saw to cut them.
Add glue to the inside long edge of one of the boards and clamp it to the inside long edge of the other board. Let the glue dry.
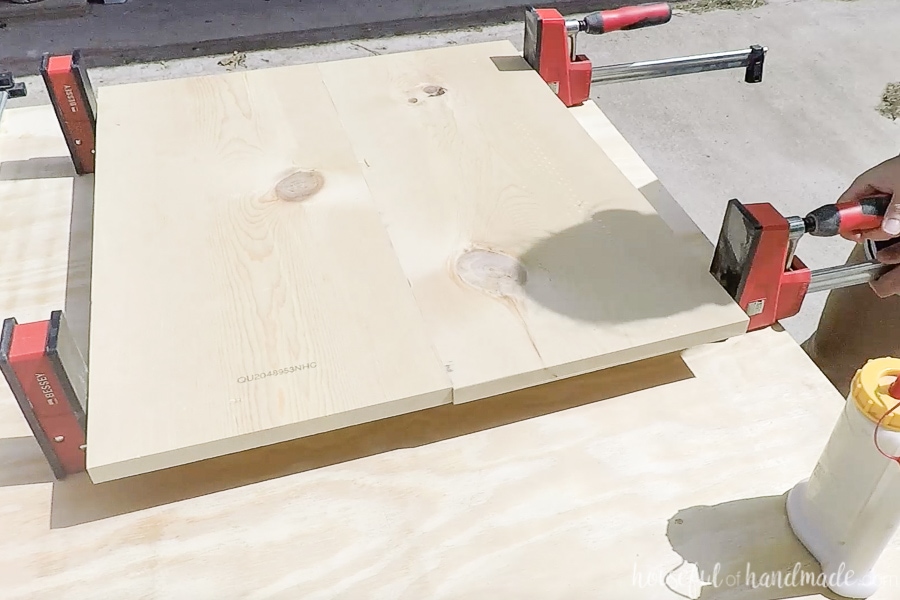
Sand both sides of the board.
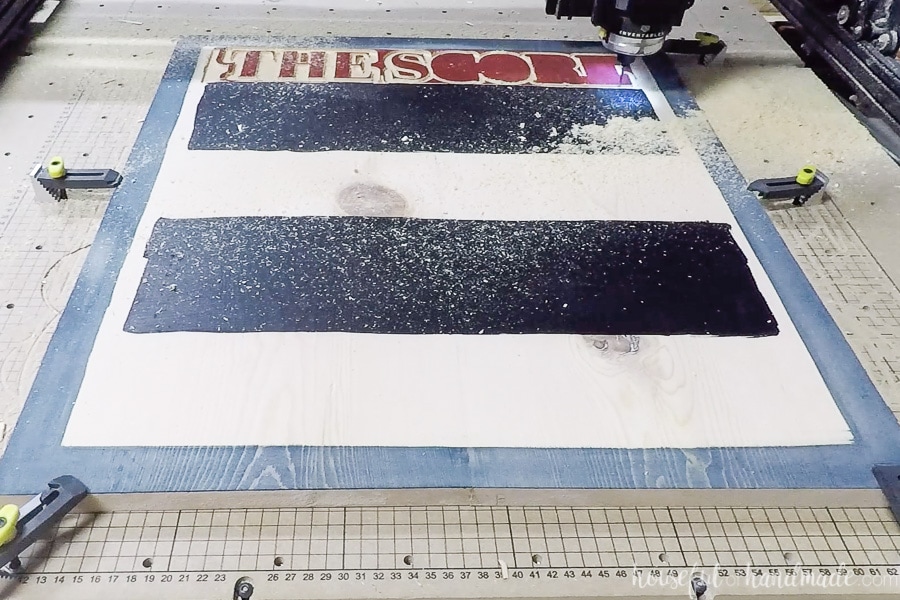
Map out the carving on the top of the board. Add colored sealer or paint to the boarder and words areas. I used a navy blue and red wood sealer for mine.
Add 2-3 coats of chalkboard paint to the boxes for team names. Let the paint dry overnight before carving.
Carving the Scoreboard
You can use the design I created for the score board by first, signing up for a free Easel account, then clicking on the link below to open the file.
When you open the link, it will not be editable unless you make a copy.
In the file, there are 3 different workpieces on the bottom: one for carving the score board, one for cutting out the wood beads, and one for V-carving the Team 1 & 2 into the chalkboard.

Clamp the prepared board on the X-carve and carve the first workpiece. I used the following cut setting for my whitewood boards with a 1/8″ straight bit.
- Feed rate: 44 in/min
- Plunge rate: 12 in/min
- Depth per pass: 0.0625 in
I noticed the thinner detail lines on the text would occasionally chip out white carving. I had to fix one of my Es with wood putty after the carve. It might be a good idea to use a thicker font with less thin, pointy lines.
Follow the prompts in the Easel software to set up the carve and then watch the magic happen!
I like to stay close when I am carving in case a bit breaks or my computer goes to sleep. But I didn’t have any issues with this entire carving and it was my longest single carve yet. Yay!
After the first workpiece carve is done, switch out the bit to the 60 degree v-carving bit. Carve the 3rd workpiece (team 1 & 2) out of the chalkboard areas.
If you don’t accidentally jog the machine when changing the bit, you can use the previous XY zero when setting up the second carve.
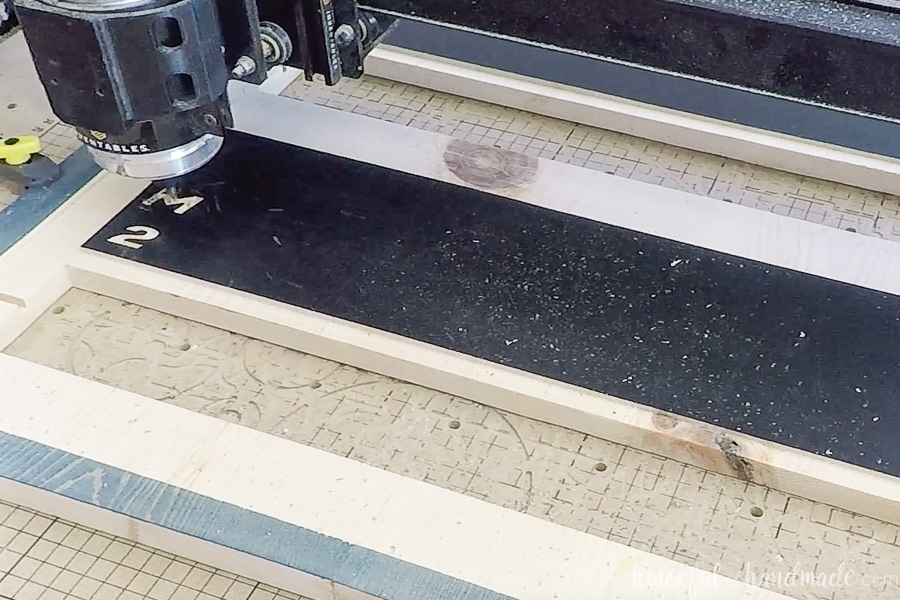
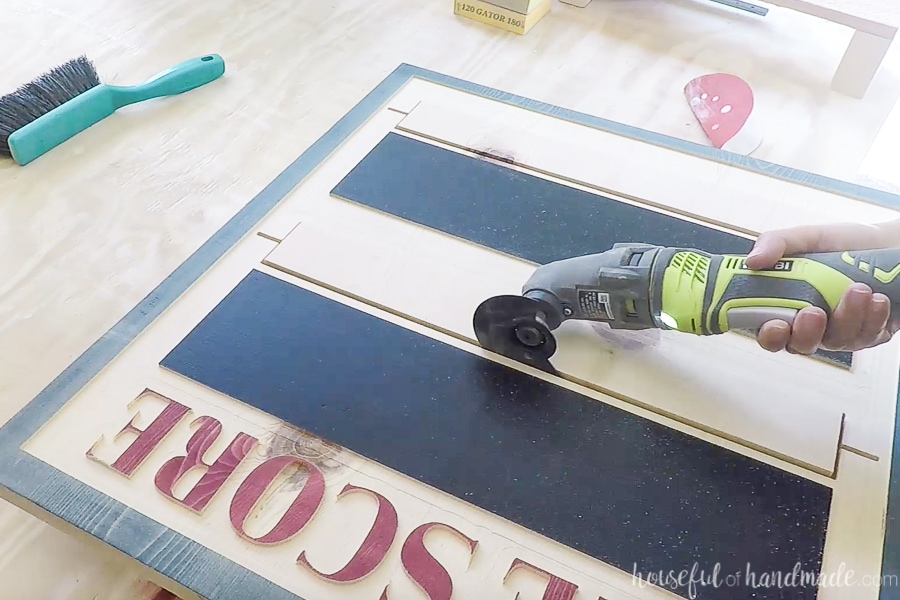
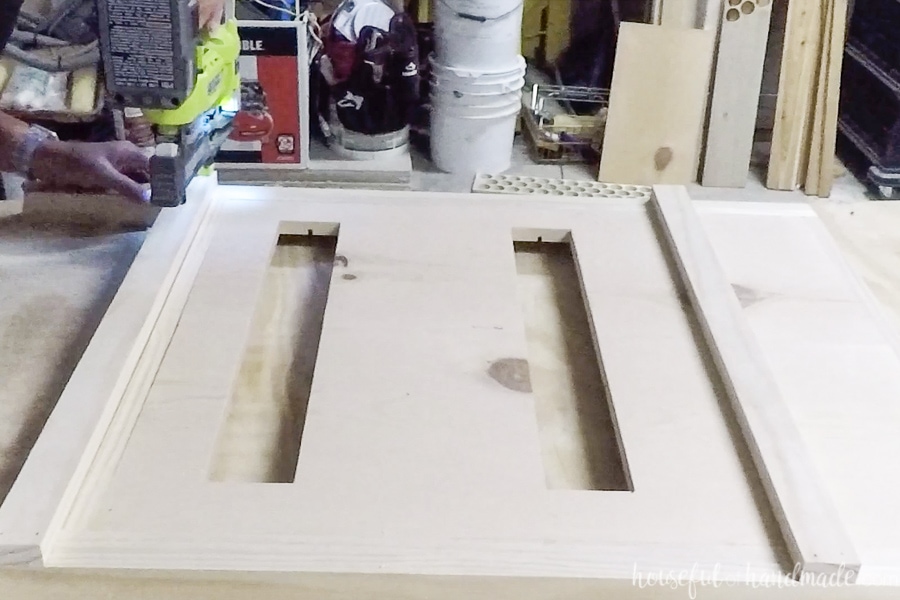
Remove the scoreboard and cut the tabs holding the cut out squares in. Sand any areas that need it.
Build the A-Frame
Cut the following pieces from the 1×2 boards:
- (4) Legs: 36″ long with a 15 degree angle on one end
- (2) Frame top/bottom: 22 1/2″ long
- (2) Back support: 25 1/2″ long
Attach the frame top/bottom to the top and bottom of the carved scoreboard with wood glue and finish nails. Make sure the frame back is flush with the back of the score board.
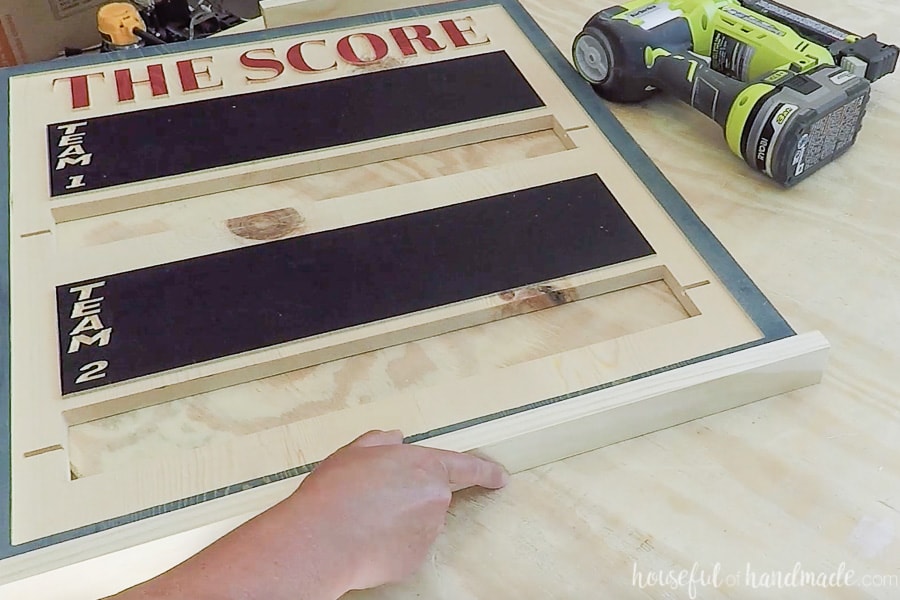
Attach two of the leg pieces to the sides of the score board with wood glue and finish nails. The longer side of the leg should be on the top and the shorter side to the back.
Make sure the top of the legs (the straight edge) is flush with the frame top piece and back is flush with the back of the scoreboard.

Line the other two legs up on the outside of the assembled frame. These legs should be mirrored to the attached ones (the top will be the shorter side and the bottom the longer side).
Drill a 1/2″ deep hole 3/4″ down from the top of the legs in the center of the board. Make sure these are on the outside of the attached leg and the inside of the second leg. Place a shelf-pin in the hole and press the two legs together.
Repeat on the other side.
Flip the score board over so the carved part is facing down. Measure 6″ down from the top of the two outside legs.
Attach one back support at this mark using wood glue and finish nail. Make sure to only attach it to the outer leg.
Attach the second back support the same way but 27 1/2″ down from the top of the legs. Again, make sure to only attach to the outer legs.
Test your frame by opening up the score board. It should hinge at the shelf pins. The 15 degree angle on the bottom of the legs will lay flat on the ground when hinged open giving it more stability.
Seal your outdoor scoreboard with a waterproofing sealer.
Make the Wood Beads
Clamp the 1/2 x 6 board the X-carve waste board. Using the 1/8″ straight bit, cut out the 2nd workpiece.
The workpiece is set up to cut out 36 wood beads. You can cut more or less depending on how many you want on your scoreboard. I cut 42 total for a score of 21 for each team.
The total opening for the wood beads on the scoreboard is 18″ wide. So you could fit a total of (36) 1/2″ wide beads on there but it would not allow room to move them for scoring. I would not suggest more than 26-28 beads for that size.
If you want more wood beads, you could make the cut out area bigger or use thinner wood for your scoring beads.
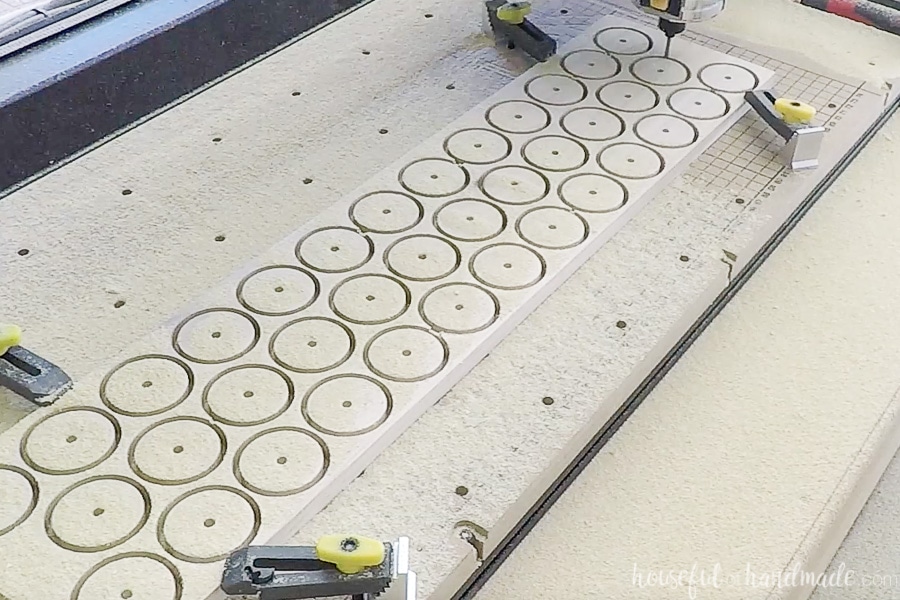
Remove the cut out beads and sand off the tabs.
I considered adding a round-over or chamfer to each beads edge, but I didn’t have access to my router and router table. The edge detail would make it easer to grab and slide the beads.
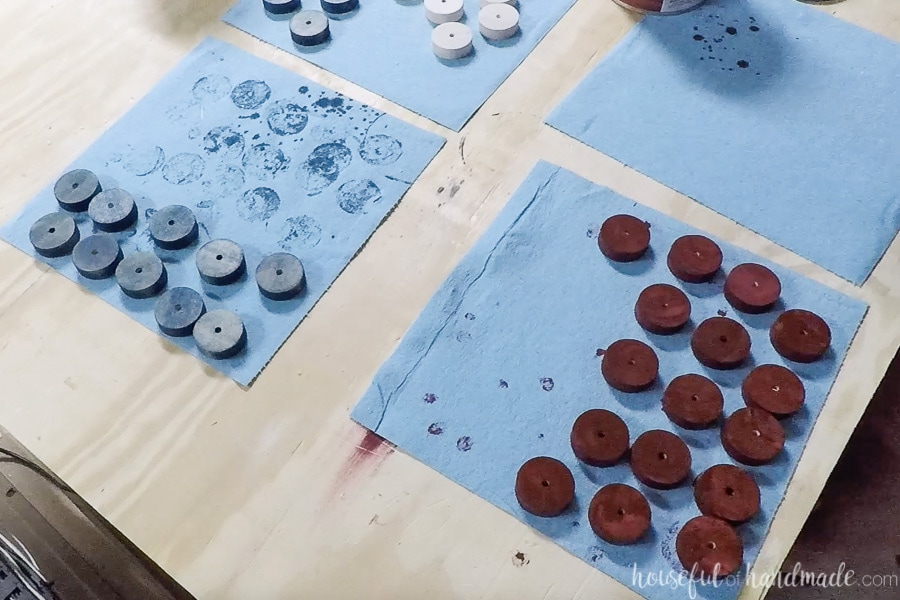
Stain/paint the beads with your desired colors. I also stained every 5th bead white to make it easier to quickly see the score.
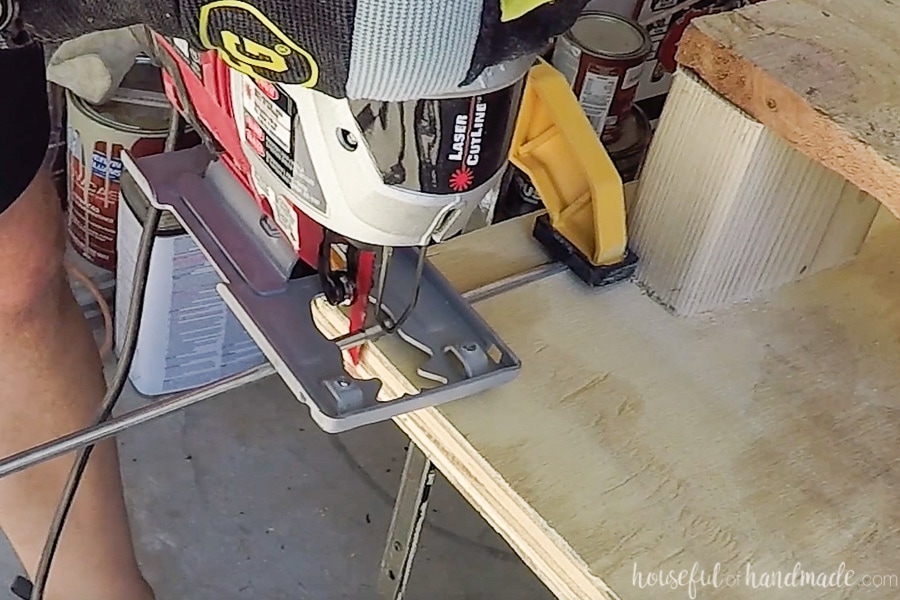
Cut the metal rod to fit into the grooves on the side of the scoring area. We used a jigsaw with a metal blade to cut it easily.
Thread the wood beads on your metal rod in the order you want. Place a few drops of super glue gel in the grooves and press the rod into them. Hold firmly for a few seconds to secure.

Now you are ready to play! And your handy new scoreboard will keep score so you can just enjoy the game.

Happy Building!

Thank you to Inventables for sponsoring this post. I only recommend products that I use and love and all opinions are 100% my own. Click here to read my full disclosure policy.