Learn how easy it is to install a bathroom vanity for your next remodel.
Whether you have built or bought your new bathroom vanity, you will need to install it.
Vanities need to be installed so they are secured to the wall before you can add a vanity top or hook up the plumbing.
Installing a vanity is easy and can be done in just a couple hours. So grab your tools and let’s get started!
This post may contain affiliate links. As an Amazon Associate I earn from qualifying purchases. Click here to read my full disclosure policy.
The most important part of installing a vanity is making sure it is level. Not all floors are level so even the most level vanity could be off.
If you vanity is not level, water could run behind it or pool up against the wall. Standing water is never a good idea!
Part of leveling is also making sure it is square to the walls.
Not all walls are straight. Walls tend to curve in towards the corners because more drywall mud is needed there to cover the drywall tape.

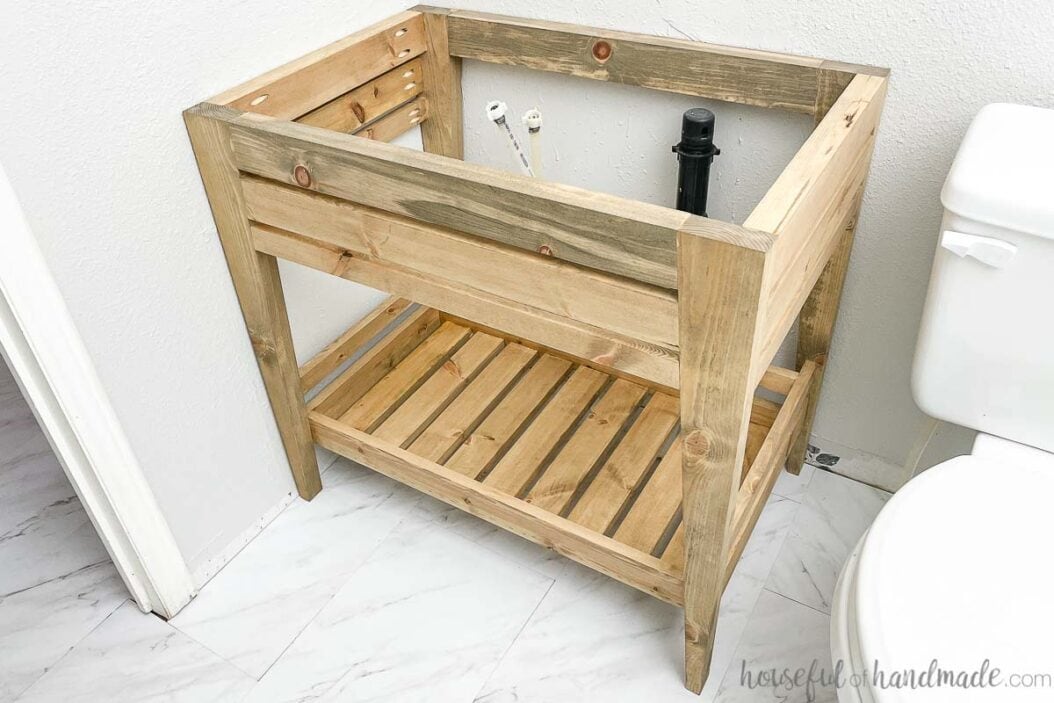
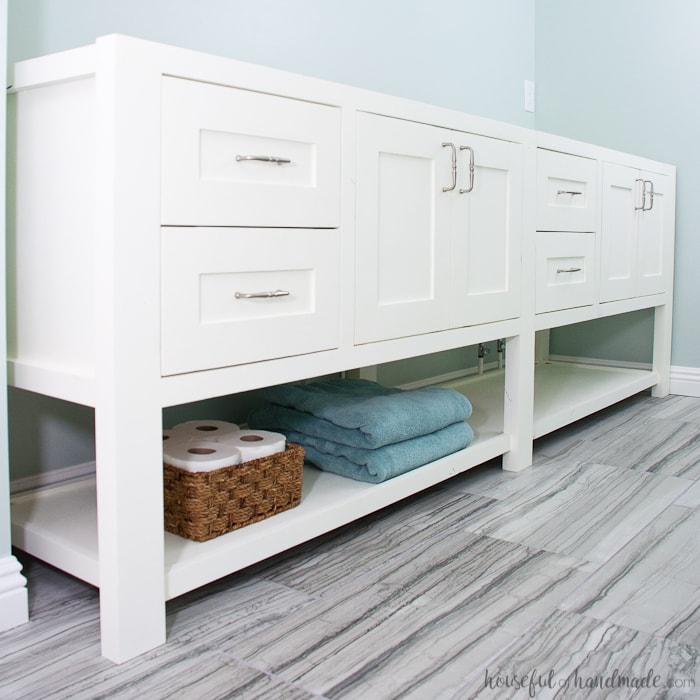
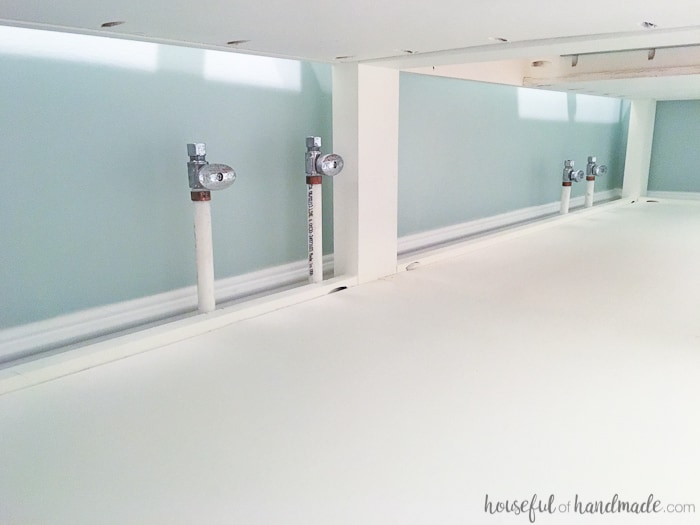
You will also need to make room for your plumbing pipes to install your vanity.
You will cut out holes to line up with your plumbing pipes in either the back or bottom of your vanity.
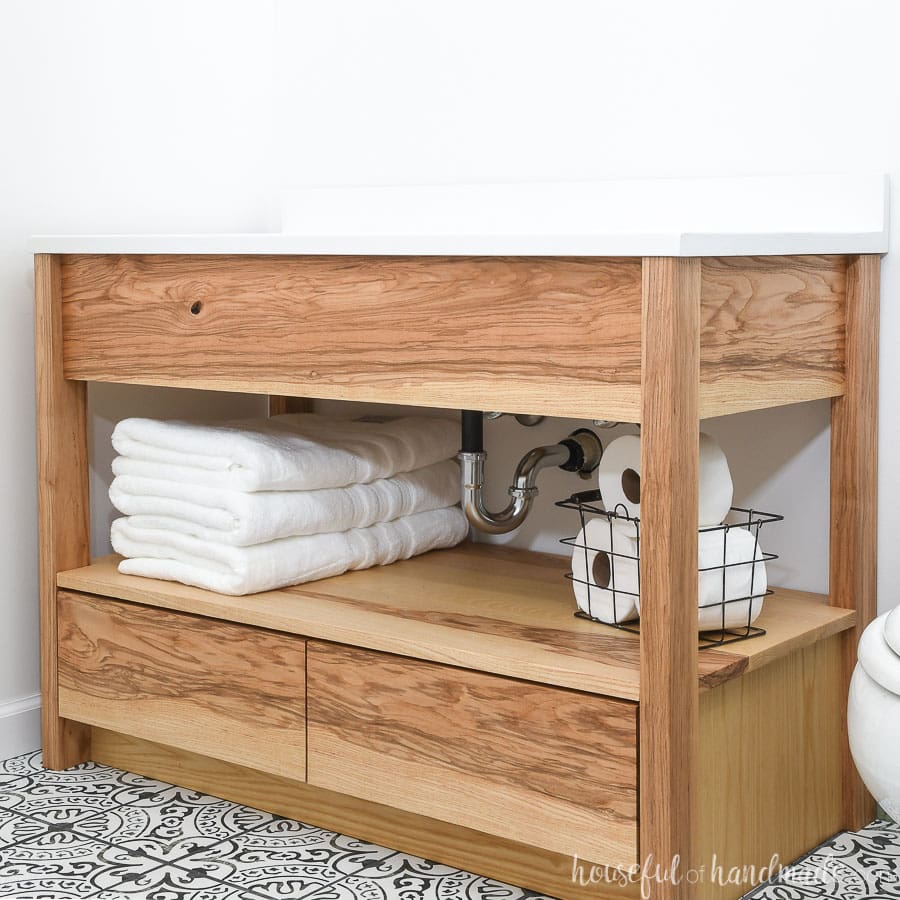
To avoid cutting into your vanity during install, you can build this easy open bathroom vanity or this bottom drawer bathroom vanity.
Build your own vanity and save!
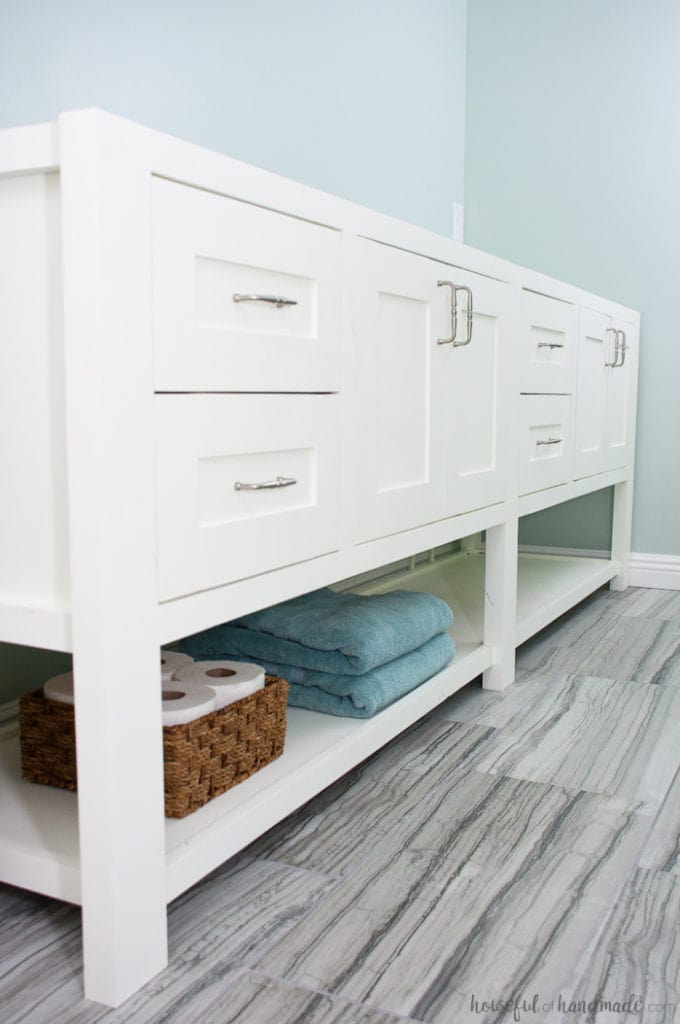
A DIY bathroom vanity is the perfect way to remodel your bathroom on a budget.
How to Install a Vanity
Tools & Supplies
Supplies:
- Scrap wood or wood shims
- Wood screws
STEP 1- Cut for plumbing pipes
Measure and mark where you need to cut for your pipes.
EXPERT TIP:
It is best to cut the holes slightly large to make sure you have room to align and level your vanity once in place.
If your pipes are coming in from the wall, you will have to cut out holes in the back of the cabinet for the plumbing pipes to fit through.
If your pipes are coming into your bathroom through the floor, you will have to cut holes in the bottom of the vanity for the plumbing pipes.
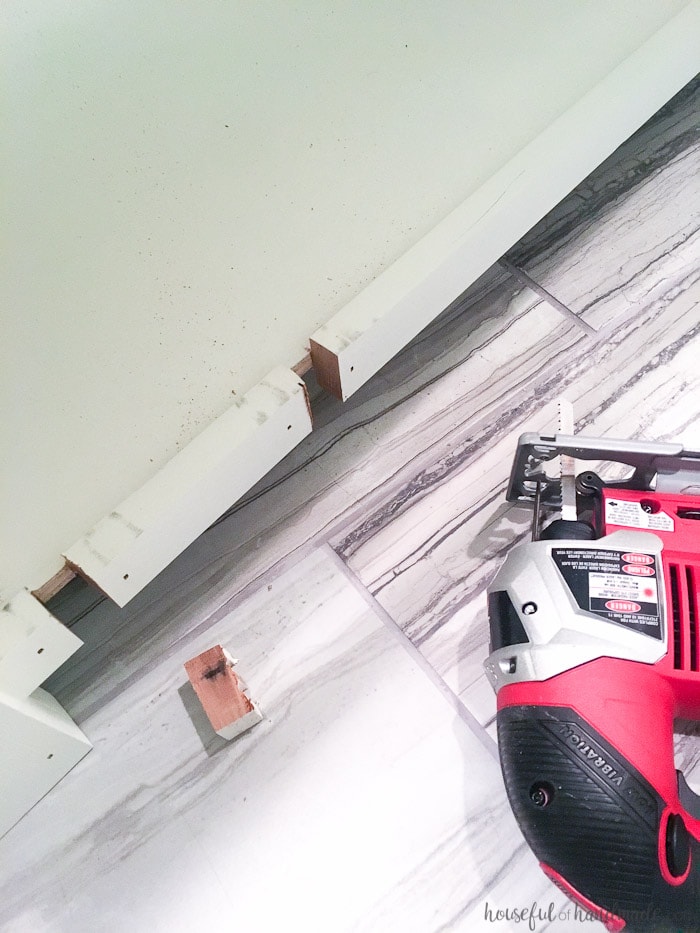
For our open shelf vanity, I needed to cut the trim on the back of the shelf so the vanity could sit flush with the baseboards on the back wall.
The vanity had a trim piece around the bottom shelf.
I used the nail gun to secure the trim right around the sections I would be cutting out so the trim remained in place.
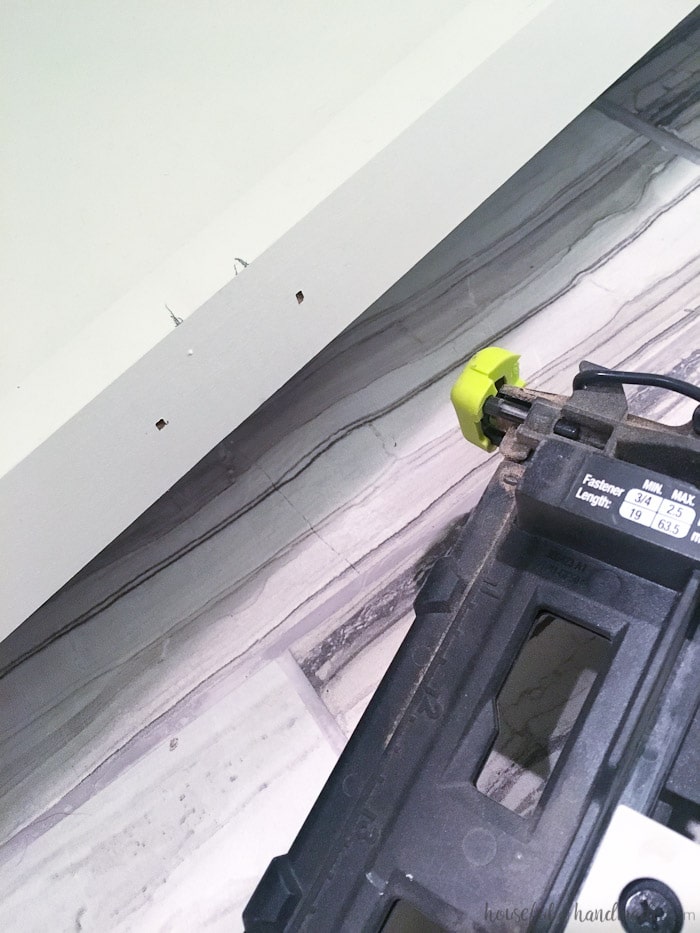
Using a drill with a hole saw or jigsaw, cut out the sections you need to fit around the pipes.
If you are using a jig saw, you will need a drill to give you a starter hole to start your cutting.
For our vanity it meant just removing the trim around the bottom shelf.
STEP 2- Line up and Level
Slide the vanity up agains the wall so the pipes fit into the holes you cut.
Check your vanity for level. Use shims under the feet of the vanity as needed to level your vanity.
Identify and mark the wall studs in the wall behind your vanity.
Use shims between the wall and the vanity to ensure the vanity stays level and is square to the wall.
Since our vanity had a gap between the frame and the wall because of the baseboards, I used a scrap piece of wood between the frame of the vanity and the wall.
Also, the wall our vanity is on was not very straight. On the right side of the vanity I had a 3/4″ gap between the wall and vanity but on the left side it was a 1 1/4″ gap.
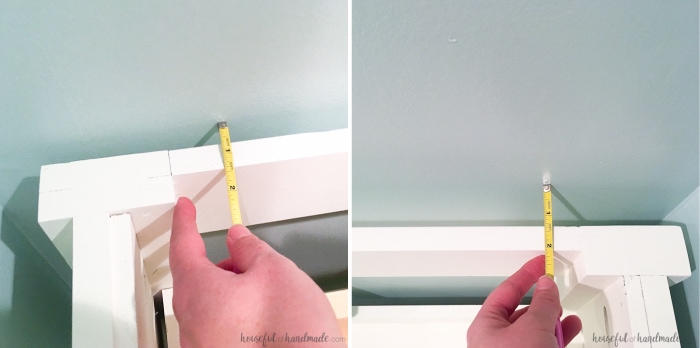
If you do not have a second set of hands, a nailer can be used to attach the shims to the vanity so they would stay in place while securing it to the wall.
STEP 3- Attach vanity to wall
Using wood screws, secure the vanity to the wall into the wall studs.
EXPERT TIP:
Pre-drill pilot holes in your vanity and shims where you will attach it to the wall so they don’t split when attaching it.
Make sure your screws are long enough to go through the vanity, shim, drywall, and are secure into the wall studs.
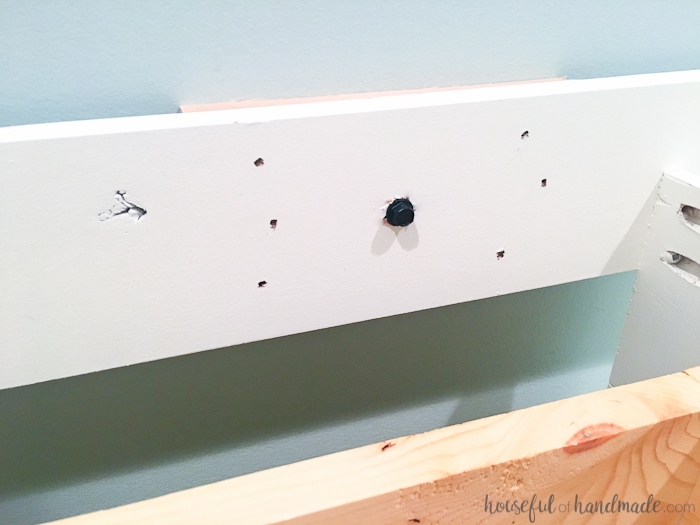
Continue to check for level as you secure the vanity into the wall studs behind it.
Secure the vanity in at least 2-3 walls studs. It should not wiggle or move at all.
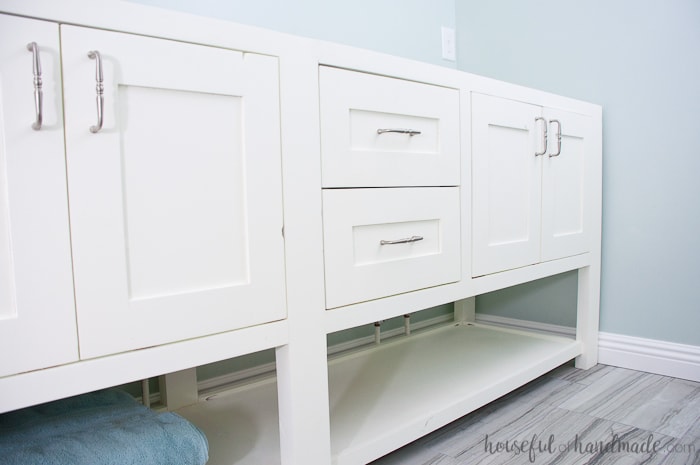
Now your vanity is installed. You can install a new bathroom vanity next.
For our bathroom, I added a DIY wood vanity top and it looks amazing! Or find other budget friendly vanity top options here.
