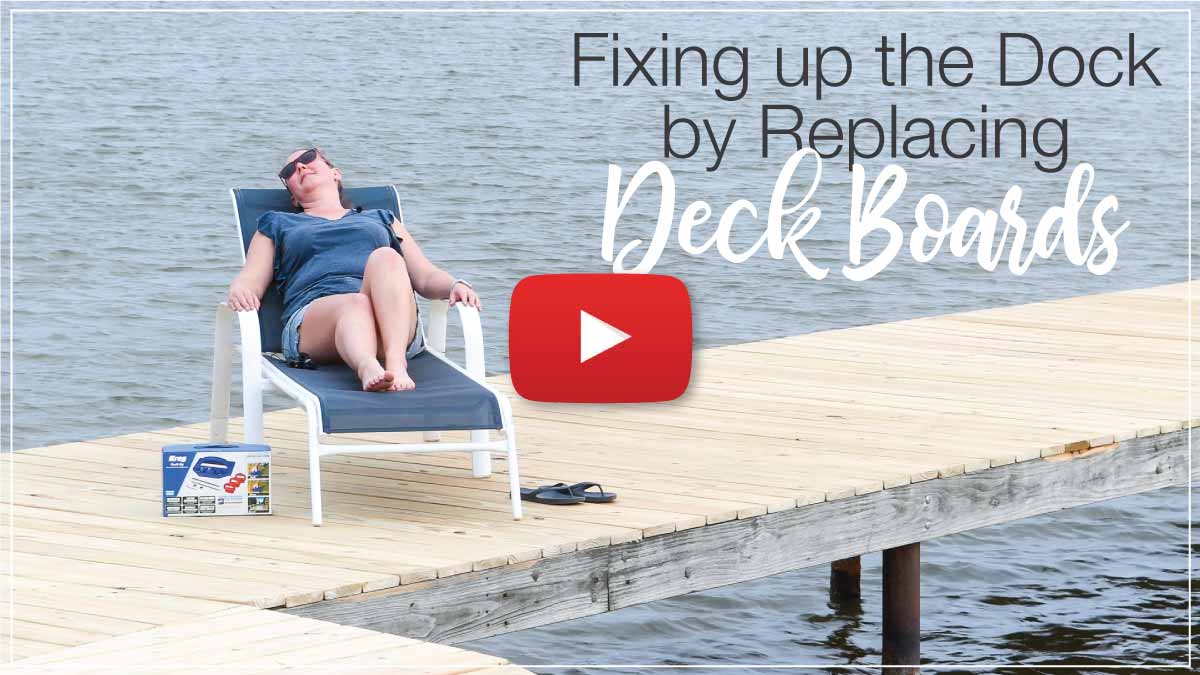
Get ready for summer by replacing deck boards on your deck or dock to make it feel new again!
Spring is the perfect time of year to upgrade your deck by replacing old deck boards! Use the cooler days to work so you can enjoy your beautiful deck when the summer heat arrives.
Our dock was looking old and worn out because of the old wood boards on top. The splintery boards plus nails and screws coming up, made it a hazard for bare feet. And no one wanted to even lay their swim towels down for fear of slivers.
So I partnered with Kreg Tools to use their Deck Jig to replace the deck boards on the dock with brand new treated lumber. The Kreg Deck Jig hides all the screws in the sides of the boards. Now our swim deck is bare feet ready!
This post may contain affiliate links. As an Amazon Associate I earn from qualifying purchases. Click here to read my full disclosure policy.
And now through April 30, 2022, the Kreg Deck Jig and the Deck Screws are on sale so you can get your deck ready for summer too. Save $10 off the Deck jig and $9 off the Protec-Kote screws used for 5/4 deck boards.
Deck boards with Hidden Deck Screws
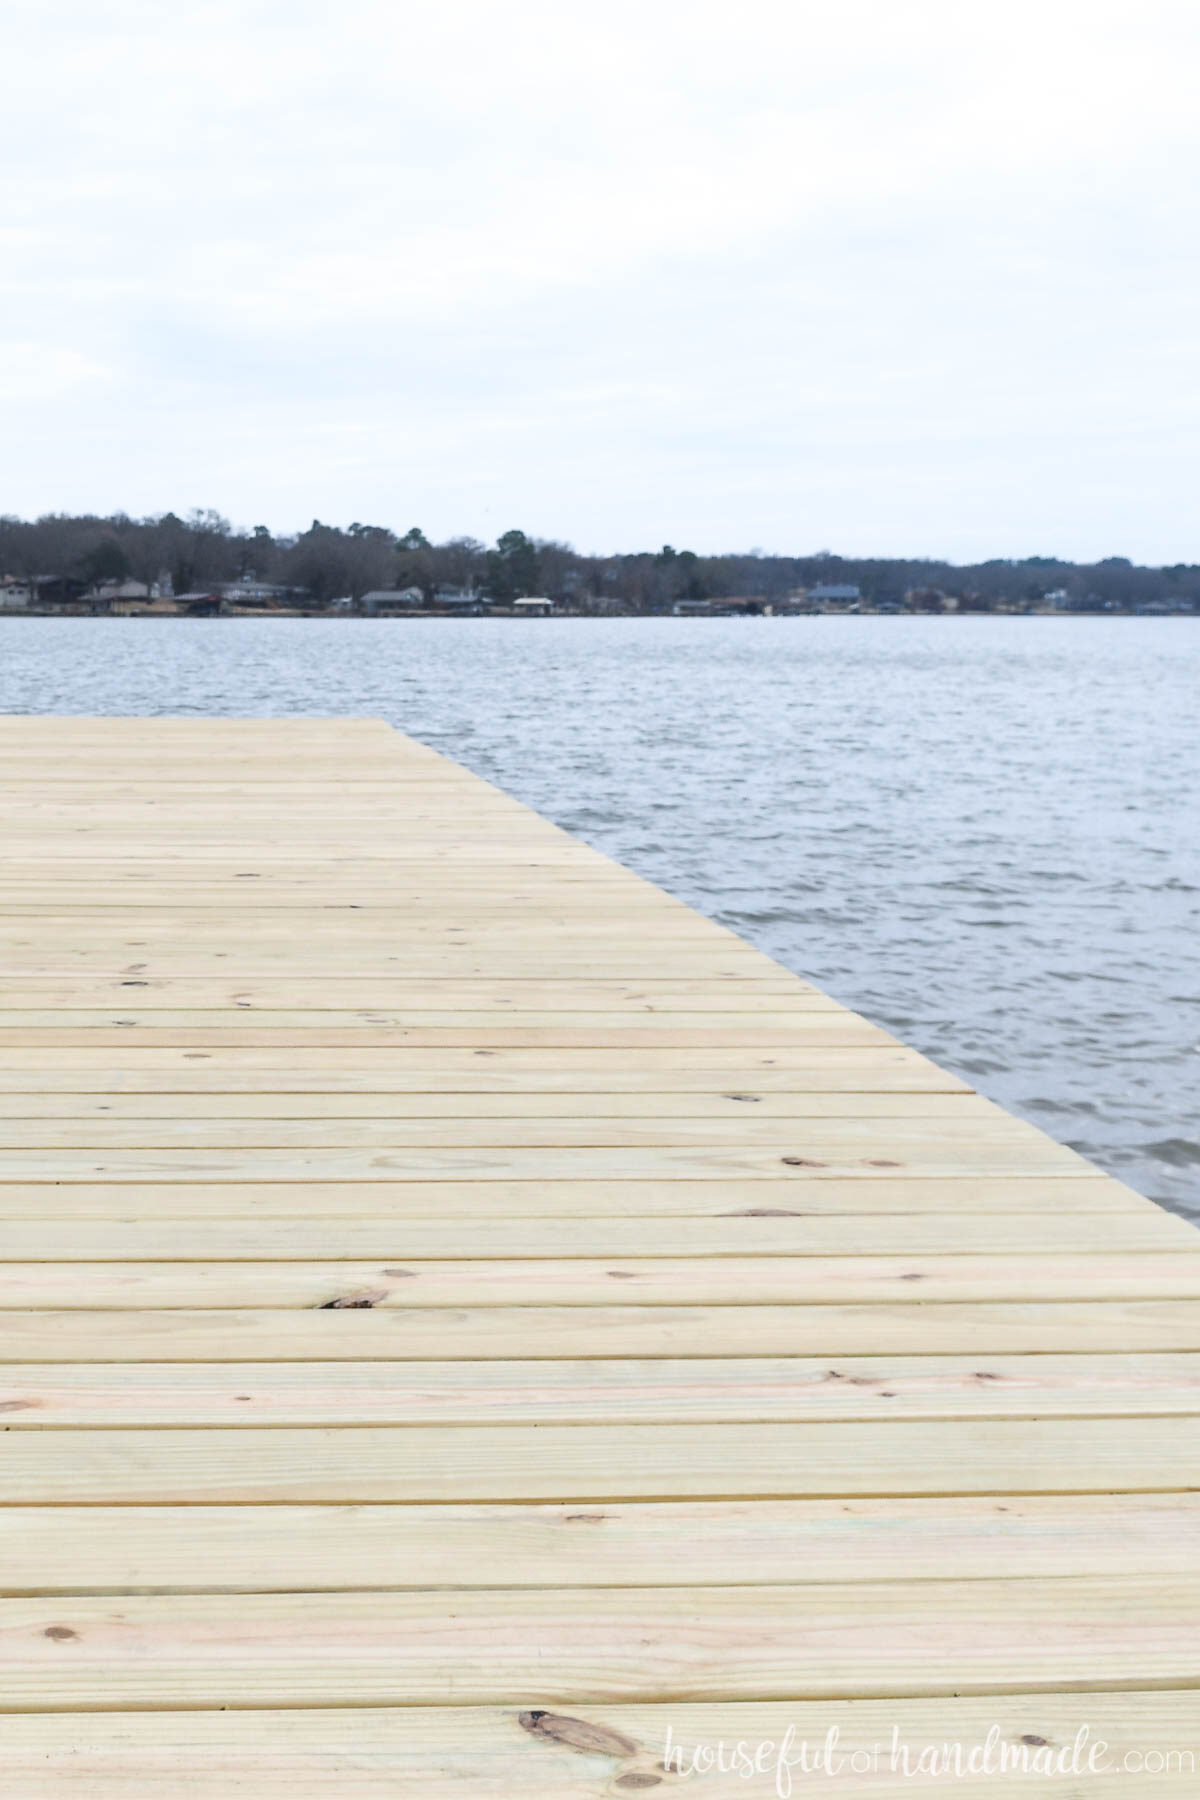
The best part of using the Kreg Deck jig is that it creates a professional looking deck with no visible screws or fasteners!
There are no screws to work their way loose and become a tripping hazard. Or worse, to cut up bare feet in the summer!
All the deck screws are hidden in special pocket holes that secure the board from the side into the deck joists. It leaves the top of your deck stunningly perfect.
Our old dock was full of splintering boards, and even had a huge hole in one end where there was a fire before we moved in. It was not safe to use.
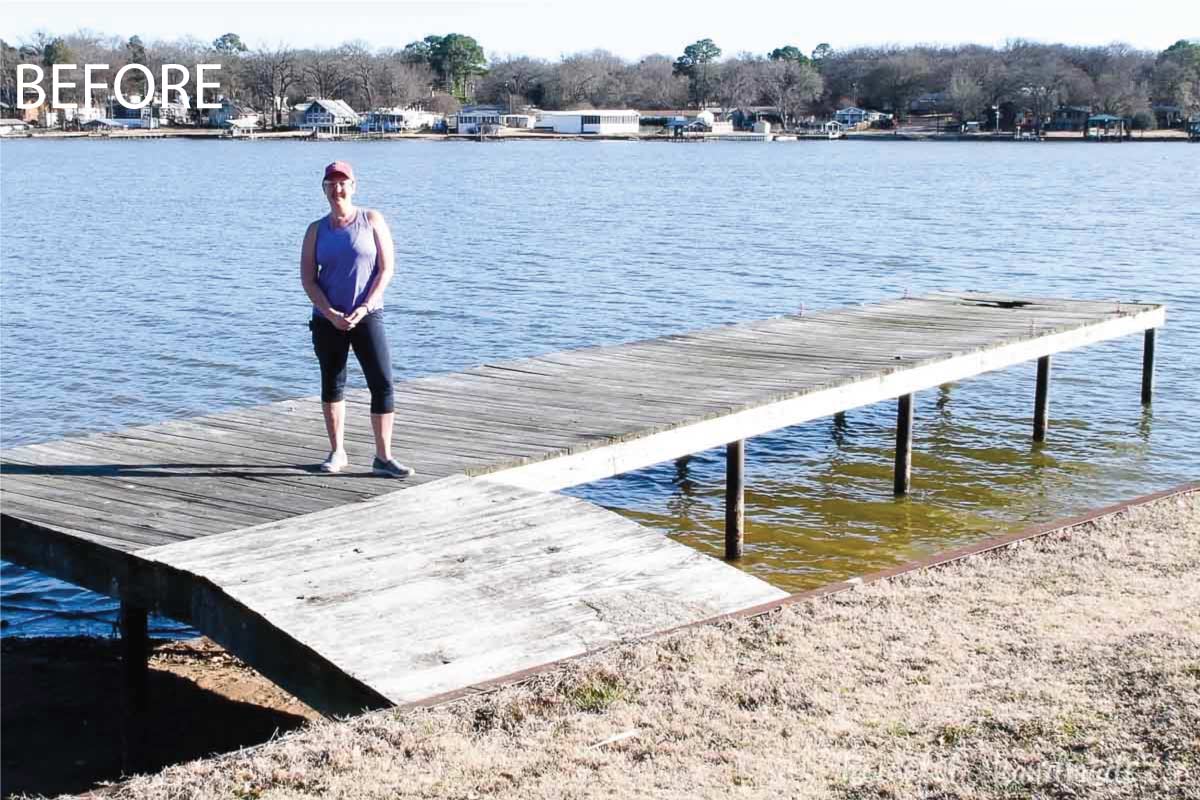
And most of the boards were extremely soft from rot and decay. There was no proper spacing between deck boards, which probably caused it deteriorate faster.
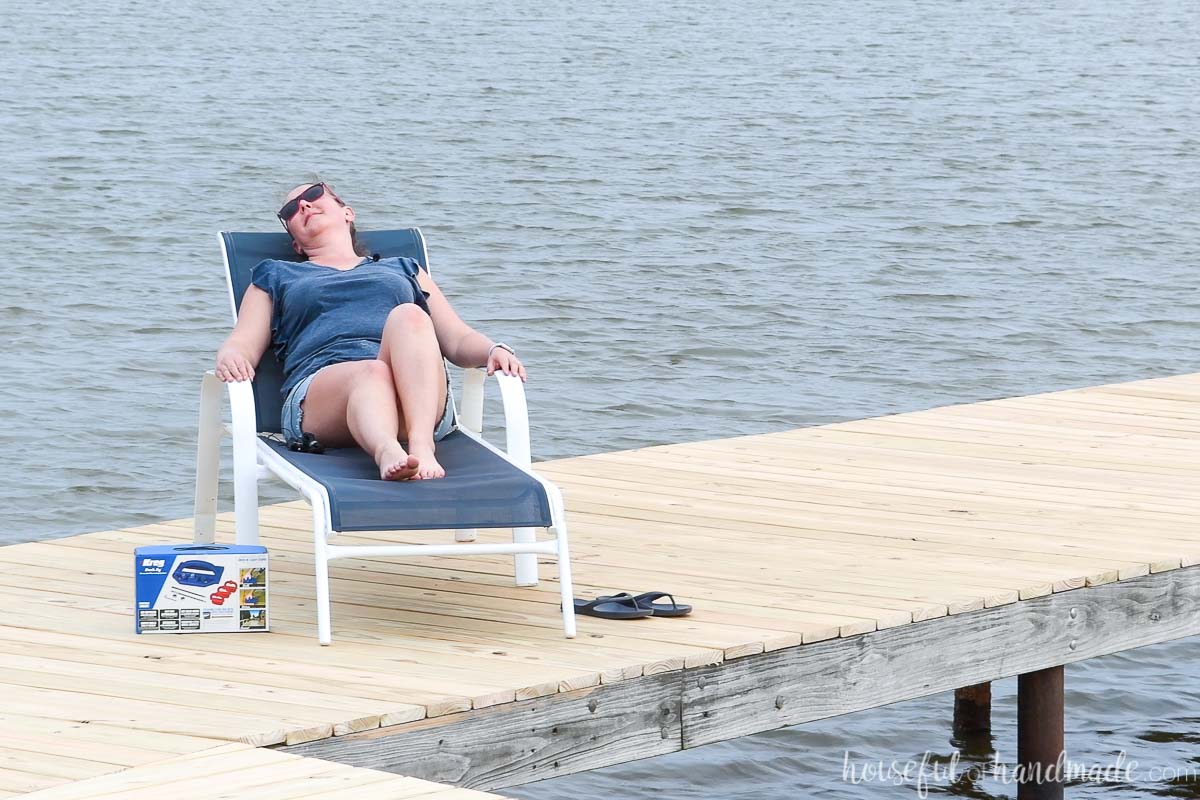
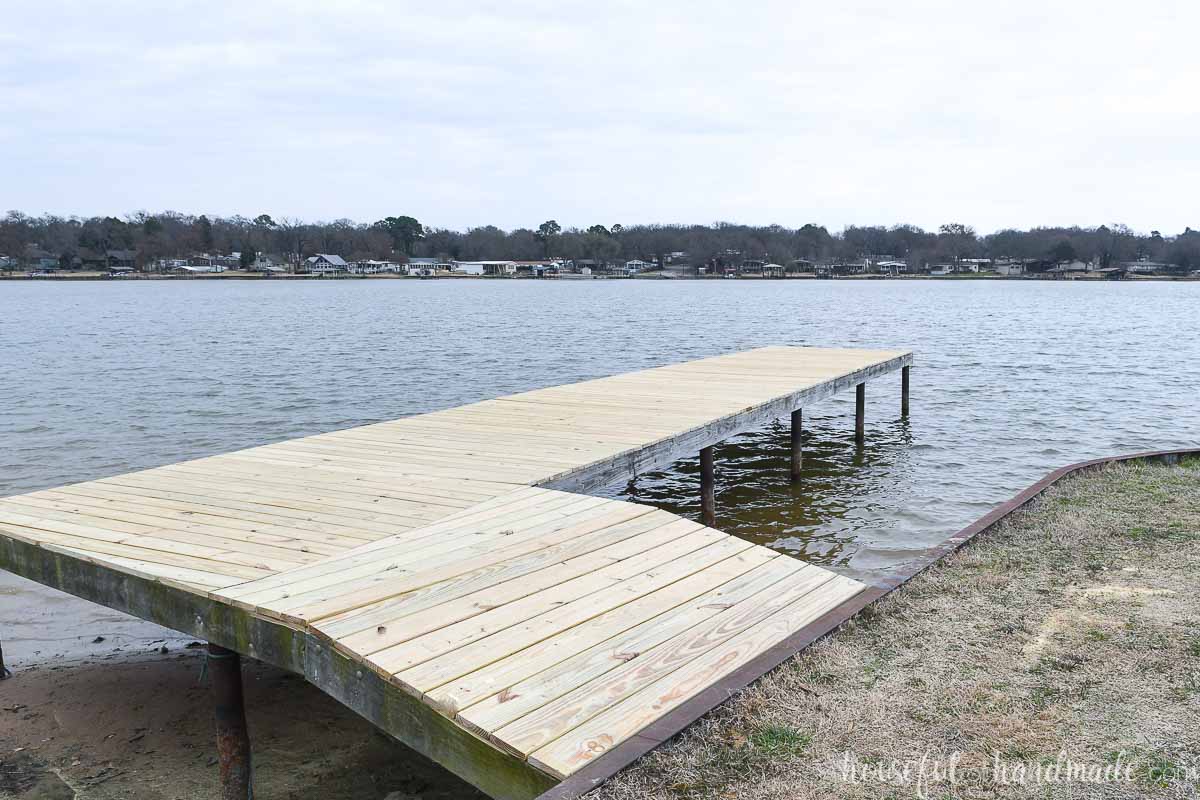
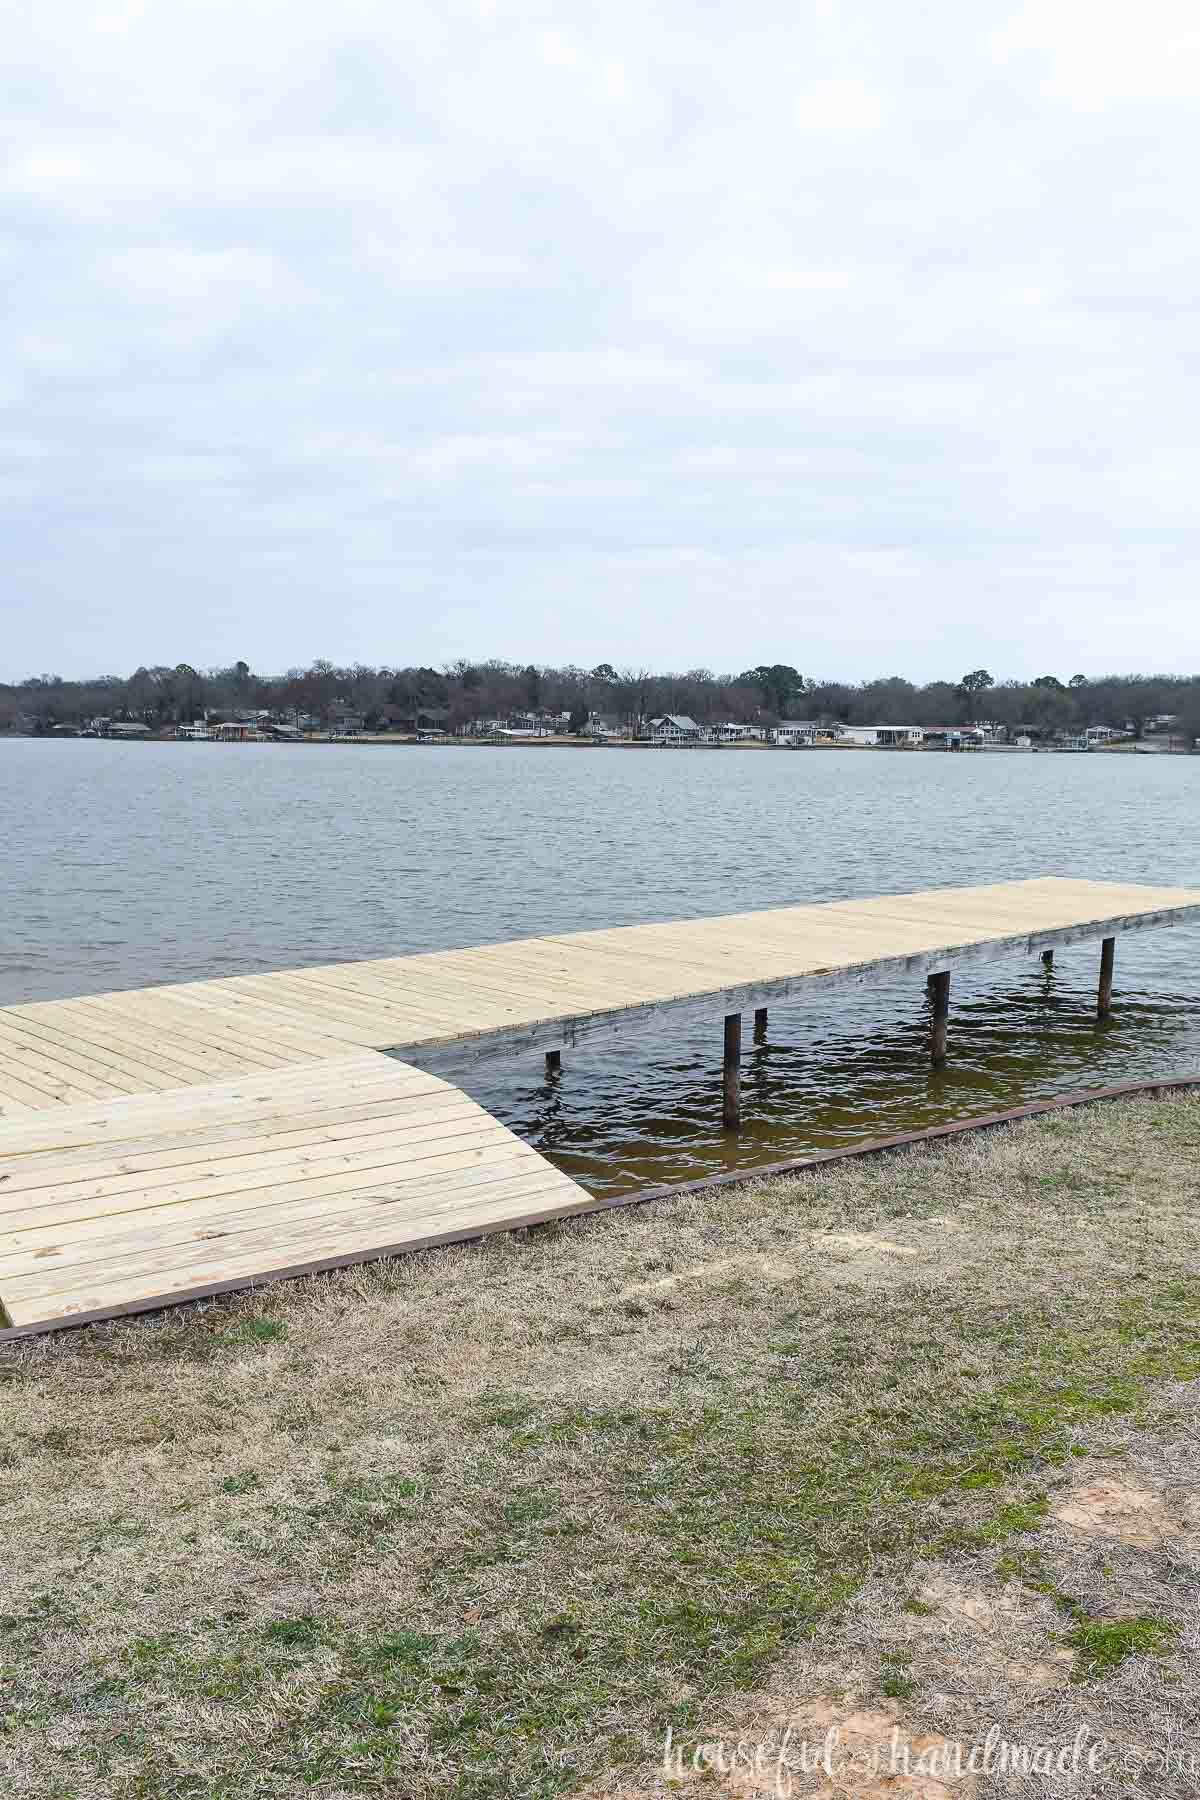
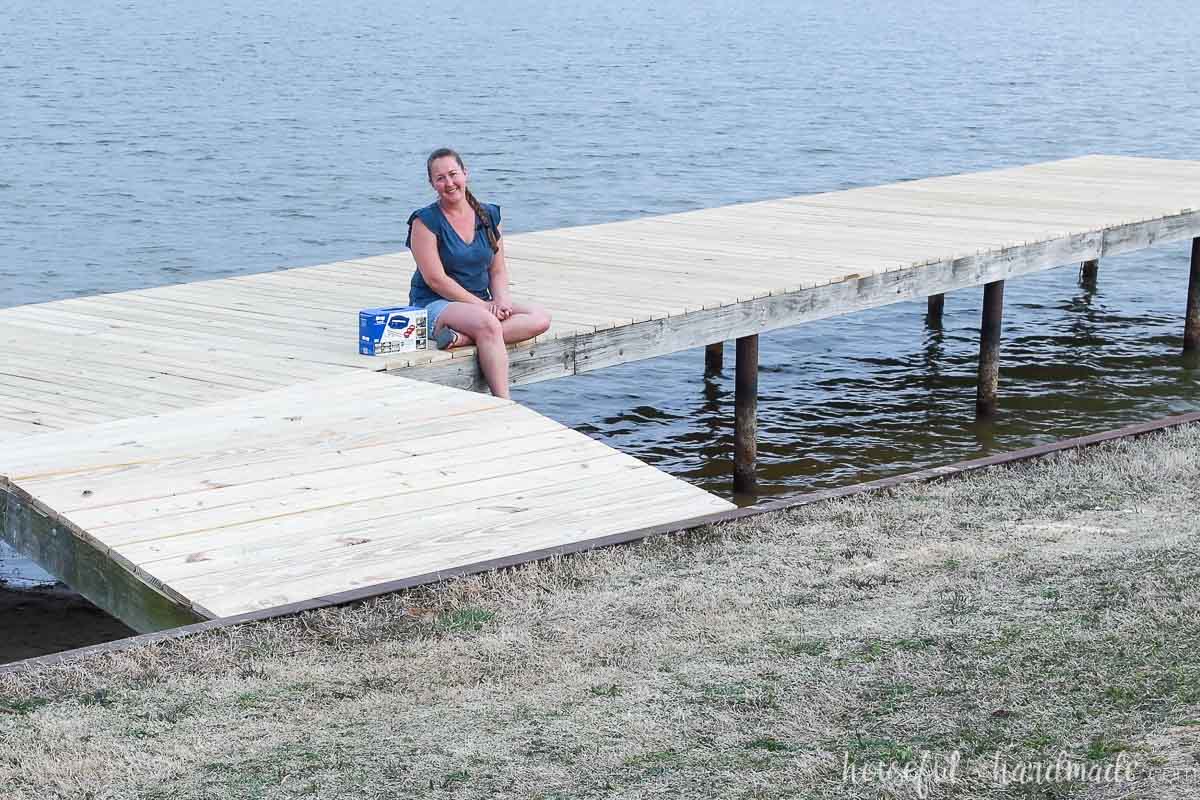
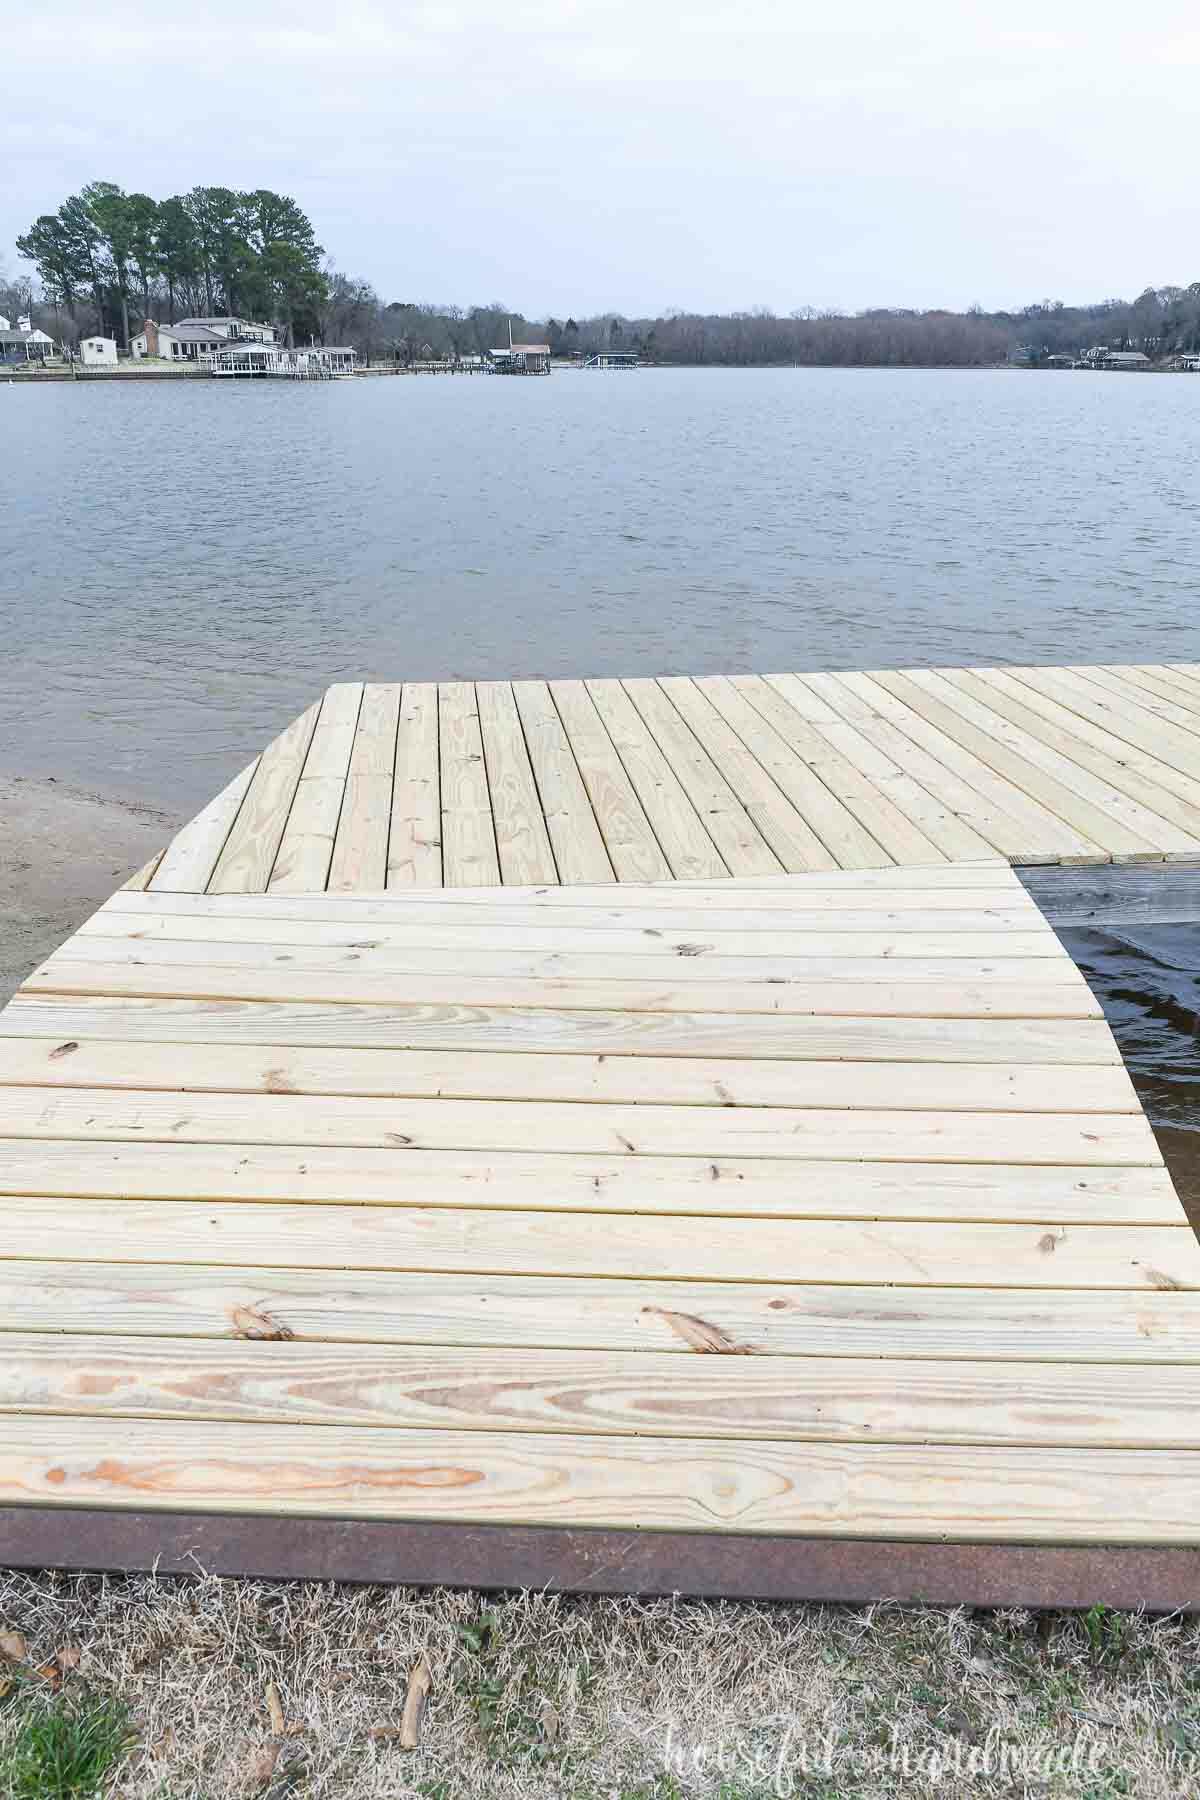
But now our dock is the perfect swim deck for summer!
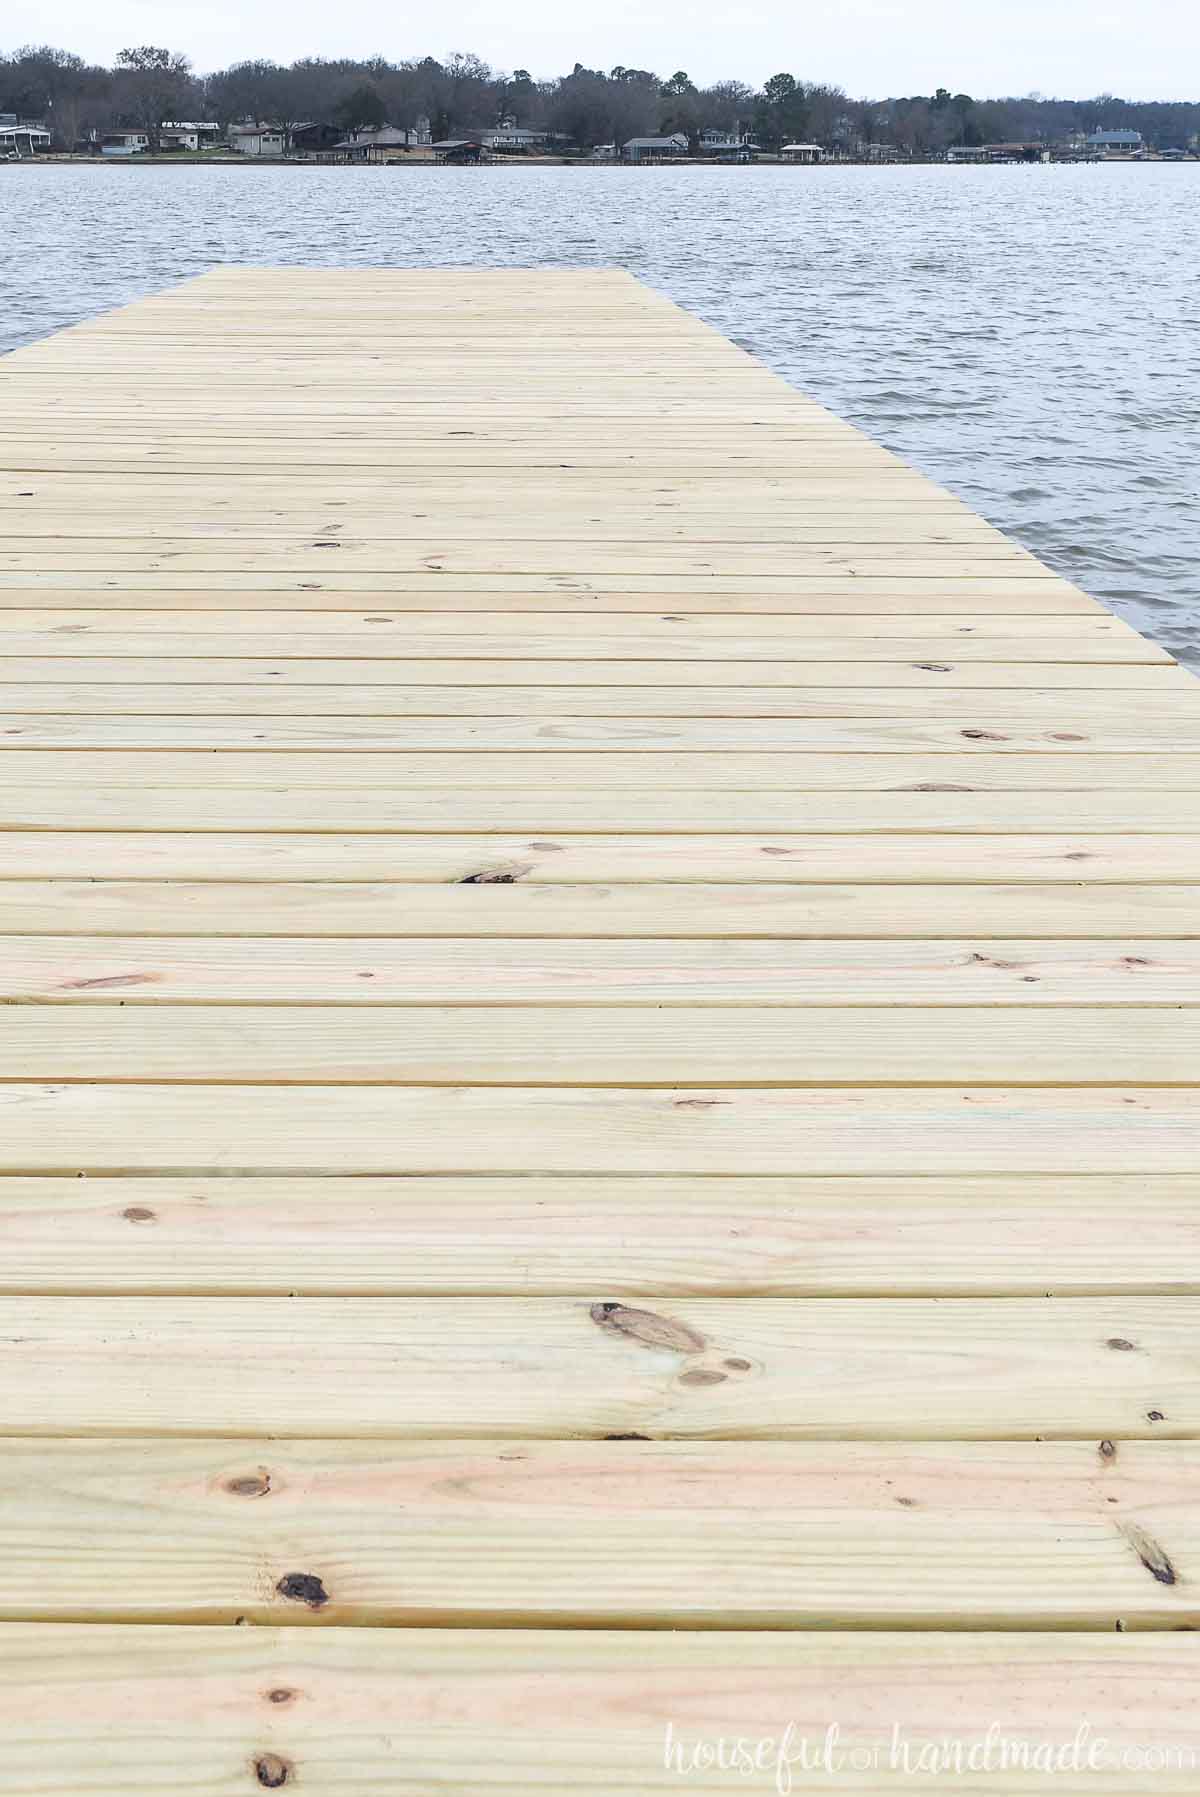
The new boards are solid and sturdy and I know the joists below are solid too. And the smooth wood deck boards just make my heart happy.
You have to look to find the hidden screws holding each board down. Now I can feel confident going barefoot on the deck while enjoying a swim this summer!
Cost of Replacing Deck Boards
The cost of replacing your deck boards is based on three factors:
- What deck boards you choose
- How big is your deck
- Are you going to DIY it
You will save a lot of money by doing the work yourself. Removing the old deck boards and installing new ones is not difficult work, but is can be hard on the body.
Removing the old boards can require some strength, especially if they are installed with screws that are stripped or rotted.
We were unable to remove about 2/3rds of the screws holding down the old deck boards and had to rely on a pry bar and muscles to remove them. It took us one more day than planned to remove the deck boards because of this.
Installing the new deck boards can also be hard on the knees and back since you are working on the floor.
But the time spent enjoying the new deck made the aches and pains of the DIY project easier to take! And we saved so much money by doing the work ourselves.
Choose your deck boards
There are many options you can choose for your deck boards. The most common are pressure-treated lumber, cedar or redwood, or composite decking.
Pressure-treated lumber
Using pressure-treated boards (usually pine) is the most afforable option for replacing deck boards. These boards can suffer from shrinking as the moisture from the treatment subsides. And they may not be as long-lasting as other deck options.
You can extend the life of these boards by protecting them with a deck sealer. These sealers are re-applied every year or two. But you do need to wait to apply it until the wood can dry out first.
We chose to use the 5/4 wood deck boards to save money and look like a classic dock. We plan to seal it in about a month, along with the joists of the deck. And will add sealing to our annual spring cleaning list.
Cedar and Redwood
I group cedar and redwood boards together because the have similar properties of resisting rot/decay and minimal shrinking. Also, depending on where you live, one or the other might be more available.
When we lived in Utah we had lots of redwood lumber options. Now in Texas, we cannot find redwood anywhere, but there is way more cedar available.
Depending on availability and lumber costs, these might be a great option for a deck without breaking the bank. But you will still want to seal the wood to maintain it and keep it strong for years to come.
Composite Decking
Composite decking is decking made with wood fibers and plastic. It is more expensive than treated lumber but can last much longer. It is manufactured to resist shrinking/swelling and is the easiest to maintain.
I also find the composite decking can get very hot in the summer. The more expensive options are labeled to stay cooler, but that comes with extra cost.
What thickness should my deck boards be?
Once you know the type of material, what about the size? You can use 1x lumber (which is actually 3/4 inch thick) but it can feel not as firm under your feet and may not last as long.
Most hardware stores carry 5/4 deck boards. These are actually 1 inch (or just over 1″) thick. They are also carried in longer lengths like 12′ and 16′, and sometimes even 20′, for your deck.
5/4 decking requires a deck with joists that are 16″ apart (on center).
The other option for decking is to use 2x lumber. These boards are actually 1 1/2″ thick and can be used on decks with joists 24″ apart (on center).
What width should my deck boards be?
I recommend using 6″ deck boards, which are actually 5 1/2″ wide.
You can use a 4″ (actually 3 1/2″) wide board. But they take more time to lay down and use up more fasteners, which means more cost.
Boards larger than 6″ are more prone to cupping and bowing so they are not recommended for decking.
Calculate how many deck boards you need
It is best practice to use deck boards that are the full length of your deck. This will give you the strongest and longest lasting deck.
You can use a splice joint over a joist if needed instead of full length boards. But the ends of the boards are softer and more prone to absorb water and therefore can rot faster.
Most deck boards are available in longer lengths so it is best to choose boards the full length of your deck. Then take the depth of your deck in inches and divide by 5 3/4. This will allow for a 5 1/2″ wide board and a 1/4″ spacing between deck boards. This will give you the total number of boards needed.
For our dock, it is just under 8′ wide so we used 8′ long boards. It is 49′ long, so I divided 588 by 5.75 and got 102.26. That means we need 103 boards. Then I repeated this for the L part that connects the dock to the land.
Spacing Between Deck Boards
You need to have proper spacing between deck boards. The spacing allows for movement as the wood deck boards expand and contract in the varying temperatures and humidity levels throughout the year.
The spacing also allows for proper air movement to reduce moisture buildup and for the water to escape the top of your deck. No spacing could result in pools of standing water in low spots.
You need to have at least 1/8″ spacing between your deck boards when installing. The Kreg Deck jig spaces your deck boards 1/4″ apart to allow the hidden installation of the screws and give plenty of air flow.
How to Replace Deck Boards
Tools Needed:
- Kreg Deck Jig
- The jig is on sale for $10 off through April 30, 2022.
- Circular saw
- Drill
- Impact driver (optional, but I love not having to switch bits with the drill)
- Pry bar/hammer
- Speed square
- Level or straight edge
- Optional: Framing nail gun
- Very helpful if replacing/repairing deck joists
Supplies:
- Deck boards
- Protec-Kote Kreg Deck Screws
Remove old deck boards
Grab your pry bar and get to work removing the old deck boards.
If the deck boards are attached with screws, use a drill to remove them if possible. Most of our screws were stripped or rotted so they would not remove with screws.
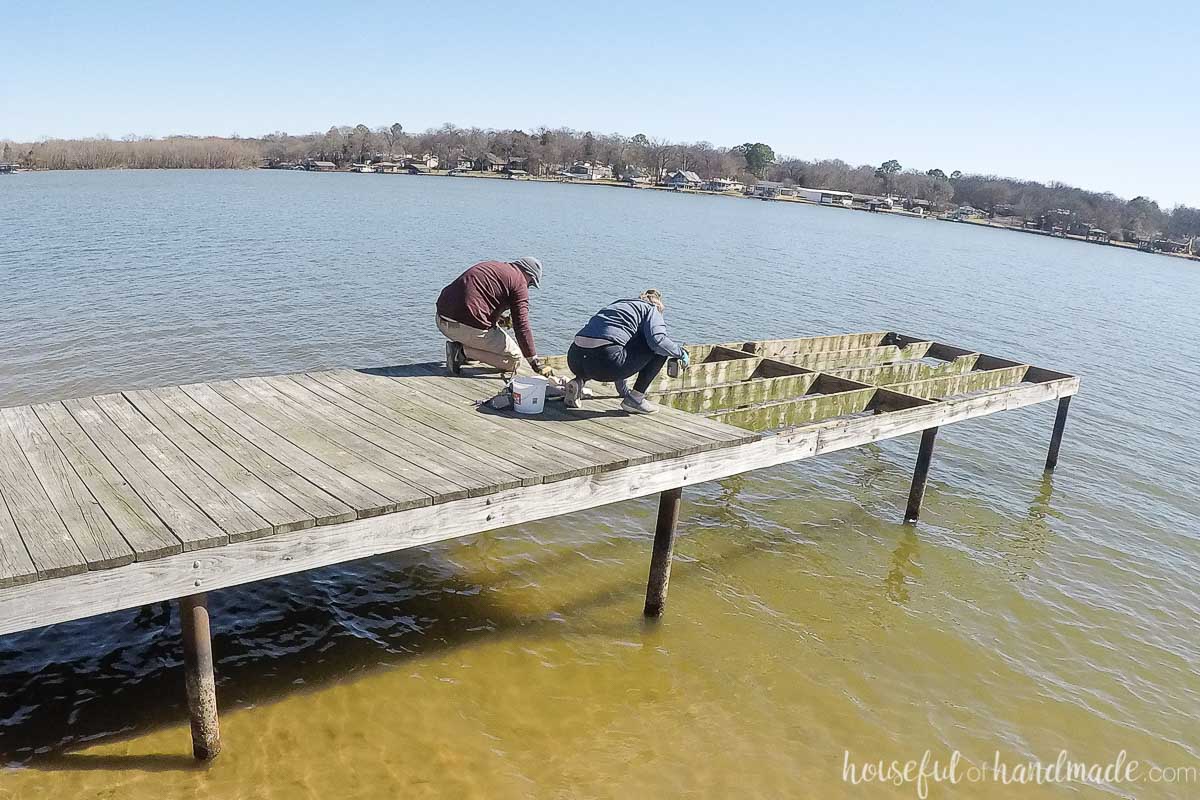
We used the pry bars to pry the boards up, sometimes breaking them in pieces.
If the deck boards are attached with nails, you can pry them out with the boards. Or if the nail heads have worked themselves up a little bit, pry them out first to make it easier.
To remove the ends of the old screws, we used an angle grinder. It quickly cut the tops flush with the deck joists.
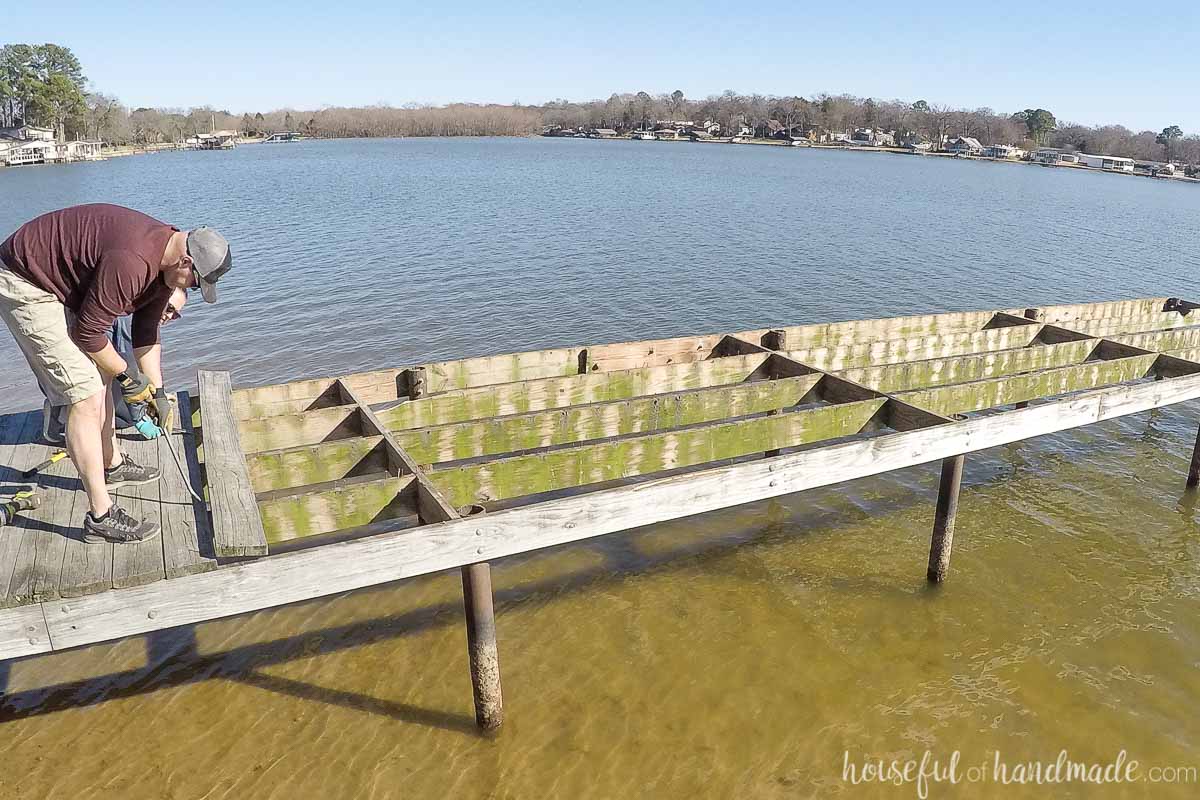
Repair/replace rotted joists
Before putting down new decking, inspect the joists for rot or damage.
You can replace the rotted joist boards or sister joists next to the damaged ones.
We knew we needed to repair some of the deck joists because there was a fire at the end of the dock at one point. Some of the joists were burned up to 3/4 the way through.
For our project, we also decided to move some of the joists and add more to make them 16″ on center. The 5/4 wood deck boards we wanted to use on the top requires joists no further than 16″ apart.
The previous joists were 24″ on center. When you do joists at 24″ or 16″ on center they both still meet up at 48″.
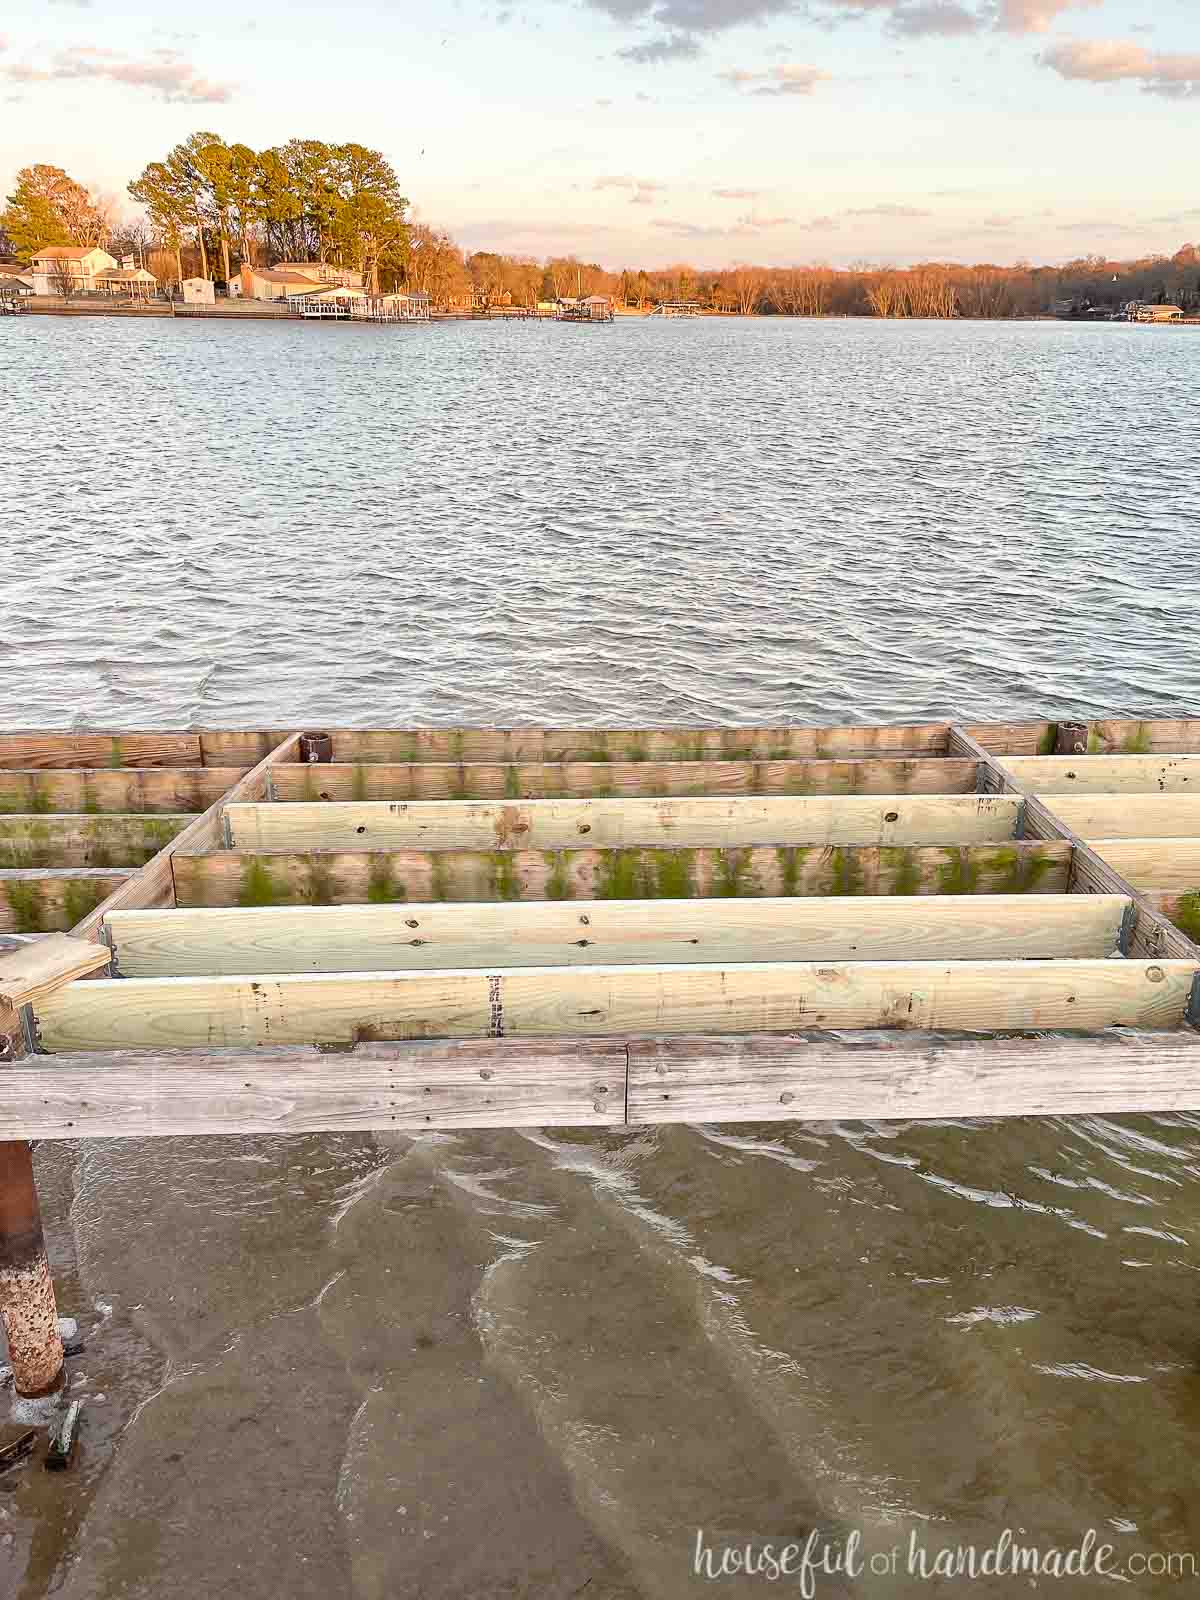
So we only had to remove the one board on either side of the center board (for our 8′ wide dock). Then we moved it to 16″, and added a second board at 32″. We did this on both sides.
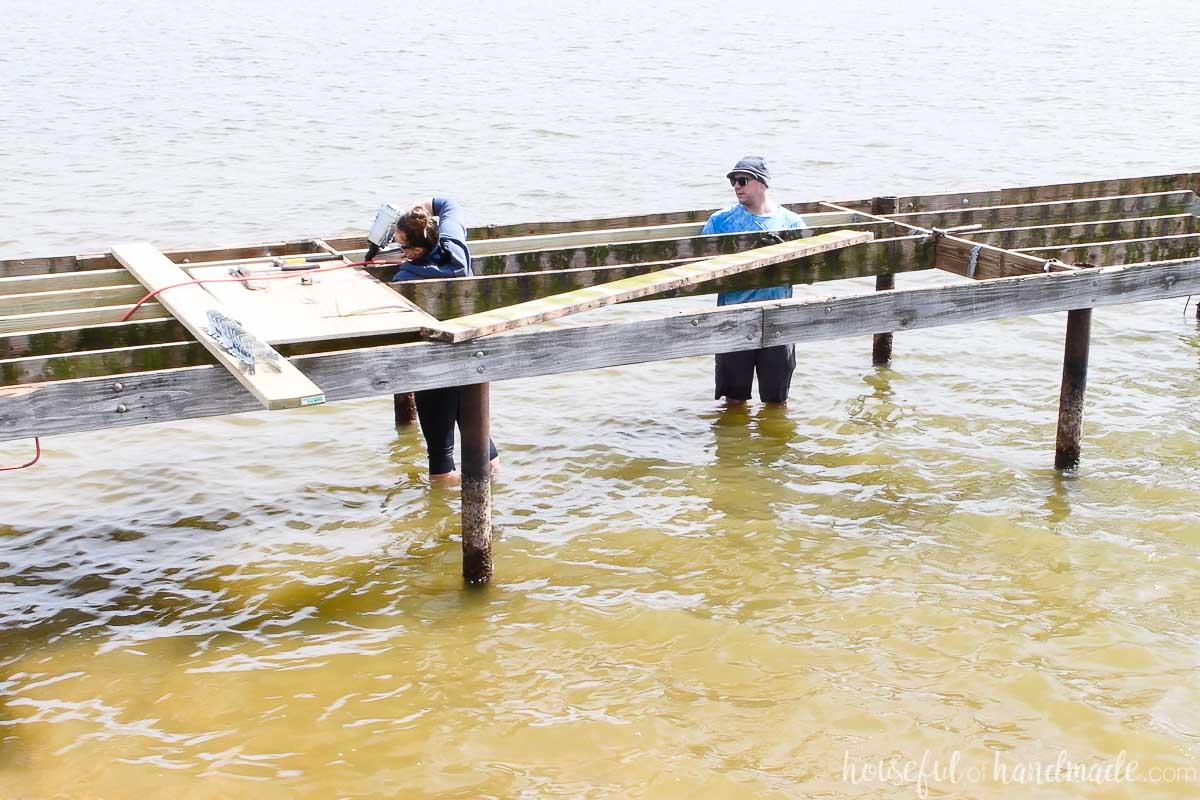
Then we replaced the damaged joists as we moved the other joists to get our dock ready for new deck boards.
Measure where the joists will be and cut the 2×8 boards to fit. Use a joist hanger to make it easier to attach joists or toe nail 3″ deck screws into the end with a framing nail gun to secure.
Determine where to start laying deck
Just like when laying out a new floor, you need to plan your deck before you attach the first board. You do not want to be left with extremely slim pieces at the front or back.
Measure the full depth of your deck in inches. Divide it by the width of your board + the gap (5 3/4″).
If you have a 13″ deep deck (156″) and you divide by 5.75, you are left with 27.13. That means you will have 27 full width boards and one only .715″ (.13 X 5 1/2″).
You do not want a sliver of a board at the end of your deck. So instead of starting with a full board on the outside, you will want to start with a cut board.
Take the .715 and add it to a full board (5.5″) = 6.125. Then divide that by 2 to get 3.1075. You can cut the first board to be 3.25″ (3 1/4″) wide and that will leave the last piece 2.875 (2 7/8″).
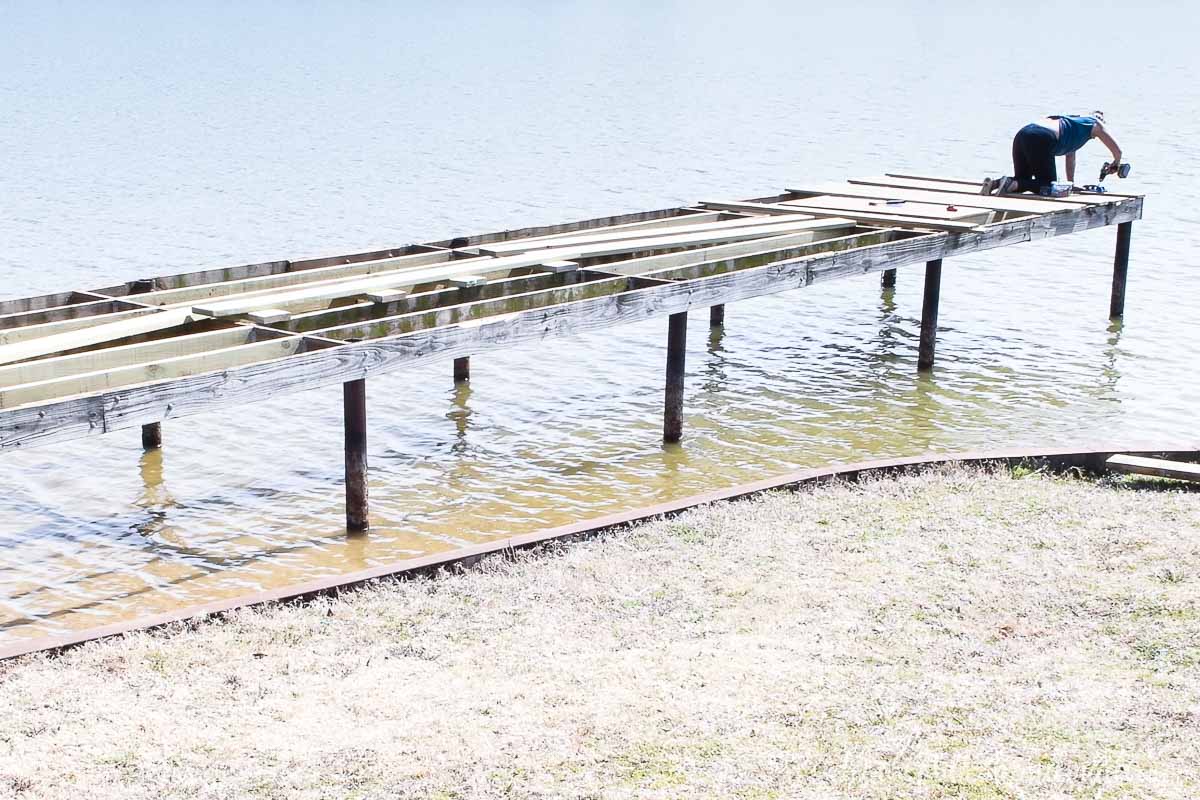
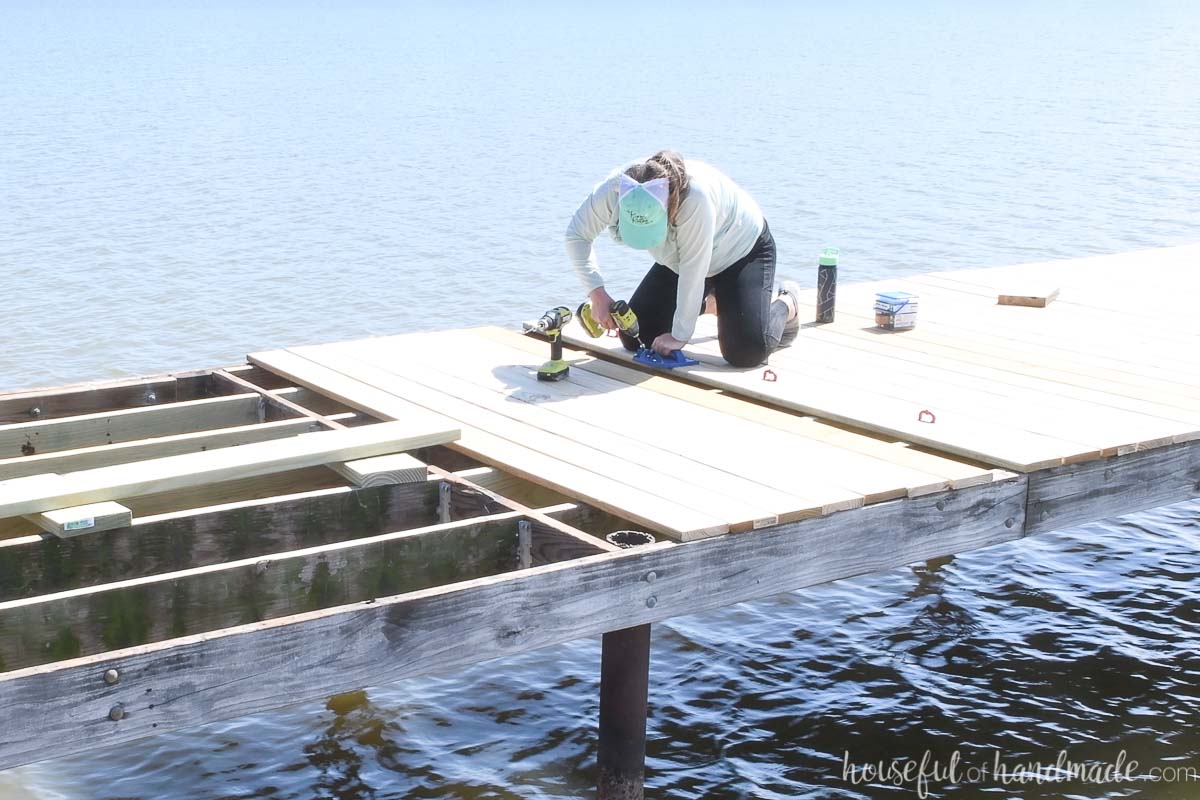
Now that you have the boards planned out, you can start laying them. You will want to start laying them at the most visible place then work your way back from there.
For our project, we wanted the boards to be perfectly parallel with the far edge of the dock so we started laying the new deck boards there.
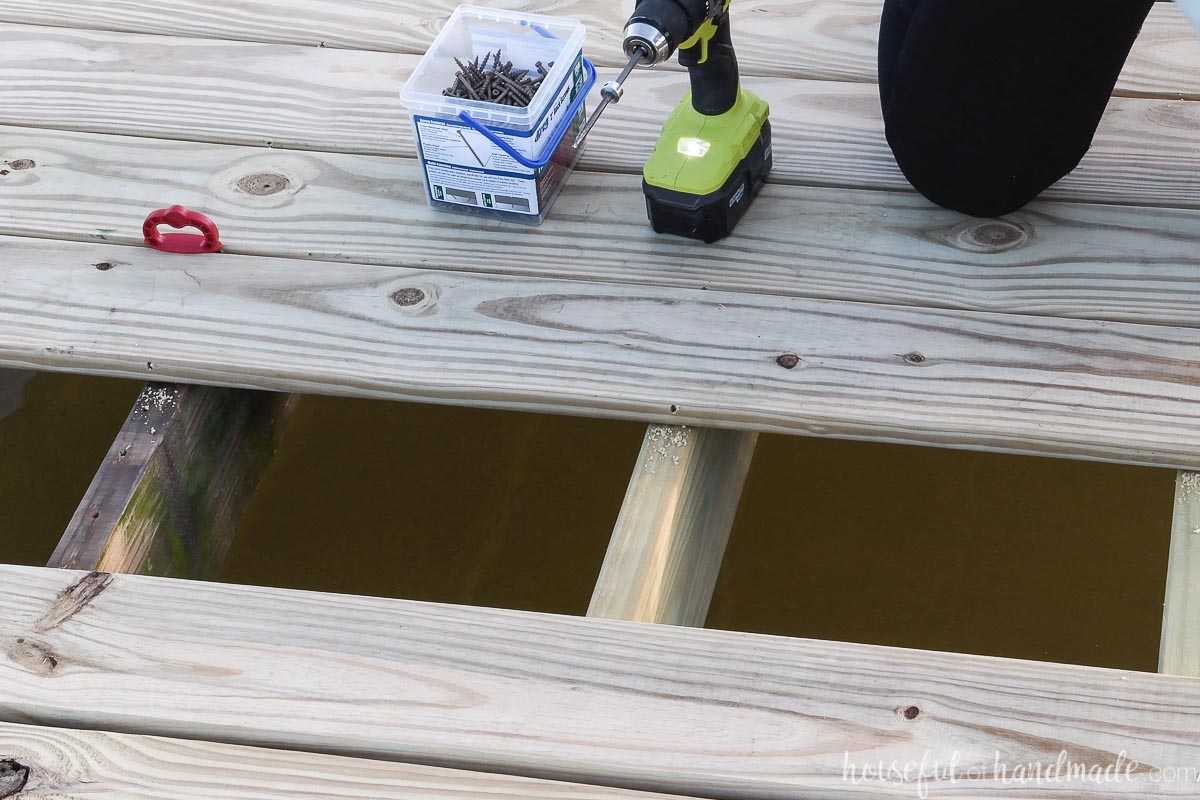
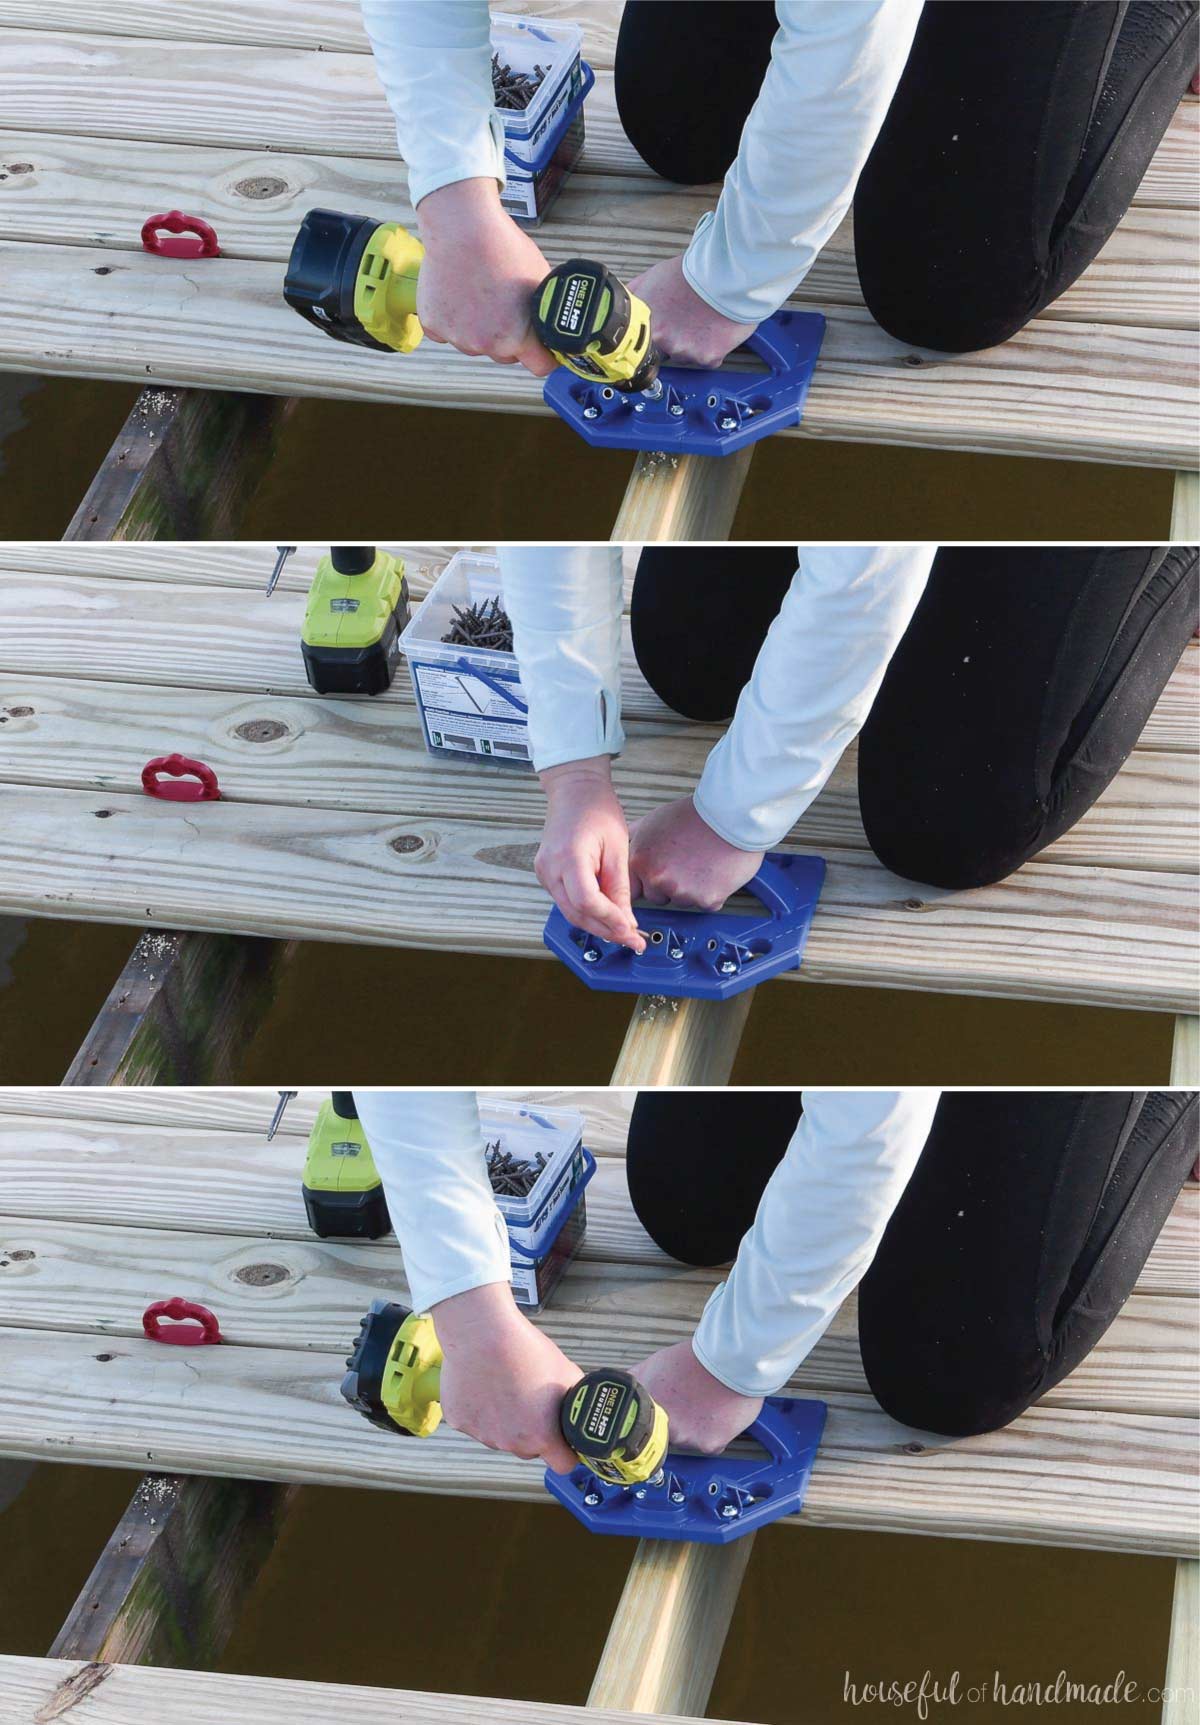
Secure the new deck boards
Lay the first board in place. Step on it or have a helper step on it to hold it down.
Set the depth collar on the drill bit and the driver bit for the decking you are using.
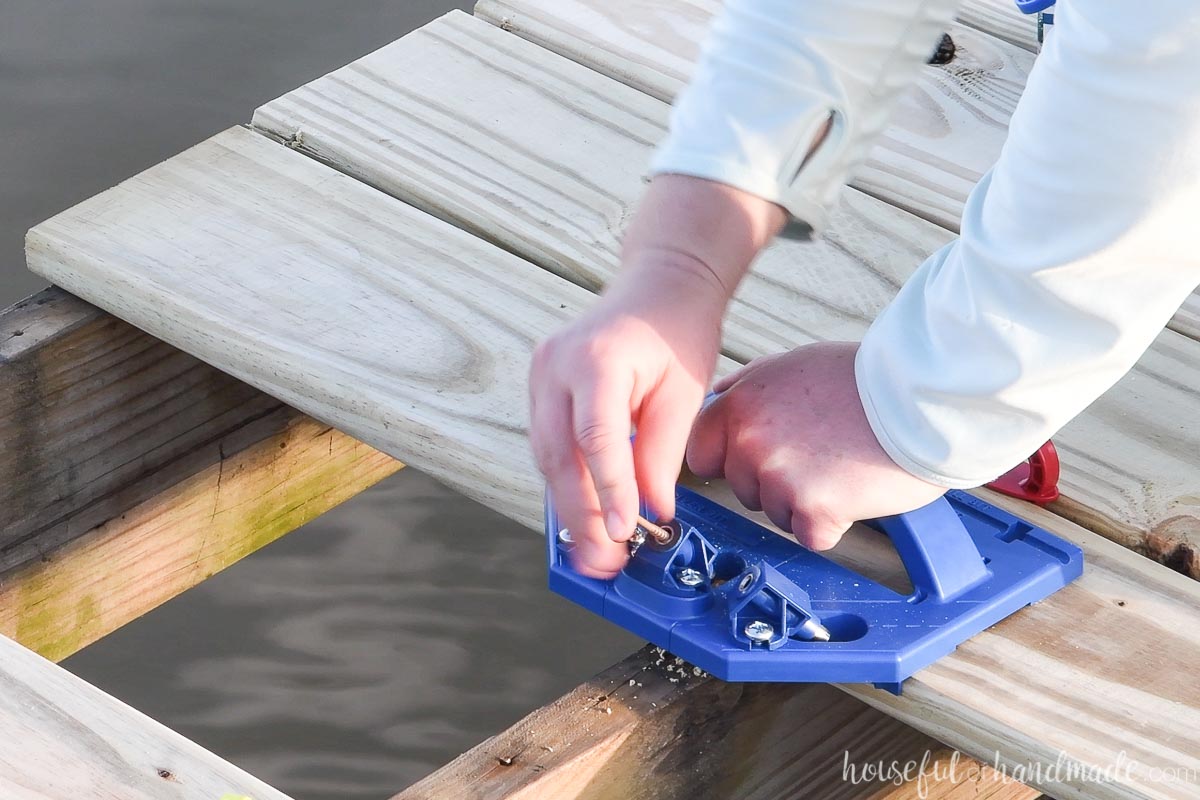
Place the Kreg Deck jig on the board so the drill guides are on the side you are working on and the stop underneath is pressed firmly agains the deck board.
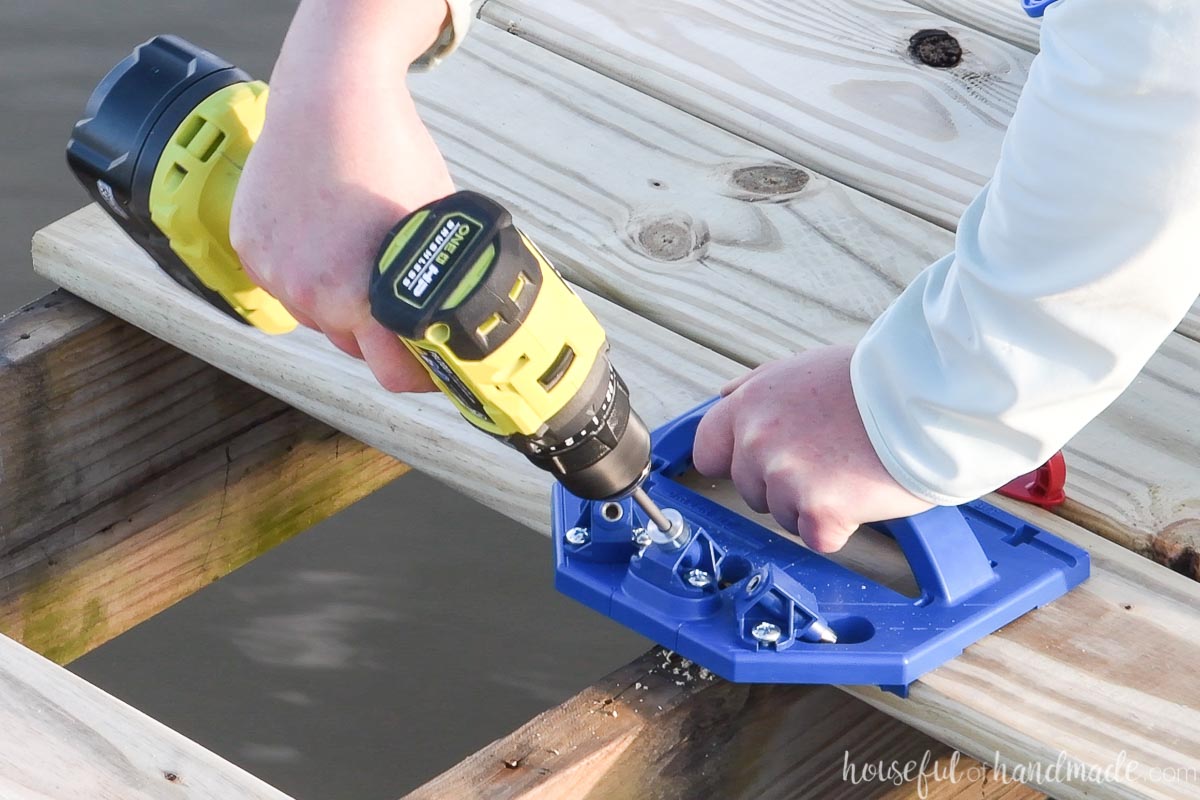
Position the jig so the center drill guide is over one of the joists. Drill the pocket hole until the depth collar hits the guide.
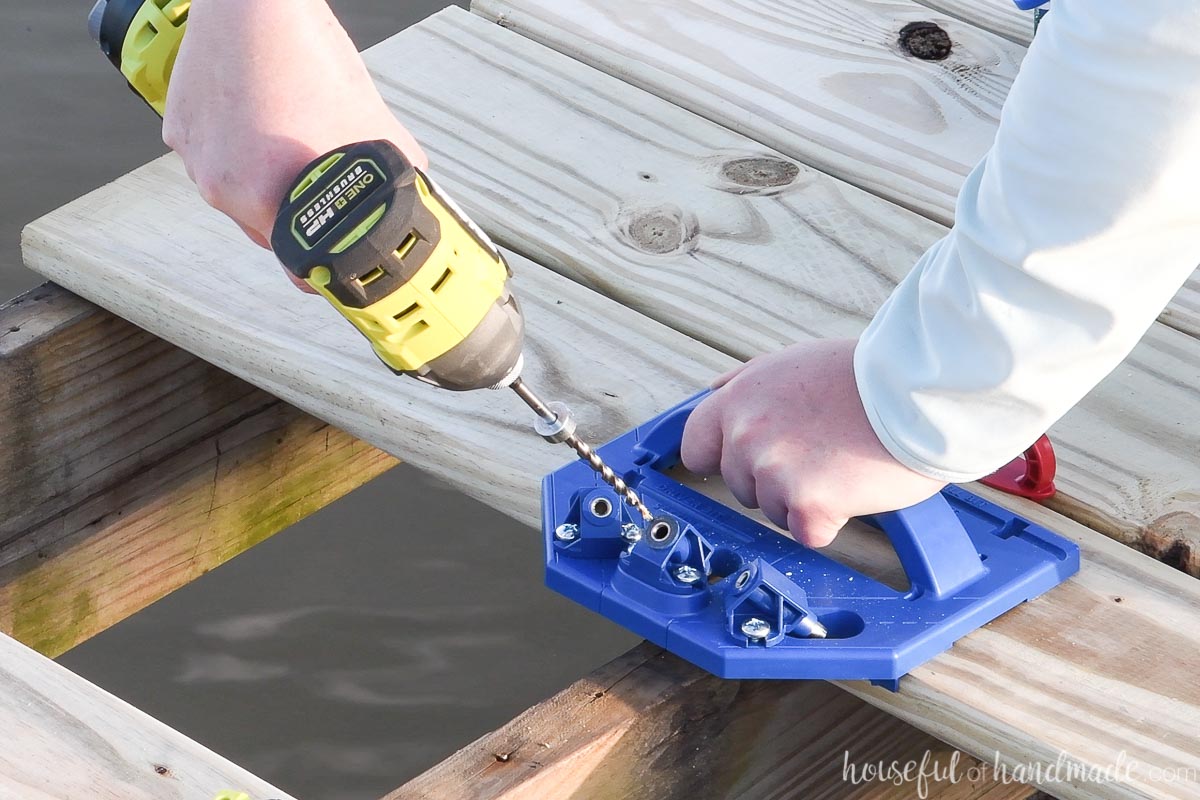
Insert a screw into the drill guide.
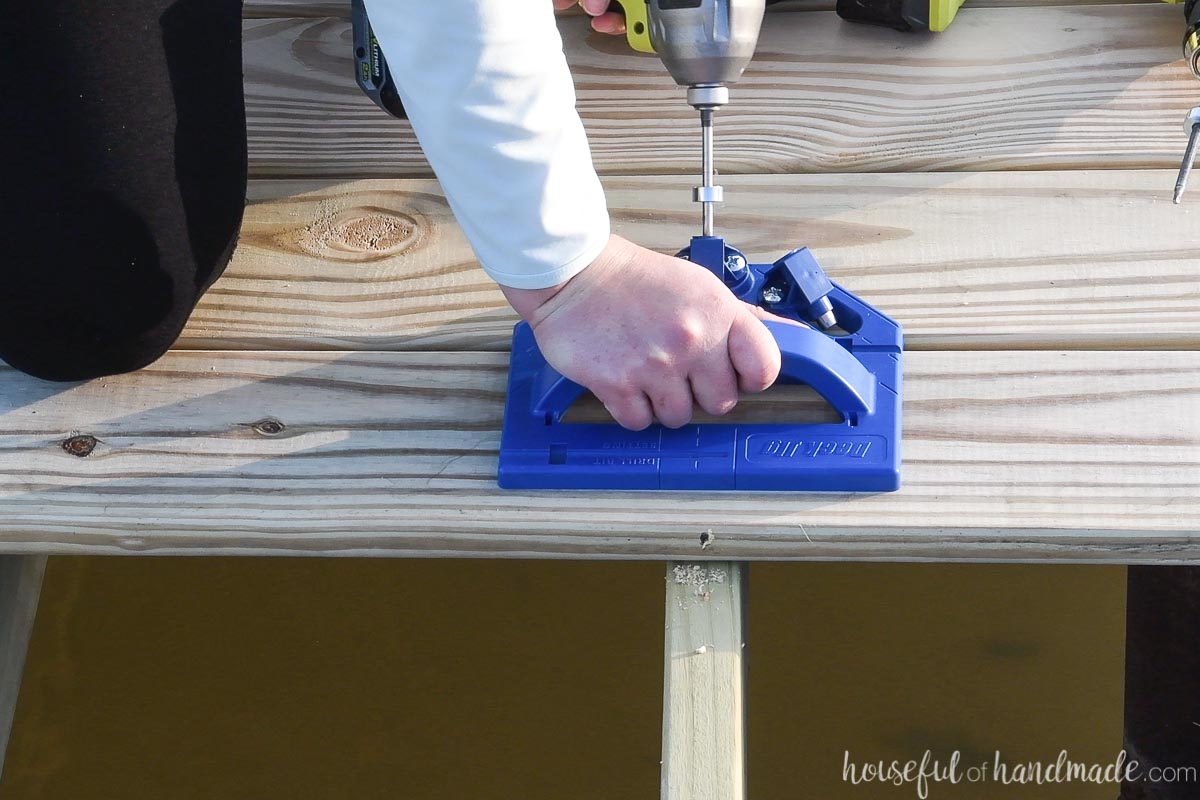
Then secure with the driver until the depth collar hits the guide.
Move to the next joist. Stay on the same side of the board, making sure it doesn’t move.
Drill and attach a screw the same way.
Repeat by putting a screw in all the joists on the one side of the board. Then start attaching the other side the same way.
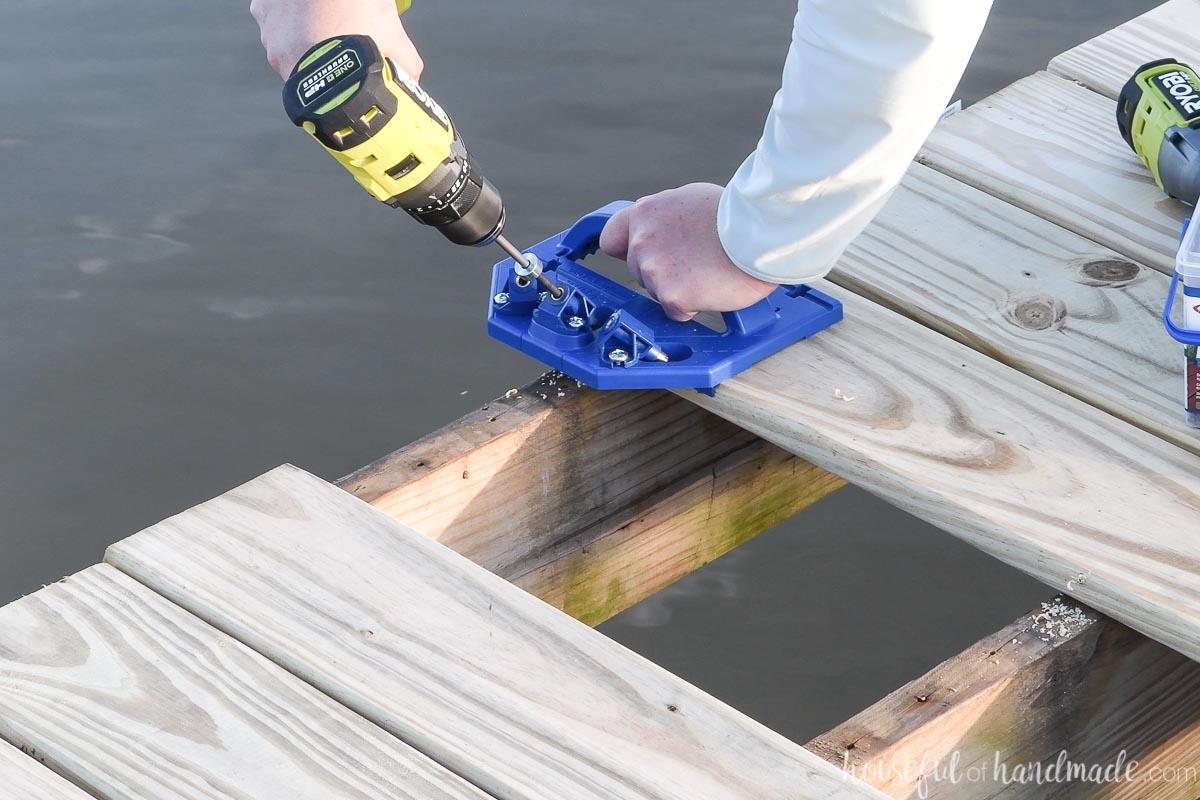
On the edges, if it is not obstructed (like ours are) just slide the jig over the edge and use the center, straight-on, drill guide.
If you cannot put the jig over the edge (like up against a house or railing post) you can use the angled drill guides.
Also, I just hung the boards off the edges and will trim them flush with the side of the deck later. This is easier than measuring and cutting each board to length and making sure the sides line up.
Now that the first board is fully attached, add the spacers between it and the next board. This will ensure proper spacing on all deck boards.
When attaching subsequent boards, always attach the side furthest away from the attached board. This will make sure the board is pushed toward the spacers.
Then remove the spacers and attach the side flush with the attached board. Step or kneel on the boards to keep them flat.
EXPERT TIP:
Use the driver bit in a drill, not an impact driver, when attaching the deck screws. The jolts from the impact driver can cause the depth collar to move over time. A drill will offer more consistent driving power without moving the collar. If you don’t have 2 drills, place the drill bit in the impact driver.
That is all it takes to attach your new deck boards with the Kreg deck jig.
Now all it takes is doing that over and over until you have covered the entire deck with the new wood deck boards.
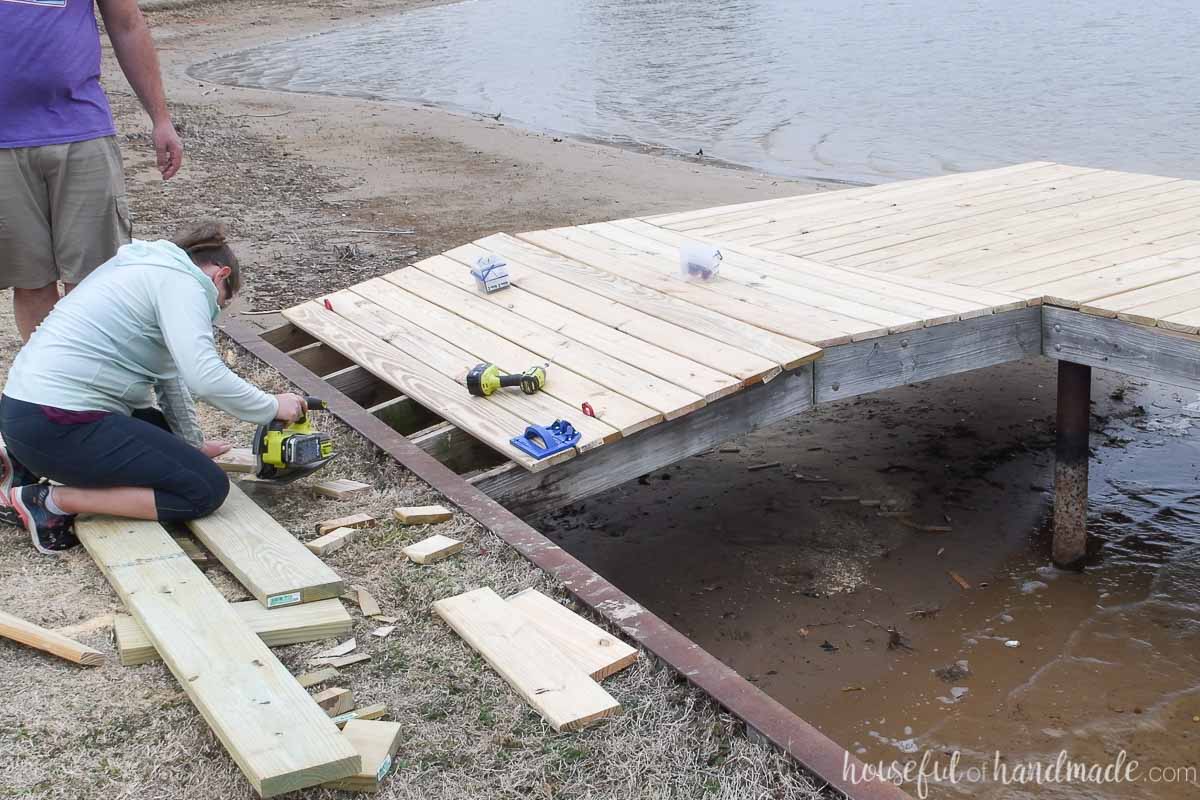
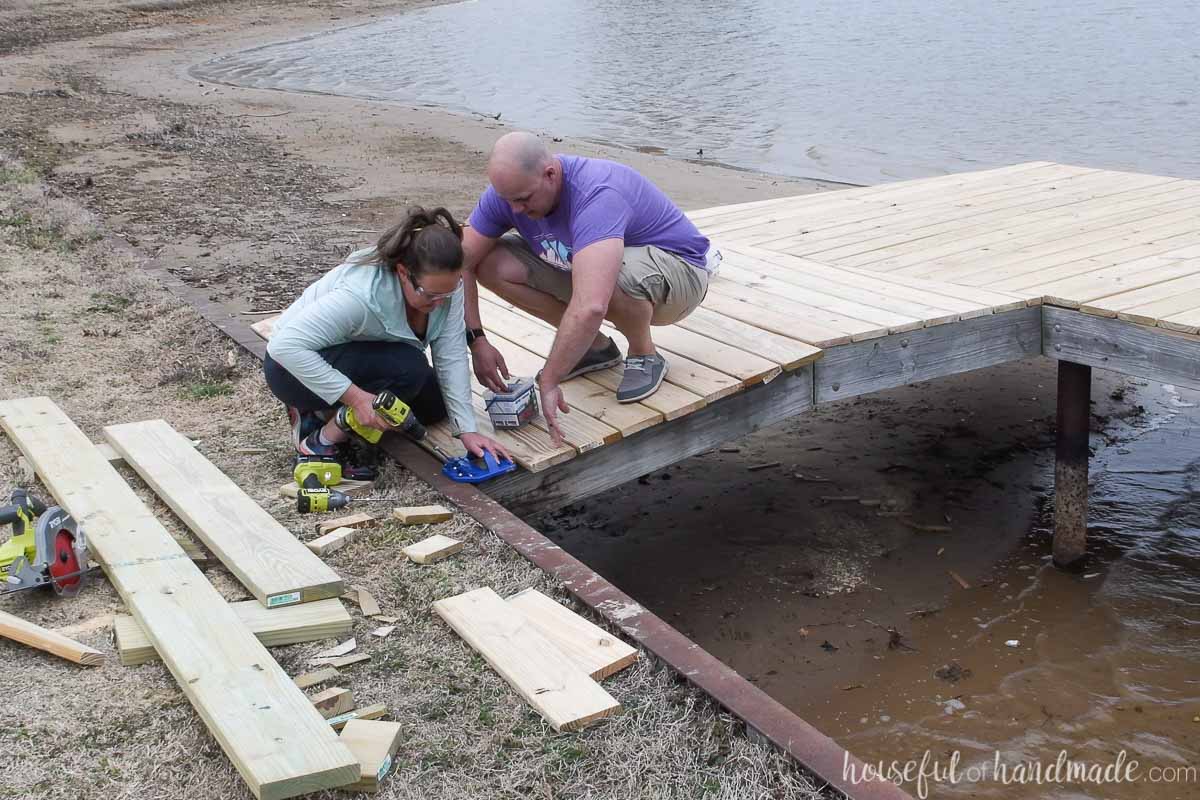
If you have any odd shaped areas on your deck, you may have to cut the boards to fit.
Our ramp connecting the dock to the ground is not straight so I had to cut the boards at the end to fit into the space.
When doing this it is important that each board is properly supported by the joists underneath. Make sure the ends always land on a joist.
Add extra joists/blocking underneath as needed to make sure this can happen. For the small sliver at the very end of the ramp, I added a piece of blocking right below it so the entire small piece was fully supported.
Trim ends flush with deck sides
As you are installing the boards, if there are any boards that will be hard to trim at the end, cut them to size before attaching.
To do this, place the board in its place, with the spacers. Then draw a line on the edge (or edges) that hangs over from underneath the edge of the deck.
Cut along the line with a circular saw.
Then line the board back up on the deck with the spacers. Install it the same way as the rest.
Once all the boards are attached, you will want to trim off the boards that hang over the edge so they are flush with the edge.
Place a speed square between the deck boards, flush with the outer joist, and mark the top of the boards.
Use a level or straight edge to draw the line on the top of the deck boards.
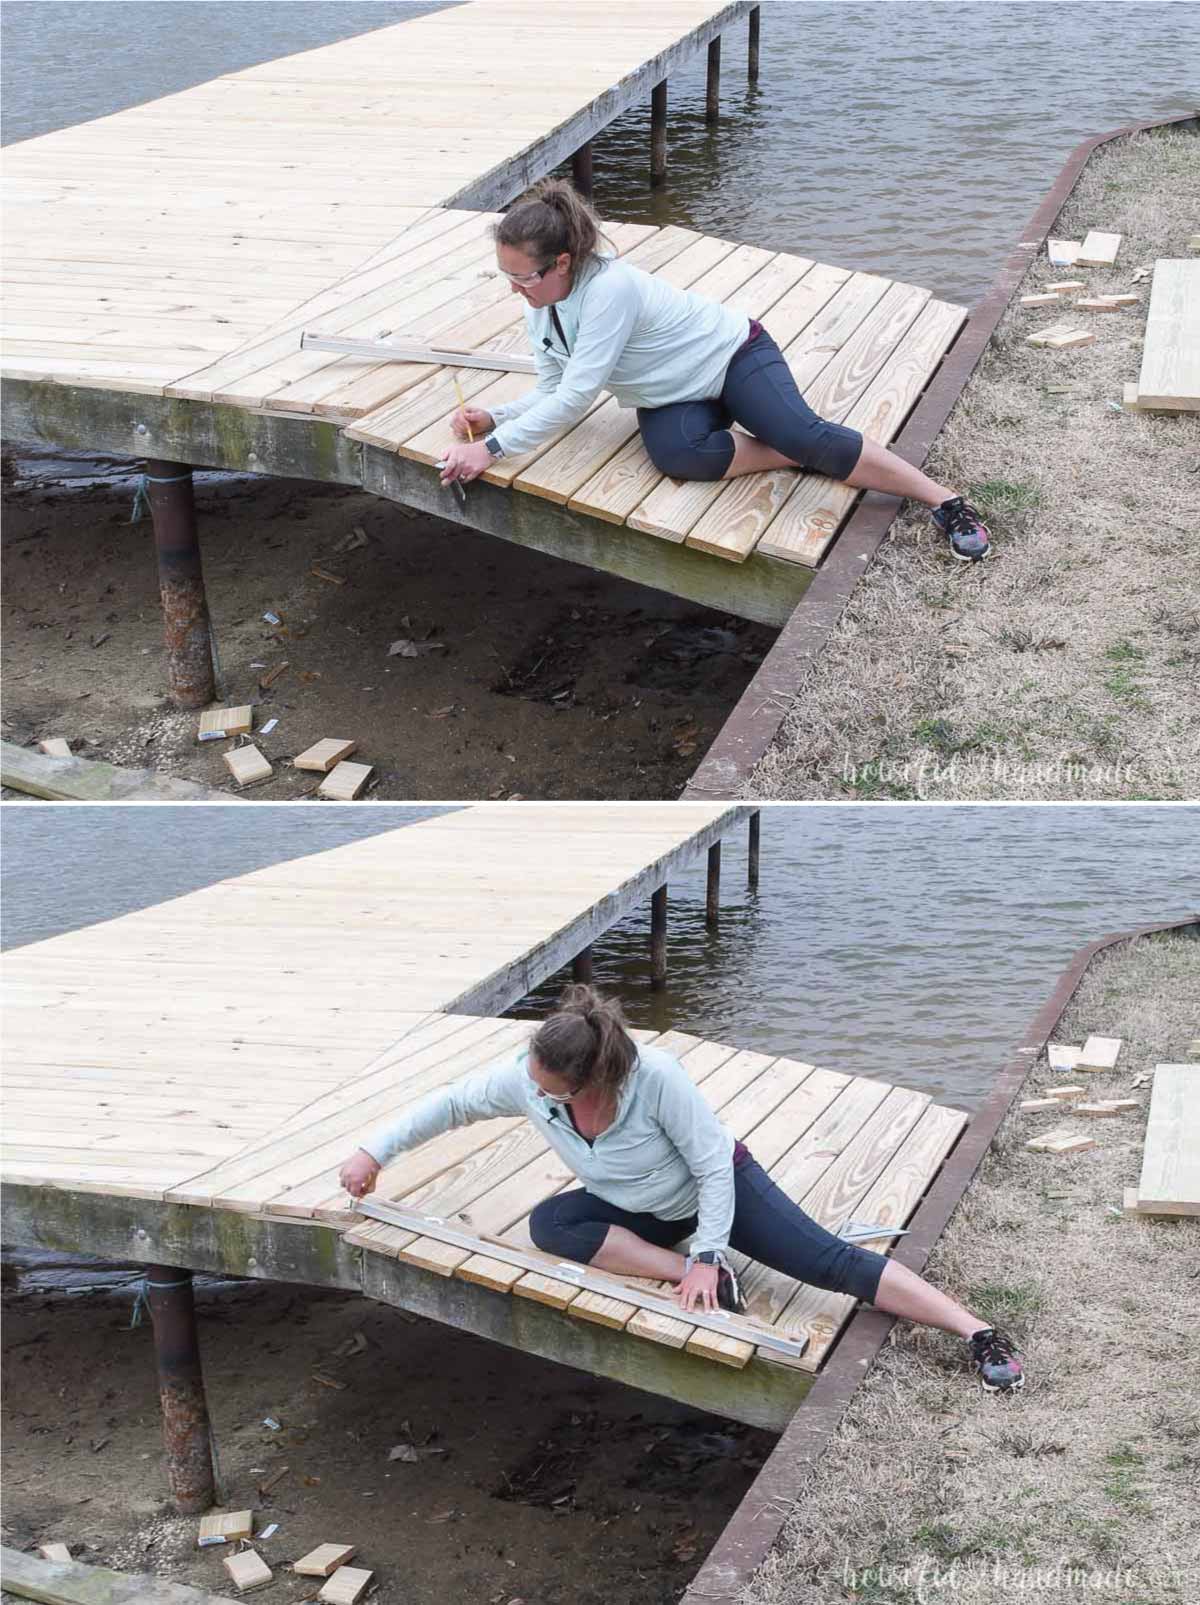
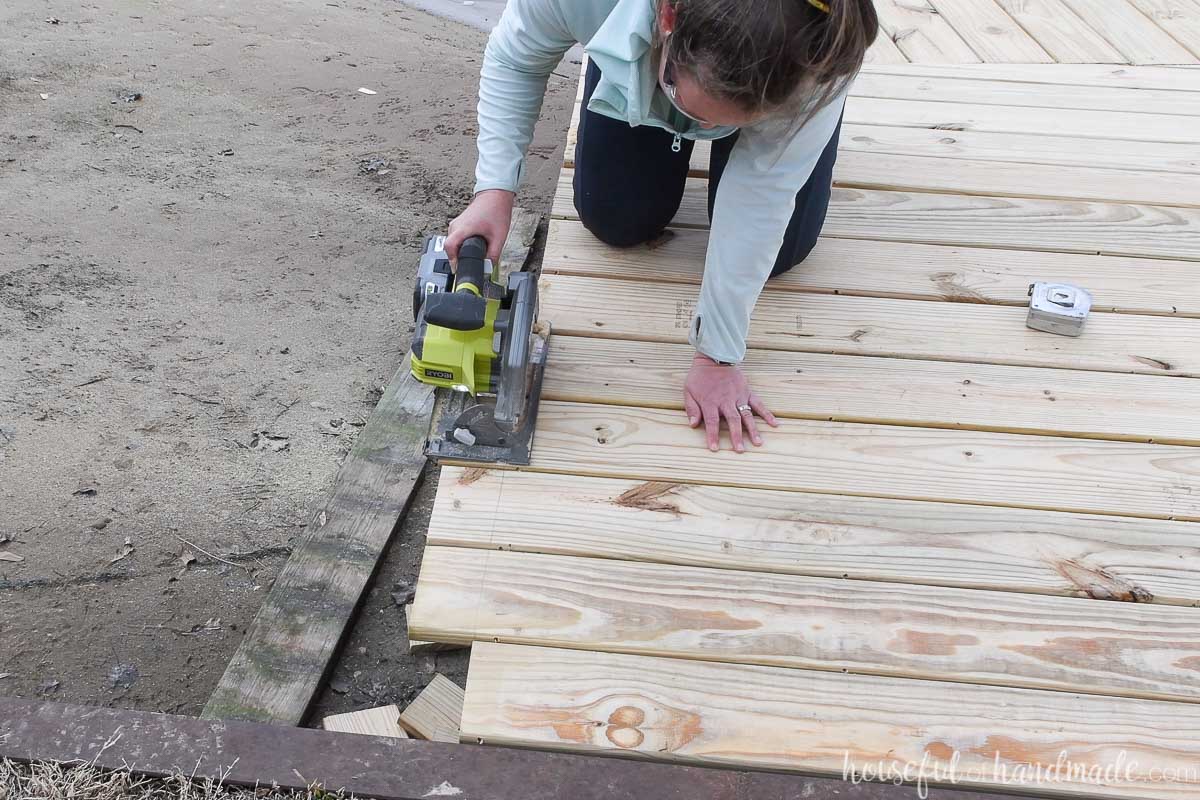
Cut along this line with your circular saw.
EXPERT TIP:
Set the depth of the circular saw to the exact thickness of the deck boards when trimming the edges off. This will make sure you don’t cut into the joists if you are a little off the line.
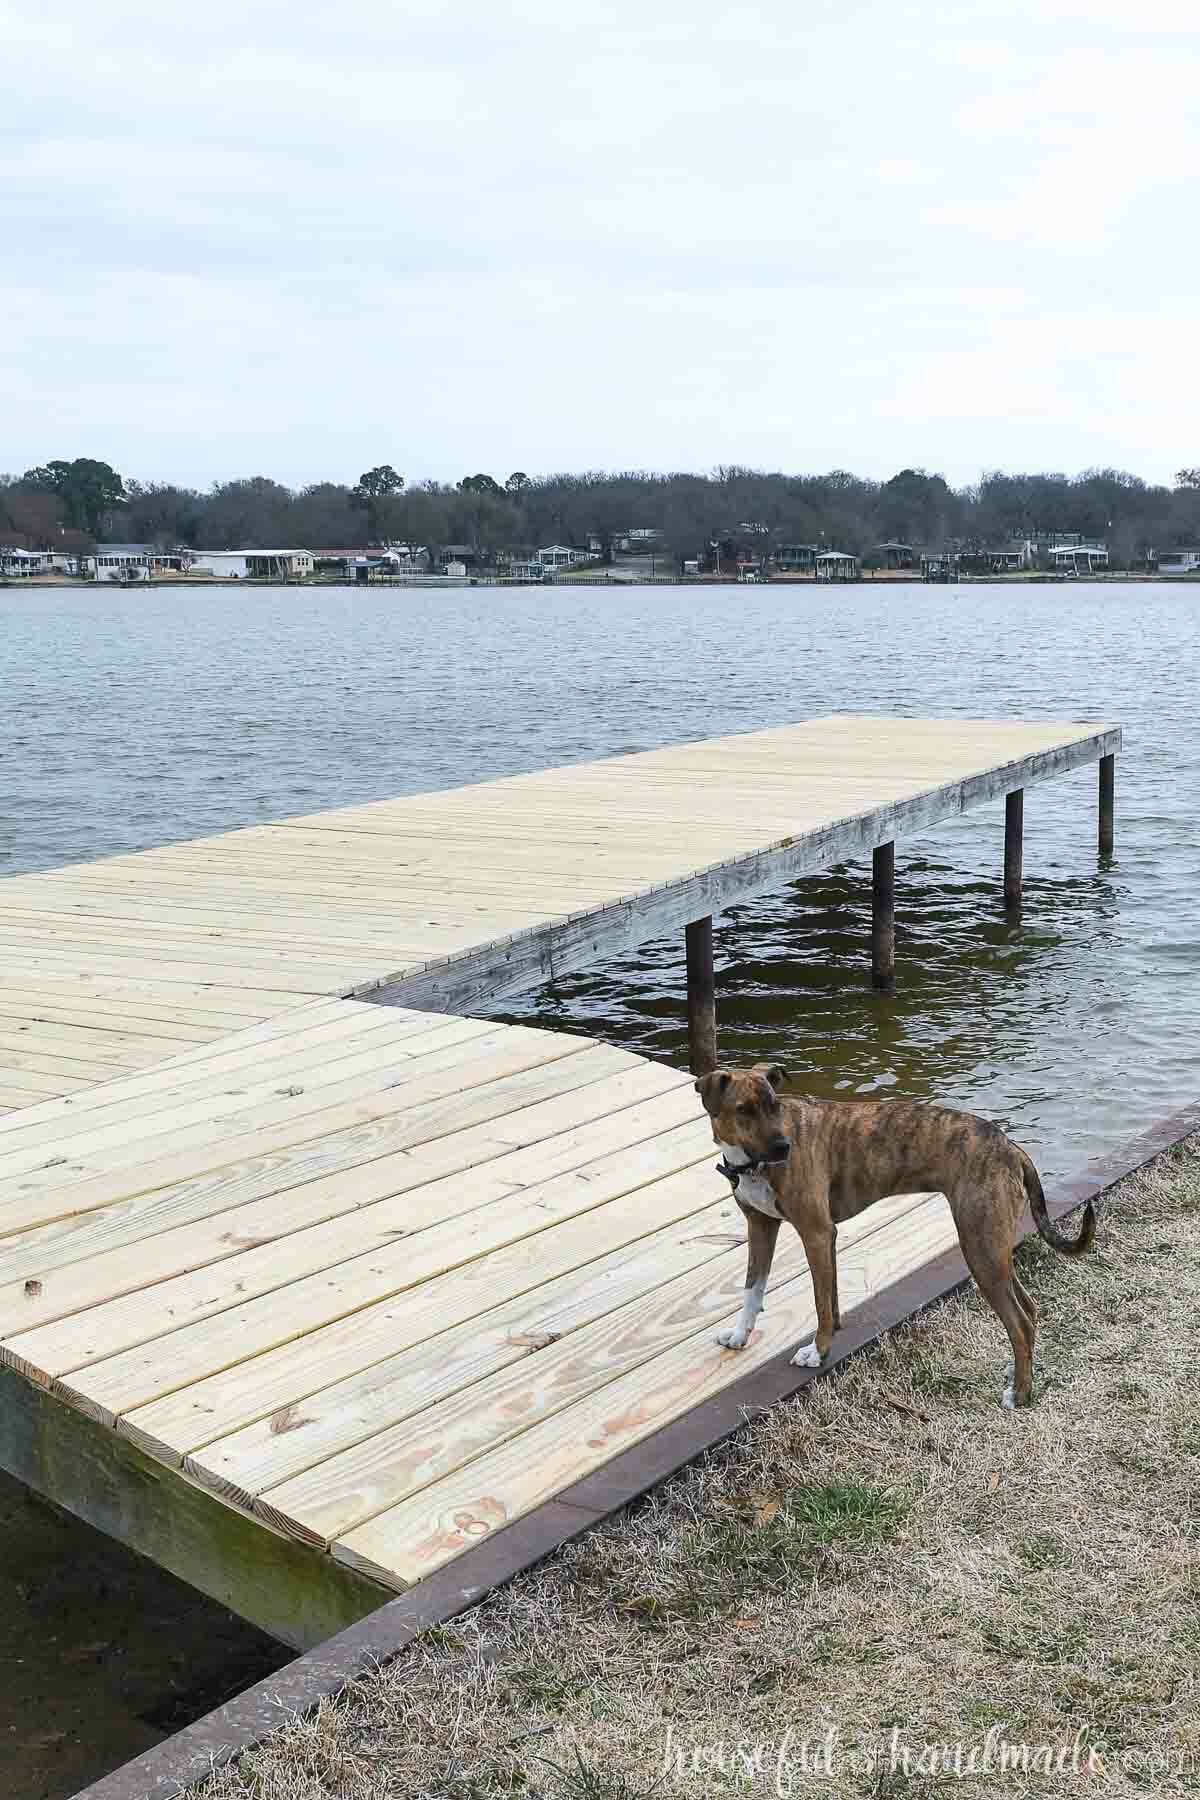
And now your new deck is done!
You will want to protect your hard work with a deck sealer. But make sure to let the pressure-treated lumber dry out a bit first so it will accept the sealer.
I think I am also going to try to pressure wash the joists before sealing to clean them up too.
And it looks like I am not the only one excited to put our new swim deck to use this summer. It is going to be so hard to wait until the weather cooperates!
Happy building!
