So you want chickens? But first you need a chicken coop!
You can buy a small chicken coop at the feed store, but if you read the reviews, they are flimsy and too small for the number of birds they say they can hold.
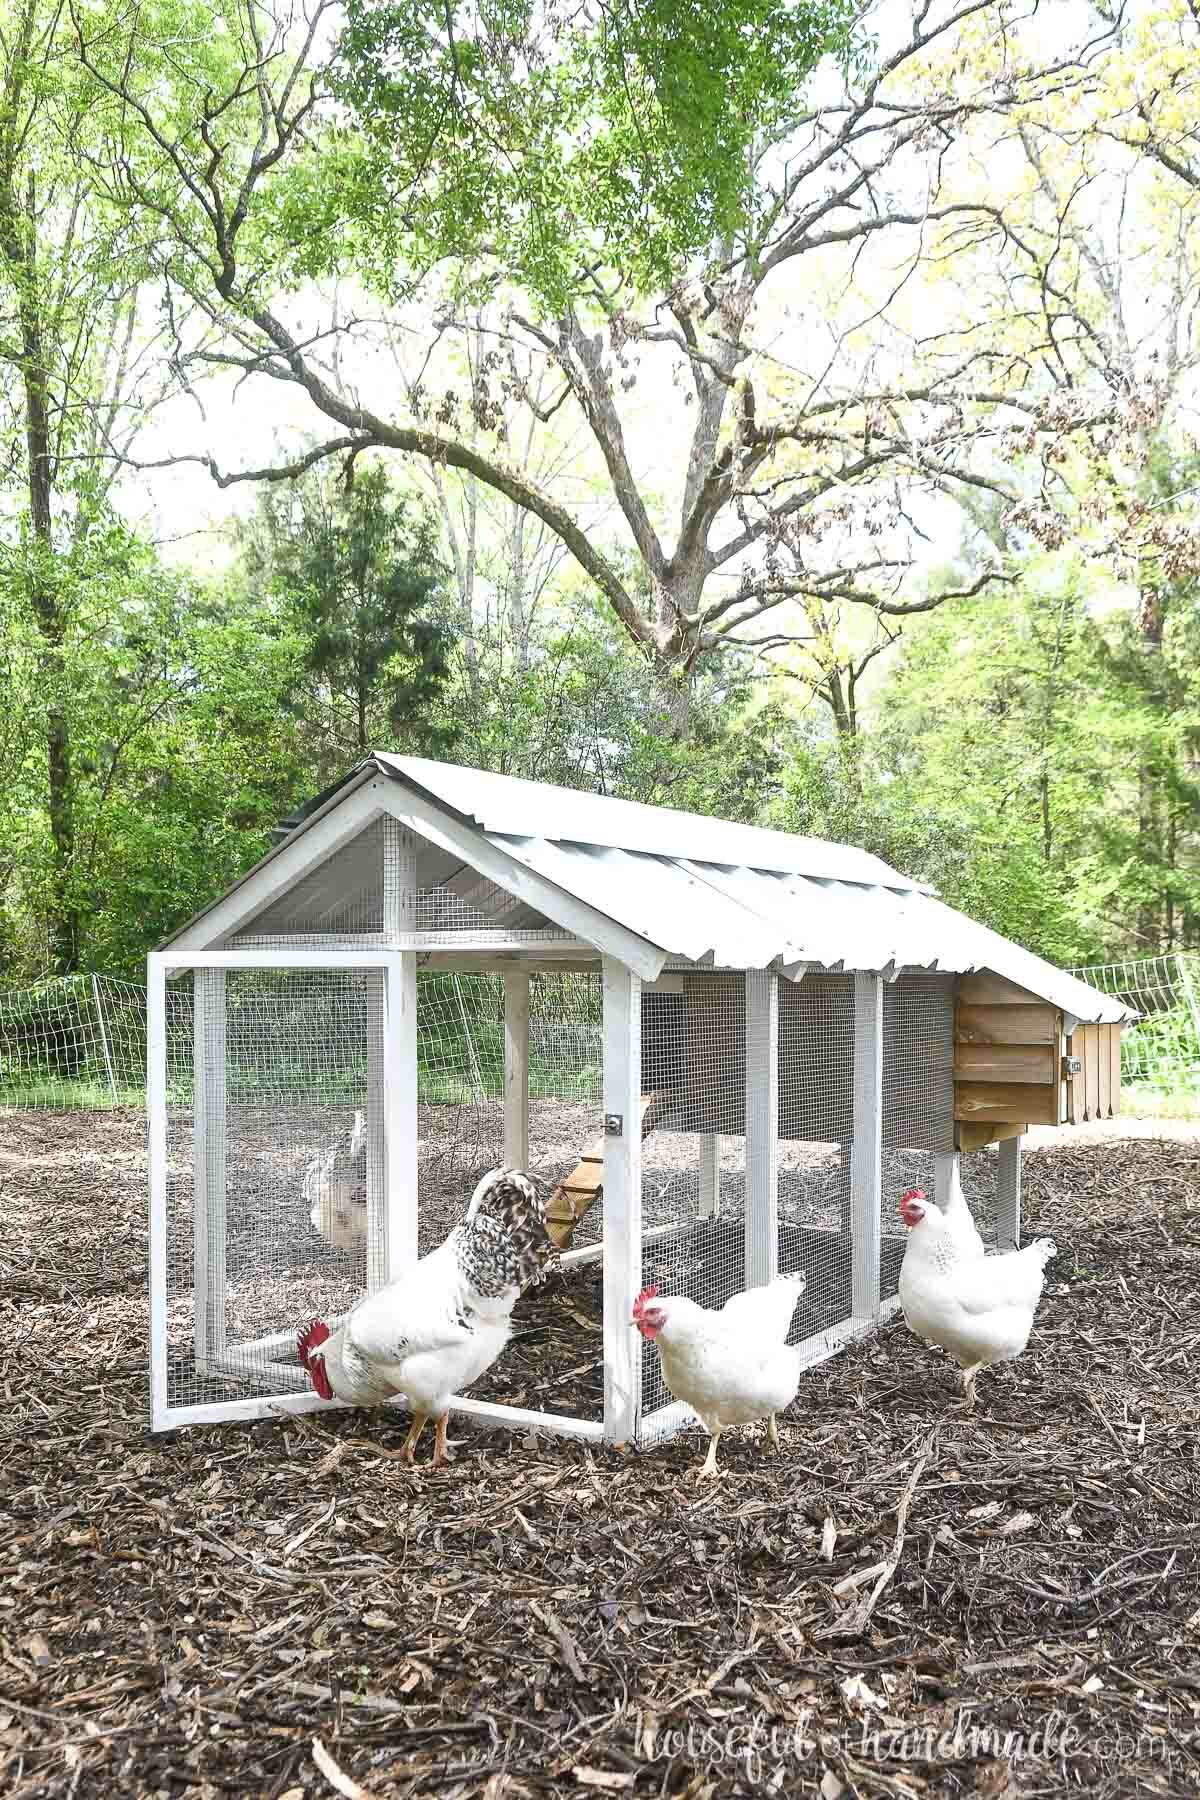
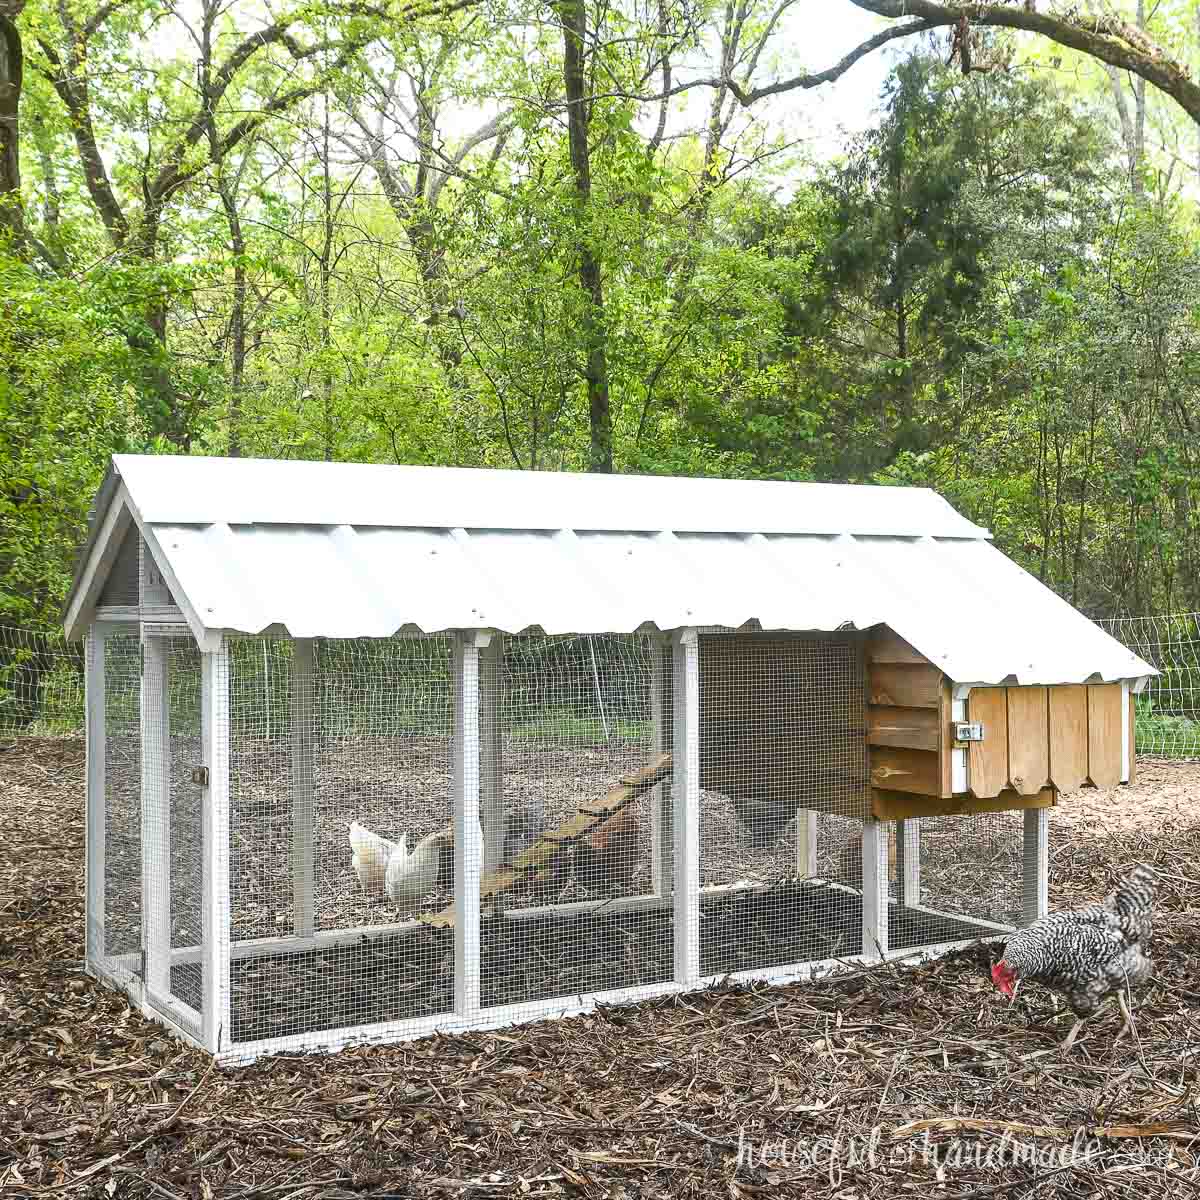
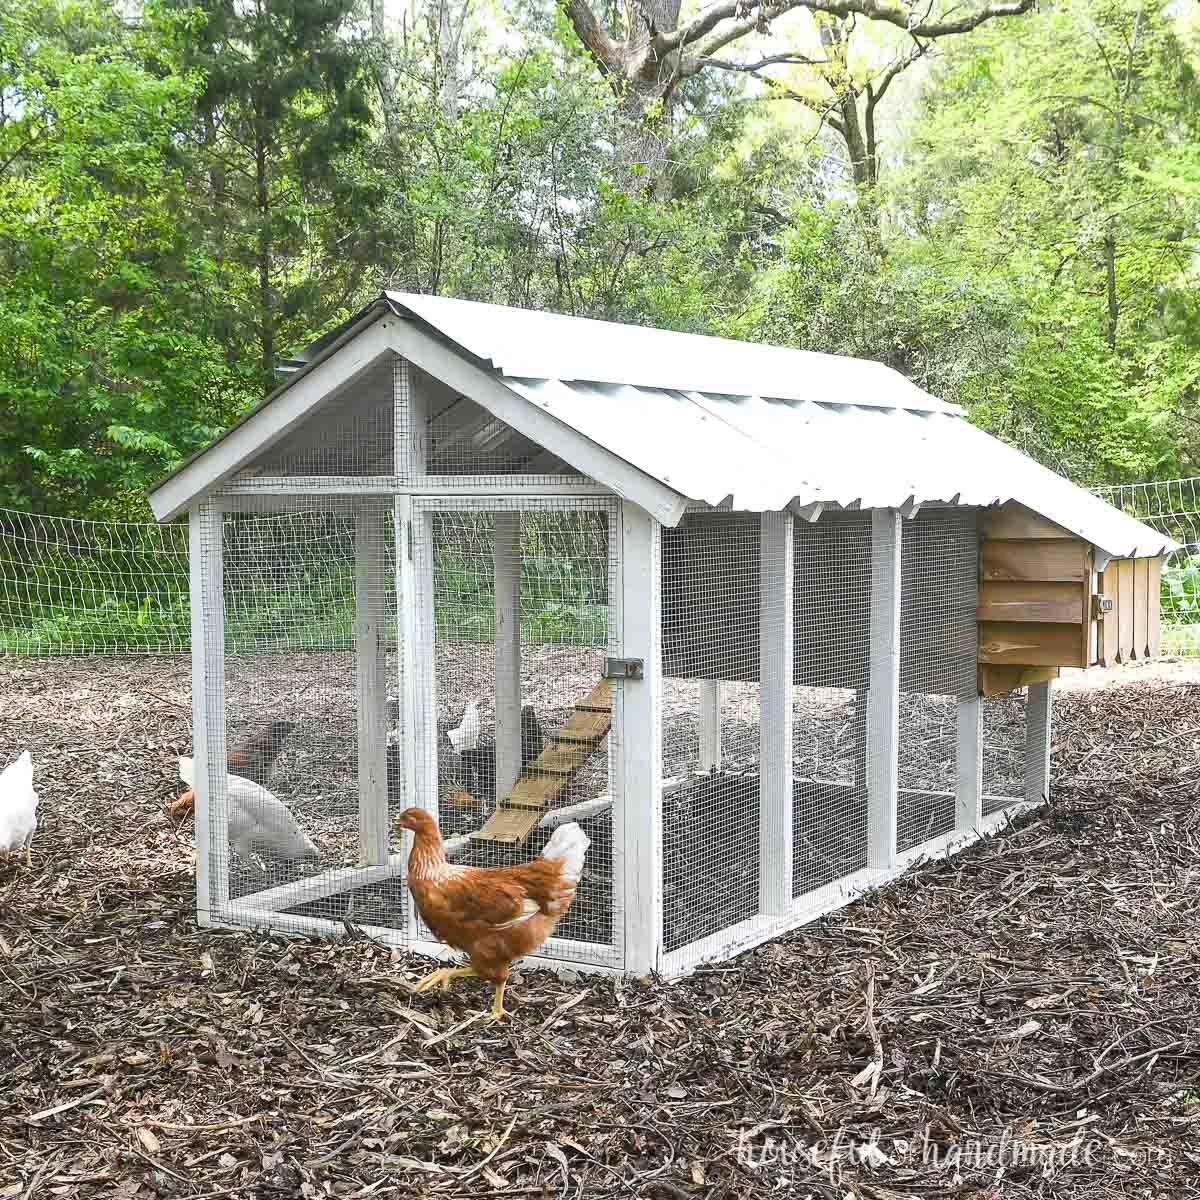
Instead, you can build your own small chicken coop! This easy DIY chicken coop is strong, sturdy, predator proof, and beautiful.
This post may contain affiliate links. As an Amazon Associate I earn from qualifying purchases. Click here to read my full disclosure policy.
Plus you can build this small chicken coop for less than the cost of a pre-made coop. But it looks like it cost 10 times more.
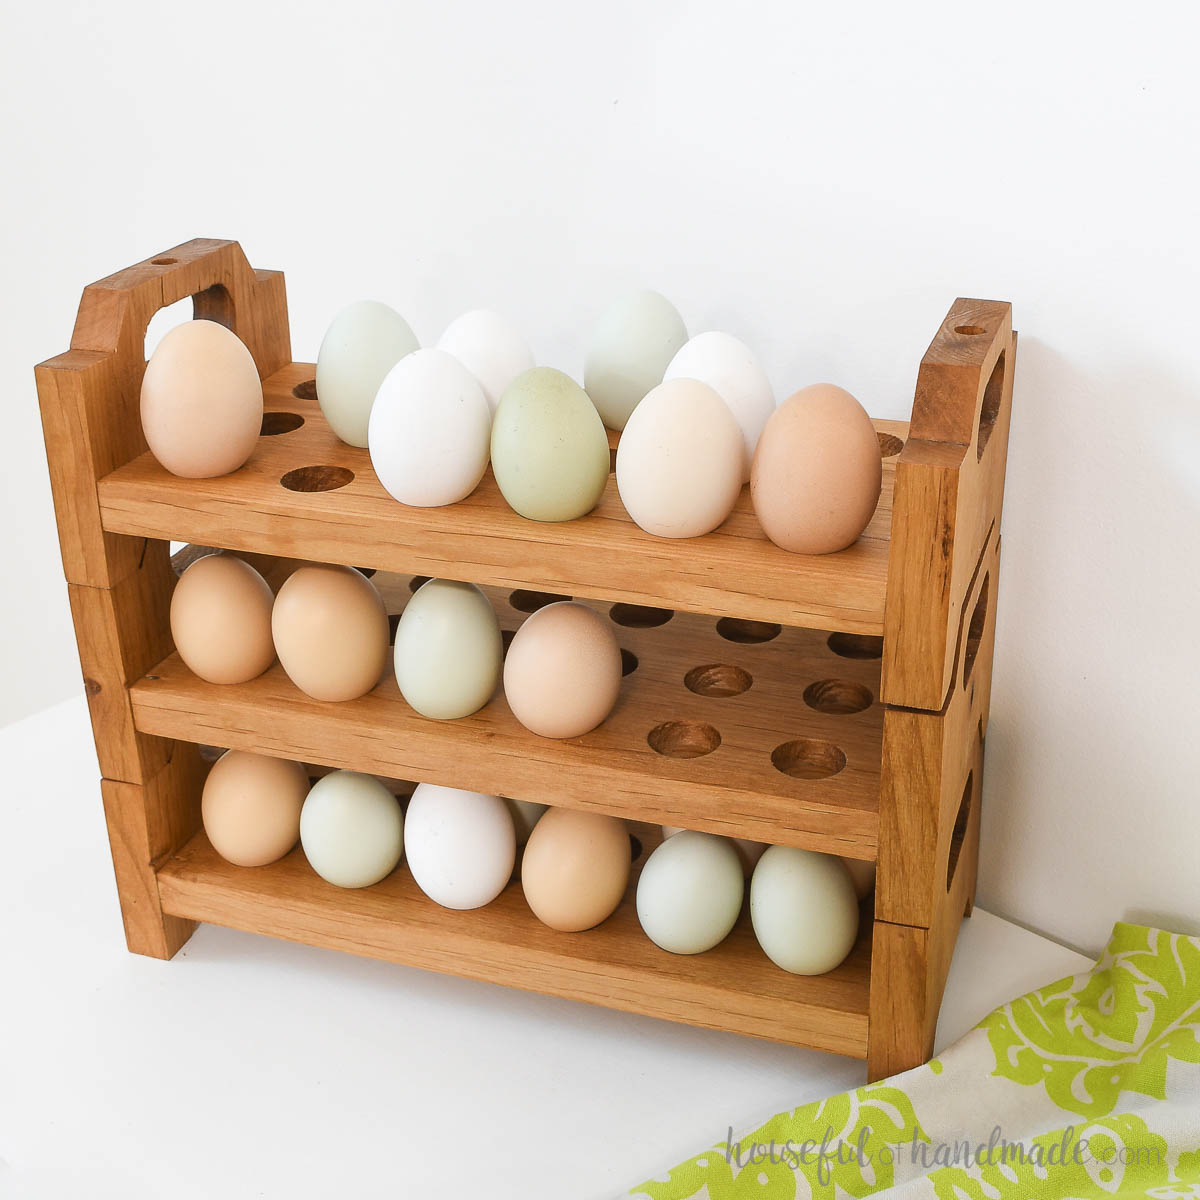
And before you know it, you will be enjoying fresh eggs that you can keep on the countertop in these beautiful stacking egg trays.
How Many Chickens Can it Hold?
When you plan to build a chicken coop, you need to understand the sizing recommendations for keeping chickens. Larger breeds will need more space and smaller bantams can live with less.
Recommended Space per Chicken:
- Roost bar: 1 linear foot
- Coop: 2-4 square feet
- Run: 8-10 square feet
- Nesting box: 1 box for every 3-4 hens
This DIY chicken coop will work for a small flock of 2-4 chickens. Perfect for an suburban back yard.
If using it for 4 chickens, pick smaller breeds. Also, I would recommend letting them have some hours of free ranging outside the run.
It is easy to free range the chickens after you get home from work for a few hours. Then they will put themselves to bed back in the coop as the sun goes down so all you have to do is close and latch the run door.
Other Uses for a Small Coop
We have a large flock of chickens, so we use this small coop as our nursery coop.
When we get a broody hen, they can be placed in the small DIY coop with their clutch until the babies are big enough to rejoin the flock.
Also, when we hatch out new chickens, after they have outgrown the brooder, we put them in this small coop inside the large fenced-in run. This allows the older chickens to get use to the new birds.
They live in the small chicken coop for a month or so, until they are pretty close to full size.
Then we open their run door so the two flocks can interact in the run. At night they return to their small coop and we close and latch the run door.
After a few weeks, we remove (or lock up) the small coop and the chickens are introduced into the main coop. It has worked great for safely adding new chickens to the flock.
More Homestead DIYs
Create your own mini homestead to go with your new backyard chickens with these other fun builds.

How to Build a Chicken Coop
Tools & Materials
Recommended Tools:
- Miter saw
- I recently upgraded to this larger sliding miter saw (watch for it to go on sale), but all my projects before were built with this inexpensive miter saw that I loved.
- Framing nailer
- Jig saw
- Circular saw
- Pocket hole jig
- Finish nailer
- Drill
- Impact driver (optional, but I love not having to switch bits with the drill)
- Stapler
- Speed square
- Sander
- Metal snips or angle grinder
Supplies:
- Wood products
- (20) 2×3 boards, 8′ long
- (3) 2×2 boards, 8′ long
- (1) 1×1 boards, 2′ long
- (18) 5 1/2″ wide fence pickets, 6′ long
- 2 3/8″ galvanized framing nails
- 2 1/2″ exterior pocket hole screws
- (30′) 1/2″ hardware cloth, 36″ tall
- 1″ staples
- 1 1/4″ exterior wood screws
- 2 1/2″ exterior wood screws
- (3) 26″ wide roof panels, 8′ long
- (1) roof ridge cap, 8′ long
- 1 1/2″ roofing screws
- 2 1/2″ roofing screws
- (3 pair) door hinges
- (3) swivel hasp latches
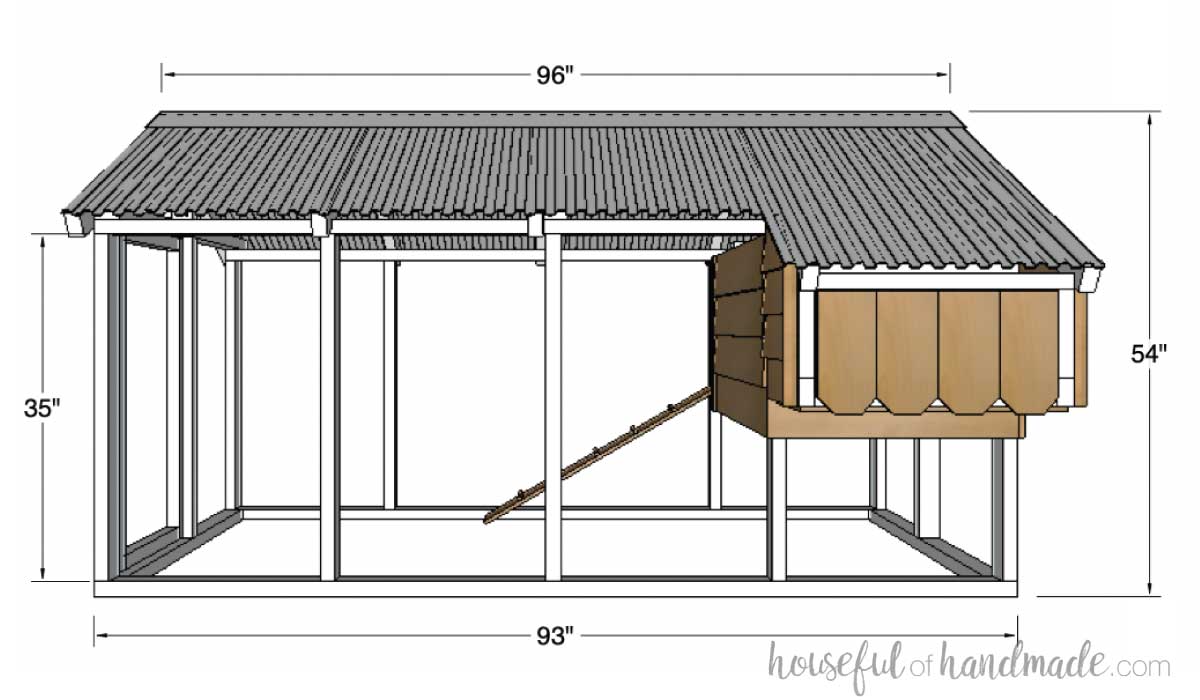
Overall Dimensions
The finished chicken coop with run is 8′ long by 6′ wide by 4 1/2′ tall. The run area is ~48 square feet.
The coop area is ~8 square feet and can have one or two 2′ long roost bars. The nesting box area is large enough for 2 nesting boxes.
Cut List
Cut out the pieces according to the easy-to-read table in the PDF plans.
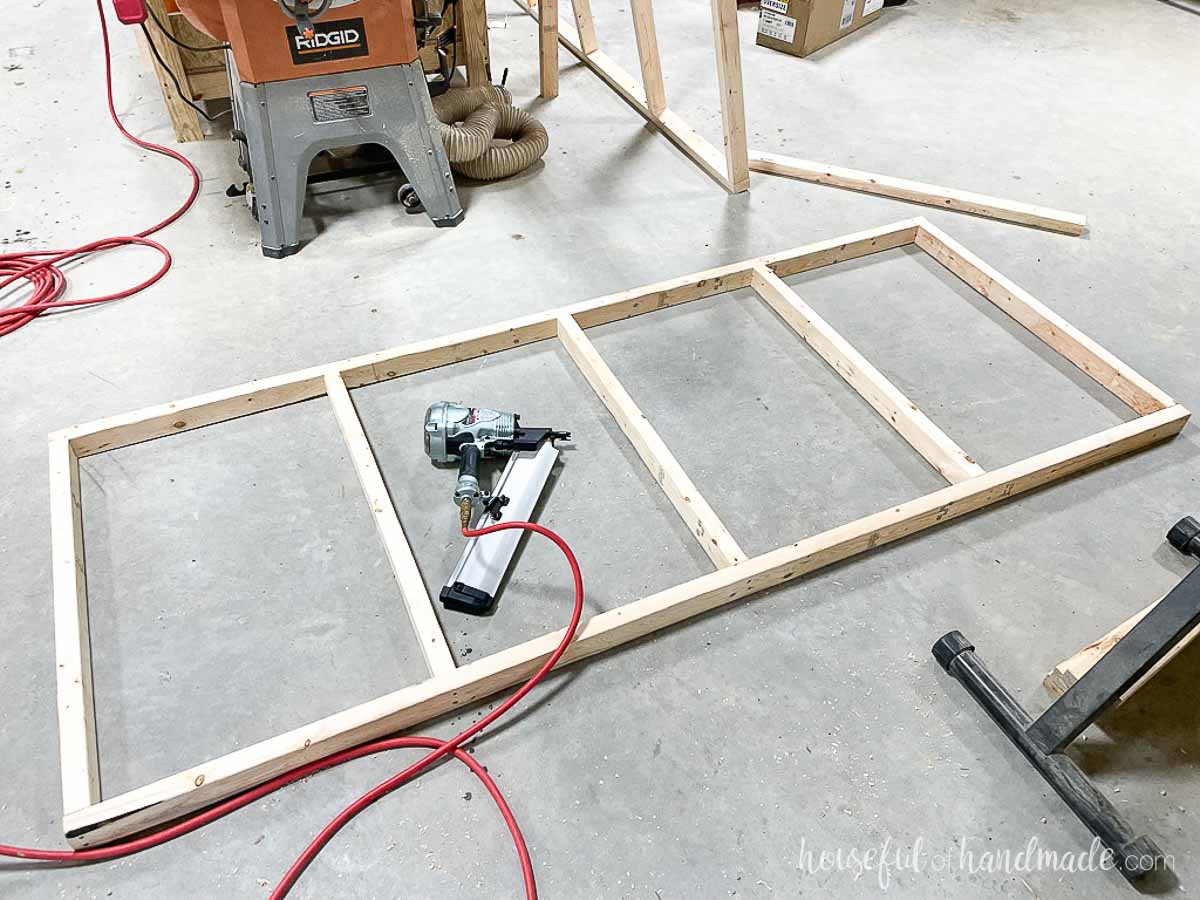
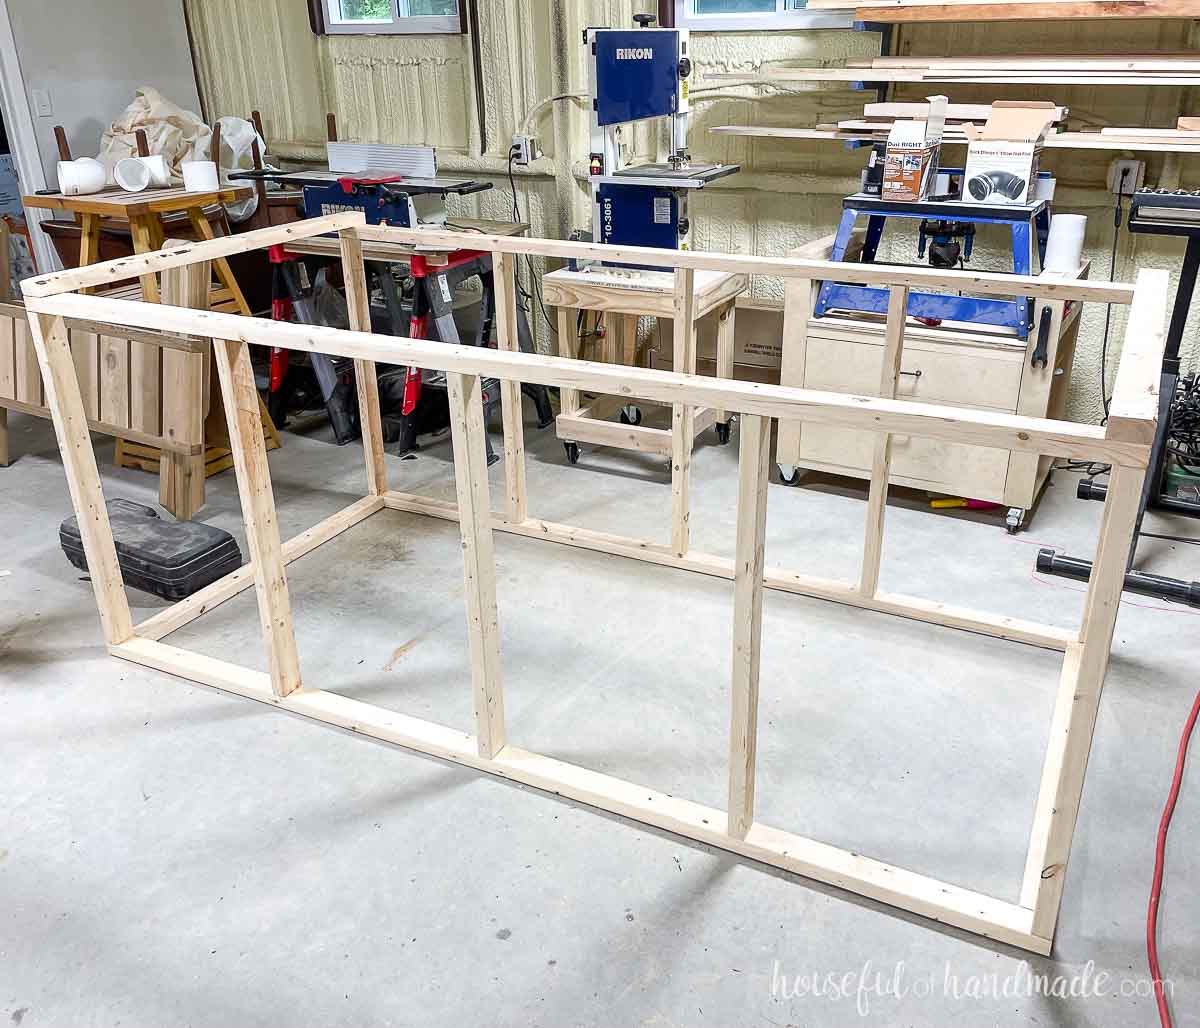
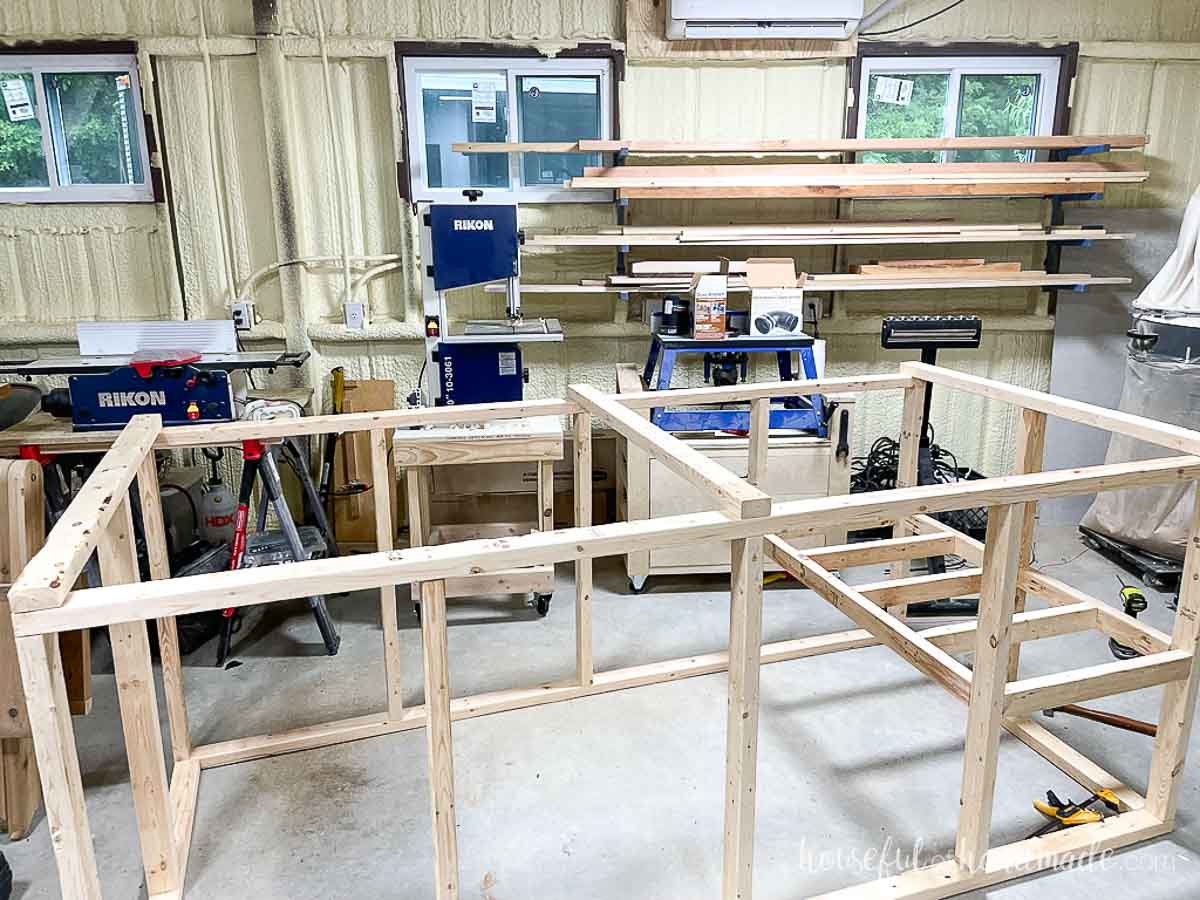
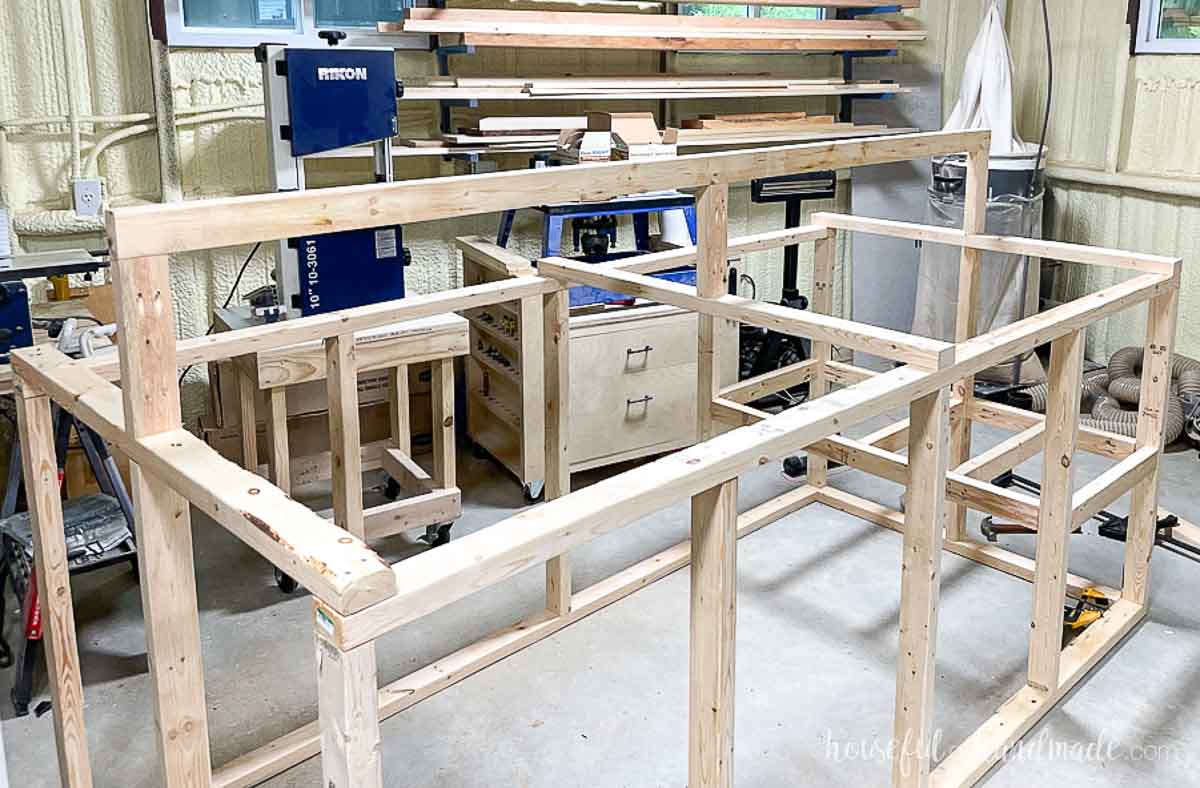
STEP 1- Build the run frame
Build the sides by attaching (5) run side boards between (2) side top/bottom boards as spaced in the diagram in the plans.
Attach with wood glue and 2 3/8” long framing nails through the top/bottom boards into the side run boards. Use 2 nails per board joint.
Repeat for the second side.
EXPERT TIP: If you do not have a framing nailer, you can assemble the coop with screws instead. Use 2 1/2” exterior wood screws in place of the framing nails through the rest of the plans.
Drill pocket holes set for 1 1/2” thick material in both ends of the front/back bottom boards.
Attach them between the two assembled sides so they are flush to the bottom and front/back.
Secure with wood glue and 2 1/2” pocket hole screws.
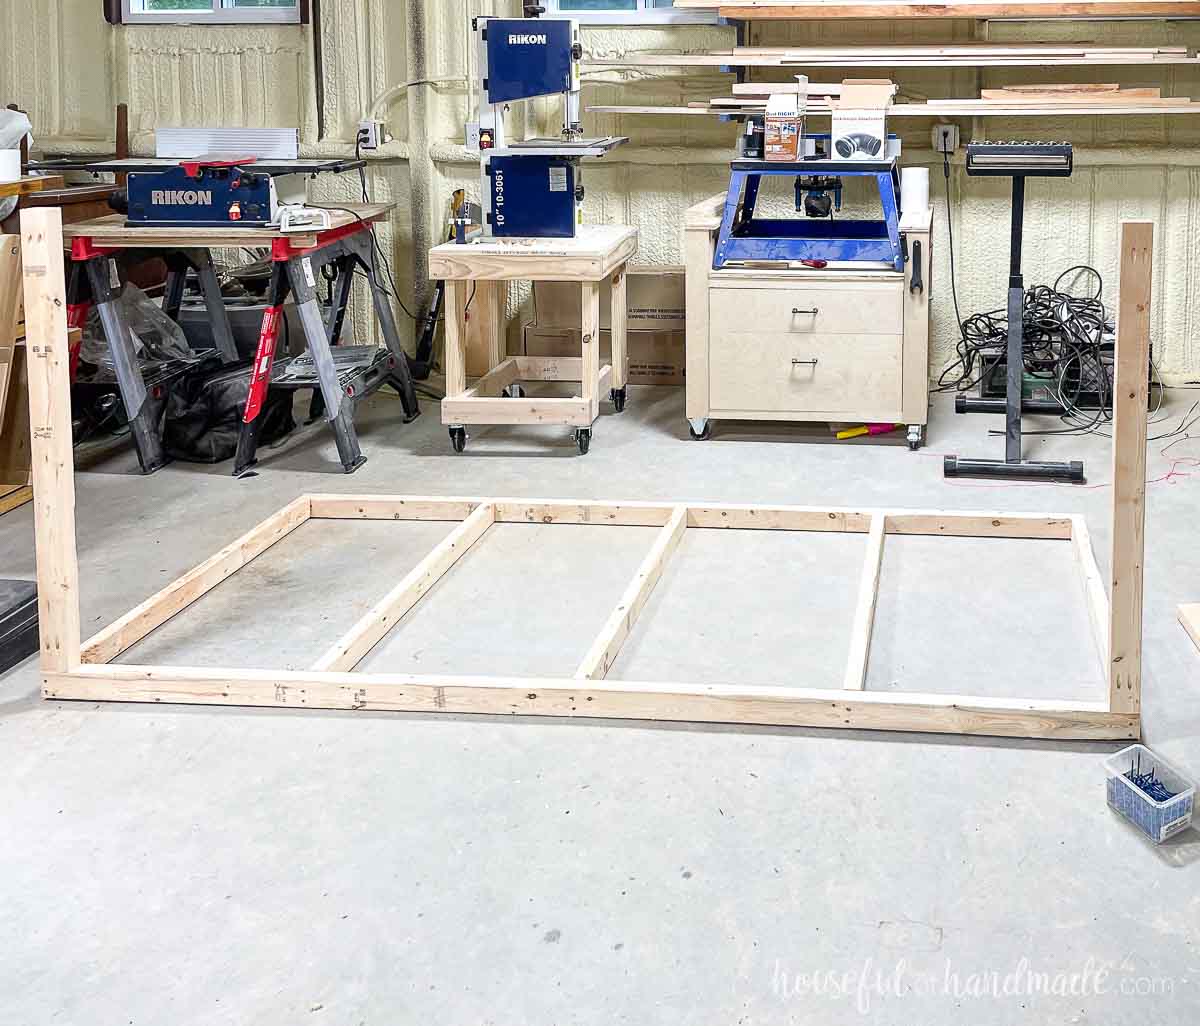
Place the run top boards on top of the coop sides. They will sit on top and should be flush to the sides and front/back.
Attach with wood glue and framing nails down into the assembled sides.
Add the front/back center boards between the top and bottom pieces. Center them between the sides.
Attach with glue and framing nails through the top and bottom boards into the center piece.
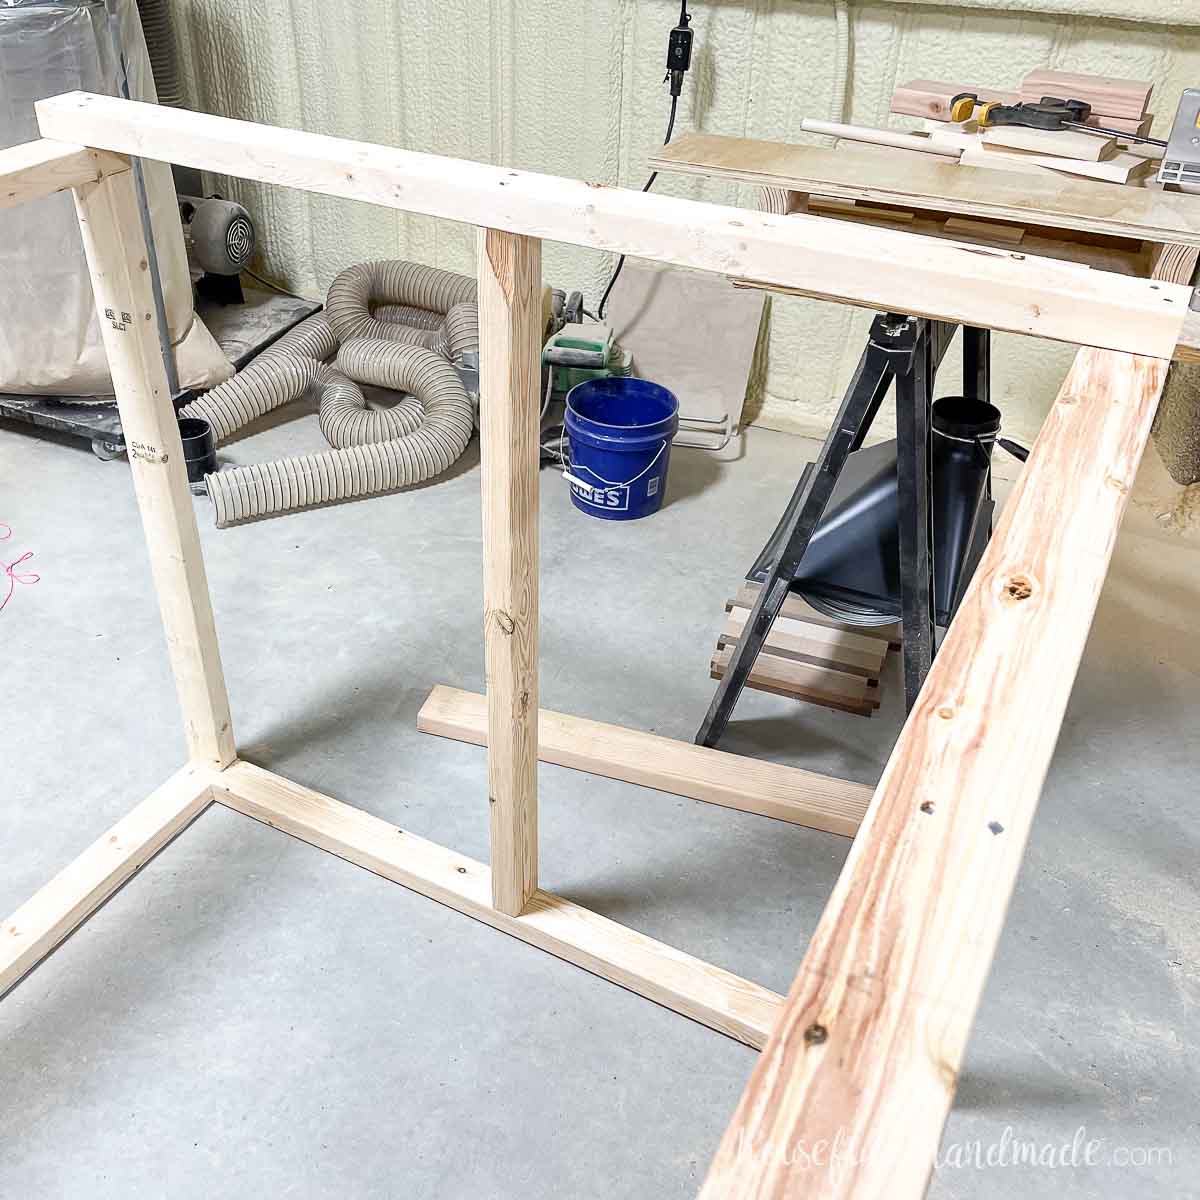
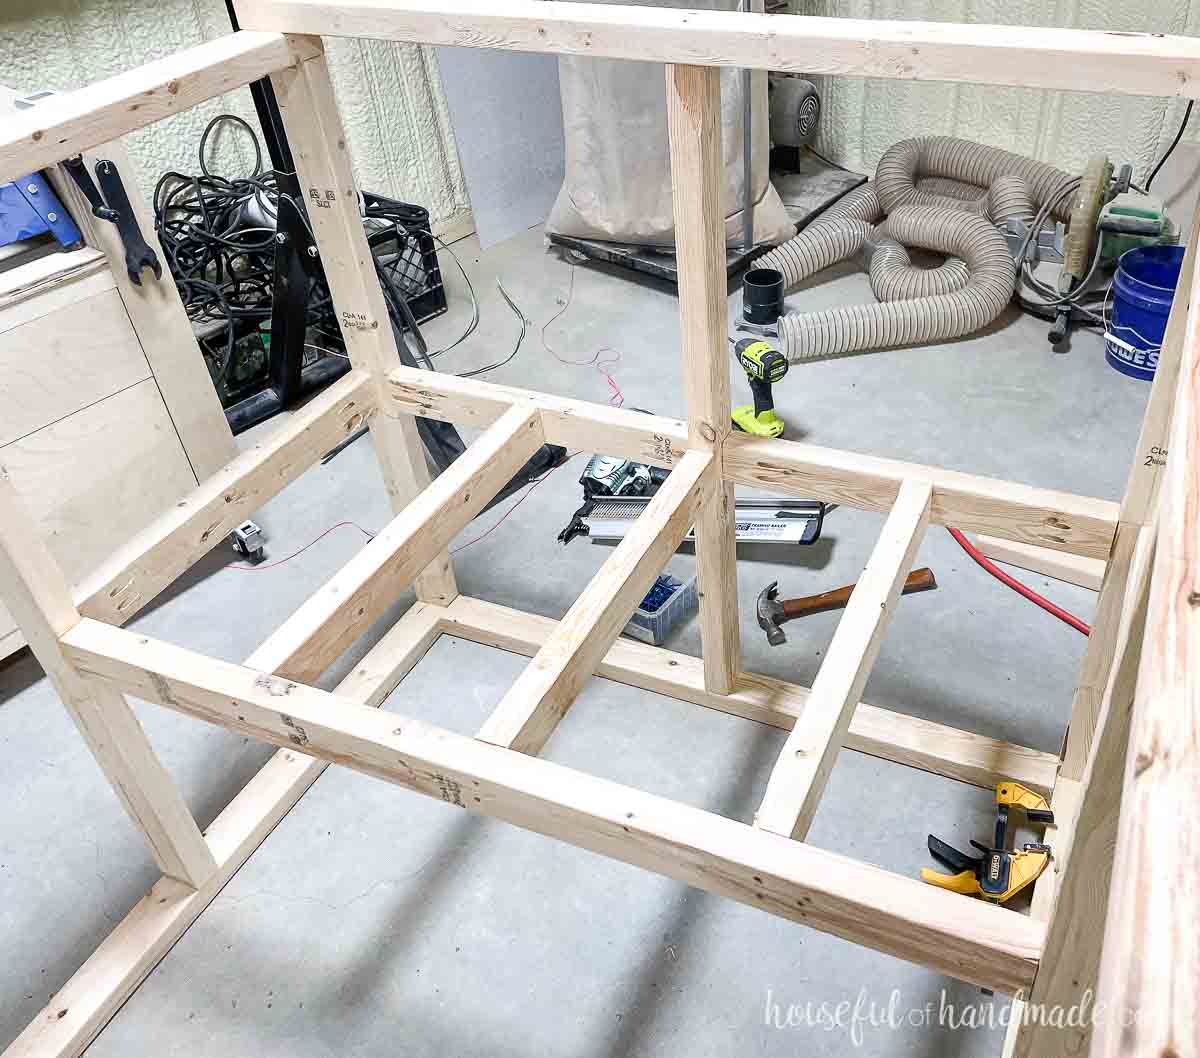
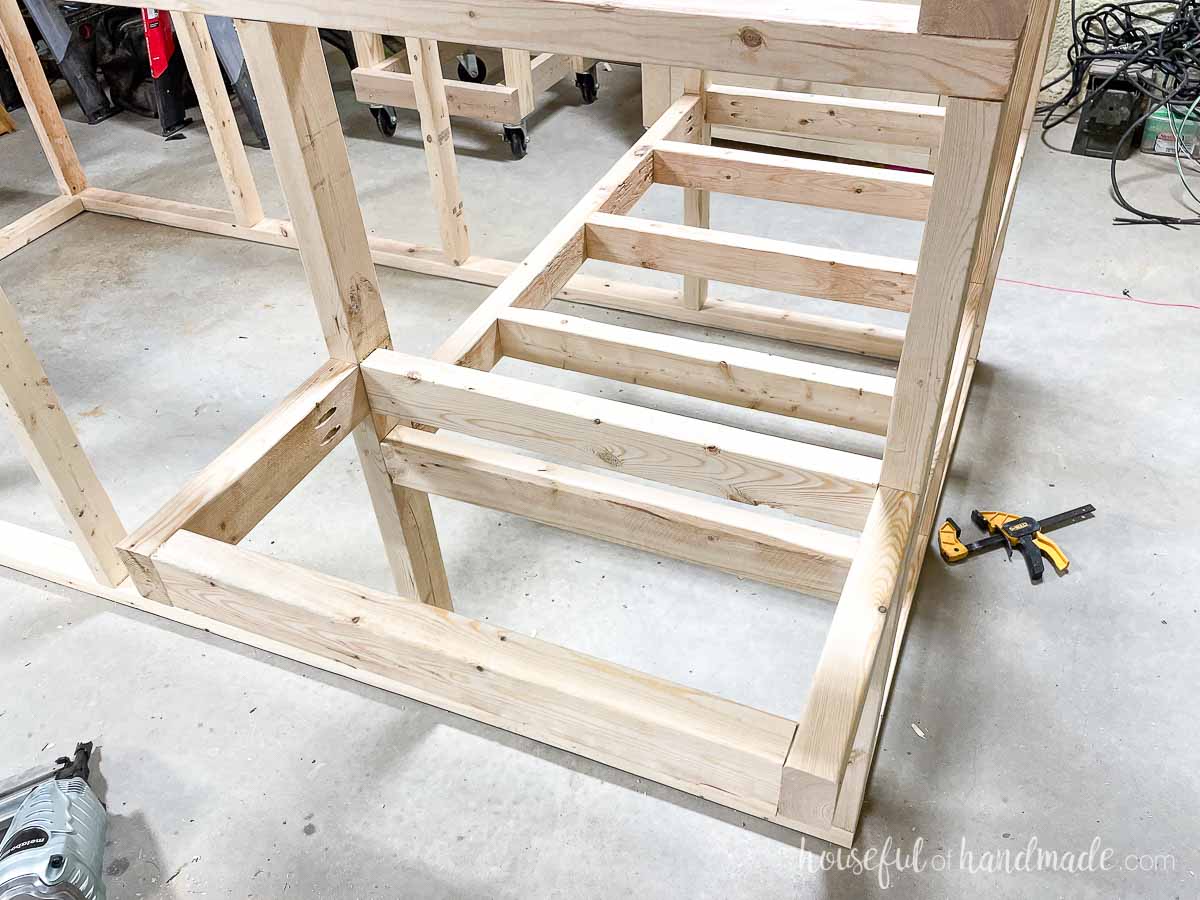
STEP 2- Build the coop frame
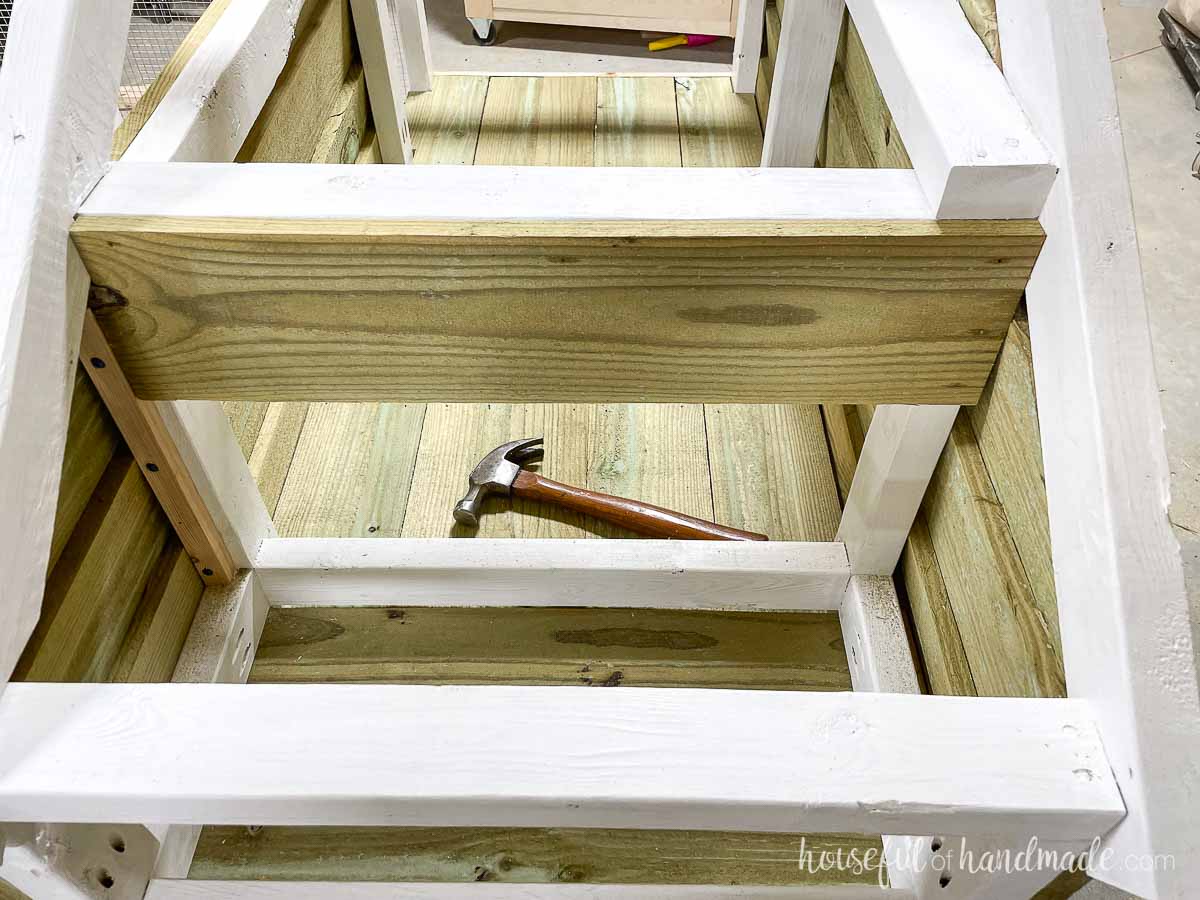
Drill 2 pocket holes set for 1 1/2” thick material in both sides of the coop floor boards (joists, front and backs).
Attach the boards so they create a frame around the coop floor 16” up from the ground.
Secure with wood glue and 2 1/2” pocket hole screws.
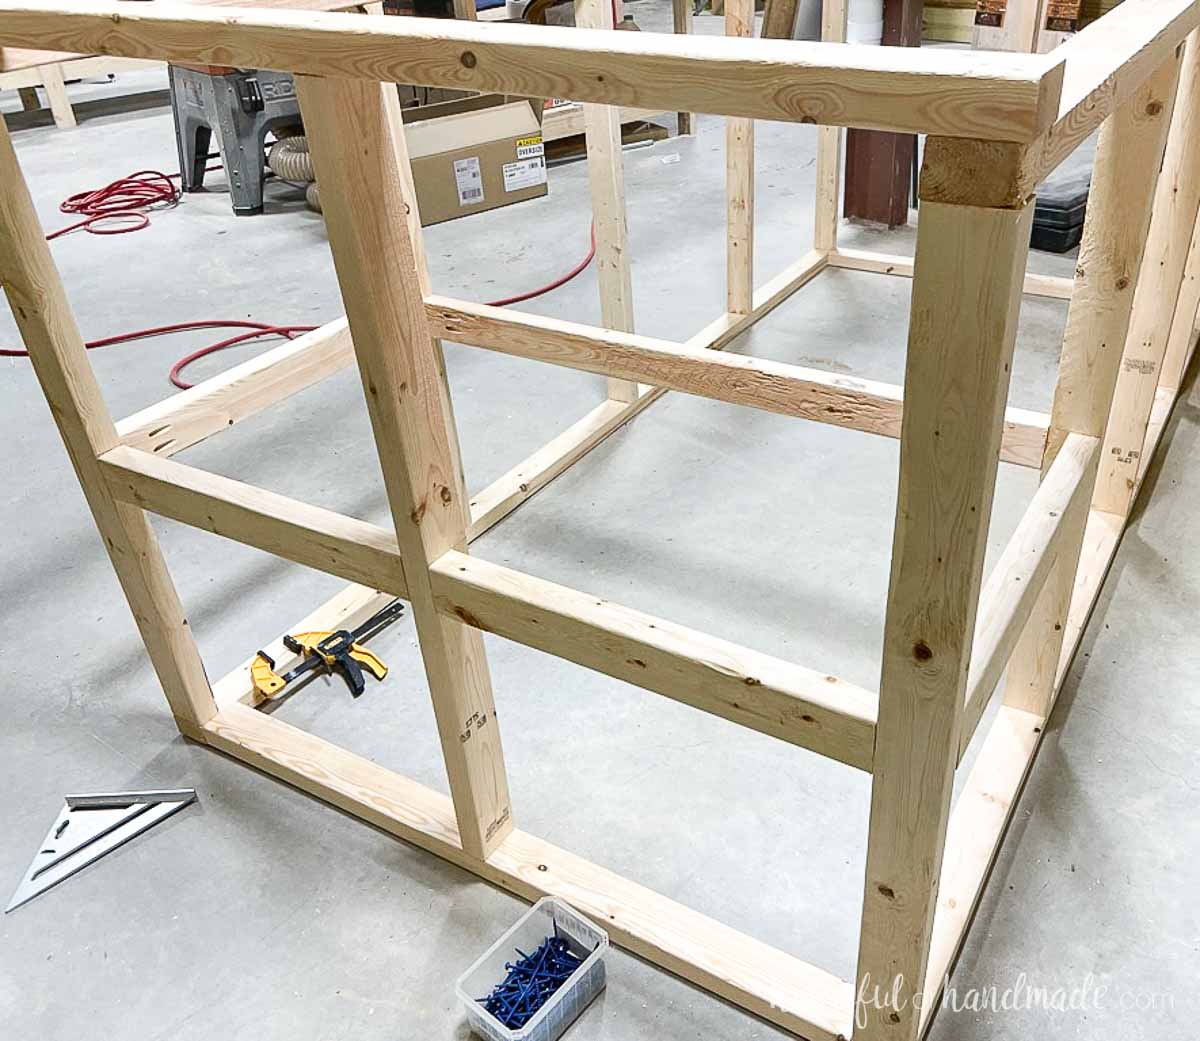
Then attach the floor joists inside the frame.
The longer joists will be centered on the two sides. The shorter board will connect the back center board to the coop floor front board in the center.
Secure with glue and 2 1/2” pocket hole screws.
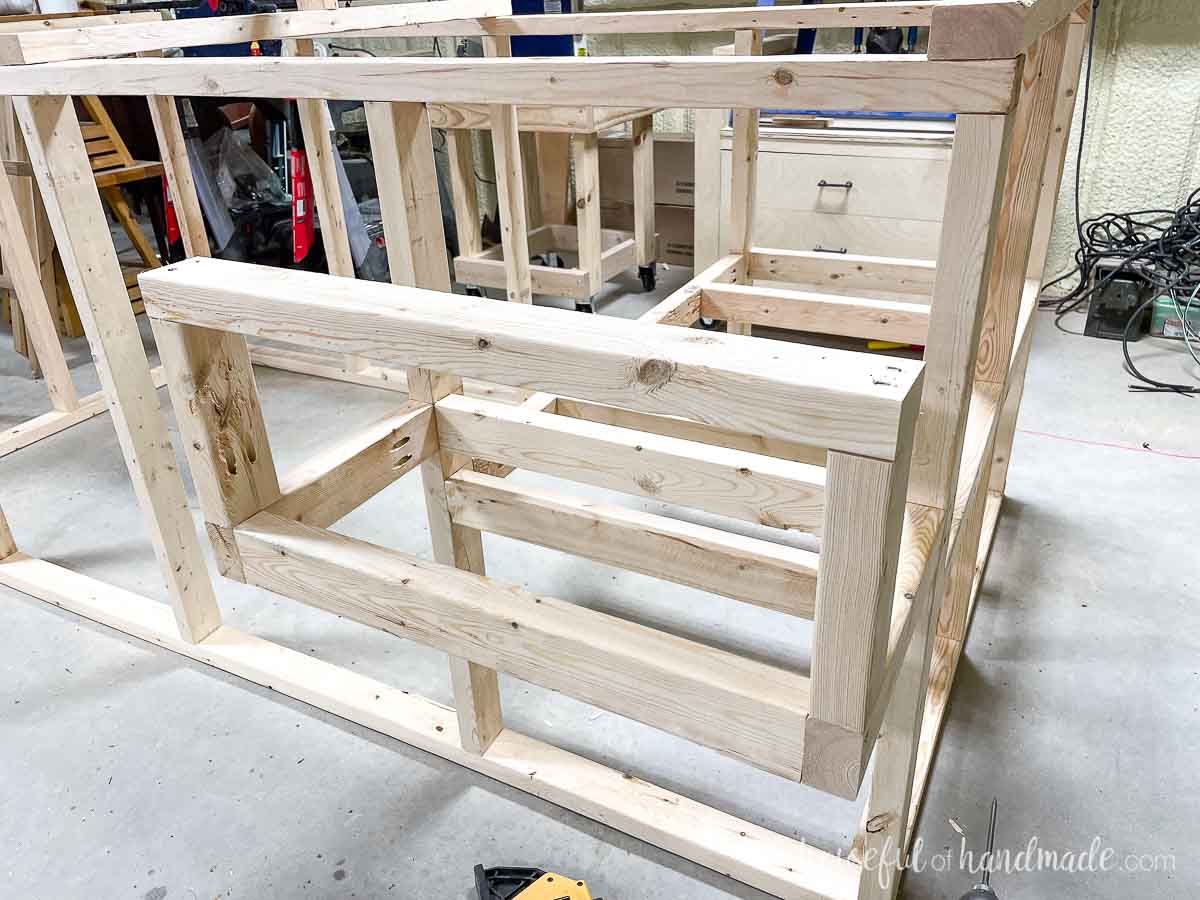
Drill pocket holes set for 1 1/2” thick material in one end of the netting box bottom side pieces.
Create the base of the nesting box area by attaching one nesting box front/back between the side upright boards so it is 20” up from the ground. Secure with glue and nails.
Then attach the nesting box bottom side pieces with 2 1/2” pocket hole screws. And finally attach the final front/back piece between the sides and secure with nails through the sides.
Next, drill 2 pocket holes in one end of the nesting box side pieces.
Attach them to the front sides of the assembled floor with glue and 2 1/2” pocket hole screws.
Then place the nesting box front top on top and secure with nails to create a frame for the door.
Drill pocket holes set for 1 1/2” thick material in both ends of the coop doorway side and coop doorway top boards.
Attach the boards to the front of the coop to create a doorway from the run. If you plan to use a door to the coop (automatic or not), space the doorway side to fit it.
It is quite warm in TX so I like to leave my doorway open for lots of airflow. If you live in a colder climate, you will want to prevent too much airflow during the cold months with a door.
Secure with glue and 2 1/2” pocket hole screws.
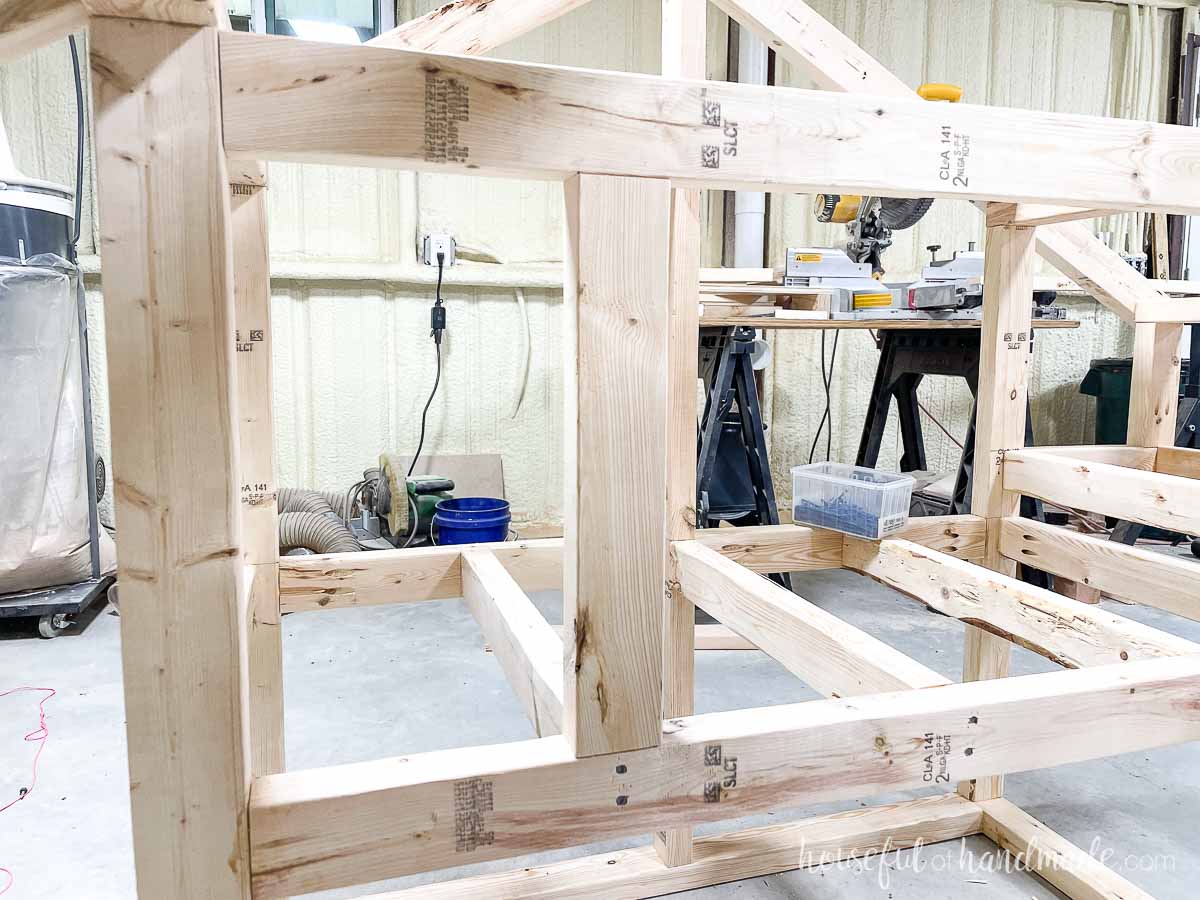
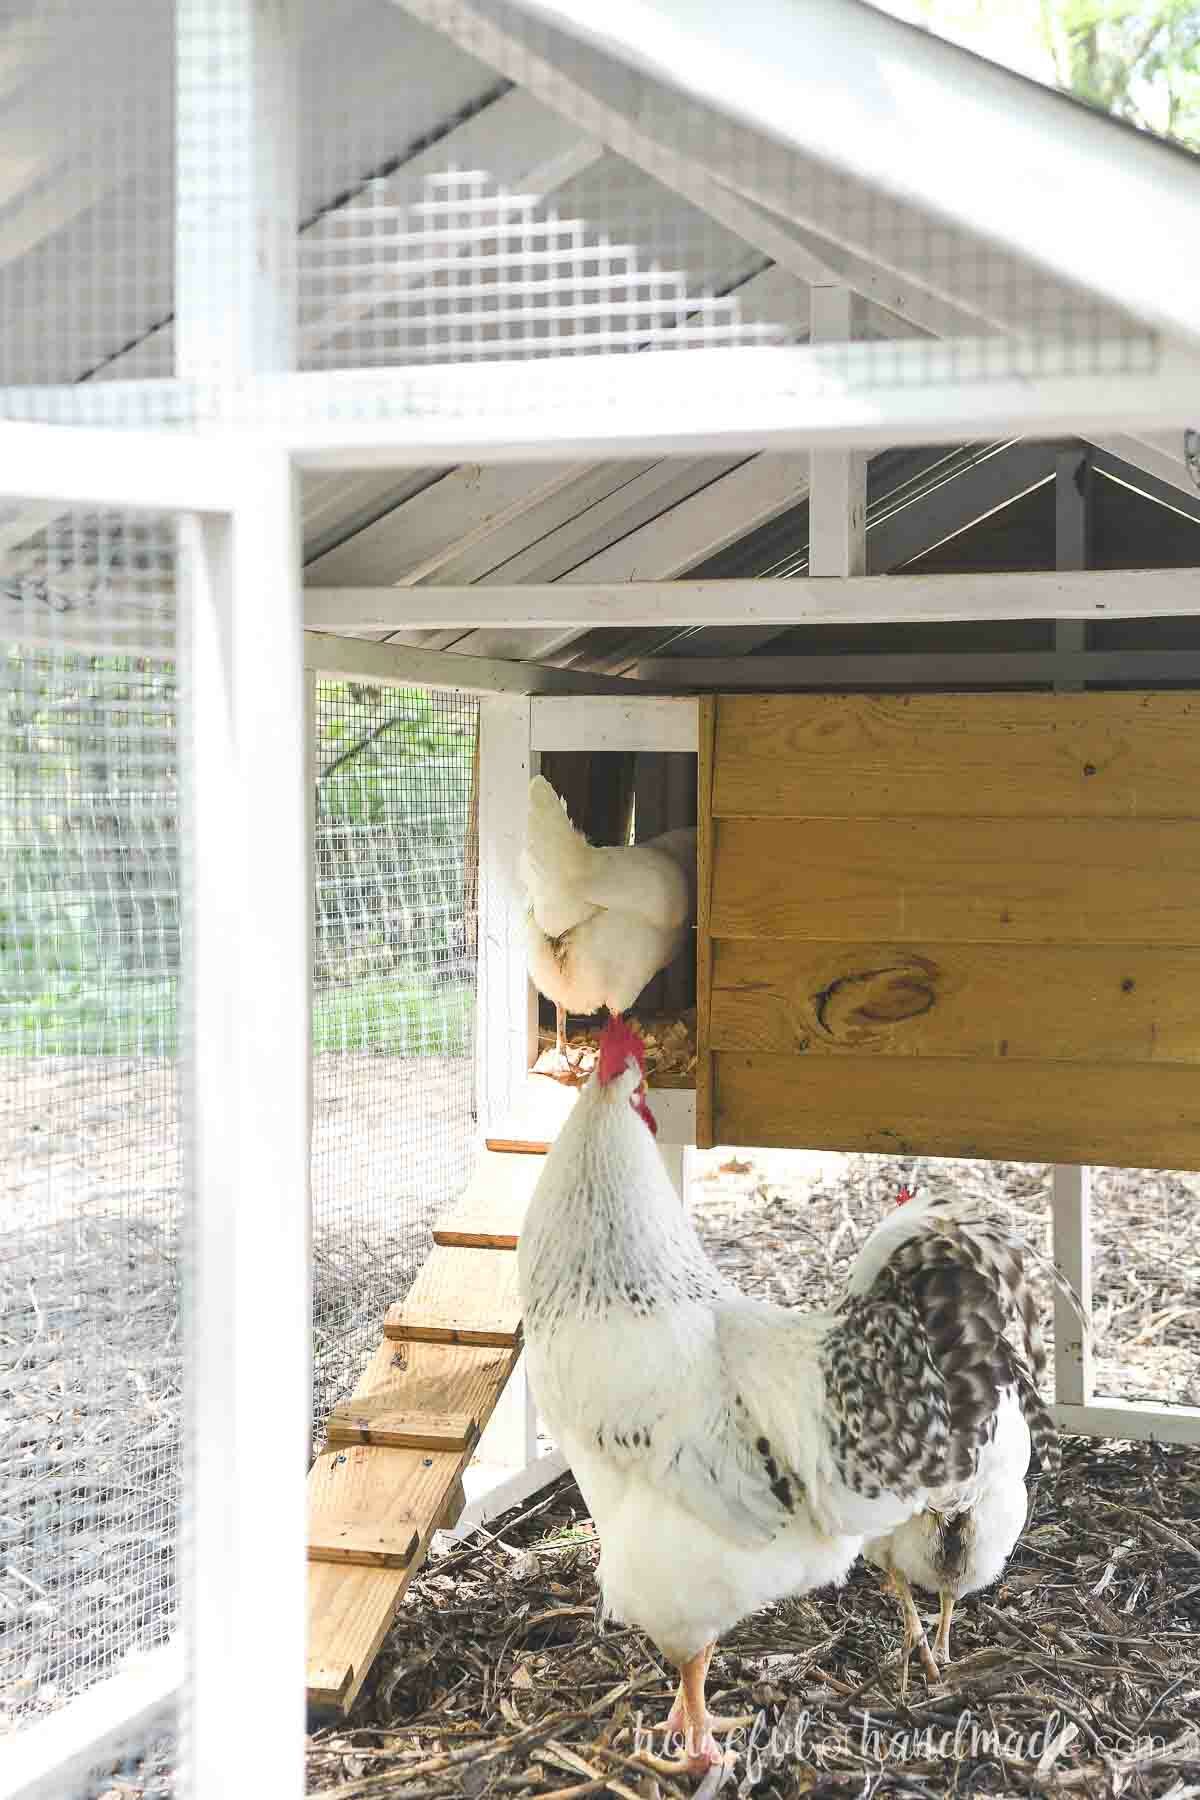
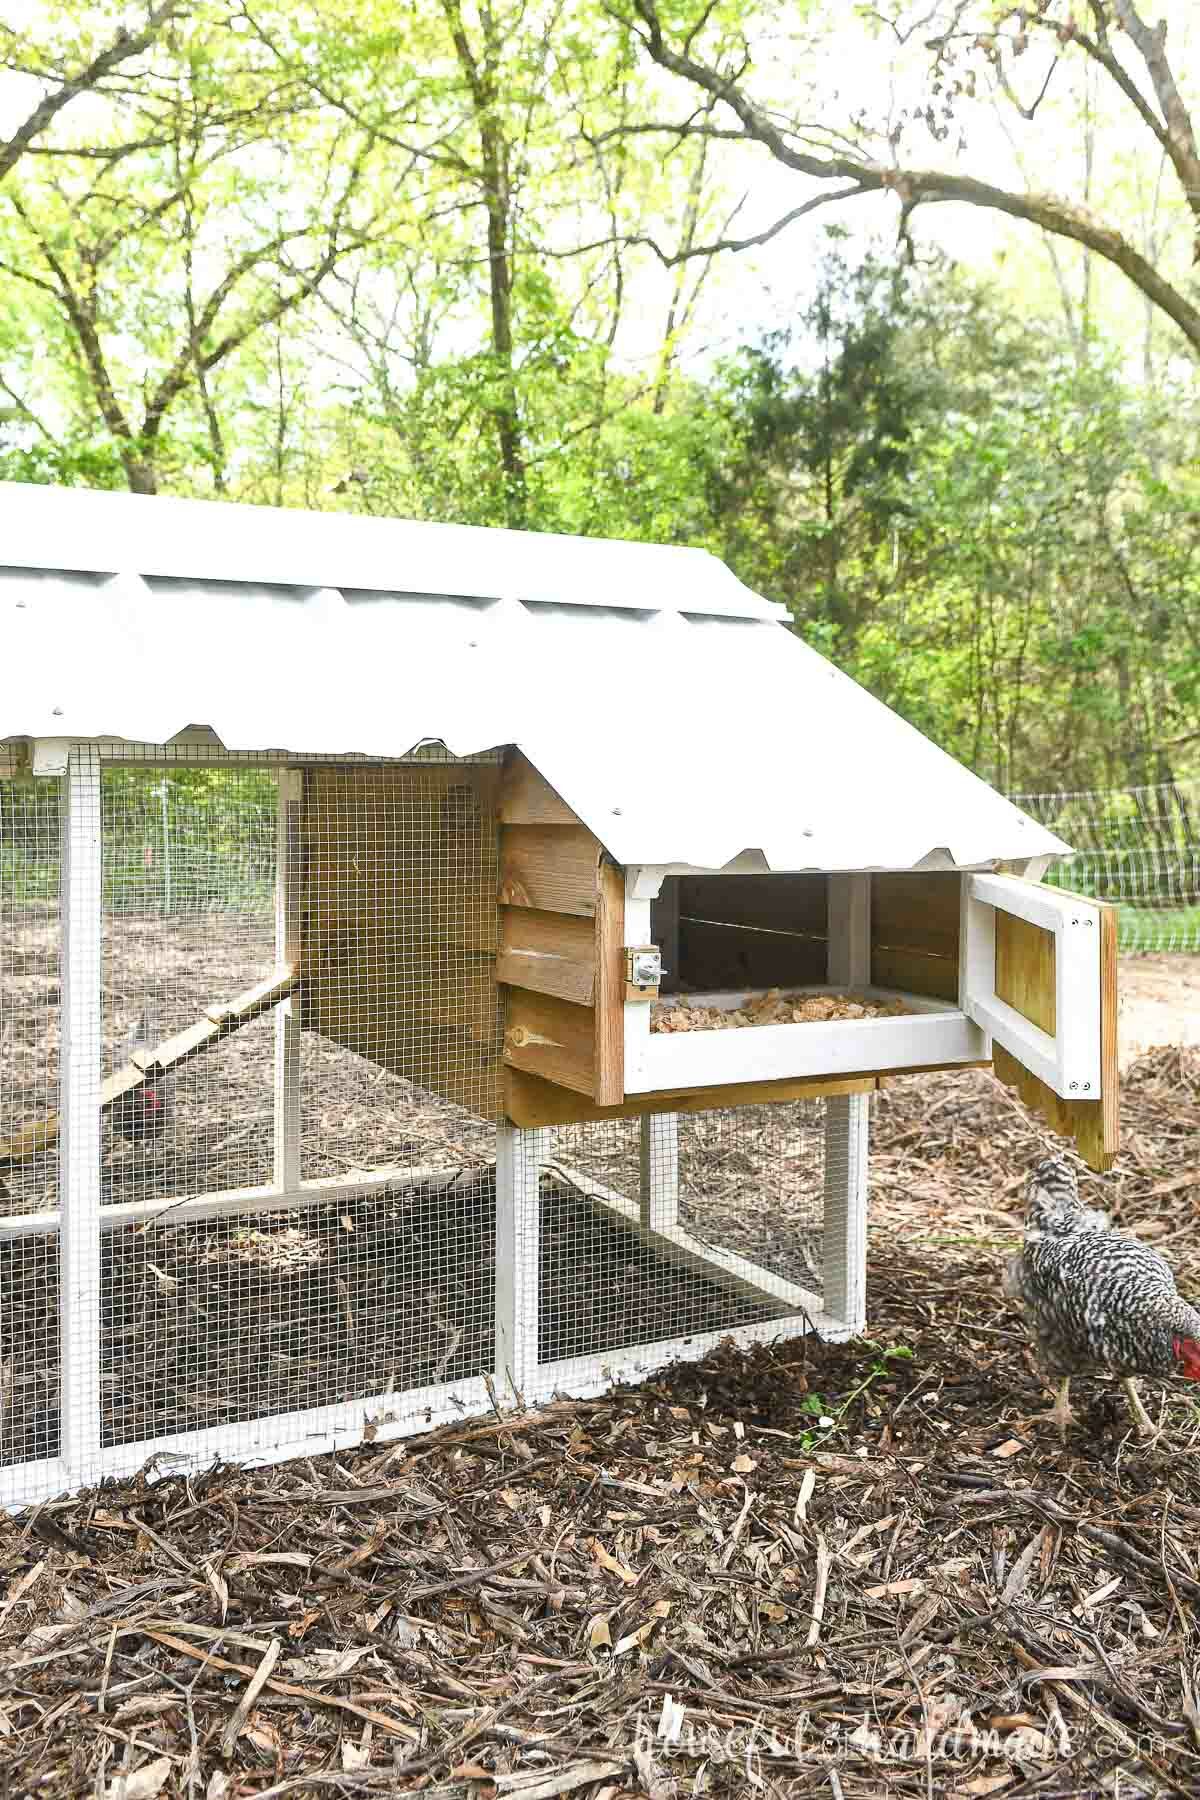
For my coop, I added a single roost bar to the center of the coop. The wall between the coop and run is not covered (again for airflow because it is warm here) so the birds use the doorway top board as a roost also.
If you want to cover this area with siding for a colder climate, you can add two roost bars in the coop.
The easiest way to do this is with a couple pieces of 2×2 boards to hold the roost bar on the back. Then attach the front to the underside of the doorway top board as shown in the diagram in the plans.
STEP 3- Build the roof
Attach a third run top board to the center of the run area. Secure with nails.
I like to wait to attach this board till now so that I don’t have to duck under it while working on the coop assembly.
Then drill pocket holes set for 1 1/2” thick material in both ends of the roof support pieces.
Attach them to the center of the run top boards with glue and 2 1/2” pocket hole screws.
Place the roof ridge board on the top of the support boards so it is flush on the ends. Secure with 2 1/2” pocket hole screws and glue.
Cut one end of the roof rafter at a 28 1/2 degree angle.
Attach the outer rafters so they are on the outside of the front/back of the coop. Use the larger one
Line up the angled cuts to create a peak in the top. Attach them with nails. Then attach them to the top side boards with nails too.
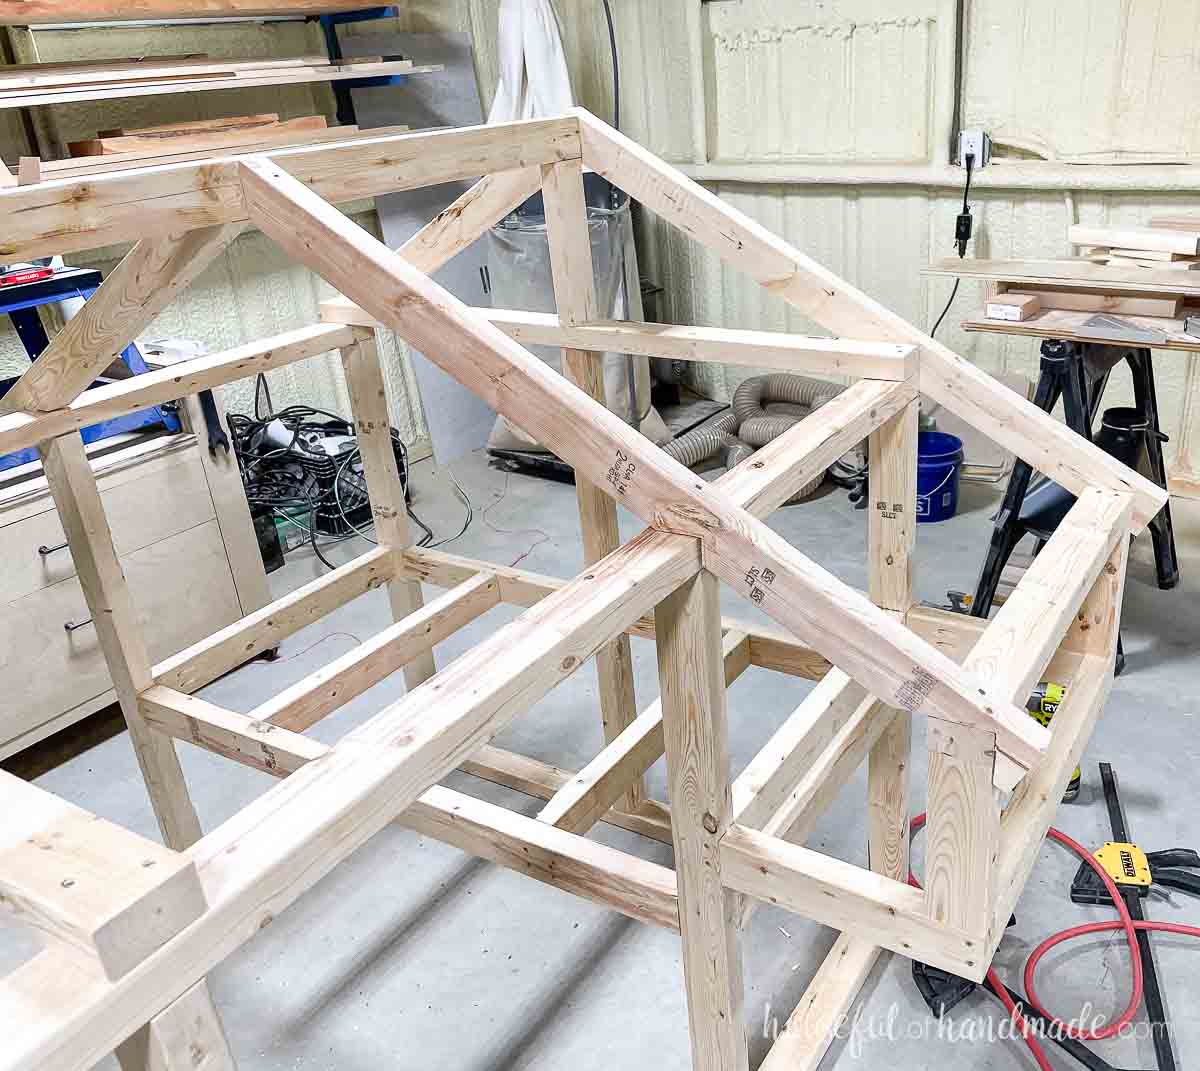
For the longer back rafter, also attach it to the end of the nesting box.
Line up the center rafters so they are the same angle as the outer rafters.
Mark and cut a notch out to make the rafter sit on top of the run top boards. Also, for the long rafter, you will need to notch it to fit around the nesting box front.
Secure the rafters to the roof ridge, side top boards, and nesting box top with nails.
Space the rafters according to the diagram in the plans. The long rafter will be flush with the side of the nesting box and the center one will set off the side of the center top board.
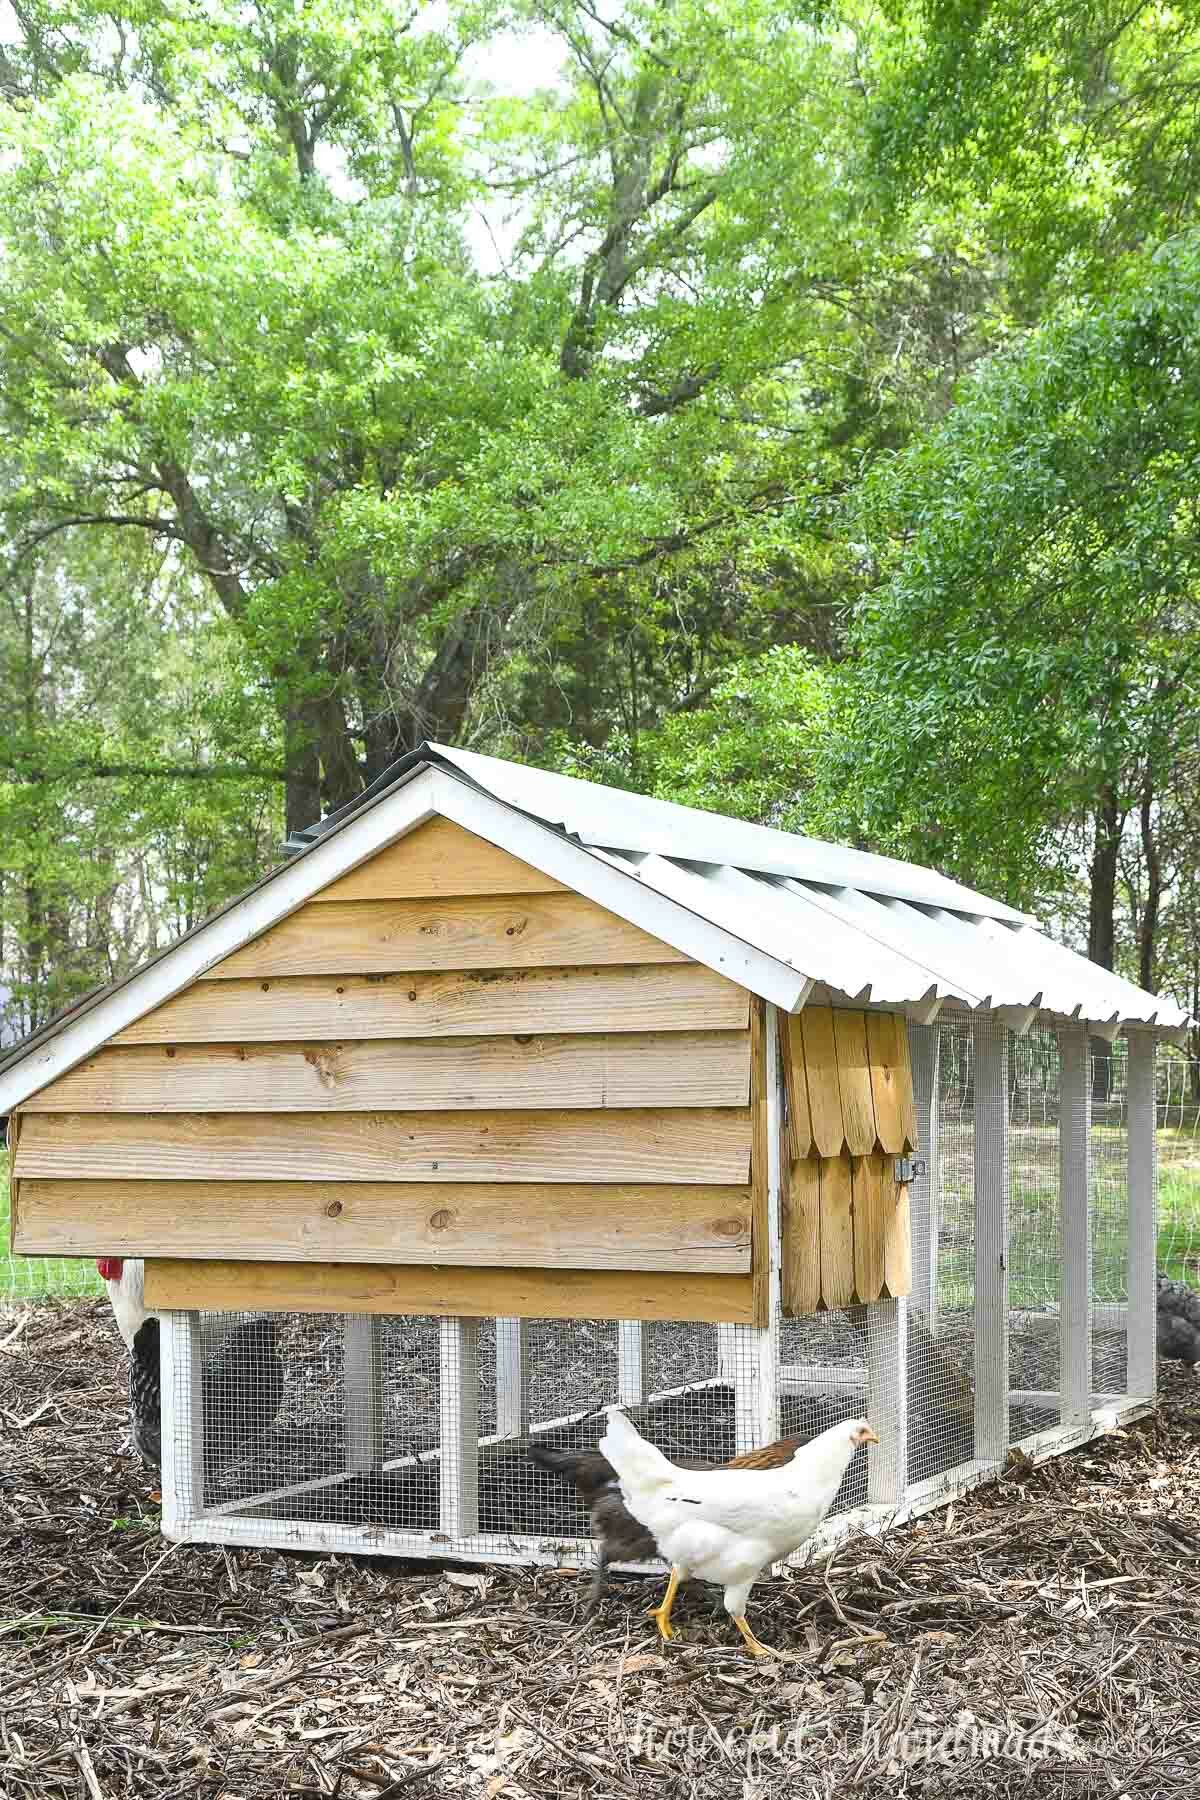
STEP 4- Clad the coop
Now is the time to paint/seal/stain the finished coop frame. Use outdoor paint/stain/sealer to ensure your coop will last a long time.
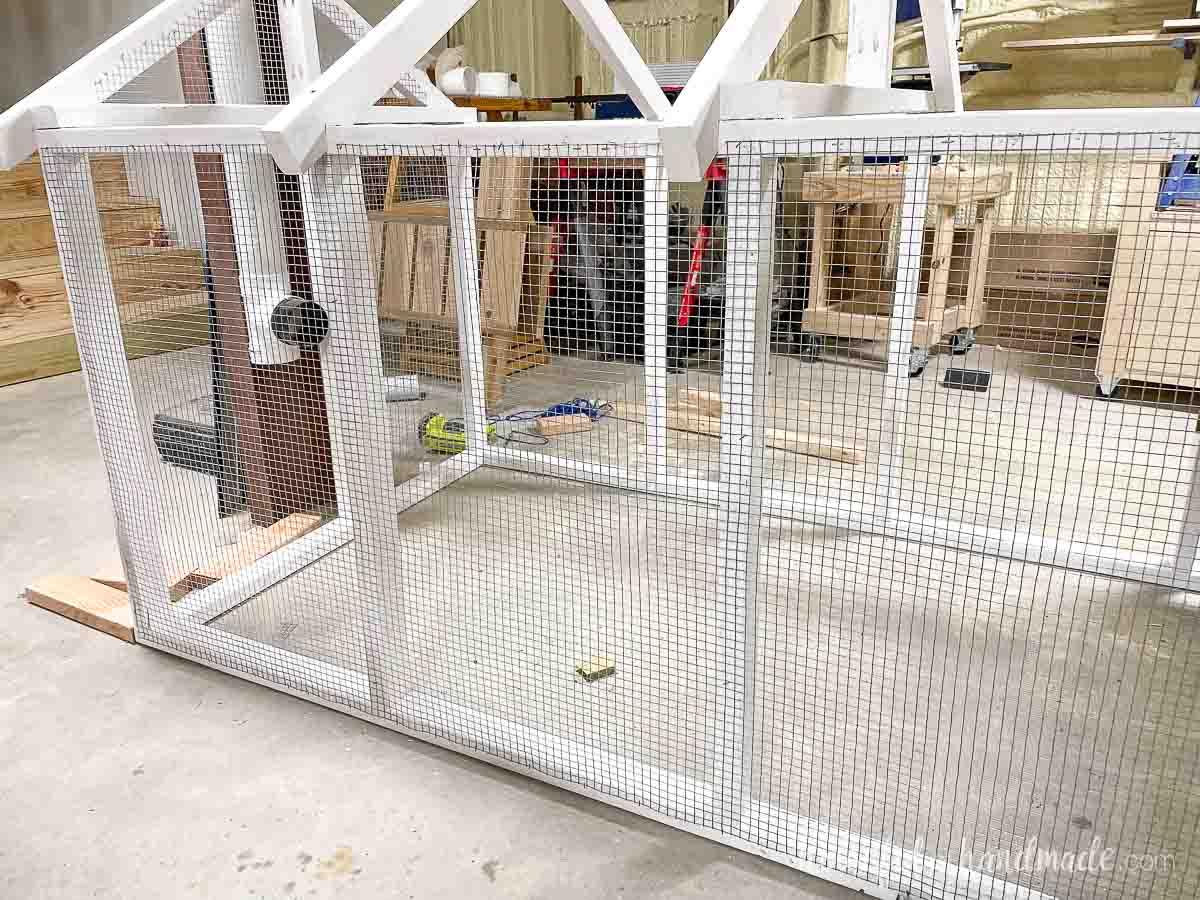
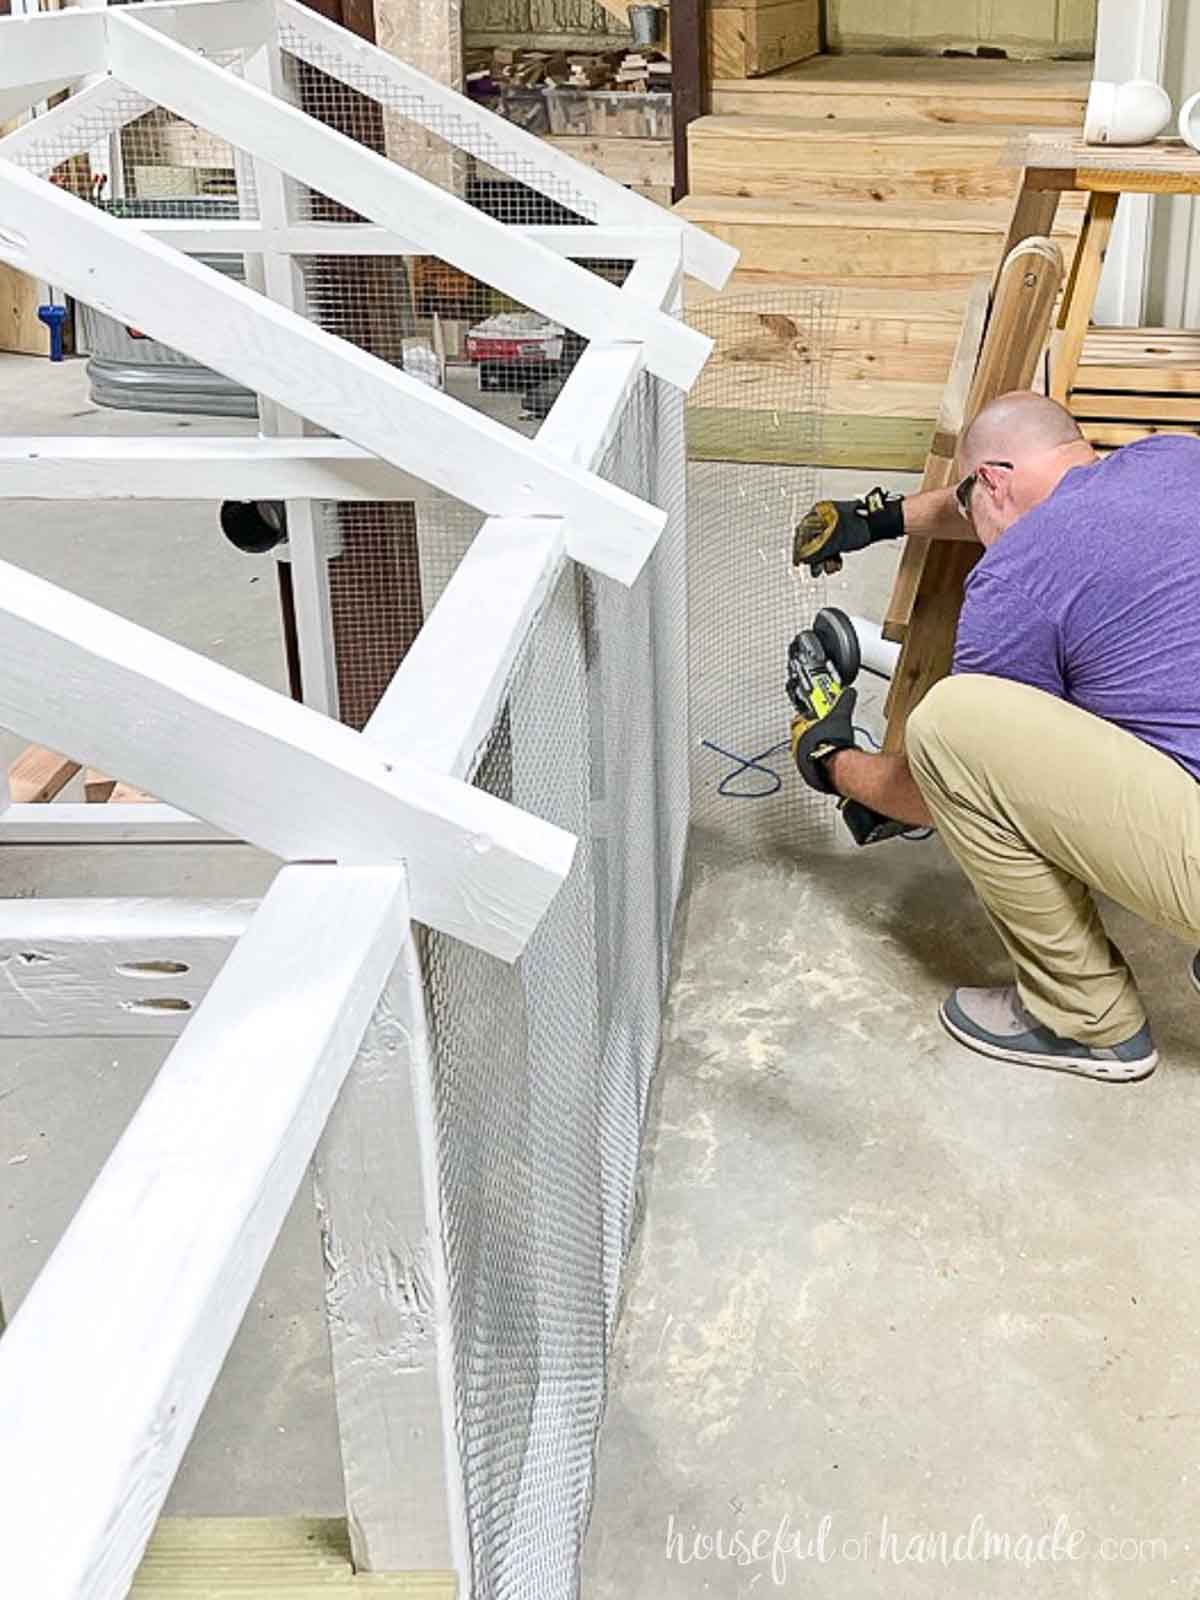
Staple the hardware cloth to the outside of the run on the nesting box side and below the coop.
You want to do this now so that the siding sits on top of it to make it easier (and prettier). But leave the other side open for now to make it easier to install the siding.
Pull the hardware cloth as tight as you can (it can be very tightly curled up) and attach it with staples.
To cut the hardware cloth, use tin snips or an angle grinder.
I prefer the angle grinder because it is faster and I get a cleaner cut. This coop was the perfect excuse to buy an angle grinder to add to the shop.
EXPERT TIP: Don’t skip the hardware cloth. Using chicken wire will save money, but it will not protect your flock. Predators can easily rip though chicken wire, but not hardware cloth.
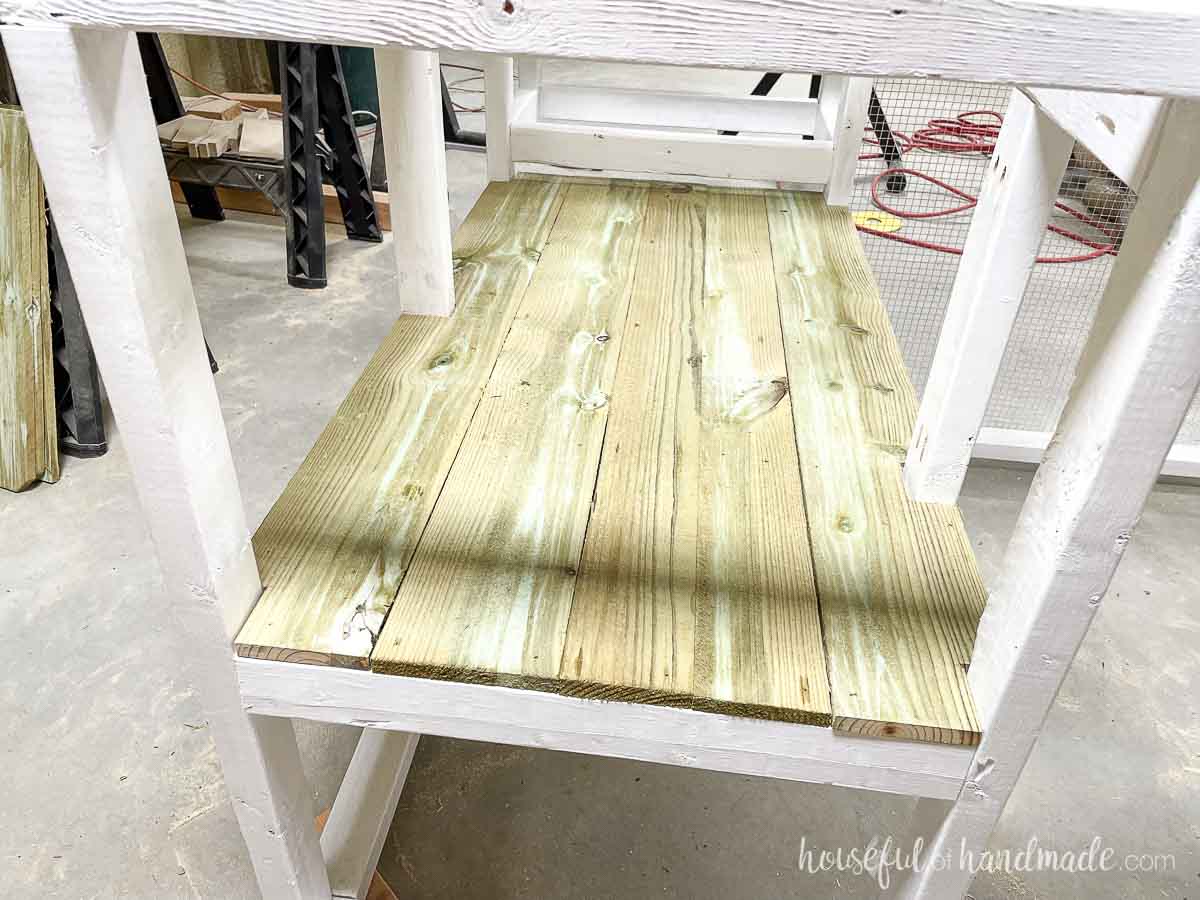
Measure and cut the fence pickets to fit the floor of the coop.
Start at the outside. Use a jigsaw to cut notches to fit around the frame boards. Then add a full board next to it.
Finally, measure the remaining section in the center and rip a strip off one of the fence pickets to fit. You can rip the board with the jigsaw, use a straight edge as a guide to keep it straight.
Attach the floor boards with 1 1/4” brad nails or wood screws into the joists.
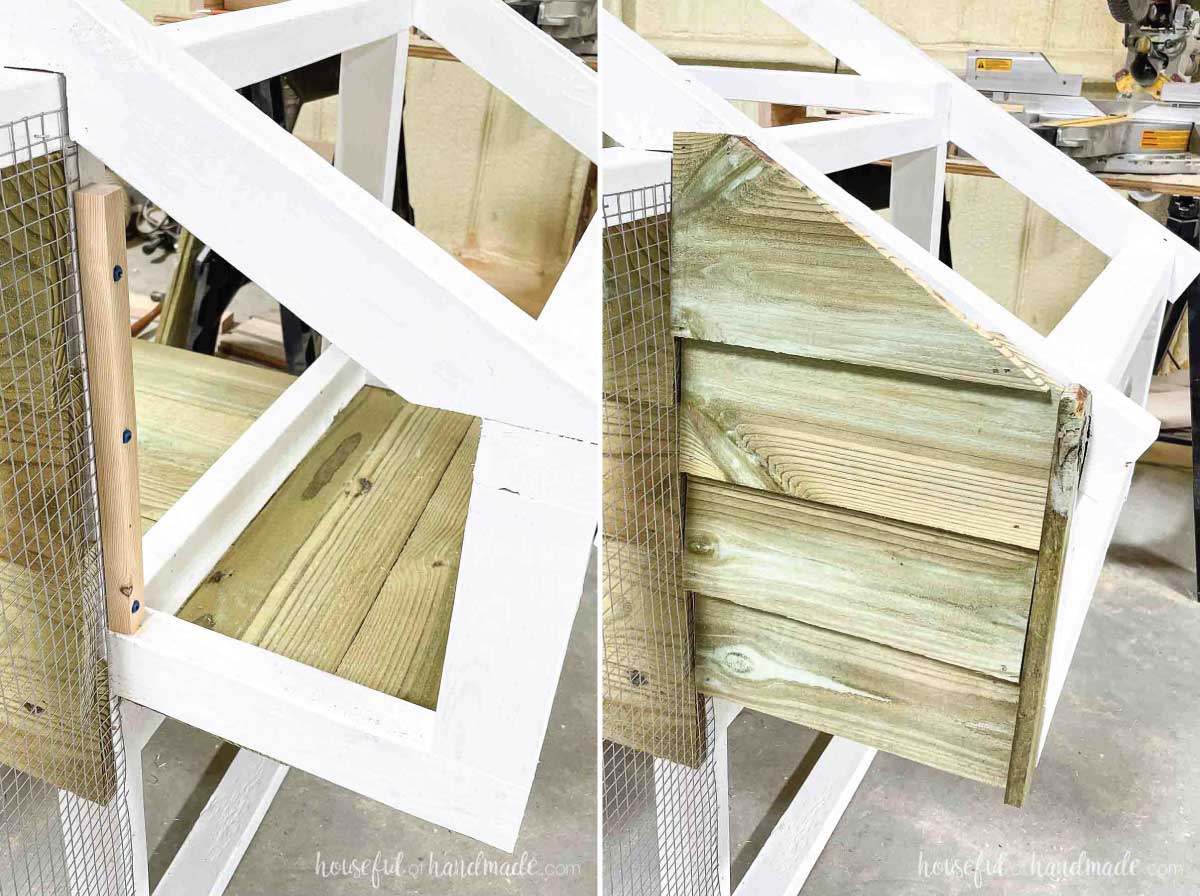
Cut one fence picket to cover the gap from the coop floor to the nesting box floor. It should be flush with the back of the coop, but hang over the other side the thickness of the fence picket (to cover the end of the inside siding later).
Secure with nails or wood screws.
Then cut fence pickets to cover the bottom of the nesting boxes. Secure these with wood screws (nails may loosen the bottom when the hens go in and out over time).
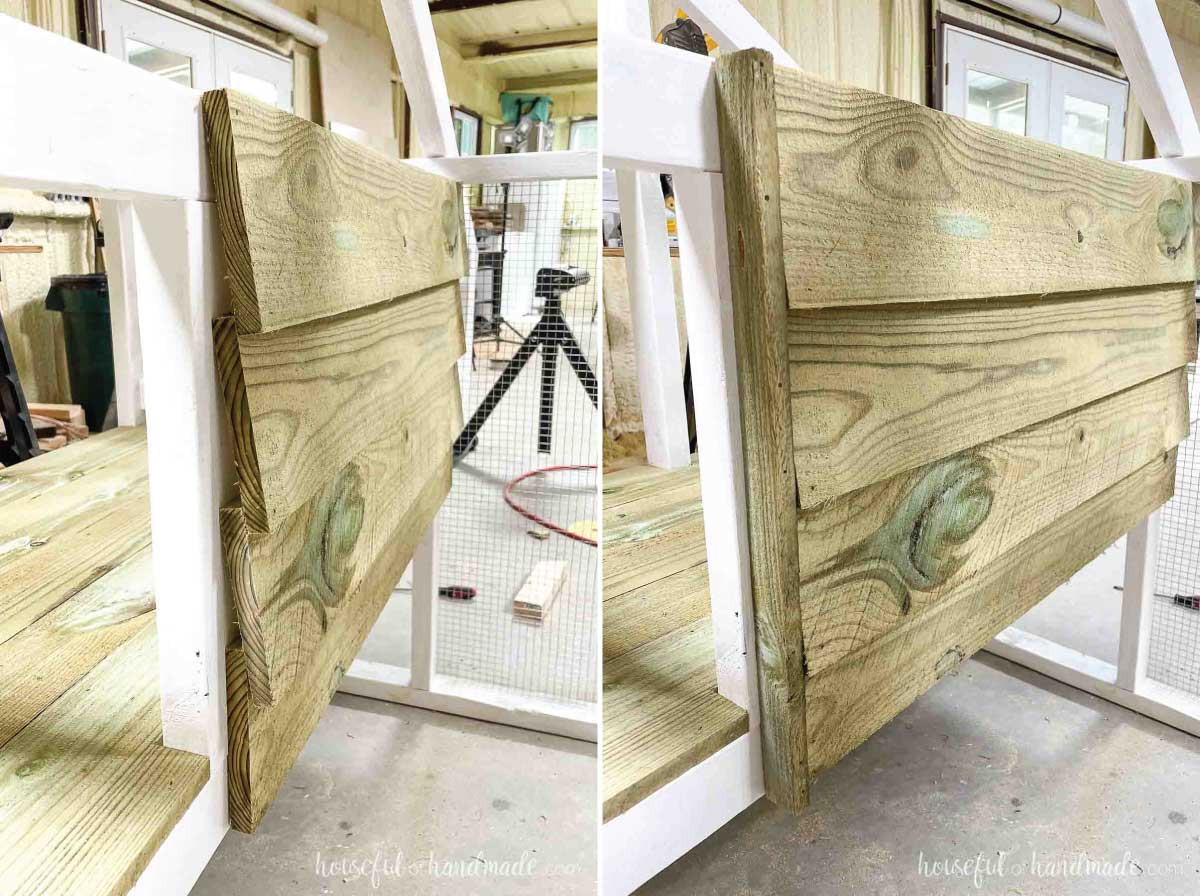
For the siding, start on the inside of the coop. Cut boards to go from the outer edge of the coop wall to 3/4” in from the doorway edge.
Attach the bottom so it is flush with the bottom of the floor joists. Secure with nails or screws.
Then add the remaining boards so they overlap the first siding piece ~1/2”. Secure the siding to at the top where it touches the 2×3 and at the bottom where it overlaps the previous siding piece.
Rip a piece of fence picket to cover the edge of the siding. This will help with drafts and moisture from getting in the coop.
My pieces were ~1 1/4” wide. Secure them to the edge of the installed siding with nails.
EXPERT TIP: If you live in a colder climate, add siding all the way up the inside wall of the coop. You may want to add a center support piece to allow a third point of contact to secure the siding boards.
Add a 12”-13” piece of 1×1 board to the inside of the nesting box side (it will be on top of the hardware cloth that should already be attached). This will give you a place to secure your siding.
Then cut the siding piece to fit the side of the nesting box. The bottom piece will be flush with the bottom of the nesting box.
Hold the final piece up in place and mark the angle of the roof on the back. Then cut it with the jigsaw before attaching.
Finish with a trim piece on the open edge to finish off the siding.
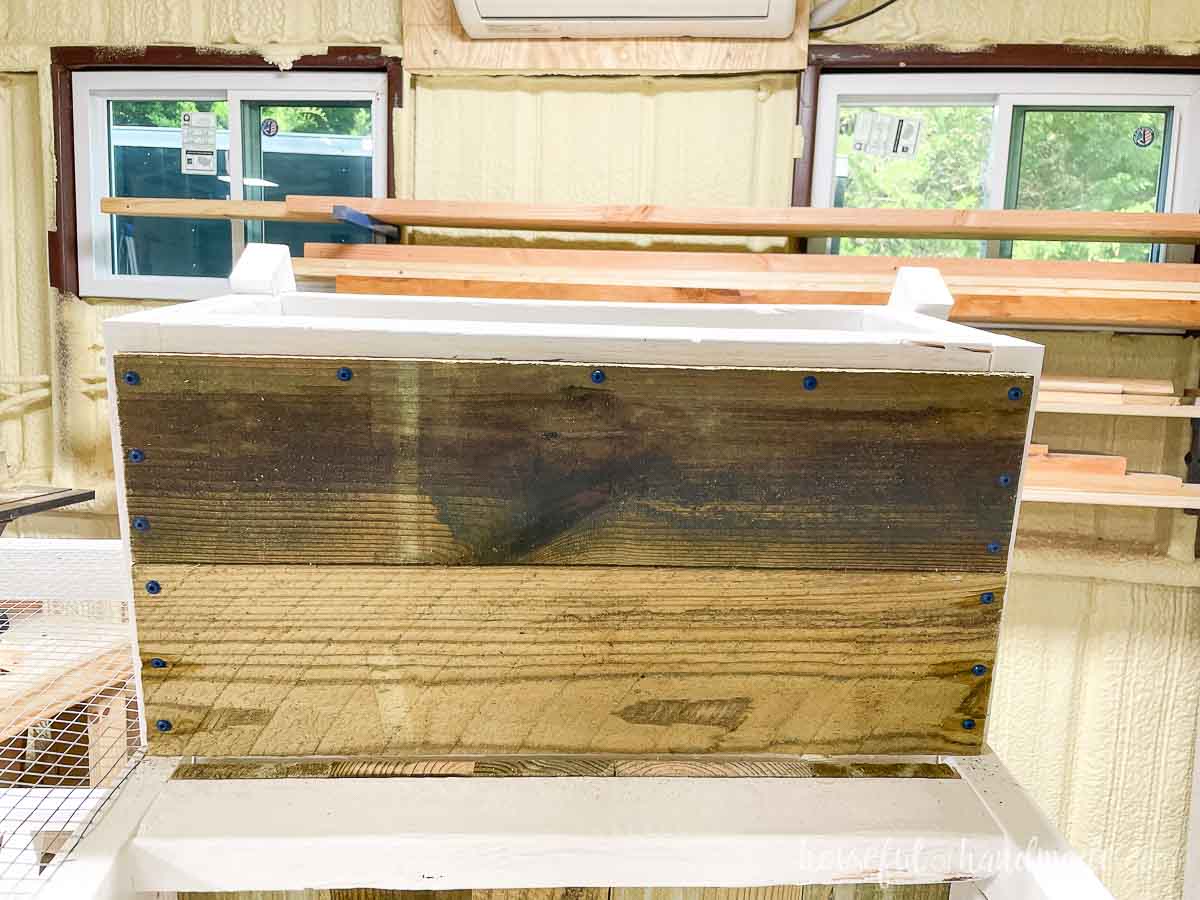
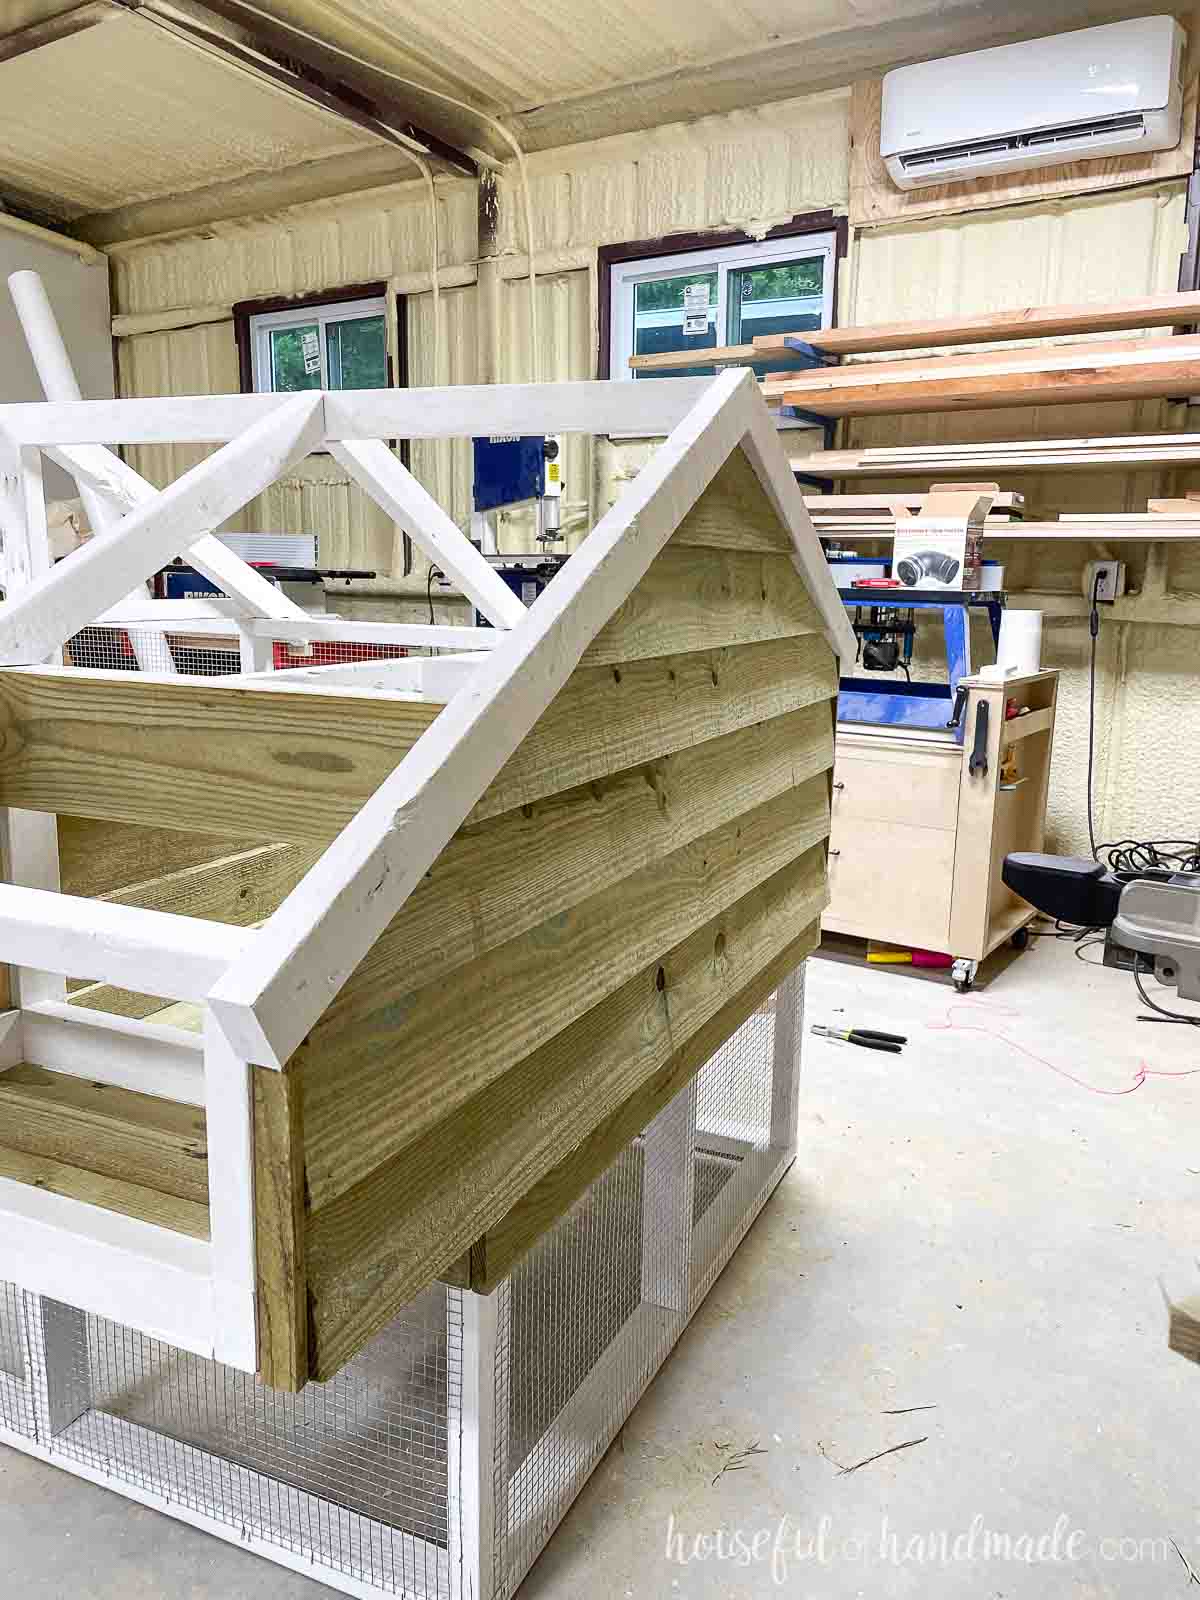
The add siding to the back of the coop.
The bottom piece will be notched out so that the bottom of the siding is flush with the bottom of the nesting box on the one end. On the other end it should be flush with the bottom of the coop floor joists.
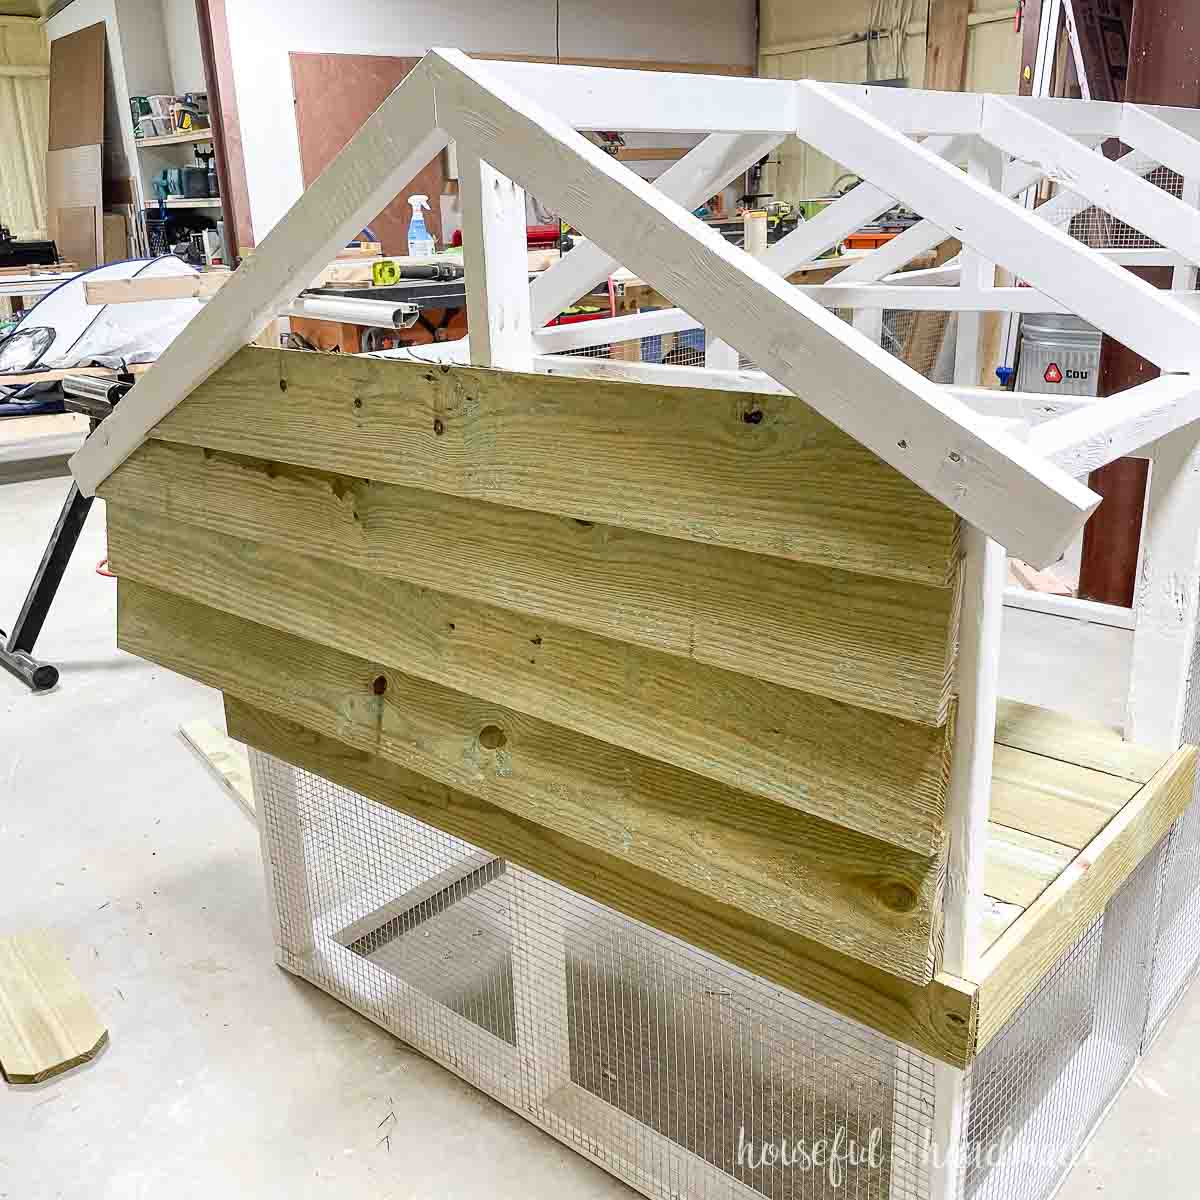
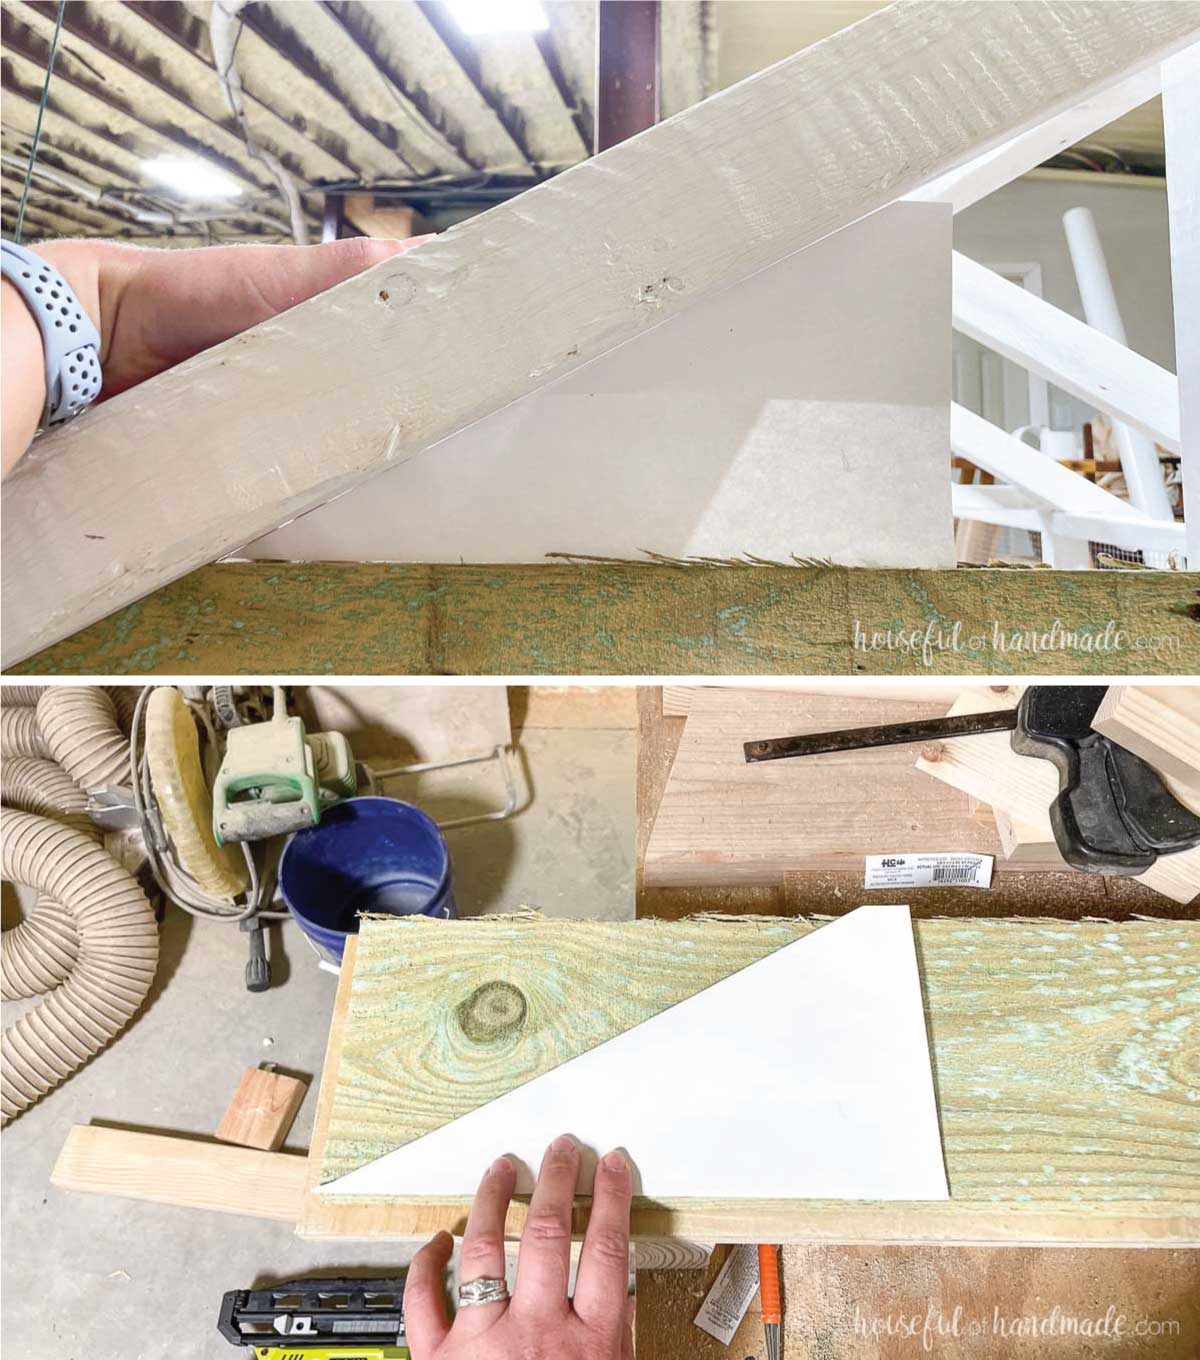
The upper pieces will need to be cut to fit inside the roof rafters. I used a piece of paper to make a template for each side. Then transferred that to my siding board and cut it with a jigsaw.
Secure the siding with nails or screws into all the upright boards.
Then finish off both sides of the siding with a trim piece.
You can cut the angle on the top to get close to the roof, or leave it flat.
Cut a piece of fence picket to slightly close off the opening to the nesting box. This will make it cozier for the hens when laying.
Secure to the inside with nails.
Also, now is a good time to finish installing the hardware cloth on the other side and front of the run.
EXPERT TIP: To prevent predators from digging under your coop, add a hardware cloth skirt around the perimeter. Staple an 18” wide piece of hardware cloth to the bottom of the run on the outside of the coop once it is in place. Cover with dirt, gravel or mulch.
STEP 5- Add doors
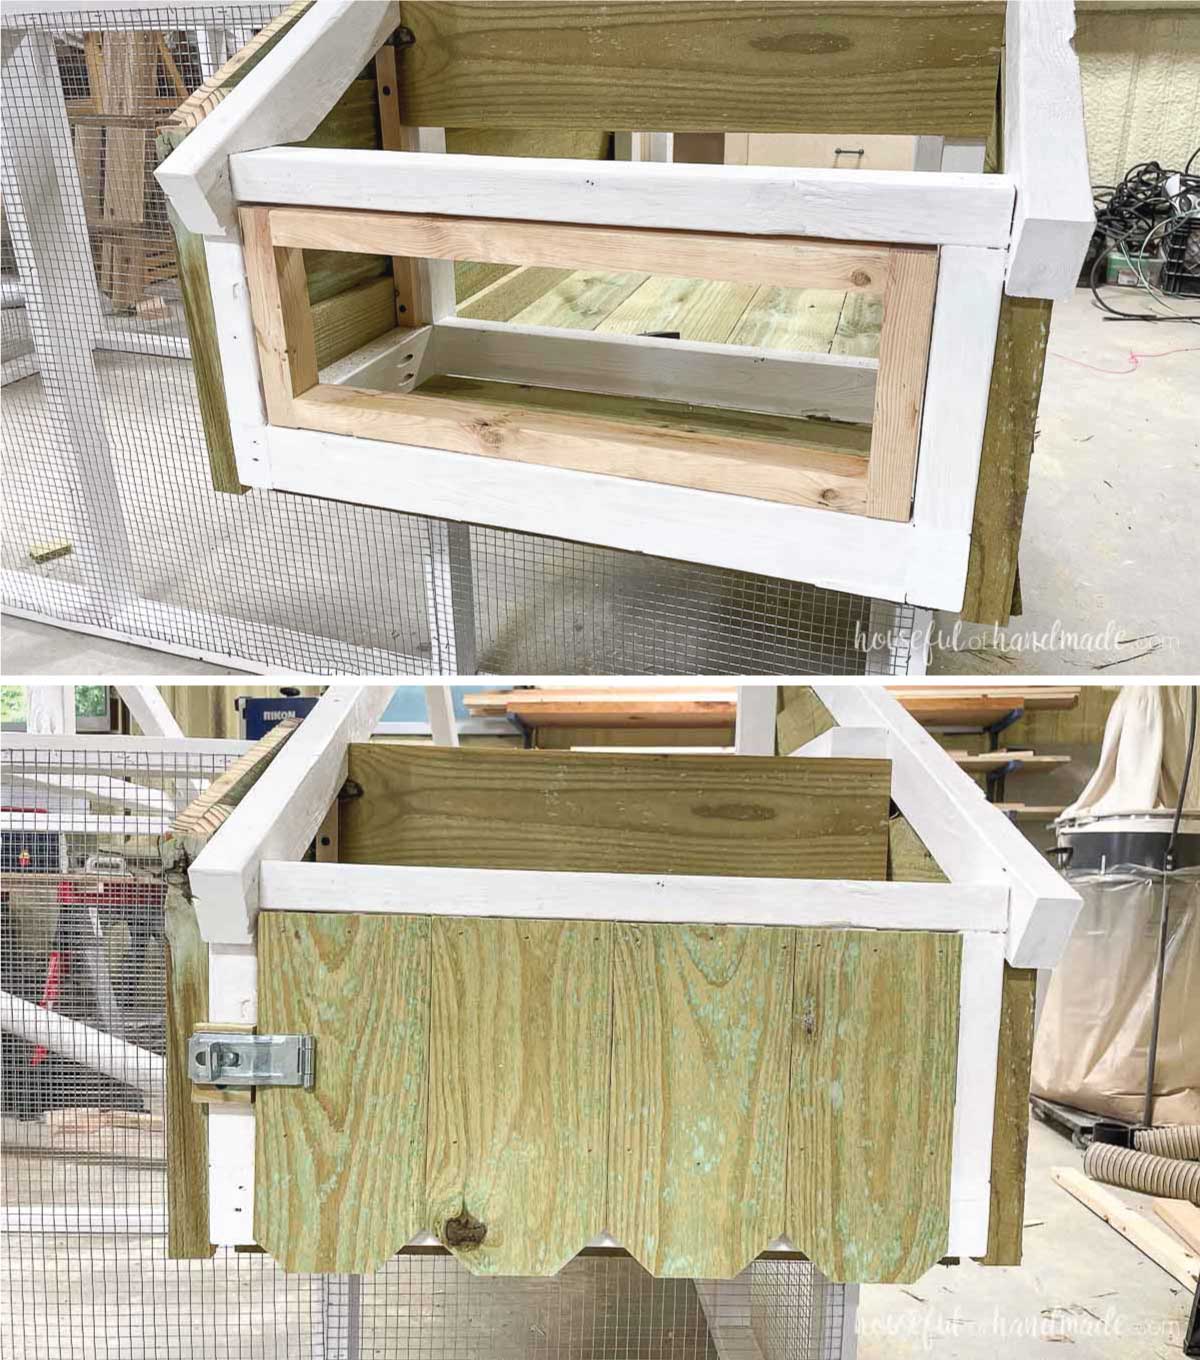
Attach the nesting box door sides between the top/bottom boards to create a rectangle.
Secure with wood glue and nails or wood screws through the sides.
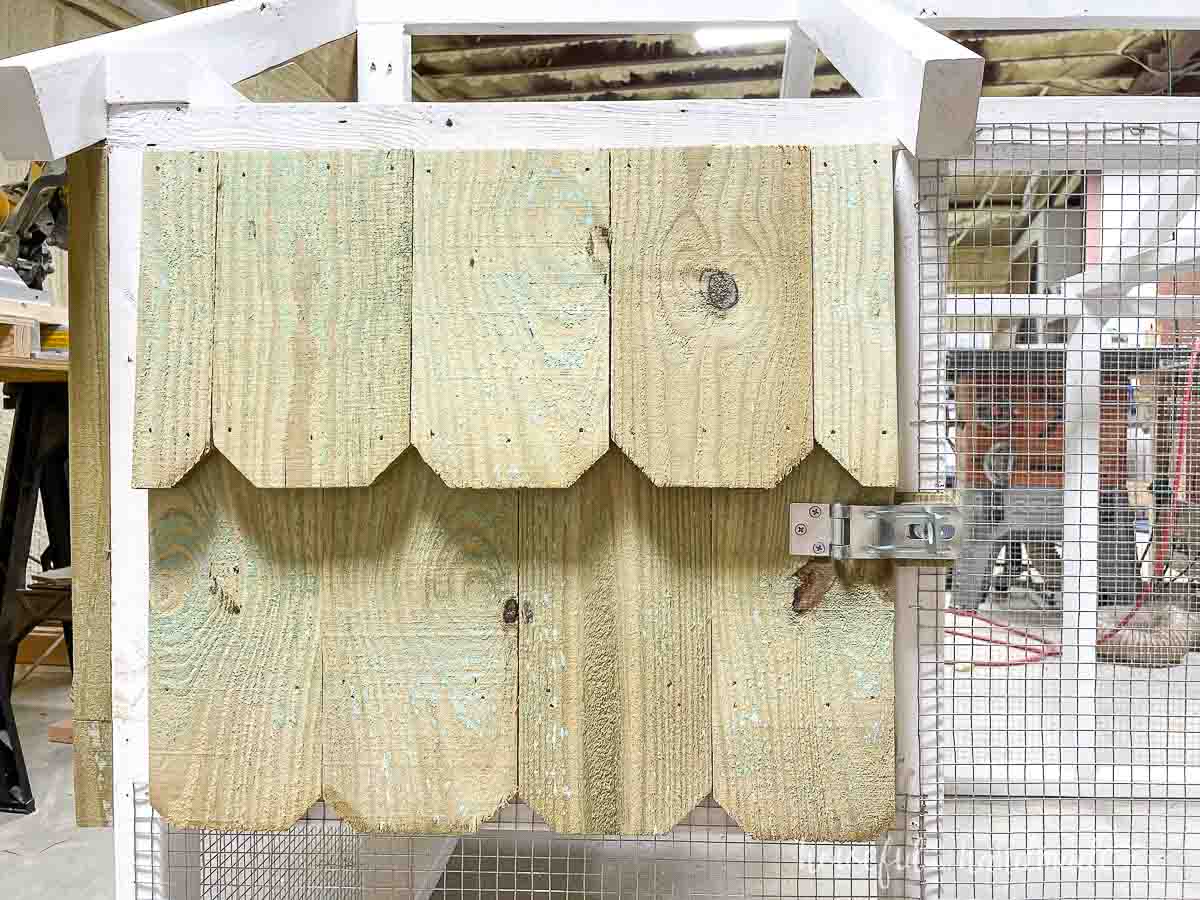
Cut 11” pieces off the dog-eared end of the fence pickets and attach to the door frame with nails. The outer fence pickets will also need to be cut narrower to fit.
Overhang the sides about 1/8” longer on the sides to cover the gap in the door opening and help prevent drafts in the coop area.
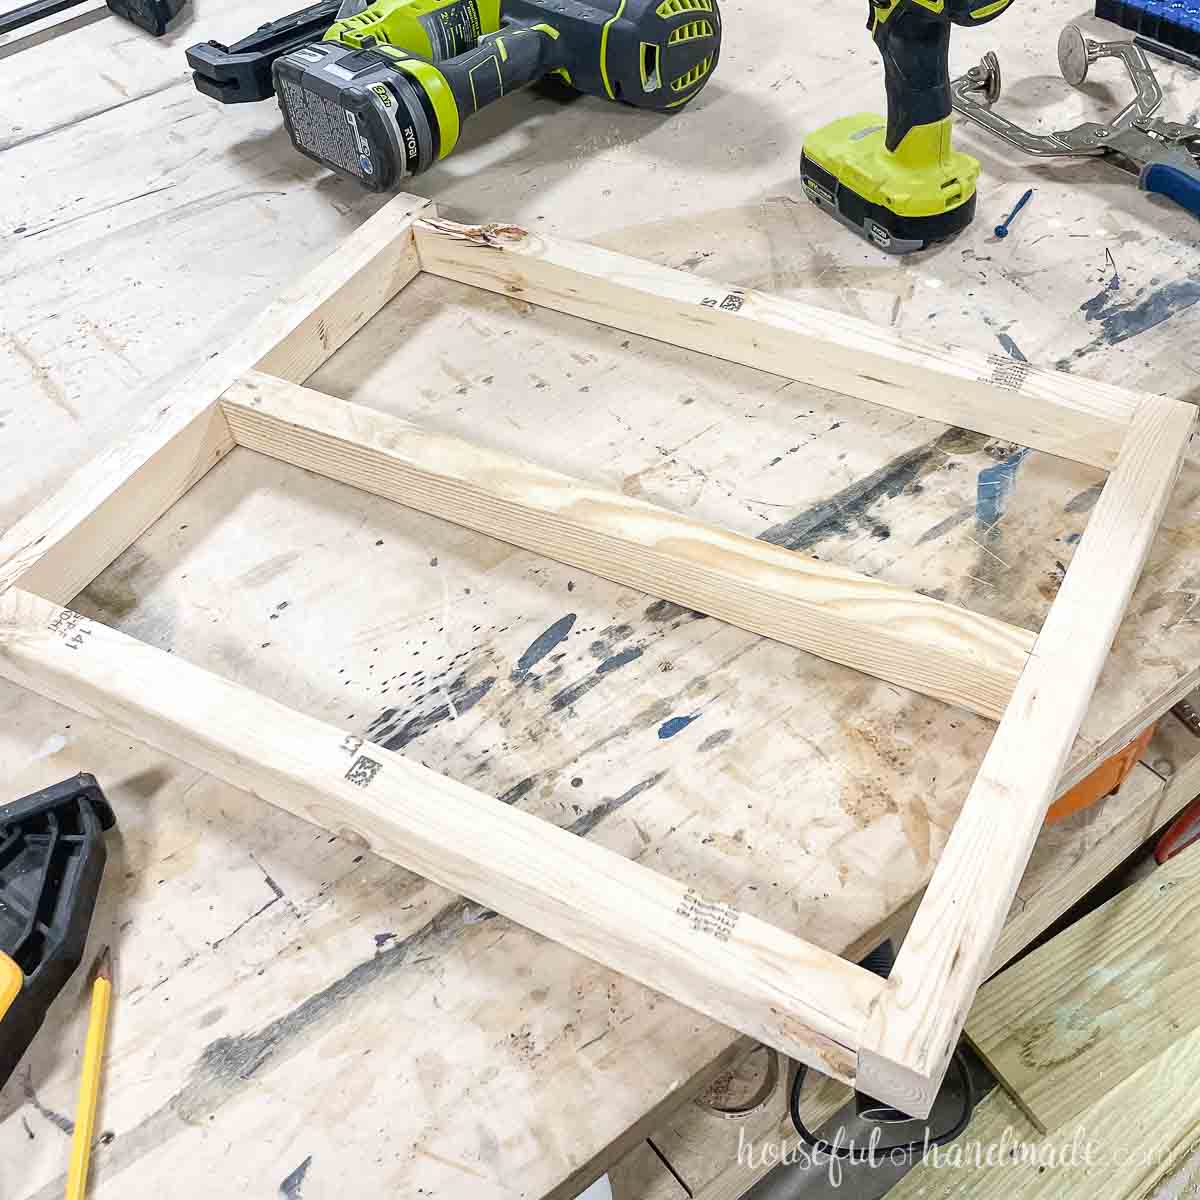
Assemble the coop door by attaching the three top/bottom boards in between the sides according to the diagram below.
Secure with wood glue and nails or wood screws through the sides.
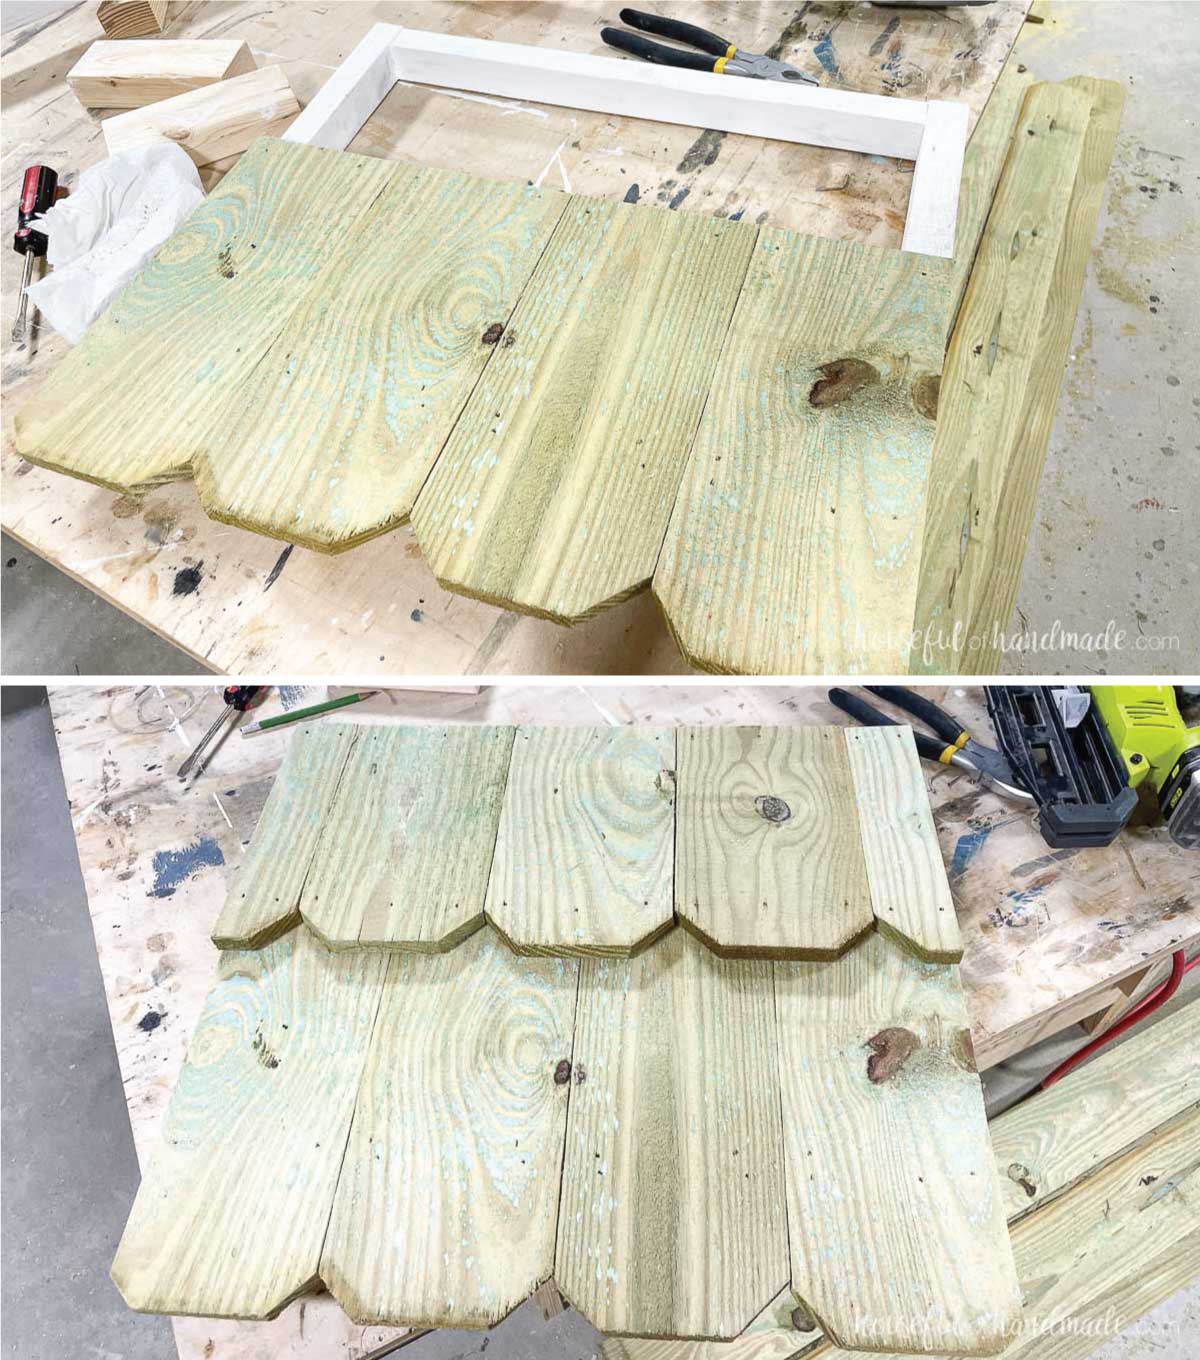
Cut pieces off the dog-eared end of the fence pickets and attach to the lower part of the door frame with nails. Again, the outer fence pickets will also need to be ripped narrower to fit.
Then cut more dog-eared pieces to cover the top of the door. Center 3 full width pieces, so they stagger the first line. Cut the outer pieces to fit.
Attach with finish nails.
Cut the run door pieces from the 2×2 boards. Attach the run door top/bottom between the sides.
Secure with wood glue and nails or screws.
Paint/stain/seal, then attach hardware cloth to the front of the door with staples.
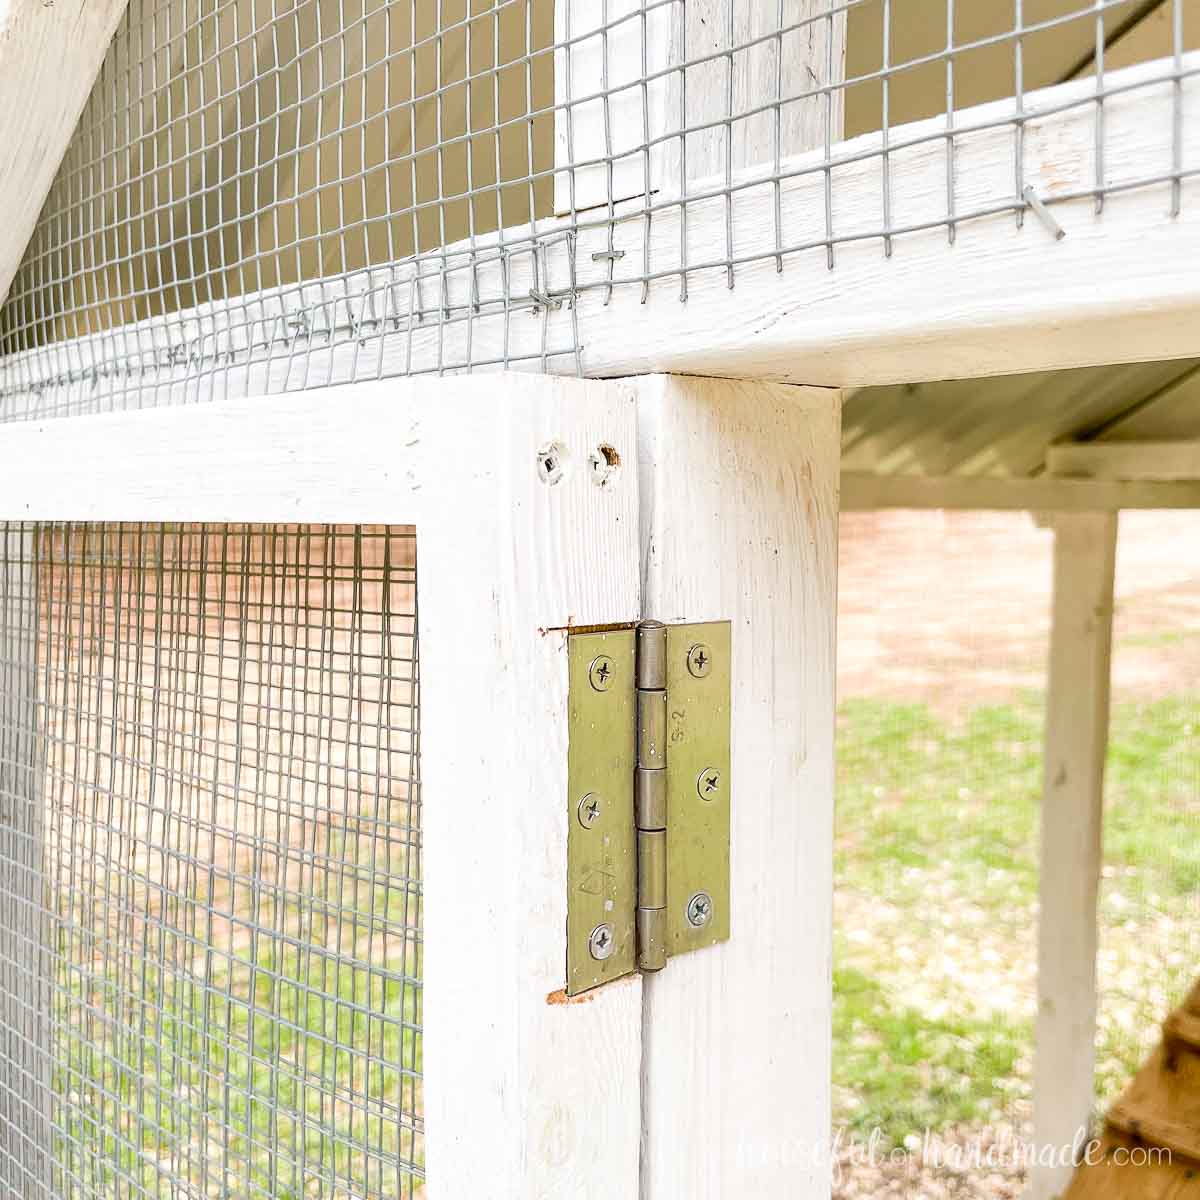
Hang all three doors with hinges.
You may need to recess the hinges into door frames to ensure smooth operating.
Add latches to the doors to keep close and protect chickens from predators.
Use a scrap of fence picket under the latch pieces attached to the coop to bring them level with the siding on the doors as needed.
Cut a piece of fence picket for the ramp. Add 1” wide strips up the ramp every 6” to make it easier for the chickens to climb it.
Line the ramp up and mark where it lines up with the run side board. Cut a scrap of wood attach it to the side board with pocket holes to support the bottom of the ramp.
Secure the ramp to the coop floor and support piece with wood screws.

STEP 6- Attach the roof
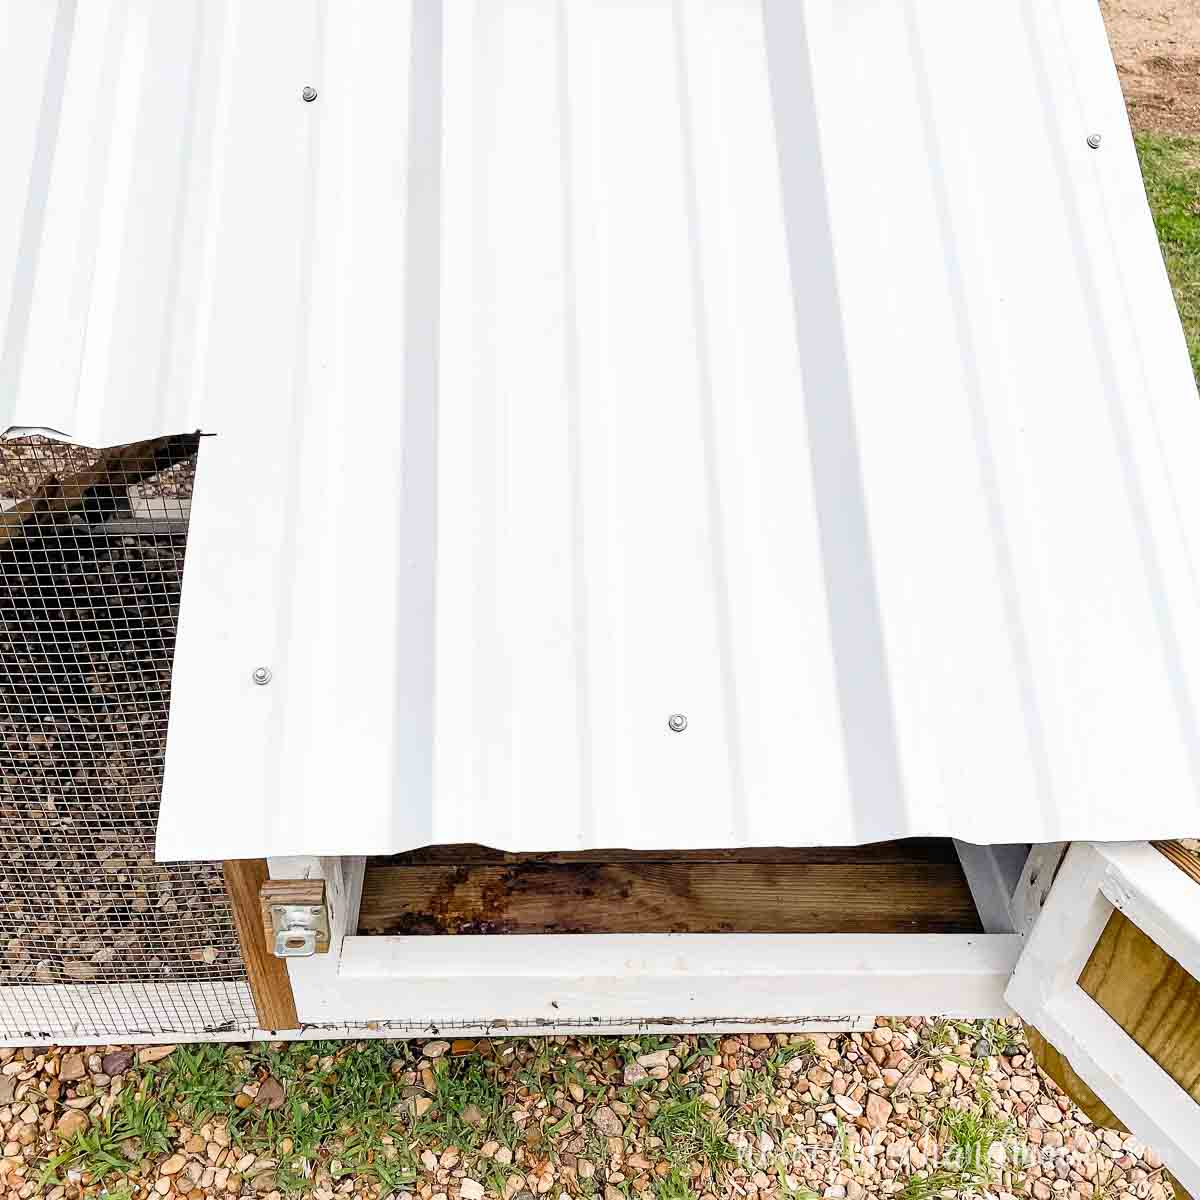
The long roof panels are for covering the roof over the nesting box. Lay the panel so it is flush on the outside with the roof ridge and hangs over the bottom 1/2”.
Mark where it needs to be cut to cover the siding on the inside of the nesting box.
Notch out the panel so it is 30” long on the short side and covers the nesting box side.
You can cut the metal panel with a circular saw or angle grinder.
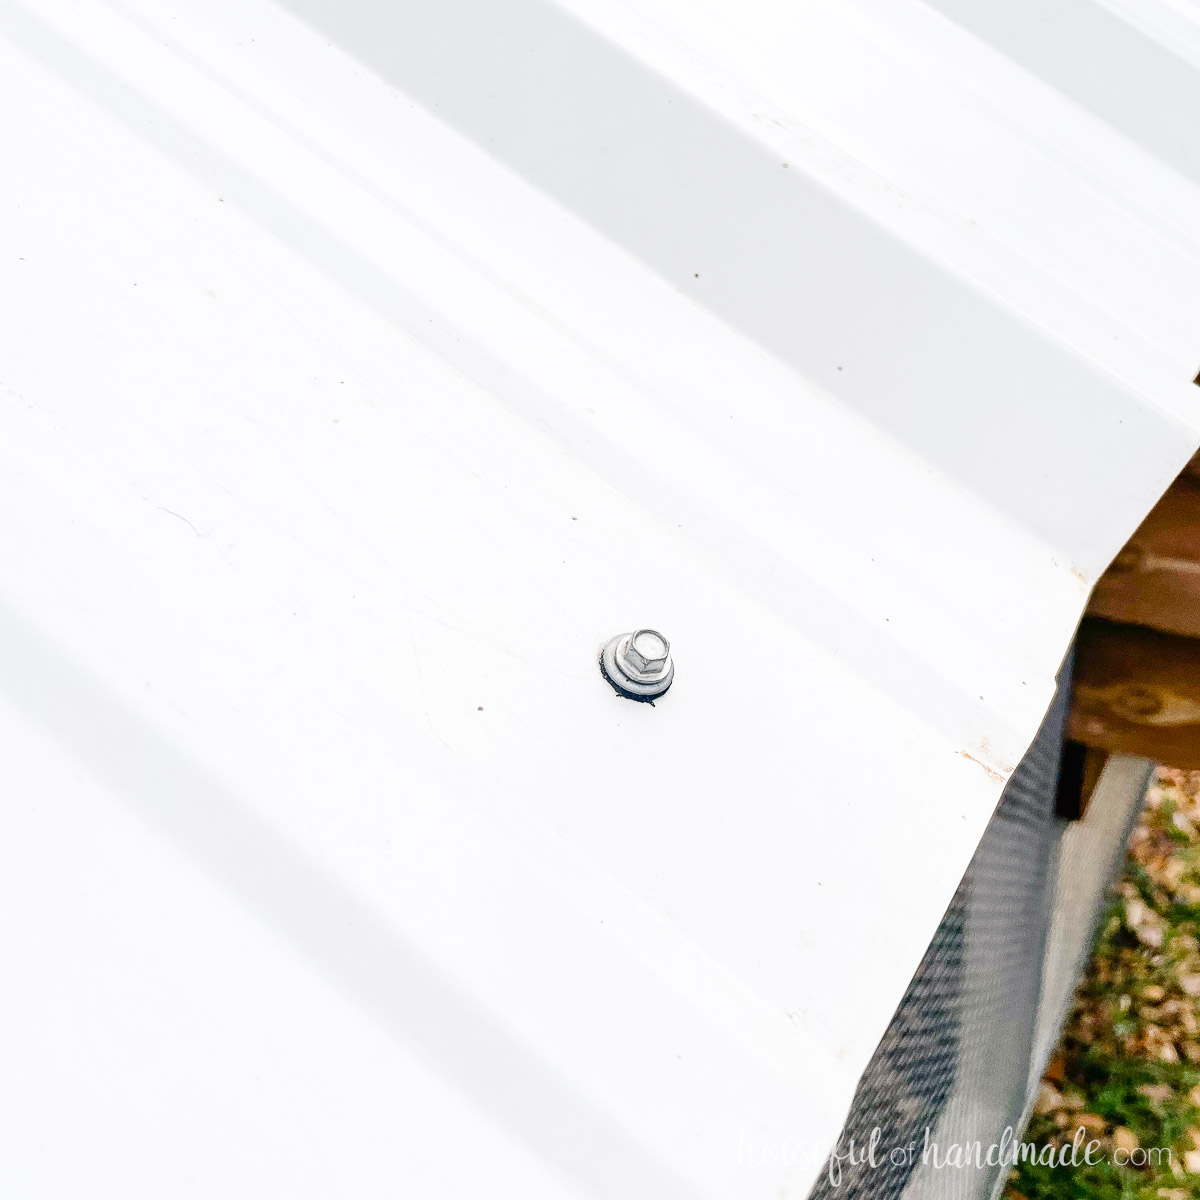
Attach the panels with 1 1/2” roofing screws into the roof ridges. Make sure to use a screw where the panels overlap.
But don’t add one toward the top yet (you will secure it when you add the ridge cap).
Then attach the remaining short roof panels. They need to overlap the panel next to them and overhang the bottom 1/2”.
The panels on the edge should be flush with the edge of the roof ridges.
Secure with 1 1/2” roof screws into the roof ridges toward the bottom and in the center.
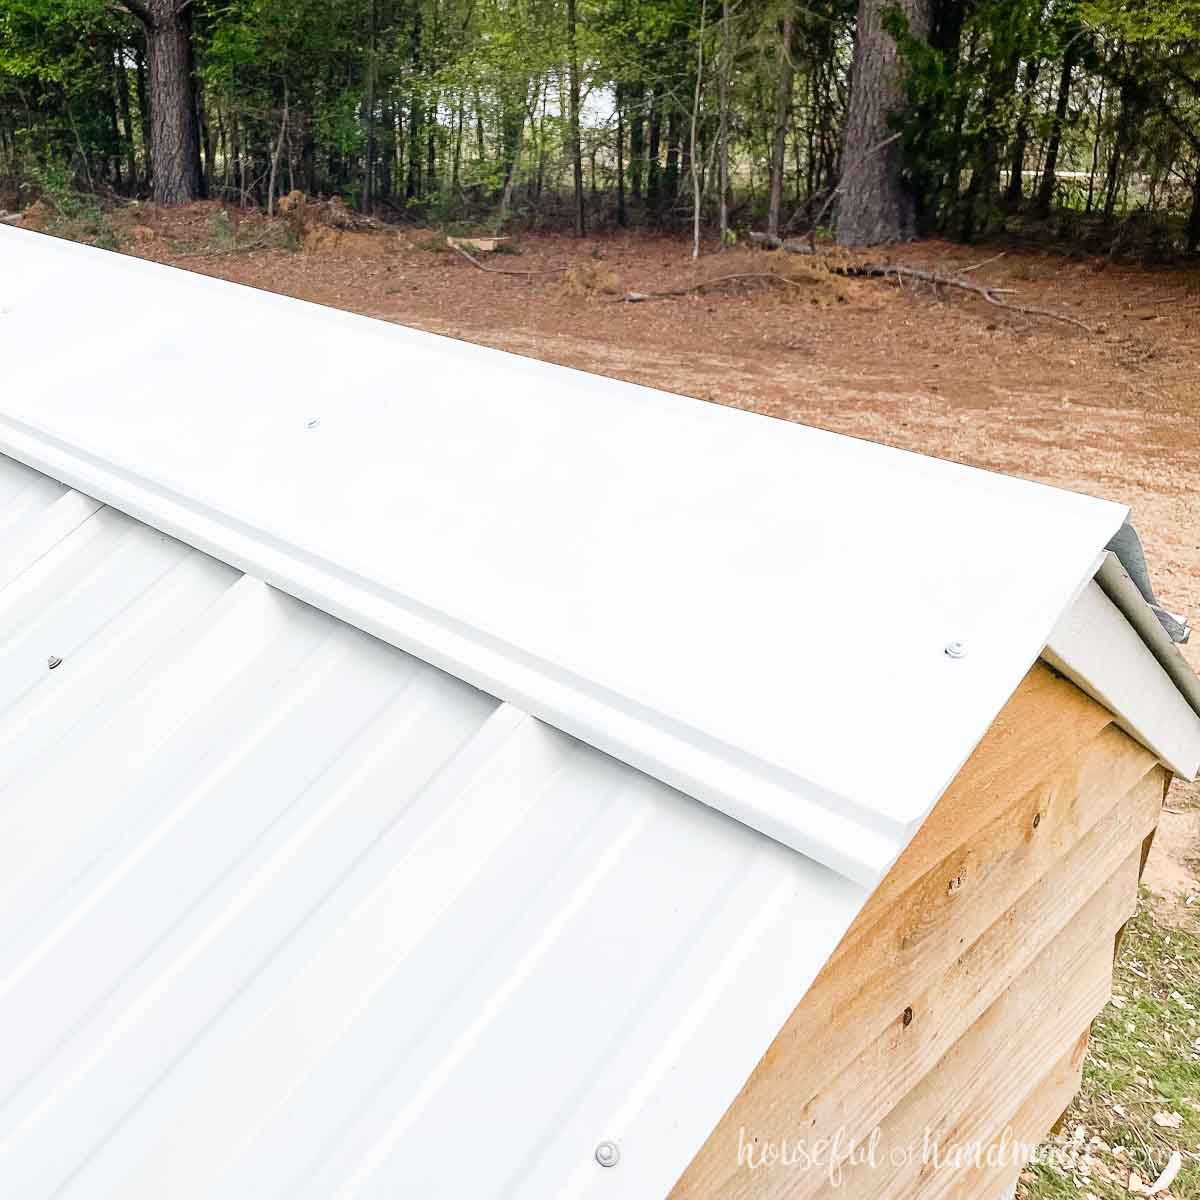
Place the roof ridge cap centered on top of the roof.
Secure to cover the space with 2 1/2” roof screws into all the roof rafters.
Be careful not to pull the ridge cap flat, just drive the screw in so that it is flush agains the roof panel, but not squishing it.
You will be going through the roof ridge cap and the panels so it may be easier to drill a pilot hole with a metal drill bit.
You did it! Time to introduce your chickens to their new home.
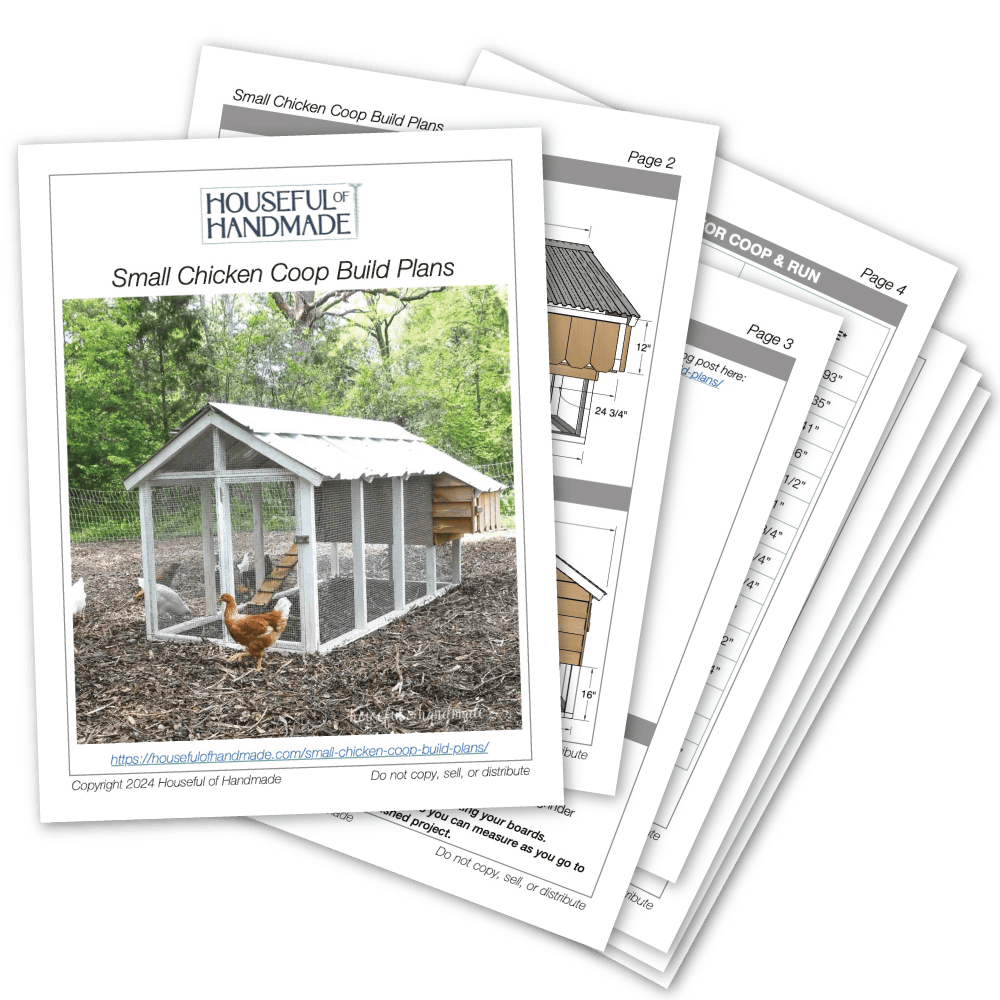
Premium plans include:
- Recommended Tools
- Shopping list
- Easy to read cut list table
- Cut diagrams
- Step-by-step instructions with 3D renderings
- Helpful resources
- BONUS: 3D SketchUp file
How Much Does it Cost to Build?
When tackling a big DIY project, you want to know what the cost will be before getting too deep into it. Here is a breakdown of cost for the coop.
Use this just as a reference. Costs vary by location and can change at any time.
- 2x3 boards at $2.50 each = $50.00
- 2x2 boards at $3.30 each = $10.00
- 1x1 board (use a scrap) = Free
- Fence pickets at $2.00 each = $36.00
- Nails & screws = $30
- Hardware cloth = $67.50
- Metal roof panels at $30 each = $90.00
- Roof ridge cap = $35
- Hinges & latches = $25
- Paint = $30
Total cost to build a chicken coop for 2-4 birds was $373.50.
It was cheaper than buying a small coop at the feed store, but way sturdier! We have moved this coop at least 6 times and it is as sturdy as the day it was built.
Happy building!
