I am dying over how fun this new game is! I guess I should have known because everything is more fun in miniature.
But you will also love how easy to make this mini cornhole game is too. And it is fast so you still have plenty of time to make some for those hard-to-buy for people on your Christmas list.
And not only is it easy to build, but it is made from just a 1×6 board and a couple scraps of 2×2 board. So dig through that scrap pile and get ready to make a super fun game!
This post may contain affiliate links. As an Amazon Associate I earn from qualifying purchases. Click here to read my full disclosure policy.
Easy DIY Gift
This cornhole game would make the perfect DIY gift for just about anyone! And if they love DIY outdoor games, this is a great way to play when the weather is not cooperating.
We have been playing our tabletop cornhole non-stop for the last three days. Not only is it fun for the adults, but my kids love it too!
First thing they do when they get home from school is play a few games with each other and then challenge the parents to a game too. And sadly, they are getting so good I cannot even win anymore!
So stop stressing about what to buy for the person who has everything. Because this game is a fun gift for dads, teens, kids, families, neighbors, teachers and more!
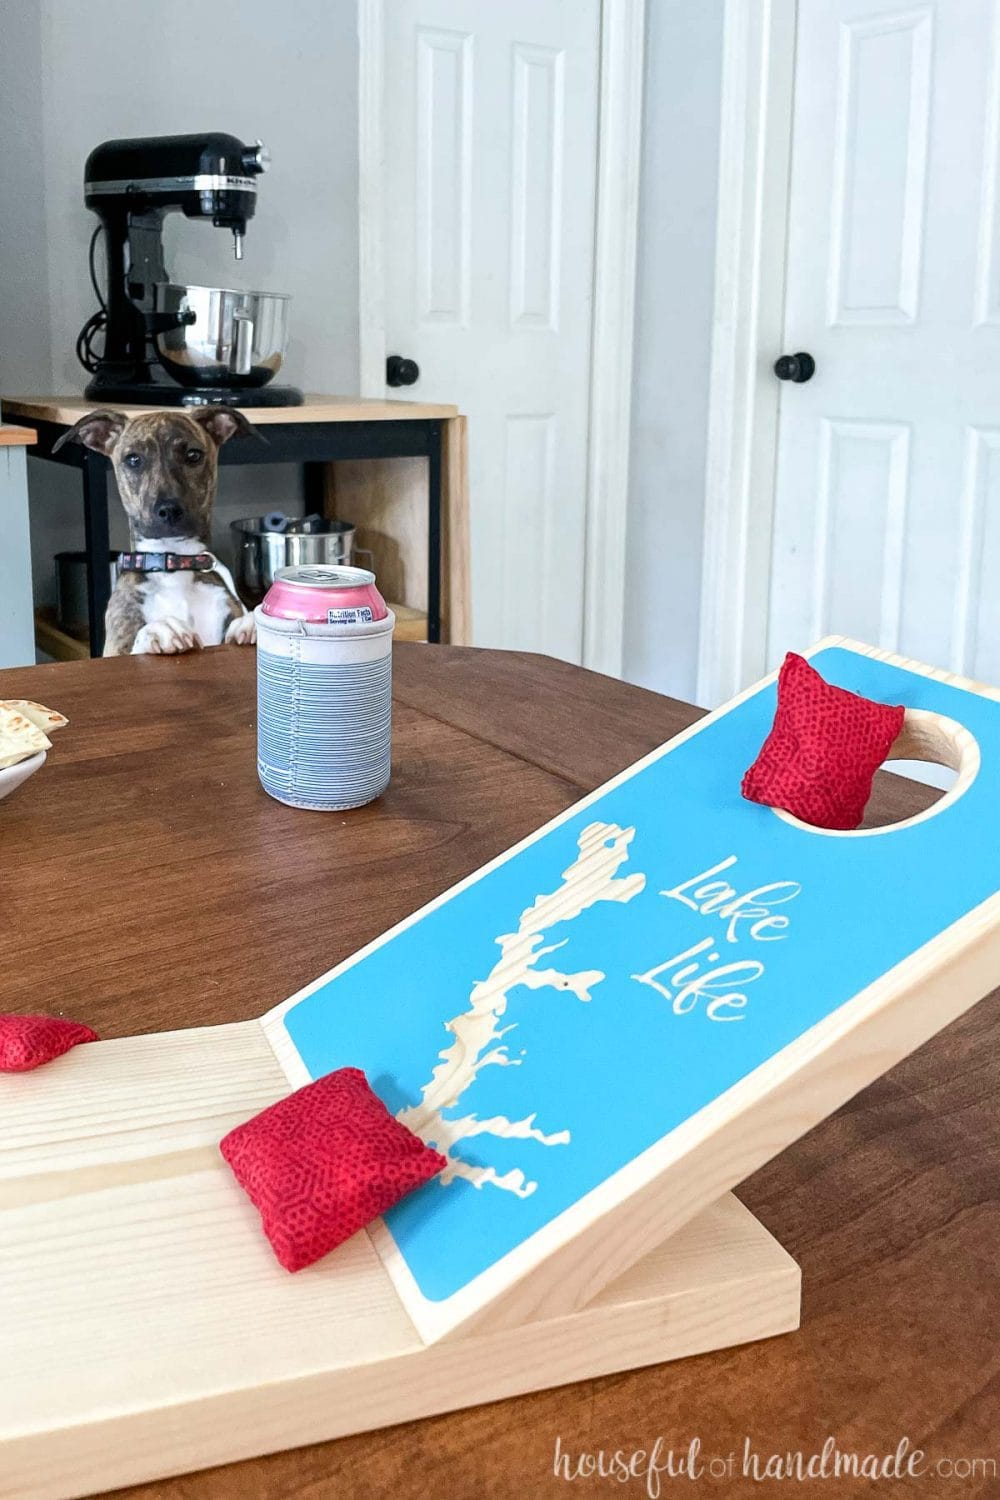
Even our new puppy wants to get in on the fun 😉
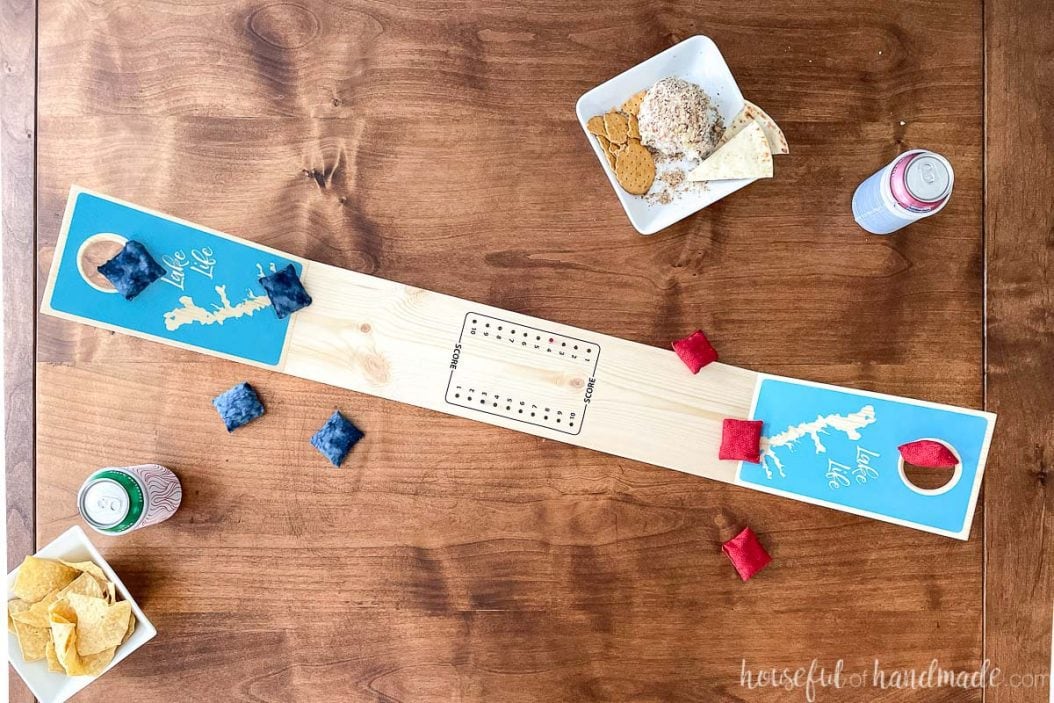
Cornhole Board Decor
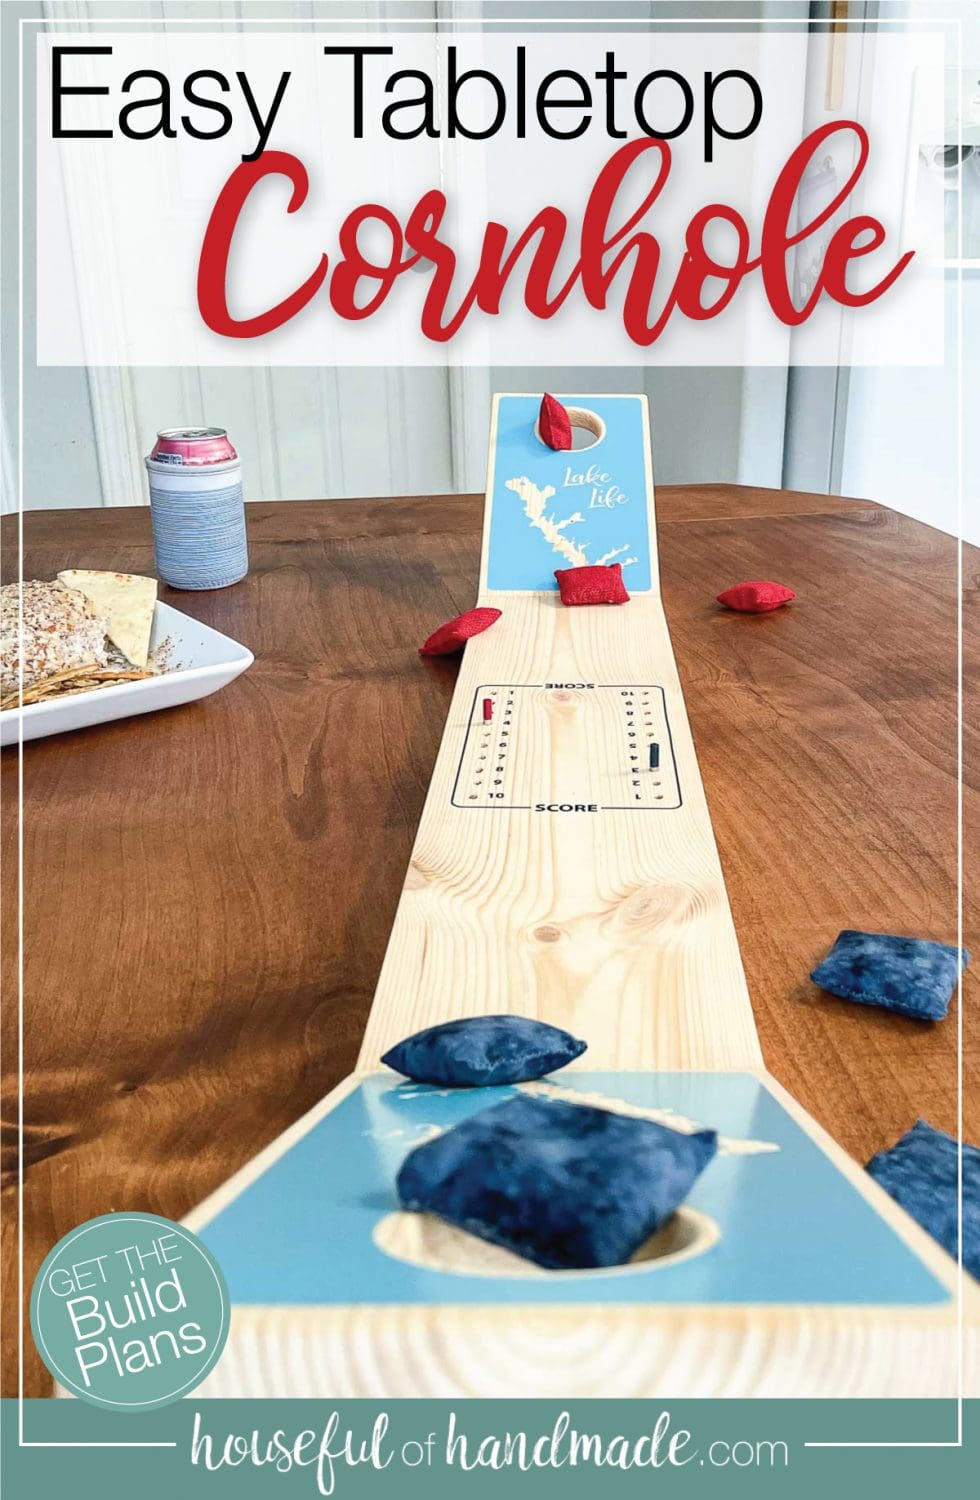
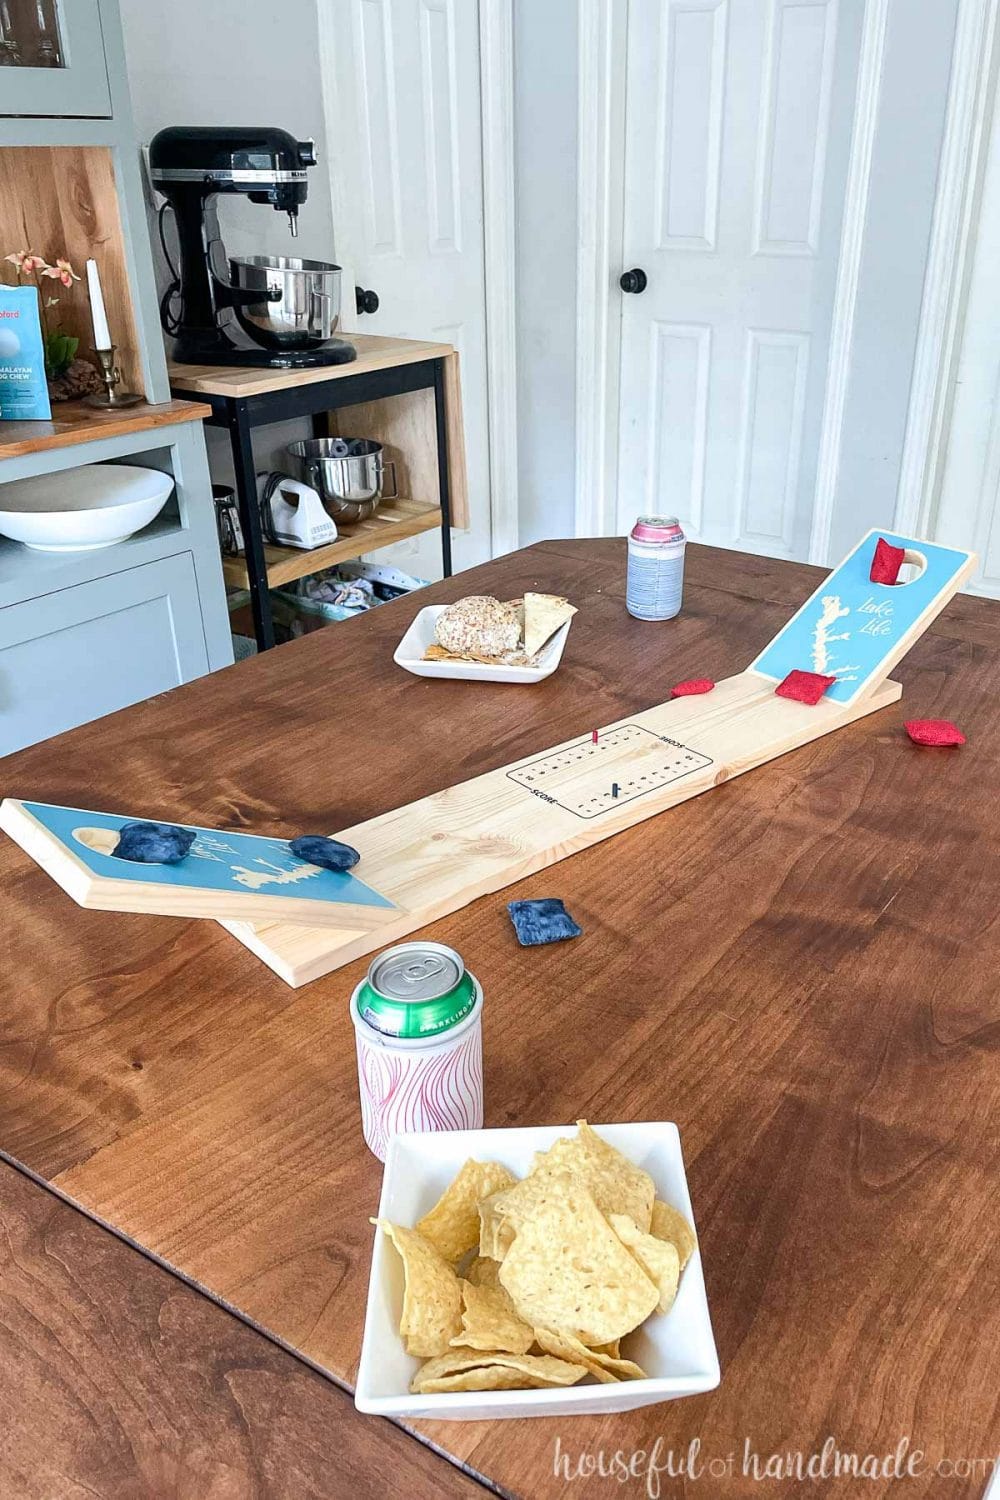
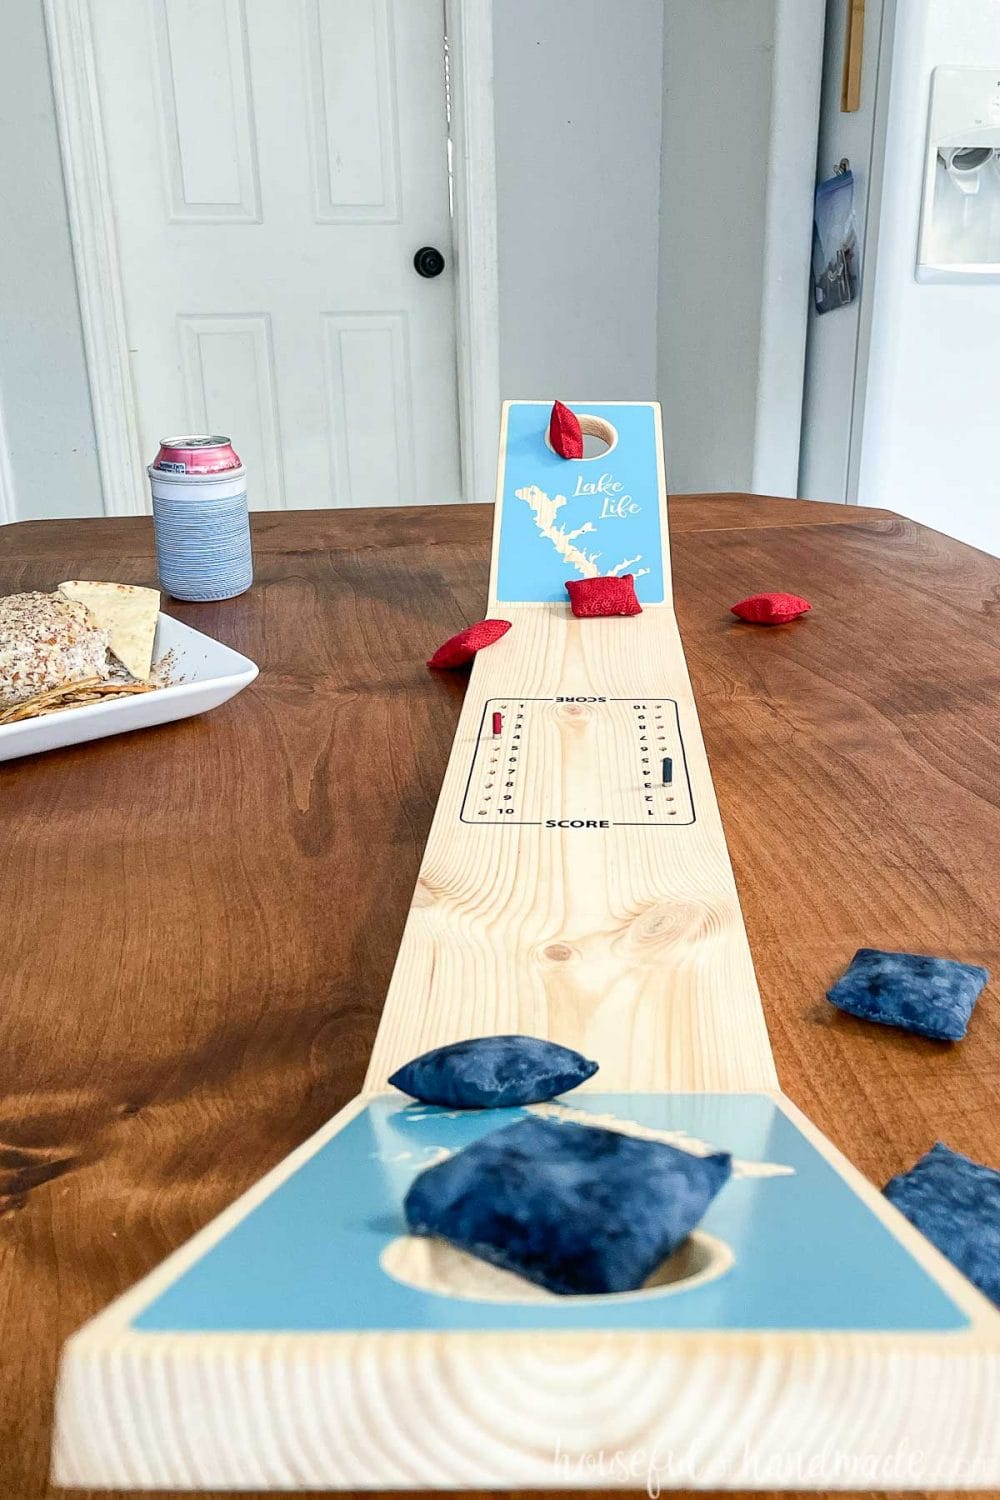
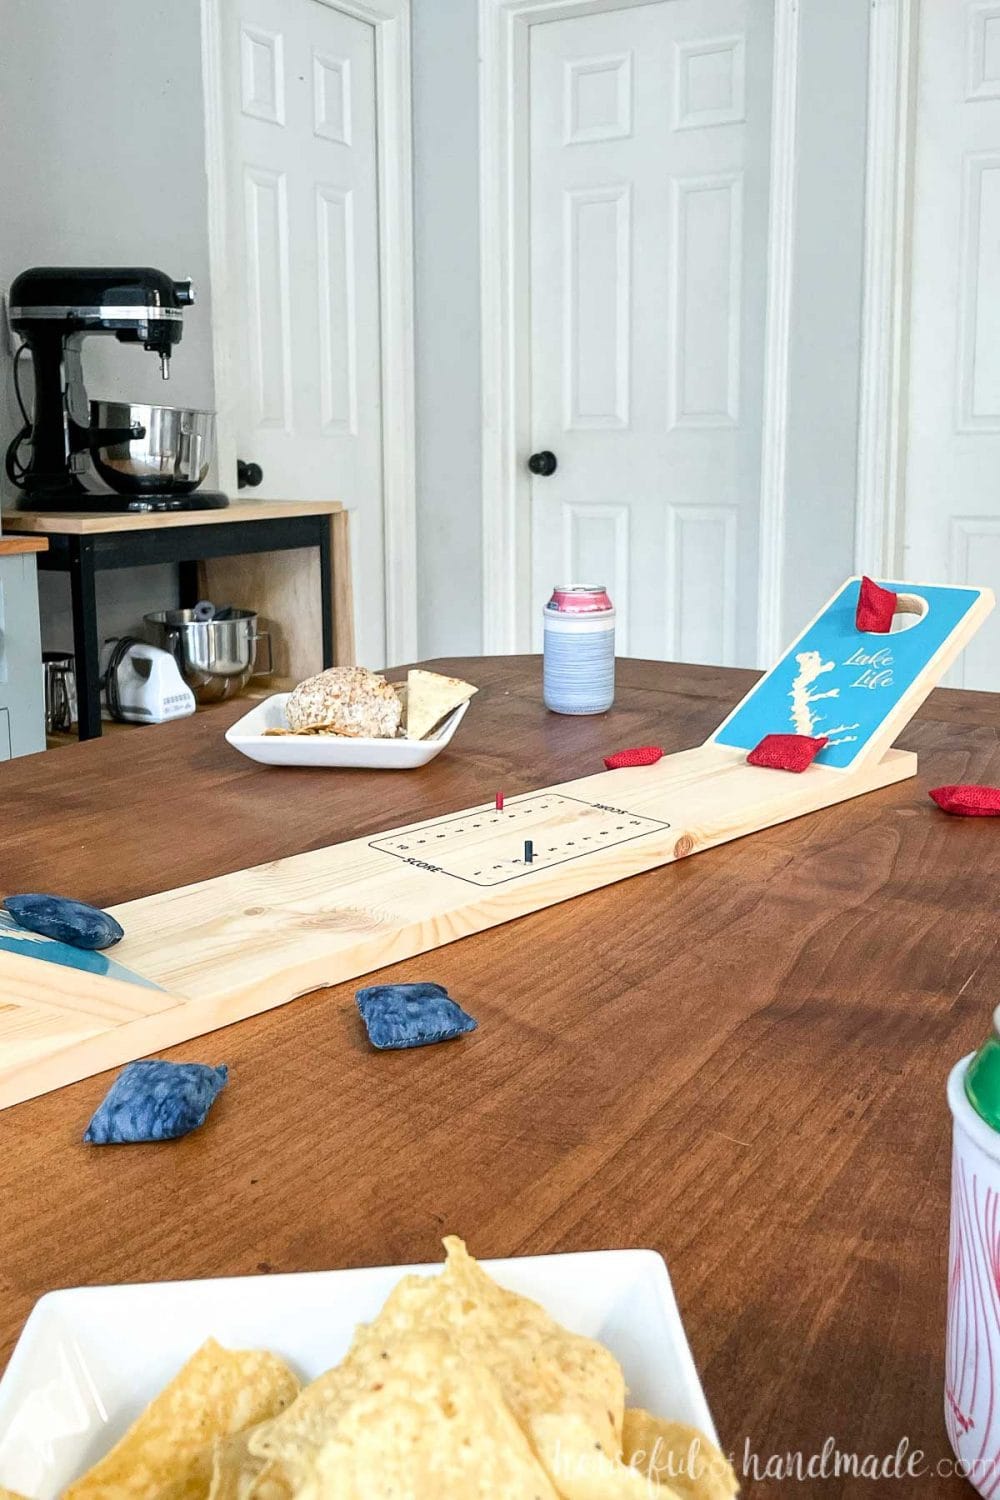
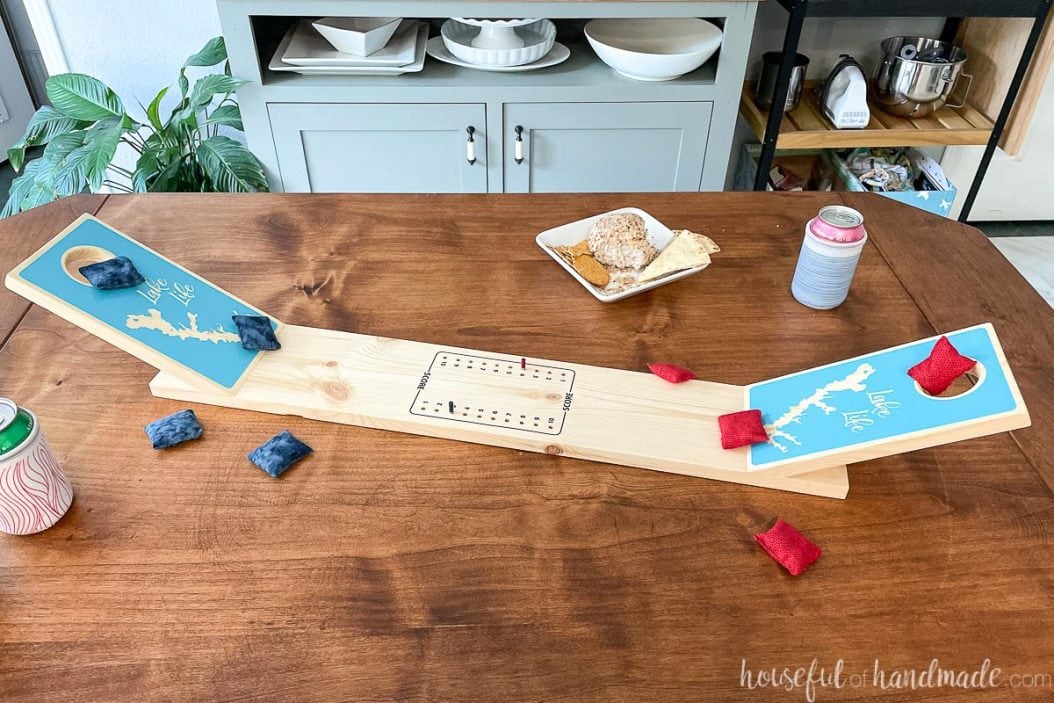
One of the best parts of any cornhole board is the ability to customize the decor. And this table top cornhole is no different!
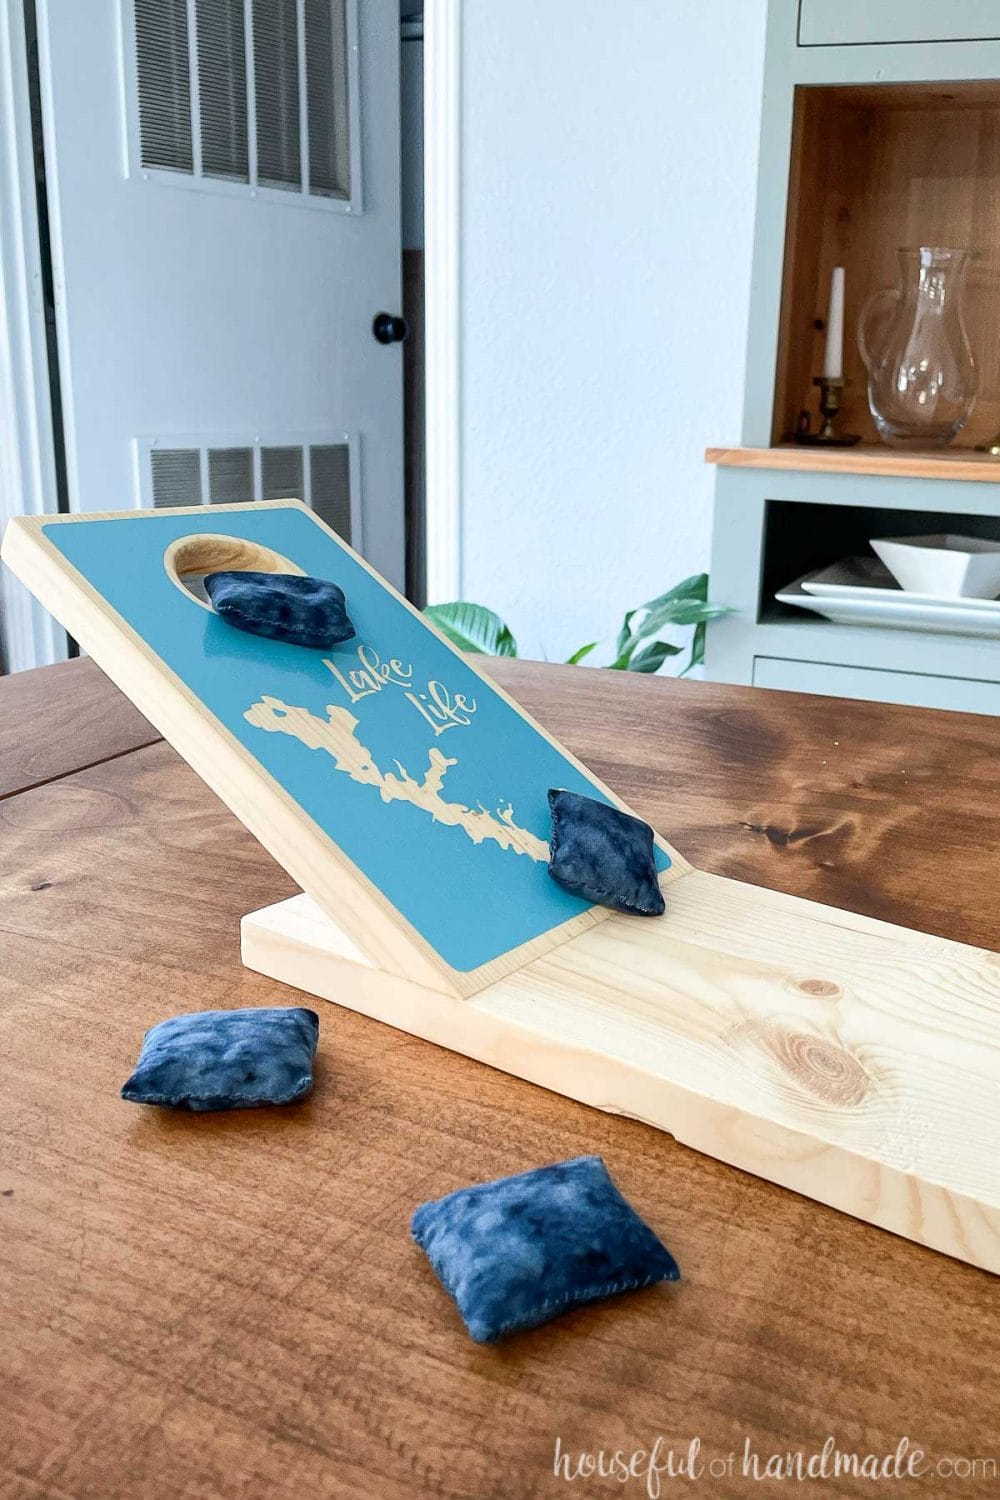
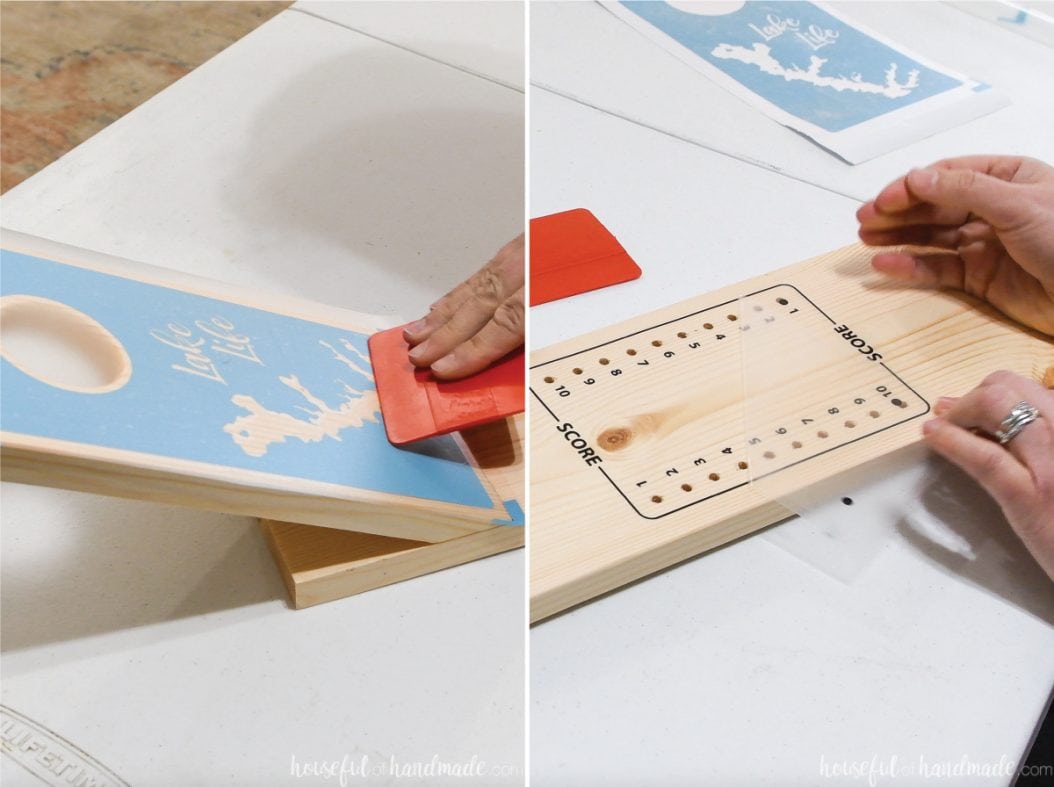
You can add and decoration to the boards you want. I chose to pay tribute to our new life on the lake and added a silhouette of the lake we are now living on.
If you look closely, you can even see the star that indicates where our home is!
I used vinyl and my Silhouette Cameo to decorate my cornhole boards. But you can decorate them however you want. Go simple with classic stripes (use painters tape to get straight lines) or have fun hand painting a design.
Each cornhole board surface is 5 1/2″ x 10″. Use these dimensions when planning your own design.
Integrated Scoreboard
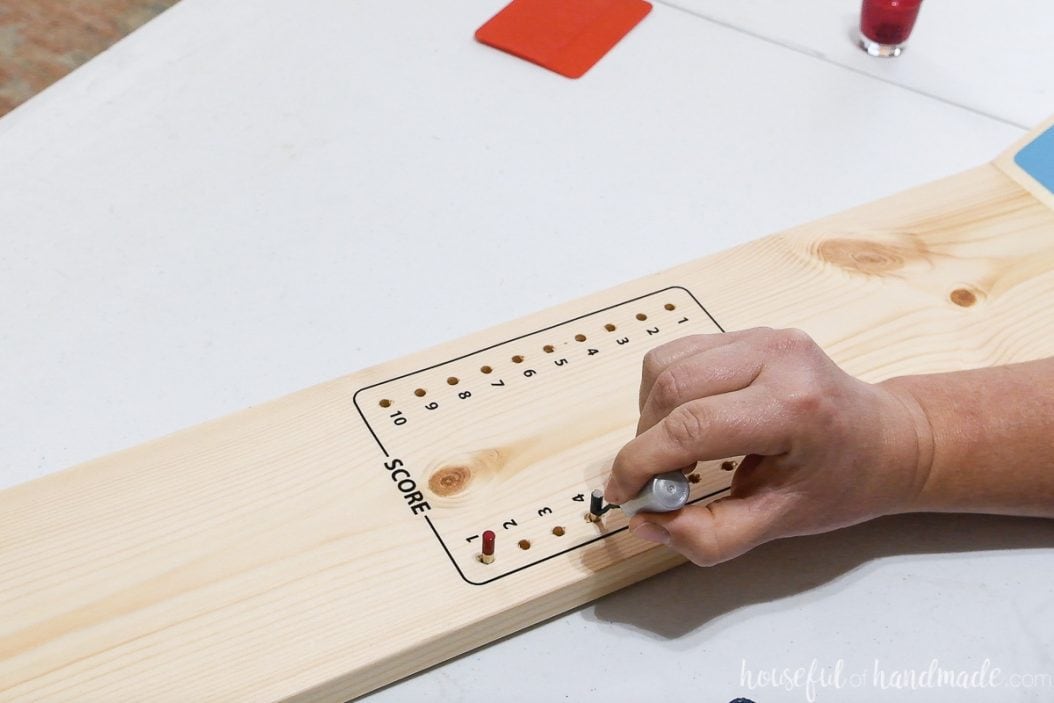
In the center of the tabletop cornhole board, is a scoreboard. And while it looks complicated, it was far from it!
The fancy scoreboard is actually a series of 5mm holes and the scoring pegs are just 5mm straight self pins! I found these longer shelf pins without a center ring at my local Lowes store.
Then I painted the top of the shelf pins with a super fancy lacquer… aka, nail polish! I used a 2 coats of a red and blue nail polish (that I already had on hand) to just add some color to the top of the pins.
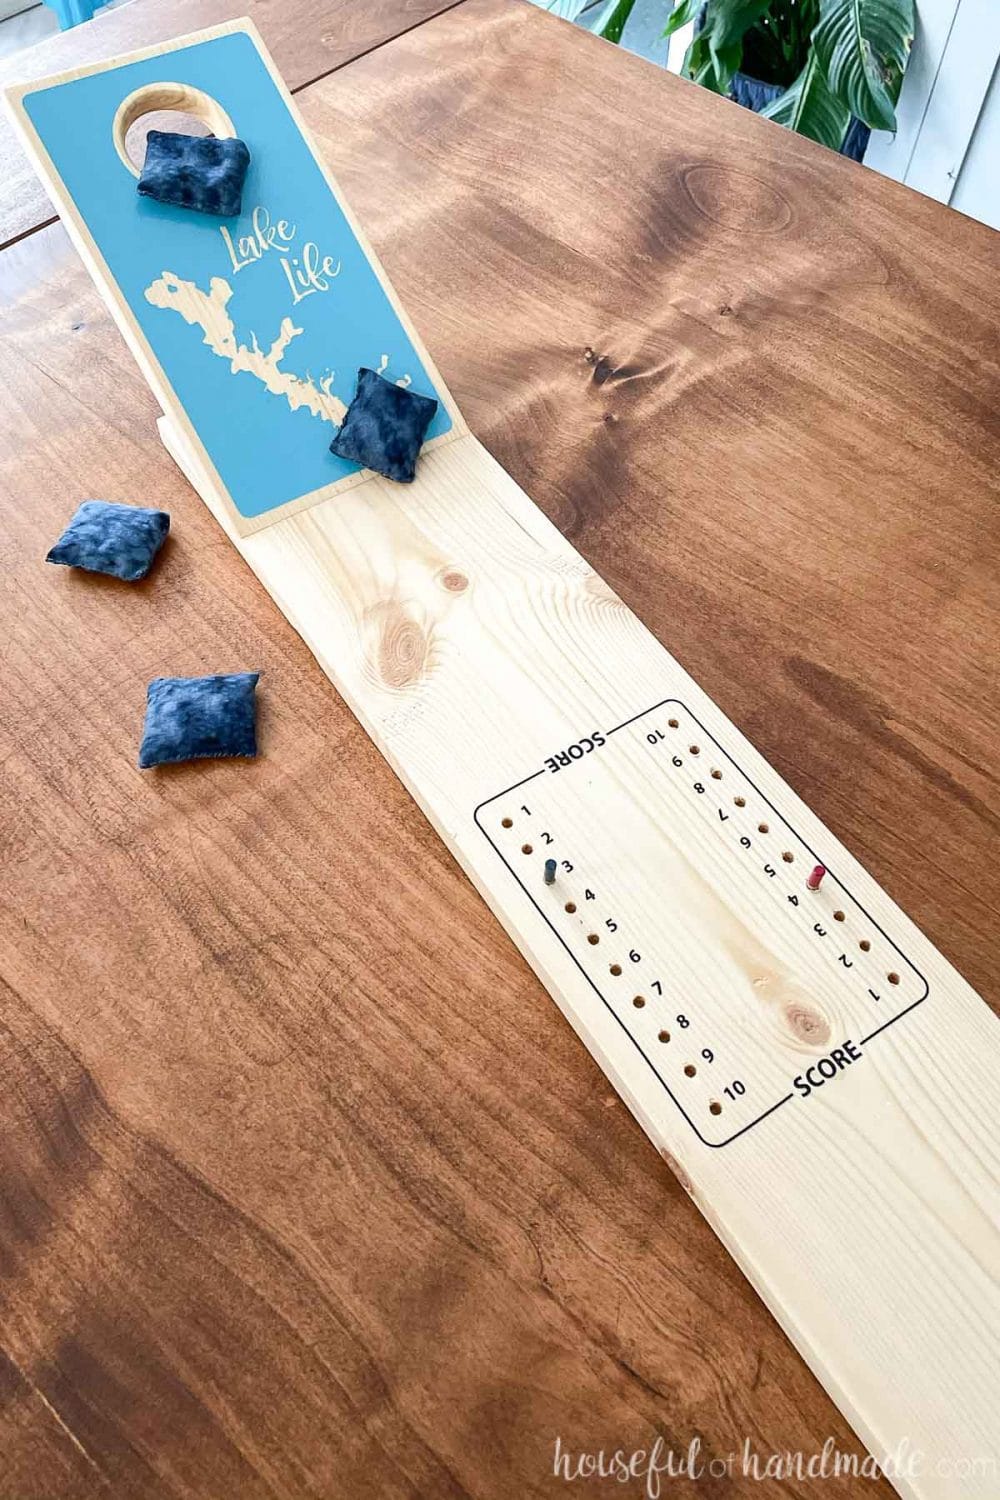
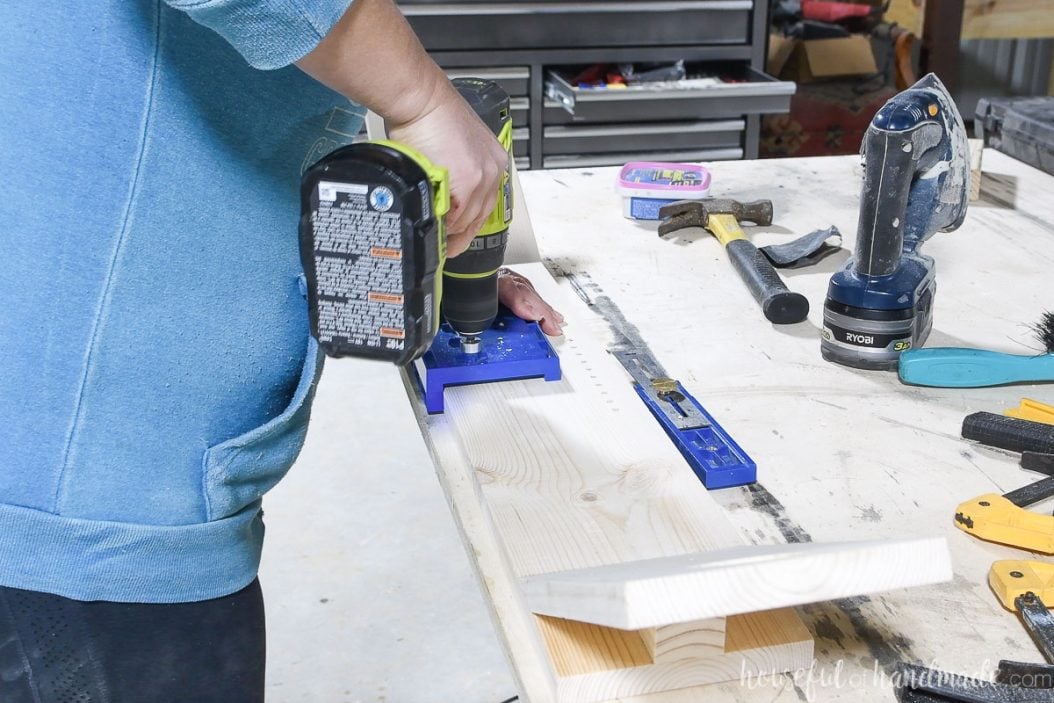
To make drilling the holes easy, I used the Kreg shelf pin jig. The shelf pins are normally 3/4″ apart, so I drilled 1/2 of them, then shifted the jig 3/8″ (half of 3/4″) and drilled the other half.
That made it easy to space out the 10 holes without having to measure a lot. And the shelf pin jig keeps the drill bit straight as it drills and stops it at the same depth everytime. It’s practically foolproof!
And lastly, I added some more vinyl to the score board with numbers 1-10 next to each hole. You can make your scoreboard go as high as you want, but we love the fast paced quick 10 point games.
If you don’t have a way to cut vinyl, use number stickers or hand draw the numbers next to the scoreboard.
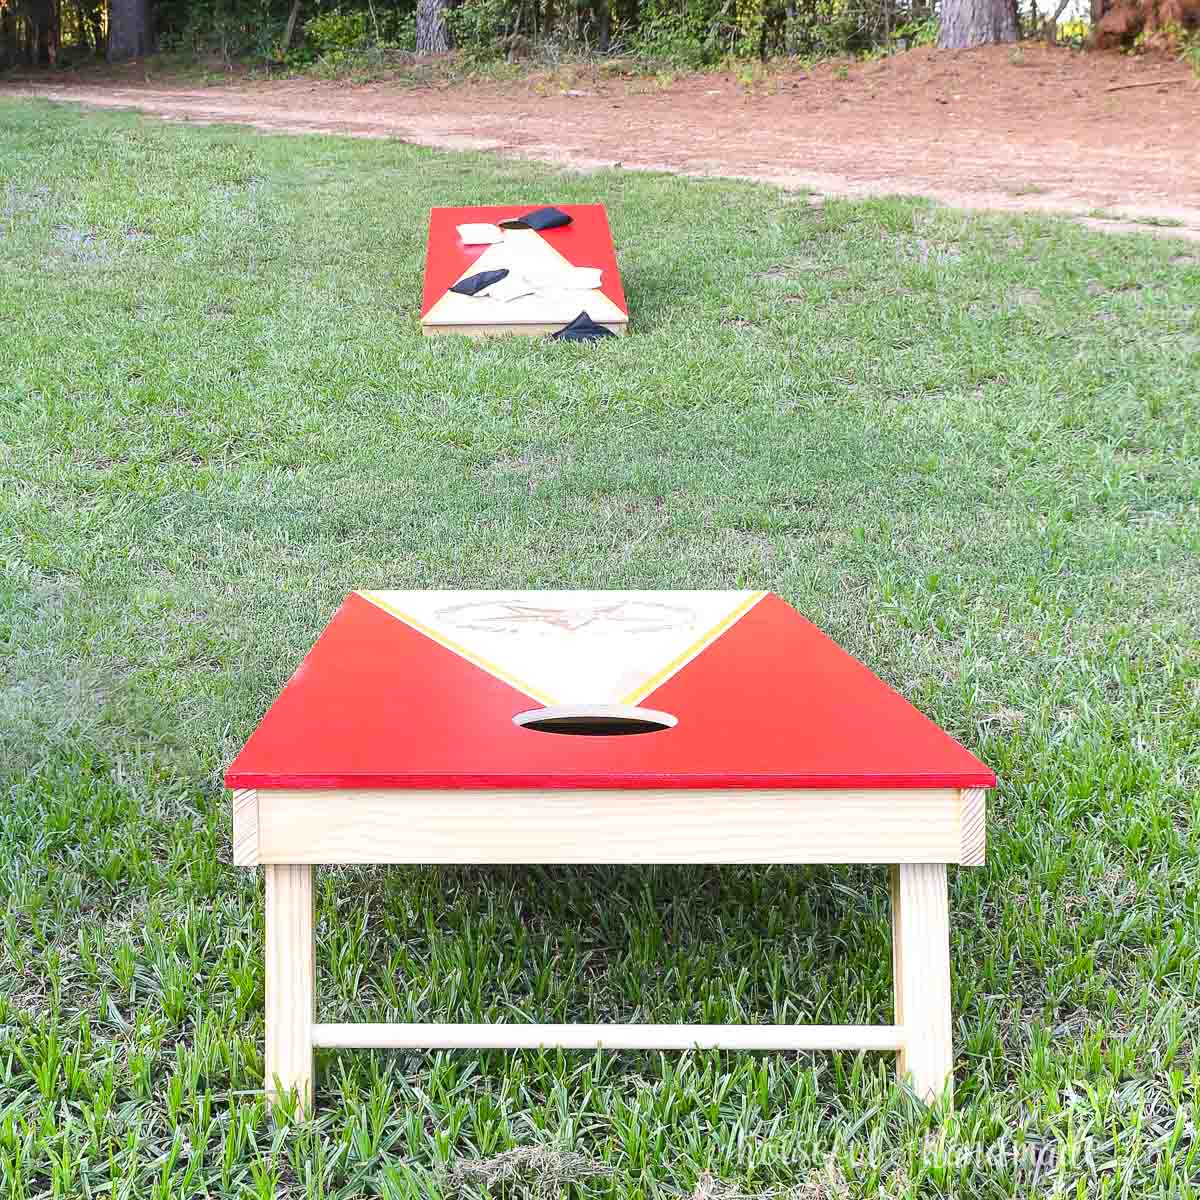
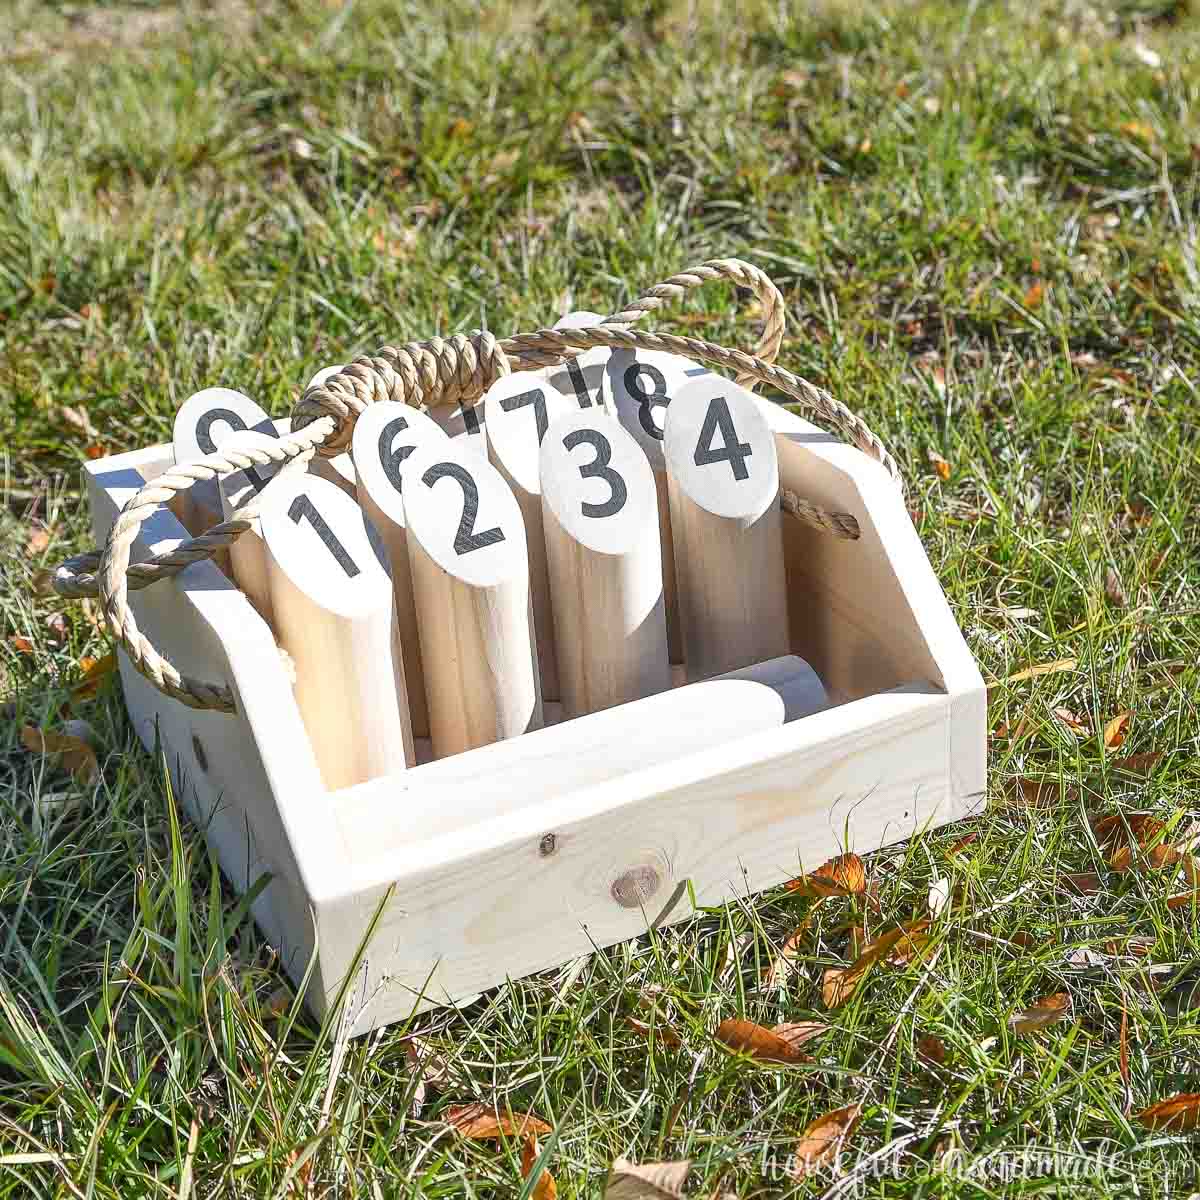
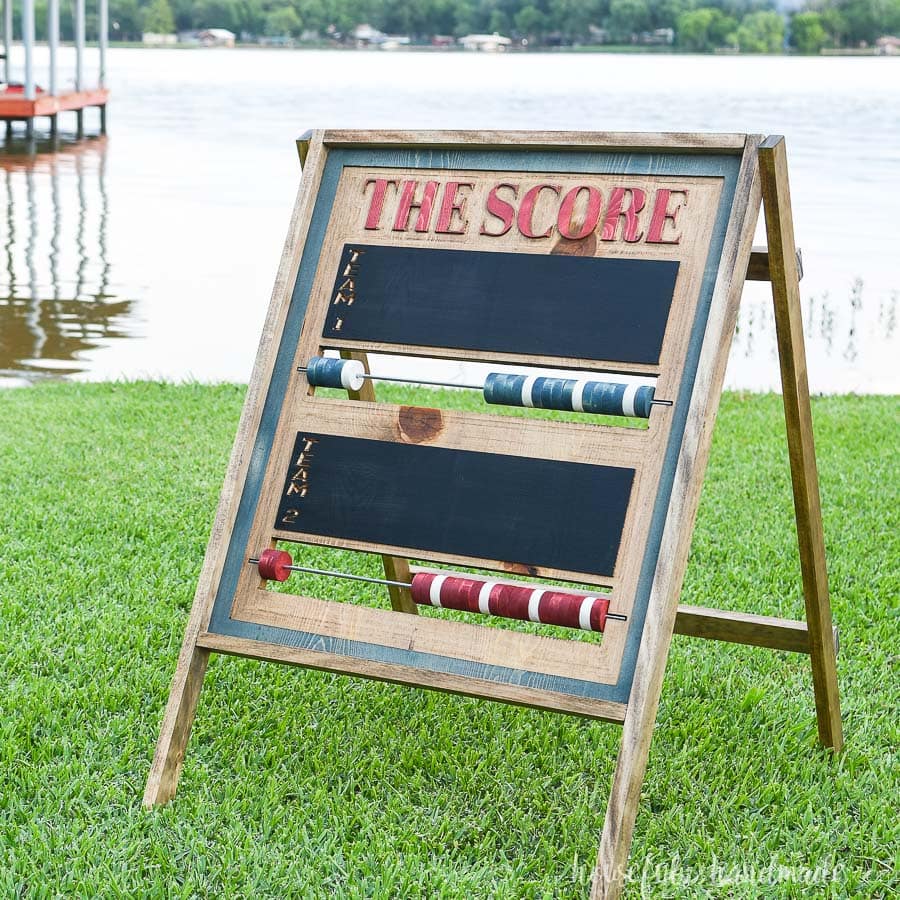
More Games to Build
Make game night more fun with DIY wood games. Check out some of our favorites here.
How to Make a Tabletop Cornhole Board
Tools & Materials
Recommended Tools:
- Miter saw
- Brad nailer
- Drill
- 2″ Forstner drill bit
- Measuring tape
- Sander
- Optional: Trim router
- Optional: Shelf pin jig
- Optional: Silhouette Cameo
Supplies:
- Wood produts
- (1) 1×6 board, 8′ long
- (1) 2×2 board, 7-8″ scrap
- 1 1/4″ brad nails
- Wood glue
- (2) 5mm straight shelf pins
- Vinyl or paint to decorate the board
- Nail polish
- (8) 1 3/4″ bean bags or fabric to make your own
- If making your own bean bags, you will also need beans and a needle and thread.
Cut List
Cut out the pieces according to the easy-to-read table in the PDF plans.
The side pieces are cut with a 60 degree angle on one side.
If your miter saw will not easily cut a 60 degree angle, you can always cut them at the highest angle it will cut.
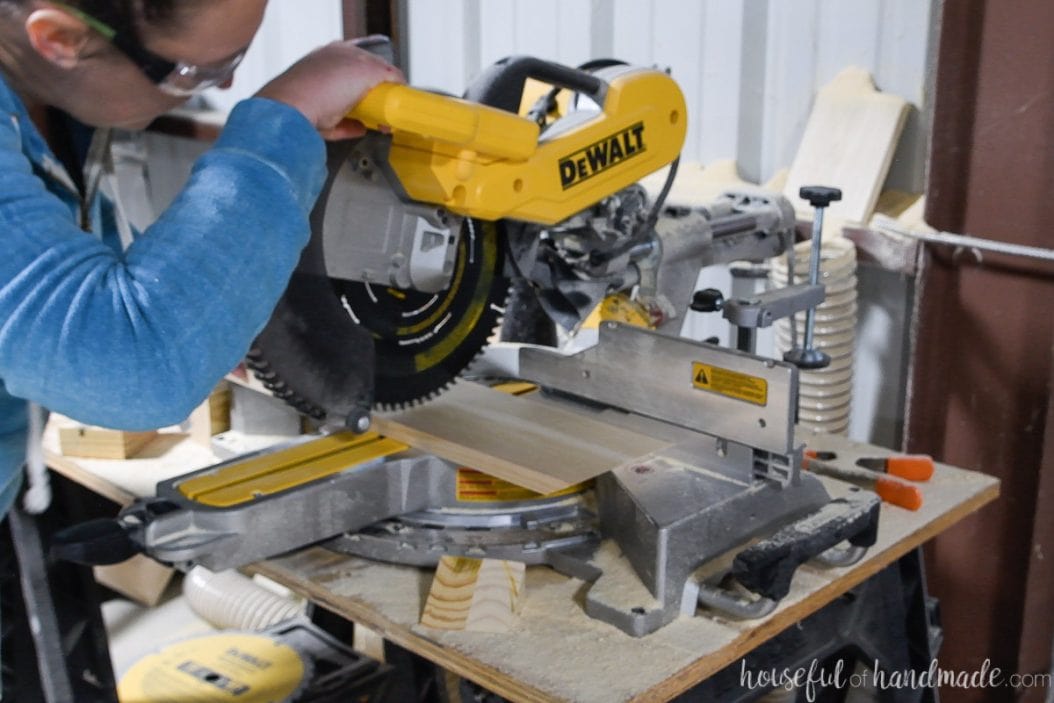
From the 2×2 scraps, cut 2 wedges at the same 60 degree angle that you cut the other boards.
STEP 1- Assemble the Game Board
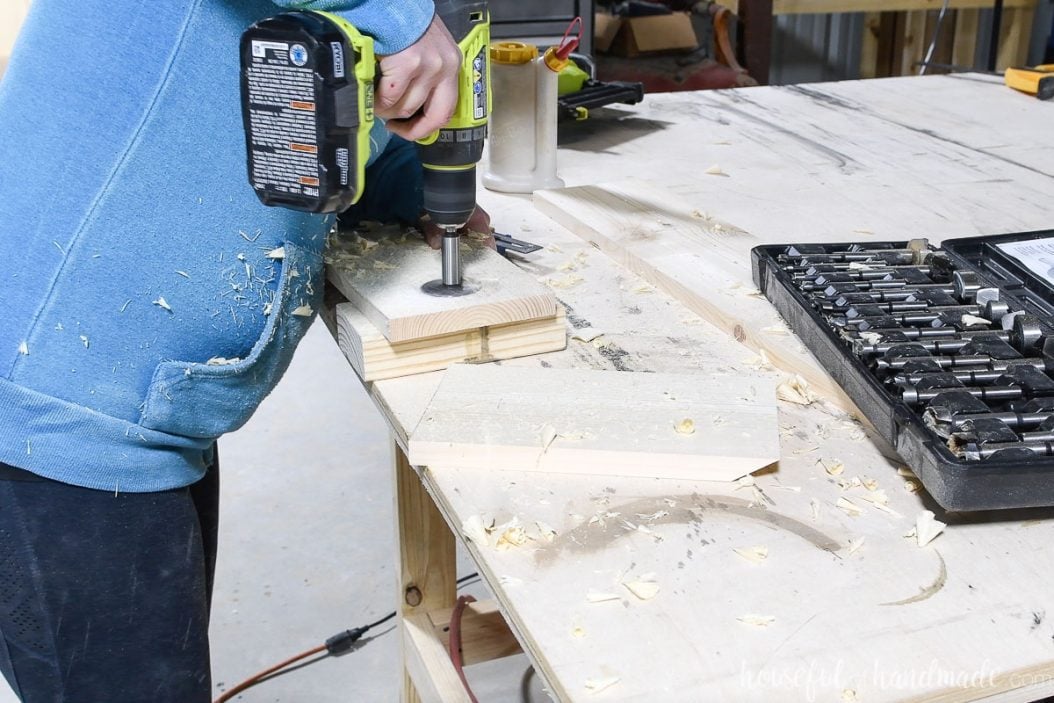
First, drill the holes in the top of the cornhole boards. Mark 2″ down from the top of the non-angled side of each board, and then mark the center of board across it.
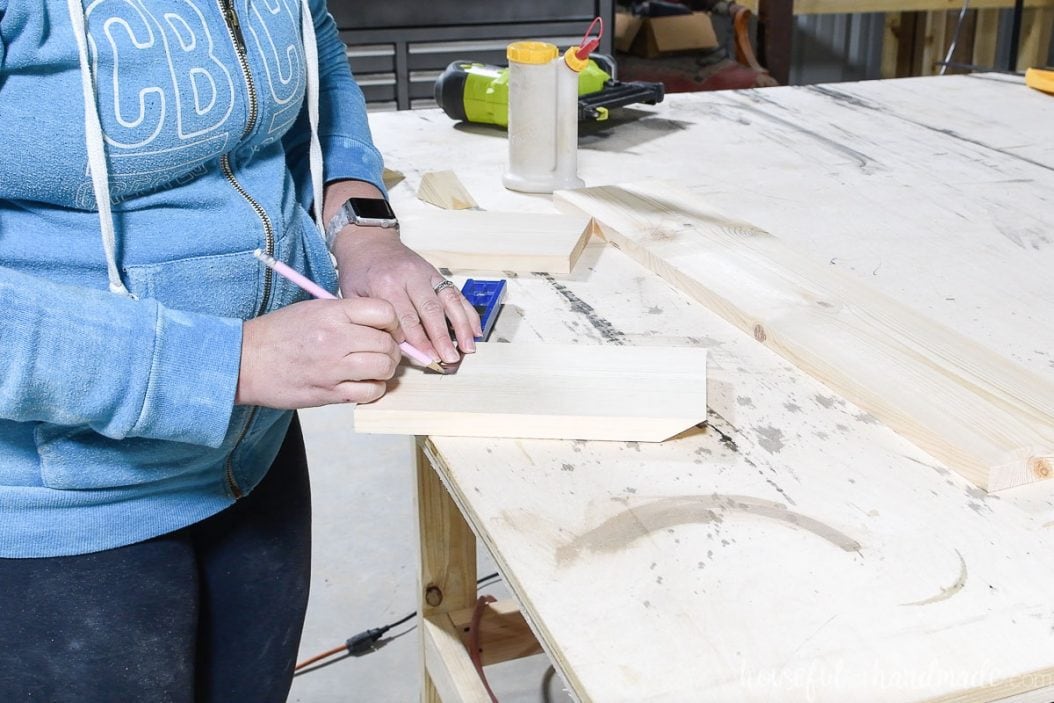
Place the center of your drill bit on this mark and drill a hole straight through.
I like to place the board I’m drilling on a scrap piece. This protects the back from tear out when the drill bit breaks through.
Repeat for the second board.
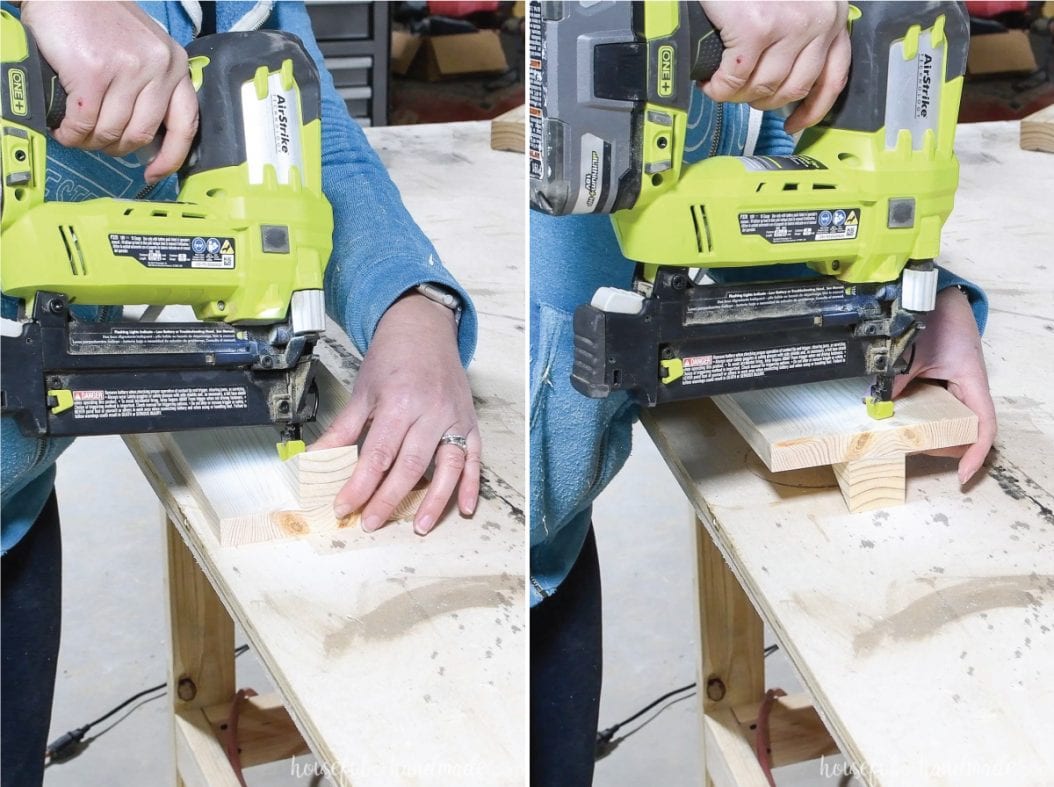
Attach the 2×2 wedge to the back of the 30″ board. Center it on the back and make sure the back is flush with the back of the board.
Secure it with wood glue and brad nails.
When attaching the ones on the front of the wedge, don’t go too close to the front or your 1 1/4″ long nails will poke through the underside.
Then flip the board over and secure with 2 more nails into the wedge from the bottom.
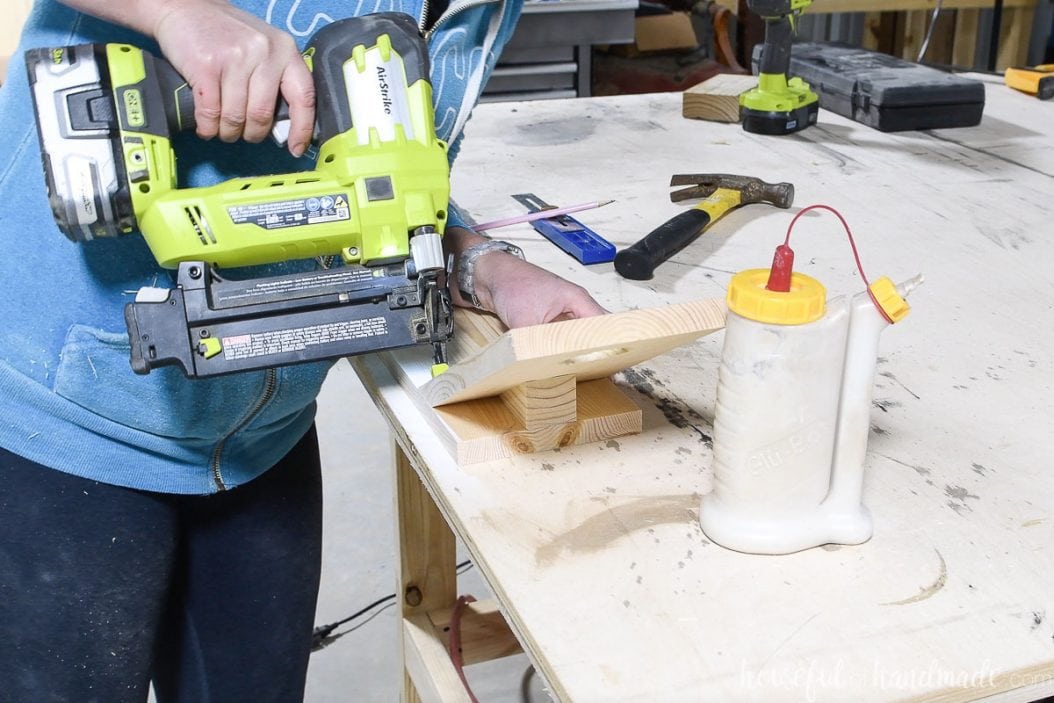
Next attach the cornhole boards. Add wood glue to the angle on the board and the top of the wedge.
Line the board up so it is flush with the wedge and the angle is flush on the bottom board. Secure with brad nails into the board and wedge.
Again be cautious of where you add the nails in the angled board so your nails don’t pole through the bottom.
If you want, use a palm router to add a small round over to the holes on the cornhole boards.
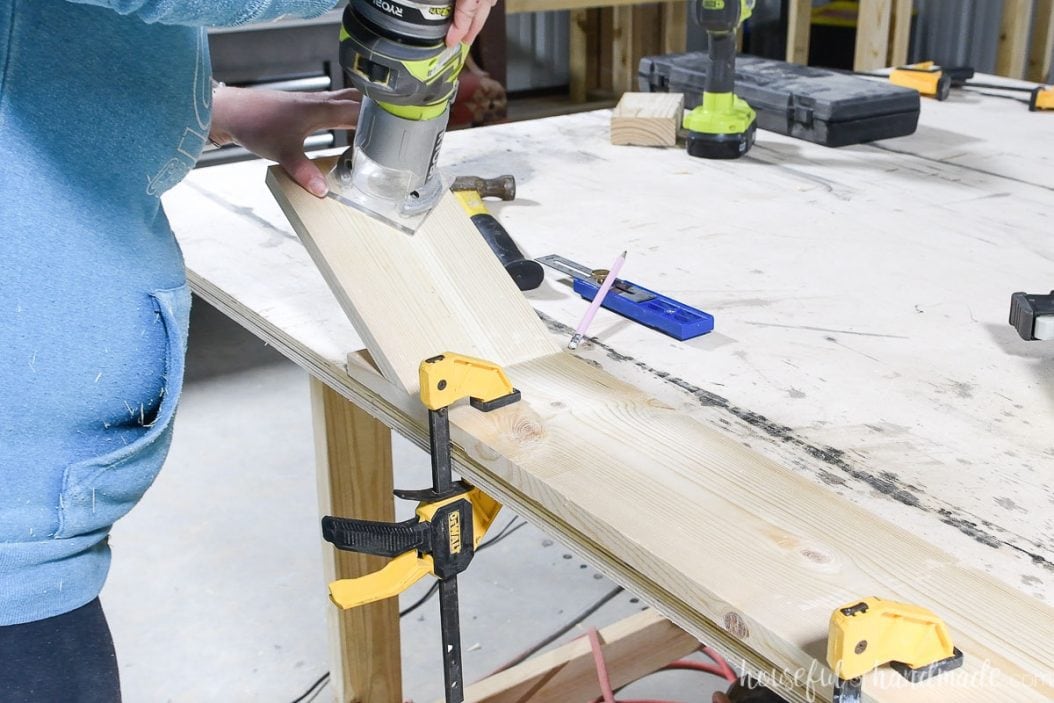
Then give everything a good sanding. I used the sander to add a slight rounding to the rest of the corners so they were not sharp 90 degree angles.
STEP 2- Adding the Scoreboard
To add the scoreboard, you want to drill 5mm holes in the center of the board. I did this using the Kreg shelf pin jig.
Use the jig to drill 5 shelf pin holes. Then shift the jig so the new holes will be in the center of the first set and drill 5 more.
This will give you 10 holes close together for the scoreboard.
You can add more holes if you want to make your scoreboard go higher. You could even switch the jig to the other side so the next set of holes is next to the first.
If you don’t have the jig, feel free to use a drill press or free-hand the holes!
STEP 3- Decorate the Cornhole Boards
Now comes the fun part! Add your personalization to your tabletop cornhole game.
I first sealed the wood with 2 coats of rub-on polyurethane. Then cut out vinyl decorations with my Silhouette Cameo. I added these with a piece of transfer tape.
To add color to the shelf pins, paint the tops with 2 different colors of nail polish. Add 2 coats and let them dry thoroughly before touching.
I left the pins in the holes when I painted them so I could see how far down to paint them and they would have a place to dry.
STEP 4- Make the Bean Bags
To make my mini bean bags, I cut 4 pieces of fabric in each color that was 2 1/4″ wide by 4″ long.
Fold these pieces in half so the right sides are together. Then sew along 2 sides with a 1/4″ seam.
Turn the bean bag right-sides-out. Fold over 1/4″ seams on the open side so they are tucked into the bean bag. Sew half of this seam closed.
With 1/2 of the seam open, add 1 Tbsp of dry beans to the inside of the bag. Then finish sewing the seam closed.
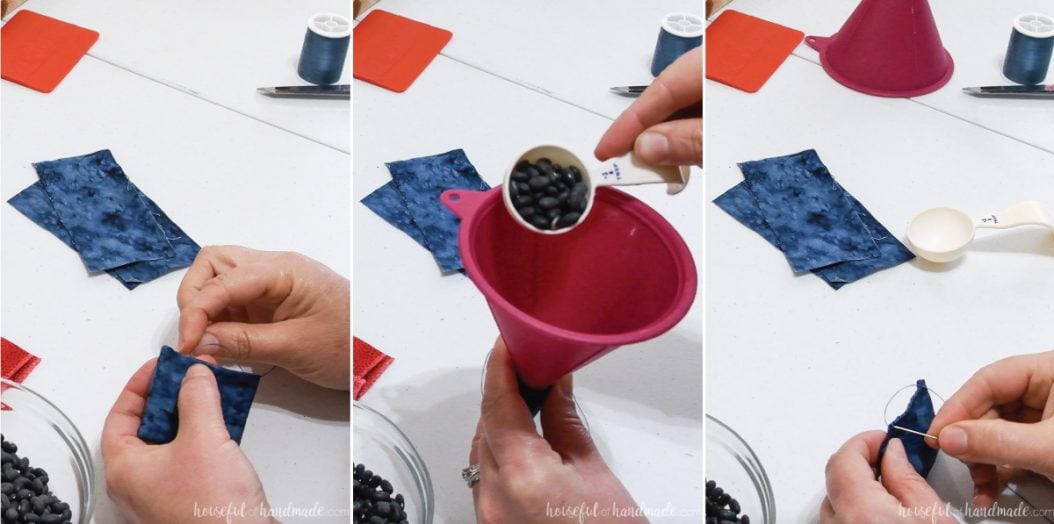
Repeat so you have four 1 3/4″ x 1 3/4″ bean bags in 2 different colors.
Using 4 bean bags each player does make our games go quickly as we are getting better at it.
You can decrease the number of bean bags if you want. Or increase the number on the scoreboard for a longer game.
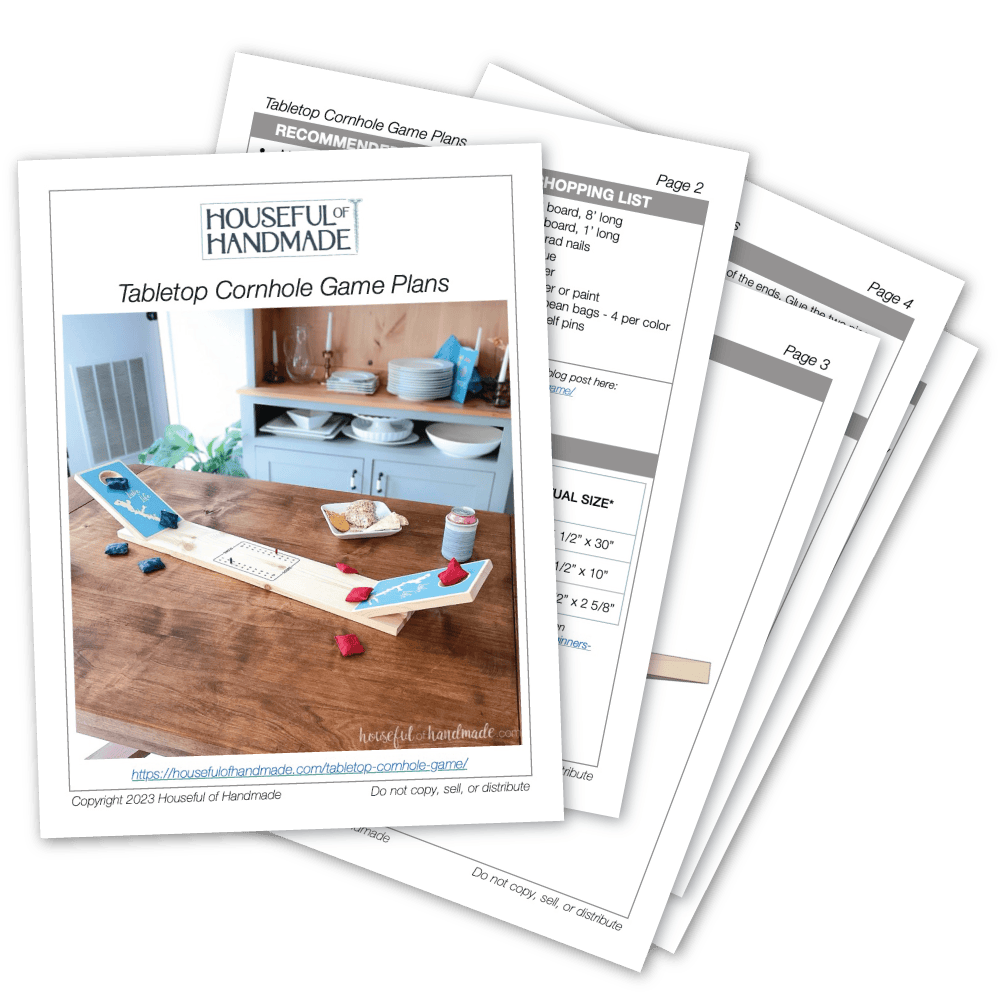
PDF mini plans include:
- Recommended Tools
- Shopping list
- Easy to read cut list table
- X-ray view with measurements
- Step-by-step instructions
- BONUS: 3D SketchUp file
Now all that is left is to find your opponent and have some fun. You will love playing this simple tabletop cornhole game over and over!
We are even having fun adding challenges to it. Try throwing the beans backwards, with your eyes closed, or through your legs (with the board on the floor).
Whatever way you play, I am sure you will have as much fun as we are!
Happy Building!