This fun yard game, sometimes called Yard Skittles or Skittle Scatter, reminds me of a combination of pool and kubb.
Mölkky can be played by just two people, a few, or even in teams. So its the perfect outdoor game for gatherings or quiet evenings at home.
And it makes a great DIY gift idea too!
This post may contain affiliate links. As an Amazon Associate I earn from qualifying purchases. Click here to read my full disclosure policy.
How to Play Mölkky
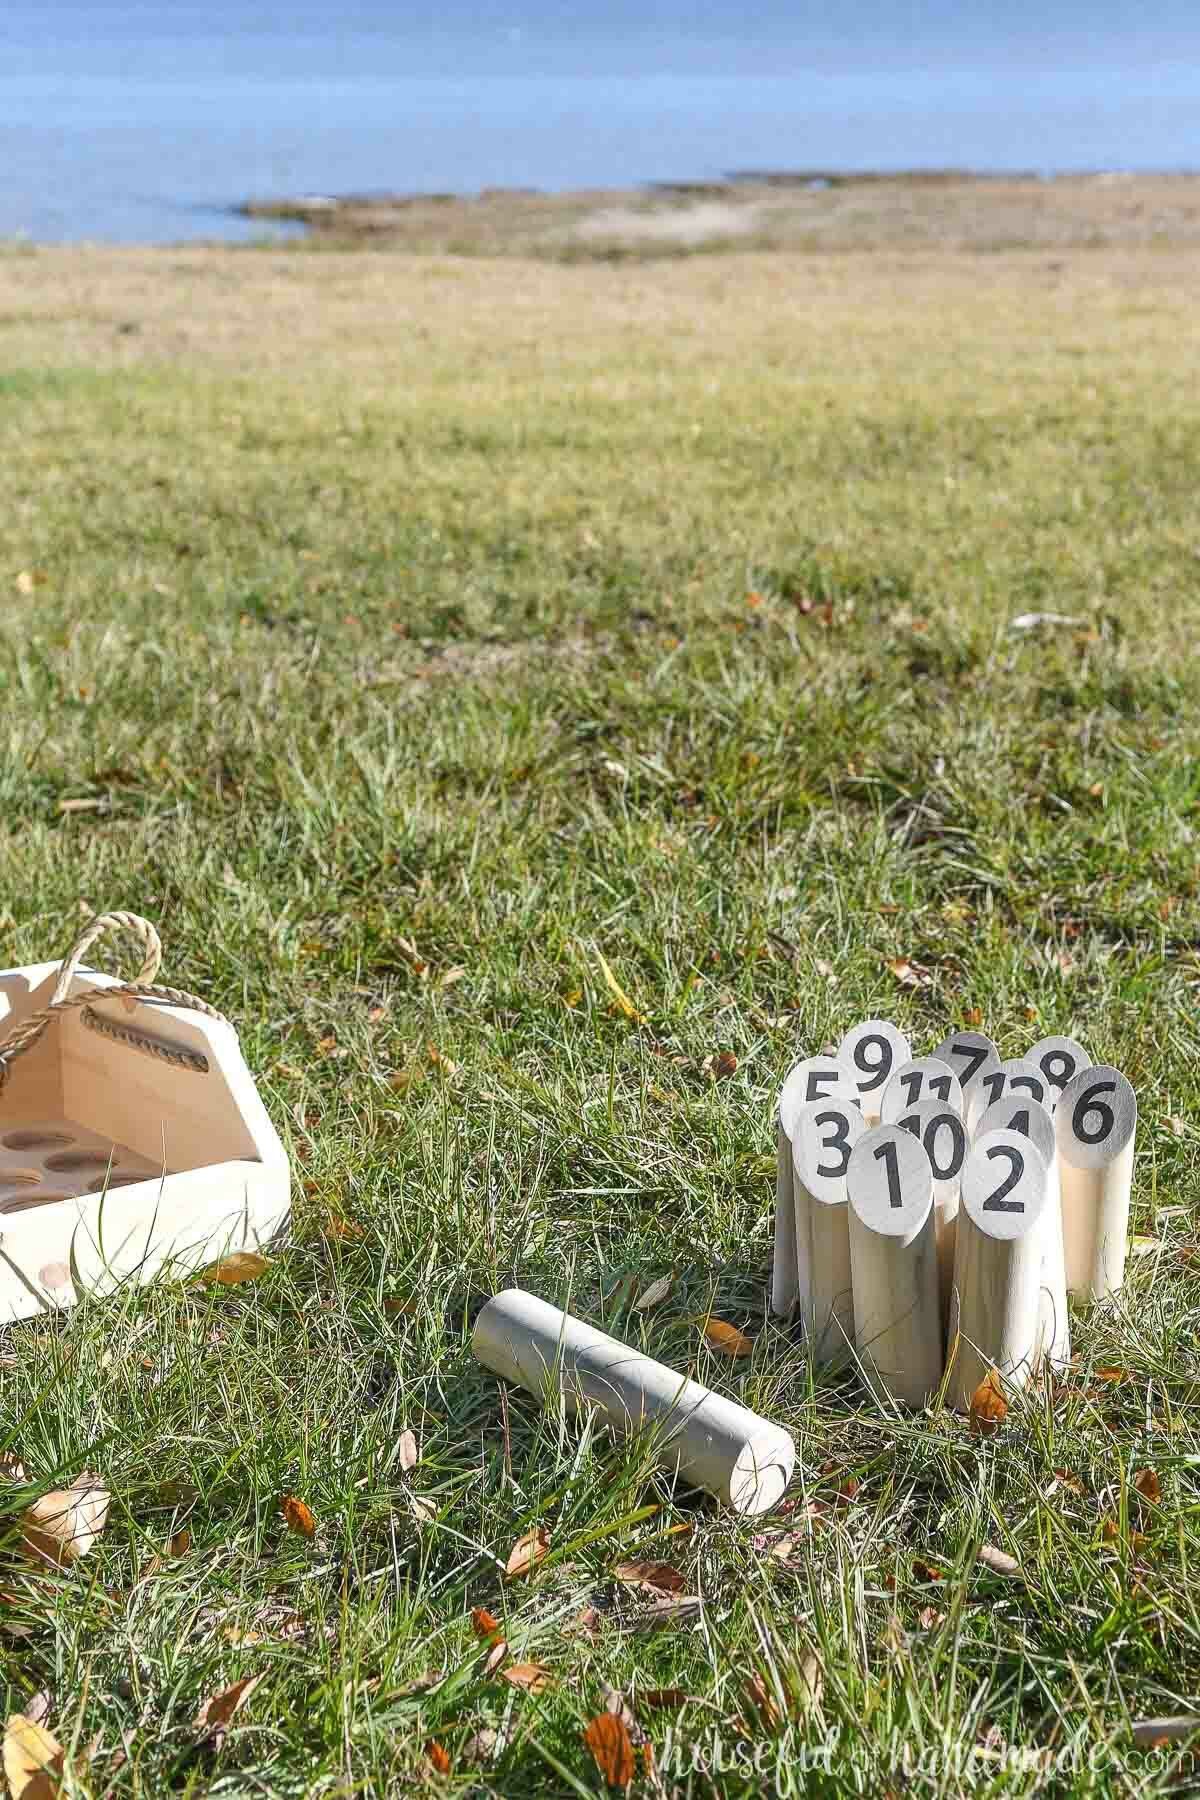
The Mölkky set consists of twelve wooden pins with numbers on top and a larger throwing pin, called the Mölkky.
You arrange the pins in a cluster with two pins in the first row, 3 in the second, 4 in the third, and 3 in the last. The smallest numbers are at the front and the largest are in the very center.
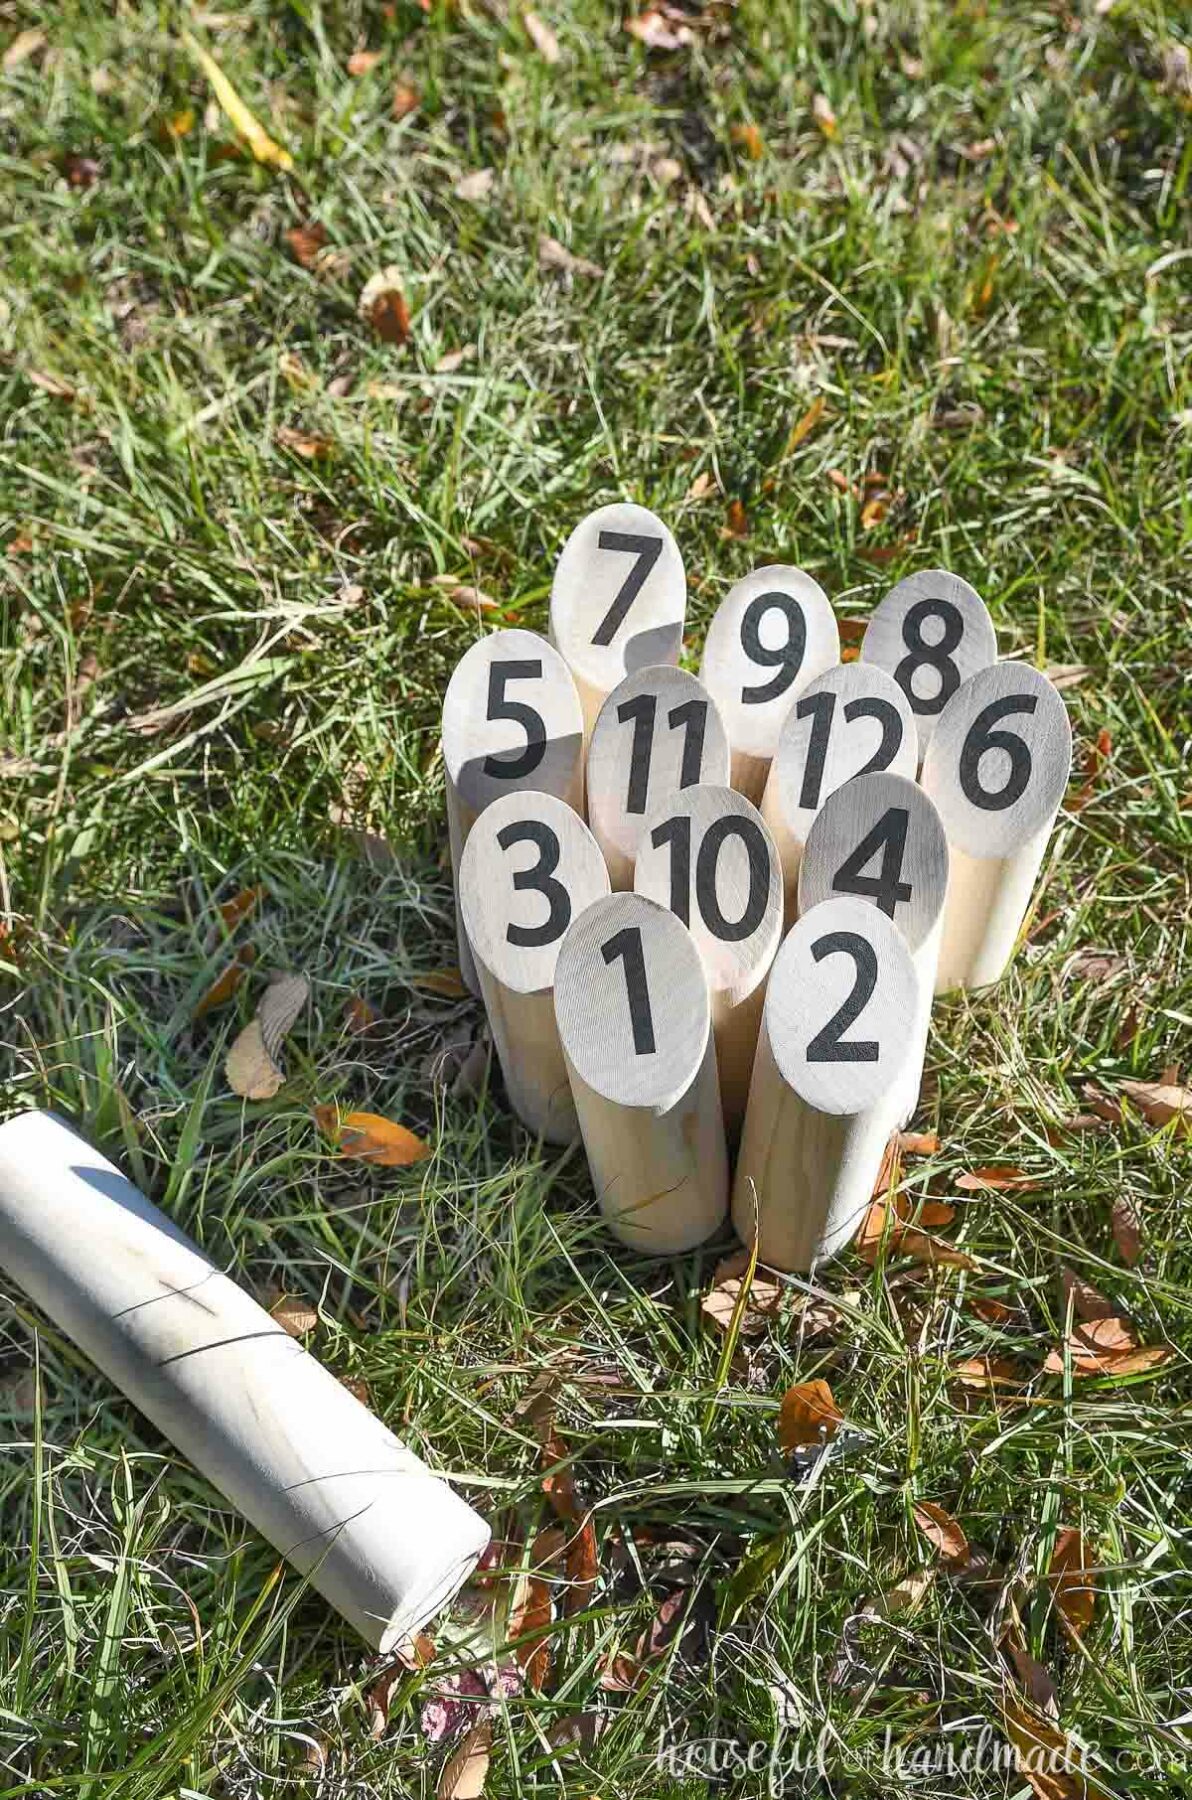
Then the opponents, or teams, take turns underhand tossing the throwing pin at them from 11 1/2 feet away.
You score points as you knock over pins as follows:
- If you only knock over 1 pin, you score the number painted on the pin.
- If you knock over more than 1 pin, you get 1 point for every pin knocked over.
- If you exceed 50 points, you drop back to 25 points.
- If you do not hit any pins three times in a row, you are eliminated.
After each throw the pins are stood up where they fell. They will start to scatter away from the original formation and that is okay.
The first player, or team, to reach exactly 50 points wins!
There are more intricate rules you might want to know as you get better at the Mölkky game. Check out Molkky Word for detailed rules here.
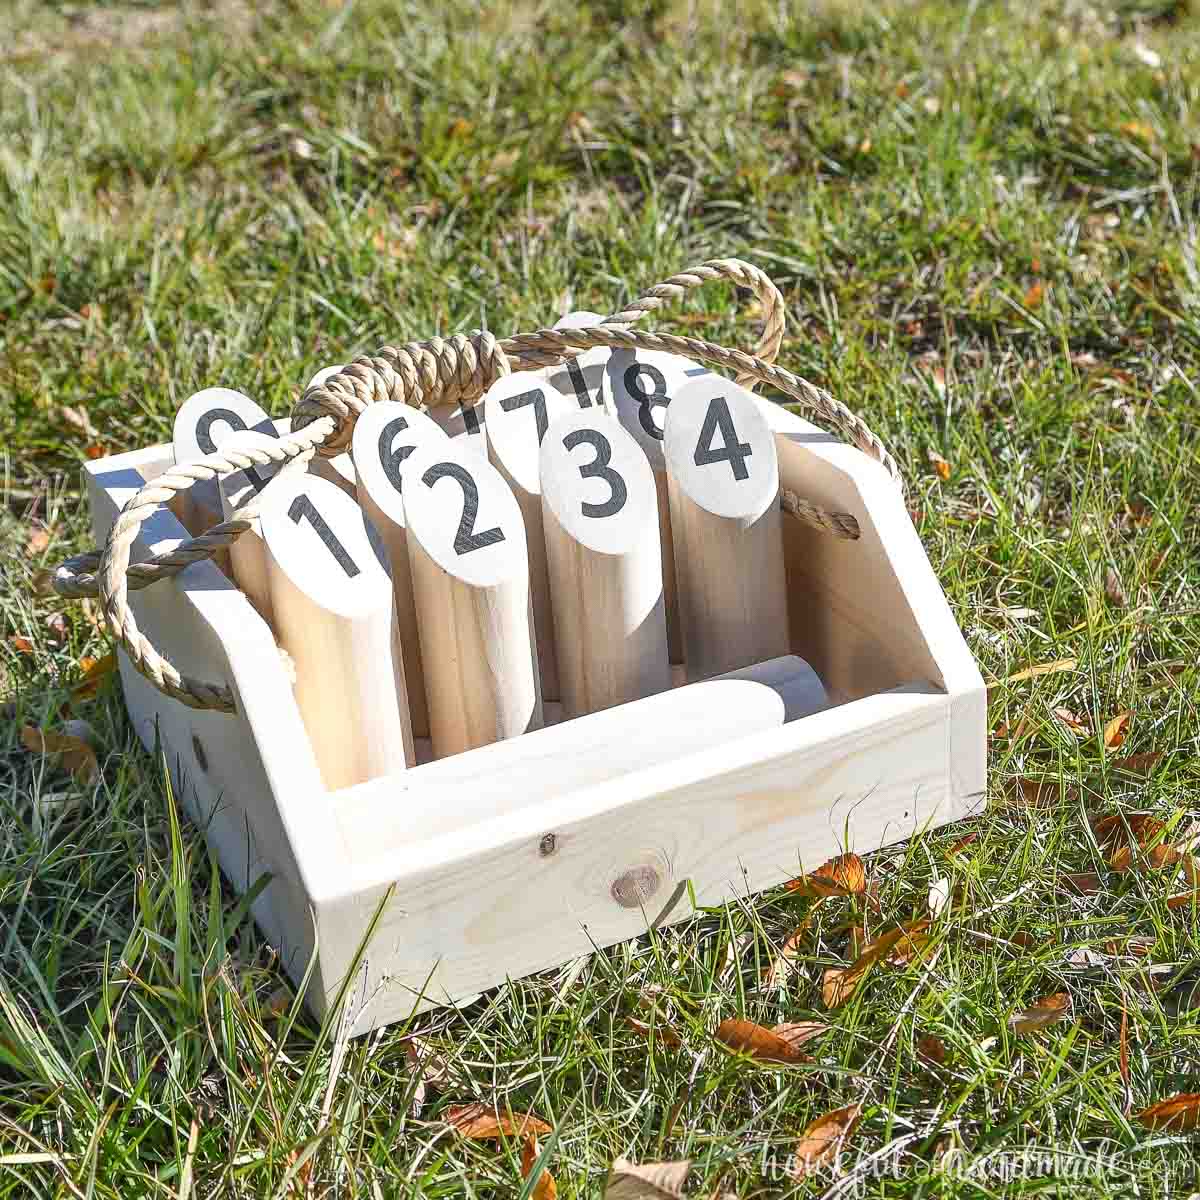
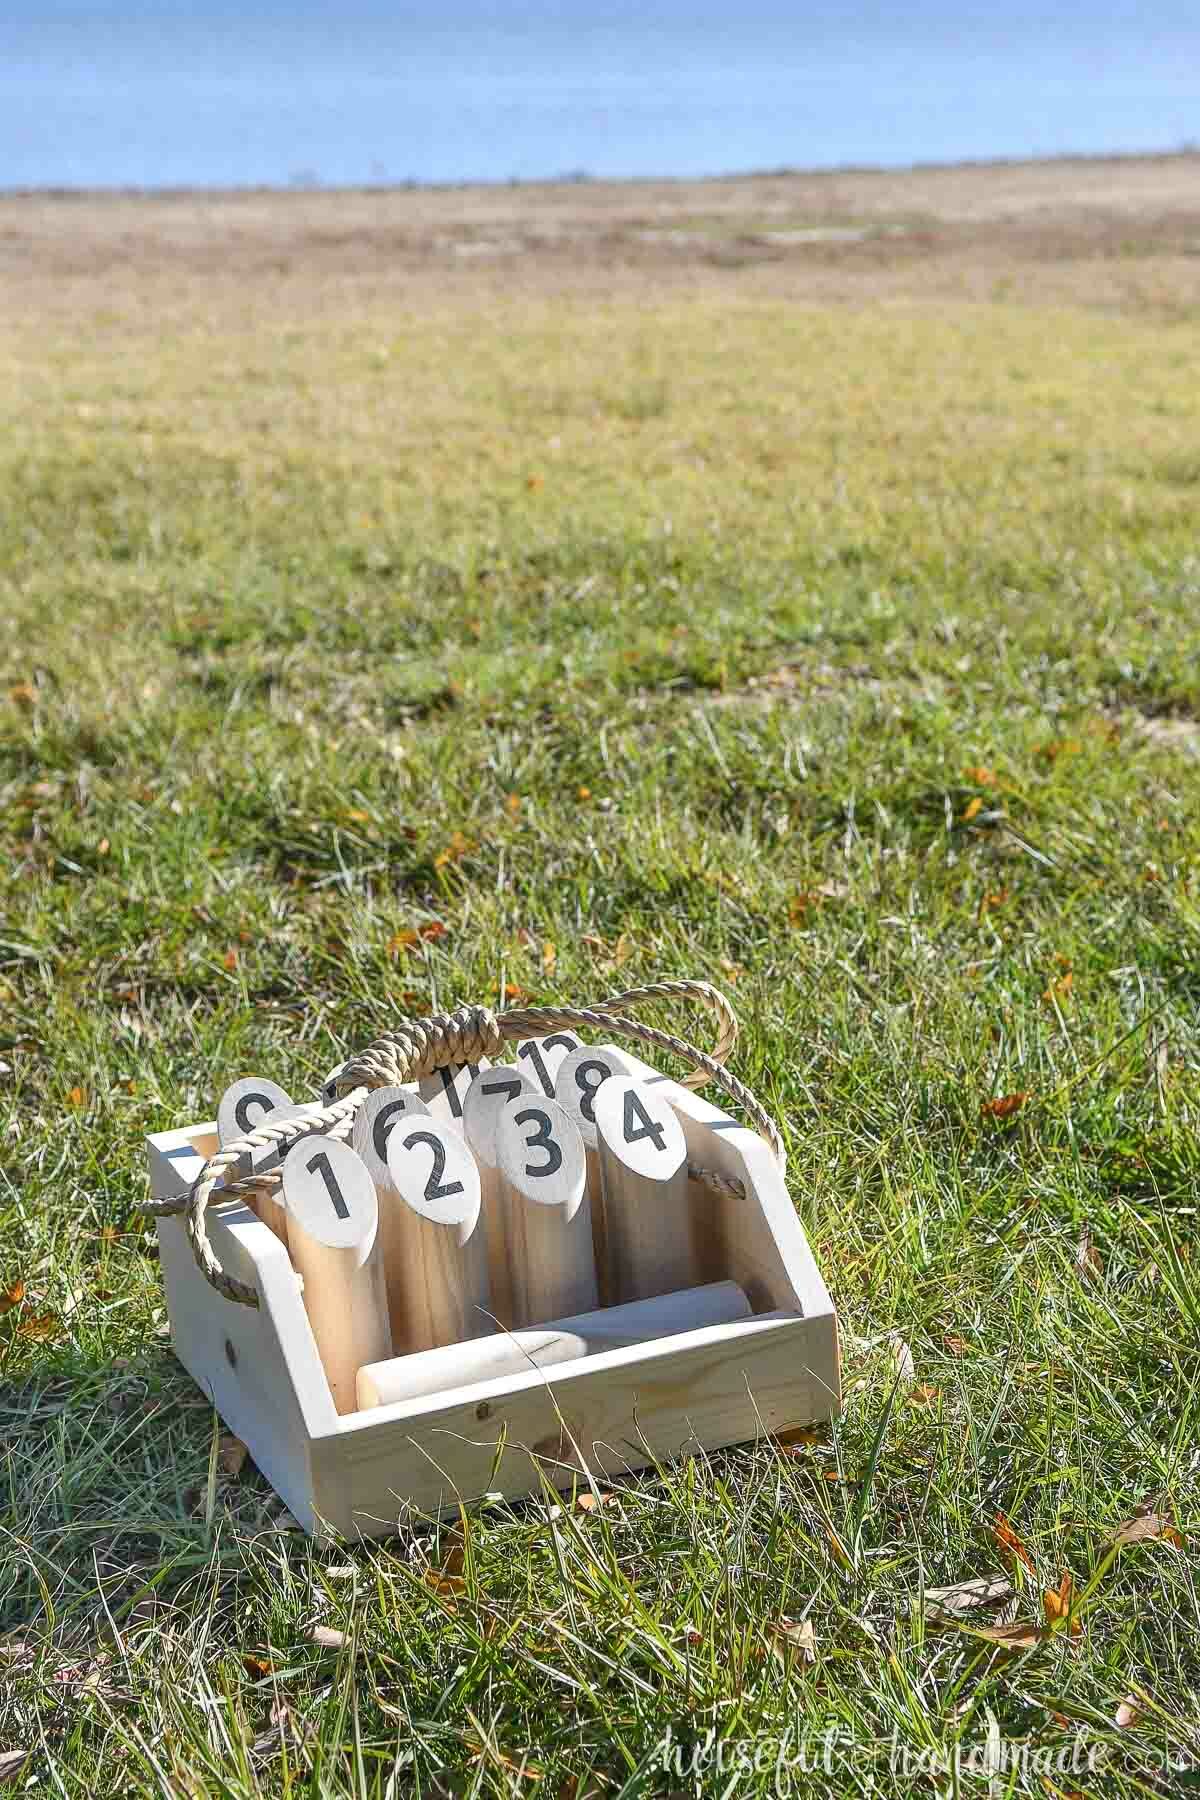
Mölkky Set Carrier
You could just cut the Mölkky pins from a dowel and be done (see Step 4 below). A canvas bag could be a simple storage option.
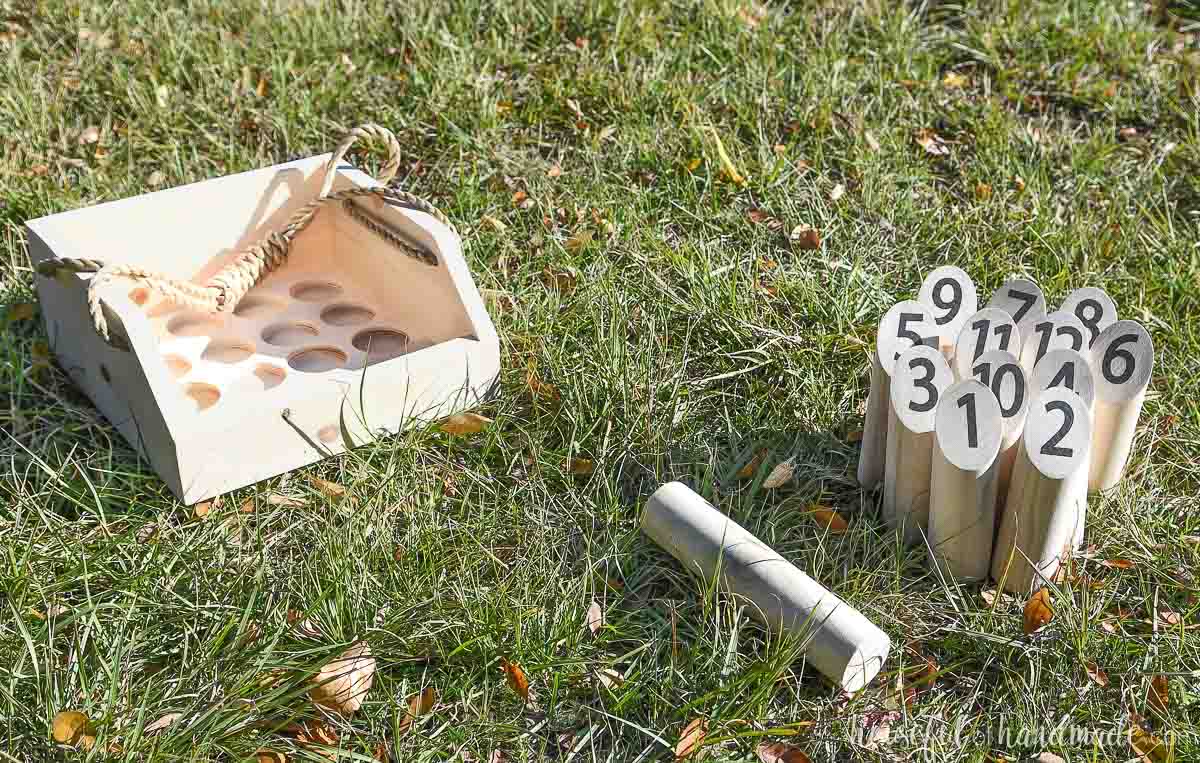
But with just a few small pieces of wood you can create an amazing carrier to keep your set nice.
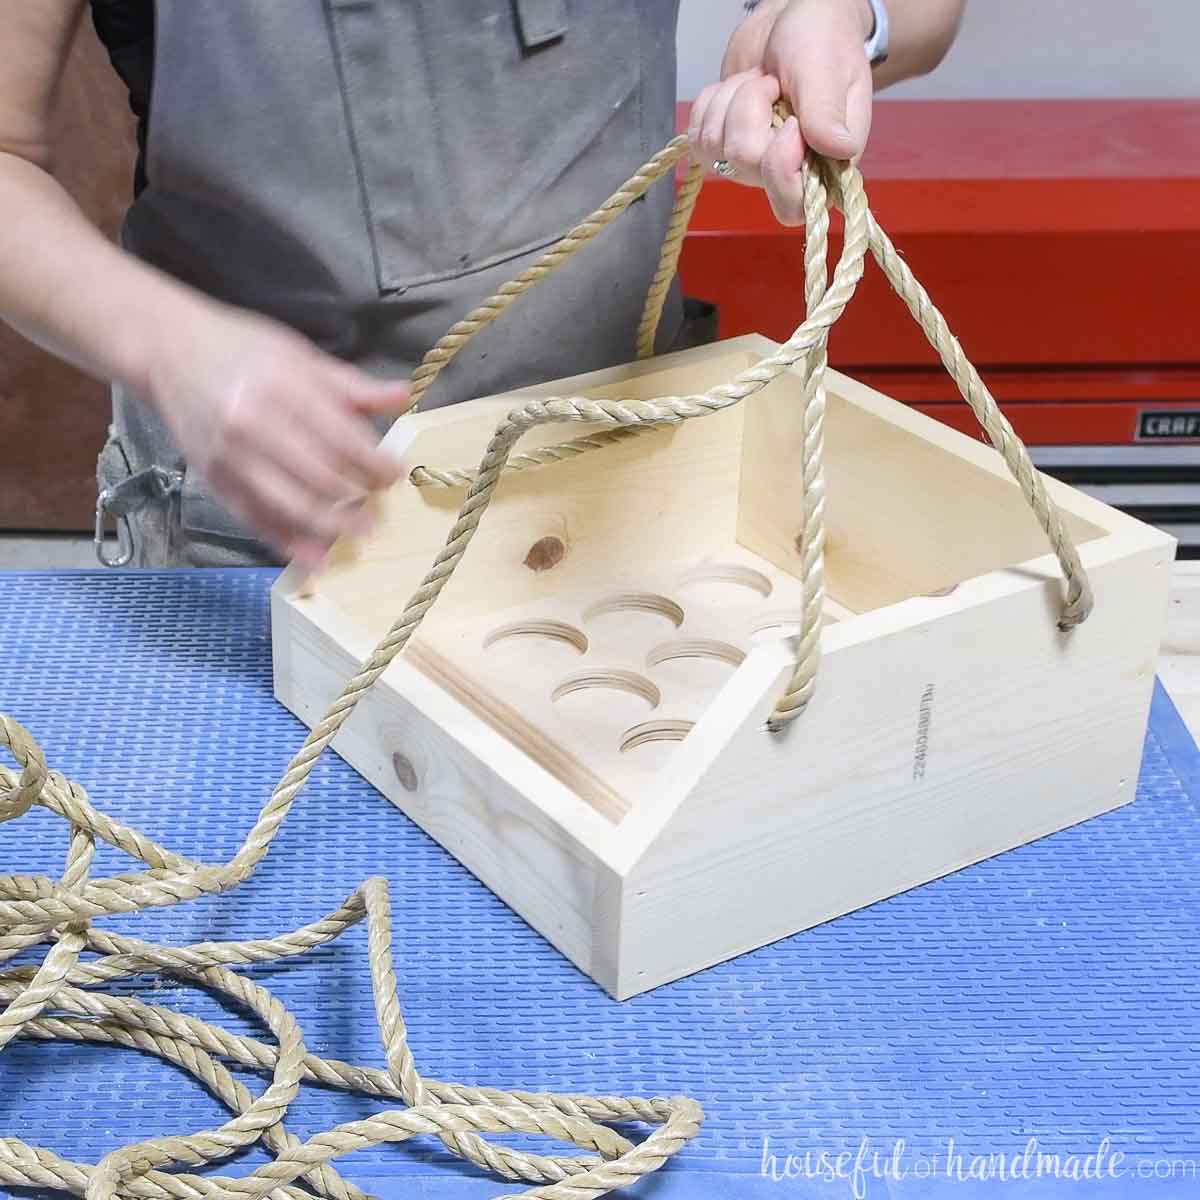
This carrier is so easy to make. It has spots to hold the 12 numbered pins, plus a groove to hold the throwing pin.
But my favorite is it has a handle! Makes it easy to grab the entire game set and take it outside whenever you are ready to play.
DIY Gift Ideas
Who wouldn’t love getting a fun new Mölkky game as a gift?
This week my friend Shara, from Woodshop Diaries, and I are sharing easy DIY gift ideas every day! That is 10 new handmade gifts you can use for anyone on your list.
Check out all the new ideas below or check out these 50+ handmade gift ideas. I will be adding new posts as we share throughout the week.


How to Make a Mölkky Set with Carrier
Tools & Materials
Recommended Tools:
- Miter saw
- I recently upgraded to this larger sliding miter saw (watch for it to go on sale), but all my projects before were built with this inexpensive miter saw that I loved.
- Drill
- Brad nailer
- Sander
- 2 1/2″ drill bit
Supplies:
- Wood products
- (1) 1/2″ plywood, 1′ x 2′ piece
- (1) 1×6 board, 3′ long
- (1) 1×3 board, 1′ long
- (2) 2″ or 2 1/4″ dowels, 4′ long
- 3/4″ brad nails
- 1 1/4″ brad nails
- Wood glue
- Rope
- Paint
- Optional: VInyl cutter
- I used my Silhouette Cameo to cut out vinyl stencils to paint the numbers on the top of the pins. But you can free hand the numbers if you do not have a vinyl cutter.
Cut List
Cut out the pieces according to the easy-to-read table in the PDF plans.

STEP 1- Cut pieces for the carrier
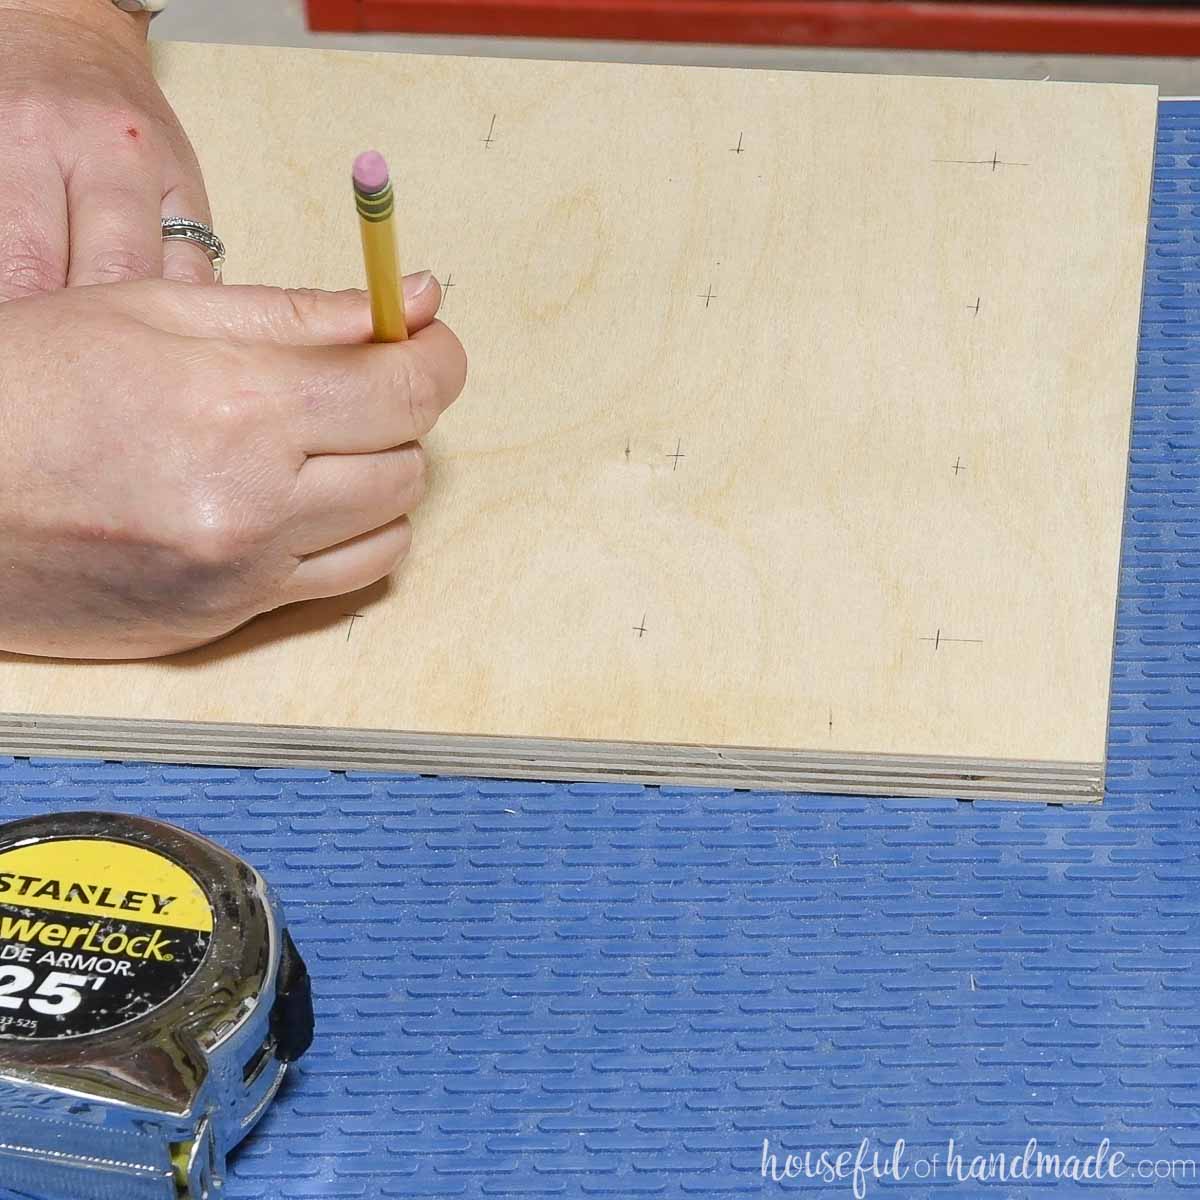
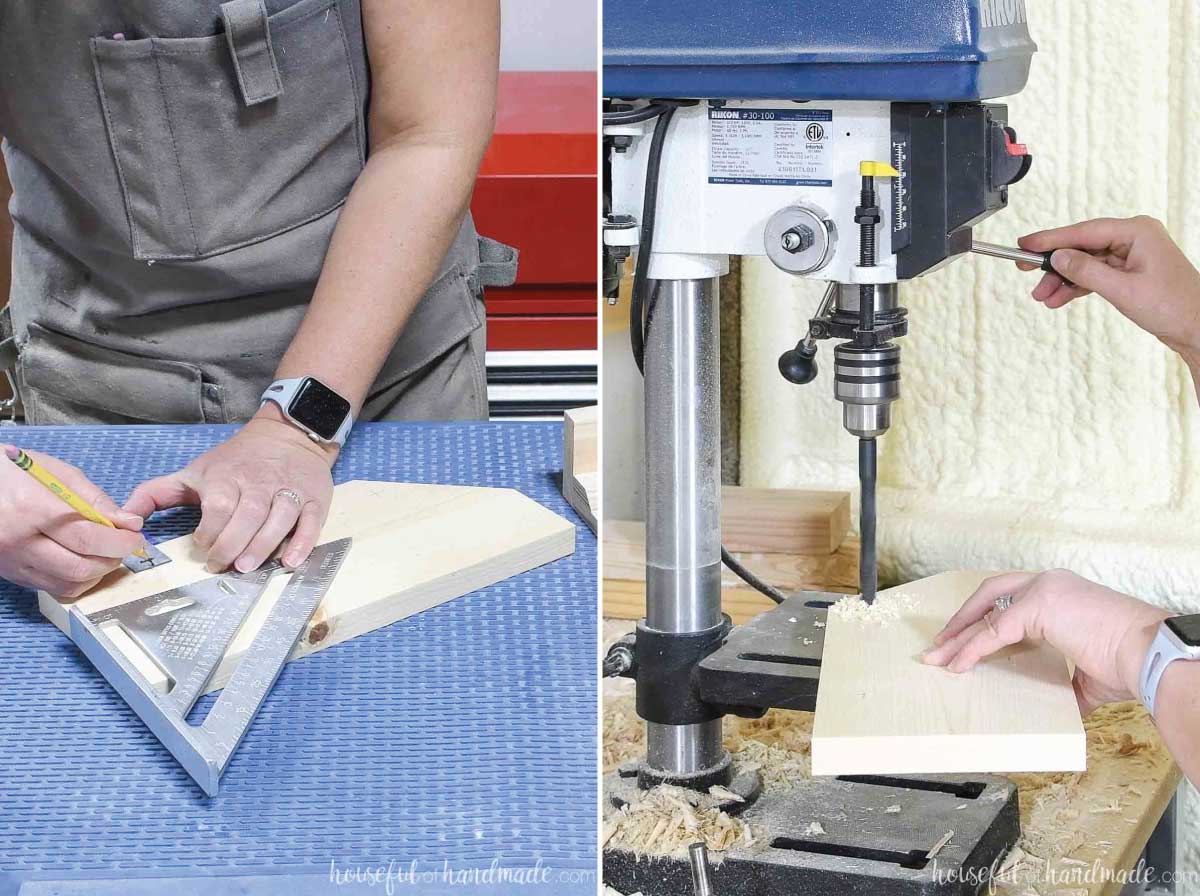
On one of the plywood piece, and mark out the center points for the holes to hold the Mölkky pins. Start them 1 1/2″ in from the edges and 2 1/2″ between the marks.
Mark 4 holes across and 3 down on one side of the board according to the diagram in the premium plans.
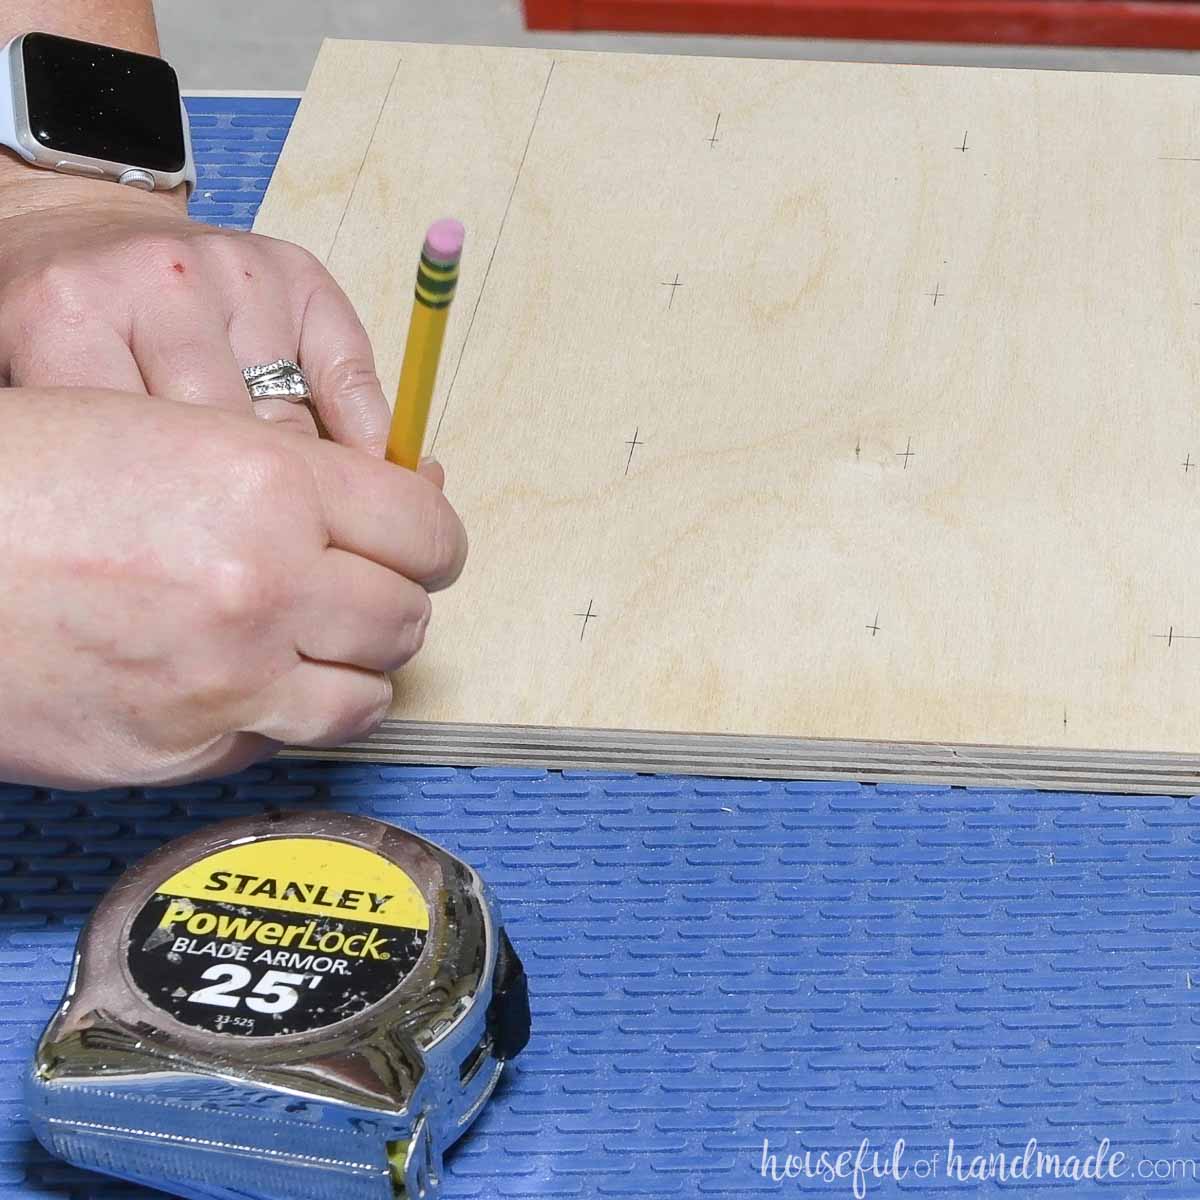
On the other side of the board, draw a line 3/4″ from the edge and 2 1/4″ from the edge.
These will be cut at an angle to create a groove to hold the Mölkky throwing pin.
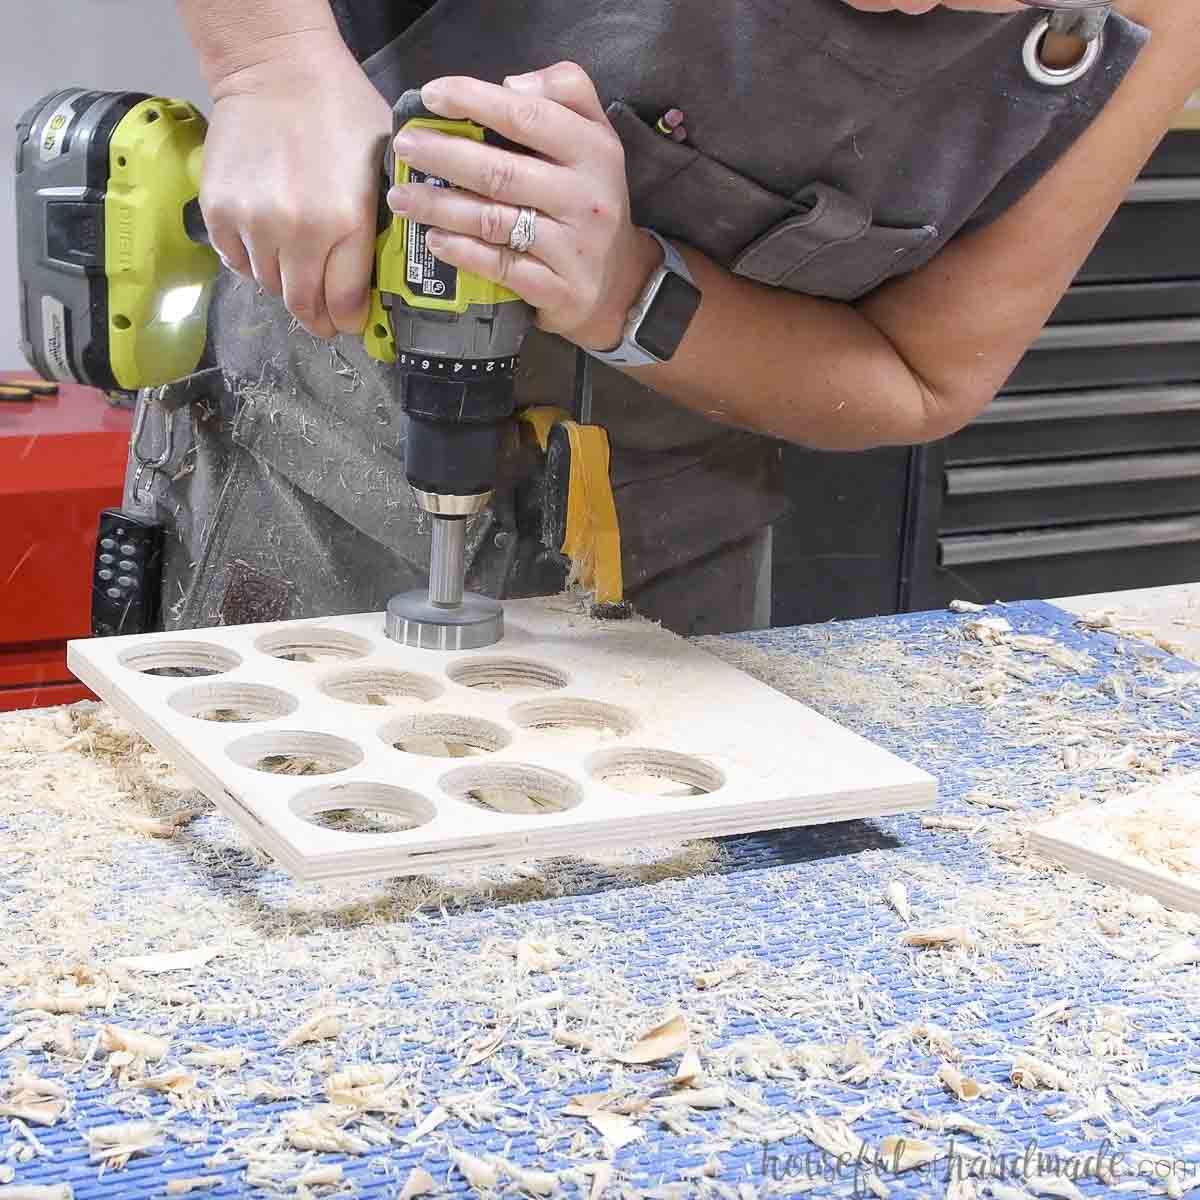
Then drill the twelve holes to hold the pins all the way through the plywood.
Use a bit that is slightly larger than your dowel. My dowel was 2″ so I used a 2 1/4″ forstner bit for clean holes.
EXPERT TIP:
Clamp a scrap piece of wood under your hole to help prevent blow-out as the bit exists the other side.
I first tried drilling the holes on my drill press, but found that the large forstner bit needed to be rocked slightly to grip into the plywood to cut it.
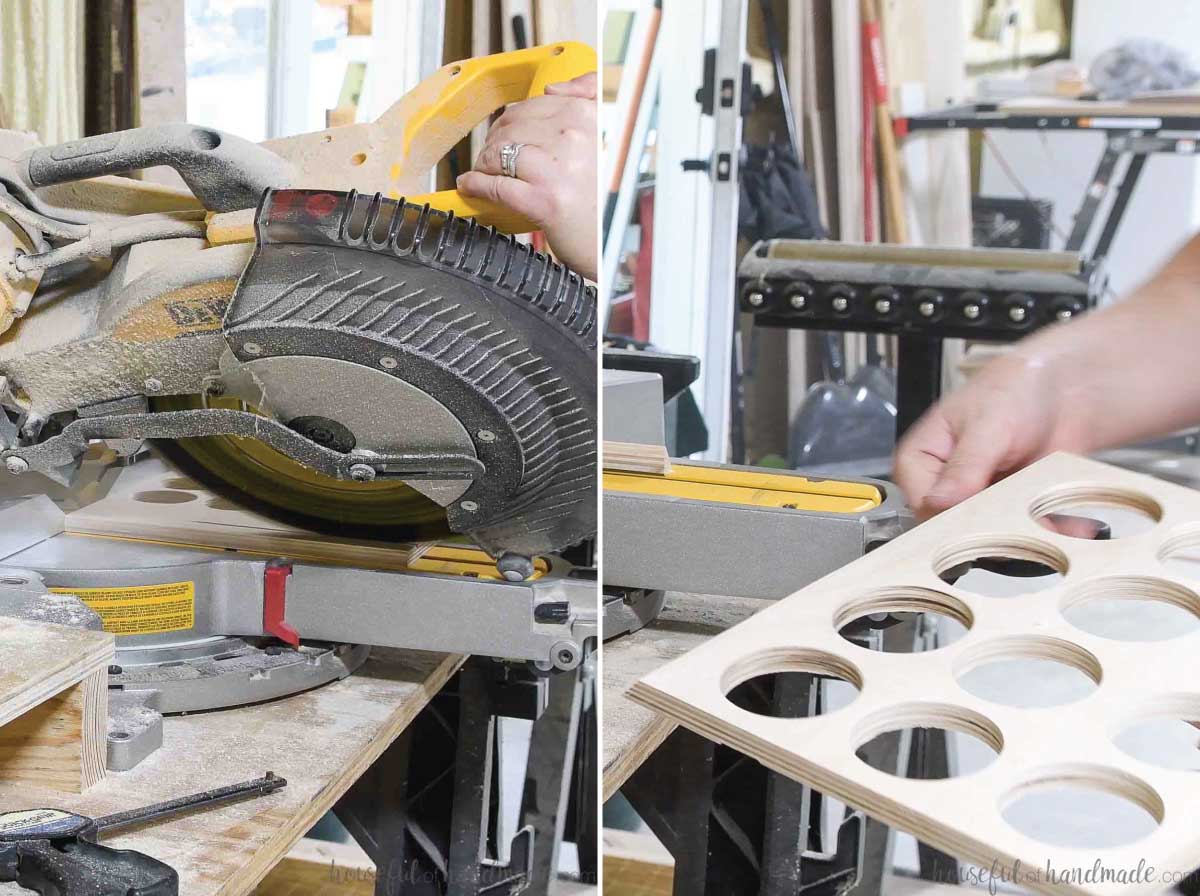
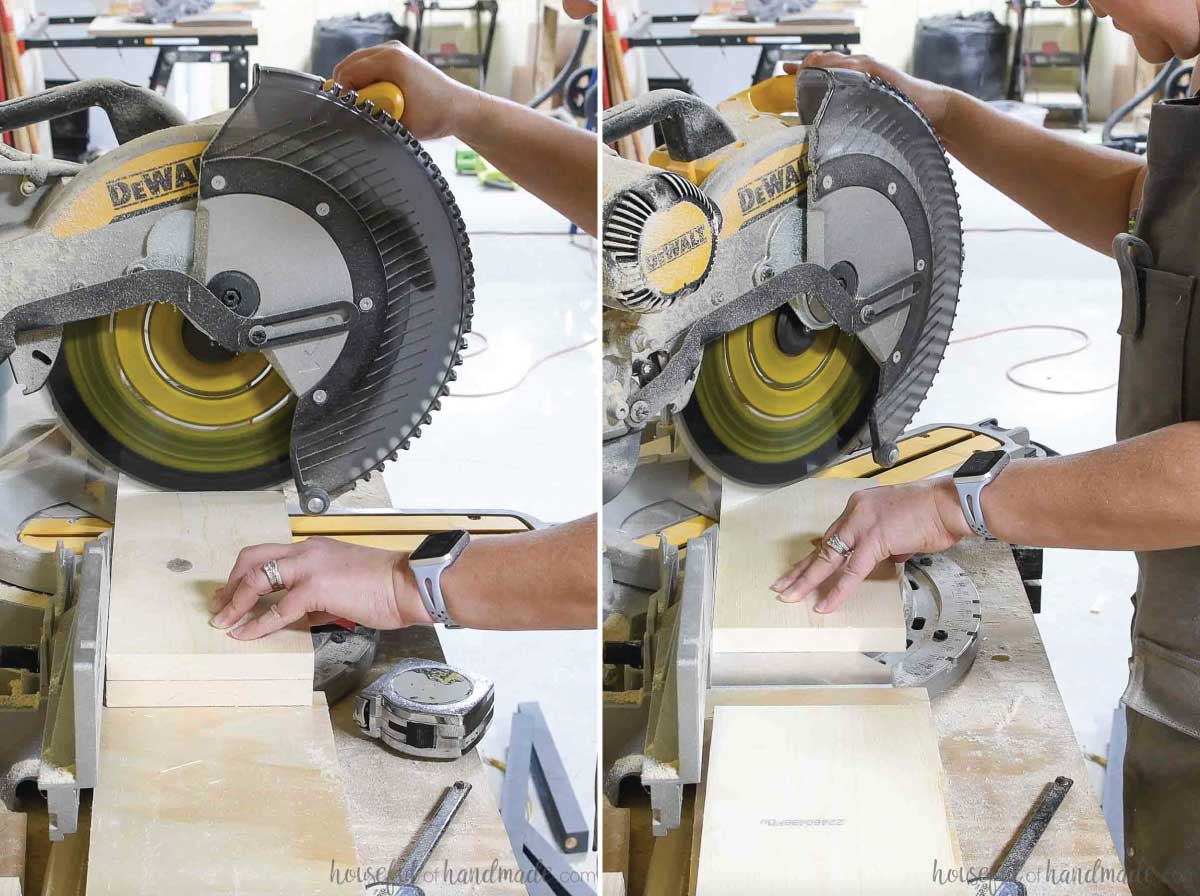
Next, cut along the lines on the plywood at a 45 degree angle. This will cut the piece apart.
Start with the smaller section since it will be easier to hold the larger half safely than a tiny strip.
I used my sliding miter saw, and held the plywood safely with a clamp. But you could use a circular saw or table saw as well.
For the sides of the carrier, cut one 10 1/2″ long piece from the 1×6 and 1×3.
Then cut two 12″ pieces from the remaining 1×6 board. On these boards, measure and mark a 45 degree line 2 1/2″ up from the bottom.
Cut this piece off to create an angle on the front of the sides.
Last step before assembly is to add holes for the handle.
Measure 1″ down from the top and 3″ in from the back and front on the side pieces. Drill a hole just larger than the rope you are using for your handle.
STEP 2- Build the carrier
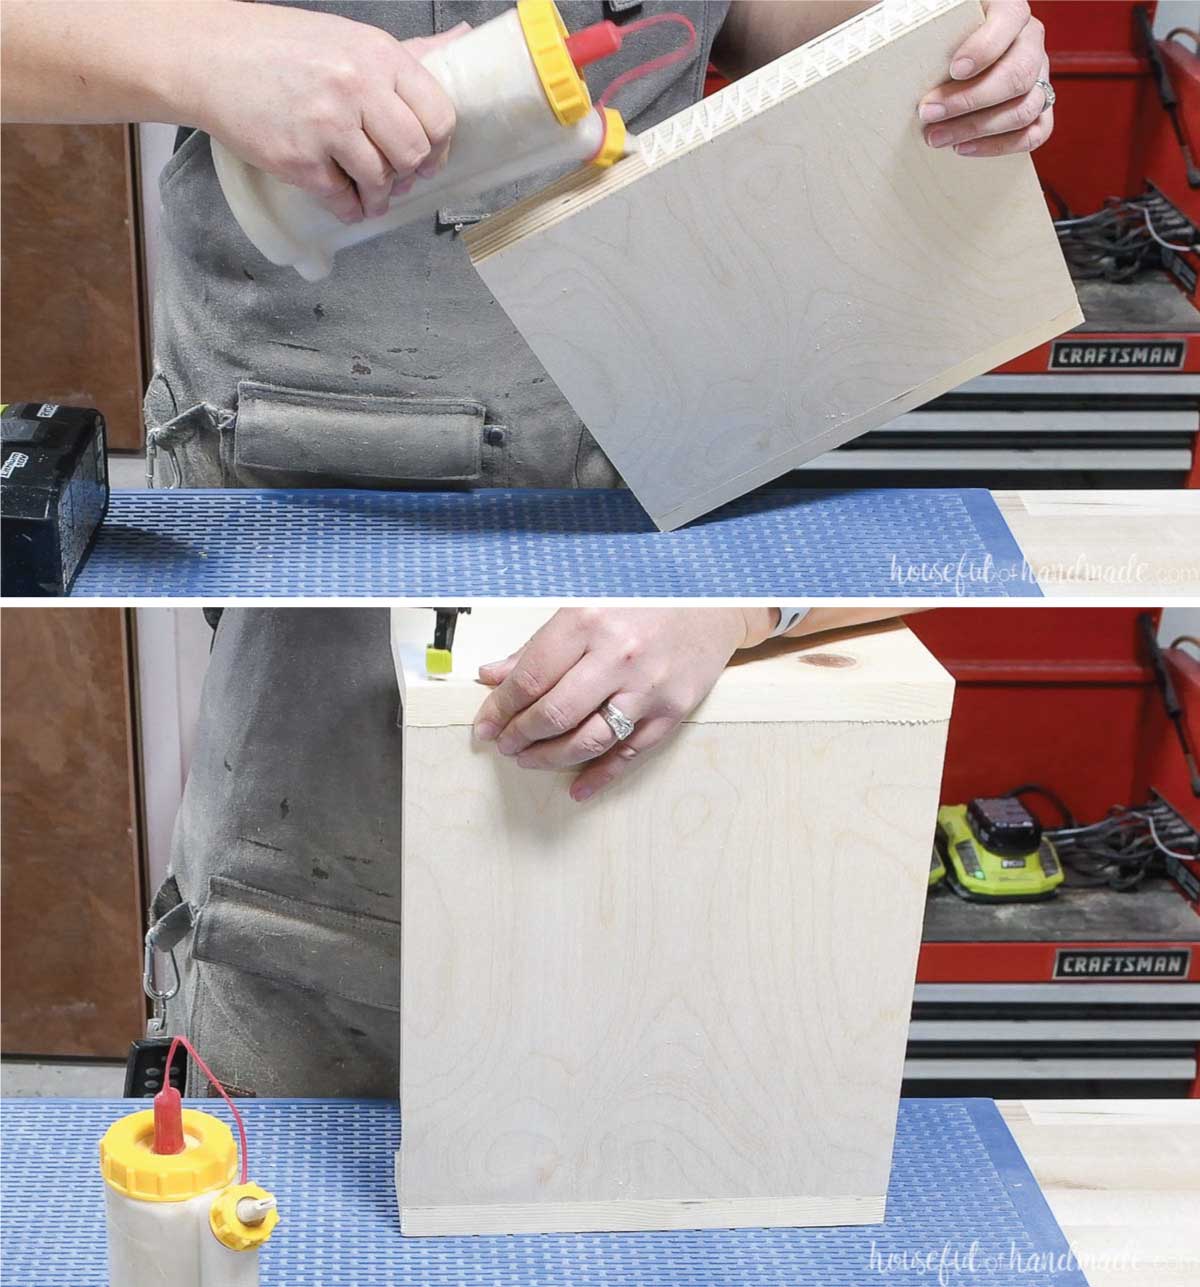
Glue the pieces of plywood together and secure with 3/4″ brad nails.
Line the edges of the plywood up, there may or may not be a gap in the center of your throwing pin groove, that is okay.
It is more important that the edges are flush.

Add glue to the front of the carrier (the side with the groove) and attach the 1×3 board to it with 1 1/4″ brad nails.
Then repeat with the 10 1/2″ 1×6 on the back.
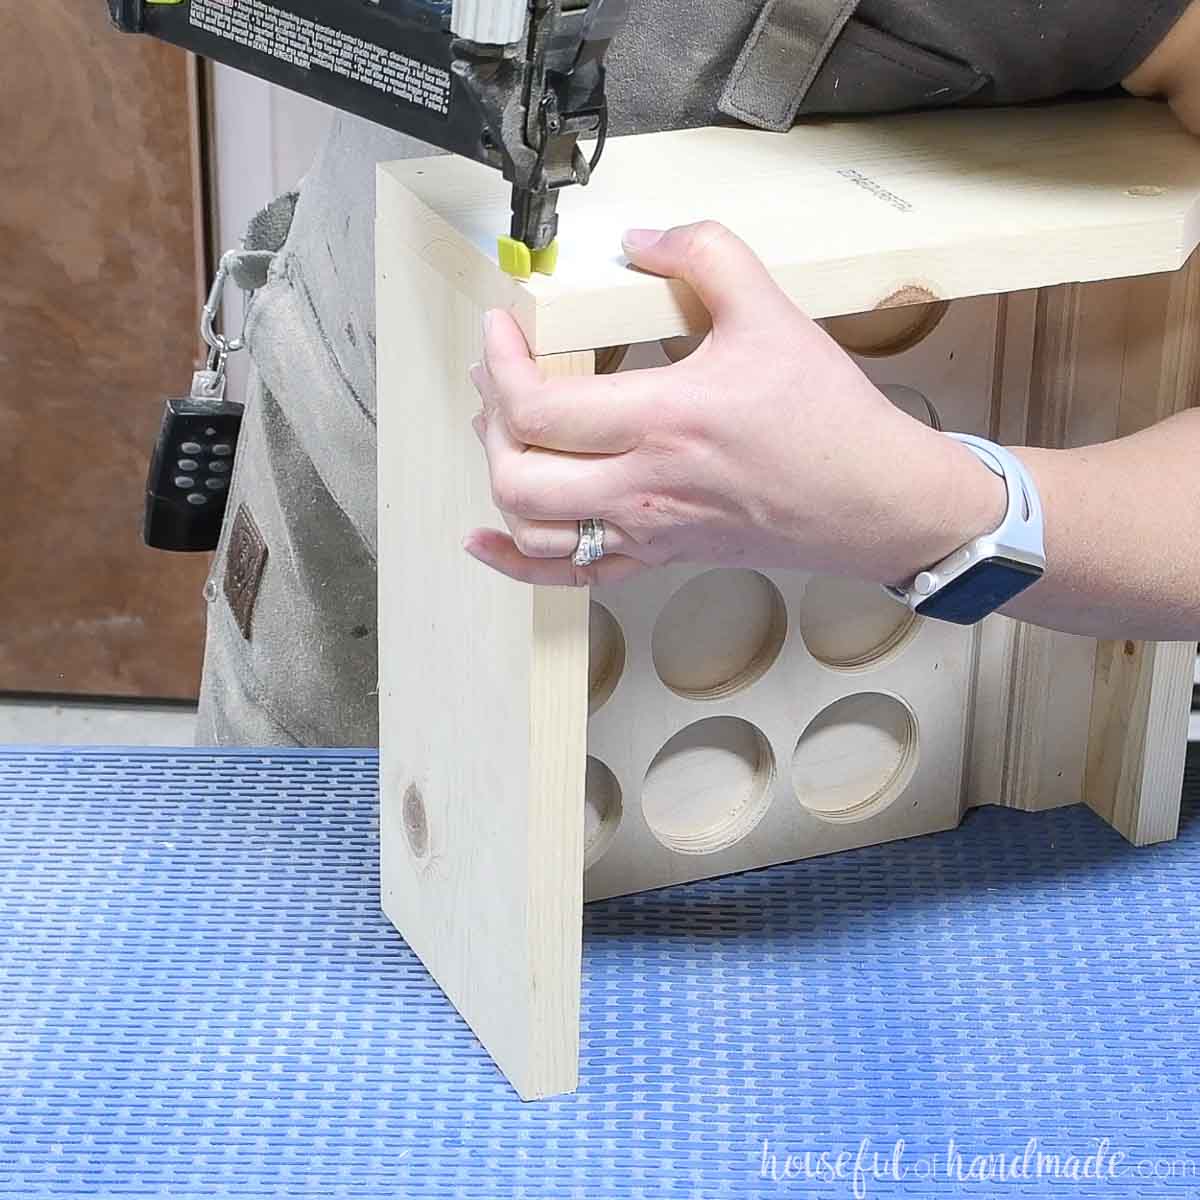
Add wood glue to the sides and attach the side pieces so the angled part is at the front.
Secure with 1 1/4″ nails.
STEP 3- Add a rope handle
Weave your rope into the holes so the handle starts and stops in the center on top.
The rope should go inside the carrier between the holes. And come over the sides of the carrier to the top.
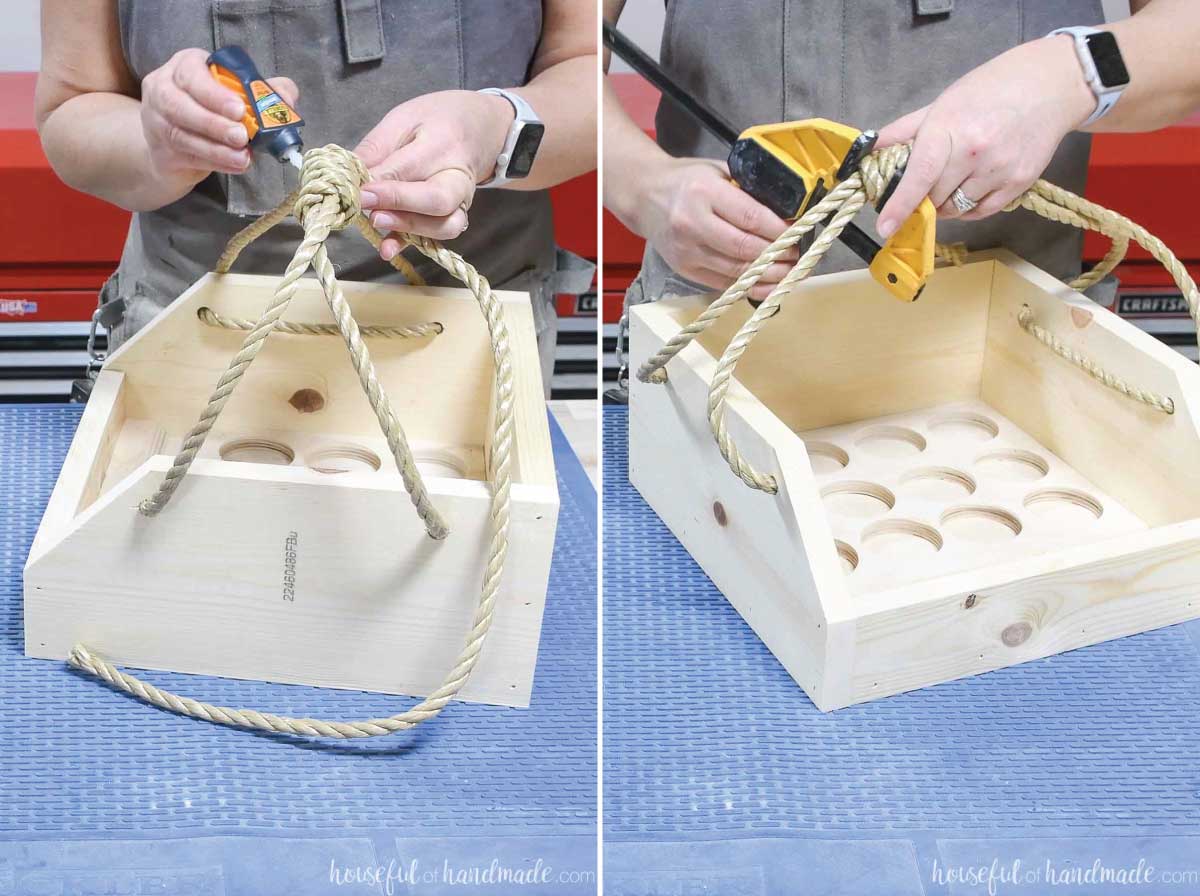
When you are happy with the size, cut off the excess rope.
Then wrap rope around the center part of the handle. Tuck the ends inside and use some glue to hold it in place.
I found a simple clamp was helpful to hold the wrapped handle ends in place while the glue dried.
STEP 4- Cut the Molkky pins
An authentic Mölkky game is made from 5.9 cm (2.3″) birch wood dowels.
I used 2″ poplar dowels because that is the largest I could find at my local hardware stores. If you can find 2 1/4″ dowels, that will be closer to the regulation size.
If you have a lathe, you could make your own 5.9 cm dowels to get a truly authentic game set. But if you just want a fun yard game to play, the 2″ poplar dowels are perfect!
Cut the throwing pin 8 5/8″ long.
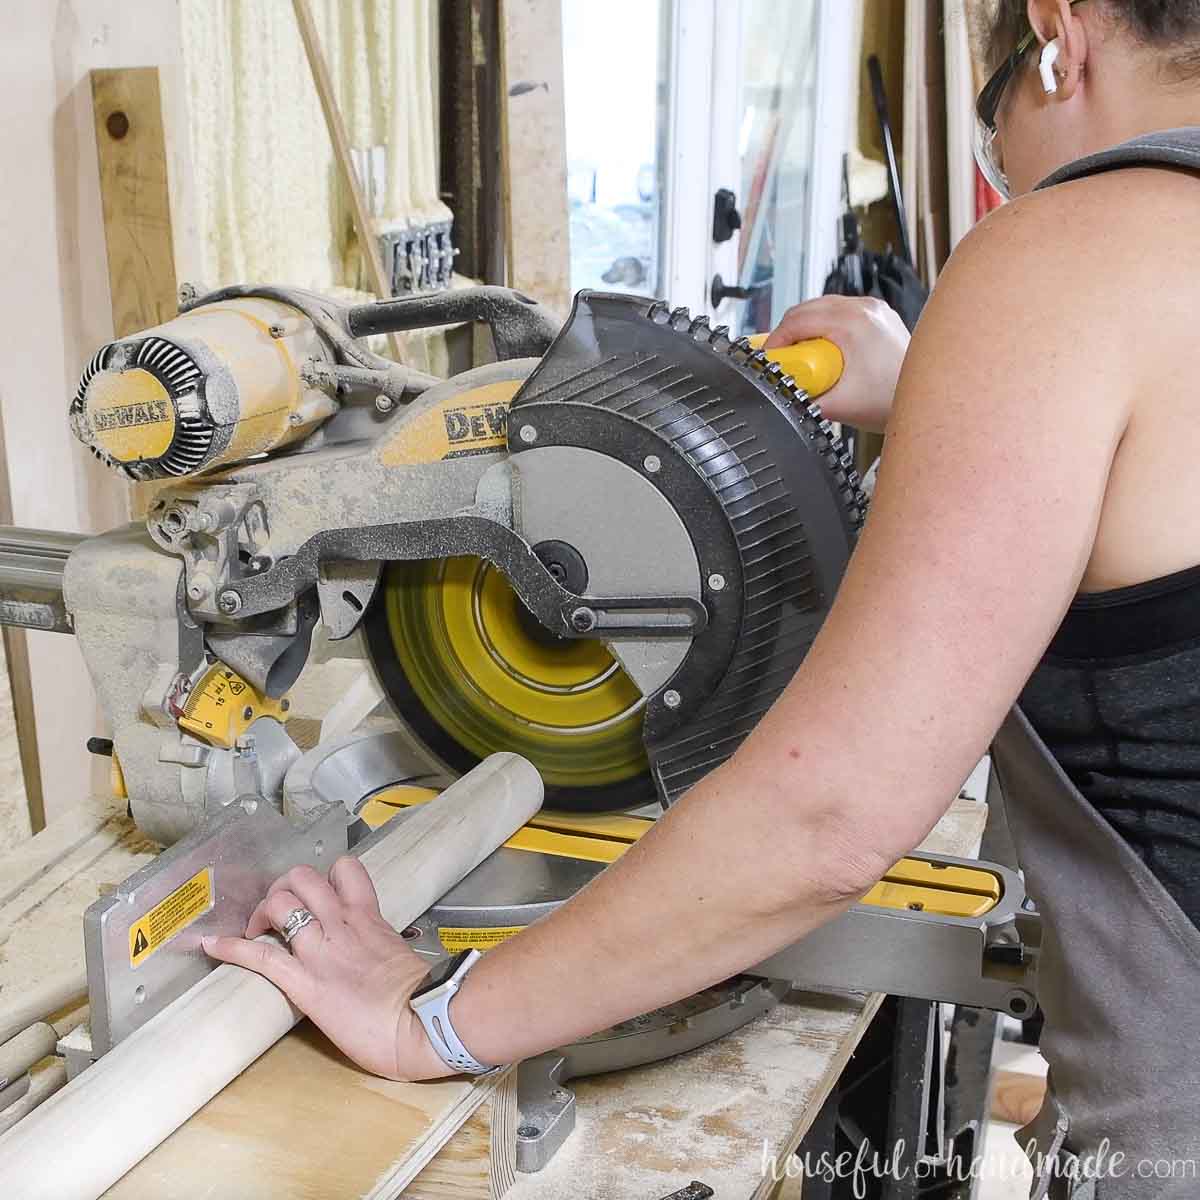
Cut (12) 6″ long pieces of dowel so that one side is at a 45 degree angle.
The fastest way I found to do this was to trim both ends of both dowels so they were clean and flat. Then I measured and marked the 6″ line on one end.
Switch your saw blade to 45 degrees and line up the blade with the mark. But before cutting, place a stop block at the end of the dowel.
Then cut the first Mölkky pin. Rotate the dowel and cut a second pin from the other straight side.
Line it up with the stop block to ensure it is the same size as the first. Then repeat for the two straight sides of the other dowel.
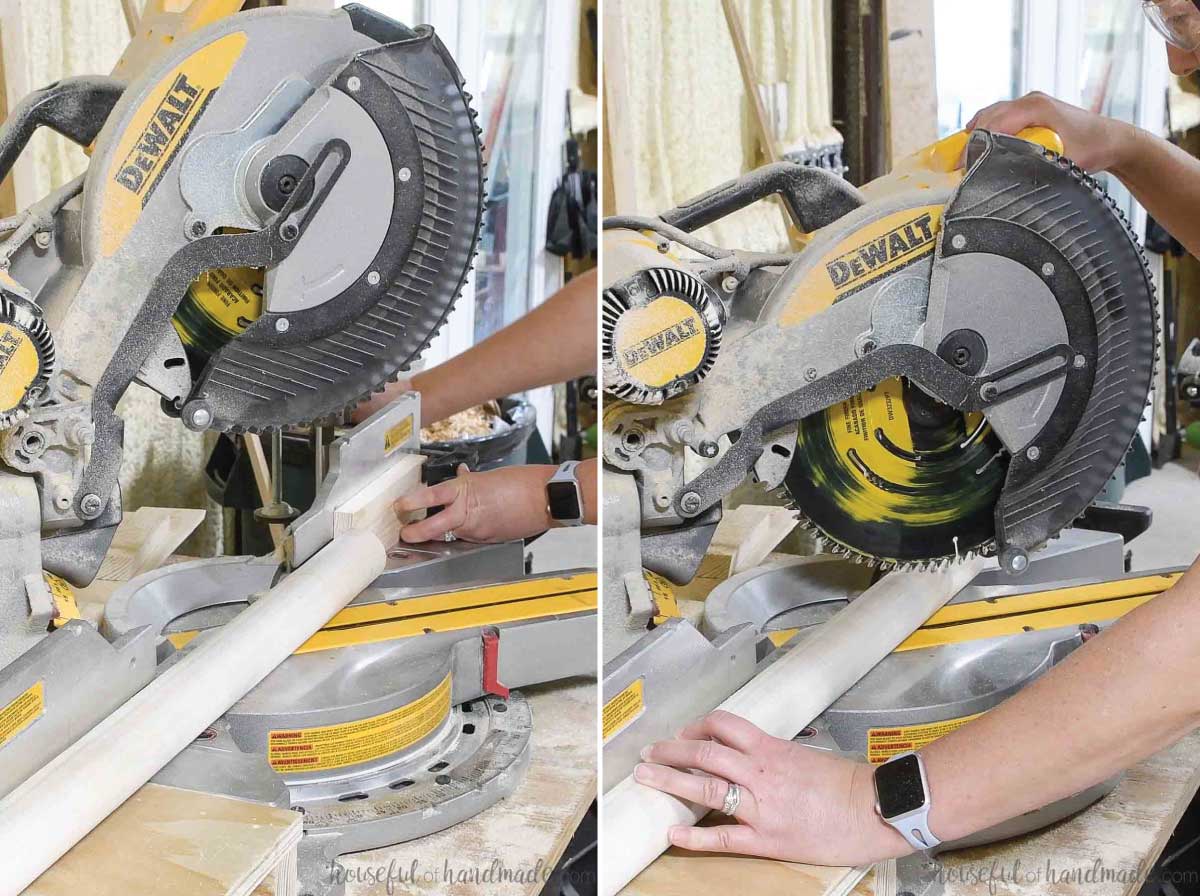
Now with all four dowel ends cut at an angle. Move your blade back to 0 and line the angled end of the dowel up with the stop block.
Cut the pin. Then repeat to cut all the angled ends off the dowels.
Rotate the blade again and make 4 more cuts. Now you will have all 12 Mölkky pins you need.
STEP 5- Add numbers to the pins
I used my Silhouette Cameo to make 2″ x 2 3/4″ ovals (the size of the top of the Mölkky pins). Then added chunky numbers 1-12 inside them.
Cut the ovals and numbers out of vinyl. Weed out where you want the paint.
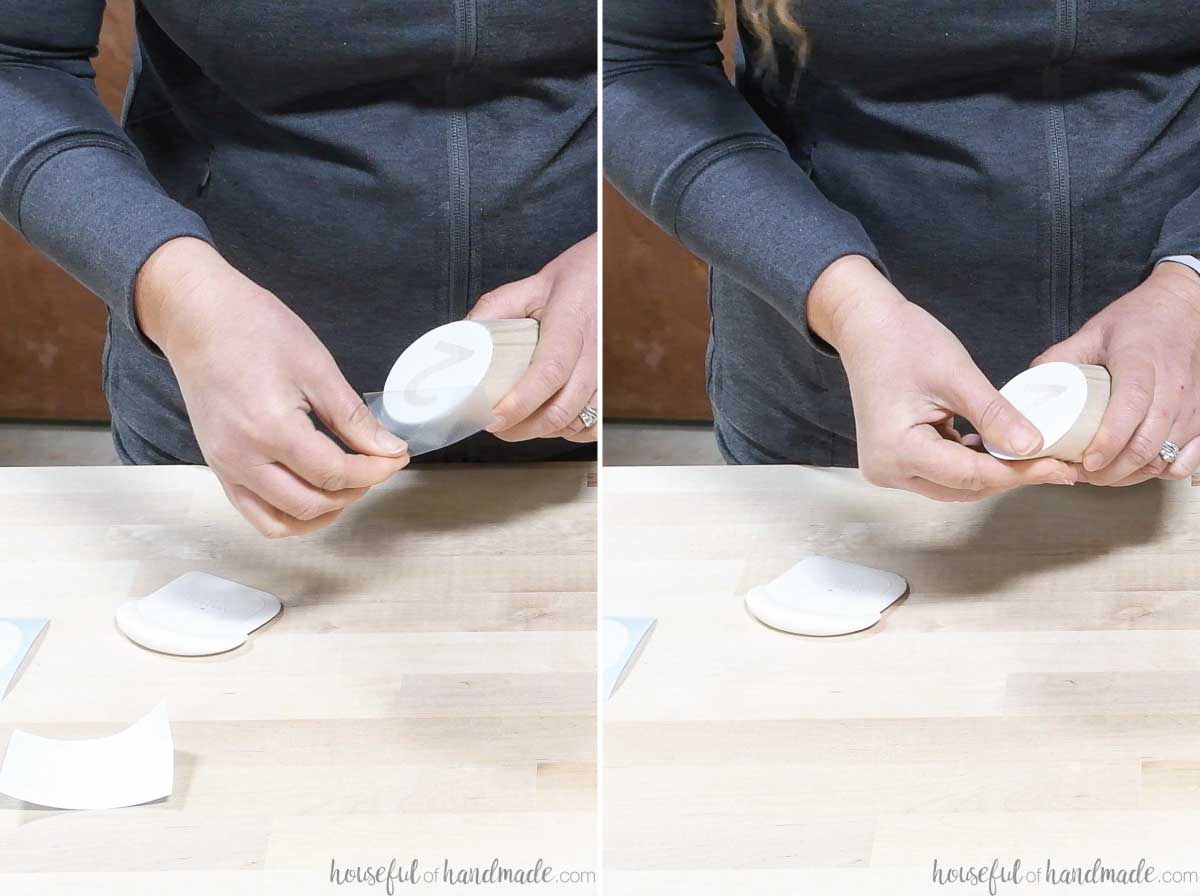
Place a piece of transfer tape on top of the vinyl stencil then pull it away from the backing.
Line the stencil up on top of the pin. Scrap it down to secure.
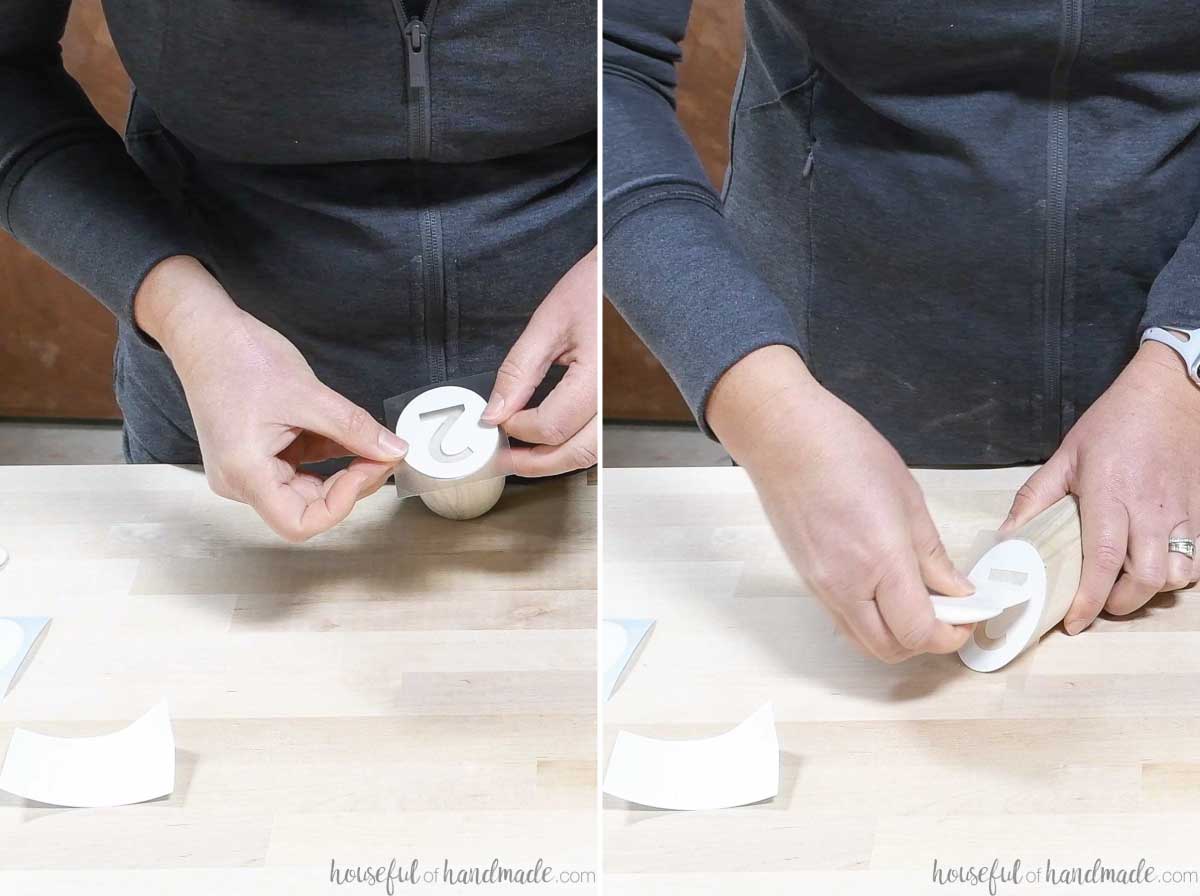
Remove the transfer paper.
Double check that the vinyl is still pressed firmly on the wood. I like to run my finger over where the paint will go to ensure it’s adhered.
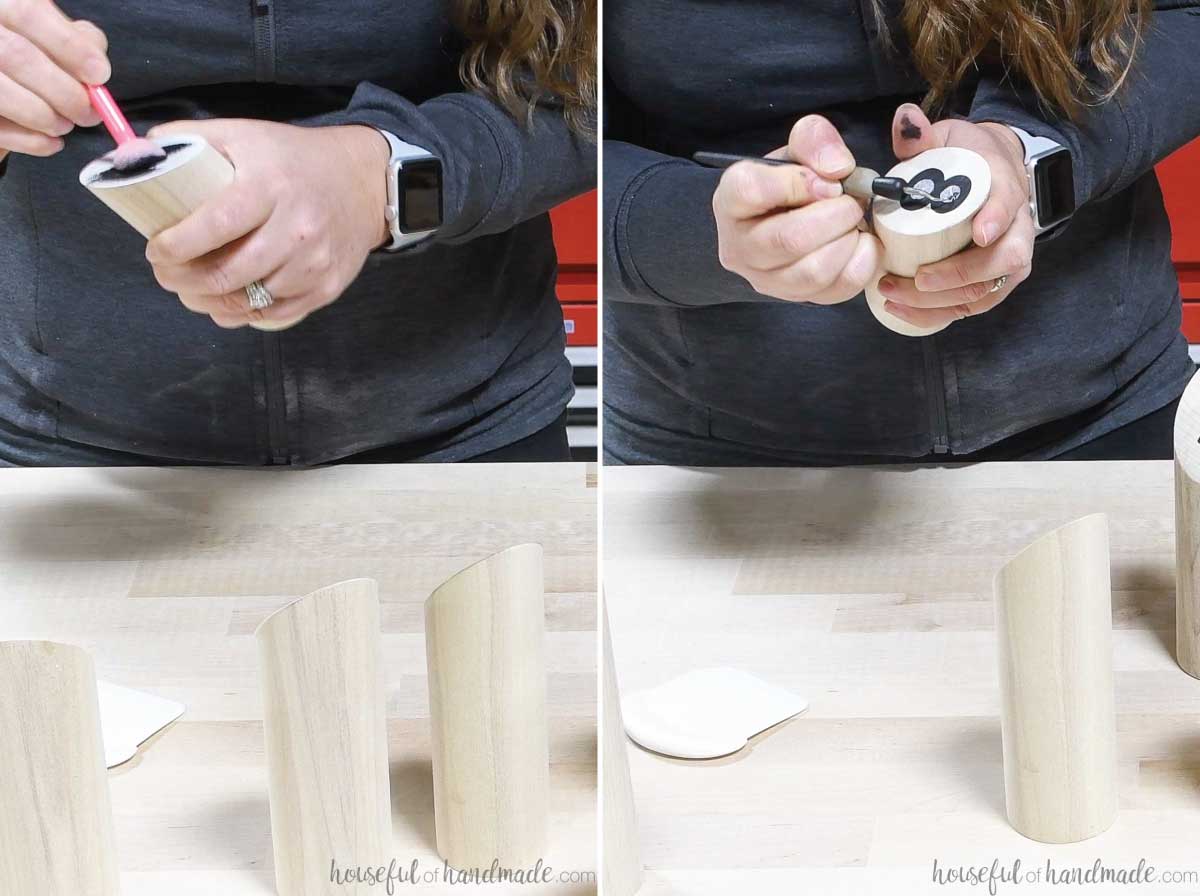
Then add paint to the stencil where the numbers are.
EXPERT TIP:
Use a pouncer and only add paint in an up-and-down motion, never side-to-side, to prevent the paint from bleeding under the stencil.
Once the paint is slightly dry, but not fully dried, remove the stencil. If the paint is left for too long, sometimes the stencil can adhere to the paint and pull it off.
Seal your Mölkky pins, throwing pin and carrier however you want to protect it from the grass.
Then you are ready to have fun!
Premium plans include:
- Recommended Tools
- Shopping list
- Easy to read cut list table
- Cut diagrams
- Step-by-step instructions with 3D renderings
- Helpful resources
- BONUS: 3D SketchUp file
Even with the cold temps, I am excited to be able to get outside and play some Mölkky. And I know this game will get tons of use once spring is here again.
Happy building!
