
Build a beautiful DIY console table to add storage and decor to your home.
This DIY farmhouse console table has two large drawers and two shelves. Perfect small space storage idea.


A small console table is the perfect solution for small spaces. This white farmhouse console with open shelves is perfect for displaying your favorite finds.
And the large drawers will help to add storage to your space. Plus, this small console table is a quick build, the perfect weekend project.
This post may contain affiliate links. As an Amazon Associate I earn from qualifying purchases. Click here to read my full disclosure policy.


We have this awkward corner in our living room. It is right next to the window so I thought it would be a great place for a chair, but with just over 36″ of space, it was a bit too tight to sit.
What ended up happening instead was it became our junk corner. Do you have one of those? A place that you shove things you don’t want to find a home for?
I was sick of the clutter so I decided it was time to find the perfect solution for our little corner.


Since our corner is right next to the window, I thought a small console table would be the perfect way to fill the space.
Something with open shelves so I could display pretty things (instead of the piles of clutter that were there before). And to maybe help hide some of the clutter that can never actually disappear, a few drawers would be nice too.


I looked around for the perfect farmhouse console table. But either they were too big, or didn’t offer the storage I needed, or were too expensive.
Instead I decided it was the perfect time to make a small console table that would give me everything I wanted. And I came up with this beautiful farmhouse style console that I am in love with!
I think my favorite part of this console is the beautiful shape cut into the drawers. You could always add trim to give the drawers some decorative fronts, but I wanted something different.
With a table saw, I cut away the edges of the drawer fronts at an angle and the results are perfect! With the easy aging techniques, the shape of the drawers stands out and looks amazing.


This small console table would be perfect in a living room (like we have it) or a dining room. It’s the perfect place to store napkins, table cloths, and entertaining dishes.
It would also work as an entry table or hallway console. The small size is perfect for filling any of the awkward corners you might have in your home. So time to get to building!
How to Build a Small Console Table
Tools & Materials
Tools needed:
- Miter saw
- Table saw
- Circular saw or jig saw
- I use this guide track with my circular saw for easy straight cuts every time.
- Finishing nailer
- Pocket hole jig
- Drill
- Impact driver
- Clamps
- My go to clamps are this right angle clamp and face clamps.
- Measuring tape
- Speed square
- Sander
Supplies:
- Wood
- (1) 3/4″ plywood, 1/2 sheet
- (1) 1/4″ plywood, 1/4 sheet
- (2) 1×6 boards, 8′ long
- (1 1/2) 1×3 boards, 8′ long
- (1 1/2) 1×2 boards, 8′ long
- (55) 1 1/4″ pocket hole screws
- (12) 1″ pocket hole screws
- 1 1/4″ finishing nails
- Wood glue
- Wood putty
- Sand paper
- Paint or stain
- (8) felt furniture pads
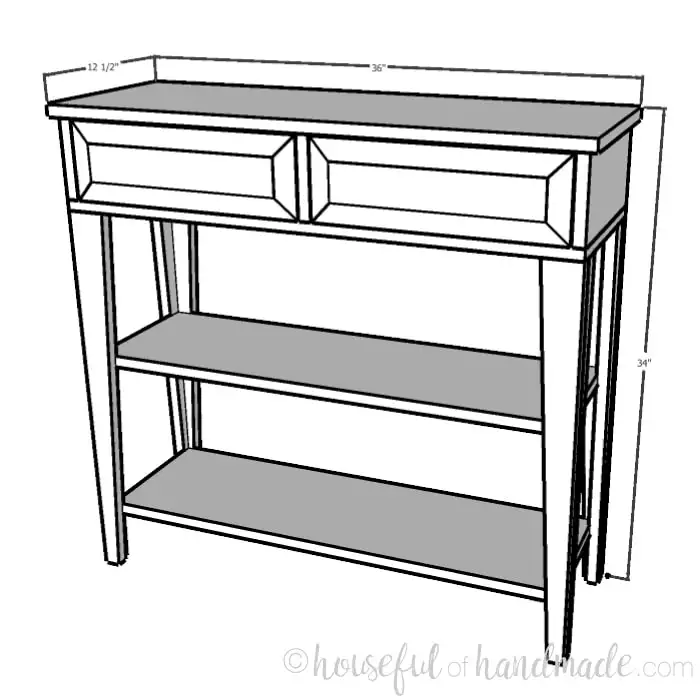
Overall Dimensions
The final dimensions for the console table with drawers is 36″ wide x 34″ tall x 12 1/2″ deep.
Each drawer is 16 1/4″ wide x 11″ deep.

Cut List
Cut out the pieces according to the easy-to-read table in the PDF plans.

STEP 1- Cut and assemble the legs
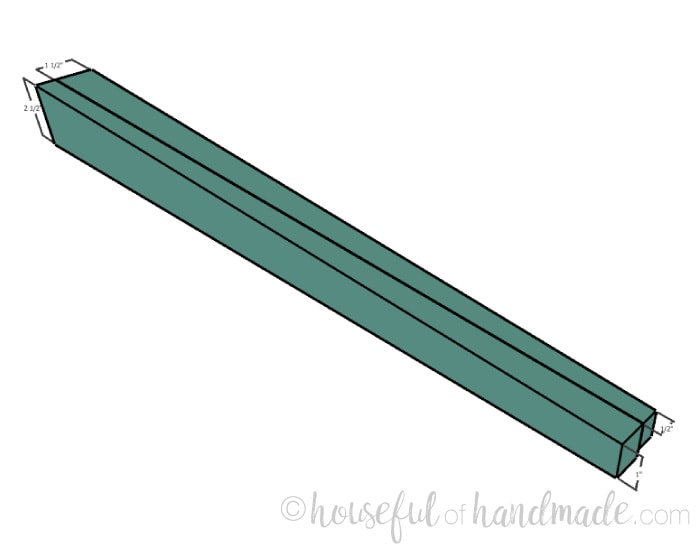
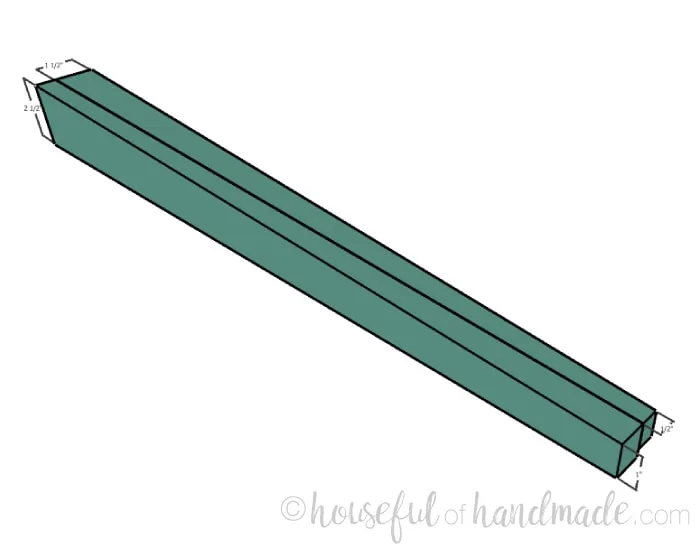
Using a circular saw with guide track (I love this one) or a jig saw, angle the 27″ leg boards so the top of the board is 2 1/2″ wide and the bottom is 1″ wide according to the diagram in the plans.
Then angle the leg side boards so the top of the board is 1 1/2″ wide and the bottom is 1/2″ wide.
Before assembling the legs, drill pocket holes for 3/4″ wide material in the top of the legs and leg sides. Make sure the pocket holes will be on the inside of the small console. Except for the pocket holes on the back legs, those can be on the back of the console.
Assemble the legs so the straight edge of the leg side is flush to the straight edge of the leg. Secure with wood glue and finishing nails then let dry.
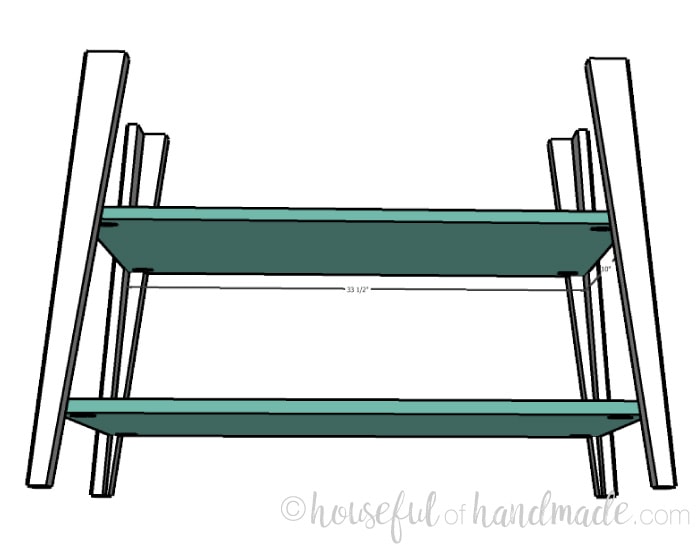
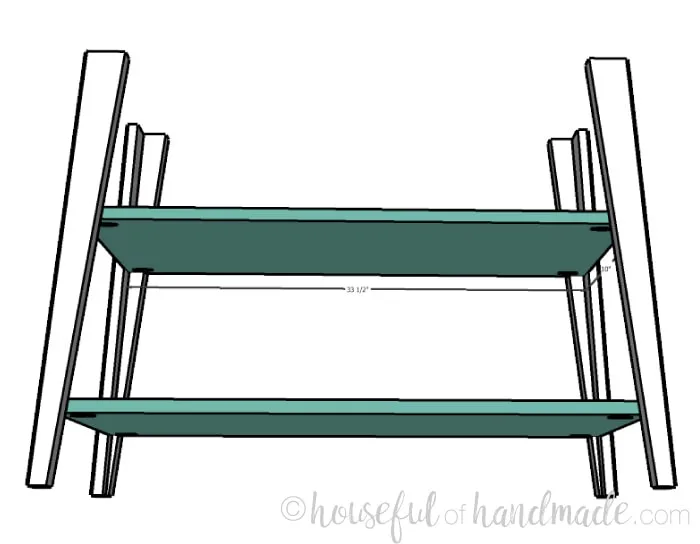
STEP 2- Build base
Drill 4 pocket holes for 3/4″ wide material in the side corners of the plywood shelves. These need to be close to the edges of the shelves so the screws will hit the skinny of the legs.
Measure up on all four legs where you want your shelves and secure them with pocket hole screws and wood glue.
Secure the bottom of the drawer area to the top of the legs with wood glue and pocket hole screws. Make sure the plywood bottom is flush with the outer corners of the legs.
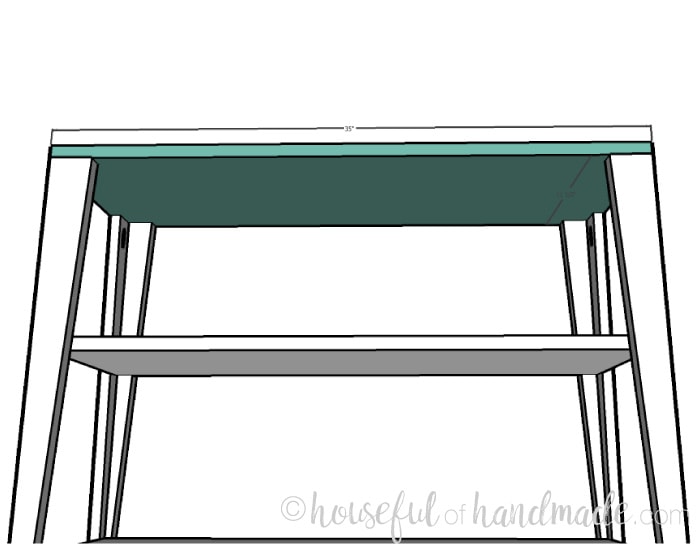
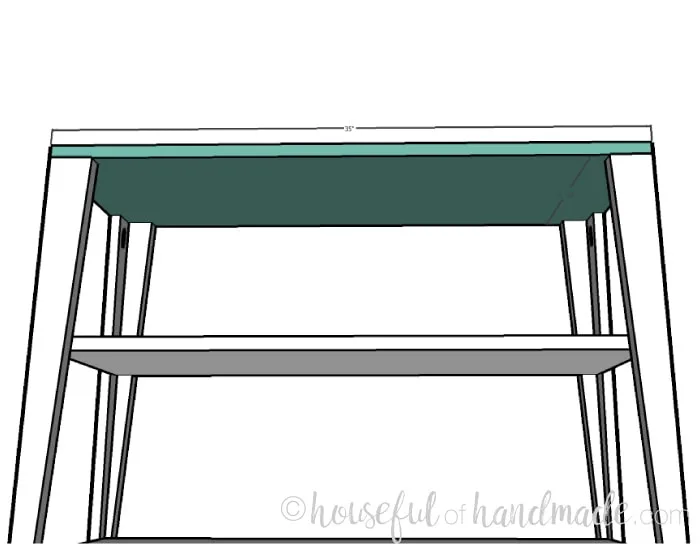
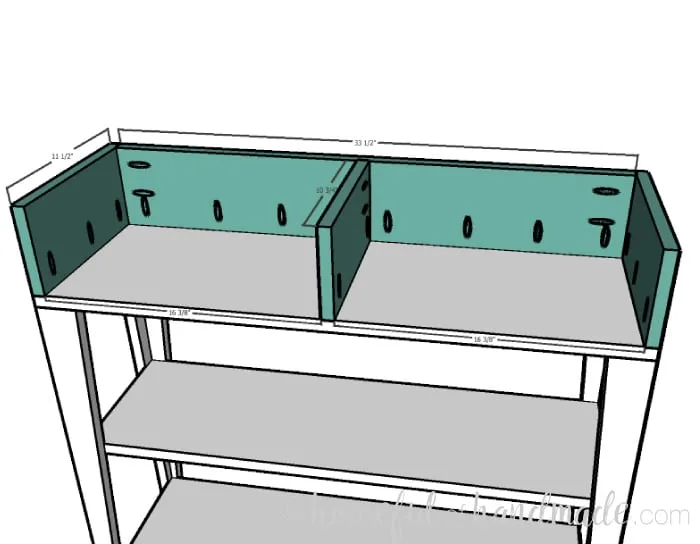
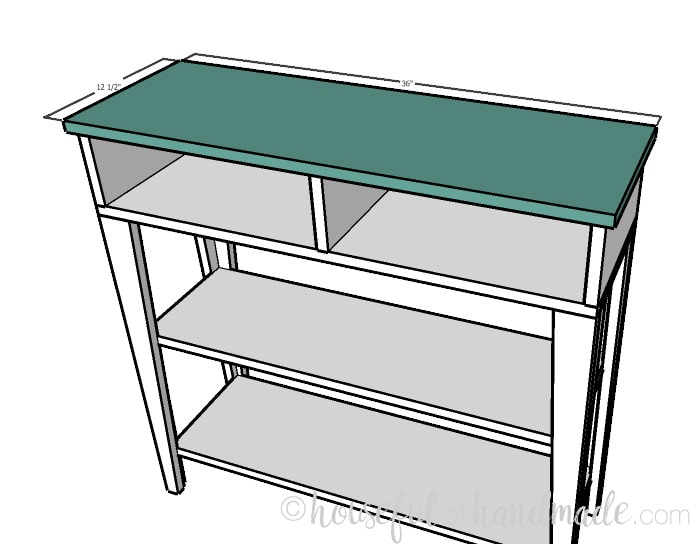
STEP 3- Build console top
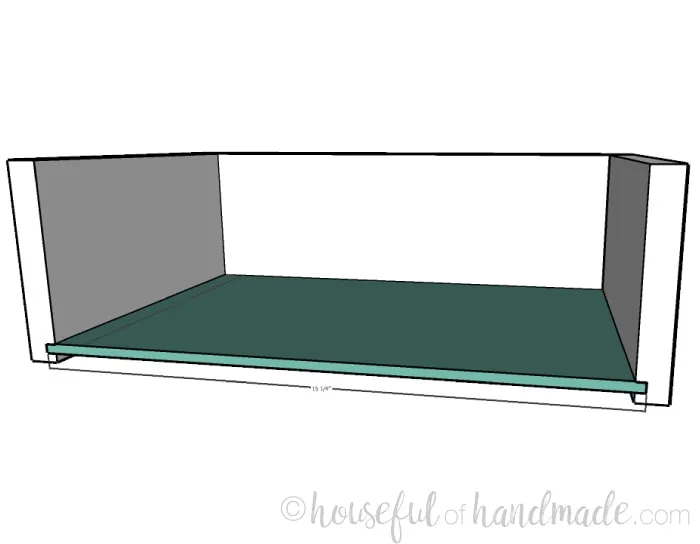
Attach the drawer area back, sides and center divider to the top of the bottom piece according to the diagram in the build plans. Secure with wood glue and pocket hole screws.
Ensure the boards are flush with the outer edge of the bottom and the center divider is centered and straight.

Place the console table top on top and center it so there is a 1/2″ overhang all around. Secure to the drawer area sides, back and center divider with wood glue and finishing nails.

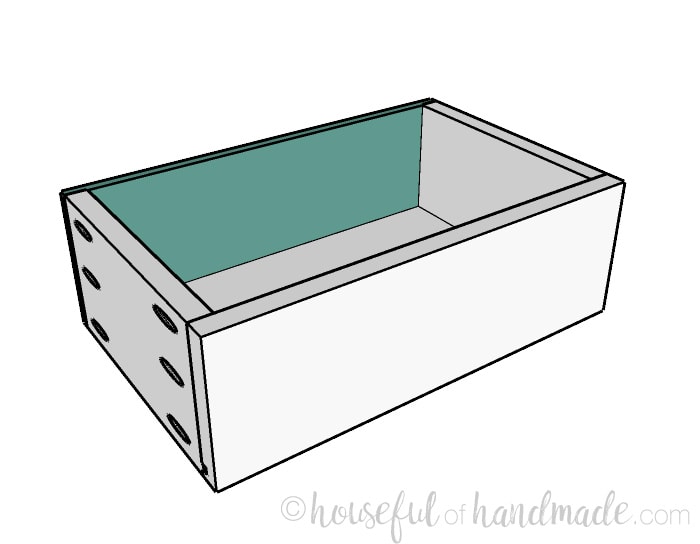
STEP 4- Build drawers
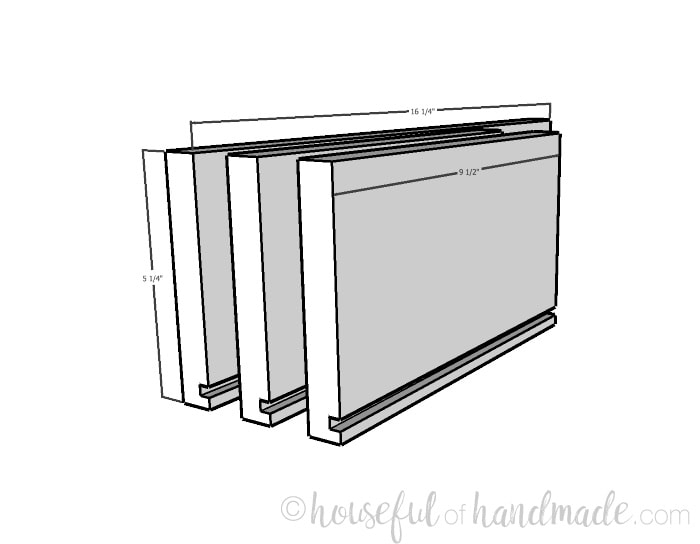
To build the drawers, rip down the 1×6 boards 5 1/4″ wide so they will slide into the console drawer area.
These drawers are not mounted on drawer slides, they are just slid into the boxes. Four felt furniture pads are added to the bottom of corners of the drawer for easy sliding.
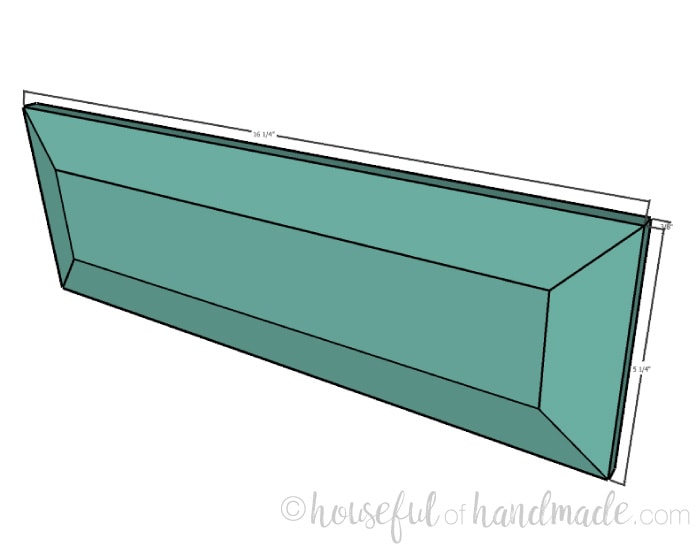
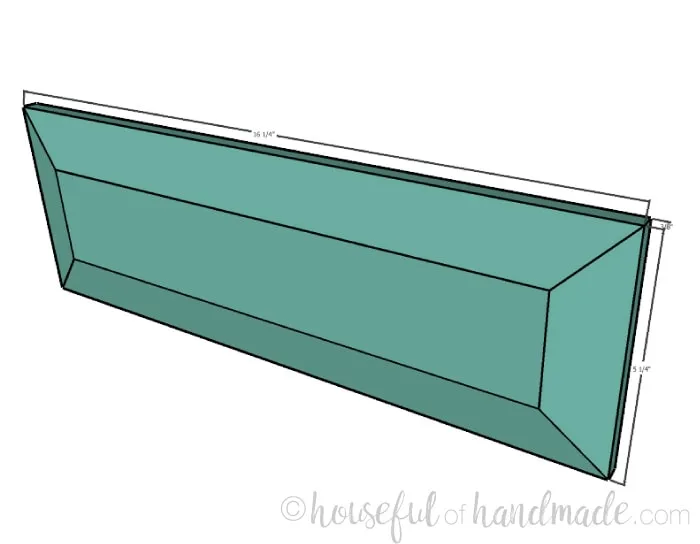
To cut the two drawer front boards with the decorative front, set your table saw fence 3/8″-1/2″ away from the blade. Set the height of the blade to about 2″ and turn it to a 15 degree angle away from the fence.
Run all four sides of the drawer front board through the table saw to cut the board at an angle but leave the center front flat.
Alternately, you could keep the top of the drawer flat and add trim to the front like I did for this sewing machine table makeover.
Cut a 1/4″ deep by 1/4″ wide groove into the drawer side and back boards 1/4″ up from the bottom. You can do this with the table saw by setting the fence 1/4″ away from the blade and setting the blade at 1/4″ height.
Run the boards through the saw then adjust the fence a blades width further away from the blade and rerun the boards. Continue until the groove is 1/4″ wide.
Learn more tips and ways to build drawer boxes here.

Drill pocket holes for 3/4″ material on the outside back of the drawer sides. Drill pocket holes for 1/2″ material on the outside front of the drawer sides (remember the front of your drawer is only about 3/8″ -1/2″ thick because of the decorative cuts).
Attach the drawer sides to the drawer back with wood glue and 1 1/4″ pocket hole screws.
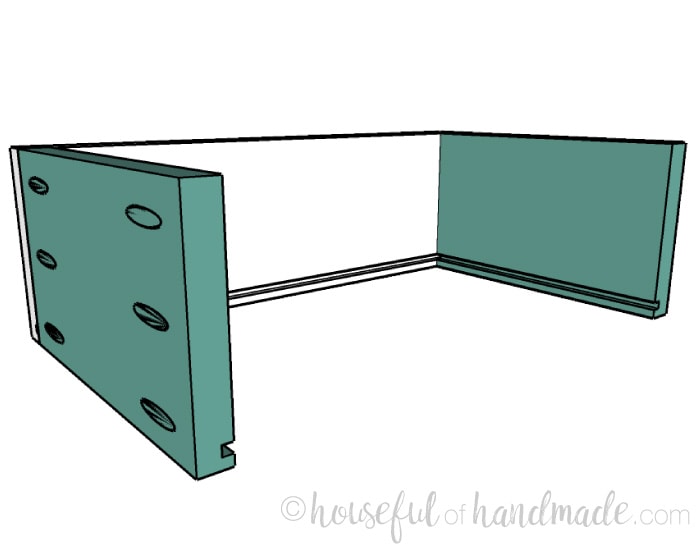

Slide the 1/4″ plywood drawer bottom boards into the grooves on the drawer boxes.

Attach the front of the drawers to the sides with the 1″ pocket hole screws and wood glue.

STEP 5- Finish
Sand and finish the small console table.
I created a farmhouse look to mine by staining it first with Varathane weathered wood accelerator. Then adding Vaseline to the edges and parts that would be worn with use.
I painted the entire thing with 2 coats of Behr Ultra Pure White turned into chalk paint with this homemade chalk paint recipe.
Then I waxed the entire thing with furniture wax. I used these library card drawer pulls and absolutely love how it turned out!
Don’t forget to grab the printable PDF plans here!
Premium plans include:
- Recommended Tools
- Materials list
- Easy to read table cut list
- Step-by-step instructions with 3D renderings
- Helpful resources
- BONUS: 3D SketchUp file


And for more woodworking fun, check out the rest of my woodworking tutorials.


mc
Friday 4th of February 2022
Great design, thanks so much. But this great design, just as the one before it, is written as if we were in the room with you! Small but important build details, such as the distance between the shelves, the bottom shelf to the bottom of the leg,many other small but critical measurements are not indicated. Sure, I can probably figure it out, but a standard plan typically includes all measurements. This also allows the maker to make small changes or adjustments for their needs (e.g., i plan to add drawer slides and greater depth to the drawers.)
In any case, a wonderful idea and a good place to start.
Kitchen Set
Tuesday 27th of February 2018
So nice decoration and ideas. Thanks for sharing.