Do you feel like you never have enough storage in your home?
It is amazing how much storage space you can gain with one well designed piece of DIY furniture. And that piece is this beautiful cube storage shelf.
You may be thinking cube (or cubby) storage is cheap furniture, and I get it. It reminds me of the off-the-shelf particle board furniture from my past.
This post may contain affiliate links. As an Amazon Associate I earn from qualifying purchases. Click here to read my full disclosure policy.
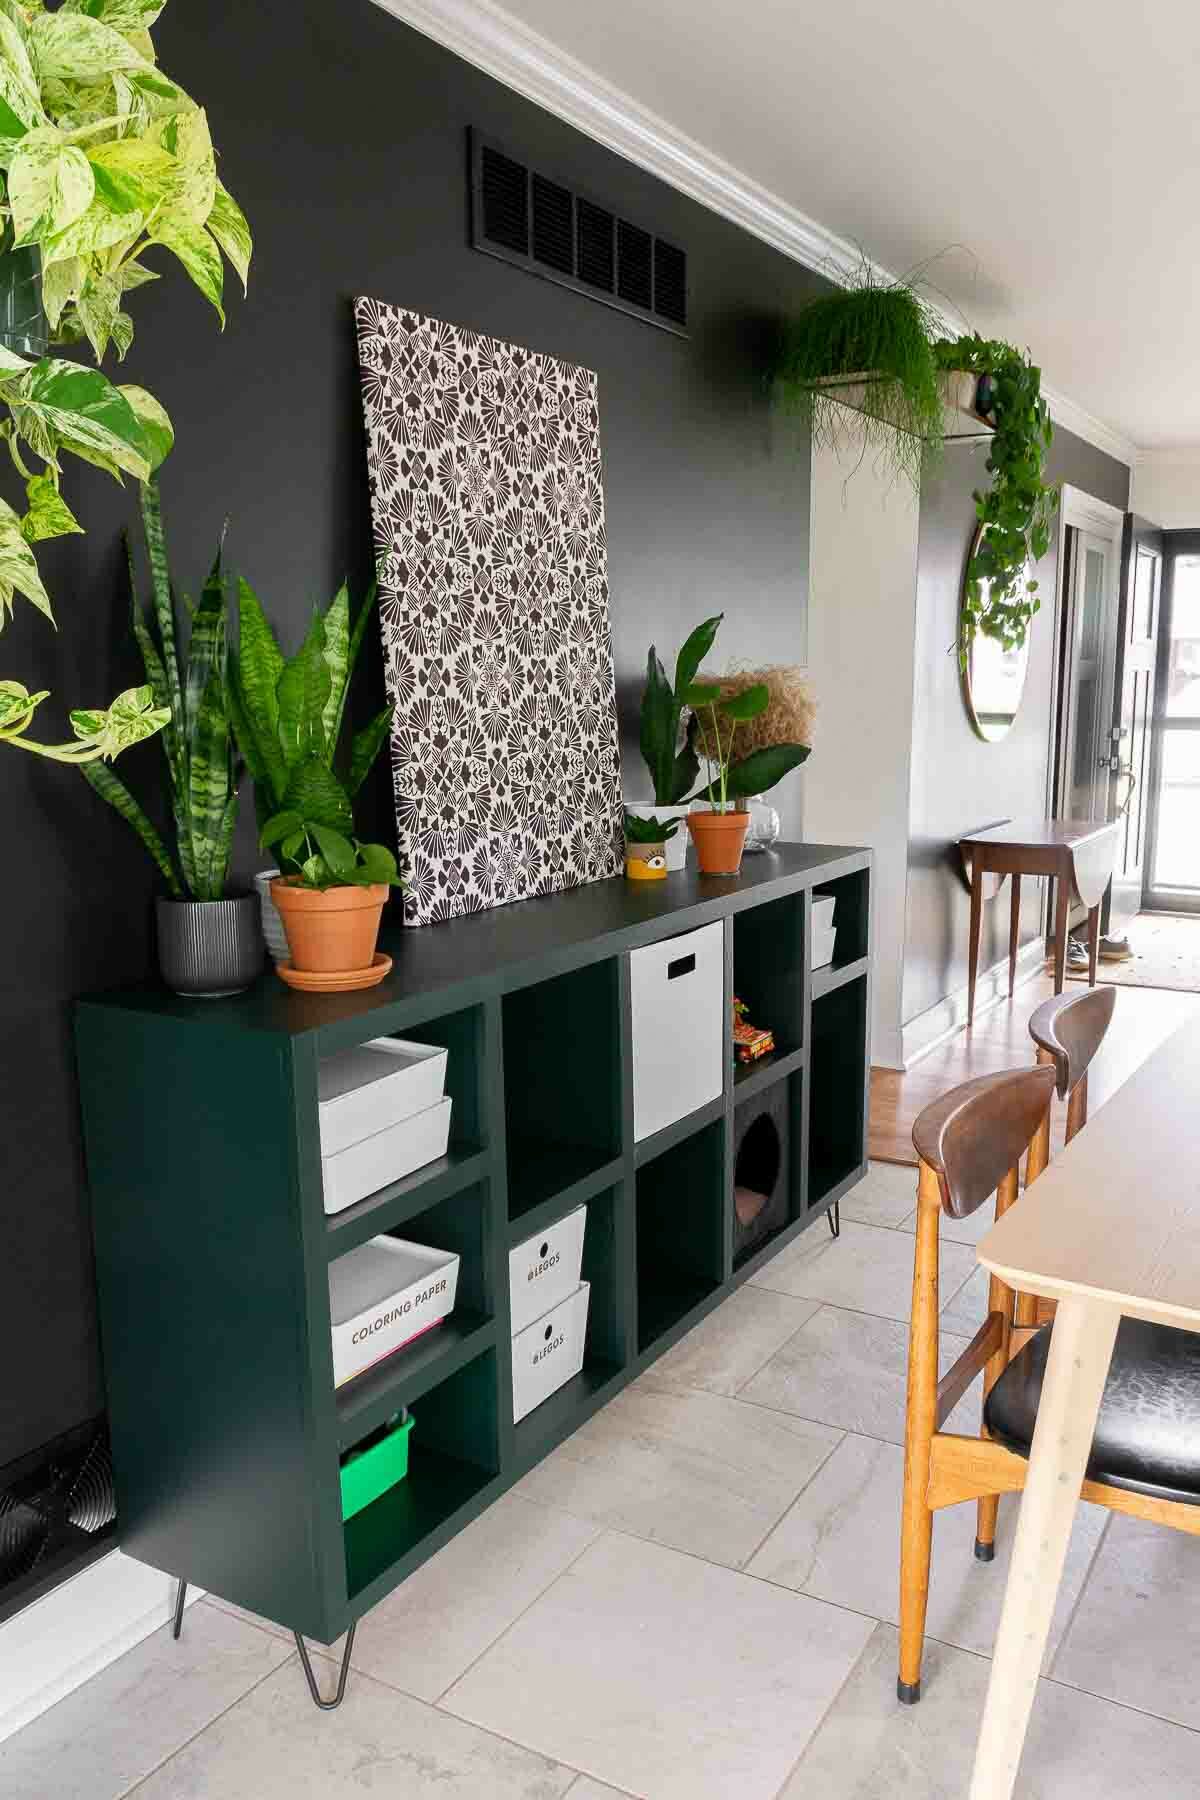
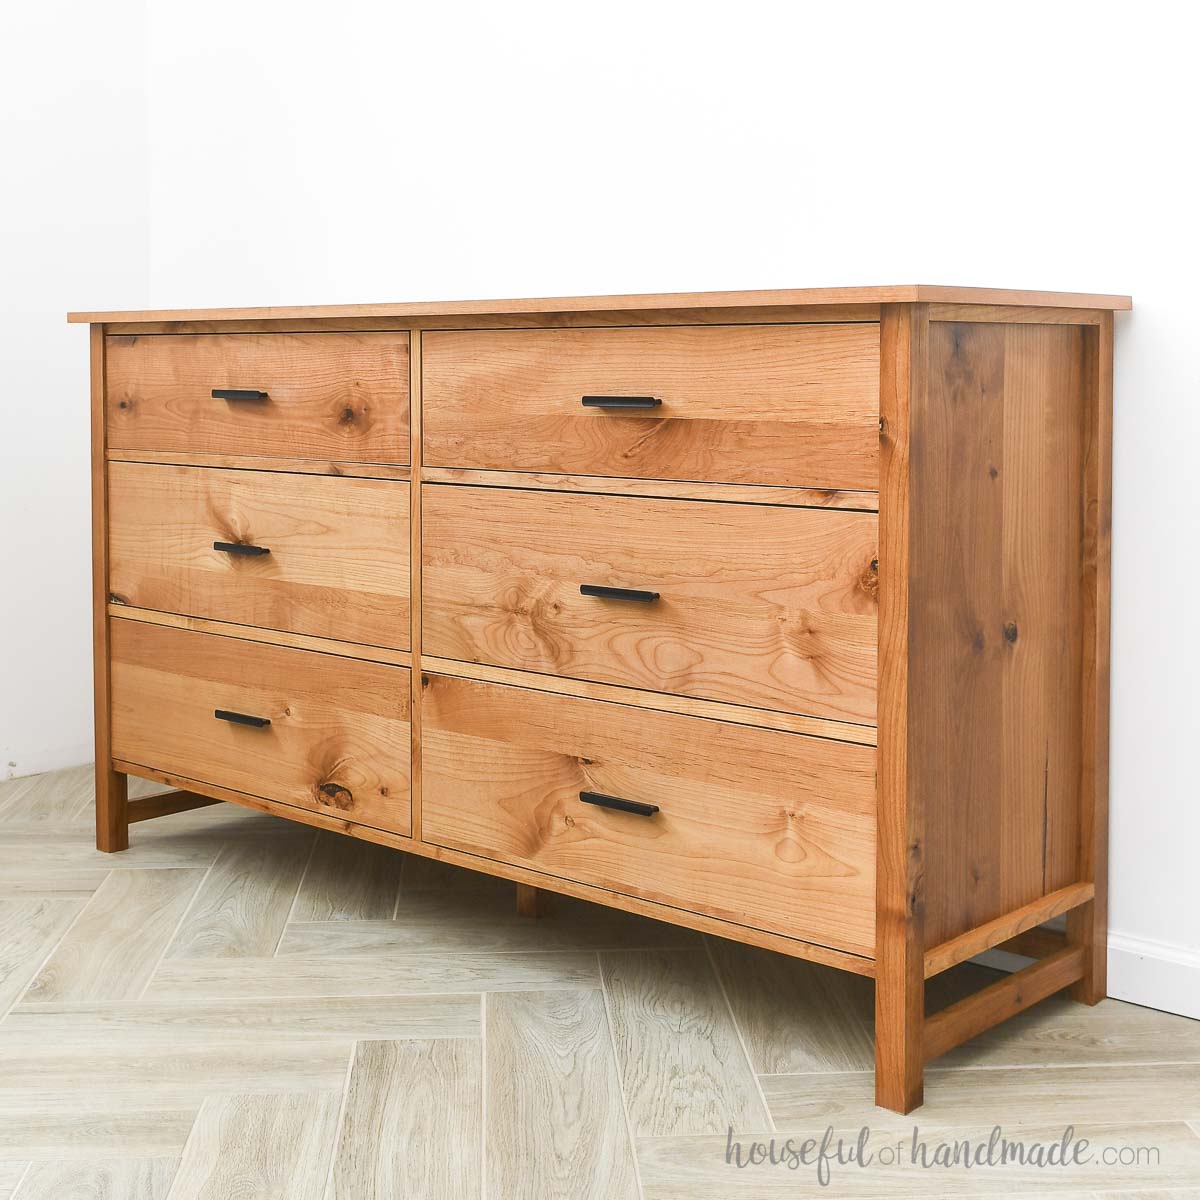
But this cube storage is different! It is a gorgeous console table made from solid wood. And when you add stylish feet to it, it looks nothing like the cheap cube shelves from big box stores, but has all the functionality you need!
Kallax Shelf Upgrade
If you love the storage of the Kallax cube shelf from Ikea, but want something a bit more grown up, you will love this console!
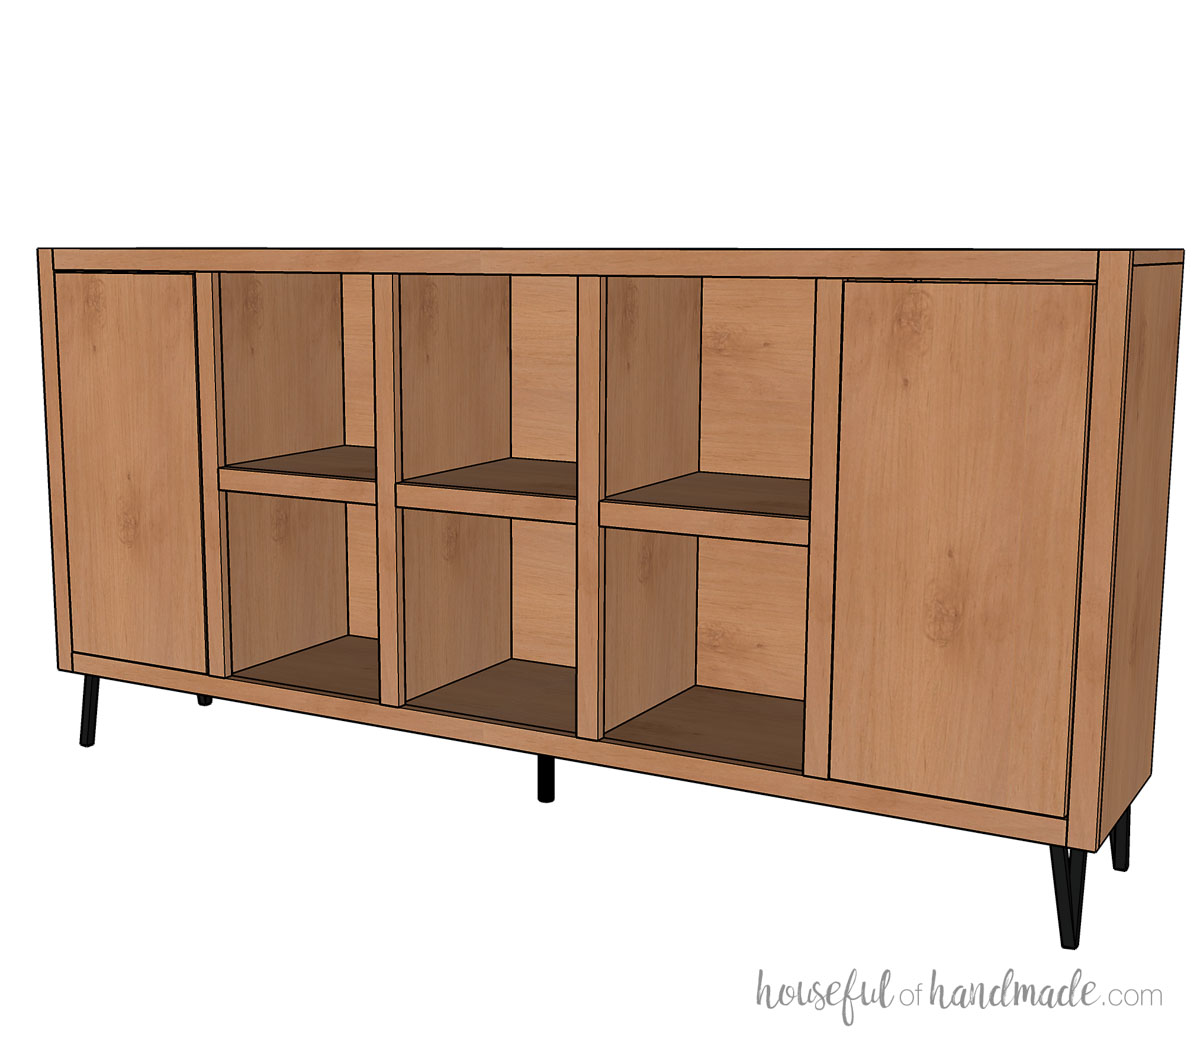
The 6 center shelves are perfectly sized to fit the Ikea fabric bins or plastic boxes in that fit the Kallax collection.
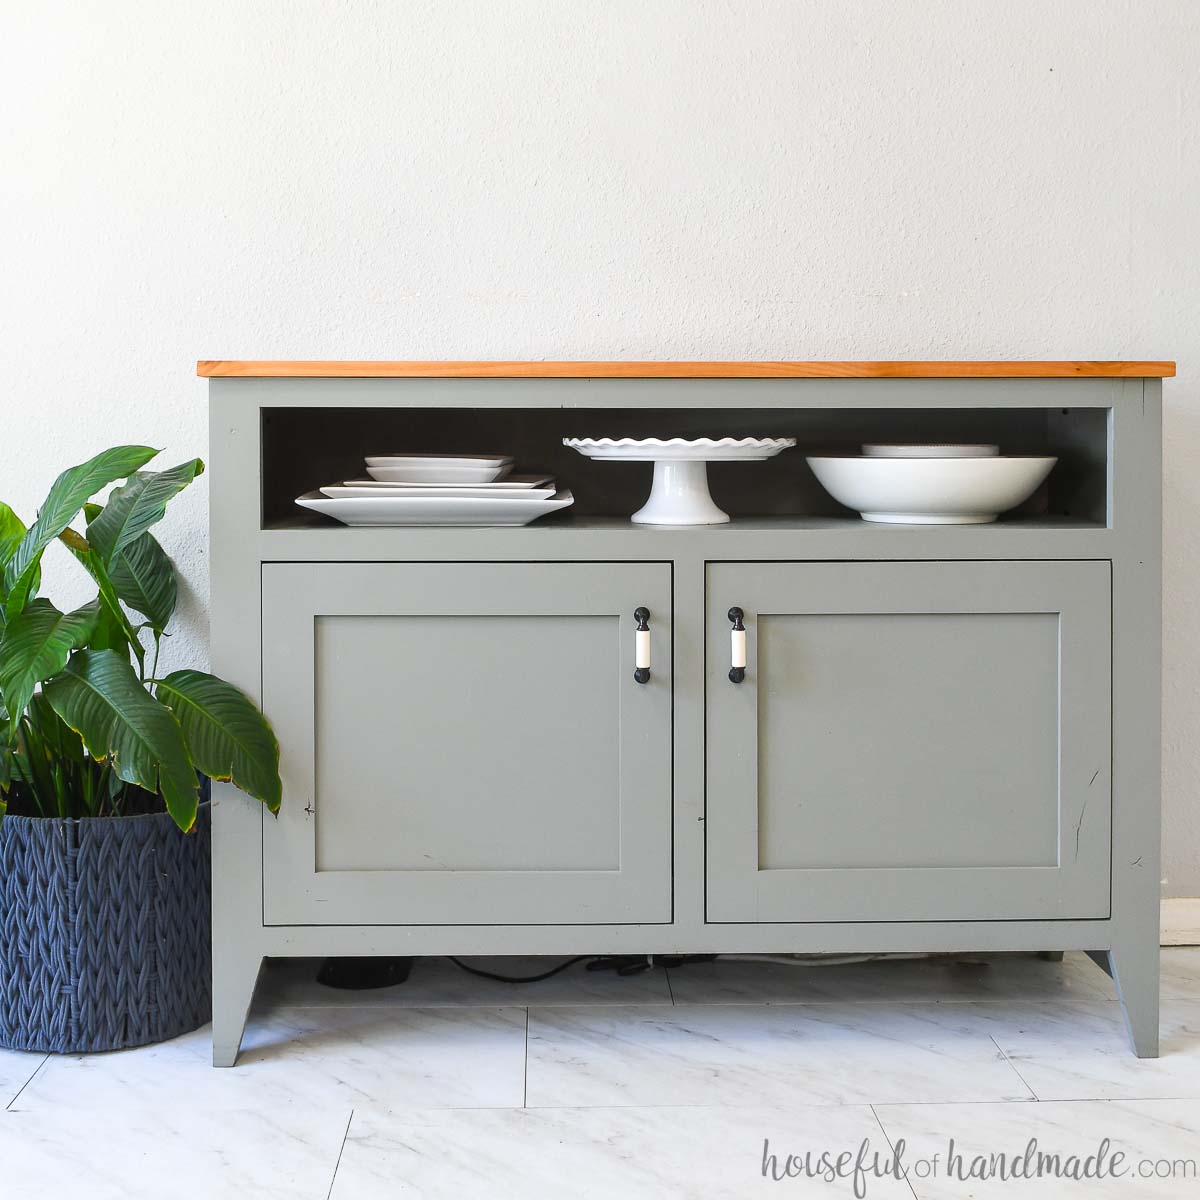
The two sections on the sides can have your choice of shelves (adjustable or stationary) or doors. Doors are great for giving you a place to hide away things and really make your DIY storage unit look amazing.
And while this may look like a huge project, it is a simple build. Cut all the plywood pieces with a circular saw and assemble with easy, but strong, pocket holes.
Then have fun staining or painting your new storage console to match your own home.
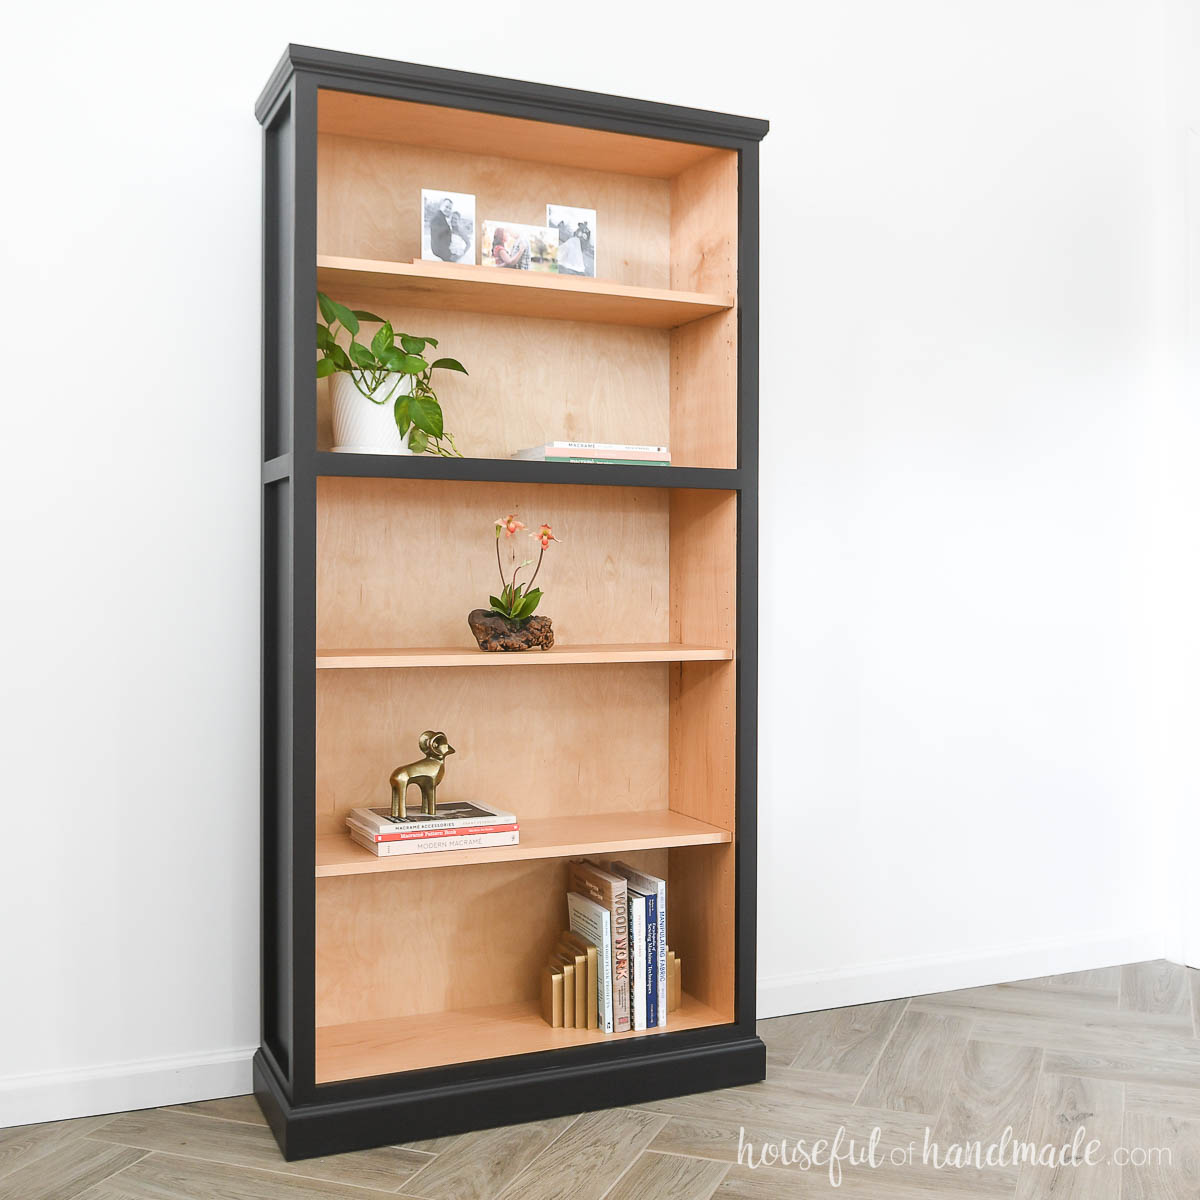
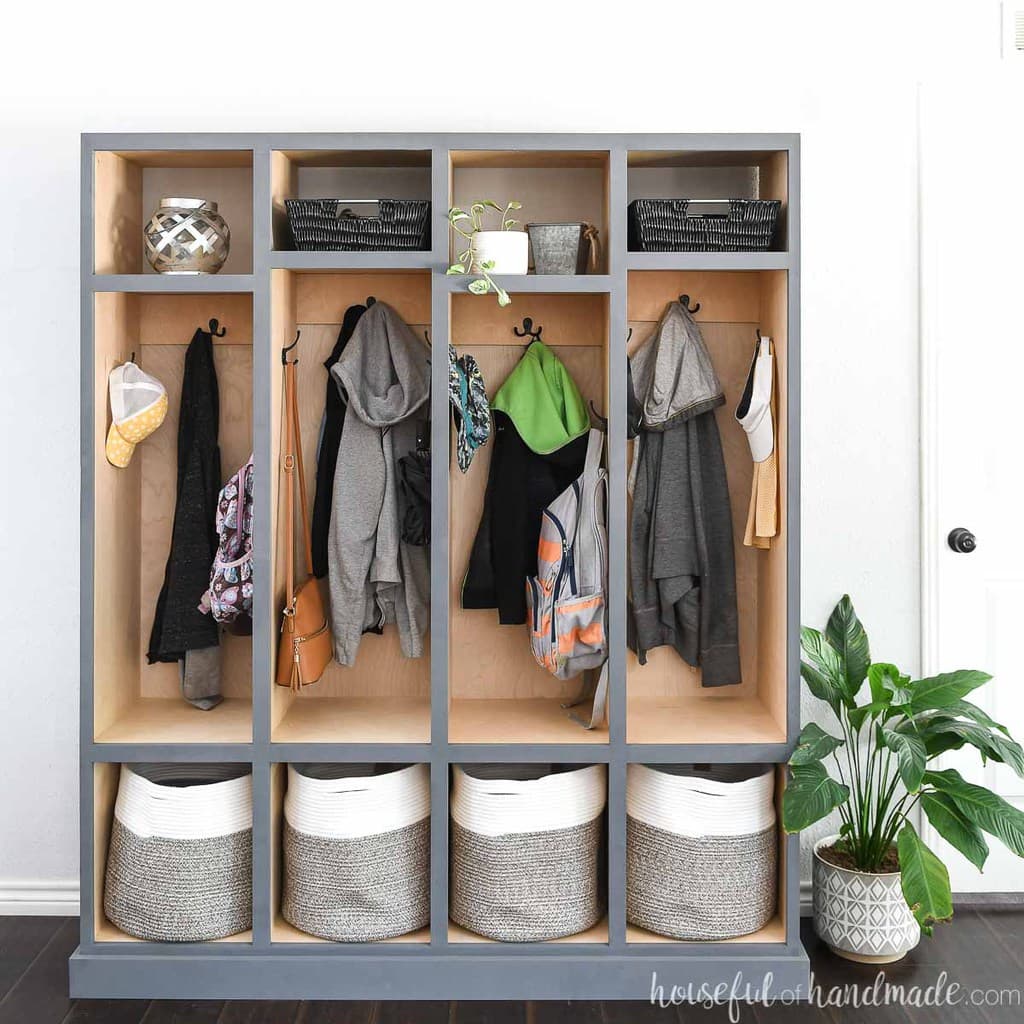
More Amazing Storage Builds
Build storage solutions for every room in your home with these DIY plans.
How to Build a Cube Storage Console
Tools & Materials
Recommended Tools:
- Miter saw
- I recently upgraded to this larger sliding miter saw (watch for it to go on sale), but all my projects before were built with this inexpensive miter saw that I loved.
- Circular saw with guide track
- Pocket hole jig
- Drill
- Impact driver (optional, but I love not having to switch bits with the drill)
- Right angle clamp
- Face clamps
- Finish nailer
- Trim router
- Sander
- Optional: Shelf pin jig if you want adjustable shelves on the sides
Supplies:
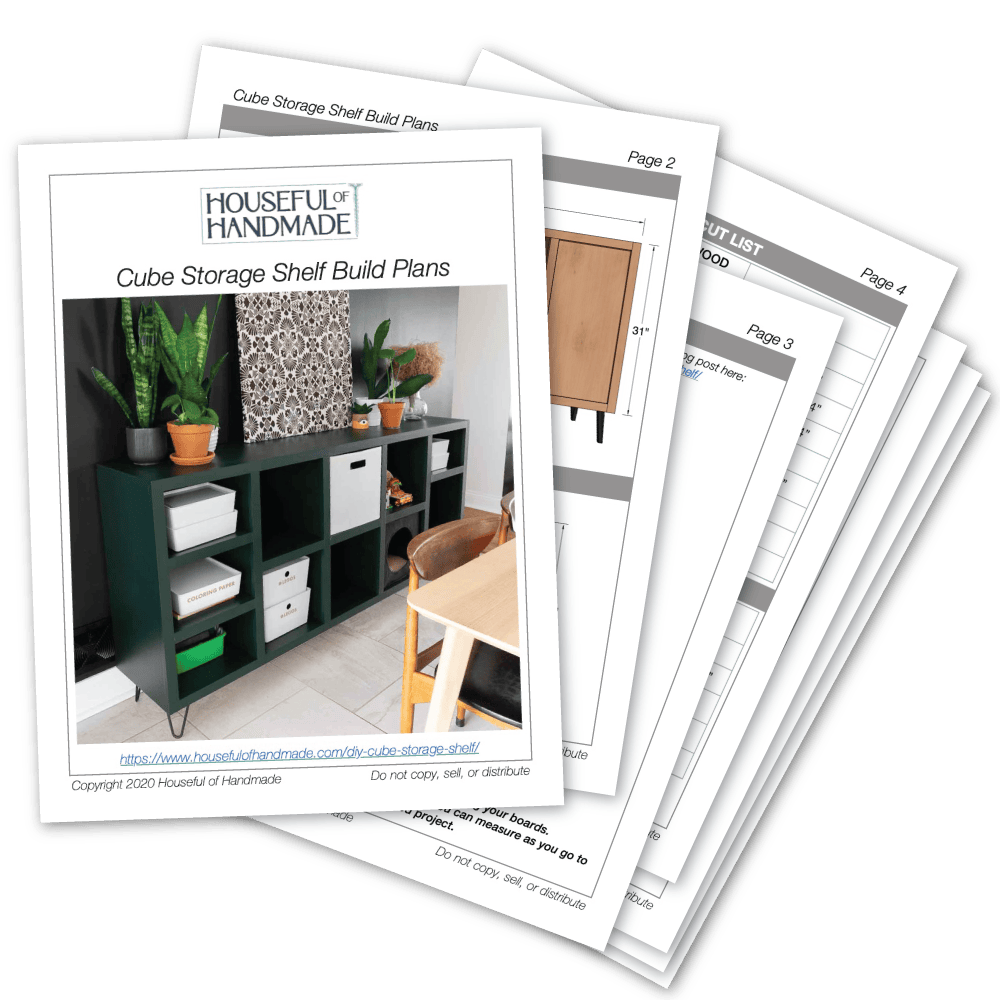
- PDF build plans
- Wood products
- (2) 3/4″ plywood, 4×8 sheets
- (1) 1/4″ plywood, 4×8 sheet
- (5) 1×2, 8′ long boards
- 1 1/4″ pocket hole screws
- 1 1/4″ finishing nails
- 3/4″ finishing nails
- Wood glue
- Sandpaper
- (5) furniture legs
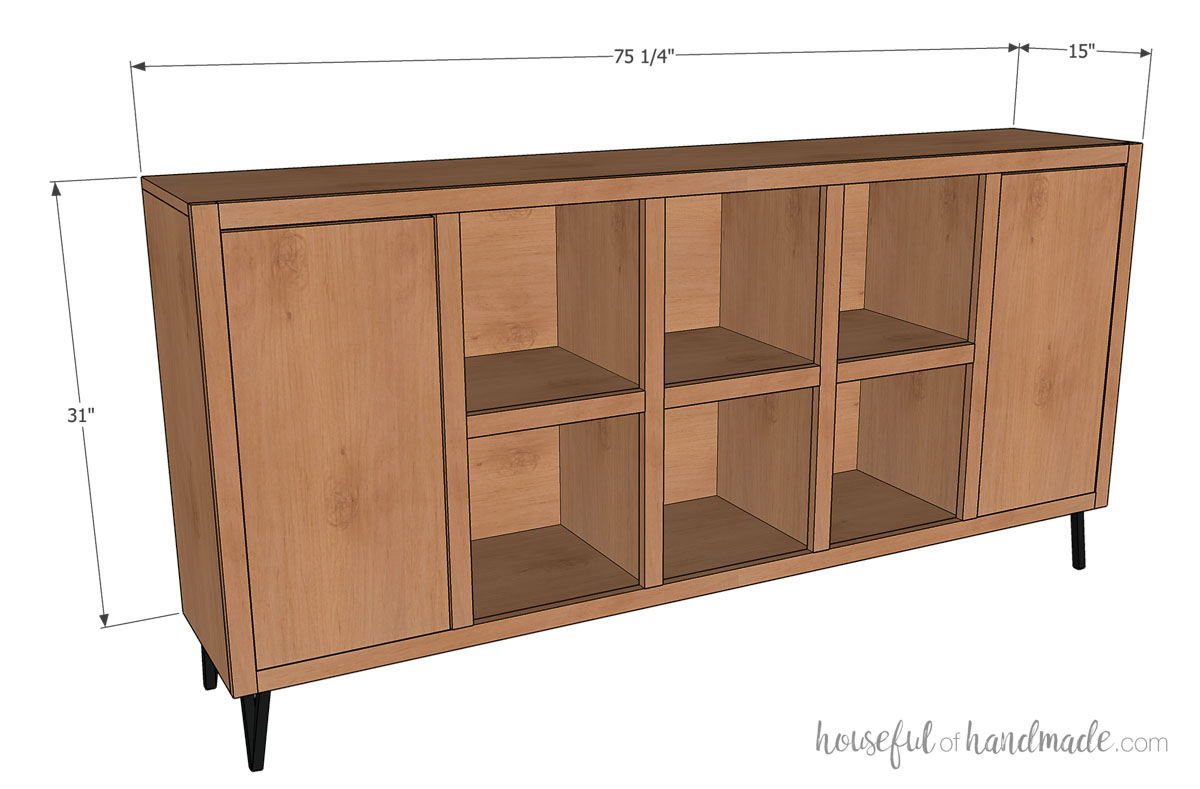
Overall Dimensions
The finished cube storage shelf is 75 1/4″ wide by 31″ tall (without the legs) and 15″ deep. You can add any height legs to make the modern console as tall or as short as you need.
I collaborated with Brittany from By Brittany Goldwyn who built the cube storage shelf from these plans. Check out her post here for notes and photos from the build process.
Cut List
Cut out the pieces according to the detailed plywood cut diagram in the PDF plans.
Start by ripping the long strips from the plywood with your saw. Then cross-cut them to size.
I love using the Kreg RipCut and Accucut to easily cut down a sheet of plywood.
EXPERT TIP:
Lay the plywood on a 2″ thick piece of rigid foam to fully support the plywood while cutting. It also helps prevent the plywood from being pushed by the saw.
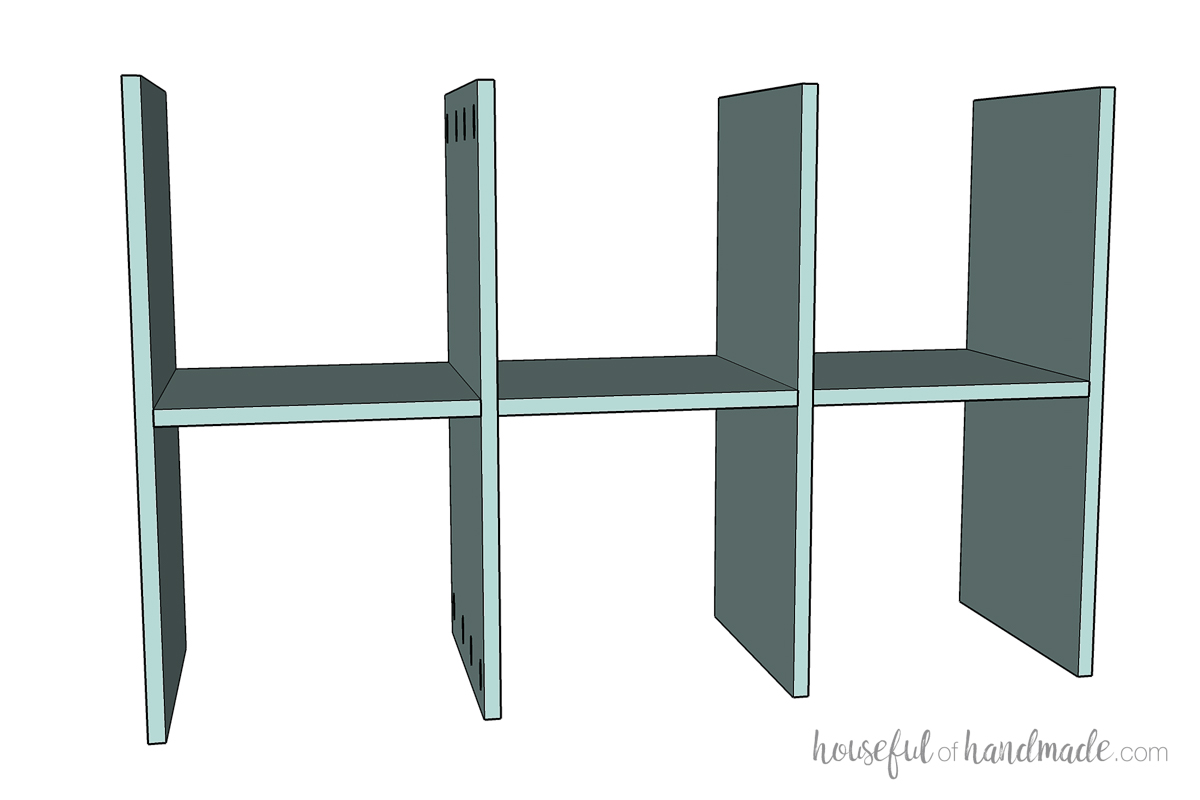
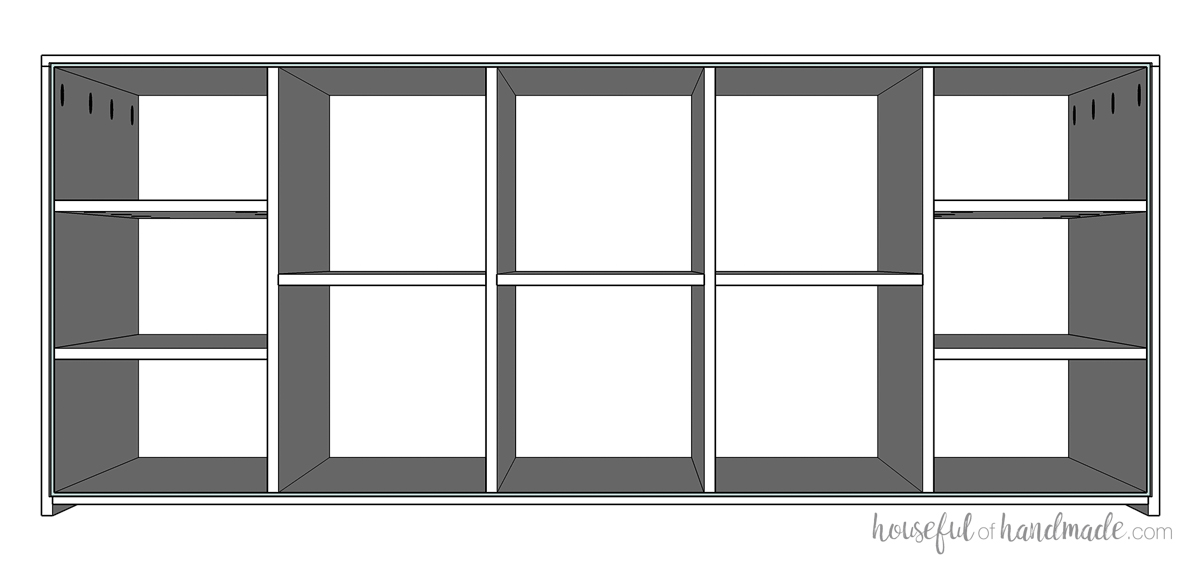
STEP 1- Build cube frame
Set your pocket hole jig to drill pocket holes in 3/4” thick material (all pocket holes in this project are in 3/4” thick lumber). Drill pocket holes in both sides of the cube shelves and center wall pieces.
Attach the cube shelf pieces between the center walls according to the diagram below. Secure with 1 1/4” pocket hole screws and wood glue.
EXPERT TIP:
If you do want visible nail holes on the front of the face frame you can attach it with pocket holes. To do that, add pocket holes on the front of all the pieces too before you assemble them. Just a few pocket holes spaced 6-8” apart is all you need.
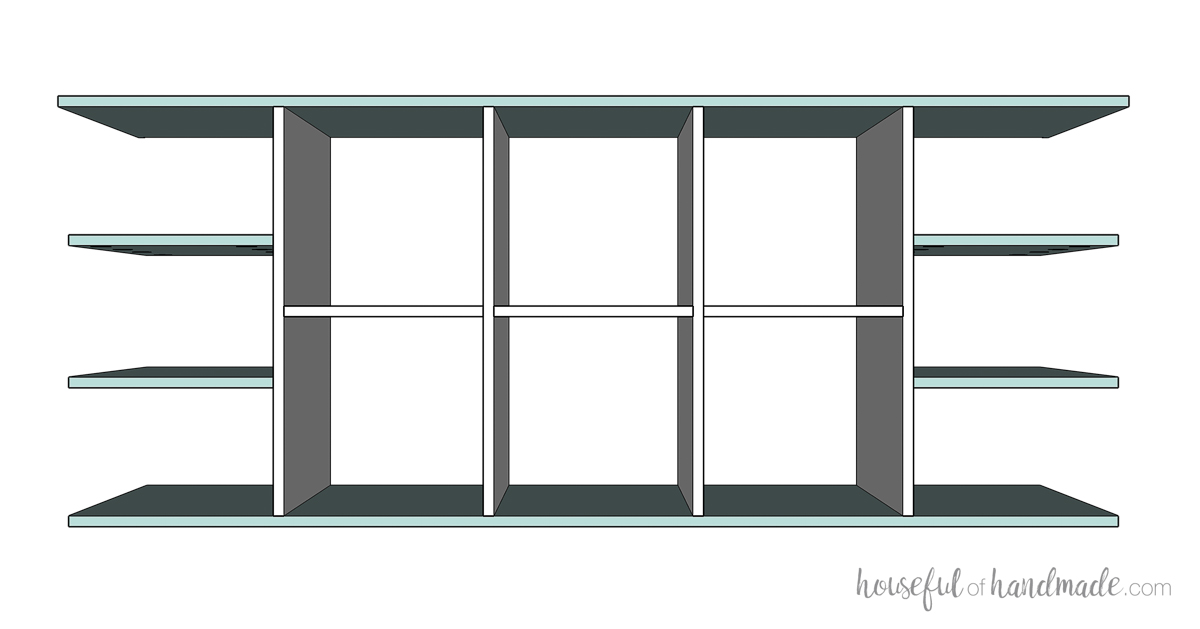
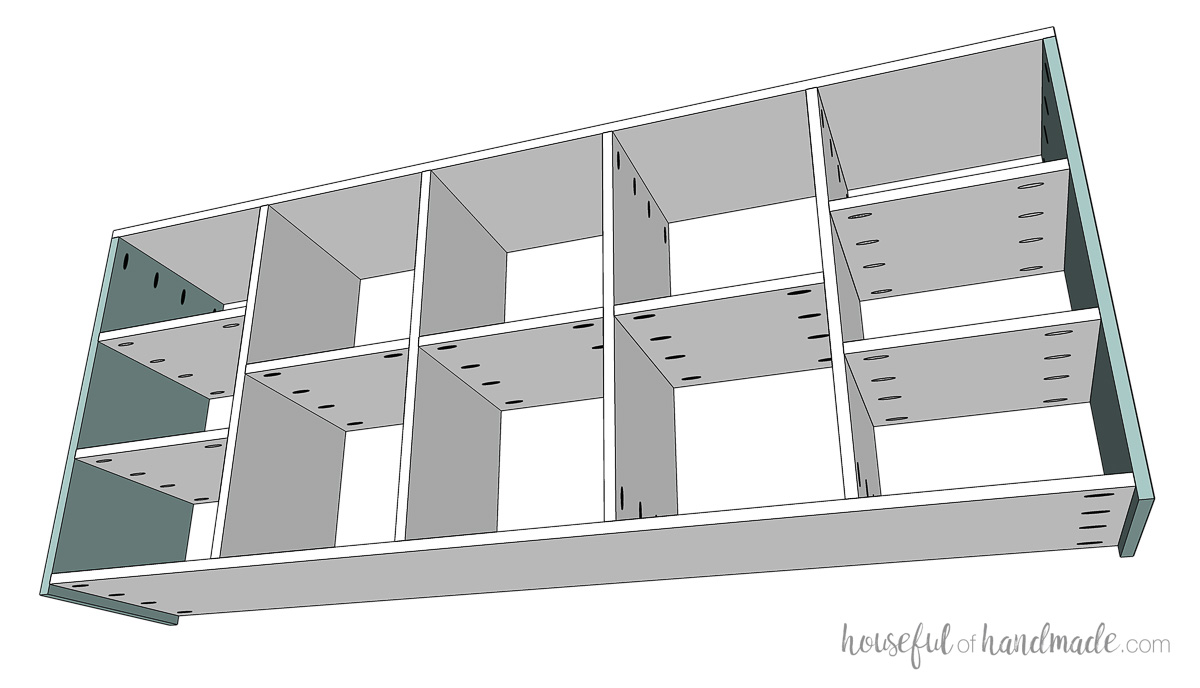
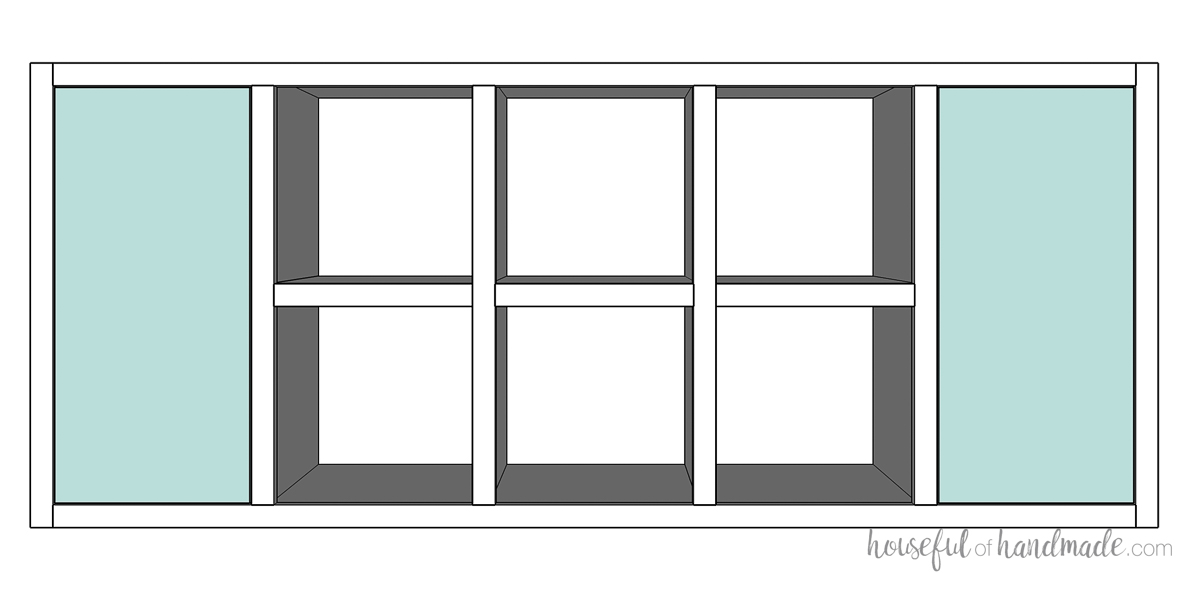
Drill pocket holes in both sides of your bottom board. Also, if desired, add edge banding to the ends of the top board. Then attach the top and bottom to the center walls according to the diagram.
The front of all the pieces will be flush, but the top and bottom will stick out 1/4” on the back (to be routed later for the back or you can router before attaching if preferred).
Secure using wood screws and 1 1/4” pocket hole screws in the holes on the center wall pieces.
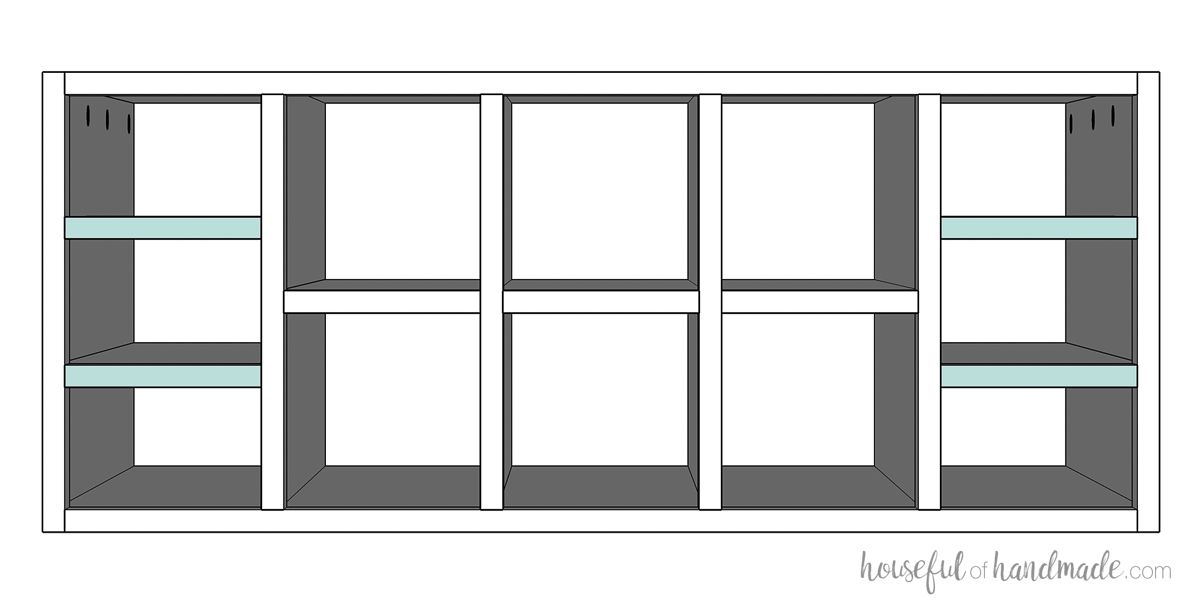
If you want stationary shelves, drill pocket holes in both sides of the shelf pieces and attach to the outside of the cube section with 1 1/4” screws and wood glue.
If you want adjustable shelves, cut the shelf pieces slightly smaller and do not attach in this step.
EXPERT TIP:
Wait until the cabinet is assembled and put the shelf pins you are using in the holes. Then measure between them to get the shelf width measurement.
Attach the sides with pocket hole screws. The side will go 3/4” past the bottom and will be flush with the top/bottom on the front and back (1/4” deeper than the inside and shelves).
If you routed the top/bottom already, also route the insides of the side boards.
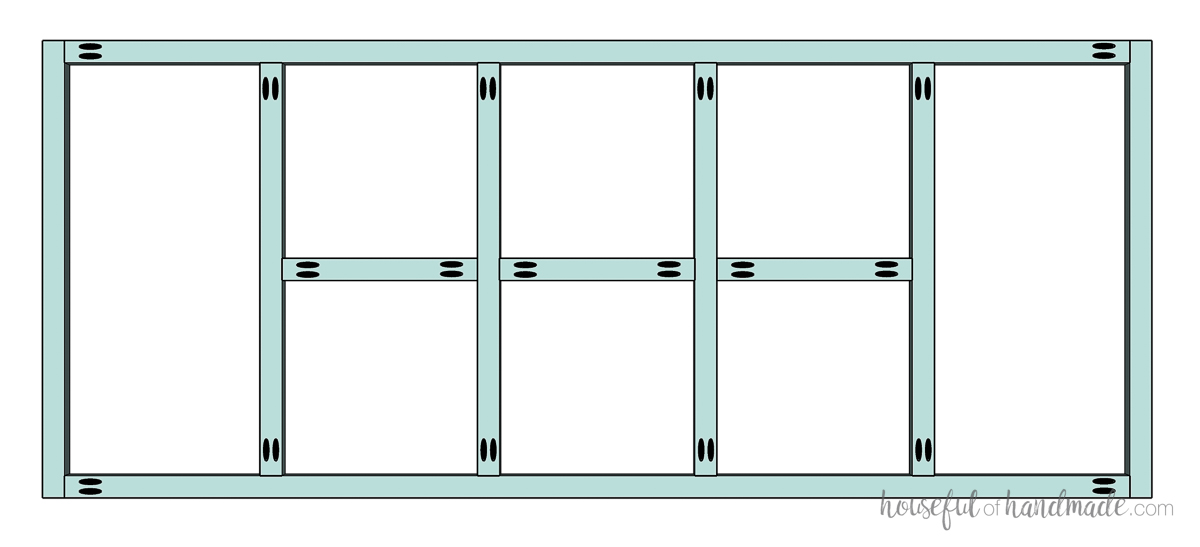
STEP 2- Attach face frame
I prefer to build the face frame, then attach it. It prevents the face frame from getting cracks in the seams as the wood moves overtime. Or you can cut and nail/glue the face frame pieces on individually.
To build the face frame, drill pocket holes and assemble as noted in the diagram in the plans.
EXPERT TIP:
Use face frame clamps to keep your face frame flat as you assemble.
Measure and match the openings to the actual openings of the assembled cabinet boxes.
Either attach the assembled face frame (with pocket holes drilled earlier or finish nails). Or cut and attach each piece separately with finish nails and glue.
Line up the face frame so it is:
- Flush on the top and sides
- Bottom flush should be with the bottom of the side pieces
- Center stiles should be centered on the wall pieces
- Center rails should be flush with the top of the cubby shelves

STEP 3- Add finishing touches
Attach the bottom supports on the underside of the bottom piece. The outer pieces should be flush with the sides and the other one centered. They will be hidden inside the bottom of the face frame.
Secure with wood glue and 1 1/4” finishing nails.

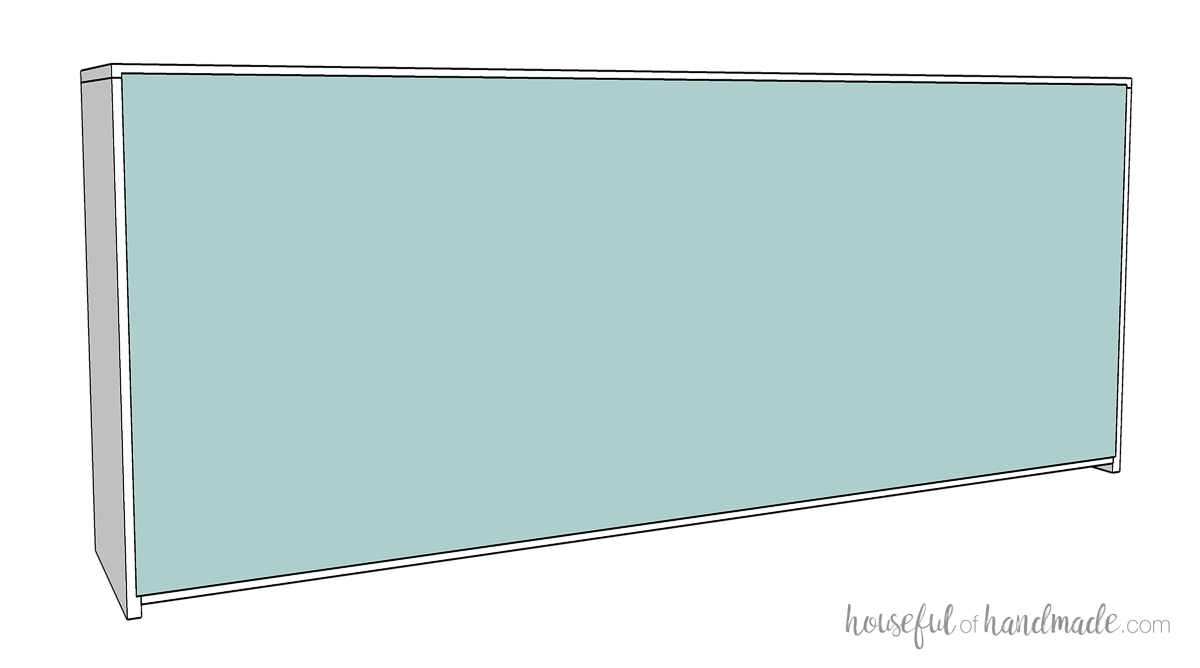
If you did not router the 1/4” groove in the top/bottom/side pieces yet, use a palm router to route out a 1/4” deep by 1/4” wide groove for the back.
You will need to chisel out the areas that are not fully routed out in the corners and where the router does not go between the cubby walls.
Insert the 1/4” plywood back into the routed groove. Square up cabinet if necessary.
Secure with 3/4” finish nails into the perimeter and the walls and shelves.
If you are adding doors to the sides, cut the pieces from the plywood according to the cut list in the PDF plans. Then finish all the plywood edges with edge banding.
Attach the doors with inset hinges for face frame cabinets. Find more information on different hinges here.
If you are not adding doors, you can add face frame pieces to the front of the side shelf pieces if you want them to match the rest of the cabinet.
Or keep the shelf fronts plain and finish the front with edge banding.
STEP 4- Sand & finish the console
Fill any visible pocket holes and nail holes with wood filler. Then sand and seal or paint your new storage shelf.
Attach feet to the bottom of the cube storage. Add one to each corner and one in the center (necessary to prevent sagging) onto the bottom support pieces.
EXPERT TIP:
Add any height furniture legs you want to make the console as tall or as short as needed.
If you built adjustable shelves, drill shelf pin holes in the sides of the shelf compartments. Then insert your shelves.
And you are done!
Premium plans include:
- Recommended Tools
- Shopping list
- Easy to read cut list table
- Cut diagrams
- Step-by-step instructions with 3D renderings
- Helpful resources
- BONUS: 3D SketchUp file
/*<![CDATA[*/ (function () { var scriptURL = 'https://sdks.shopifycdn.com/buy-button/latest/buy-button-storefront.min.js'; if (window.ShopifyBuy) { if (window.ShopifyBuy.UI) { ShopifyBuyInit(); } else { loadScript(); } } else { loadScript(); } function loadScript() { var script = document.createElement('script'); script.async = true; script.src = scriptURL; (document.getElementsByTagName('head')[0] || document.getElementsByTagName('body')[0]).appendChild(script); script.onload = ShopifyBuyInit; } function ShopifyBuyInit() { var client = ShopifyBuy.buildClient({ domain: 'houseful-of-handmade.myshopify.com', storefrontAccessToken: '67be1252d864e69b28d4cd5343206ccd', }); ShopifyBuy.UI.onReady(client).then(function (ui) { ui.createComponent('product', { id: '7807958646972', node: document.getElementById('product-component-1737490615054'), moneyFormat: '%24%7B%7Bamount%7D%7D', options: { "product": { "styles": { "product": { "@media (min-width: 601px)": { "max-width": "calc(25% – 20px)", "margin-left": "20px", "margin-bottom": "50px" } }, "title": { "color": "#ffffff" }, "button": { "font-size": "16px", "padding-top": "16px", "padding-bottom": "16px", ":hover": { "background-color": "#326963" }, "background-color": "#37756e", ":focus": { "background-color": "#326963" }, "border-radius": "15px", "padding-left": "80px", "padding-right": "80px" }, "quantityInput": { "font-size": "16px", "padding-top": "16px", "padding-bottom": "16px" }, "price": { "font-size": "16px", "color": "#ffffff" }, "compareAt": { "font-size": "13.6px", "color": "#ffffff" }, "unitPrice": { "font-size": "13.6px", "color": "#ffffff" } }, "text": { "button": "Add to cart" } }, "productSet": { "styles": { "products": { "@media (min-width: 601px)": { "margin-left": "-20px" } } } }, "modalProduct": { "contents": { "img": false, "imgWithCarousel": true, "button": false, "buttonWithQuantity": true }, "styles": { "product": { "@media (min-width: 601px)": { "max-width": "100%", "margin-left": "0px", "margin-bottom": "0px" } }, "button": { "font-size": "16px", "padding-top": "16px", "padding-bottom": "16px", ":hover": { "background-color": "#326963" }, "background-color": "#37756e", ":focus": { "background-color": "#326963" }, "border-radius": "15px", "padding-left": "80px", "padding-right": "80px" }, "quantityInput": { "font-size": "16px", "padding-top": "16px", "padding-bottom": "16px" }, "title": { "font-family": "Helvetica Neue, sans-serif", "font-weight": "bold", "font-size": "26px", "color": "#4c4c4c" }, "price": { "font-family": "Helvetica Neue, sans-serif", "font-weight": "normal", "font-size": "18px", "color": "#4c4c4c" }, "compareAt": { "font-family": "Helvetica Neue, sans-serif", "font-weight": "normal", "font-size": "15.299999999999999px", "color": "#4c4c4c" }, "unitPrice": { "font-family": "Helvetica Neue, sans-serif", "font-weight": "normal", "font-size": "15.299999999999999px", "color": "#4c4c4c" } }, "text": { "button": "Add to cart" } }, "option": {}, "cart": { "styles": { "button": { "font-size": "16px", "padding-top": "16px", "padding-bottom": "16px", ":hover": { "background-color": "#326963" }, "background-color": "#37756e", ":focus": { "background-color": "#326963" }, "border-radius": "15px" }, "title": { "color": "#121212" }, "header": { "color": "#121212" }, "lineItems": { "color": "#121212" }, "subtotalText": { "color": "#121212" }, "subtotal": { "color": "#121212" }, "notice": { "color": "#121212" }, "currency": { "color": "#121212" }, "close": { "color": "#121212", ":hover": { "color": "#121212" } }, "empty": { "color": "#121212" }, "noteDescription": { "color": "#121212" }, "discountText": { "color": "#121212" }, "discountIcon": { "fill": "#121212" }, "discountAmount": { "color": "#121212" }, "cart": { "background-color": "#f4f4f4" }, "footer": { "background-color": "#f4f4f4" } }, "text": { "total": "Subtotal", "button": "Checkout" } }, "toggle": { "styles": { "toggle": { "background-color": "#37756e", ":hover": { "background-color": "#326963" }, ":focus": { "background-color": "#326963" } }, "count": { "font-size": "16px" } } }, "lineItem": { "styles": { "variantTitle": { "color": "#121212" }, "title": { "color": "#121212" }, "price": { "color": "#121212" }, "fullPrice": { "color": "#121212" }, "discount": { "color": "#121212" }, "discountIcon": { "fill": "#121212" }, "quantity": { "color": "#121212" }, "quantityIncrement": { "color": "#121212", "border-color": "#121212" }, "quantityDecrement": { "color": "#121212", "border-color": "#121212" }, "quantityInput": { "color": "#121212", "border-color": "#121212" } } } }, }); }); } })(); /*]]>*/
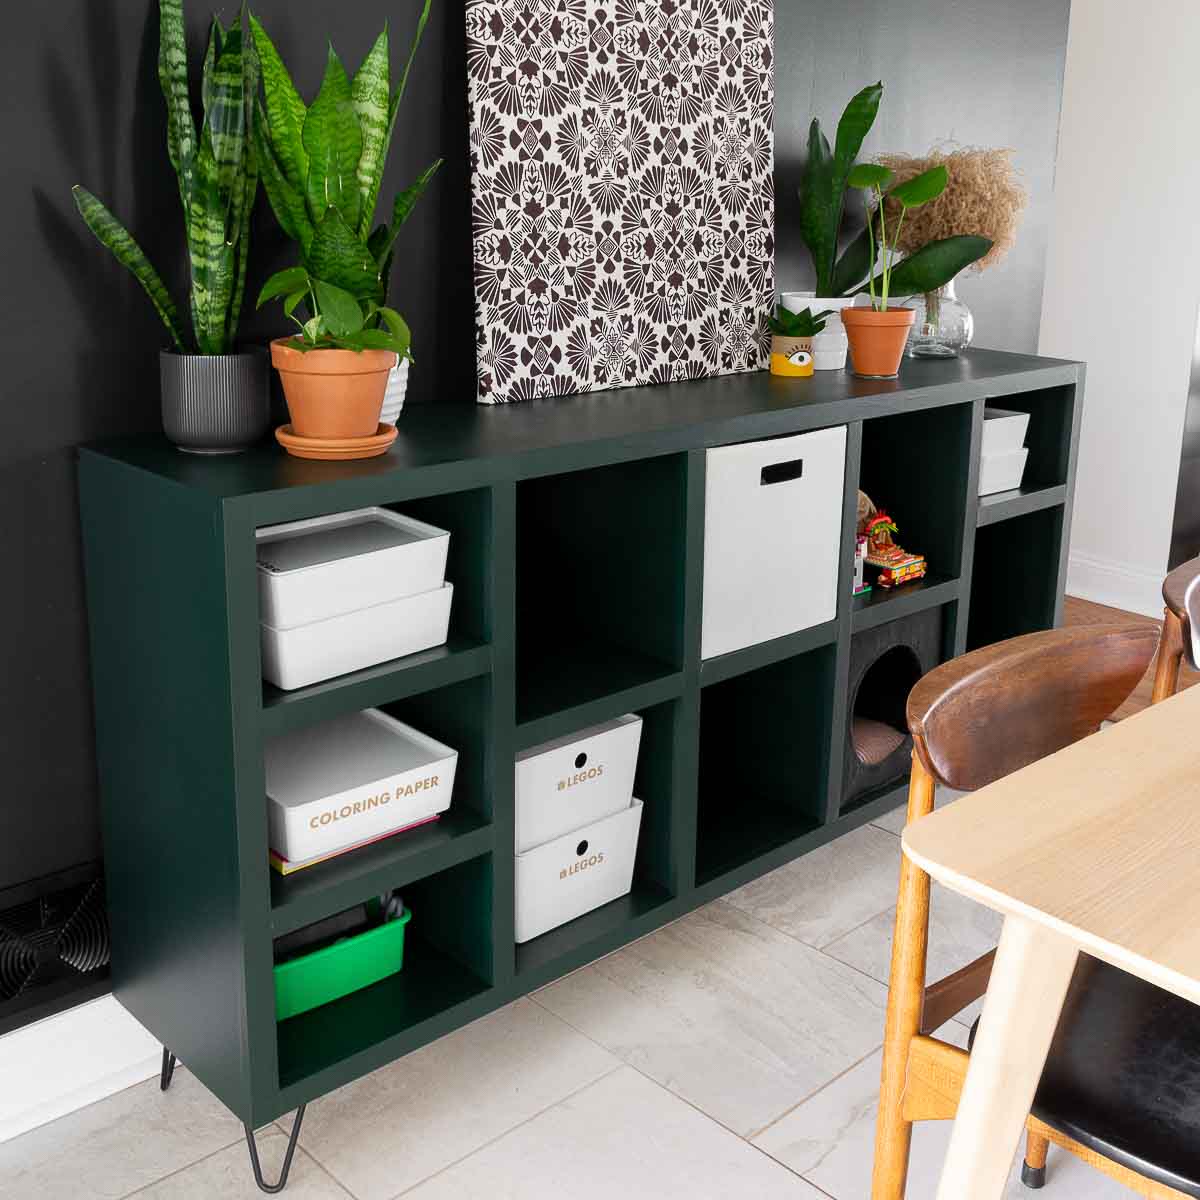
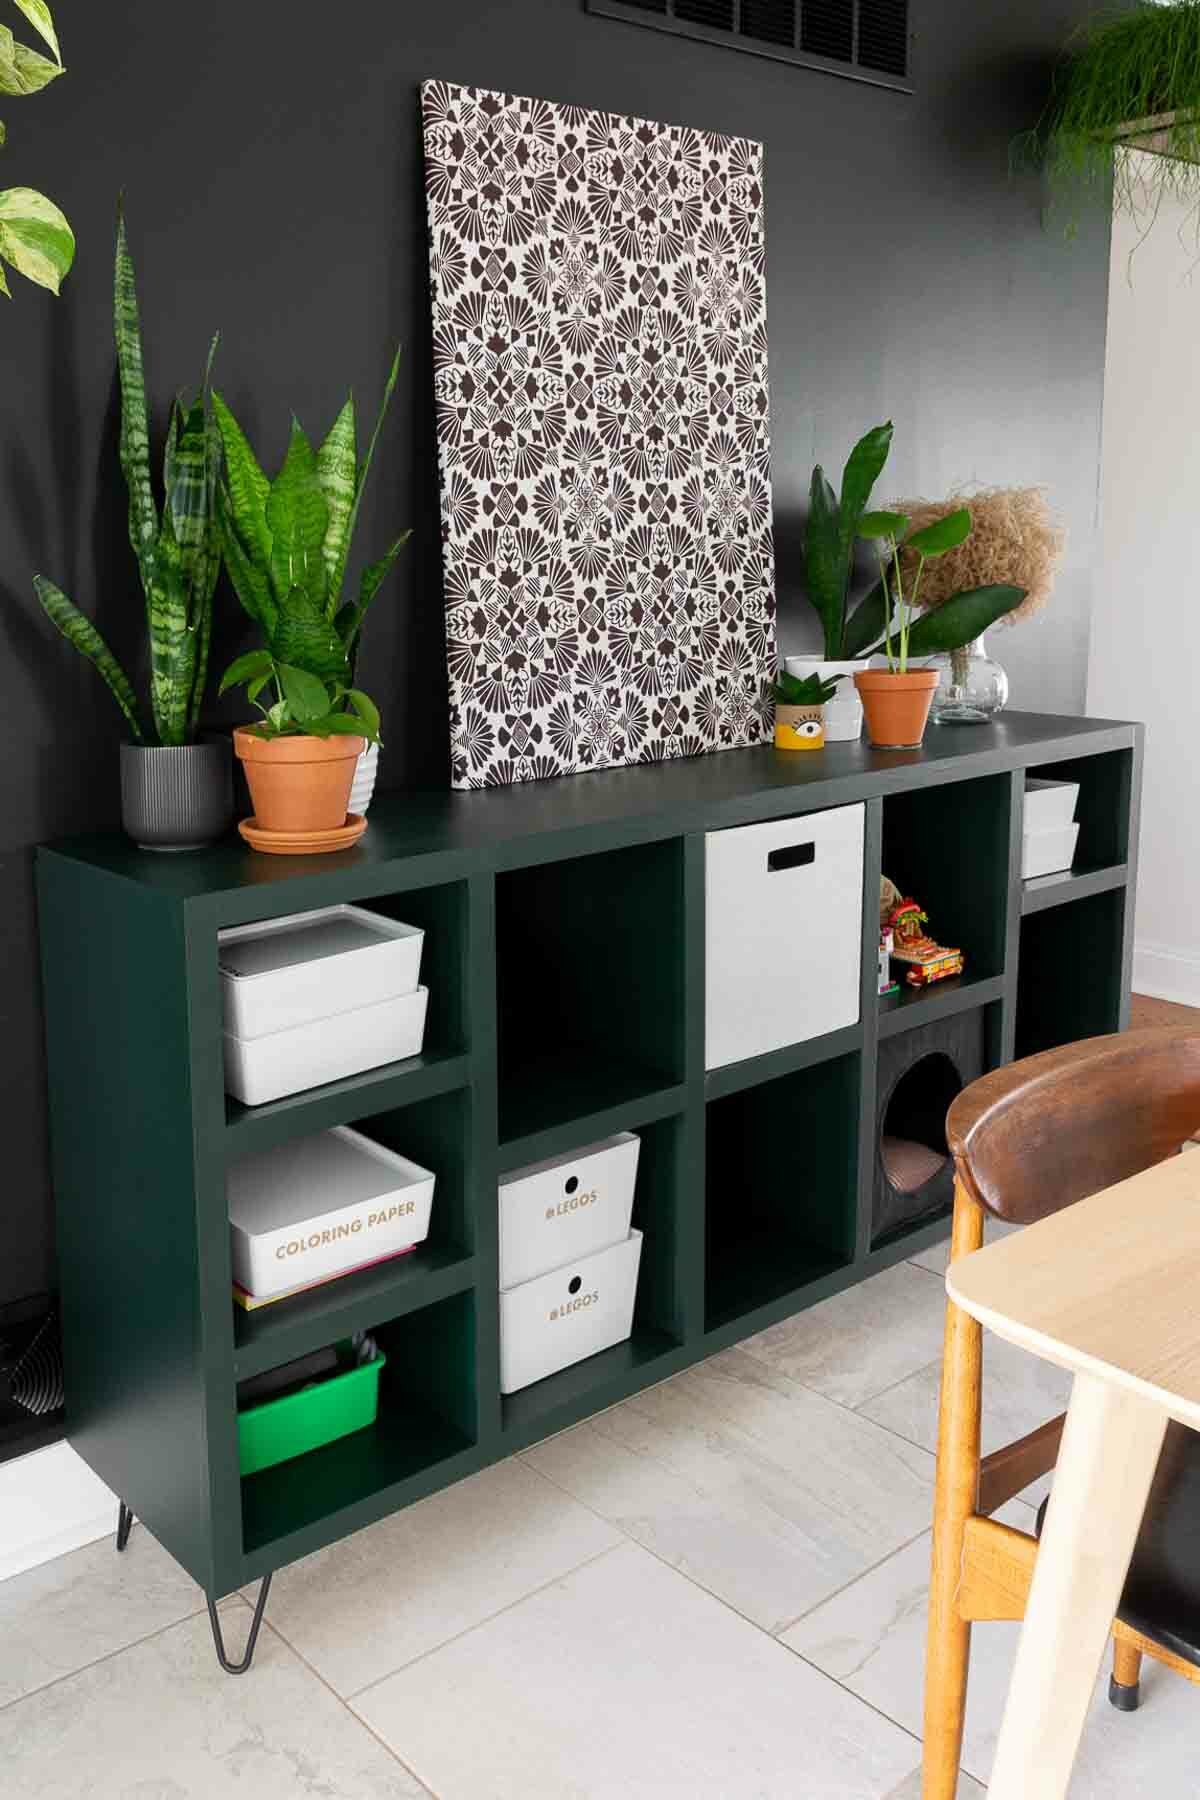
Enjoy all the storage you added to your home.
Brittany’s cube console turned out amazing. I just adore the bold color she painted it. And look at all that storage space.
Happy building!
