If having enough drawers to organize your clothes is a challenge, you need this dresser!
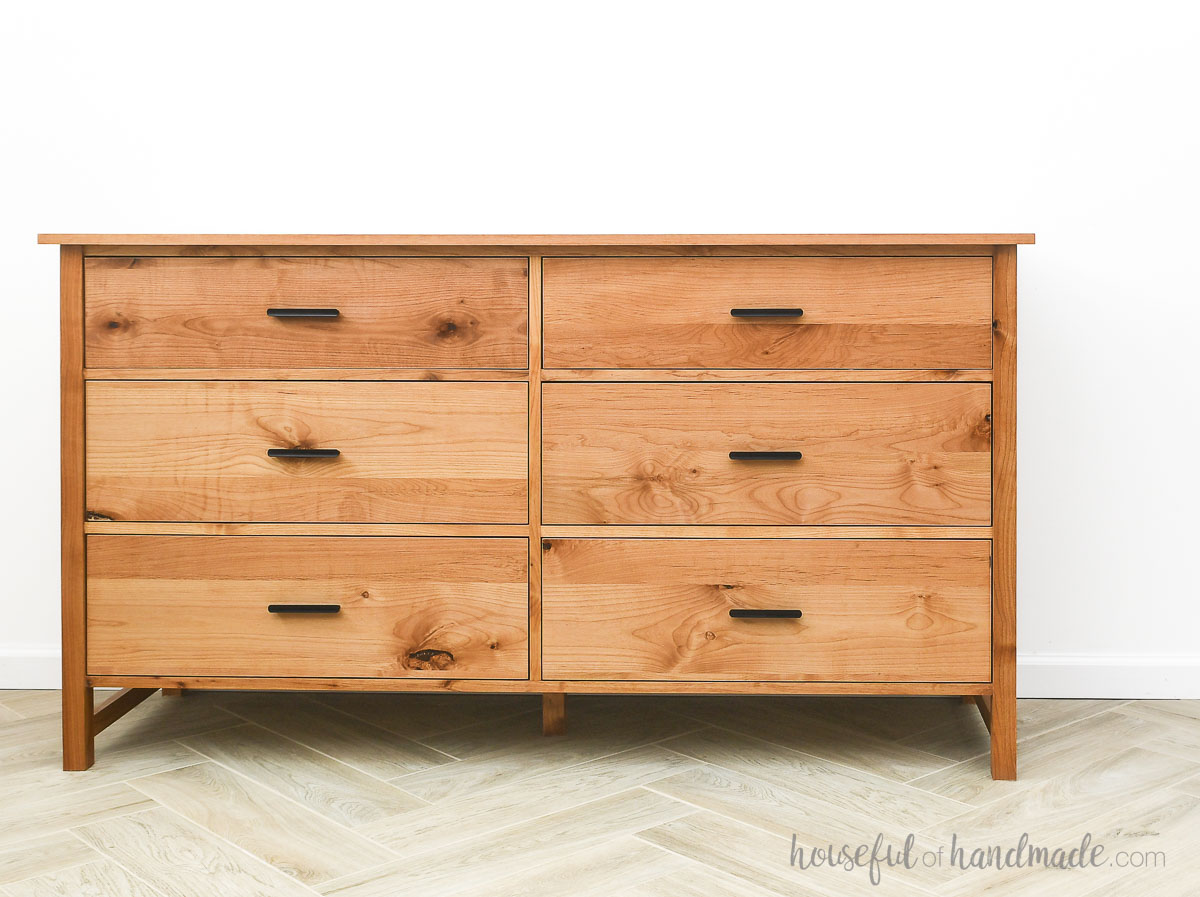
This DIY 6 drawer dresser has so much storage space. Way more space than the tiny drawers in my old dresser.
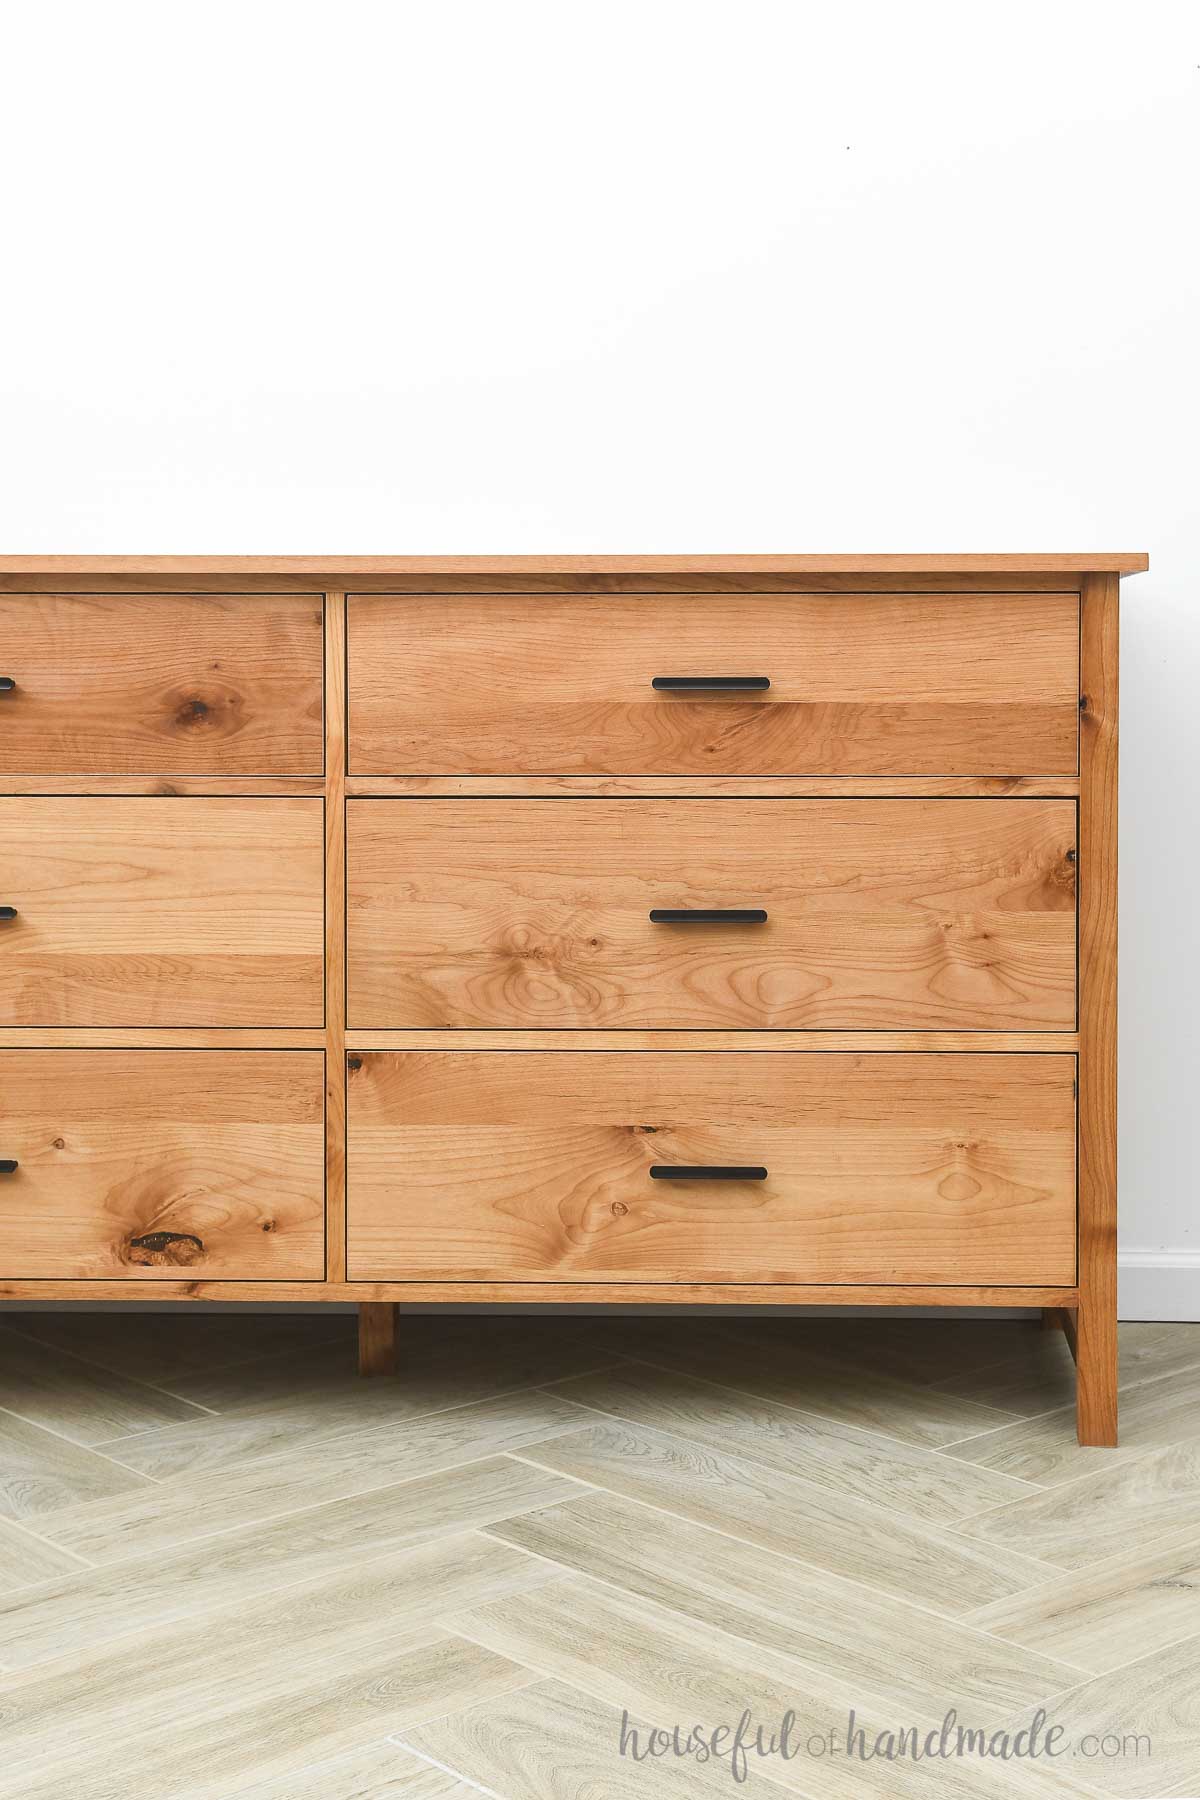
There are two shallower drawers on top and 4 extra deep drawers on the bottom. Even if you have to share a dresser, you will have plenty of room to store so many clothes.
This post may contain affiliate links. As an Amazon Associate I earn from qualifying purchases. Click here to read my full disclosure policy.
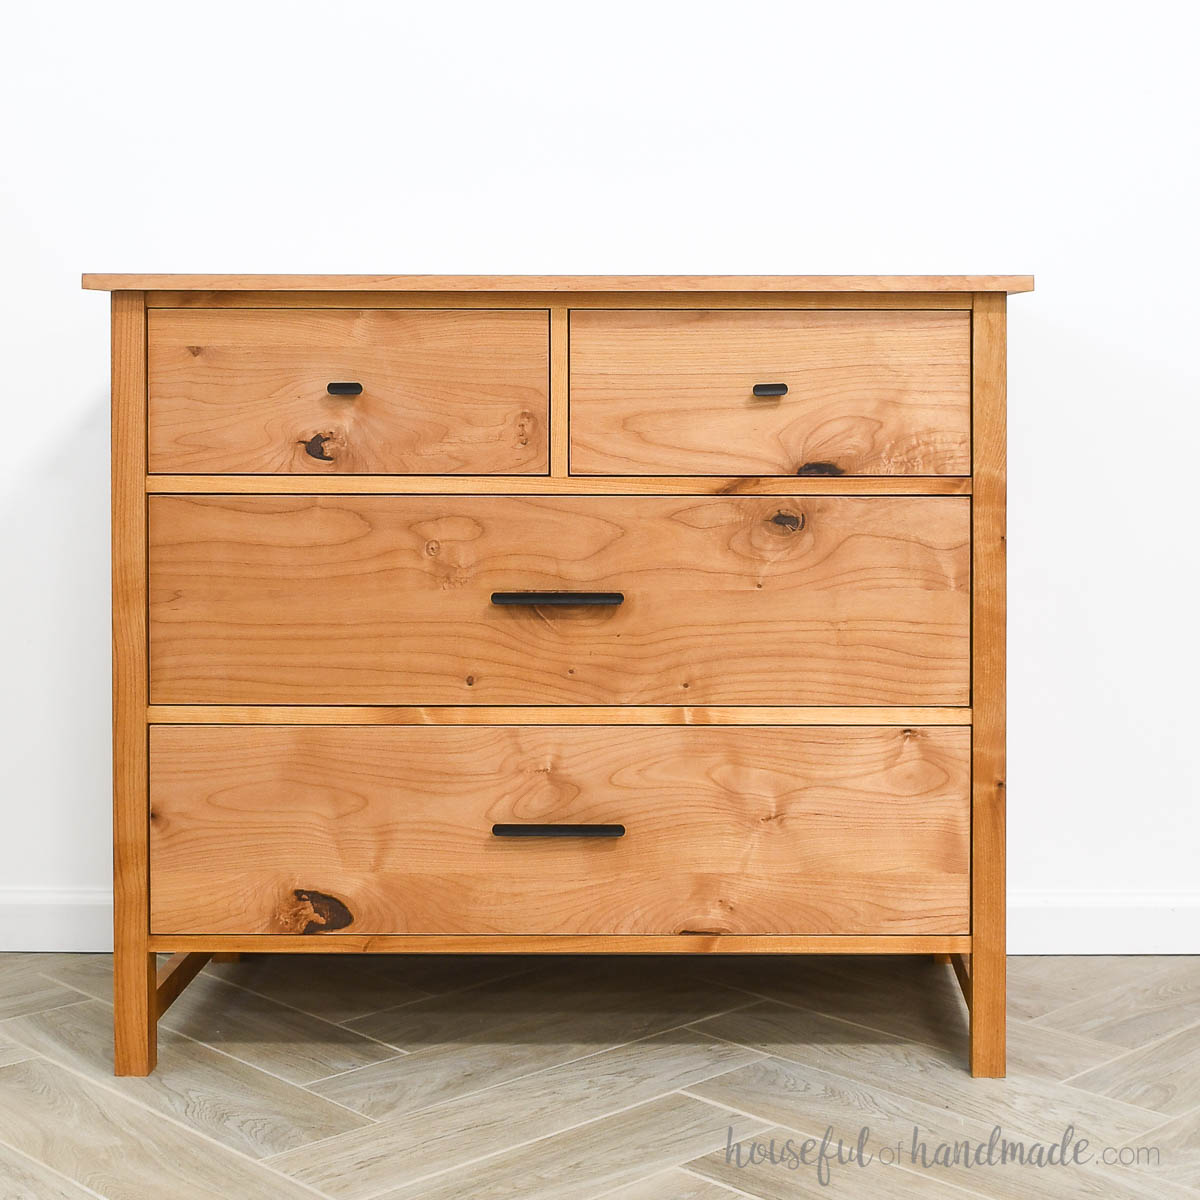
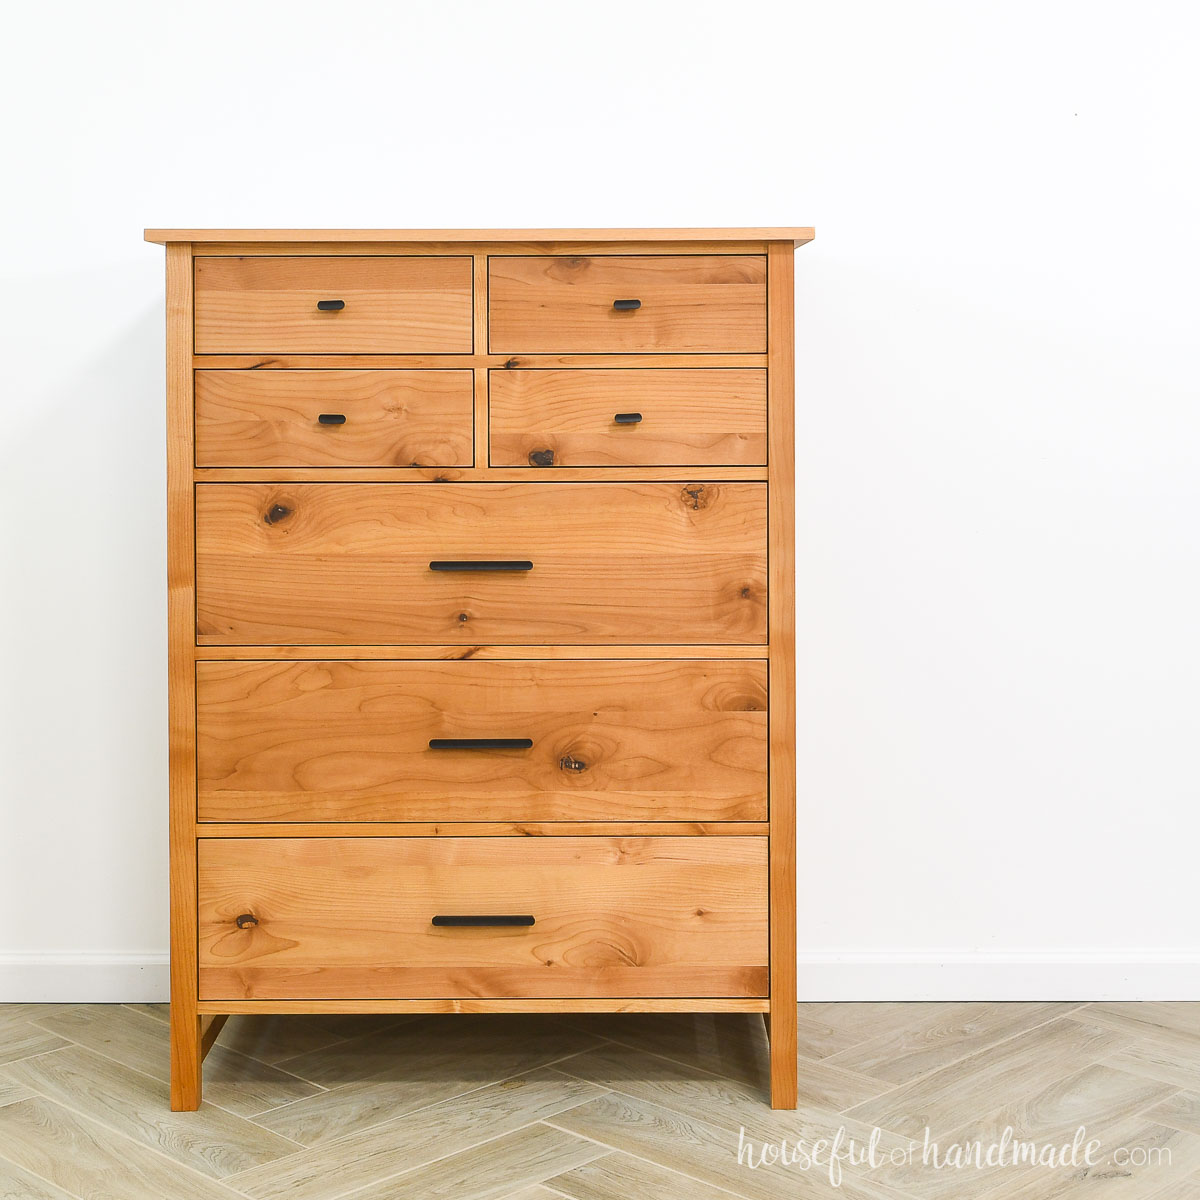
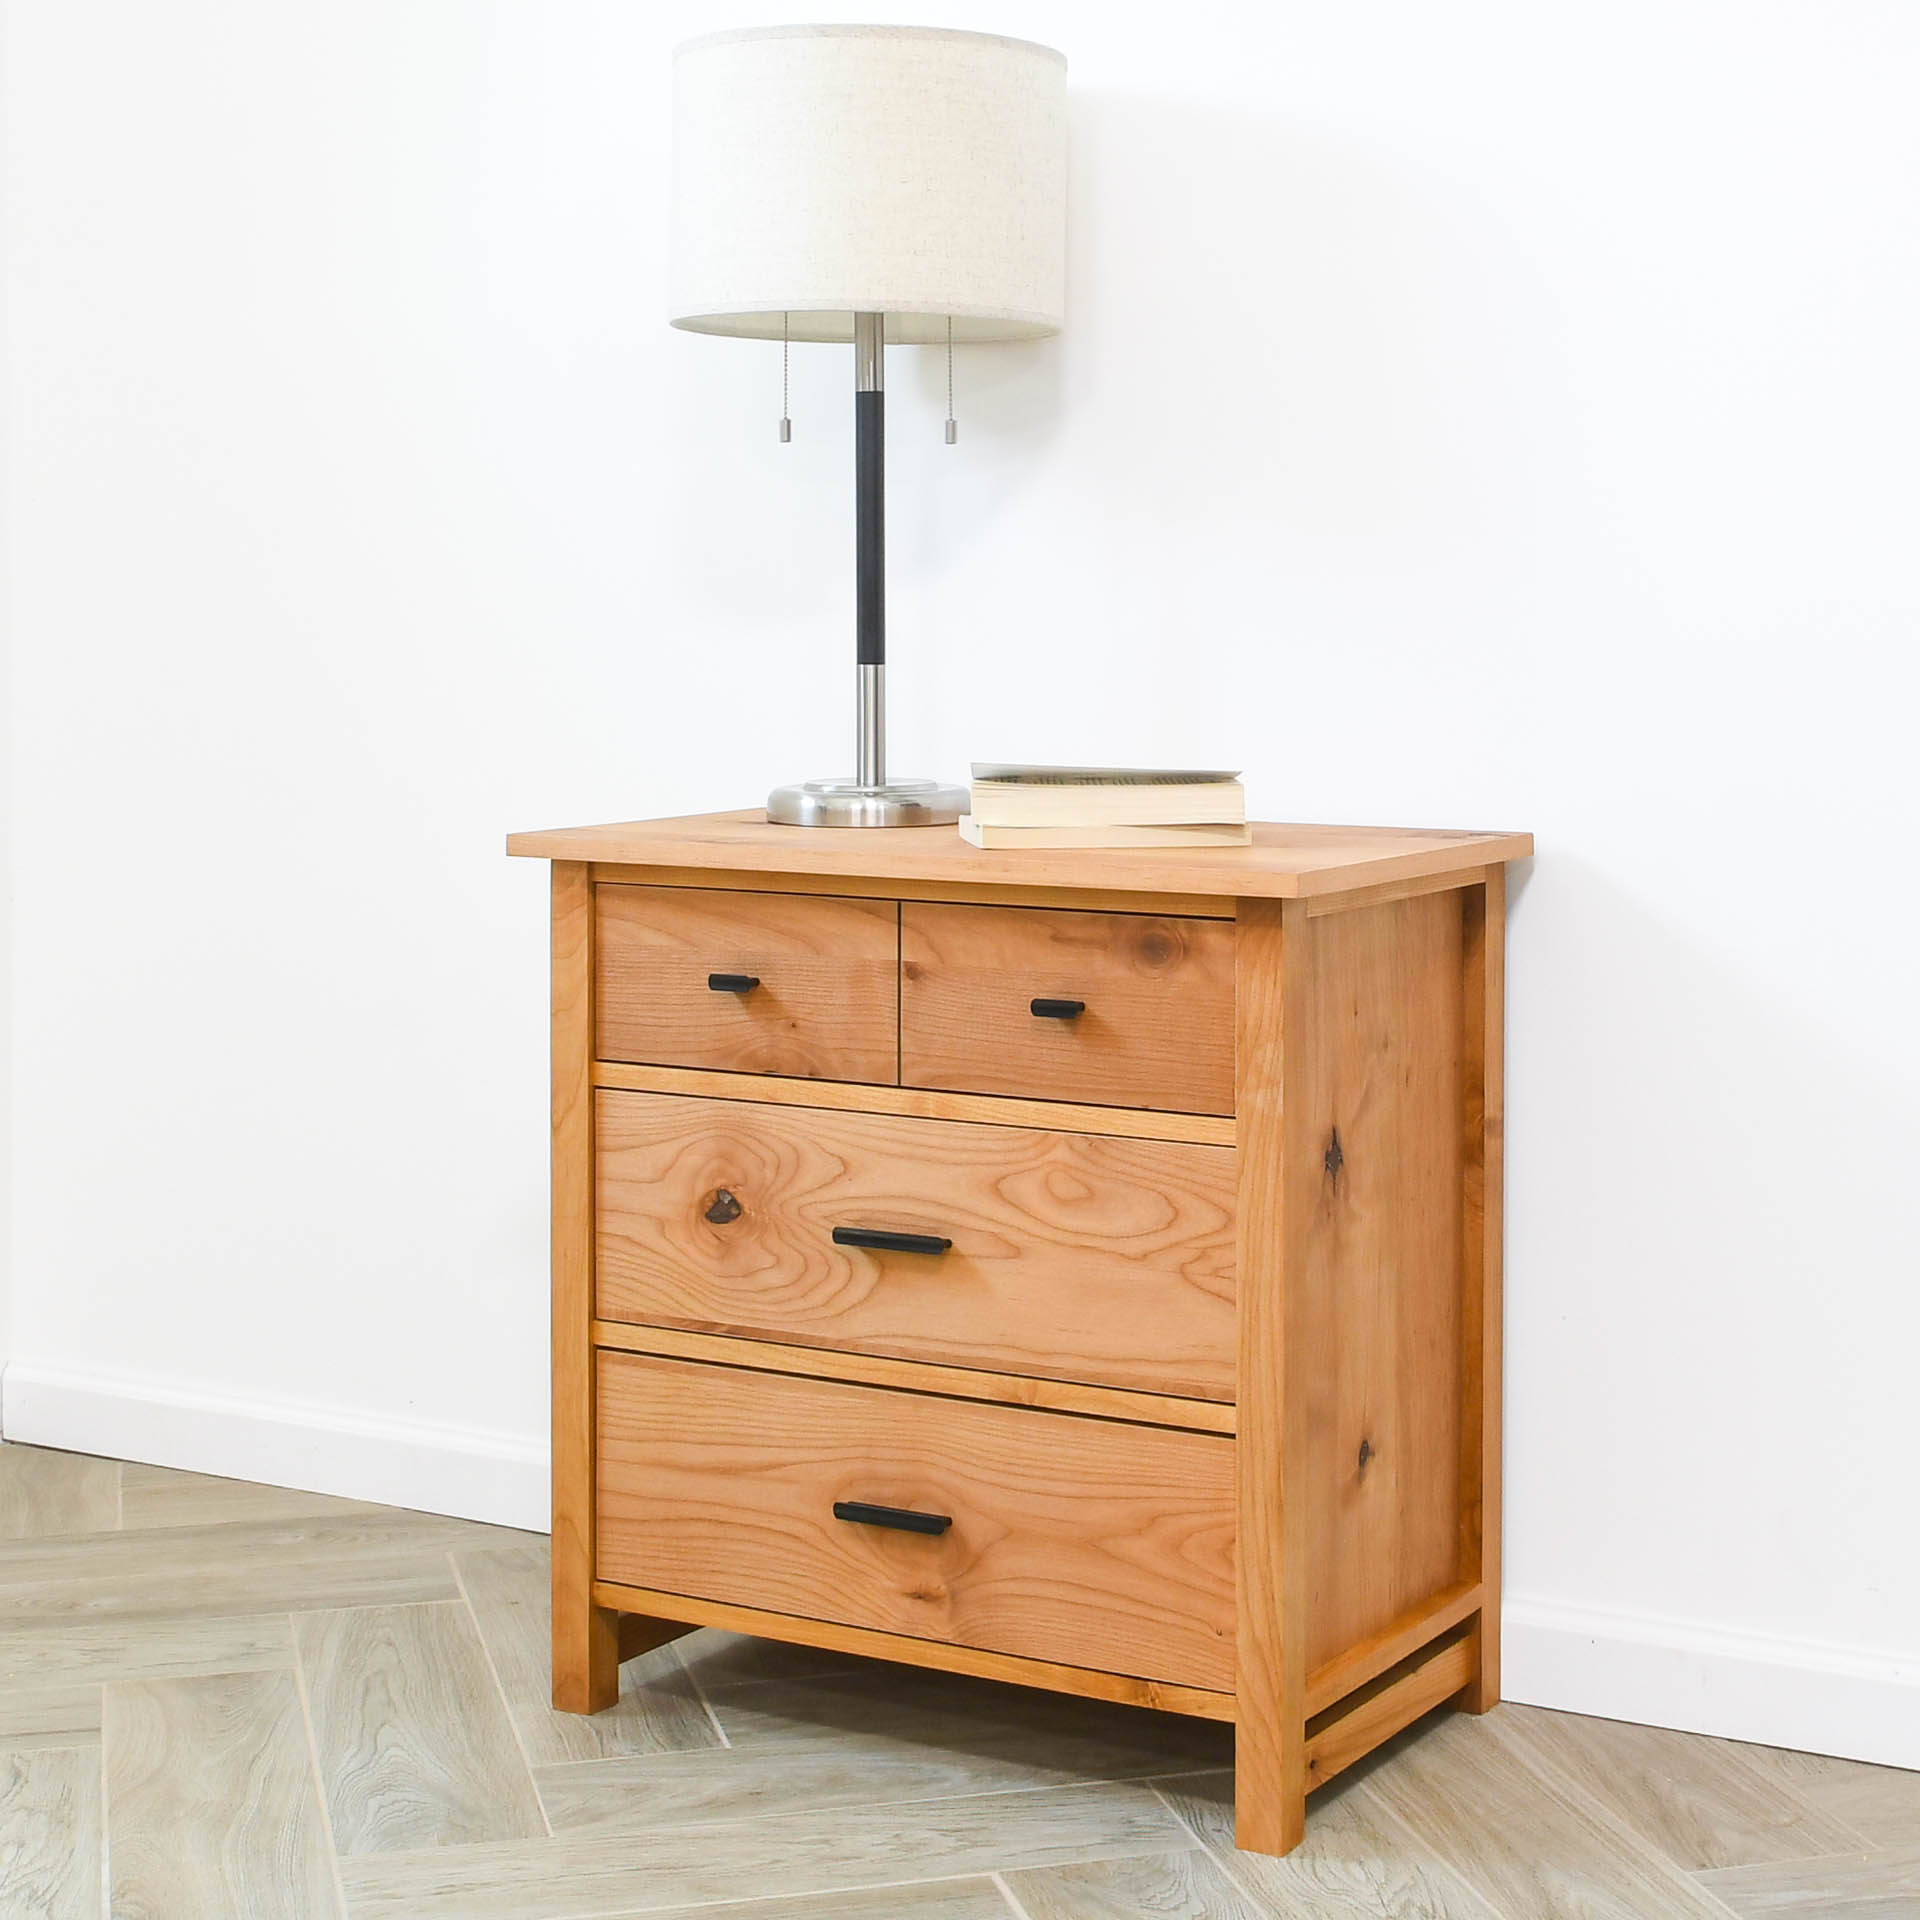
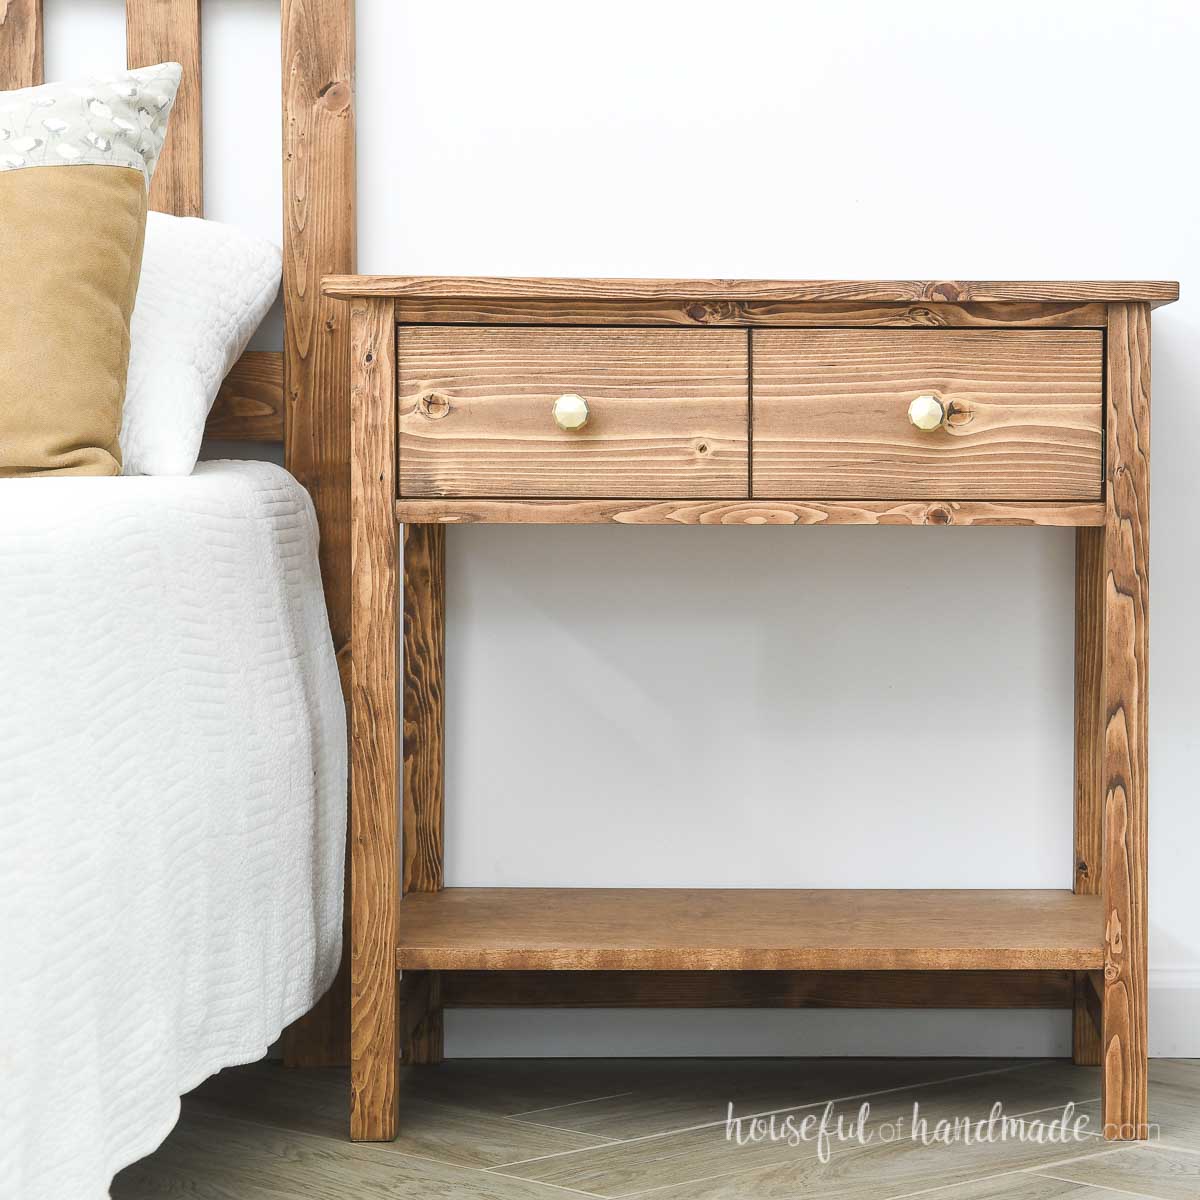
And this classic 6 drawer dresser is part of a bedroom set. You can find the matching 4 drawer dresser, tall 7 drawer dresser and 1 drawer nightstand plans already. The coordinating 3 drawer nightstand plans are coming soon.
PB Farmhouse Dresser Dupe
I love the look of the farmhouse series from Pottery Barn, but not the price! For half the price of the extra wide 6 drawer dresser, I bought enough lumber to build 3 matching dressers and a nightstand (coming soon).
My version of the dresser is way cheaper to build but does not sacrifice any style or function.
The 6 large and extra large drawers hold so much. You will love all the storage it gives you.
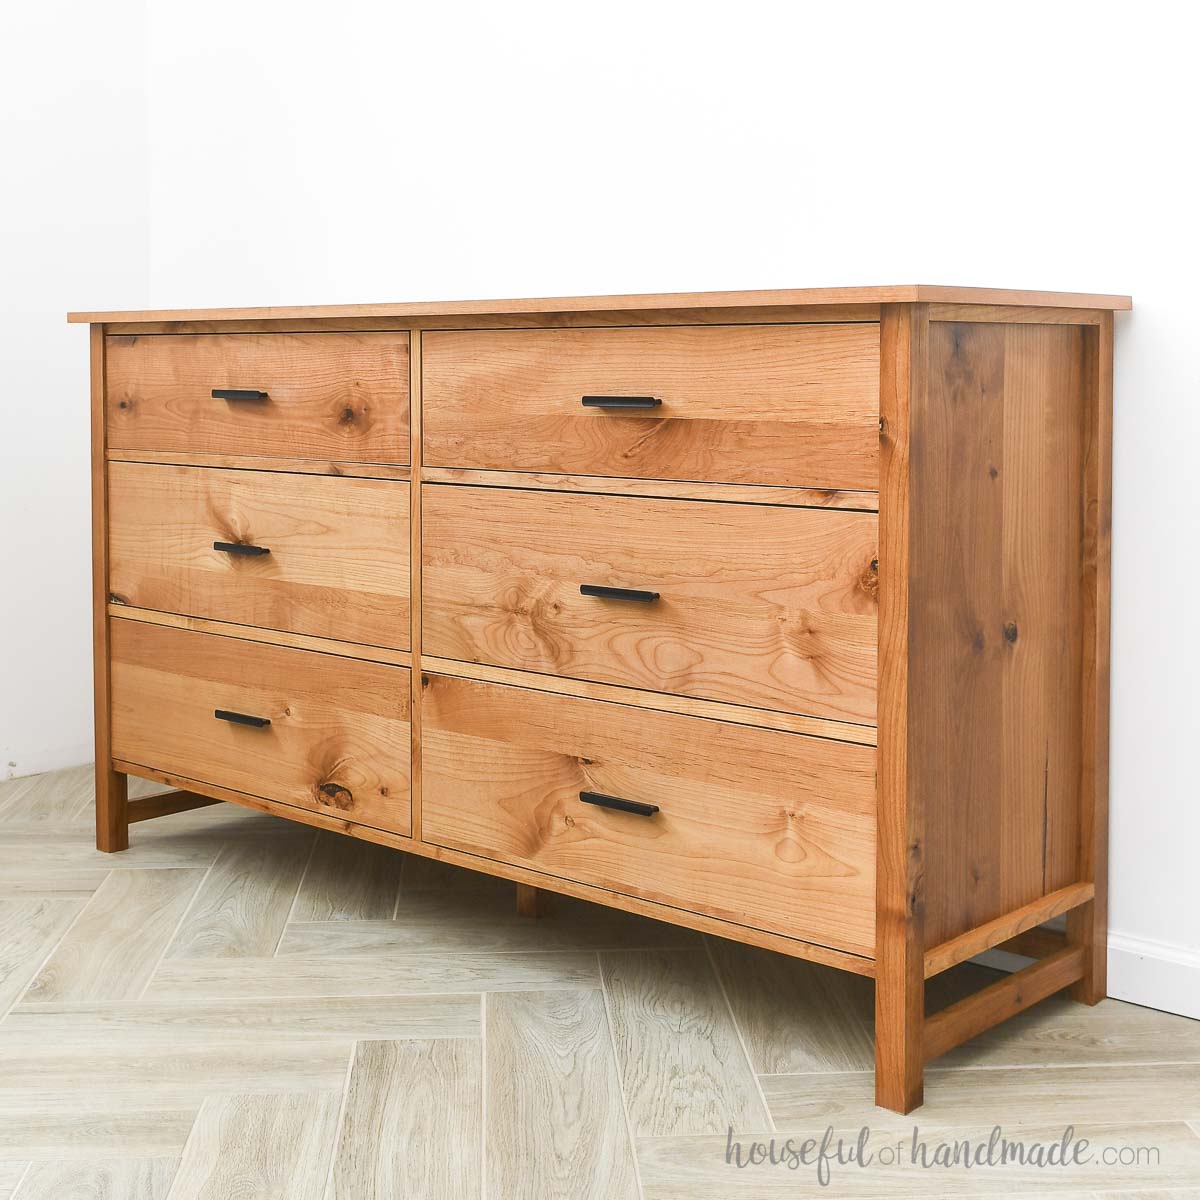
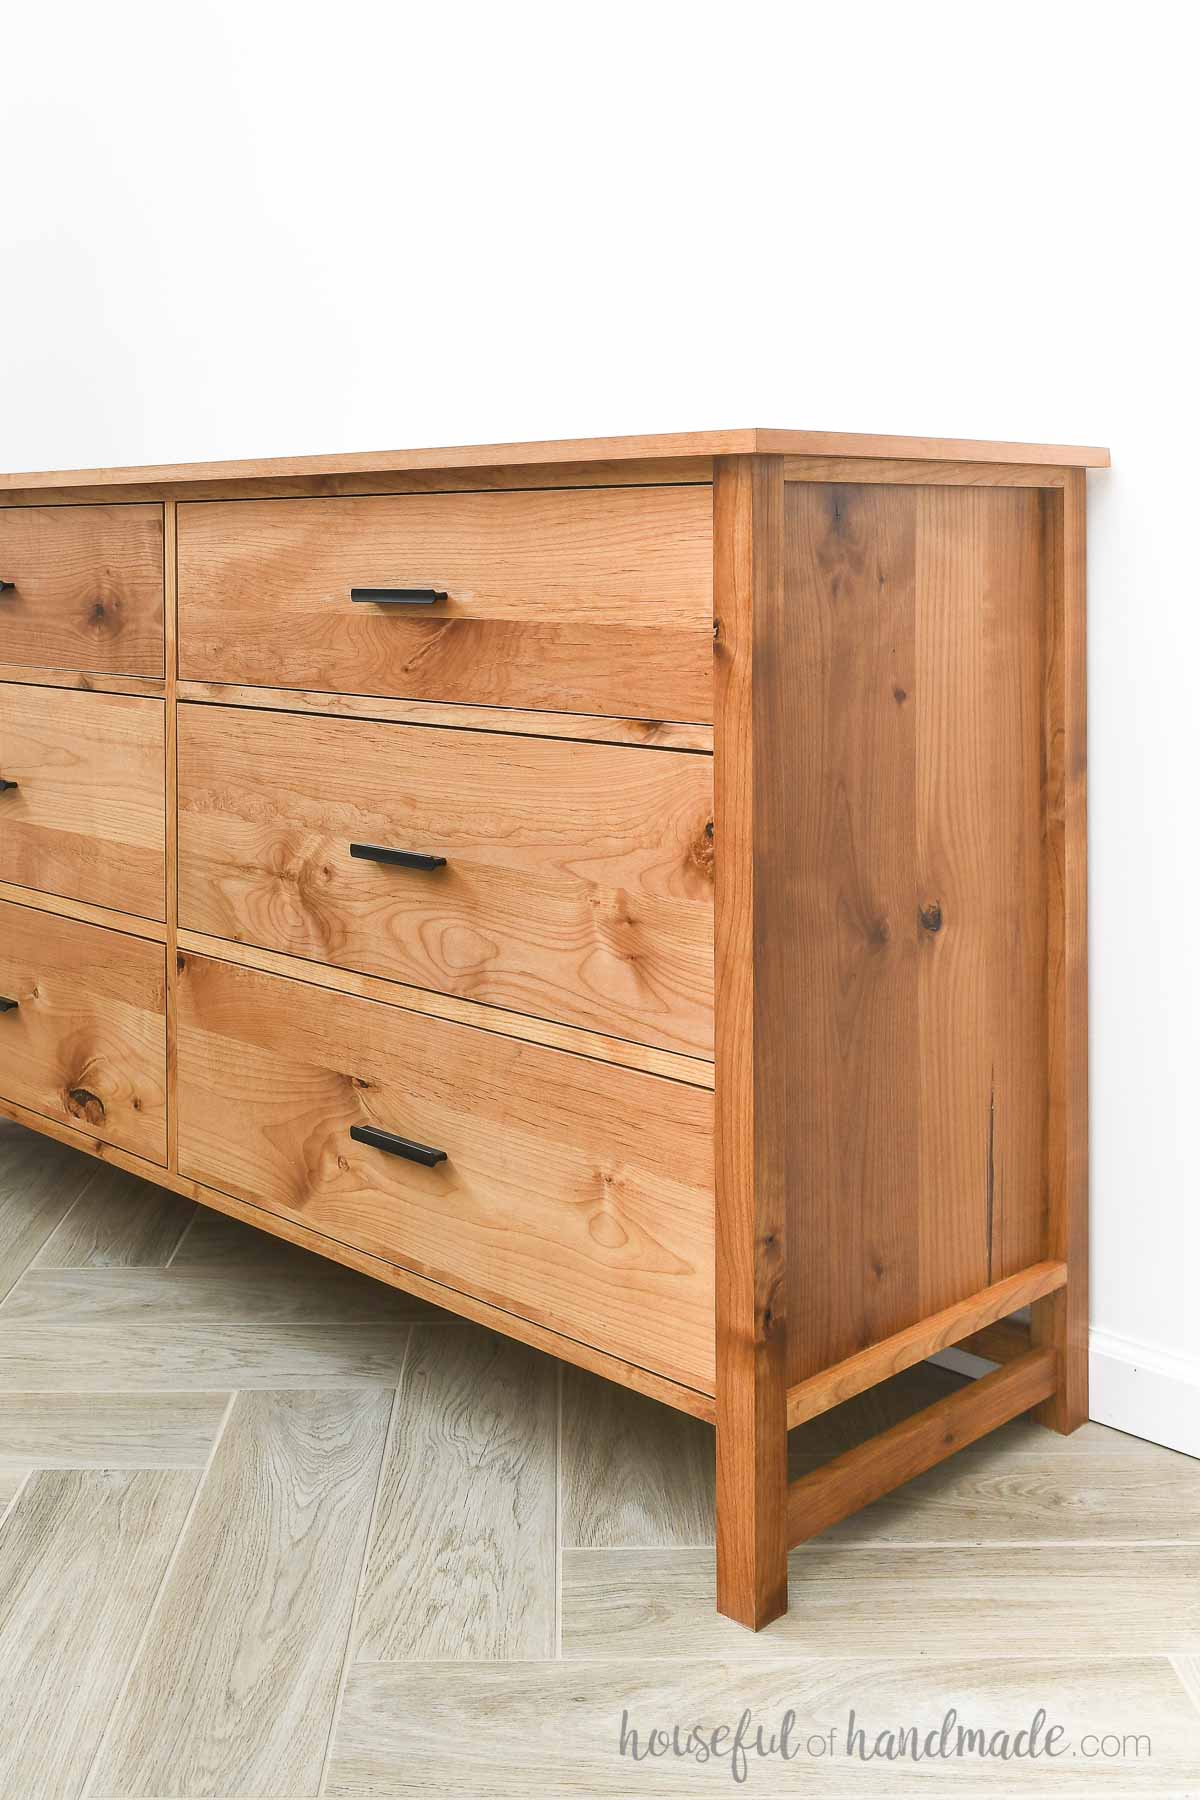
I built my dresser out of knotty alder wood. The top, drawer fronts, and side panels are built from alder plywood.
The warm tones of the alder are one of my favorites.
Plus alder is a great beginner hardwood to work with. It is an inexpensive harder wood and is easy to work with.
I added no stain, just sealed the wood to reveal its beautiful color.
Matching Dresser Set
Love this dresser? Finish off your dresser set with more matching dressers and nightstands.
How to Build a Large 6 Drawer Dresser
Tools & Materials
Recommended Tools:
- Miter saw
- I recently upgraded to this larger sliding miter saw (watch for it to go on sale), but all my projects before were built with this inexpensive miter saw that I loved.
- Circular saw with guide track or Table saw
- Pocket hole jig
- Drill
- Impact driver (optional, but I love not having to switch bits with the drill)
- Speed square
- Multi-mark measuring tool
- Right angle clamp
- Face clamps
- Sander
- Optional: Pneumatic stapler
- Optional: Trim router
- Optional: Brad nailer
Supplies:
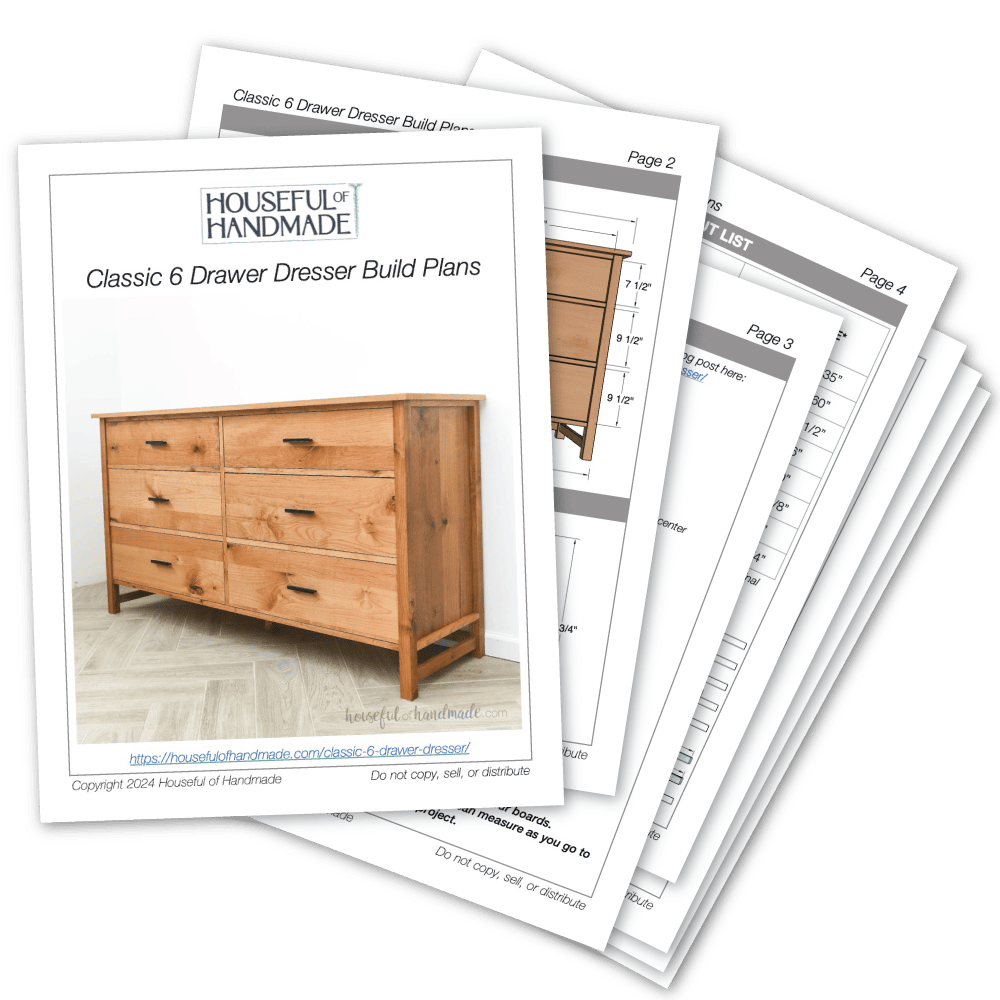
- PDF Build Plans
- Wood products
- (3) 2×2 boards, 8′ long
- (5) 1×2 boards, 8′ long
- (1) 3/4″ plywood, 4×8 sheet
- (1) 3/4″ plywood, 16″ x 30″ piece
- (1) 1/2″ plywood, 4×8 sheet
- (1) 1/4″ plywood, 4×8 sheet
- 1 1/4″ pocket hole screws
- 2 1/2″ pocket hole screws
- 2″ pocket hole screws
- 1″ wood screws
- 2″ wood screws
- 1″ pneumatic staples or 1″ pocket hole screws
- Wood glue
- (6 pair) 16″ drawer slides
- (6) drawer pulls
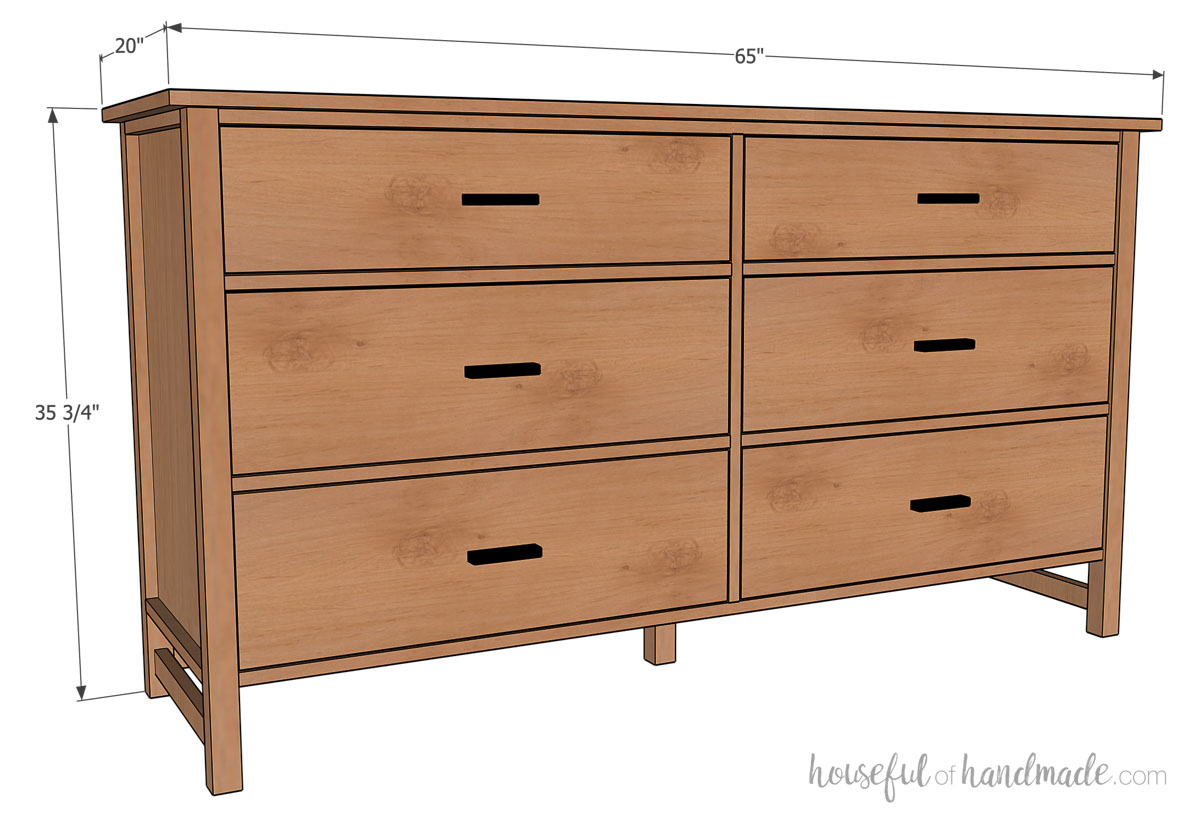
Overall Dimensions
The finished dresser is 65″ long, 20″ deep and 35 3/4″ tall.
There are 6 large drawers, two smaller ones (16″ x 27 5/8″‘ x 6 1/2″ deep) and 4 larger ones (16″ x 27 5/8″ x 8 1/2″ deep).
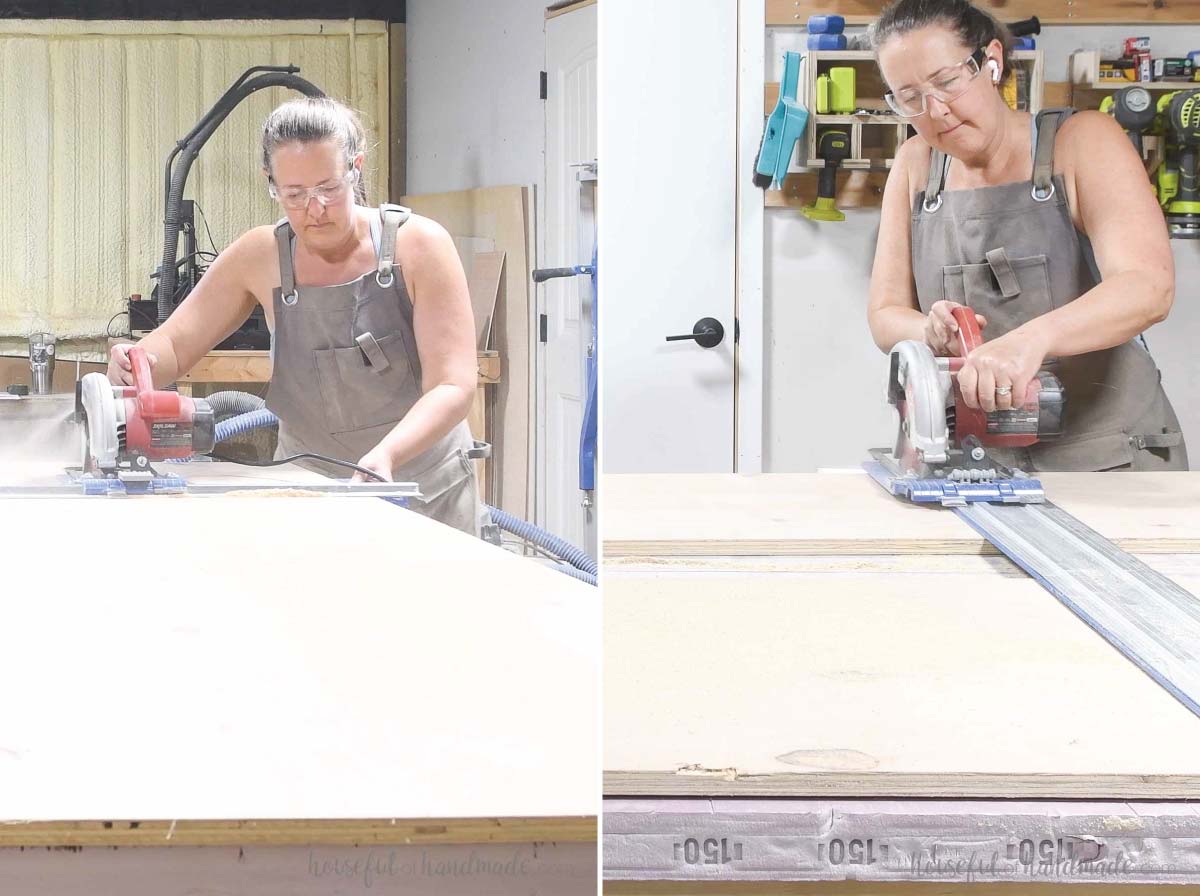
Cut List
Cut out the pieces according to the easy-to-read table and diagrams in the PDF plans.
I like to use my circular saw with a RipCut guide to rip the 4×8 plywood sheets into strips, then use an AccuCut to cross cut the pieces to final length.
Learn all my tips for easily breaking down sheets of plywood with a circular saw here.
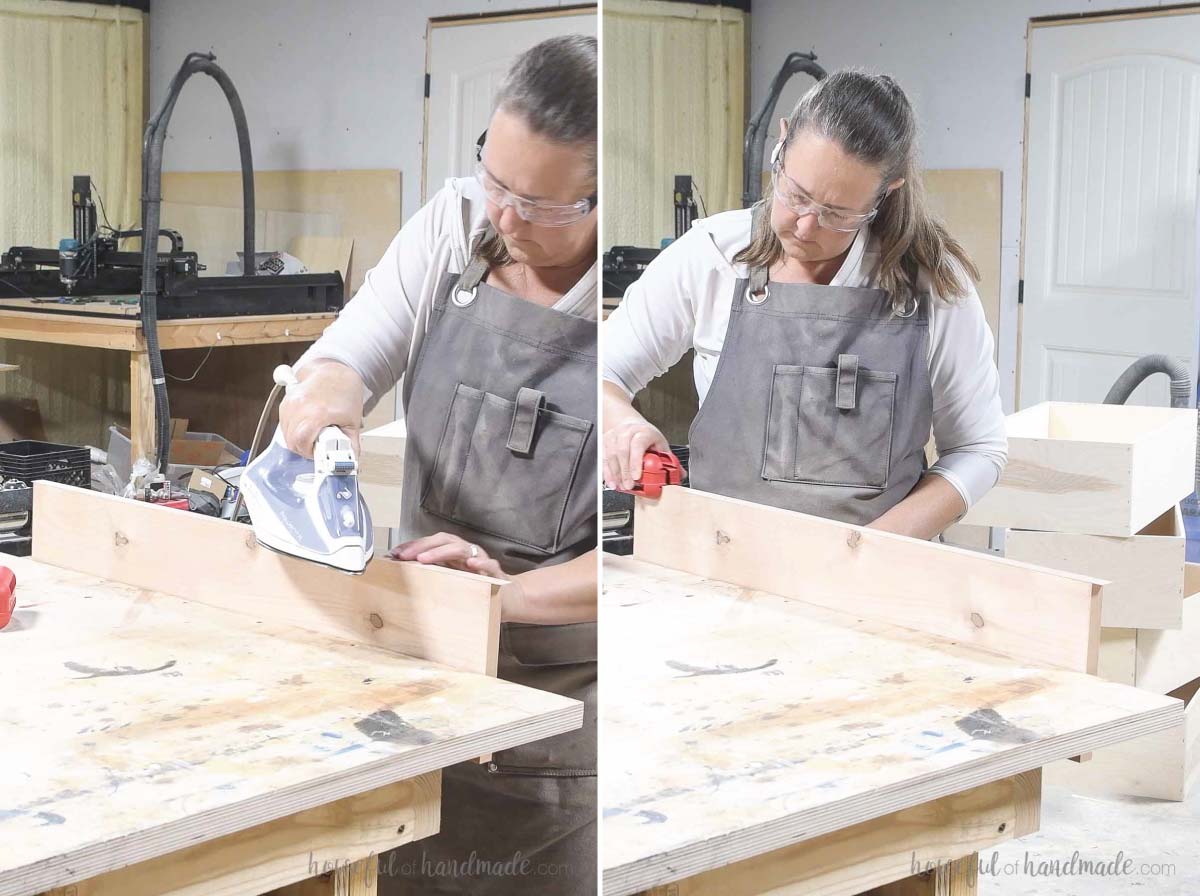
For the drawer fronts and top, iron edge banding around the perimeter of the drawer front pieces to cover the plywood edge.
Alternately, you could cut the drawer fronts from 1×8 (actually 7 1/4” wide) and 1×10 (actually 9 1/4” wide) boards if you prefer solid wood drawer fronts.
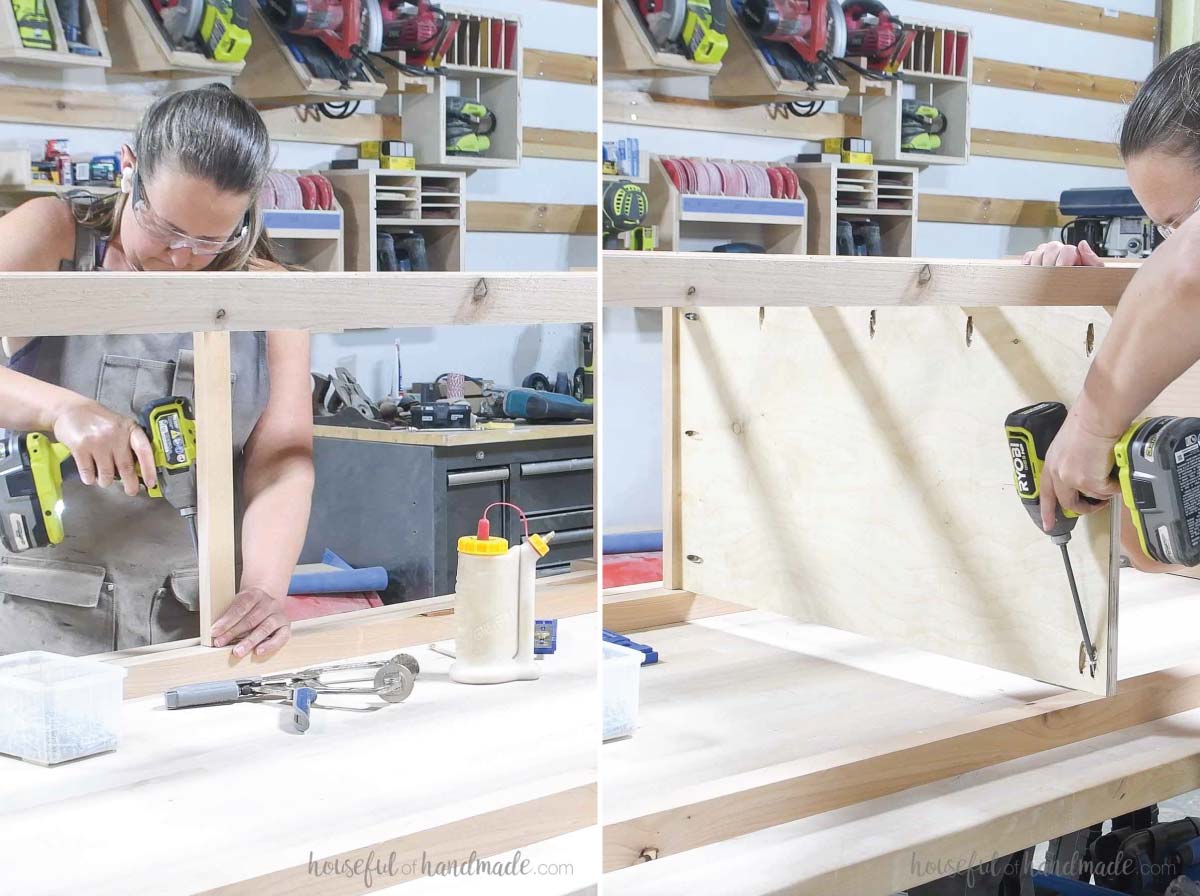
STEP 1- Build the sides
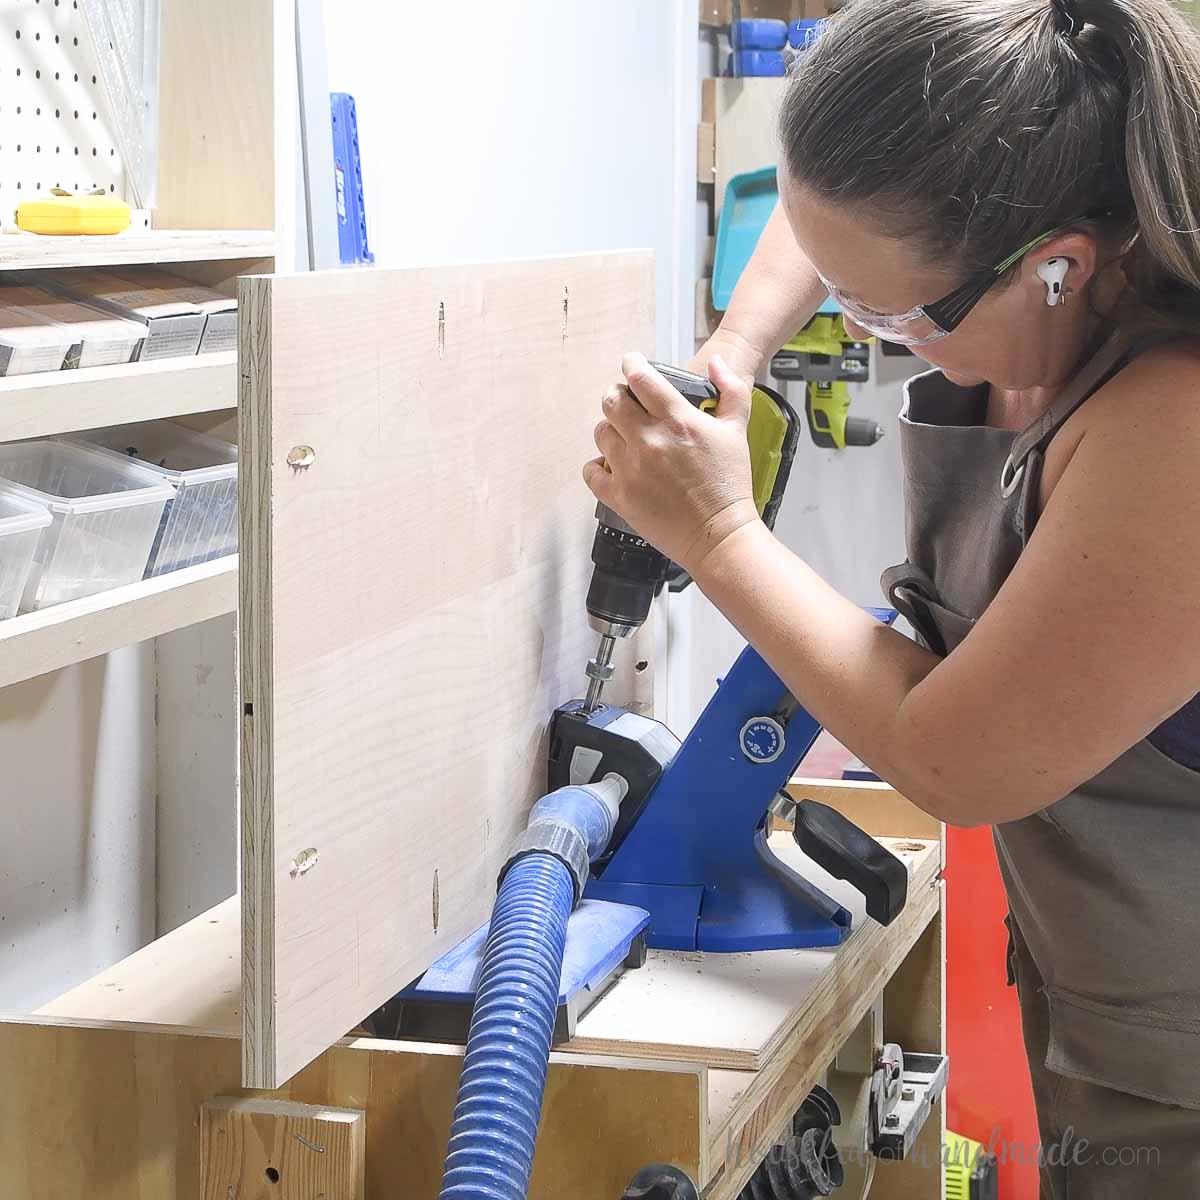
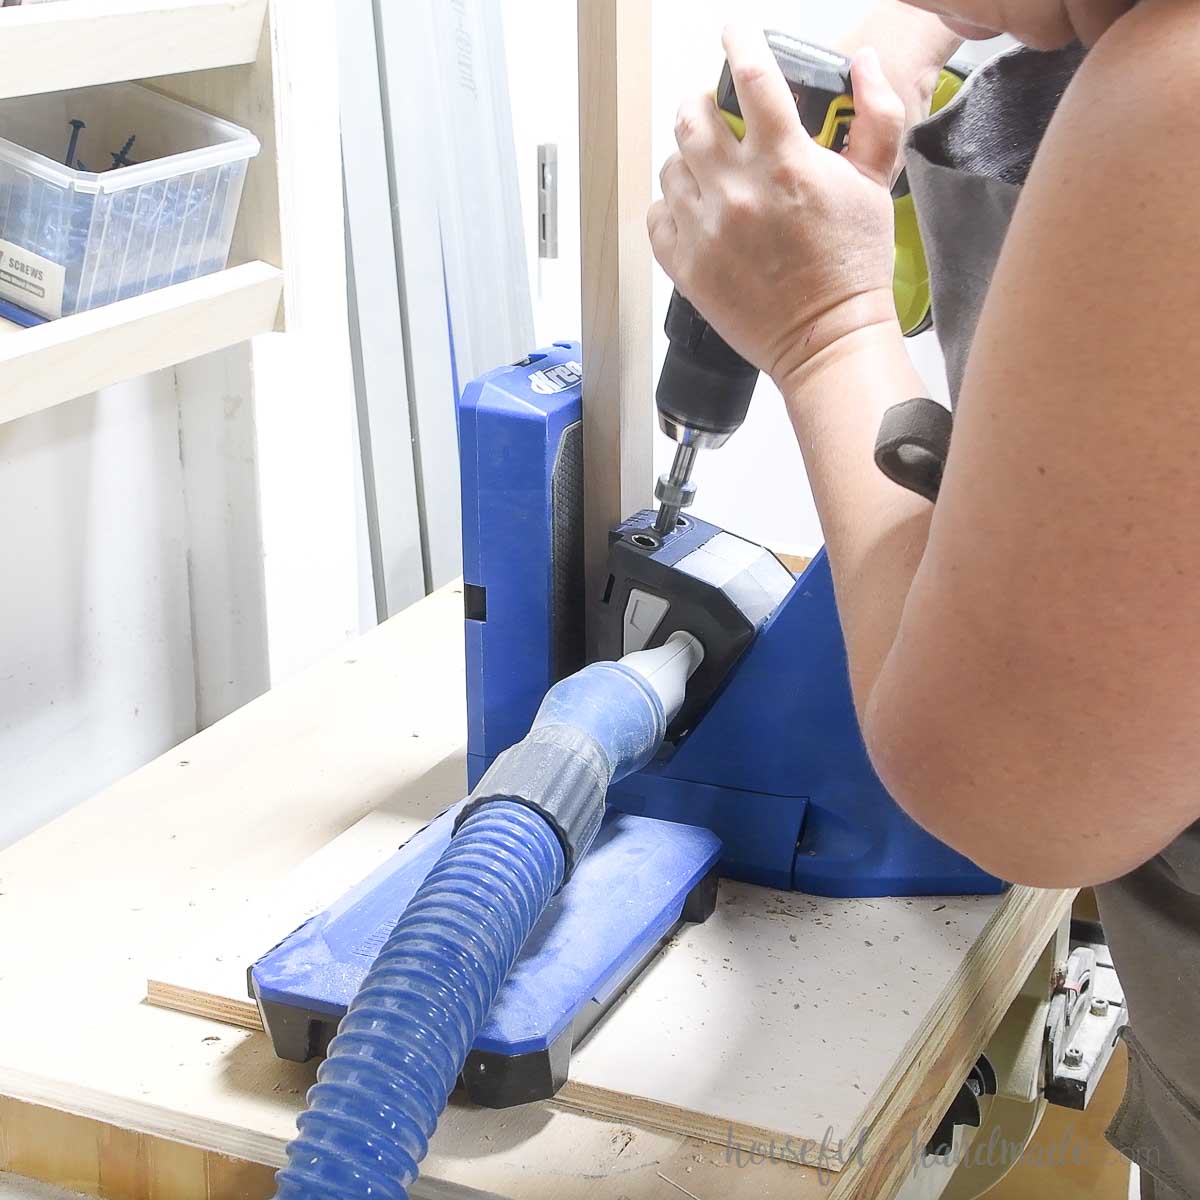
Drill one pocket hole, set for 1 1/2” thick material, in both ends of the 3/4” wide edge of the side trim pieces.
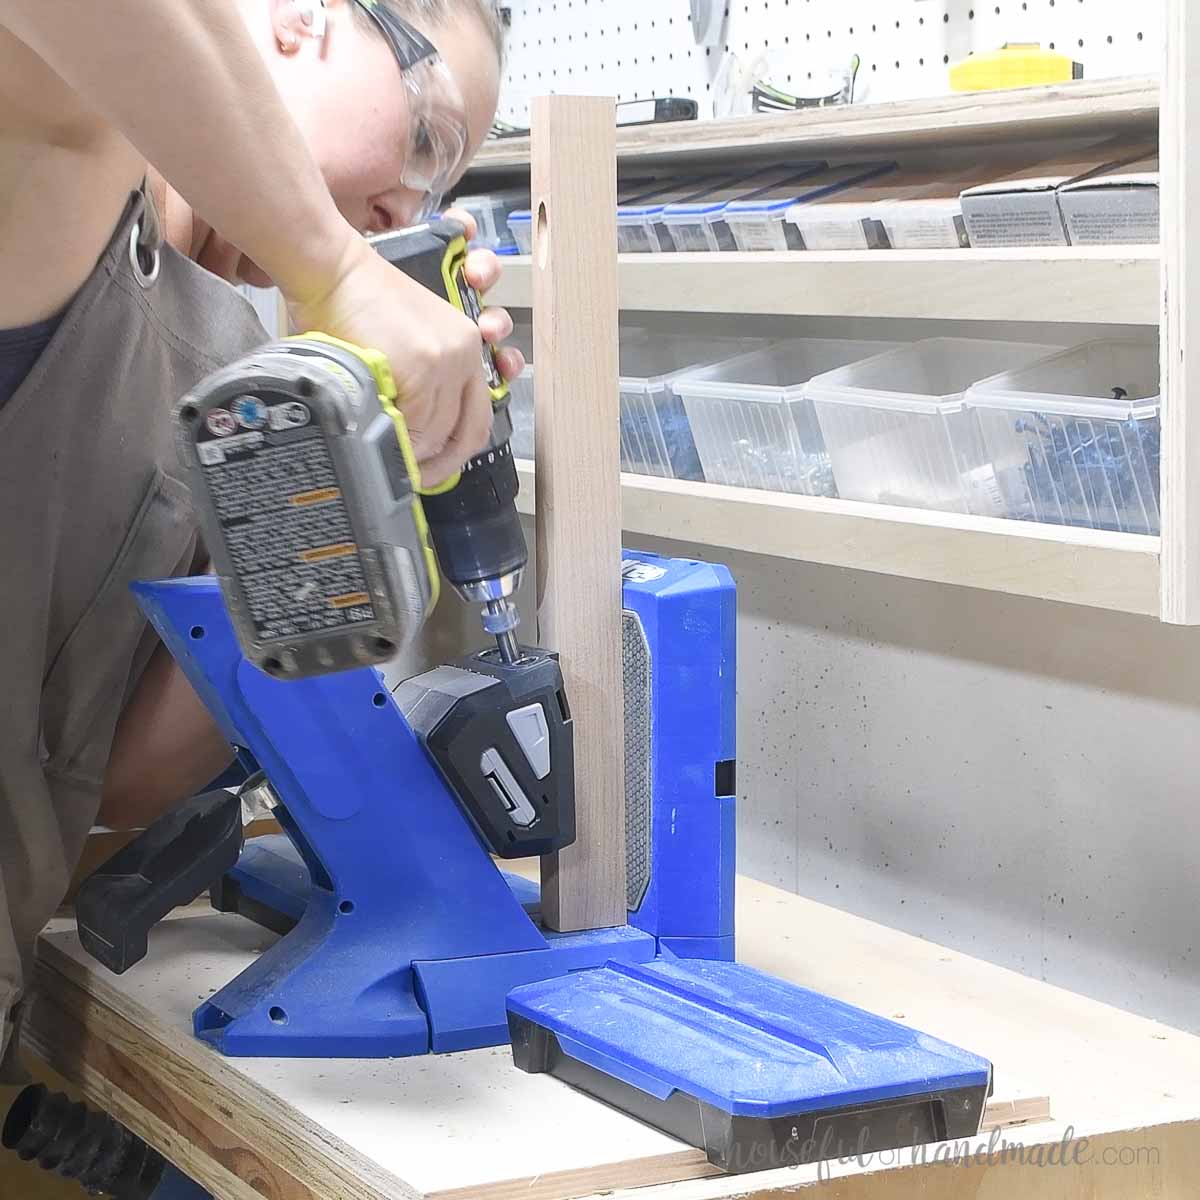
Drill pocket holes set for 3/4” thick plywood in the perimeter in the side panel pieces.
On the top/bottom of the side panel, keep the pocket holes far enough away from the edge to not be in the way of the pocket holes on the side trim pieces.
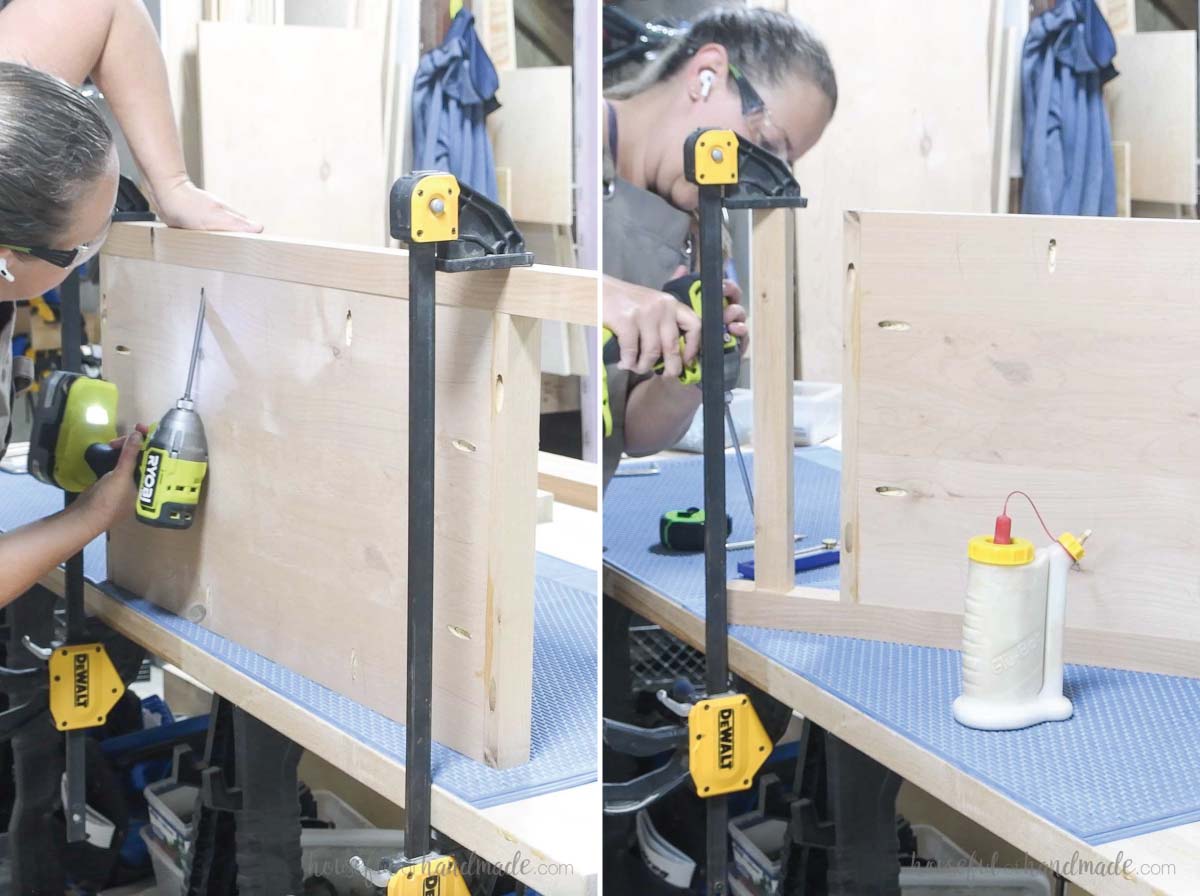
Attach the side trim to the top and bottom of the panel so the panel is flush with the back of the trim board.
Secure with 1 1/4” pocket hole screws and wood glue.
Attach the side panel to one leg piece with wood glue and screws so it is flush to the top and the panel is flush to the back of the leg.
- Use 2 1/2” long pocket hole screws to secure the trim pieces to the leg.
- Use 1 1/4” pocket hole screws to attach the panel to the leg.
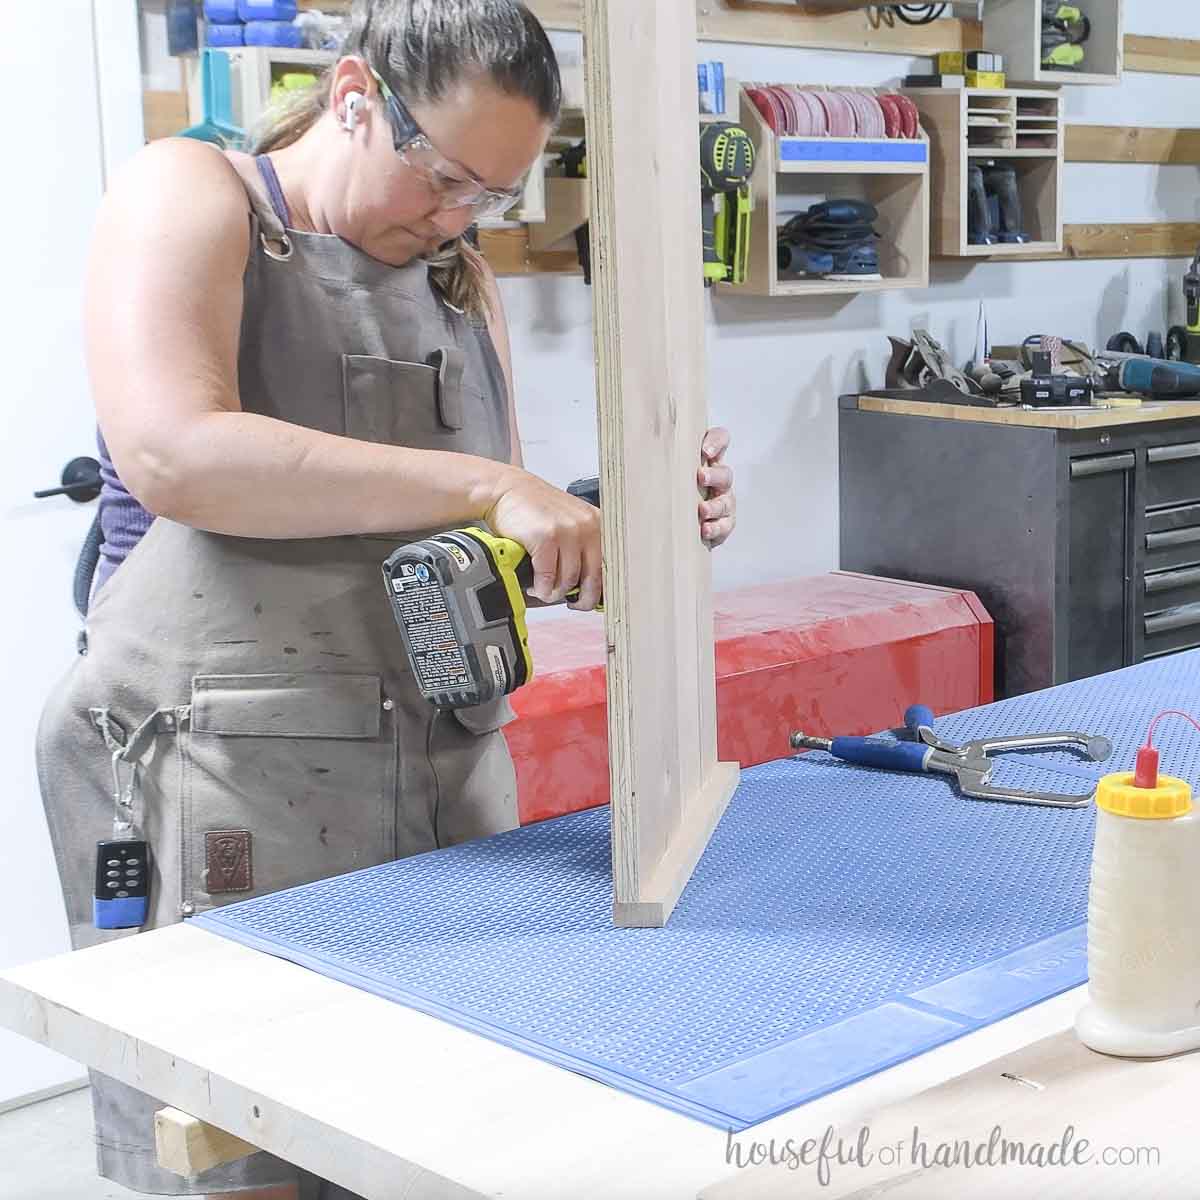
Attach the third side trim piece to the bottom of the leg so it is 1 1/2” up from the bottom of the leg and centered on the leg (3/8” in from the front and back).
Make sure the pocket hole is on the underside so it is hidden. Secure with glue and 2 1/2” pocket hole screws.
Then attach the second leg to the other side in the same way.
STEP 2- Build the front frame
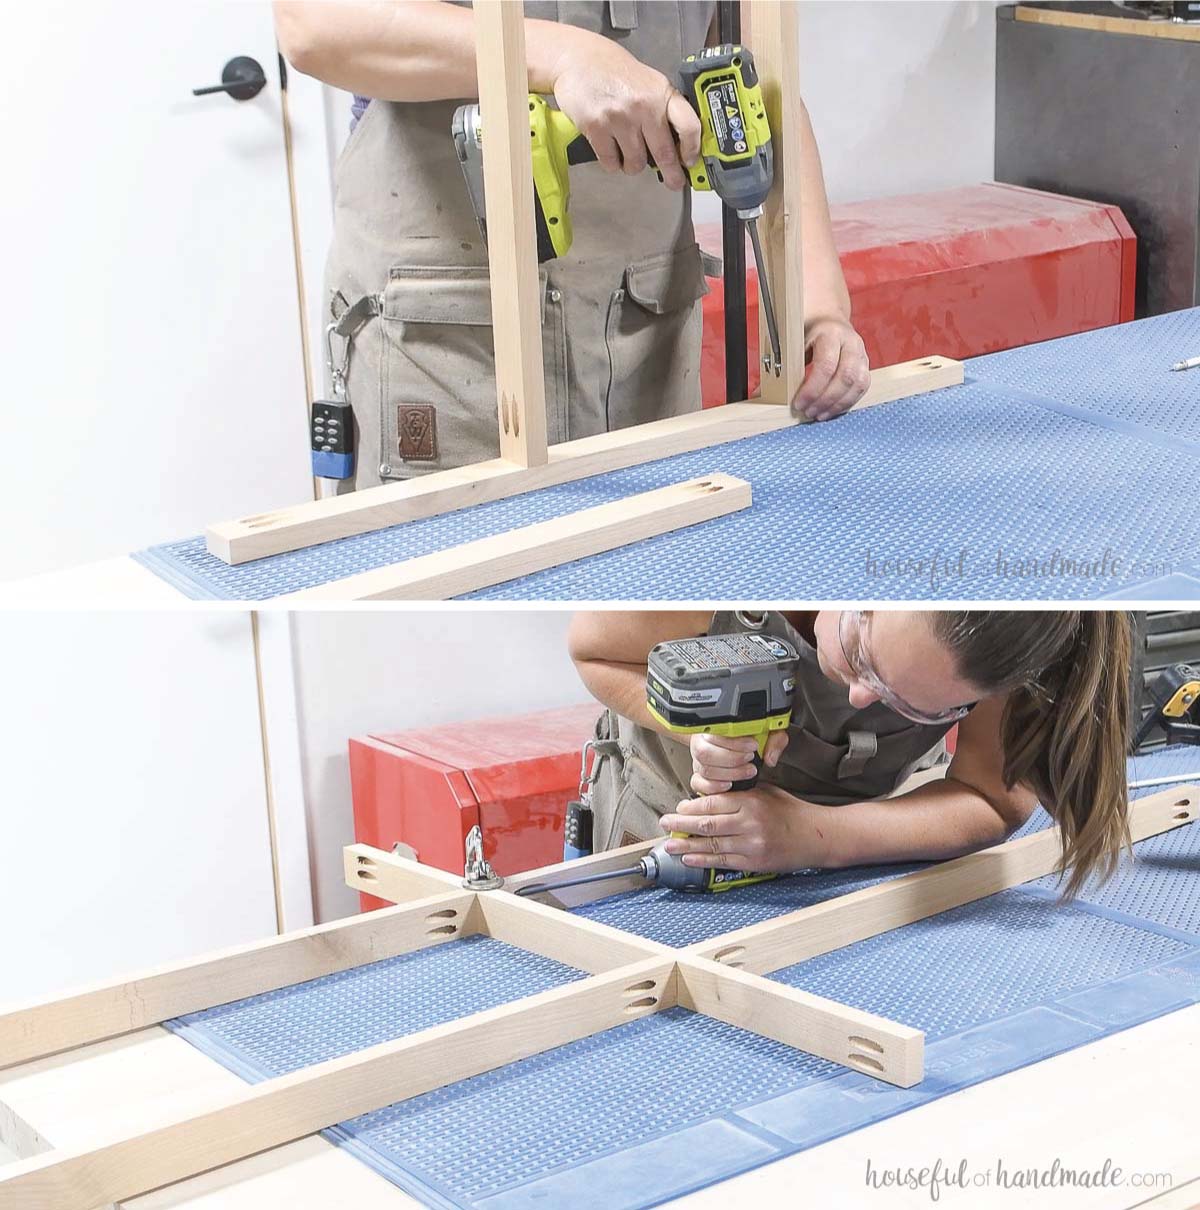
Drill two pocket holes set for 3/4” thick material in each end of the front and back trim, dividers and center pieces.
For the dividers, offset the pocket holes slightly where they meet in the center piece.
Attach the center dividers to the center piece so they are flush front to back and spaced according to the diagram in the plans.
Secure all boards with 1 1/4” pocket hole screws and wood glue.
EXPERT TIP:
Use a face frame clamp to hold the boards tight while securing when you cannot use a 90 degree clamp to create the “t”.
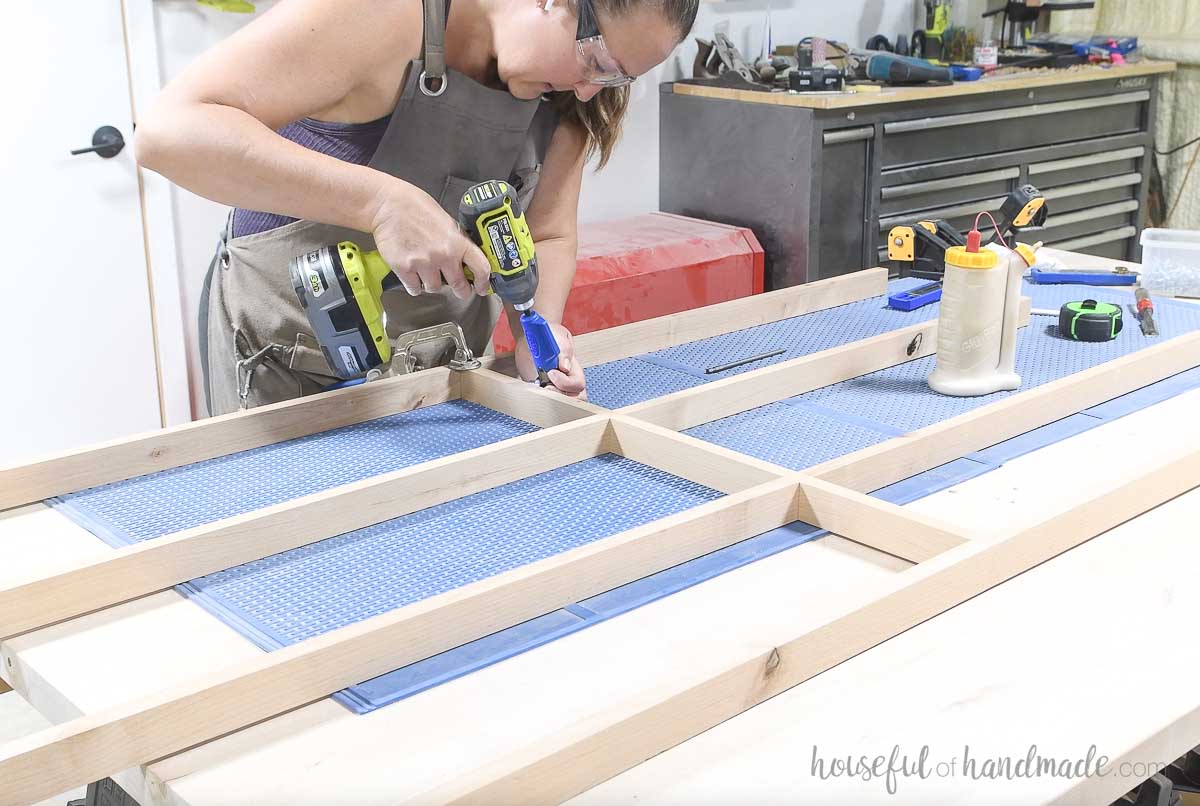
Finish the front frame by attaching the front trim pieces to the top of and bottom of the frame so it is centered.
Secure with 1 1/4” pocket hole screws and wood glue.
To hide the pocket holes, face the pocket holes in the top trim up so it is hidden under the top and the pocket holes in the bottom trim down so they are toward the floor.
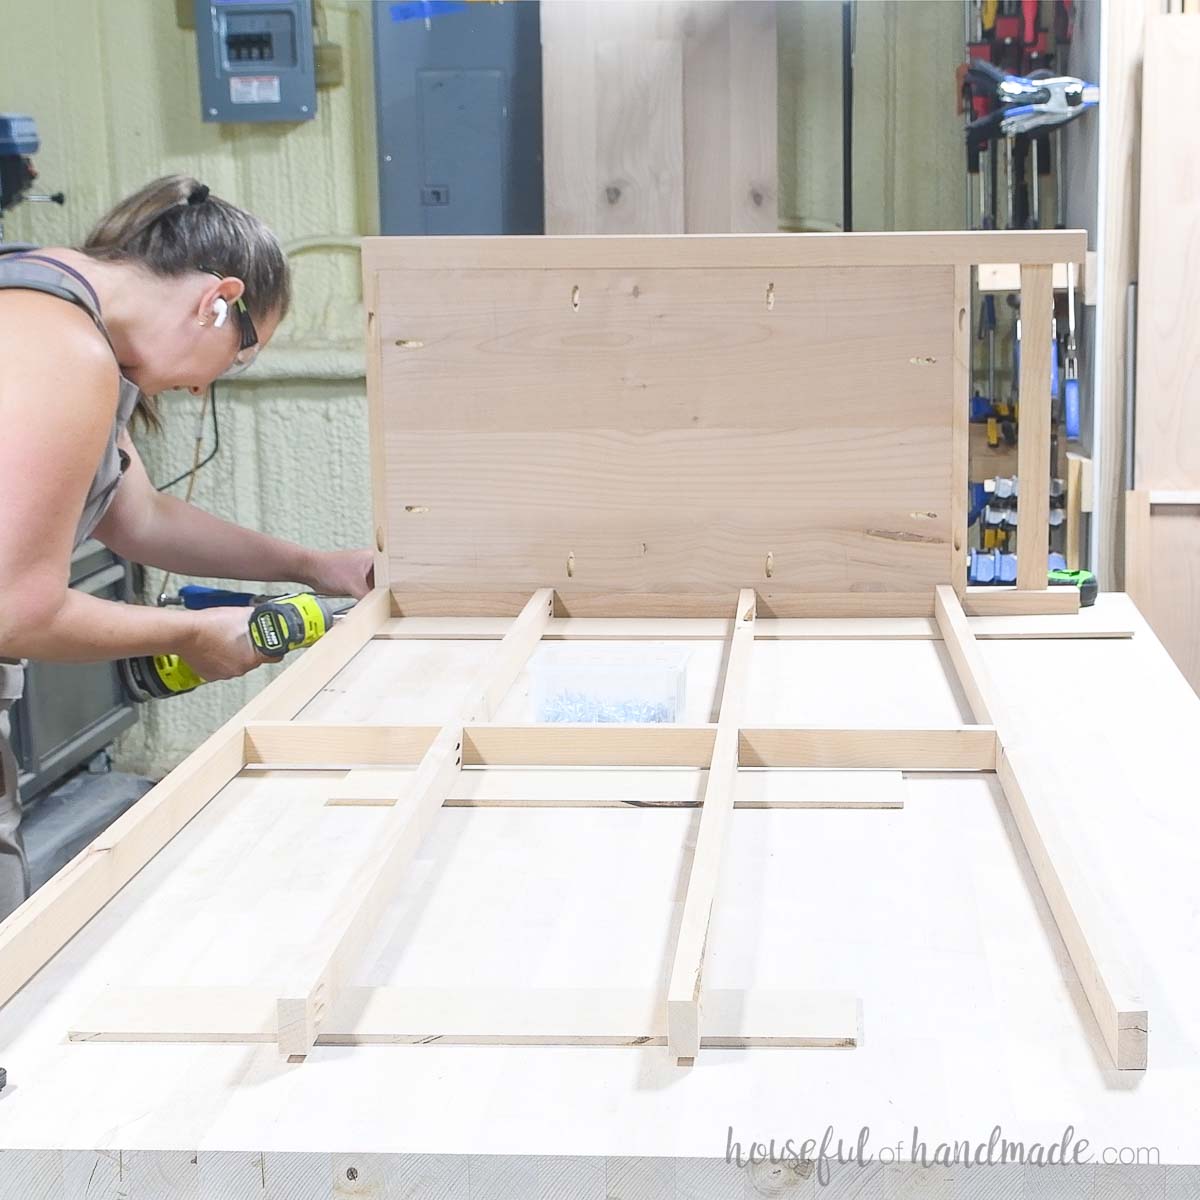
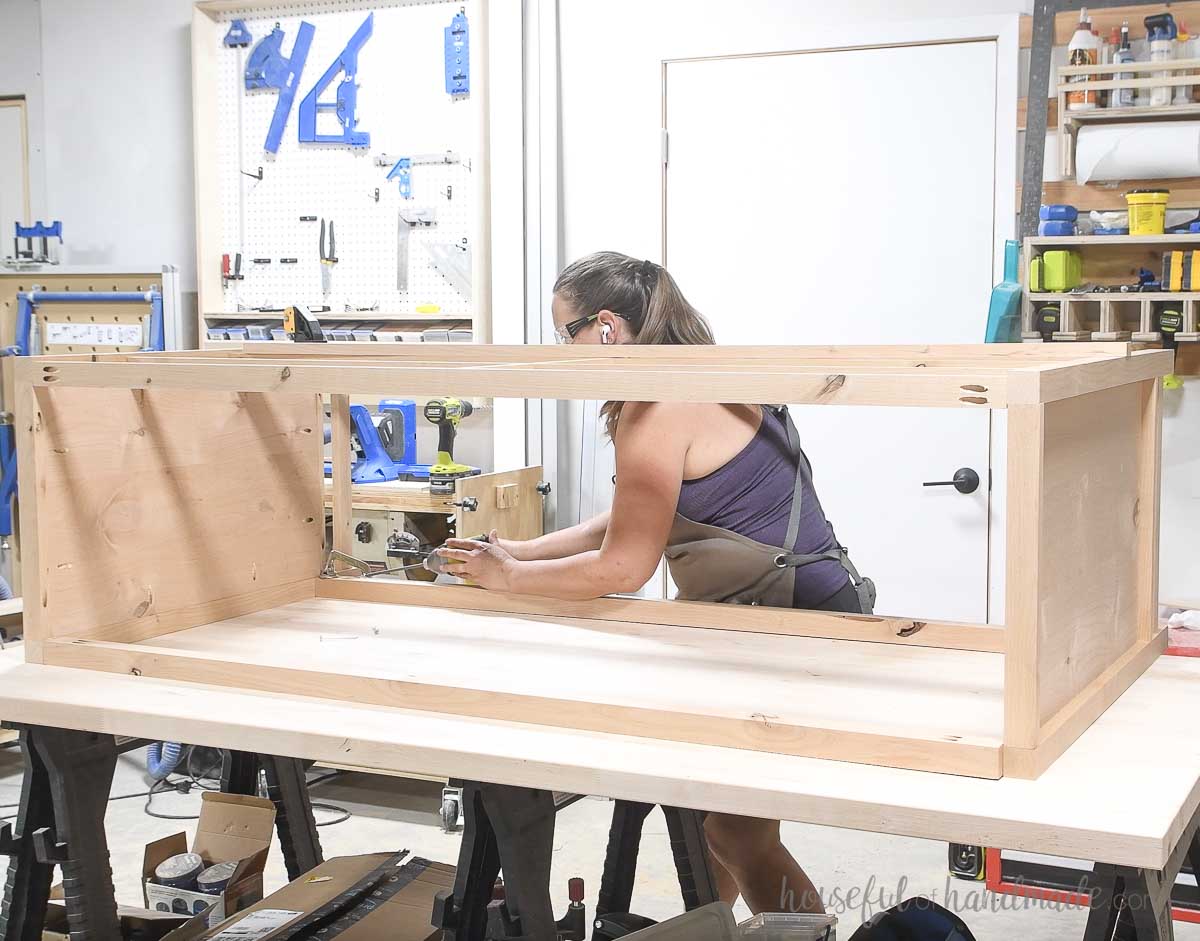
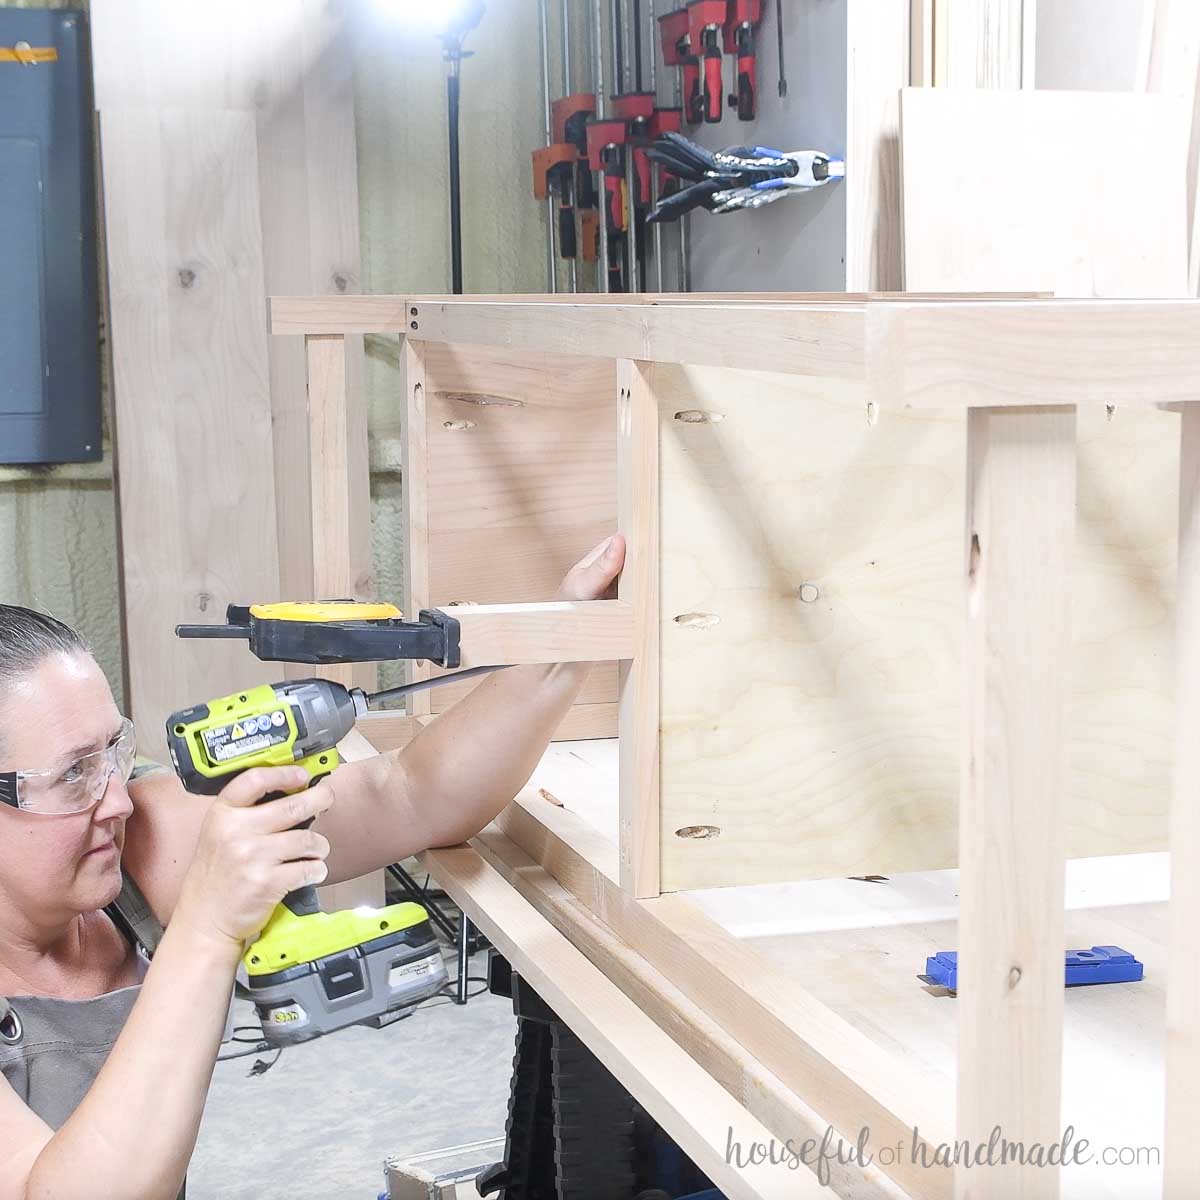
STEP 3- Assemble the dresser frame
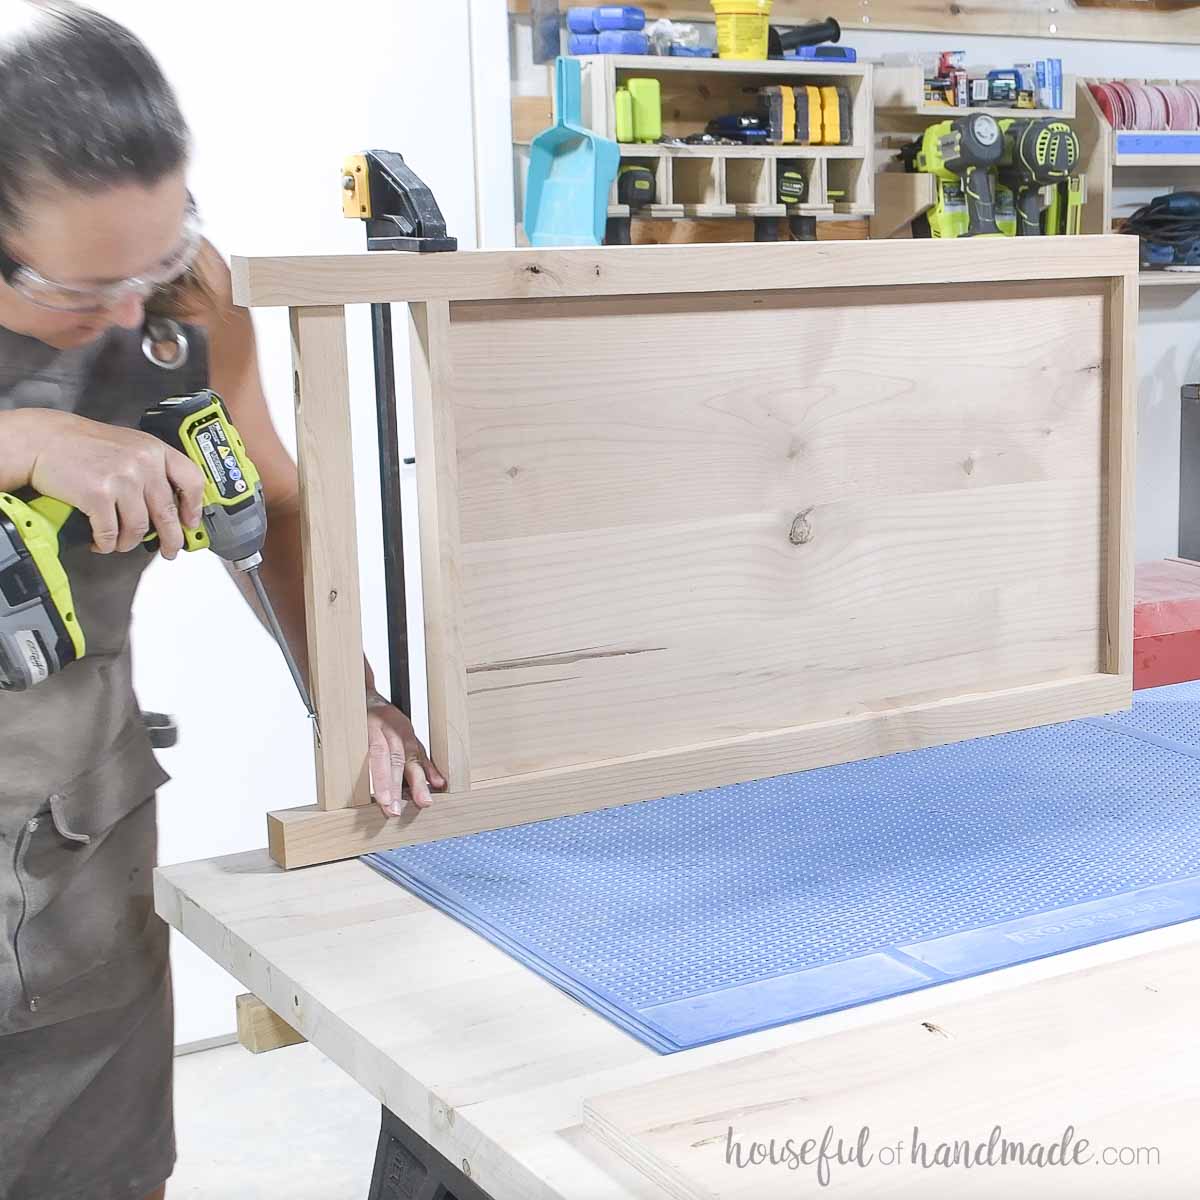
Using the pocket holes already drilled in the ends of the front trim and divider pieces, attach the frame between the sides.
The front frame should be set back from the front of the side 1/4” and flush with the top. Also, make sure to align the center dividers so they are spaced the same as they are in the center.
EXPERT TIP:
Use a few scraps of 1/4″ plywood under the front frame to set it back the 1/4″ required.
Secure with 1 1/4” pocket hole screws and wood glue.
Drill pocket holes set for 1 1/2” thick material in both ends of the back pieces and the 3/4” wide edge of the back trim piece.
Attach the back pieces to the sides with 2 1/2” pocket hole screws so they are flush with the top and bottom side trim.
Attach the back trim between the sides so it is 1 1/2” up from the bottom and centered on the legs (3/8” in from each edge) with the pocket hole on the bottom to keep it hidden.
Secure with wood glue and 2 1/2” pocket hole screws.
NOTE: The back of the dresser is complete. If you want to add a back to cover it up, you can cut a piece of 1/4” plywood to cover it up but it is not necessary for structure. Also, I prefer to have the open back to prevent things from getting stuck behind drawers.
Drill pocket holes set for 3/4” thick plywood in the perimeter in the center support piece. No need for pocket holes in the top. On the back, only add pocket holes were the plywood connects to the back pieces.
Also drill pocket holes set for 3/4” thick material in both ends of the center support board. Then drill two pocket holes set for 1 1/2” thick material in one end of the center leg board.
Attach the center board between the bottom front face and back so it is center. Secure with glue and 1 1/4” pocket hole screws.
Then center the plywood piece in the center of the dresser and attach with 1 1/4” pocket hole screws.
Lastly, attach the center leg with 2” pocket hole screws to the center of the board.
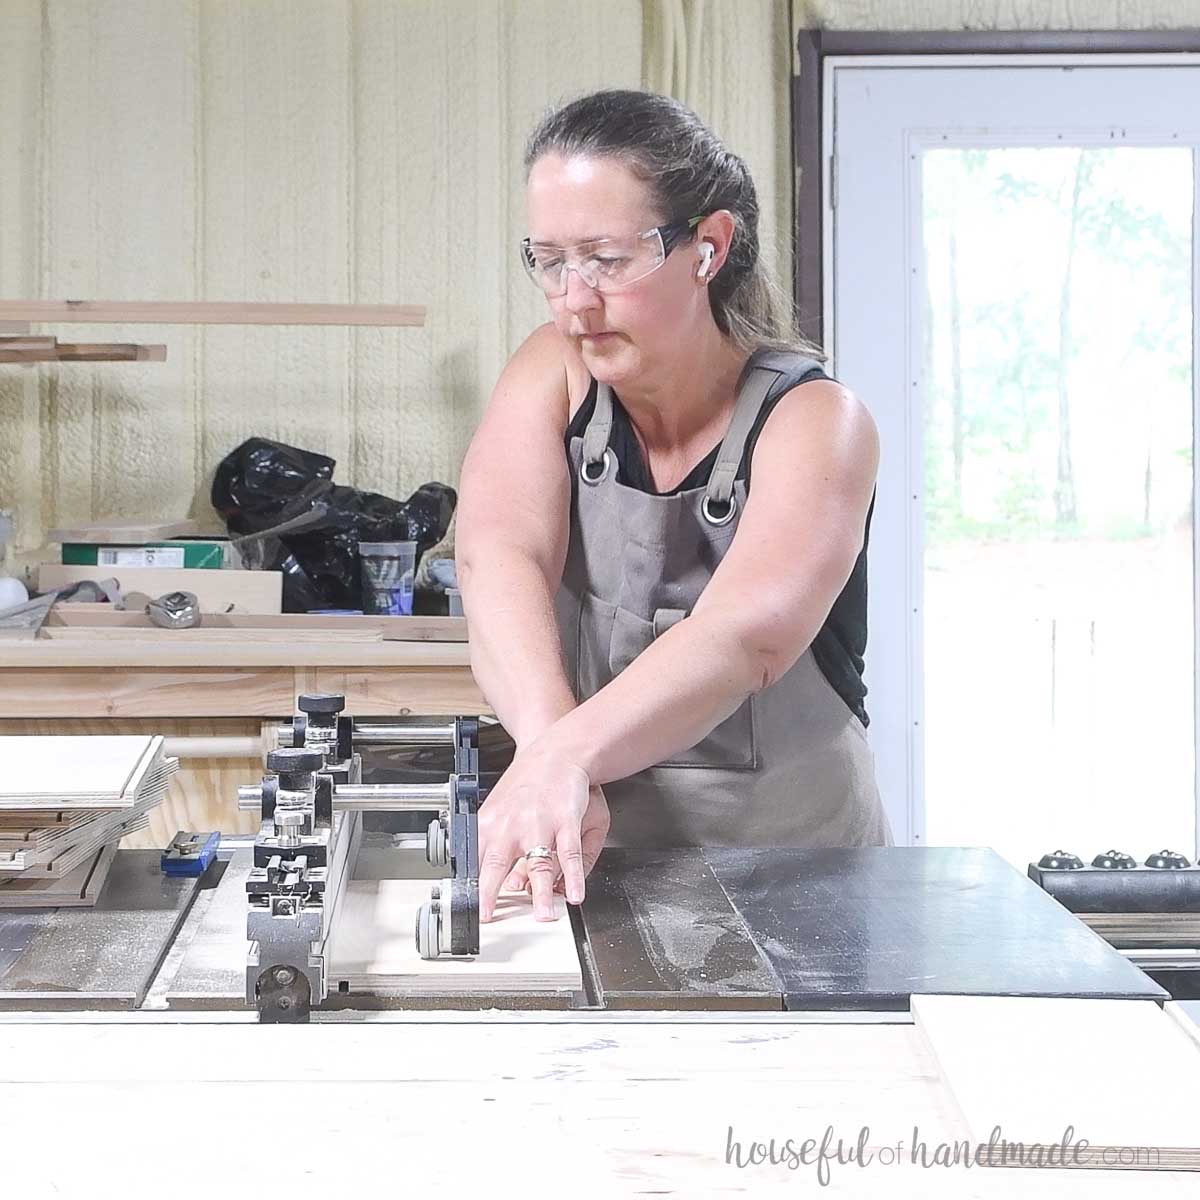
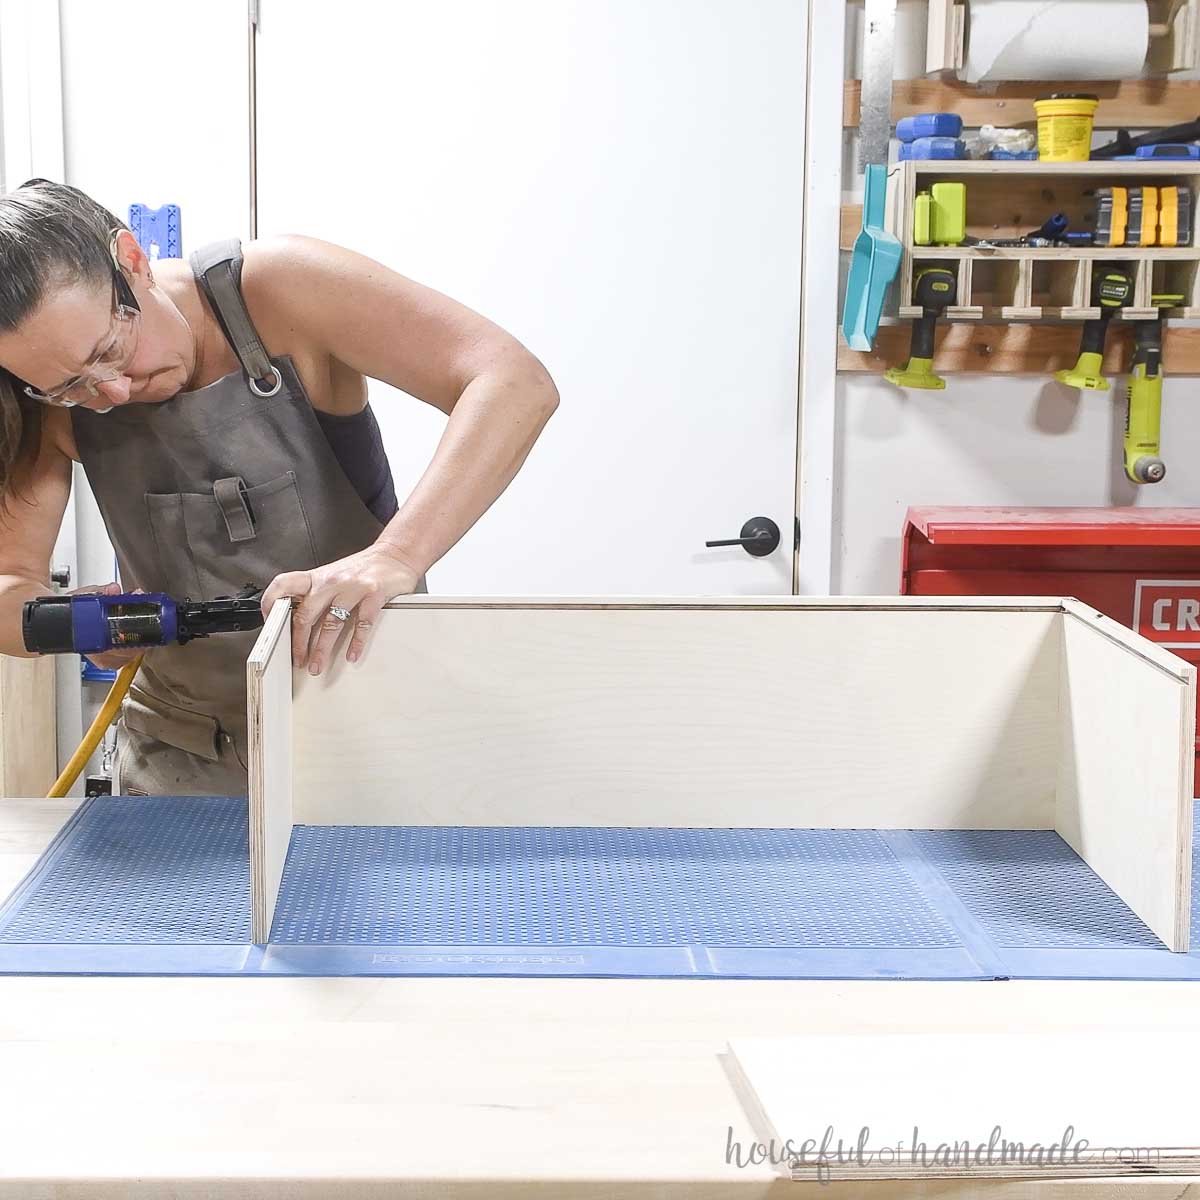
STEP 4- Build drawer boxes
Cut a 1/4″ wide by 1/4″ deep groove in the inside of the drawer box pieces 1/4″ up from the bottom.
I did this by taking multiple passes with my table saw. You could also use a circular saw or router to add a groove.
You can assemble the drawers with pocket holes or pneumatic staples. If using pocket holes, drill pocket holes set for 1/2″ material in the outside sides of the drawer box front and back pieces (not the same side as the groove).
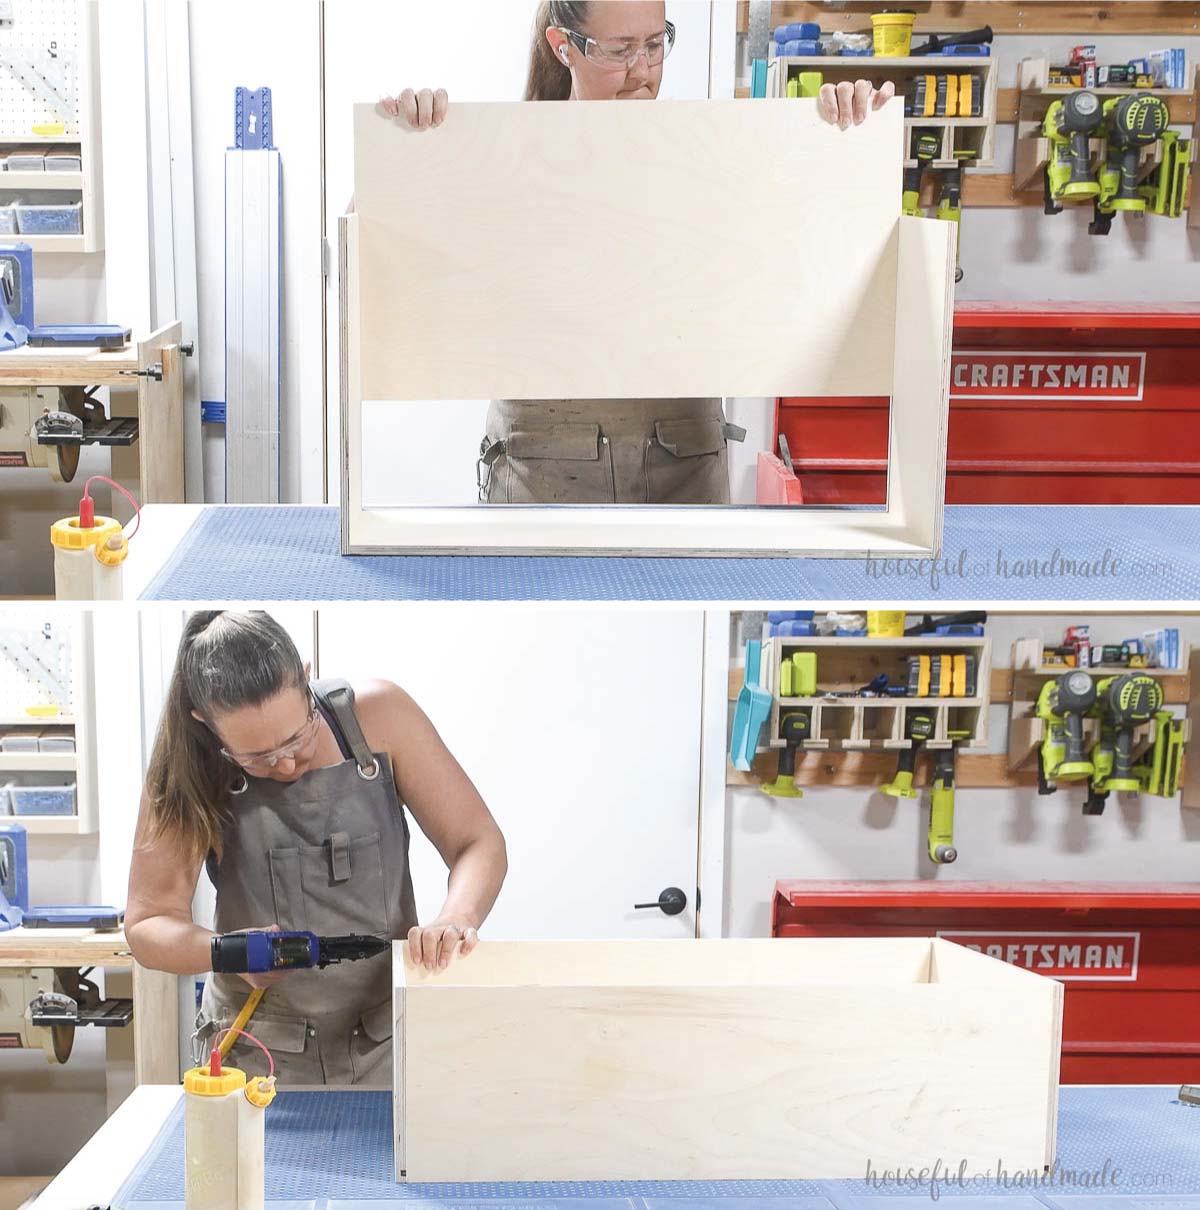
Build the drawer boxes by securing the side pieces to the front pieces with wood glue and 1″ staples or pocket hole screws.
Make sure the top of all the drawer box pieces is flush.
Slide the drawer box bottom piece into the groove on the sides and front. Then attach the back piece the same way you did the front to enclose it.
Repeat for all (6) drawer boxes.
Find tips and additional ways to build drawer boxes here.
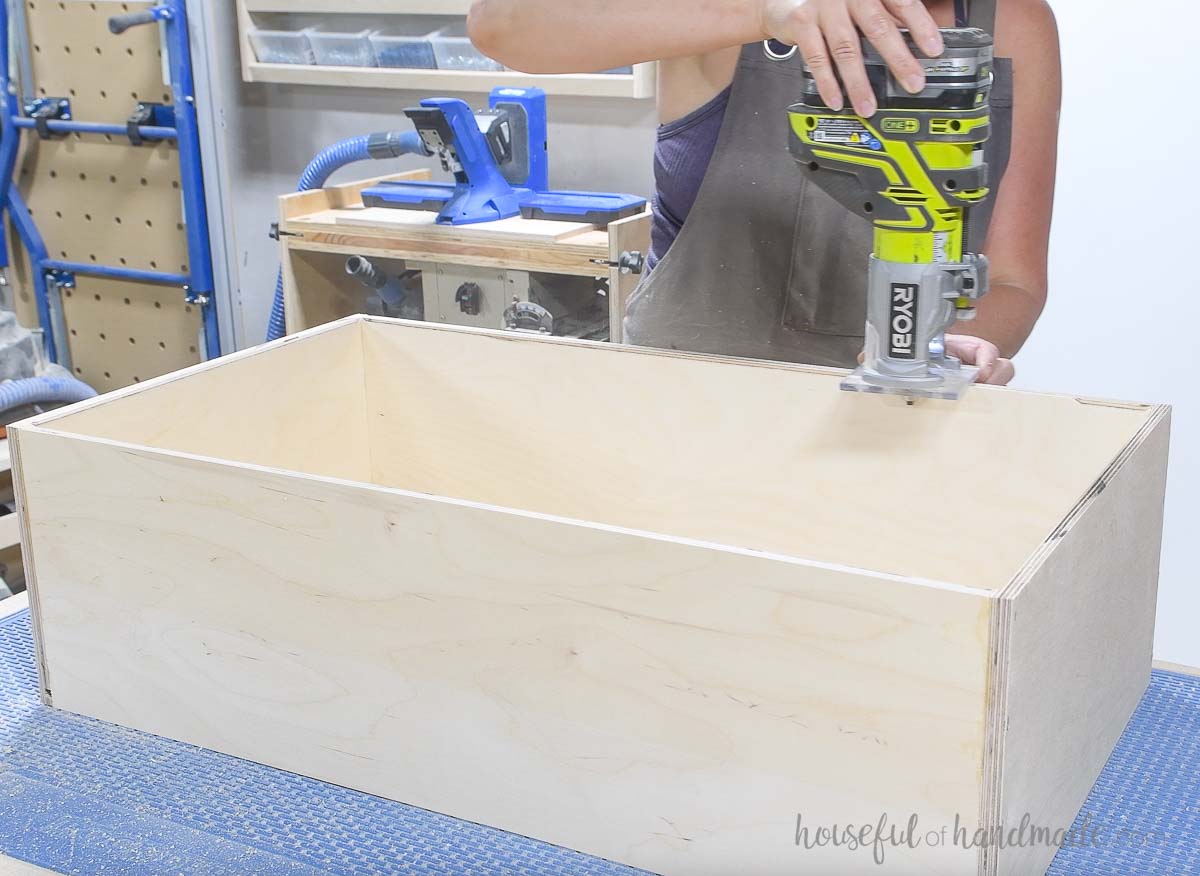
I like to round over the inside of the drawer box to remove the sharp edge of the plywood. This step is totally optional, but is easy to do with an inexpensive trim router and a round over bit.
Or you can smooth the inside edge with a sander.
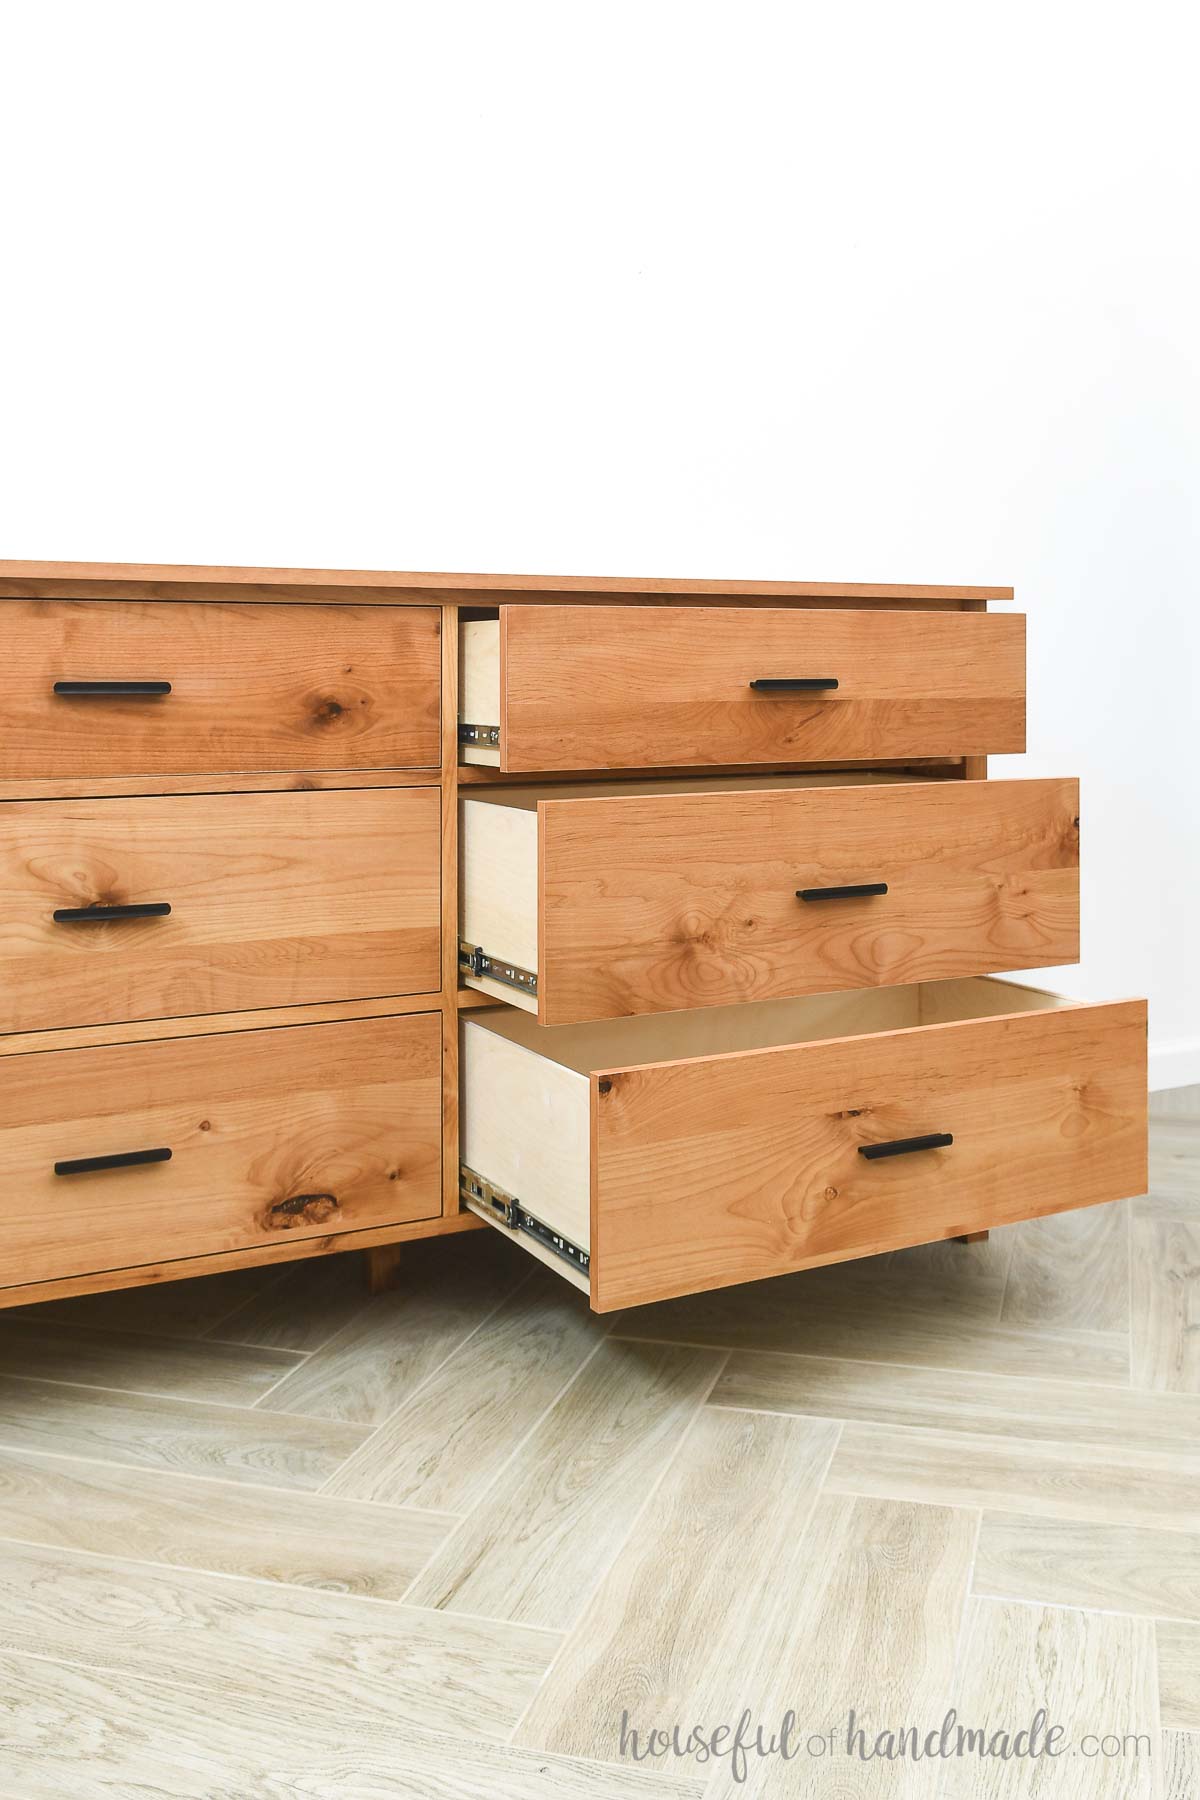
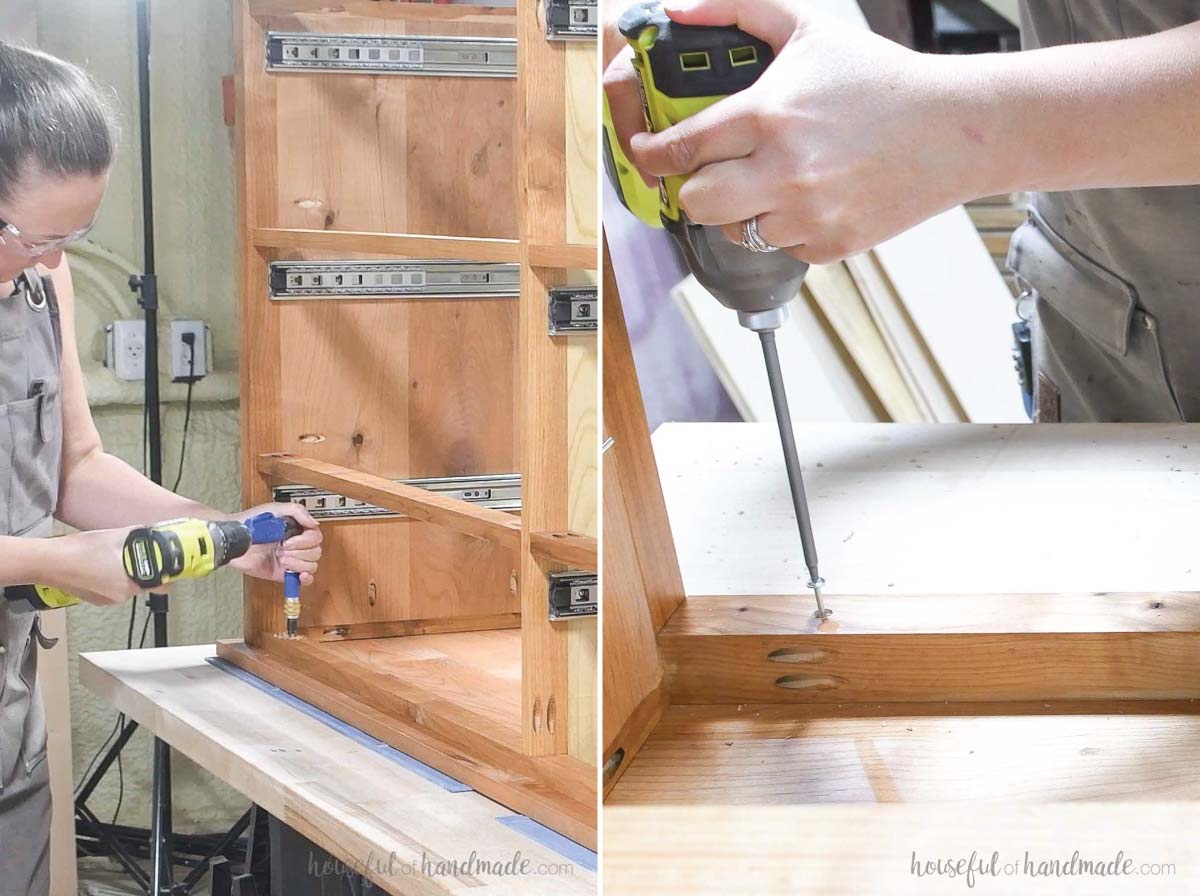
STEP 5- Install drawers boxes and fronts
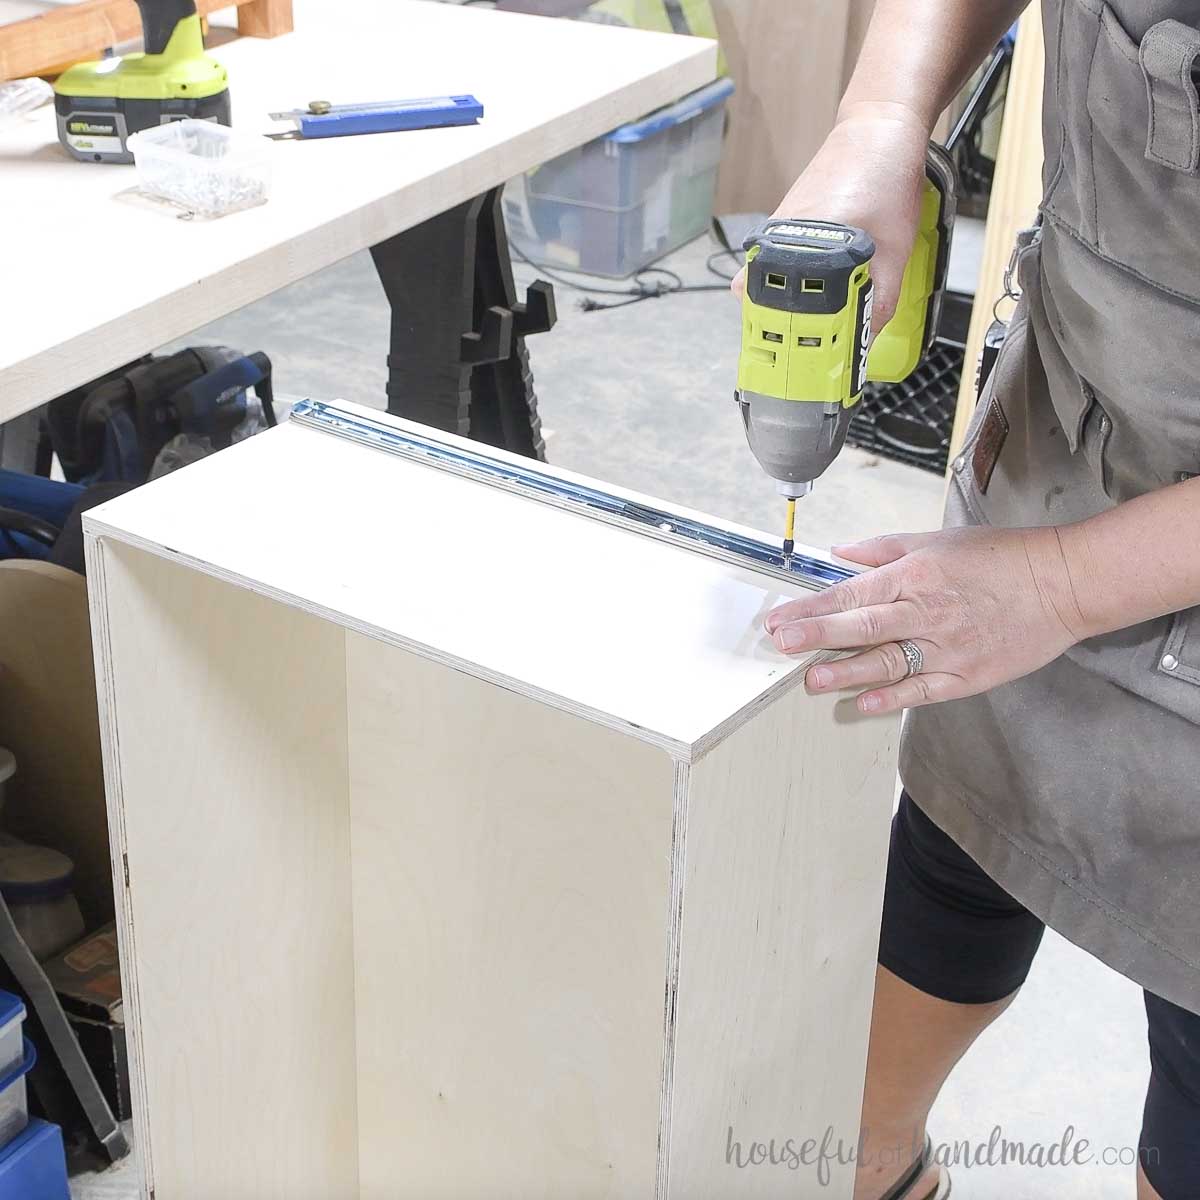
Install the drawer boxes using the side drawer slides so the drawer boxes are set back 3/4” from the front of the front frame (1” back from the front of the legs).
The drawer boxes should be 1/4” up from the bottom of the drawer opening, leaving 3/4” clearance on the top.
Learn how to install drawers with ball bearing slides here.
EXPERT TIP:
Clamp a scrap of 3/4″ plywood on top of the front frame. Make sure it is level and clamp at the back of the dresser. Then set your drawer slides on top of it while you secure them. This will keep your slides level inside the dresser.
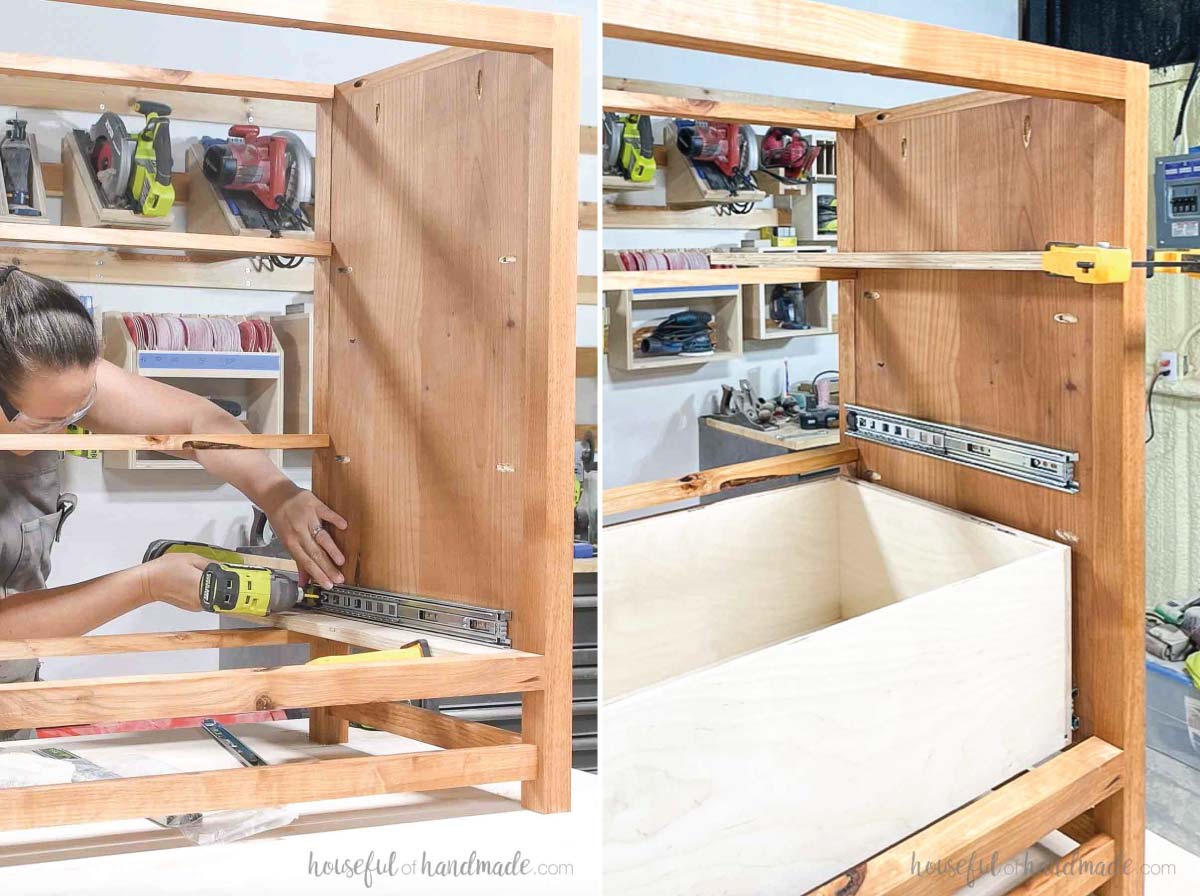
Attach the smaller part of the drawer slides to the side of the drawer box.
I spaced it 7/8″ up from the bottom of the box to give me the correct clearance once installed. Make sure to measure and adjust for your specific drawer slides.
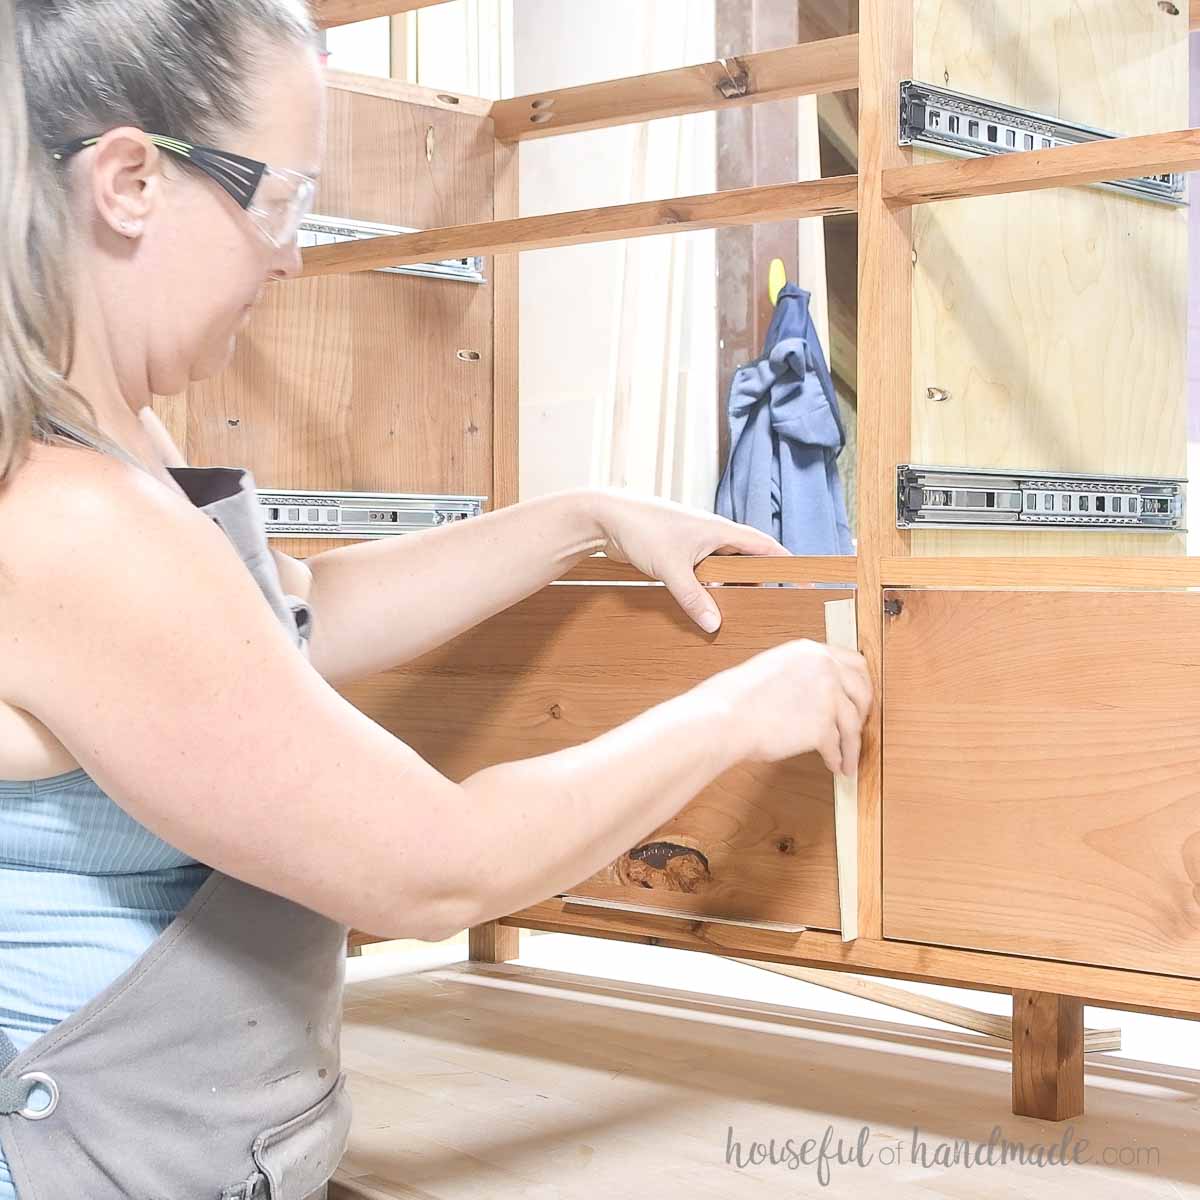
Attach the drawer fronts so they sit inside the frame and are flush to the front. You should have 1/8” gap all the way around the drawer fronts.
Once the drawer front was lined up properly (use 1/8” spacers or playing cards to get the perfect reveal), I used a brad nailer with 1” nails to temporarily attach the drawer front from the inside of the drawer.
Or you can use my trick for installing drawer fronts using the drawer pulls. I just hadn’t settled on what pulls I was going to use yet.
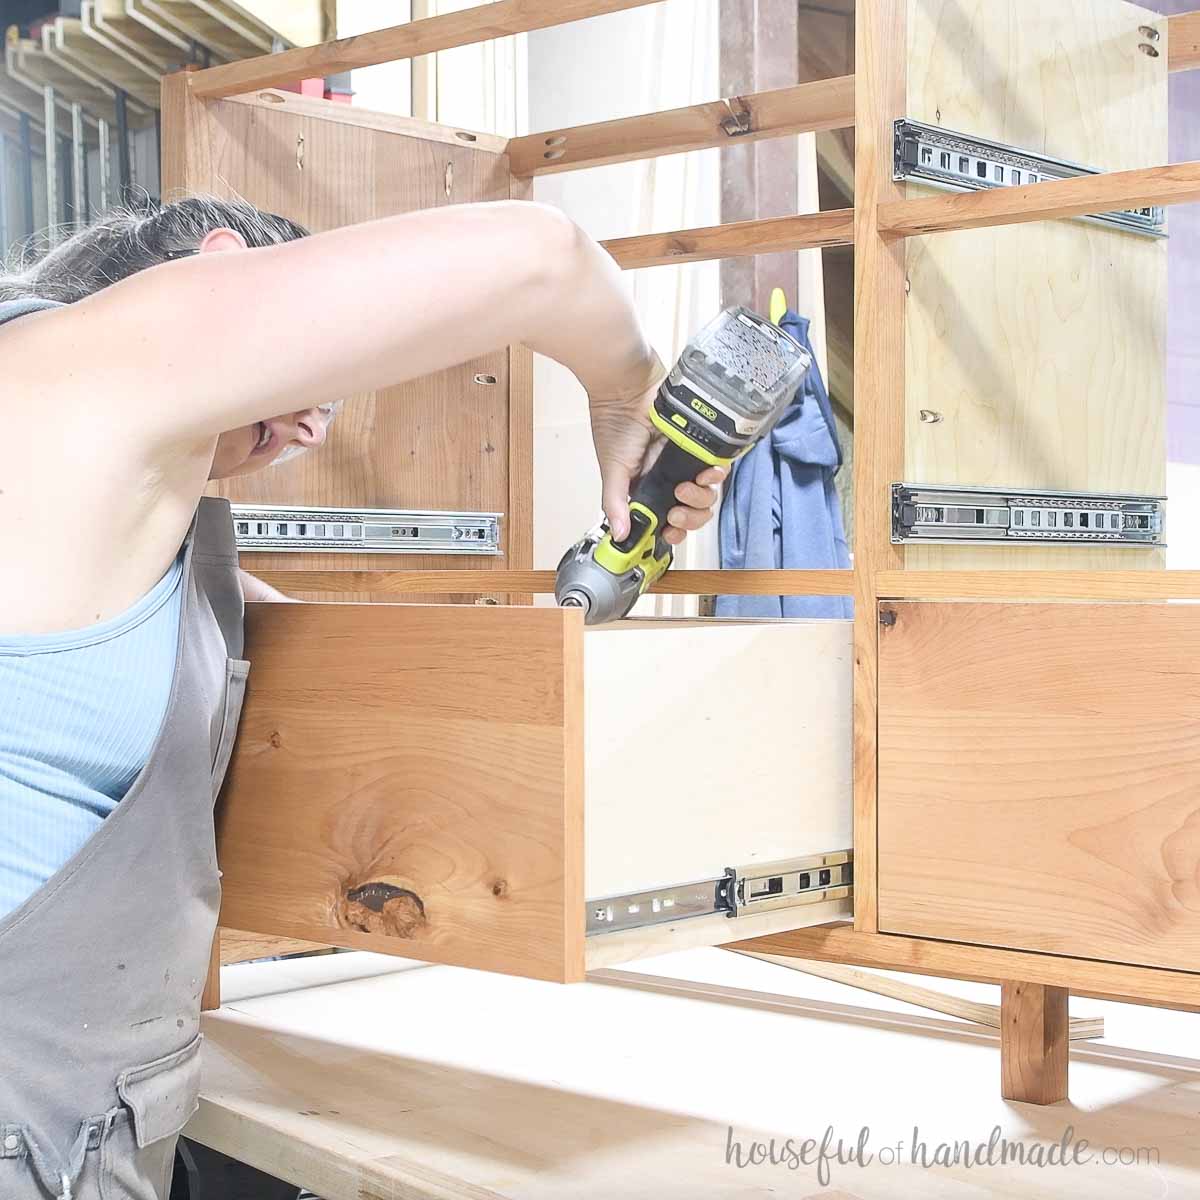
Then permanently attach the drawers using 1” wood screws from the inside of the drawer.
Use (4) screws per drawer, one screw in each corner of the drawer front.
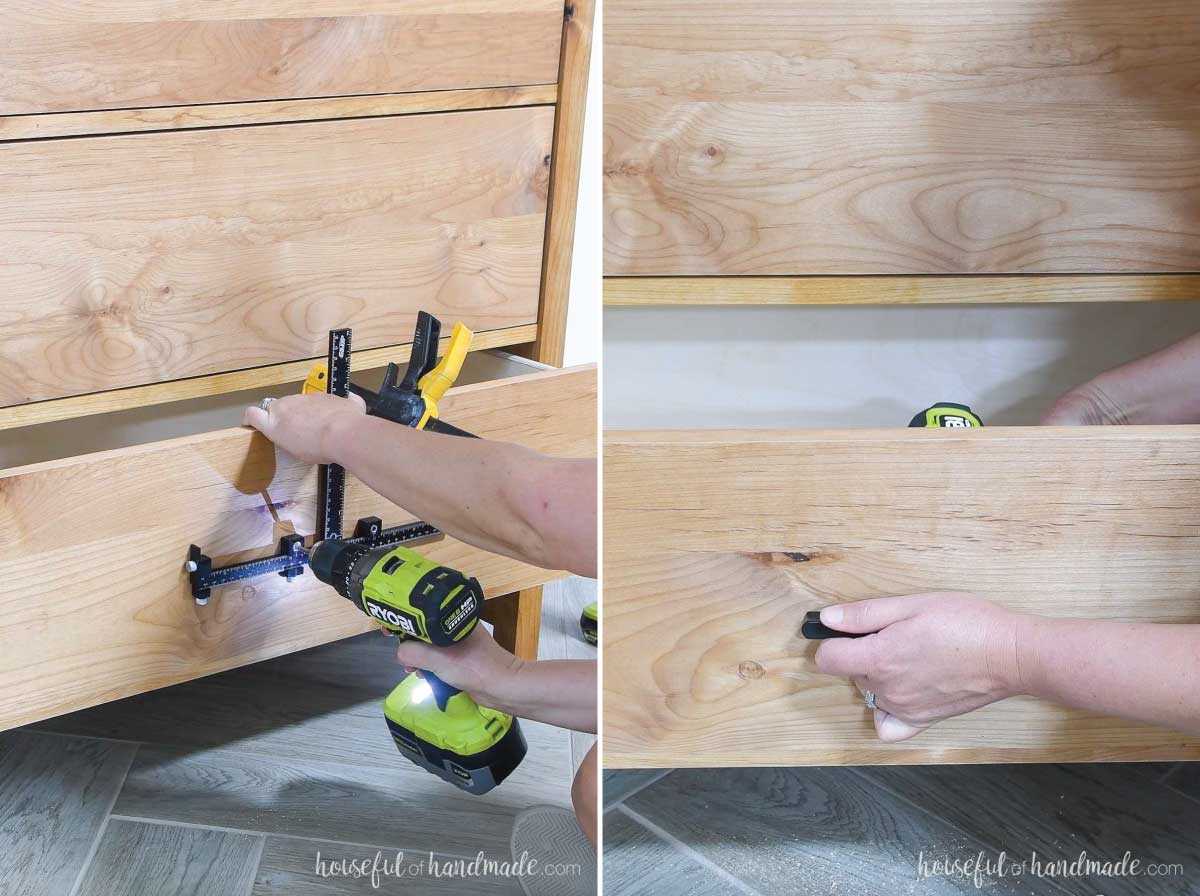
Add your desired drawer pulls. I used a single 4” long black pull centered on each drawer front.
STEP 6- Attach top and finish
I prefer to attach the top last so that you can easily access the inside of the drawers while installing them. So first, remove all the drawers, make sure to label them. I wrote their location on the back of the drawer box.
Place the top on your work table and then place the dresser frame upside down on top of it. The top should be flush with the back of the dresser frame and hang over the sides and front 1”.
Drill 1/4” deep countersunk holes in the top of the frame in the front and back.
Attach the top with 1” screws in the holes on the front and 2” long wood screws in the back.
Reinsert your drawers and you are done!
Stain/seal/paint your new 6 drawer dresser. I used a matte finish to seal the alder wood without adding any color. I just highlights the warmth of the natural wood.
You did it!
Premium plans include:
- Recommended Tools
- Shopping list
- Easy to read cut list table
- Cut diagrams
- Step-by-step instructions with 3D renderings
- Helpful resources
- BONUS: 3D SketchUp file
Now you can load up the large drawers and enjoy all the storage you built!
Happy building!
