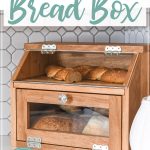
I hate having loaves of bread in bags all over my kitchen counters. Not enough to stop eating bread, but enough that I decided it was time to come up with a much prettier way to store those loaves.
So I partnered with Kreg Tools to make a DIY bread box with loads of storage that looked beautiful in the kitchen.
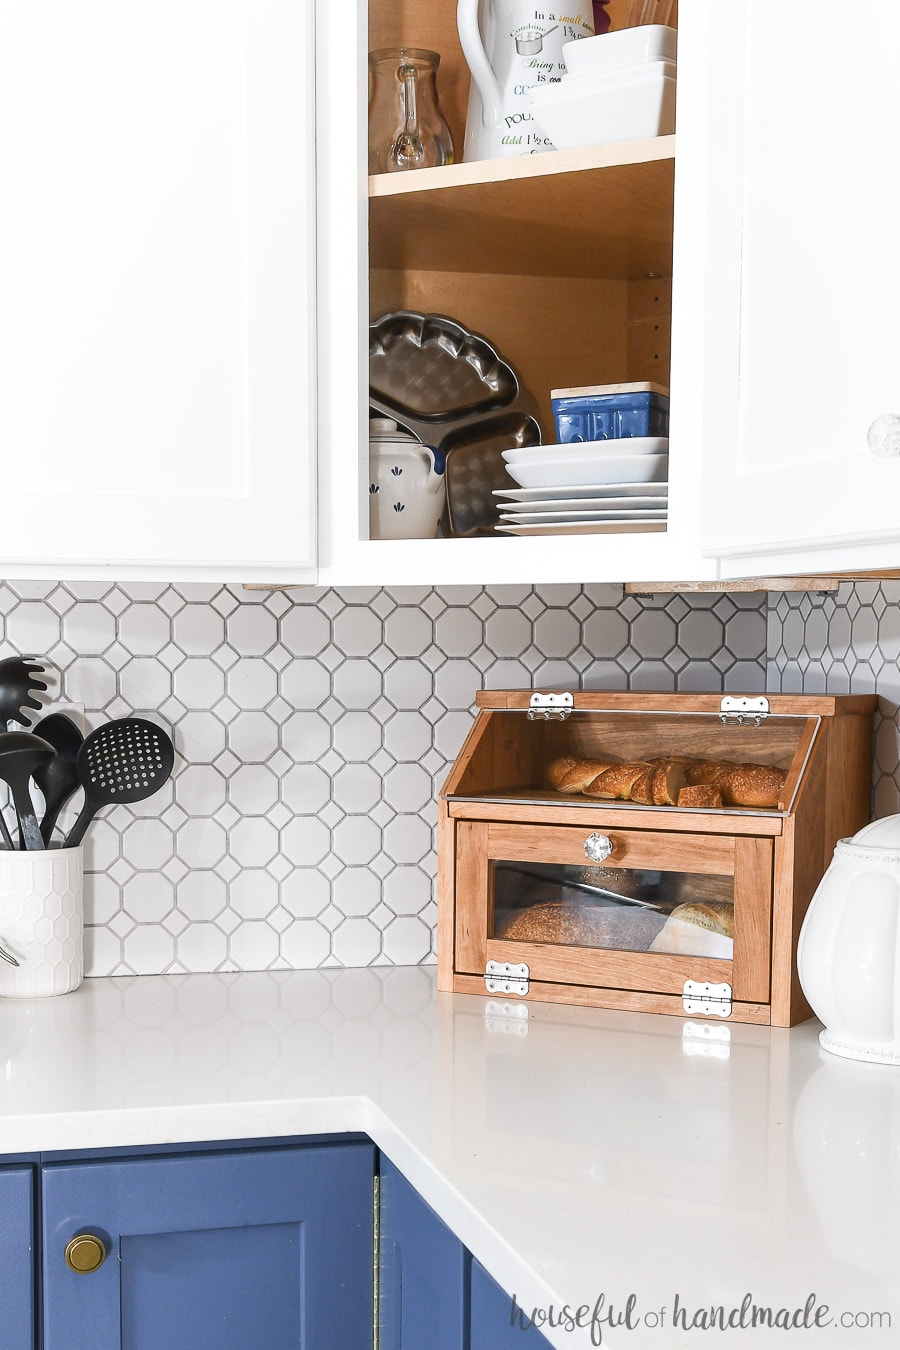
Artisan Bread Storage Solution
Nothing beats a loaf of fresh made sourdough bread or a crusty loaf of artisan bread. But storing those loaves is kinda a pain.
This post may contain affiliate links. As an Amazon Associate I earn from qualifying purchases. Click here to read my full disclosure policy.
Sealing bread in a plastic bag causes the crusty outside to get soft. They need a little bit of air to keep them perfect!
That is why a bread box is so amazing. They create a wonderful environment to store your non-sliced bread to keep it perfect.
Soft insides with crusty outsides. And the best part, it looks so pretty on your kitchen counters.
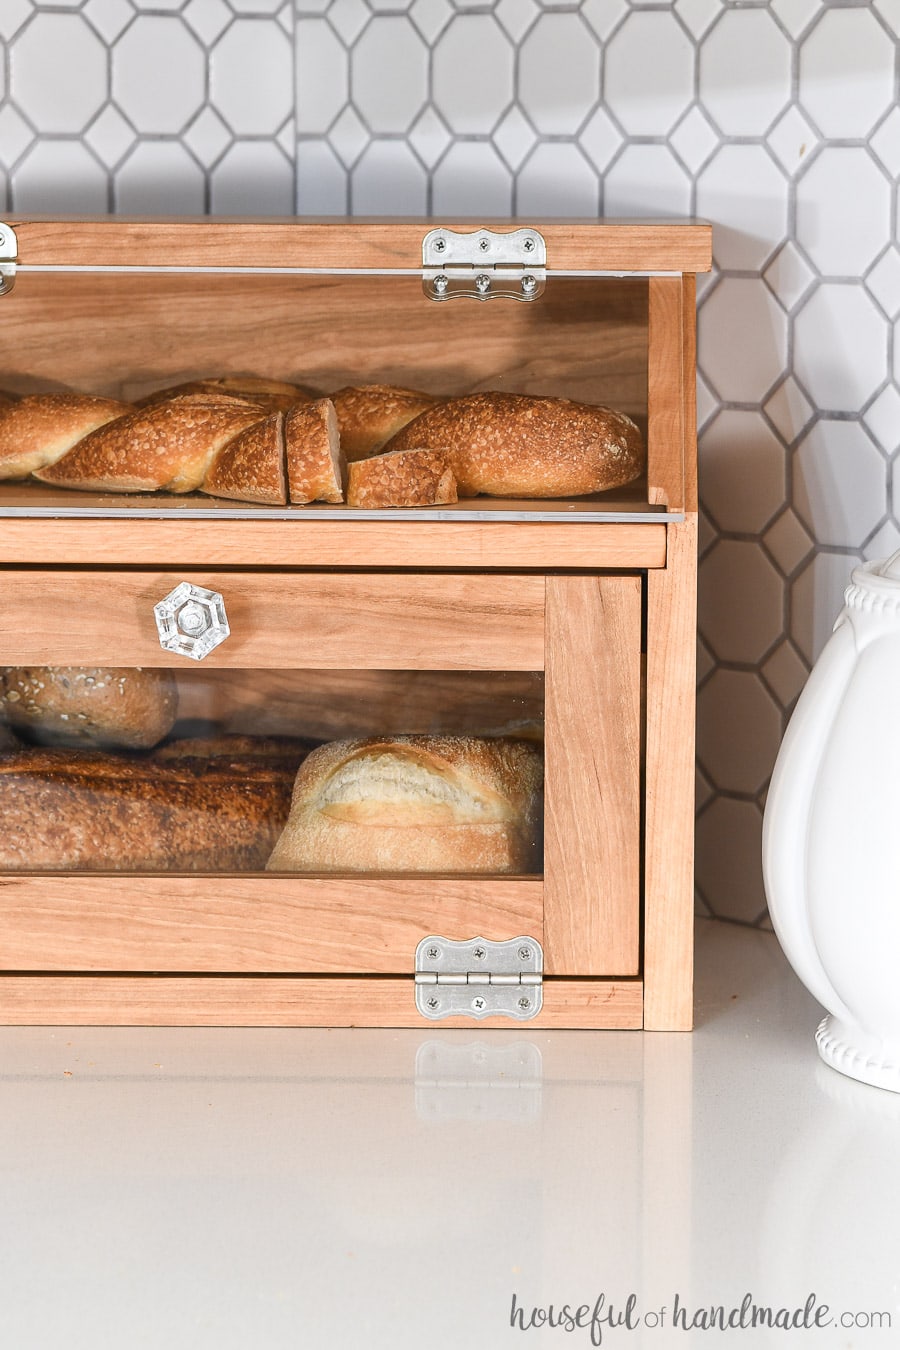
Large DIY Breadbox
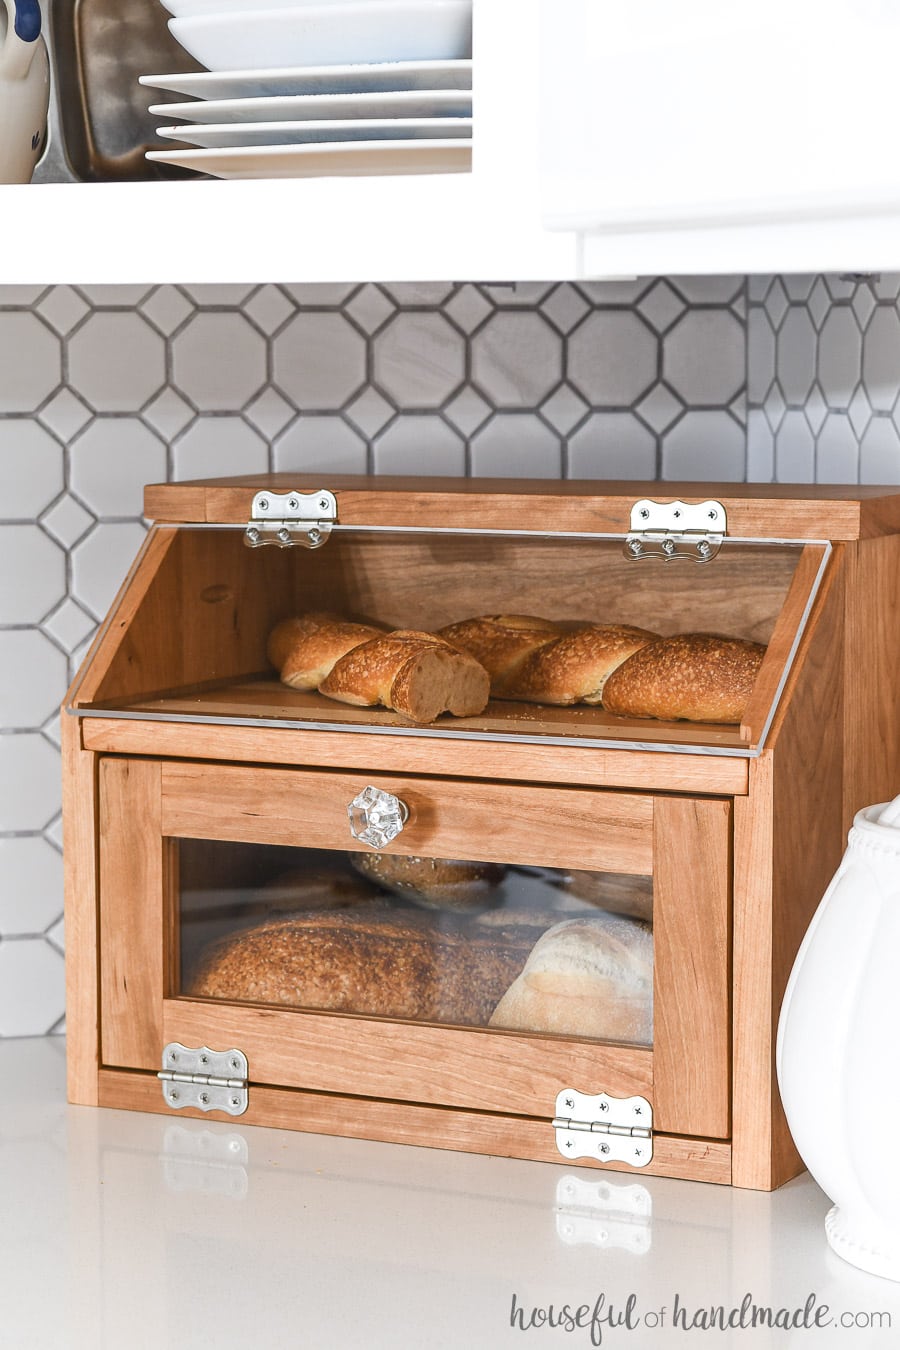
Since our family is definitely in the carb eating category, we needed a large bread box with room for more than just 1 loaf of bread. One loaf is just an appetizer and I don’t have time to run to the store daily for more!
But our new DIY bread box now has enough room to keep my family in bread for a solid couple days.
There is a large bottom compartment to store lots bread. And the cute little window means I can easily see when we are getting low (or what ‘s available for lunch!).
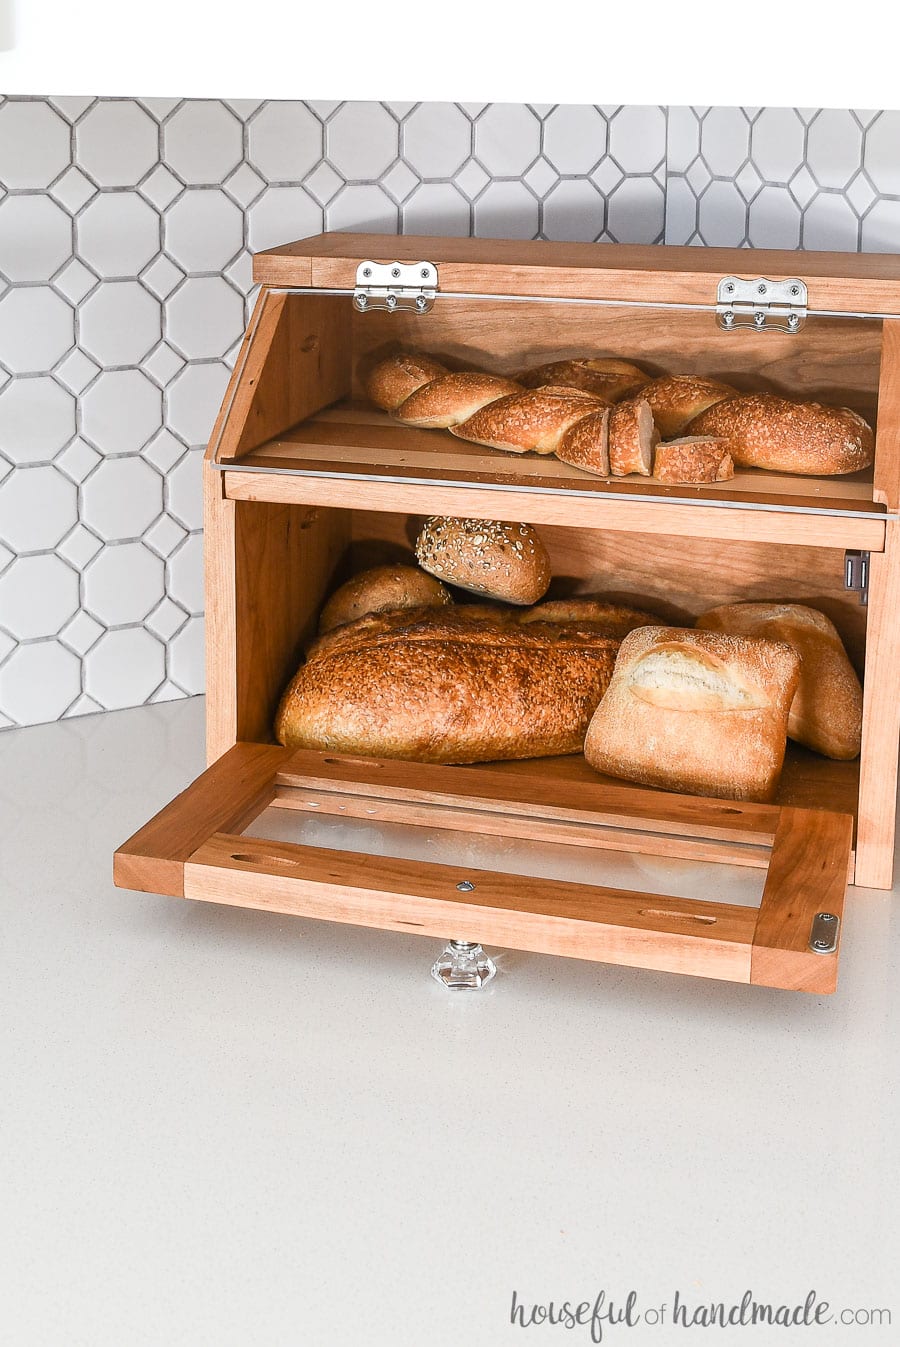
But my favorite part of the new bread box is the top shelf with the plexiglass cover. That top shelf is more than just a shelf… it’s a pull-out cutting board!
Yep, store your favorite hearty loaf right there and then when you are ready to serve, just slide the entire shelf out and you have a beautiful cutting board ready to go.
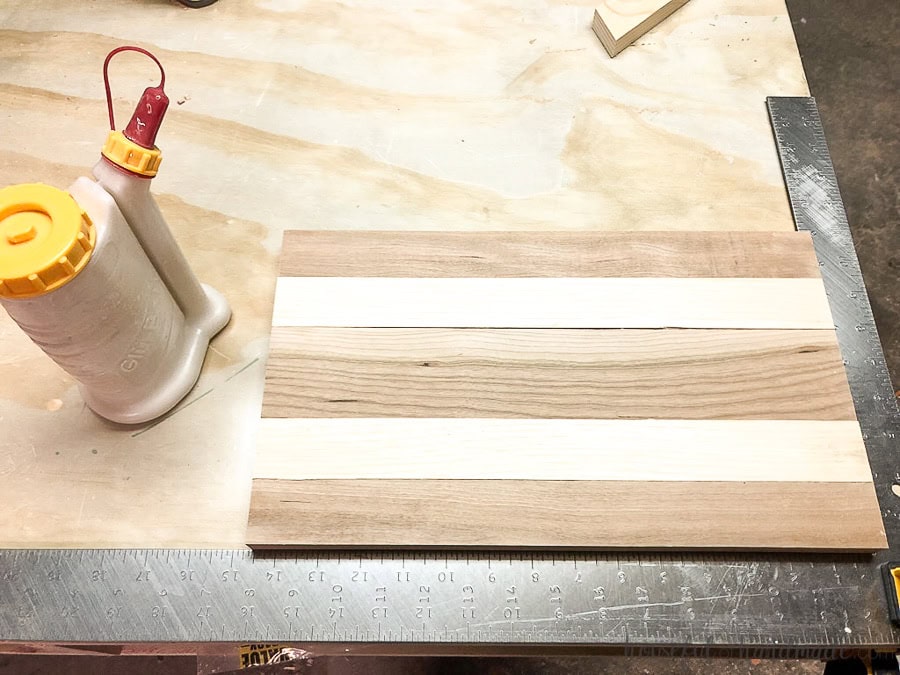
I made a simple cherry and hickory striped cutting board and love it. Then I can just slide it back into the bread box to store for later (it there is any left).

And this bread box was a fun weekend build with the Kreg Jig! I love this jig for making solid joints.
Build one for yourself of make a fun DIY gift for the bread lover in your life.
How to Store Bread
The bread box is great for storing non-sliced loaves of bread. Once sliced, you will want to store in a more tightly sealed environment to prevent the inside of your bread from drying out.
For non-sliced loaves, you can still store them in the bread box. Just place the sliced edge down on the bottom of the bread box to help seal it more from drying out. This will keep the outside crusty and the inside soft.
More Amazing Kitchen Builds
How to Make a Bread Box
Tools & Materials
Recommended Tools:
- Miter saw
- I recently upgraded to this sliding miter saw (watch for it to go on sale), but previously used this inexpensive miter saw that I love.
- Circular saw with guide track
- Pocket hole jig
- Drill
- Impact driver (optional, but I love not having to switch bits with the drill)
- Speed square
- Right angle clamp
- Brad nailer
- Trim router
- Sander
- Optional: Planer
Supplies:
- Wood products
- (1) 1×4 board, 4′ long
- (1) 1×6 board, 8′ long
- (1) 1×2 board, 8′ long
- (1) 1×3 board, 2′ long
- 1 1/4″ pocket hole screws
- Wood glue
- 0.22 thick plexiglass, 15″ x 10″ piece
- Decorative hinges
- 1/2″ screws with bolts
- Knob
- Magnetic latch
- Cutting board oil
Overall Dimensions
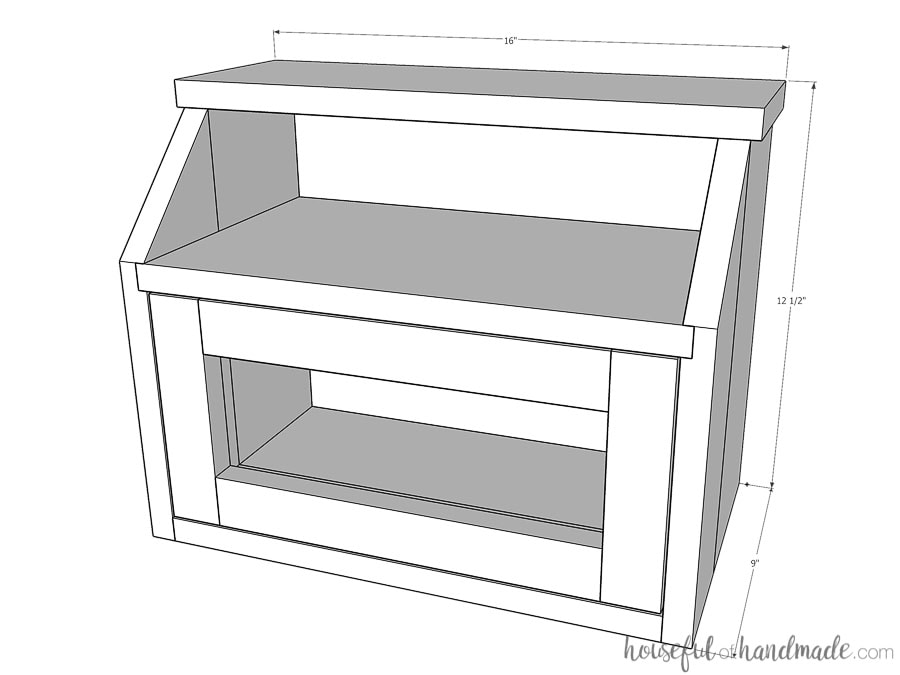
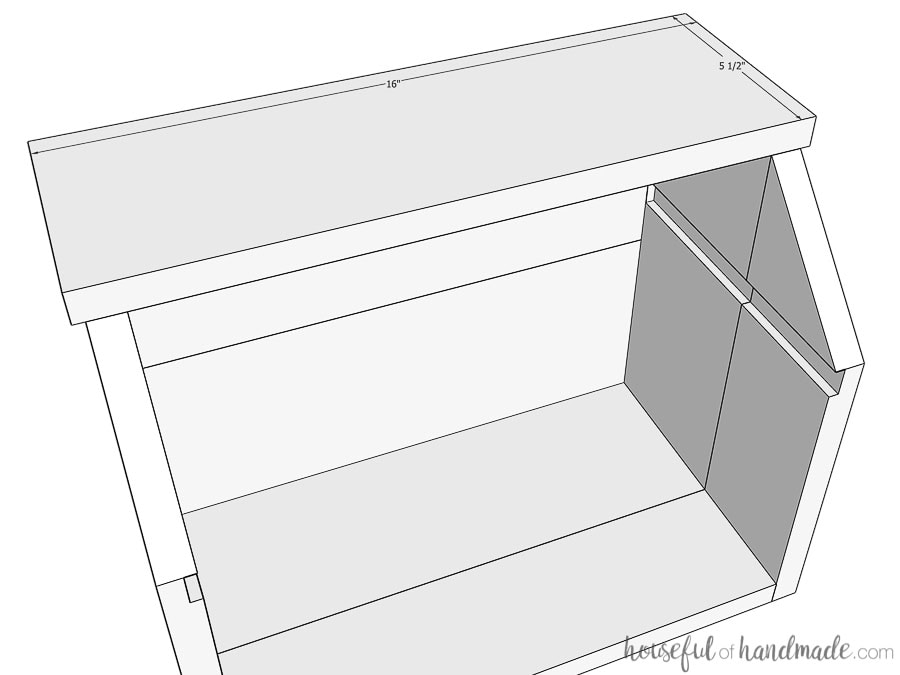
The finished breadbox is 16″ wide by 9″ deep and 12 1/2″ tall.
Cut List
Cut out the pieces according to the plans shared on Kregtool.com.
STEP 1- Build the sides
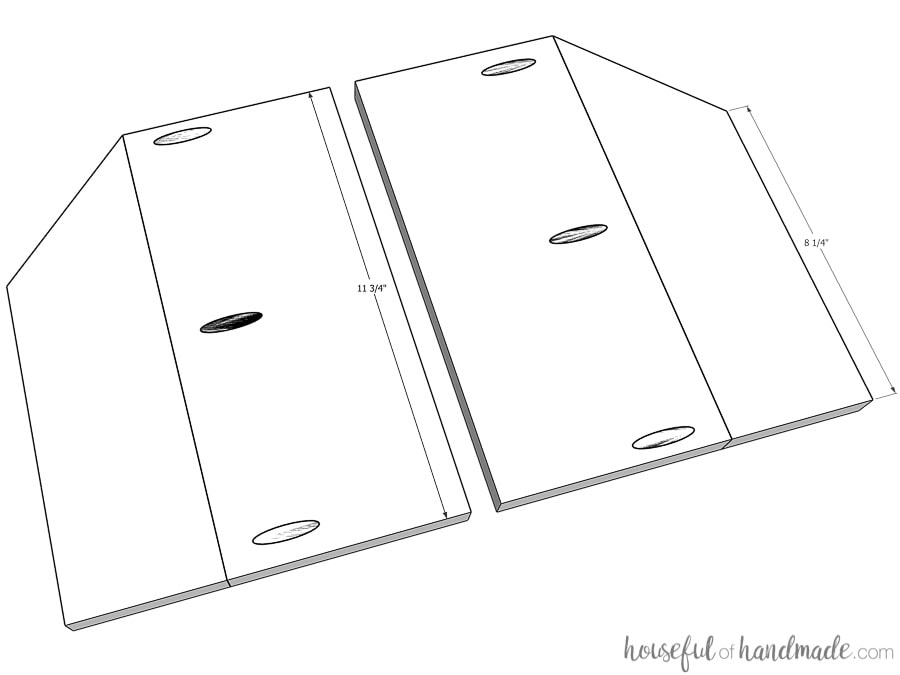
Cut the top of the front side board so it is a 45 degree angle.
Drill pocket holes set for 3/4″ thick material along the edge of the back side board.
Using wood glue and pocket hole screws, attach the two boards together to create one side piece. The pocket holes should be on the inside.
Then repeat for the second side, but make sure to mirror it.
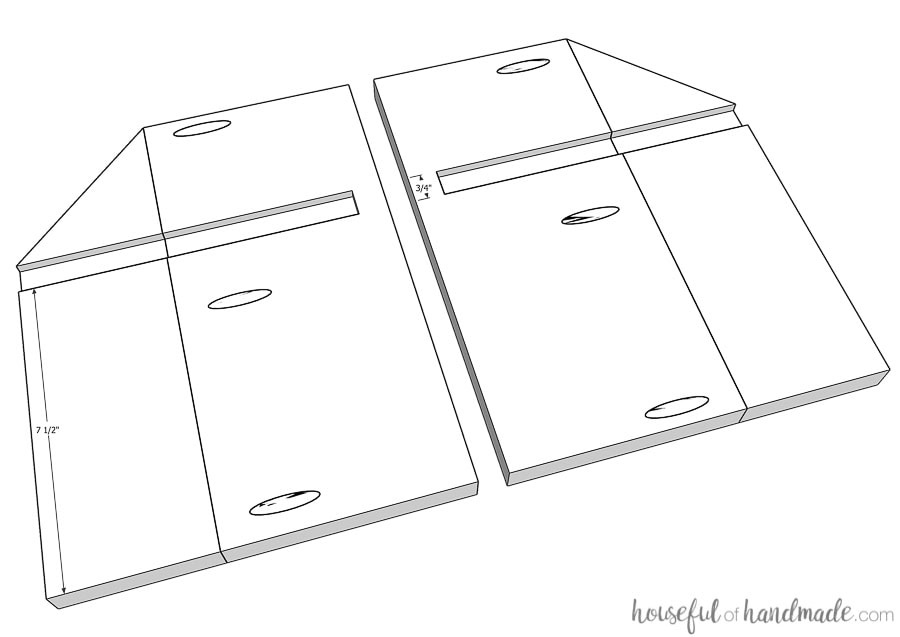
Router a 1/4″ deep and 3/4″ thick groove on the inside of the assembled side pieces.
The top of the groove should start at the end of the angle on the front board. Stop the groove 3/4″ away from the back.
I forgot this until I assembled the box, but was able to fix it by cutting a scrap 3/4″ x 3/4″ x 1/4″ and glueing it into the groove to fill it.
EXPERT TIP:
Be careful of tear-out on the edge when you router. The angled edge is fragile if you router towards it, so I recommend starting on the front and routing towards the back for a small section before finishing the groove.
STEP 2- Assemble breadbox
Drill pocket holes set for 3/4″ material on the edge of the bottom rear board and one back board.
Using wood glue and 1 1/4″ pocket hole screws, attach the boards together.
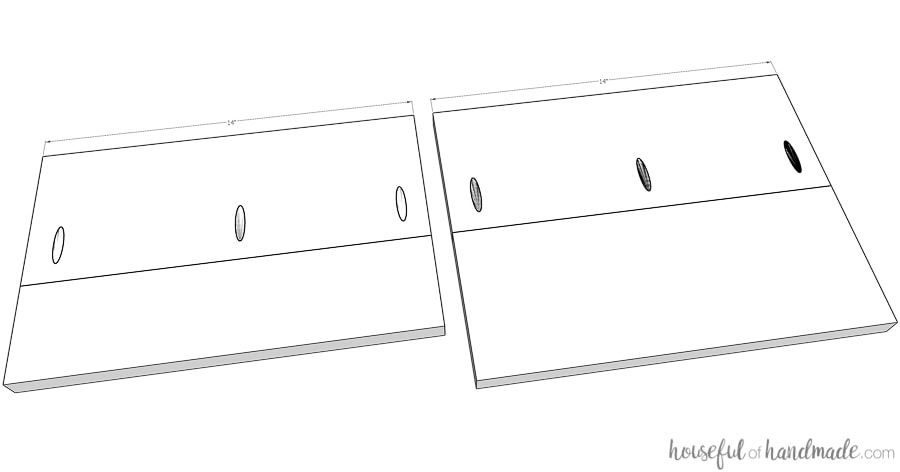
Drill pocket holes in either side of the assembled bottom piece.
Attach one of the sides pieces to the bottom with wood glue and 1 1/4″ pocket hole screws.
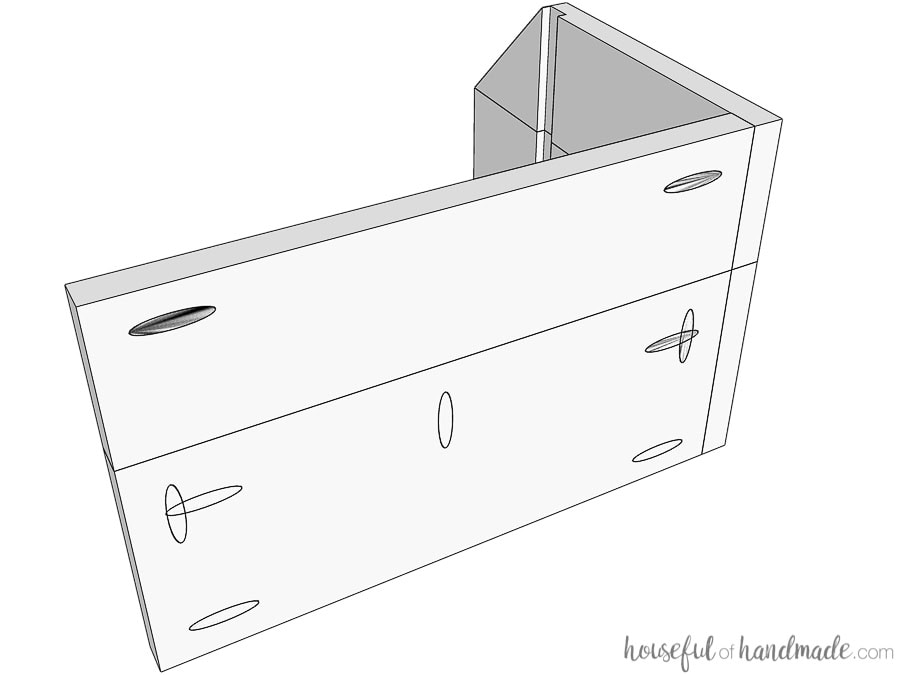
Drill pocket holes in the bottom and either side of the assembled back piece.
Attach it to the bottom and side piece with glue and pocket hole screws.
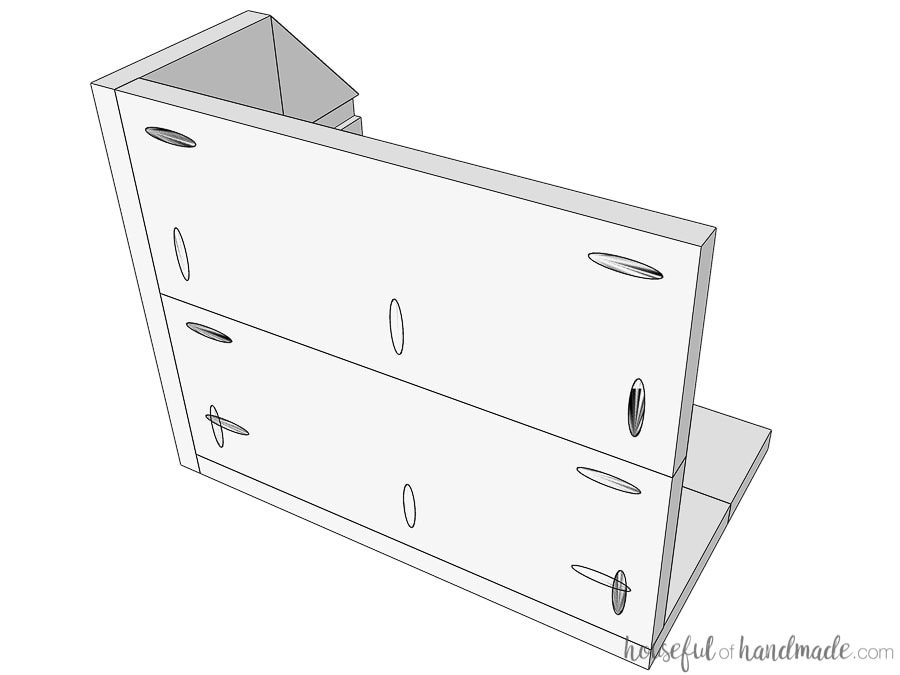
Then attach the other side piece.
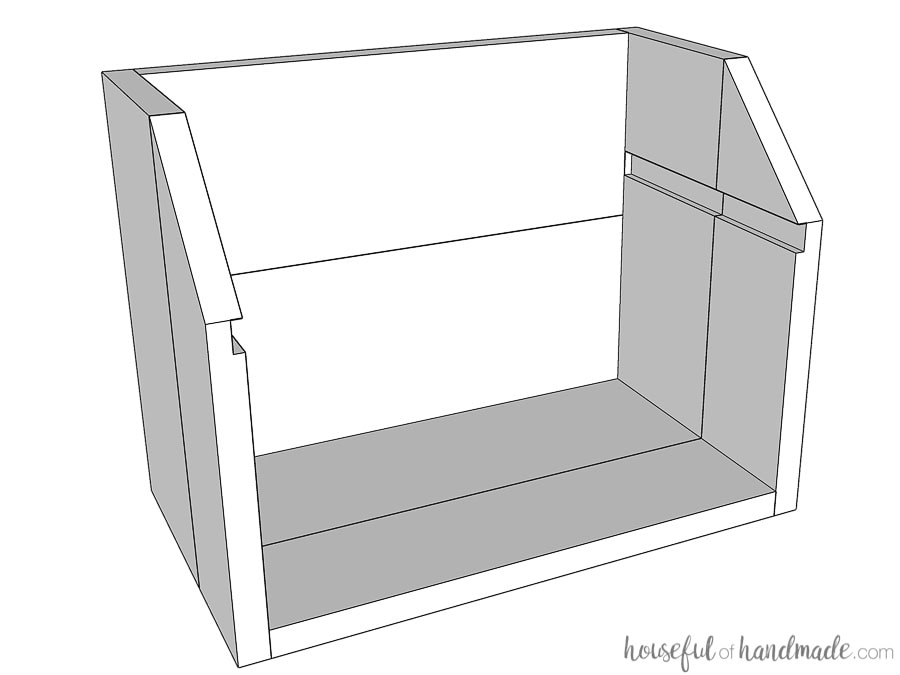
Add wood glue to the top of the bread box and position the top piece on it so that it hangs over each edge 1/4″ and is flush to the back.
Secure with a few finishing nails.
STEP 3- Build the door
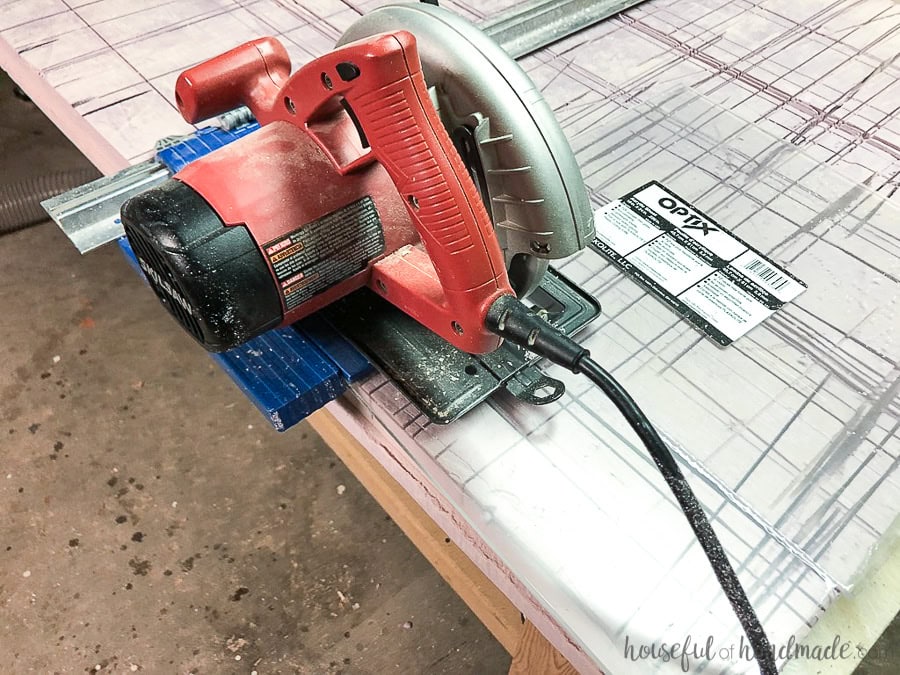
Using a circular saw with the edge guide, cut the plexiglass.
Cut a 11 3/8″ x 4 1/8″ piece for the door and cut a 15″ x 5″ piece for the top flap.
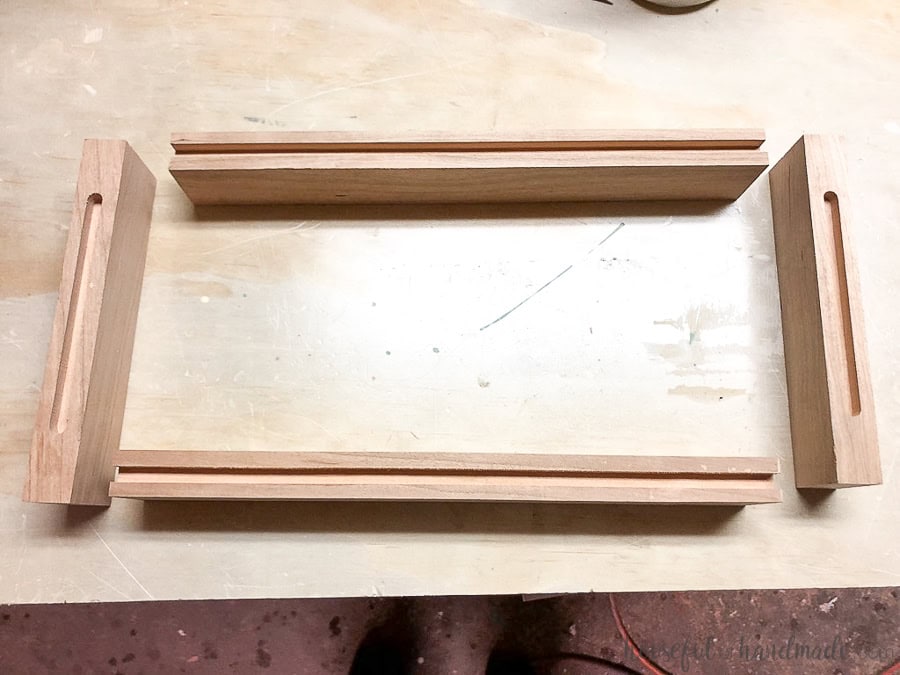
Router 1/4″ x 1/4″ grooves into the inside of the door rails and stiles.
For the stiles, start and stop the groove 1 1/4″ from the edge.
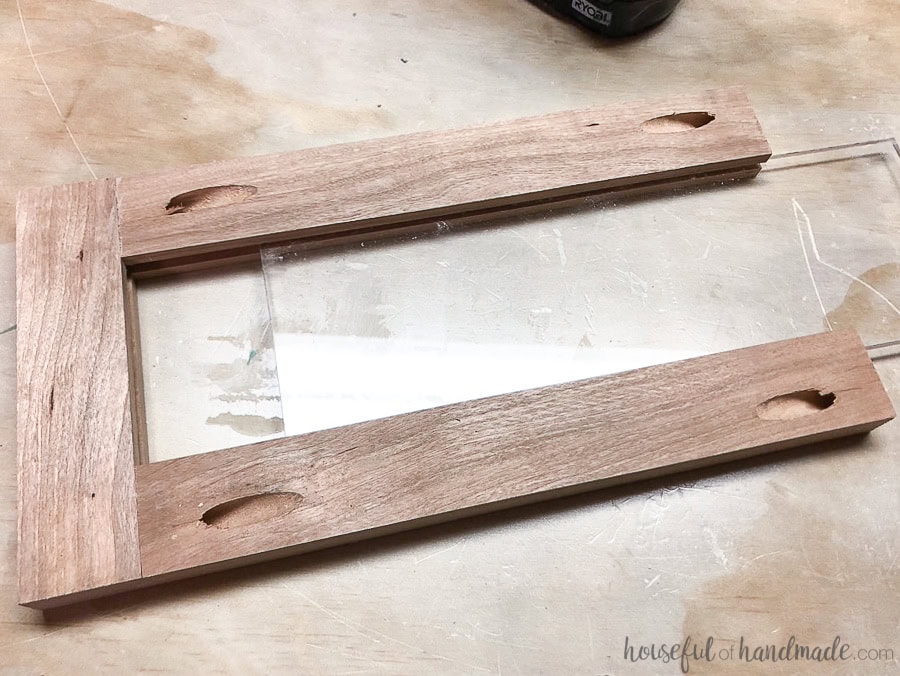
Drill pocket holes set for 3/4″ thick material in both ends of the door rail boards.
Using wood glue and 1 1/4″ pocket hole screws, attach the rails to the top and bottom of one stile board.
Slide the plexiglass into the groove. Then attach the other stile.
STEP 4- Build cutting board shelf
Cut the boards for the cutting board.
To give it stripes, use (2) 1×2 boards of a different species.
Add glue to the sides of the boards and line them up. Clamp tightly and allow to dry.
Smooth the cutting board with a sander with a corse sandpaper, then step down till you get to 220 grit. Or run the cutting board through a planner to smooth the top and bottom.
As assembled, the cutting board will be 8 1/2″ deep. Trim the cutting board to 8 1/4″ with a table saw or circular saw with edge guide.
STEP 5- Finish
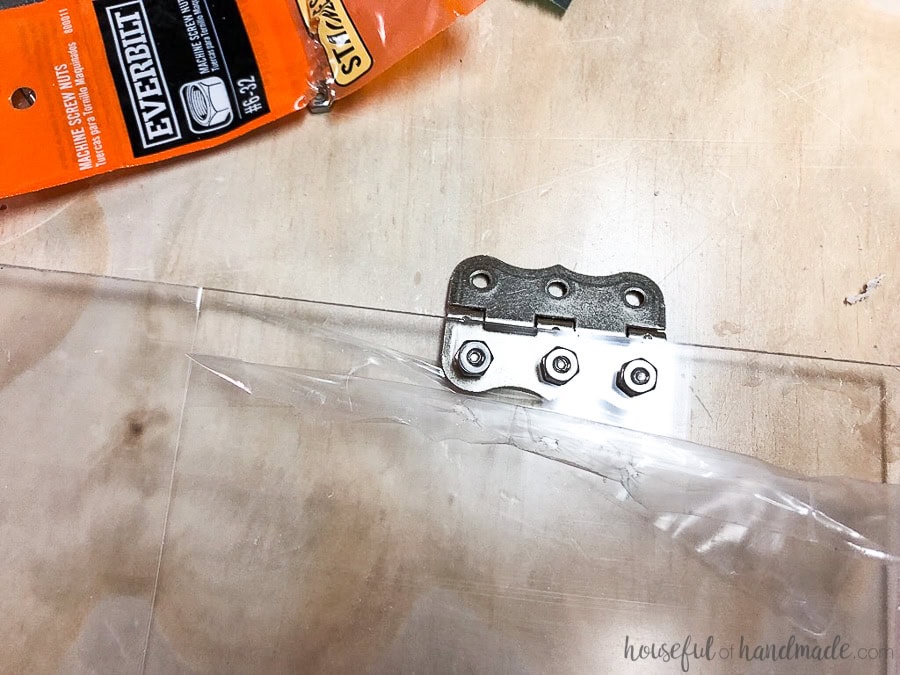
To attach the hinges to the plexiglass cover for the top of the bread box, first mark where the holes need to be. Then drill a hole through the plexi.
Using the 1/2″ screws and press through the holes, then line up the hinge behind the plexiglass and secure with the bolts.
The hinges need to be on the backside of the plexiglass to make it lay properly.
Then line the flap up on the bread box and attach the hinges to the top.
To attach the door, line up the hinges on the front of the door and secure.
Then attach to the bottom of the bread box so there is a 1/8″ space between the door and bread box bottom.
Place the magnetic hinge on the side of the box below the cutting board shelf 3/4″ in from the front of the box. Attach the magnet to the back of the door.
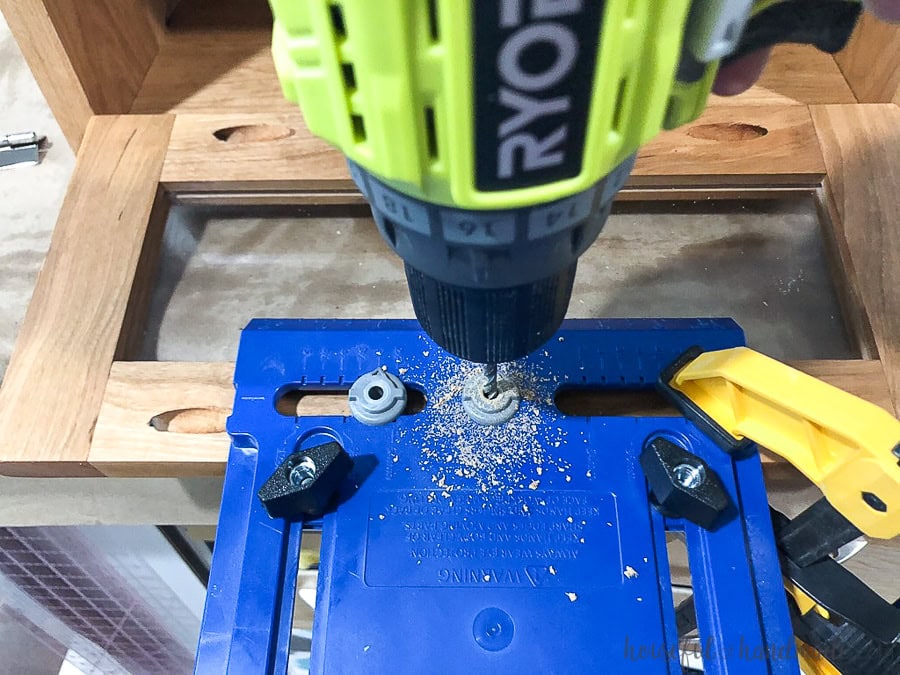
Using the cabinet hardware jig, drill a hole in the center of the door and attach a knob.
Finish the bread box as desired.
I chose to make it out of hardwood so I just sealed it with cutting board oil. For the cutting board shelf, you definitely want to finish it with cutting board oil.
Slide the cutting board into the groove and fill your new bread box with your favorite breads.
Happy Building!

Thank you to Kreg Jig for sponsoring this post. I only recommend products that I use and love and all opinions are 100% my own. Click here to read my full disclosure policy.

