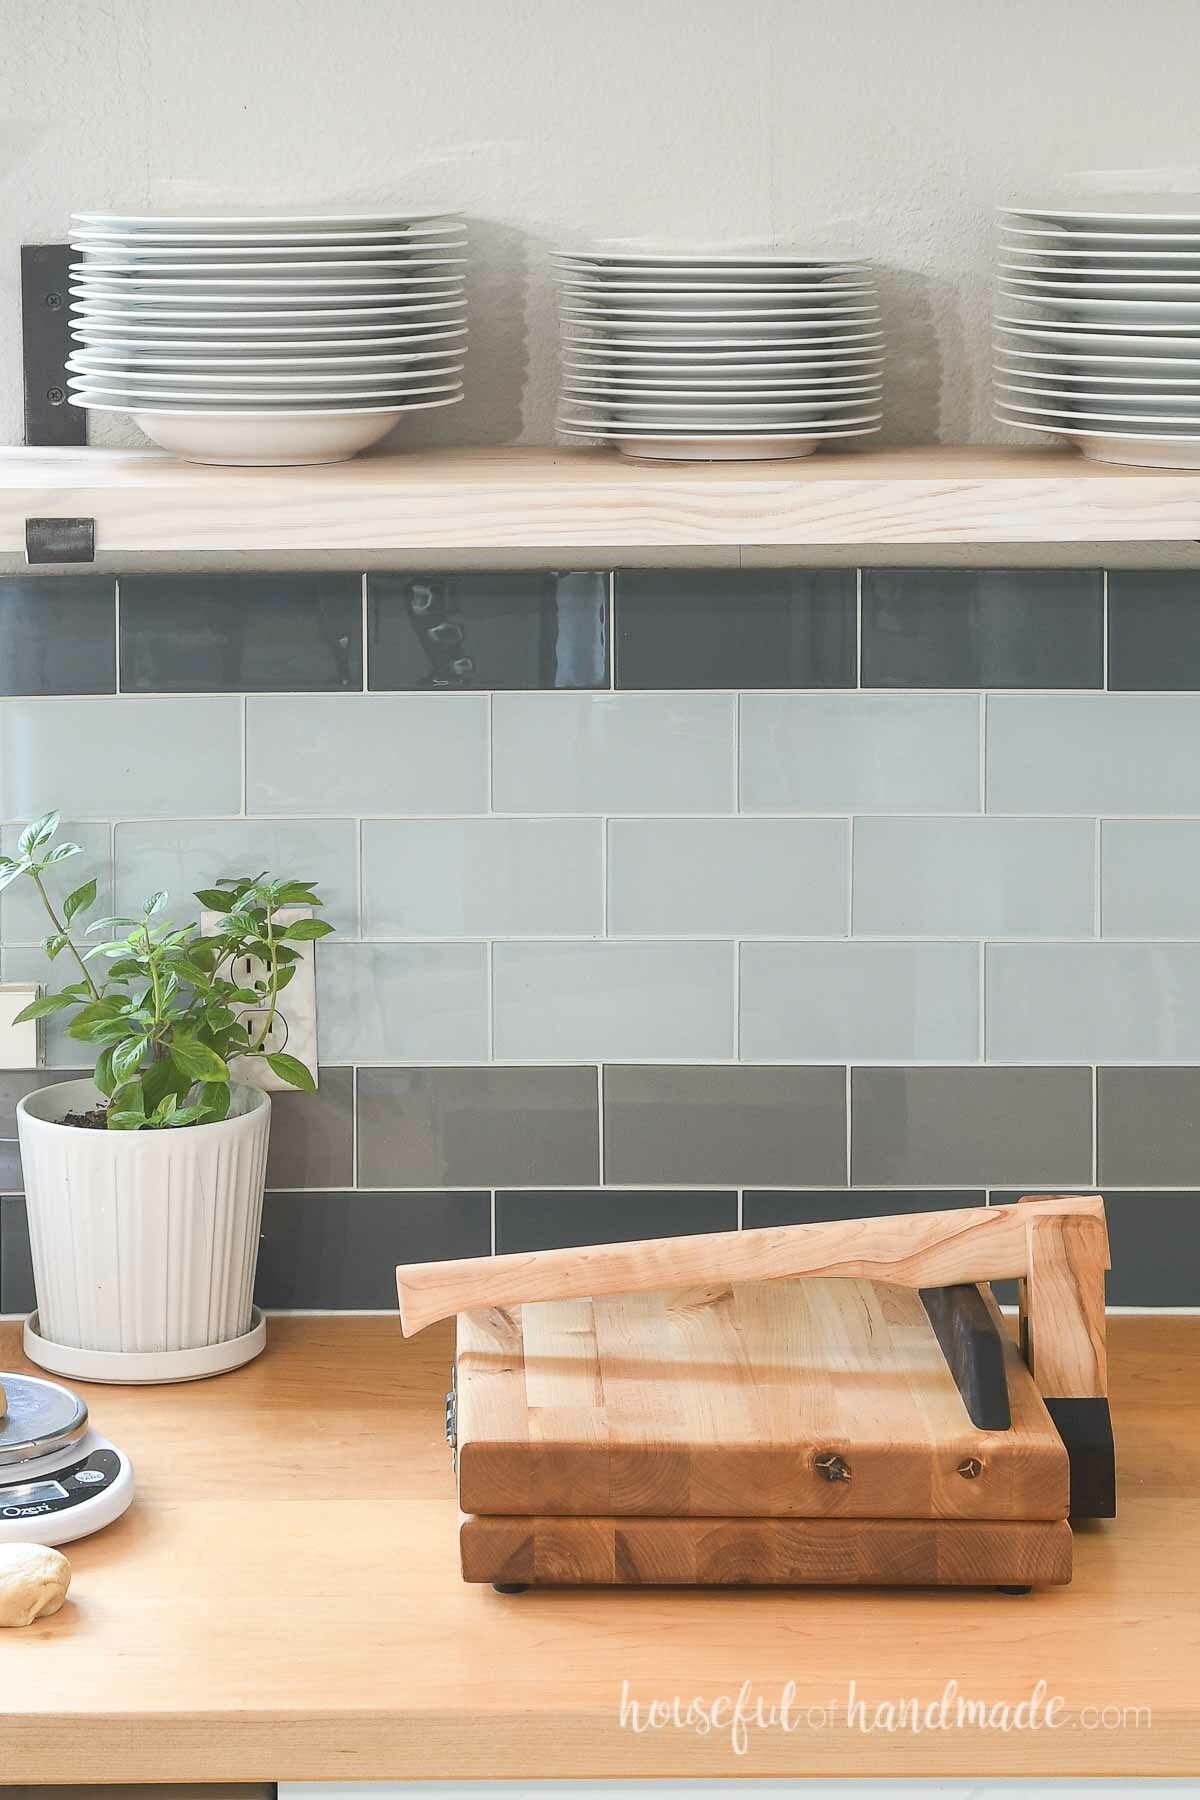
My newest obsession is homemade tortillas! Store bought ones just cannot compare to fresh cooked flour or corn tortillas.
And while you can make tortillas with a rolling pin, a tortilla press makes it much faster. Plus you get pretty round tortillas from a press, which is way harder with a rolling pin.
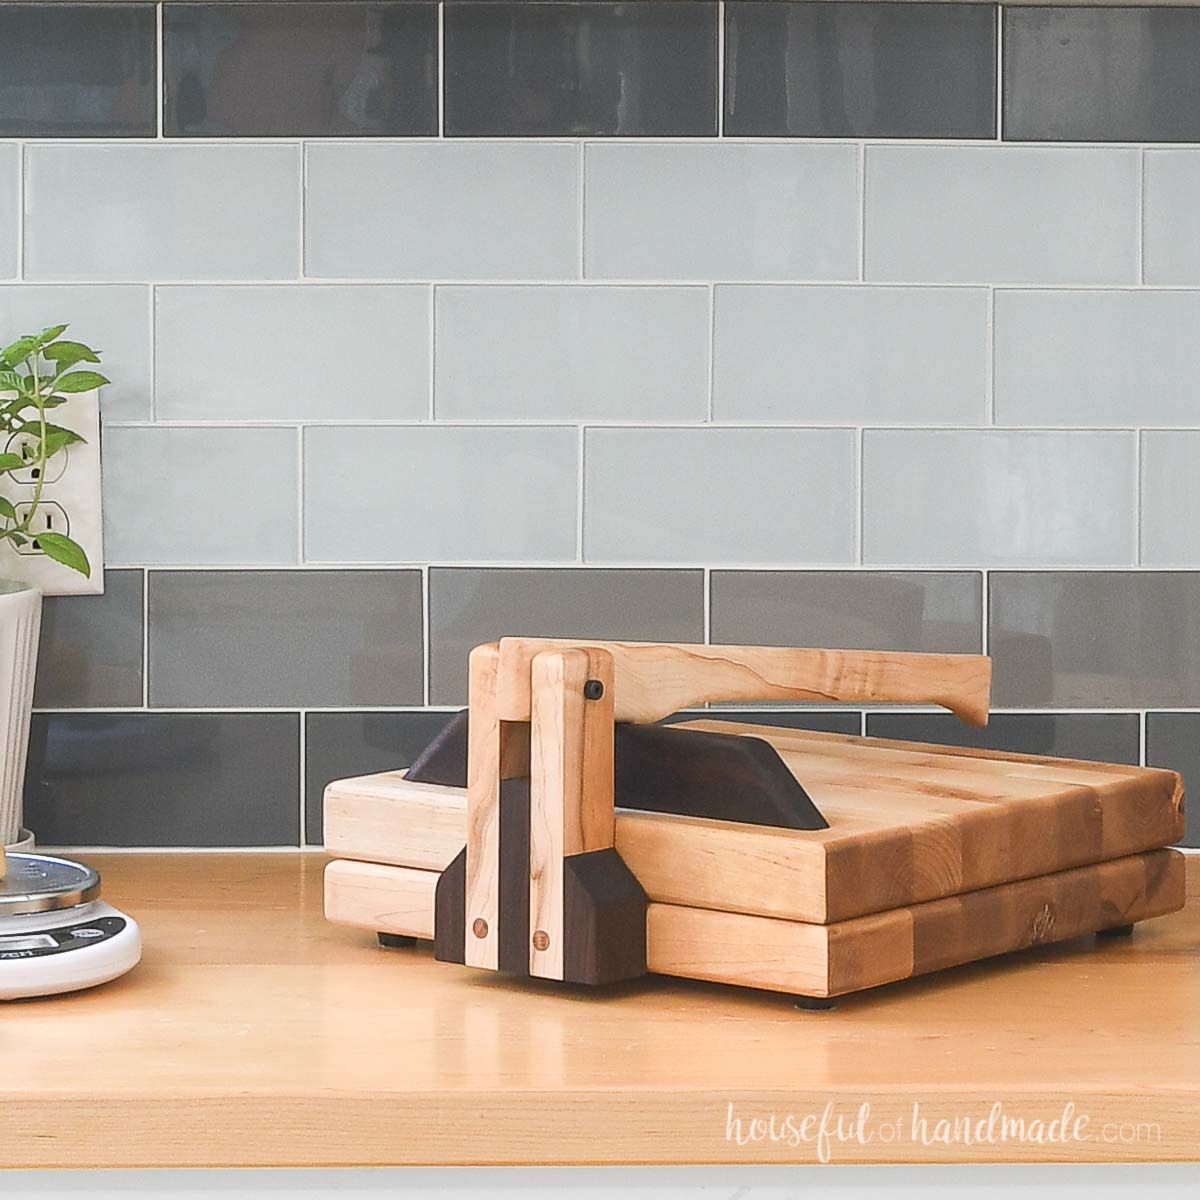
This DIY tortilla press is made completely from scraps of wood. I used left over butcher block from installing the butcher block as a desktop for our DIY built in desk.
This post may contain affiliate links. As an Amazon Associate I earn from qualifying purchases. Click here to read my full disclosure policy.
If you do not have butcher block scraps, use 1×2 boards to make an easy DIY cutting board to press the tortillas instead.
The Easiest Way to Press Tortillas
We have been pressing our homemade tortillas on a small store bought press. This wooden tortilla press is much bigger, which means we can have larger tortillas.
After using a press at least weekly for the last 6 months, I have learned some tips and tricks to get perfectly pressed tortillas (both corn and flour tortillas can be pressed).
My favorite corn tortillas are this recipe from Pro Home Cooks. Super quick to mix together and delicious.
For flour tortillas, most people say you cannot press them. But I found this recipe from King Arthur flour is soft enough for perfectly pressed flour tortillas.
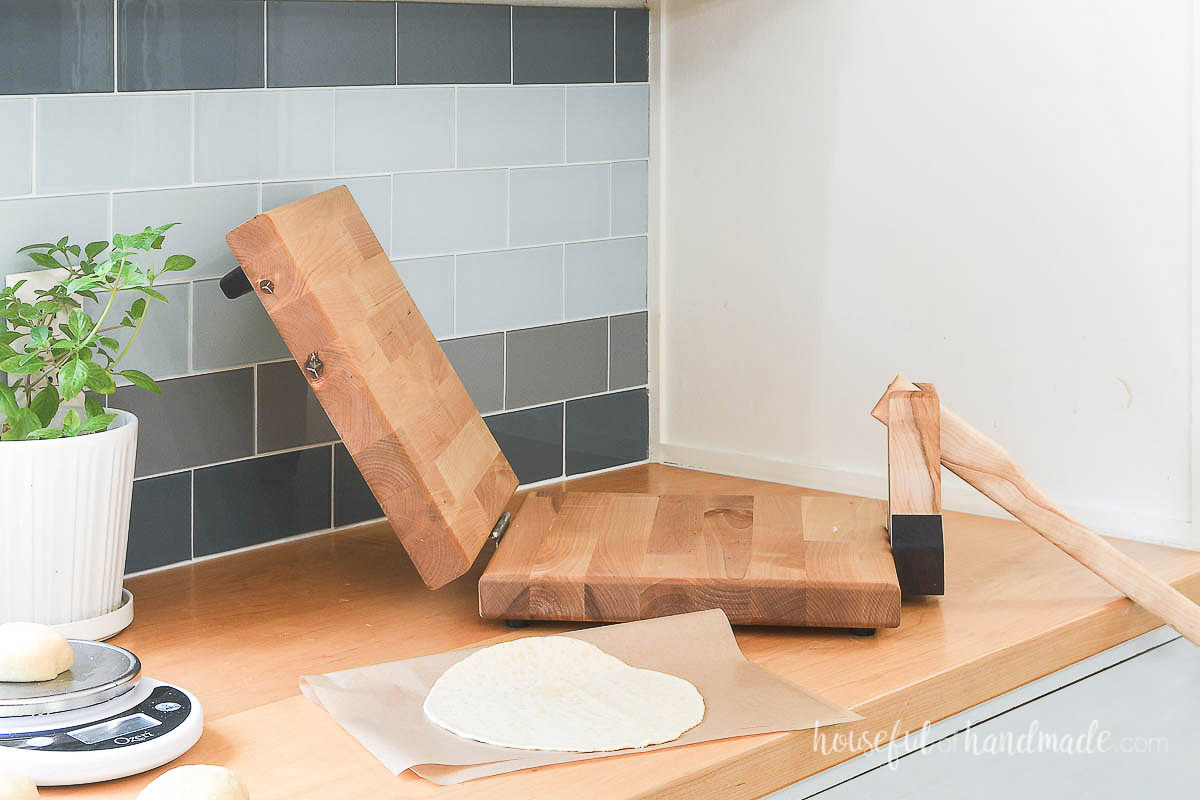
Instead of using the commonly recommended plastic wrap to press the tortillas on, I prefer to use parchment paper.
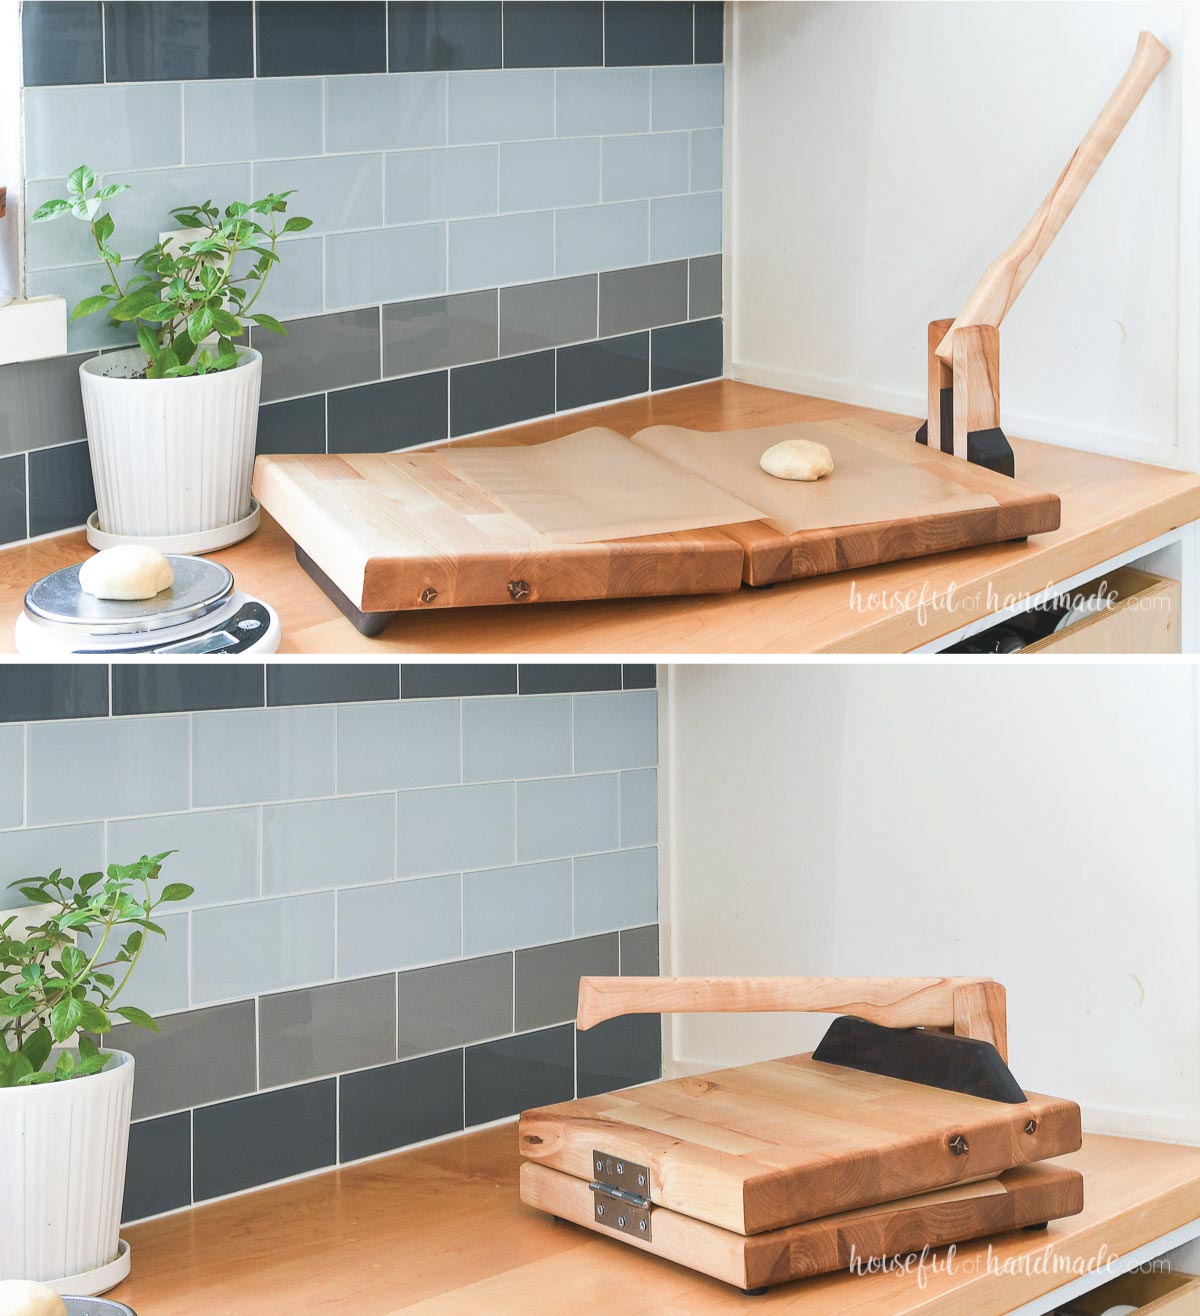
Fold your parchment paper in half and place the dough in the center, or slightly toward the hinges of the press.
Press down with the handle, but do not press with all your weight. Get a mostly thin flat tortilla. Then rotate the parchment 180 degrees and give it a slight press again.
This will make sure you have an evenly pressed tortilla that is not thicker on one side or the other.
Open the parchment and lay it, tortilla side down, on your hot cast iron pan. Then after a few seconds, the other side of the parchment should easily peel off the top of the cooking tortilla.
Cook according to the recipe. Repeat with all the dough and marvel at your homemade tortillas!
How to Build a Wood Tortilla Press
Tools & Materials
Recommended Tools:
- Miter saw
- I recently upgraded to this larger sliding miter saw (watch for it to go on sale), but all my projects before were built with this inexpensive miter saw that I loved.
- Circular saw or Table saw
- Drill press or Drill guide
- Drill
- Impact driver (optional, but I love not having to switch bits with the drill)
- Trim router
- Jigsaw or Bandsaw
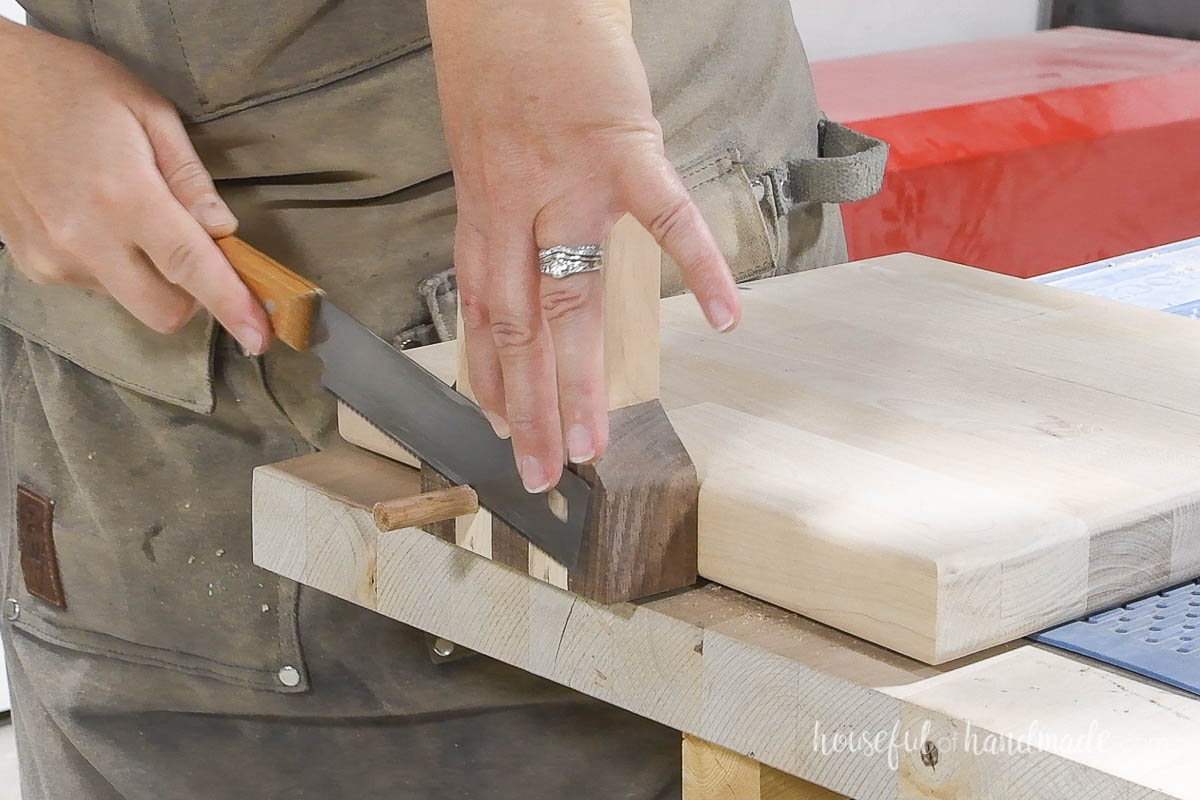
- Flush cut saw
- Sander
Supplies:
- Wood products
- (2) 12″ x 12″ butcher block or cutting board
- (1) 1×2 board, 4′ long
- 3/8″ dowel scrap
- 1 1/2″ stainless steel wood screws
- 1 1/2″ long 1/4″ shoulder screw
- 1/4″ threaded insert (for hardwood)
- 3″ hinge
- 1″ wood screws
- Cutting board feet
- Waterproof wood glue
- 1/16″ thick washers
- Sandpaper
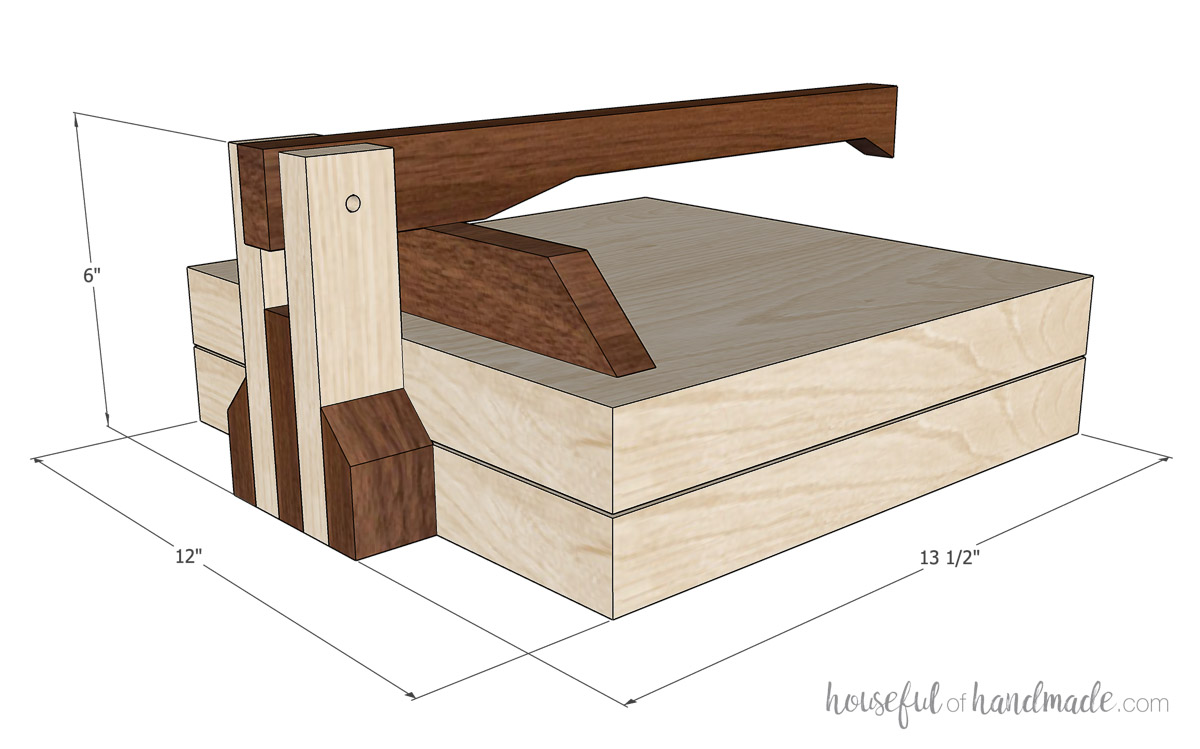
Overall Dimensions
This wooden tortilla press has a 12″ x 12″ pressing area for large tortillas.
The finished tortilla press is 6″ tall (without feet) by 13 1/2″ deep and 12″ wide. The handle is 15″ long.
Cut List
Cut out the pieces according to the diagram in the PDF plans.
I recommend using hardwoods regularly used for cutting boards for this project. They will be strong enough to hold up to the pressure of pressing tortillas and be food safe.
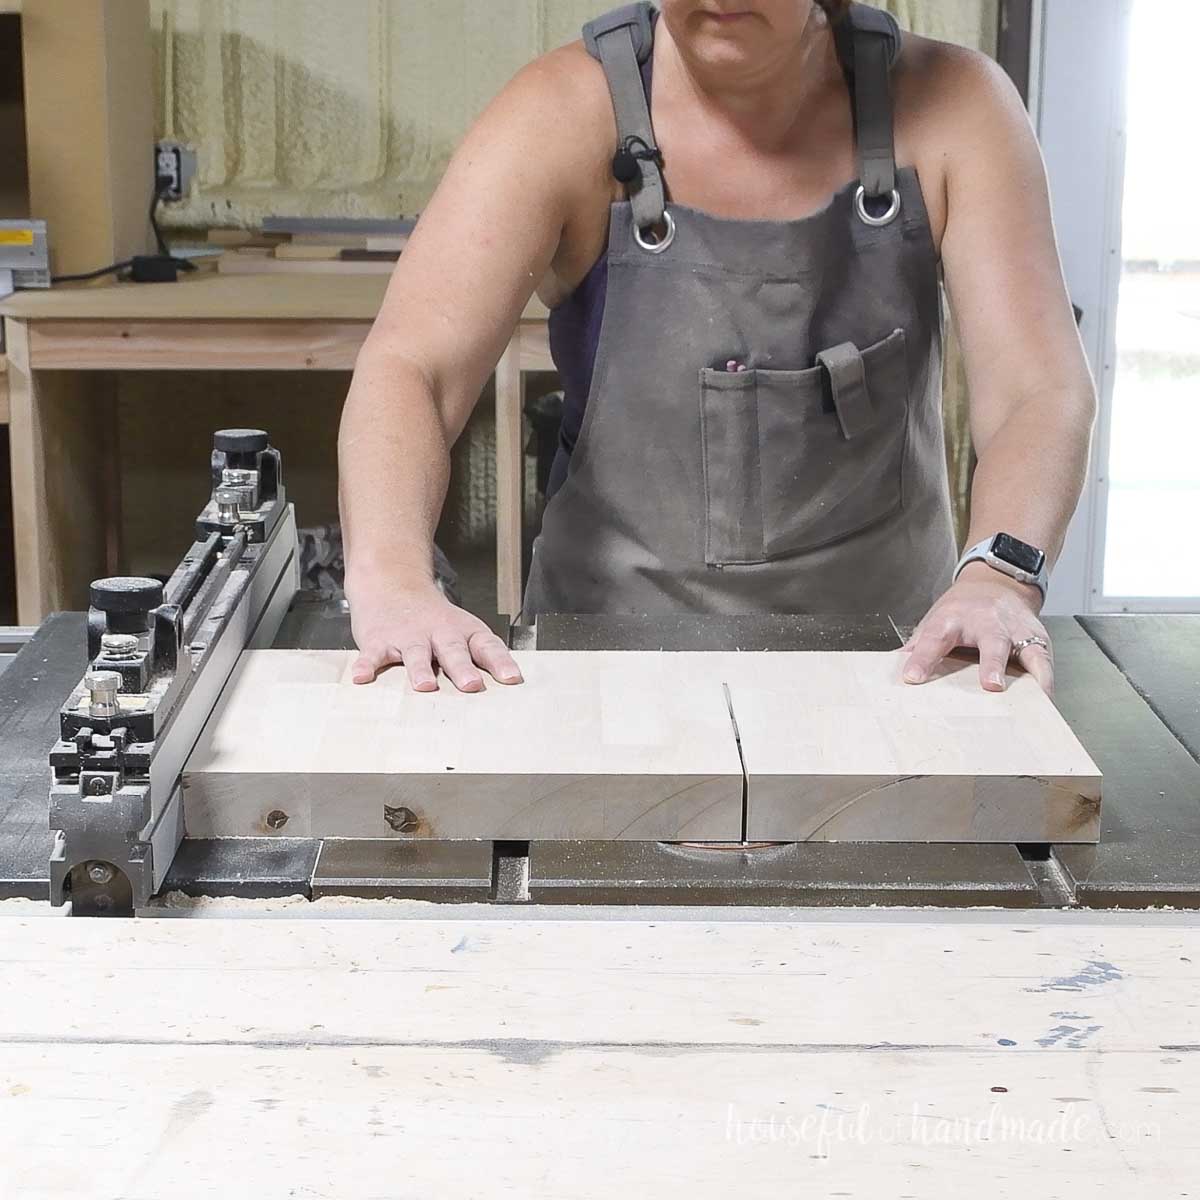
Cut the butcher block to size with a table saw or circular saw.
If you don’t have pieces of butcher block countertop to use. Build two easy edge grain cutting boards that are 12″ x 12″ for the top and bottom pieces.
Or you could try to use a 12″ x 12″ piece of 1x board (usually 3/4″ thick), but it is possible the wood could warp overtime and then you will not have a flat press.
Also you will need to adjust the handle mechanism to accommodate thinner boards.
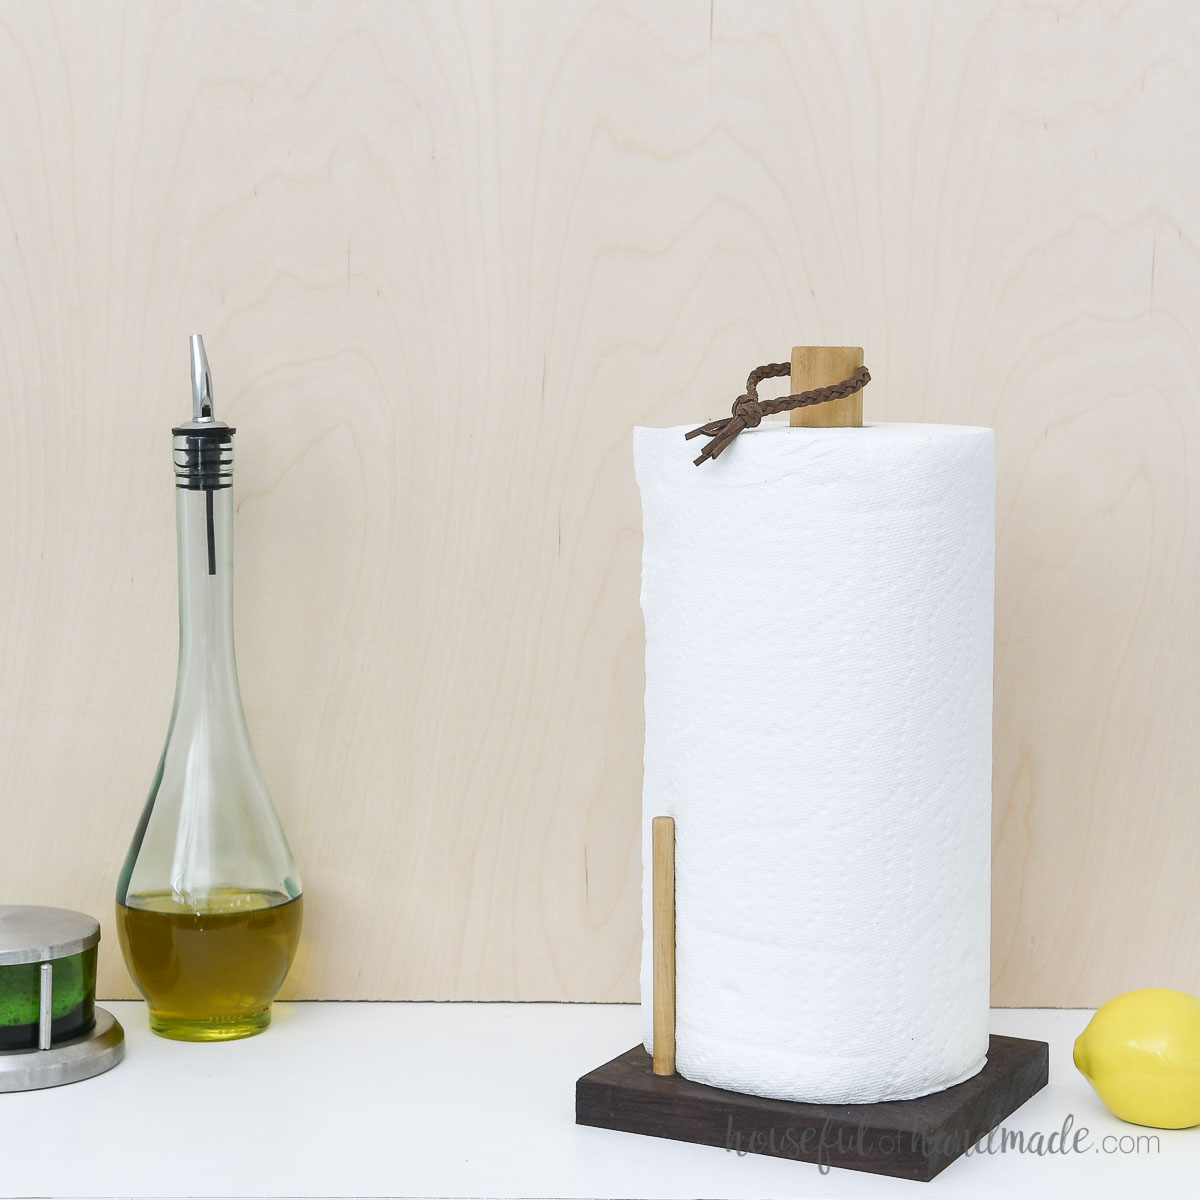
I used a small scrap of walnut left over from making the beautiful paper towel holder last week. I ripped it into 1×2 sized pieces to offer some contrast to the handle area.
This is a great place to have some fun with mixing wood species.
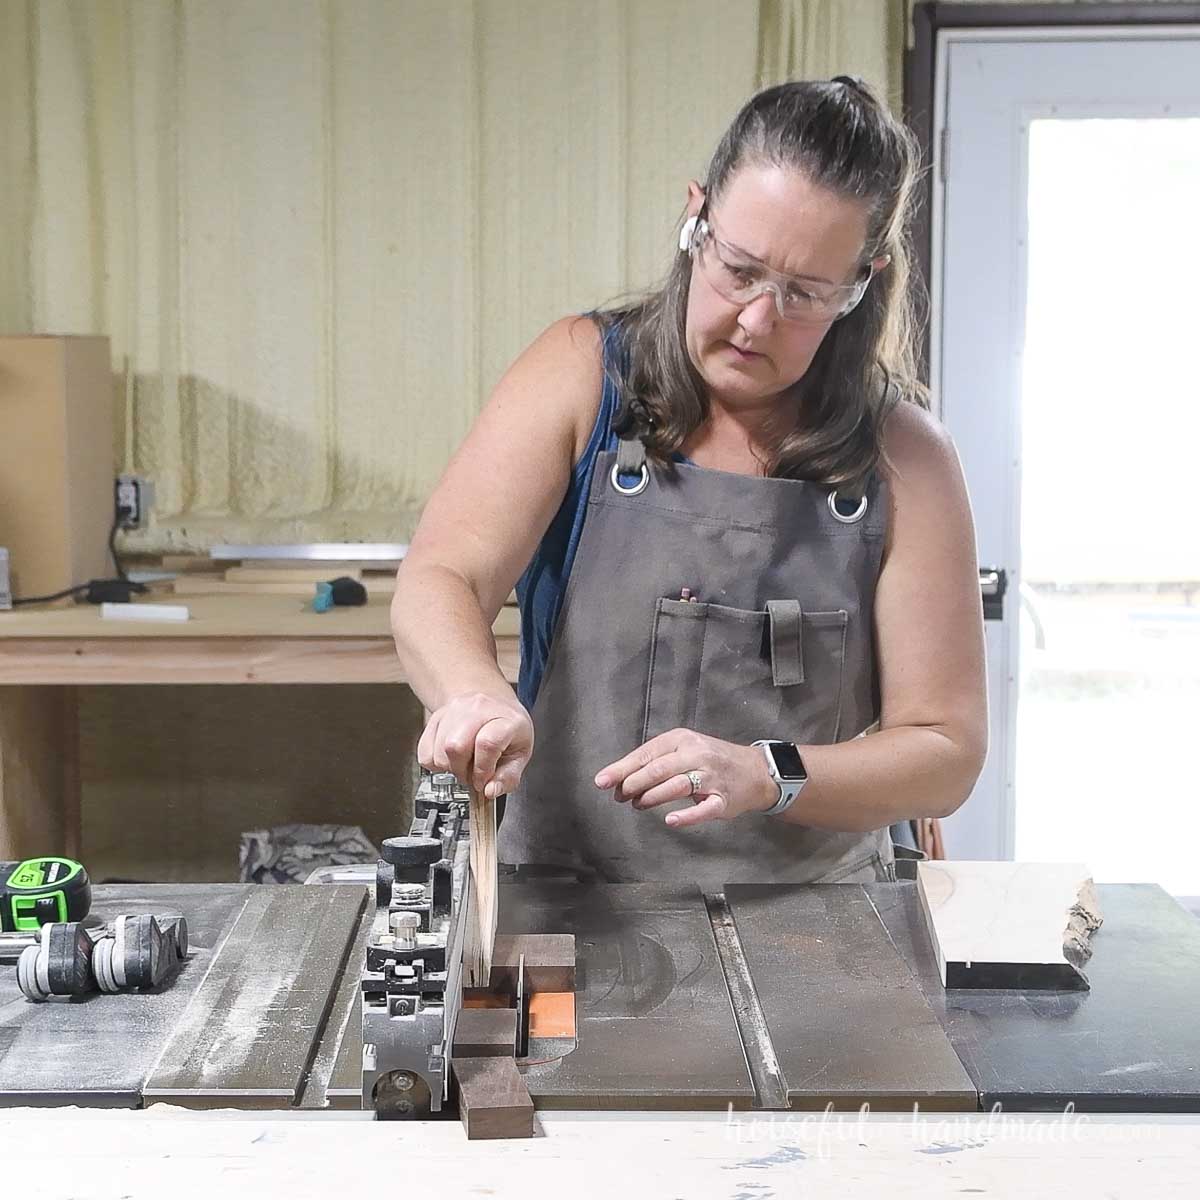
When cutting small boards on a miter saw, use a larger scrap of wood to hold the board and keep your fingers safe.
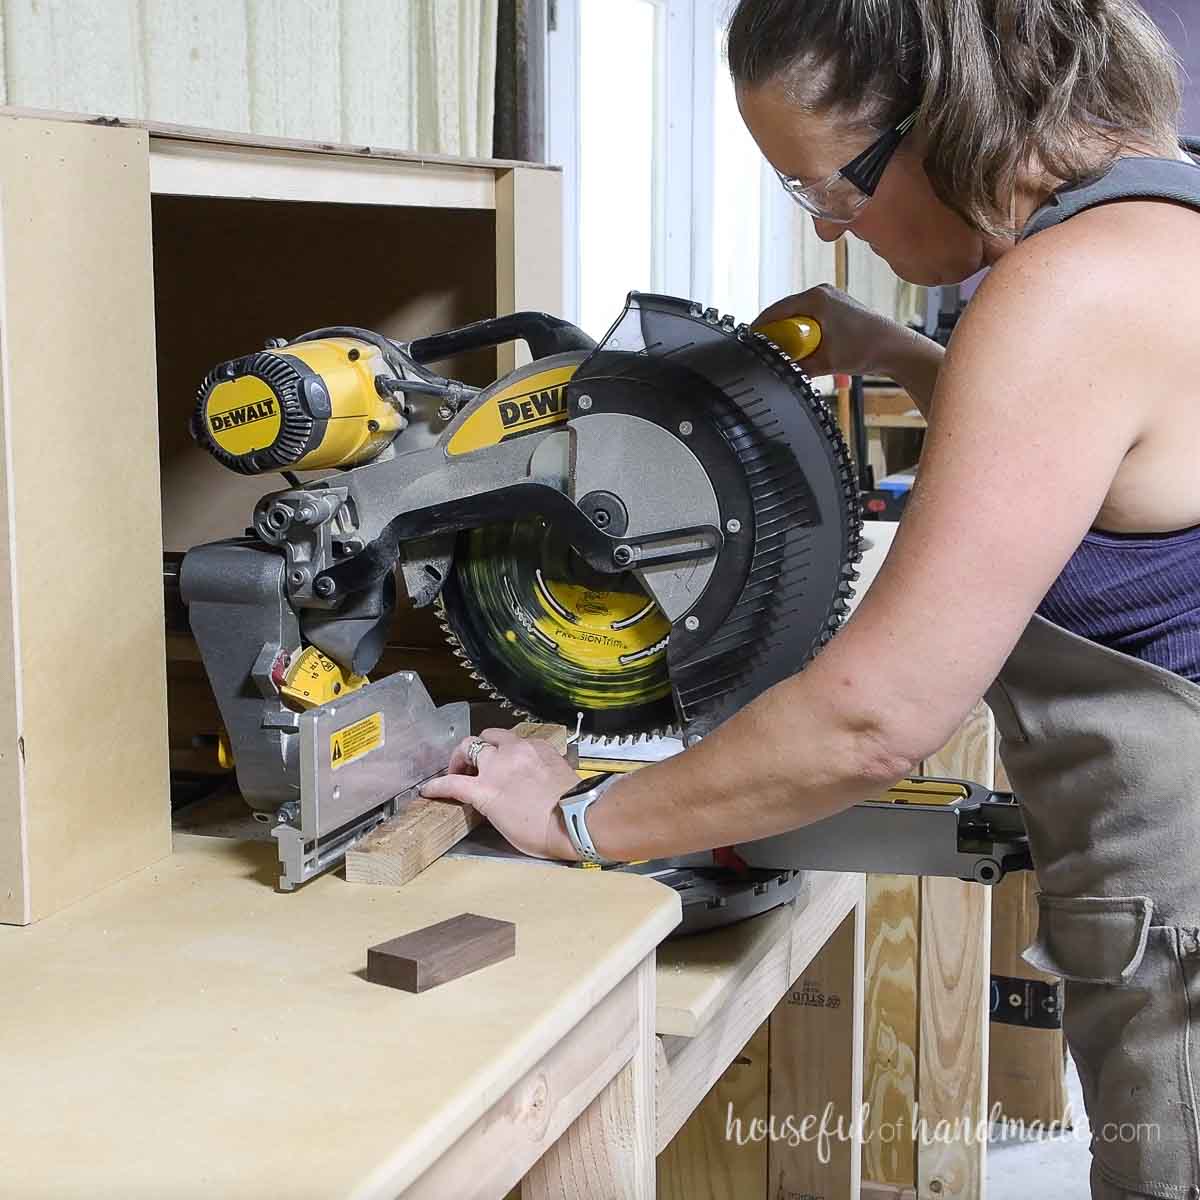
STEP 1- Prepping the handle pieces
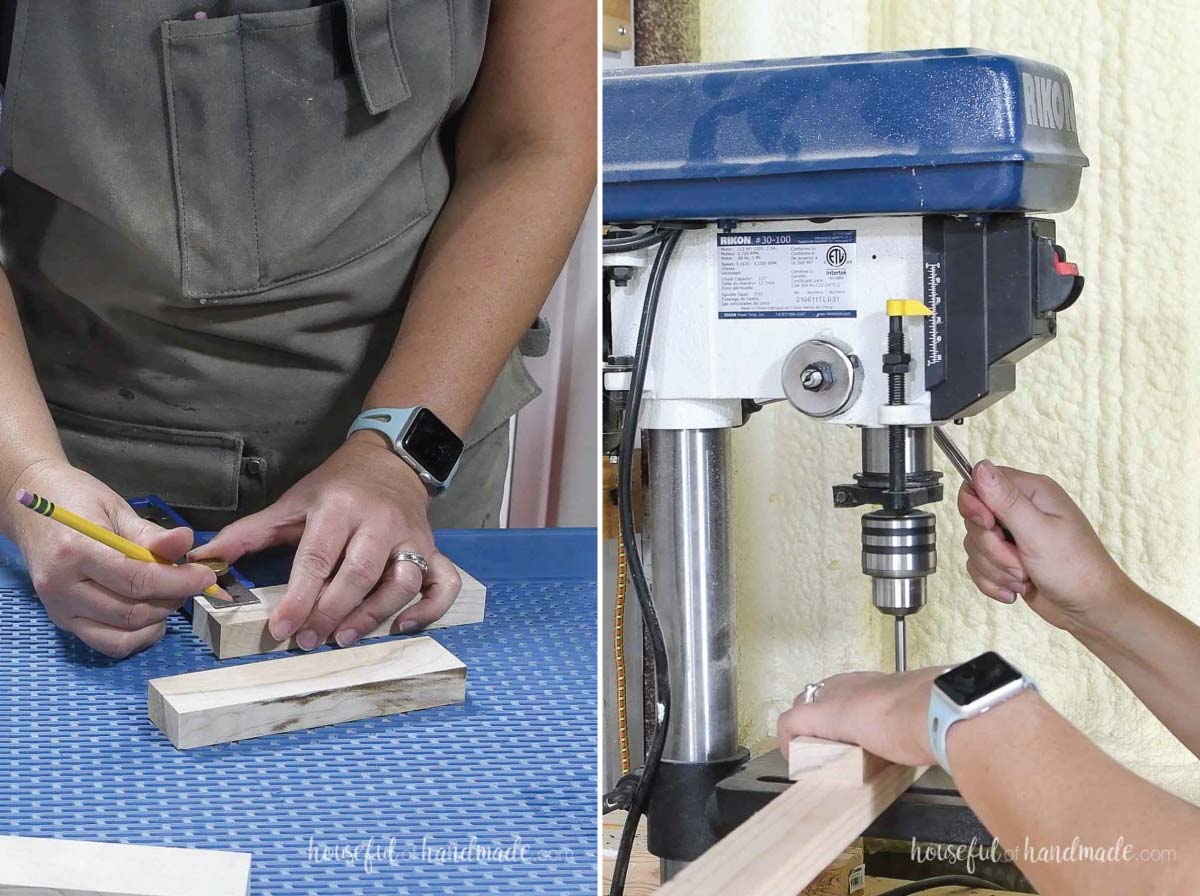
On the two handle side pieces, mark 3/4″ down from the top and the center of the board.
On one of the pieces, drill all the way through with a 1/4″ drill bit. Use a drill press or guide to ensure the hole is straight.
On the other piece, drill a hole the size specified in by the threaded insert (mine was 3/8″). Only drill it deep enough for the insert (mine was 1/2″).
EXPERT TIP:
Use a scrap piece of wood under the board you are drilling through to prevent it chipping as the drill bit exits out the back.
Then screw in the threaded inset into the hole.
Make sure you use threaded inserts made for hardwood. I used an insert left over from building my chaise lounge chairs.
It was labeled for softwoods but I decided to try anyway. The softer metal stripped out before I could fully drive it into the maple and I had to redo this piece.
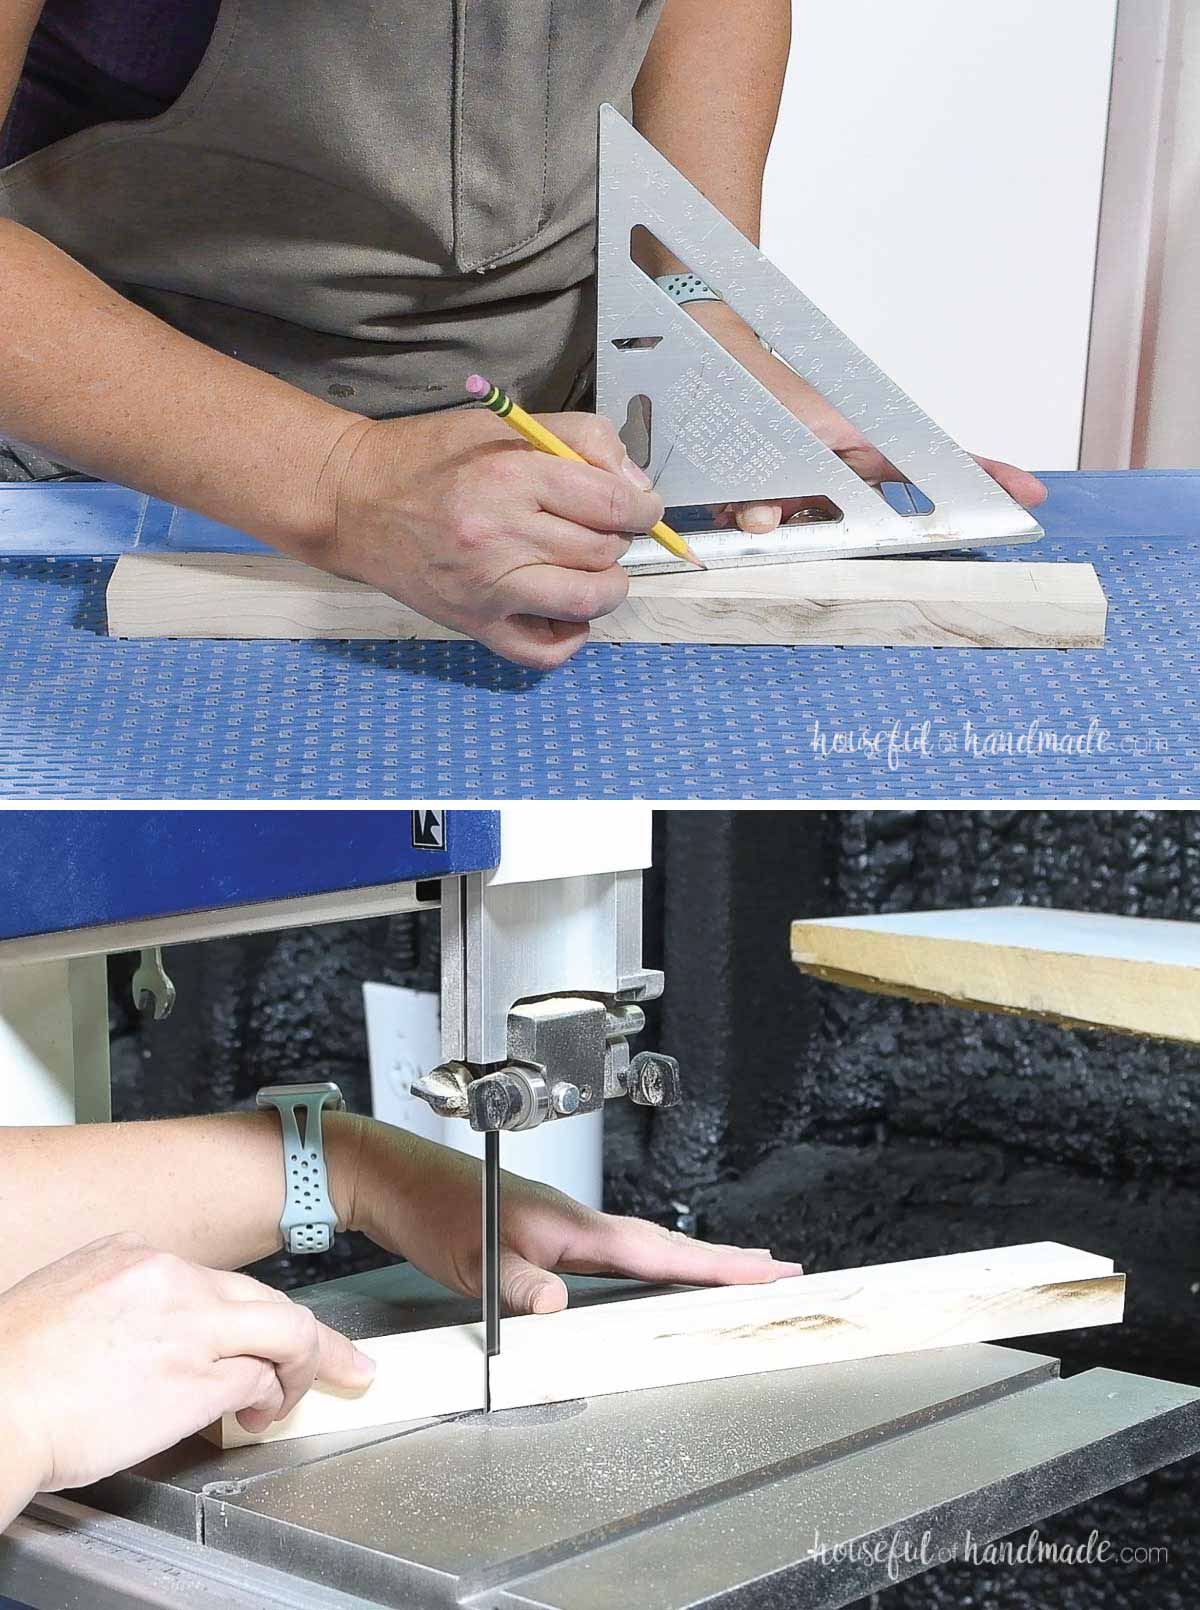
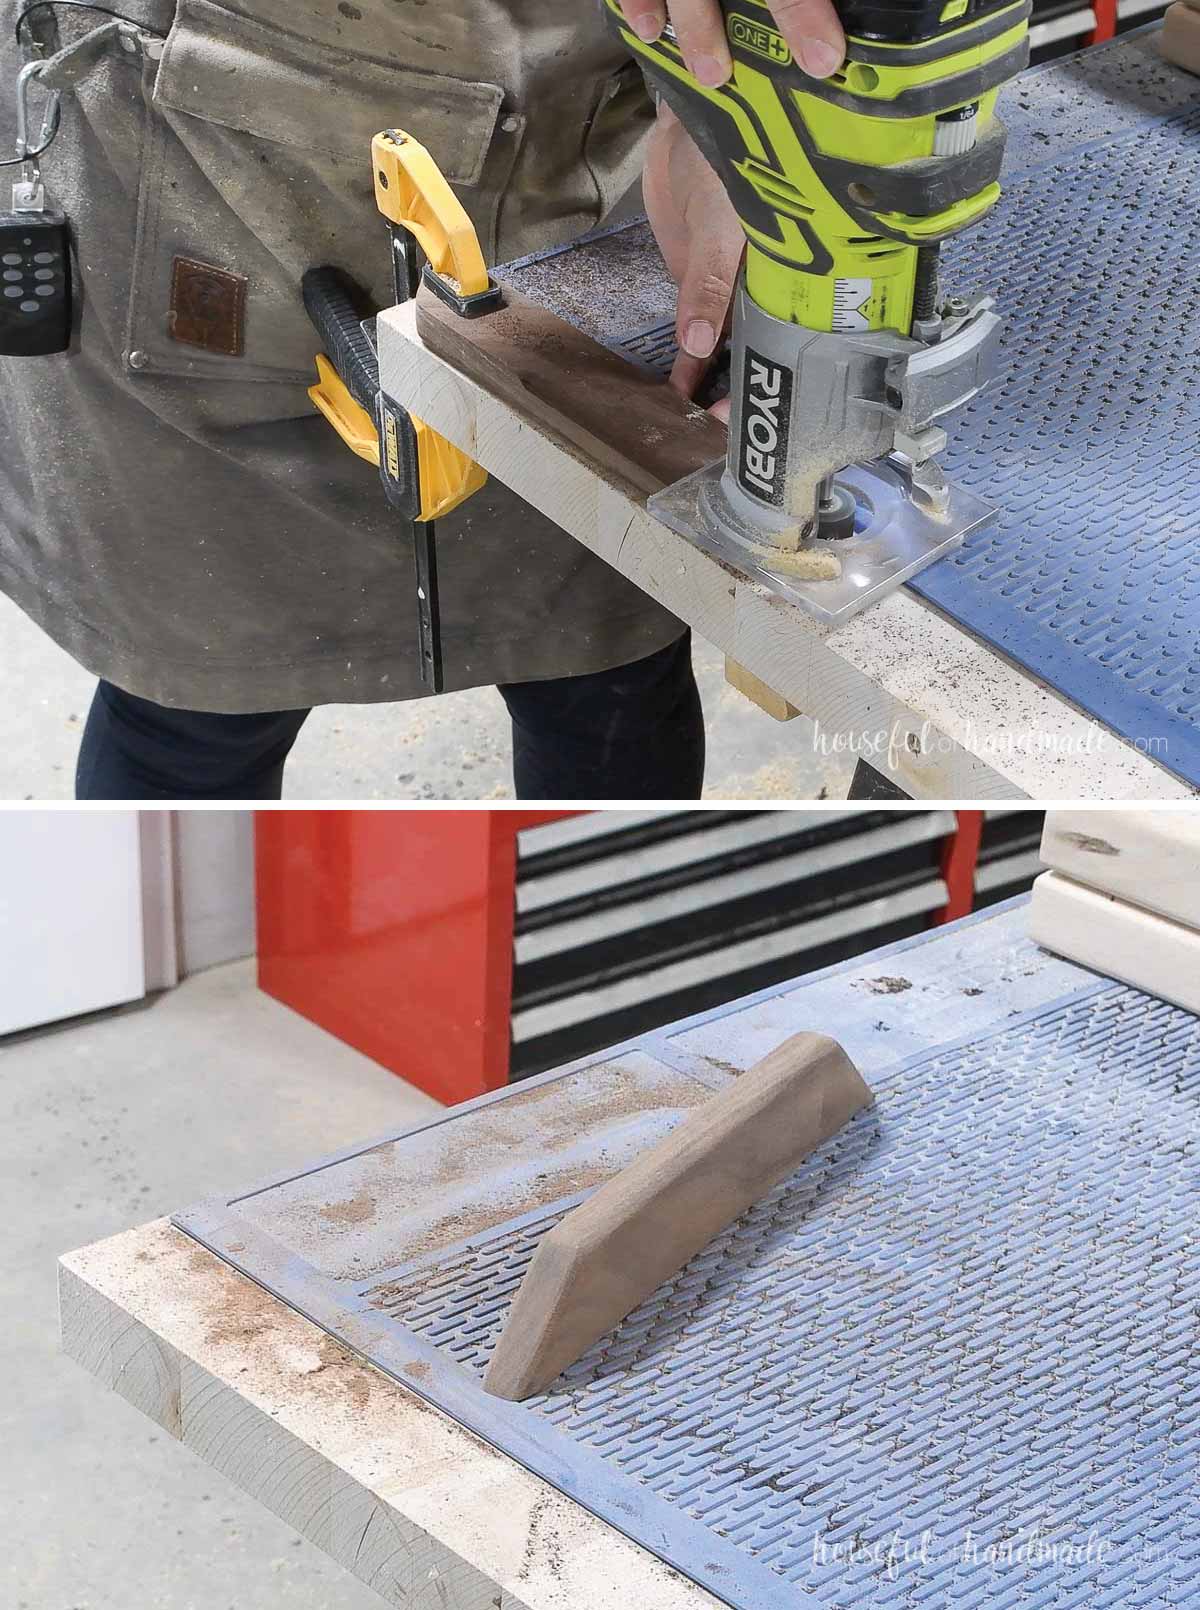
Sketch out the shape for the handle according to the diagram in the premium plans.
Also, mark where to drill the hole to attach it to the handle unit. Drill a 1/4″ hole all the way through it.
Then cut the handle shape out with a jigsaw or bandsaw.
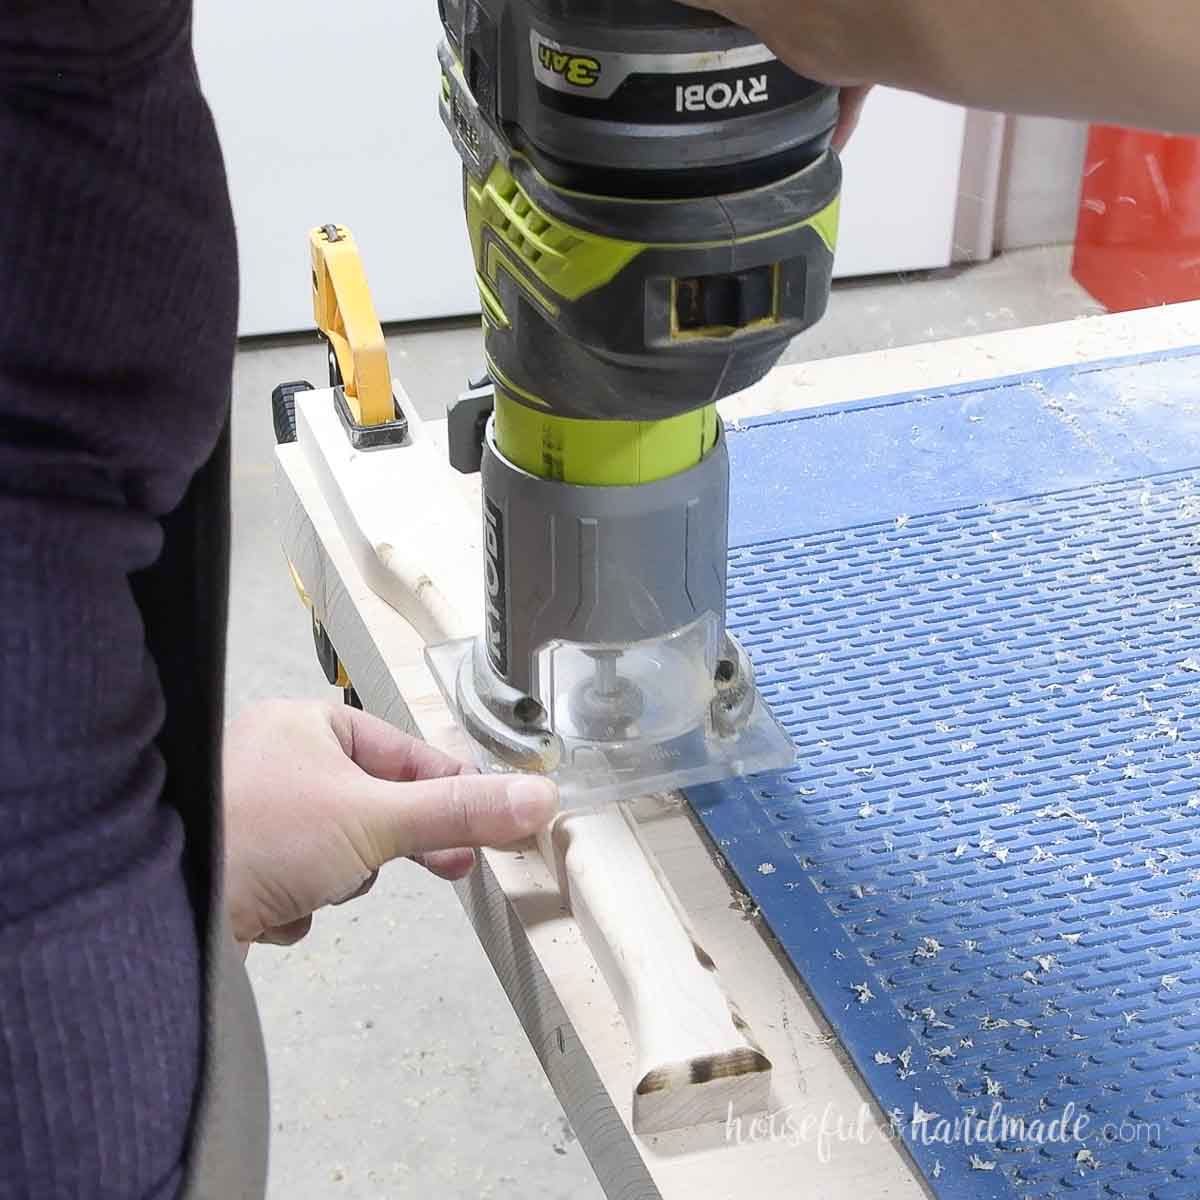
Finish shaping the handle by adding a round over around the entire thing, on both sides.
This is easily done with a simple trim router. Just make sure to clamp your piece firmly so it does not move on you.
Sand the handle smooth.
STEP 2- Assemble the handle unit
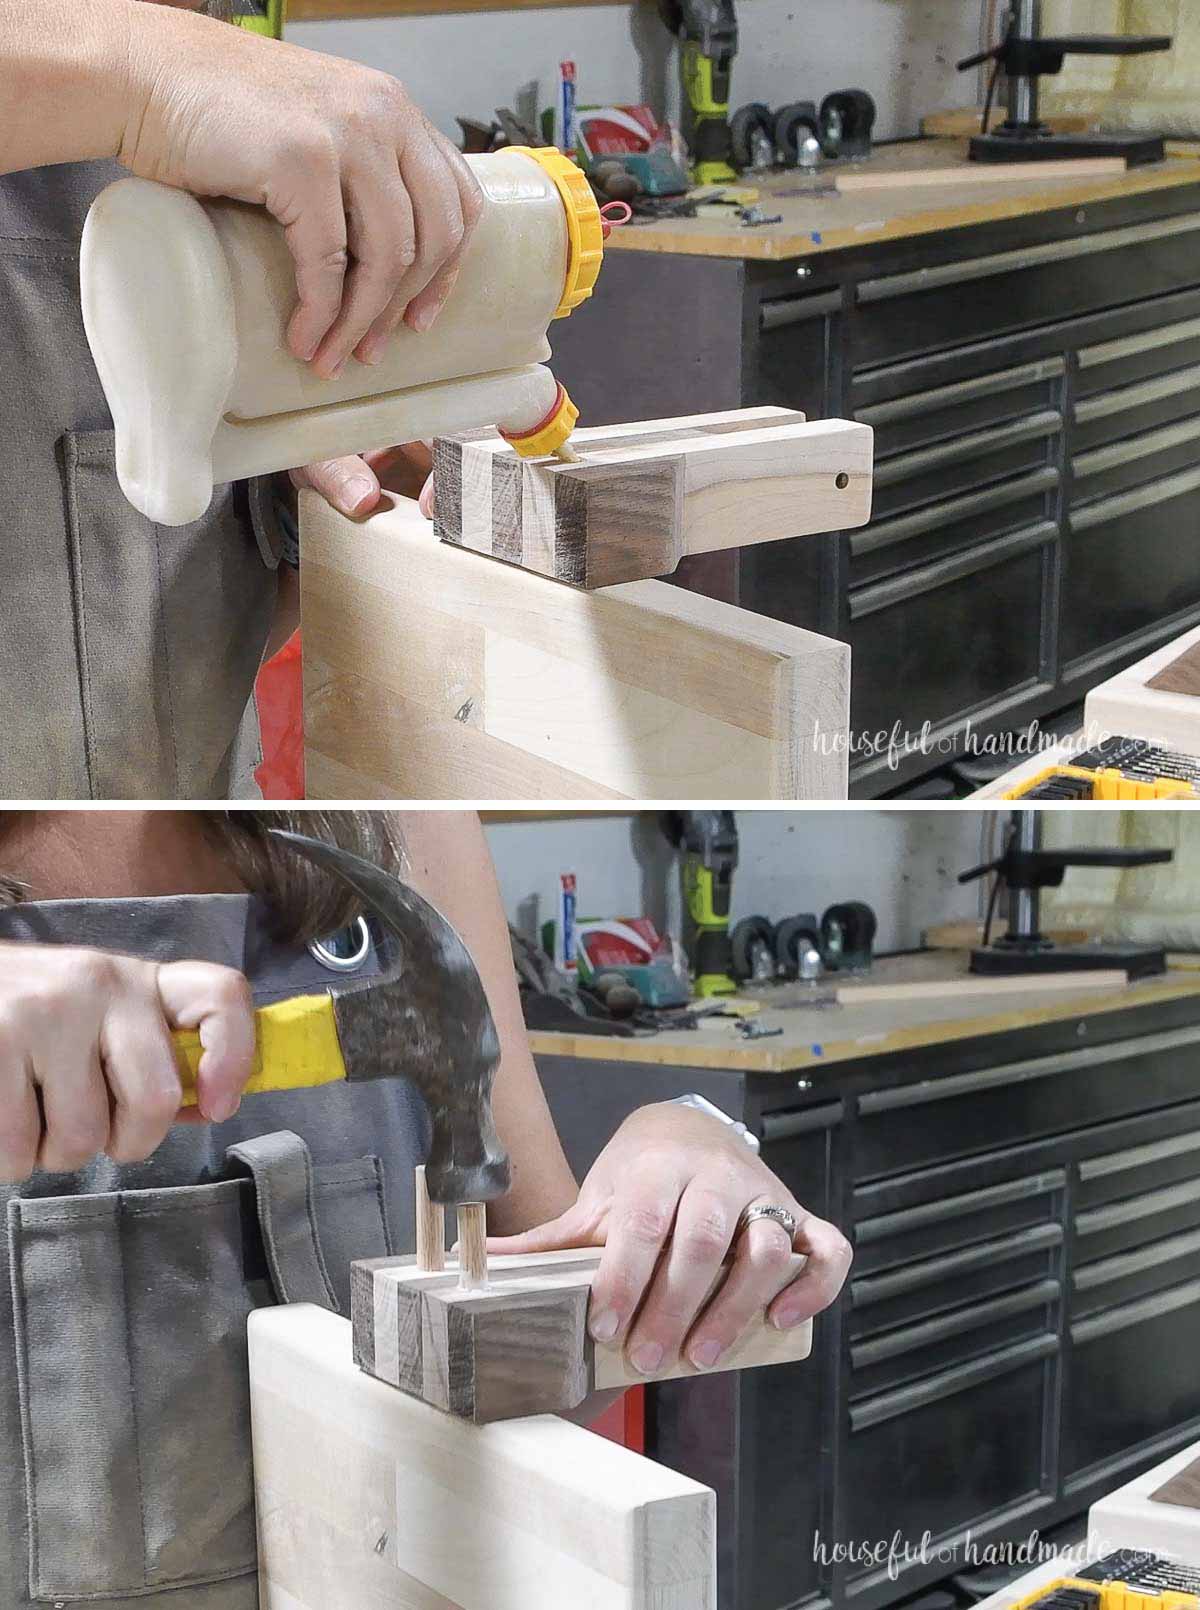
With all the pieces prepped, it was time to glue together the handle unit.
Add glue to the pieces and layer them so there is a spacer between the two handle sides and the decorative end pieces on the outside.
EXPERT TIP:
Add glue to the smaller piece when glueing two different sized pieces together. This will ensure the glue is only where you need it.
Place the shoulder screw through the hole on the one side piece and secure it into the threaded insert before clamping.
This will ensure your handle pieces are line up properly.
Then clamp the entire thing and let the glue dry.

Sand the handle unit smooth.
STEP 3- Assemble the top piece
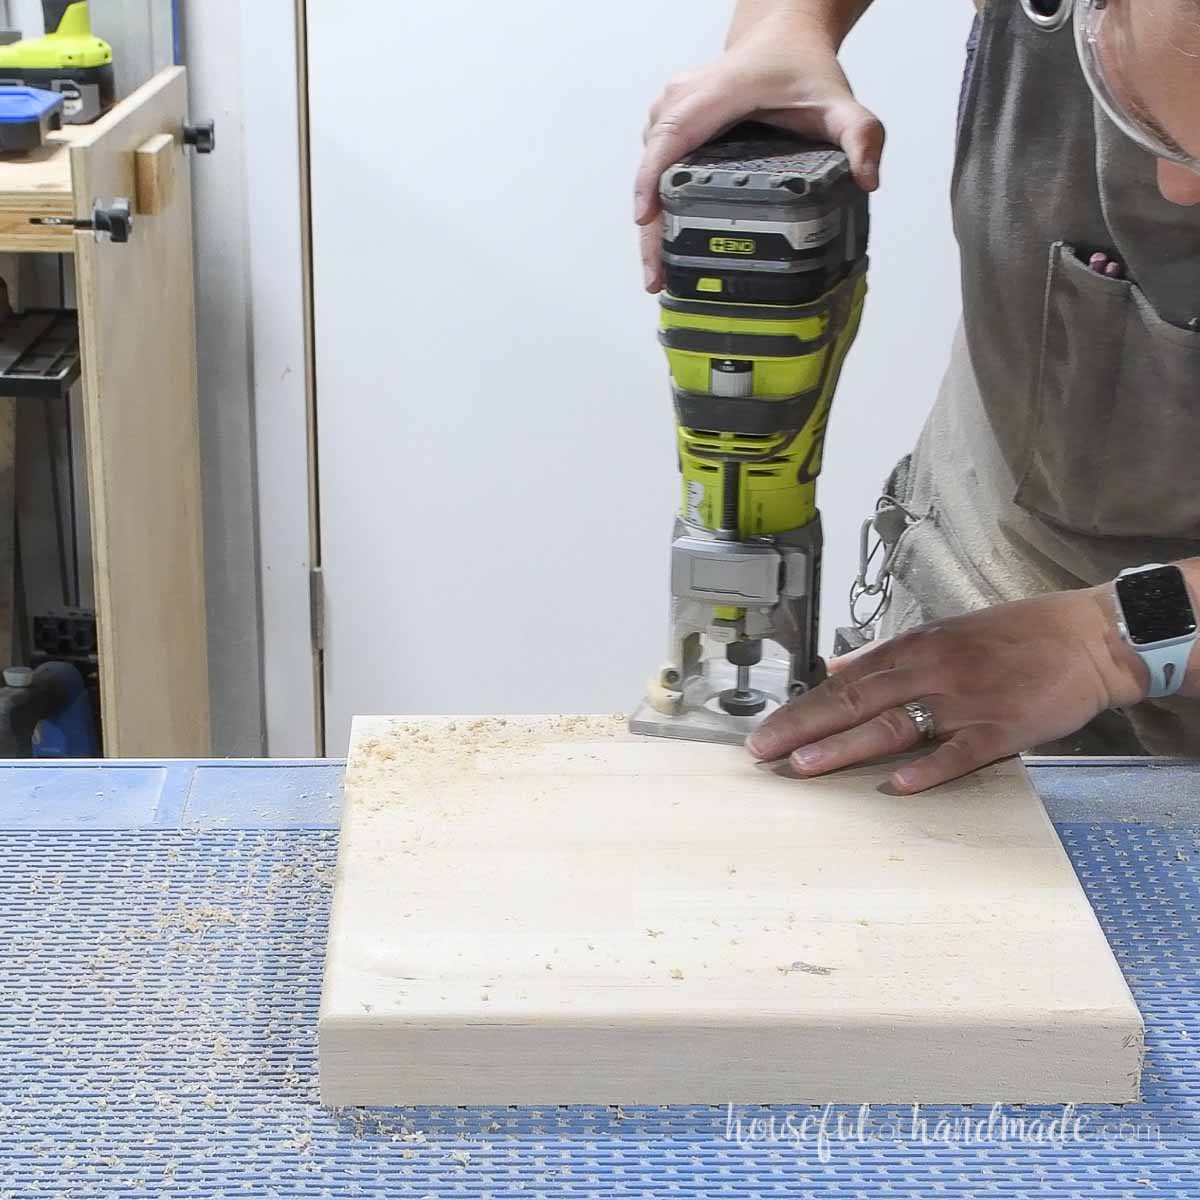
Add a round over to the butcher block pieces.
If I were to build it again, I would not add the round over to the bottom piece where the handle unit attaches.
With the round over, there is a small groove where food can get into on the top and bottom of the butcher block.
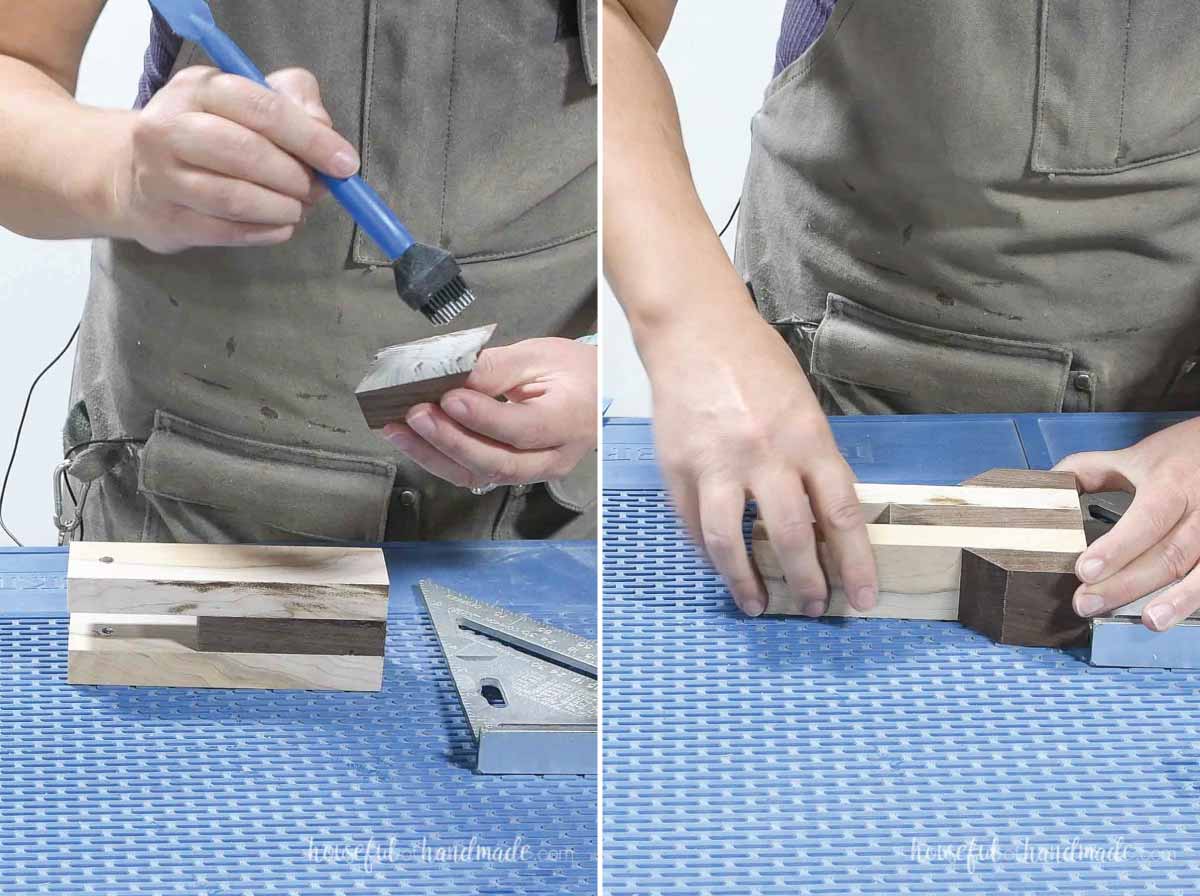
Cut the top press plate piece so the sides are cut at a 45 degree angle towards each other.
Add a round over to both sides of the top and sides.
Then sand it smooth.
Glue the top press plate onto the butcher block according to the 3D sketch in the plans.
Secure it so it goes with the grain of the butcher block.
This will ensure the handle and hinge are screwed into the edge of the wood instead of the end grain which will be a stronger hold.
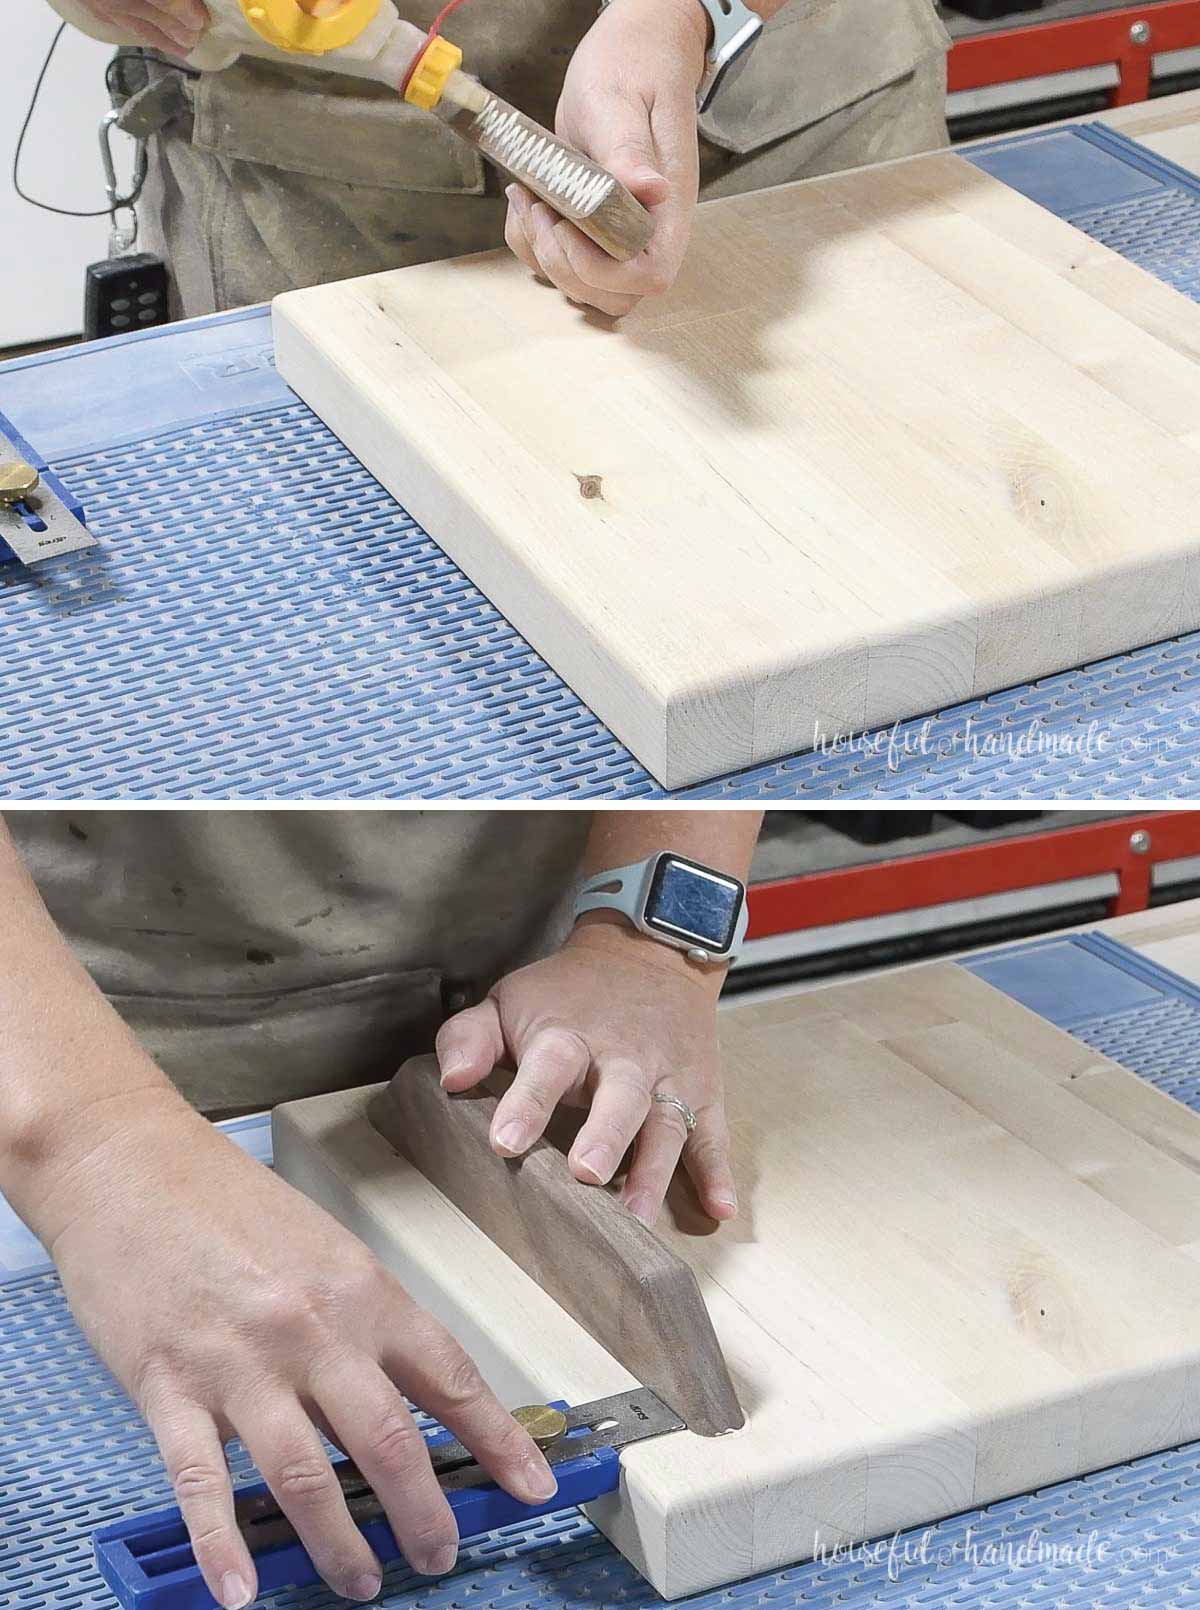
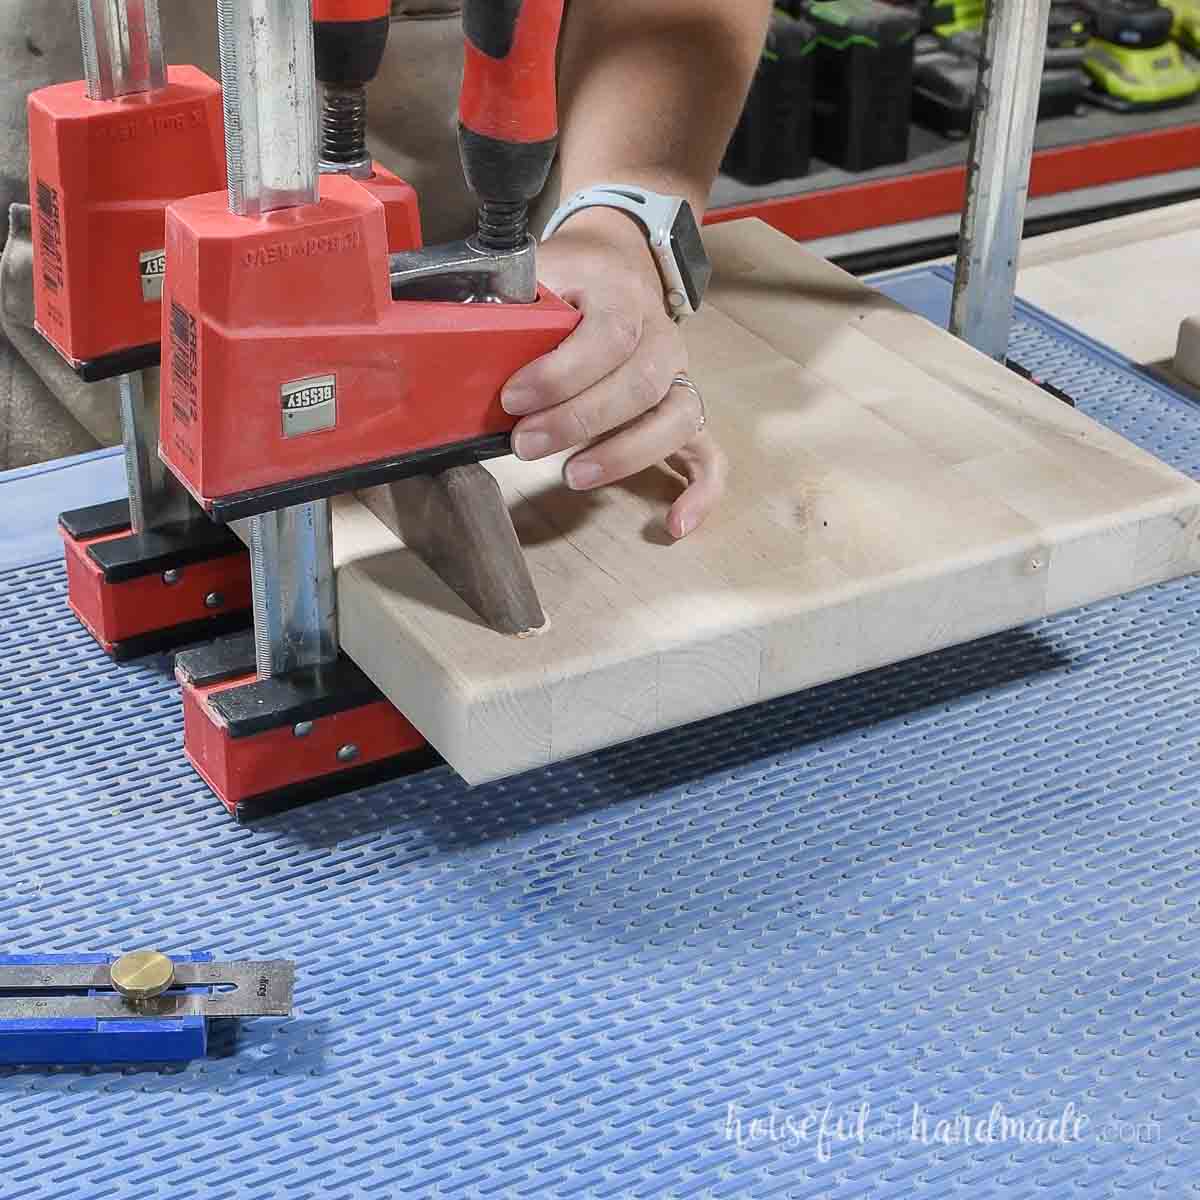
Clamp it and let the glue fully dry.
EXPERT TIP:
If the piece is moving around too much while trying to secure the clamps, let the glue dry a couple minutes with just hand pressure before clamping. The tackier glue will not slip when clamping.
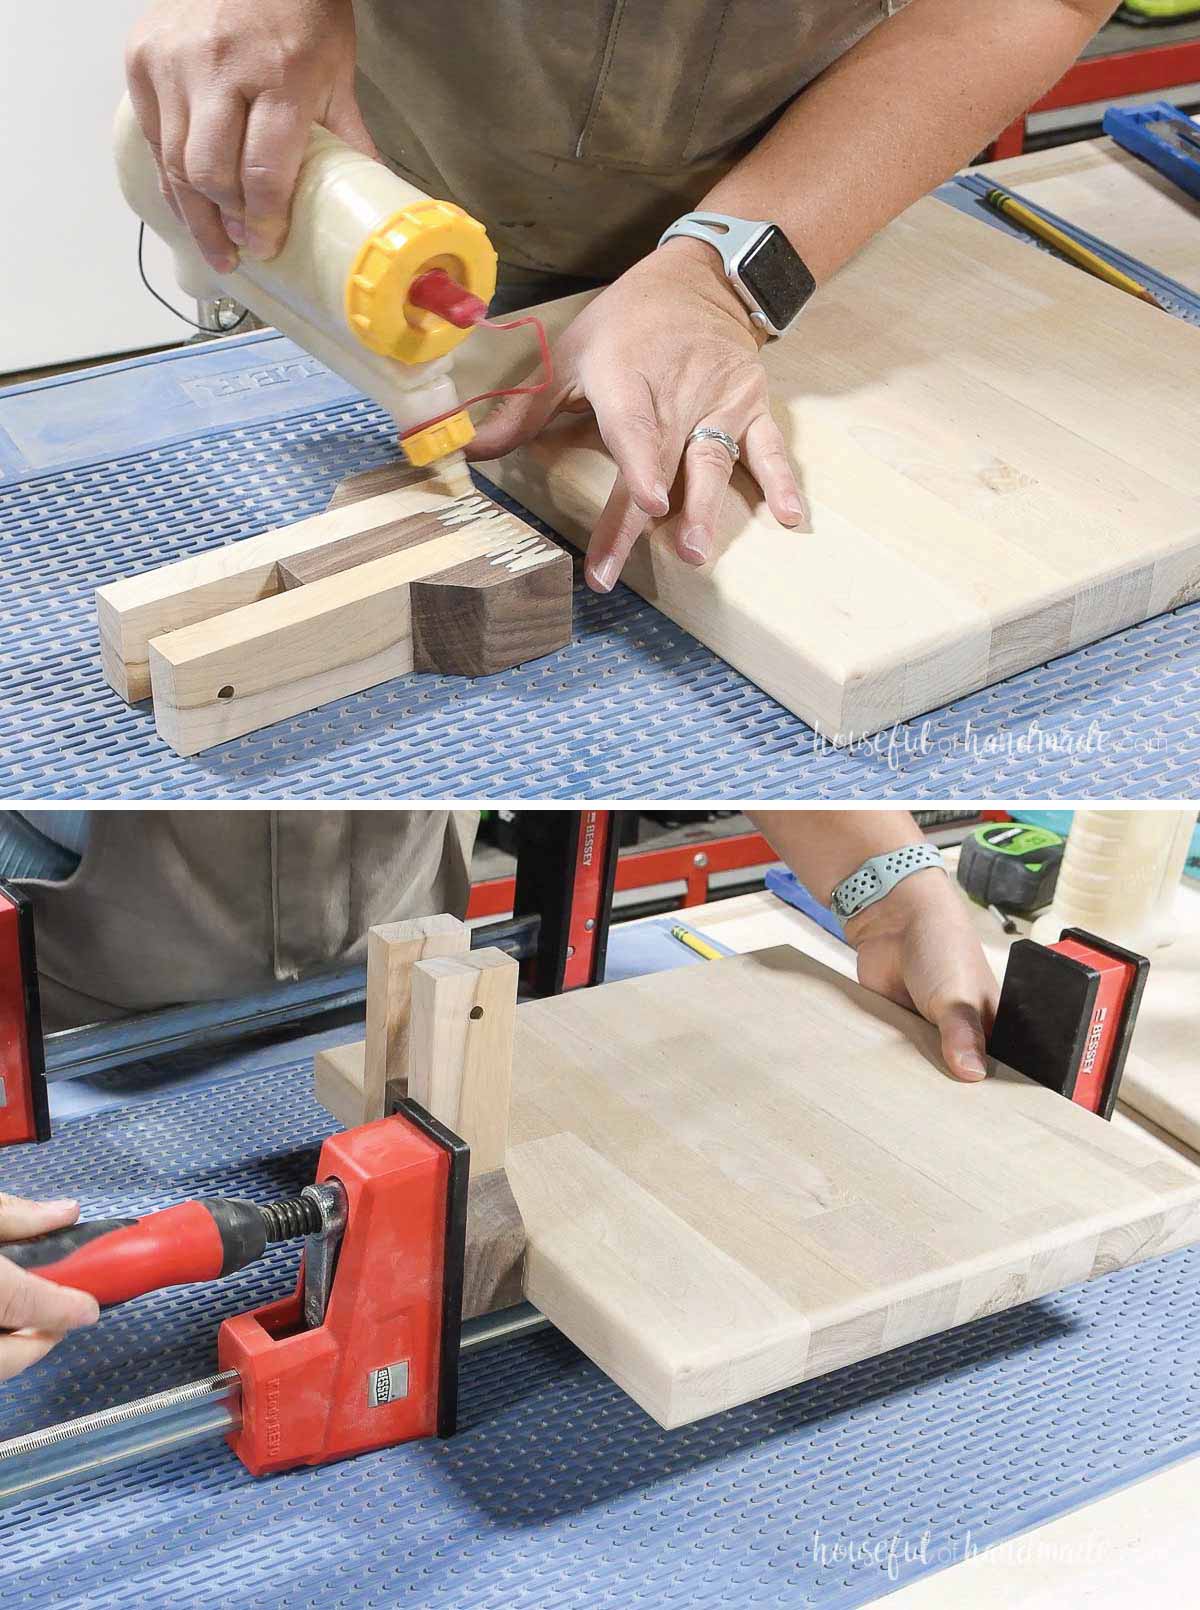
STEP 4- Assemble the bottom piece
Add glue to the side of the handle unit where it will touch the bottom butcher block piece.
Then center it on the butcher block (on the edge grain of the board, not the end grain).
Clamp it into place and let the glue dry.
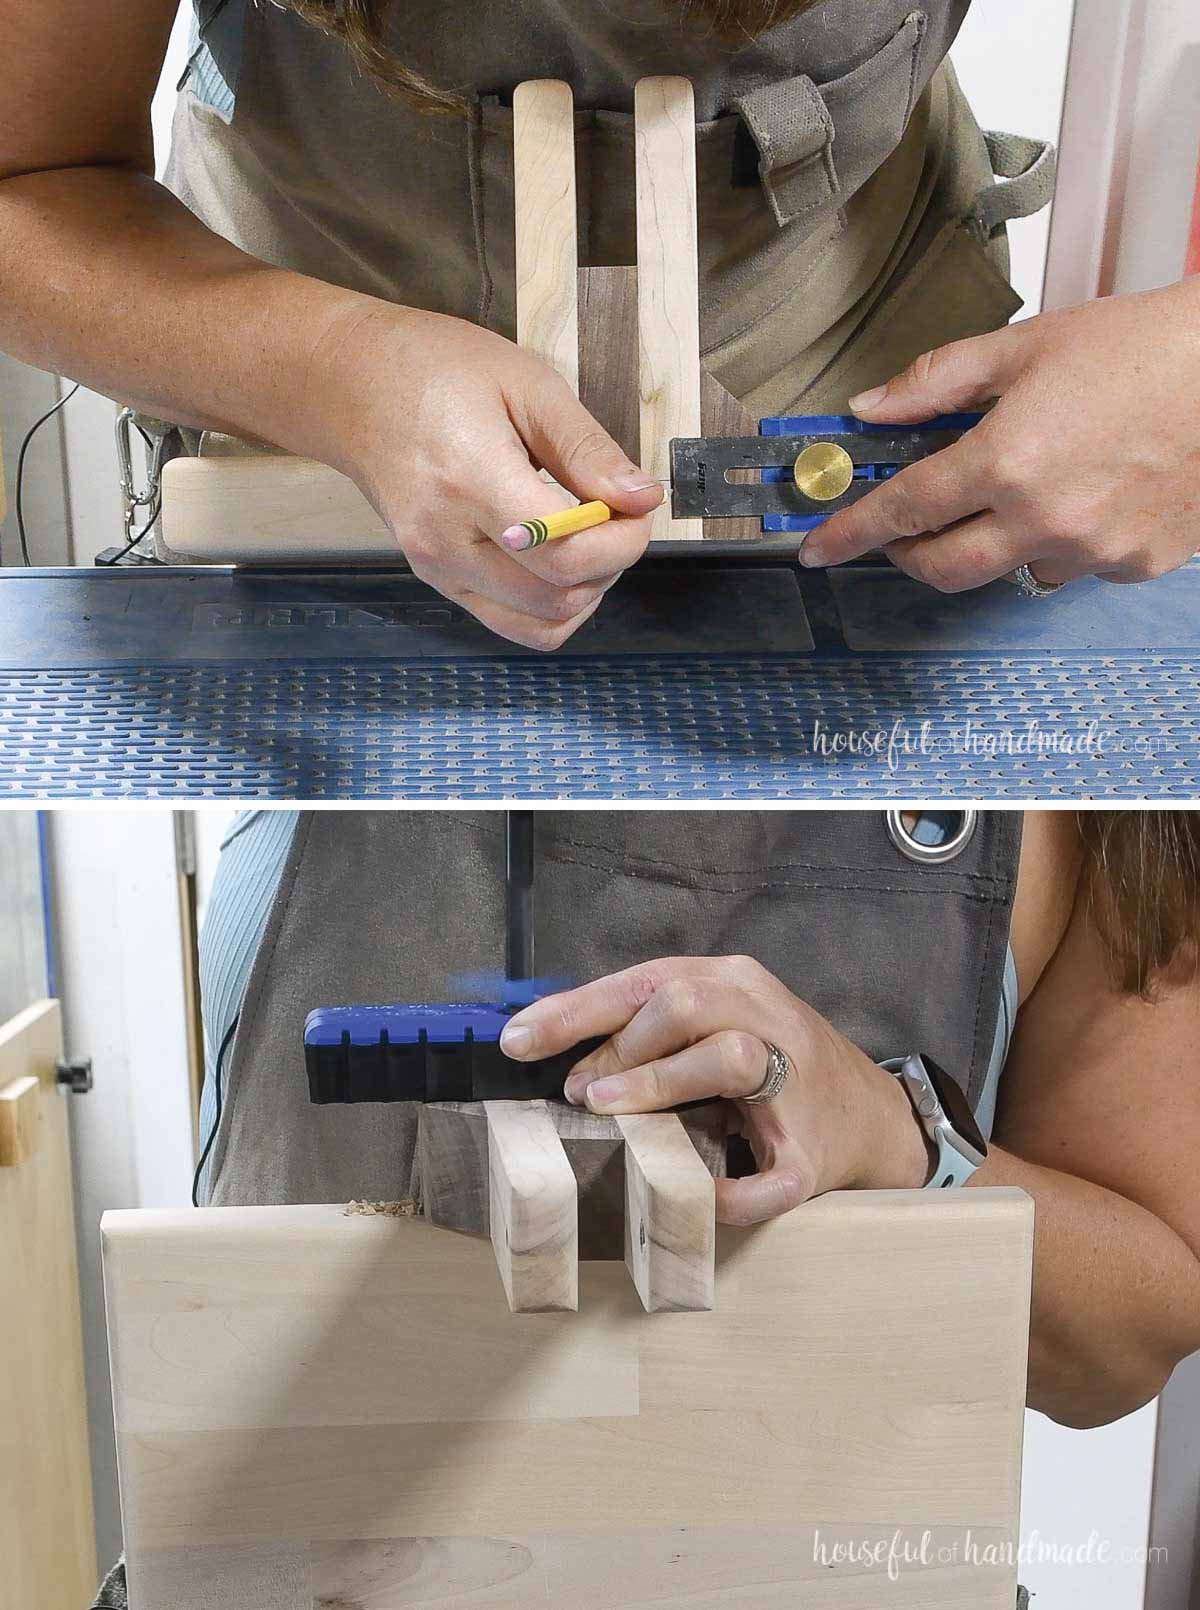
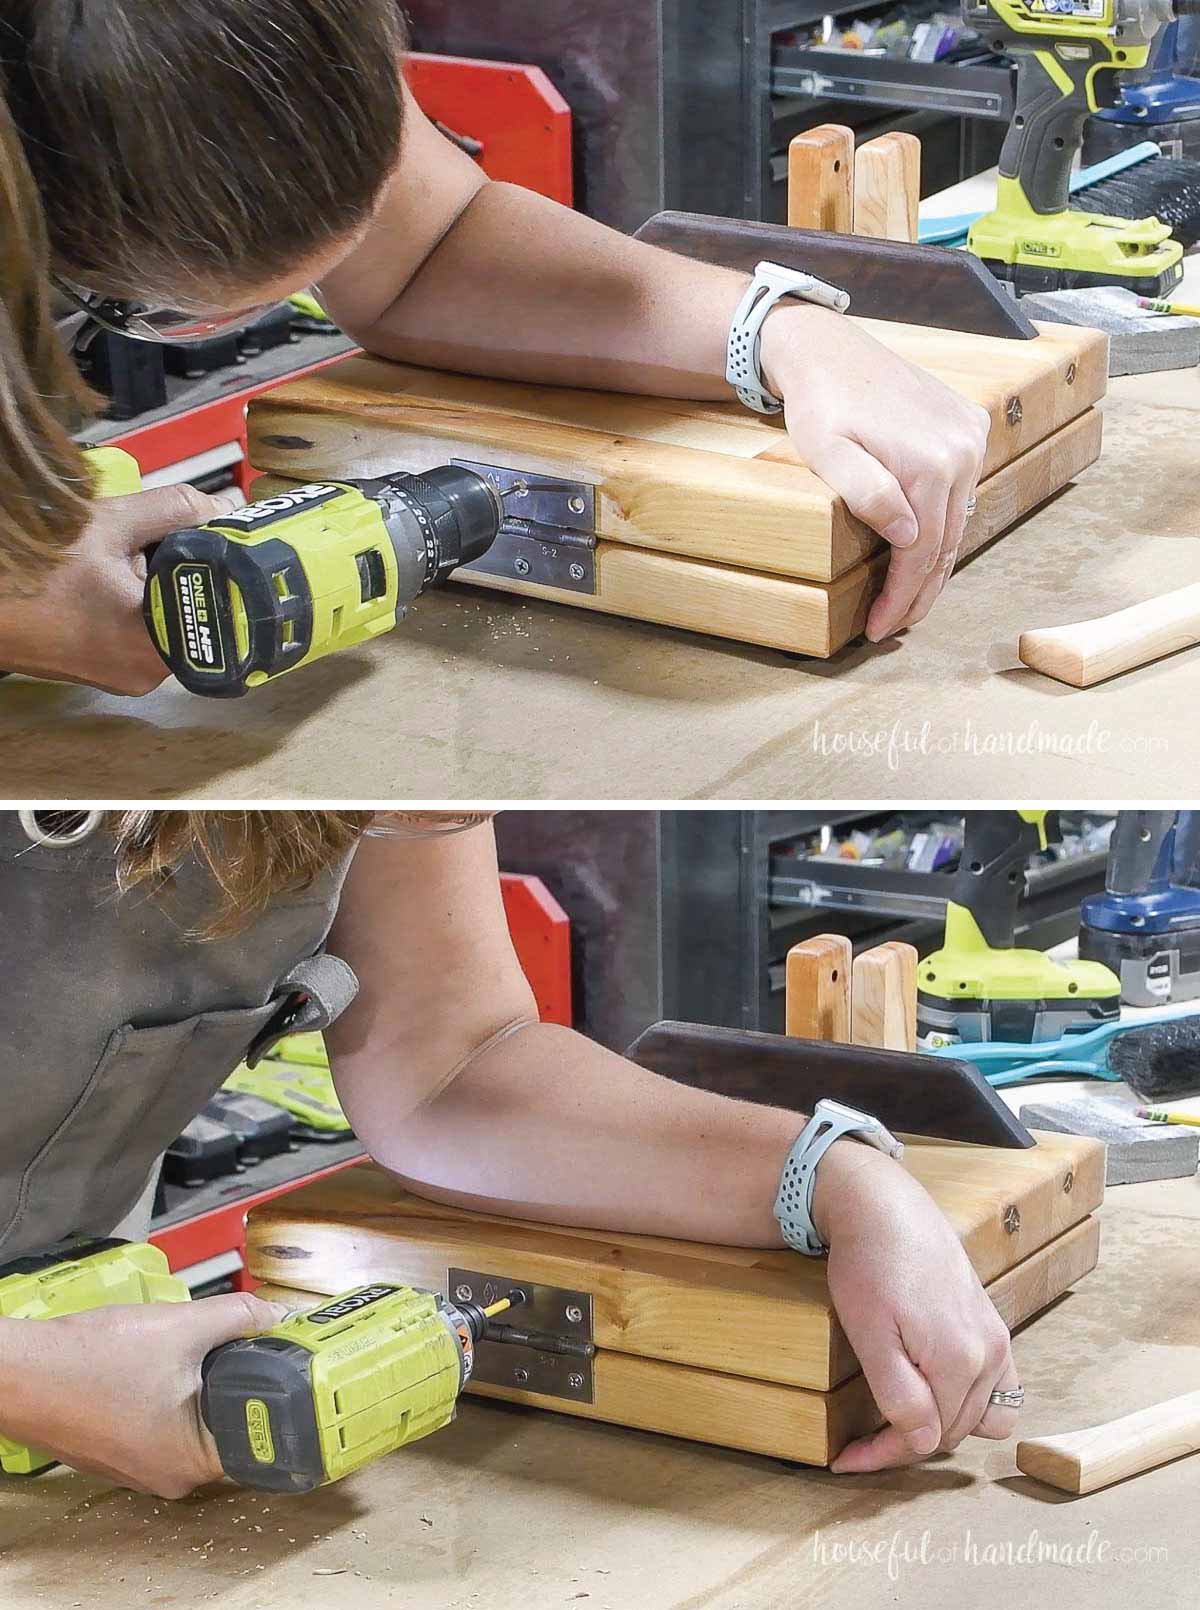
Remove the clamps and mark the center of the handle side boards 3/4″ up from the bottom (the center of the butcher block).
Drill 3/8″ wide holes 3/4″ deep on those marks. Use a guide to ensure the holes are straight.
EXPERT TIP:
Measure how deep you want your hole on the drill bit, then wrap a piece of blue tape around it. This will ensure your hole is the proper depth.
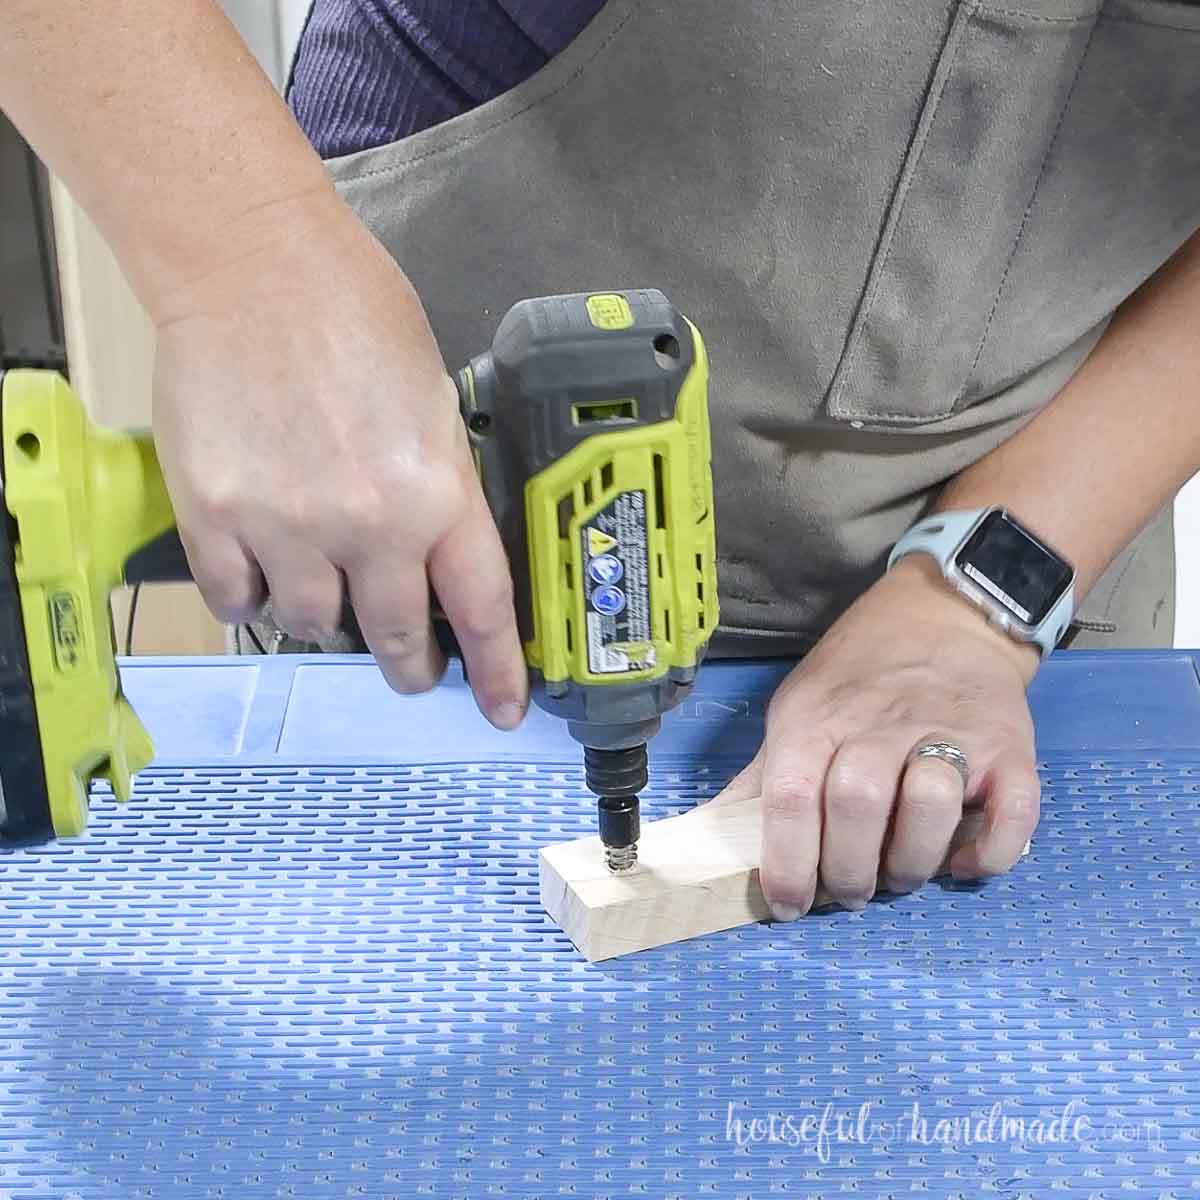
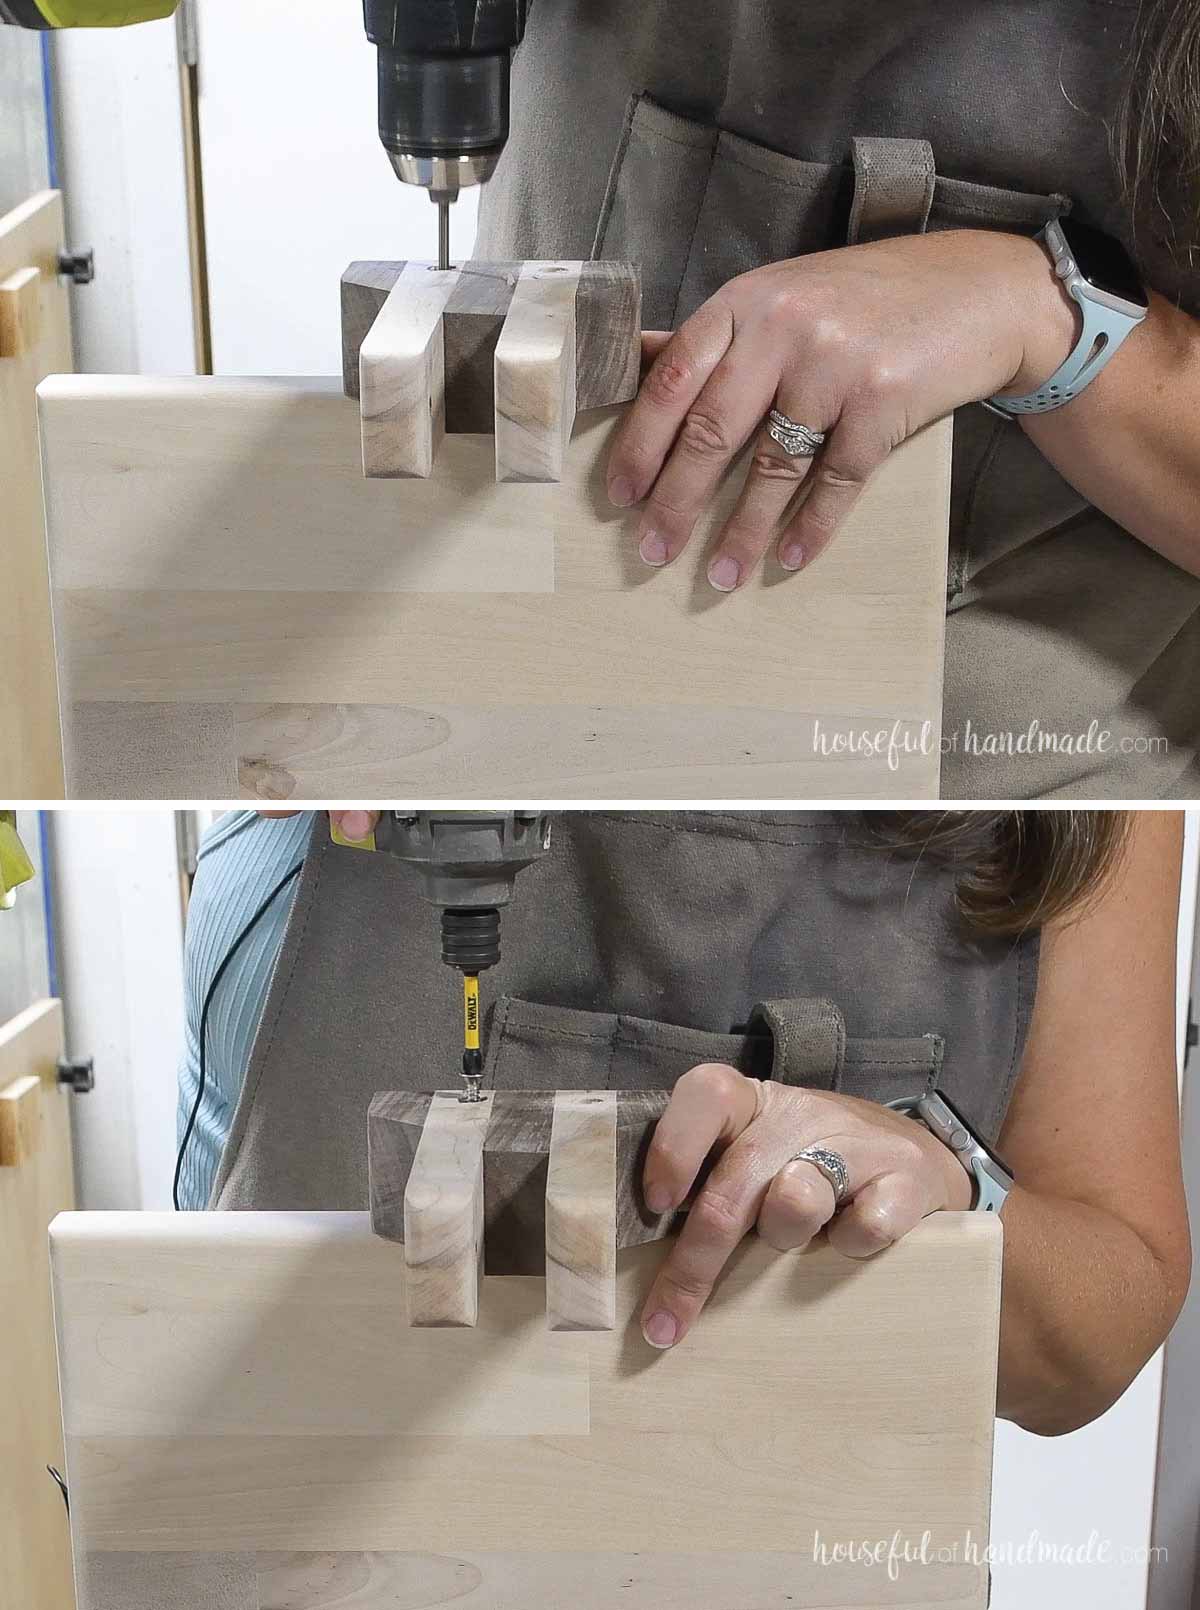
In the center of these holes, pre-drill a hole for the screw.
Then drive in the 1 1/2″ long wood screws to permanently secure the handle unit to the bottom piece.
Fill the holes with 3/8″ dowels to hide the holes.
Add glue to the hole, then tap the dowel into place.
Flush cut the remaining dowel and sand the handle unit smooth.
STEP 5- Put it all together
Carefully scrape off any glue squeeze out and touch up sand the pieces.
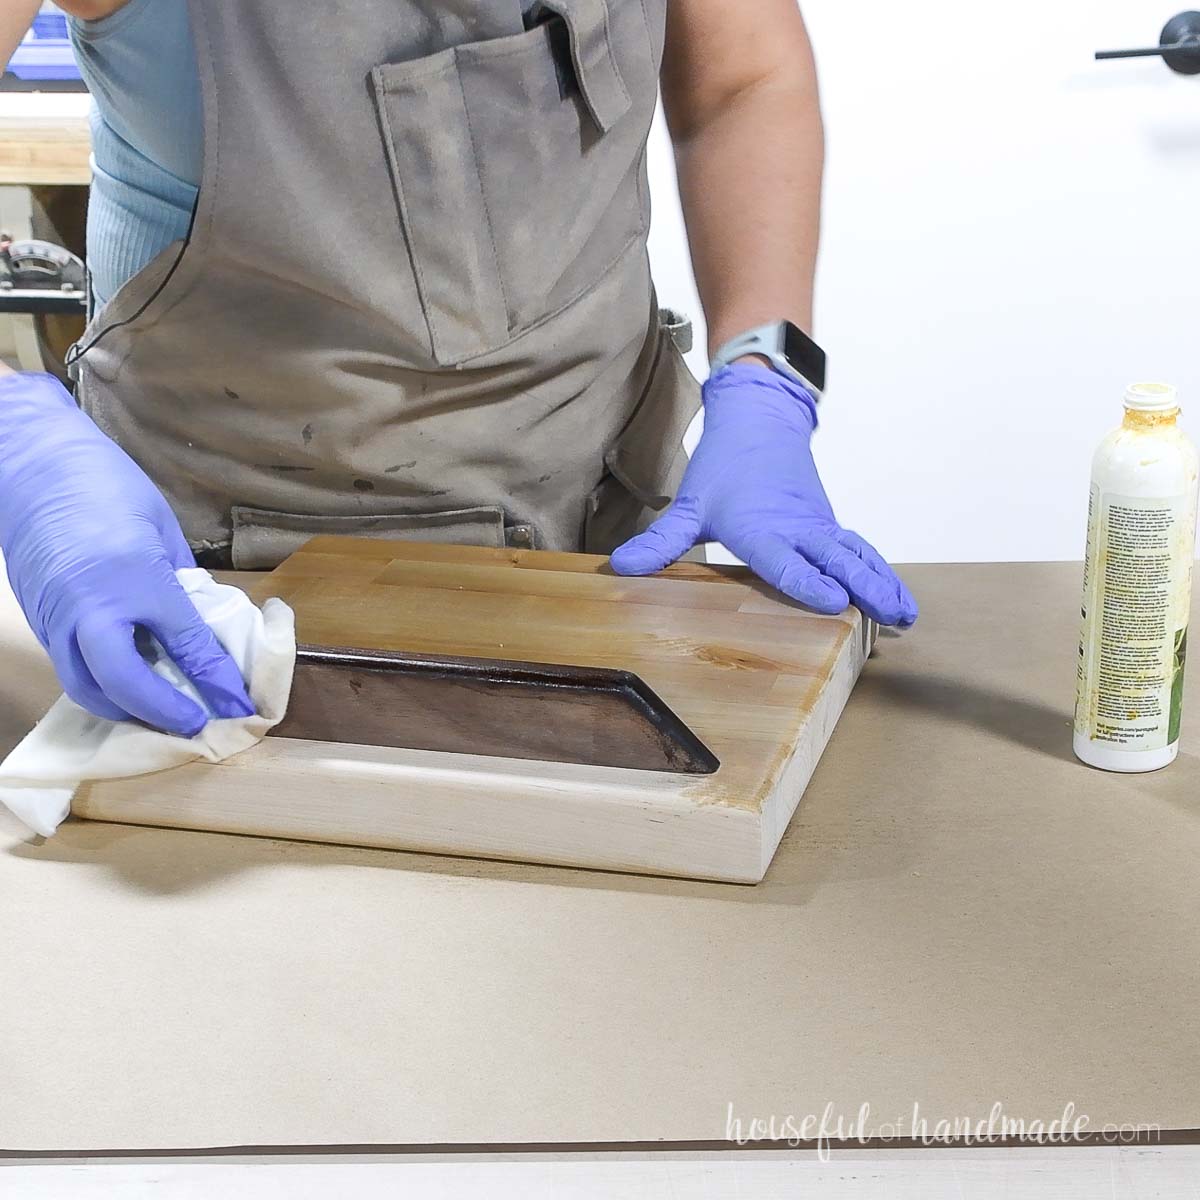
Then seal the assembled top, bottom, and shaped handle with food safe sealer.
I used pure Tung Oil from Waterlox on my tortilla press.
Add cutting board feet to the bottom four corners of the bottom piece.
I used the top piece underneath to give me a more flat surface when attaching the feet.

Then place some 1/16″ thick washers on top of the bottom butcher block.
This will help when pressing the tortillas so they are not super thin on the hinge side.
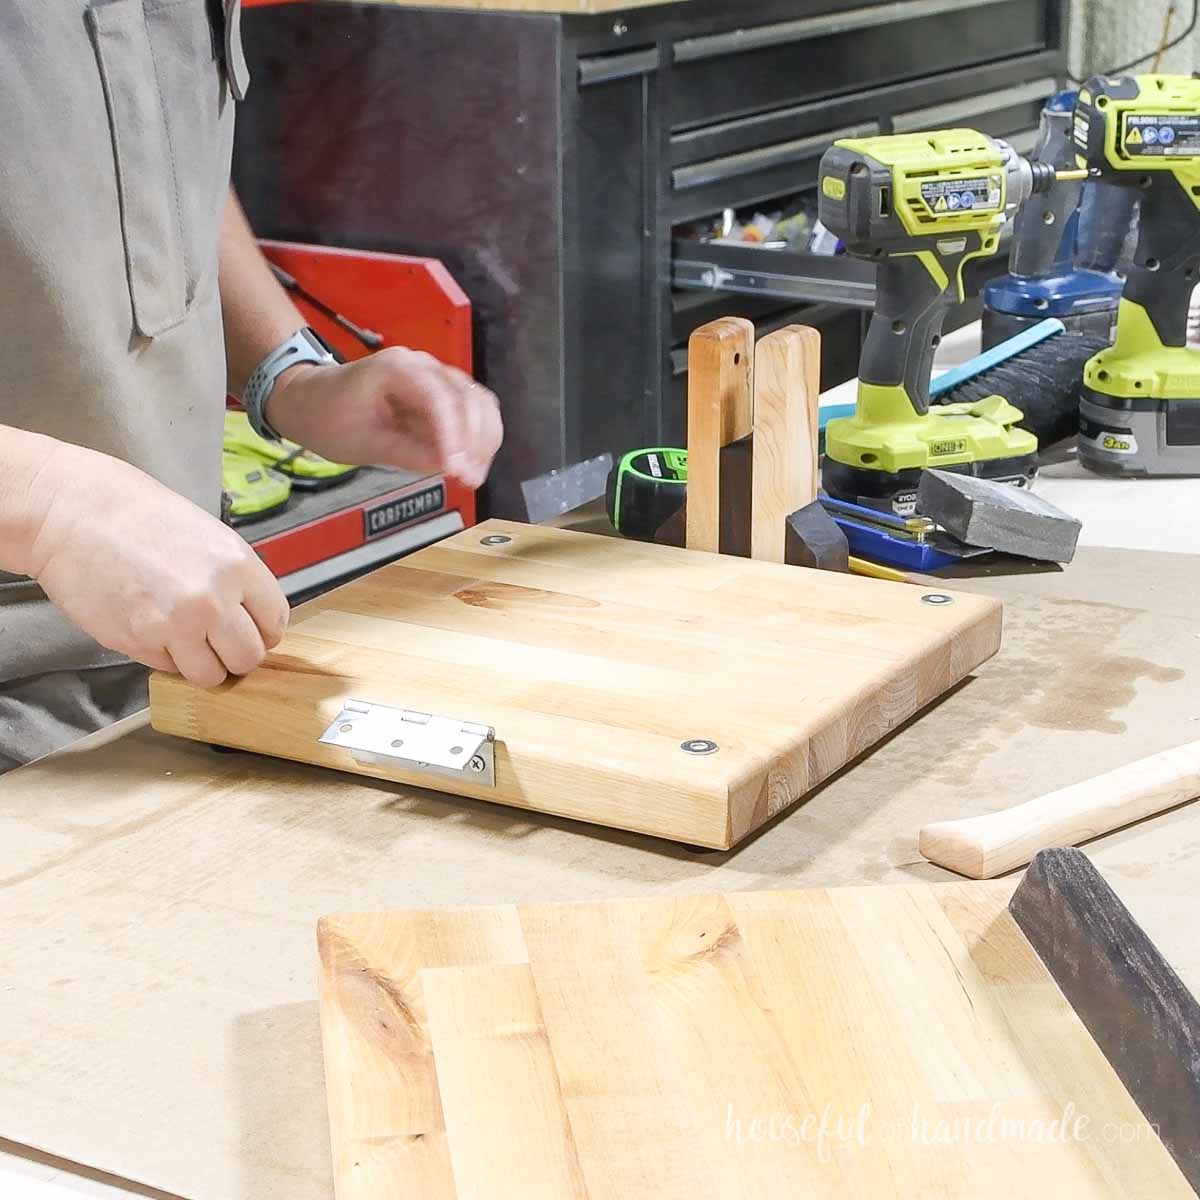
Set the top piece on it so the top press plate is close to the handle unit.
Attach the two pieces together with the hinge using 1″ screws.
Attach the handle by feeding the shoulder screw through the one side piece, then the handle, and securing it to the threaded insert.
The handle should easily pivot at this point.
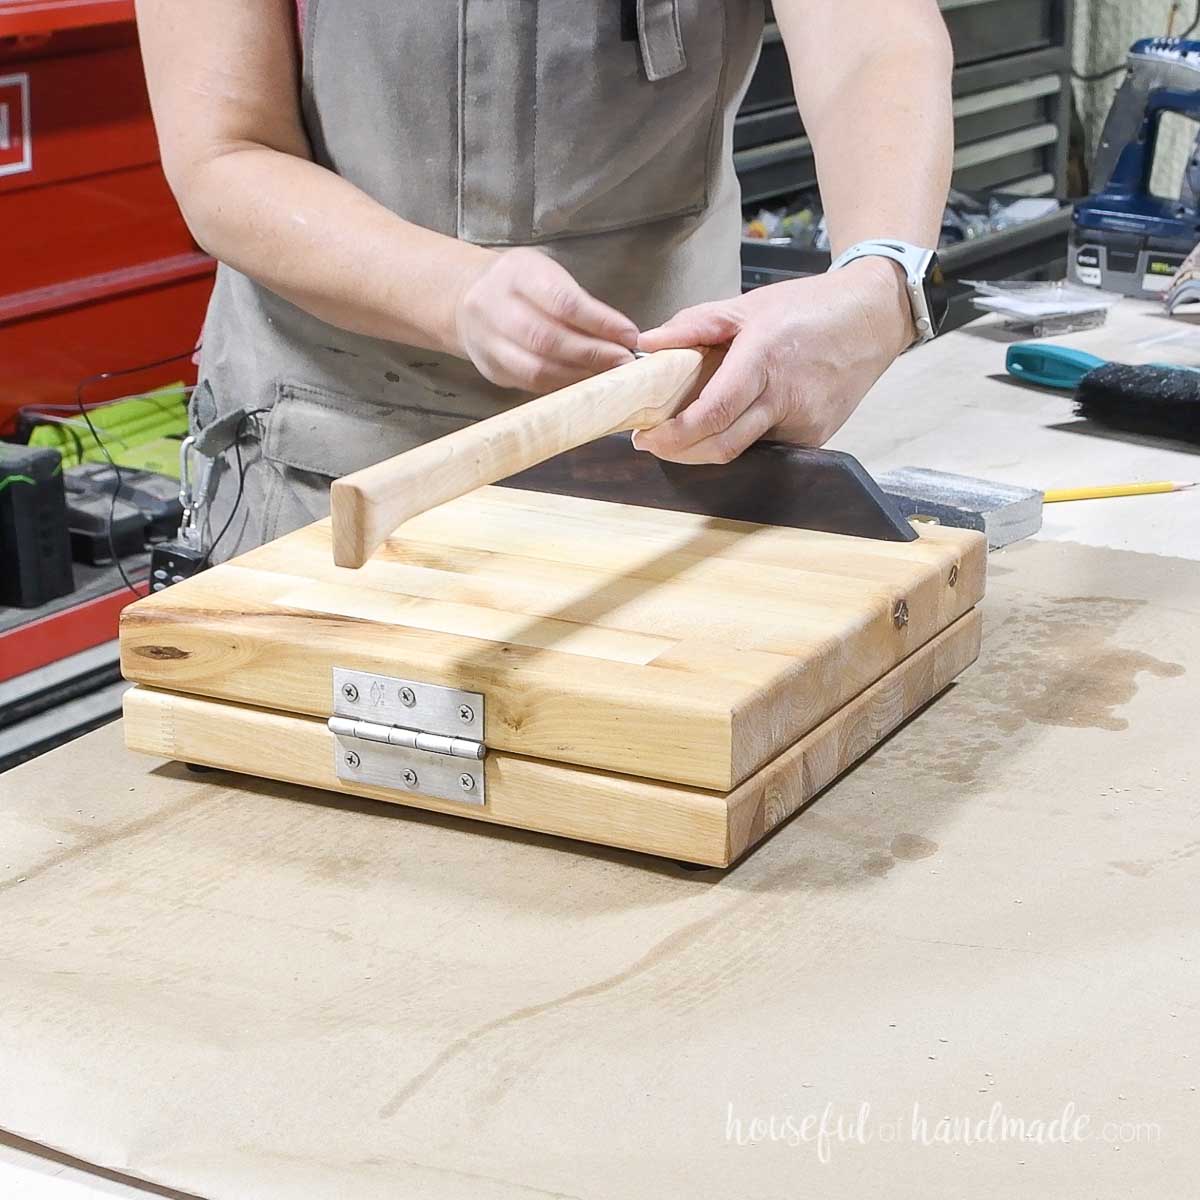
You did it!
Premium plans include:
- Recommended Tools
- Shopping list
- Easy to read cut list table
- Cut diagrams
- Step-by-step instructions with 3D renderings
- Helpful resources
- BONUS: 3D SketchUp file
Now your beautiful DIY tortilla press is ready use. It's a good thing it's Tuesday... cause Tuesday's are for tacos!

More Scrap Wood Projects:
This amazing tortilla press is the final build for this year's Scrap Wood Summer series!
Every Tuesday this August, Woodshop Diaries and I shared a new scrap wood project. Now are scrap wood piles are a bit smaller, but we made some amazing things!
Check out any projects you may have missed below and check more fun scrap wood projects here.


Happy building!
