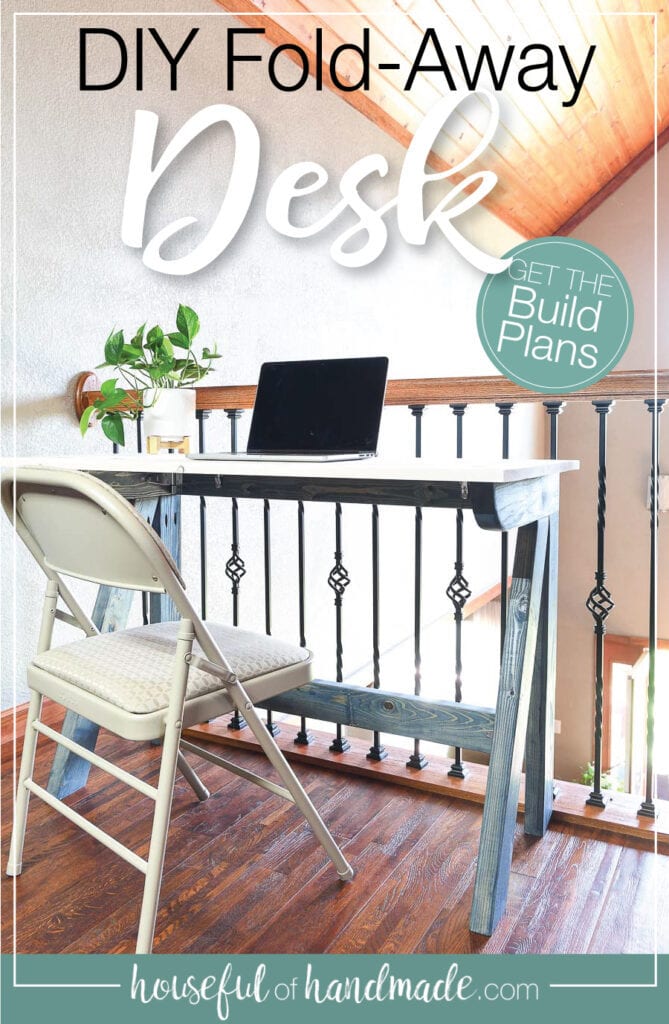
Make this easy fold-away desk to give you an extra workspace whenever you need it.
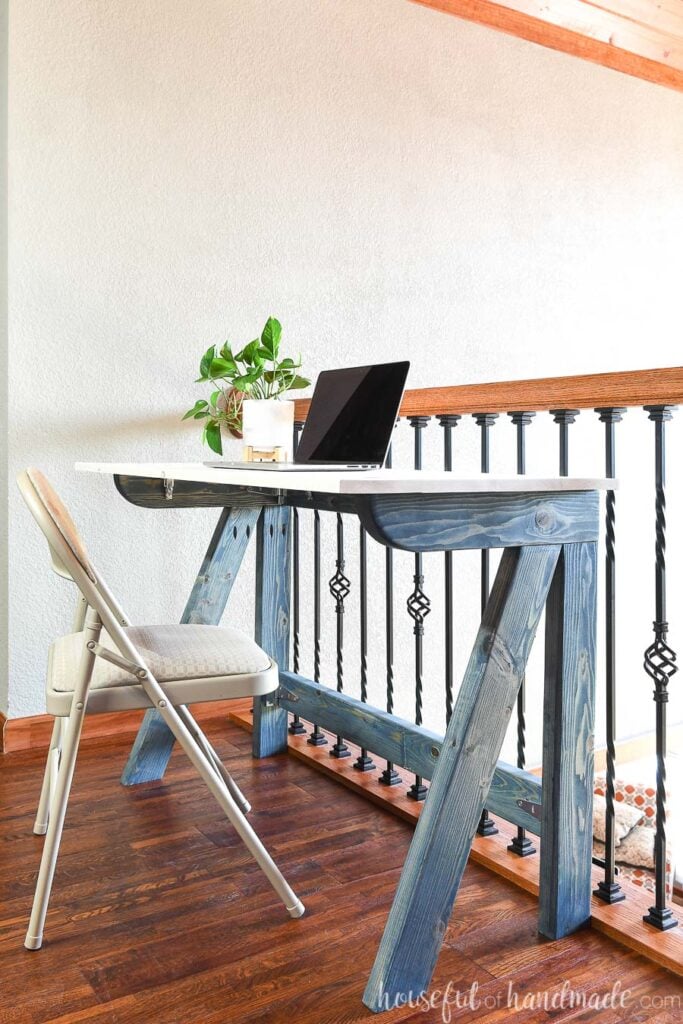
If you are finding yourself in need of more work spaces in your home, today’s DIY is perfect for you! I partnered with Kreg Tools and their project plan site, BuildSomething.com, to share this simple fold-away desk.
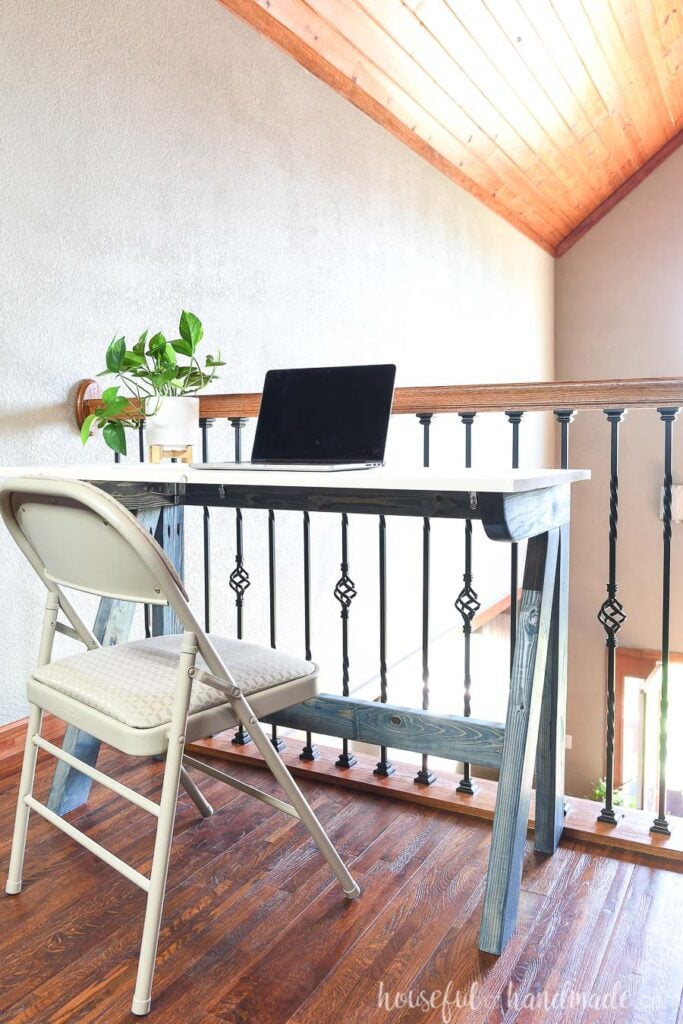
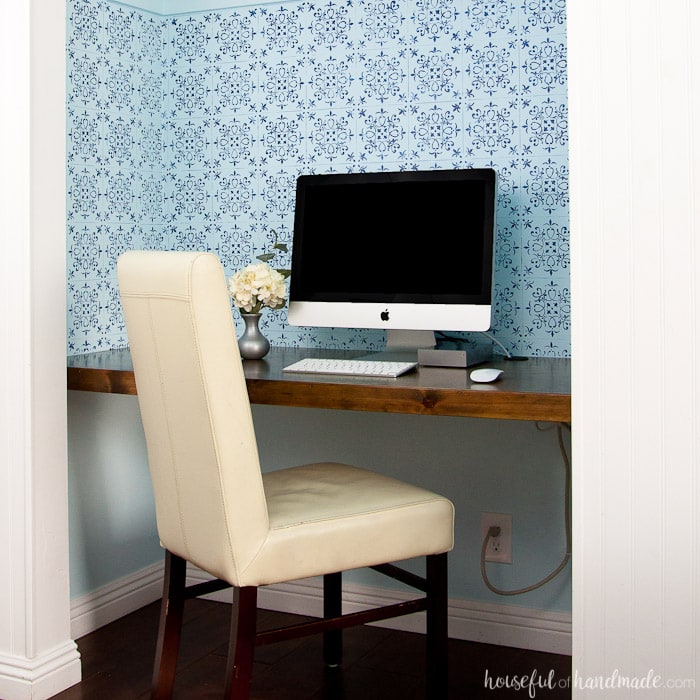
We are using our new folding desk for a computer desk while we are between houses. It is much better than the plastic folding table we have been using!
But this table doesn’t only work for an office. It would make a wonderful craft table too!
This post may contain affiliate links. As an Amazon Associate I earn from qualifying purchases. Click here to read my full disclosure policy.
If you are crafting out of a closet, this table would be the perfect workspace. You could open your closet and set up your craft table in minutes, but easily store it back in the closet when not in use.
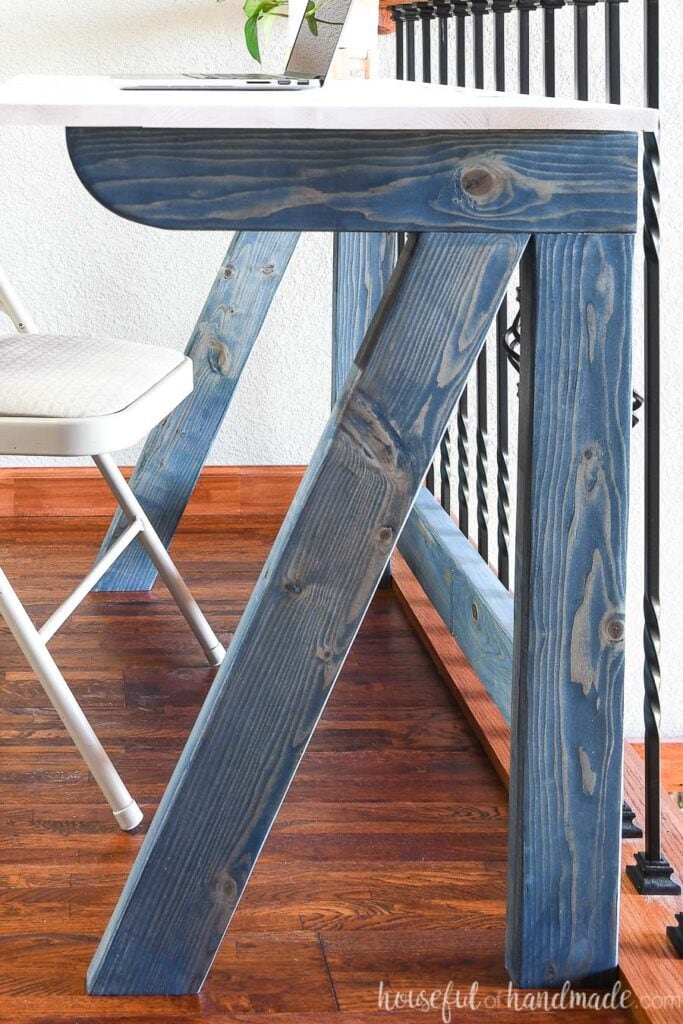
2×4 Desk Base
I wanted to keep this folding desk build easy, but still sturdy. It was the perfect job for 2x4s.
Using 2x4s also makes the DIY folding desk inexpensive. The wood for the build cost me only $30. It would also be a great build to use up scraps of 2x4s you may have lying around.
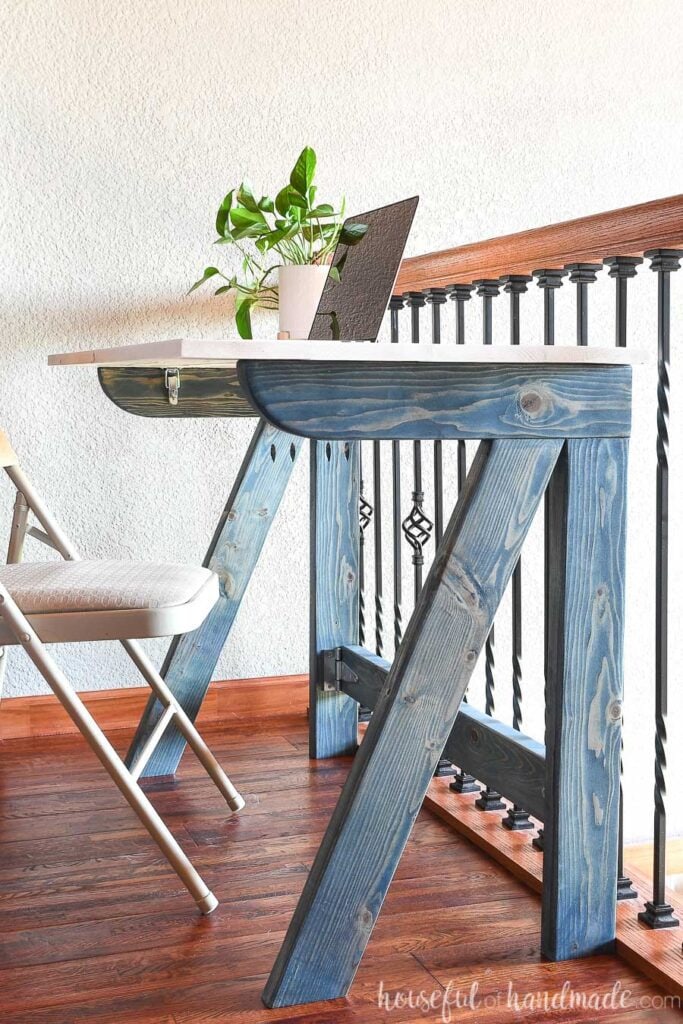
Plus, the legs go together so easy with the Kreg Jig. Just a few screws is all you need to make these sturdy desk legs.
And the angled design makes your desk look extra fancy, no one will realize it was so easy to do with just a miter saw!
Solid Wood Desk Top
The top of the fold-away desk is made from two 1×6 boards. These are also put together easily with just a miter saw and the Kreg Jig.
I love the beauty of an easy and inexpensive solid wood top. Our top was stained with a white stain. It give the desk top a clean look, but you can still see the grain of the wood peeking through.
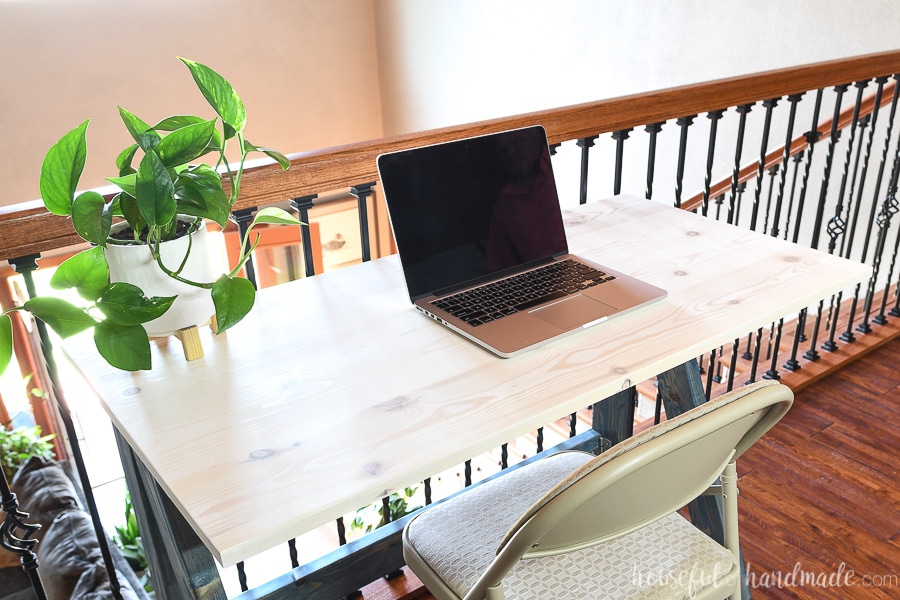
But if you happen to have a scrap of plywood, you could easily use it to make a quick flat table top!
If I was making my folding desk for a craft space, I would use a melamine covered board for the top. Or a piece of plywood covered in laminate countertop material.
They way you could easily wipe off glue and paint, keeping your craft table cleaner longer. And I know my craft table is always a mess!
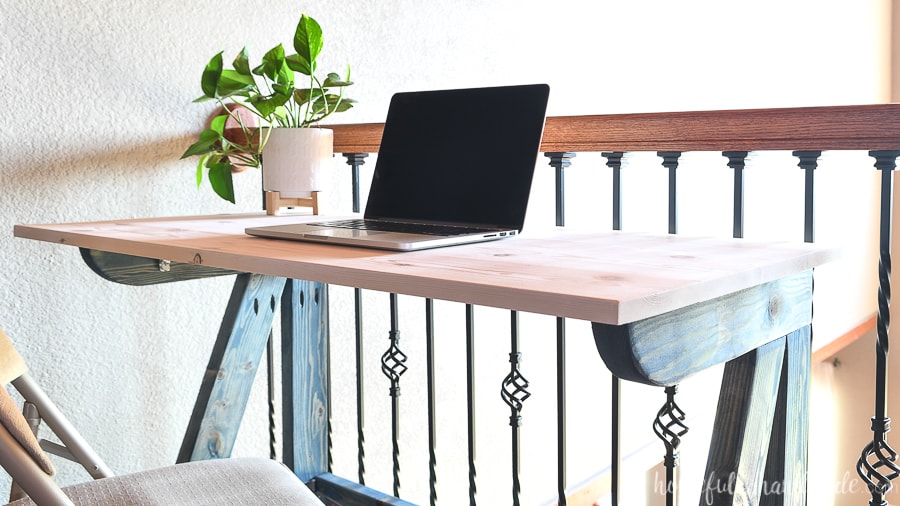
Folding Desk Base
But the best part of this desk, you can put it away when you don’t need it!
The desk top clicks off and the legs fold down easily. You can easily store it away in a closet, under a bed, or even behind a sofa.

And it only takes a quick couple minutes to open the legs back up and latch the top in place. Then you are ready to work (or create).
I found the hinges and latches needed to create the folding desk at my local Lowe’s, but found similar options for you online too! The base is held together with T-hinges (Amazon link) giving it a little extra strength and the top is held on with draw catches (Amazon link).
The hinges and latches cost me $30 making the cost of the desk $60 total. I had screws on-hand and used up leftover stain from these nesting plant stands.
Fold-Away Desk Build Plans
If you are ready to build your own easy folding desk, I am sharing the building plans for free thanks to BuildSomething.com.
Click here for the complete build plans.
And for more DIY desk ideas, check out these other great projects:

Happy Building!

Thank you to Kreg Tools for sponsoring this post. I only recommend products that I use and love and all opinions are 100% my own. Click here to read my full disclosure policy.