DIY Freestanding Toilet Paper Holder with Storage

by

Kati

Turn wood scraps into a beautiful, modern toilet paper holder.

After struggling with wall-mounted toilet paper holders that refuse to stay on the wall, I decided it was time to try a freestanding one.

Now I have the perfect place to hold my toilet paper as well as up to 3 extra rolls.

But the best part, this entire project was built from scraps. Nothing is better than turning wood scraps into something useful!

This post may contain affiliate links. As an Amazon Associate I earn from qualifying purchases. Click here to read my full disclosure policy.
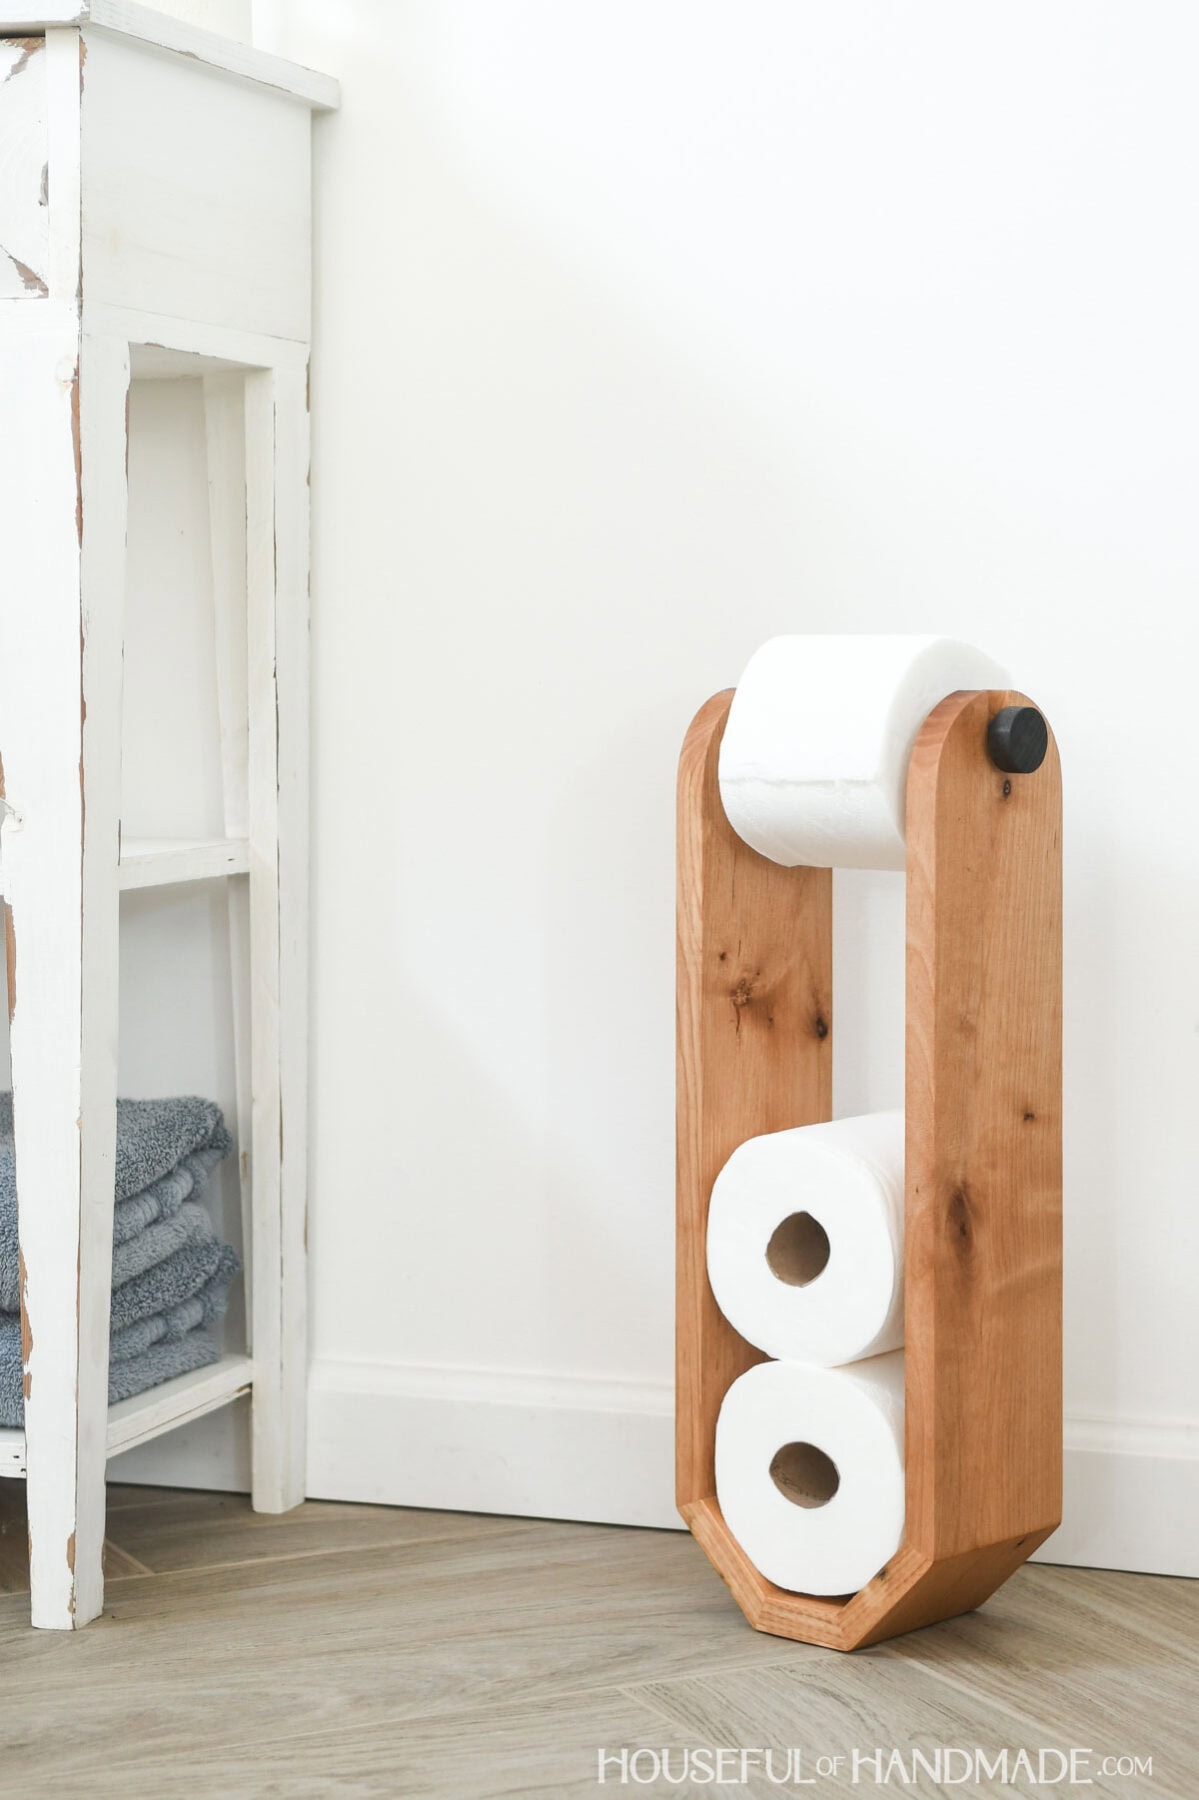
Modern toilet paper stand with room to store 3 extra toilet paper rolls made from alder.

Modern Toilet Paper Stand

Instead of a boring stand like my grandma had, I decided to create a more modern design.

The simple U shaped design holds a dowel on top that locks the roll in place, but is super easy to change when the roll is empty.

And below it there is enough space to store away 3 extra toilet paper rolls. You will never be stranded again!
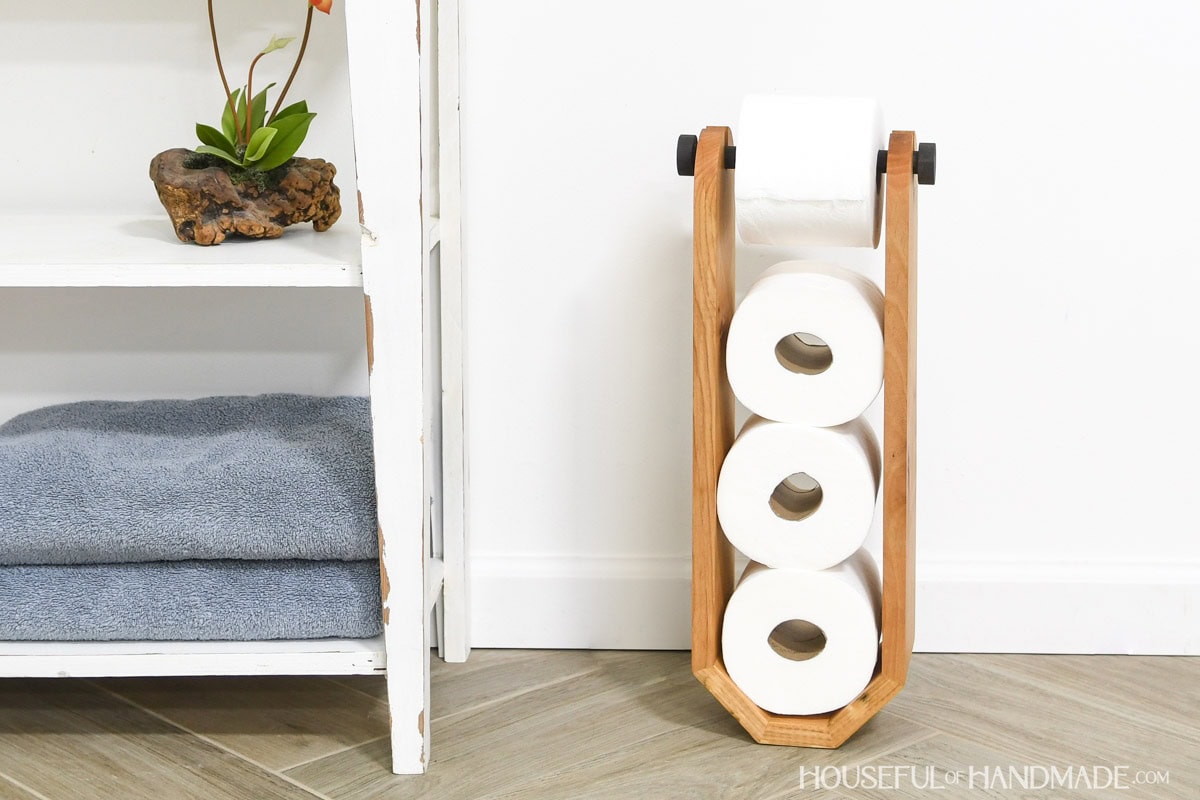
Unique toilet paper holder design with extra space for storage next to bathroom vanity.

The simple design is also simple to build.

All you need is a miter saw to cut the boards at a bevel, drill to add a few holes and a jig saw to shape the top.

In just an afternoon you can turn a 4′ long board into a beautiful toilet paper holder too!
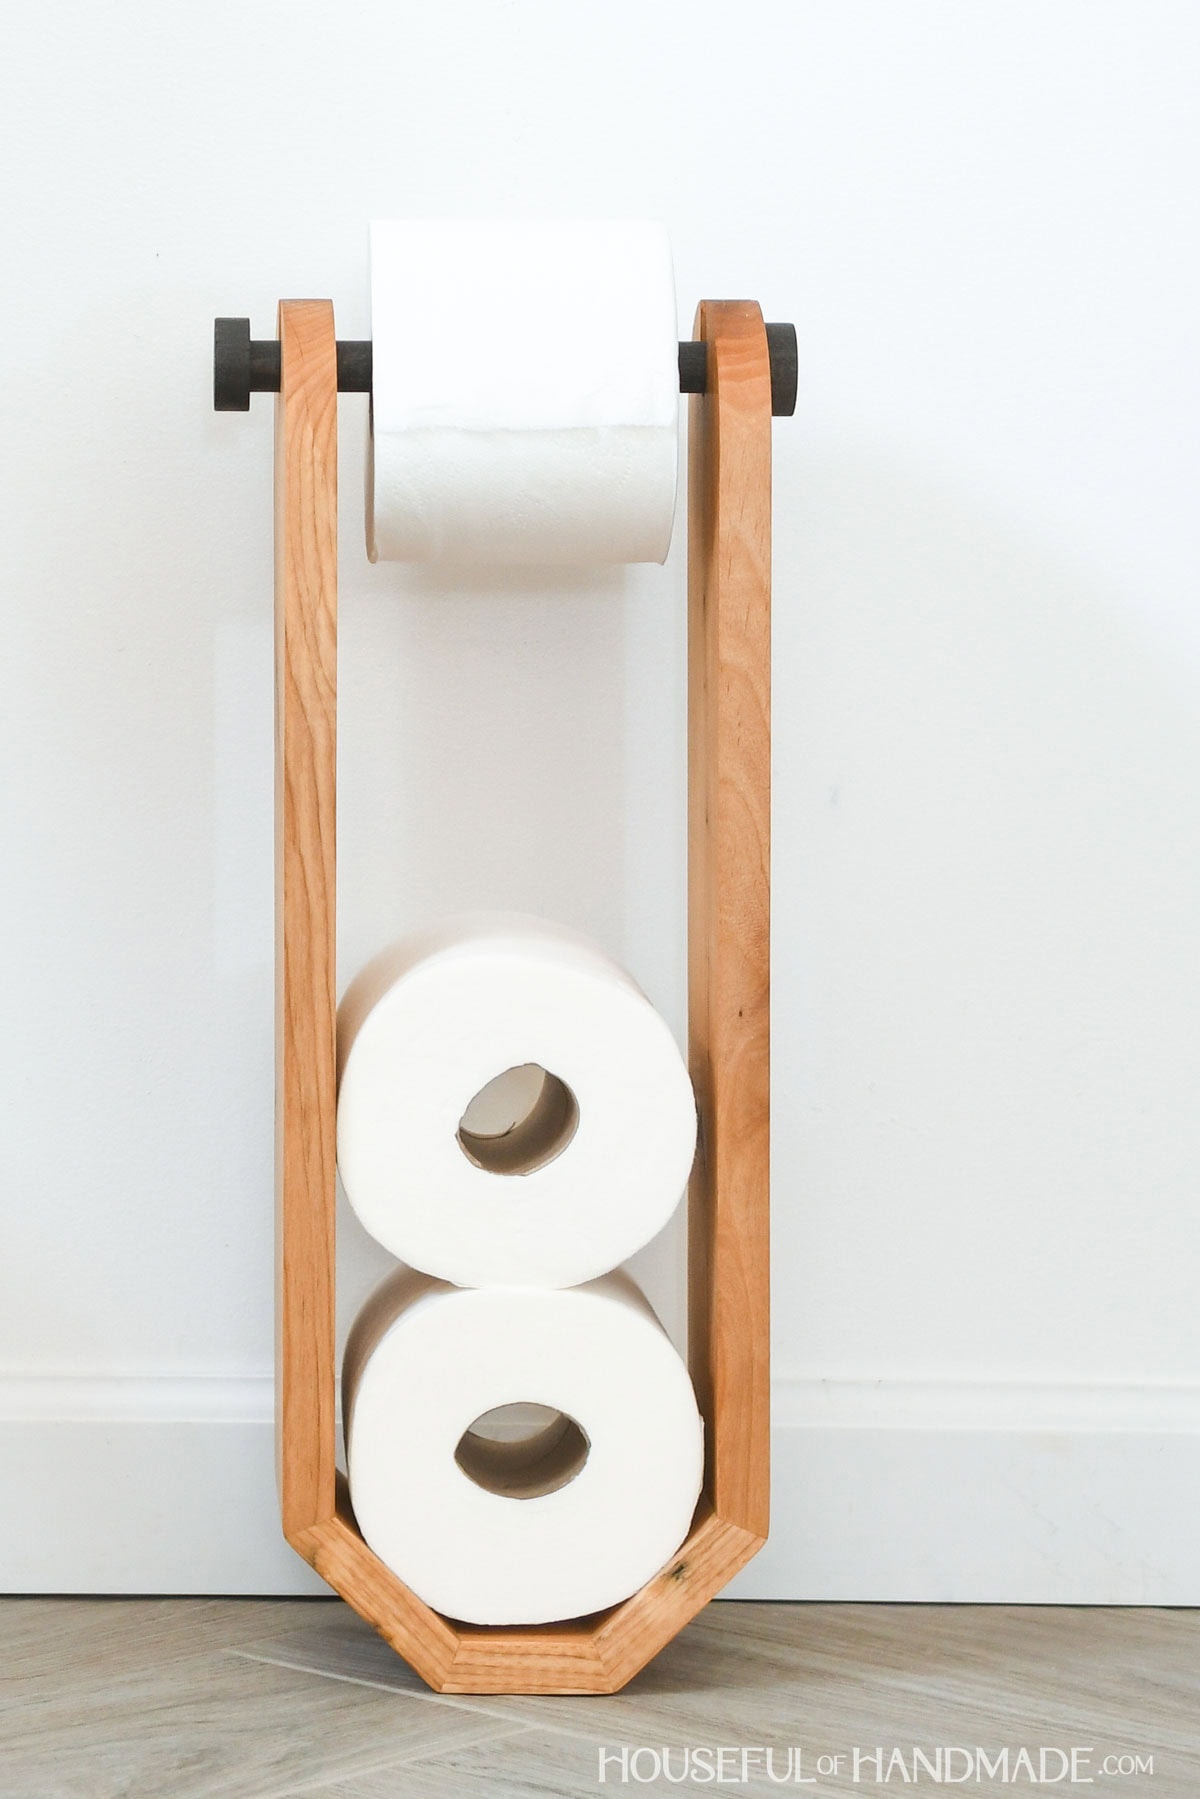
Close up of the freestanding wood toilet paper holder.

How to Build a Toilet Paper Holder Stand

Tools & Materials

Recommended Tools:

Supplies:

  • Wood products
    • (1) 1×6 board, 4′ long
    • (1) 1 1/4″ dowel, 1′ long
    • (1) 3/4″ dowel, 1′ long
  • Wood glue
  • Painters tape

Overall Dimensions

The finished toilet paper holder is ~20 1/4″ tall and 8 1/8″ wide. The base can hold 3 additional rolls for storage.
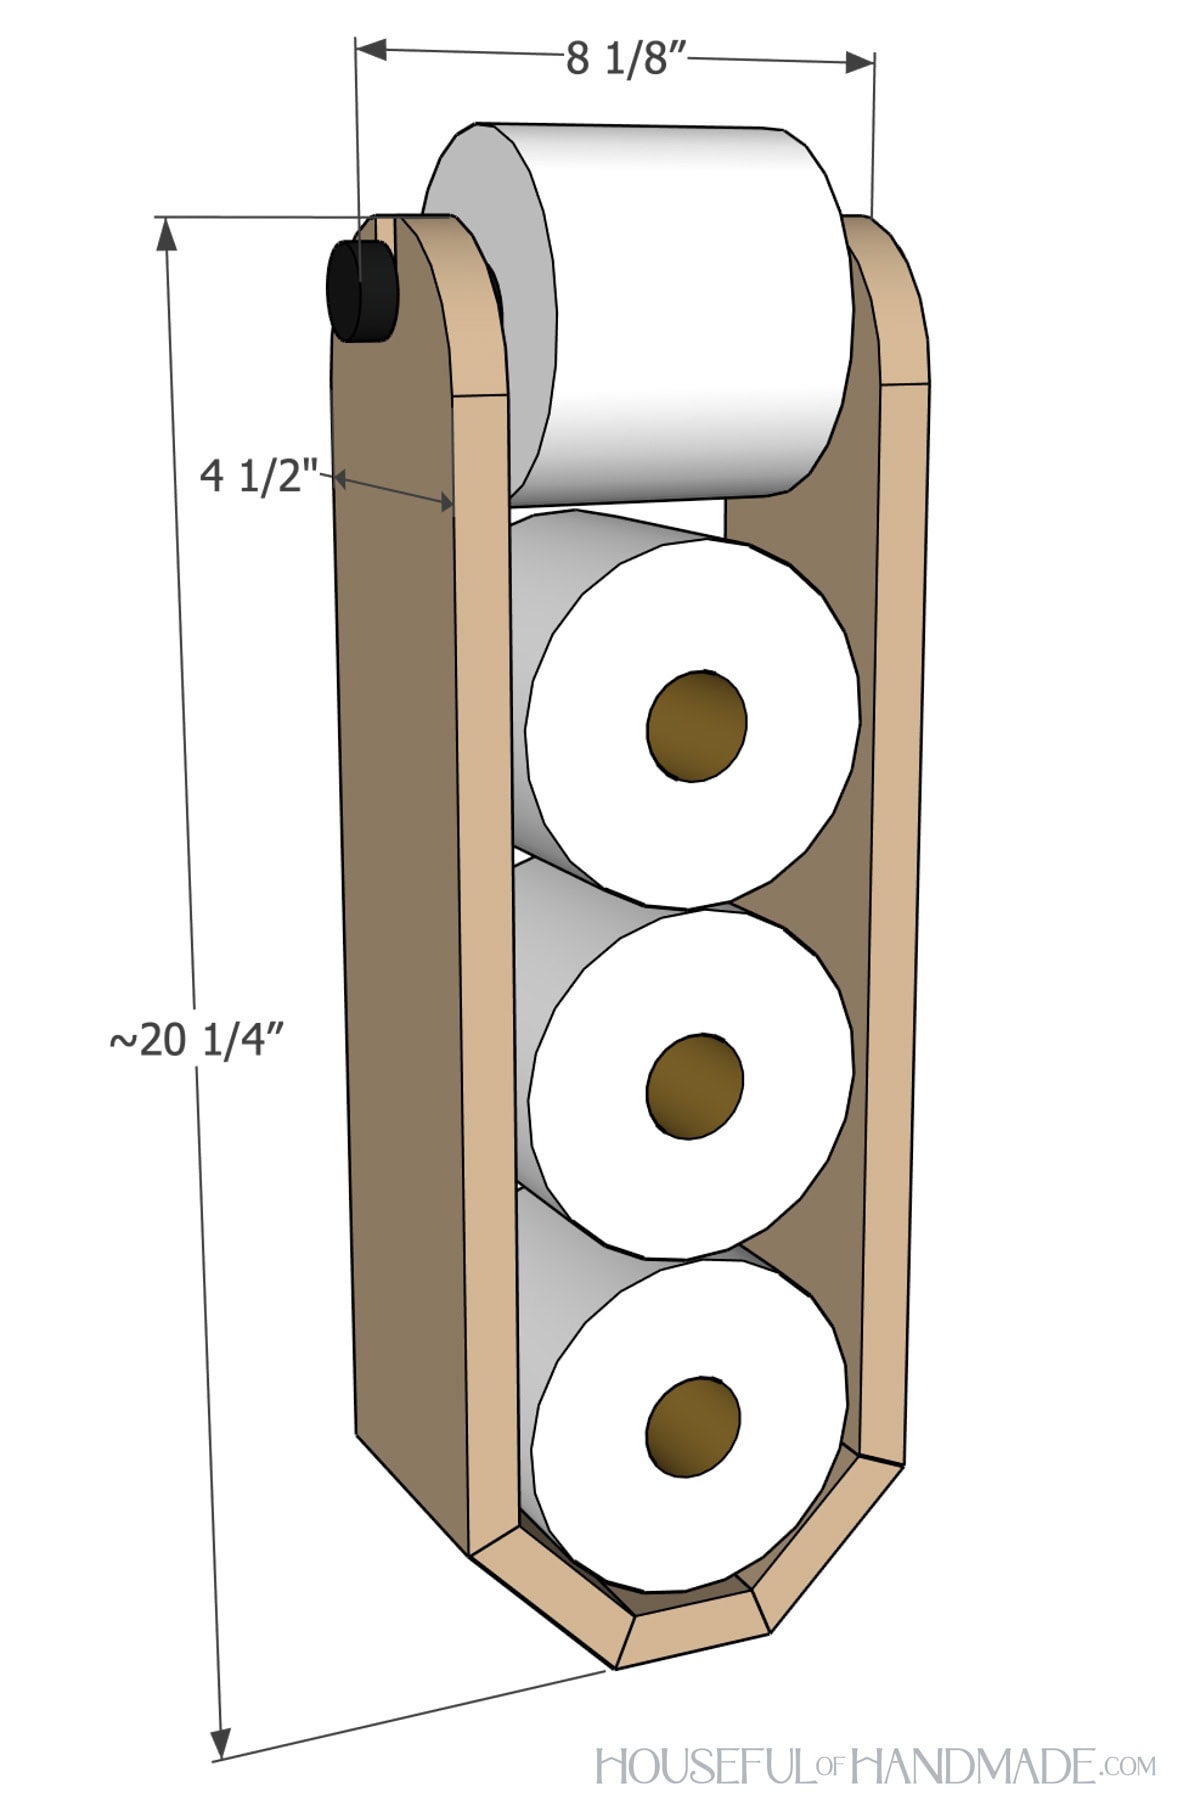
DIY freestanding toilet paper holder with dimensions noted.

Cut List

Rip the 1×6 board (actual width 5 1/2”) down to 4 1/2” wide. Then cut out the pieces according to the easy-to-read table in the PDF plans.
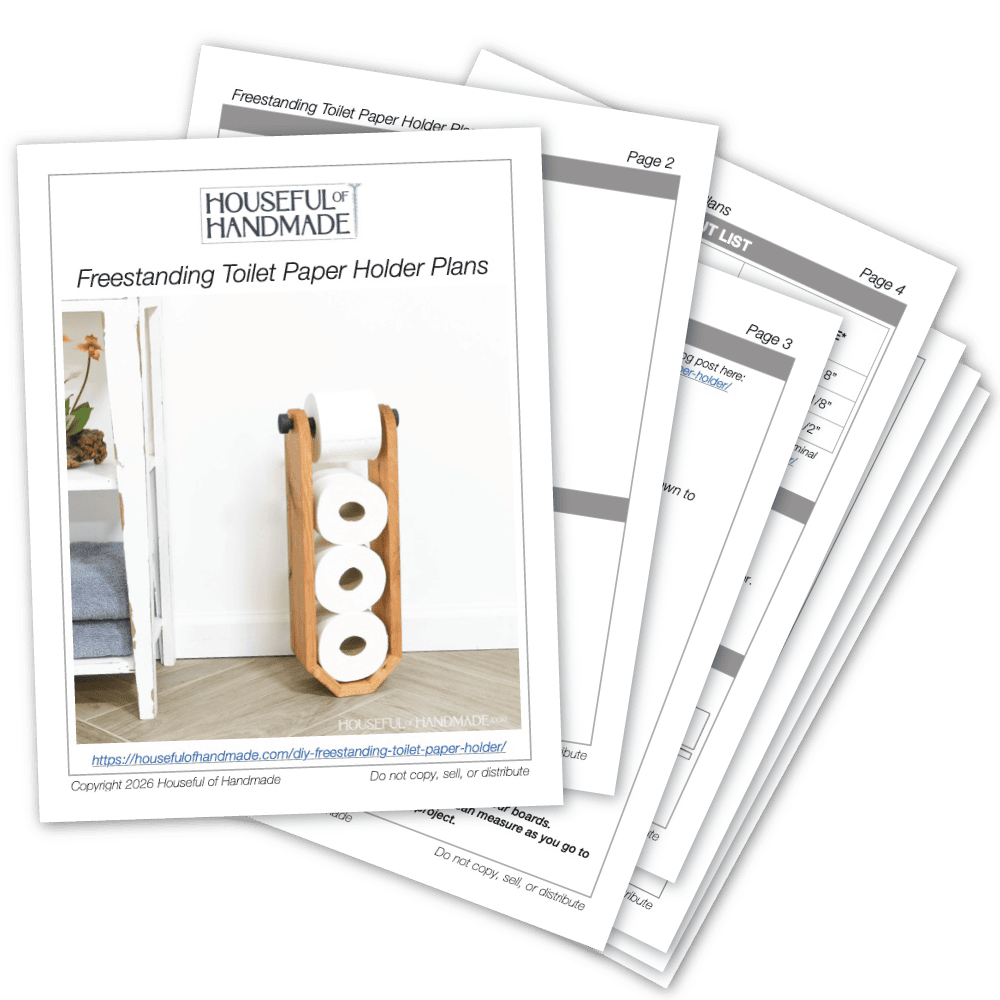
Get the Premium PDF Woodworking Plans

PDF plans include- Easy to Read Cut List, Shopping List, Recommended Tools, Step-by-Step Instructions with 3D drawings, & Helpful Resources

BONUS- 3D SketchUp File

PDF plans for a freestanding toilet paper holder.

Cut the one ends of the side boards and both ends of the lower boards with a bevel as detailed in the plans.
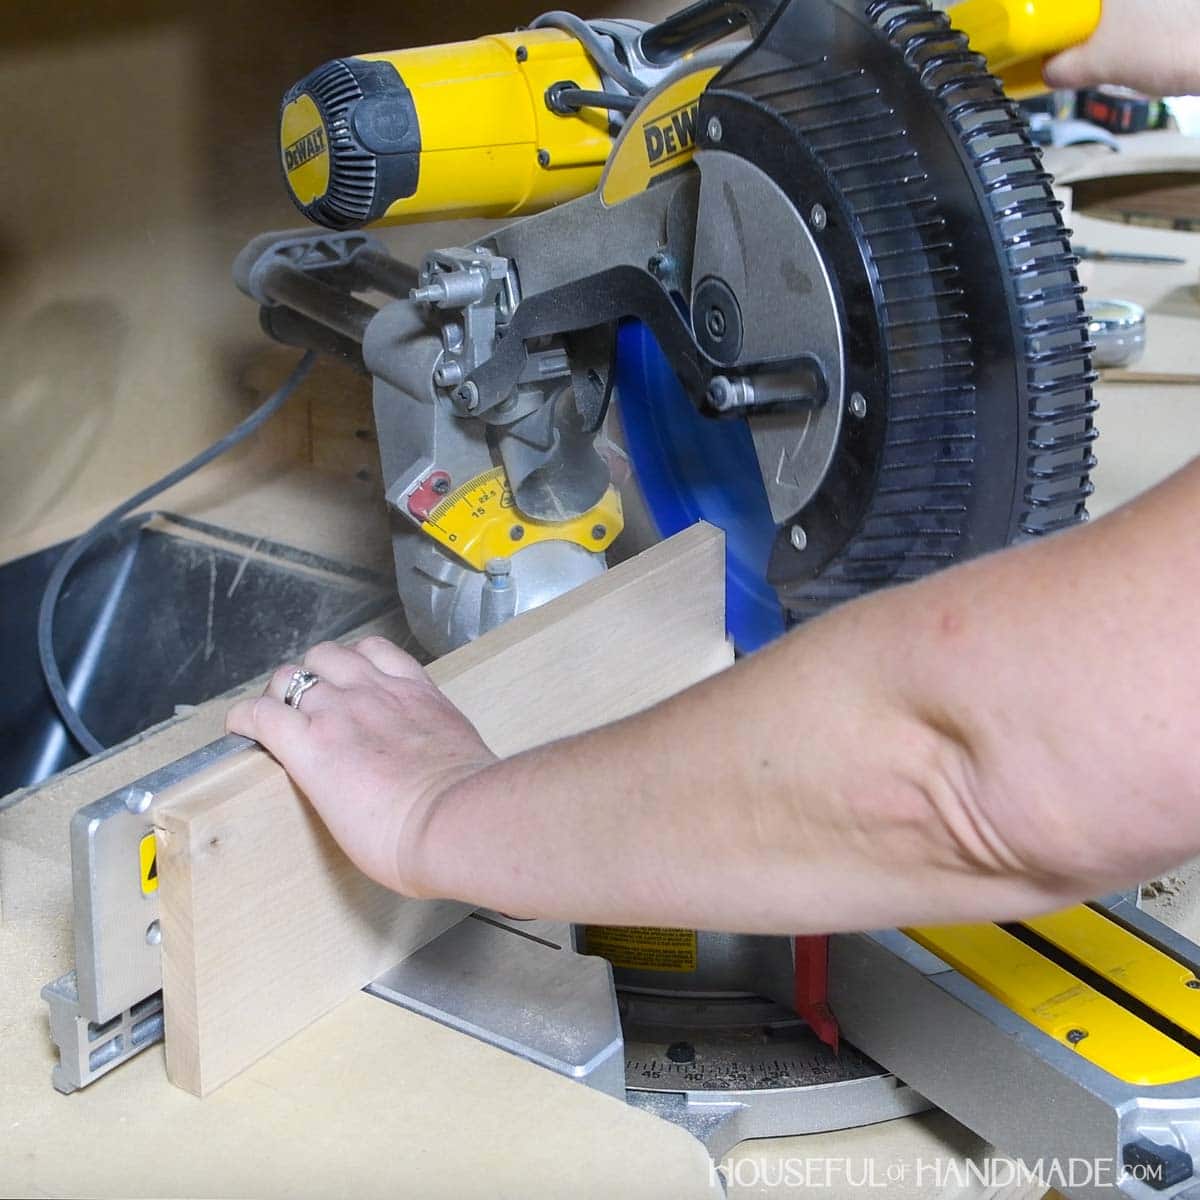
Cutting a bevel on the end of a board with a miter saw.

STEP 1- Shape the sides

On the top of each side board (not the side with the beveled cut), draw a 3/4″ channel in the middle of the board.

Draw an arch on either side of the channel. I traced a small paint can to create my curve. 

Cut it out with a jig saw and sand smooth. 
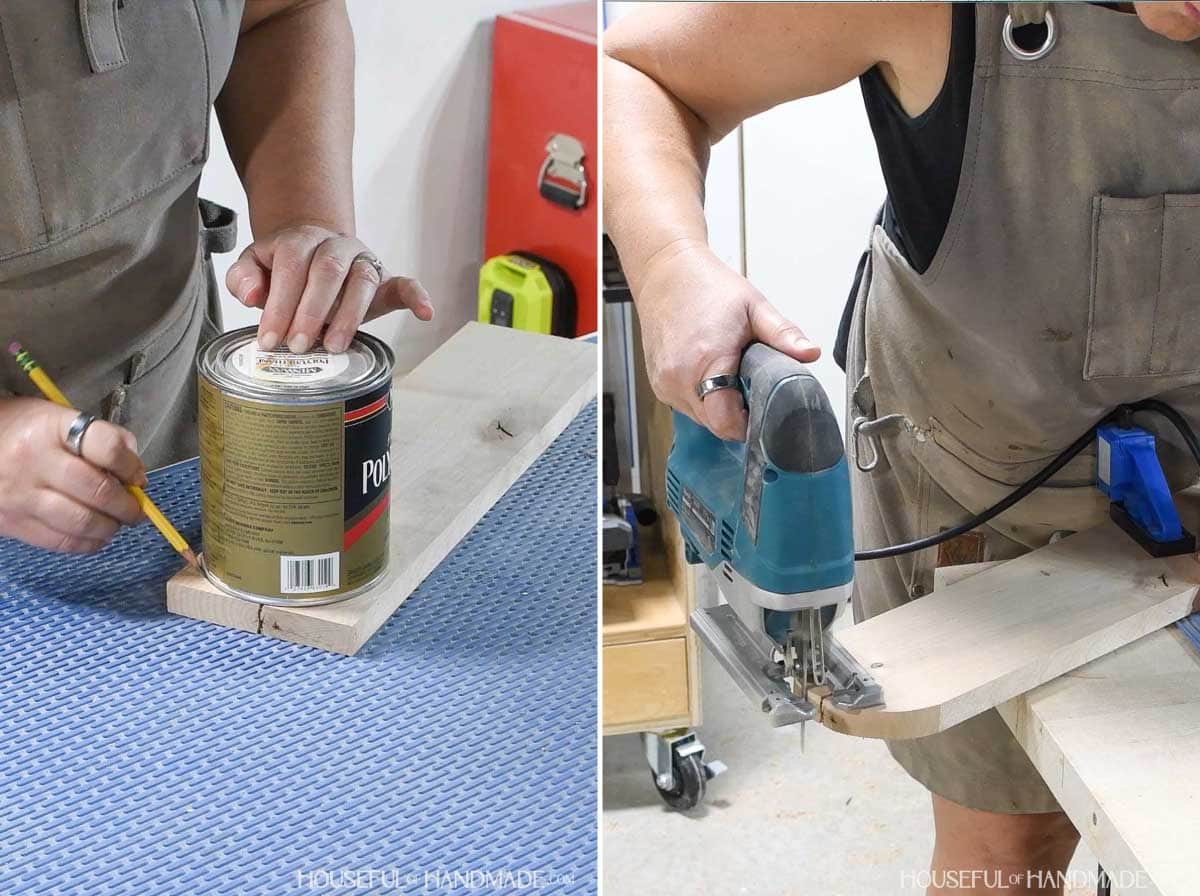
Cutting a curve in the top of the side boards.

Drill a 3/4” hole centered in the channel, 1″ below the top. 

Use a jig saw to cut from the top to the sides of the hole to create a channel.
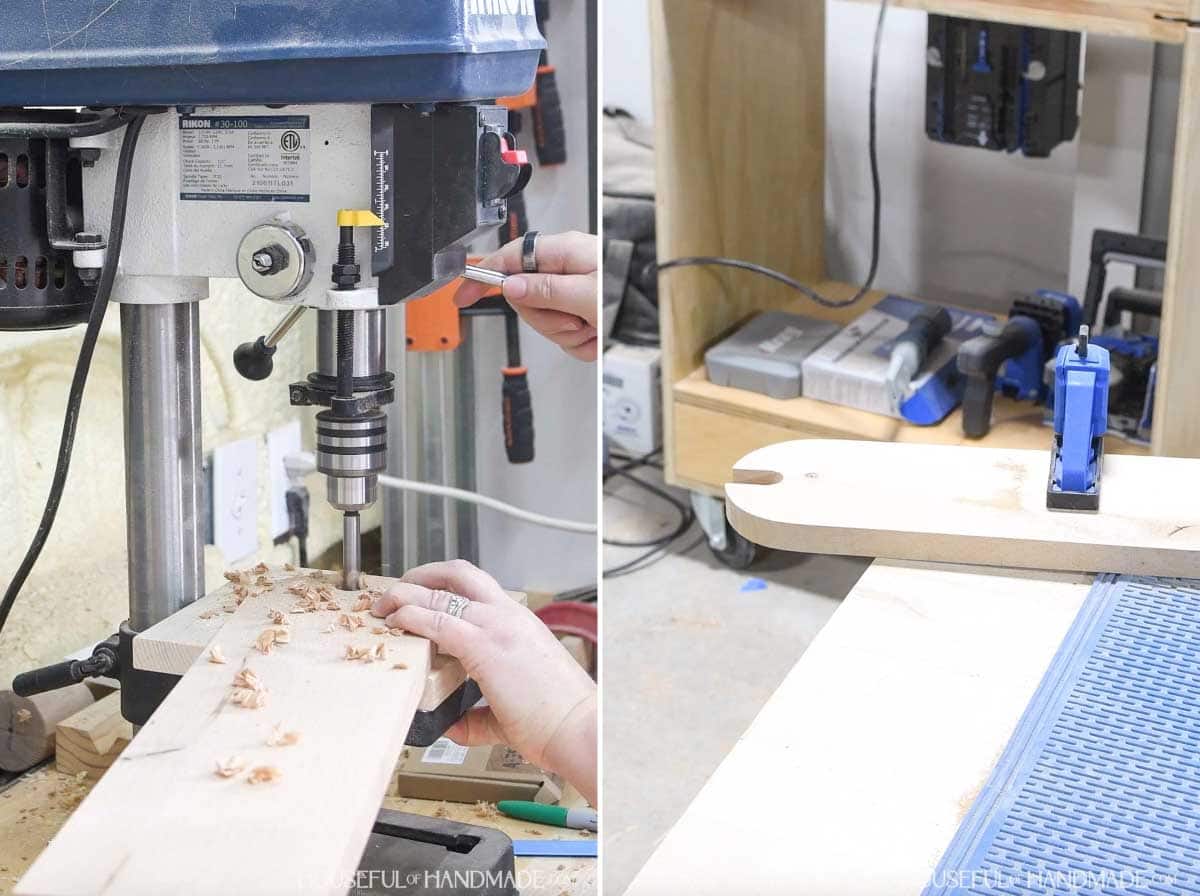
Adding a channel in the top of the side boards.

STEP 2- Glue together the base

Lay out the pieces so the long sides are facing up. Put the two sides on the end, then the lower sides, and the bottom in the middle. 

Line them up carefully so the tip of the beveled cut is touching and the front/back are flush. Place a couple pieces of painters tape across the top to hold them in place. 

Flip over the boards (they should remain stuck together). 
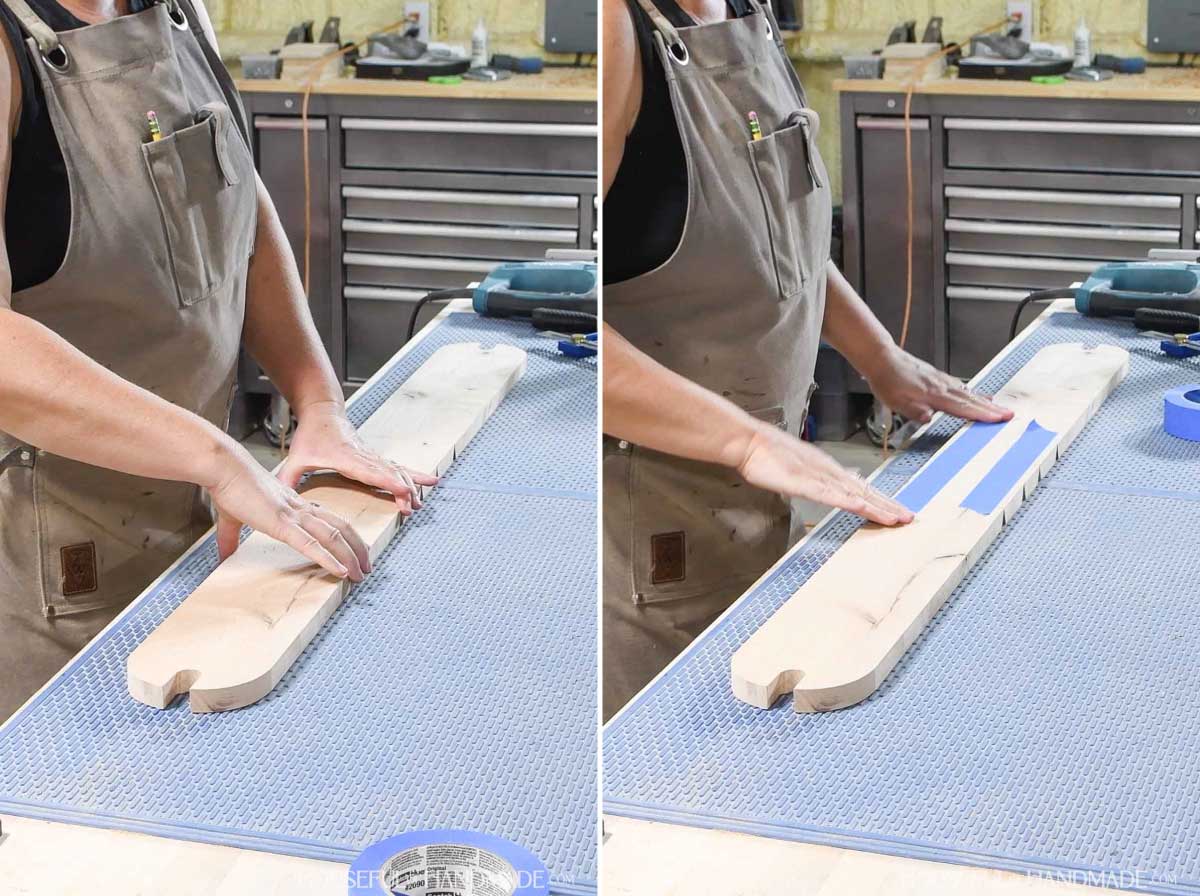
Taping the pieces together for the glue up.

Add wood glue between the boards.

Spread it on the cut ends of the wood to ensure there is glue all over the seam. 
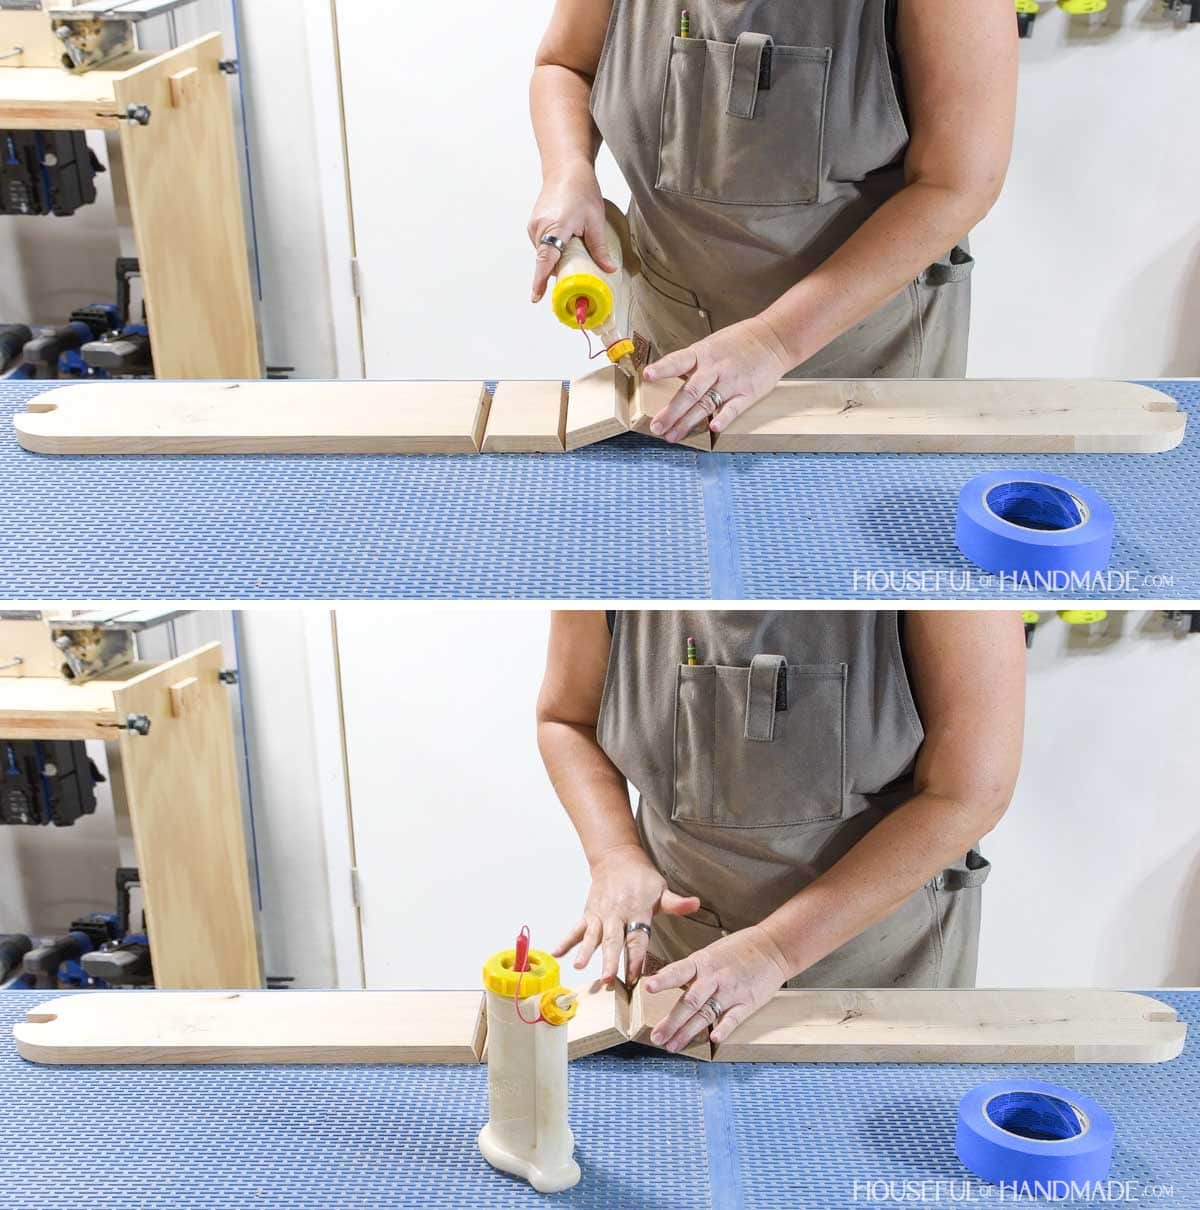
Adding glue to the beveled seams.

Roll one side piece up and around until all the seams close. 
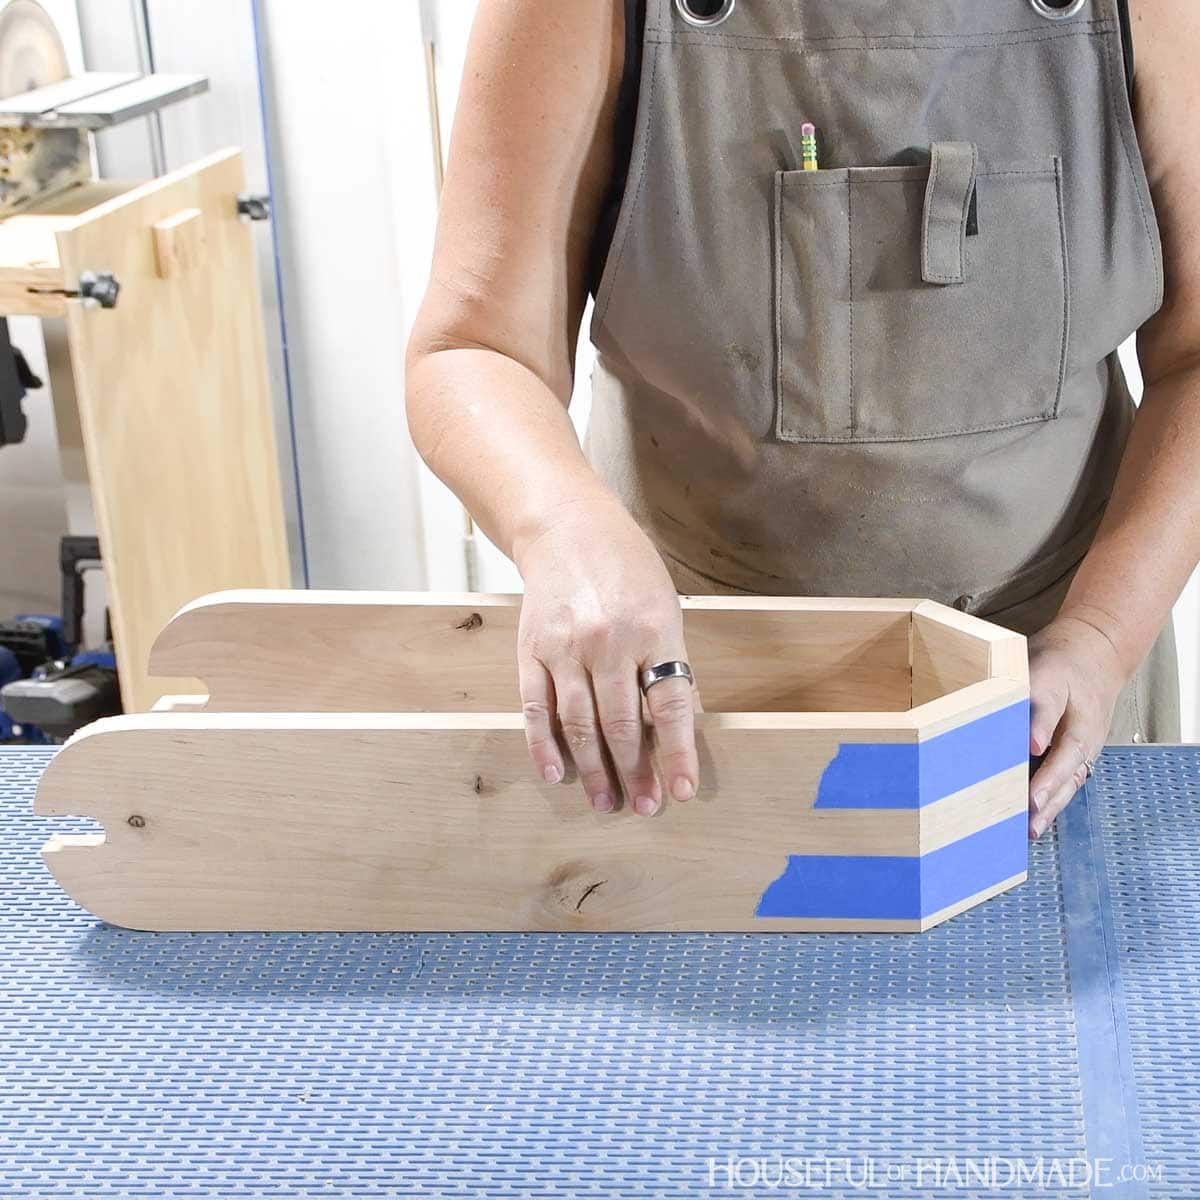
Glueing the toilet paper holder pieces together.

Measure the distance between the sides right above the seams. Cut a scrap of wood this size and place it towards the top to keep the sides parallel. 

Clamp the boards together and allow to dry.
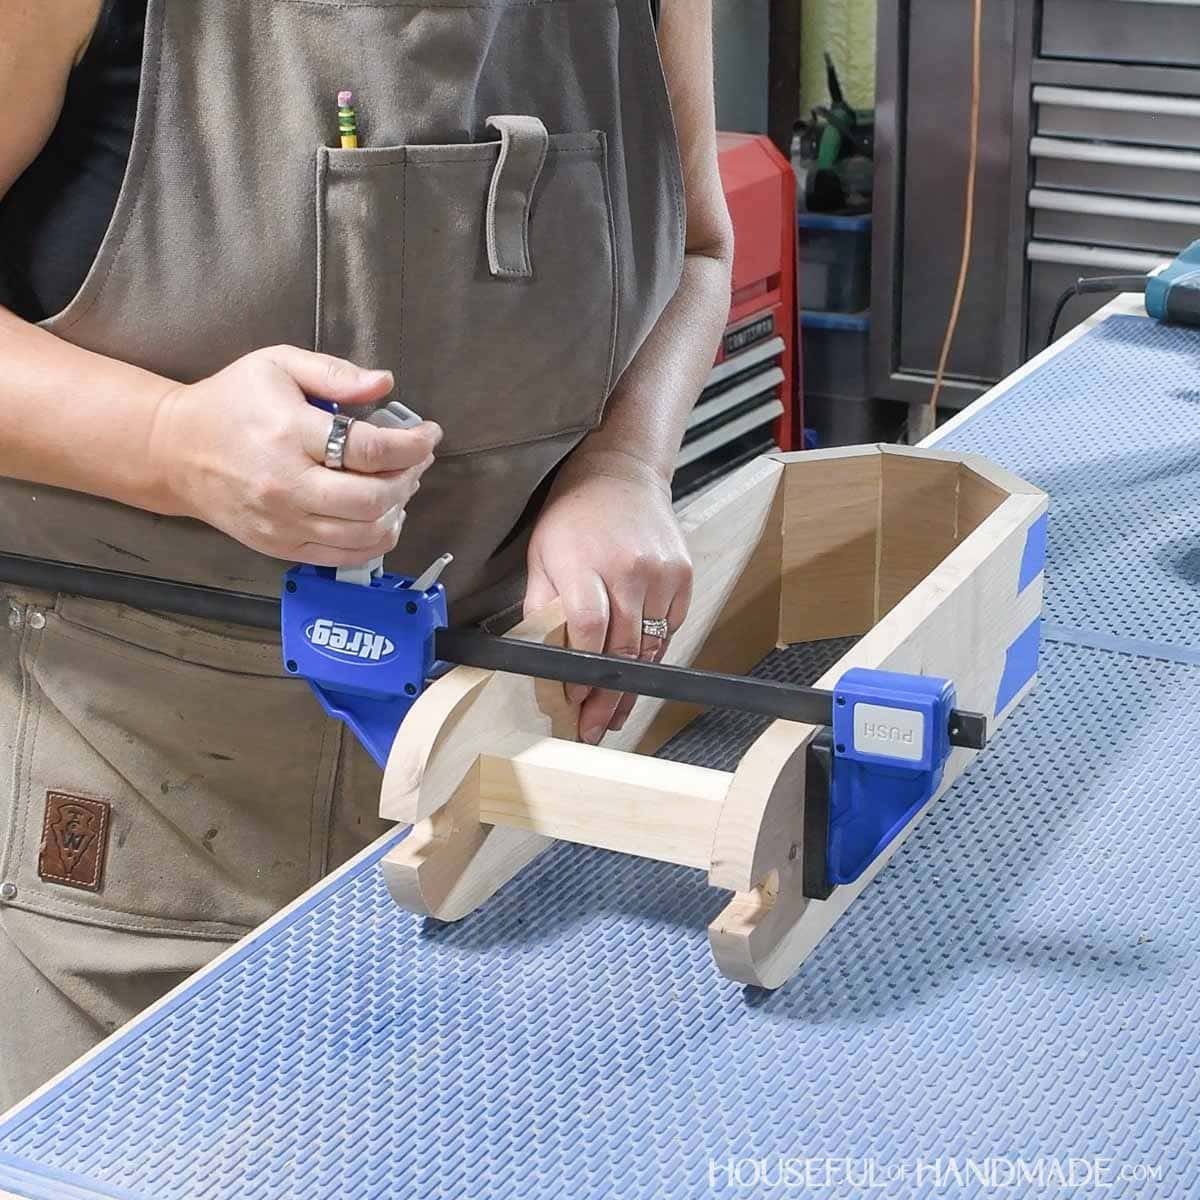
Clamping a scrap between the top and letting dry.

Remove the clamps and painters tape. Use a chisel to clean up any glue squeeze out on the inside seams. 
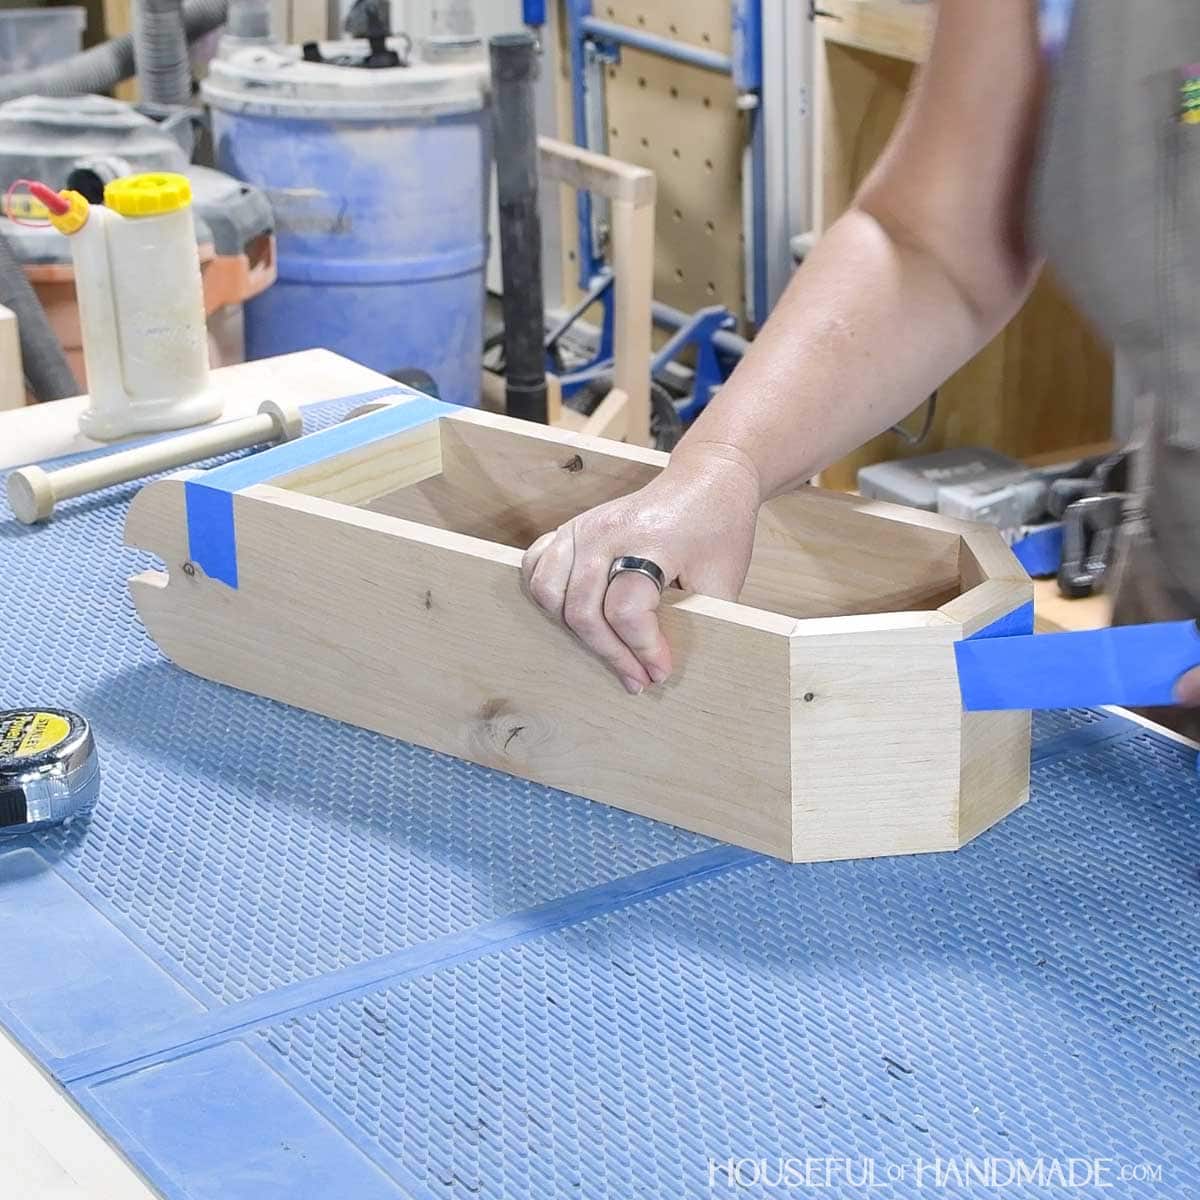
Removing tape from the bottom of the toilet paper stand.

STEP 3- Build the roller

Carefully cut two 1/2” discs off the end of the 1 1/4” dowel.

Using a forstner bit, drill 3/4” holes 1/4” deep in the center of each one. 


EXPERT TIP:
A forstner bit will create a clean, flat bottomed hole that will ensure a strong glue up. 
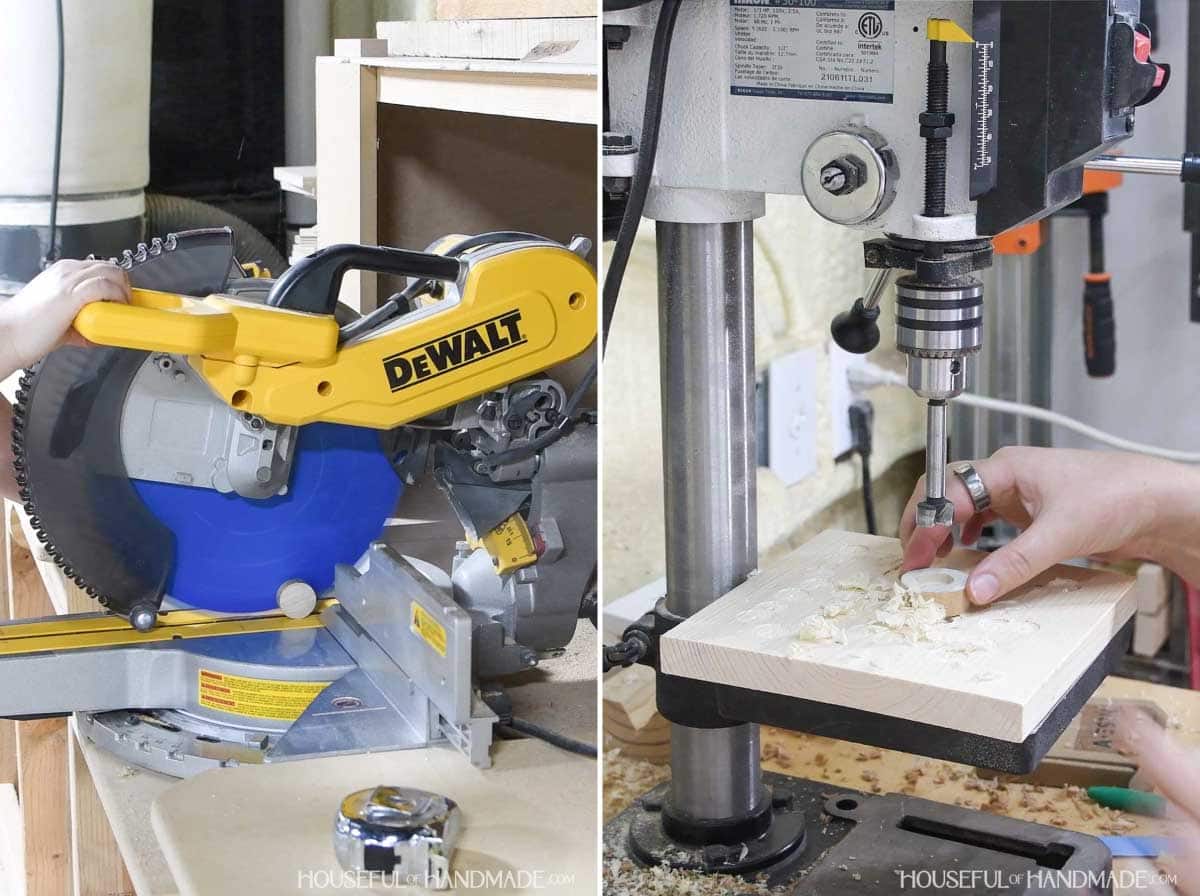
Cutting 1/2" disc from the dowel and adding holes.

Add wood glue inside the holes and attach to the ends of the 3/4” dowel. Clamp and let dry. 

Drop the assembled roller into the channel on the top. It should be easy to drop into the channel and spin. If not, sand the channel or use the jig saw to adjust.
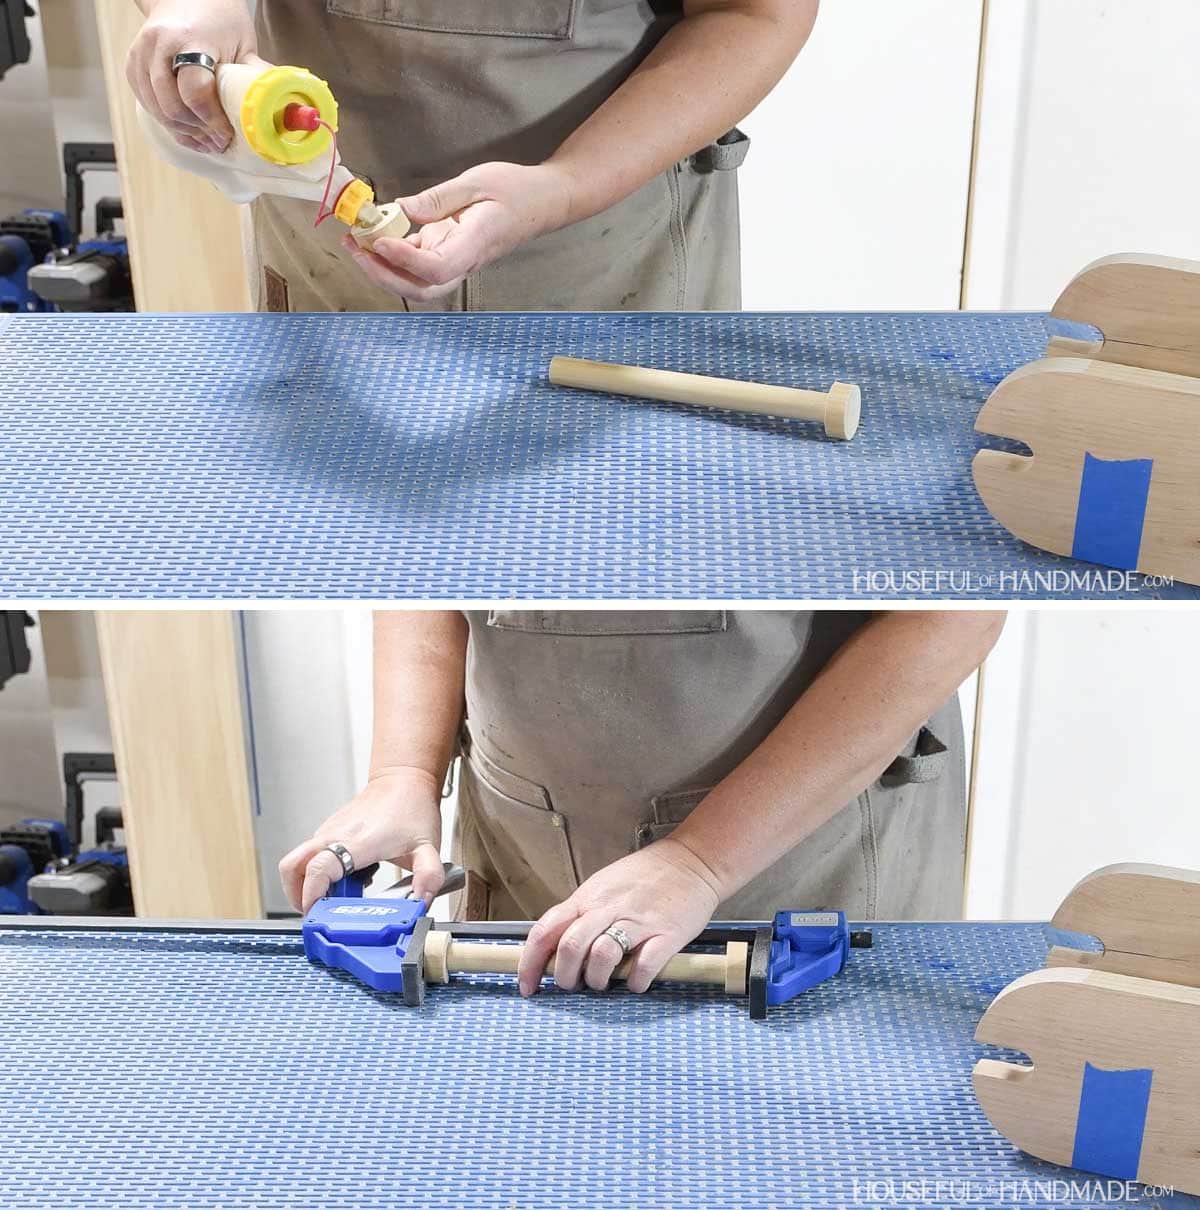
Glueing the ends on the roller.

STEP 4- Finish

Sand and finish the completed toilet paper holder. Make sure to seal it against water since it will be in a bathroom.
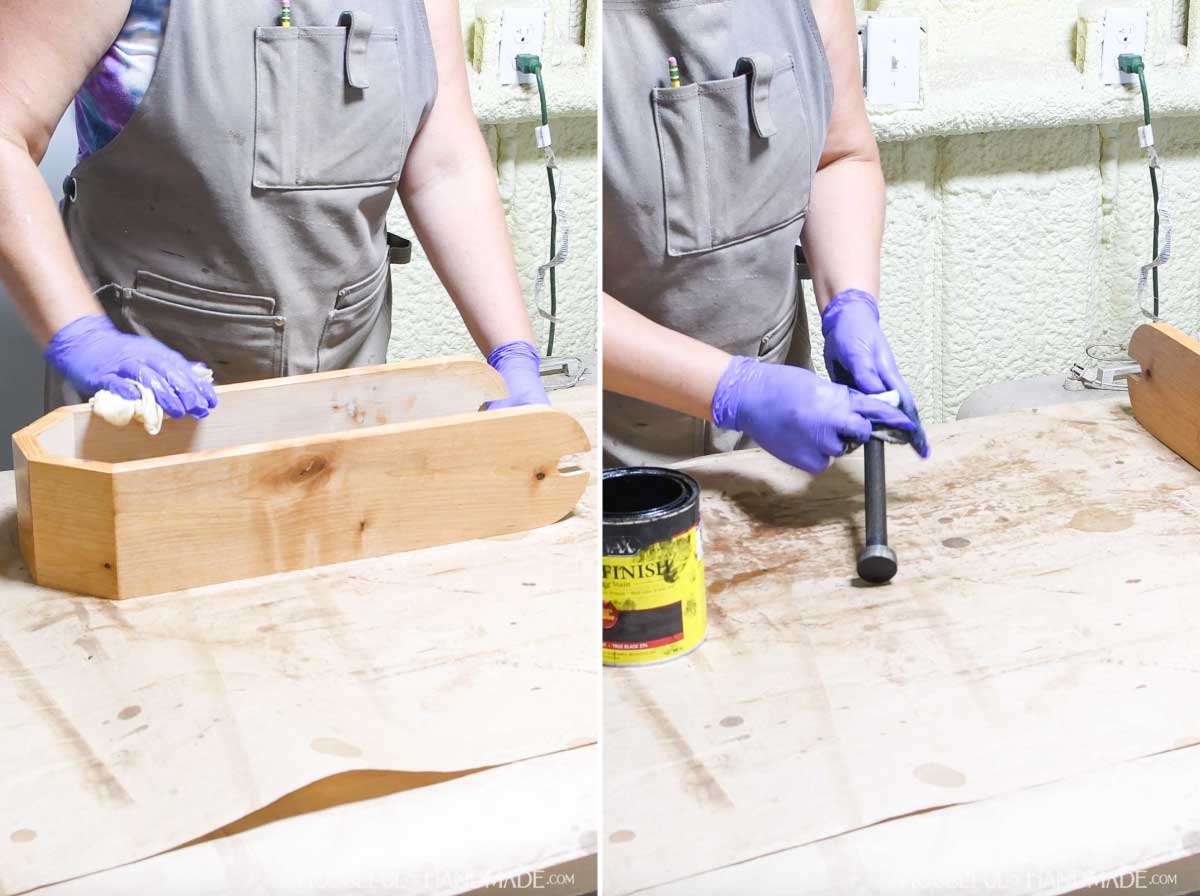
Adding sealer and stain to the finished toilet paper stand.
Don’t Forget to Grab the Printable PDF Plans Here!

/*<![CDATA[*/ (function () { var scriptURL = 'https://sdks.shopifycdn.com/buy-button/latest/buy-button-storefront.min.js'; if (window.ShopifyBuy) { if (window.ShopifyBuy.UI) { ShopifyBuyInit(); } else { loadScript(); } } else { loadScript(); } function loadScript() { var script = document.createElement('script'); script.async = true; script.src = scriptURL; (document.getElementsByTagName('head')[0] || document.getElementsByTagName('body')[0]).appendChild(script); script.onload = ShopifyBuyInit; } function ShopifyBuyInit() { var client = ShopifyBuy.buildClient({ domain: 'houseful-of-handmade.myshopify.com', storefrontAccessToken: '67be1252d864e69b28d4cd5343206ccd', }); ShopifyBuy.UI.onReady(client).then(function (ui) { ui.createComponent('product', { id: '9488612786364', node: document.getElementById('product-component-1785781343394'), moneyFormat: '%24%7B%7Bamount%7D%7D', options: { "product": { "styles": { "product": { "@media (min-width: 601px)": { "max-width": "calc(25% – 20px)", "margin-left": "20px", "margin-bottom": "50px" } }, "title": { "color": "#ffffff" }, "button": { "font-size": "16px", "padding-top": "16px", "padding-bottom": "16px", ":hover": { "background-color": "#326963" }, "background-color": "#37756e", ":focus": { "background-color": "#326963" }, "border-radius": "15px", "padding-left": "80px", "padding-right": "80px" }, "quantityInput": { "font-size": "16px", "padding-top": "16px", "padding-bottom": "16px" }, "price": { "font-size": "16px", "color": "#ffffff" }, "compareAt": { "font-size": "13.6px", "color": "#ffffff" }, "unitPrice": { "font-size": "13.6px", "color": "#ffffff" } }, "text": { "button": "Add to cart" } }, "productSet": { "styles": { "products": { "@media (min-width: 601px)": { "margin-left": "-20px" } } } }, "modalProduct": { "contents": { "img": false, "imgWithCarousel": true, "button": false, "buttonWithQuantity": true }, "styles": { "product": { "@media (min-width: 601px)": { "max-width": "100%", "margin-left": "0px", "margin-bottom": "0px" } }, "button": { "font-size": "16px", "padding-top": "16px", "padding-bottom": "16px", ":hover": { "background-color": "#326963" }, "background-color": "#37756e", ":focus": { "background-color": "#326963" }, "border-radius": "15px", "padding-left": "80px", "padding-right": "80px" }, "quantityInput": { "font-size": "16px", "padding-top": "16px", "padding-bottom": "16px" }, "title": { "font-family": "Helvetica Neue, sans-serif", "font-weight": "bold", "font-size": "26px", "color": "#4c4c4c" }, "price": { "font-family": "Helvetica Neue, sans-serif", "font-weight": "normal", "font-size": "18px", "color": "#4c4c4c" }, "compareAt": { "font-family": "Helvetica Neue, sans-serif", "font-weight": "normal", "font-size": "15.299999999999999px", "color": "#4c4c4c" }, "unitPrice": { "font-family": "Helvetica Neue, sans-serif", "font-weight": "normal", "font-size": "15.299999999999999px", "color": "#4c4c4c" } }, "text": { "button": "Add to cart" } }, "option": {}, "cart": { "styles": { "button": { "font-size": "16px", "padding-top": "16px", "padding-bottom": "16px", ":hover": { "background-color": "#326963" }, "background-color": "#37756e", ":focus": { "background-color": "#326963" }, "border-radius": "15px" }, "title": { "color": "#121212" }, "header": { "color": "#121212" }, "lineItems": { "color": "#121212" }, "subtotalText": { "color": "#121212" }, "subtotal": { "color": "#121212" }, "notice": { "color": "#121212" }, "currency": { "color": "#121212" }, "close": { "color": "#121212", ":hover": { "color": "#121212" } }, "empty": { "color": "#121212" }, "noteDescription": { "color": "#121212" }, "discountText": { "color": "#121212" }, "discountIcon": { "fill": "#121212" }, "discountAmount": { "color": "#121212" }, "cart": { "background-color": "#f4f4f4" }, "footer": { "background-color": "#f4f4f4" } }, "text": { "total": "Subtotal", "button": "Checkout" } }, "toggle": { "styles": { "toggle": { "background-color": "#37756e", ":hover": { "background-color": "#326963" }, ":focus": { "background-color": "#326963" } }, "count": { "font-size": "16px" } } }, "lineItem": { "styles": { "variantTitle": { "color": "#121212" }, "title": { "color": "#121212" }, "price": { "color": "#121212" }, "fullPrice": { "color": "#121212" }, "discount": { "color": "#121212" }, "discountIcon": { "fill": "#121212" }, "quantity": { "color": "#121212" }, "quantityIncrement": { "color": "#121212", "border-color": "#121212" }, "quantityDecrement": { "color": "#121212", "border-color": "#121212" }, "quantityInput": { "color": "#121212", "border-color": "#121212" } } } }, }); }); } })(); /*]]>*/

You did it!

Place the roller inside the center of a roll of toilet paper and drop it into the channel to lock it in place.

Then place up to 3 extra rolls below for later. 
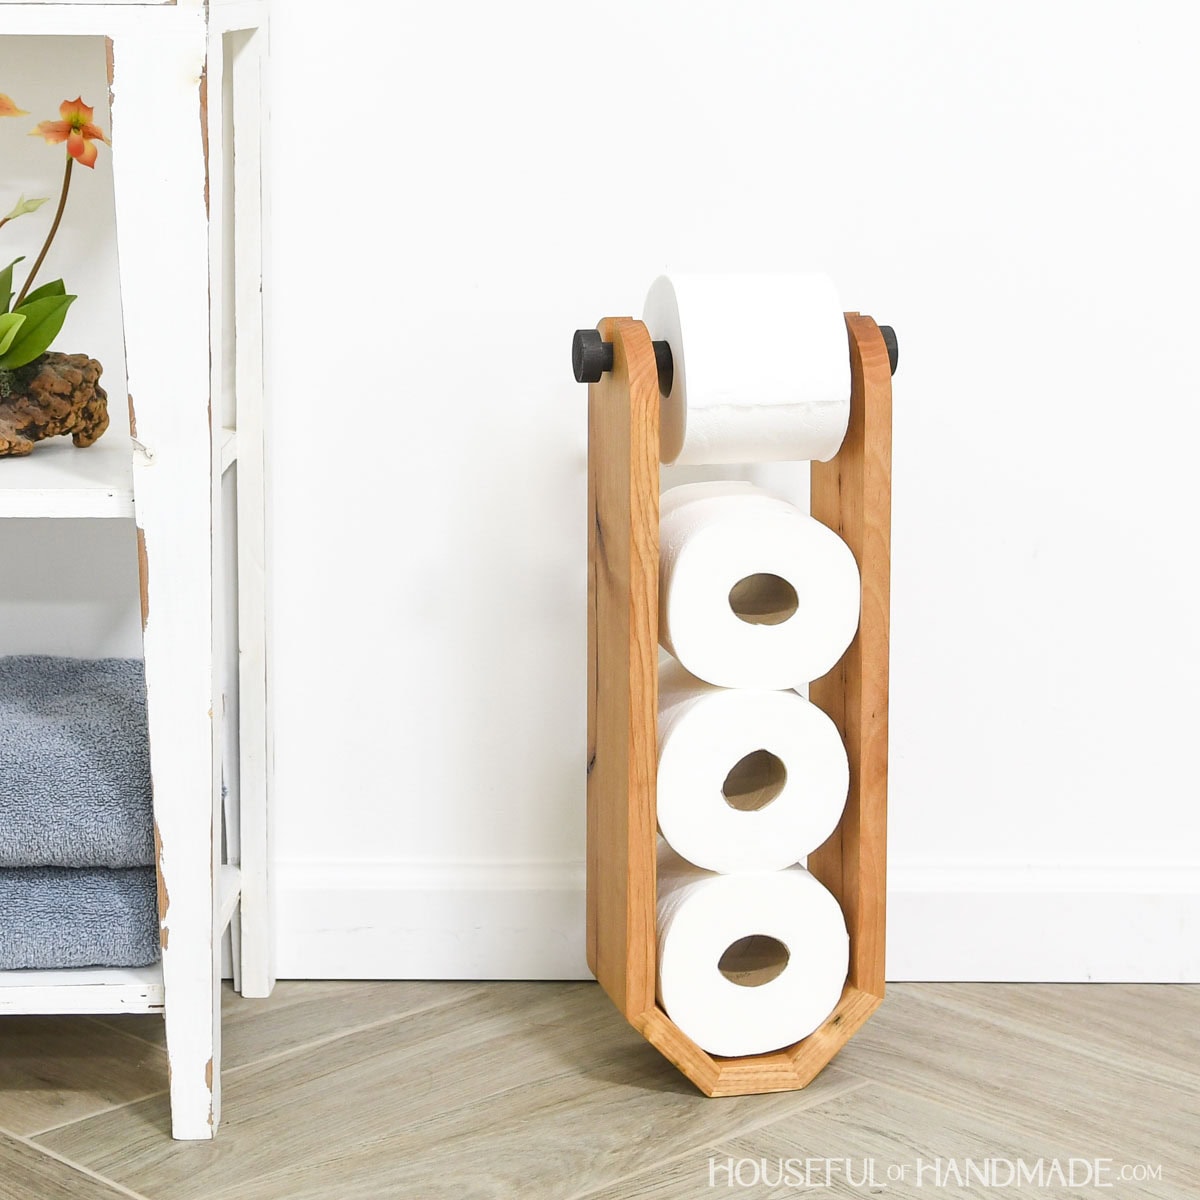
DIY freestanding toilet paper holder with storage for 3 additional toilet paper rolls.

More Scrap Wood Projects

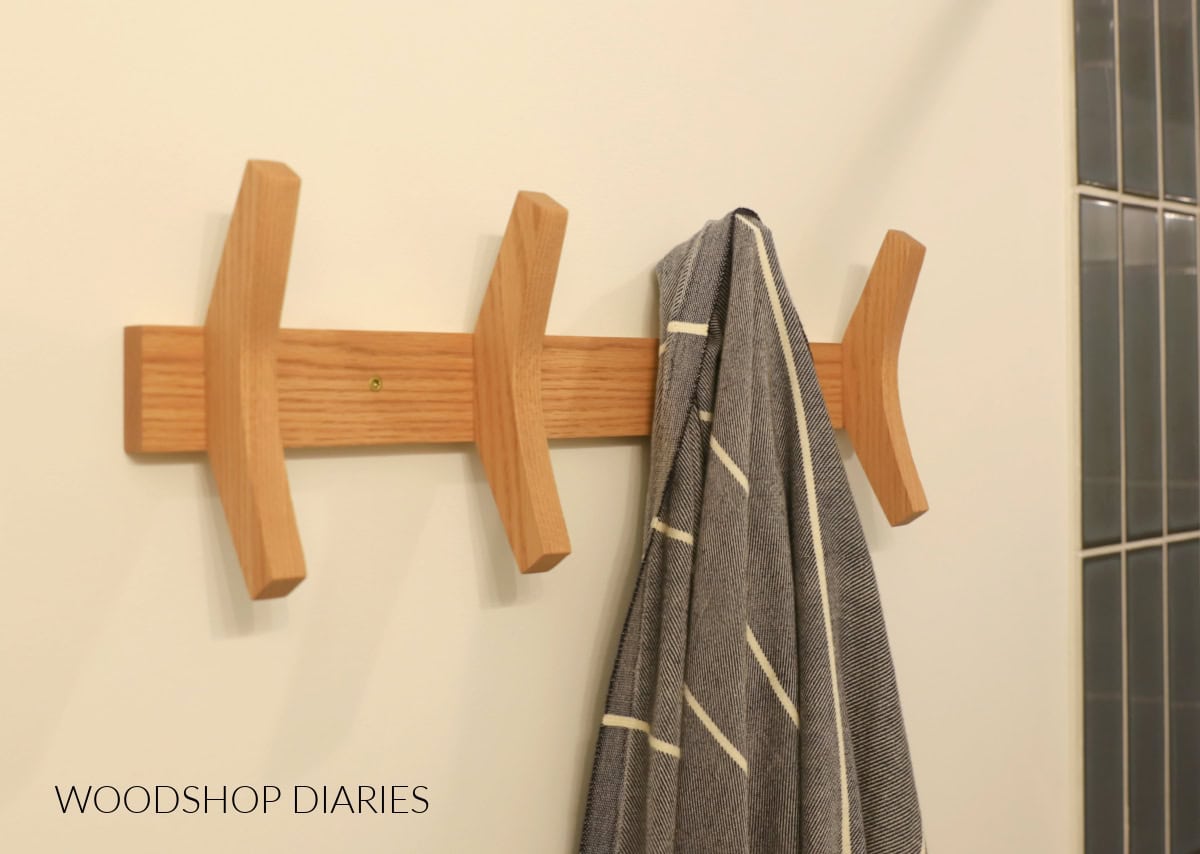
This is the first project for this year’s Scrap Wood Summer!

My friend Shara from Woodshop Diaries and I will share a new project made from scraps every Tuesday throughout August. It’s the best time to have some fun and clean out the scrap pile.

I’ll share each week’s new projects below so you can use up your scraps too!
Happy building!

-Kati with picture of blog author Kati

Would you like to save this tutorial?

I'll email this post to you, so you can come back to it later!