I was sick of losing things under the kitchen sink. And to get to items from the back, I had to pull everything out.
It was past time to get this space organized!
So armed with just a few scraps of 1/2″ and 1/4″ plywood I created the ultimate under sink organizers.
This post may contain affiliate links. As an Amazon Associate I earn from qualifying purchases. Click here to read my full disclosure policy.
Each side is organized for efficiency and to maximize the space. Now I can find everything quickly and it looks so much better.
Two Easy DIY Organizers
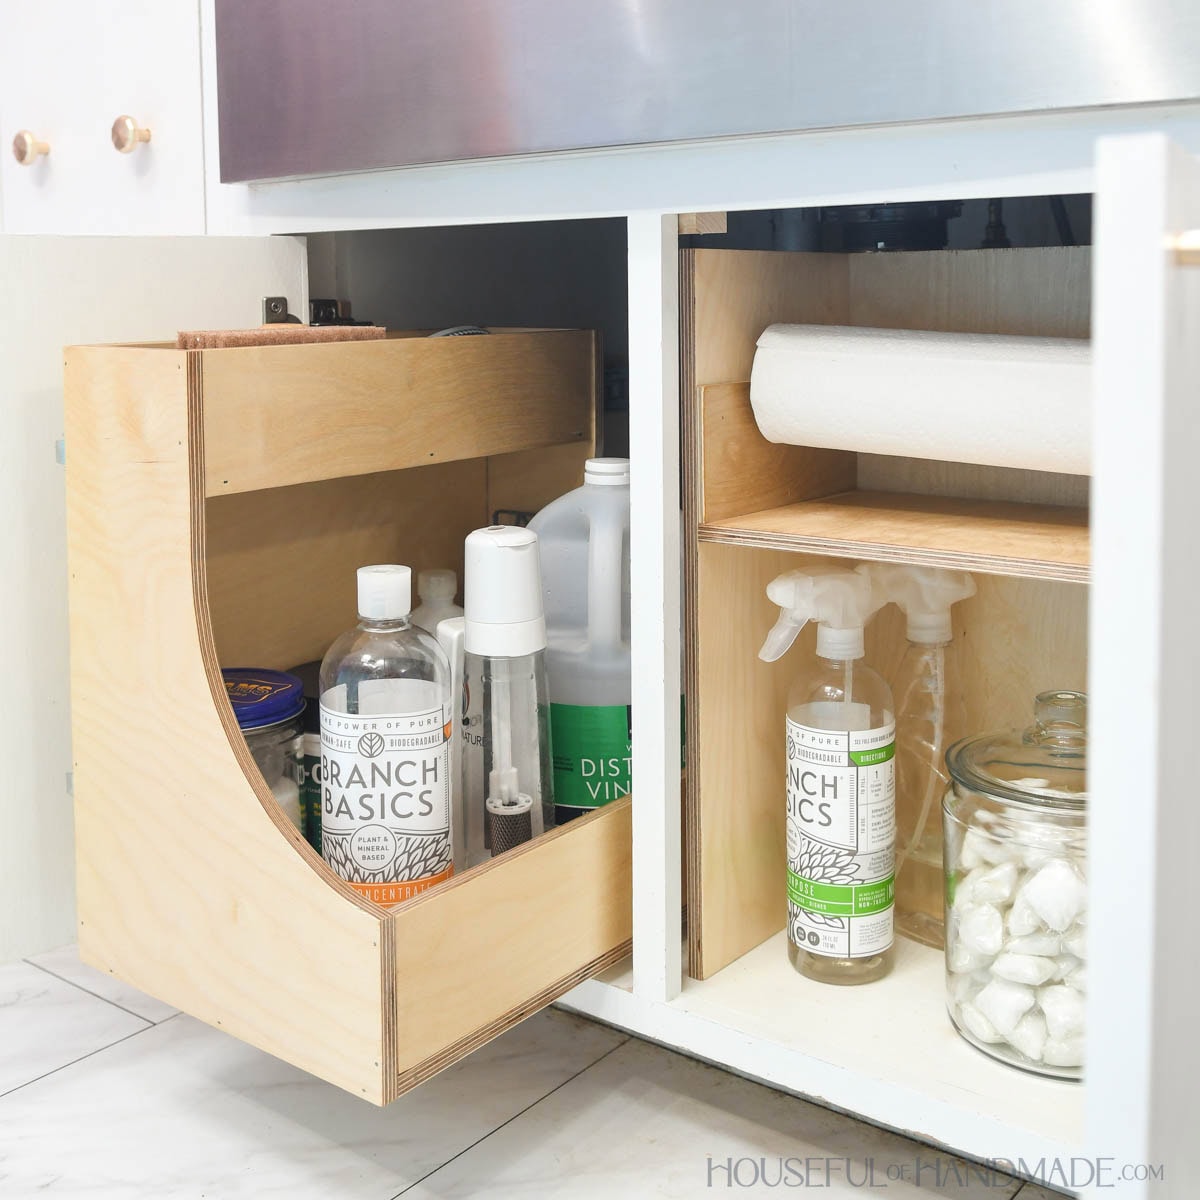
To use up every available inch of storage space under my sink I built 2 different organizers: a drawer and a shelf.
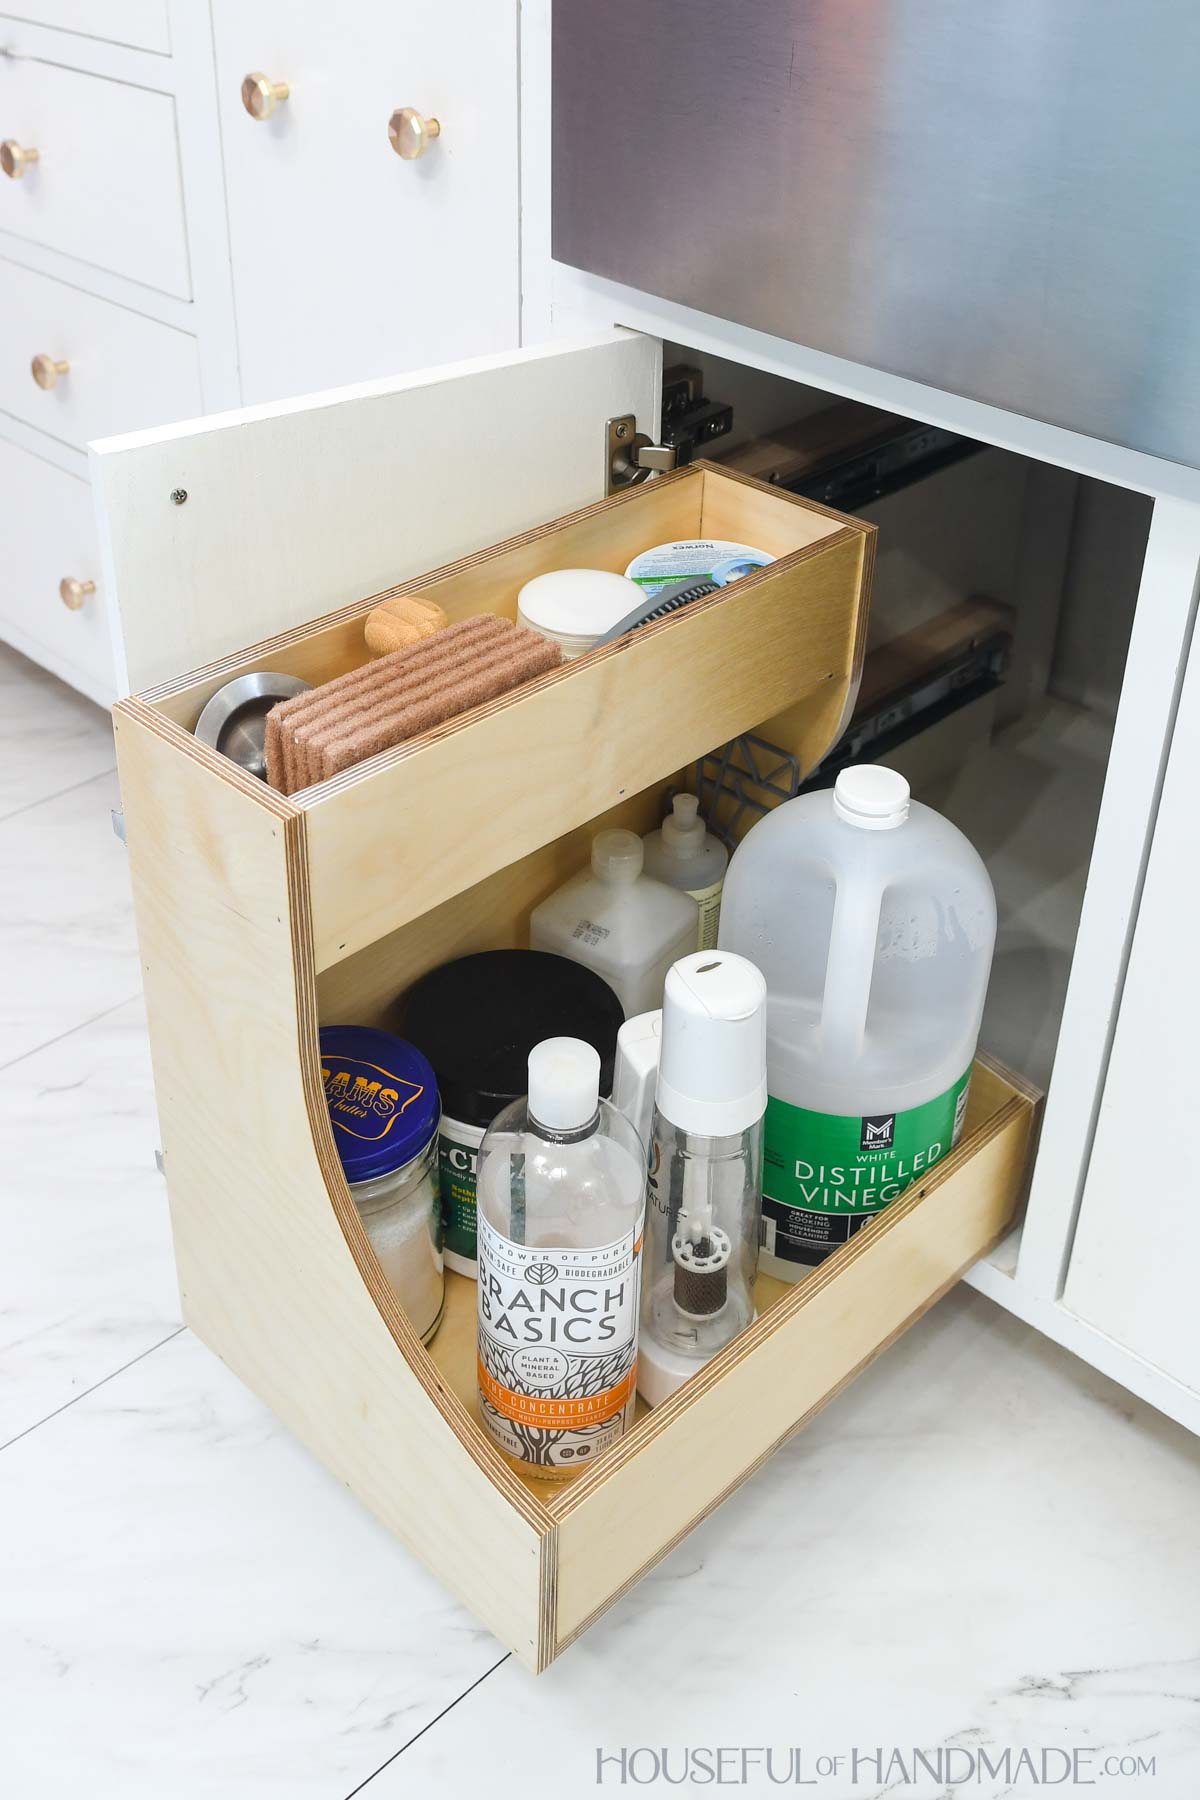
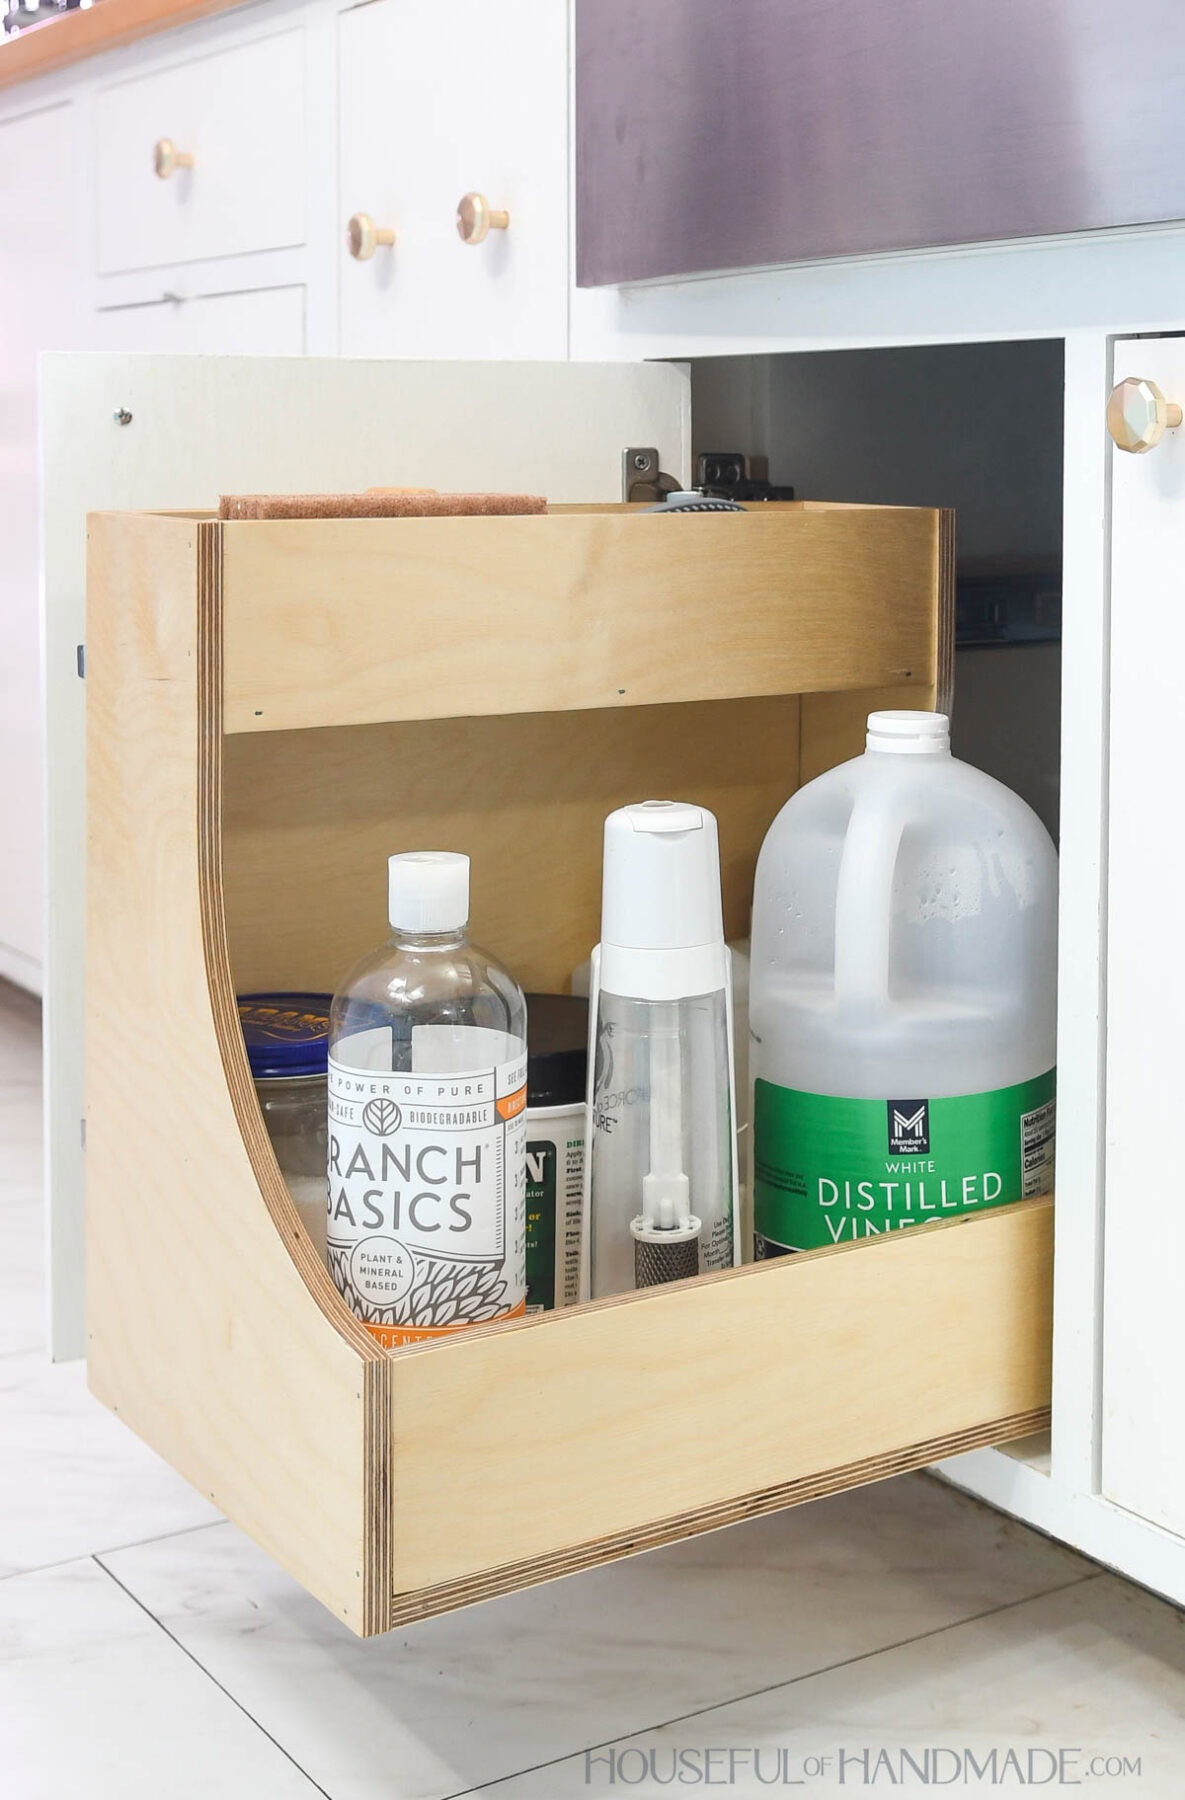
The drawer is two tiered. The lower shelf is large and holds all my cleaning supplies. And the small upper shelf is perfect for sponges and little items.
This drawer is mounted to one side of the cabinet so you do not need a center support. And it makes the bottom nice and open for large items.
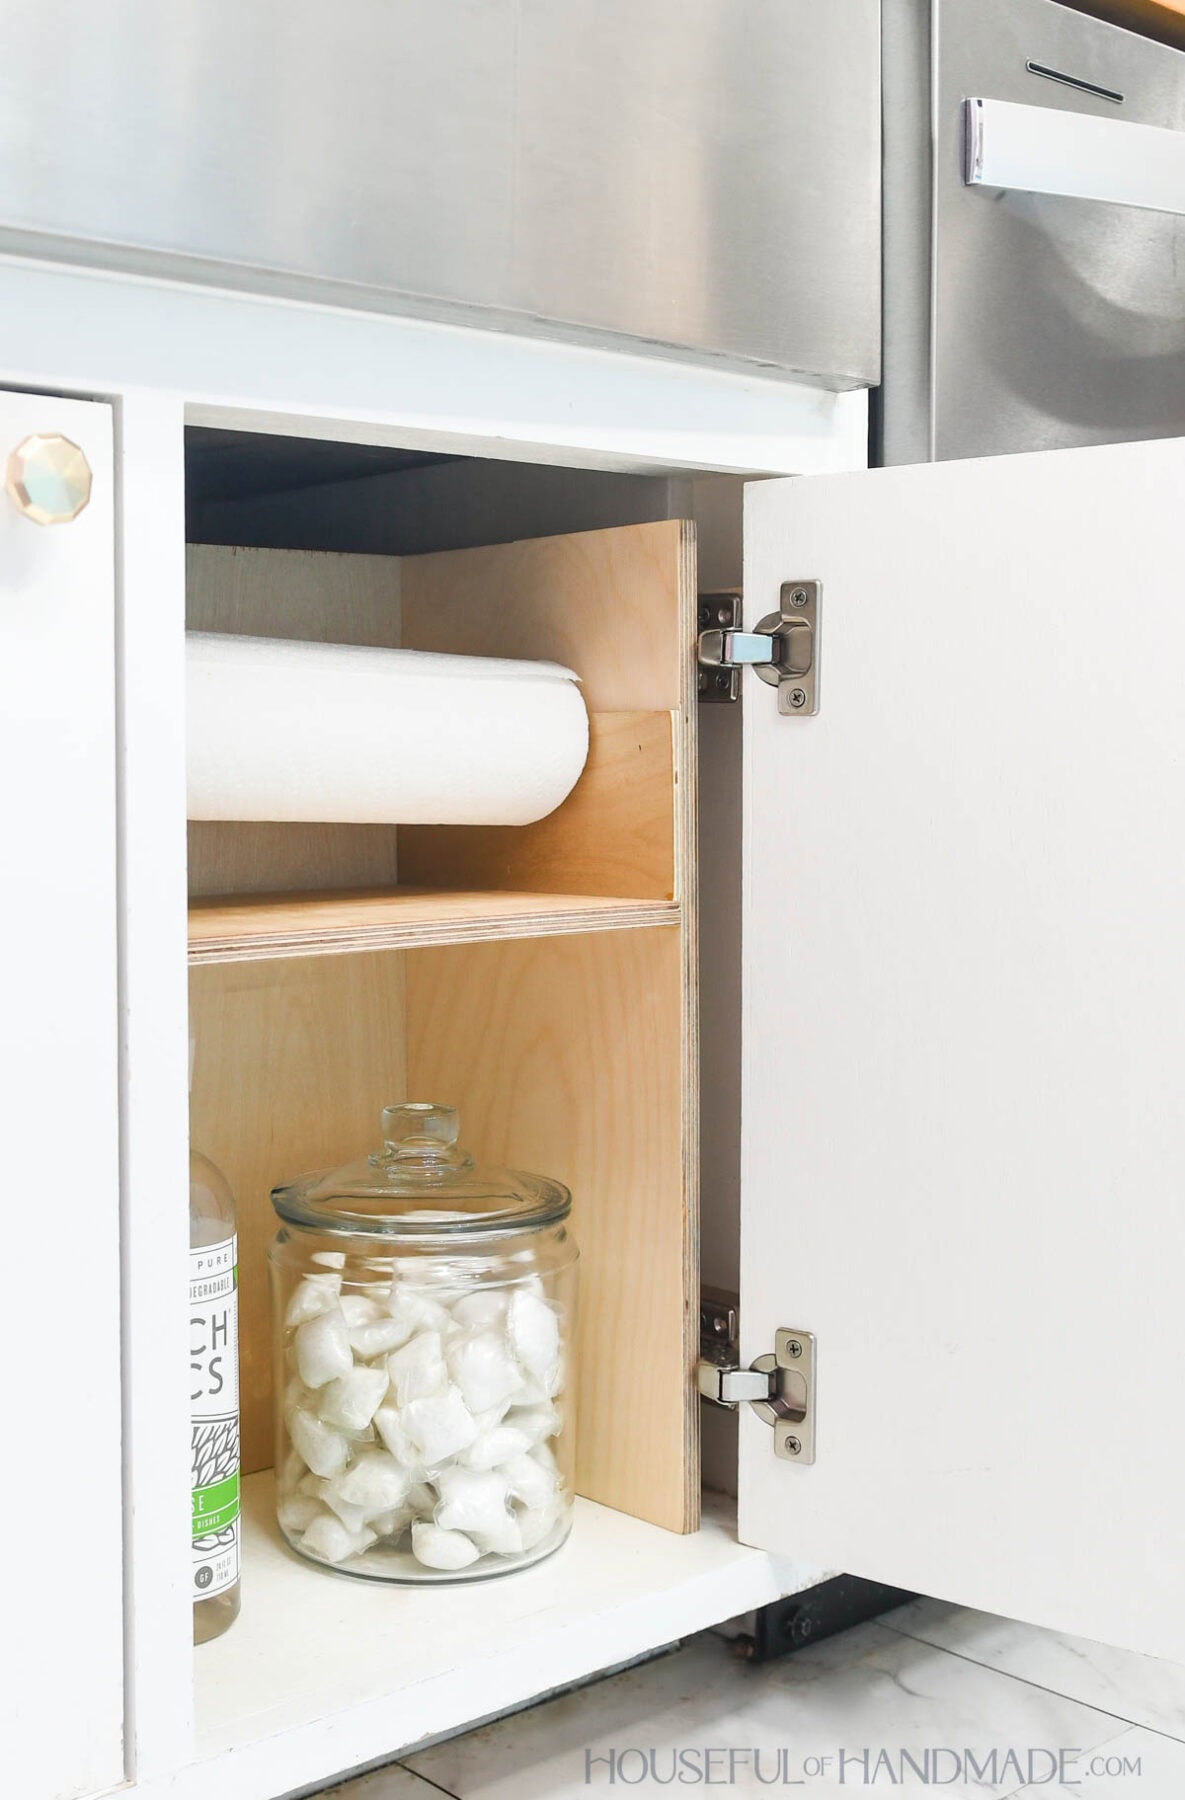
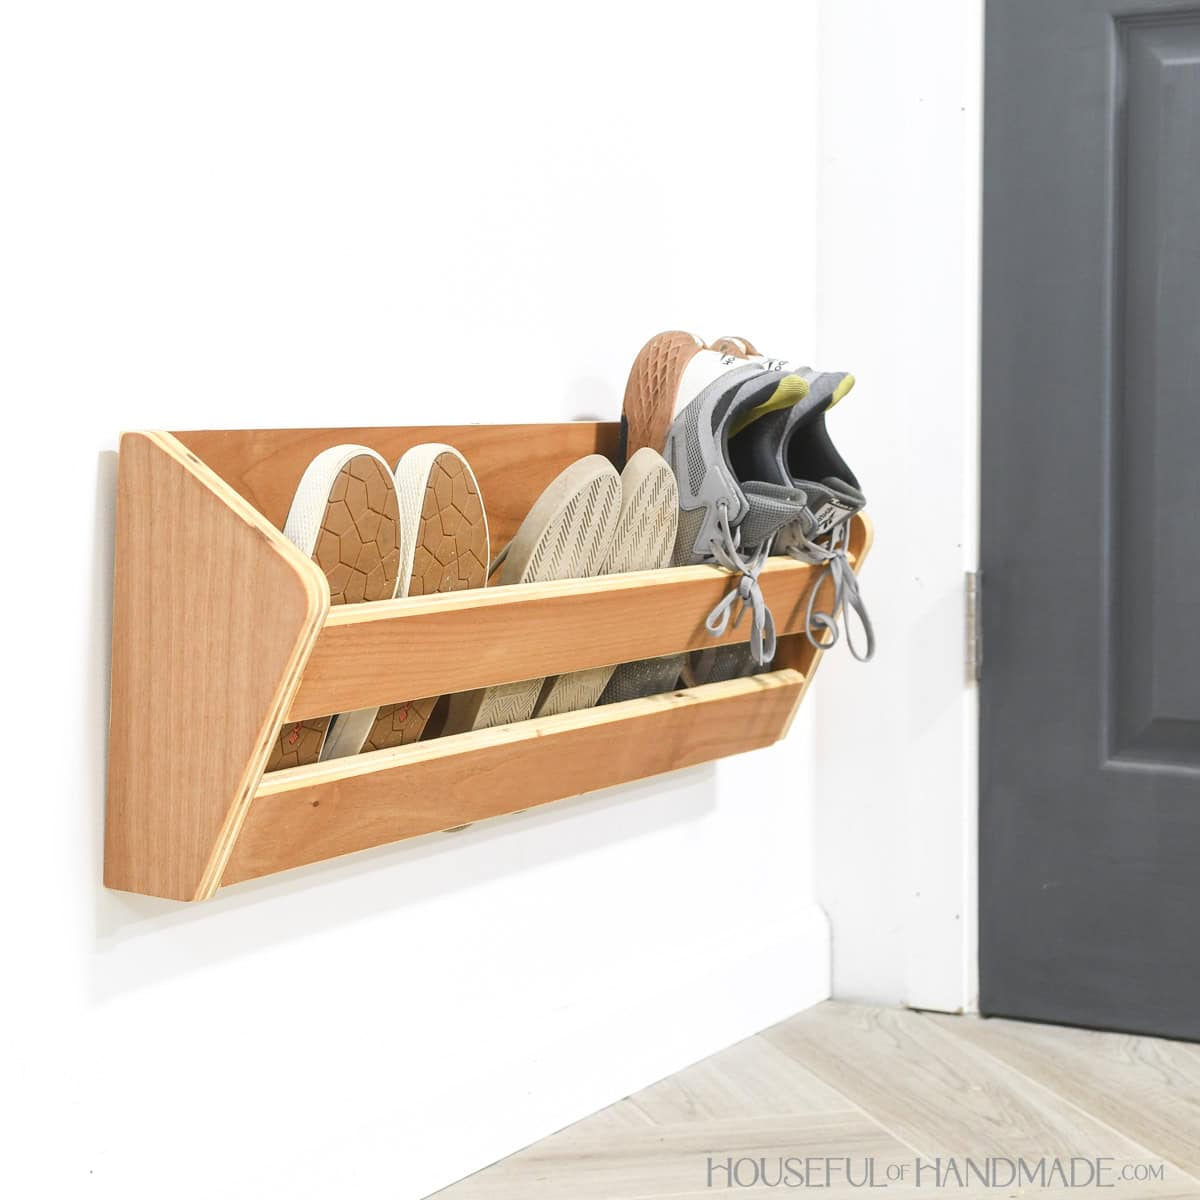
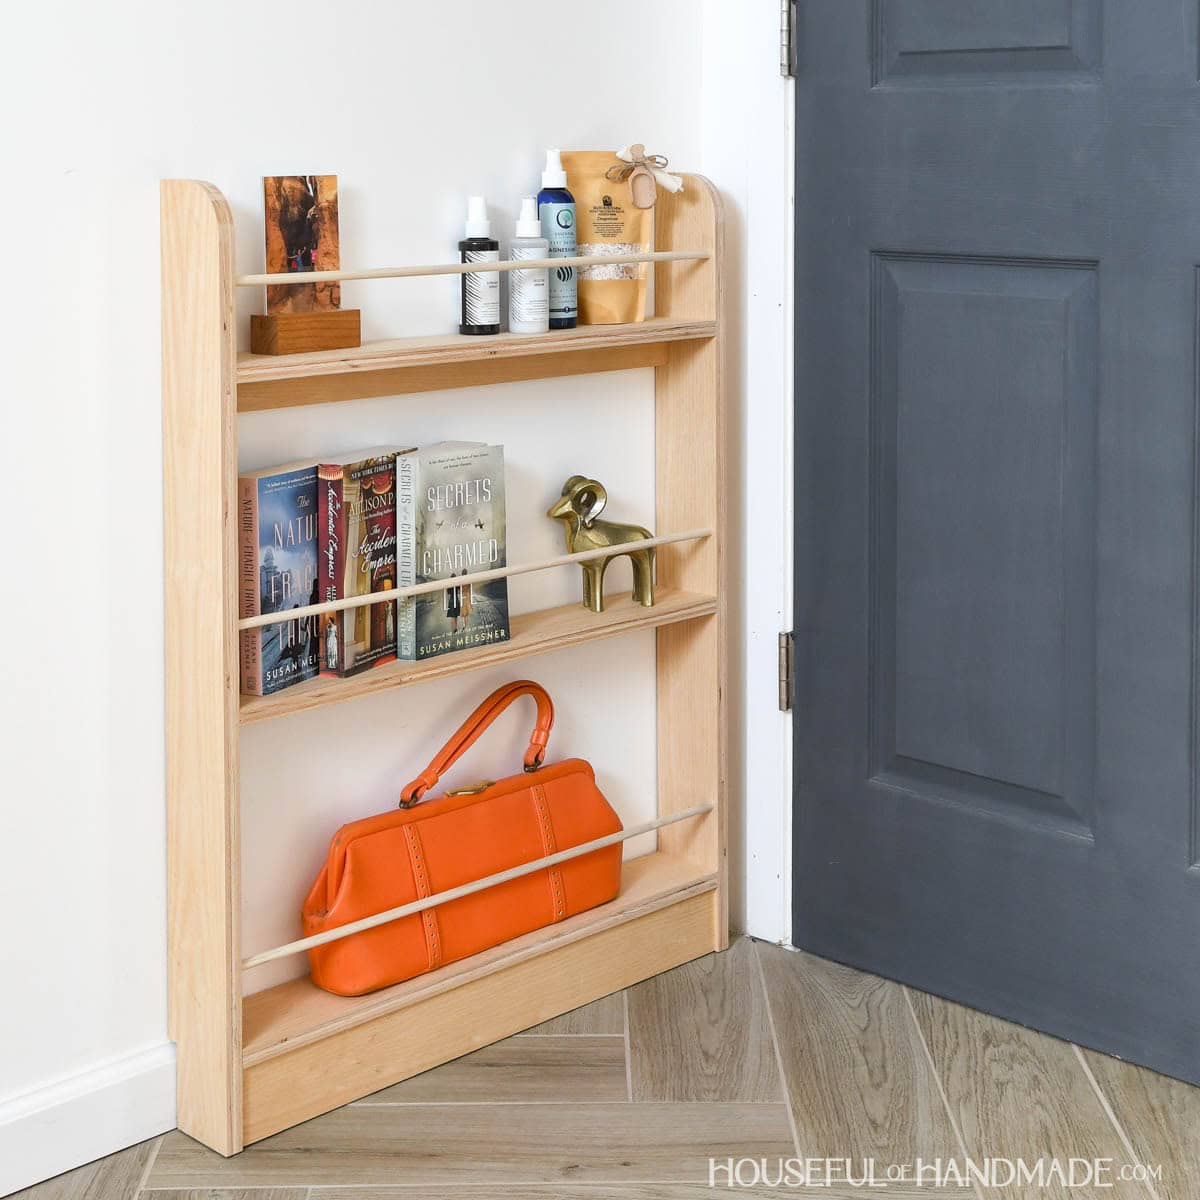
The shelf is super simple, but maybe my favorite!
It holds a roll of paper towels. I love that it makes them easily accessible, but they are no longer cluttering up my countertop.
And under the paper towels is the perfect opening for my dishwasher pods and most used cleaning sprays.
But the best part is it blocks the view of the back of the cabinet. The dishwasher hose and pea trap are hidden so everything looks so much cleaner!
This project was built as part of February’s Scrap Plywood Challenge. Make sure to check out all the other scrap plywood projects below.
How to Build Sink Cabinet Organizers
Tools & Materials
Recommended Tools:
Supplies:
- Wood products for the drawer organizer
- (1) 1/2″ plywood, 2×4 sheet
- (1) 1” dowel, 1’ long
- Wood products for the organizer shelf
- (1) 1/2” plywood, 20” x 25” piece
- (1) 1/4” plywood, 18” x 20” piece
- 1” brad nails
- 5/8” brad nails
- Wood glue
- (1 pair) 16” drawer slides
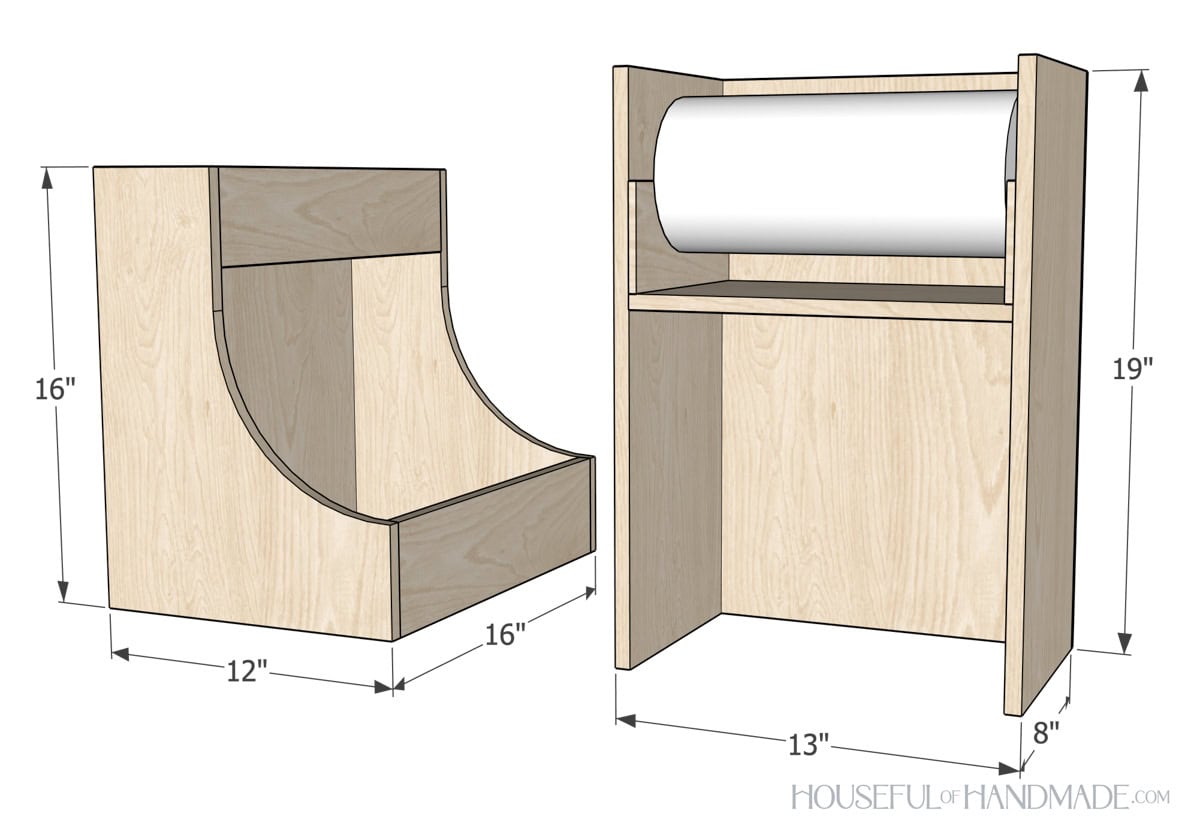
Overall Dimensions
The under sink drawer is 16″ tall by 12″ wide and 16″ deep. You need to have an opening of at least 13” of width, 18” of height, and 17” of depth in the cabinet to fit.
The under sink shelf is 13″ wide by 8″ deep and 19″ tall. It can tuck behind a face frame or hinges as needed. You cannot make it narrower or a roll of paper towels will not fit.
Cut List
Cut out the pieces according to the easy-to-read table in the premium PDF plans.

IMPORTANT-
Make sure to measure your opening carefully before cutting your pieces, you may notice in my final pictures that the front of the lower shelf sits on top of the bottom.
That is because I had to cut down my finished drawer 3/4″ before I could install because I did not take into account the hinges that held the door on when measuring the opening.
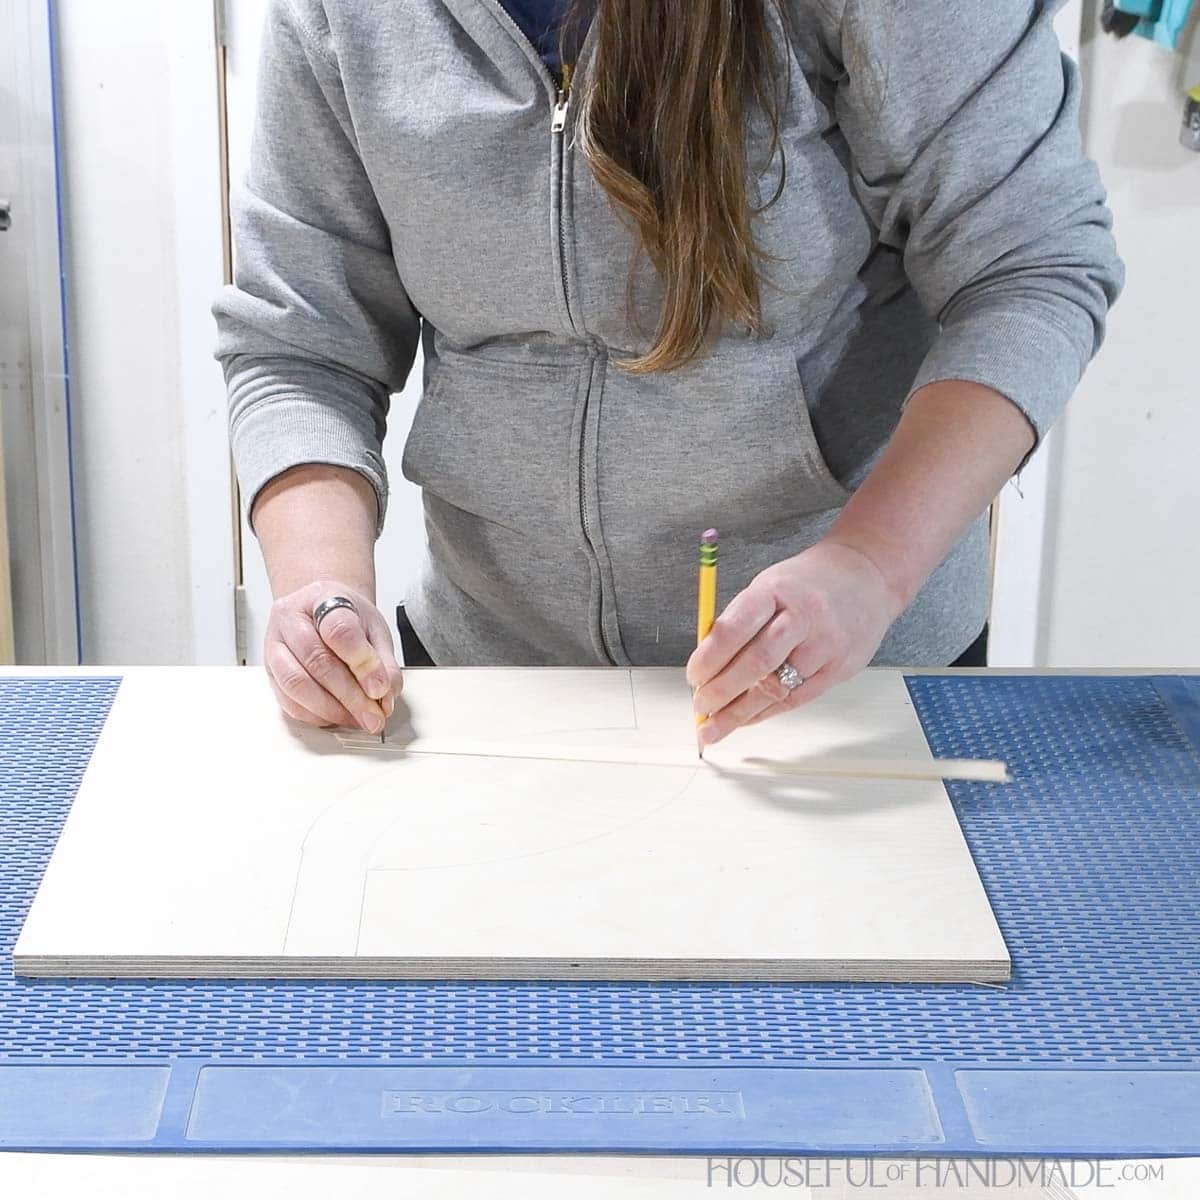
STEP 1- Shape drawer sides
On the side board, measure and mark out the design according to the diagram in the plans.
To draw the curves, mark the center point of the outside of the arc. Then use a piece of string or thin scrap of wood to pivot the pencil around the mark to draw a curve between the straight lines.
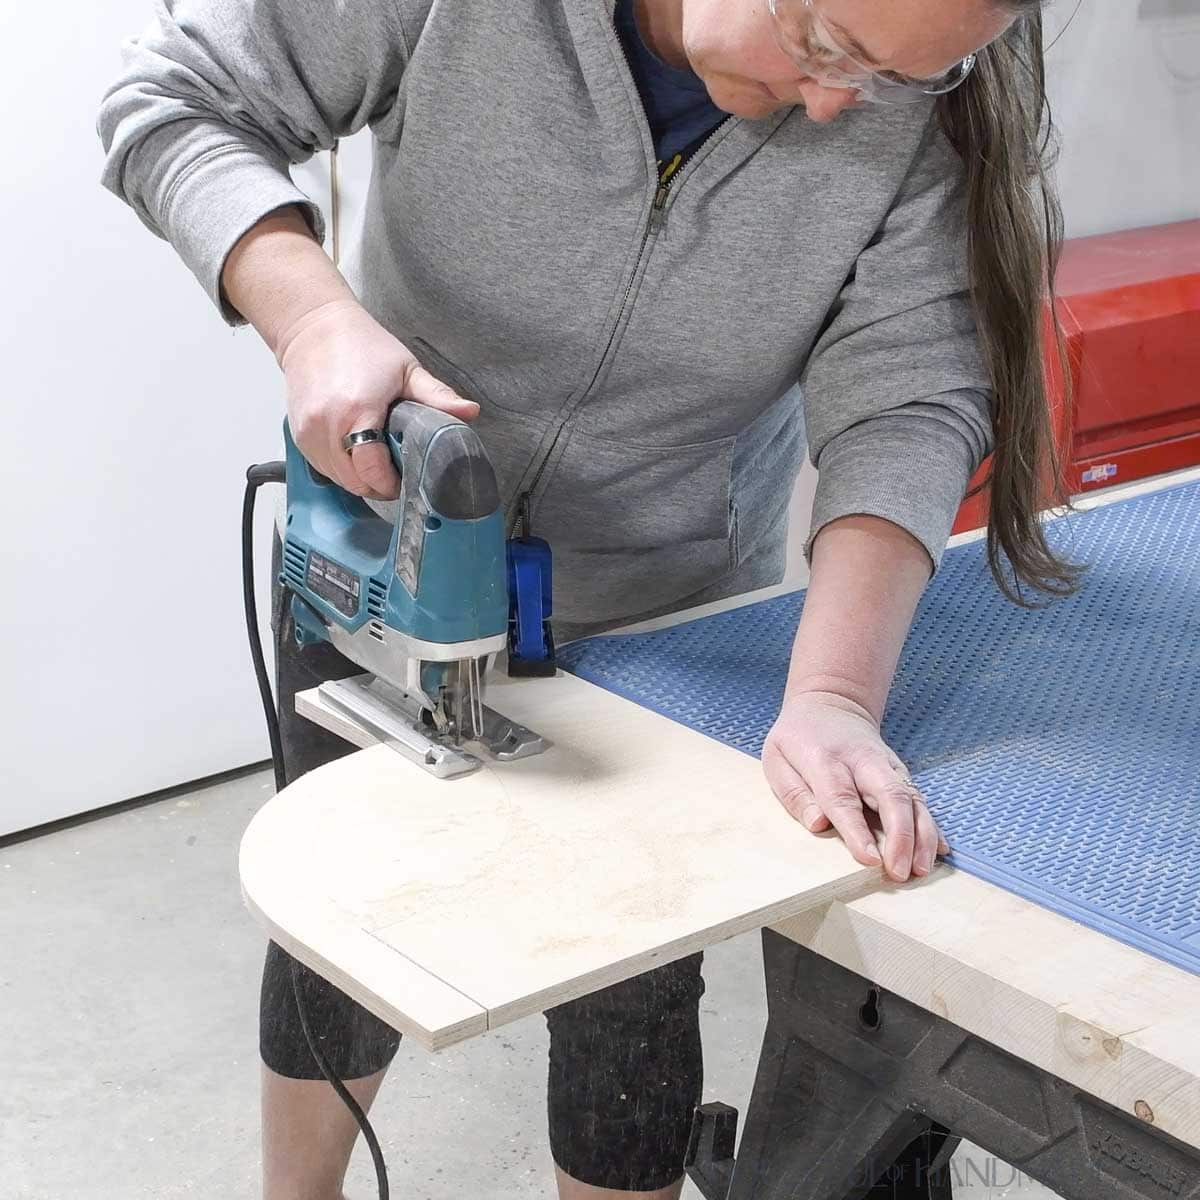
Then cut the two side pieces out with a jig saw.
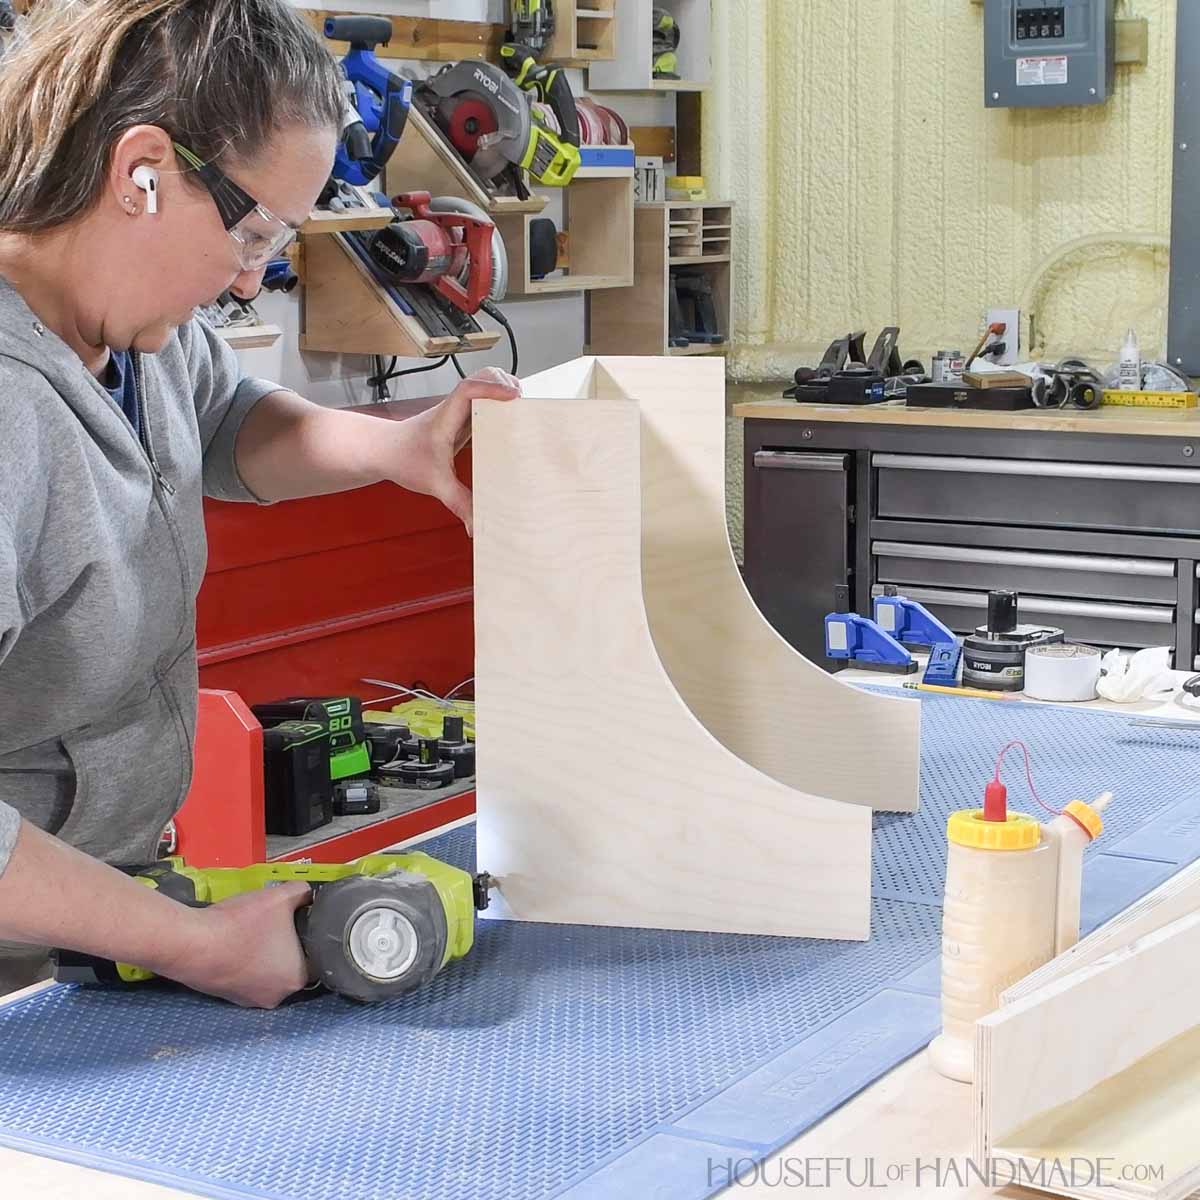
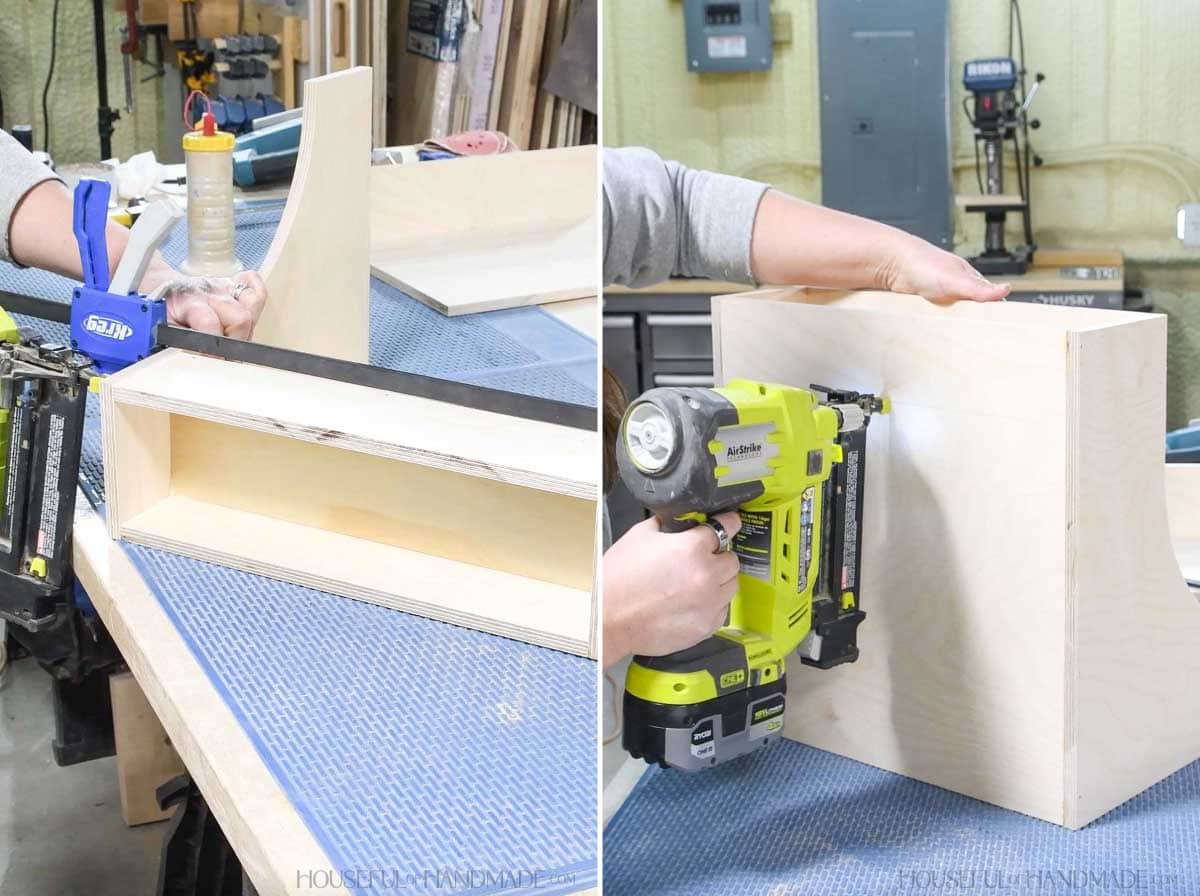
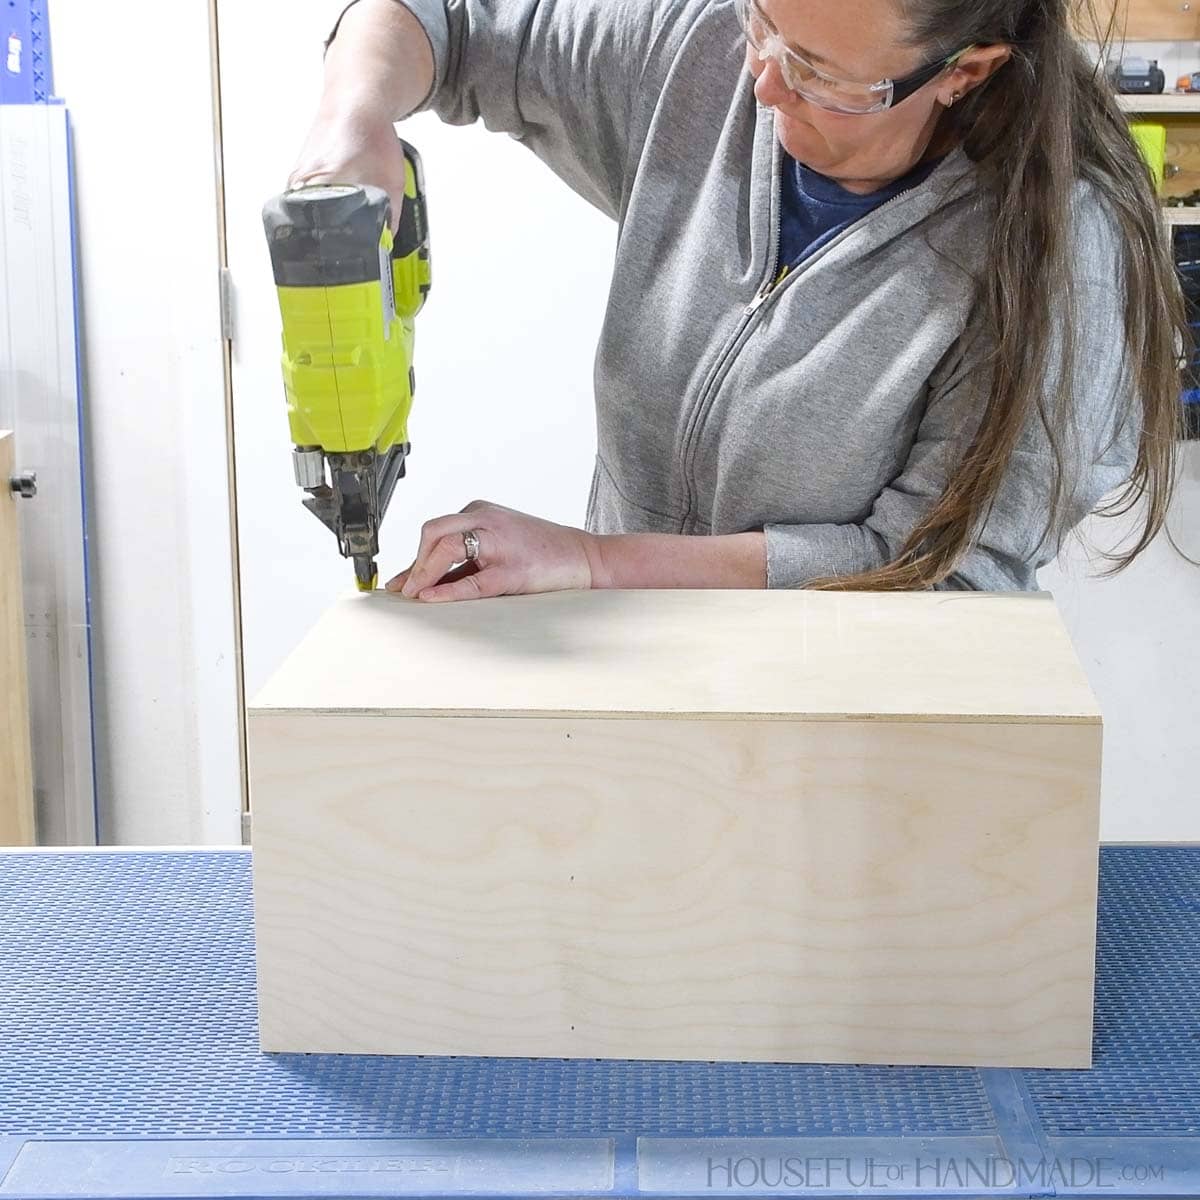
STEP 2- Assemble drawer
Attach the back piece between the two sides so it is flush with the back.
Secure with wood glue and 1” brad nails.
EXPERT TIP:
Always hold the nailer perpendicular to the board being nailed into. The nails like to veer side to side when shot, so if your nailer is parallel you risk the nails poking out of the boards and making a mess of your project.
Attach the shelf fronts to the coordinating bottom pieces.
Secure with glue and 1” brad nails.
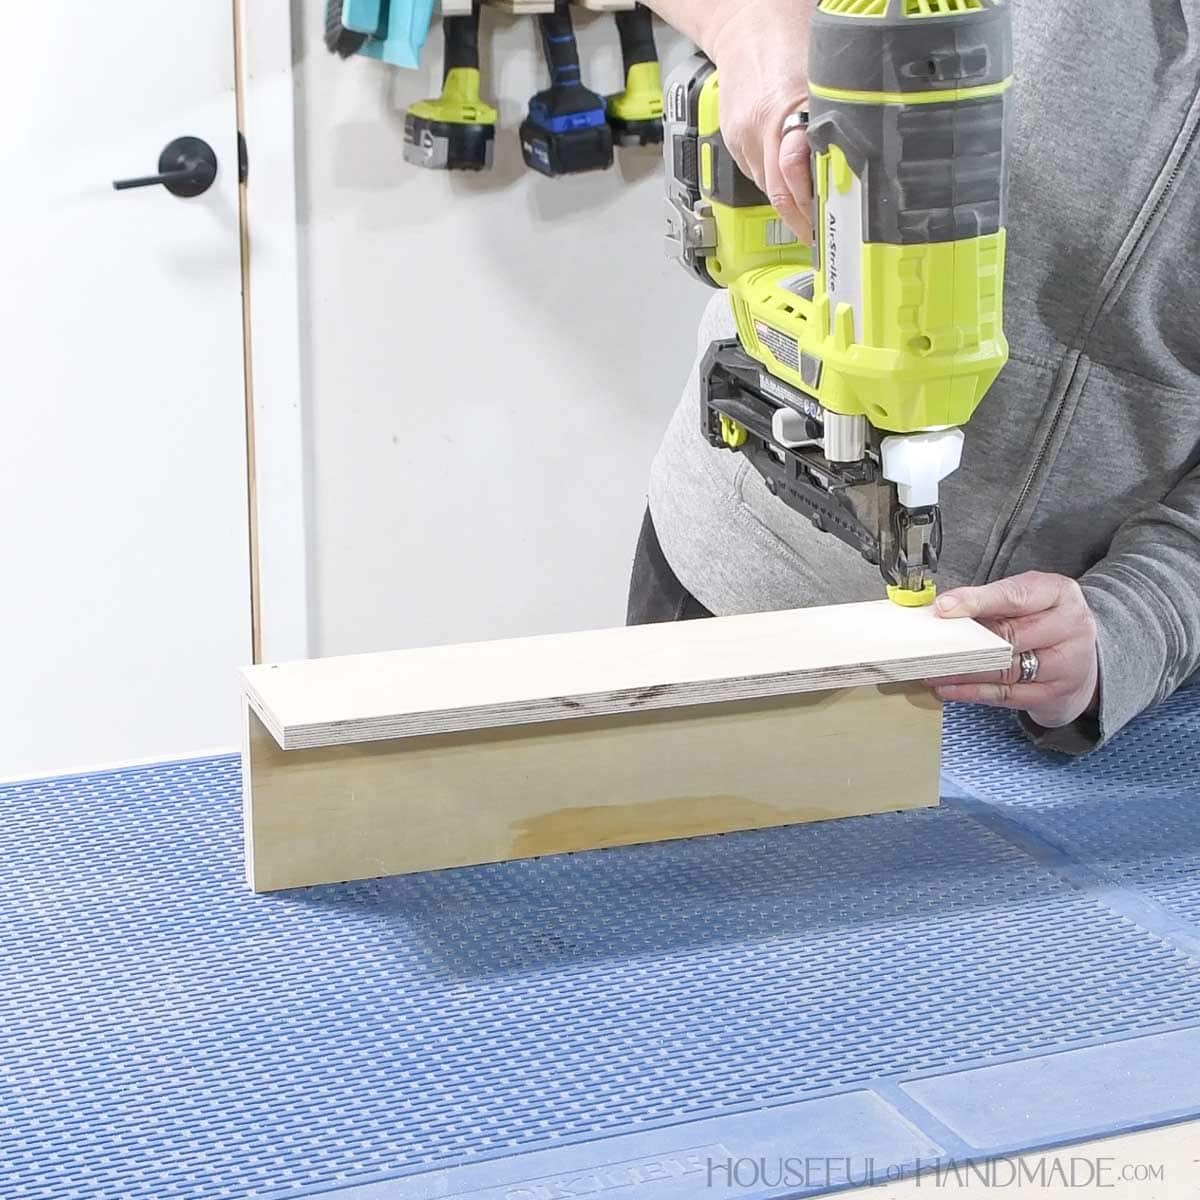
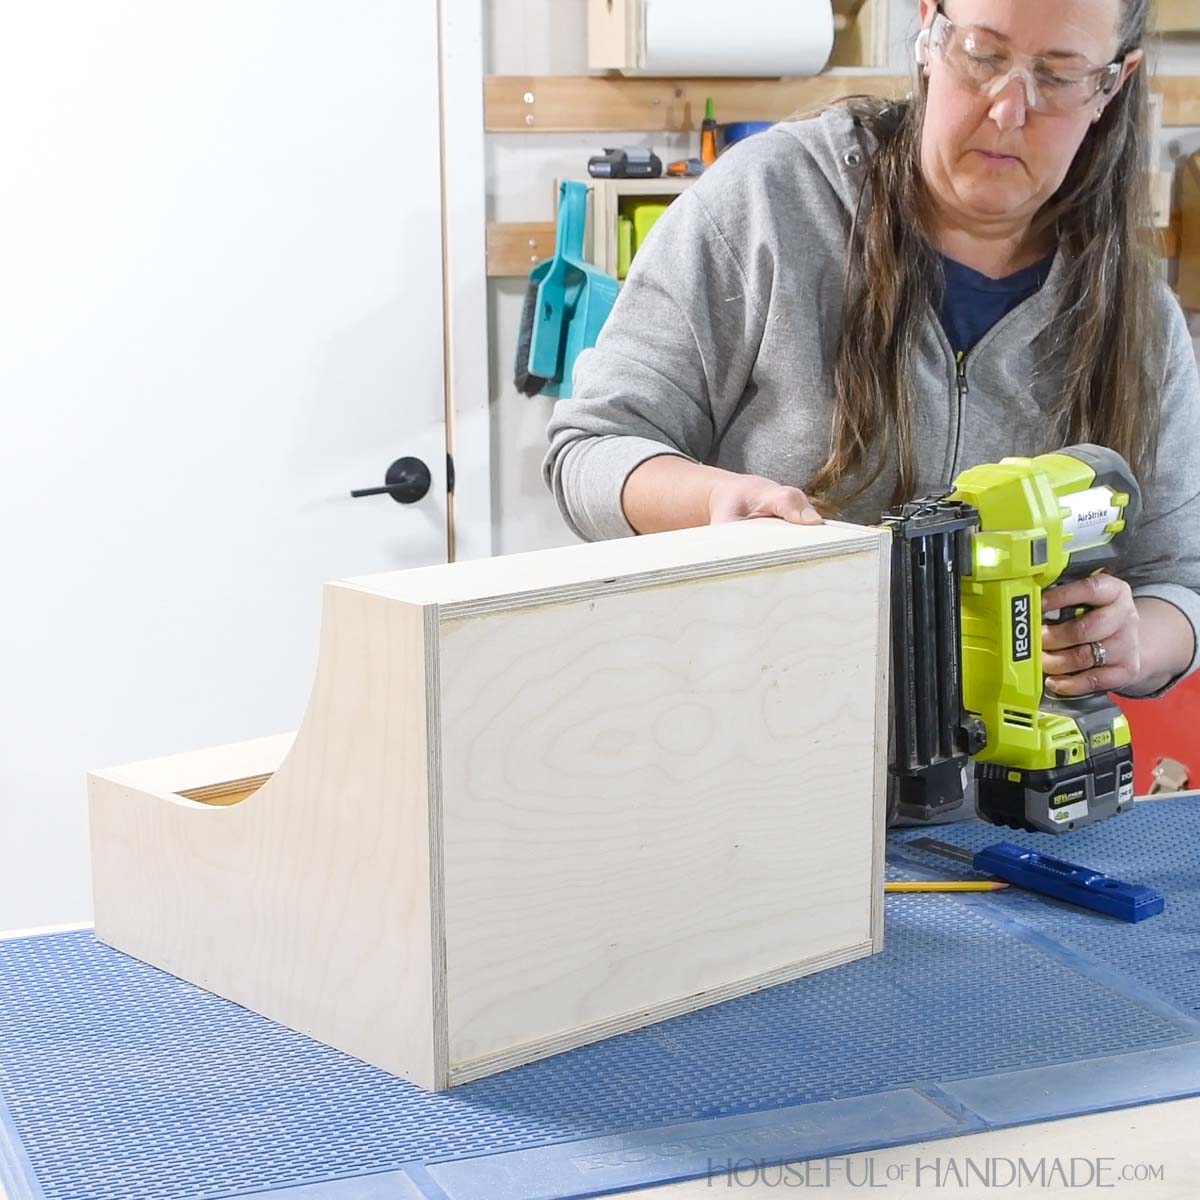
Line up the top shelf pieces so the front is flush with the top and front of the sides.
Attach to the sides and back with wood glue and 1” brad nails.
EXPERT TIP:
Draw a line along the side and back marking the center of the bottom shelf board. Use this as a guide when attaching the shelf to ensure your nails don’t miss.
Attach the bottom shelf between the sides so it is flush with the bottom and front edge.
Secure with 1” nails and wood glue.
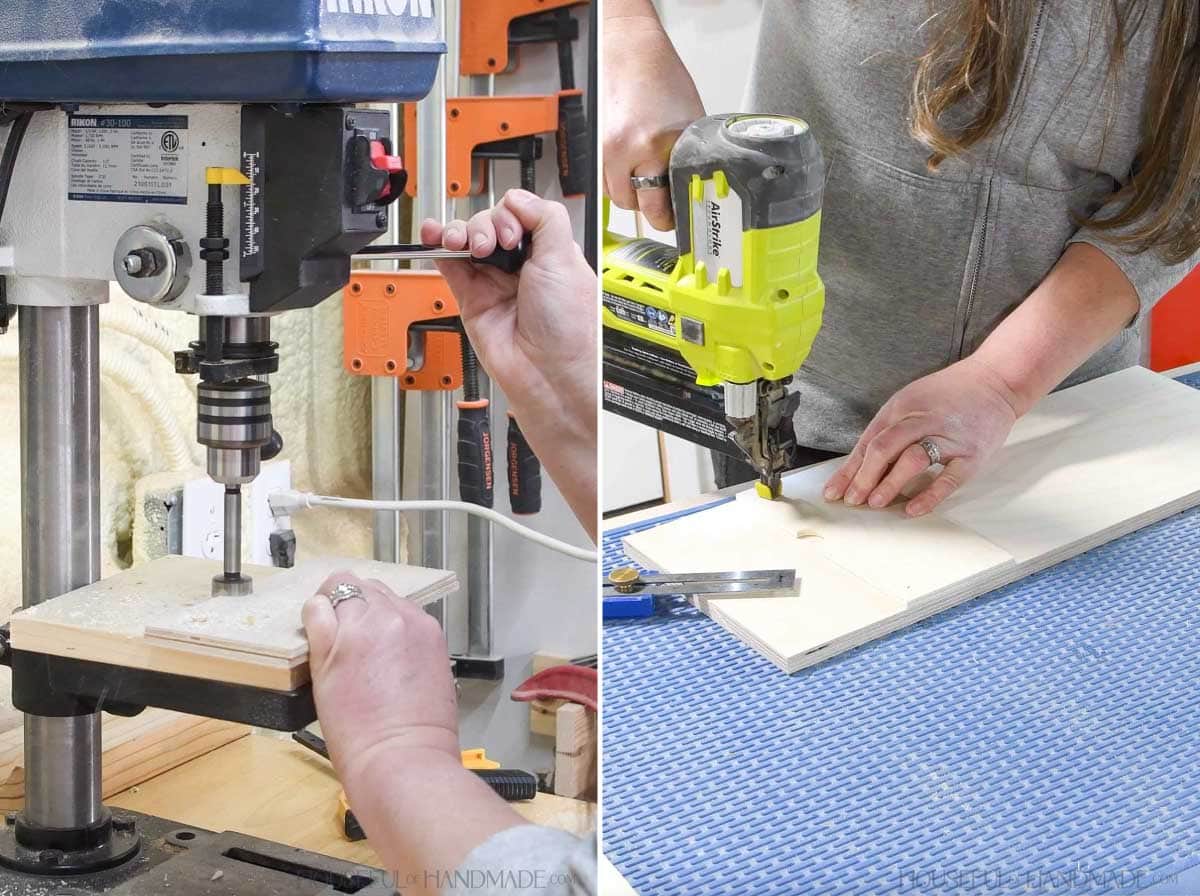
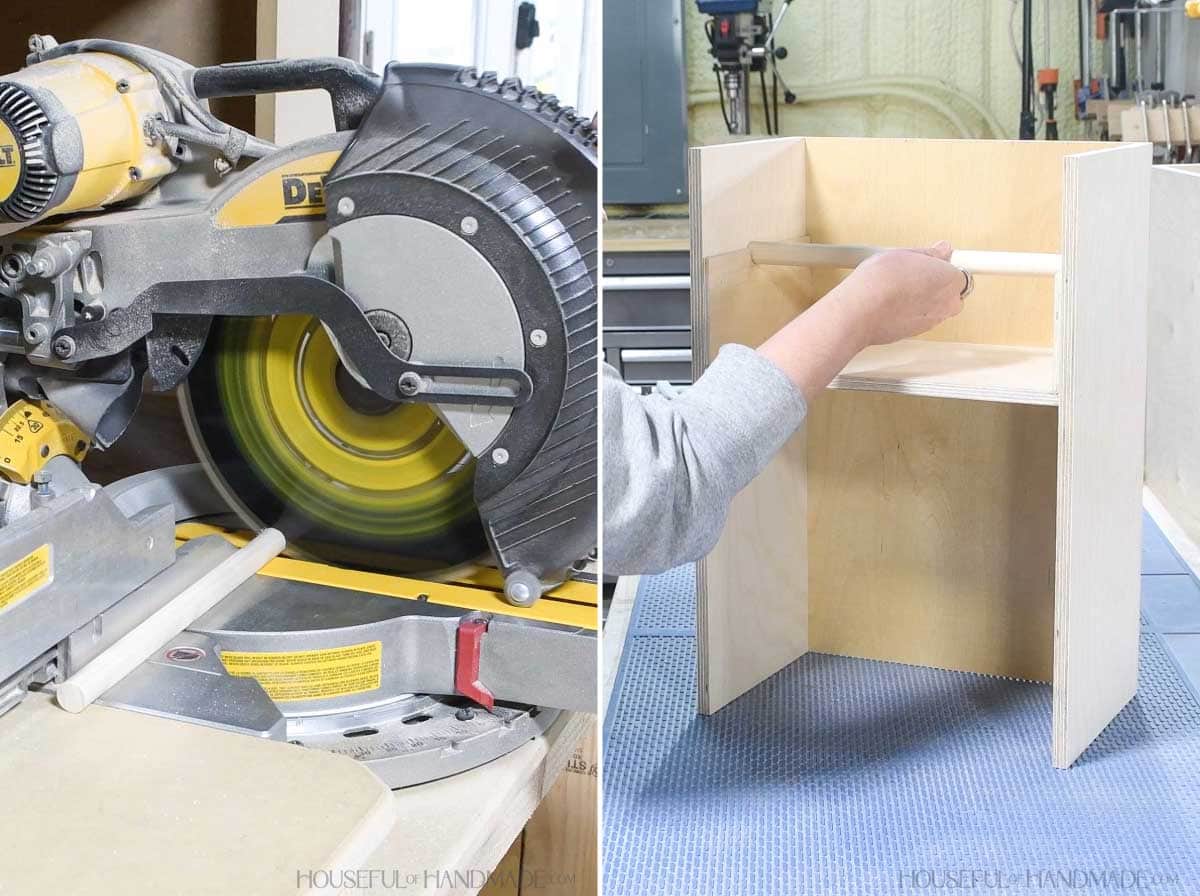
STEP 3- Assemble shelf
Measure and mark the top of each support piece for the center of the notch. Use a 1 1/8” drill bit to drill a U shape in the board centered on that mark.
If there is an obvious front and back to your plywood, make sure to mirror the pieces.
Attach the support pieces to the sides and secure with wood glue and 5/8” brad nails. Make sure the the supports are mirrored on the sides.
Attach the shelf between the sides so that it is flush up against the bottom of the support pieces. The notches in the supports should be lined up.
Secure with wood glue and 1” brad nails.
Draw a line along the side marking the center of the shelf board. Use this as a guide when attaching the shelf to ensure your nails don’t miss.
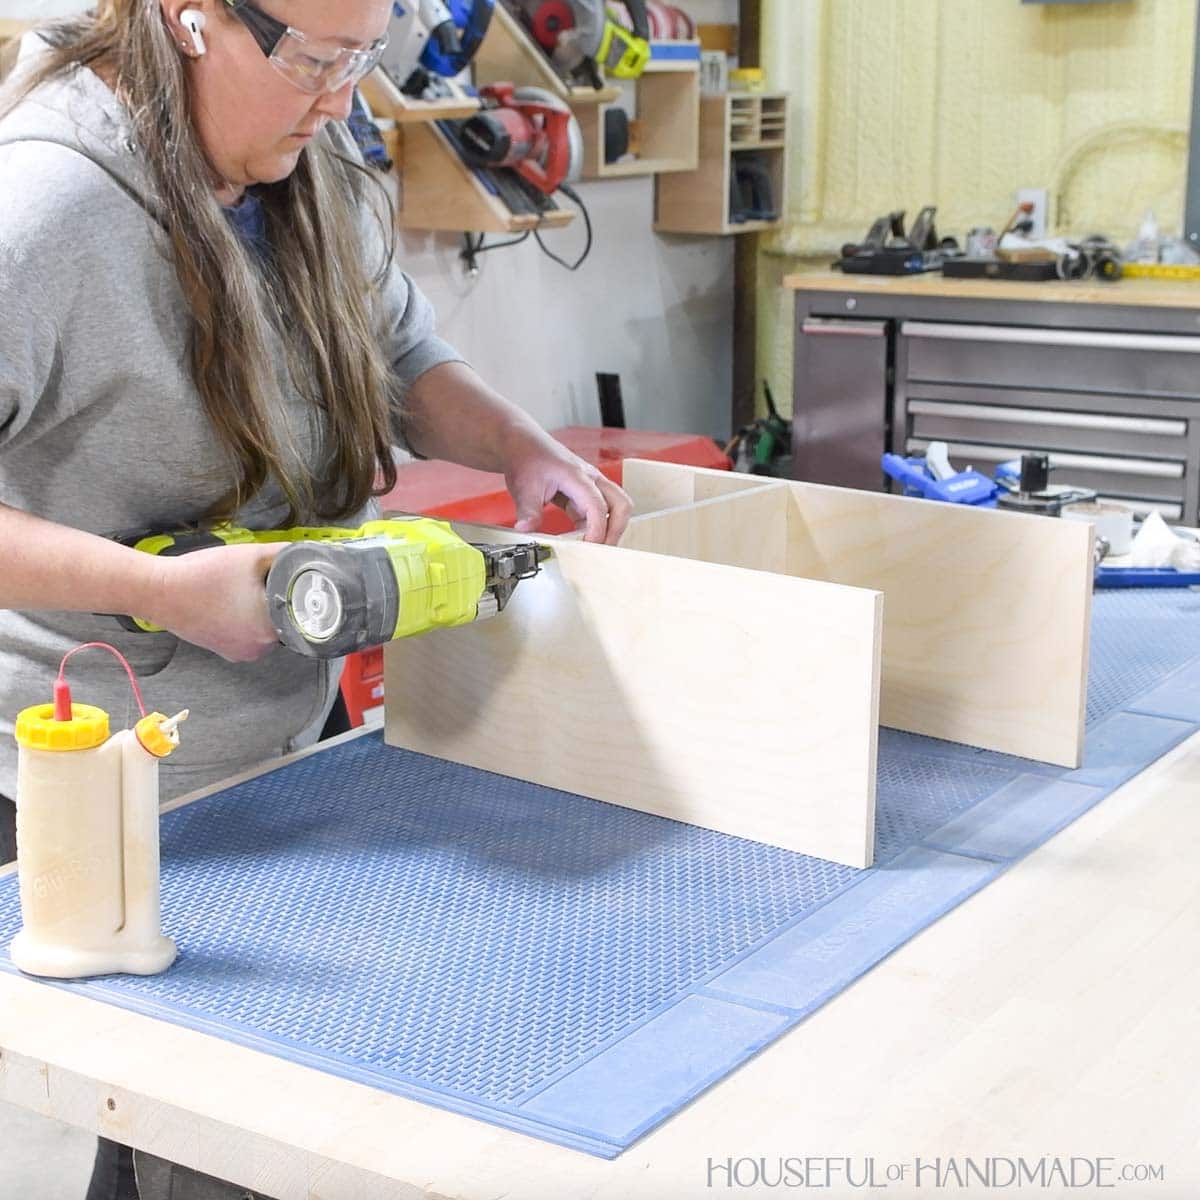
Attach the back so it is flush with the top, bottom and sides.
Secure with wood glue and 1” brad nails.
Cut the dowel so it will fit easily in between the sides. Drop it into the notches on the support pieces.
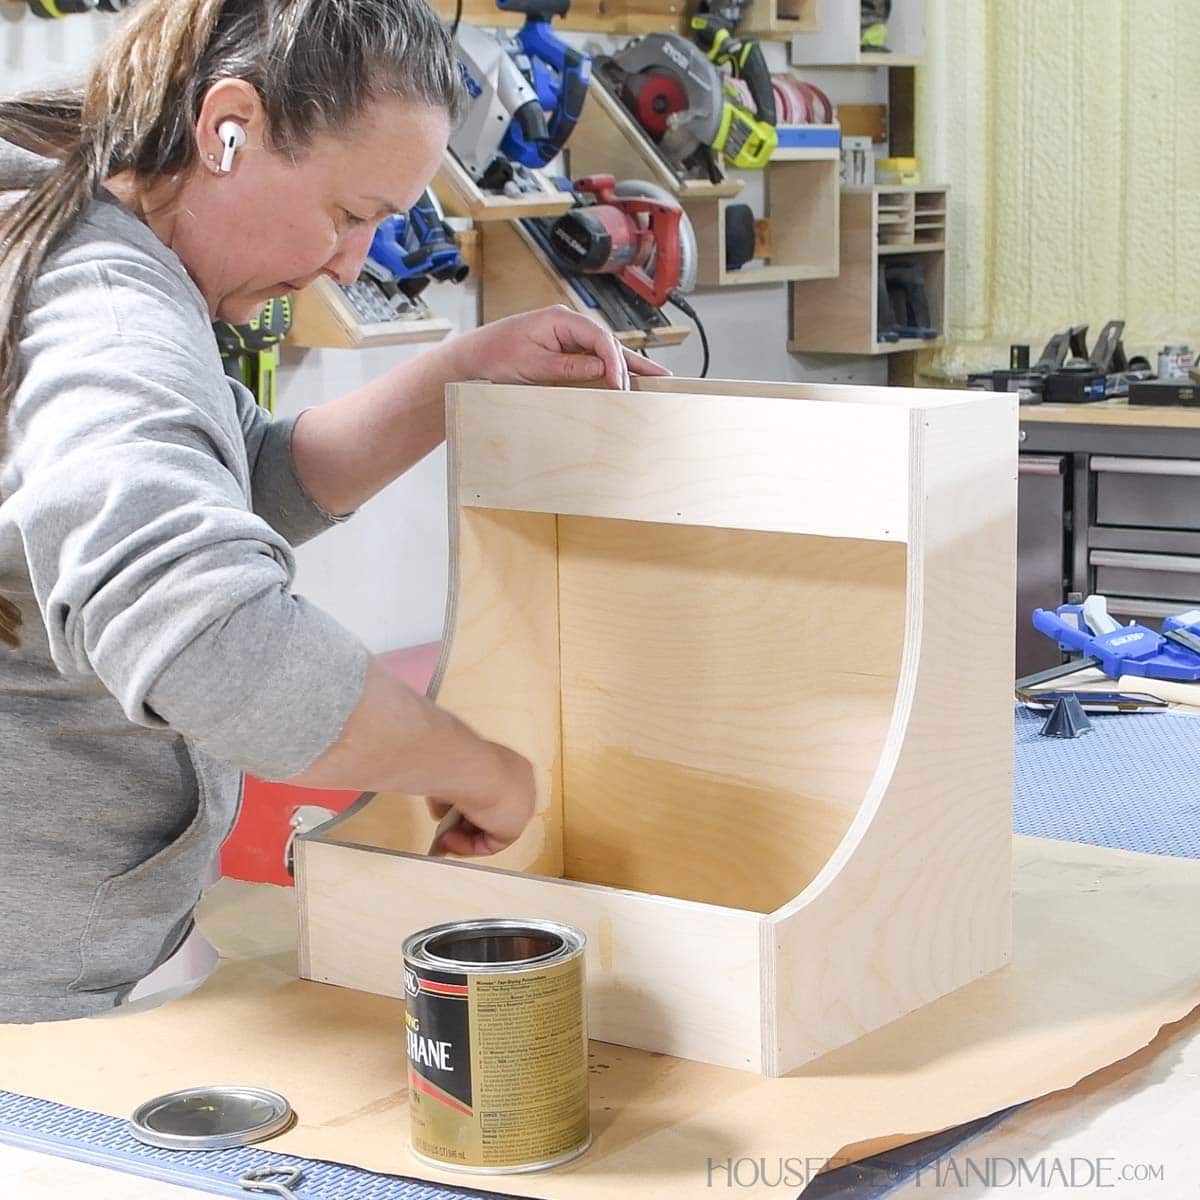
STEP 4- Finish and install
Sand and finish the under sink organizers.
I sealed mine with polyurethane to help protect them from any possible water damage.
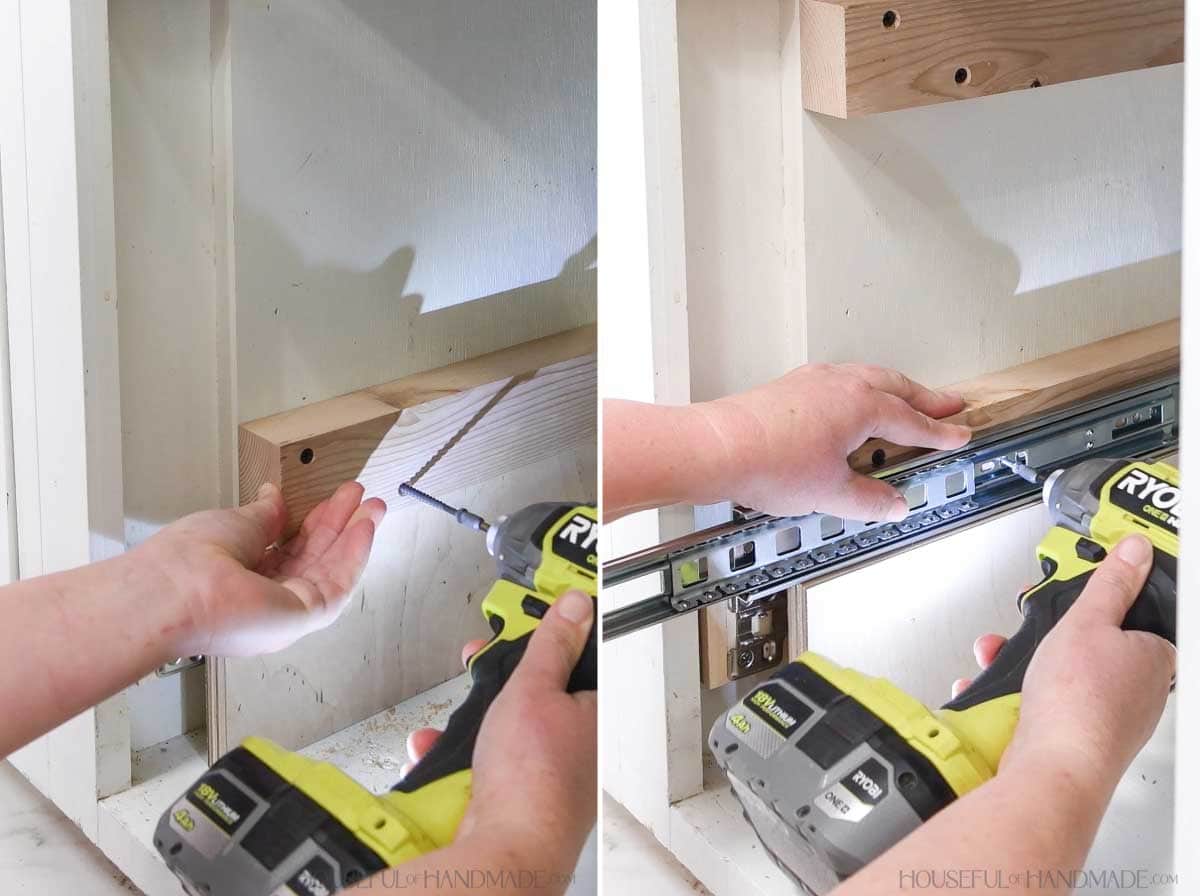
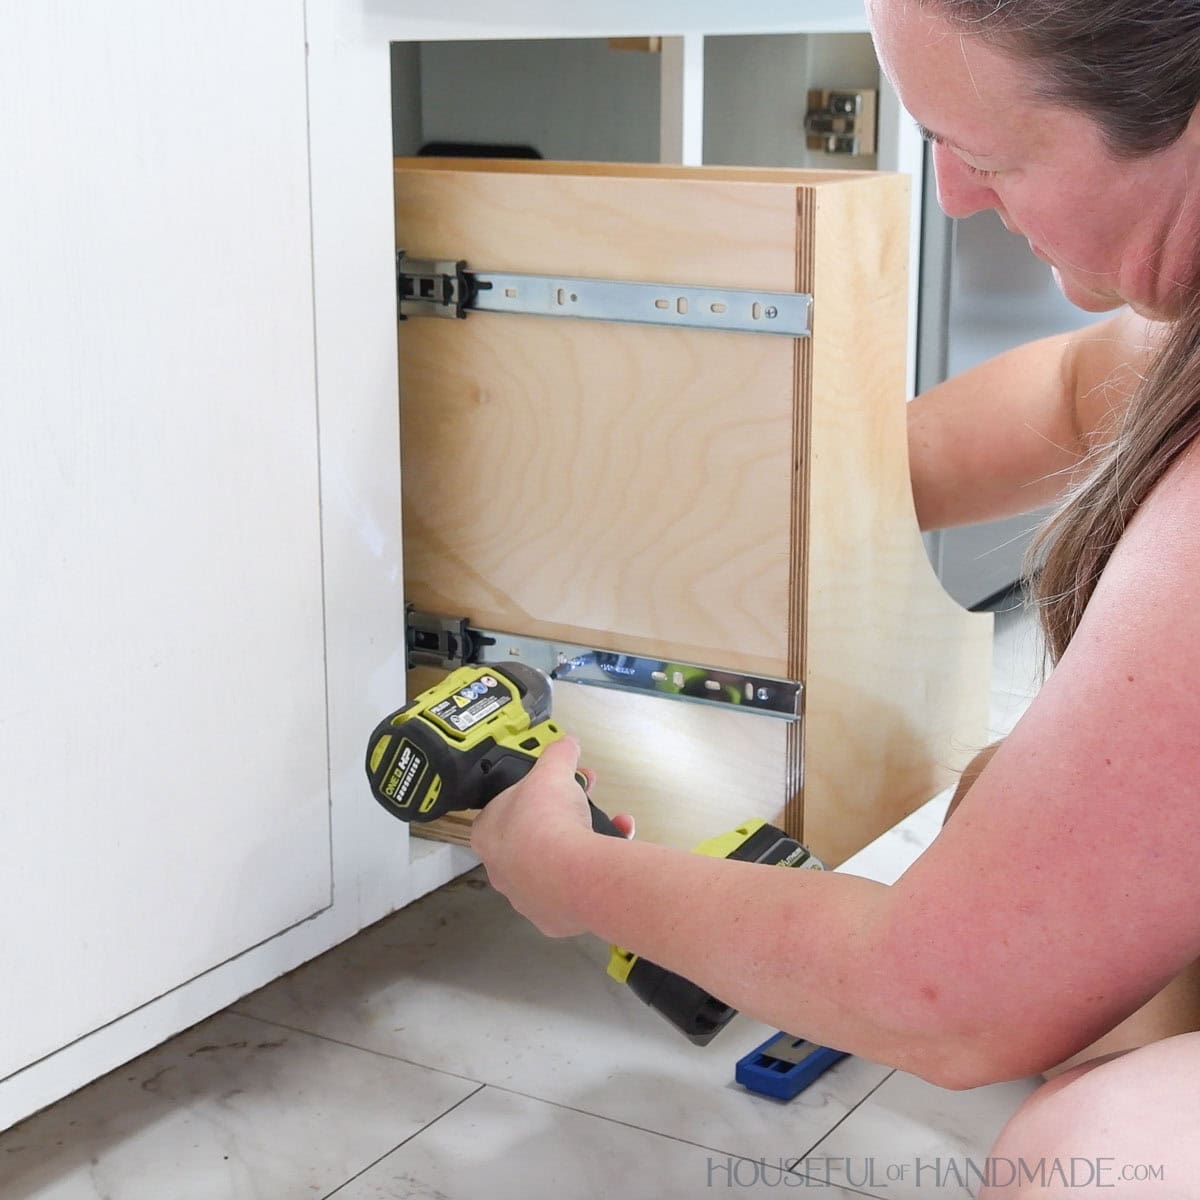
Both drawer slides will be attached on one side of your sink cabinet. You most likely will need to attach blocking to the inside of the cabinet.
Measure how far away from the inside of the cabinet your drawer slides need to be to clear any face frame, hinges or the door if it is in the way. Cut a scrap piece of lumber that is that thickness.
I needed 1 1/2” in order to clear the inset door hinges so I used a 1x board. You also can stack a couple pieces of scrap plywood to get the correct thickness if needed.
Attach to the inside of the cabinet with wood screws. Then attach the outside of the drawer slide on top of it. The front of the slide needs to be flush with the inside of your cabinet door.
Learn how to install drawer slides here.
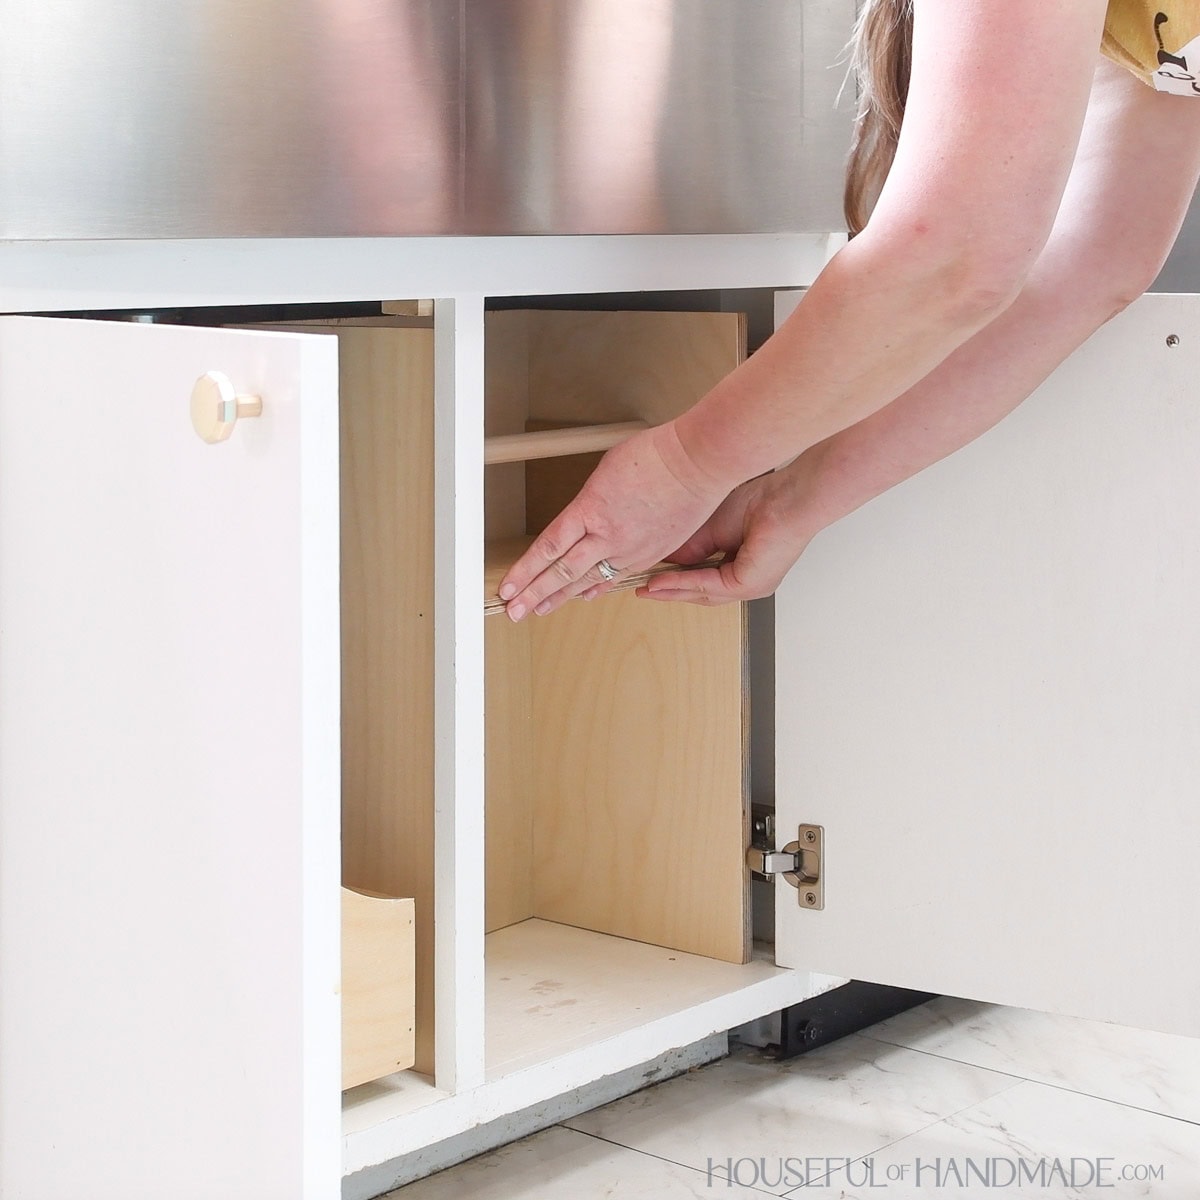
Place the inside of the drawer slide back into the outside and use a scrap of 3/4” plywood on the bottom of your cabinet as a spacer. Place the drawer on top of it.
Pull the drawer and inside of the slides out just a little bit. Make sure the front of the slide is flush with the front of the drawer. Attach the slides to the cabinet.
Pull the drawer completely out of the slide by releasing the lever. Then finish attaching the slide to the drawer all the way to the back.
Reinsert the slides and press the drawer in fully to engage the slides.
The shelf organizer just needs to be slid into the cabinet.
Mine fits just behind the face frame center stile on one side and behind the inset hinges on the other.
To add a roll of paper towel, place the dowel inside the roll and slide it into the notches on the support pieces.
Premium plans include:
- Recommended Tools
- Shopping list
- Easy to read cut list table
- Cut diagrams
- Step-by-step instructions with 3D renderings
- Helpful resources
- BONUS: 3D SketchUp file
You did it!
You can organize all the sponges and cleaning supplies in the drawer. Then place a roll of paper towels on the dowel and place it inside the notches.
Now you can enjoy a clean, and very organized, under sink cabinet in your kitchen.
More Plywood Scrap Projects
This month I am teaming up with my friend Shara from Woodshop Diaries to clean out all our plywood cut offs.
So come along as we share a new project every Tuesday in February and get excited to clean up your plywood scrap pile with us.
I'll share each week's new scrap plywood project below so you can use up your scraps too!


Happy building!
