
Drawers are so useful! They are my favorite part of a kitchen, desk, console, and more. But they can be intimidating to install.
So I partnered with Kreg Tools to share all my tips for how to install cabinet drawers using their awesome drawer slide jig.
I use all of the Kreg Hardware jigs on a regular basis! If you plan to make any cabinets in the new year, you will definitely want to grab this kit to make your build easier.
This post may contain affiliate links. As an Amazon Associate I earn from qualifying purchases. Click here to read my full disclosure policy.
Now let’s get down to installing some cabinet drawers! And for help building your own cabinets check out this post.
Tips for Building Drawers
The first part of a successful drawer install is a successful drawer build. I go into detail on building DIY cabinet drawers here.
You need to know what the requirements for spacing are for your drawer slides. It’s a good idea to double check the specs of your drawer slides before building your drawers.
Most ball bearing drawer slides I have used require 1/2″ spacing on either side of the drawer. So I built my drawers 1″ smaller than the cabinet opening.
Also, when building your drawers, I always err on the side of too small over to large. The drawer slides can quickly be shimmed out a 16th or 32nd of an inch to fit a smaller drawer.
But to make a 1/16″ too wide drawer fit takes lots of time and is very aggravating.
Lastly, square drawers will fit so nicely into your cabinets. So take the extra time to set up your saw blades & fences to perfect 90 degree angles and square up the ends of your boards before assembly.
Having a blade or fence off by a couple degrees will quickly make a wonky drawer box that you will be fighting when it’s time to install.
Picking the Right Drawer Slides
There are so many different options for drawer slides. I typically use ball-bearing drawer slides for a few reasons:
- they come in full extension (yay for finding things in the back of your drawers),
- they come in soft close,
- they slide smoothly,
- they can hold a lot of weight,
- they are usually in stock at home improvement or woodworking stores,
- they are a good mid-priced option.
Full Extension
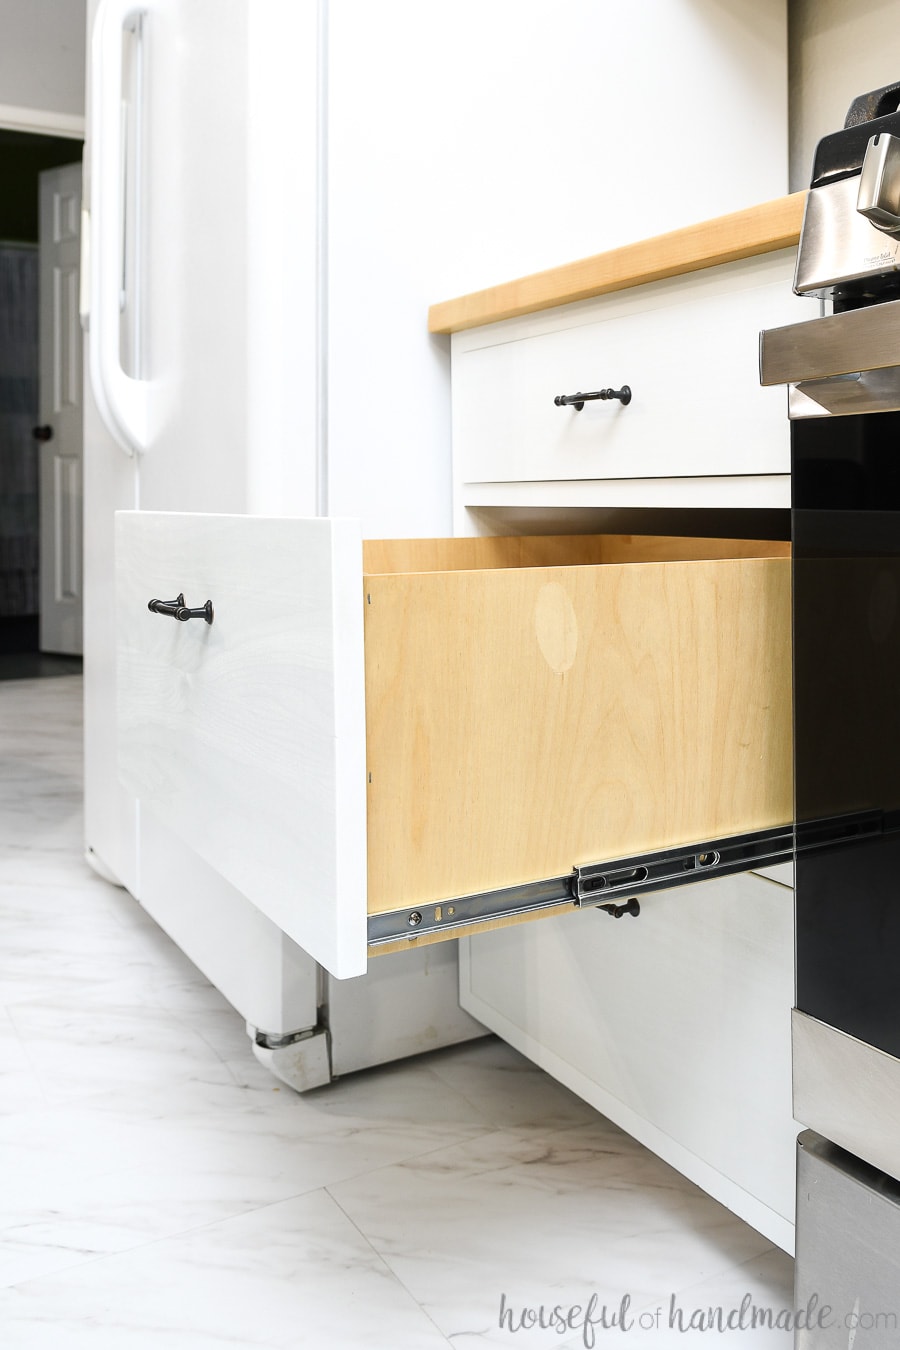
Full extension means that the drawer back is brought to front of the cabinet box when fully opened. This allows full access to the contents of the drawer.
Of course, if you have an overhang on your countertops (most usually do) the back top drawers will be slightly hidden behind the overhang. But it’s barely noticeable because that is only an inch or so.
If you want even more access to the items in your drawer, you can use over-travel drawer slides that extend the back of the cabinet an inch or so past the cabinet box.
We used an over-travel drawer slide for our pull out trash can cabinet. This allows us to lift the trash can out of the trash can drawer if needed because it brings the drawer out past the countertop.
And don’t be tempted by the low price of 3/4 extension drawer slides. If you have ever been frustrated by older drawers that felt like they stopped way too soon, that is a 3/4 extension.
Just think, if your drawer is 20″ deep, 5″ of that will still be hidden in the cabinet. This makes a large drawer feel so small.
Soft Close
Soft close is a feature that stops the drawer from slamming shut. Even better, after it stops the drawer, it slowly pulls the drawer to the fully closed position.
If you have kids, the soft close can come in very handy. No more slamming drawers and no more almost-closed drawers.
But if you are on a budget, you can save yourself around $5 per pair of slides by not choosing the soft close option. And you can always upgrade slides later when you have more money in your budget (and save the non-soft close slides for more projects!).
Weight Limit
Make sure to pay attention to the weight limit on your drawer slides when purchasing them. Large drawers can hold lots of items so you want to make sure the slides can handle it.
Also, take into account the weight of your drawer when figuring how much weight you need your drawer slides to hold.
Prefer to Watch? Check out the Video Below

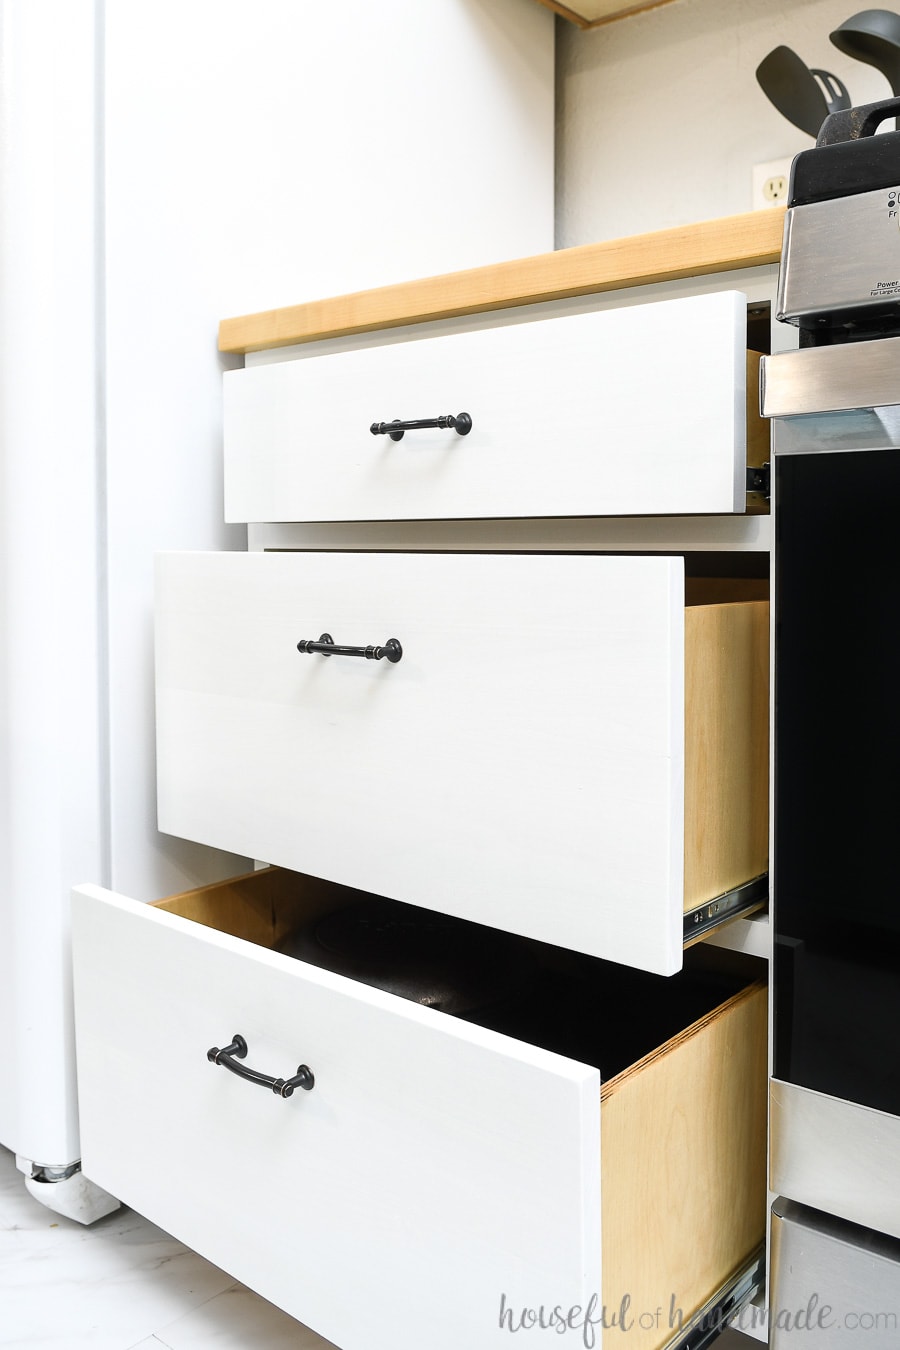
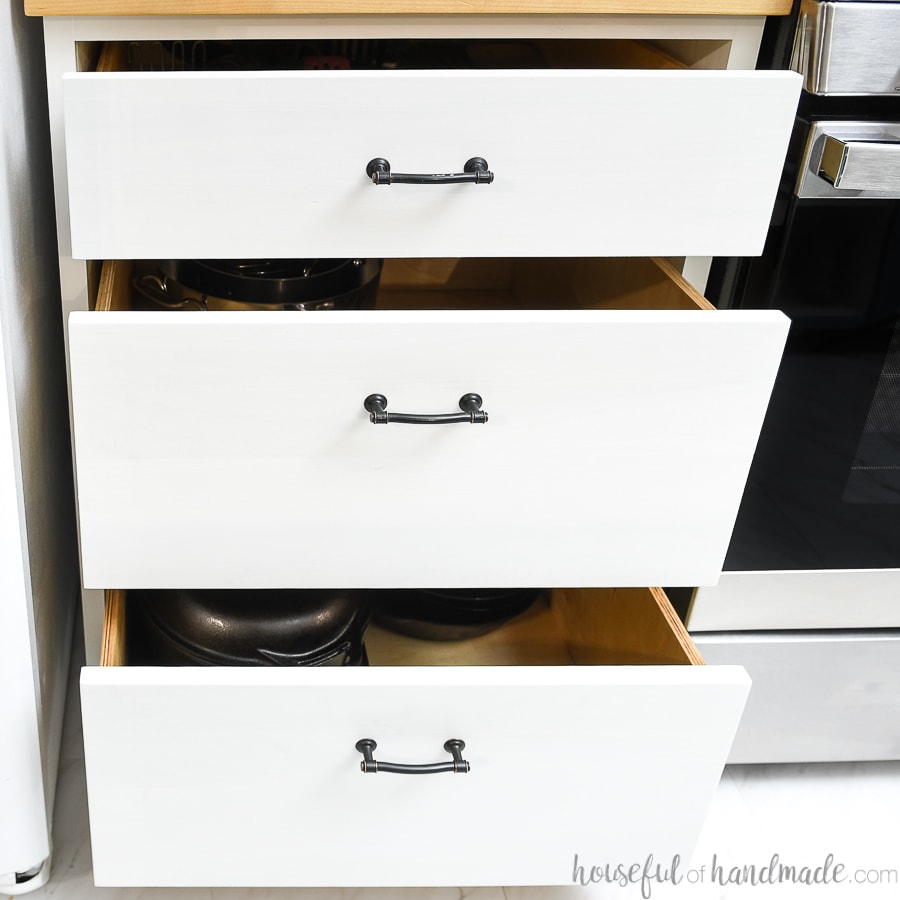
How to Install Ball Bearing Drawer Slides
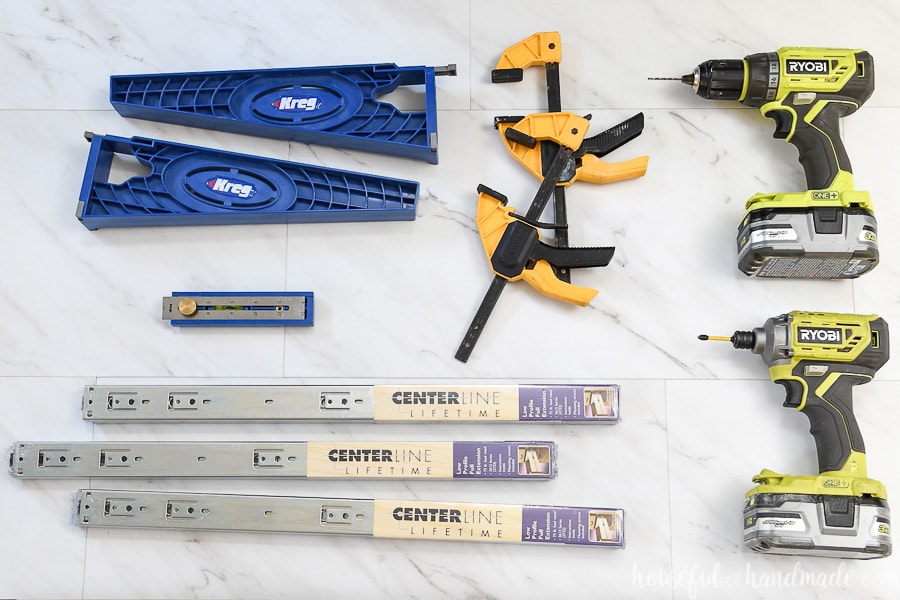
Tools & Materials
Recommended Tools:
- Kreg Drawer Slide Jig Kit
- Drill
- Impact driver (optional, but I love not having to switch bits with the drill)
- Clamps (2 are included in the kit)
- Kreg multi-mark tool
- Pencil
- Measuring tape
Supplies:
- Ball bearing drawer slides
- Drawer box
- Coverstock or cardstock paper
- Scraps of wood
STEP 1- Prep the cabinet for drawers
To install drawer slide, the side of cabinet needs to be flush with the side side of the opening. If you are installing drawers in frameless cabinets, this is already the case.
If you are installing drawers in a face frame cabinet, you will have to do some additional work before you can install drawer slides since the face frame (usually) will have an overhang into the cabinet box.
You have two choices to fix this, one is to use the plastic clips made to work with face frame cabinets. The front of the drawer slide is attached to the inside of the face frame and the back to the clip.
The other option is to add a strip of scrap wood inside your cabinet where you are installing the drawer slides to bring it flush with the sides of the face frame.

If you want to install overlay cabinet doors (where they sit on top of the face frame) you can use either method. If you want to install inlay cabinet doors (where they sit inside the face frame) you can only use the second option.
I prefer using the second option all the time. I always have scraps of wood laying around that I can use for drawer slide blocking.
And since I like to use fill my drawers full and use them often, I am worried those plastic clips will not hold up to lots of heavy use and abuse. The wood blocking definitely does!
The cabinets I built for our new kitchen are a mix of frameless and face-frame cabinets. I am installing inlay cabinet doors, but still wanted the classic look of the face frame cabinet.
So I made my face frames only 1″ wide. That way the inside of the face frame is flush with the inside of the cabinet and the extra 1/4″ (since my cabinets are built with 3/4″ plywood) give me some wiggle room when it comes to installing them.
And bonus, it makes it easy to install drawer slides without any additional blocking or clips. But even if you have face frame or frameless cabinets, installing the slides is the same!
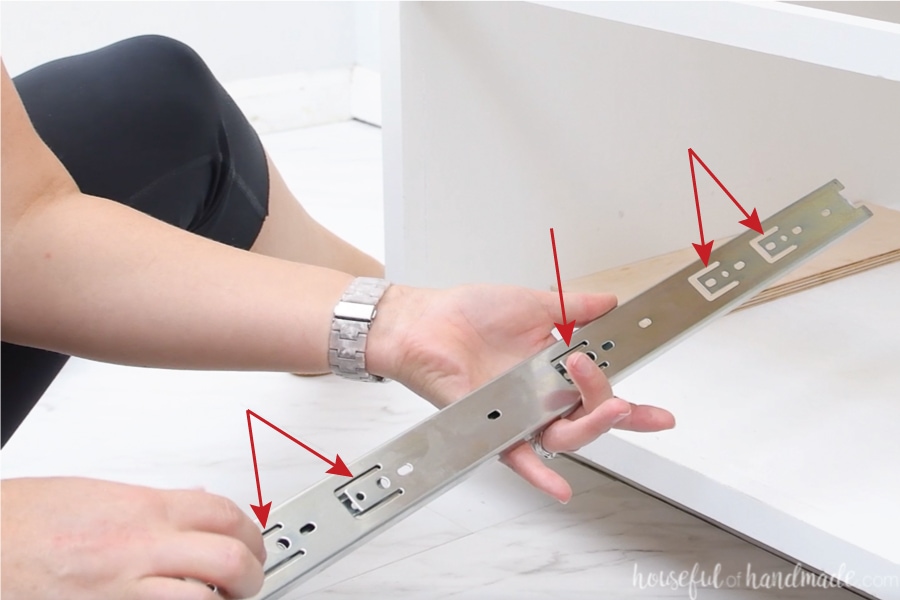
STEP 2- Take the slide apart
Before you can install the drawer slides, you need to take them apart. To do this, pull the two pieces apart until they stop.
Then look for the black plastic tab on the inside of the drawer slide. Pinch this tab toward the side of the drawer slide to release the two pieces.
I find you need to pinch the tab and press them slightly together again, then pull apart to get the slides to release.
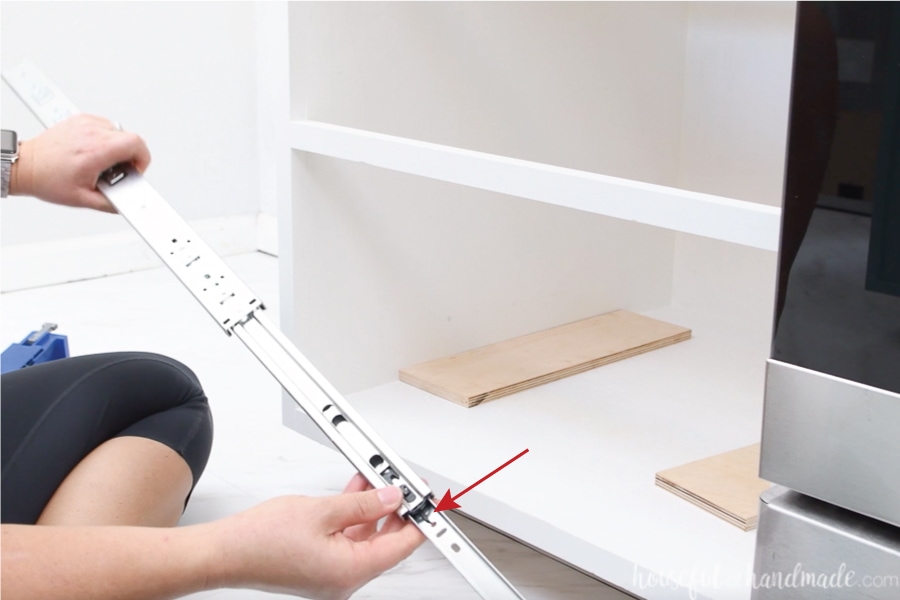
Set aside the inside pieces. They will be installed on the drawer box later.
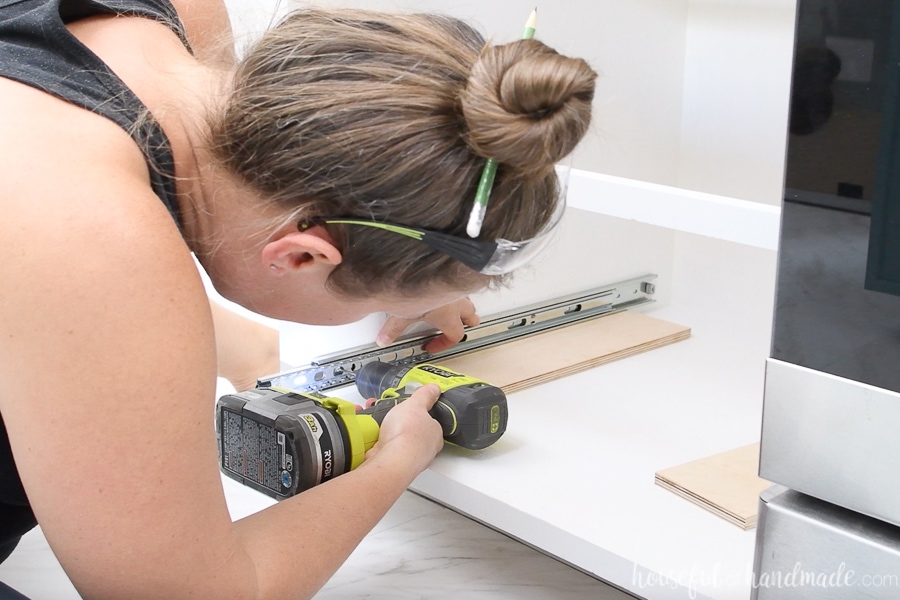
STEP 3- Install the bottom drawer slide
If you are installing drawers in a drawer base without a cabinet on bottom, the install of the bottom drawer is a little different.
You cannot use the Kreg drawer slide jig for the install since you need the drawer slide closer to the bottom of the cabinet. Instead, use a couple pieces of scrap wood to hold the slides off the bottom of the cabinet.
I use 1/2″ baltic birch plywood to build my drawer boxes out of, so I always have a few scrap pieces of it laying around. This works perfectly for a spacer when installing the bottom drawer slide.
Lay the outside part of the drawer slide on top of the scrap wood.
- If installing overlay doors, the front of the drawer slide should be flush with the front of the face frame.
- If installing inlay doors, set the front of the drawer slide back the thickness of your drawer front (mine are 3/4″).
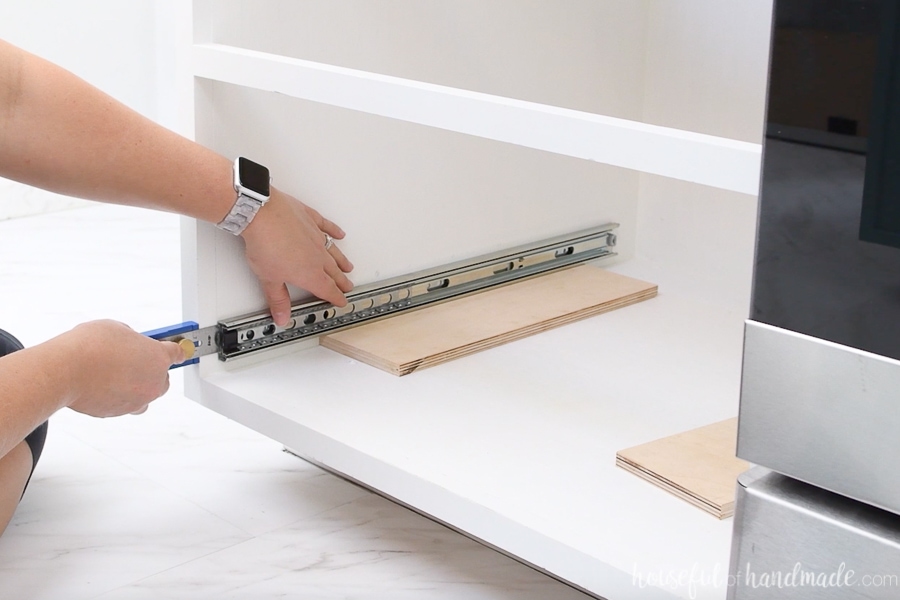
When installing the drawer slides, I like to use the holes in the tabs sections of the drawer slide. These will allow a little flex as the drawers are installed.
Drill a pilot hole in the hole in the front tab of the drawer slide. Make sure it is centered in the hole.
Then secure it with one of the screws that came with your drawer slides.
Now repeat with 2 more screws (one in the center of the slide and one toward the back). Make sure to use the screw openings on the tabs again.
You might have to move the slide in or out to reveal these holes in the slide.
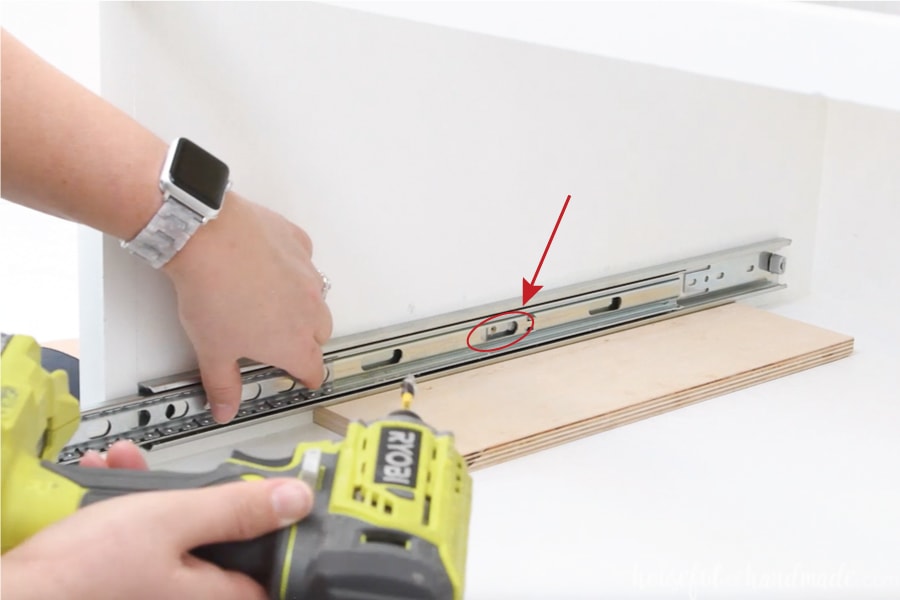
Be careful not to bump or move your slide as you install the screws. Double check the slide is flush against the plywood scrap and properly spaced on the front as you go.
Repeat for the slide on the other side of the cabinet.
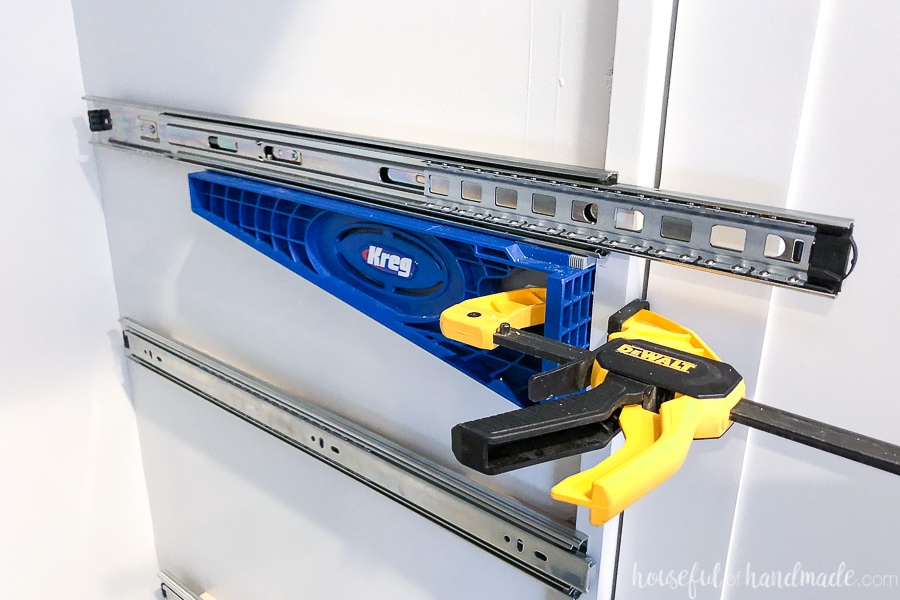
STEP 5- Install the upper drawer slides
Any drawers not on the bottom will be installed the same way using the handy Kreg drawer slide jig.
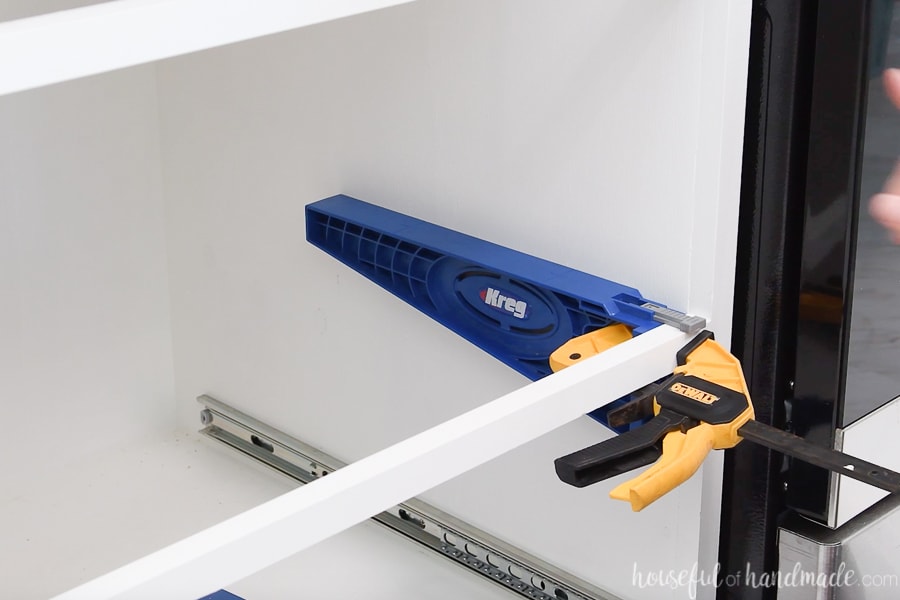
For face frame cabinets: pull out the gray tab on the top of the drawer slide jig forward. Also, pull out the side tab out too.
Place drawer slide jig A on the right side of cabinet and B on the left. The tab on the top should rest on top of the face frame rail and the tab on the side should sit up against the wall.
Clamp it to the face frame.
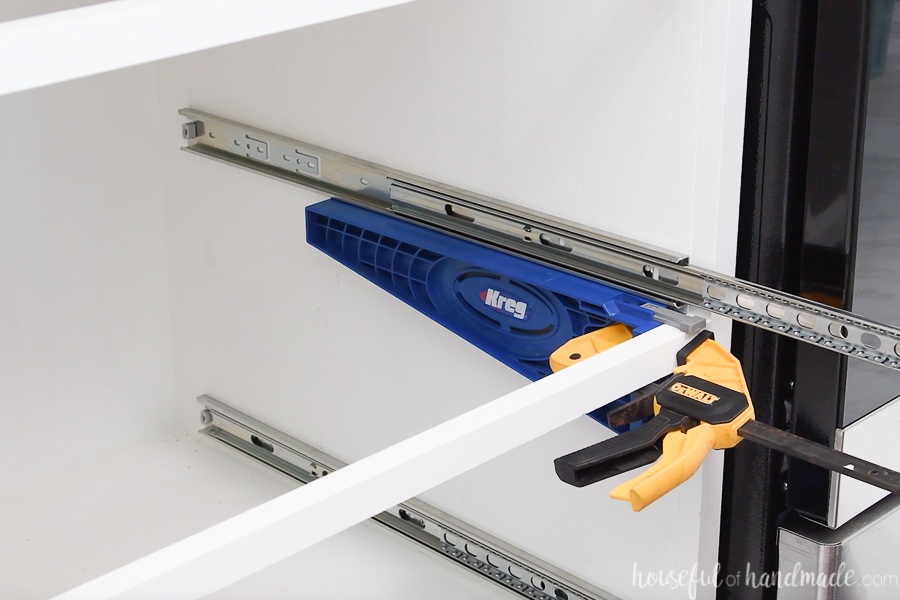
For frameless cabinets: do not pull out the tabs. Place drawer slide jig B on the right side of cabinet and A on the left. Clamp them to the side of the cabinet to secure.
You can clamp both jigs on at the same time, but I find myself bumping up against the one I am not using as I try to maneuver inside the cabinet. So feel free to do one at a time!
For my face frame/frameless cabinet hybrid: I used drawer slide jig B on the right side and A on the left (like frameless cabinets). Then I used the top tab over the face frame and clamped them to the face from (like face frame cabinets).
I did have a small challenge with the weight of the drawer slide causing the back of the drawer slide jig to occasionally drop down because there was not a face frame for it to but up against. But I just always double-checked that the bottom was flush with the face frame before securing the back screws.
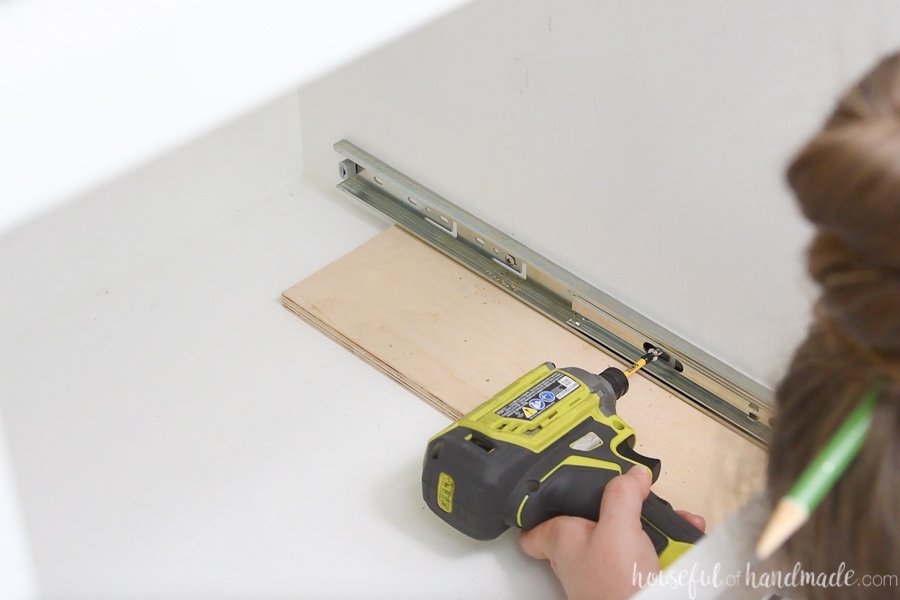
Drill pilot holes in the screw positions on the tabs (just like you did with the bottom shelf).
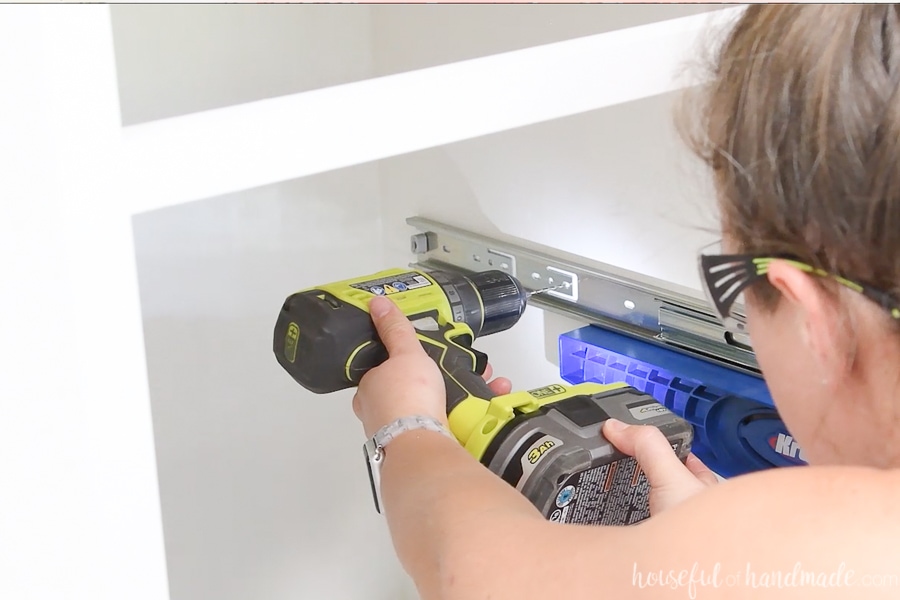
Add screws in the front, middle and back to secure. Then repeat for the other side and any other drawer slides you need in your drawer base.
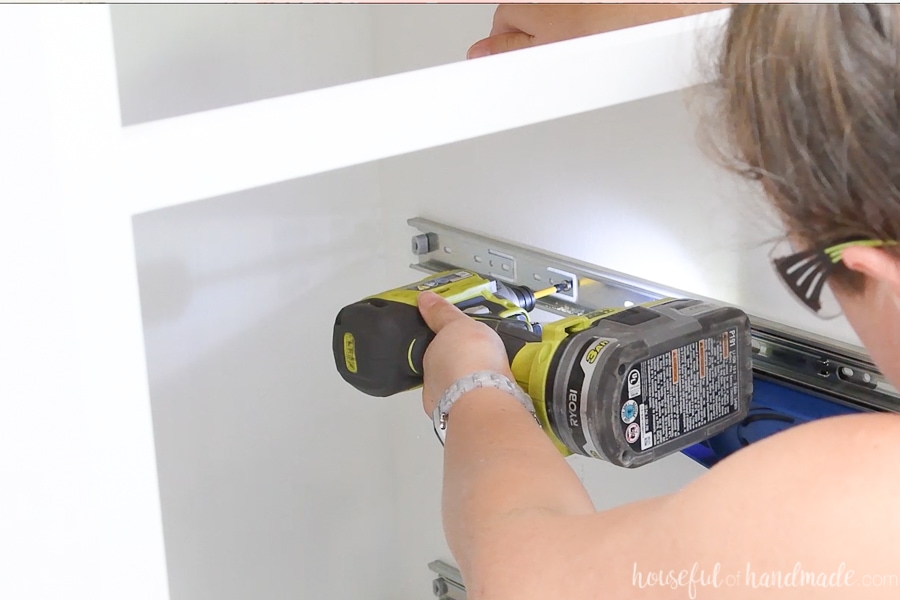
This is also how you would attach drawer slides to any base cabinet that has just a single drawer above the cabinet.
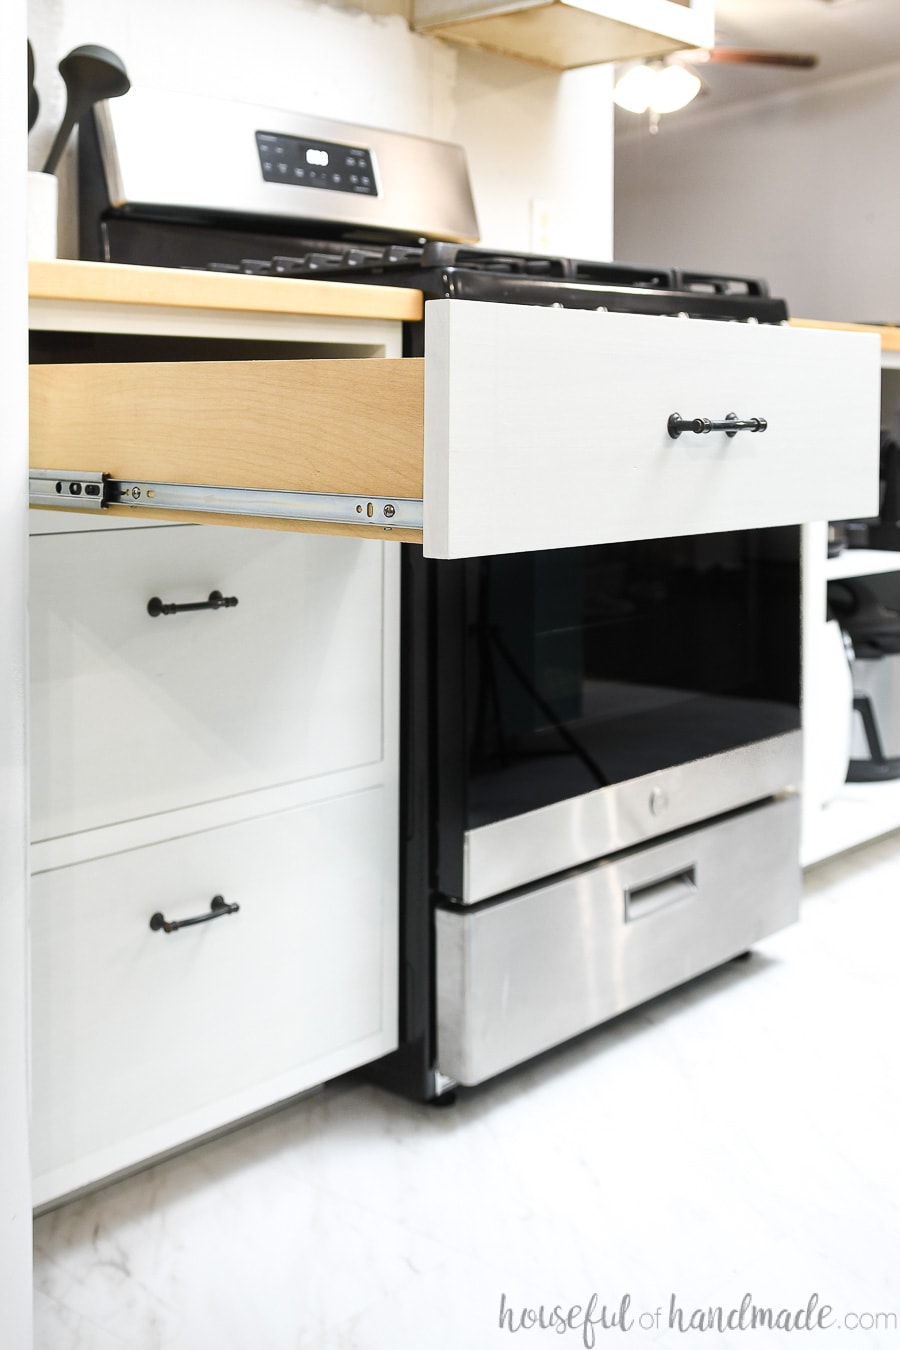
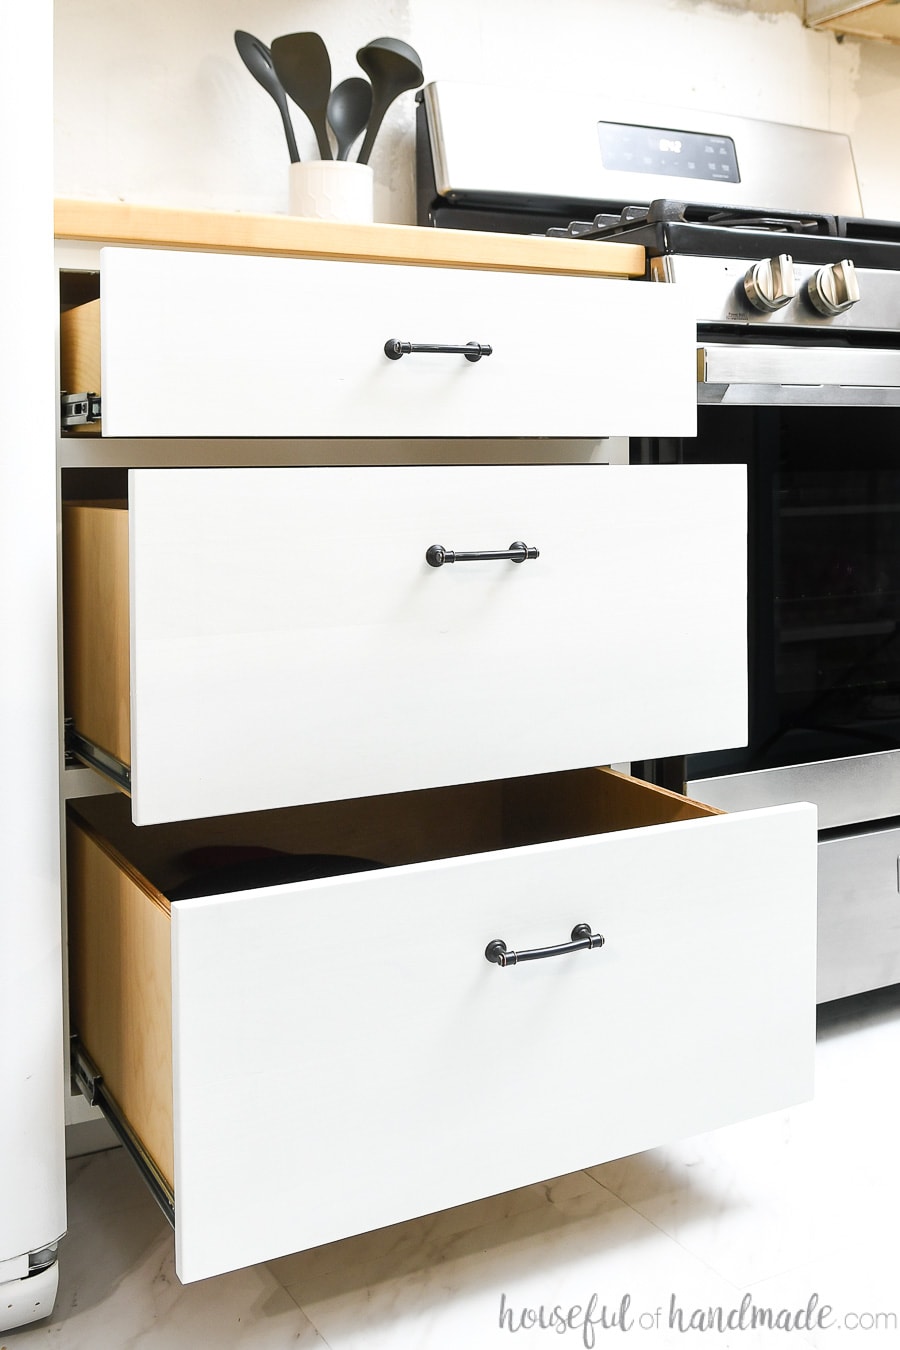
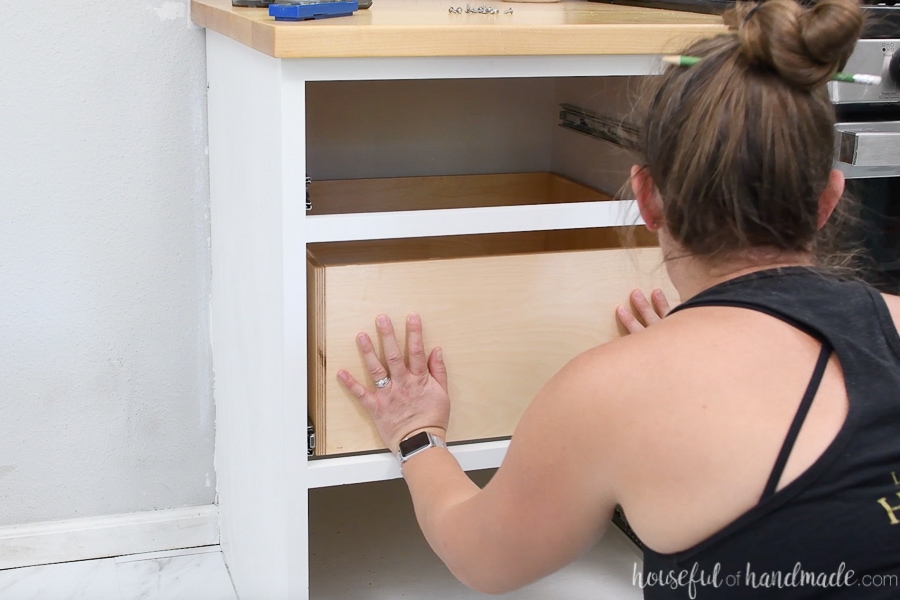
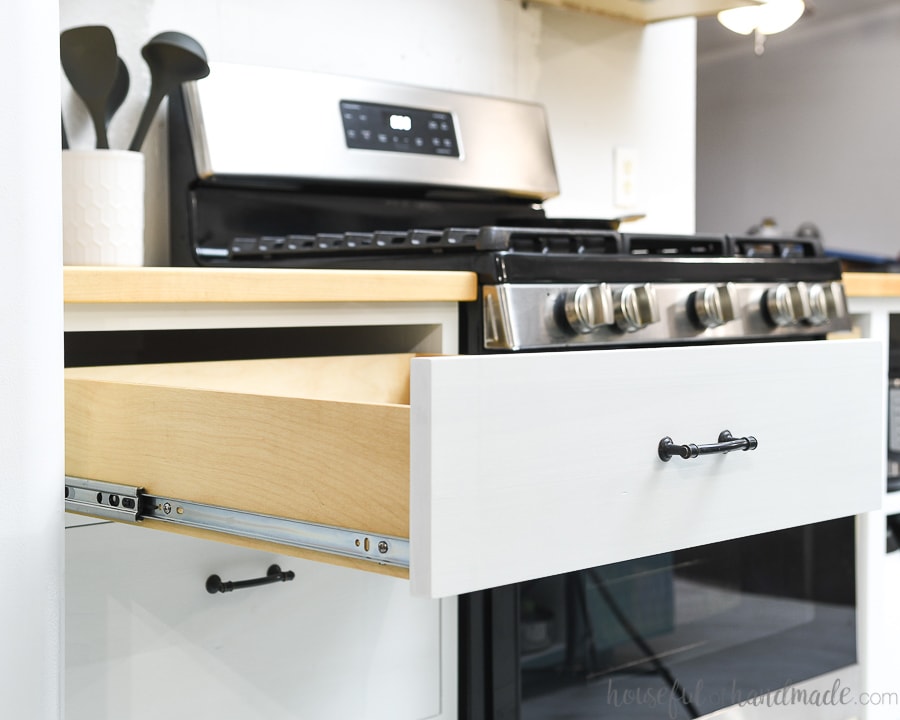
STEP 5- Install the drawer box
If you look at the instruction manual for the drawer slide jig, it will show you how you can clamp the jigs so they protrude in front of the cabinet. Then you can balance the drawer box on them and attach the other part of the slide to it.
I find this a little challenging with large kitchen drawers (which are the only kind of kitchen drawers I like!). So instead I easily attach the slide to the drawer box before I insert it into the cabinet.
Using my Kreg multi-mark tool, I place the second piece of the drawer slide on the side of the drawer box. I figured for my drawer slides, I needed to space the bottom of the slide 3/8″ above the bottom of the box.
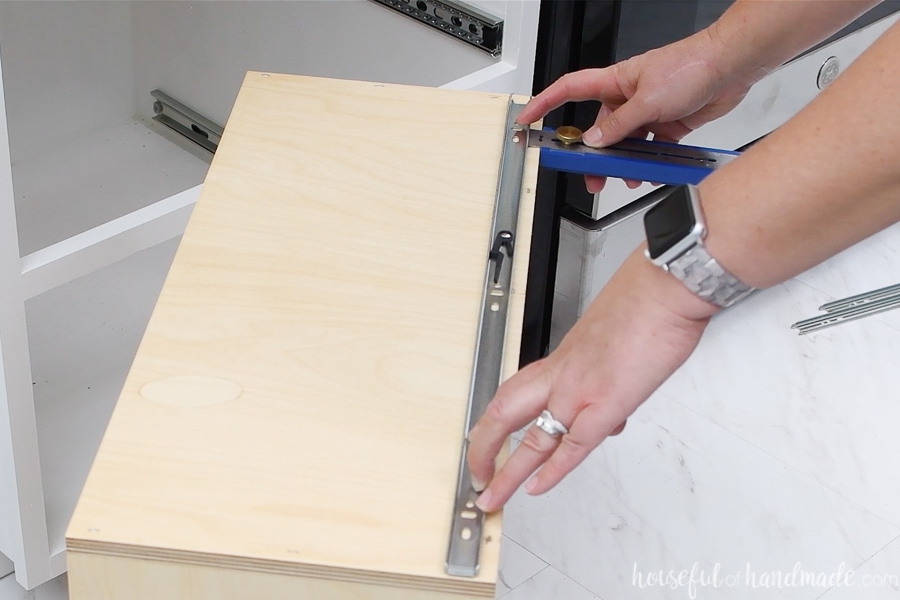
The front of the drawer slide needs to be flush with the front of the drawer box.
Once it was all placed properly, I used a pencil to mark where to drill my pilot holes.
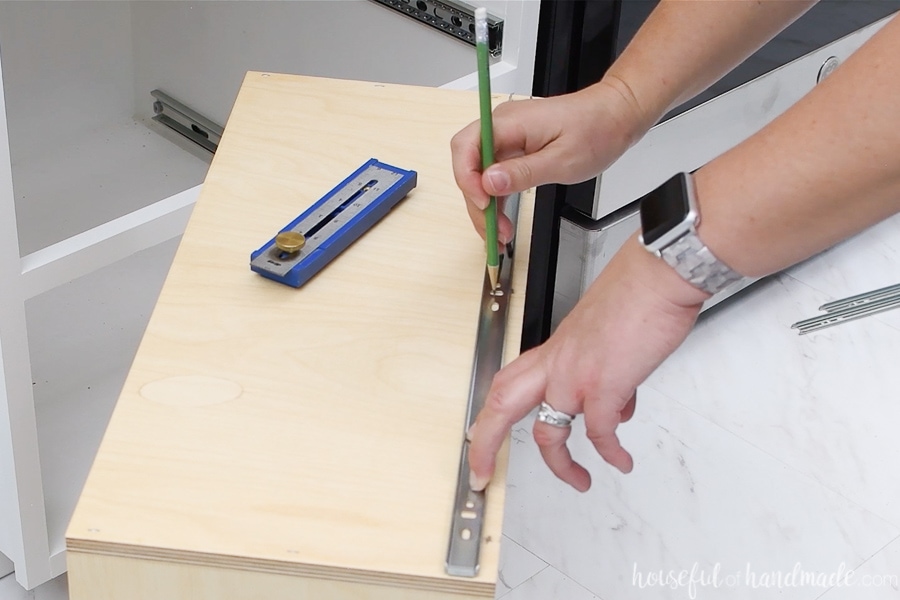
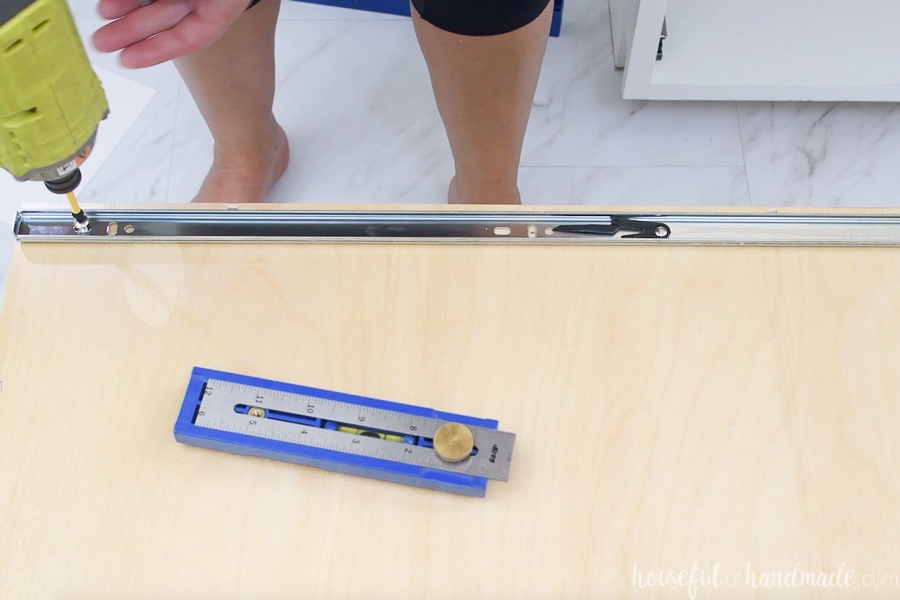
The I drilled right in the center of my marks.
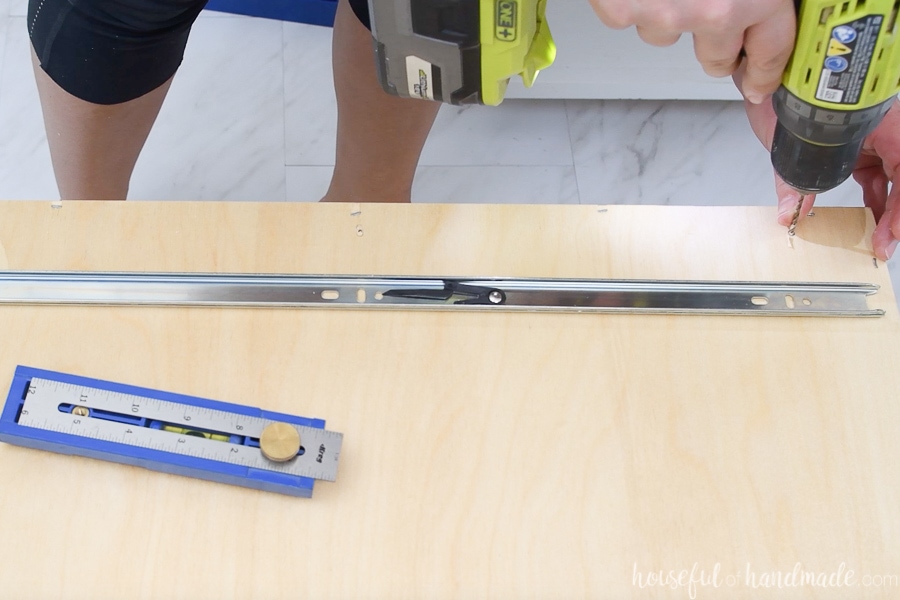
And finished with adding the screws to secure it.
Then flip the box over, use the scraps of plywood to balance the drawer box without having it teeter on the slide.
Secure the other slide in the same manner, make sure the slide is mirrored so the front is on the front of the box.
Then slide it into the drawer sides in the cabinet. You want the slides on the box to slip into the notches on the slides in the cabinet.
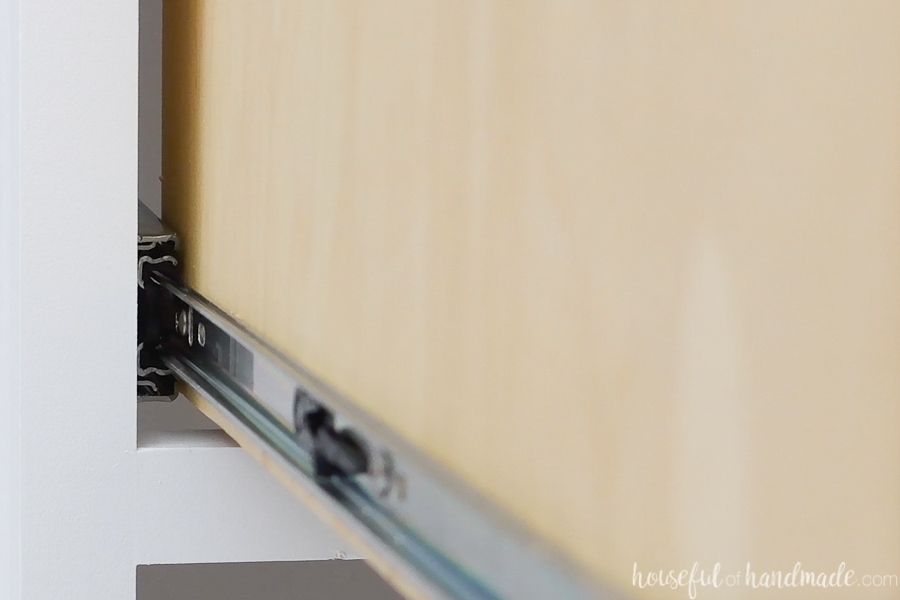
The slide will be tough to push in the first time re-connecting the slides. But push it in all the way.
Then check your drawer slide installation by opening and closing the drawer a few times. It should slide nicely!
STEP 6- Adjust as needed
If your drawers do not slide easily, it is time to adjust.
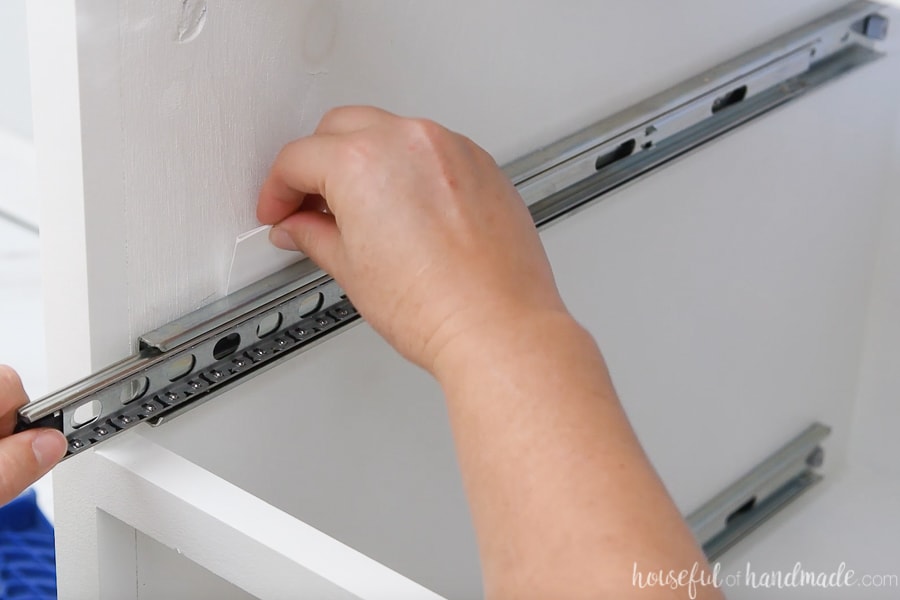
If you are having trouble connecting the two pieces of the slides because the drawer box is slightly too small, cut a piece of cardstock about 1″ x 4-5″.
Depending on how much you need to shim the slide out, fold the piece of paper in half, thirds or fourths. Loosen up the screws on your slides and tuck the piece of paper next to the tabs that the screws are in.
Rescrew in the screws and retest your drawer. It should be easier to connect the two pieces and things should slide smoother. Continue to tweak as needed.
If the front of your drawer is not flush with the front of your cabinet, you may need to move the drawer slides slightly higher or lower on the box (or cabinet) to tilt it properly.
Loosen the screws and adjust as needed. You can also add new pilot holes to different screw holes if needed.
Reinstall your drawers and check again.
Once you get the hang of it, you will have less and less adjusting that needs to be done.
But even after installing so many drawers in 3 DIY kitchens and many projects, I still have some days that I struggle with them. So don’t get discouraged.
Sometimes you just need to take a break and come back at it later with fresh eyes (this is true for so many parts of woodworking and DIY!).
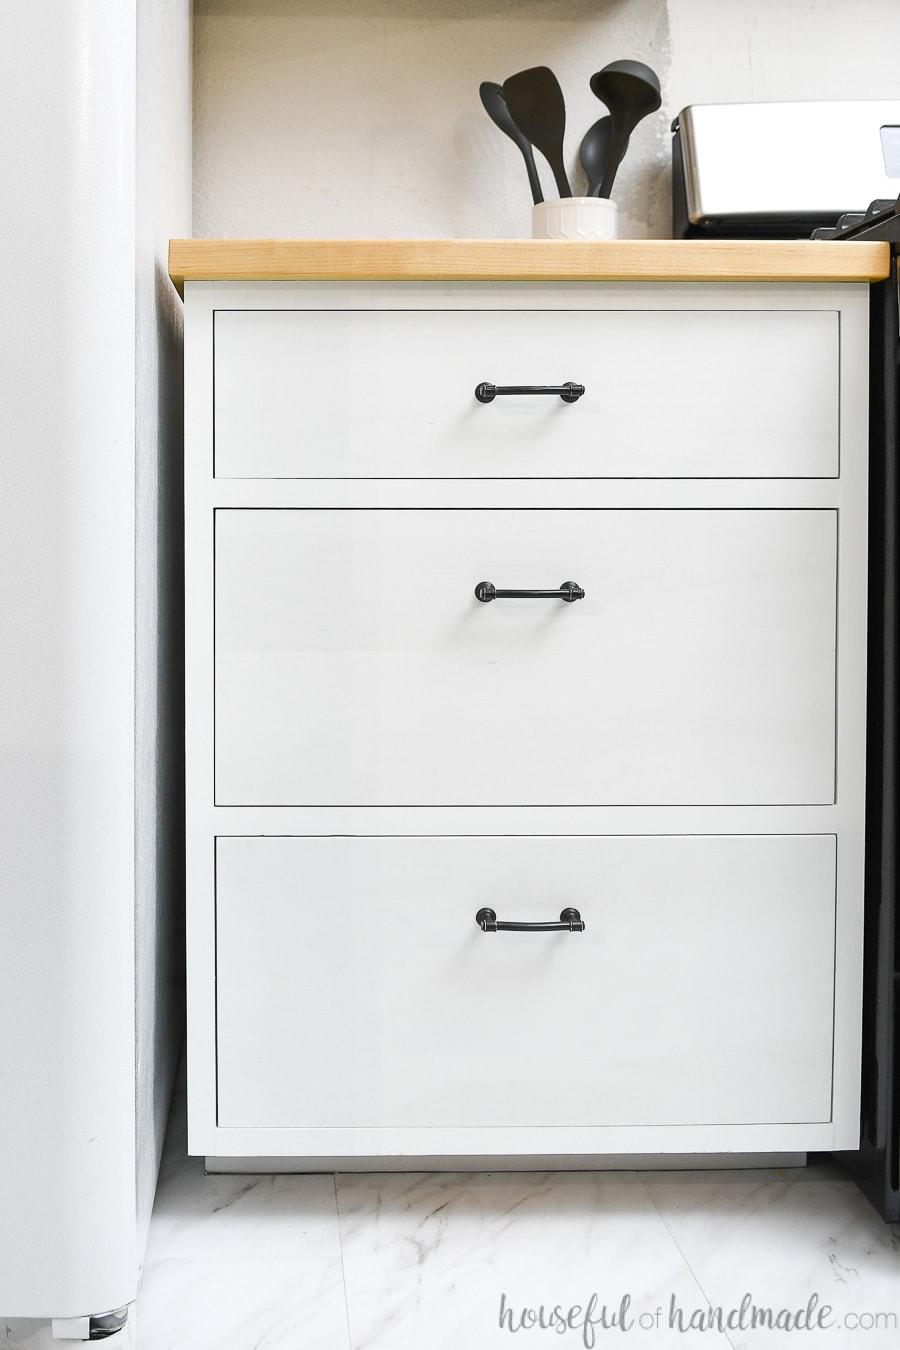
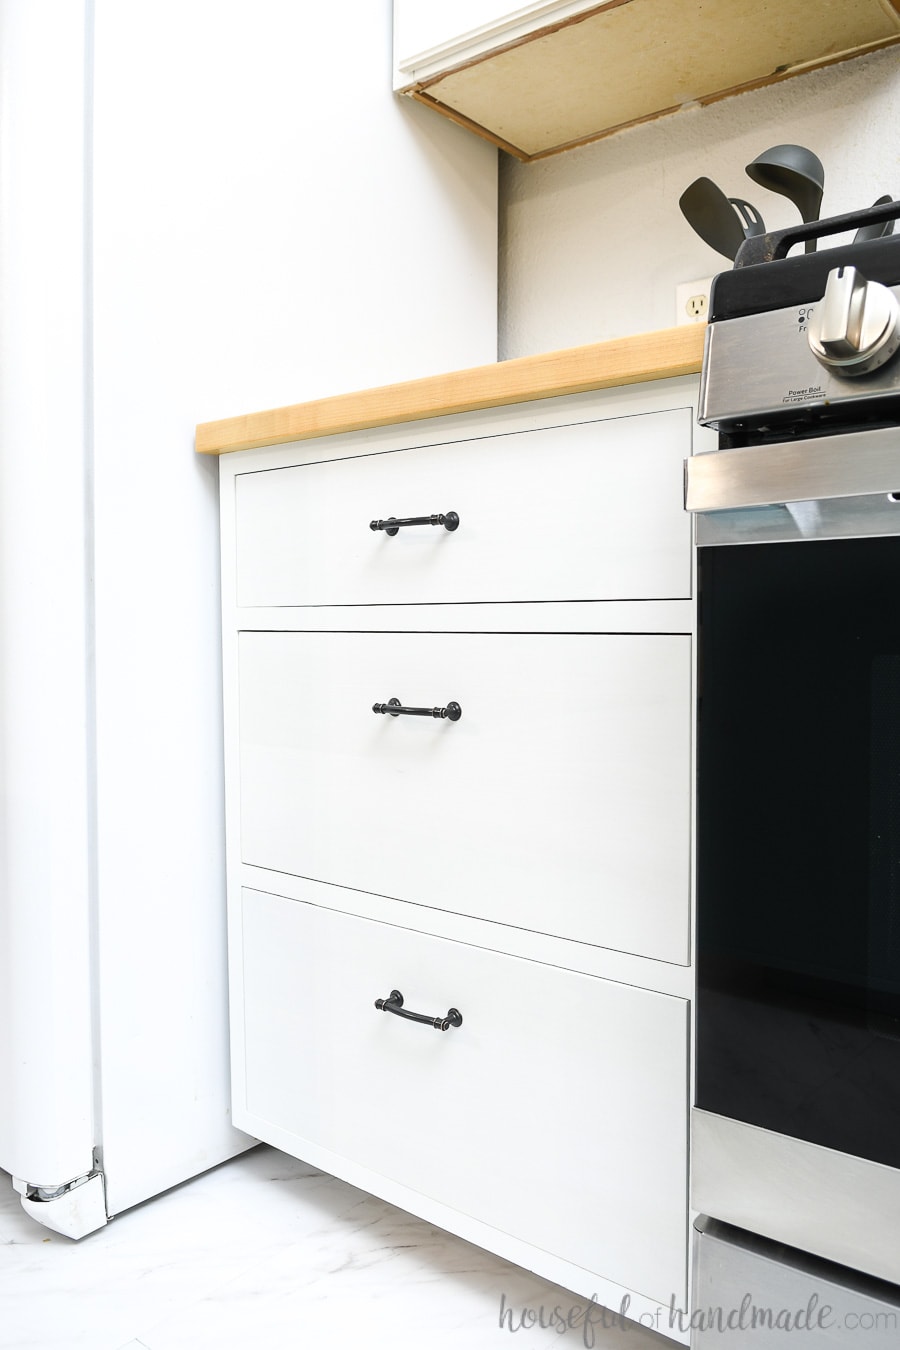
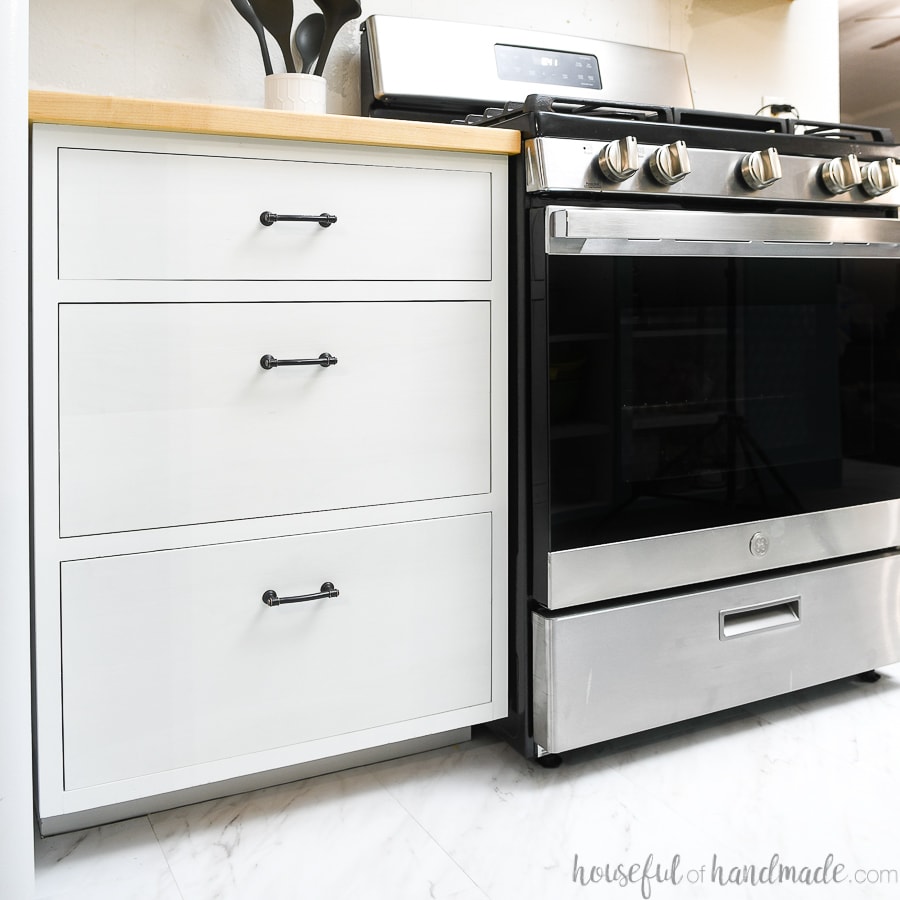
Once your drawer boxes are installed, you can line up and attach the drawer fronts.
And don’t forget to grab your own drawer slide jigs in the Hardware installation kit. Or grab them for someone you love for the perfect present for a DIYer 😉
Happy Building!

Thank you to Kreg Tools for sponsoring this post. I only recommend products that I use and love and all opinions are 100% my own. Click here to read my full disclosure policy.