Get a fall and Christmas sign in one with this DIY double sided wood sign.
What’s better than a beautiful seasonal wood sign??? How about 2 decorative wood signs in 1!!!
One of the things I struggle with the most is finding enough storage for all my seasonal decor. And fall and Christmas are the two seasons I have the most decor for.
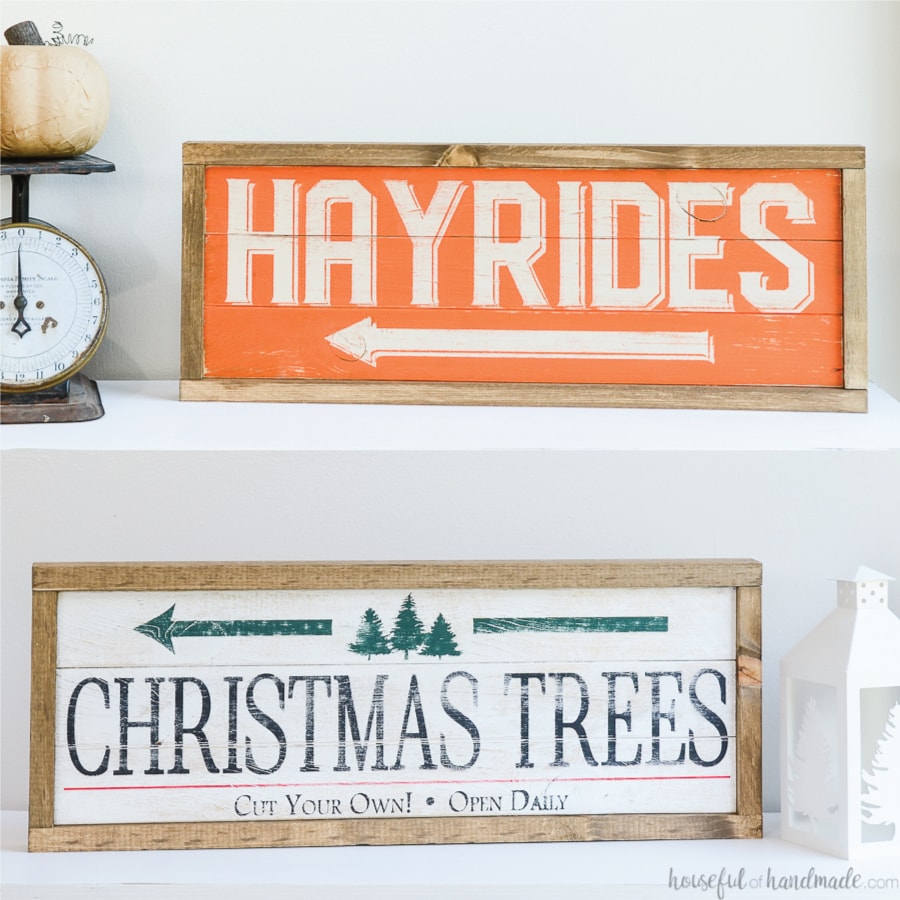
So to save some space, I decided to make this amazing double sided wood sign. One side is the perfect Hayrides sign for fall. And the other is a Christmas tree farm sign for Christmas.
This post may contain affiliate links. As an Amazon Associate I earn from qualifying purchases. Click here to read my full disclosure policy.
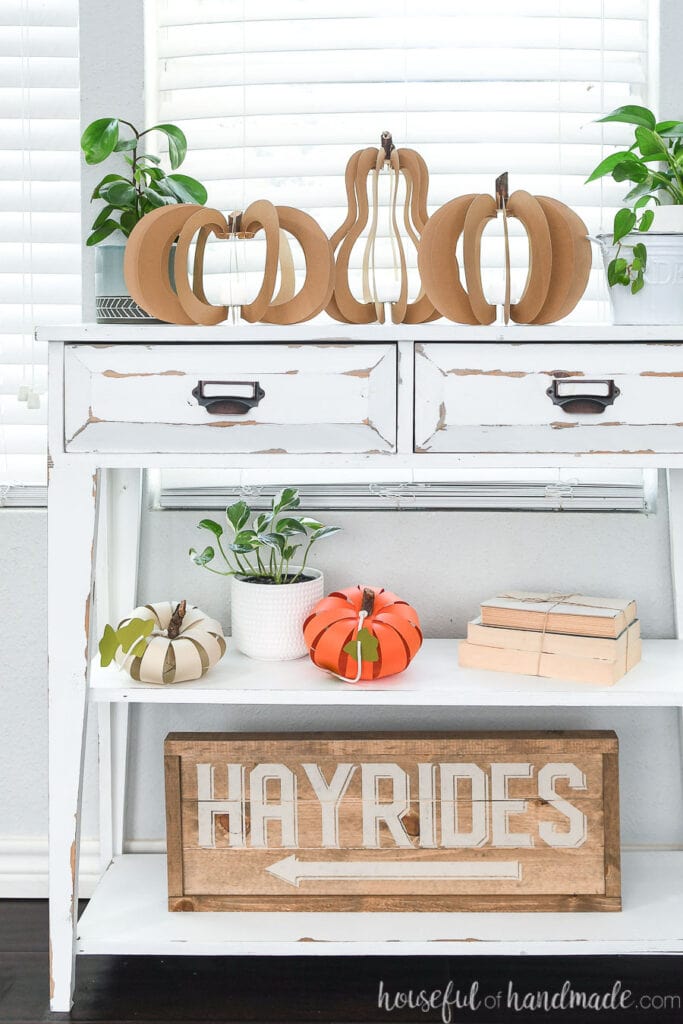
Hayrides Sign for Fall
The fall portion of the double sided wood sign is this simple Hayrides sign. A simple font is given some dimension with a vintage inspired drop shadow.
I love the simplicity of the sign. It makes it perfect for nestling in to any fall decor. And you can make it any color to match your own home.
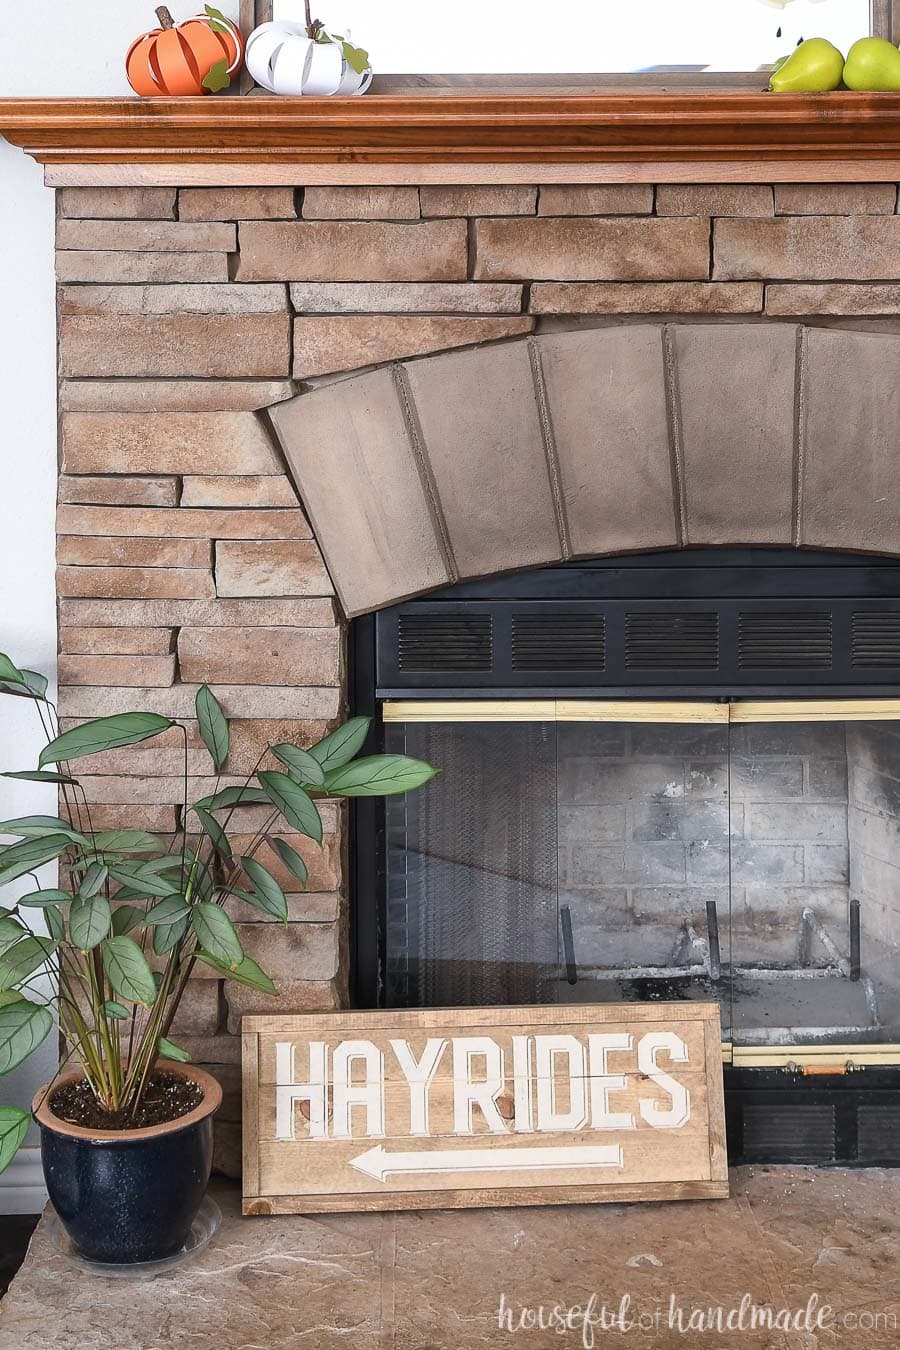
I have actually made 2 of these double sided wood signs. One was given away as a gift. But I made sure to take a photo first so you can see how easy it is to change up the look with just paint!
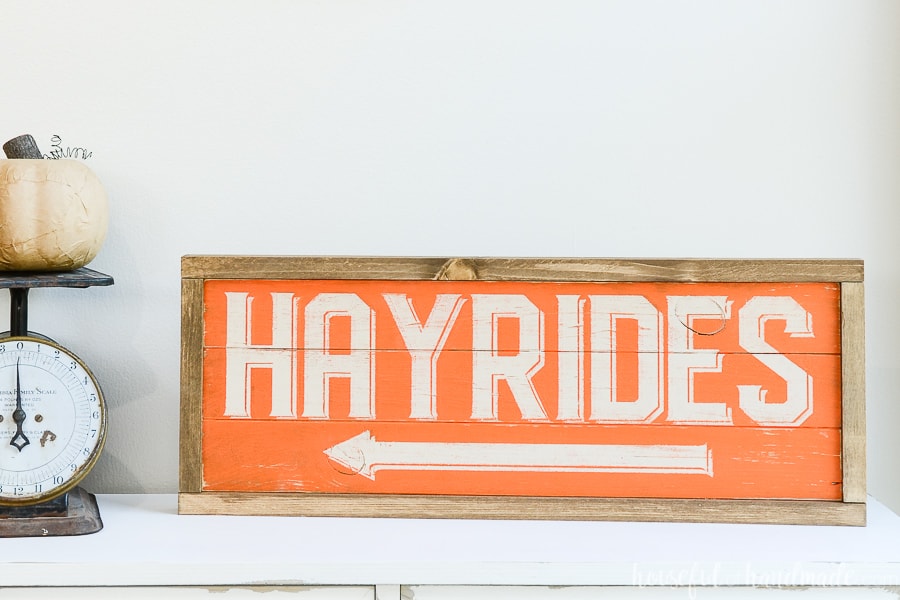
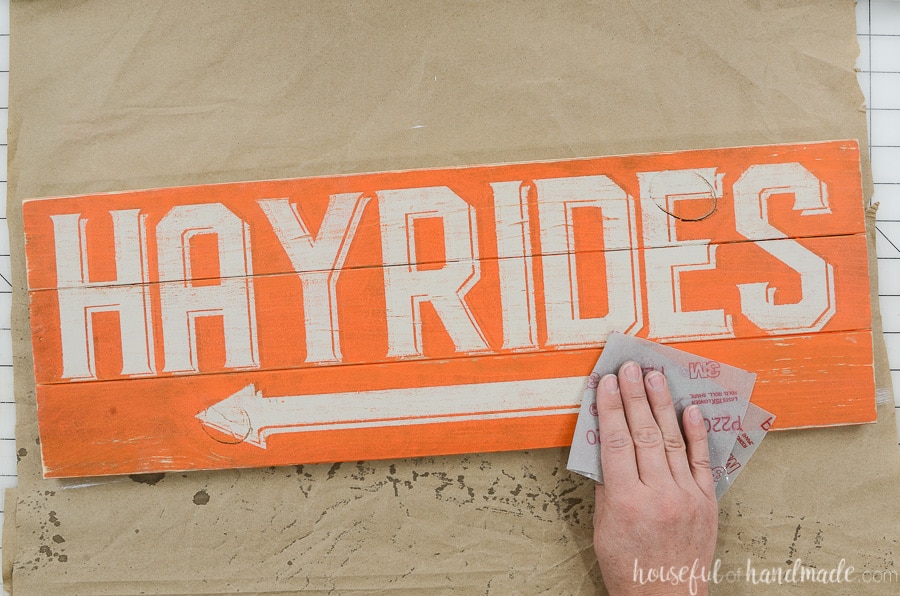
The colorful sign was first painted orange. Then the Hayrides layer was painted on top with a cream paint.
The neutral sign was stained to match the frame first, then the Hayrides was painted on top with the same cream paint.
Two totally different looks from the same sign!
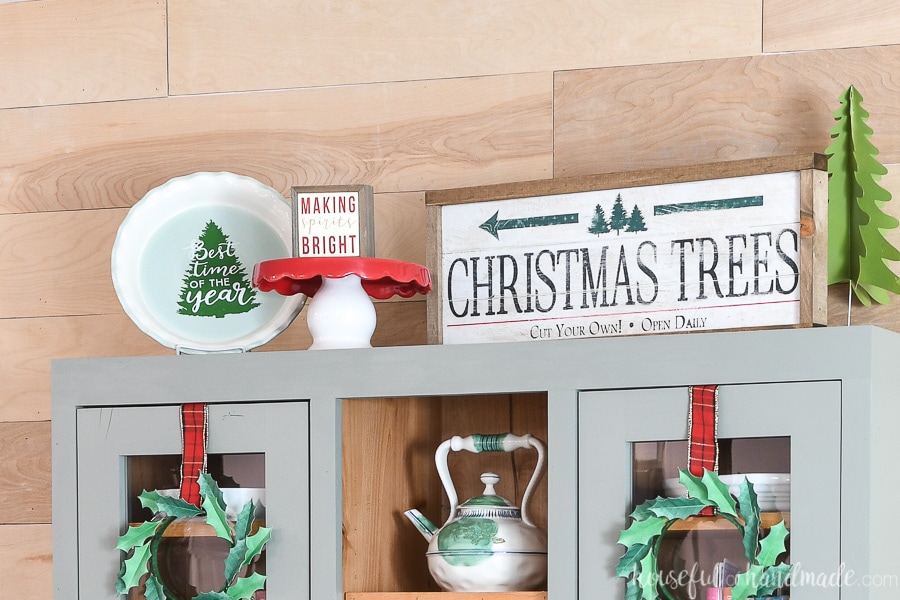
Christmas Tree Farm Sign
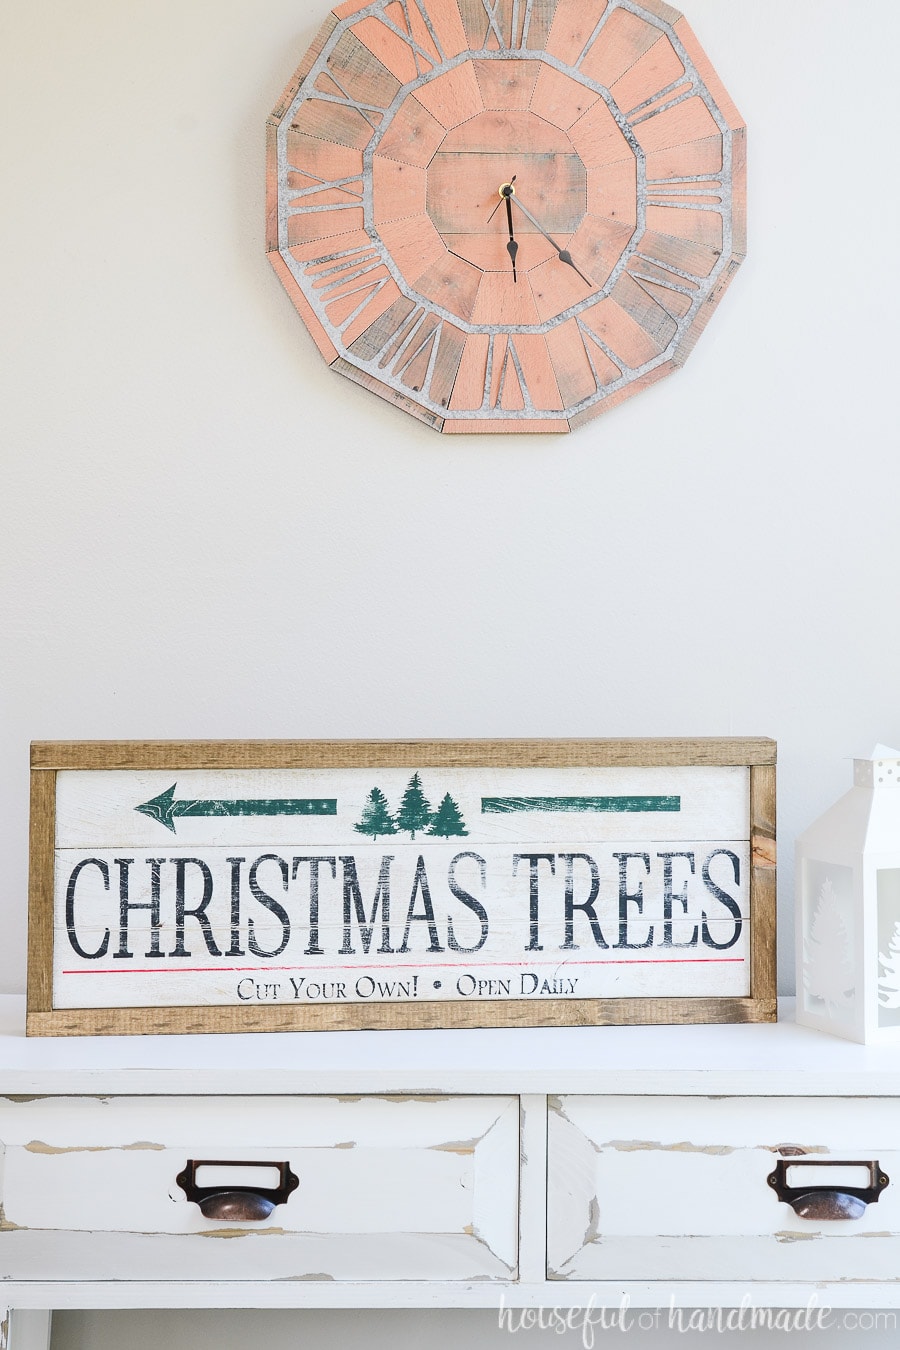
The Christmas portion of the double sided wood sign is smaller version of the large Christmas tree farm sign I made to hang over our mantel one year. I love the smaller version that fits beautifully on top of the DIY hutch in our dining room.
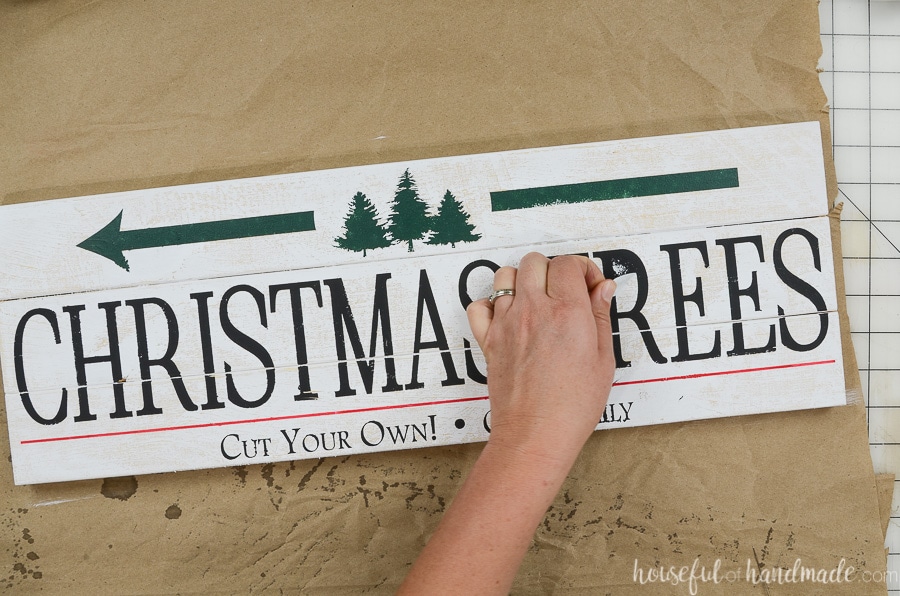
In both versions of the Christmas Tree sign I used a white background. Then I had some fun with using the traditional red & green Christmas colors to give the wood sign some contrast.
And if you are using non-traditional colors in your Christmas decor, you can have fun by adding them into your own Christmas tree farm sign.
Or stick with neutrals so you can change things up if you want.
However you decide to make your own double-sided wood sign, you will love that you only have 1 sign to store and can use it to decorate your home for 1/3 of the year!

Now I need to make another one for spring & Easter, winter & Valentine’s and more… Oh the possibilites!
How to Make a Two Sided Wood Sign
Tools Needed:
- Saw
- To cut the wood I used my miter saw, but you can use any kind of saw that you can cut a straight line with.
- Hammer or nail gun
- Measuring tape
- Electronic cutting machine
Supplies Needed:
- Hayrides & Christmas tree farm SVG Files
- Wood products:
- (1) 8′ long 1×3 board
- (1) 8′ long 1×2 board
- Wood glue
- Blue painters tape or clamps
- 1 1/4″ finish nails
- Vinyl
- Transfer tape
- Craft paint and wood stain in the colors you want
- Paint brushes and foam pouncers
STEP 1- Build the Sign
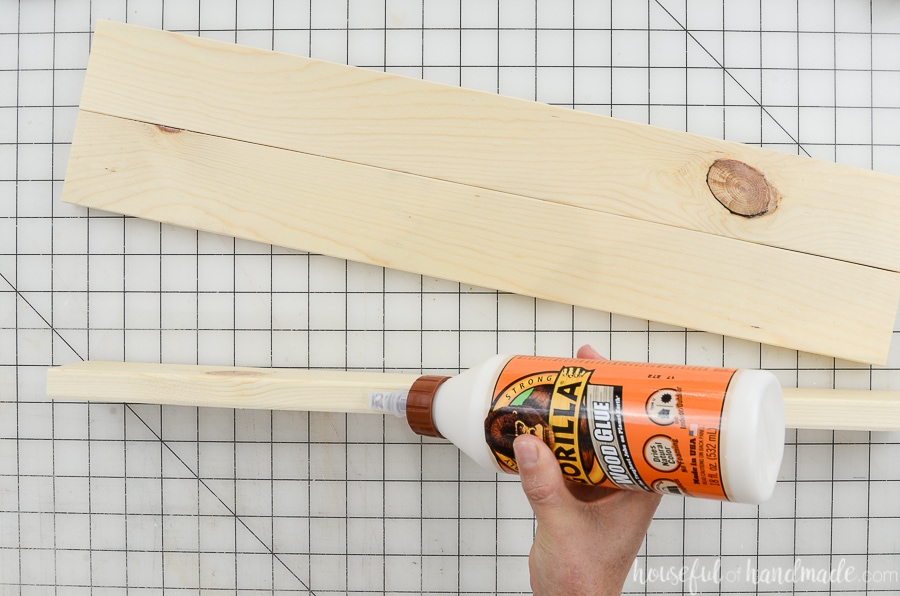
Cut three 22″ long pieces from the 1×3 board. Make sure all your pieces are exactly the same width (I use a simple miter saw stop like I shared in this woodworking hacks post).
Don’t worry if your 1×3 has slightly curved edges (mine did). It’ll give the sign a shiplap look texture to it.
Add glue to the long edge of two of the boards. Glue them all together to create one large board.
Use blue painters tape or clamps to hold them tight together while the glue dries. Make sure the boards lay flat while they are drying by placing a few heavy books on top.
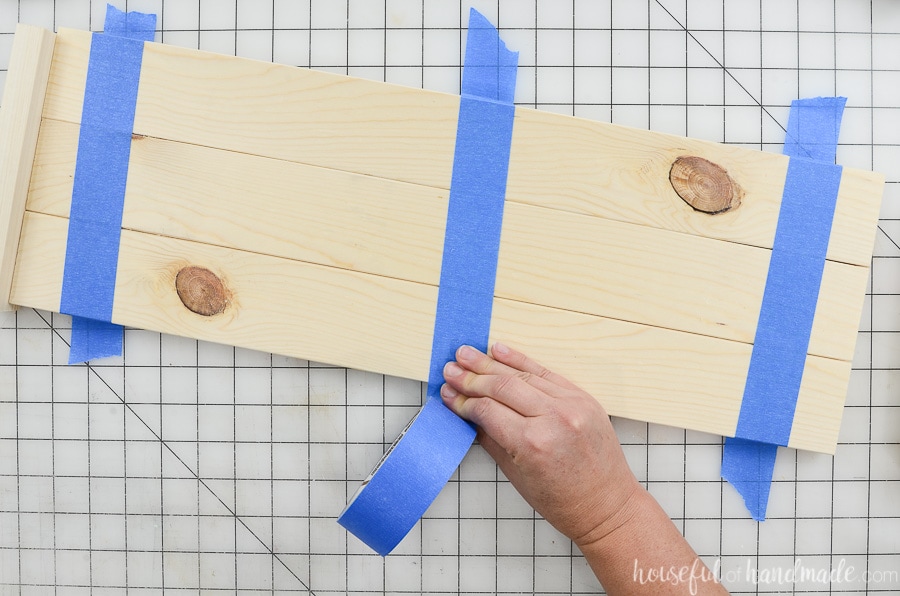
After the glue is dry, remove the tape or clamps and sand both sides of the wood sign.
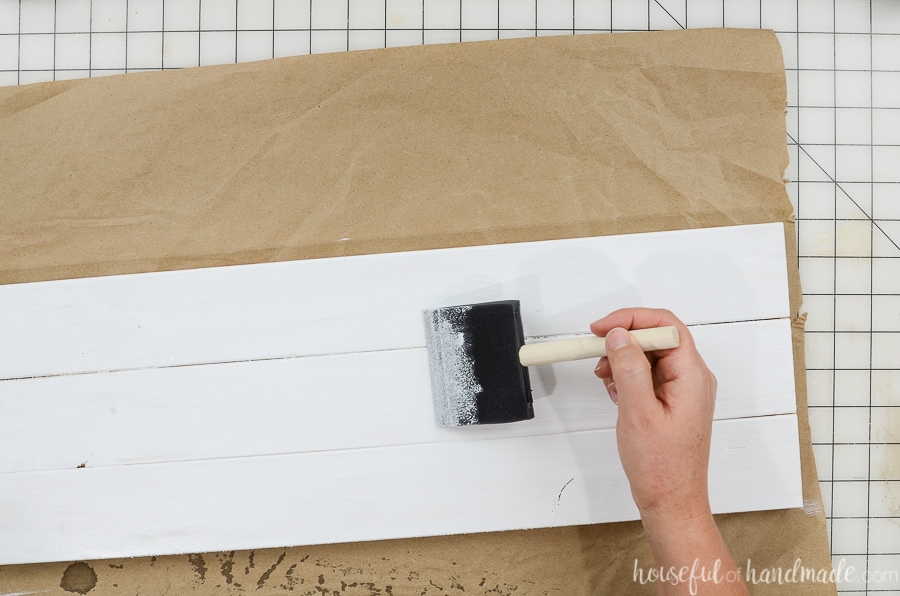
STEP 2- Paint each side
Paint or stain the front and back of the sign. Do not paint or stain the sides or the wood glue will not adhere properly.
Let them fully dry overnight to prevent the vinyl stencil from pulling the paint off later.
Cut the stencils out of vinyl. Weed out the areas that will be painted.
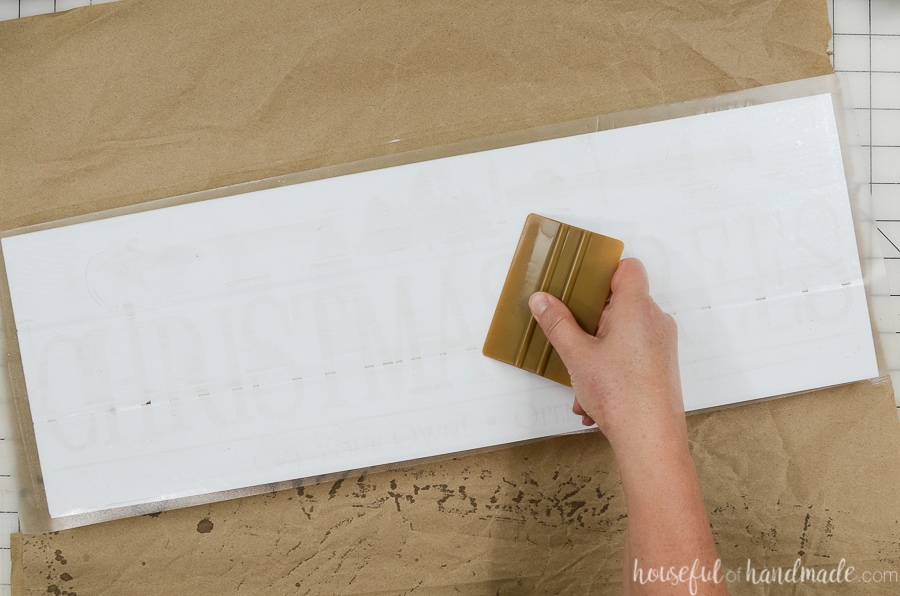
Add a piece of transfer tape over the top and then pull the back of the vinyl off.
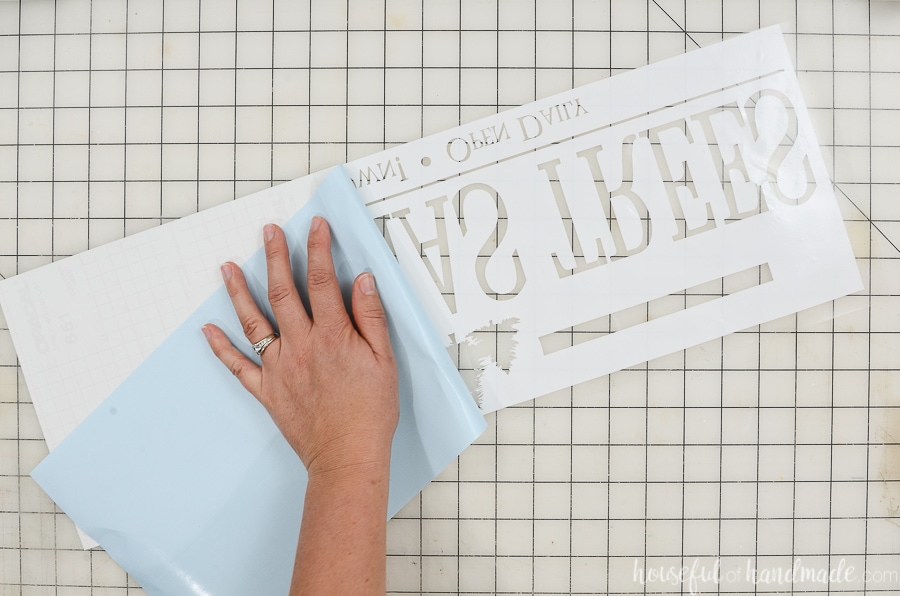
Carefully place the vinyl on top of the wood sign. Make sure to center it on top. Smooth it down. Then remove the transfer tape.
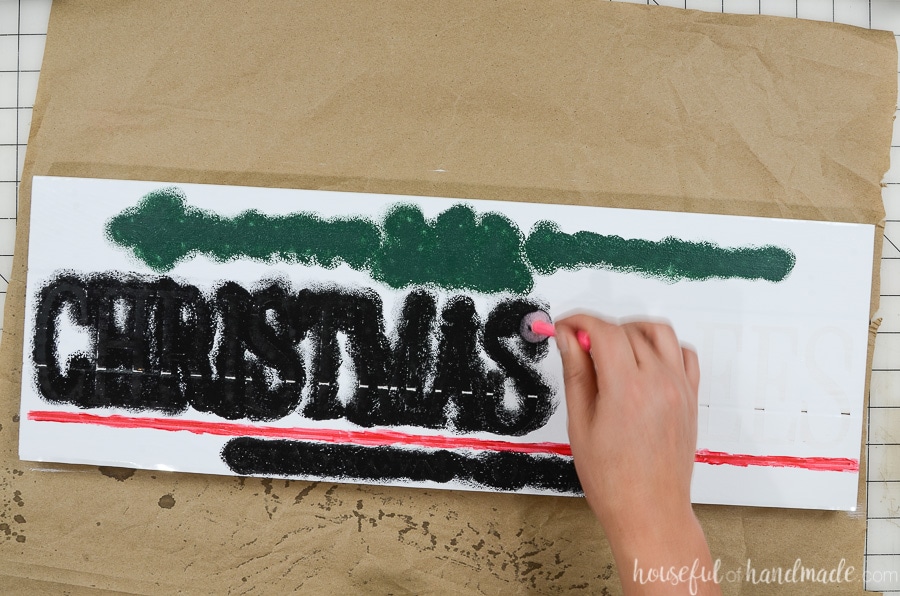
Use a pouncer to dab the paint over the vinyl stencil. Use an up and down motion (not side to side) to prevent the paint from getting under the sides of the stencil.
Be careful dabbing the paint around the curved parts of the wood to prevent it from leaking underneath. You can see I just don’t have paint hitting those areas. It helps accentuate the curved texture.
Let the paint dry just until no longer tacky. If you wait too long, it can peel off with the stencil.
Carefully peel away all the pieces of the vinyl stencil revealing your completed wood sign!
Repeat for the back of the sign.
If you want to give your sign an aged look (like I did), lightly sand the dried sign with a piece of sandpaper to rough it up as much as you would like.
STEP 3- Add the frame
Measure the sides of your sign and cut 2 pieces of the 1×2 to that length. It should be around 7 1/2″ but it is best to cut to fit since your boards might not be exactly 2 1/2″ wide.
Lay them against the sides of the sign back and measure for the top and bottom frame pieces (around 23 1/2″). Cut 2 pieces this length from the 1×2 board.
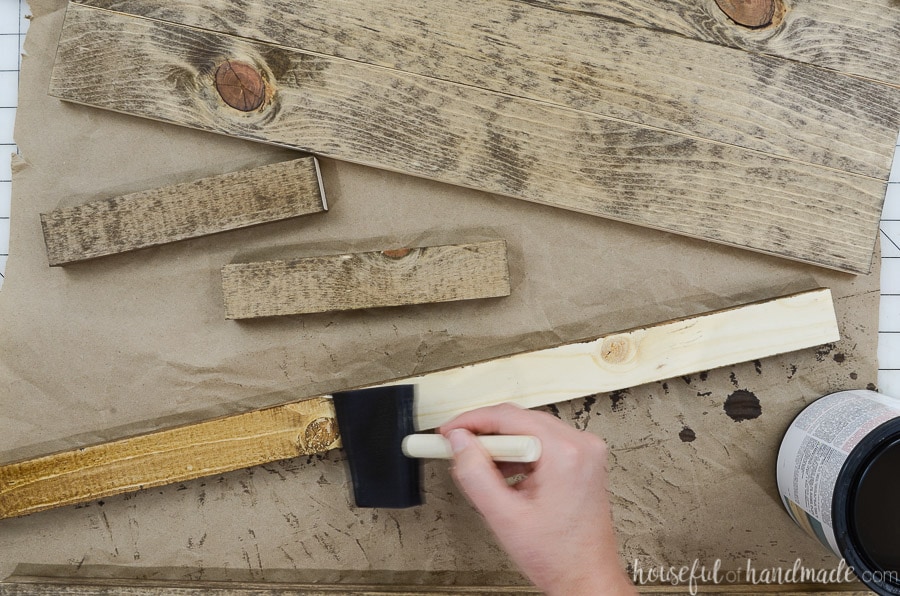
Stain or paint all the frame pieces.
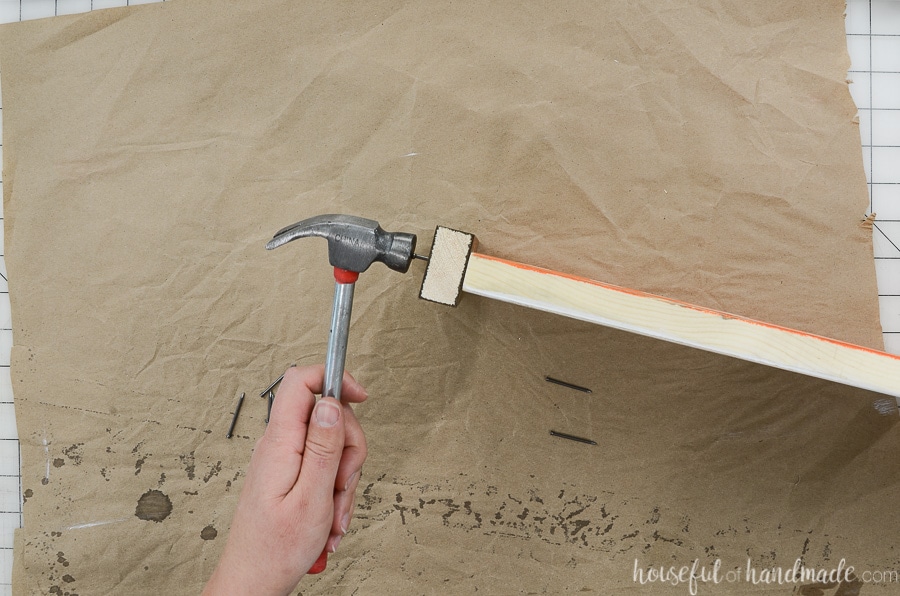
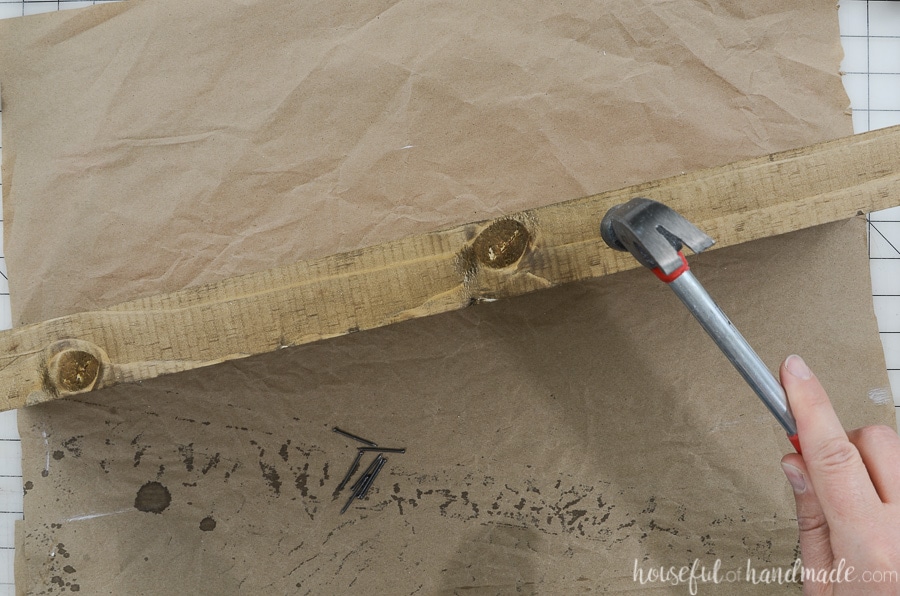
Attach the side pieces first by using wood glue and then attaching them with the finishing nails. You can do this by hand or use a nail gun.
Center the sign in the frame so there is an equal amount of overlap on each side.
Then attach the top and bottom pieces so they are centered and the ends should be flush with the edges of the side pieces.
Secure with wood glue and finish nails.
And you are all done!

Now you can decorate your house from September to December with just this one sign.
You are going to love all the places you find to use this easy to build wood sign!!!
And now that I have broken the Christmas decor seal, get ready for lots more Christmas decor.
