Skip to Content

Dining Room Hutch Build Plans

Add tons of storage and style to your home with a dining room hutch.

For way too long I have been wanting a big beautiful cabinet with a hutch in my dining room. It’s like adult furniture…. when I grow up I would get one.

Well guess what?!? Apparently I am grown up because I finally have the perfect dining room hutch.

And I partnered with Kreg Tools and their new project plan site, BuildSomething.com, to share the build plans for this amazing hutch for free!

This post may contain affiliate links. As an Amazon Associate I earn from qualifying purchases. Click here to read my full disclosure policy.

Dining room bench next to modern farmhouse hutch in the dining room.

A buffet with hutch is a great way to display (aka, store) all the pretty baking and entertaining dishes. I feel like I collect them like other people would collect figurines.

And as much as I love the fact that they are finally organized in our new blue & white two-tone kitchen, I really wanted a place to display them instead.

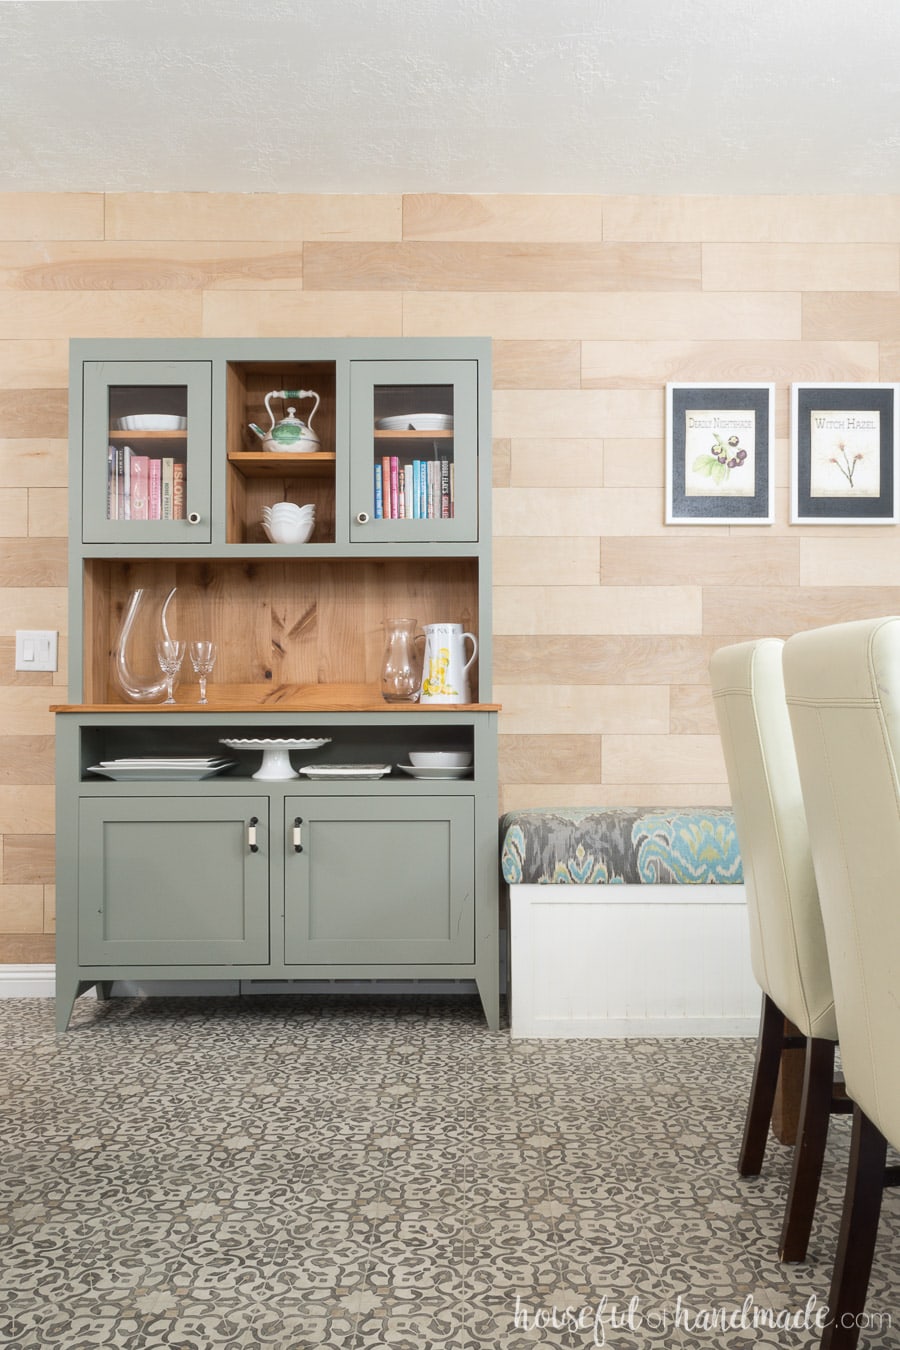
Build a Dining Room Buffet with Hutch

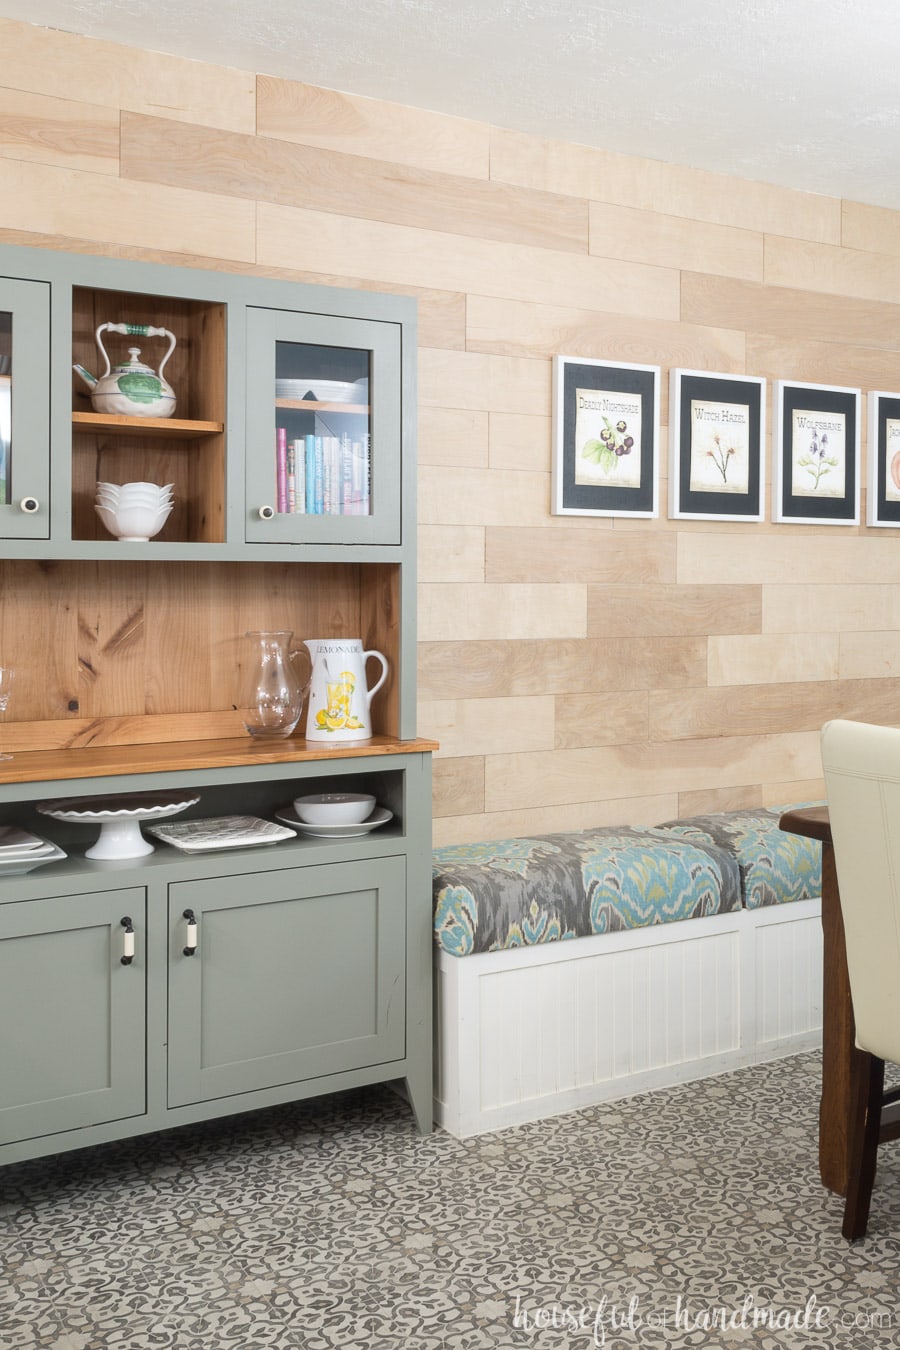
The space in our dining room next to the built in bench is only large enough for a 4′ wide hutch. I was not finding any hutches that I loved to fit the space so I decided it was time to make my own.

That is the best thing about building, you can get exactly what you want to fit your own space! And this big project was made easier with the Kreg Jig and cabinetry jigs for shelf pin holes, cabinet hardware, and my favorite: the concealed hinge jig.

Gorgeous gray dining room hutch with natural knotty wood in the inside. Lots of storage and display space.

One of the biggest challenges I had when trying to find a modern dining room hutch for our space is that there is an air return vent on the wall that cannot be covered up.

Our coffee center console was open so it worked for the space, but anything on the shelf was always covered in dust. I swear it was instantly covered as soon as I placed it there.

Bottom view of the dining room hutch raised up to allow for the air return vent on the wall.

So I knew I wanted something with doors that would hopefully protect from the excess dust. But that meant I needed the buffet part of the hutch to be raised off the floor more so the air return was not blocked. And bonus, the Roomba can easily go under the hutch to help clean up the dust!

What I came up with is truly one of my favorite pieces. I know I say that every time I build something new, but this one was almost a year of planning.

I loved it so much, when I built our new storage lockers for the entryway I made them match this amazing hutch.

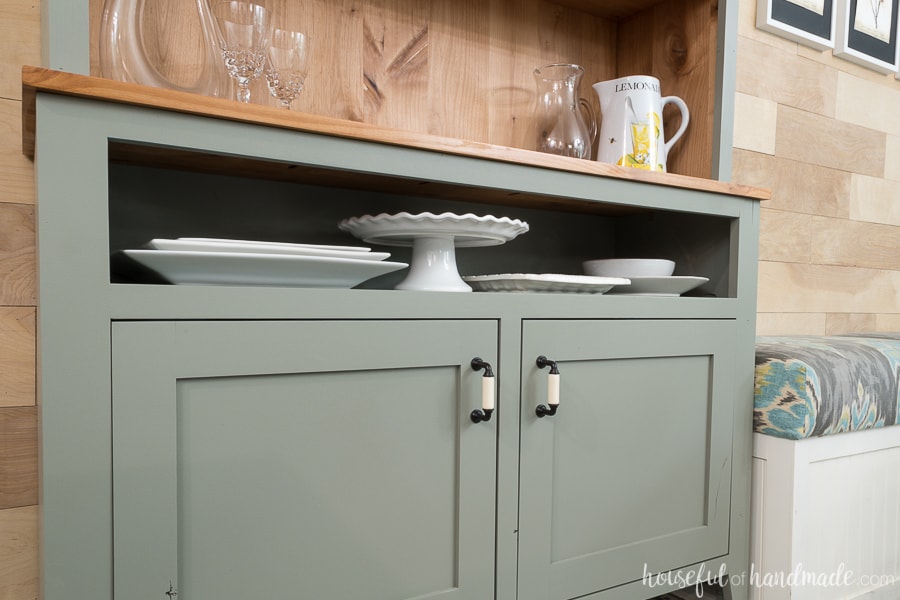
I wanted something to display pretty items, but protect them from dust. I think I achieved that with the buffet that has beautiful shaker style cabinet doors and a large storage cabinet.

But with the smaller open area at the top for displaying platters.

A narrow open shelf at the top of the dining room hutch is perfect for displaying and storing platters.

And the hutch is for even more display and storage. To keep the top open and bright, I wanted doors with glass centers. I used plexiglass to make it less breakable, but still give me the beautiful open look I wanted.

Plus the way these doors were put together turned out so great. A super easy to build door with a simple routed insert for the glass.

Then the glass is held in place with some simple 1/4″ trim, making it easy to paint the door completely before adding the glass. There is no need to tape off or risk getting paint on the clear surface.

Natural wood hutch with painted gray interior storing platters, cook books, and baking dishes.

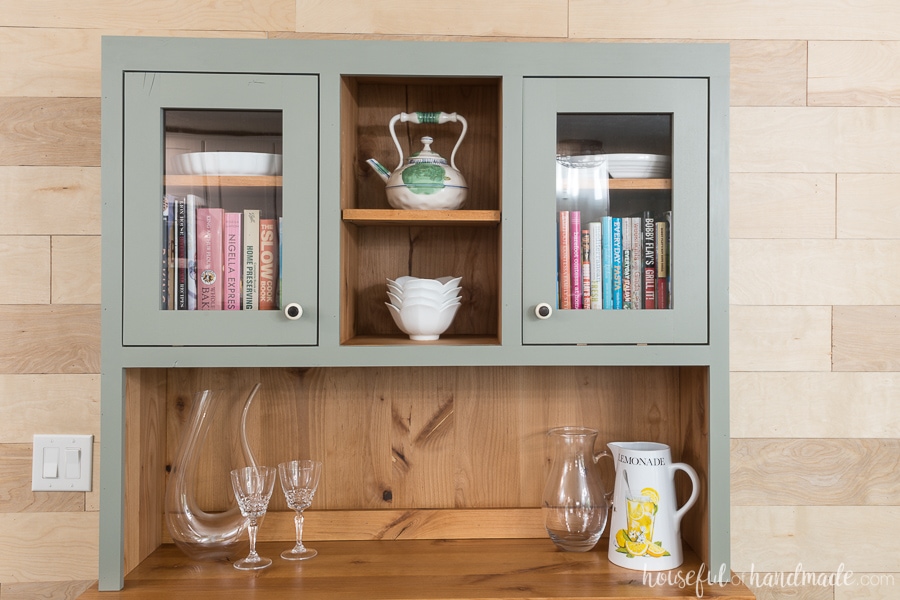
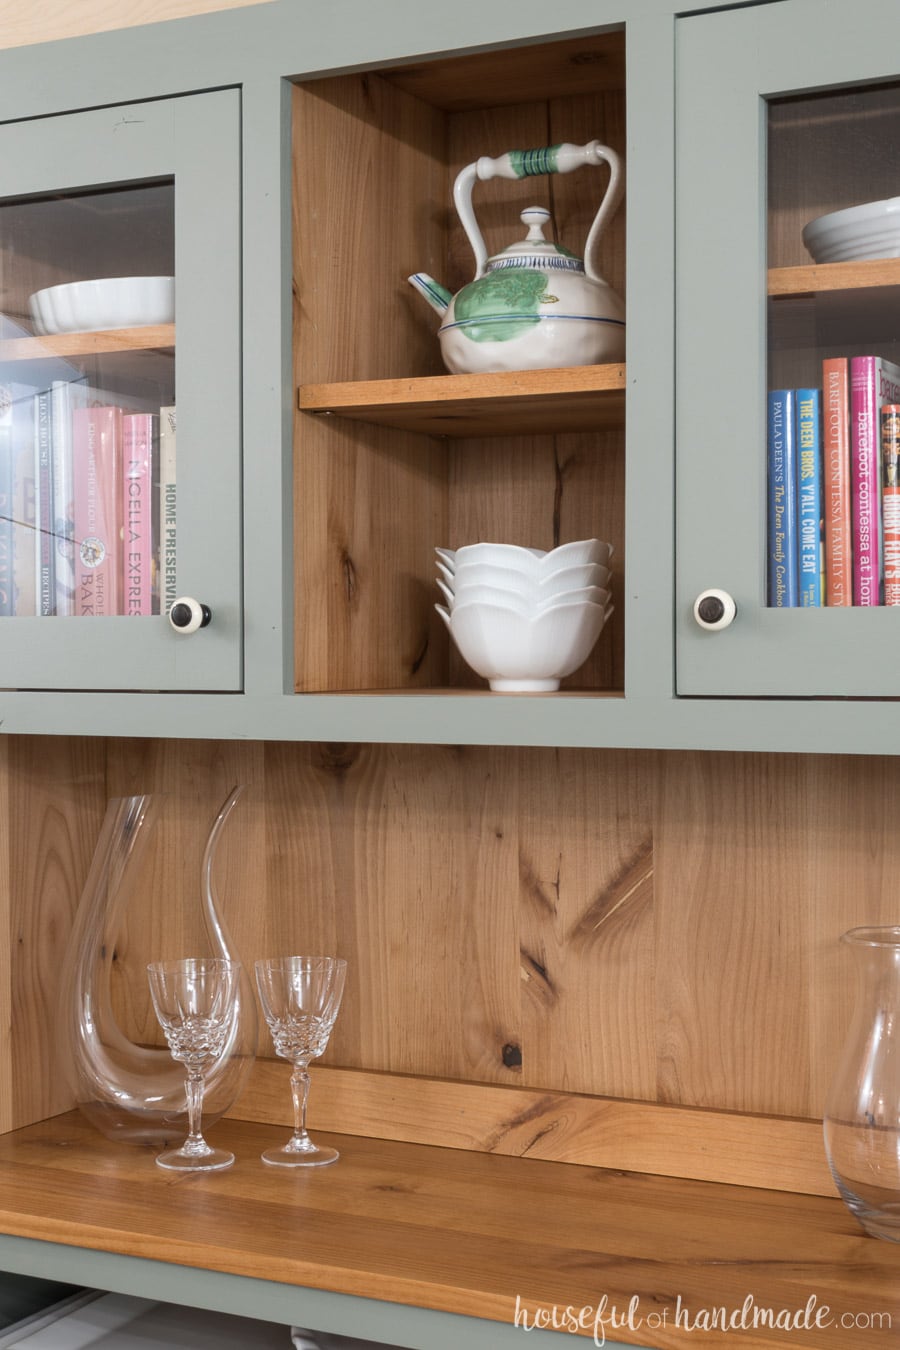
One of my favorite parts of the hutch is the wood inside and painted outside. I love the way it turned out and gives the entire thing a modern farmhouse look.

The entire hutch was built out of knotty alder, which is a great budget friendly hardwood option.

The knots in the wood and plywood show through the paint and really pop on the raw wood center. So high end and gorgeous!

Closeup view of the natural wood with the visible knots and grain, on the inside of the dining room hutch. Outside is painted a warm gray.

Because I used hard wood and very solid alder plywood for the build, this complete hutch was not the cheapest piece I have made. The total cost including hardware and paint came to just under $500.

But this is a piece that I know I will be passing down to my kids and hopefully they will pass it down to theirs.

Creating memories of baking and entertaining in the kitchen like their mom did!

Dining room with patterned vinyl flooring, built in bench, and 4' wide gray rustic dining room hutch.

DIY Hutch Woodworking Plans

If you are ready to build your own dining room hutch, I am sharing the free build plans at Kregtool.com. Click here for the complete plans.

Or get plans for the sideboard cabinet 48″ or 60″ here.

It has the same amazing serving dish display shelf for entertaining.

Happy building!

-Kati with picture of blog author Kati

Thank you to Kreg Tools for sponsoring this post. I only recommend products that I use and love and all opinions are 100% my own. Click here to read my full disclosure policy.

Tibi

Thursday 16th of February 2023

Hi,

I really like this cabinet. I was wondering if I can get somehow the original plans, I am leaving in Europe and we use metric system here.. recently I build a coffee table based on imperial unites and it was a pain.. also most of the lumber has different dimensions here in Europe so if somehow I could get the original plans in a format which could be used in Sketch or Revit etc.. I could switch to metric system and also adjust the plan for the lumber which is available here for me.

Many, Thanks.

bev. l.

Thursday 13th of July 2023

@Tibi, too bad you don't have the old fashioned "Hoosier cabinet". it had it all. it was an entire kitchen all by itself. Bev

Kati Farrer

Friday 17th of February 2023

I am glad you like the cabinet. Unfortunately I don't share the plans outside of the Kreg site or PDF which are all in imperial units.

Justine

Sunday 5th of February 2023

Hi! I'm just wondering what the approximate finished dimensions are! I tried to find them but I may be blind! Thanks!

Kati Farrer

Monday 6th of February 2023

The finished dimensions are on the link. The top picture has some circles below it, and the last picture gives all the dimensions. Its easy to miss that. Its about 75 inches tall, 48 inches wide and 16 inches deep.

Adi

Tuesday 10th of January 2023

Hi Kati, This hutch is amazing !!! Thank you for the detailed instructions. I’m planing to use you plans with small size modifications. Which type of wood did you used? Adi

Kati Farrer

Wednesday 11th of January 2023

Thank you, I am glad you like it. The wood is alder. I also used alder plywood for it.

Ivana

Wednesday 22nd of June 2022

I was wondering was this incognito Behr ULTRA or something else and in what finish? (ie. flat/ eggshell/ satin)

Kati Farrer

Thursday 23rd of June 2022

It was Behr incognito, they can make that color in any of their paints. I don't remember the finish but I believe it was eggshell. The brighter the sheen the easier to clean, so I don't think I did mat.

Meghan

Monday 18th of January 2021

Hi Kati, I left this comment on buildsomething as well, as I wasn’t sure which method was more efficient, so please ignore one of them. I love this design and I’m looking forward to making it! Going to try to modify it a bit to add a few inches here and there. But I have a question about the finishing work you did. I like the two tone a lot, and hope to do that. My guess is that you finished the components individually, and then assembled, then just needed to do touch up work? Also, the plywood that you used for the hutch back looks like its finished face looks like multiple vertical boards. I really like that look but have only seen the good plywood at the store that is a single piece of top lamination. Did you by chance rip out plywood and reattach together to give it that look? Thanks so much!

Meghan

Tuesday 19th of January 2021

@Kati, thank you! I live in the DC metro area and our lumber yards are incredibly hard to come by if you can believe that. I'm currently hand painting doors and drawers for our built in bookcase so I was hoping to spray this piece because its such a better finish that way, but we will see. Appreciate the response :)

Kati

Tuesday 19th of January 2021

Hi Meghan! For the finish, I didn't finish before assembly. Instead I used tape to block off the area I wanted painted and sealed the wood with a 3-4 coats of wipe on polyurethane (I think 3 on the walls and 4 on the top of the cabinet).The plywood on the hutch came that way. I bought it at a lumber yard where they have more options, it is an alder plywood. But it was not cheap, it was just over $100 per sheet).

Comments are closed.

This site uses Akismet to reduce spam. Learn how your comment data is processed.