

With just a few tools you can make these amazing wood hooks for every room in your home.
Sometimes projects just need to be really, really easy… like these DIY wall hooks!
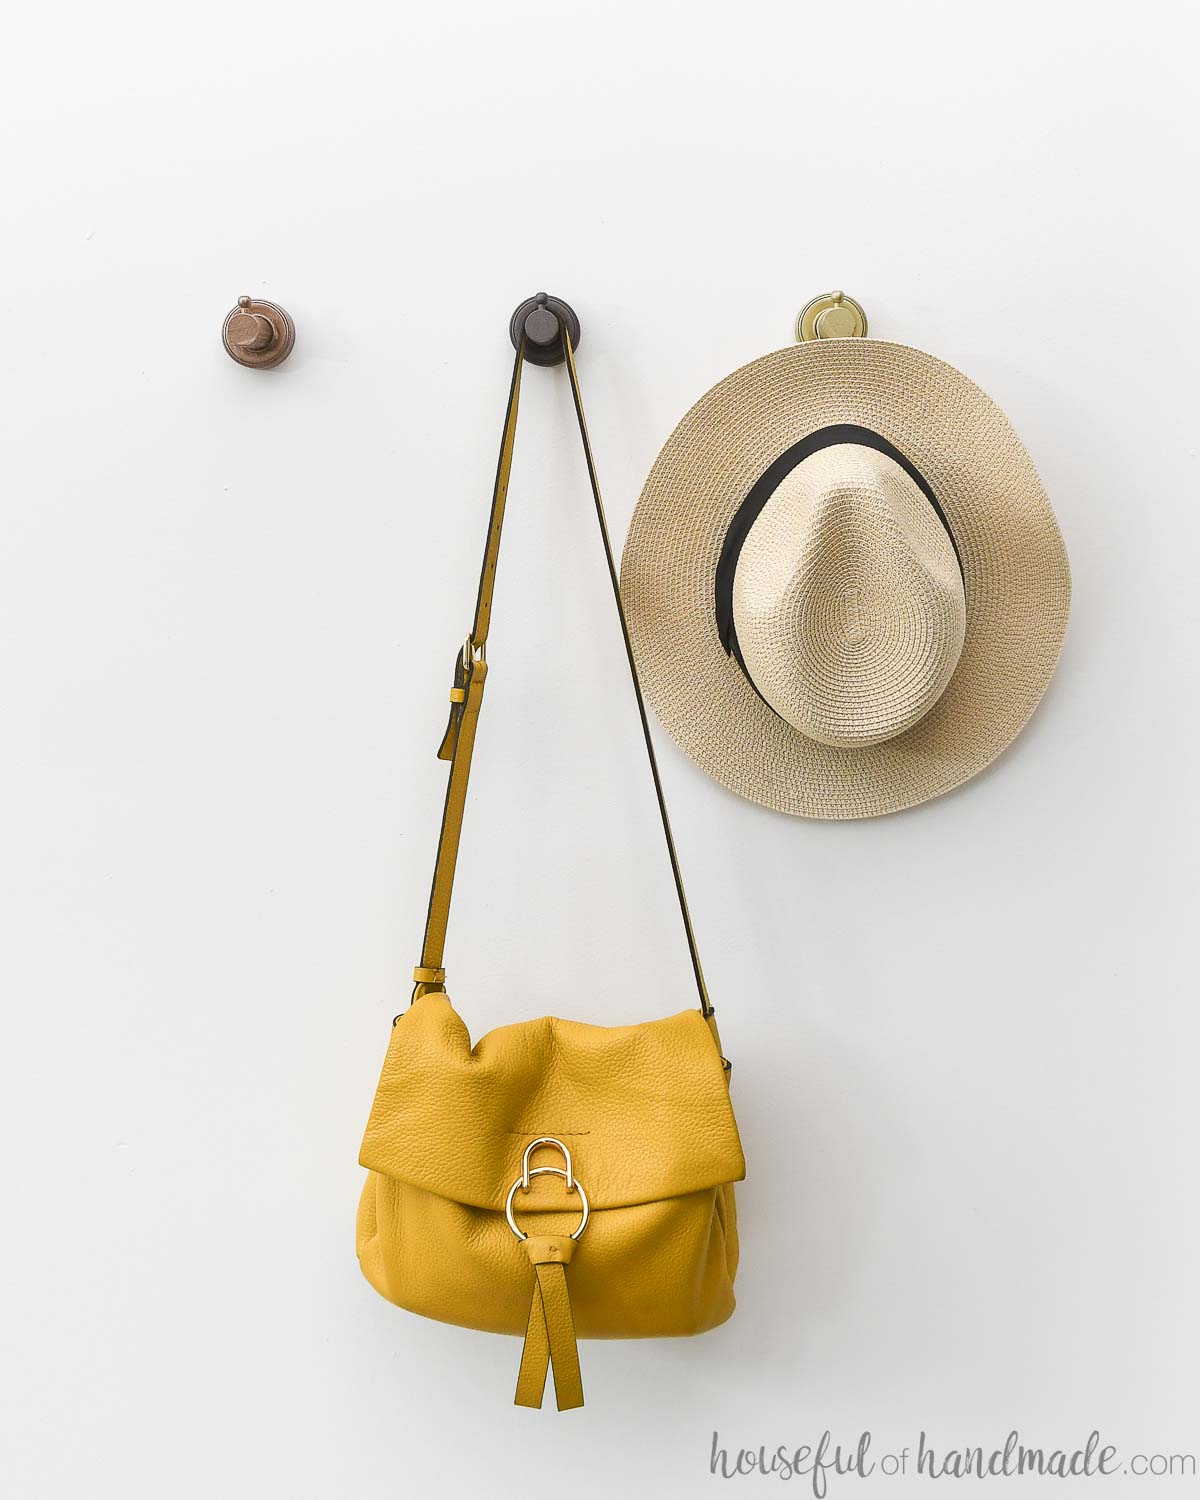
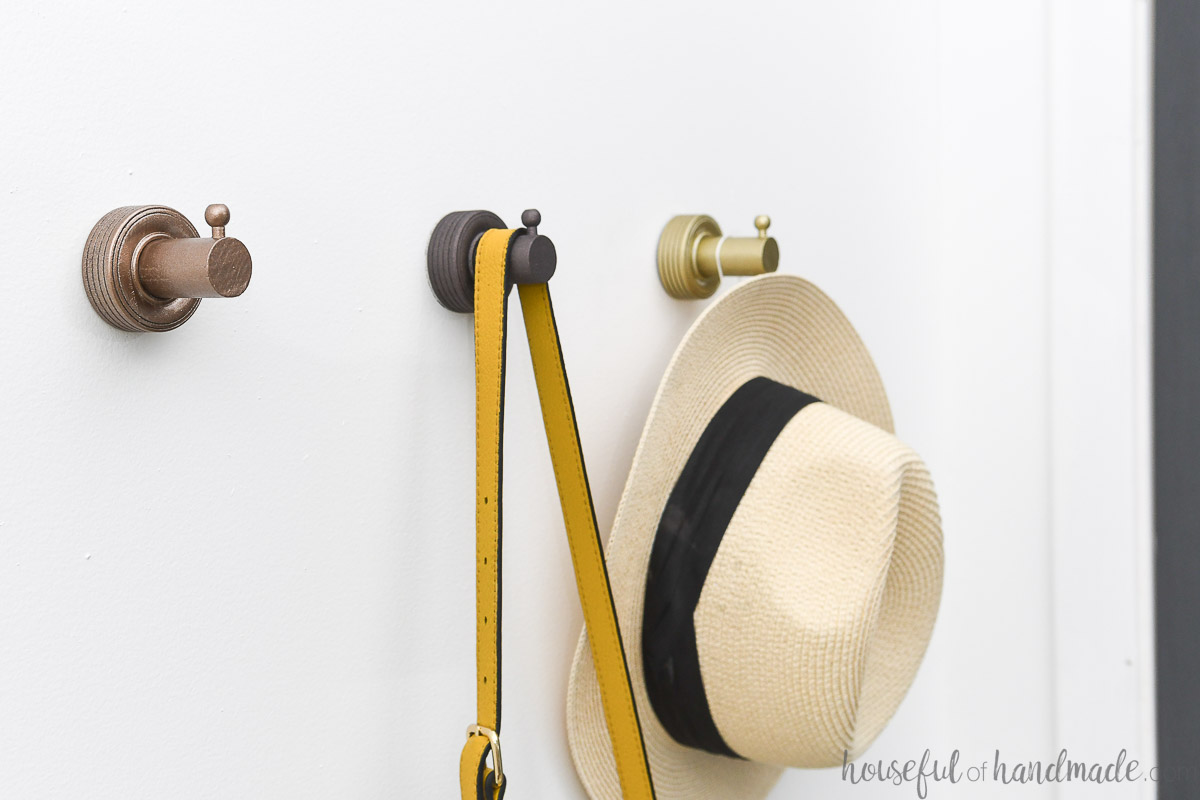
Chunky wood hooks can be added to any wall, any where. And you only need a simple saw to cut a dowel and a drill to make them.
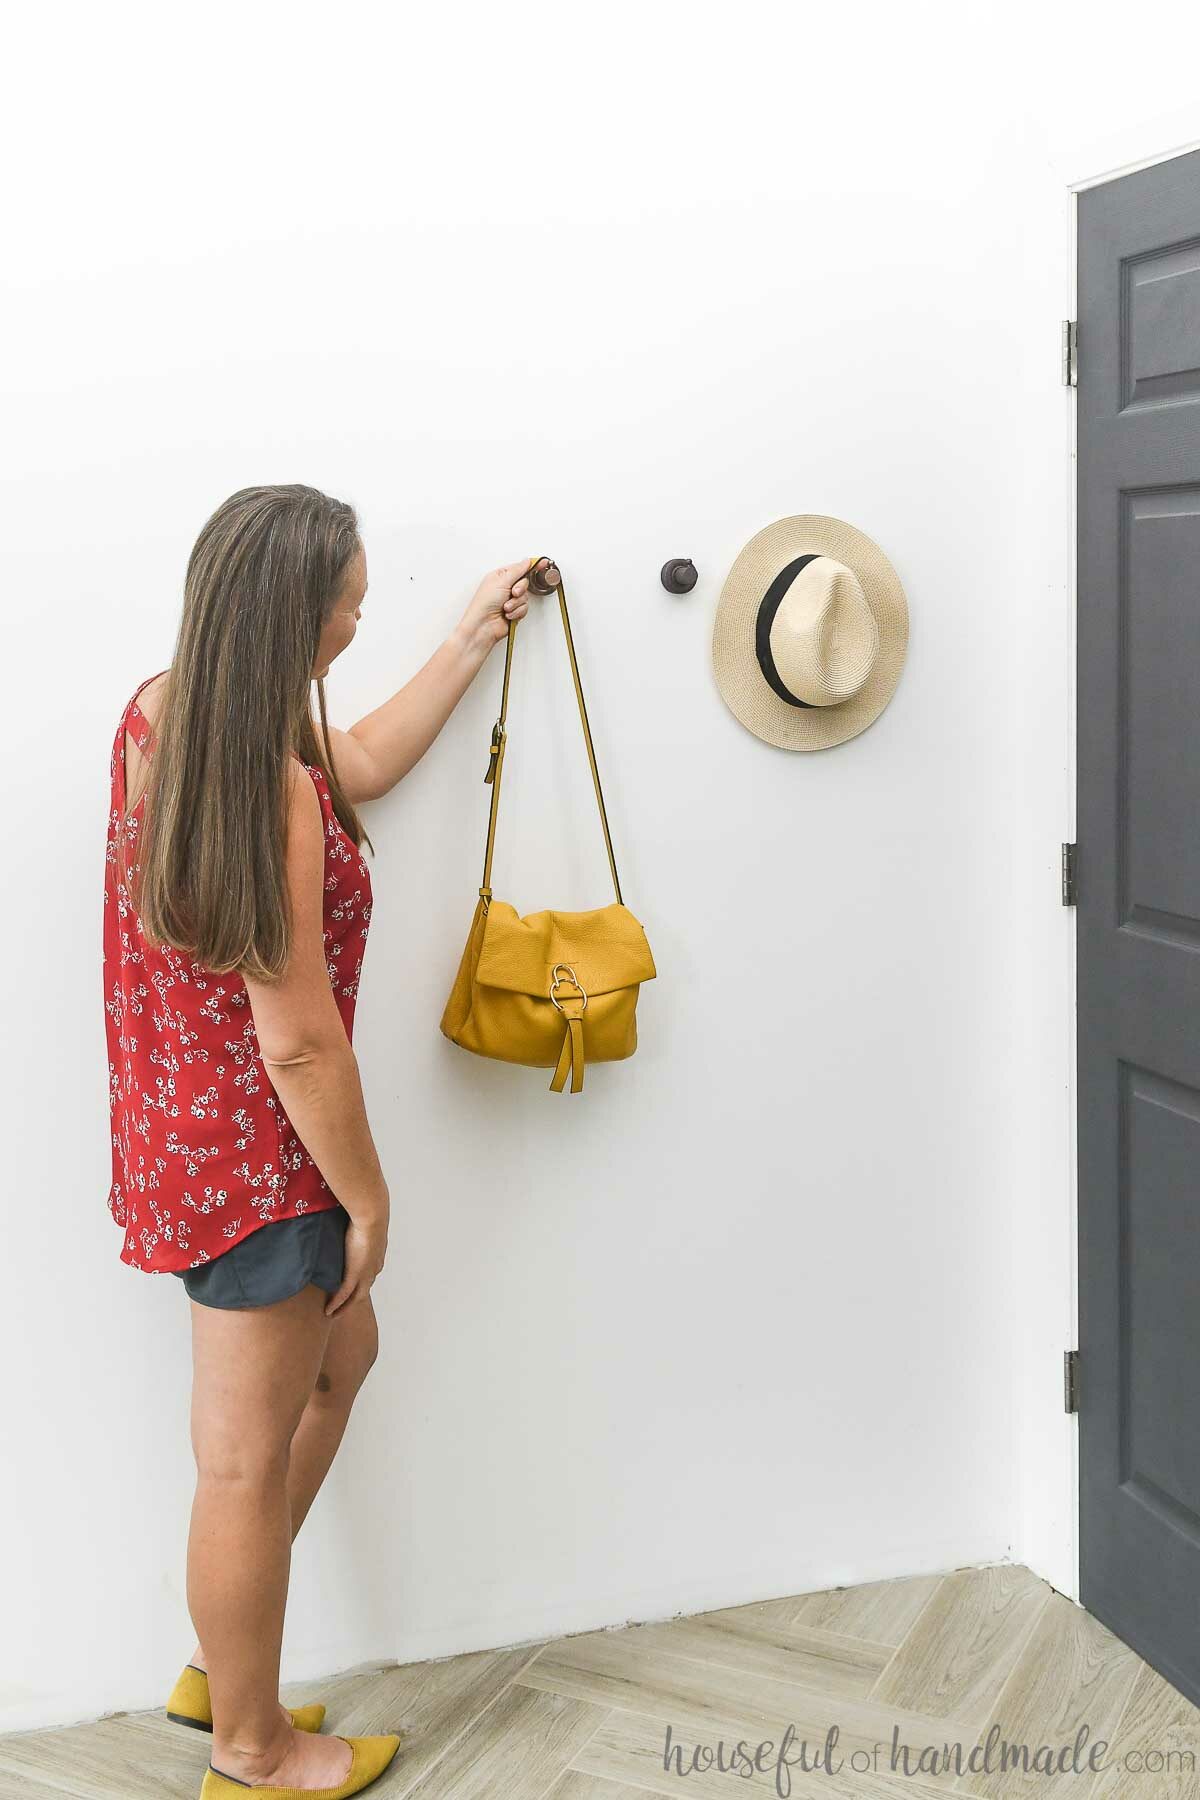
Just imagine how handy it would be to have extra hooks all over. These sturdy hooks can hold larger, heavy items. And the pin on the end keeps thing in place!
This post may contain affiliate links. As an Amazon Associate I earn from qualifying purchases. Click here to read my full disclosure policy.
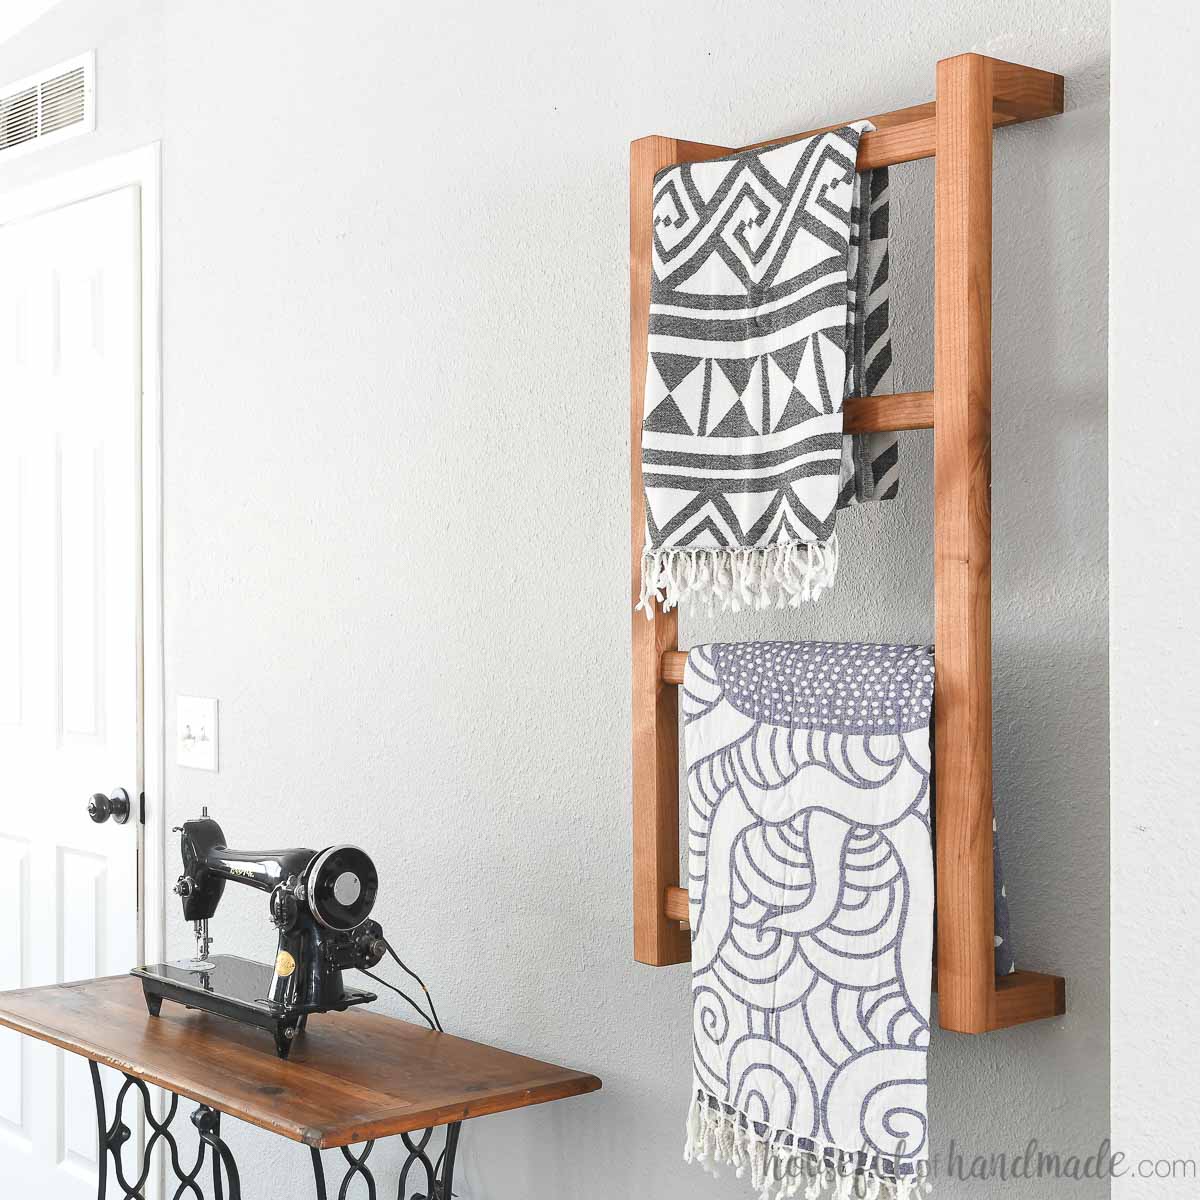
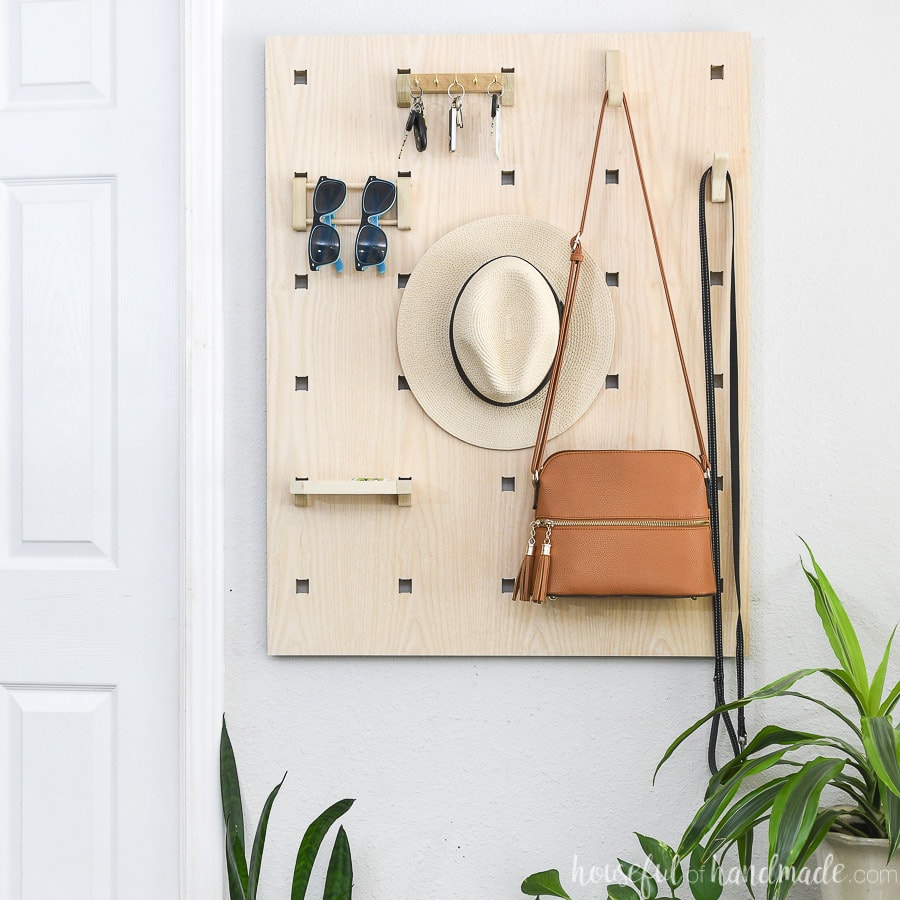
They are great for adding simple storage anywhere you need. If you need more hooks & storage options, check out this adjustable plywood entryway organizer.
Ways to Use Wall Hooks
Once you make your first batch of wall hooks you will be hooked (ha ha, see what I did there)!
These hooks are not like those flimsy metal hooks you can buy, they are strong wooden hooks. And they look amazing!
I think my favorite is the pin on the end. It is perfect for giving things extra holding power. No more towels on the floor!
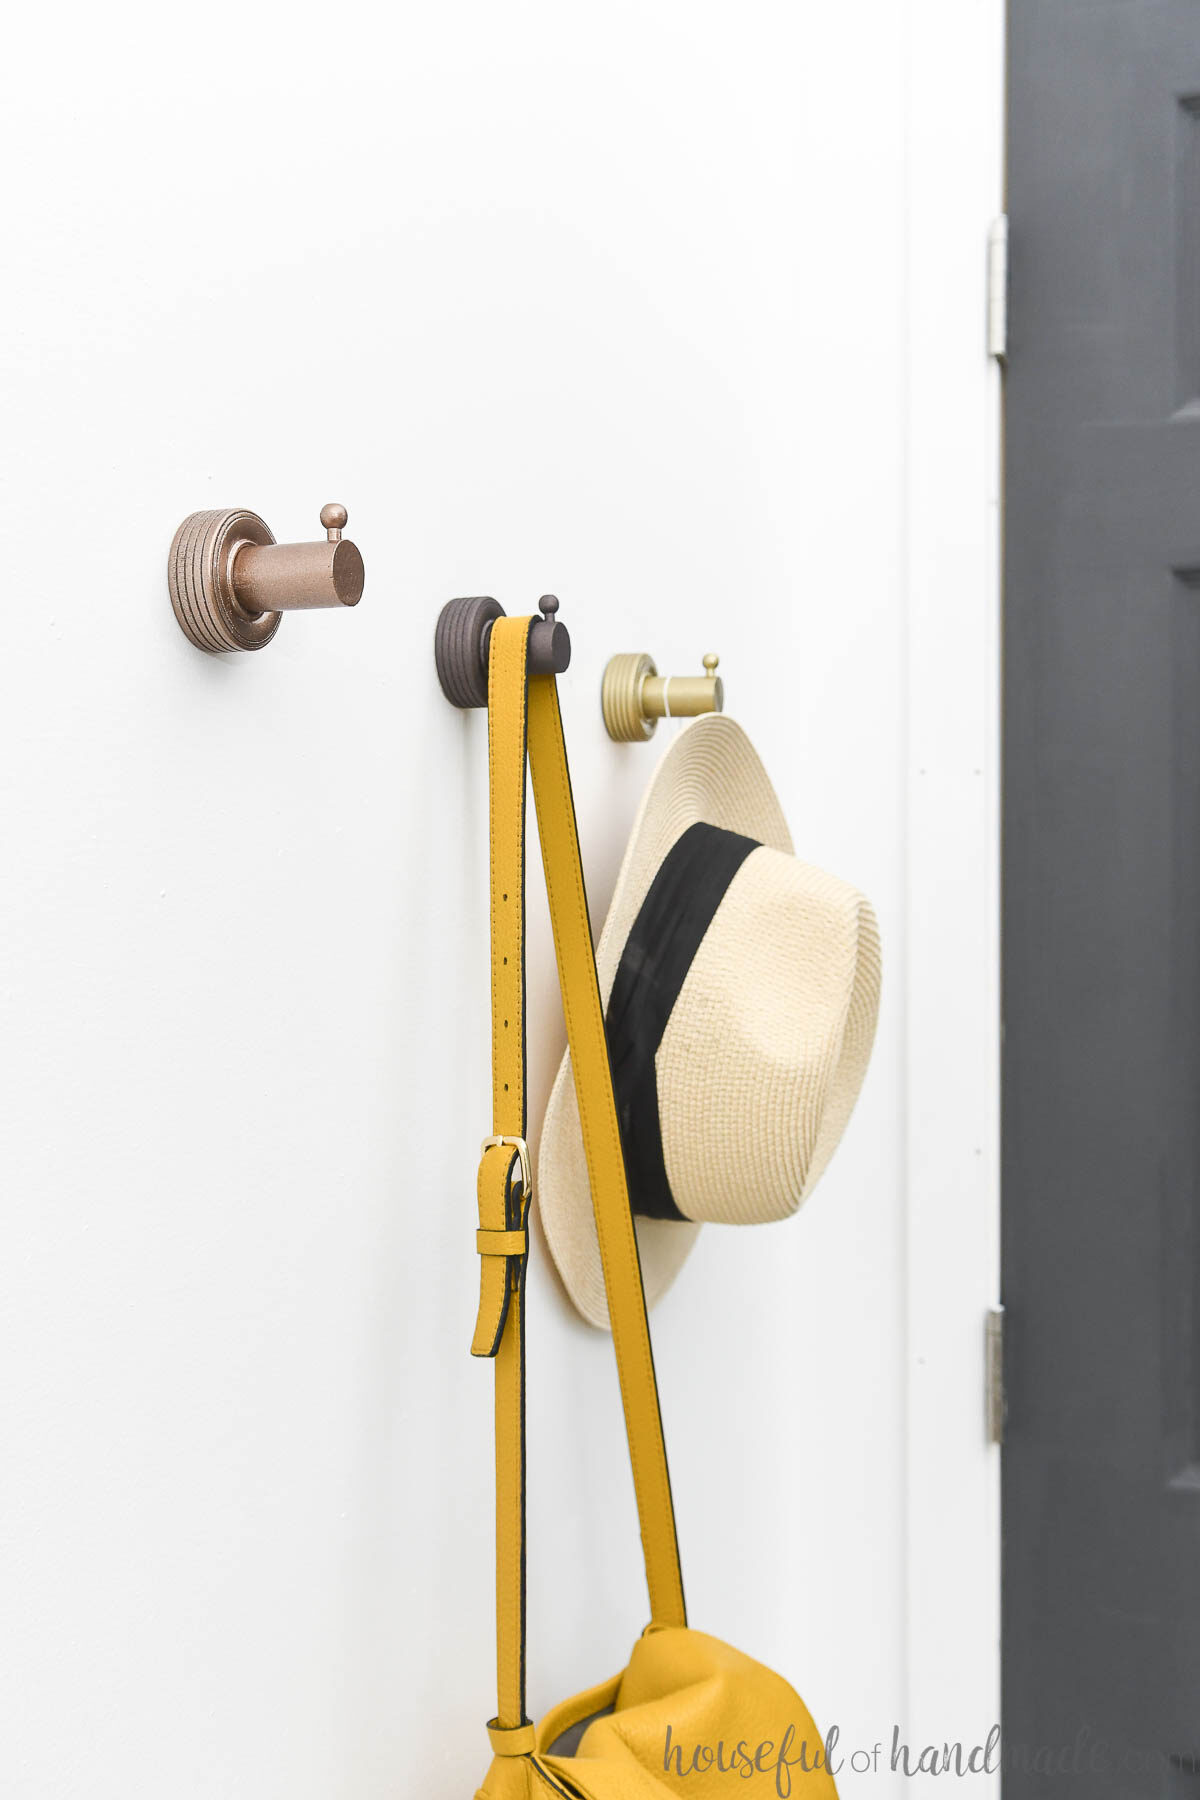
And since these wooden hooks are secure on their own, there is no need to have a board behind them to attach them to wall studs.
Instead, each hook is securely fastened to the drywall through a drywall anchor. I used ones that can hold 75 lbs so they are not going anywhere!
You can easily add one, two, or more hooks wherever you need them! Here are just a few ideas of where to add wall hooks in your house:
- For towel hooks in the bathroom
- As jewelry hooks in your bathroom or closet
- Add one or two next to every exterior door
- In your bedroom for hanging not-ready-for-the-hamper clothes
- For blanket hooks in your family room
- In the playroom for dress-ups
- Add a few to every closet for extra storage
The possibilities are endless!
Need more easy organization ideas?
How to Make Wood Hooks
Tools needed:
- Saw
- Drill
- Impact driver (optional, but I love not having to switch bits with the drill)
- Clamp
- Pliers
Supplies:
- 2″ Wood wheels
- Wood pegs
- Dowel
- The size of dowel depends on your actual wood wheel openings. Take one to the hardware store and find a dowel that will fit snuggly in the hole.
- Spray paint
- 1 1/2″ dowel screws
- Twist Lock Drywall anchors
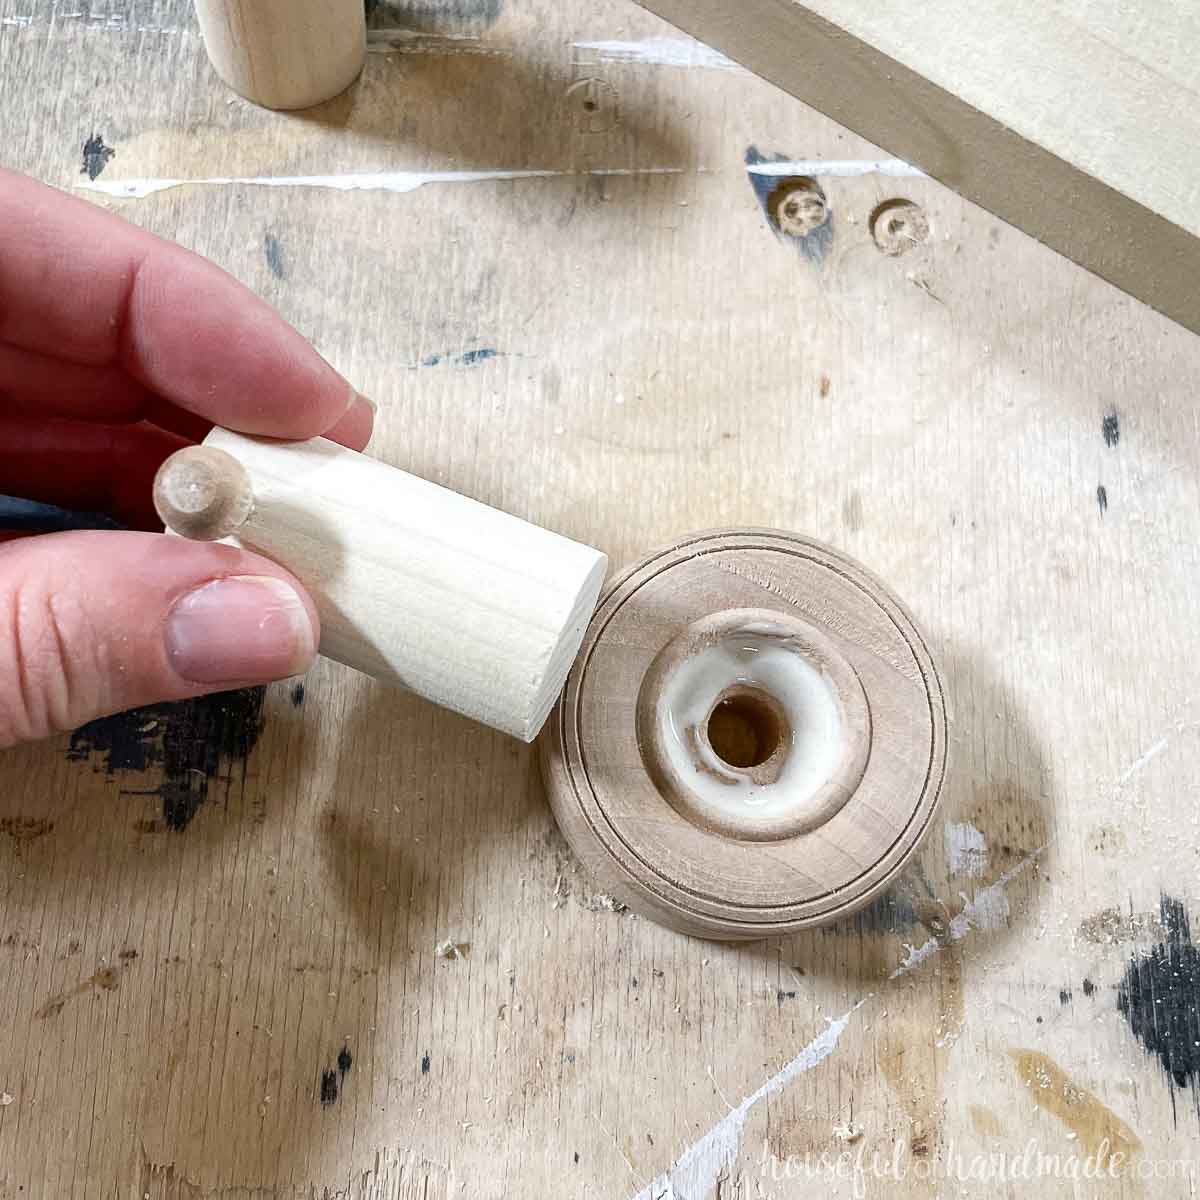
STEP 1- Add the peg
Cut a 2″ piece of dowel for each hook.
I used a miter saw to do this, but you can also use a handsaw or a miter box with saw.

Drill a hole the same size as the end of your wood peg in the top front of each dowel.
Do not drill it all the way through, just go in about half way.
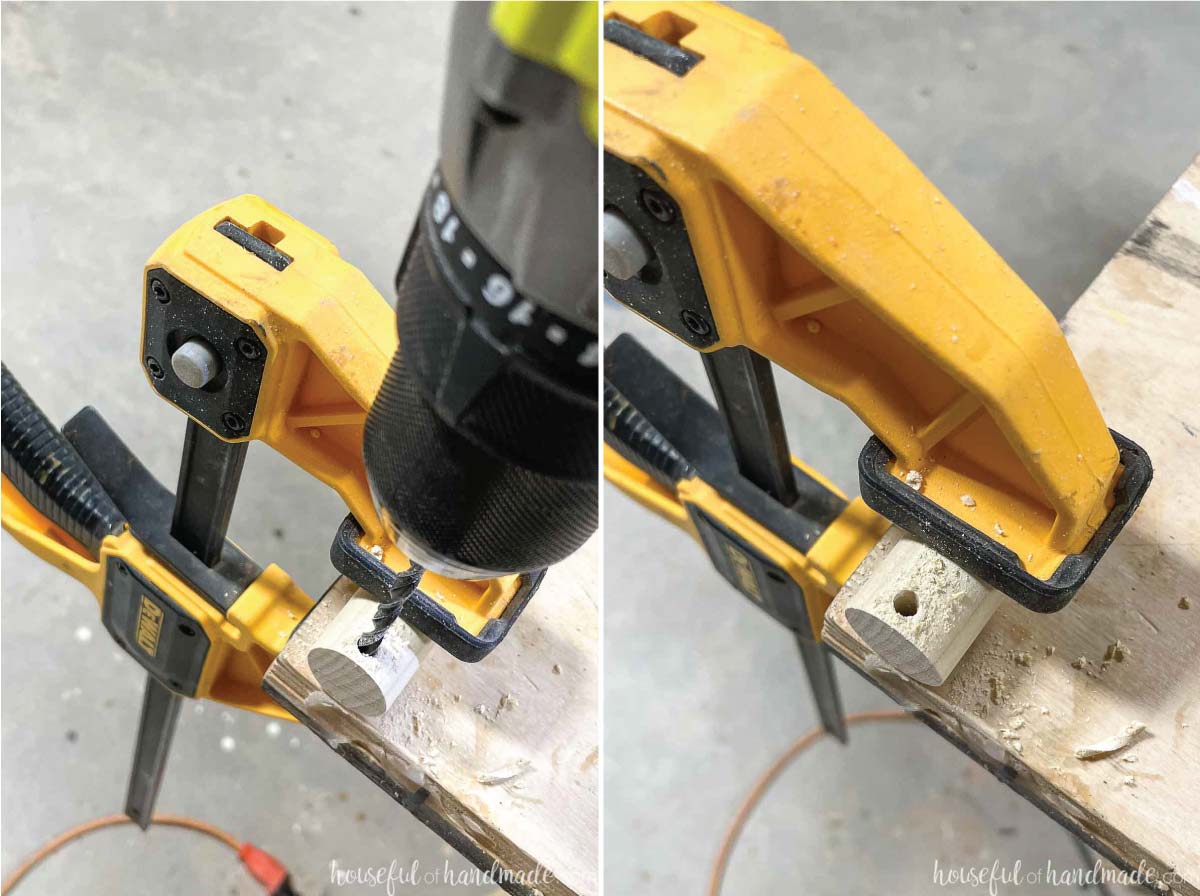
Trim the peg so that it will just stick out about 1/4″ before the round piece on top. I used a handsaw to do this since the miter saw is not safe for these small pieces.
Add a bit of glue inside the hole and press the peg into it.
EXPERT TIP:
Use a clamp to carefully squeeze the peg into the hole only as deep as you want it to go.
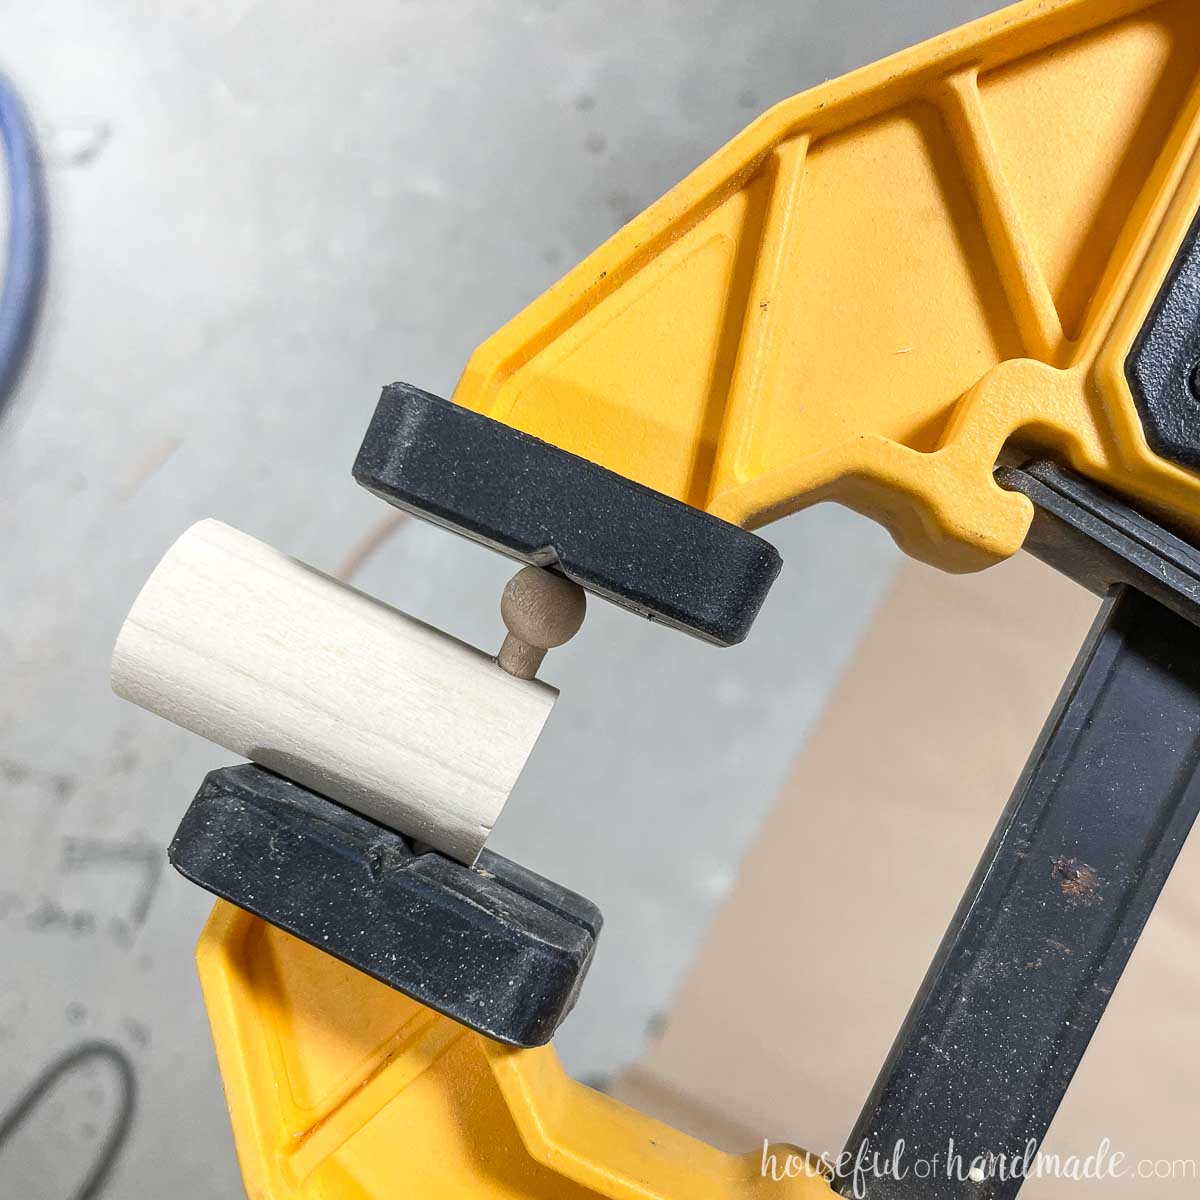
STEP 2- Assemble the hook
Add glue to the inside of the wood wheel.
Then press the dowel into it. It should fit snuggly.
EXPERT TIP:
Place a scrap of wood on top of the dowel and tap it with a hammer to get a tight fitting dowel into the opening.
Clamp if needed and allow the glue to dry.
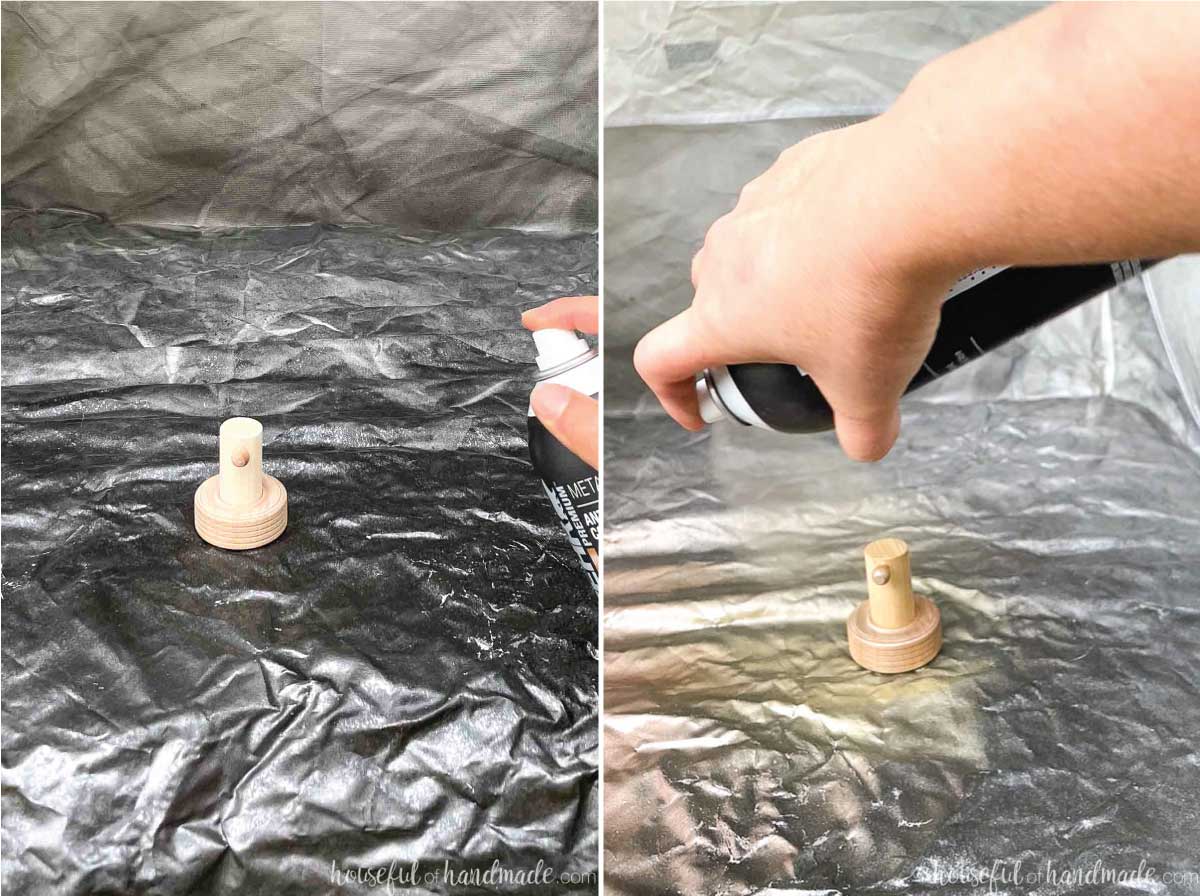
STEP 3- Paint
Once your hooks are done, you can lightly sand if needed. The front of the dowel on mine needed it.
Then paint them however you want.
Spray paint is the easiest and sturdiest option. Make sure to cover it with multiple light coats to prevent drips.
STEP 4- Attach to the wall
Once your paint is fully dry, drill a hole in the back of your hook just smaller than the size of your dowel screw. You want the screw to grip into the wood with its threads.
You want the hole into the dowel (there is already a hole in the wheel piece).
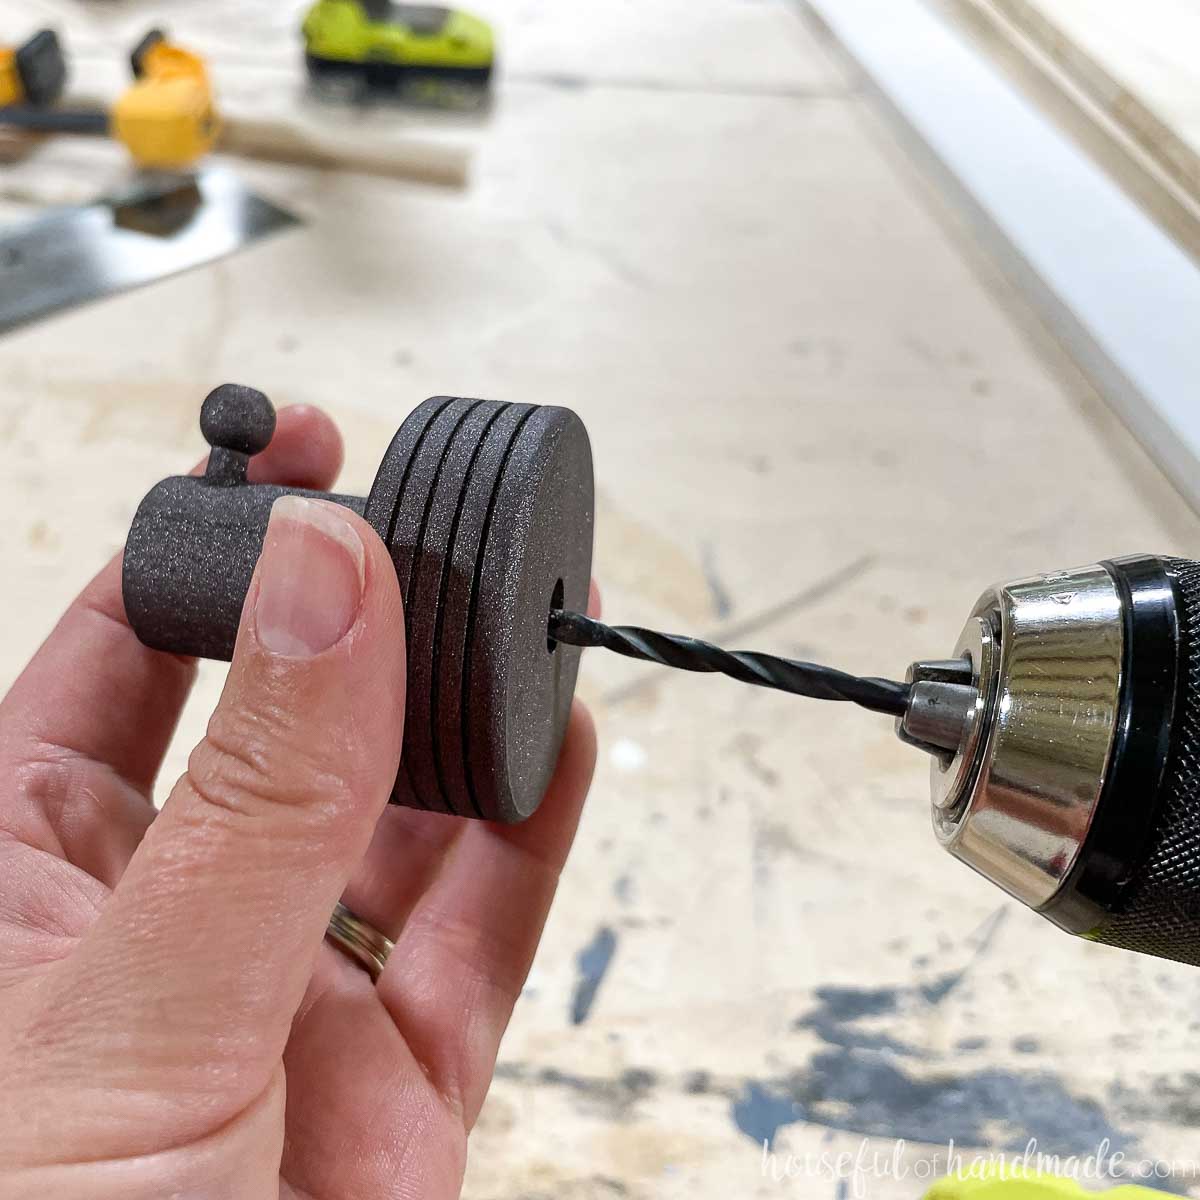
Screw a dowel screw into the hole. Make sure to leave half of the screw visible on the outside of the wall hook. This is what secures it into the wall.
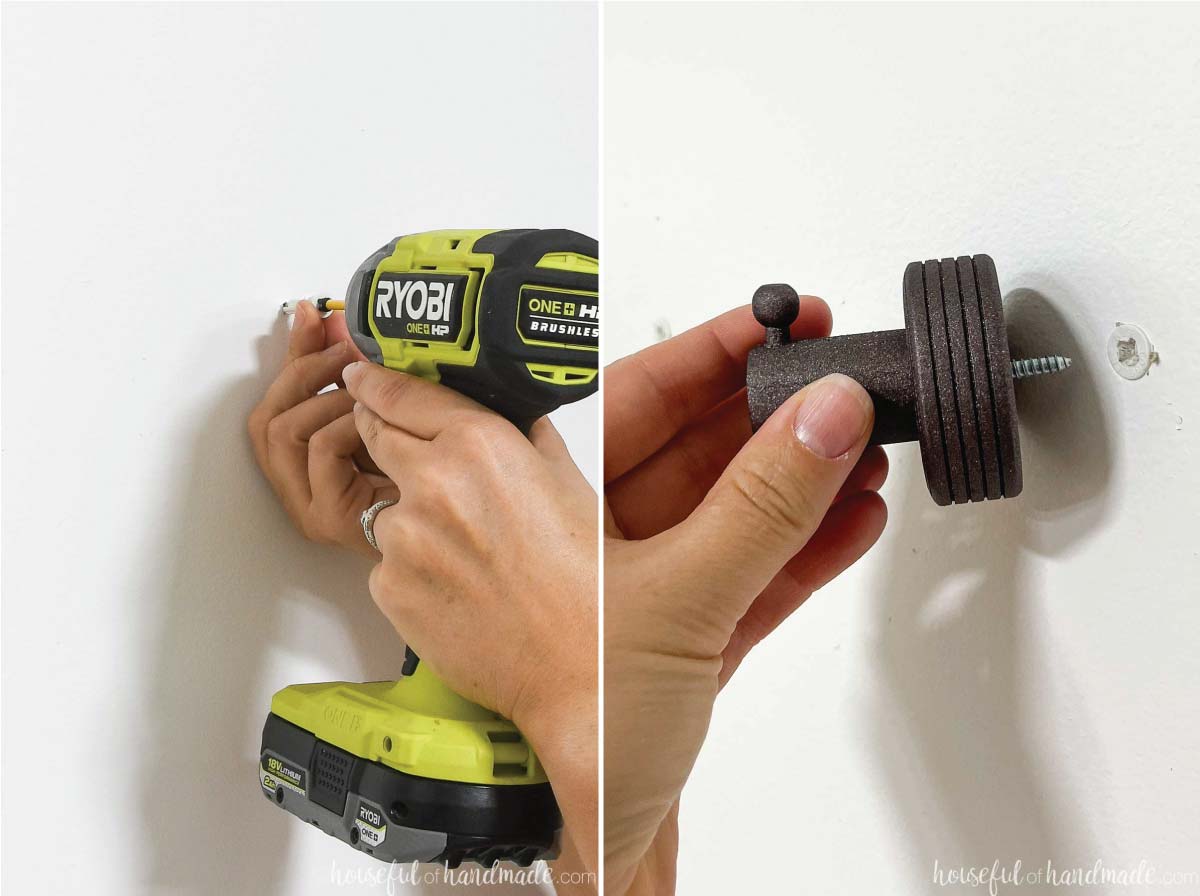
Drill a drywall anchor into the wall where you want the hook to go.
Then hand twist the hook into the anchor. Make sure it is tight to the wall and the peg is on the top.
Now you are ready to use your new hooks!
Have fun adding them all over the house. You can even experiment with other fun variations of the hook design.
That is the best part of DIY, making it your own!
Happy DIYing!
