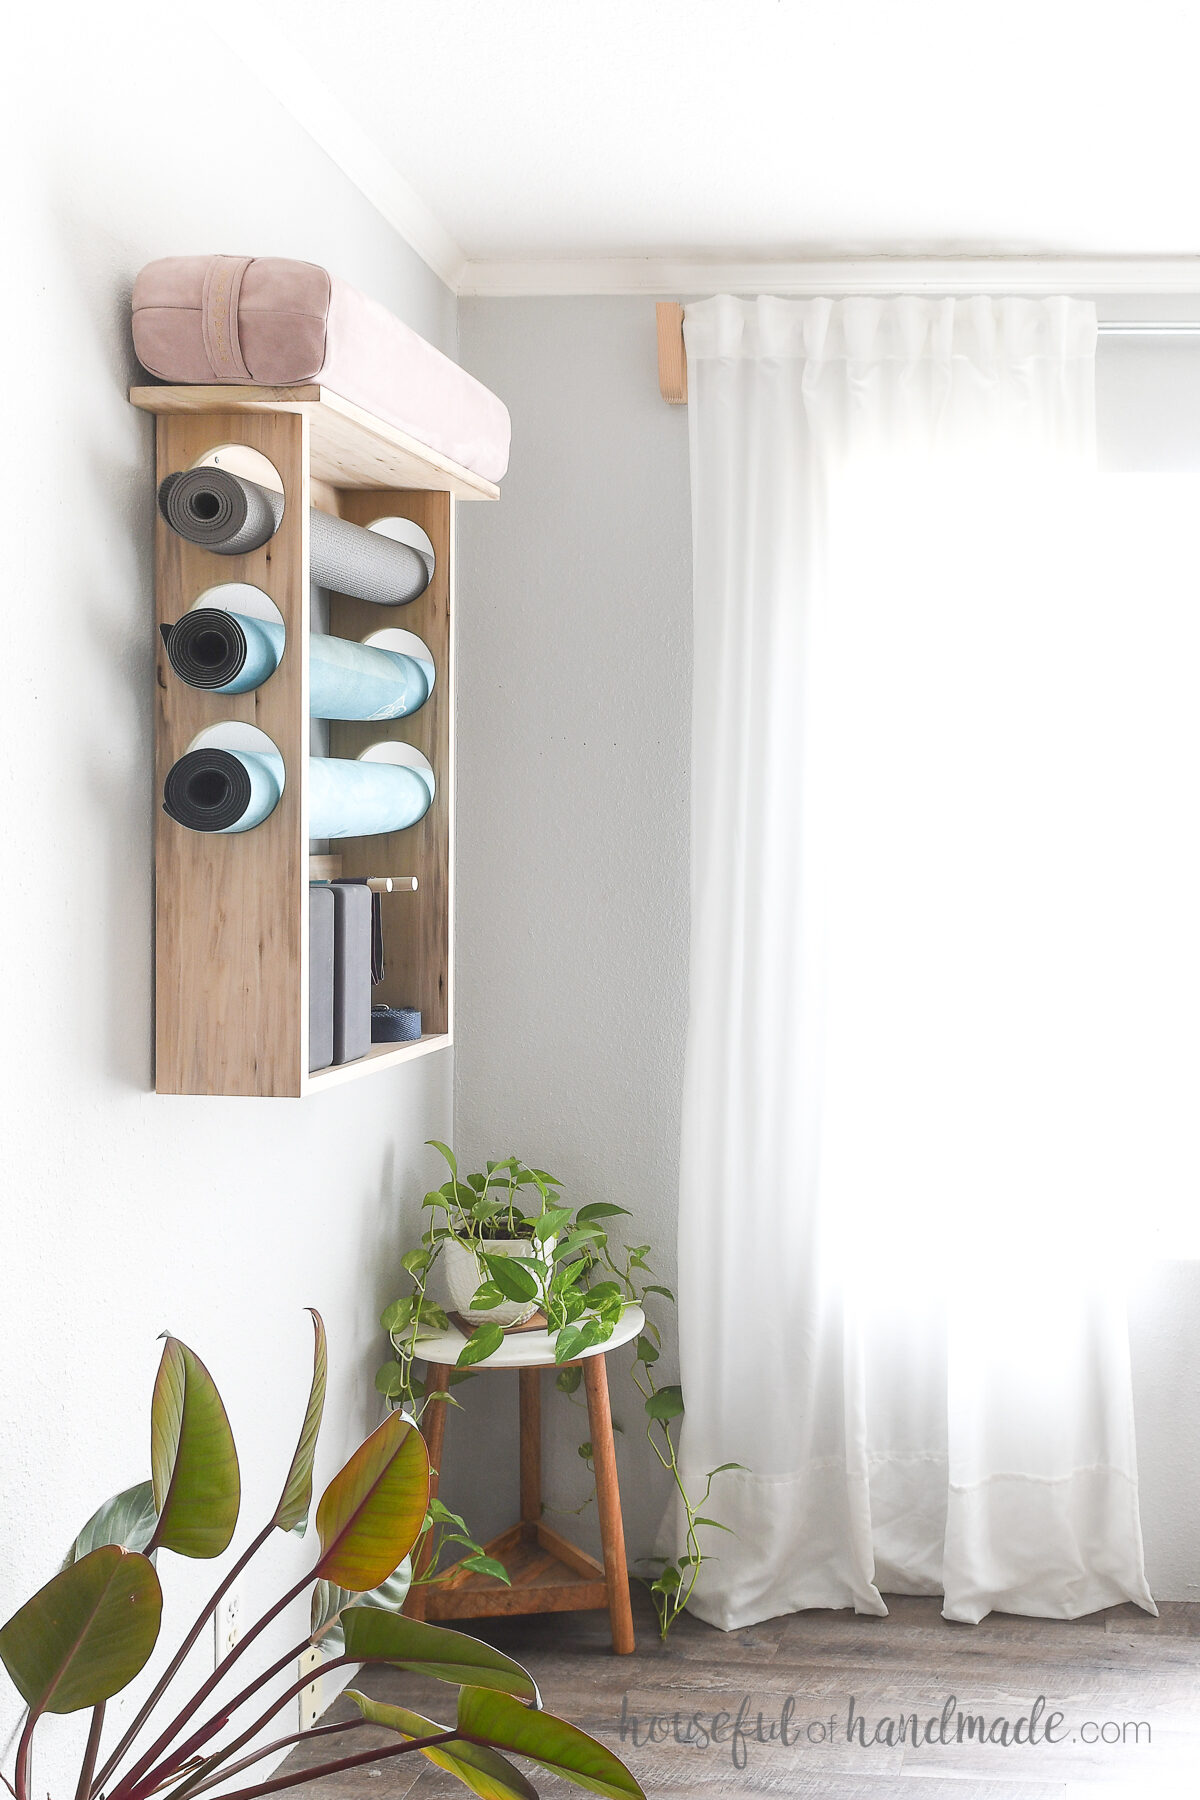
The worst part of working out at home, is storing away your exercise gear. If you do not have a dedicated work-out room, you need a place to put your mats.
I was sick of rolling them up and stashing them in a corner. They never stayed rolled and were magnets for the dog hair.
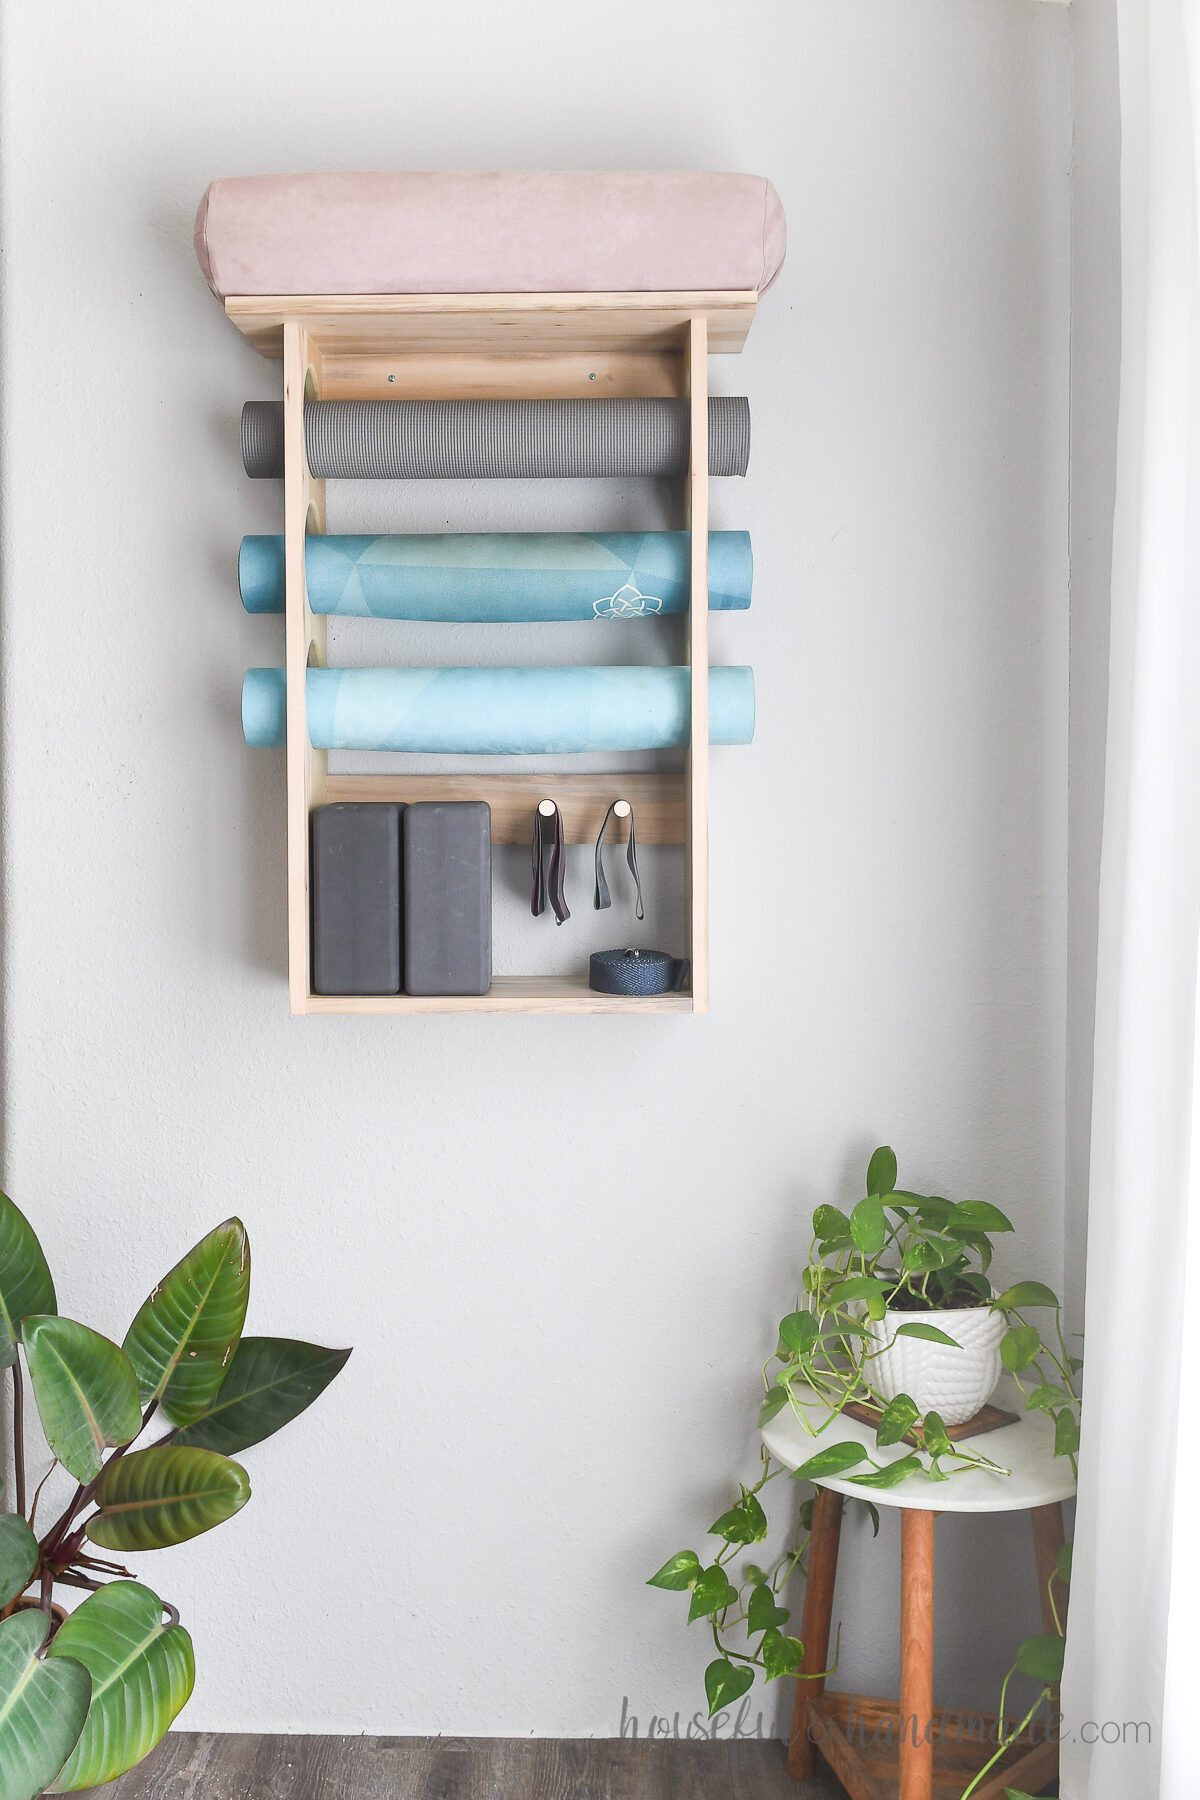
So I partnered with Kreg Tools to build the perfect yoga mat storage shelf! It is easy to build with the Kreg pocket hole jig and mounts on the wall to keep your space clutter free.
This post may contain affiliate links. As an Amazon Associate I earn from qualifying purchases. Click here to read my full disclosure policy.
Yoga Mat and Accessory Storage
If you work out at home, you have more than just an exercise mat to store away!
My corner was getting full with the yoga mat, bolster, block, straps and resistance bands.
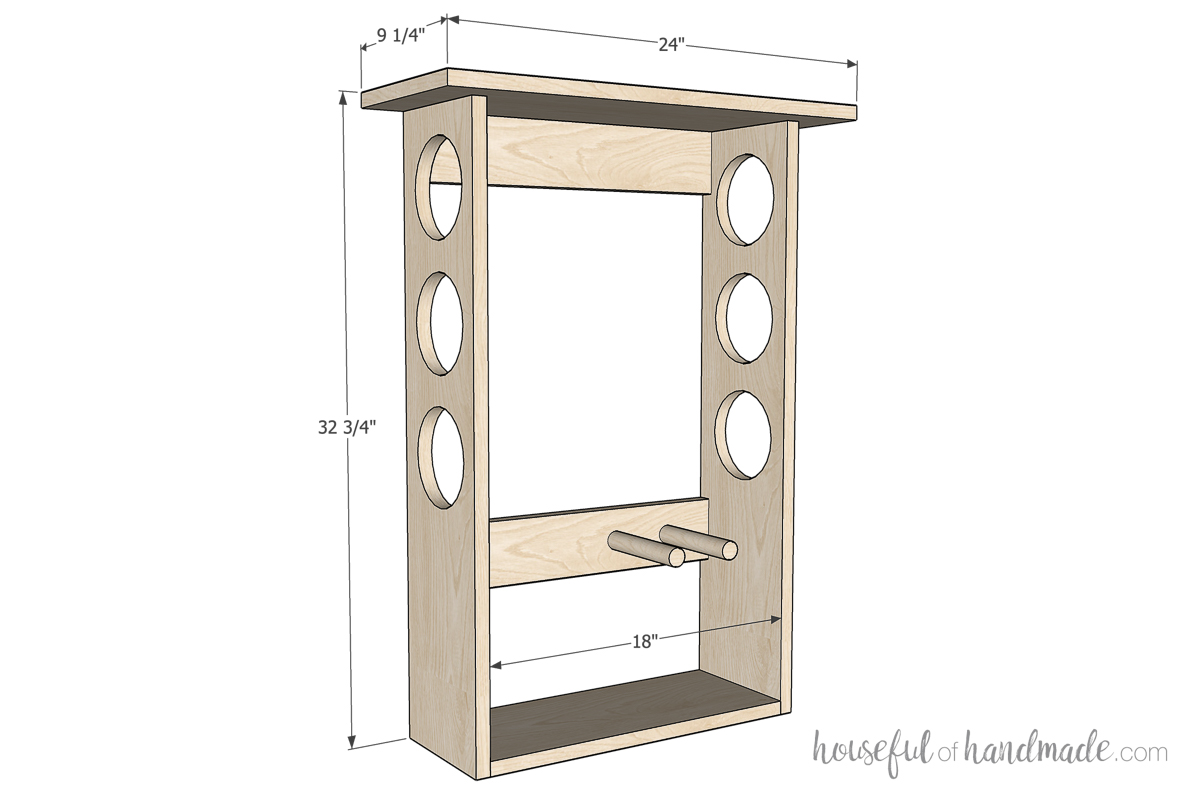
This wall mounted yoga mat holder can hold 3 yoga mats as well as the rest of the gear. I designed it to hold 3 mats, but you can easily adjust the plans to hold however many mats you have.
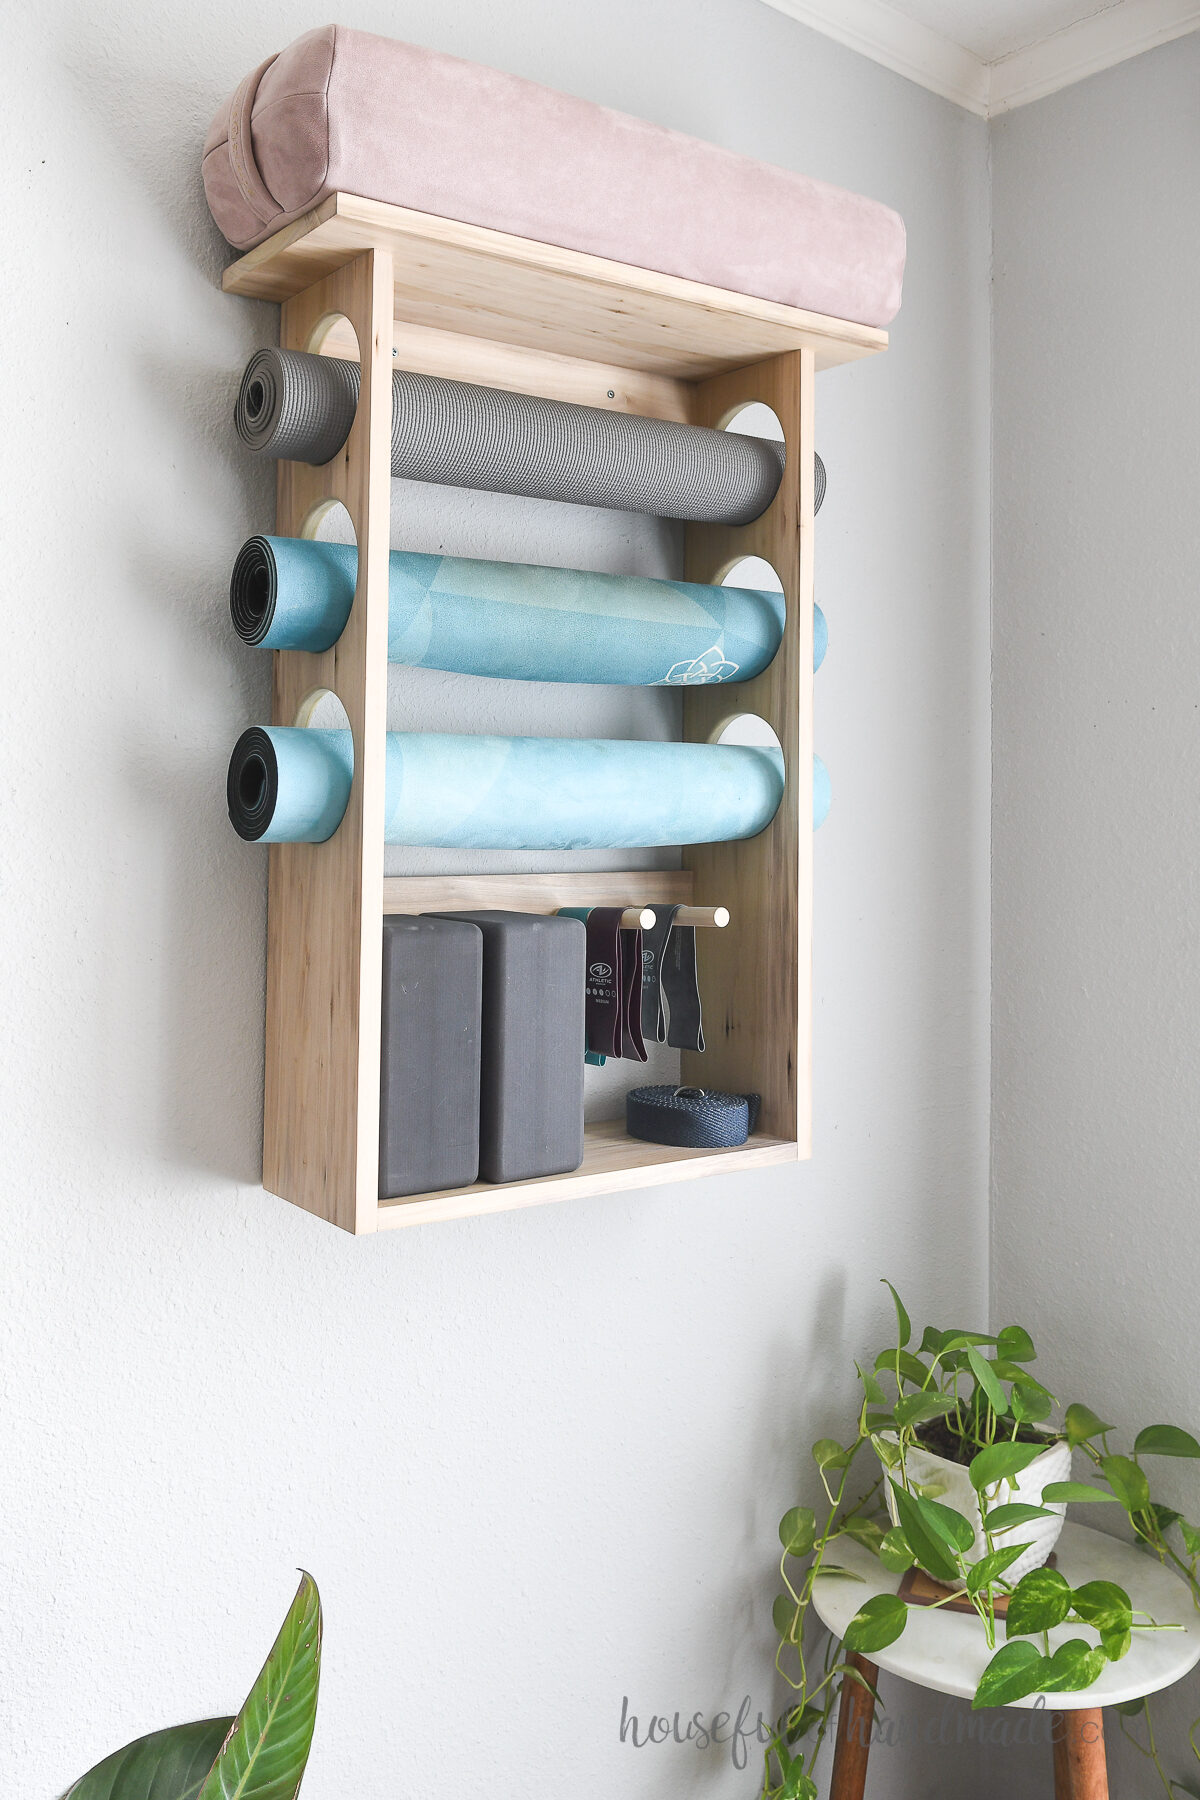
The top shelf is sized to hold the bolster perfectly. But if you do not have a bolster, you can also use it for other exercise gear or decor.
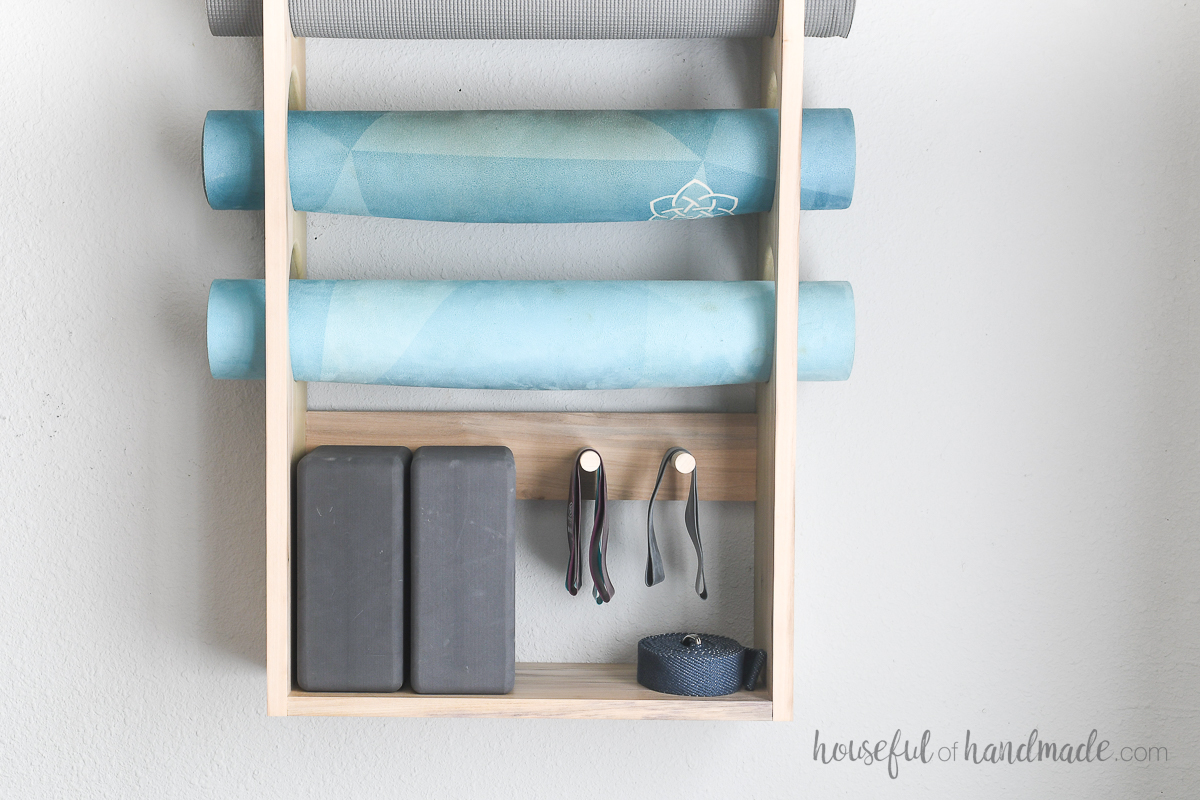
The bottom shelf is sized to hold 2 yoga blocks and has 2 pegs for resistance bands and straps.
Now all the things you need for a good workout are right were you can find them.
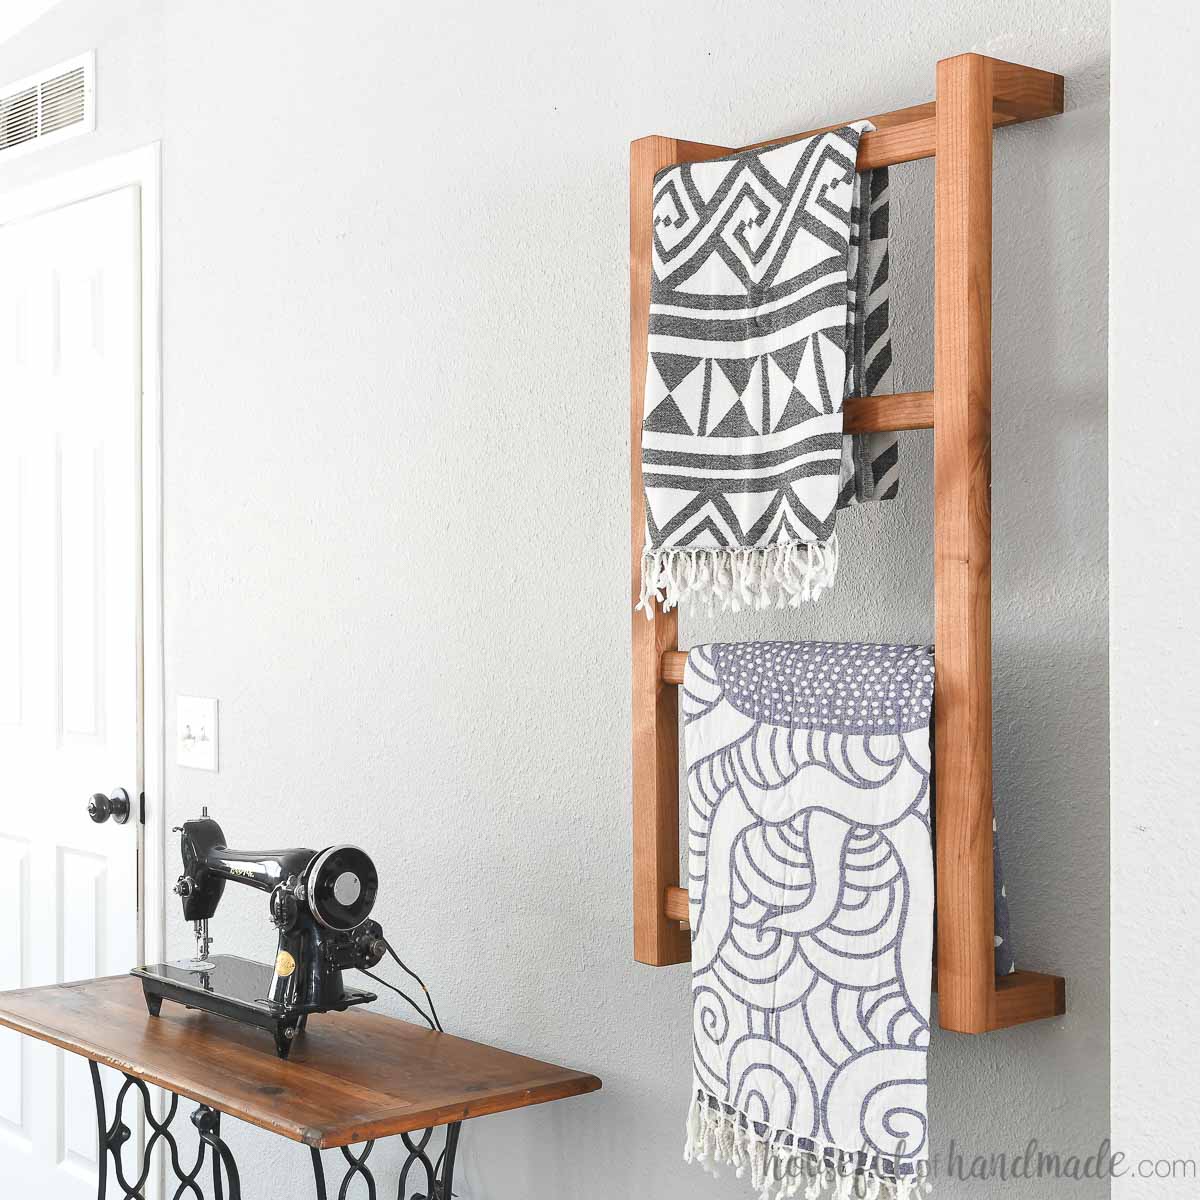
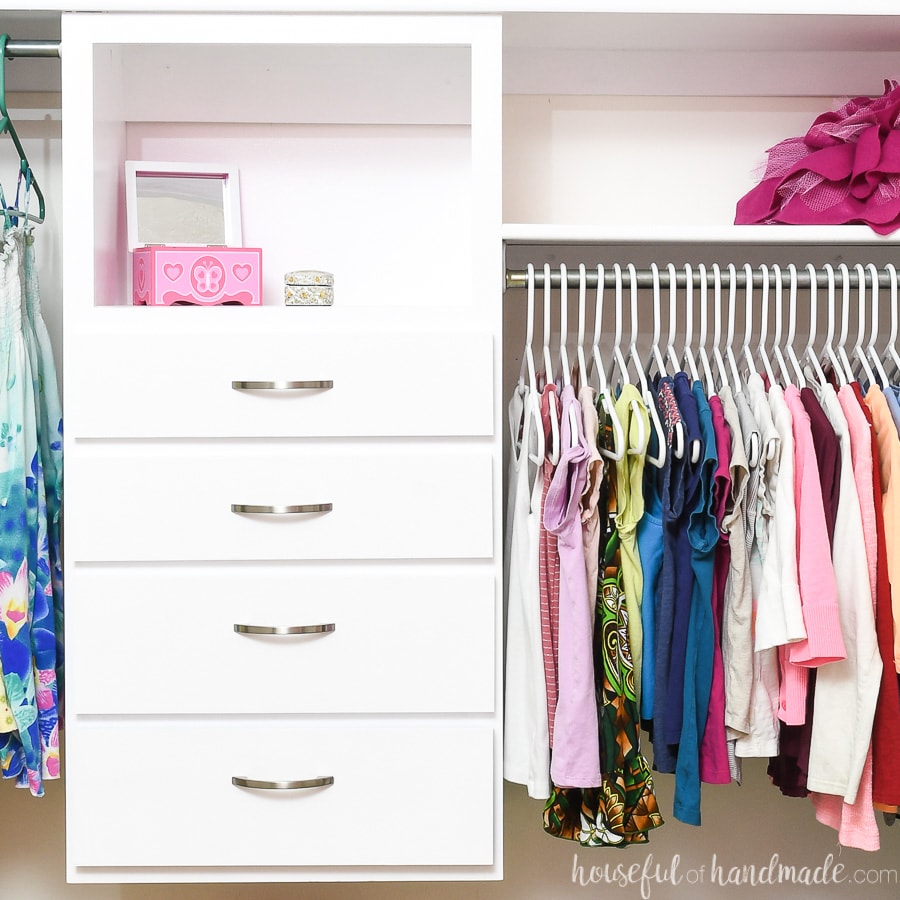
More Wall Mounted Storage Ideas
Declutter your home and use your walls to add additional storage with these fun DIYs.
How to Build an Exercise Mat Holder
Tools & Materials
Recommended Tools:
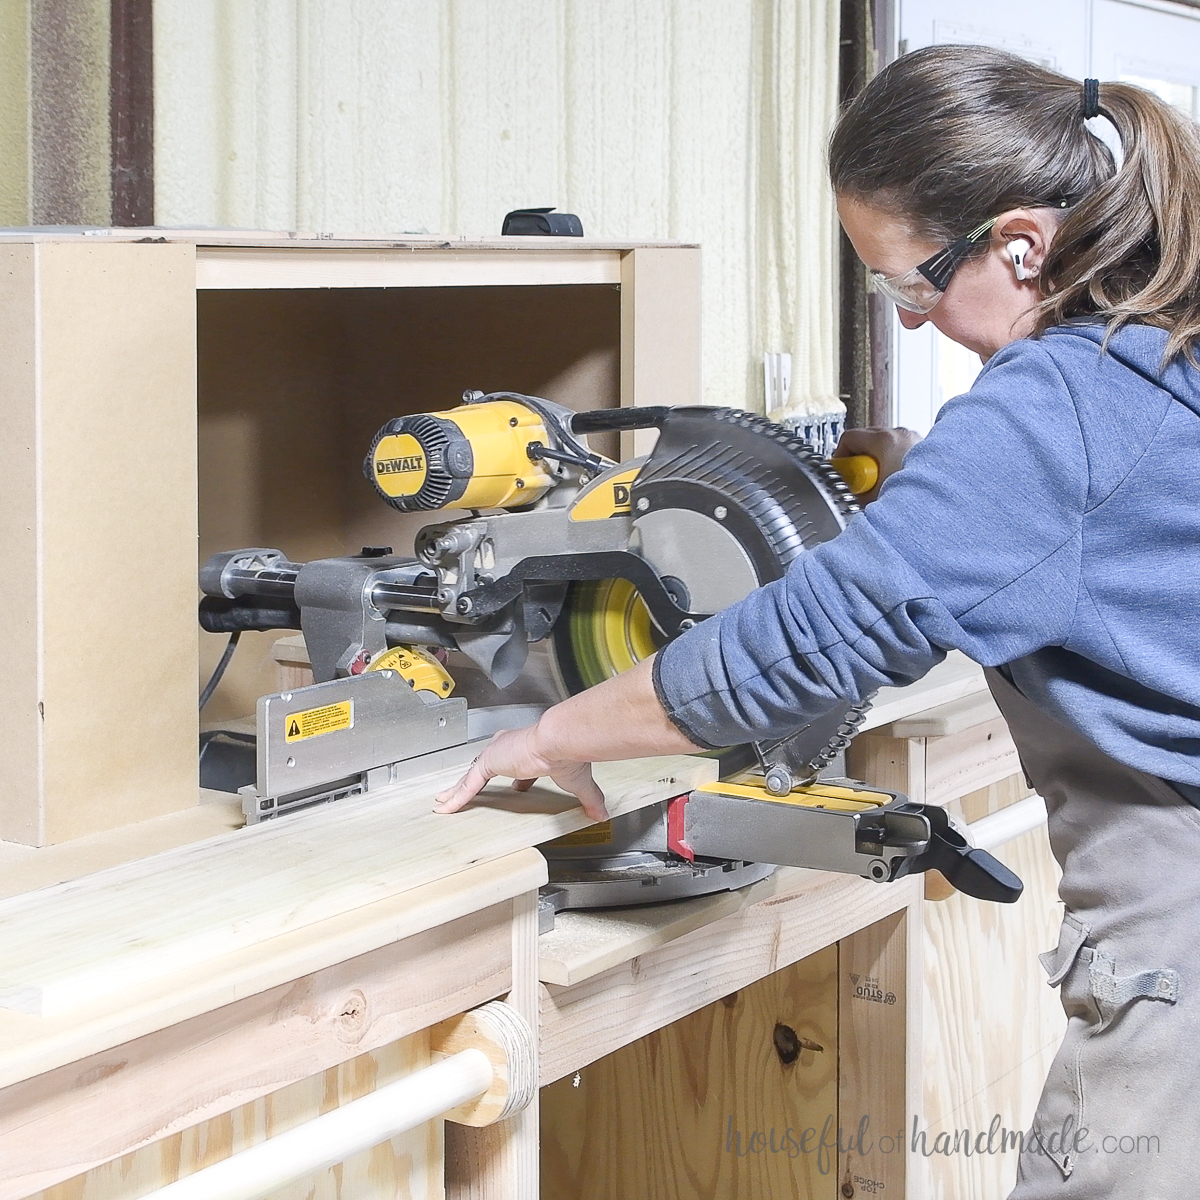
- Miter saw
- I recently upgraded to this larger sliding miter saw (watch for it to go on sale), but all my projects before were built with this inexpensive miter saw that I loved.
- Jig saw
- Pocket hole jig
- Drill
- Impact driver (optional, but I love not having to switch bits with the drill)
- Speed square
- Multi-mark measuring tool
- Right angle clamp
- Brad nailer
- Trim router
- Sander
Supplies:
- Wood products
- (1) 1×8 boards, 8′ long
- (1) 1×4 board, 3′ long
- (1) 1×10 board, 2′ long
- (1) 3/4″ dowel, 14″ long
- 1 1/4″ pocket hole screws
- 1 1/4″ brad nails
- Wood glue
- 2 1/2″ wood screws
Overall Dimensions
The finished wall-mounted yoga mat holder is 24″ wide by 9 1/4″ deep and 32 3/4″ tall.
It holds 3 exercise mats, 2 yoga blocks, a bolster, and has pegs for resistance bands or straps.
Cut List
Cut out the pieces according to the plans shared for free on Kregtool.com. Click here for the plans.
If you do not have a sliding miter saw, you can cut the wider boards with a circular saw instead.
STEP 1- Cut circles in the sides
Measure out and mark the center of the 3 holes on the side boards. The exact placement is noted on the diagram in the plans.
The circles are off set slightly so they are closer to the front. This way there is plenty of room for the back support boards.
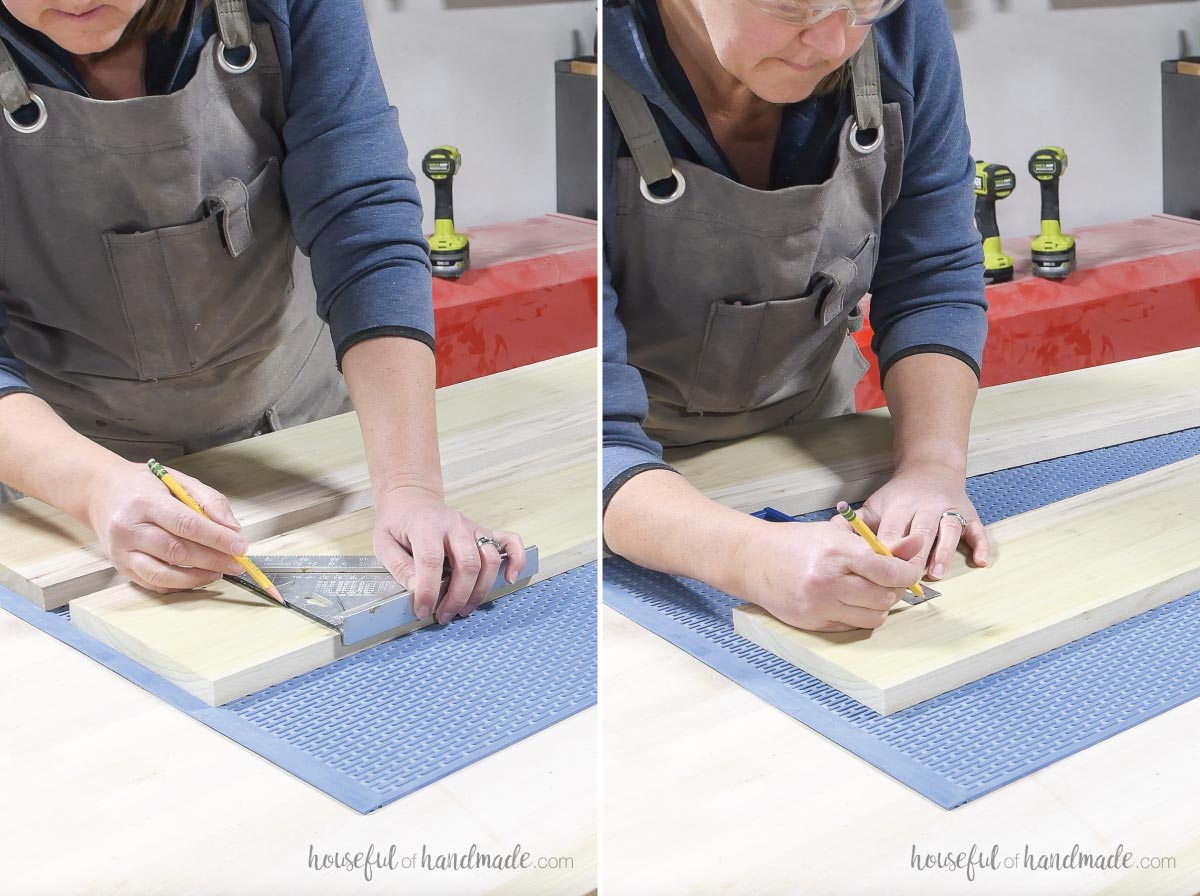
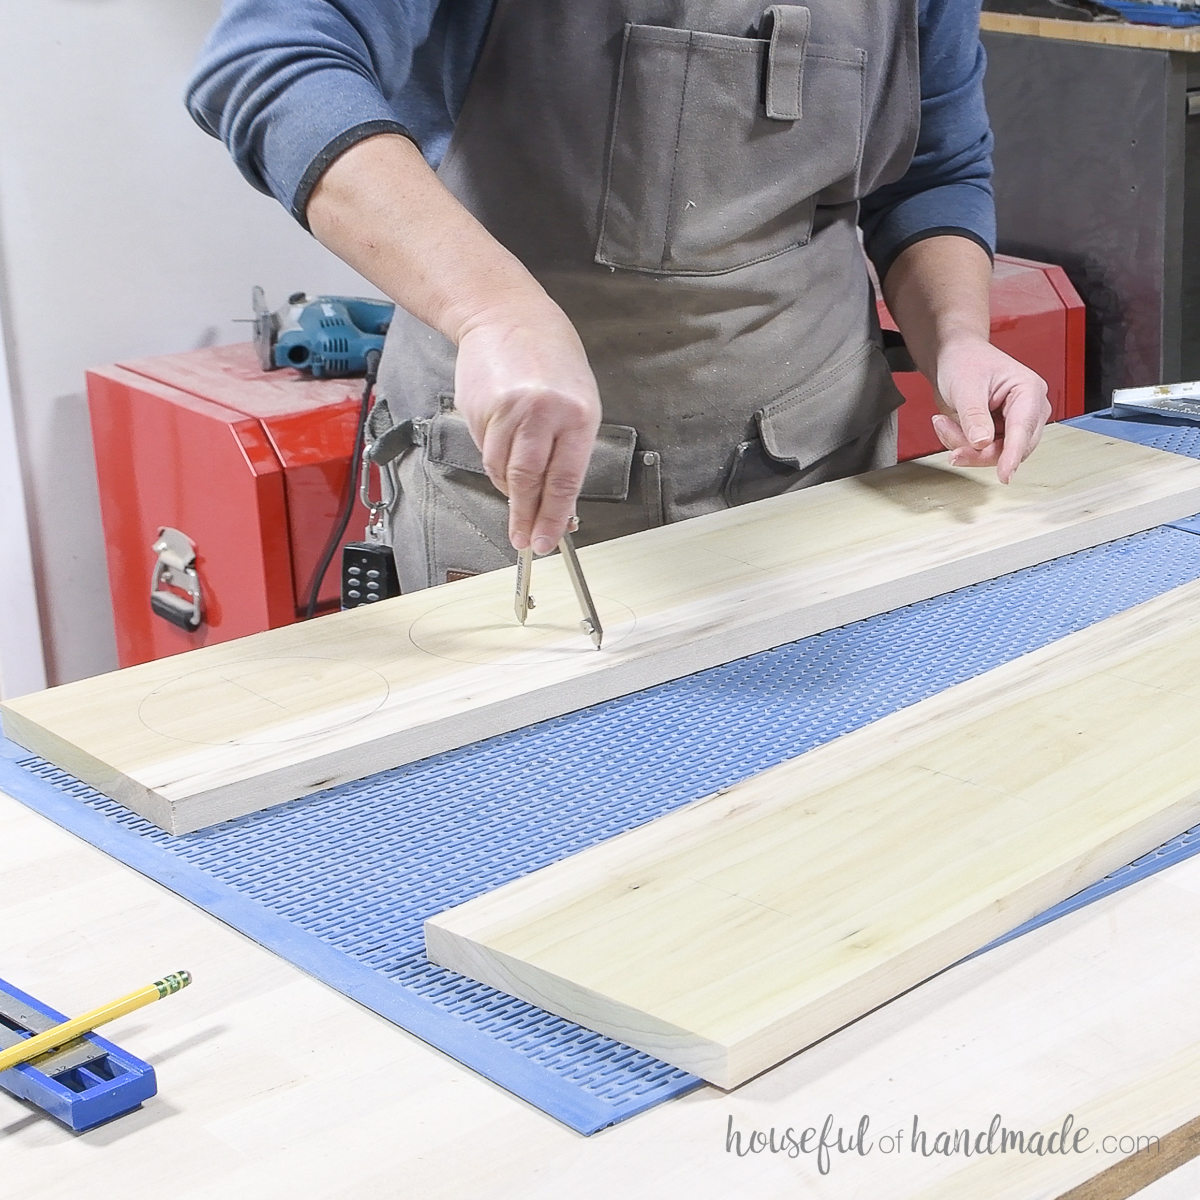
Draw 5″ circles using these marks as the center. Repeat for the other side board.
For perfect circles, I like to use a compass or tie a string around a pencil with a nail in the center to draw the circles.
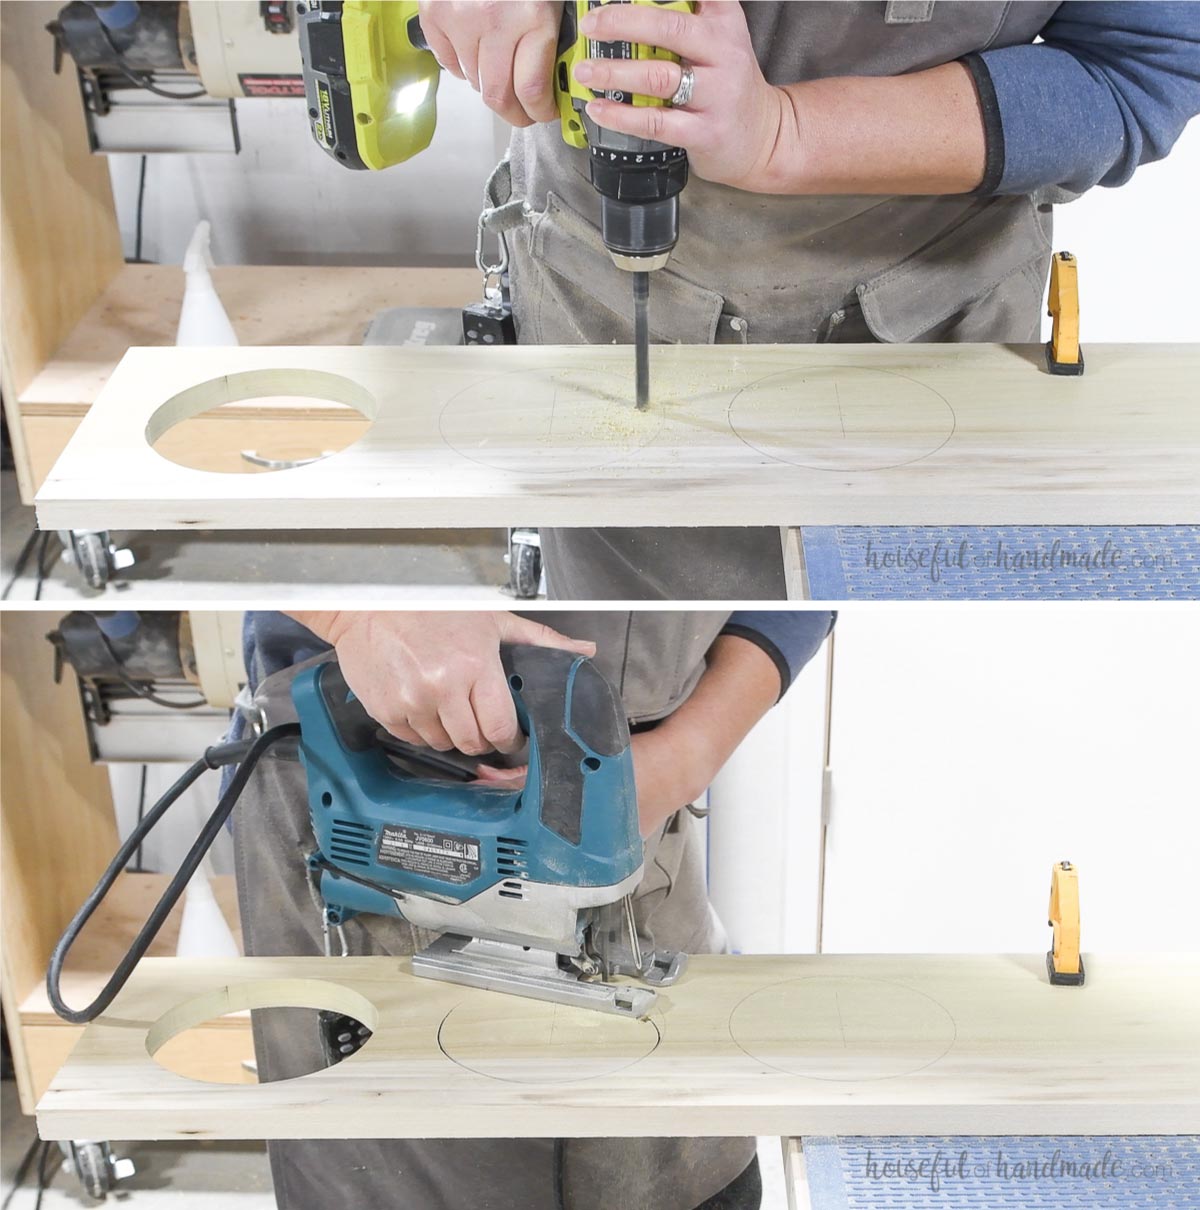
Drill a hole inside the circle close to, but not up against, the edge.
Insert a jigsaw into the hole and then cut out the circle.
Sand the inside of the circles smooth.
I love these sanding drum drill attachments for sanding inside holes, handles, and more.
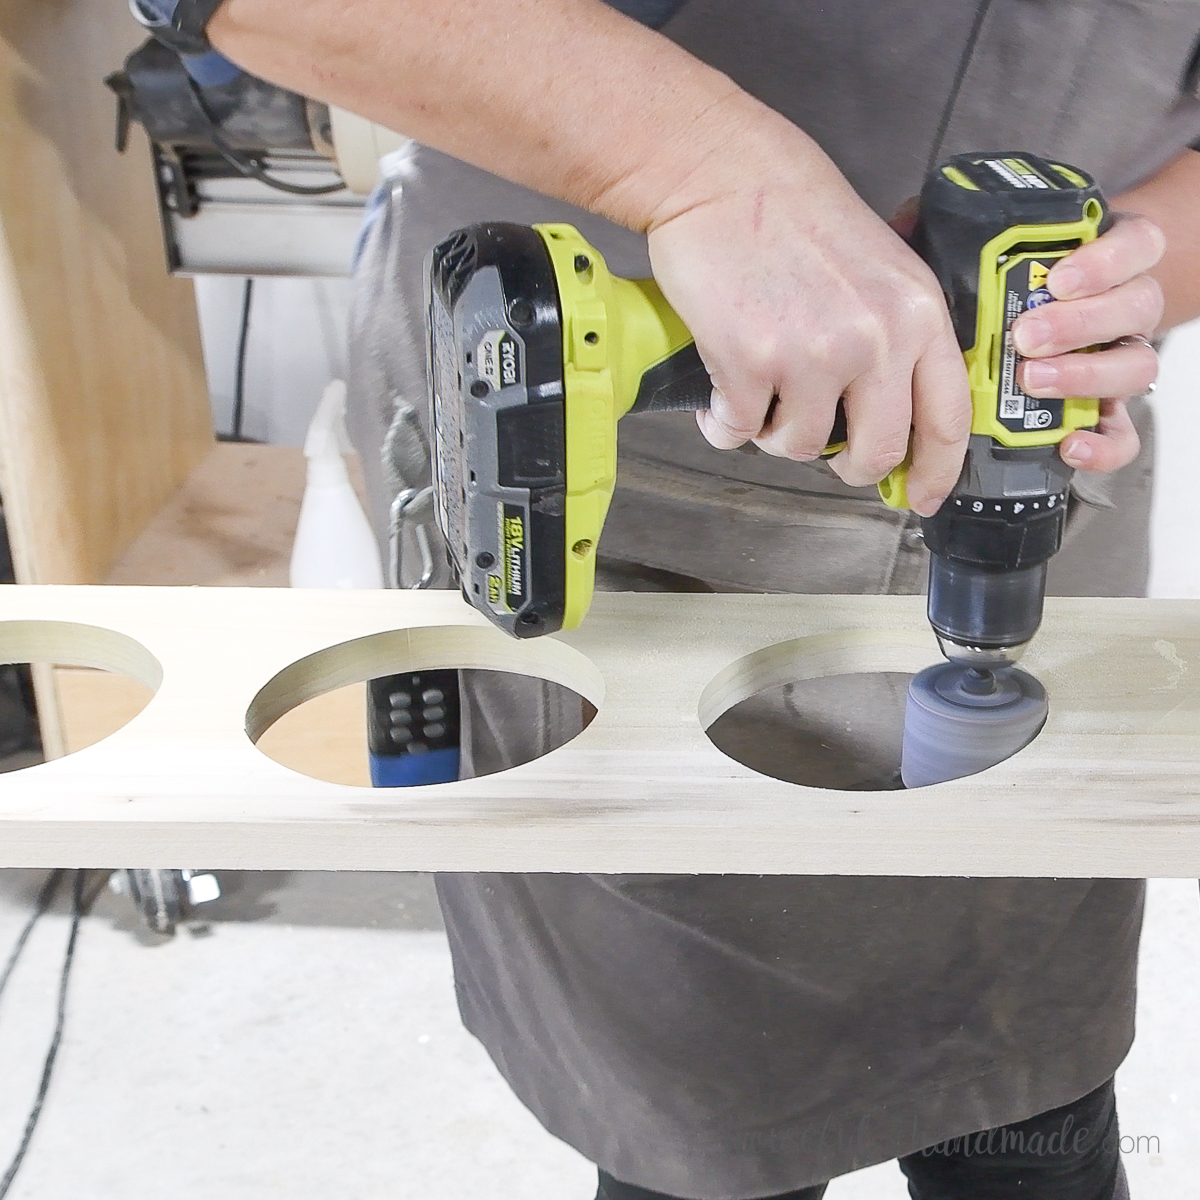
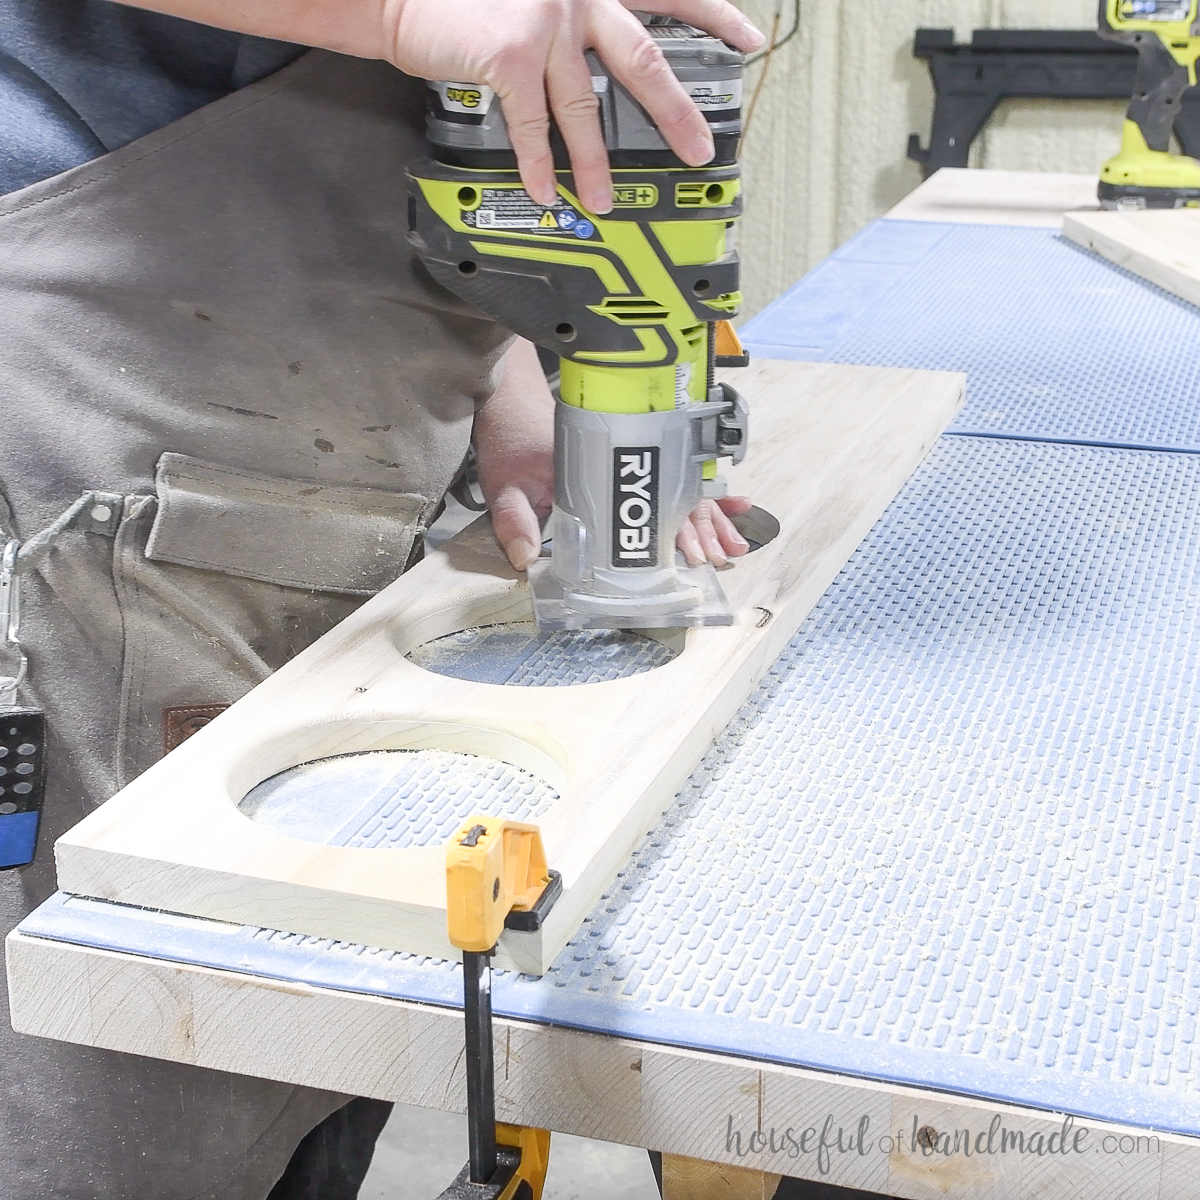
Add a round over to the inside of the holes on both sides of the board.
STEP 2- Drill holes for pegs
The pegs on the side leave room for 2 yoga blocks on the other side. You can adjust the placement, eliminate them, or even add more to work for your own exercise equipment.
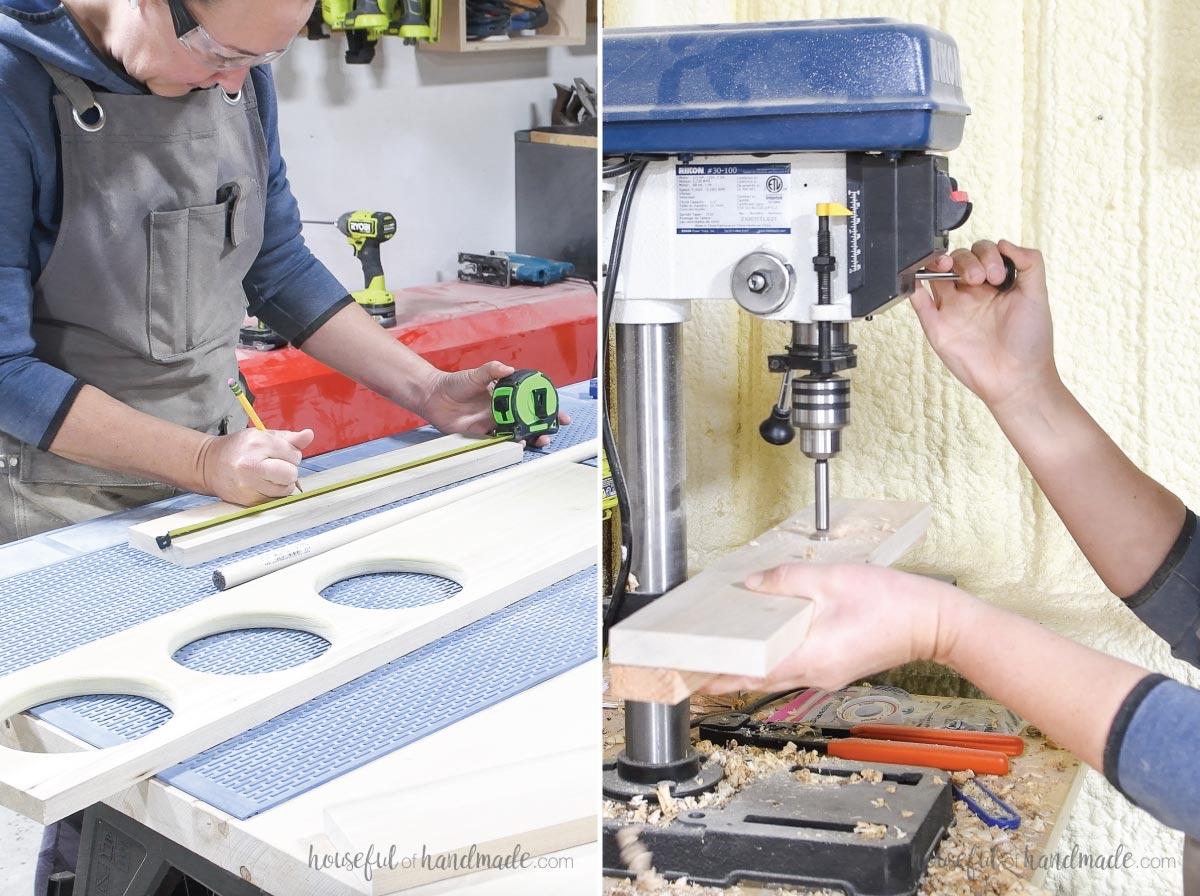
Decide on the placement for your pegs (exact placement I used is included in the plans here). Mark the center of each peg.
Drill 3/4″ holes all the way through the board with the center at these marks.
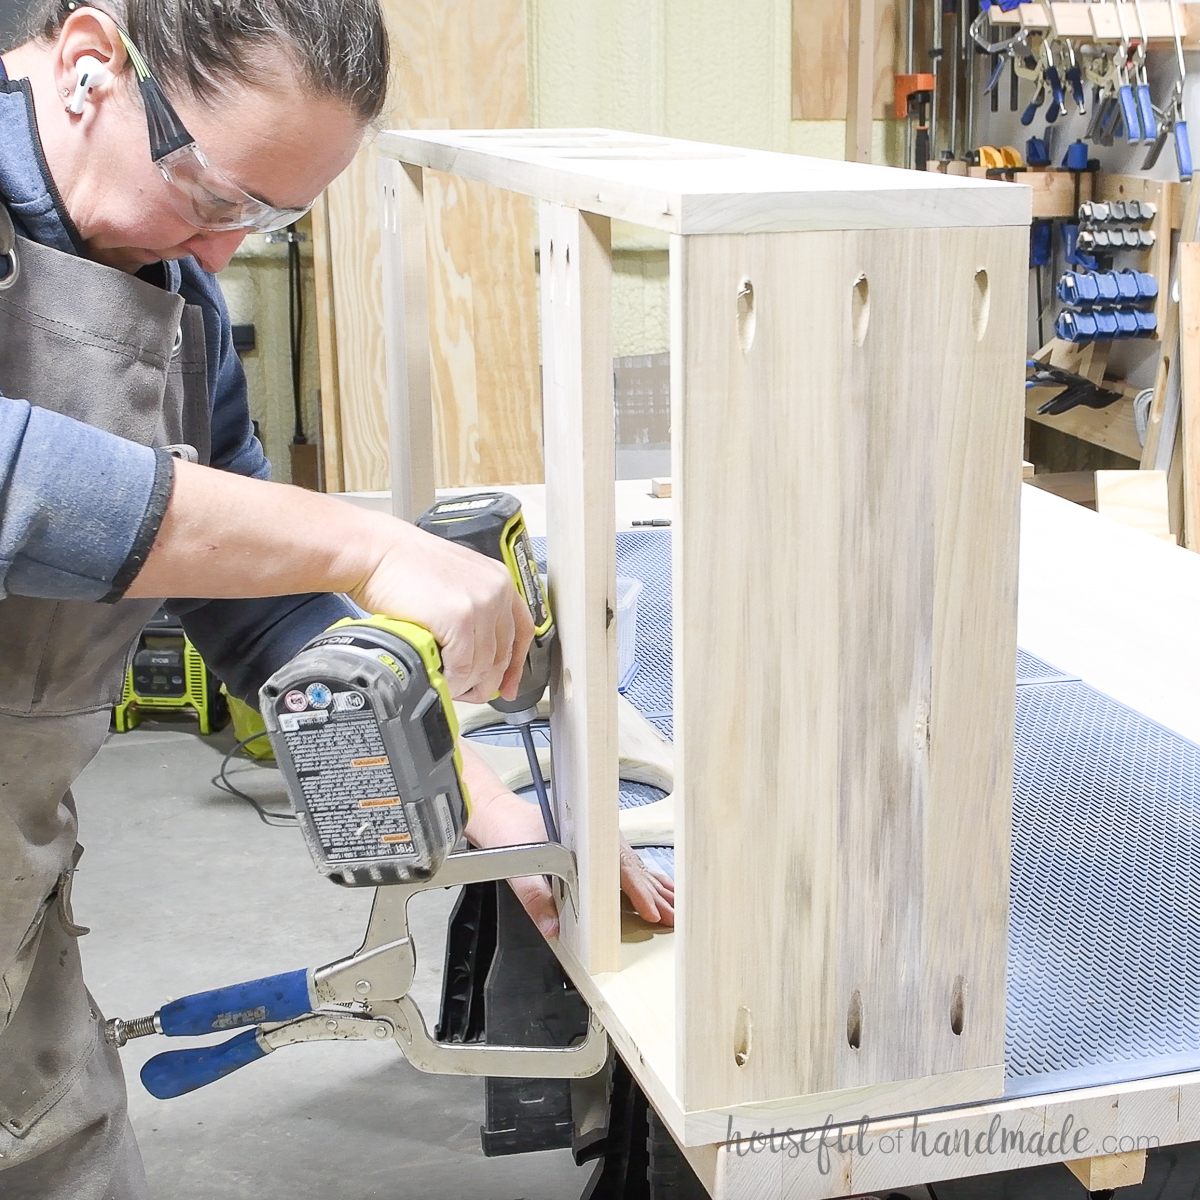
STEP 3- Assemble base
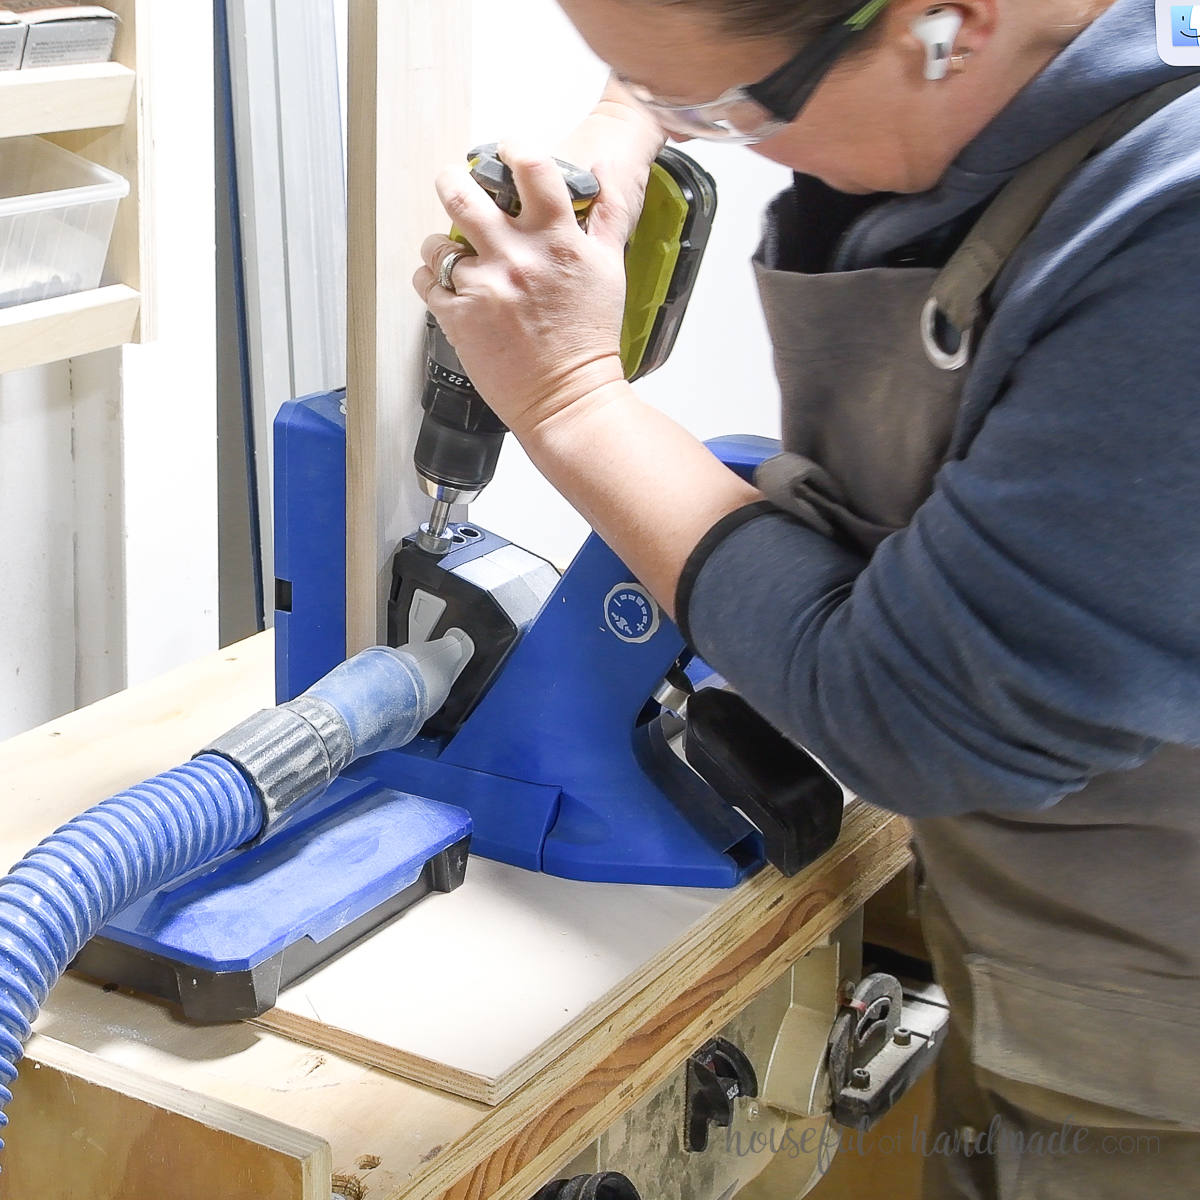
Set your Kreg pocket hole jig to drill holes in 3/4″ thick material.
Drill holes in both ends of the two back support boards and the bottom board.
Attach the back supports so one is flush with the top of the side board and the other is 11″ up from the bottom.
Attach the bottom board to the bottom of one side board so it is flush along the bottom.
Secure with wood glue and 1 1/4″ pocket hole screws.
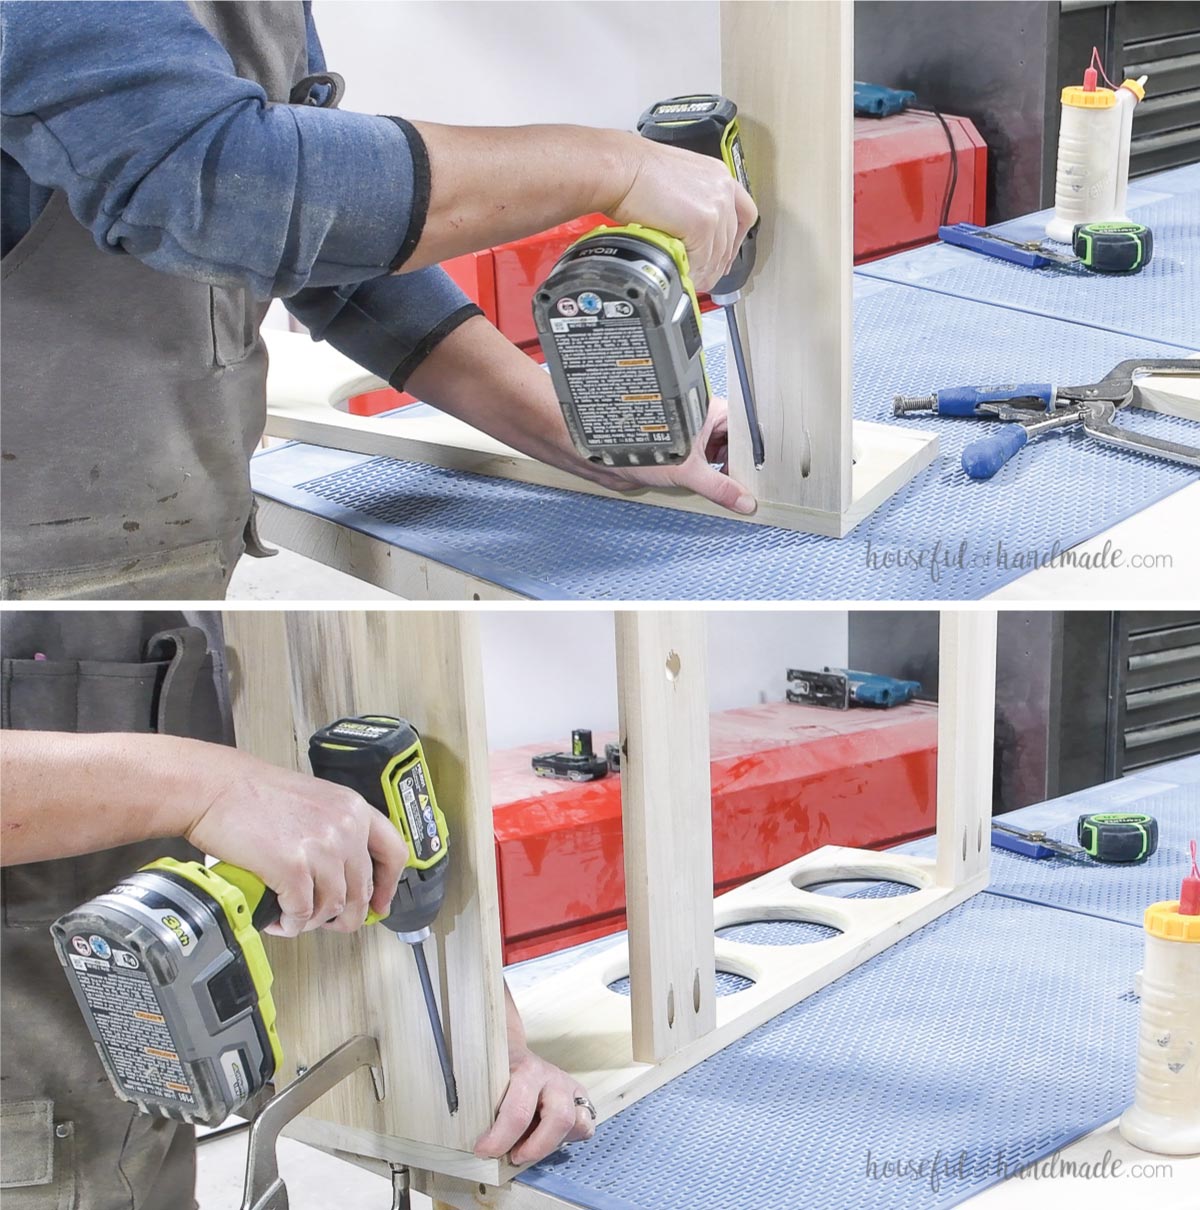
Place the second side piece on top of the boards and secure with wood glue and 1 1/4″ pocket hole screws.
Make sure to line them up the same as they were on the other side board.
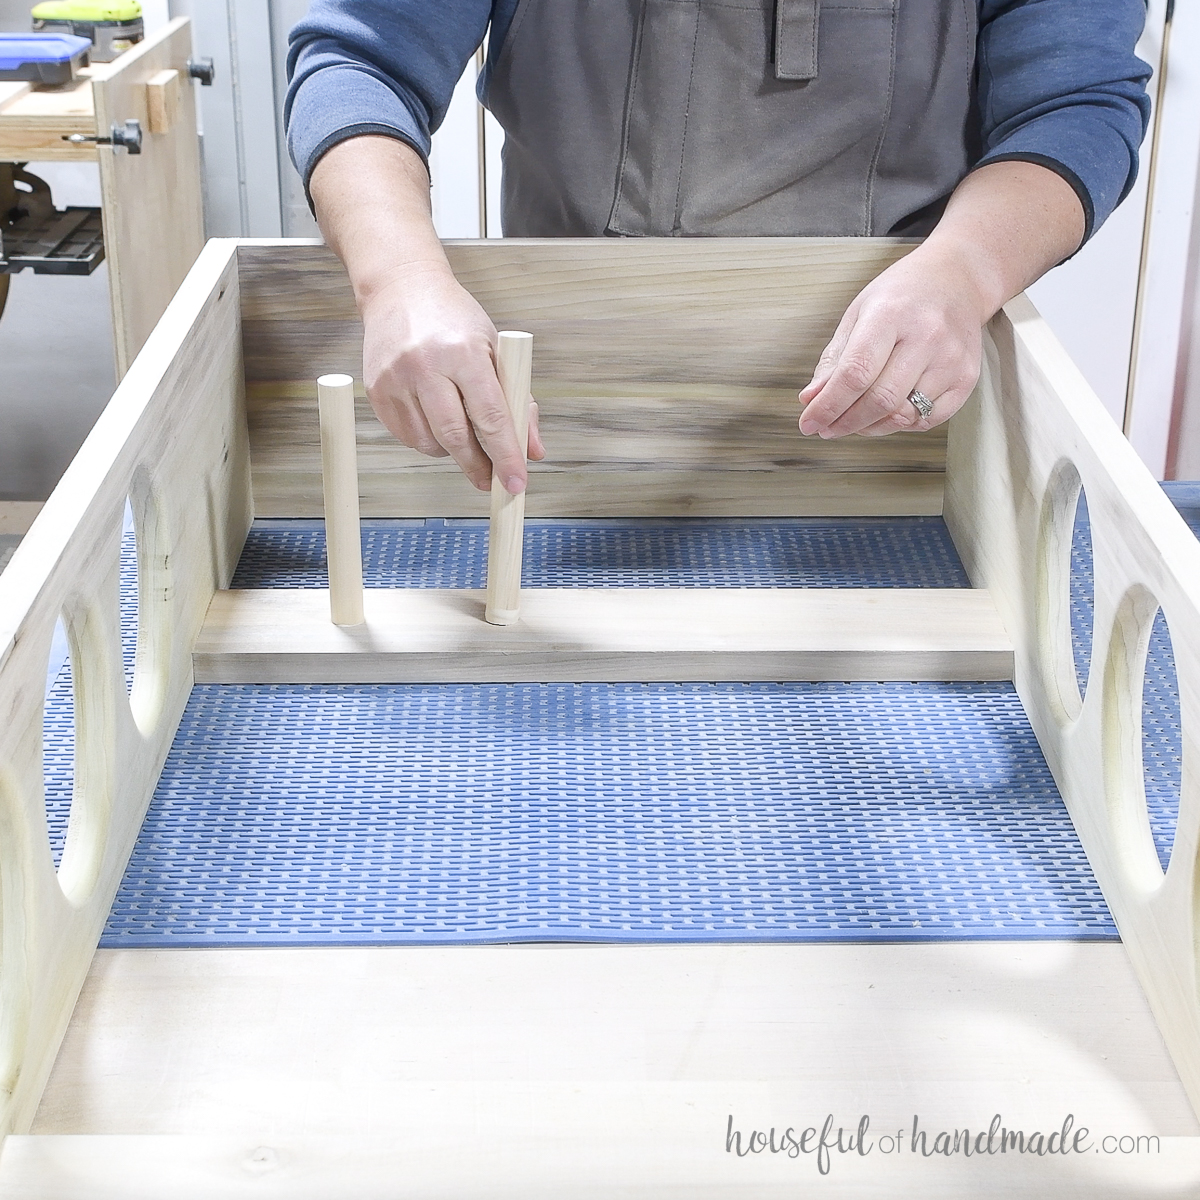
Glue the dowels into the holes on the back support board.
Place them all the way into the holes so they are flush with the back of the board.
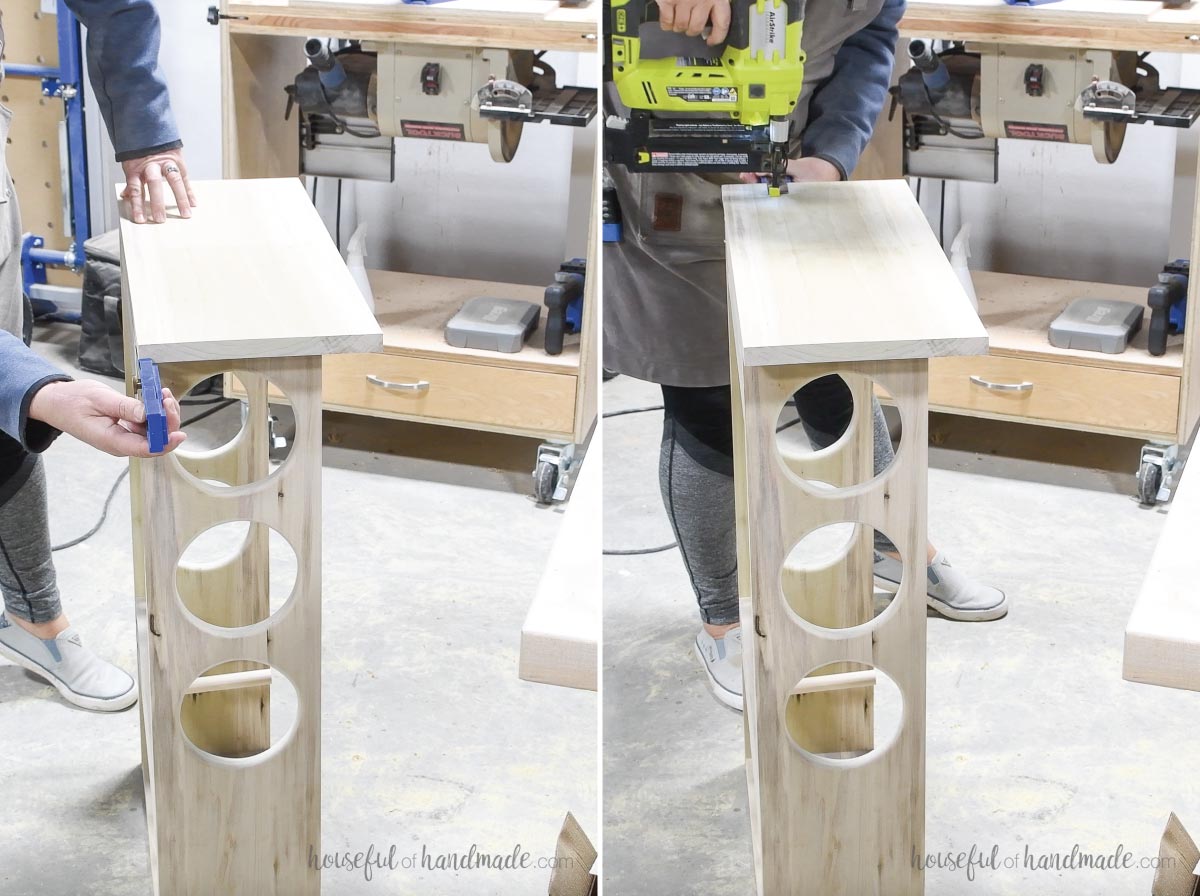
STEP 4- Attach the top
Place the top shelf on the assembled piece so it is centered side-to-side and flush with the back. I love using the Kreg Multi-Mark tool for aligning tops like this.
Secure with wood glue and brad nails through the the top into the sides and back support.
STEP 5- Finish and Hang
Sand and finish your exercise mat holder.
I built mine from poplar boards and finished it with a wood wax to give it a matte, unfinished look.
To hang your yoga mat storage shelf, attach it to your wall into the studs with 2 1/2″ wood screws through the top back support board.
You did it!
Now you can keep your mats off the floor and enjoy the serenity of an organized exercise space.
Happy building!

Thank you to Kreg Tool for sponsoring this post. I only recommend products that I use and love and all opinions are 100% my own. Click here to read my full disclosure policy.