Add character to any room with a DIY board and batten wall.
It’s week 3 of the $100 Bathroom remodel! This week we are starting to add style to the space. And to fill up the large wall opposite the vanity, I create a board and batten wall to add interest.
Board and batten is such a great tool to add interest and character to a wall. Older homes, that you always hear referred to as “full of character” never had boring walls.
Instead they had texture created by wood on the walls. You can still add artwork and more to walls with board and batten, but just the simple design and texture of the wall treatment behind the decor makes the room feel complete.
This post may contain affiliate links. As an Amazon Associate I earn from qualifying purchases. Click here to read my full disclosure policy.
Update: Our bathroom remodel is (mostly) done! You can check out the plan, with lots of tips, in this budget bathroom design plan. The week 2 remodel update includes tips and ideas for demo. We installed inexpensive peel and stick flooring and our new budget friendly open vanity was an easy DIY.
You can see the final budget bathroom remodel reveal here!
Board and Batten in a Bathroom
One of the best things about adding a board and batten wall to a bathroom is it creates a place to add hooks or a towel bar.
Trying to perfectly space hooks on a wall means you almost never hit a stud. Since studs are typically 16″ apart in a wall, if you want to add 3 hooks, you would need them to be 16″ apart or have most of the hooks not in a wall.
The same goes for adding a towel bar. If your towel bar is 24″ wide, then only one side can be in a stud in the wall.
Not having the hooks or towel bar in a stud means it will eventually wiggle itself loose and fall out. This process is usually sped up a lot if you have kids using the towel rack or hooks in your bathroom.
And the use of wall anchors can slow down this process, but any amount of weight over time had been show to still cause issues with hooks or towel bars just attached into the drywall.
This is where the board and batten wall is amazing! You are adding strips of wood to the wall, which are attached to the studs. Then you are able to attach you hooks or towel bars directly to the boards and viola… they are secure and stay put!
Even with lots of use by kids or adults, you do not have to worry about your towel bars coming loose. Plus the added character the board and batten wall adds makes your bathroom pretty amazing!
Designing a Board and Batten Pattern
There are so many different board and batten patterns you can add to a wall. So even if you don’t want super traditional design, you can still add a board and batten wall.
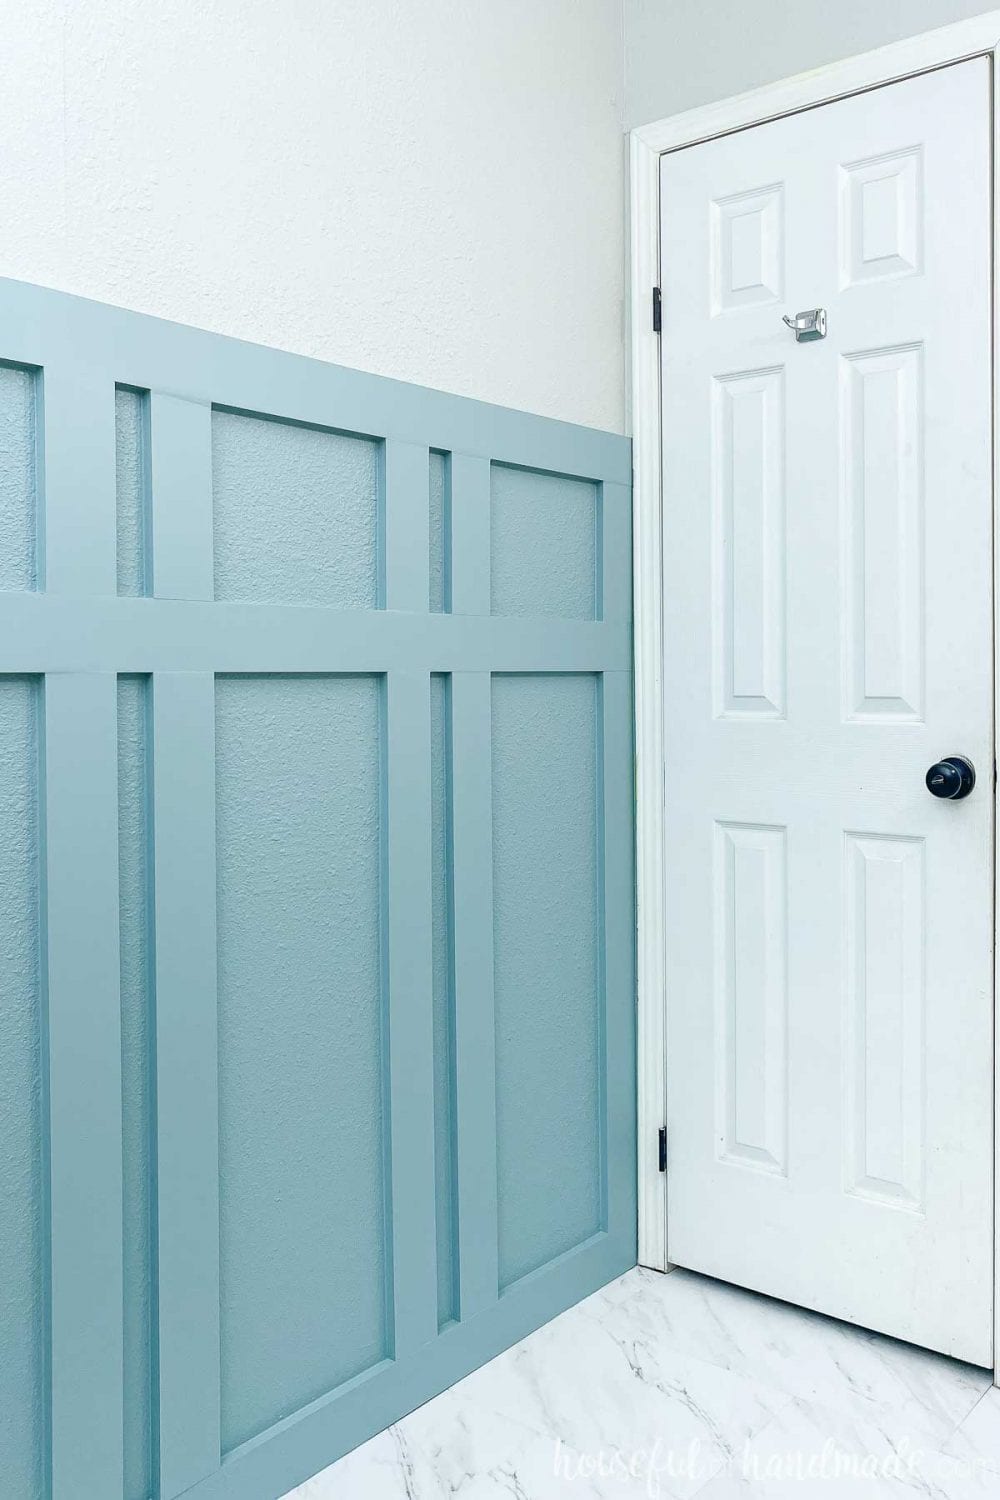
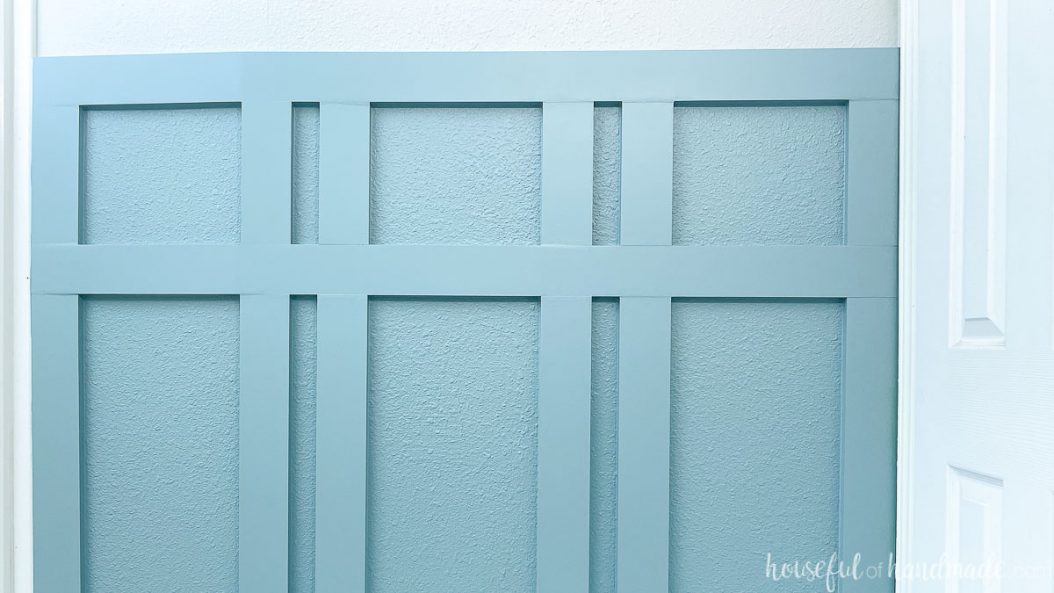
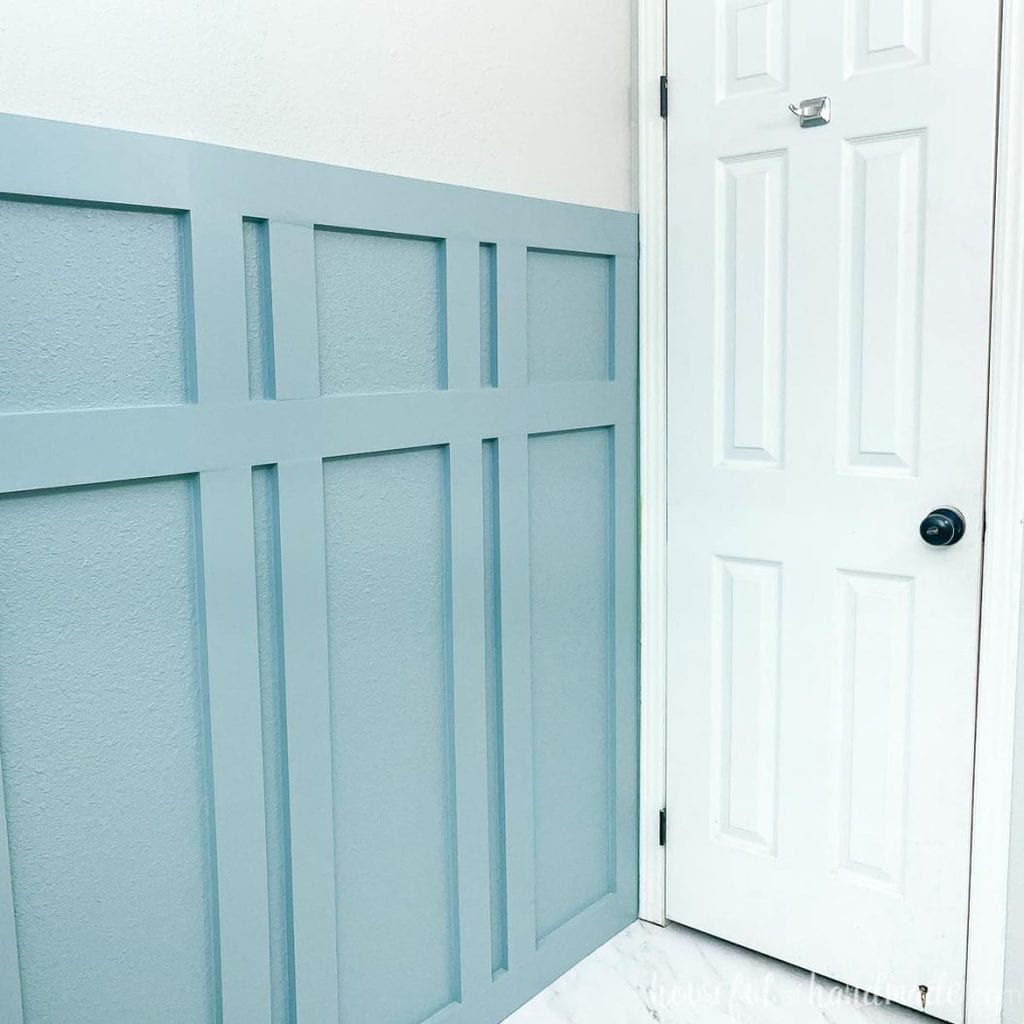
We went with a traditional board and batten design in our bathroom. This design is a horizontal board on top and bottom with vertical boards in the center.
Since the space is broken up with the tub/shower, a full wall design would have been more challenging and not what I was going for in the space.
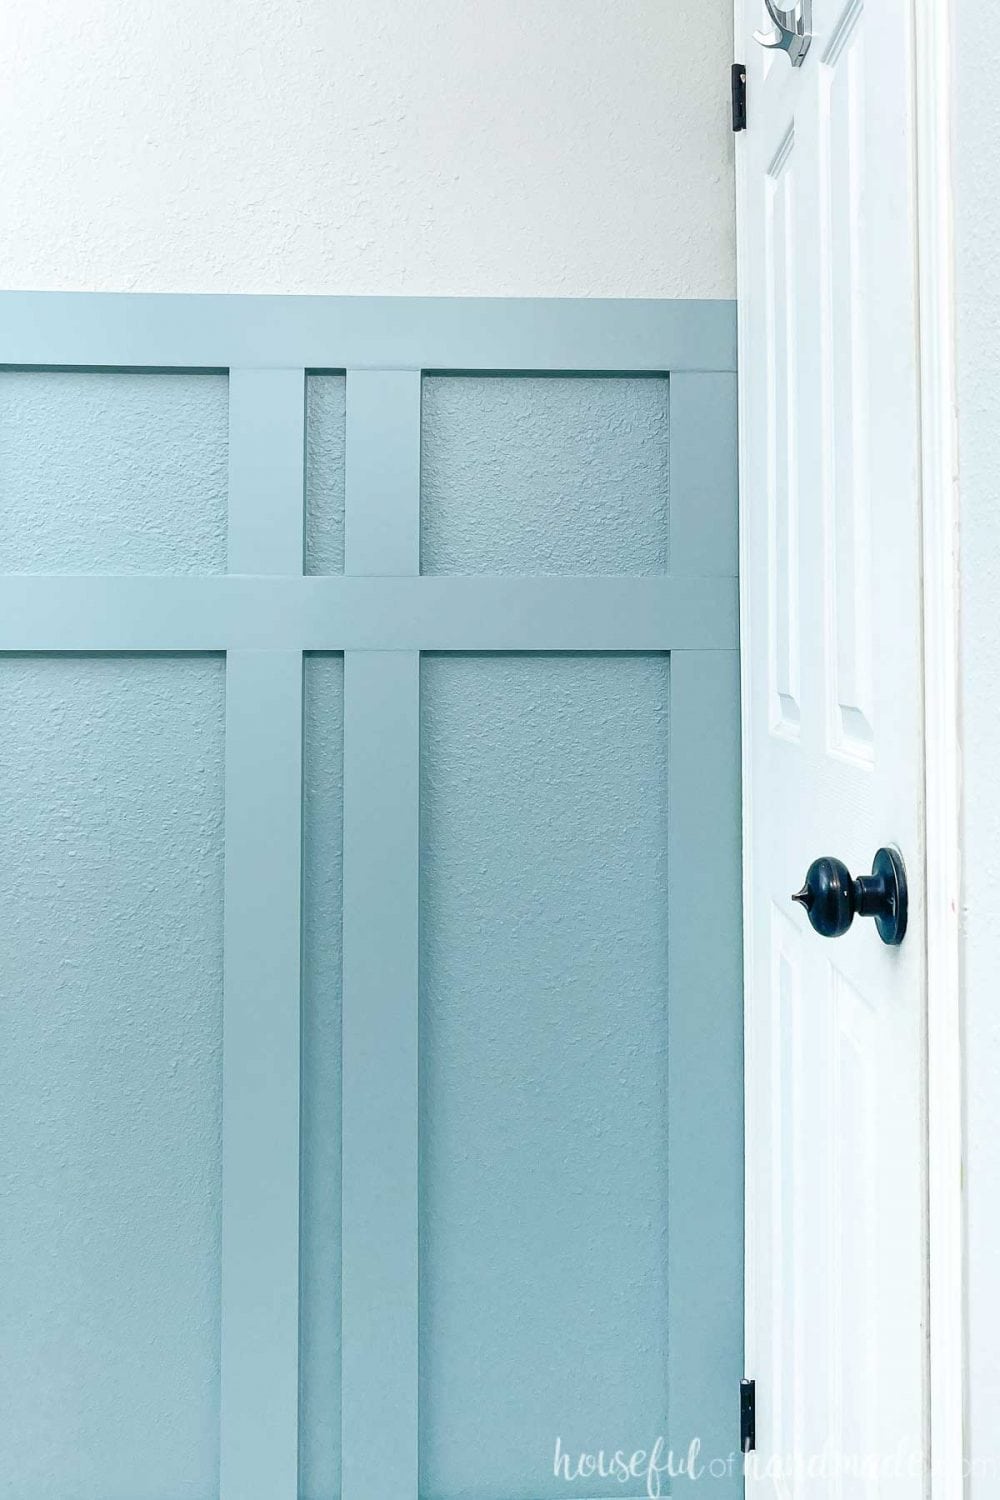
I did add a bit to the traditional design to give make it unique and add some functionality. A second horizontal board close to the top was added to added. This board is the perfect height for the hooks we need to hand towels on for the kids.
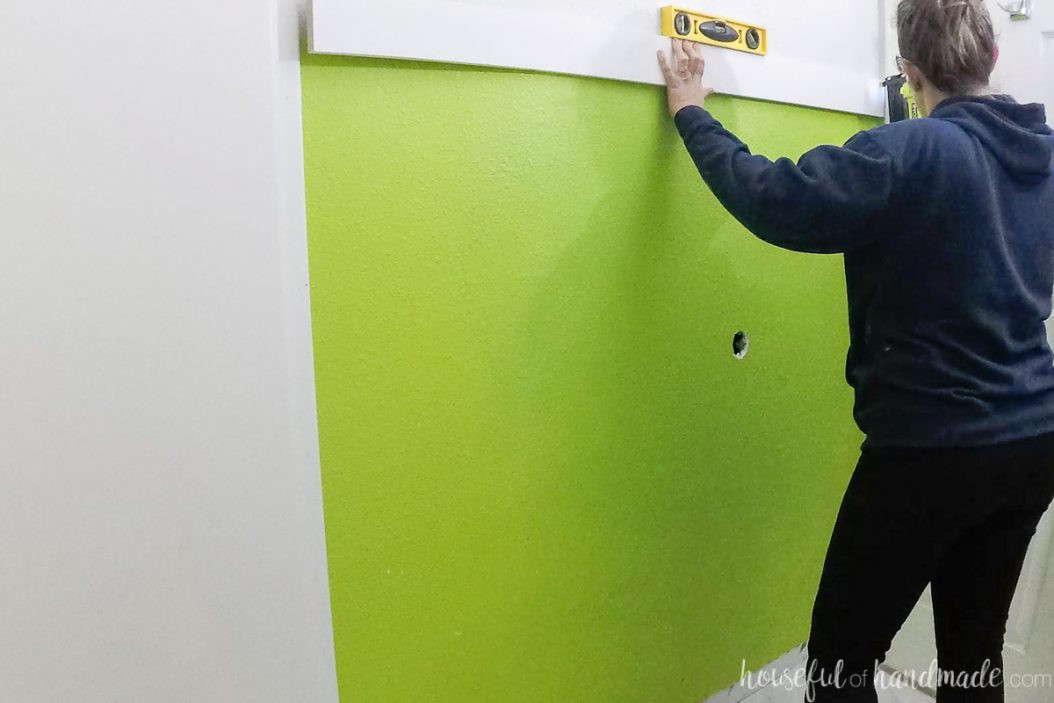
I also added a double vertical board design instead of using just one evenly spaced along the wall. This was done to help cover up the hole in the wall where the door handle hit the drywall.
Now that you understand why we chose the design we did, here are some examples of other board and batten walls to inspire you to DIY your own.
Traditional Board and Batten Designs
The most common board and batten design a top and bottom board with evenly spaced vertical boards in between. The more traditional option is to end the board and batten at a standard chair rail height (between 30-36″ off the floor).
But you can change the height of this board and batten to anything you want. Typically you want to not cut the room in half so you would go for either a 1/3 or 2/3 height. But it’s your house so you can do what you want!

You can also use the common board and batten design but take it all the way to the ceiling. This instantly looks a bit more modern and creates a beautiful feature wall in your room.
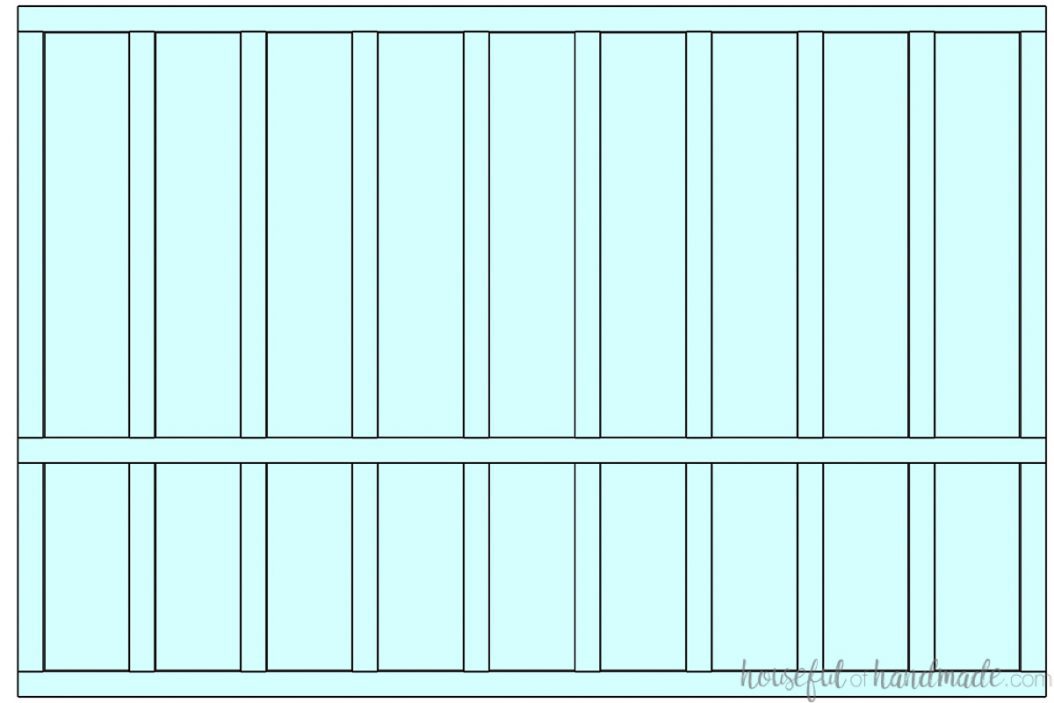
Another traditional board and batten design is to add a third horizontal board. This creates a section of cubes at the top of the board and batten wall.
In the drawing below, I split the room in half with the wall, but the addition of the extra board help to still give it the 1/3 rule. You can also raise or lower this board and batten design anywhere you want on your wall.
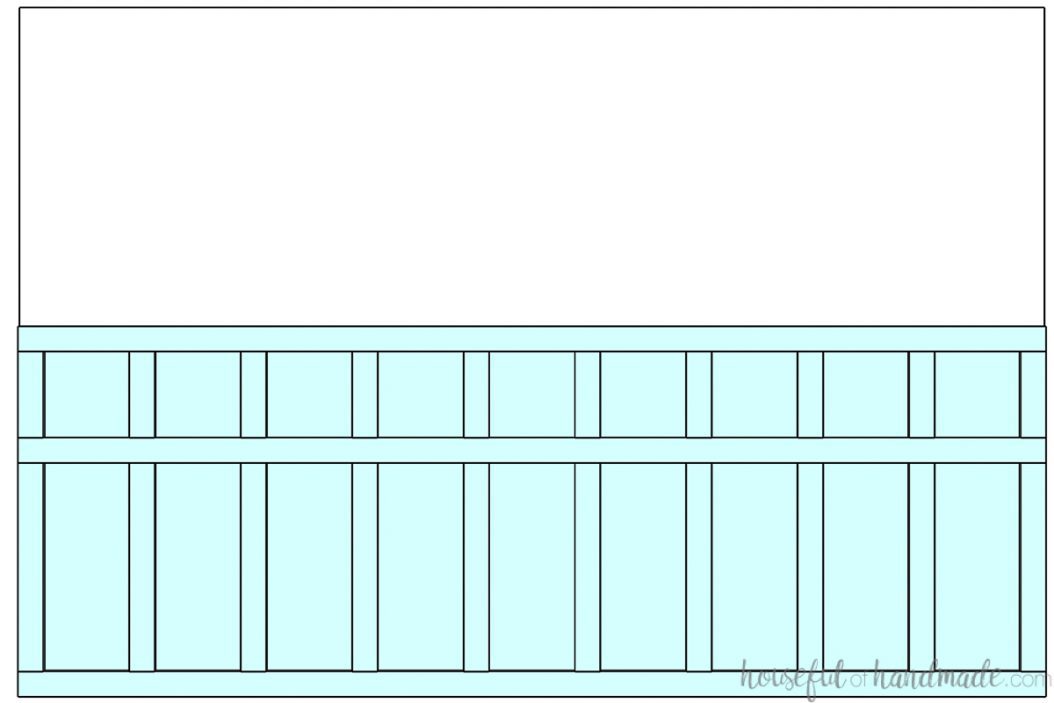
And this third horizontal board design can also be adapted for a full board and batten wall. To keep it traditional, the center horizontal line would be a chair rail height (30-36″ off the floor).
Modern Board and Batten Designs
With the popularity of DIY, you are starting to see so many different board and batten wall designs. The possibilities are endless and you can easily do a search for more ideas, but here are a few to get you started.
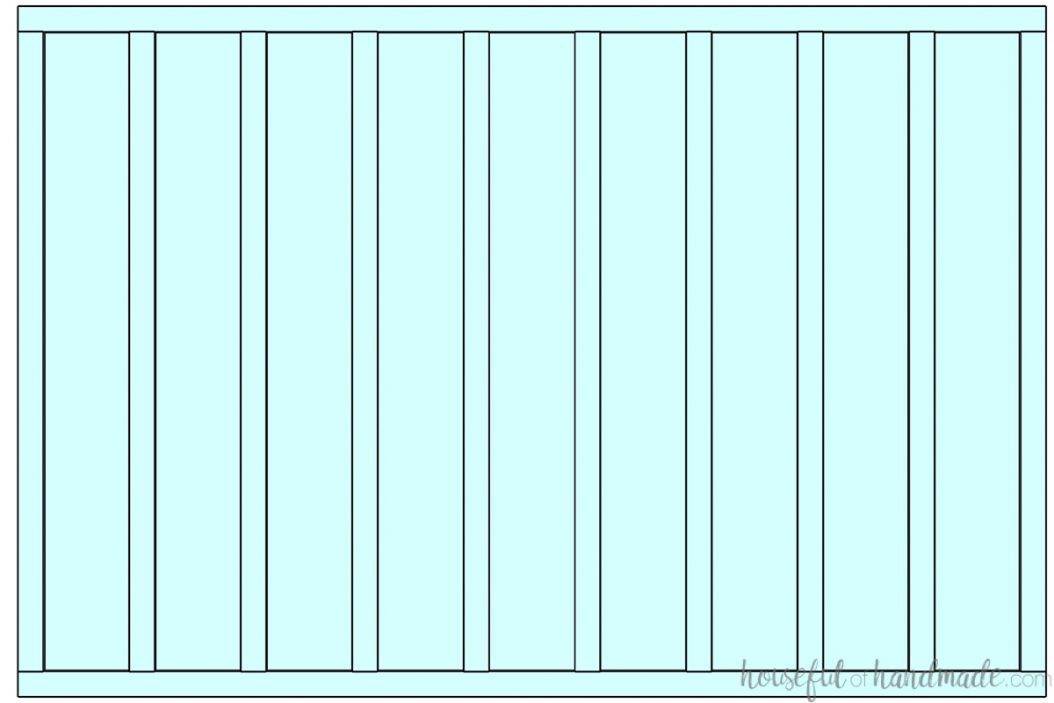
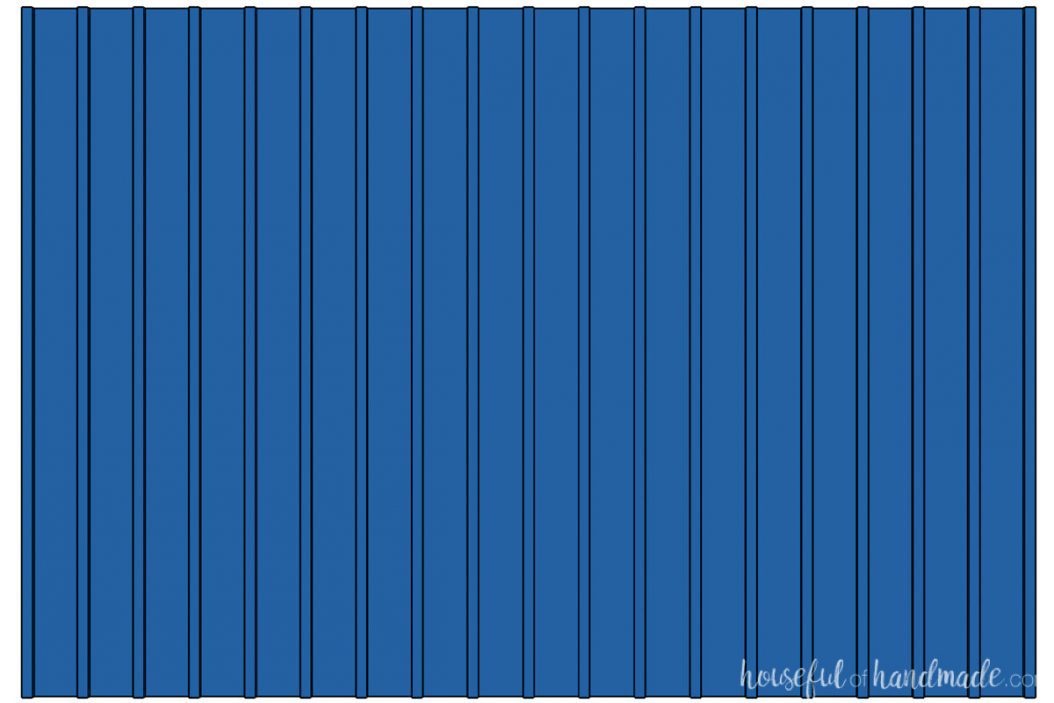
This first one is a modern take on the traditional full wall design. This one uses thin vertical strips to add more texture to the wall. And you can space them closer together for even more texture.
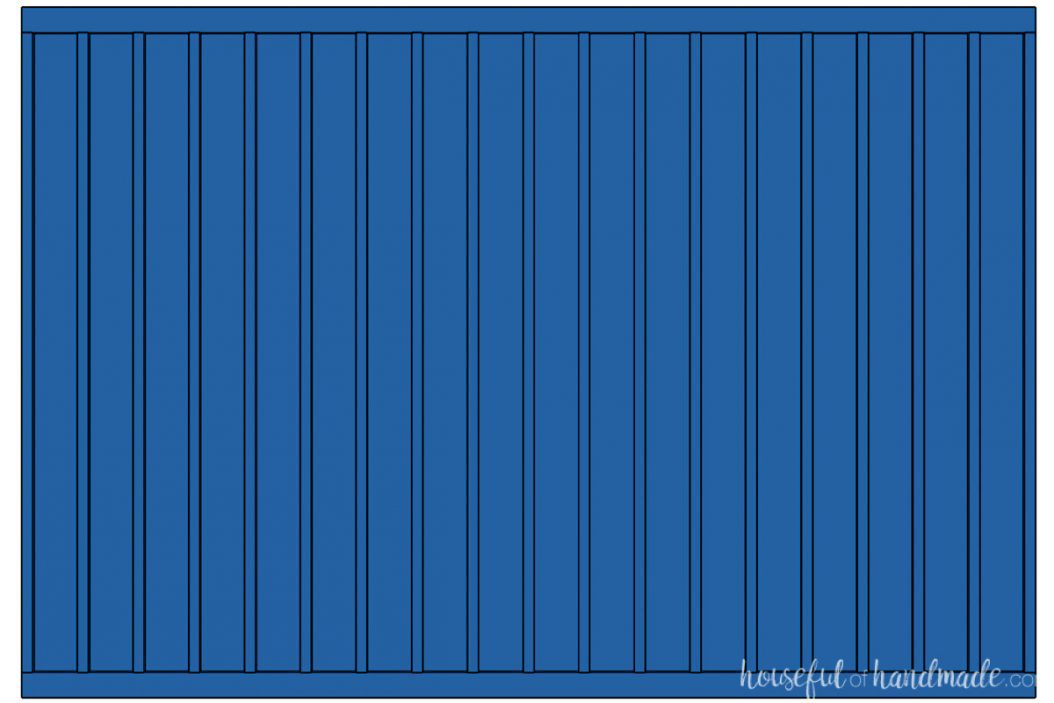
Plus, to make this design even more modern, leave the horizontal boards off completely. This will let the vertical boards disappear right into the ceiling.
This board and batten design is harder to get a clean paint line at the top so I would recommend painting the wall and the boards before attaching them. Then you just have to touch up the paint over the nail holes and caulk.
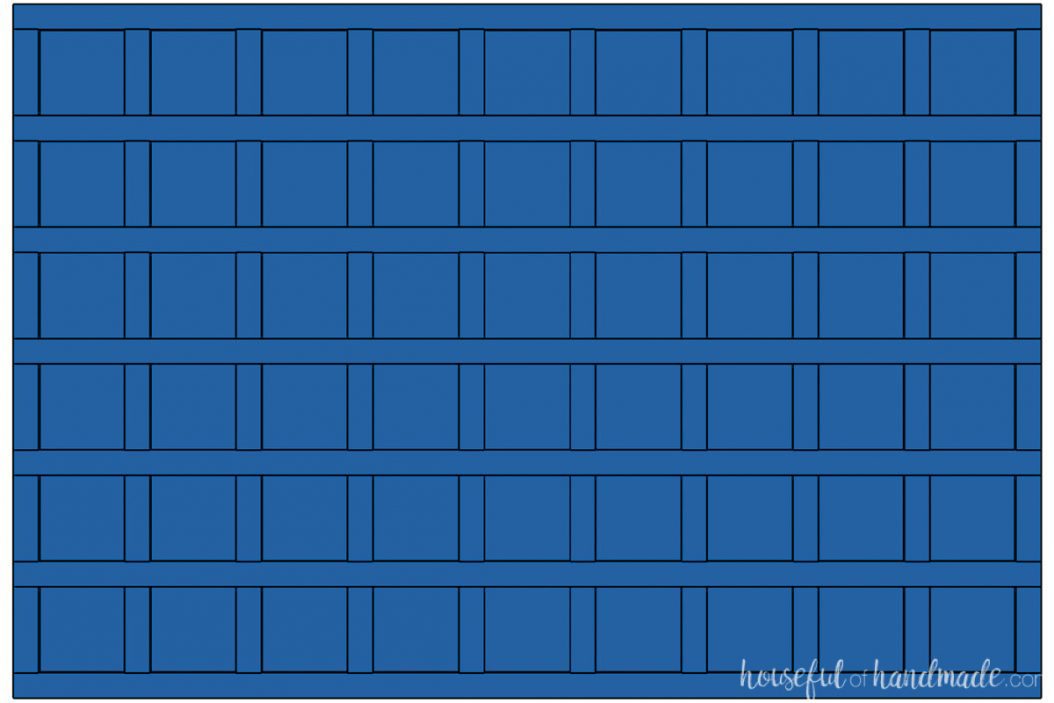
Another fun design is to create cubes with your board and batten wall. You can space them out tighter like in the drawing below or make the cubes larger.
You could also add the full vertical boards, then stagger the horizontal boards of the cubes for more interest.
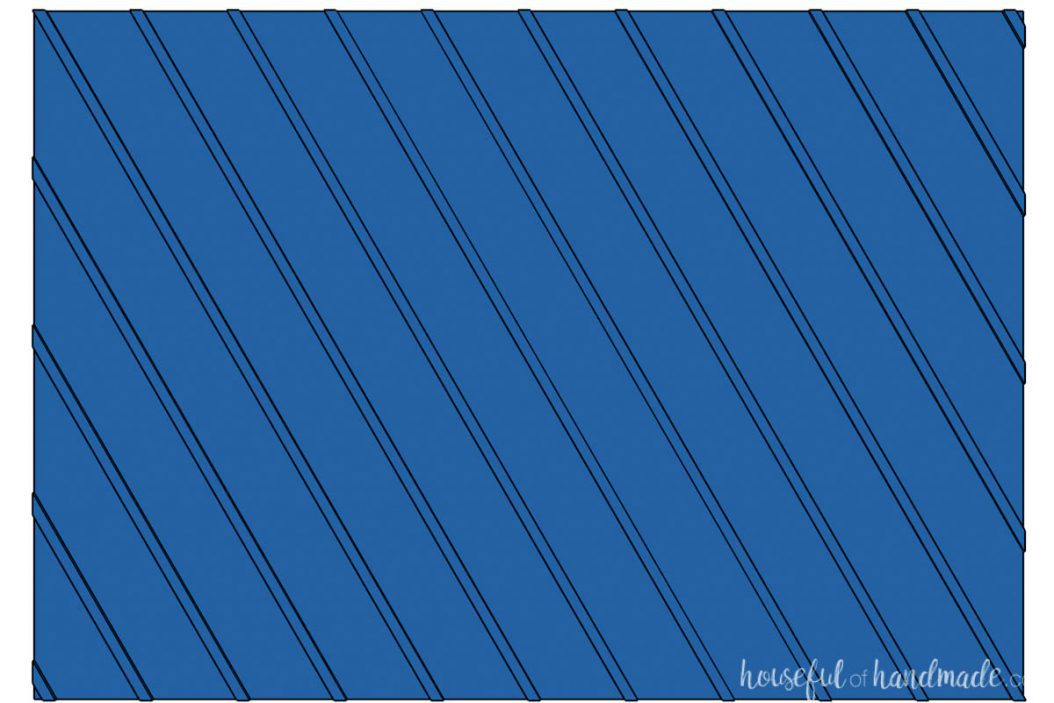
To take your board and batten wall to the next level, you can add boards at an angle. Something as simple as cutting the boards at a 30 degree angle (like in the picture below) will add interest to you wall.
Or you can get creative and add cuts all all different angles to create a piece of art on your wall.
You can also attach angled boards in a pattern like this chevron board and batten wall design. This design might look complicated, but is actually a lot of easily repeatable cuts. All together you get a bold statement in your room.
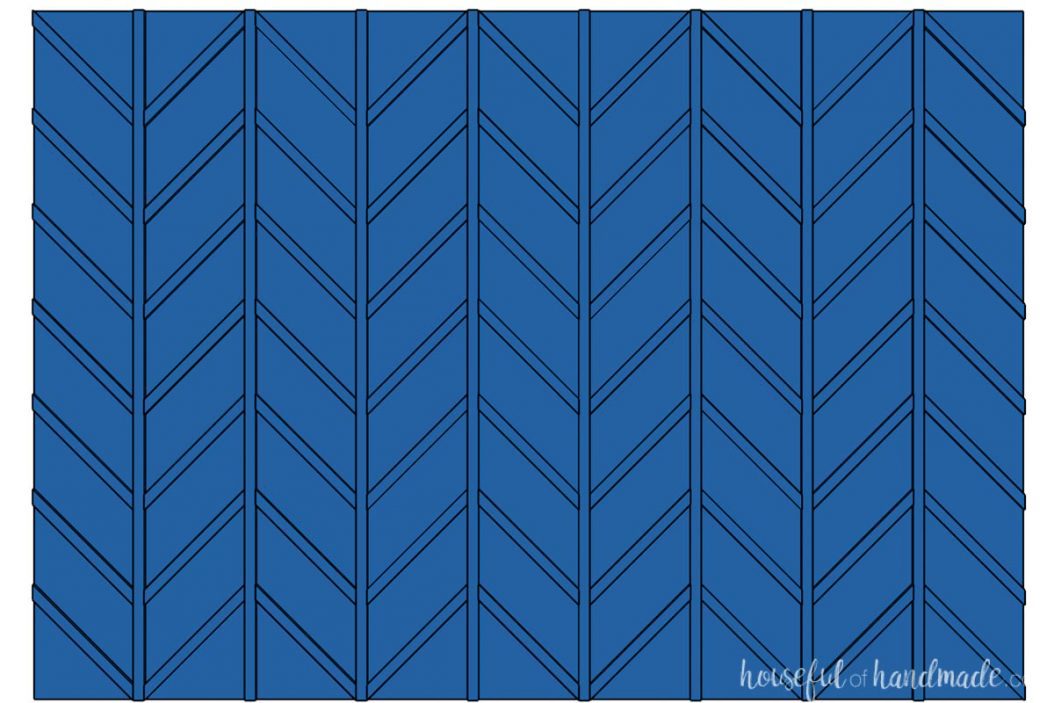
Think of modern board and batten walls more like a giant piece of art in your room. And have fun creating any design that you want!
$100 Bathroom Remodel Update
Since it is Week 3 of the DIY bathroom makeover as part of the $100 Room Challenge, I want to quickly check in on the entire room and budget! Also, at the end of the post, you can also check out the progress of all the other bloggers participating in the $100 Room Challenge.
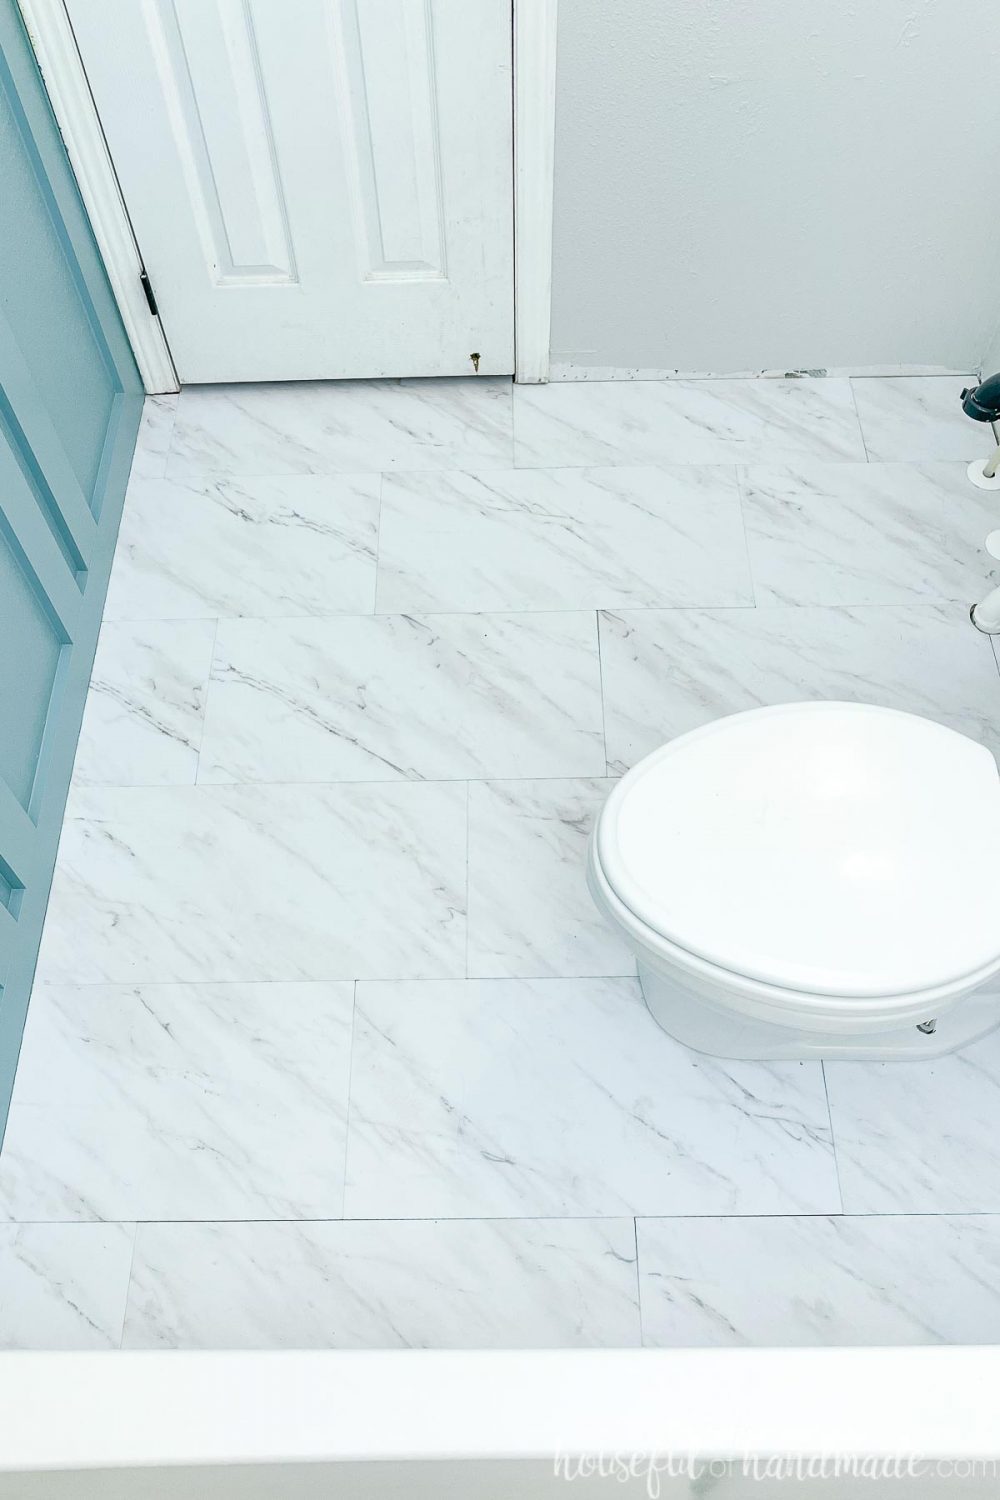
We installed peel and stick vinyl tiles that we had left over from our DIY kitchen remodel. Luckily the bathroom was small so we had plenty of tiles and underlayment scraps.
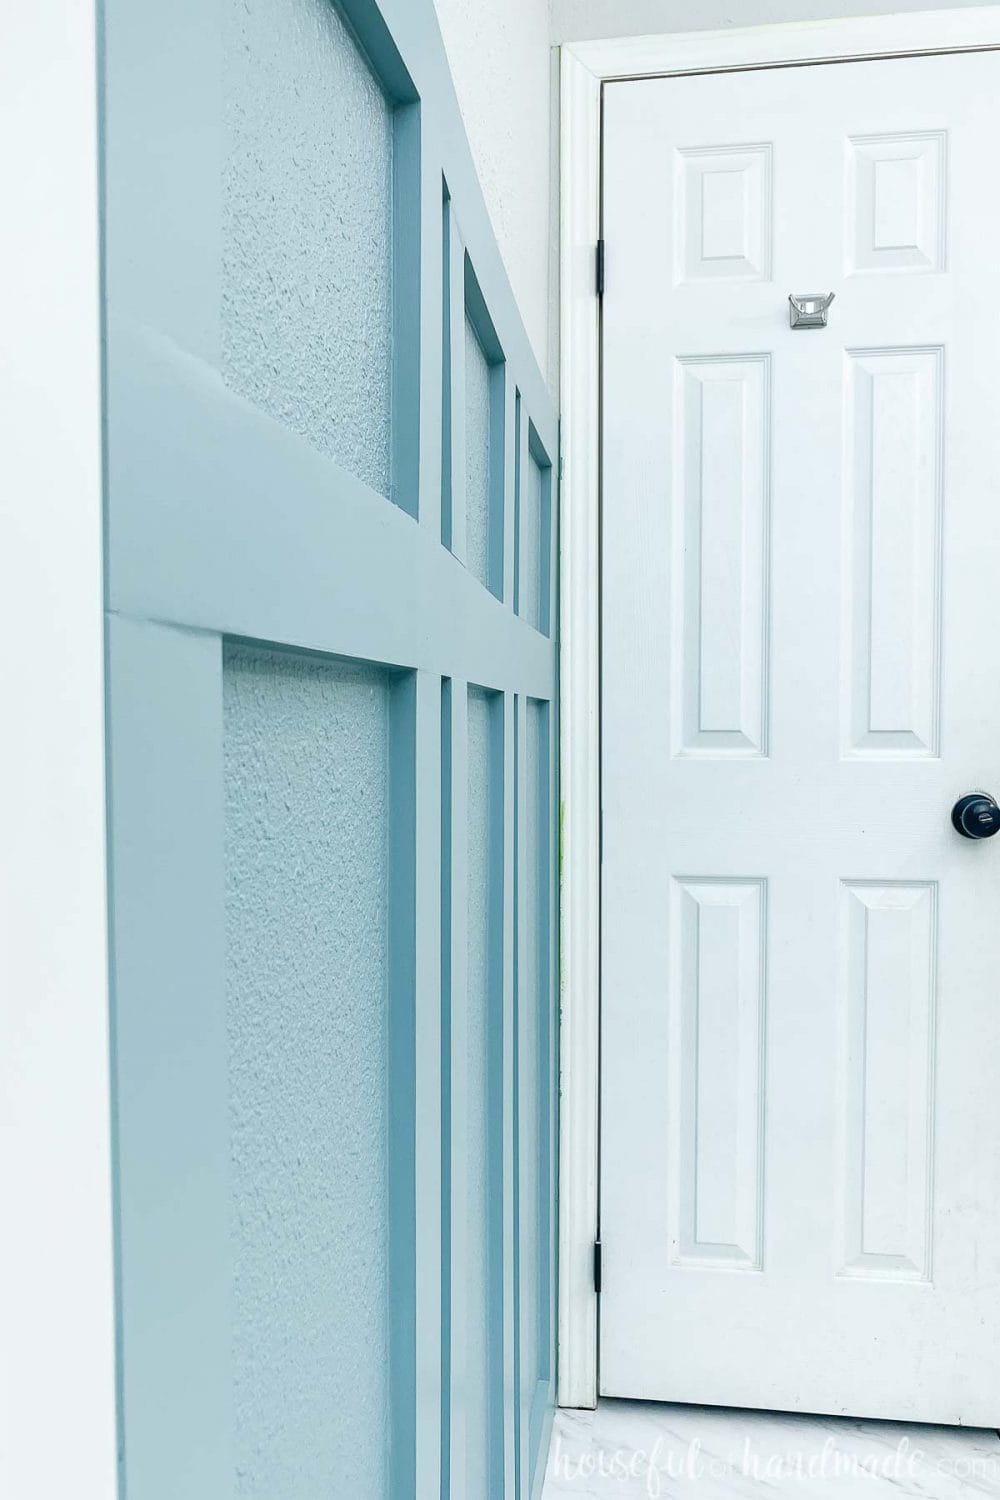
Then I installed the board and batten wall and painted it this beautiful grayish turquoise color. The paint was free because I borrowed it from my father-in-law who had left overs after painting his rental house.
Bye-bye forever florescent green!
Borrowing paint is a great option for adding color to a room on a budget! And people with left over paint are usually happy to part with it instead of them having to store it or pay to dispose of it.
Remodel Budget:
- Demo – $0
- Moving drain pipe – $2.00 (for pipe elbows)
- Repair holes – $0 (had drywall mud left over from other project)
- New gray paint – $0 (had one roller on hand and will wash and reuse)
- New turquoise paint – $0 (borrowed paint and used small roller on hand)
- New Floor – $0 (used leftovers from kitchen remodel)
- MDF boards for board & batten – $32.00
- Caulk – $2.50
- New faucet with drain – $24.00
Total: $60.50
Luckily I still have a good amount of money in my budget because this week we are building a vanity and need a new vanity top and sink!
Plus I am hoping to have some money left over for a new shower curtain too. Wish me luck!
DIY Board and Batten Wall
Tools Needed:
- Saw
- Finish nail gun
- Level
- Measuring tape
- Caulk gun
Supplies:
- MDF (medium density fiberboard) boards
- 2″ finish nails
- Wood filler
- Paintable caulk
Choosing your Boards
We used 1×4 MDF boards for our wall. But you can use any boards you want. I recommend MDF because it is inexpensive and very smooth without a lot of sanding. This means it will look amazing once painted.
The 1×4 MDF board are typically 5/8″ thick and 3 1/2″ wide. You can change the width of your boards to any width you want for your design.
Also, if you want a shallower board and batten design, you can also rip down 1/2″ or 1/4″ MDF plywood to your desired width. Using MDF plywood means you can create any design and are not limited to standard dimensional lumber sizes.
Add the Horizontal Boards
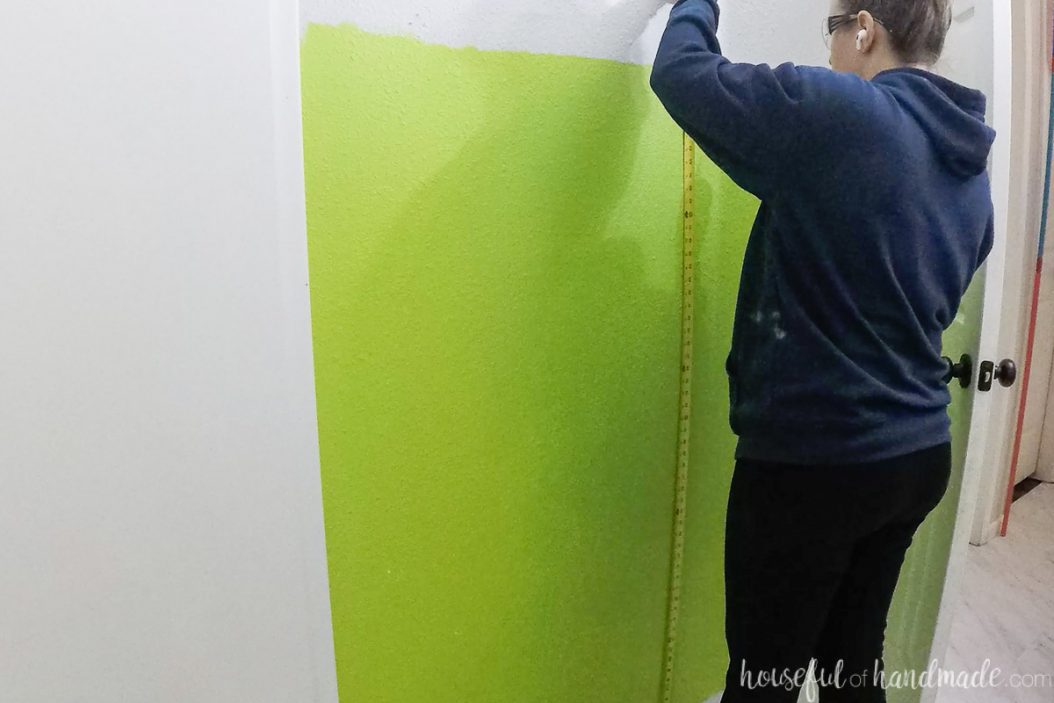
Measure and mark where you want the bottom of the top board. If you are doing a full wall, you can skip this.
Locate your wall studs and mark where they are.
Measure the width of the wall and cut your board to this measurement. Make sure to take the measurement at the lines you just marked because walls are not always straight.
Cut your first board.
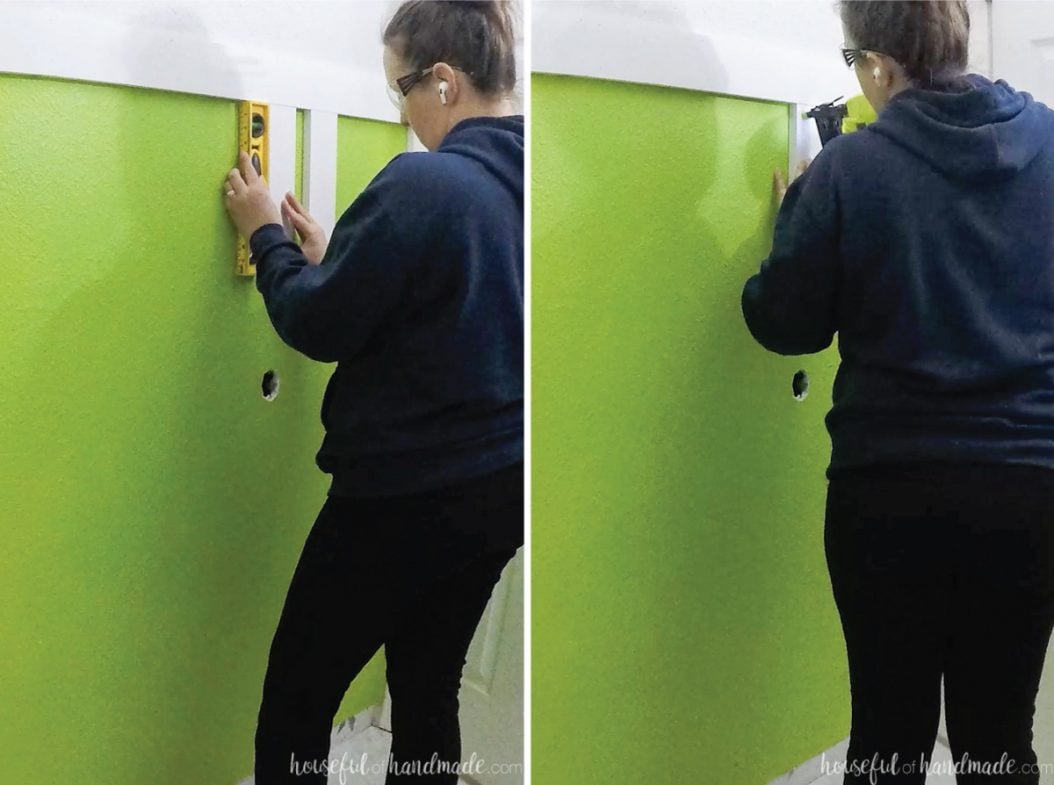
Line it up on the wall with your measurements, then use a level to make sure the board is level.
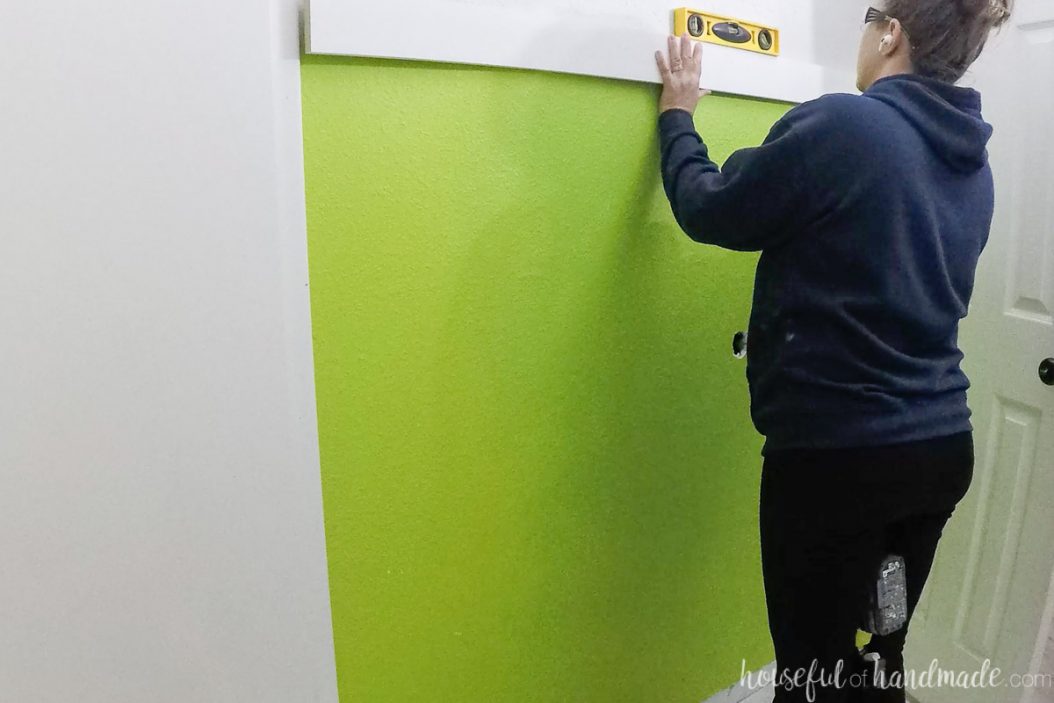
Attach it to the wall with the 2″ long finish nails. Make sure to attach it into the wall studs. The longer nails are necessary to attach the boards to the studs through the drywall.
Once the first board is attached, cut and attach the bottom board at the floor.
Add Vertical Boards
If you are adding more horizontal boards, cut the shorter vertical boards first. Make sure all these pieces are cut the same length, that way when they are attached, the next horizontal board will already be level.
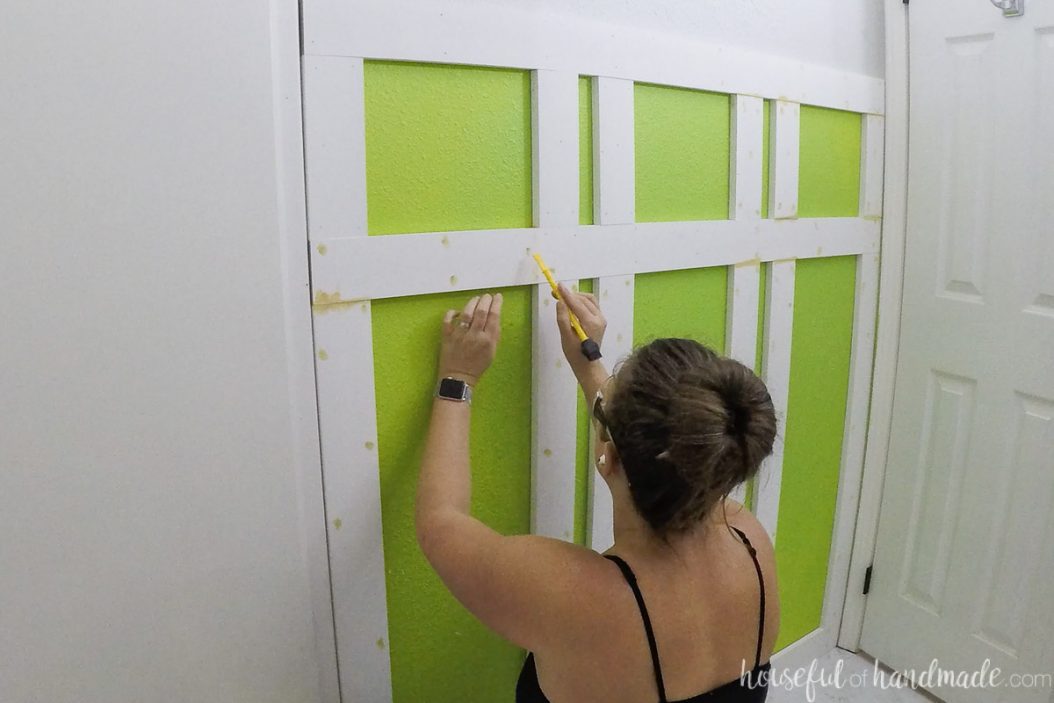
Measure where you want your vertical boards to go.
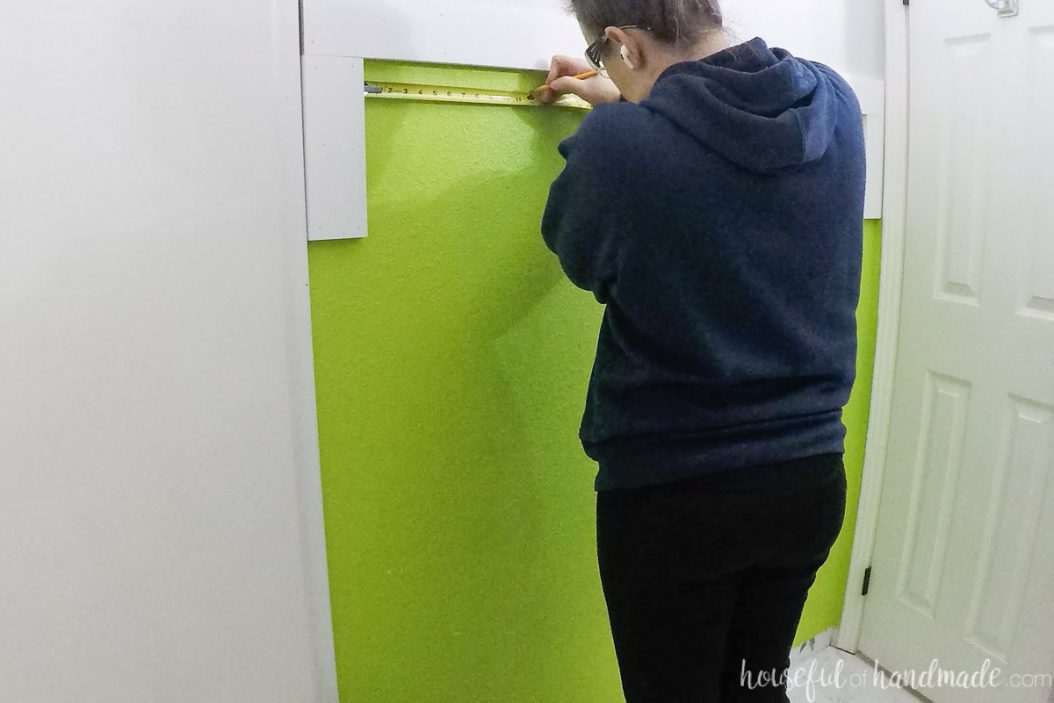
I started by attaching the smaller boards to the edges of the wall, then measured from there for the rest of my boards.
When attaching the vertical boards, make sure to level them before attaching as well. Then secure with nails.
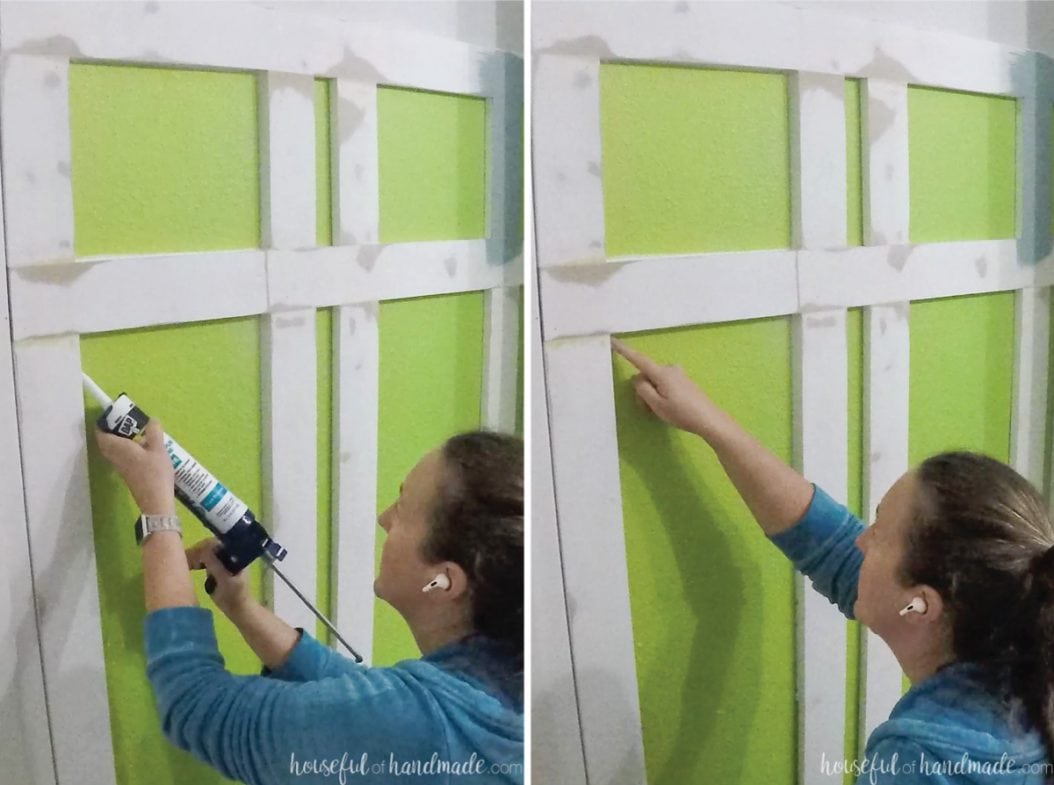
These might not all be into studs, if you want more holding power, you can use a liquid nails on the back of the boards before attaching.
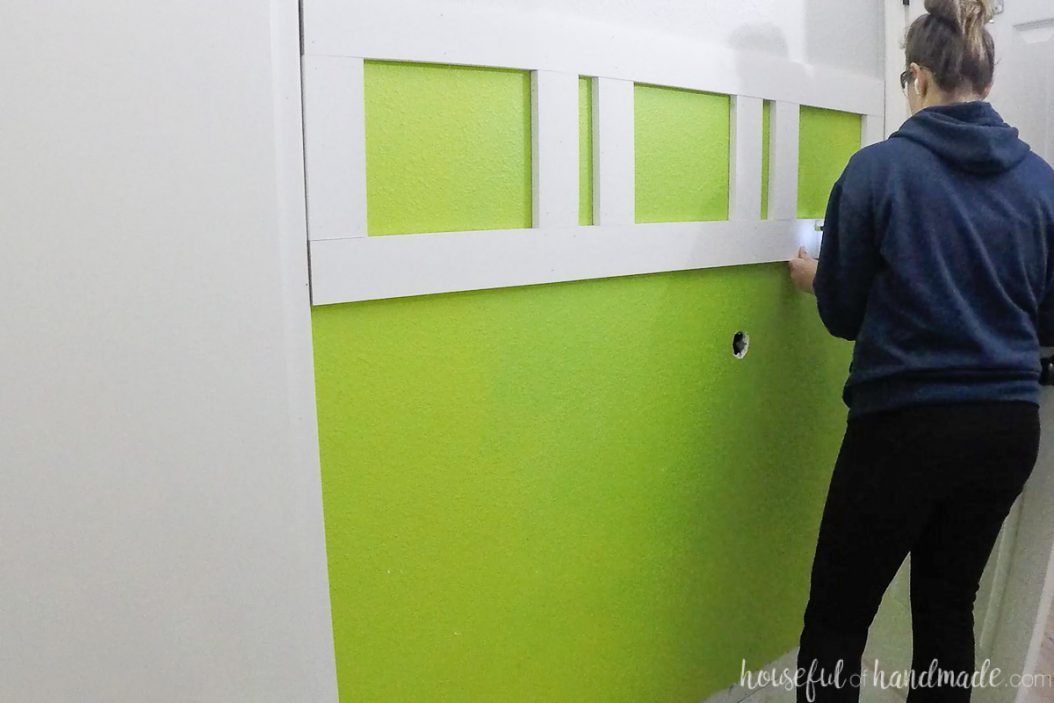
Now you can measure and cut the middle horizontal board. Press it firmly to the bottom of the horizontal boards and attach it into the studs.
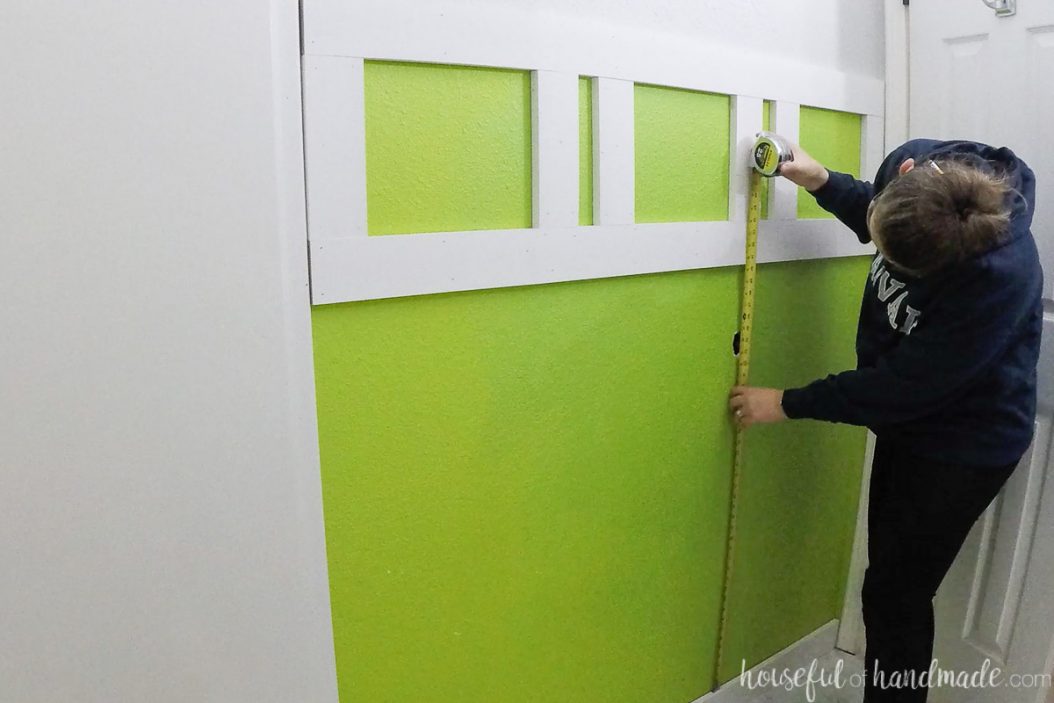
Now you will need to measure for each of the vertical boards. Since floors are not always level, if you only measure in one spot the boards might be the wrong size.
Instead measure exactly where you are going to be attaching the boards to the wall. Cut the boards to that measurement.
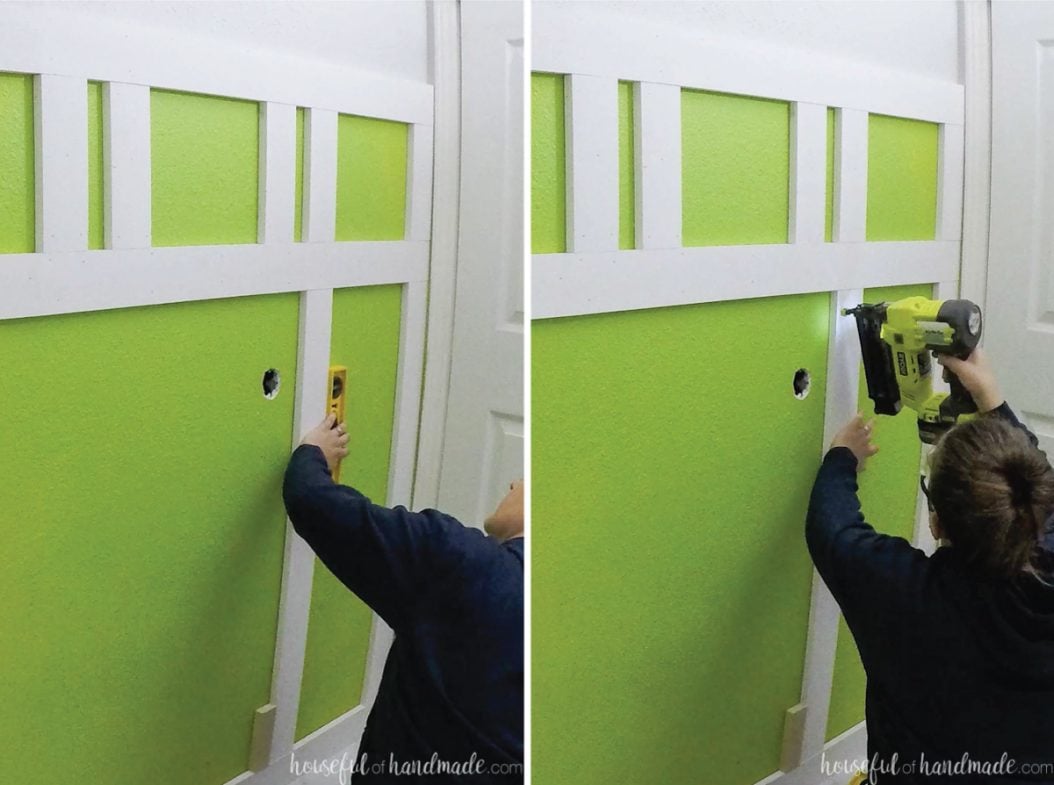
When installing these boards, you may have to tap them into place. Place a block where you want to tap it with the hammer to prevent damaging your boards.

Make sure to level the vertical boards, then attach them with the nail gun.
Finishing your Board and Batten Wall
Once all the boards are attached, you can fill the the nail holes with wood filler. I also filled any gaps in between the boards.
Then sand the wall to get it nice and smooth.
Finally, caulk all the seams with a paintable caulk. This will seal the edges where the boards meet the wall and make it look like one. It will also help fill in any gaps where the wall is not totally straight to the boards.
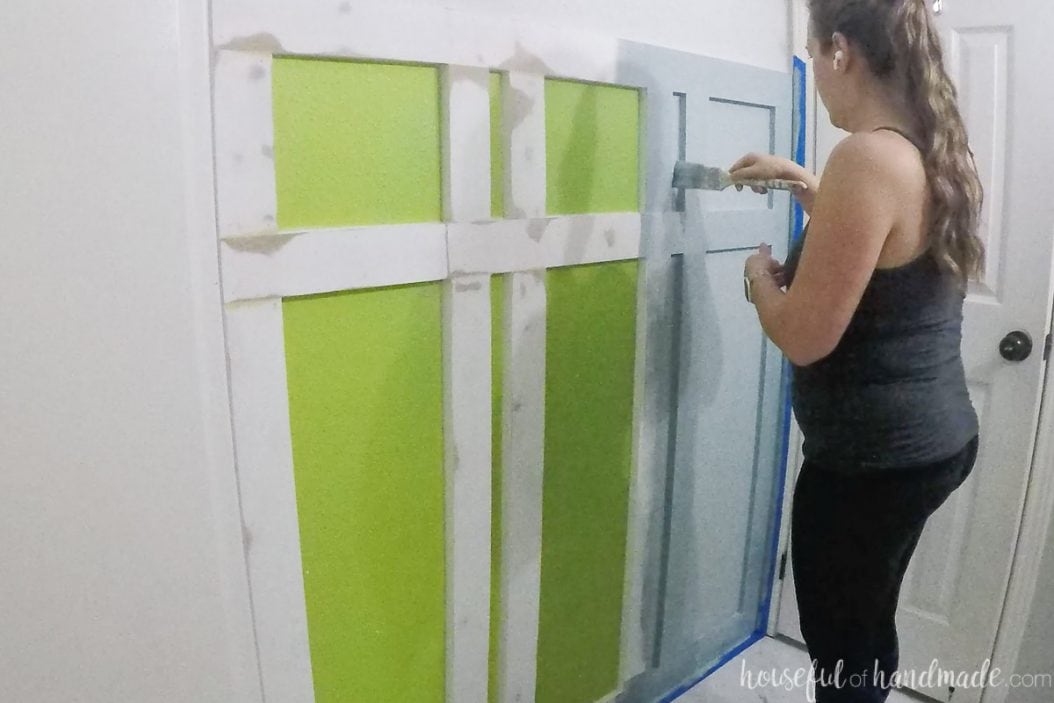
Let the caulk dry, then it is time to paint! I was so excited to finally say good-by to the vibrant green in this tiny bathroom.
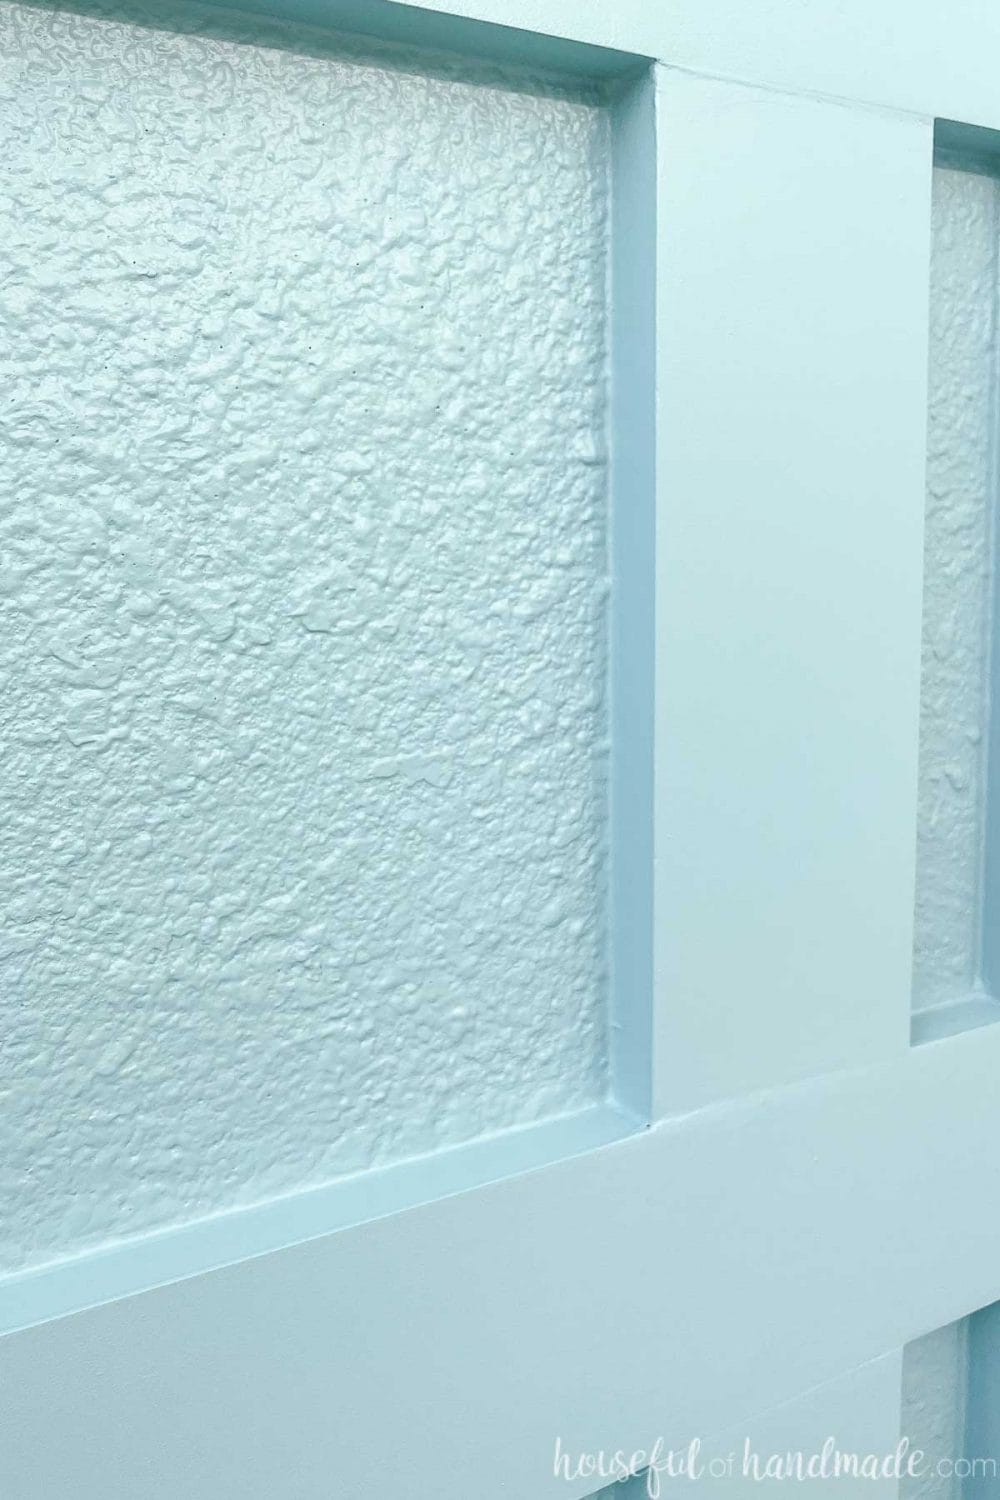
You can paint your board and batten a contrasting color to your walls, or paint it the same color as the walls. Either way, the texture and character of the board and batten will still be there.
I love how the new wall looks in the bathroom. It gives the small space so. much style. And it was super easy on our budget!
Just think of all the places you could add some variety of board and batten to your home. It is a fun and easy weekend project.
Happy DIYing!

And don’t forget to check out the progress all the other bloggers are making on their $100 Room Makeovers. We only have 1 week left until reveal day!!!