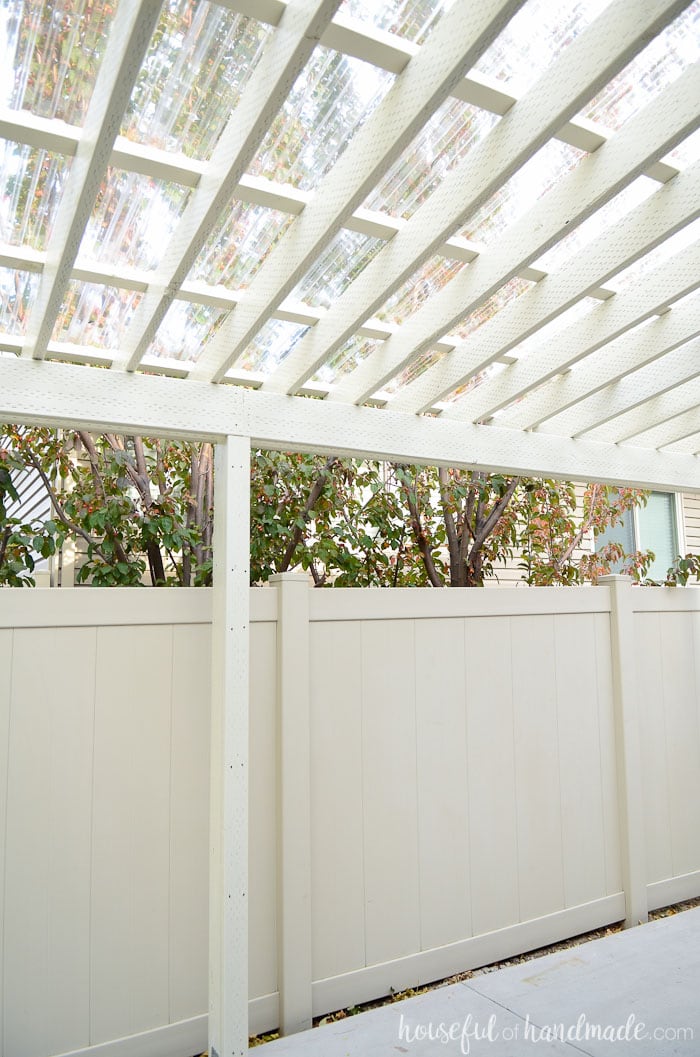
Installing a clear pergola roof was the best decision ever. It has turned our side yard is a three season patio that we can enjoy in any weather.
We love our new patio pergola, but the only thing that could make it better was installing a clear pergola roof. Now even if it decides to rain for an entire month (like it did in September), we can still enjoy gatherings on the patio.
Adding a roof to a pergola seems like a big deal, but we partnered with the Home Depot to make it easy! Now we cannot wait for another storm so we can test out our new clear pergola roof.
This post may contain affiliate links. As an Amazon Associate I earn from qualifying purchases. Click here to read my full disclosure policy.
After installing the SunTuf corrugated roofing on the kids outdoor playhouse, I knew I wanted to use it again. It looks so nice and is absolutely DIY friendly.
But my favorite part is that it lets the light in but blocks out the UV rays. Blocking UV rays on the patio means all our patio furniture will last longer. No more fading and sun bleaching! And we can enjoy the patio even if the weather decides to rain out another of our parties!
The biggest decision we had was whether to use the same Solar Gray color on the patio as we had on the playhouse roof. I love that the playhouse has the extra shading so the kids can play in it all summer long and it stays a bit cooler.
Originally I had planned on using the shading color for the patio pergola too. Then I realized the patio is completely shaded by the house in the late afternoon on and our neighbor’s trees block most of the direct sun in the morning, so we would only have direct sun for a small portion of the day.
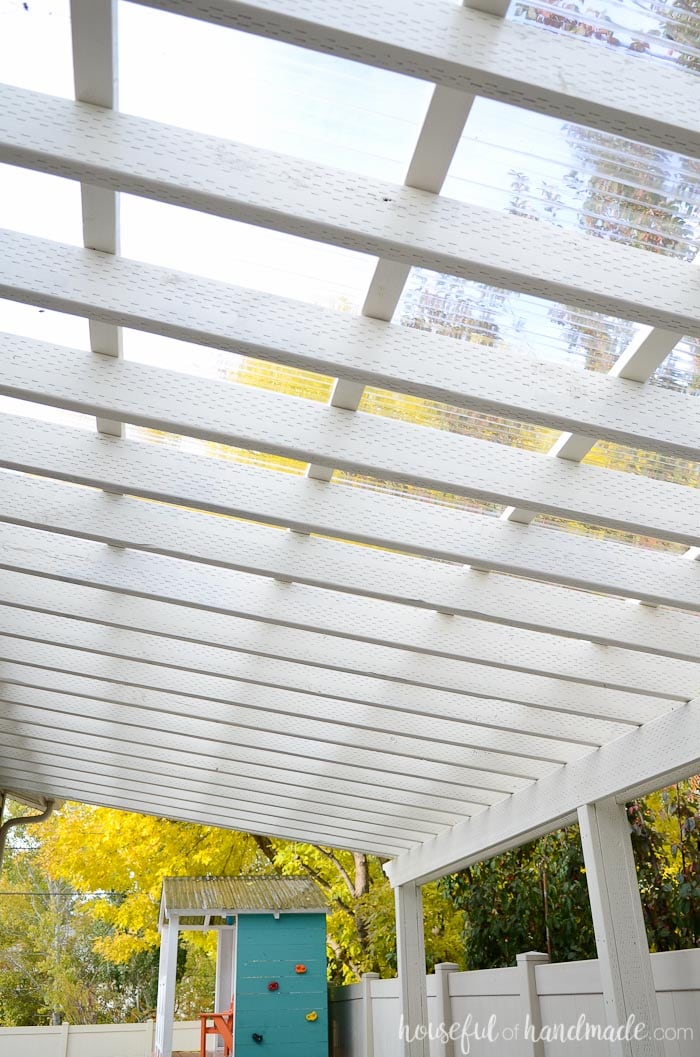
I was a little worried that the patio area might be a little dark with a shaded pergola roof, so I consulted my home design expert (aka, my mom) and she agreed with me. A clear pergola roof was the way to go! So off we went to the Home Depot for the clear SunTuf panels and I haven’t regretted my decision once!
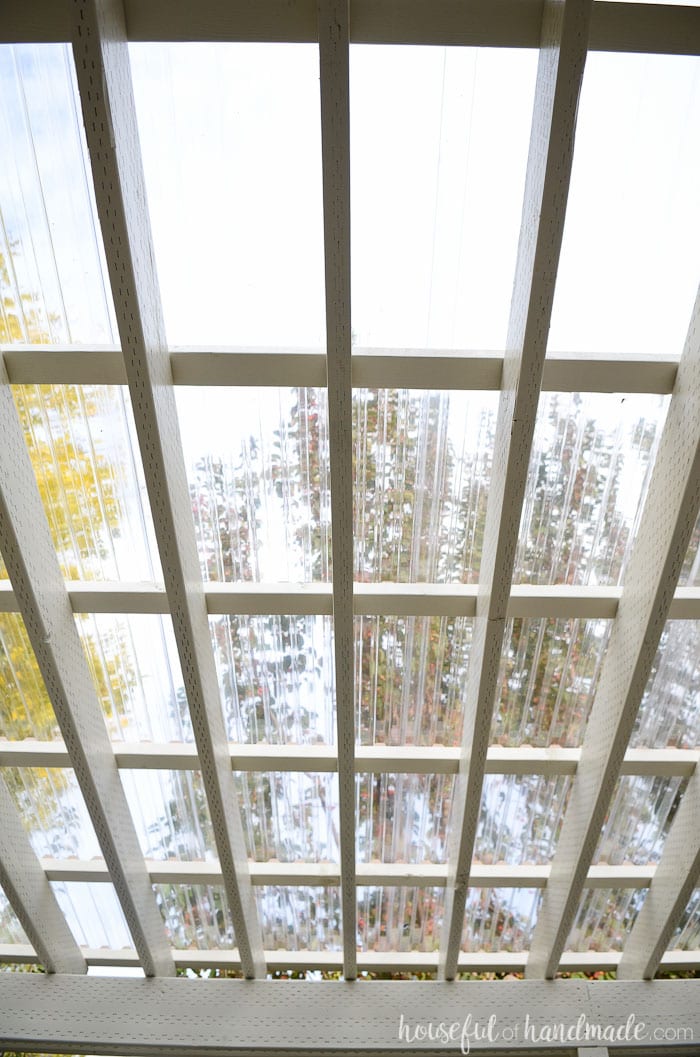
The clear pergola roof still blocks some of the sun (about 10%) so the patio still feels cooler than the non-covered area. And being able to see the sky through the roof is so beautiful.
I seriously cannot wait for a rain storm so we can sit under the roof and watch the rain drops dance on it. Since it is later in the fall season now, we may have to be bundled up with a cup of hot cocoa, but you better believe we are not going to miss our first storm under the new clear pergola roof!
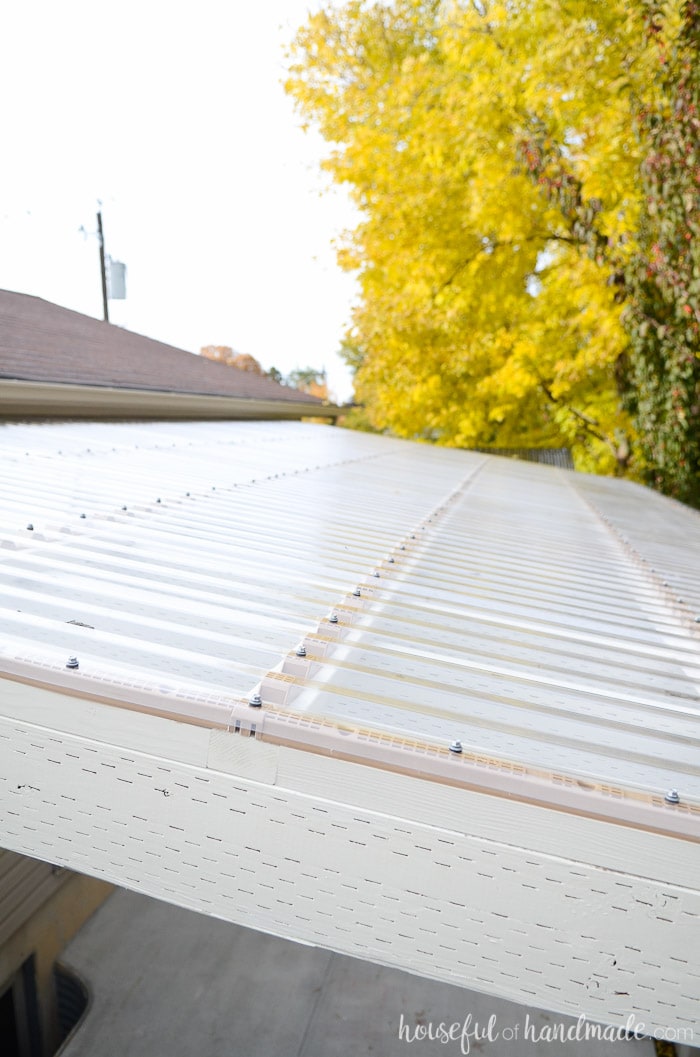
The best part of the SunTuf corrugated roofing panels is you can attach them to an existing structure. You only need to add purlins to the existing structure to attach the panels to. So if you have ever wanted to add a roof to an existing pergola, porch or even chicken coop, you are going to want to read on.
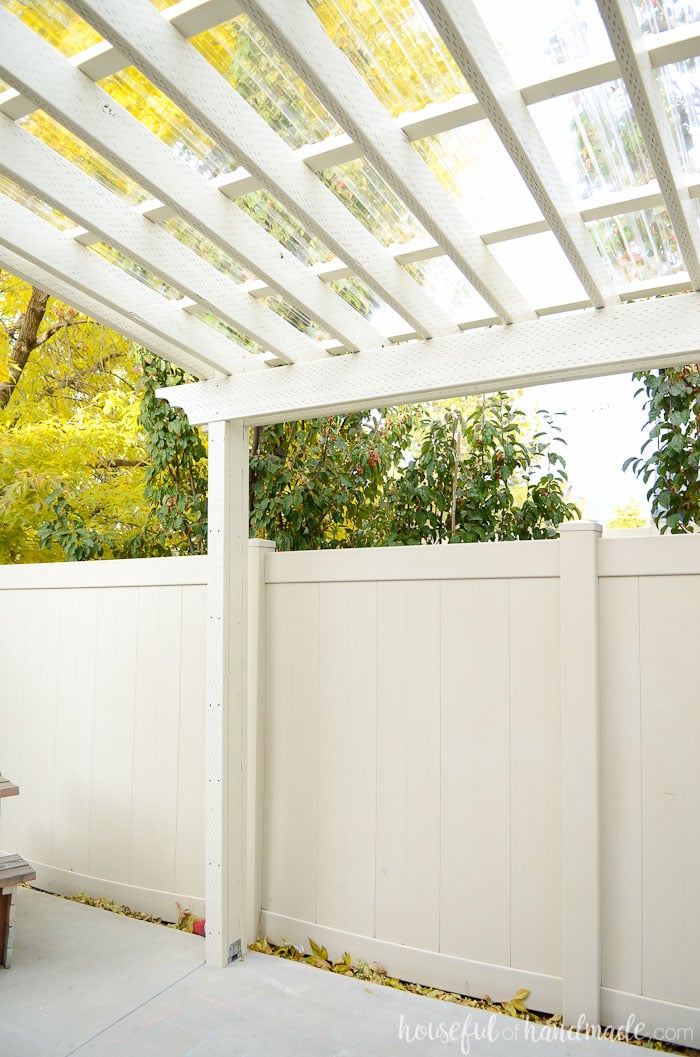
And don’t forget to check out the complete patio pergola build and the rest of our woodworking tutorials.
How to Install a Clear Pergola Roof
Supplies:
- 2×3 boards for the purlins
- 2×2 boards
- SunTuf clear corrugated roofing panels
- We used 10 12′ long panels.
- Horizontal closure strips
- Vertical closure strips
- Woodtite 2′ fasteners
- Measuring tape
- Circular saw
- Impact Driver/Drill
- Screw driver
- Ladder
Installing the Purlins
We installed the purlins to the top of the pergola from 2×3 boards. To match the pergola, I first painted the boards (way easier than painting after installing, trust me).
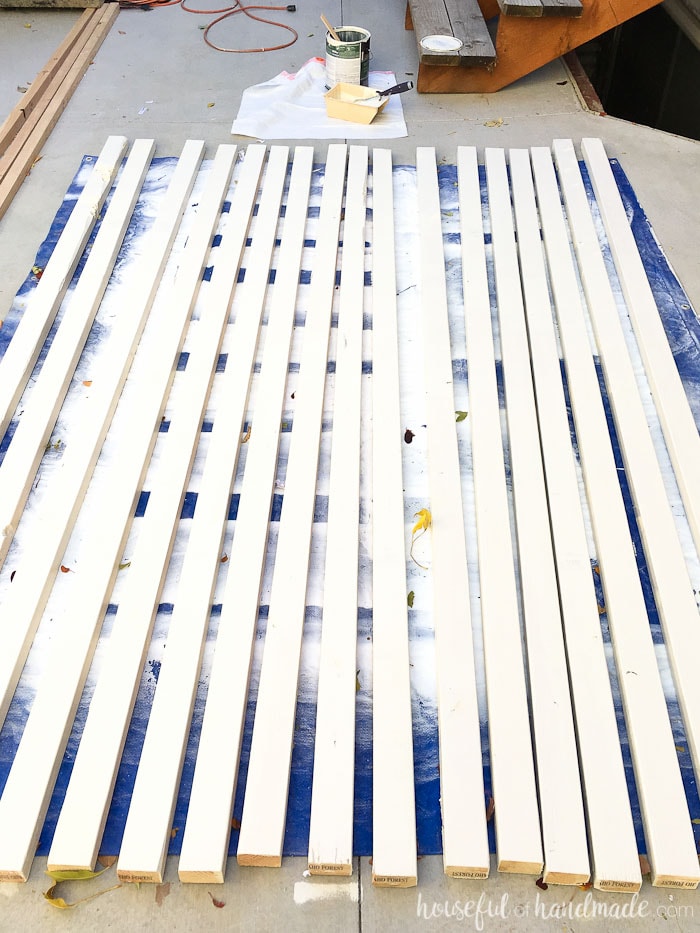
Once dry, it was time to install. This isn’t a very hard step especially if you have two people. However, I decided to try to get it done one afternoon while my husband was at work.
I think I went up and down the ladder a thousand times that afternoon (I know it was a lot because my bootie hurt so bad the next day). And I only completed 3 out of 7 purlins. The next day my husband helped me and the other 4 purlins were installed in no time.
The moral of this story, get an extra set of hands to make this so much easier on yourself.
Because our pergola is large (20′ x 11′ to be exact), it took multiple boards for each purlin. To make sure they were super sturdy, we cut the 2×3 boards so they broke over a pergola cross beam. So each purlin had to be measured to make sure the cuts with the saw were braced on the center of the beams (see where the extra set of hands comes in nicely).
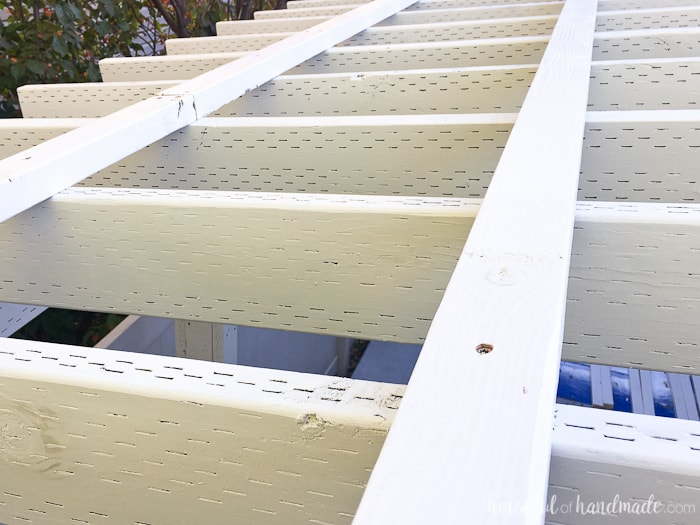
We measured and cut the boards then started screwing them into the 2×6 cross beams so they were perpendicular to the cross beams. We secured them with 2 1/2″ construction screws and made sure to screw them into each beam.
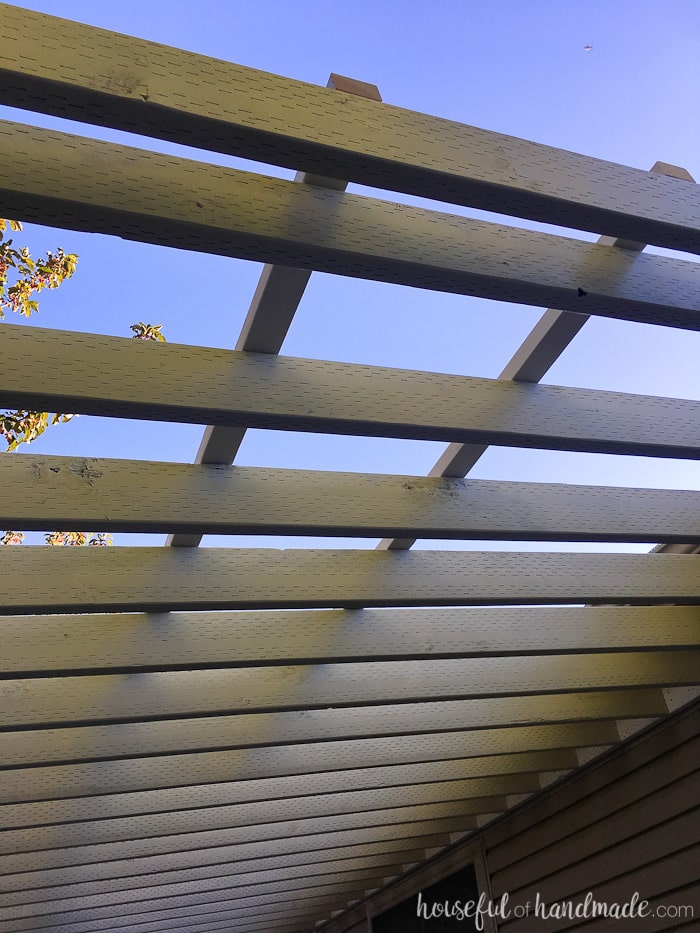
Our purlins were spaced 21″ on center apart. The requirement for our snow load was 24″, but 21″ made them even on the total pergola width so I figured less is better!
Installing the Closure Strips
After the purlins were attached, we needed to attach the SunTuf horizontal closure strips. We attached them to the bottom of the purlin on the far edge of the pergola and the center of other purlins with 1 1/4″ construction screws.
They are super easy to install because they just snap together at the ends. We just climbed on top of the pergola and made quick work of it.
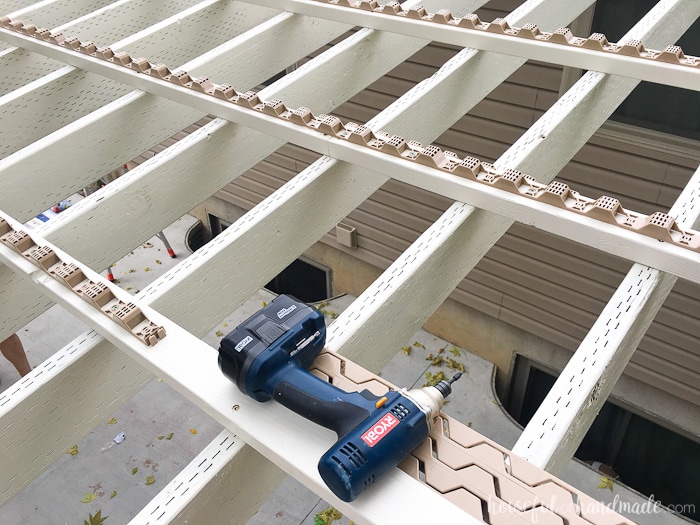
Under the eave of the house it was a very tight fit. We barely had enough space to add the pergola roof. We had to be a little creative to attach the purlins and horizontal closure strips.
First we attached the horizontal closure strips to the 2×3 boards. When the board ended and we needed to attach another closure strip, we marked where the new strip would start on the next board.
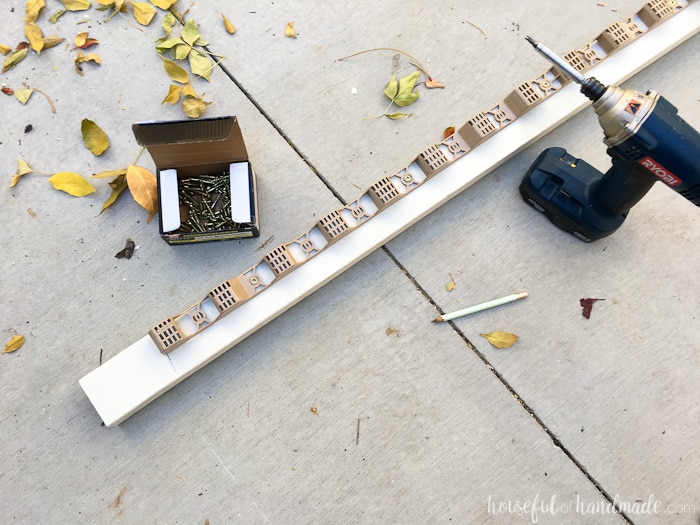
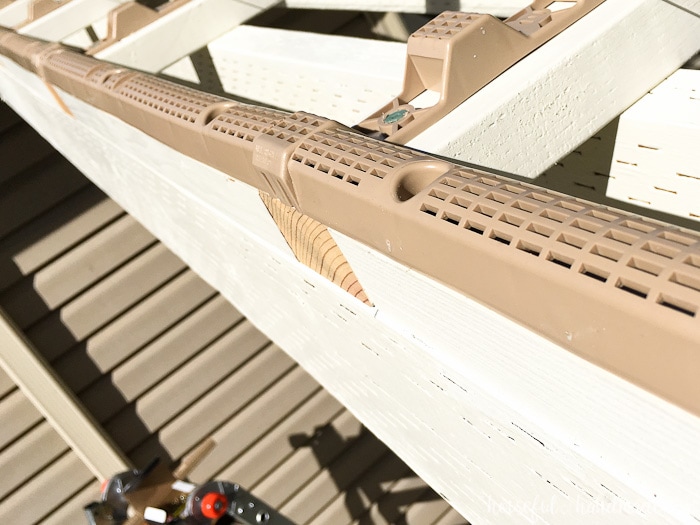
In order to attach the purlin on top of the header, we had to screw up from the header of the pergola into the purlin. We did this by pre-drilling a pilot hole at an angle then securing the purlin with a screw. I added a screw on each side of every cross beam.
Next we attached the vertical closure strips. These go in between the ends of the horizontal closure strips just on the outer edges of the roof.
We needed to add 2×2 boards in between the 2×3 purlins to bring the sides of the pergola up to the same height. These were painted before installing again.
Then it was easy to cut the boards to length and secure with 2 1/2″ construction screws. The vertical closure strips were cut to fit and then attached with the 1 1/4″ screws.
Installing the Clear Roof Panels
Now we were finally ready for the roof! All that prep took way more time that actually adding the roof, but I know proper prep is important (but I definitely prefer being able to see the instant results).
We discovered that our house is not square on the property and made our pergola line up with the fence so it didn’t look crooked. So our roofing had to be measured carefully to ensure the overhang was the proper distance all the way down.
So we measured the start and end of every 26″ panel and cut each one individually. It ended up being that each panel was 1/4″ longer at the back end than the front end. We put the slightly diagonal cut line against the crooked house and left the factory cut line at the overhang.
To cut the panels, we clamped a level to create our cut line and used a circular saw to run right down the edge of it. It was super quick to measure and cut each one. The sound of the saw hitting each corrugation is a little scary at first, but it cuts so clean that there is no need to worry.
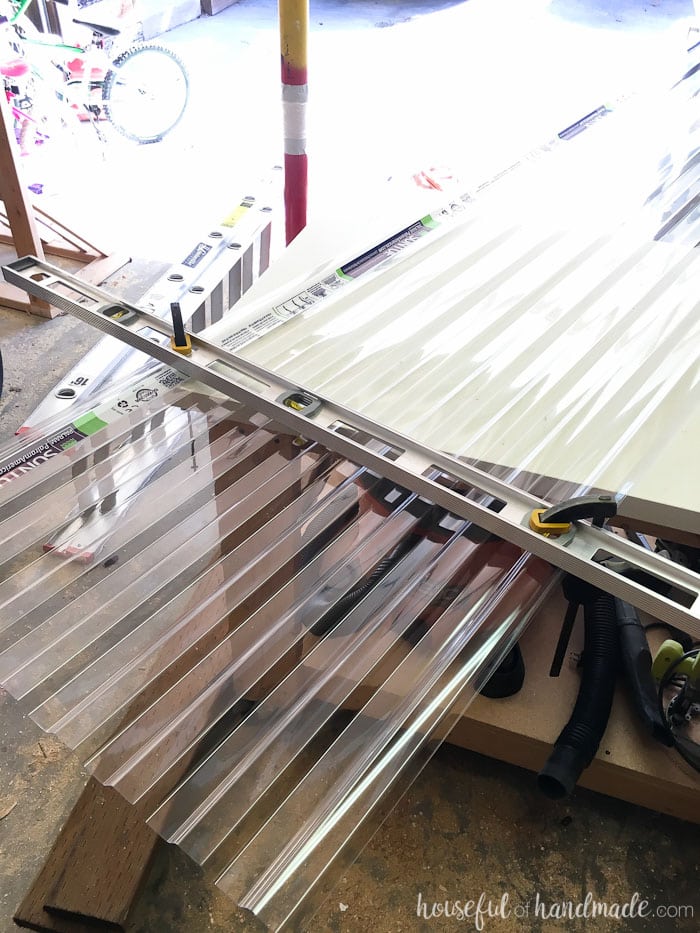
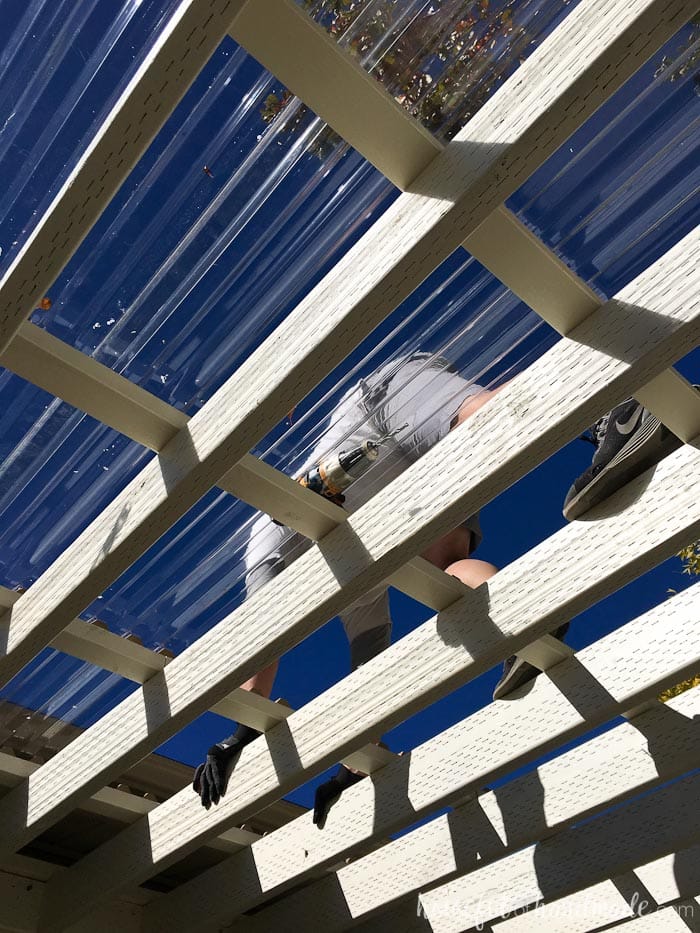
After cutting we placed the beautiful clear roof panels on top of the pergola. They just sit onto the horizontal and vertical closure strips. Once in place, it is time to start securing it.
Each screw hole needs to be predrilled with a 1/4″ drill bit first to allow for expansion and contraction due to change in temperatures. Without this there might be cracking and that is not desirable! So we used both sets of hands to make quick work of it.
One person predrilled the holes and the other one came in behind with the special screws.
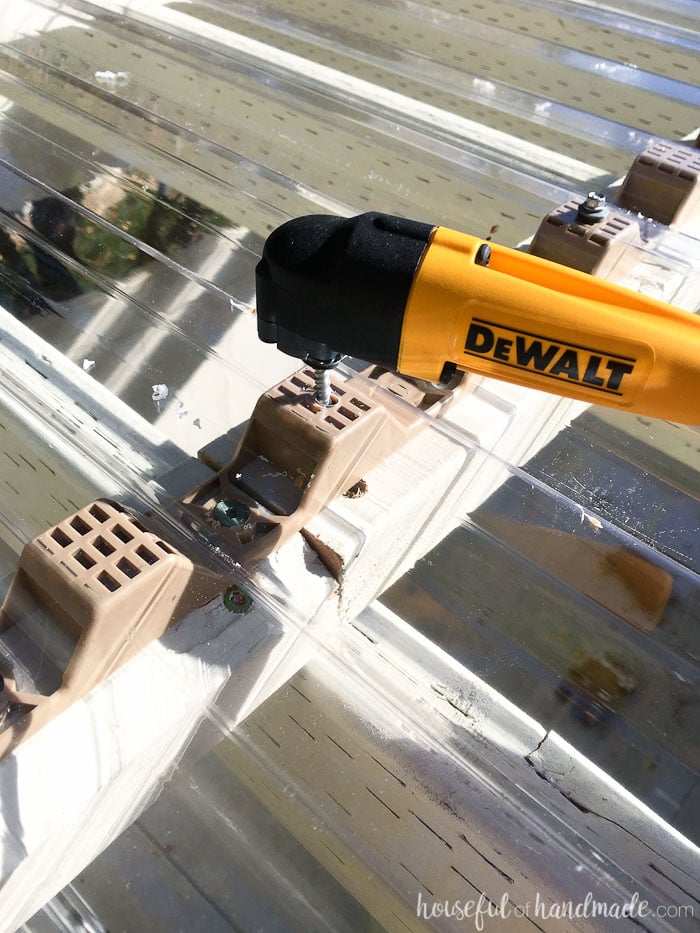
You have to be careful when fastening the screws so they do not sink into the roofing material causing a dimple. After a few screws though, we figured out the groove and were able to quickly insert each screw perfectly. We installed screws in every other corrugation except the last one where the next panel would be overlapping it.
To install the next panel, we measured and cut to the correct length. Then overlapped it one corrugation with the first panel and started pre drilling and screwing in the screws. We found it was easiest to add the screws all the way down the top of the overlap first, then go back in and fill in the rest of the panel.
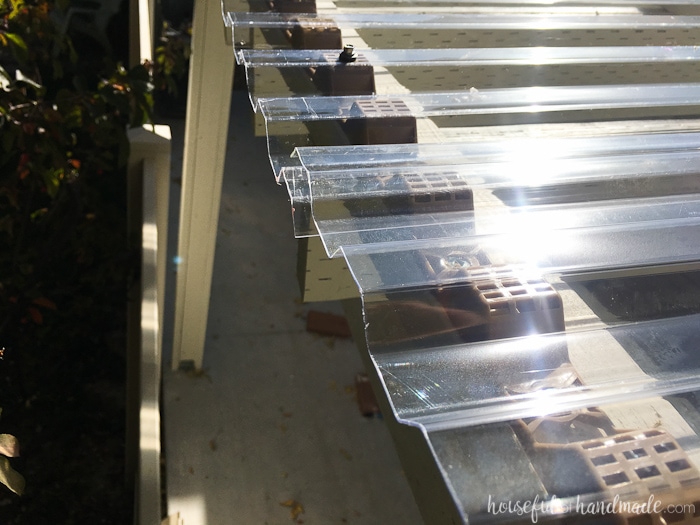
The rest of the day was all about measuring for the next panel, cutting, then securing it to the roof. Luckily it was a beautifully sunny day, with temperatures in the low 70s. A perfect day to install a clear pergola roof!
It was not hard work, but there are a LOT of screws on the top of our pergola so it did take the better part of the day to complete. But when that last screw was finally attached, we cheered a little bit and then had a few minutes to admire our work before the kids needed us.
The next day I couldn’t stop myself from wandering out onto the patio every couple hours to admire the new clear pergola roof. It just looks so beautiful with the trees and sky behind it.
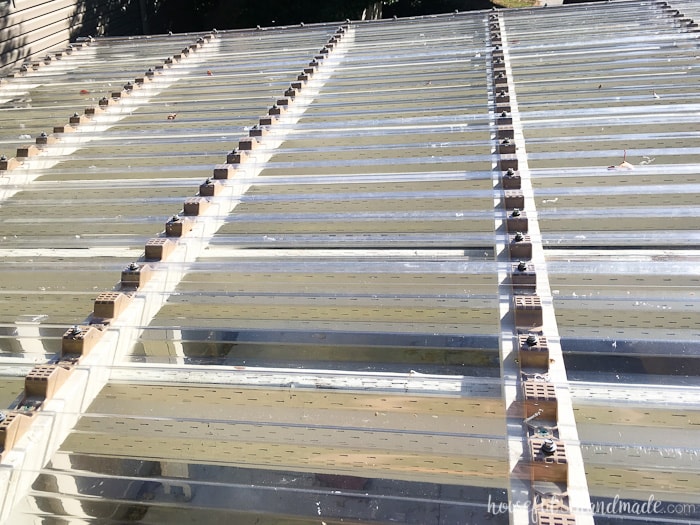
And now we finally get to fill the patio up with furnishings so we can start to enjoy it! The plan is to create an outdoor dining and kitchen area so we can have many family dinners together.
Next I will be sharing the build plans for our outdoor kitchen island. It is going to be the perfect place to store all our outdoor eating and cooking supplies. And even has a bar area for stools so the kids can sit up to it and help cook. Stay tuned for lots more patio fun!
Don’t miss out on any of the fun DIY projects, click here to subscribe to the weekly newsletter today!
Thank you to the Home Depot for sponsoring this post. I only recommend products that I use and love and all opinions are 100% my own. Click here to read my full disclosure policy.
Did you install a gutter on the end so all that rain doesn’t pour over the fence onto your neighbors property? Just curious, might stop an argument down the road.
Our roof ends 6″ before the fence line. There is a gap between the fence and the cement patio for the water to run to. But it also prevents the berries from our neighbors trees from dropping all over our patio 😉
Hi Kati… And here I thought this was my own original idea! 🤗 When I told a deck contractor what I wanted, he looked at me like I was nuts. I love brightness and the outdoors. When I decided to cover my new deck I dreaded the shade darkening the interior of my house. Clear panels,was the obvious choice. It was completed 2 weeks ago and I’m still trying to get used to such brightness when I step out. It feels like there’s no roof. It’s raining and it feels odd. I absolutely love my choice. My contractor didn’t know how to cut the panels so 2 pieces are longer by a few inches. Not happy about that. He chose foam strips supporting the panels but I highly doubt their longevity. I need to add an eaves trough because the water drops right onto my garden bed. I love seeing the sky and trees through it, and rain falling and watching it run off the roof. I’m in Ontario Canada where we can get significant snow some years so I’m waiting with bated breath to see if it will hold under the weight. I’m thinking I might have to heat underneath to melt it off if it gets too bad… Cautiously, of course. The slope isn’t what I wanted but the contractor insisted on sticking with building codes … 1″ per foot. At 10 feet, it’s only sloped about 9-10 inches. So we’ll see. I hope others see your article as this roof type solves more issues than rain, wind and snow… Except from the sides, alas. Need curtains and planning to add a retractable awning as I get a lot of sun which is too much on hot days but great on cooler days. The best of all worlds!
I have never seen wood used to build your pergola that had slotted holes every where. Never. I live in a hurricane state and believe that might weaken the wood, making it go up in the sir a lot quicker.
Kati I enjoyed your post on covering your pergola. I do have a question regarding the SunTuf clear panels. Have they yellowed or discolored any over the time you have had them up? The summer sun is quite intense in southern Alabama and it also shines brightly year round. I have seen corrugated plexi-panels, both clear and colored, that discolor or become cloudy with time.
Hi Rick, We had zero discoloration in the two years we used them. (We have moved) I expect they are still doing great. Water/Humidity might play a different role in Alabama than the dry Utah air.
@Rick,
This is something I was wondering about, too. About 10+ years ago I put a clear panel from Home Depot (I think probably SunTuf) along my fence sideways to prevent my neighbours plants from drifting onto my garden. Over the years it has maintained its clarity on the upper side but the side sitting on the ground has developed a green algae/mildew that looks like it will wash off. It would be more difficult on a roof. I’ve seen tv ads for a spray window cleaner you can apply from the ground using your garden hose. It might work on these panels. But that green is because it’s sitting on the ground surrounded by plants. Unless your roof is buried under a bushy area and very damp, this should not be a problem. The top edge is perfectly clear even after 10+ years. I can see absolutely no discoloration – and it gets lots of sun exposure.
I have installed these as well the clear panels, they are great. I did find because of the slant I did not like the way the water fell over the edge so I put a strip of eavestrough which helps a lot. What type of blade did you use on the saw as I have been afraid to cut for a different area
I use an 80 tooth plywood blade from diablo.
Looks great! Are you able to get up on top of the structure and walk on it at all? (On the crossbeams, obviously not on the clear panels themselves. I ask because I want to put up a structure like this, but it would get lots of fir needles, pinecones, and small twigs/branches. I’d like to be able to go up and sweep it off a couple times a year, if it’s safe to somehow walk on.
Thank you for sharing.
I have a question: while attaching the panels to the closure strips using the 2’ fasteners, do they have to go inside the purlin as well or just stay in the closure strip?
quick question about the closure piece some of them look to be on top is this correct? also would putting gutter board up help with the slope and stop leaks? might have to put a board to get a slope on the roof if this doesn’t help
Yes, all the closure pieces are on top. They sit on top of the purlins. Purlins can be on top of the pergola or attached between the pergola roof boards. I do not know what you mean by gutter boards. You need a slop with a rise of 1 inch for every foot. So if your pergola is 10′ long, you need the one side to be 10″ taller than the other for enough slope.
Really like this post – we are also interested in covering our pergola but have concern about snow load. How has this faired with the snow? Are all 4 posts of your pergola sitting on the ground (versus being attached to the house)?
Ray, glad you liked it. All the posts are anchored to the concrete patio. We had no issues with snow including a couple of big storms. (canceling school for a day even)
Hi. Thank you for sharing this.
I’m installing this now for a client.
Did you add a gutter on the end, or you just have the drain falling off the pergola?
Also how much did you pitch your pergola?
We did not use a gutter, it just drained off the edge and we put rocks on the ground to disperse the water. Our peak is around 9 feet tall. There is a minimum slope required by the roofing manufacturer you could look up to make sure you have what you need.
HI Kati.
Thanks so much for sharing all this wonderful information! I’ve got a pergola in my backyard that is just a large (10′ x 12′) rectangle on legs, with no crosspieces in the center. I’d very much like to do something like what you’ve done, but, of course, we would need to add both the headers and the purlins. My problem is this: my deck extends another 8 ft beyond the end of the pergola and I’d love to have the new roof cover about 6 ft of that area as well.
(1) Since we will be adding the header/purlin structure anyway, do you think we could extend it safely beyond the pergola? (Hmmm… As I write this, I started envisioning some sort of strut structure at the top that would support that extra length. What do you think?) (2) I live in Oregon where it rains year-round, so gutters of some sort are mandatory. Could I run the ribbing cross-wise to the length of the structure, so that the gutter can be placed on the long vs the short side?
I apologize for taking up so much of your time, but my builder is new to this sort of thing and I’m having difficulty finding answers online.
Thanks so very much for any ideas/suggestions you might have.
You will need to talk to someone who can help with the structure. I cannot imagine you will be able to extend the header/purlins that far over past the pergola without issues. Also, you can definitely add gutters to the roof. The way you run the roof will depend on which way the slope is.
My pergola isn’t going to have a slope, can I still use such a clear roof? If so how will the rain water drain out.
The manufacturer says the slope is necessary. I would check with them if you want to try to use it on a pergola without one.
@Pratyush K, you may be able to add a beam along the top on the side closest to the house so you have the needed pitch.
How often do you clean them?
Never, I just let the rain do it. I also don’t notice if it gets a bit dusty, it’s high enough overhead.
So I hired someone to do this for me. It didn’t work and when it rain, the whole underneath was as if nothing was put over it. My question, if you can help, there was a cushion on some of the corrugated vertical strip with foam cushion, we bought it and wonder if necessary? Then aside from screwing it down, did you use a adhesive? Luckily enough, he came back and is going to fix it and apologize, and it was then he told me that he hadn’t put one like this before. Oh vey! I am giving him the chance to fix it. I saw your post and hope that you can help me with some few questions. Also, my pergola had the horitzontal beams all ready when my pergola was built and was going to use these beams to instal the clear cover. I bought the same cover that you have, got the vertical fastener strips, not sure if he got the horizontal strips. I’ll check.
Thank you in advance, any and all advice is welcomed.
Anna I.
You have to make sure the screws that hold it down have the washer on top and they are not screwed down too tight or it will ruin the seal around the holes. I am not sure about the cushion… ours were plastic and the cushion was on the screws to secure it. Also, if there is no slope on your pergola, the rain will probably not run off right and can puddle and drip through the holes easter. Good luck, hopefully he can fix it for you!
I’m thinking of doing the same on a pergola. Now that you’ve had it up for a while can you tell me how it held up, stains, snow weight, wind, etc. Also, how loud is it when it rains? thanks
It has help up great. It gets dirty when we have big gaps between rain, but that is it. No discoloring or staining. But it is quite loud when it rains or hails. I like the sound so it only bothers me when it wakes me up in the middle of the night.
Looks beautiful! We are getting ready to build a roof structure and install the same clear Suntuf panels. Was the pergola already white? Did you paint your roof structure white to match the pergola?
We painted the pergola white before attaching the roof. We actually built the pergola with the plan to roof it all along (you can see the build process here: Build a Patio Pergola attached to the House).
Hi Kati, I’m just about to decide on this exact roof for a similar pergola area. It also has a tree directly overhead – which I’m concerned the leaves and dirt will collect inbetween the overlaps.
Should I be concerned? How is your roof looking now? Particularly cleaning inside those overlaps?
If you could share a photo that would be great!
Regards,
Paul
I can’t give you a photo because we recently moved. But we had it almost 3 years before we moved and I never noticed anything getting stuck between the overlaps. The rain did a great job of cleaning it off occasionally. Leaves definitely never got stuck in there, the overlaps are pretty tight.
Hi there, I was considering this for our front porch but my husband is worried about algae the panels becoming scummy. We live in VA and it can get a little wet here. Does this seem to be an issue for you?
We are in Utah where there is low humidity. We have had no issues with it at all. The rain cleans it off and it looks practically brand new. I’ve had it 3 years and never cleaned it off.
Does this keep the rain and bugs out? We are looking at using this for a sun room/screened in porch. Want to keep both out
It is solid so it would keep rain and bugs out if it was used all the way around. If you only use it as a roof like we did, the bugs will definitely come in.
Hi, love the look of the clear roof!!! Super cool!!! Quick question though… we live on the East coat, Pennsylvania to be more clear and we have snow in the winter and not sure how well the pergolas roof gonna handle it?? And suggestion??
The roofing material has held up great for our northern Utah winters. But you need to make sure your pergola has the ability to handle the snow load in your area. Check with building codes for pitch and structure needed.
I have used this material before and it’s GREAT…….with ONE (undisclosed to me!!) flaw! It is NOT shatterproof! We have chickens…..chickens will go outside in the sun and rain but NOT in the snow (would YOU go out in the snow barefoot??) We used these panels (from Home Depot) to make a roof over the run of our first, small coop (after the first winter shoveling out the run where it seemed to snow a FOOT a WEEK!) It worked GREAT….because that first coop was in the middle of the yard. Our bigger, new and IMPROVED coop (because chickens are like potato chips – the more you have, the more you WANT!!) is in the woods. I installed the same material on the new run and it lasted EXACTLY TWO WEEKS! Until we had a wind storm that sent ACORNS like MISSILES smashing RIGHT through every SINGLE panel! We spoke to the store manager at Home Depot and this was the FIRST he had heard of anything like this. The store manager even had a HEATED argument with the product rep on the phone in front of me – it got him no where! Because Home Depot stands by their products and “The Customer is Always Right”, they refunded our money with a store credit and now our local store has a little disclaimer sign “may not be appropriate for all applications” next to the “clear” product. It was a lesson learned I would like others to avoid! The product as a whole is GREAT – It worked beautifully on our first coop and I have also since built a greenhouse with it. Just don’t use it in a wooded setting or near an oak tree!!
That is good to know! I was planning to use it on a chicken coop area soon too.
Are you sure it was specifically Palram’s SunTuf? On youtube, there is a video of hurling baseballs at it and it doesn’t shatter. The reason I ask: we inherited (a couple years ago) two pergolas we had to take down when we moved in, due to aged wood rot and termites. The one corrugated plastic was just that … plastic. It had rounder/softer corrugation. And when I smacked it with a hammer it shattered everywhere. The other one (assumed SunTuf — or other polycarbonate make, maybe) had more angular corrugation and was a booger to demo, as my hammer bounced off it. My only salvation was the DIY pervious homeowners installed it with NAILS, so hitting it from the underside we were able to dislodge it in full sheets. I did notice that Home Depot sells both kinds.
Good to know this. There are different brands and not all created equal. I bought the one Kati used. Well the one used on this post.
How much did it cost to build something like this?
For our 11×20 pergola and roof it cost us almost $1500 (that might have included the wood for the picnic table and outdoor kitchen island too but cannot remember).
This seems like a tough job but well worth it to not have to paint so often. I have gotten new windows recently from conservation construction of dallas, and with all my money tied up there I am having a hard time finding money for more projects right now. I will do this when i have saved up a little more money.
This was definitely not a little project, but it was so worth it! We love having the our cover pergola.
Do you need the screws with the rubber washers to attach the panels
Yes. The screws with the washers help keep the pergola water tight, while allowing expansion (make sure to pre-drill the holes). You don’t want to use other screws.
K thx for the info, really helpful
Yes, adding pergola shows a more lively atmosphere and it so stylish making is more beautiful, Thanks for the share, I love it!
Bill
We have had this product over our 12×30 deck for the last 14 years and it is great. We have the smoke/grey color which has not faded. Our deck is close to cedar and pine trees and has taken a beating with falling pine cones, falling branches, etc. over the years, We will be replacing the panels this fall due to cracks/holes with the same product.
That is great to hear! Ours looks like new (except for a bit of dirt and leaves) after 2 years.
I have been searching and searching for some kind of shade coverage for our deck. We have no shade in our backyard whatsoever. Your post has given me hope of a lower cost option. It looks like it has been about 2 years, how is it holding up? Have you done any temperature comparisons? Like full sun vs under your clear roof? I would mostly be putting this up to prevent high temps on the deck, but love the look of the clear. I appreciate your input! And good job on the project!
Hi Leah, It is holding up great! I don’t have exact temp comparisons but I can tell you that when I was assembling our new grill last summer, I opened it up not under the pergola and then it got super hot, so I moved it under the pergola and it was immediately cooler. Also, the metal parts were unbearable to touch not under the pergola. If you need more temp control, they also have a gray colored one that blocks a bit more sun. We used it on our kids playhouse here, Our DIY Playhouse: The Roof.
Nice work! Does it get noisy when it rains a lot? Can you hear it from inside your house?
Yes you can definitely hear the rain. If it is a heavy rain or hail, it is very noisy.
hi kati! i was wondering, was your 2×3 boards pressure treated as well? or what kind
We didn’t use pressure treated 2x3s for the roof supports. They are painted and we don’t have to worry about them getting too wet because they are right under the roof. Just regular construction 2x3s.
Hi Kati! I’m currently going to work on our backyard on doing one and came across ur post! I just am so confused in the part about the angle .. 6 8 10.. also what do u mean u put them on blockers if u can help me out with it to understand how to do that part ! Thank you! And love the finished look on urs
The angle part was how we determined our pergola was square since it was so large. If you measure 6′ up one side of the pergola, and 8′ along the other side from the same corner. The measurement between these two marks should be 10′. This means your angle is square (or 90 degrees). And I am not sure what you mean by blockers. Are you talking about the roof post or the pergola build?
Hi Kati
We bought a home four years ago with an existing pergola and it is covered. but roof is now leaking. Love this idea from Home Depot. Do you know if they will come and do the installation for you ? My hubby is a workaholic, not sure he’d have time to do this project but it seems like this is a great replacement idea for ours !
Thanks for sharing.
I do not know about installation, but I am sure your could go talk to their install team. We do love our pergola roof!
Why didn’t you go to the edge of the house and cover your patio door?
I have a 12 x 12 deck off the patio door and I literally it. I feel like I’m on display. I am really thinking of taking off the deck and doing this setup. The total area would be 14′ deep by 40′ wide – I laid a 12′ x 28′ paver patio on the east side of the garage last summer.
But is yourbpergola flat or Angled? How does the water run off n doesn’t it collect a lot of debris??
Our pergola is angled. You can see the post about how we built the pergola here. In the fall it does tend to collect leaves because the neighbors trees are hanging over it from their yard. But it runs off when it rains. We have not had any issues with it.
I use the area right outside my dining room door for planting my herbs and wanted them to get the most sun they could as well as be watered when it rains. I also didn’t want to block any sun going into our sliding door since it is the only natural light we get in the dining room and kitchen. But if you want to cover the entire area, go for it! You will love it.
Hi!
Can you tell me what part of the country you live? We live in Montana and I just want to compare snowload on the pergola roof. ????
Thank you,
Jeanelle
You need to check with the snowload requirements for your county and city. They can vary so much from area to area and I am not an expert.
Planning for a Florida vacation home. Wind will be the issue
It is best to check with local building codes for what you need for wind.
Kati, I noticed you used 12 foot sheets. Did HD deliver those for you? I’d be afraid to drive them home in my pick up with 1/2 the length hanging off the back. Thanks
We bought them at the same time as wood and so they were braced and secured on top of the longer boards. Also, we are very very closet to the Home Depot so transporting large items is easy. You could pay to have them delivered if that is best for you.
Hi! We have a pegola in SW Montana that does get alot of snow and rain downpours. You mentioned about gutters and rain beads to divert the rain. What are rain beads? We are going to have to divert the rain some how so it wont run back toward our house. I have thought about gutter but would be interested in something less noticeable.
Rain beads do not divert the water like a gutter, but they just channel it to the ground. I feel like it helps for the water to go into one spot and not as heavy (as to create deep trenches). We have the gutters from our house diverted underground and coming out in areas that are farther away from the house to keep the water away. Maybe something like that might be helpful.
Hi! Came in via Pinterest. 🙂 I had a back porch with a corrugated roof that fell apart in a house fire. I’ve since built a pergola and this roofing was/is absolutely my plan! It’s nice to see it in action. I currently have solar fabric, but that durability is so limited. I have a raised garden bed against the outside of the pergola. My concern is the rain run-off making trenches in the garden. Although I’m thinking northern Utah might not have the same rainfall as the DC area, I was wondering if you have since thought gutters along that edge might be wise? I do love the clear, BTW. No distracting color that might not compliment your house.
Yes you definitely get a trench from rainfall. We have our roof drain into a space between the fence and the cement patio so we do not notice it. I know you can add things like rain beads or even a gutter to help control the rainfall. Hope this helps! I absolutely love our patio and cannot wait for it to warm up a little so we can use it again!!!
Hello. Thanks for the info. How high is it from the bottom and is there flexibility to make it taller (ie 10 feet or more ) ? Also does it attach to the existing roof ?
Thanks !
I’m sure you can make it taller. Just make sure the structure is solid and the slope is there. It does not attach to our existing roof, it tucks up under it (about 6 inch between it and the eaves).
Love your idea. I live in New England where we do get large amounts of snow.
Do you think this material can withstand Mountain winters?
Thank you
You will need to check with your own building codes for snow load requirements. The actual roofing isn’t the problem, you need to make sure your pergola can hold the weight of the snow in your area. Hope this helps!
We have a deck off of our second floor and would like to add something like this UNDER the deck so that our patio below stays clear of snow and rain. Do you think we could use this product under the deck….making sure to install using the recommended pitch?
Lori
I would check with the manufacturer to make sure the product will work that way. I used it according to their recommendations!
I had a clear roof panels on my greenhouse but the first time we had hail we sustained quit a bit of damage, So who is the panel maker you used please and where did you get them?
Thank you kindly.
I used Suntuf brand from the Home Depot. We have had an intense hail storm and while it sounded like we were under attack, the roof still looks great. I am going to be posting pictures of it in the coming spring (after our second winter).
Hi Kati. Very nice project. Looks great. Could you please tell me the distance (center to center) between the 2×6 cross beams. Thank you.
We did 12″ in between each beam.
Looks great! Did you paint all the wood before you put it up?
Yes, we painted everything with 2 coats of outdoor paint before installing the roof. Some of the wood we painted before assembling the pergola, but due to weather, we were not able to paint it all before. Painting it installed was a bit of a shoulder workout 😉
Hi It looks great. Could you please tell me the headroom height you have under the 2×6 beam on the outside? I am planning a 10′ x 20′ patio cover using Suntuf, and like you planning on installing under house eave, but will not have 1 1/2″ per foot fall. Thanks!
The bottom of the header on the house is 9 1/2′ above the ground. Since our patio is only 11′ wide, we only needed it to fall to 8′ on the other side for the 1 1/2″ fall.
yOU HAVE ANSWERED SOME OF MY QUESTIONS, BUT HAVE A COUPLE MORE:
Did you add some down slope to help with water run off?
I plan to hang orchids and tropicals under the pergola and since I had to cut the large white oak that used to provide shade for plants and people I now have no shad from the west sun. I think I will need to use the smokey. Question is how much shade from the sun will that provide? Enough for orchids?
Yes there is a slope to the roof. I do not grow orchids (or any delicate plants for that matter because I am more of a plant killer) so not sure what kind of requirements they need, but the solar gray on the kids playhouse makes it feel like it is shaded like a tree. Its about 70% of the light coming through. Hope this helps!
Most are Phalenopsis and this great for them.. the others like sun like the succulents do.
How did you manage the seam where it connects to your house? Is there some sort of hardware that you use to seal the gap?
Because our pergola goes right under our roof overhang, we did not worry about the seam. But SunTuf makes specific pieces to go under siding or with other house materials that will seal it next to the house so you don’t have water coming down there. You can check them out here: https://www.homedepot.com/b/Building-Materials-Roofing-Gutters-Roofing-Roof-Panels/N-5yc1vZaq4r/Ntk-Extended/Ntt-suntuf?Ntx=mode+matchpartialmax&NCNI-5.
Thanks for the link. I was wondering if they had seam type material. Our pergola attaches and partially goes around, and outdoor brick fireplace. It’s very thick, so I’m not worried about the heat. But I’ve been trying to figure out how to keep it from leaking where the two meet. I’ll check out the link. And thank you for a clear tutorial.
I just stumbled upon your blog and this project and love it!
I do have a question. You mentioned in one reply to a comment about how you kept your natural light that went into the house. Do you find that the panels are clear enough to see through?
We were going to build a retractable roof so we could see the stars at night, but a clear roof would give us the benefit of coverage AND seeing through it. IF, of course when you look through the paneling it doesn’t make everything look fuzzy.
Can you see your stars clearly? 🙂
Thanks CJ! The panels are super clear and I can see right through them. There is very little fuzzying. Since we live in the city, we rarely see any stars though, so I do not know if you would still be able to see them through it.
We have sun most of the day and my husband and I are debating over the clear or the smoky color on our 20 x 16 with full windows facing it from the family room Now the sun does heat the room up but I like the looks of the clear and afraid I wont like the smoked look How much light comes thru the tinted cover? What is your opinion? Will appreciate your help Also we are in the snow country
I was not sure how much relief from the heat the clear would give us, but this last couple of weeks we had temps near 90 and lots of sun. I was working on a project next to the pergola and then walked under the pergola to grab something and was shocked by how much cooler it was. With the shade from the actual pergola and the clear roof, it was about 10 degrees cooler under it. I swiftly moved my project under there to finish 😉 I really love the amount of light that comes through the clear because I have 2 windows under the pergola. I would do clear again in a heartbeat!
We have
Hi Kati! I am so in love with the project! You guys did a fantastic job! We just tore down a very old and weathered pergola over our patio a couple weeks ago and we’re planning to rebuild it with a roof similar to yours (although I’m struggling like you….to get clear or gray panels??).
I was wondering if you’ve experienced any condensation/drips from underneath the panels, especially in the morning? Some of the reviews on Home Depot’s site mentioned that….and that would be a bummer if so.
Thanks so much!
For me the clear roof won out since the pergola covers 2 windows of our house (one that is my office) and I wanted to keep all my natural light coming in. But the kids playhouse has the gray and it’s also great! Sorry I am no help. It is super dry here in Utah so we have very little condensation anywhere. I have noticed 2 drips with the last rain storm and will watch those to see if I need to fix the screws up-top to get a better seal (since the screws are what seals the roof). But we love our roof and it has been totally worth it.
Do you find that in the summer the summer the pergola acts as a greenhouse? I love the idea but I’m concerned about ensuring area providing shade during summer.
Hi Bruce, we have not noticed any heating up, but have not had it up in the heat of the summer yet (built it just last fall). The two open ends are in the wind path too so we get a nice breeze through it most times. I’ll have more information after this summer!
I’m impressed. That you are in Northern Utah and it works for you means it would work for me as that’s where I am.
Thanks Thomas! Be aware that different counties have different snow load requirements, always a good idea to double check. But we loved having a roof this winter so we could protect all the patio furniture from all that snow 😉
Looks amazing! I have been considering doing this for some time but have been hesitant. Your post gives me the confidence I might be able to pull it off. 😉 Curious though, as it’s not entirely obvious in the pictures, did your pergola already have a pitch to it or was it completely level on the top? Just wondering what is the minimum pitch I could get away with to allow the rain to run off.
We actually built the pergola just the week before putting the roof on (you can find that post here). So yes the pergola already had the pitch we needed for the snow load in our area. The minimum specs for the SunTuf roofing is to have a 1 1/2″ rise per foot, but always good to check your own building codes.
if I already have a pergola with a roof but they didn’t add a pitch when they build it, do you have any recommendations on adding a pitch?
It really hard to say because it depends on how your pergola is built. But if you could just lower the main supports on one side and trim off the excess on top of those posts that could give you some pitch.
How does it look after the leaves lay on it. Can they be easily removed. Do they stain?
I have not had any staining from the leaves. It is very easy to clean off, just spray it off with the hose. If we have very light rain it will leave water spots, but after a normal rain storm it looks so clean and clear!
Do you know the cost of this project ? or a per foot cost . I love it and already have purlins every 12 inches on mine . I also put a fairly large slope , since I live in Michigan
Our 20×11′ pergola roof cost us about $600. That includes the closure strips, corrugated roofing, and purlins all those screws! You can buy the roofing at different lengths but they are all 26″ inches wide which gives you 24″ of coverage when you overlap them. Check at the Home Depot website for cost for the length you will need for your roof. The screws and closure strips are pretty inexpensive, but for our roof came up to about $150 if I’m remembering right. Hope this helps! We totally love our roof and it still looks amazing even after a crazy winter!
Thanks so much Kati, Spring is finally here . And I am looking forward to getting this project underway . Mine is only 10 ft wide by 12 feet long , I actually found some that is 50 inches wide and comes in 10 and 12 foot lengths . I am hoping to have around $450 into it . Your photos , project detail , and tutorials are fantastic.
Good luck with your project! It will be super awesome when you are done.
Just wondering if its strong enough to use in an area that has snow storms snow could be on the roof for as long as 2 weeks
Lizz, we live in northern Utah and get a significant amount of snow most winters. This year we have only had one storm (it’s been an odd year) and those 8 inches were on the roof for a couple weeks before it warmed up enough for it to slide off. The most important thing to worry about for snow is the pitch of your roof. The higher the pitch the easier it will be for snow to slide off.
How were you able to get all the screws on without walking all over the plastic sheets? I imagine that you need to screw in panels that are overlapping, but how did you manage to screw those?
Great question! Each of the panels is only 24″ wide so we were able to reach over from the edge to secure the overlapping edge. It only has to overlap one corrugation so only 1 screw. Also, my husband climbed onto the roof to secure the higher up sections that were harder to reach since our ladder was not super tall. And I did all the lower sections just from a ladder. I am only 5’6″ and was able to reach just fine (but it did give me a good workout to secure the entire roof).
Hi I’m in Florida with an extremely hot back yard, No shade at all. Does the gray tinted block out heat more than the clear? Would this be a good choice for a cooler patio? Thanks in advance. I absolutely love your work ????
The gray tinted does block out sun so therefore it will help with heat. It reminds me of being under a shade tree. I hope this helps.
Hey there! Just wondering if you could tell me what the maintenance on it will be like? How long are they warrantied for, does it get dirty or scratched up, etc? Thanks 🙂
Hello Lauren, since we have only had the panels for 6 months, I don’t have too much information to share. The panels do get dirty, especially when you have small rain storms that just leave dusty rain spots on everything. They can easily be cleaned by rinsing with a hose though. The website says limited lifetime warranty of 10 years. The reviews were great and I am sure happy so far. I will have to share how they are holding up in a few years, but that doesn’t help you too much.
This is very clever, “KUDOS”. I wish I could do this!! Too much work.
Lollie
Thanks Lollie. It was a lot of work, but totally worth it!