If you hate throwing away small cut offs of wood, you are going to love this project! This fun plants stand uses up those small scraps to make them into something amazing.
Every cut of wood needed to build this plant stool is less that 12″. So you can probably make it from pieces you already have cluttering up your garage.
Or if you don’t have a pile of scraps (don’t worry, you’ll get there), you can still make your own charming little stool for your plants by buying just a couple boards and an afternoon of fun!
This post may contain affiliate links. As an Amazon Associate I earn from qualifying purchases. Click here to read my full disclosure policy.
Why you need a Plant Stand?
Plant stands are more than just cute little stools to hold your plants! They have many other purposes too.
Use your new plant stool to:
- Create visual interest in your decor
- Allow vines more room to trail
- Keep floors under the plants clean
- Raise plants up to get better light
- Gives plants a lift for easier watering and care
You will love the perfect little plant display so much, you will end up needing even more. Then you can also make these nesting plant stands and this tall corner plant stand.
With the entire collection you will have plenty of room to display all your plants!
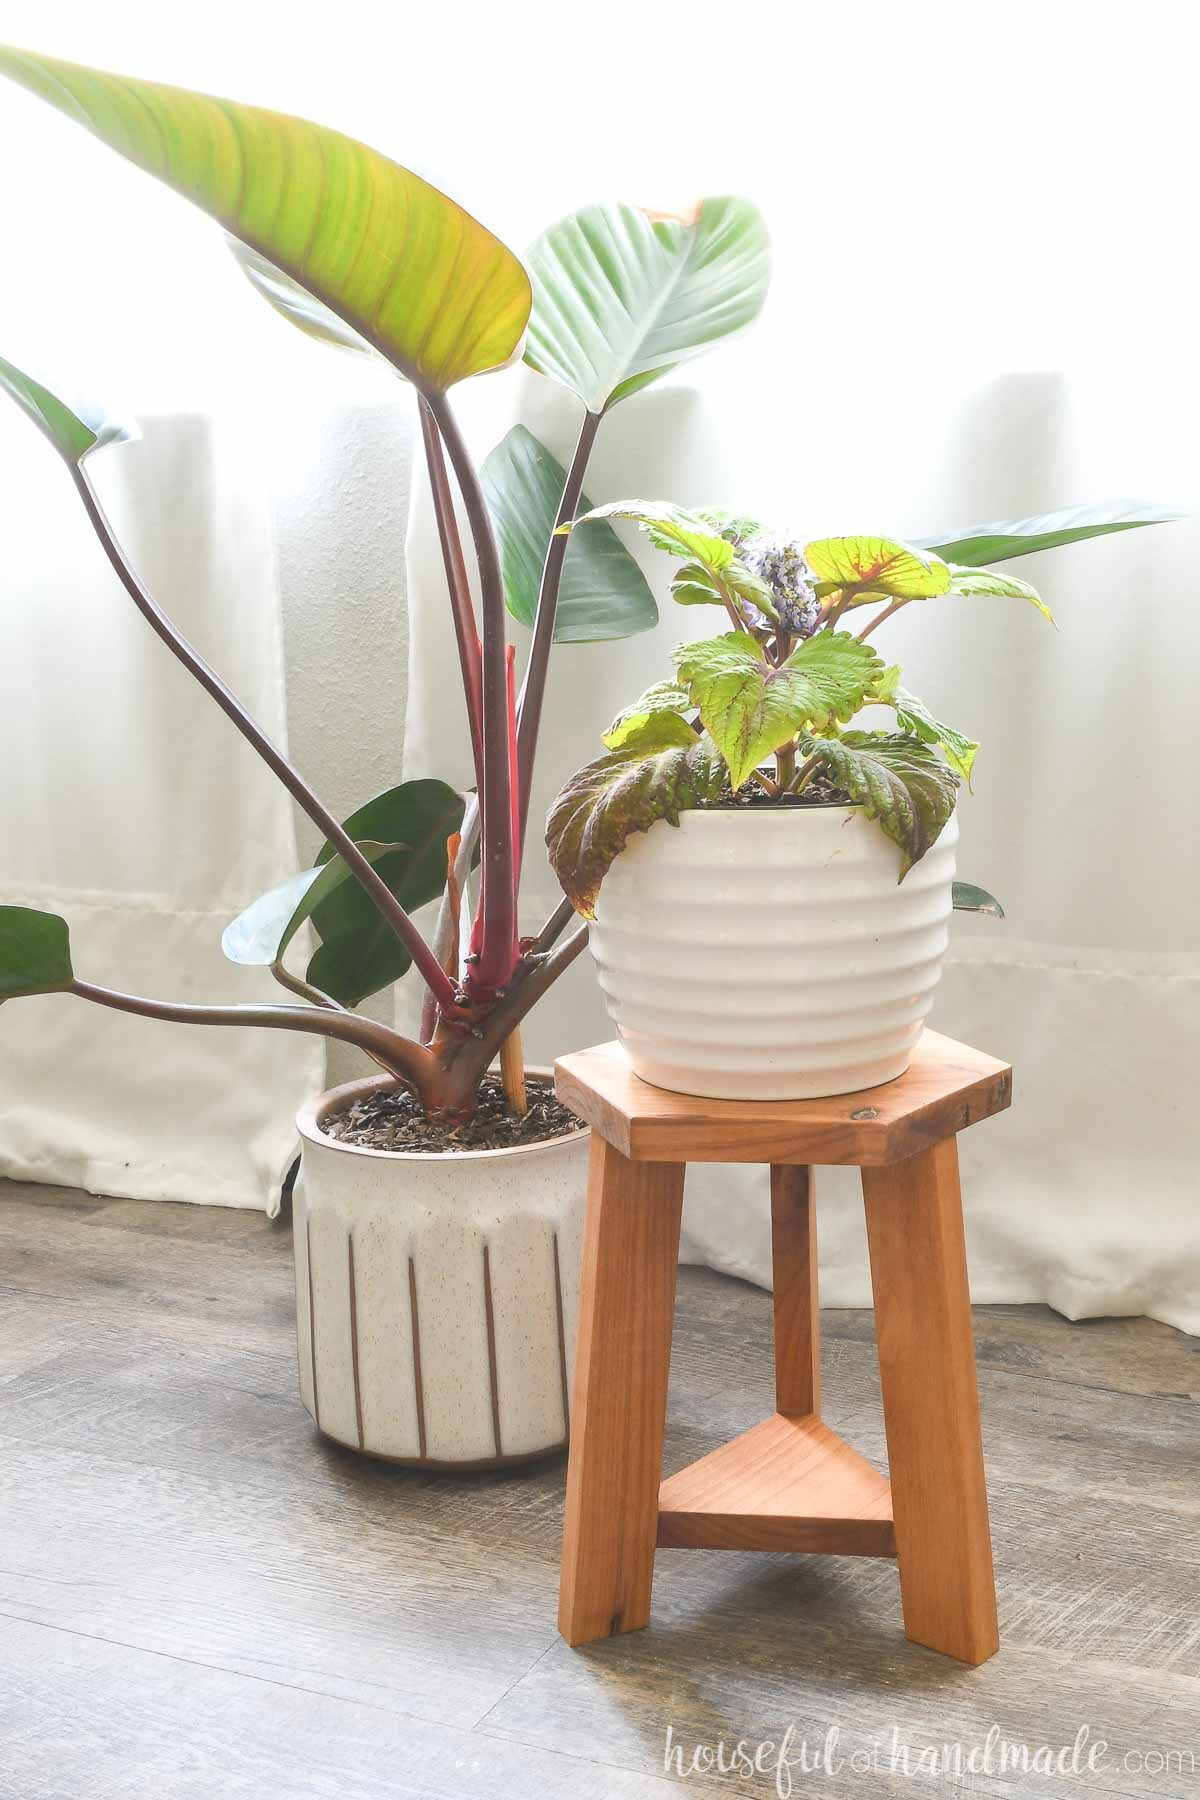
Simple Stool Design
This fun plant stand looks just like a classic stool, but much smaller. There is just something so fun and charming about small things!
The legs on the plant stool have a slight taper to them to make them look super fancy. But since the taper is small, the stool is extra sturdy.
But my favorite part of the little stand is the hexagon top!
You might think cutting a hexagon is complicated. However, I made it super simple. No need to think about angles or do any math.
Instead, two scrap boards are cut with angles on both ends and glued together. This makes a perfect hexagon all easily cut on a miter saw.
How to Build a Plant Stool
Tools & Materials
Recommended Tools:
- Miter saw
- I recently upgraded to this larger sliding miter saw (watch for it to go on sale), but all my projects before were built with this inexpensive miter saw that I loved.
- Pocket hole jig
- I used the easy and inexpensive Kreg 320 jig for this project.
- Drill
- Impact driver (optional, but I love not having to switch bits with the drill)
- Sander
Supplies:
- Wood products:
- (3) 10″ pieces of 1×2 board
- (2) 9″ pieces of 1×4 board
- (1) 6″ piece of 1×6 board
- (3) 1 1/4″ pocket hole screws
- (3) figure 8 fasteners with screws
- Stain/sealer/paint
Get the build plans for this fun plant stool in 2 sizes. Make just the size you need or make two matching plant stands to create the perfect plant display.

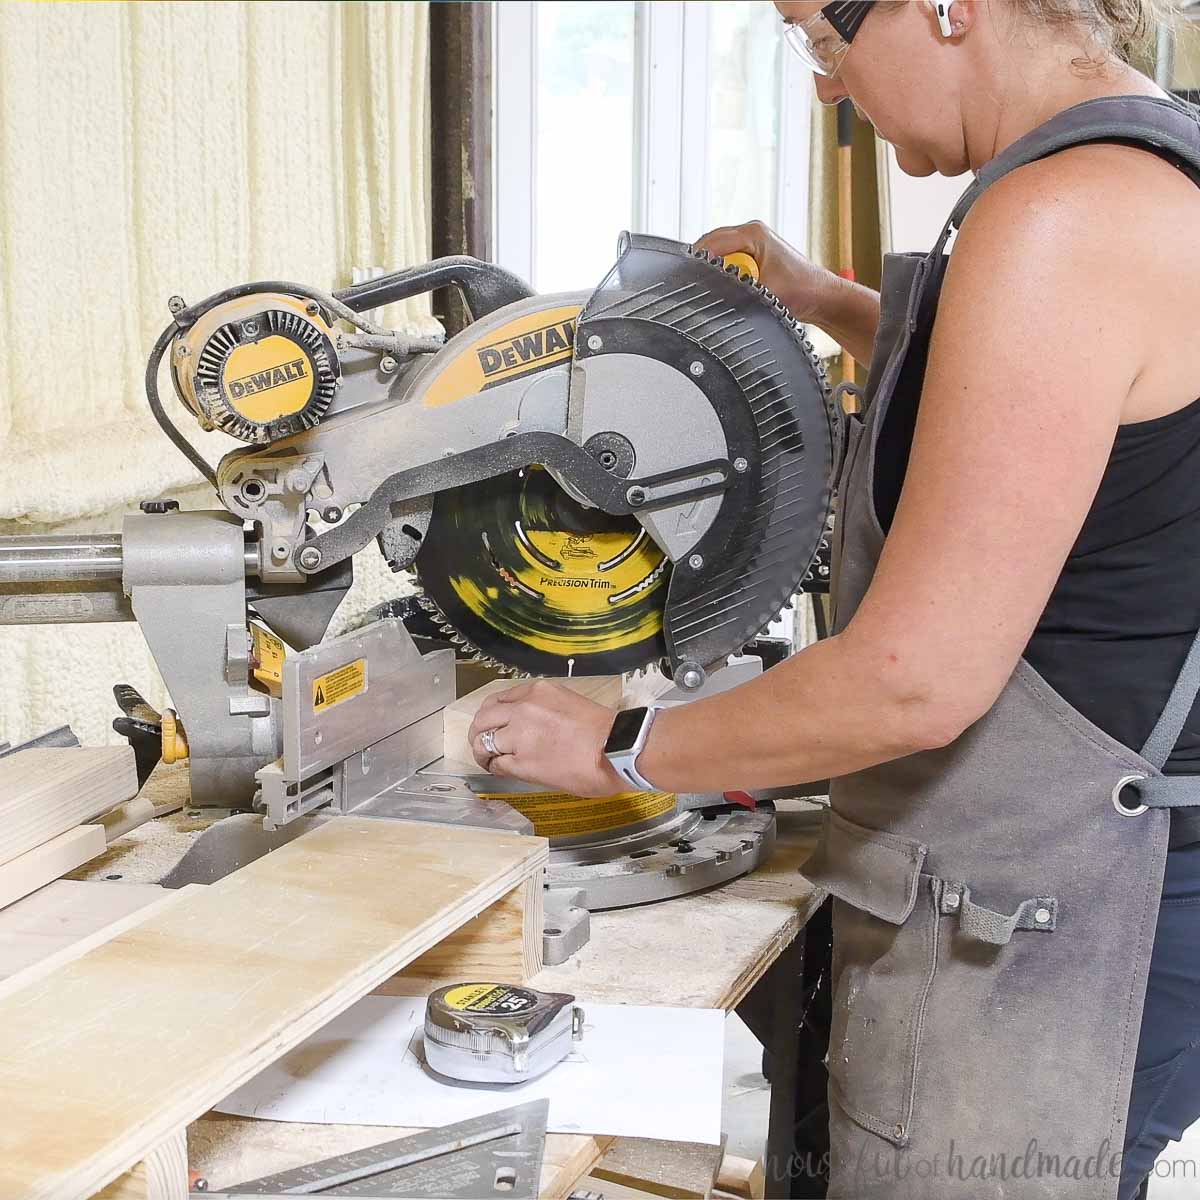
STEP 1- Cut out the Pieces
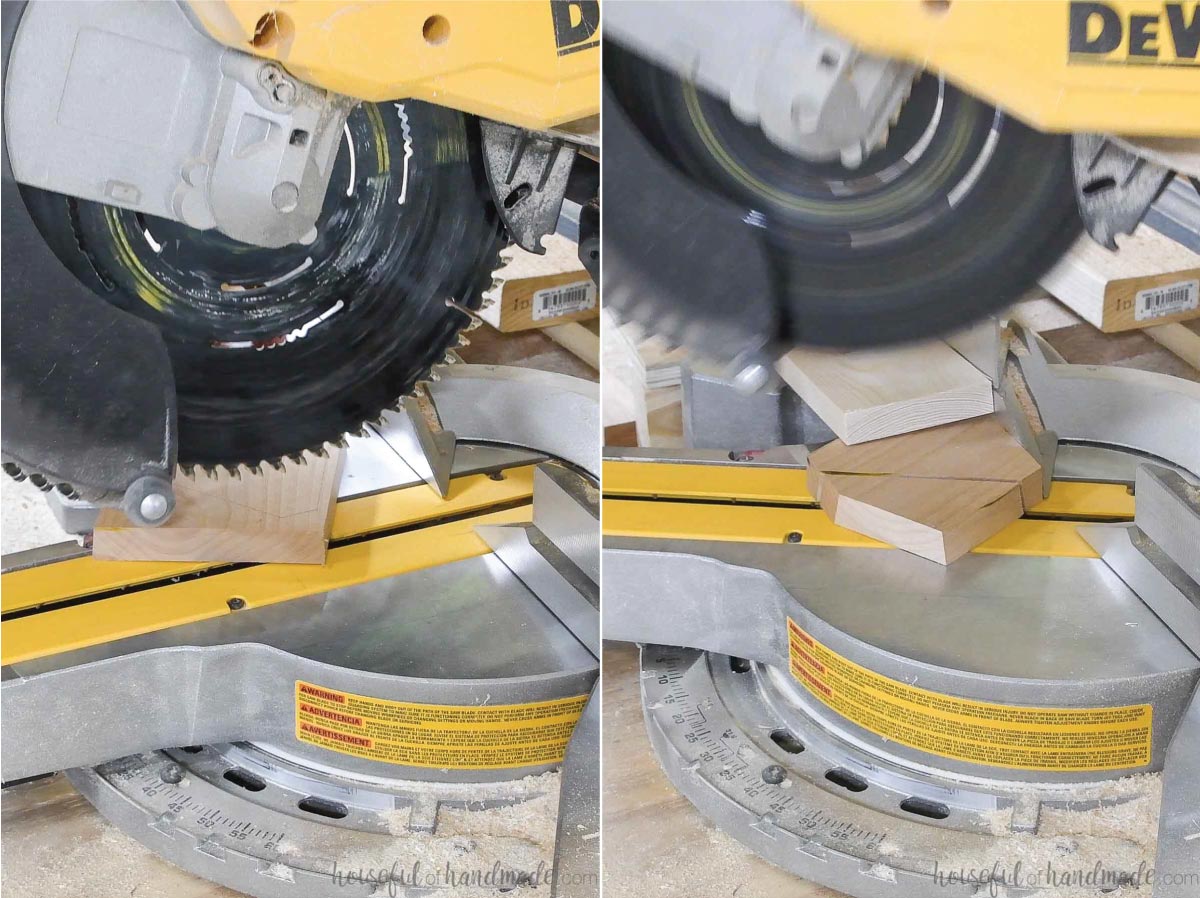
Cut the table top pieces with a 30 degree angle on the miter saw and cut the leg pieces at a 7 degree angle on the miter saw according to the diagram in the plans.
EXPERT TIP:
Use a scrap piece of wood to help keep fingers away from the blade when cutting small pieces of wood on the miter saw.
Print and cut out the bottom shelf template from the plans.
Trace the template onto a scrap of 1×6 board. Do not lay one side up against the edge, center it on the board.
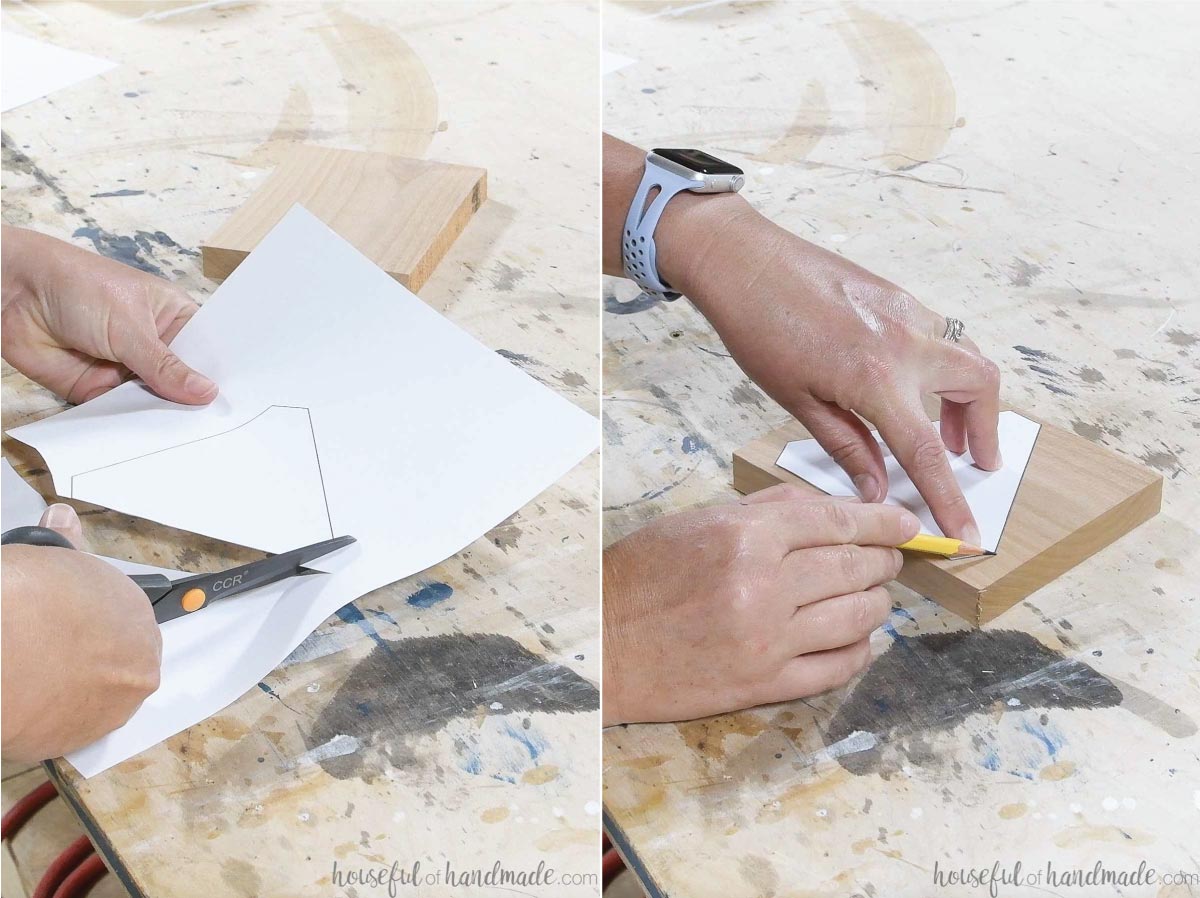
Set the blade angle on the miter saw to 7 degrees (the same as the legs). Cut the short ends of the shelf template off a this angle.
This will make the bottom of the shelf slightly larger than the top (the side you traced the template onto).
Then return your miter saw blade to a 0 degree angle and cut the longer sides of the triangle.
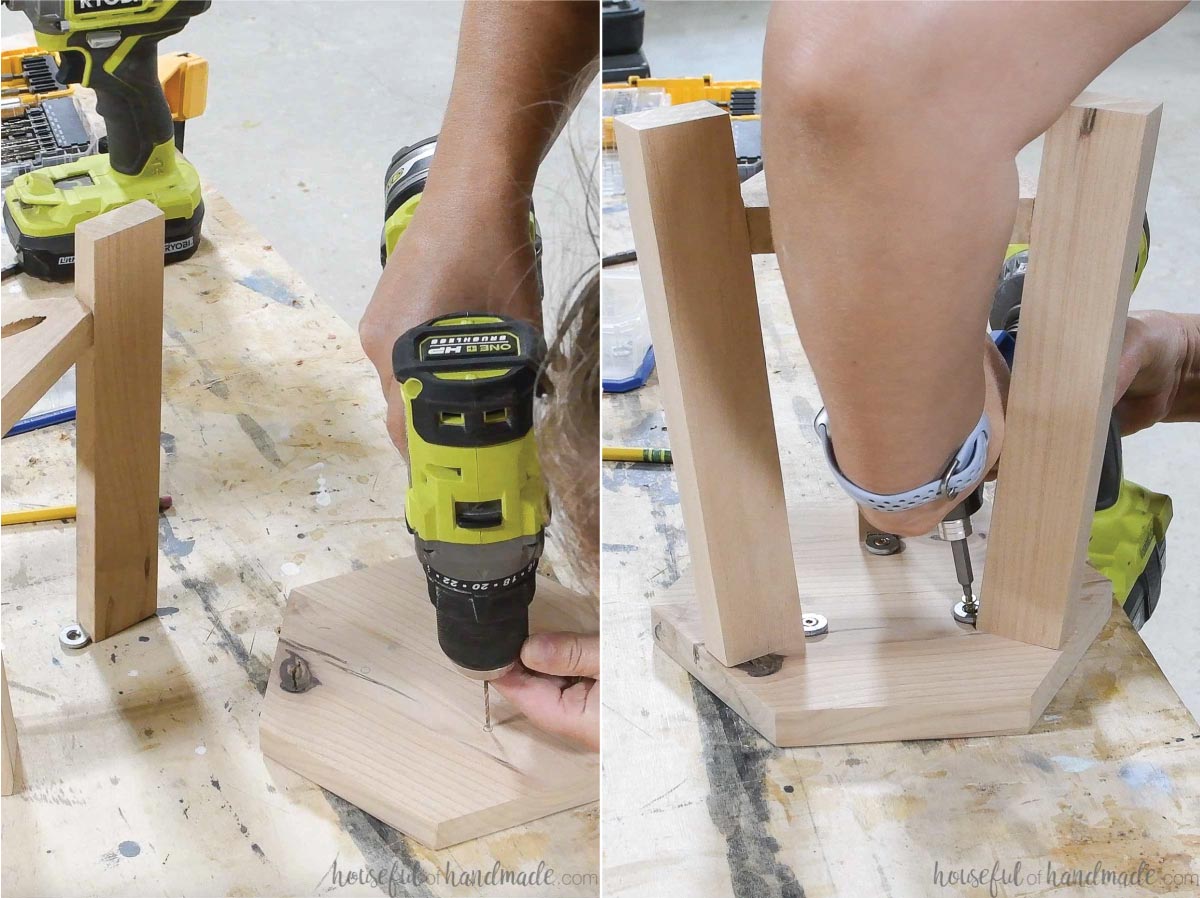
STEP 2- Assemble the Stool Base
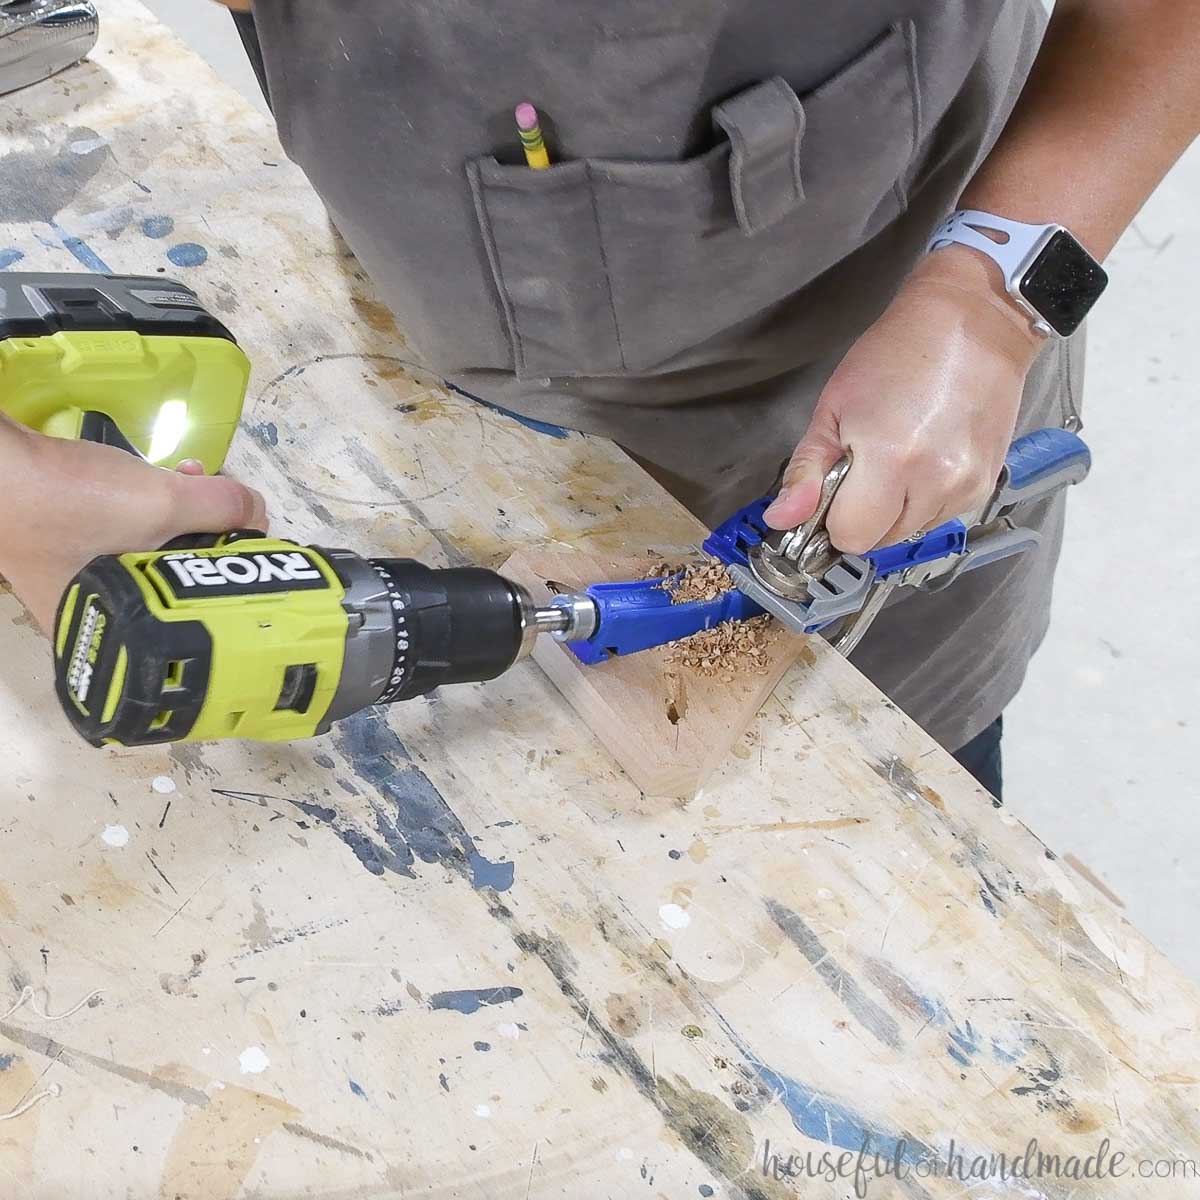
Drill one pocket hole set for 3/4″ thick material in each of the smaller sides of the shelf.
Make sure these are on the bottom of the shelf (the slightly larger side).
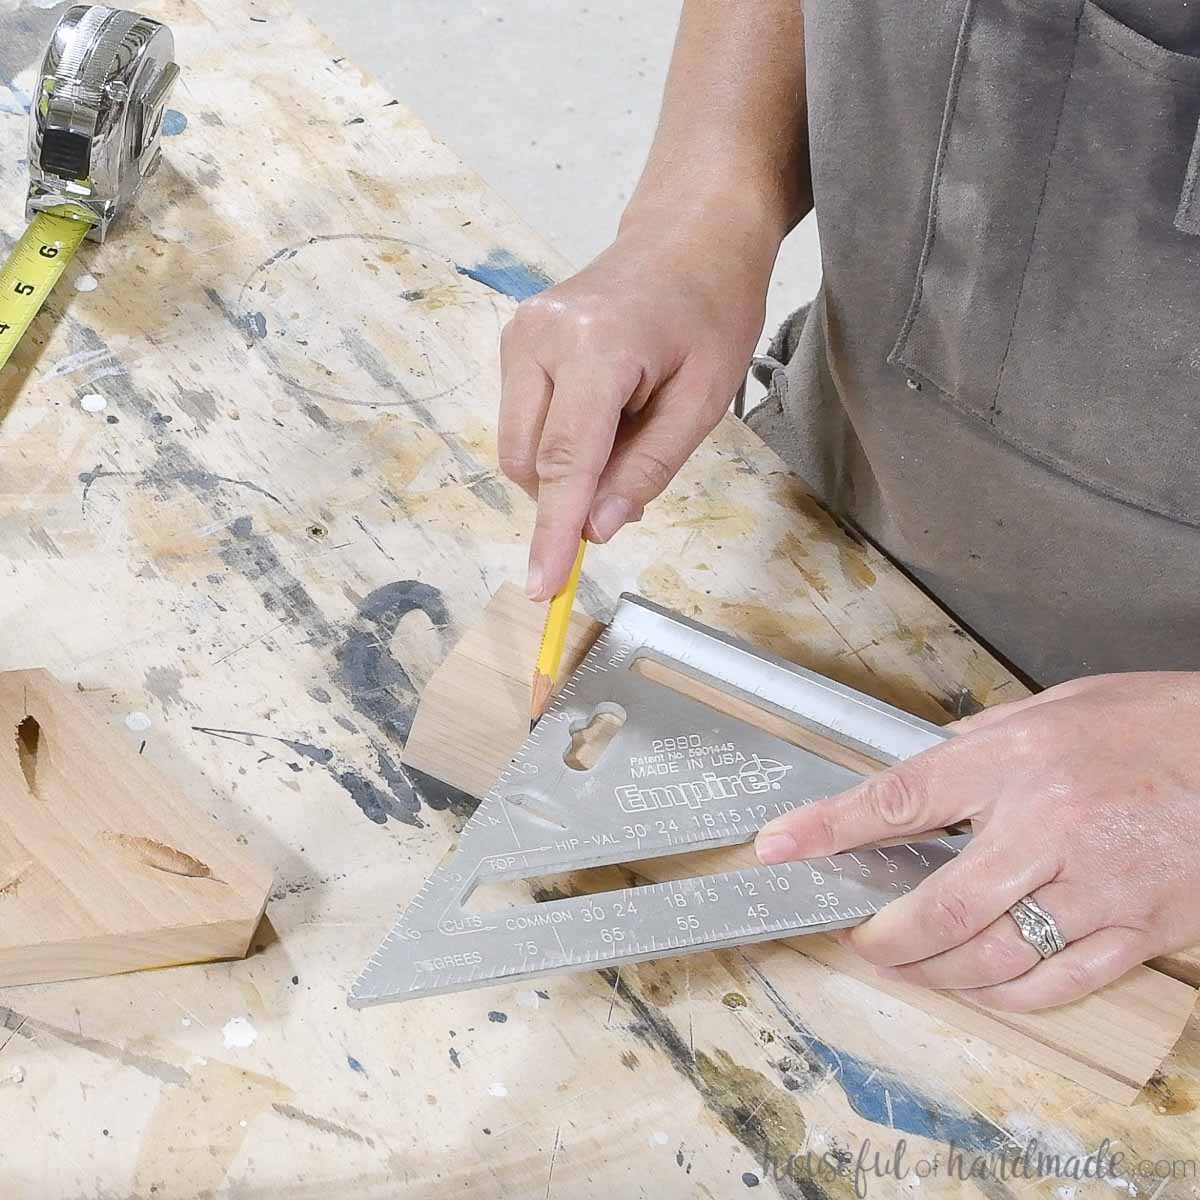
Measure and mark where to attach the shelf on the legs according to the diagram in the plans.
Make sure to mark the legs on the underside of the shelf to make it easier to see when attaching it.
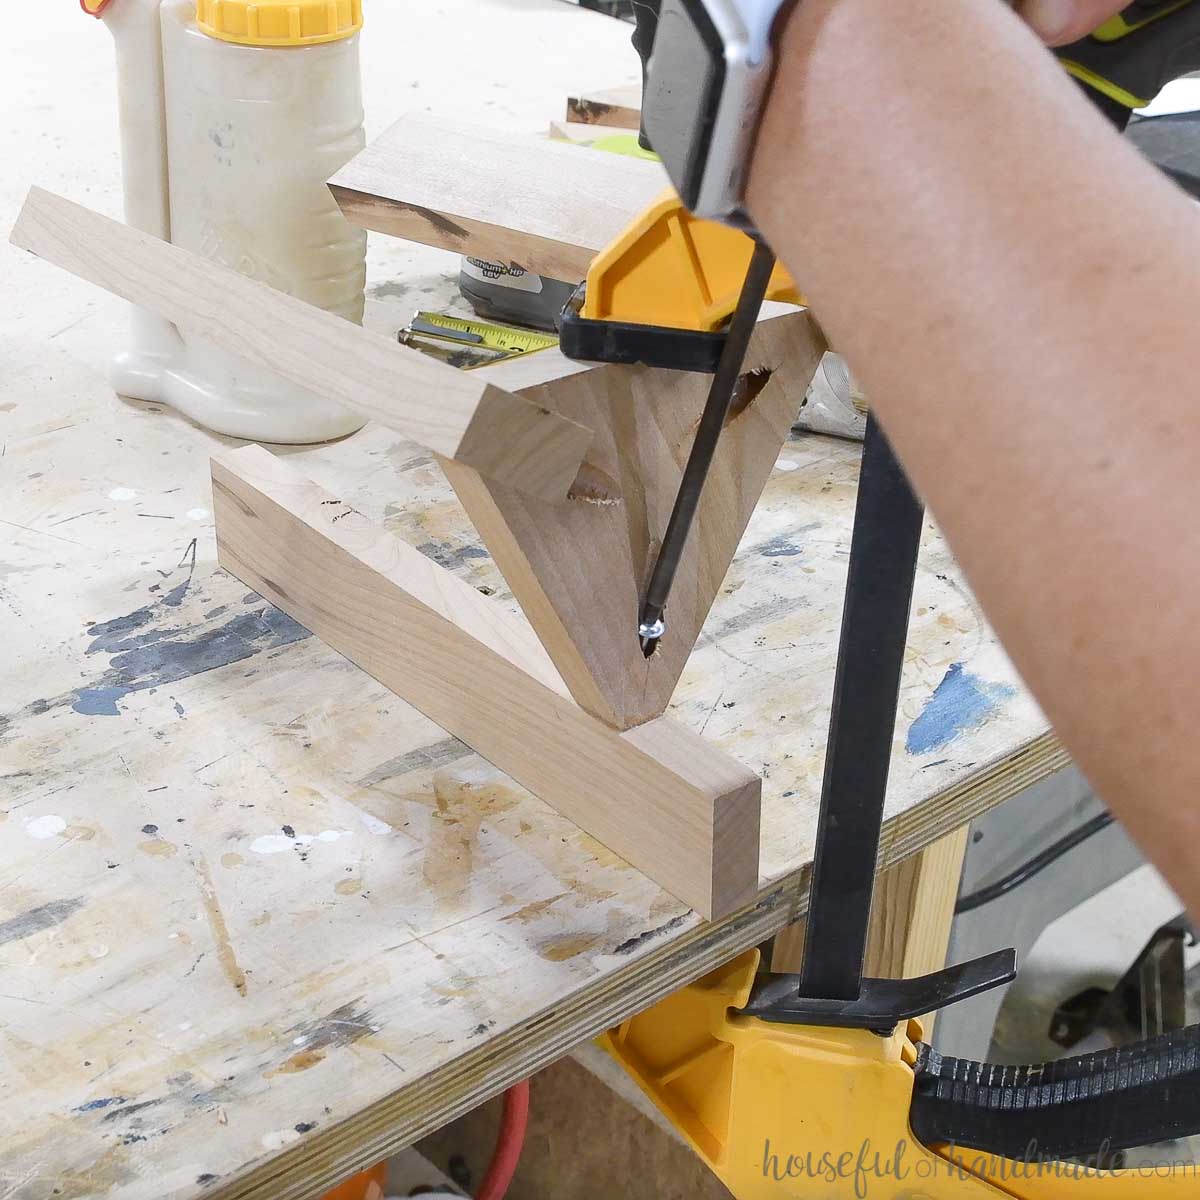
Add wood glue and then clamp the shelf to the leg.
I found it easiest to clamp the angled legs to the angled shelf by clamping the entire thing to my workbench with a trigger clamp.
Attach the leg with a 1 1/4″ pocket hole screw. Be careful not to twist the board as you secure them. If they do twist, carefully twist them back to straight on the line you drew on the legs.
Repeat for all 3 legs.
STEP 3- Glue up the Top
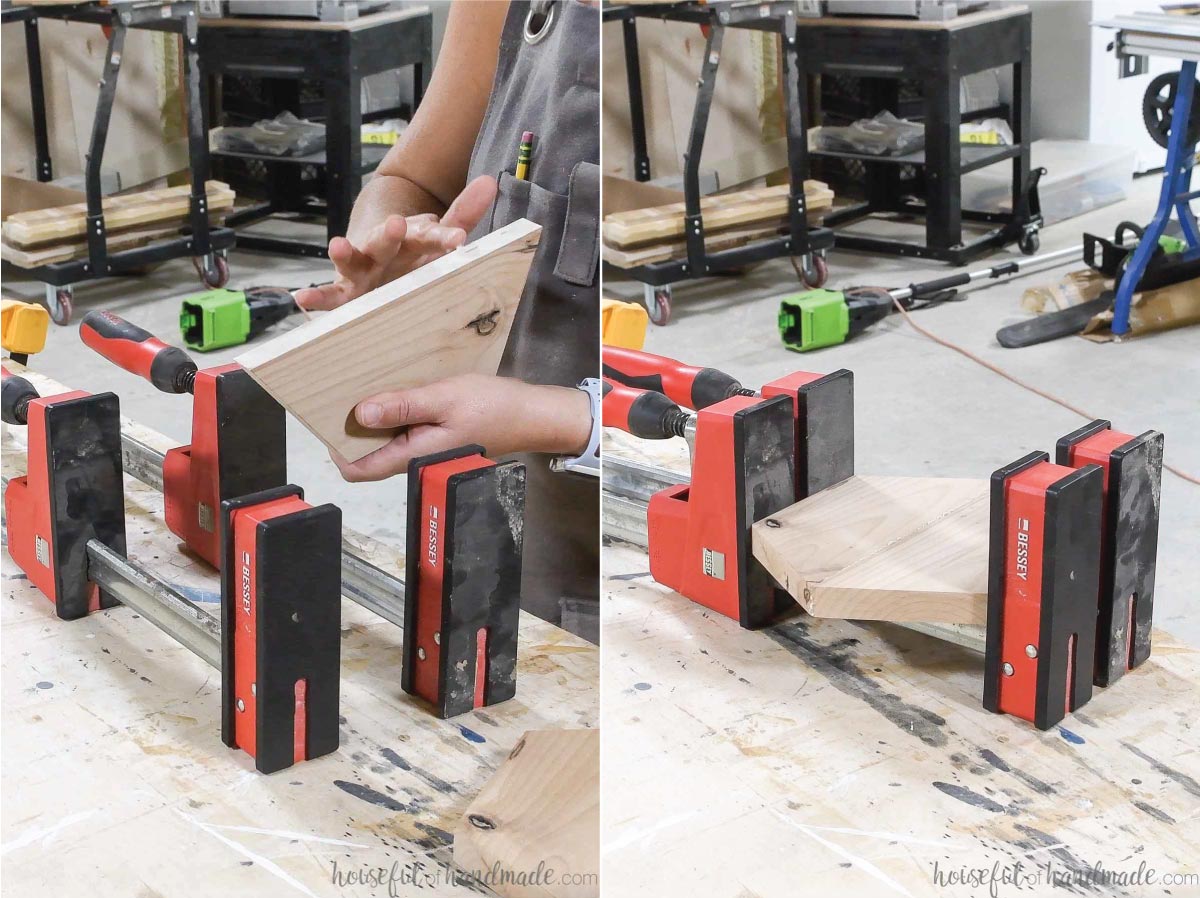
Add wood glue to the inside of one of the top boards and then clamp it snuggly to the other one to create a hexagon.
Make sure to keep the top of the table top flush. You can hold it all flush with a face clamp while clamping the boards together.
EXPERT TIP:
Mix sawdust with wood glue to fill any large cracks or holes left by knots in your top. Let it dry while the glue up dries to save time.
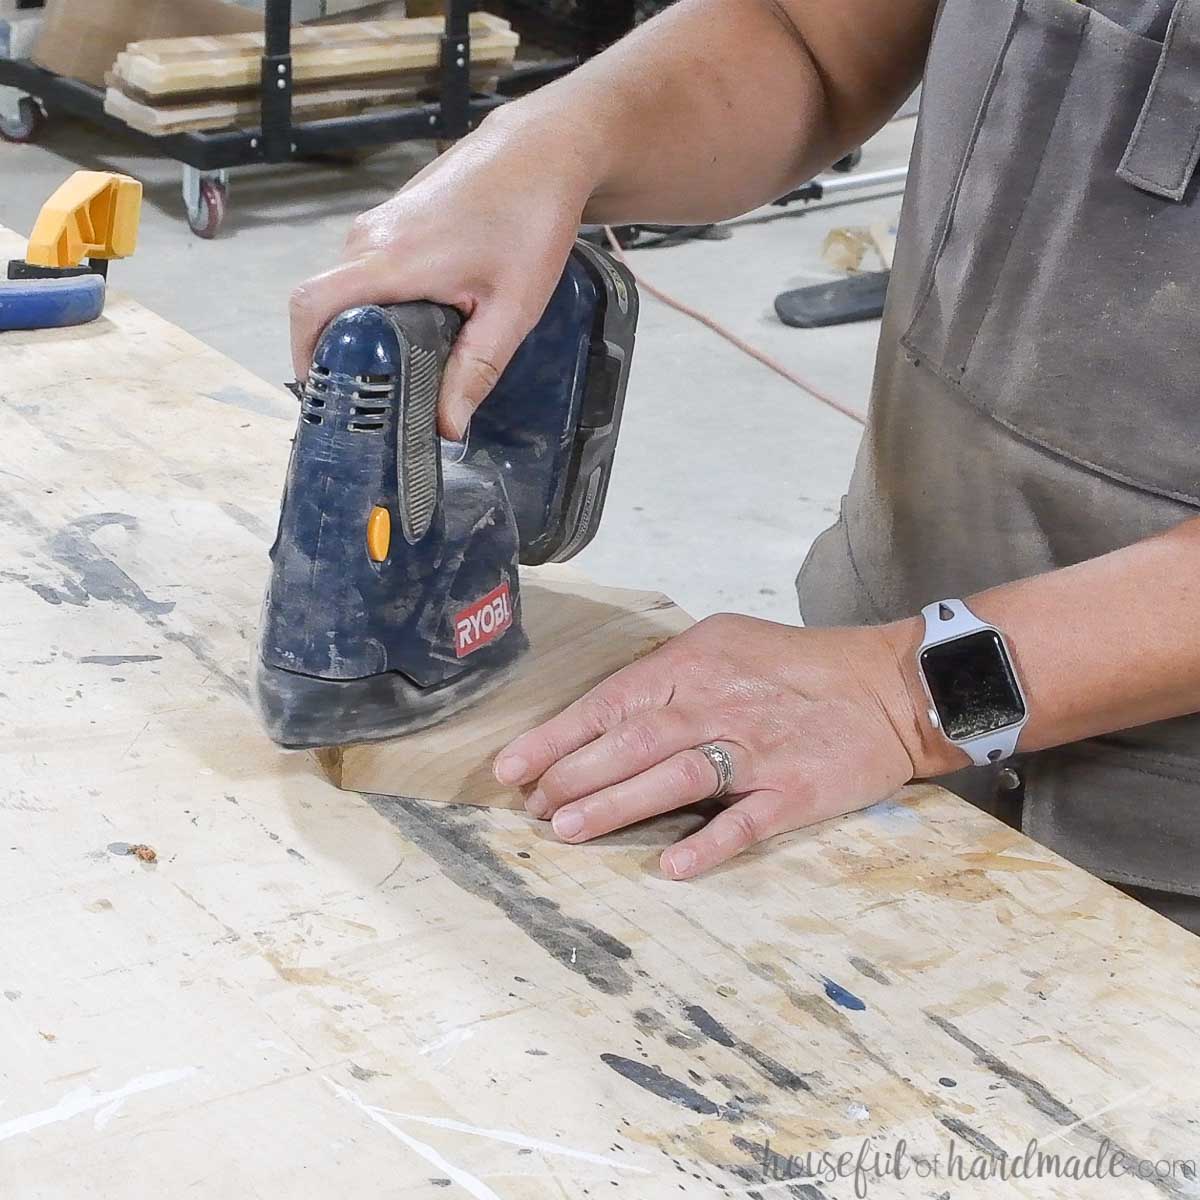
After the glue dries, remove the top from the clamps and sand smooth.
EXPERT TIP:
Use a chisel to remove glue squeeze out before sanding to save sanding time and sandpaper.
Sand the legs smooth while you are at it.
STEP 4- Attach the Top
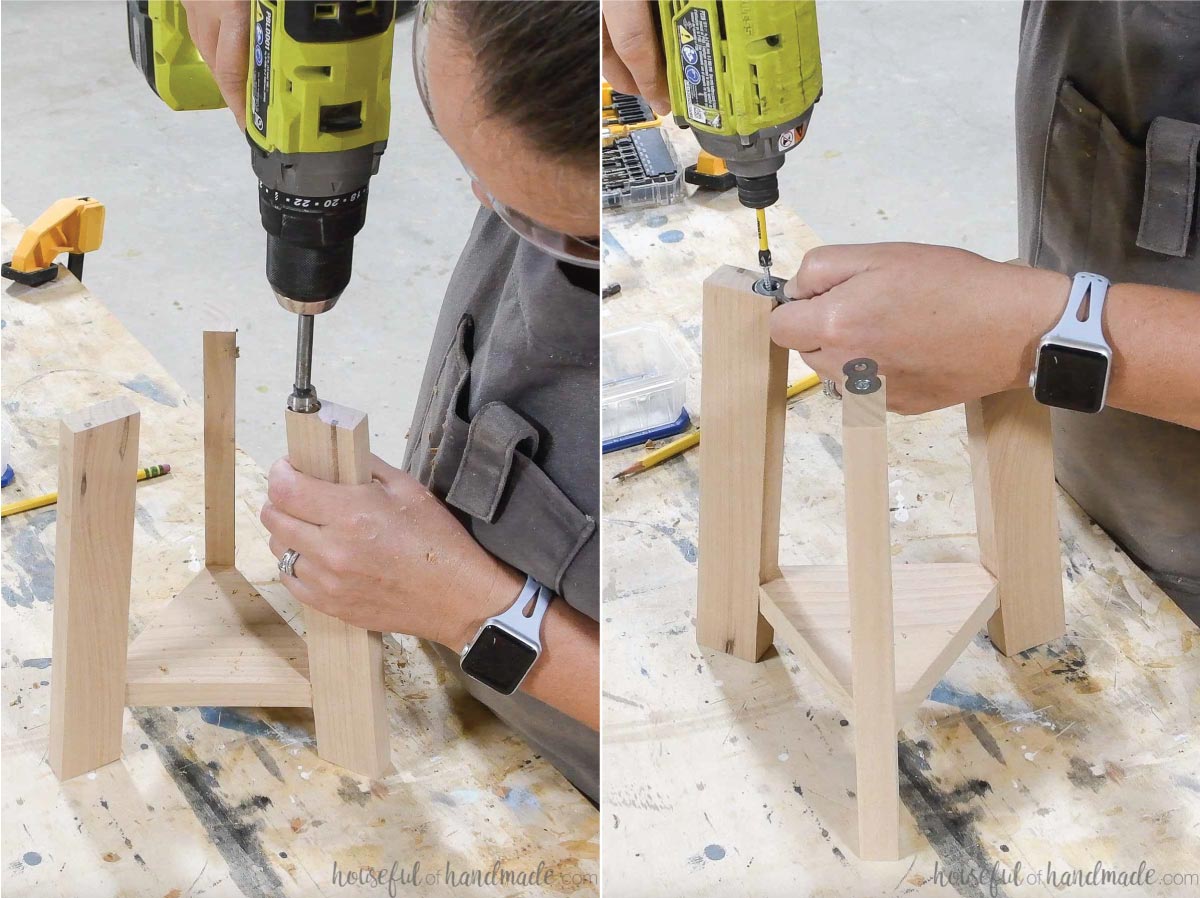
Using a forstner bit, drill the same depth as the thickness of the figure 8 fastener.
Make sure the hole is slightly over the inside edge of the leg so the fastener fits inside it and can wiggle a little bit. This will allow the wood on the plant stool top to expand and contract freely.
Predrill holes for your screws. Then attach the figure 8 fasteners to the top of each leg.
Flip the base over on top of the stool top. Center it and mark where the fasteners will go.
Predrill holes for the screws. Then secure the base to the top.
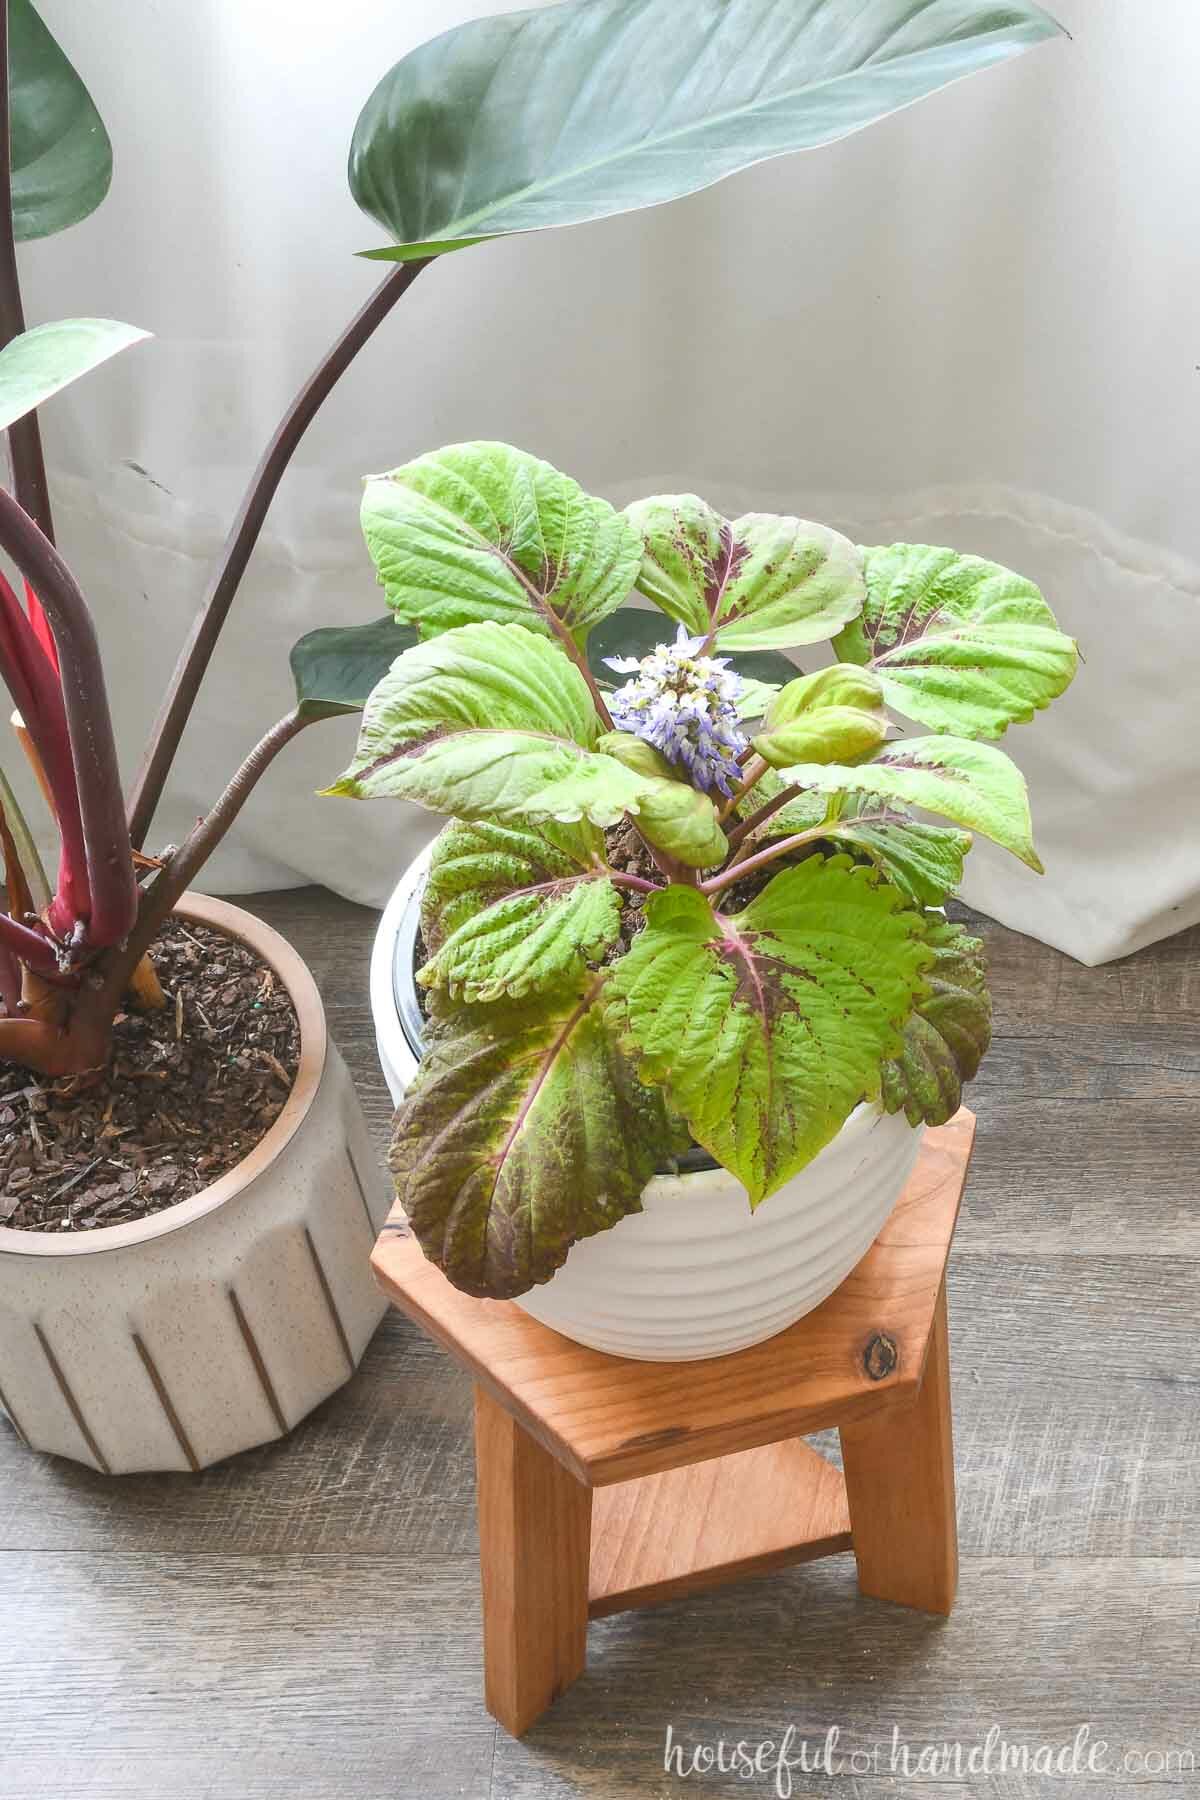
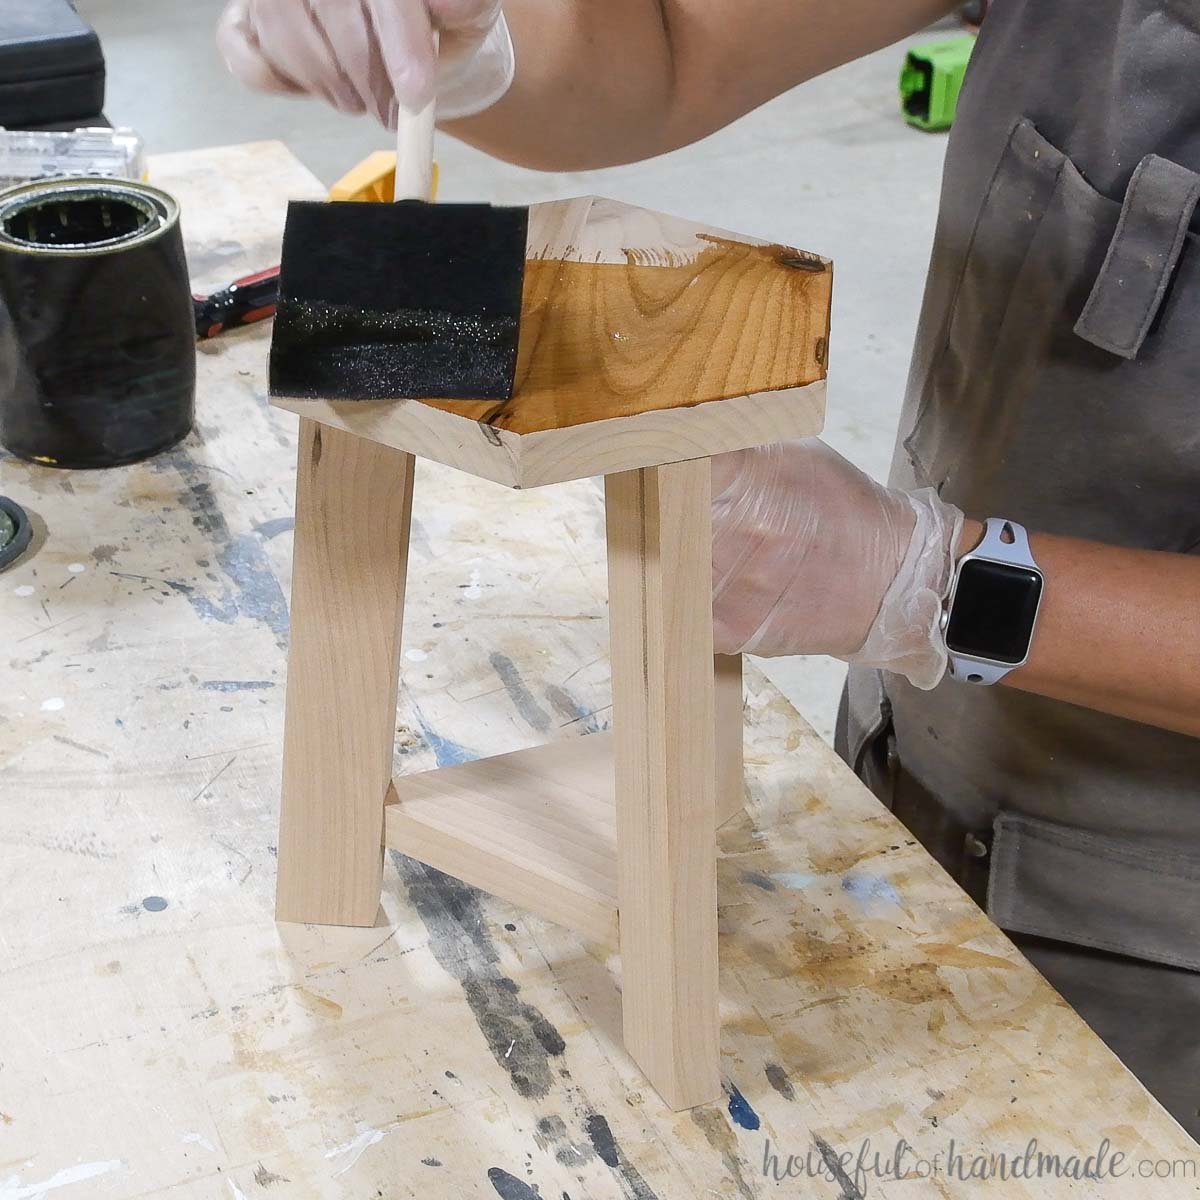
Touch up any sanding. Then stain/seal/paint your new plant stool.
I used scraps of alder wood for my plant stand. To seal it I used Simple Finish to really highlight the beautiful wood.
And you are done!
Premium plans include:
- Recommended Tools
- Shopping list
- Easy to read cut list table
- Cut diagrams
- Step-by-step instructions with 3D renderings
- Helpful resources
- BONUS: 3D SketchUp file
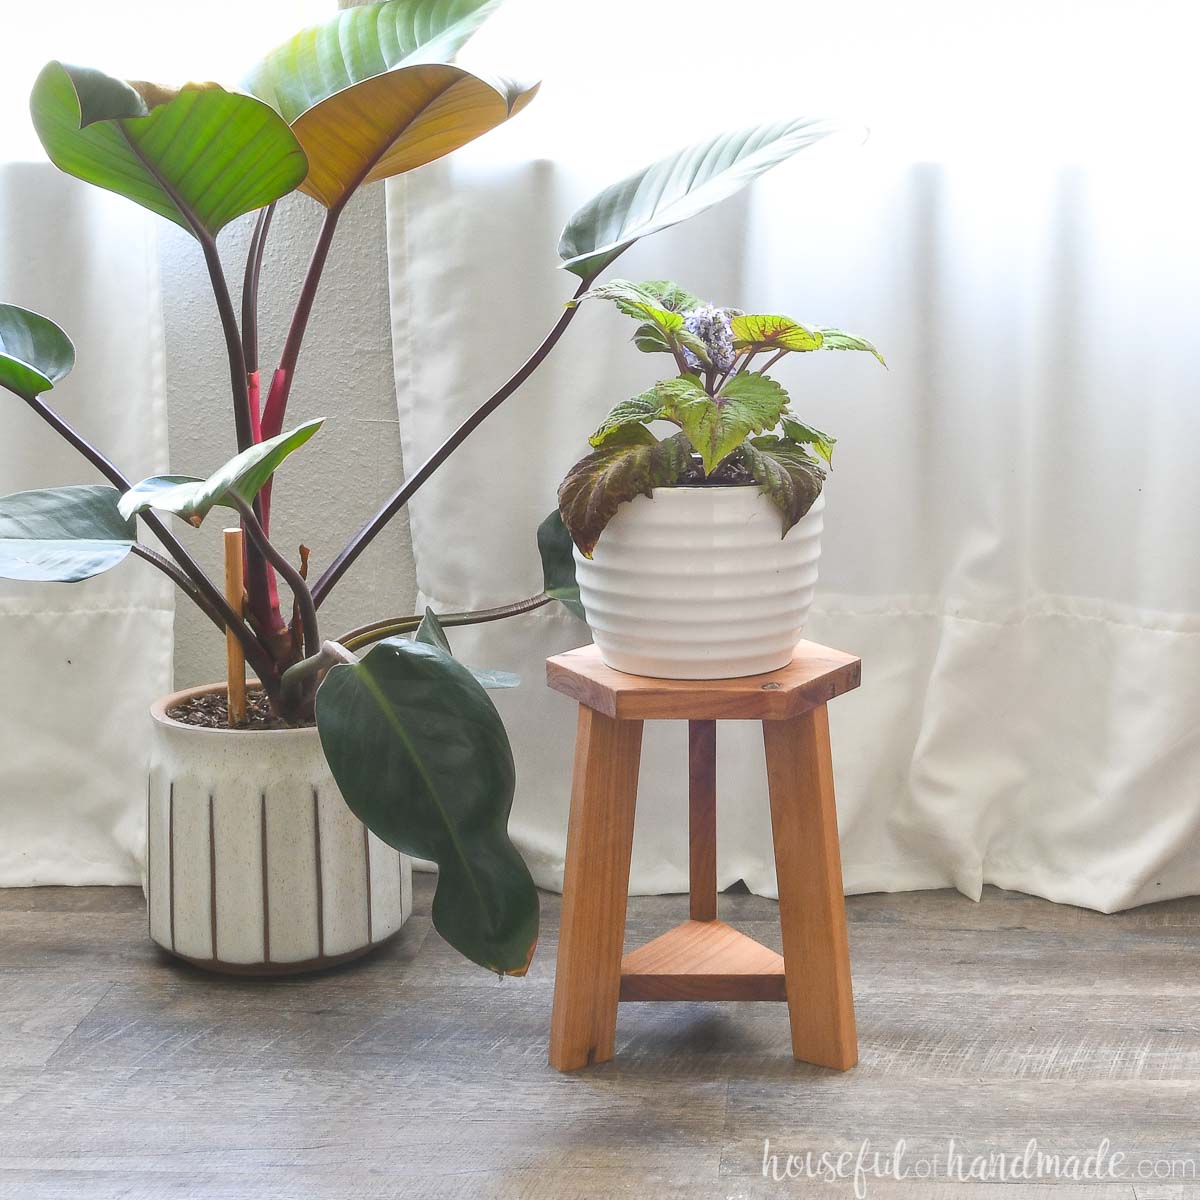
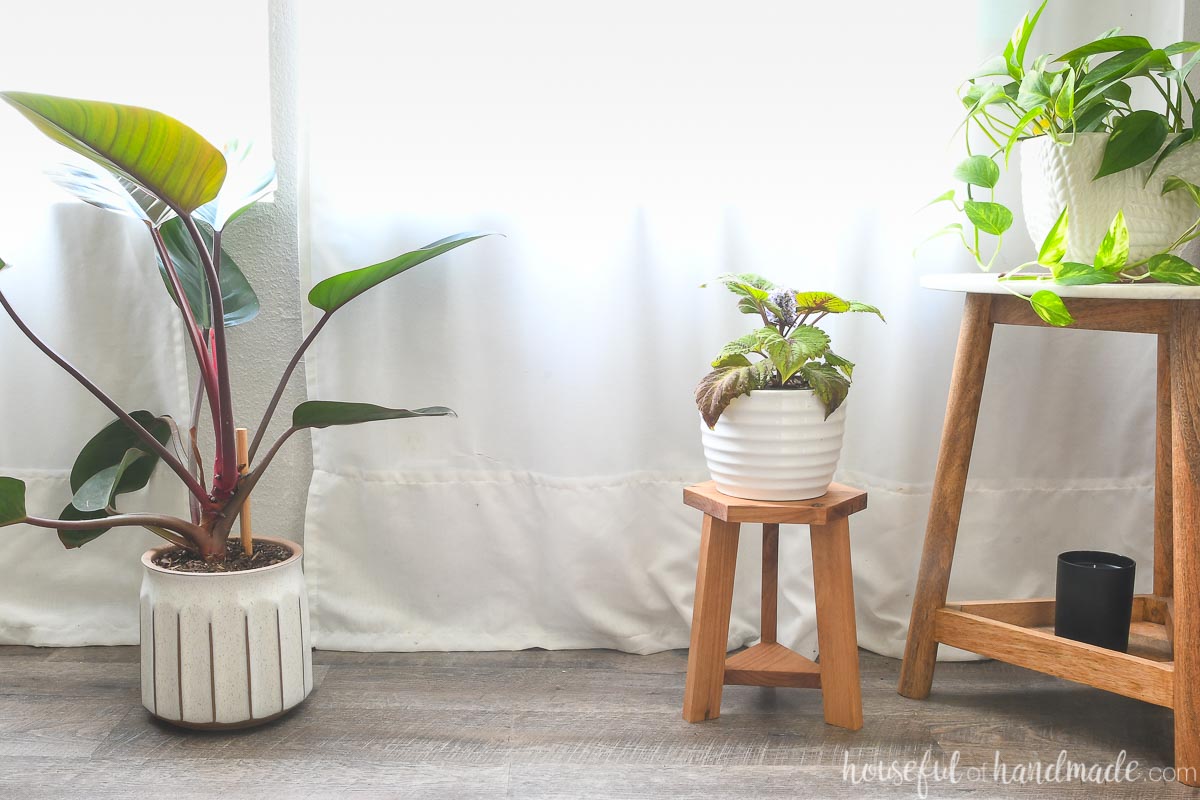
Now you can use your new plant stand wherever you need to display a beautiful plant.
I have mine in my yoga nook in my bedroom. The perfect place for some pretty plants!
More Scrap Wood Projects:
Today is the final project for the scrap wood summer series. Check out all these amazing scrap wood projects to help you clear out your scrap pile.


Happy Building!
