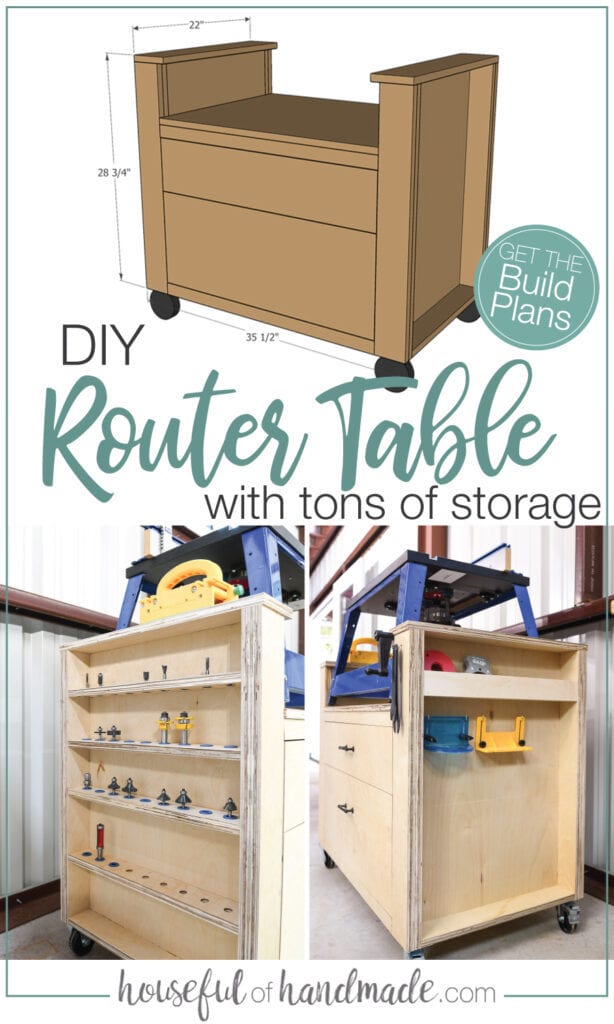
Organize your router and accessories with this bench top router table.
Moving means not only re-organizing your home, but also your workshop. Now that the shop is getting built, I am ready to unpack all the tools and be more productive!
One of my tool tables (a quickly built, scrap wood router cart) became very wobbly after being moved in and out of our tool storage trailer. So I partnered with Kreg Tools and their project plan site, BuildSomething.com, to make a new bench top router table full of storage.
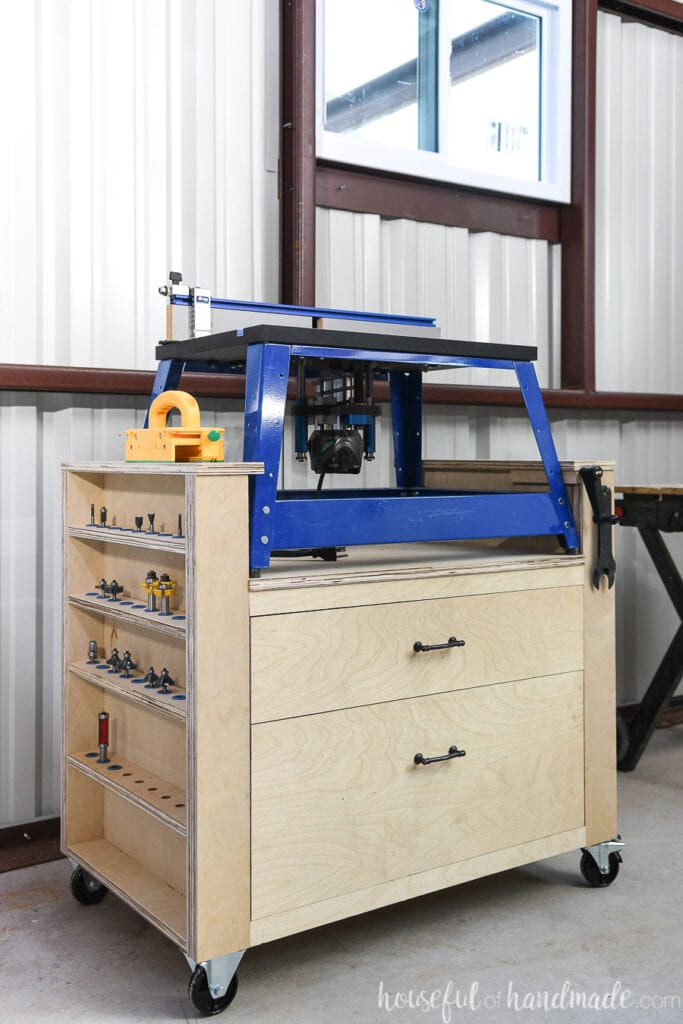
Router Table Design
This new router table is the things that organizing dreams are made of. To understand my level of excitement for the storage and organization, I want to share the old cart.
This post may contain affiliate links. As an Amazon Associate I earn from qualifying purchases. Click here to read my full disclosure policy.
I put it together with scraps in a couple hours. And instead of creating usable storage, I stuck a slightly broken set of plastic drawers on the bottom. This thing was doomed from the beginning, but served its purpose of holding the bench top router.
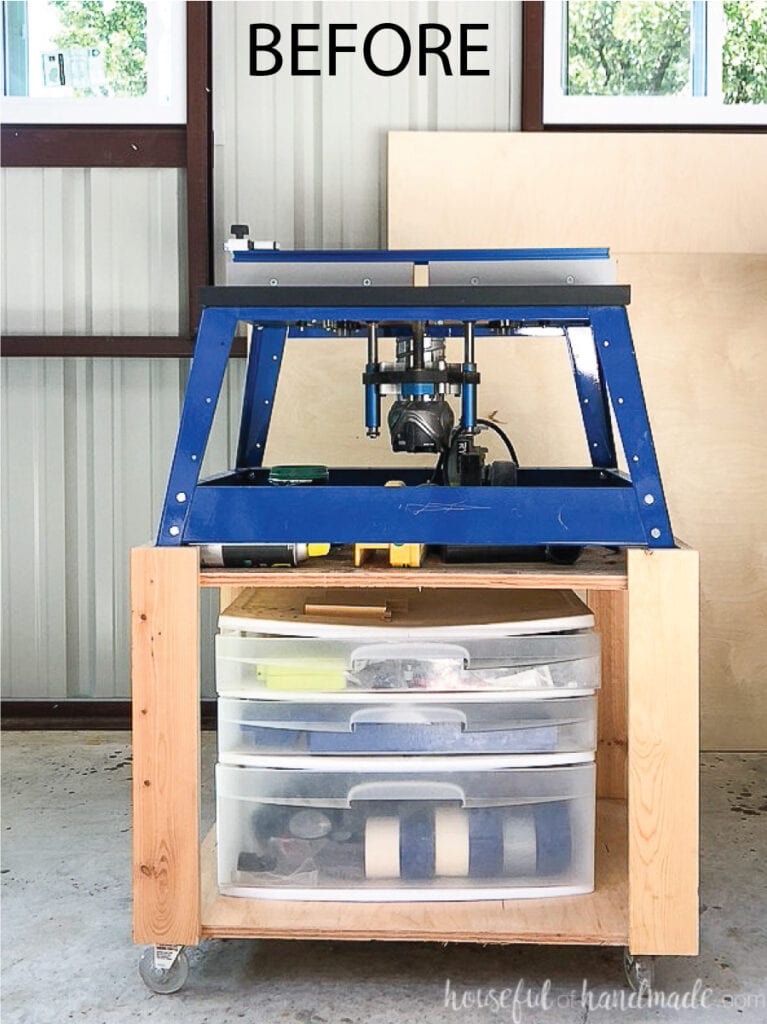
So this time I designed the new router table to be functional from the beginning! And for even more workshop organization, I am loving the rotating spray paint storage cabinet that holds so much paint.
Raised Sides
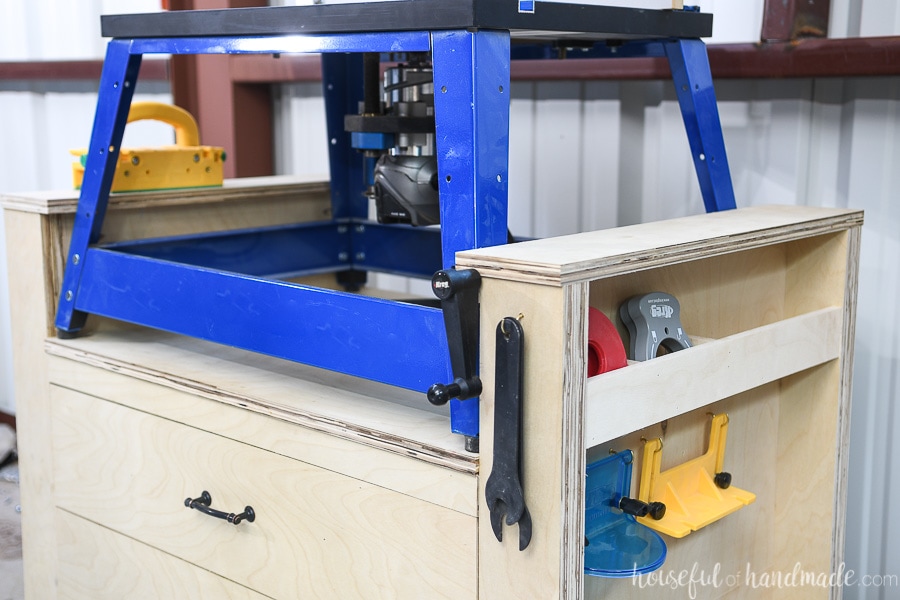
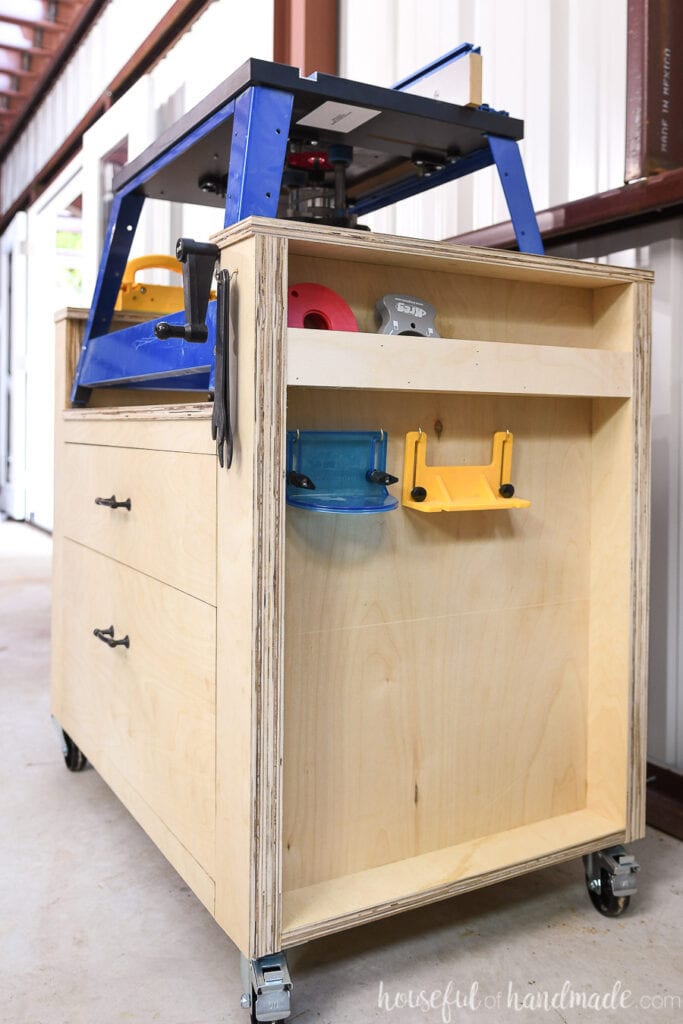
The sides are lifted up taller than the center of the table. This makes the perfect ledge to set accessories (like push blocks) that you are using but keep them off the router area.
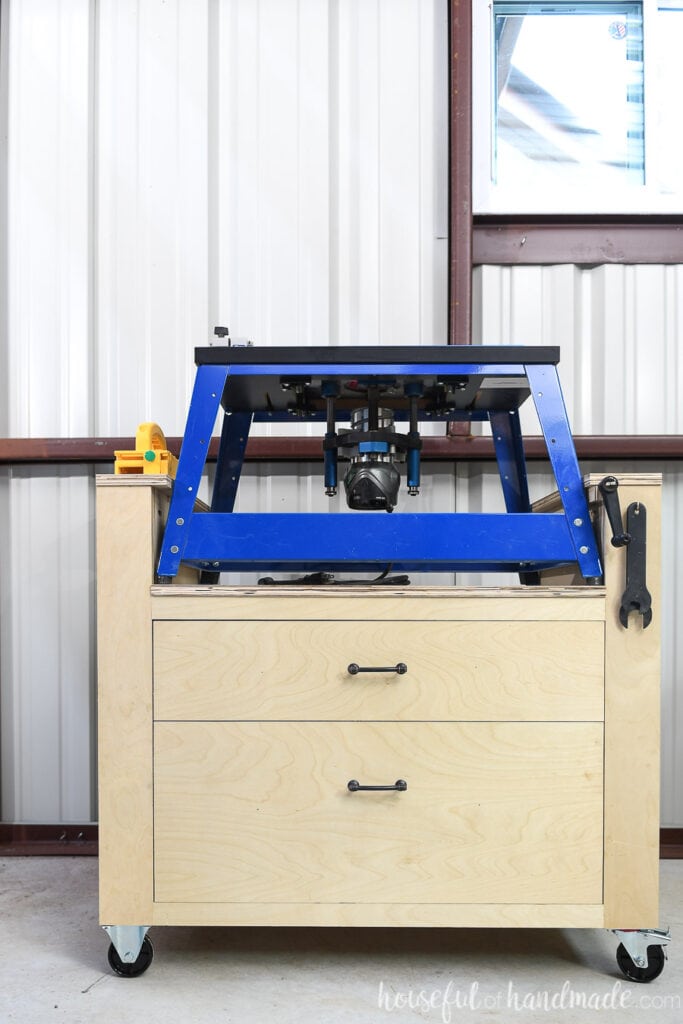
And on one side I used the ledge to also make a spot to hold the crank for my router lift. No more searching around a stuffed drawer for it!
Router Bit Storage
These taller sides also mean more space for organizing.
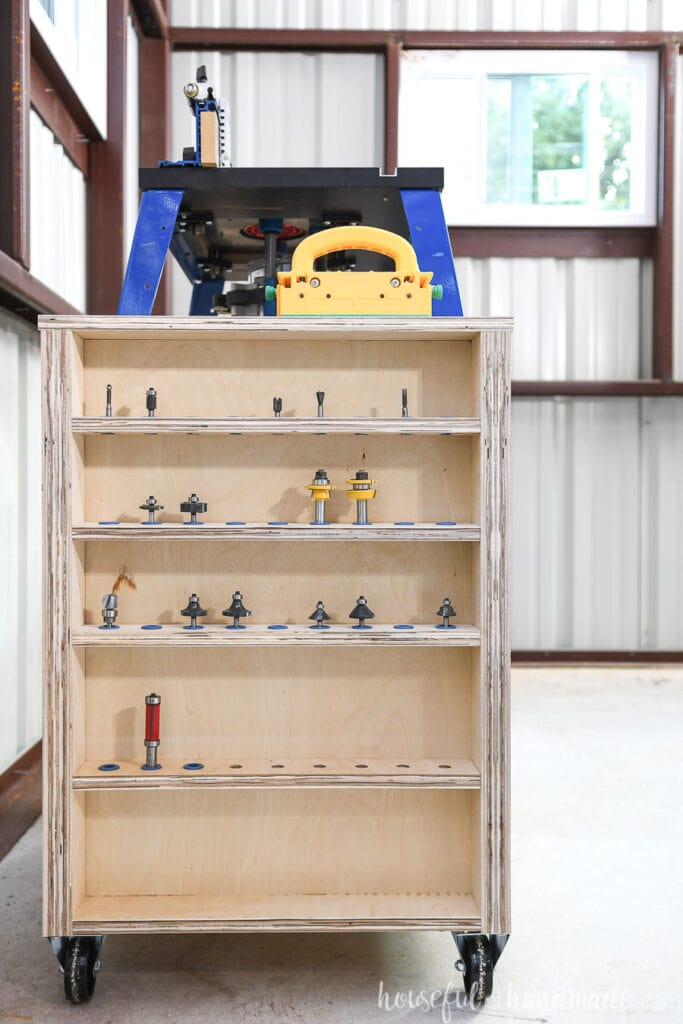
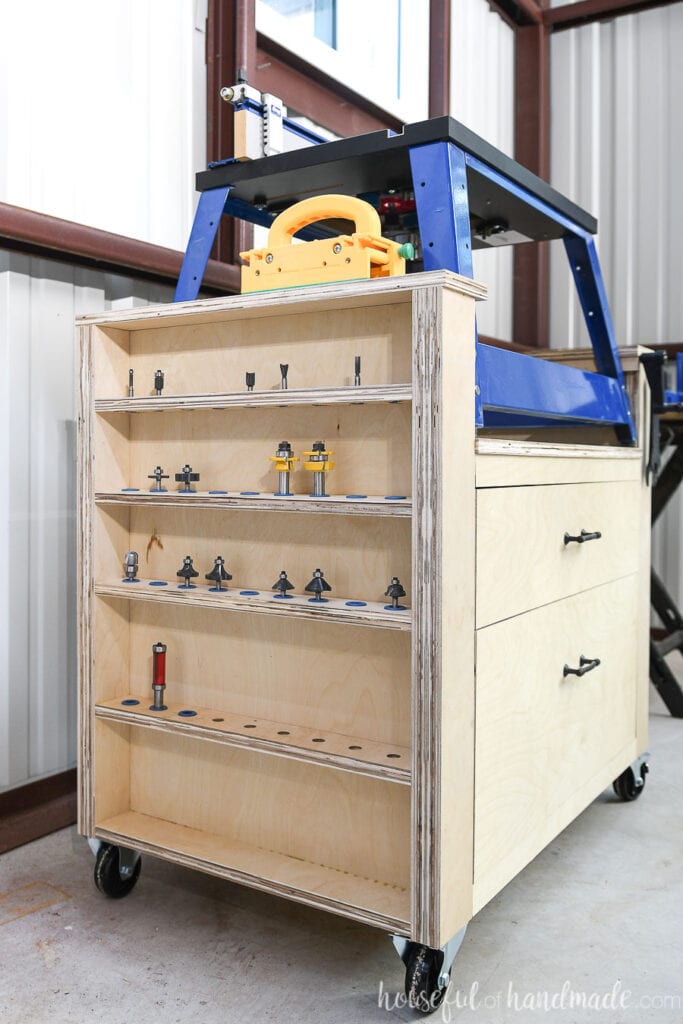
One one side I added 4 shelves that each hold 9 router bits. You could fit more, but as you can see I have plenty of room to grow into these.
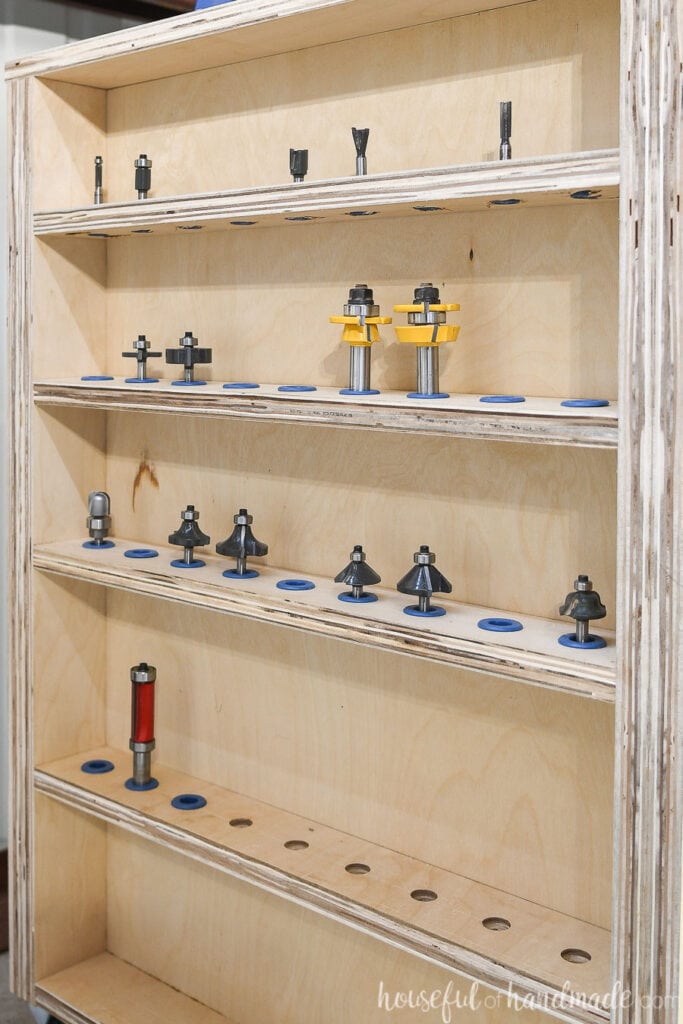
And there is a space to add a fifth shelf on the very bottom when I need it.
Plus I can even add more shelves to the side in the future because I didn’t glue in these shelves. I just attached them with a couple Kreg pocket holes & screws.
Router Accessory Storage
On the other side, I created storage for the bench top router table accessories. A shelf with a lip on the front makes the perfect storage for the reducing rings that go around the router bit.
I also added some simple cup hooks to hold wrenches and other accessories that can easily hang. And again, there is plenty of room for me to grow and add more!
Large Storage Drawers
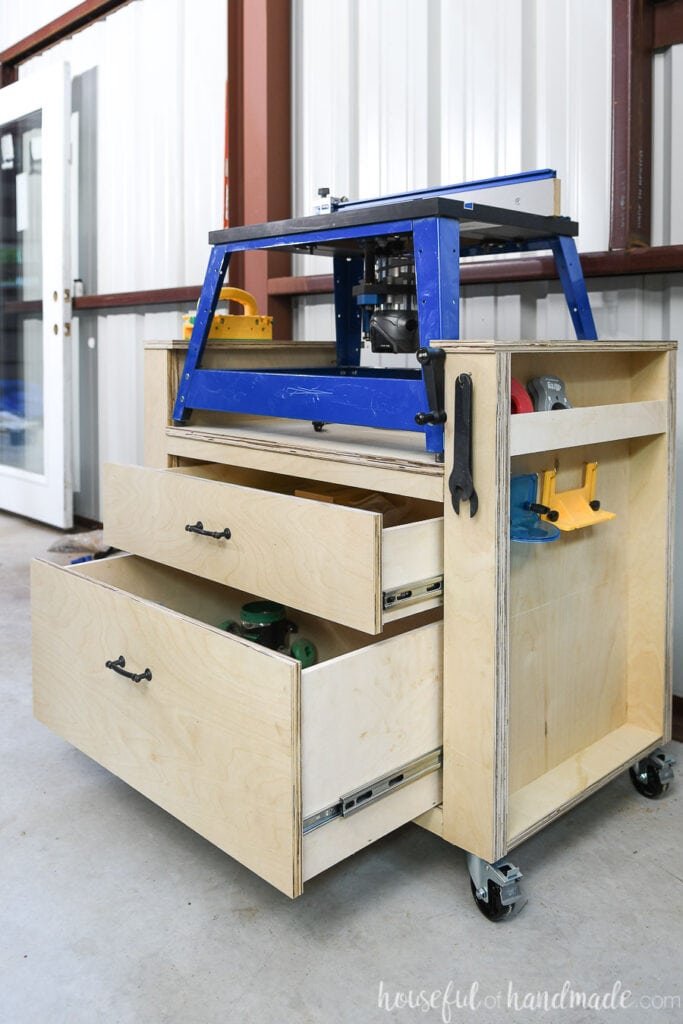
But that is not all the storage, under the router are 2 very large drawers. These drawers are so large, I think I might need to make some dividers for them.
You could always make the bottom deep drawer into 2 smaller drawers, but I wanted a large space for big accessories like the coping sled I use to build my own cabinet doors.
Learn how to build easy drawers for holding heavy items.
Plywood Construction
The bench top router table was also built to be very sturdy. After dealing with the old, wobbly table, I knew I wanted this one to be built to last.
The entire table was built from a sheet of 3/4″ plywood, with one more sheet of 1/2″ plywood needed for the drawer boxes.
To make the frame of the table extra sturdy, I created 1 1/2″ thick plywood by glueing two pieces together.
You could skip this step and use 2x lumber (I did use standard lumber sizes for these pieces). And if you have quite a bit of plywood and 2x scraps, you could possibly build it entirely from that.
But I love the industrial look of the plywood edges and the strength that the doubled-up pieces give the entire table.
Router Table Woodworking Plans
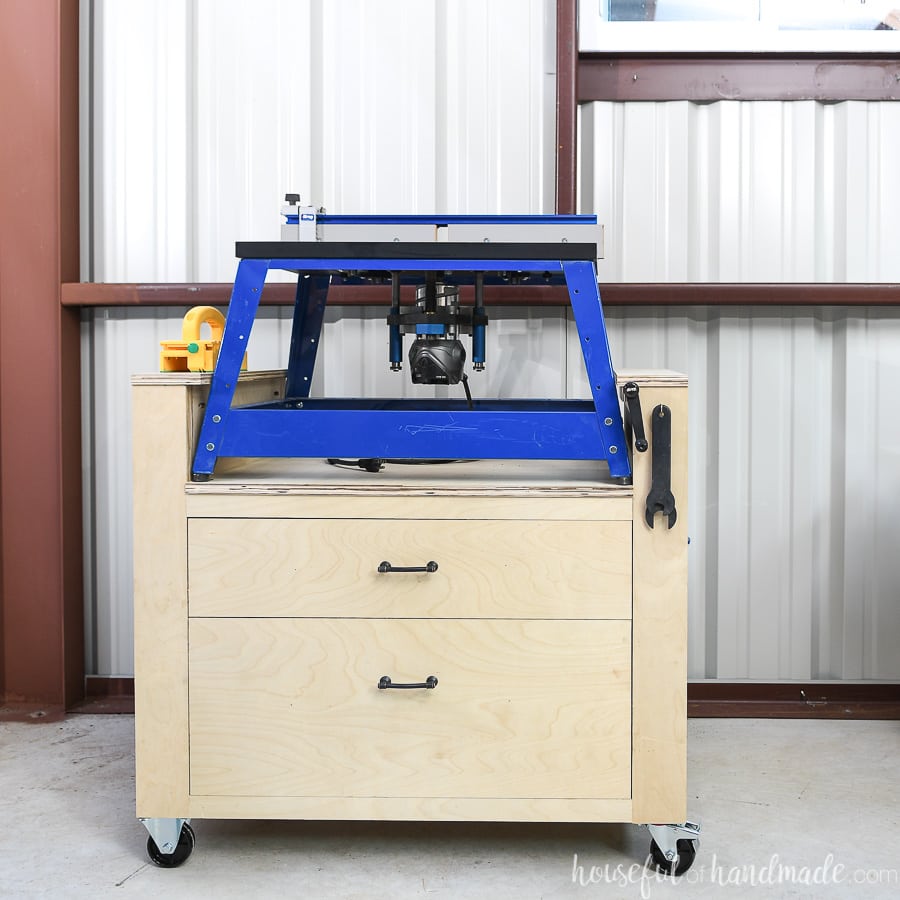
Are you ready to organize all your router stuff too? You can build your own bench top router table with the free plans over on BuildSomething.com.
Click here for the complete build plans.

Happy building!

Thank you to Kreg Tools for sponsoring this post. I only recommend products that I use and love and all opinions are 100% my own. Click here to read my full disclosure policy.
