Turn your backyard or patio into another living space with this DIY outdoor sofa.
You will love the additional square footage it will add to your house. But even more you will love how much cheaper it is to build your own outdoor furniture.
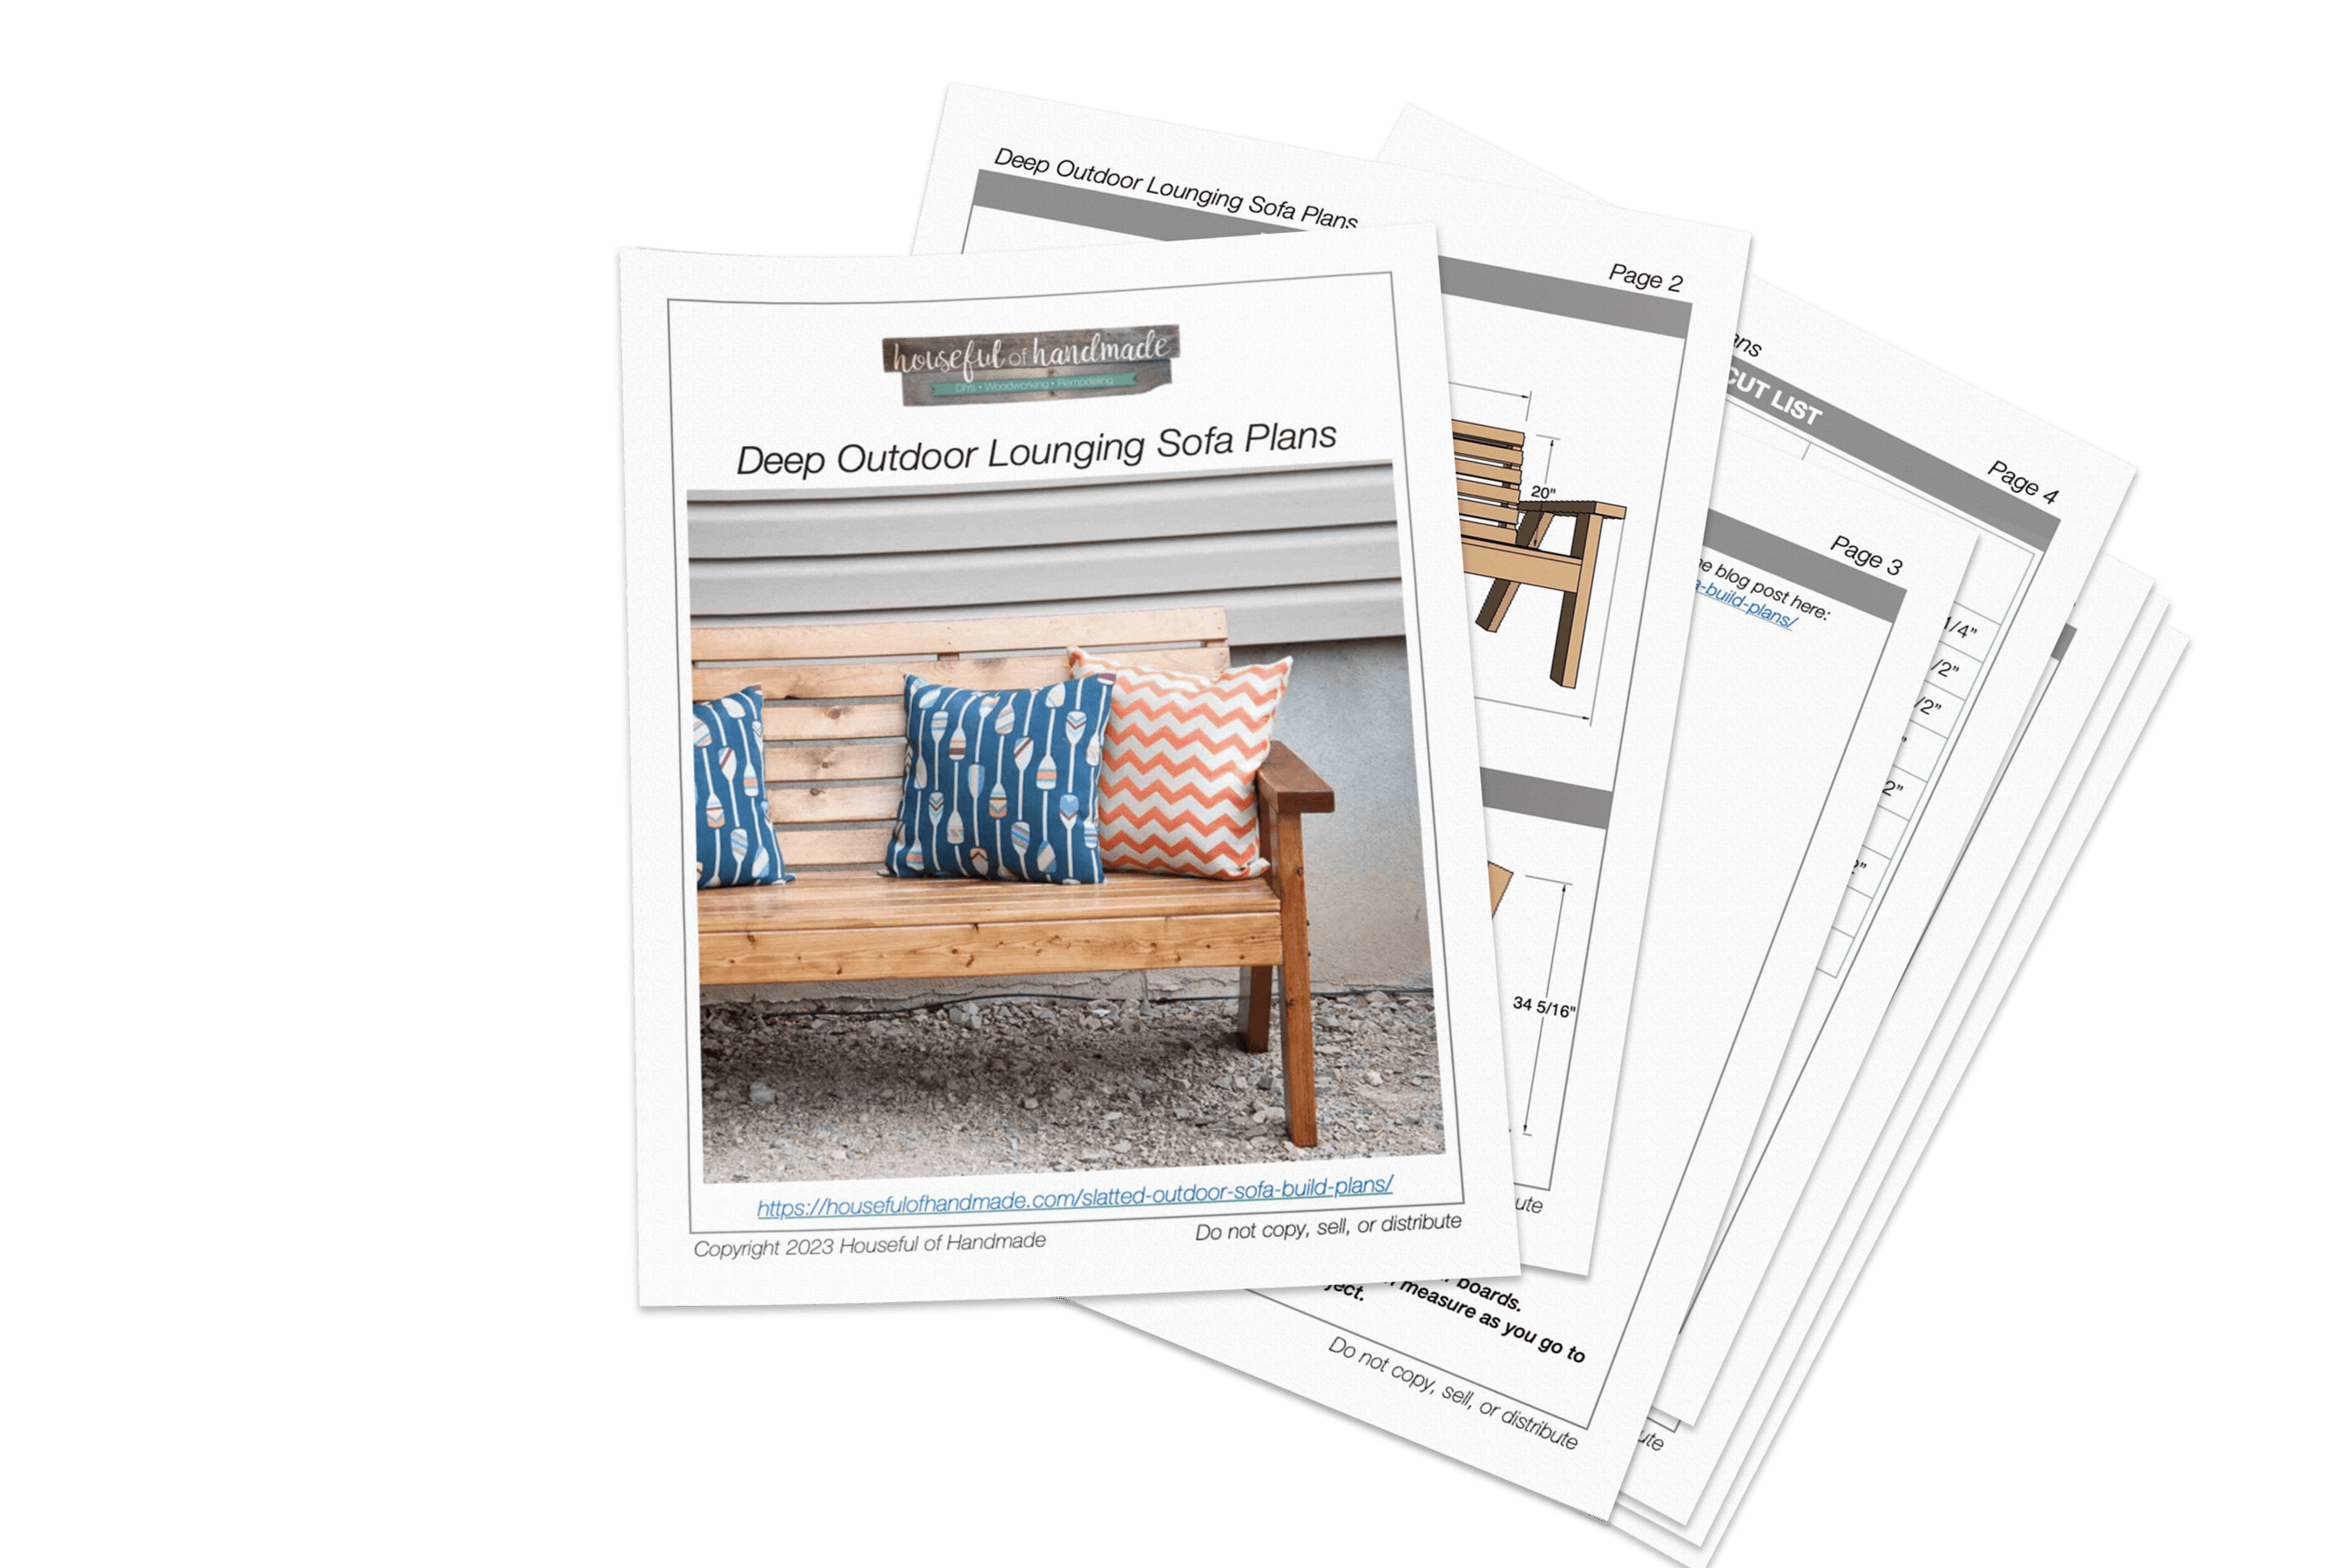
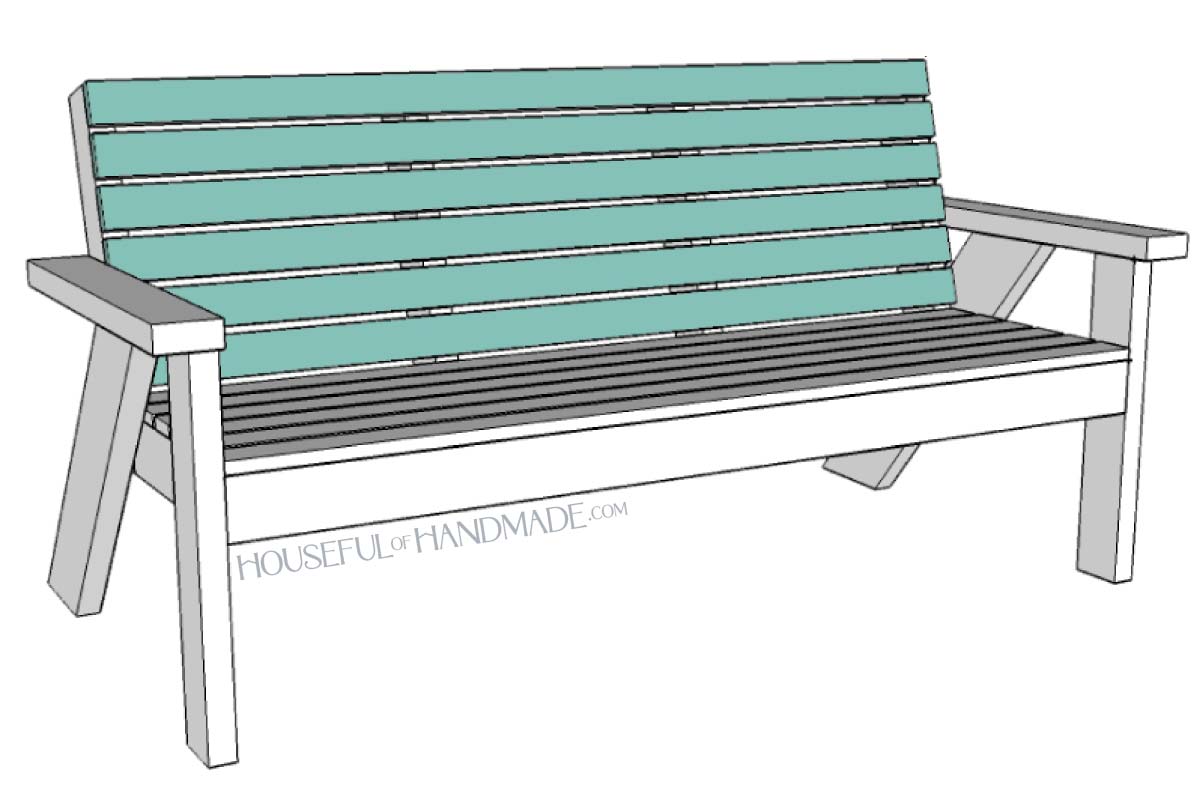
I partnered with Kreg Tools to build this slatted outdoor sofa and share the build plans for free. Or if you prefer a deeper lounging sofa, get the build plans for it here.
This post may contain affiliate links. As an Amazon Associate I earn from qualifying purchases. Click here to read my full disclosure policy.
As much as we have been working to have grown up furniture in our home, our outdoor space was seriously lacking.
We do have 2 bouncy side chairs that I bought oh so long ago. A couple years ago I recovered the cushions with some (on-sale) high end outdoor fabric and it brought them back to life.
But other than that, we had a couple old rusty folding chairs to use when company was over.
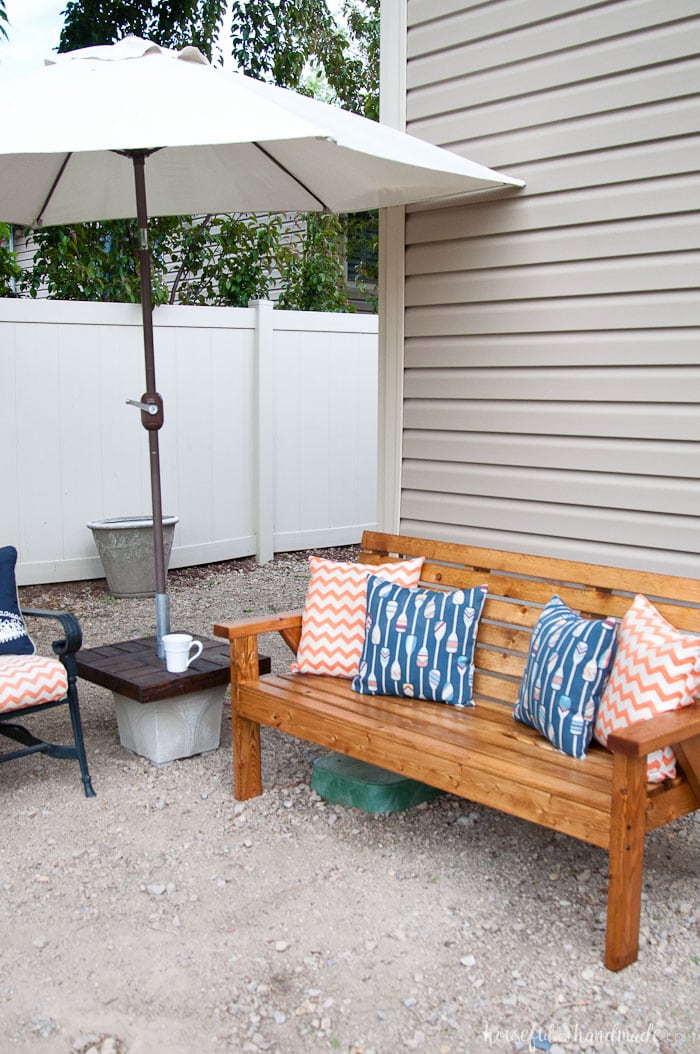
Because of our lack of outdoor seating, we didn’t have company over in the summer as much as we want to.
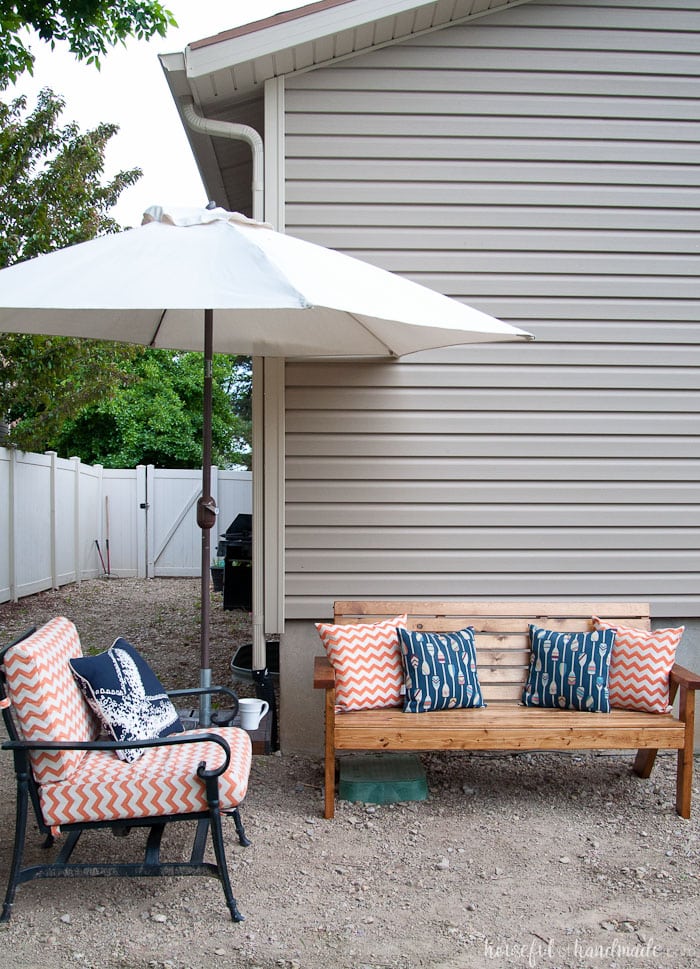
Barbecues and parties in the cool evening air are my favorite! I cannot wait to start enjoying them this summer.
We needed an outdoor sofa to help seat all our guests.
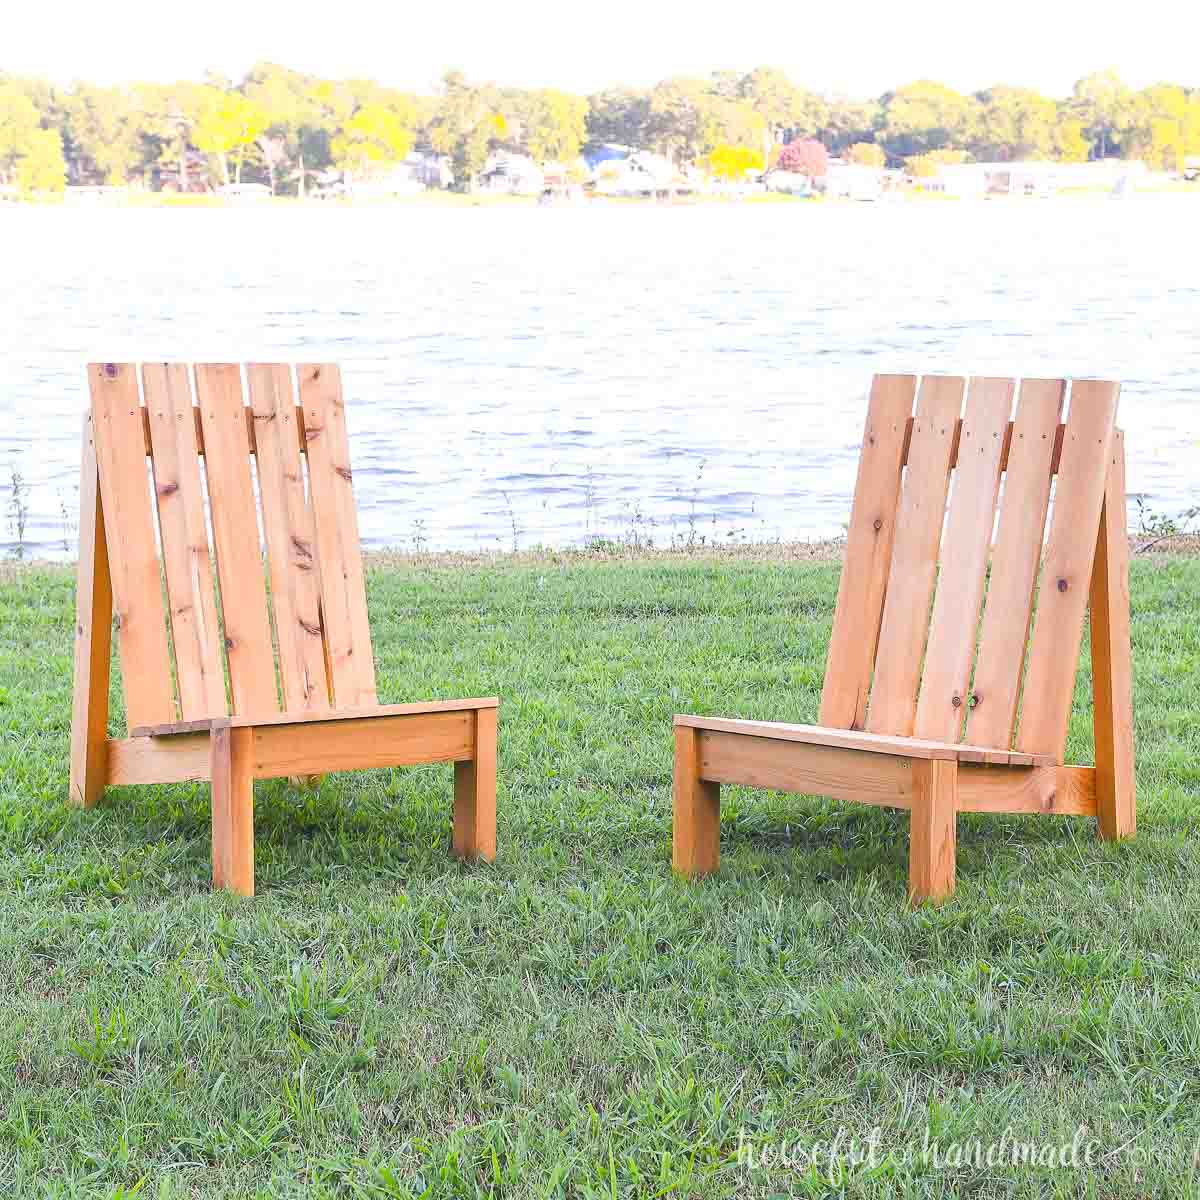
So I decided to create a line of outdoor furniture (with little kids sized chairs included) that were a fun modern take on the classic Adirondack chair.
That is how these slatted outdoor sofa build plans were born.
I took the angled back leg and made it big enough to support an entire sofa! Then added a bit of and angle to the sofa back so it was more comfortable to lounge in.
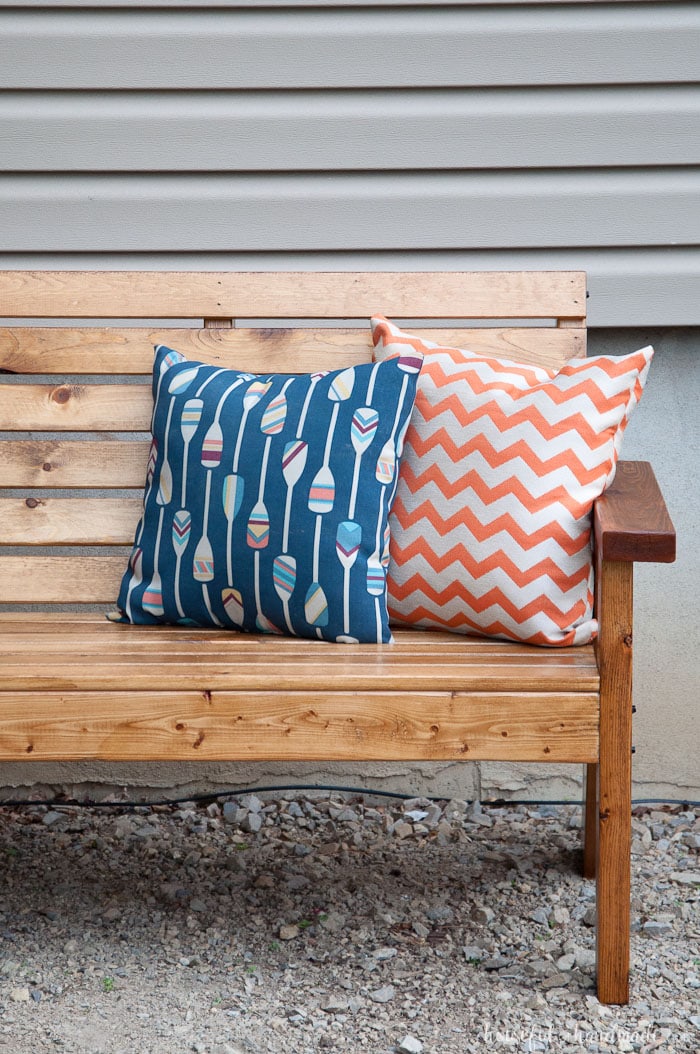
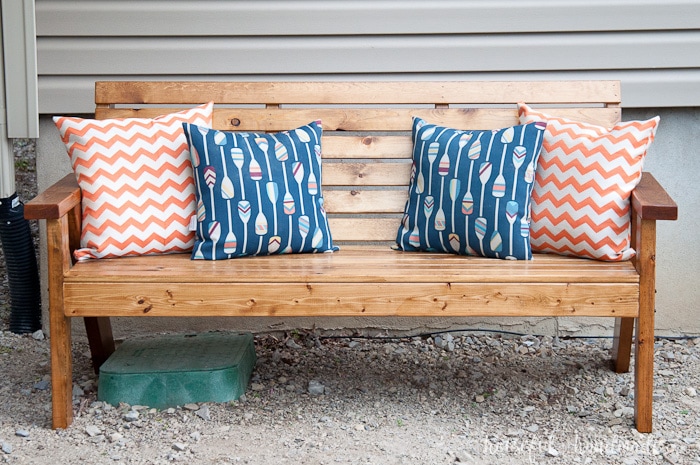
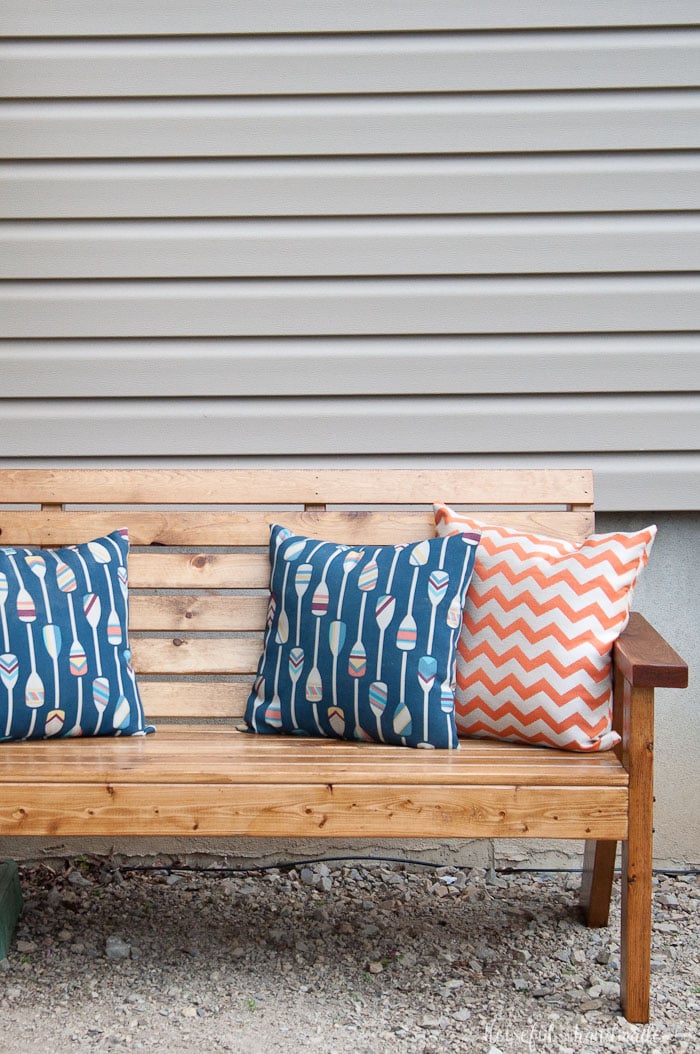
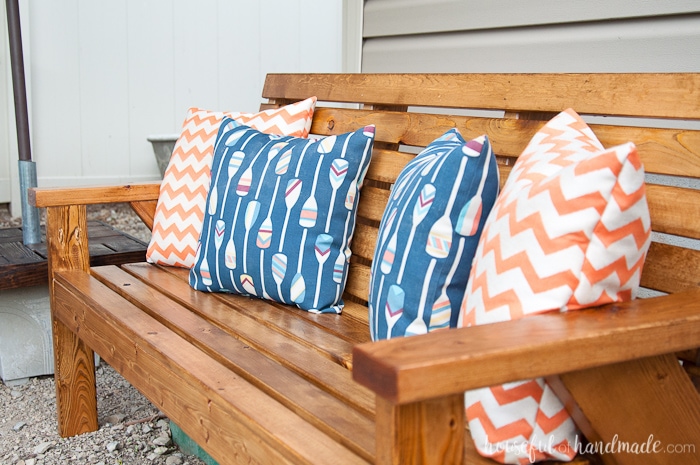
Our new outdoor sofa turned out more beautiful than I could have hoped.
The stain on the wood really added a lot of beautiful texture and brought out the grain line in this inexpensive wood.
But it looks like a much more expensive sofa than the $40 in wood it cost to make!
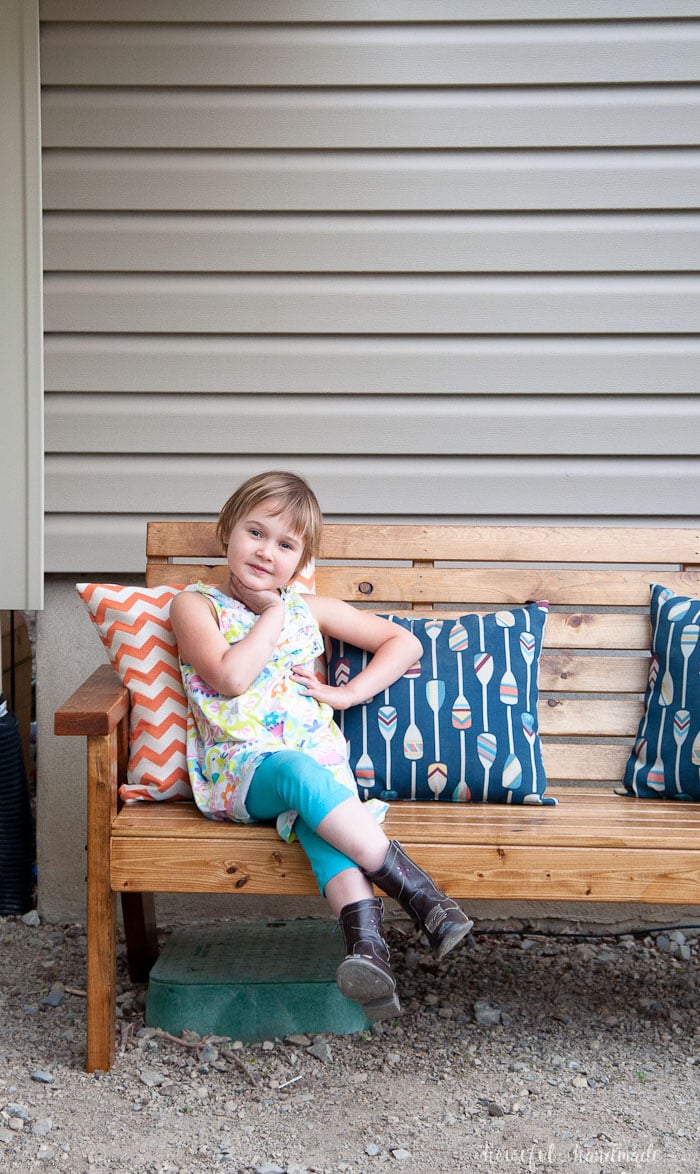
So now I am reconsidering covering up it’s beauty with cushions. For now, we will cuddle with some pillows made from extra fabric I had from when I redid the chair cushions.
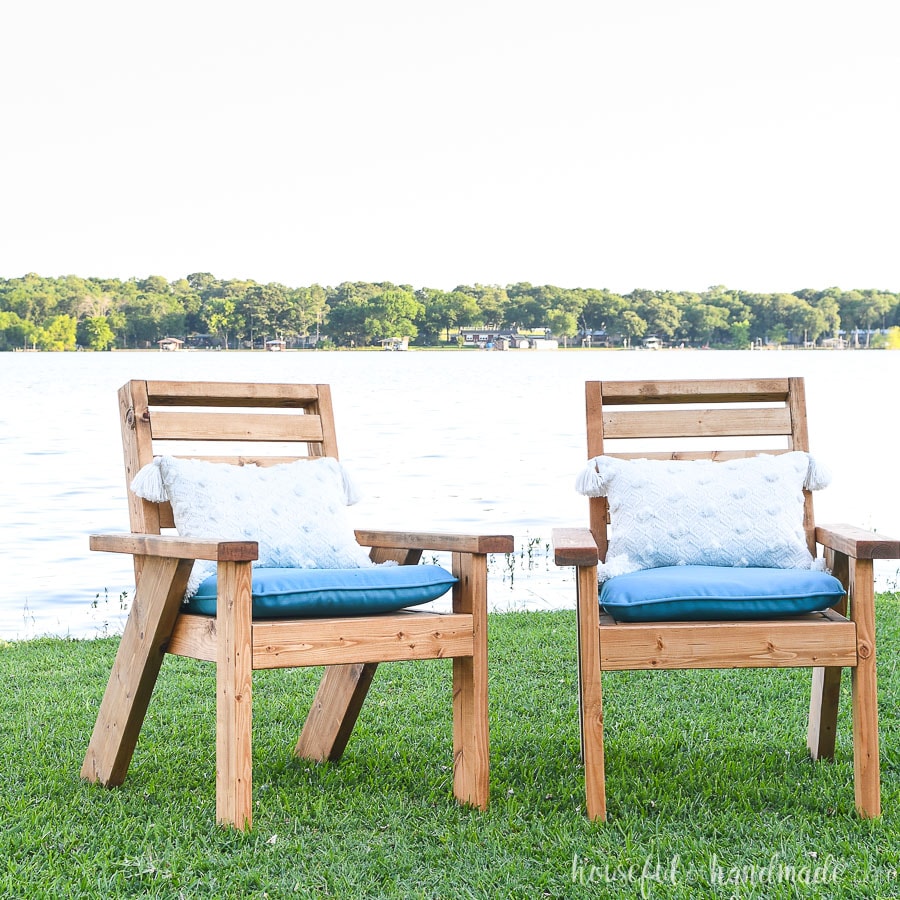
Matching Outdoor Furniture Set
If you want a complete set for you patio, I also made plans for a matching outdoor lounge chair and matching chaise lounge chair with an adjustable back.
And if you prefer a deeper outdoor sofa, perfect for lounging, get the premium PDF woodworking plans here. This deep sofa fits 3 standard 24″ x 24″ chair cushions creating the perfect place to lounge on a hot summer day.
Or grab the entire matching set of premium plans in a bundle and save! Get 30% off with the Coordinating Outdoor Furniture Set Bundle. It includes the follow PDF build plans:
- Deep Outdoor Sofa
- Outdoor Lounge Chair
- Chaise Lounge Chair


How to Build an Outdoor Sofa
Tools & Materials
Recommended Tools:
- Miter saw
- I recently upgraded to this sliding miter saw (watch for it to go on sale), but previously used this inexpensive miter saw that I love.
- Pocket hole jig
- Drill
- Impact driver (optional, but I love not having to switch bits with the drill)
- Speed square
- Brad nailer
- Sander
Supplies:
- Lumber
- (5) 2×4 boards, 8′ long
- (1) 2×6 board, 6′ long
- (12) 1×3 boards, 8′ long
- 2 1/2″ Blue-Kote Pocket Hole Screws
- 2 1/2″ TimberLOK Heavy Duty Wood Screws
- 1 1/2″ Finishing Nails
- Wood Glue
- Outdoor Stain and Sealer
Overall Dimensions
The finish sofa is 67″ wide and 32″ tall. The seat area is 60″ wide x 18″ deep.
The deep outdoor sofa is 79″ wide by 35″ tall and 38″ deep to the back of leg. The seat fits three 24″ x 24″ standard seat cushions and back fits three 24″ x 18″ standard back cushions.
Cut List
For the smaller sofa, cut the pieces according to the plans on Kregtool.com.
For the deep lounging sofa, cut the pieces according to the easy to read table in the premium PDF plans.
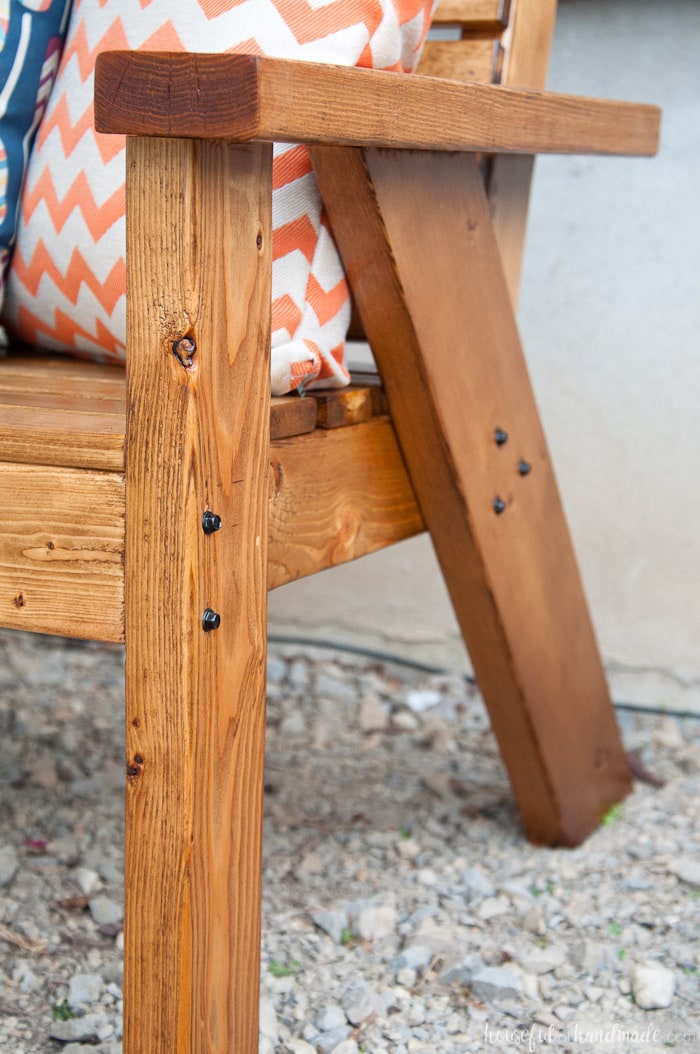
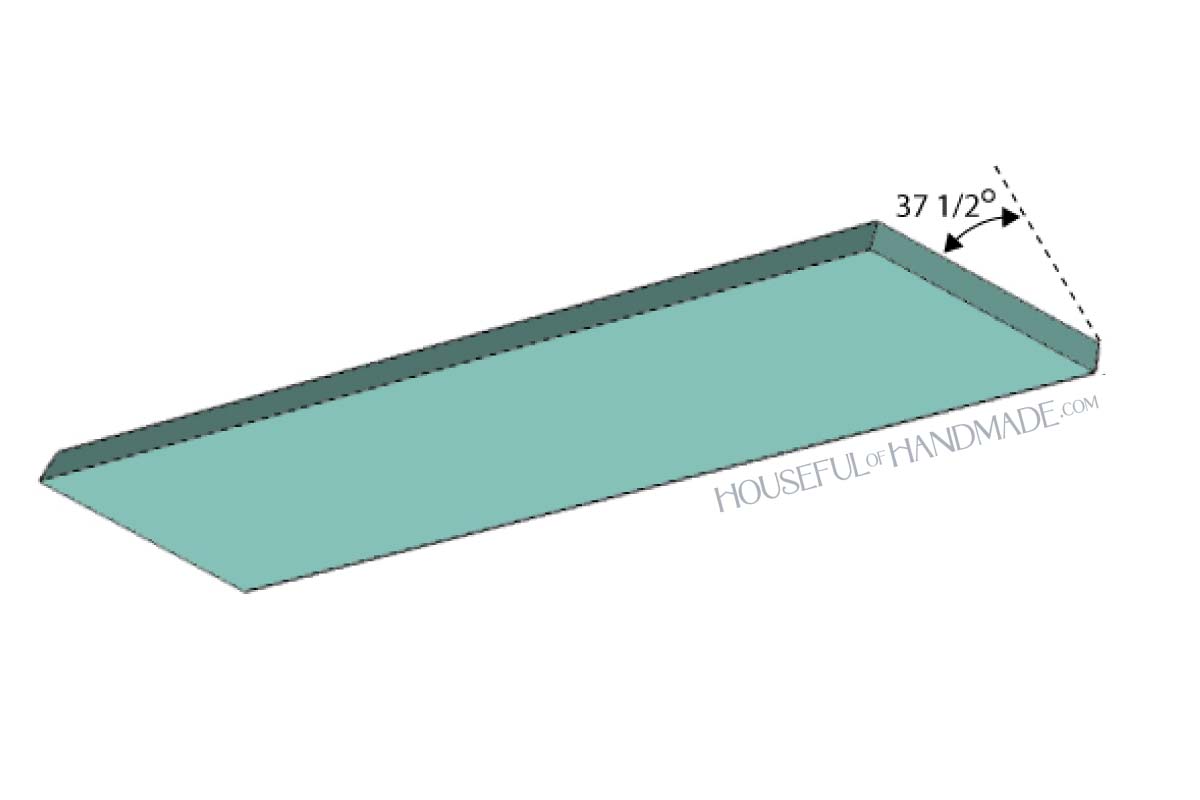
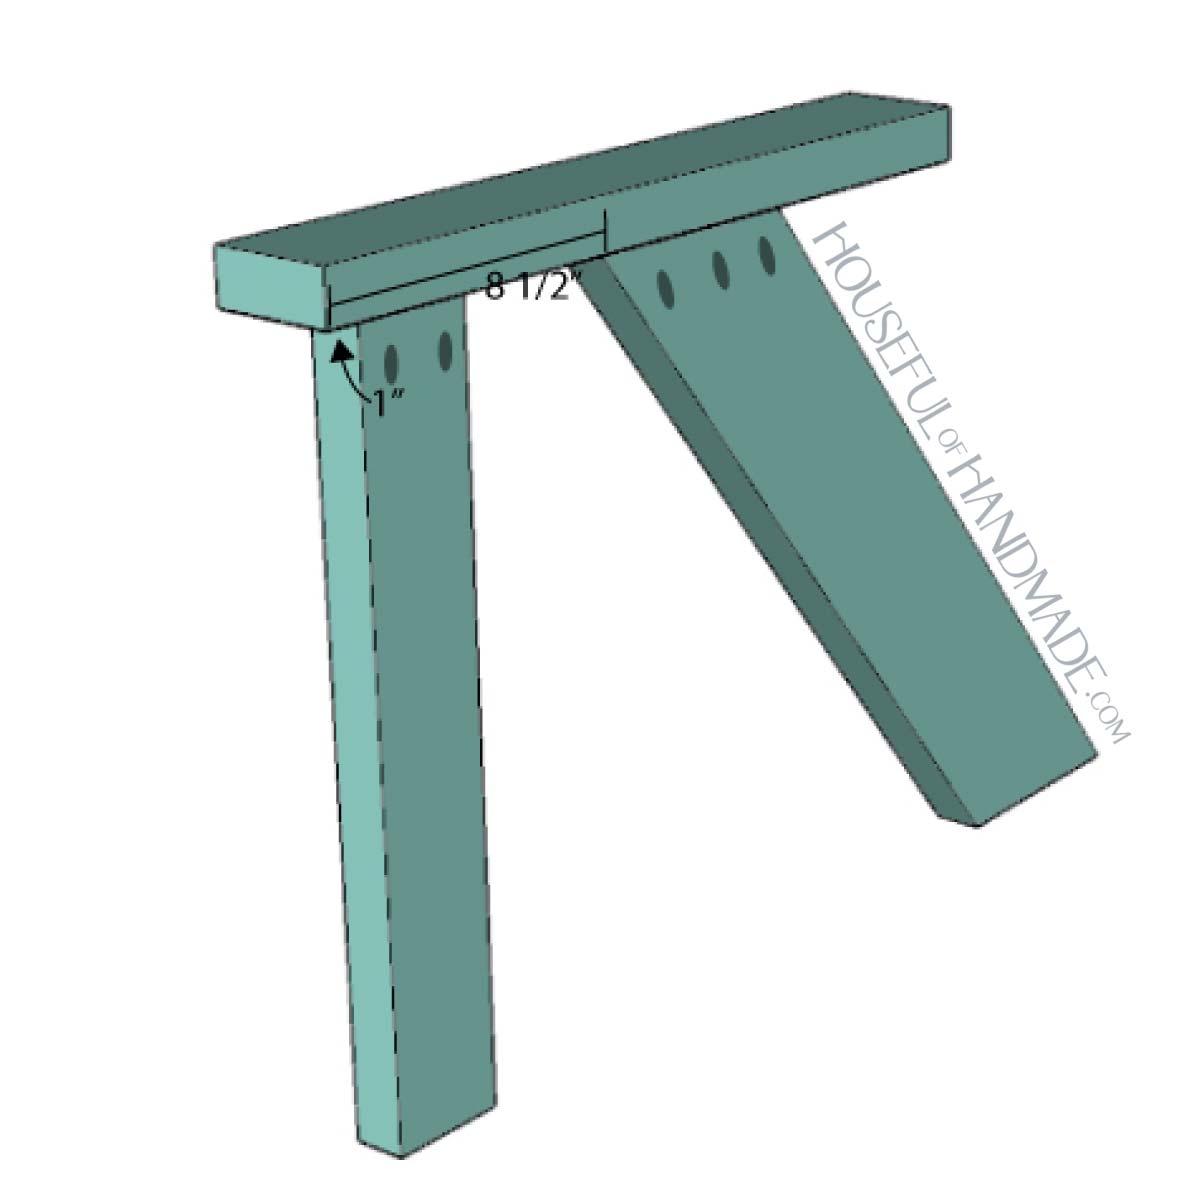
STEP 1- Build the legs
Cut both ends of the back leg pieces at a 37 1/2 degree angle in the same direction.
Drill 3 pocket holes set for 1 1/2″ thick material on the inside top of each board.
Add 2 pocket holes on the top of the front leg boards.
Attach the front leg to the arm board with 2 1/2″ pocket hole screws. The front leg should be 1″ in from the front of the arm and flush with the inside of the arm.
Attach the back leg board 8 1/2″ in from the front of the arm and flush with the inside of the arm.
Repeat for the other side, making sure the arms are mirrored.
STEP 2- Build the seat
Drill 2 pocket holes set for 1 1/2″ thick material in each end of the seat frame boards.
Attach two shorter boards between the longer boards creating a rectangle.
Then attach the remaining two shorter boards inside the rectangle so they are equally spaced with 18″ between all boards.
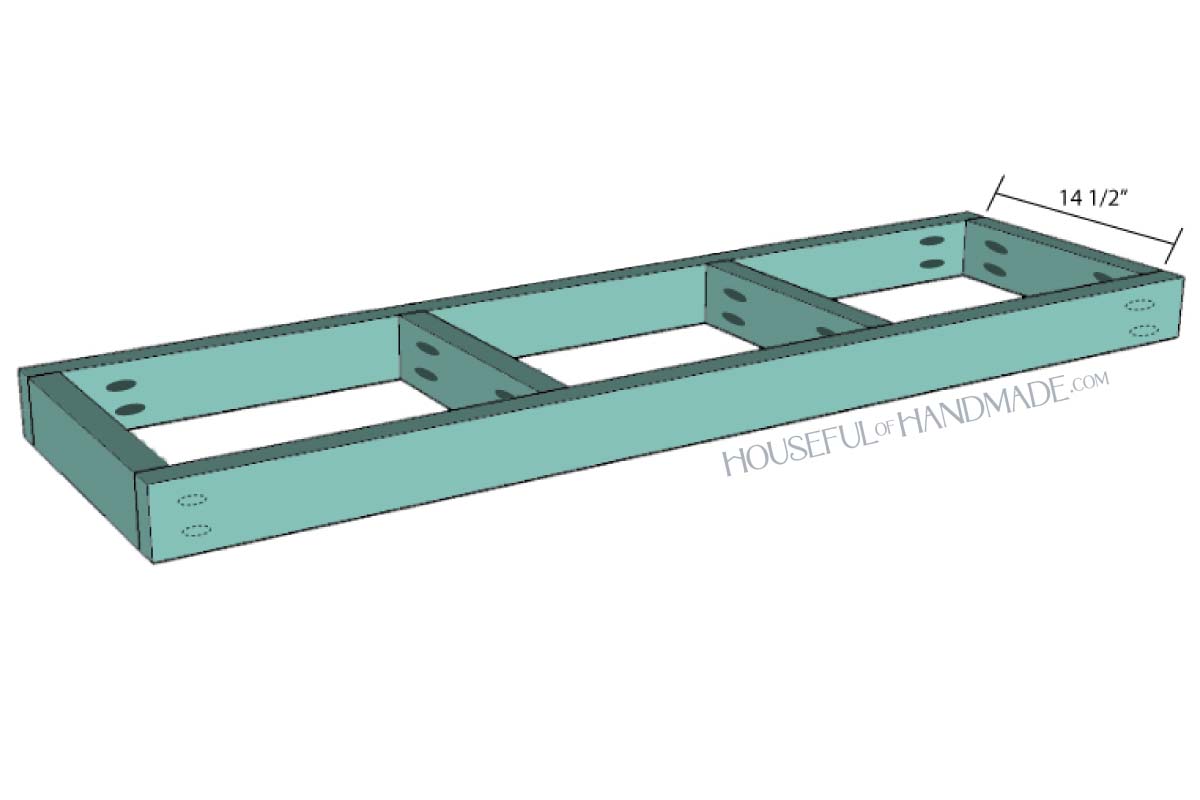
Attach the seat frame to the sides with pocket holes previously drilled in the ends of the long seat frame boards.
The top of the seat frame should be 15″ up from the bottom of the legs.
Additionally secure the seat with 2 heavy duty wood screws from the outside of the leg into the seat frame boards (in the front and the back of the seat frame).

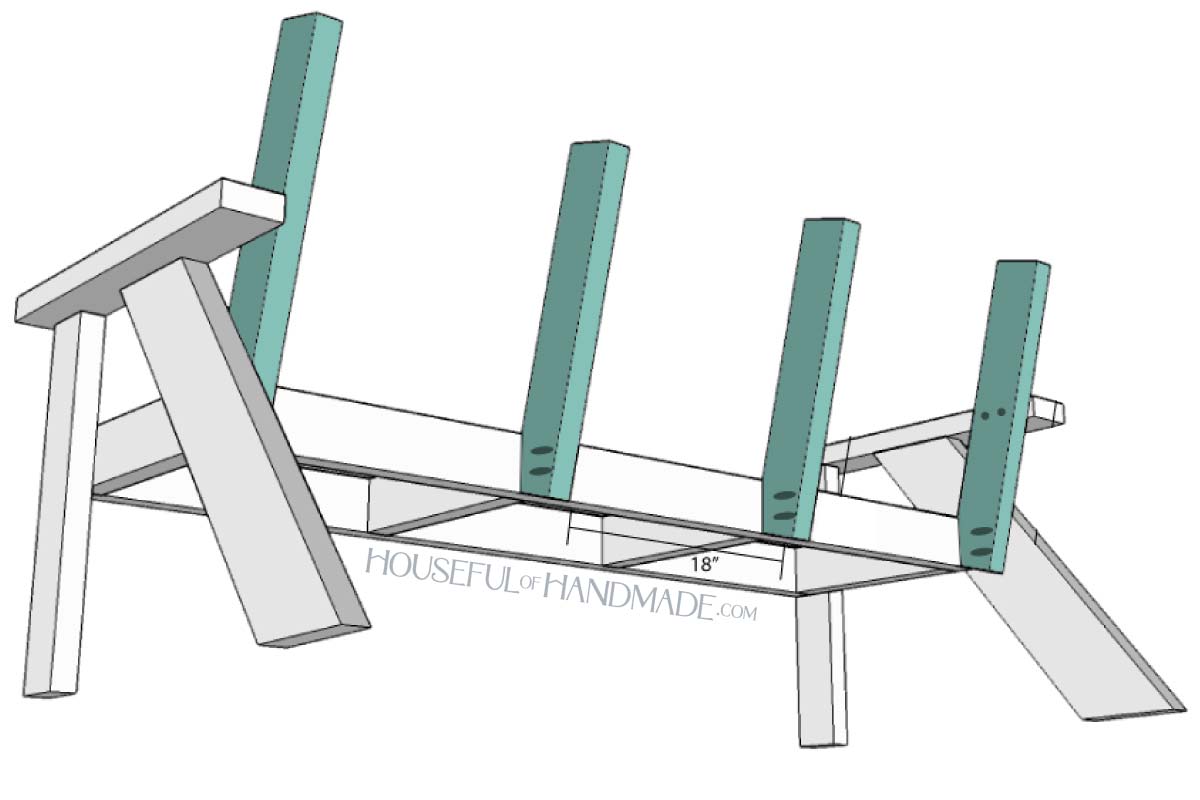
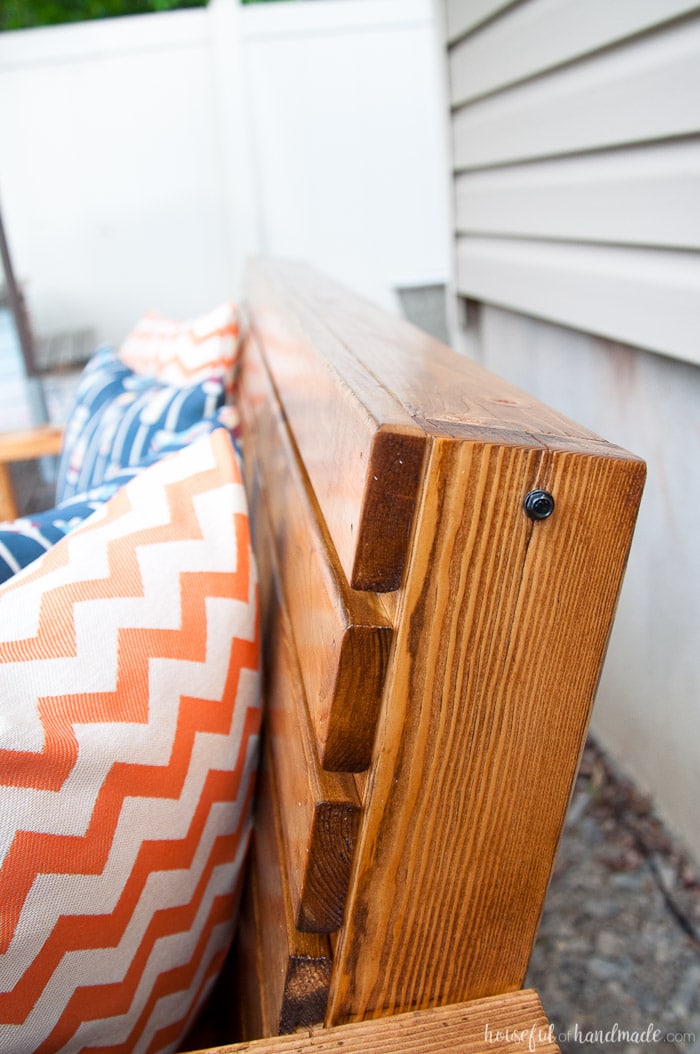
STEP 3- Build the back
Cut the angle into the back frame boards according to the plans.
Add pocket holes to the flat edge on the front and to the top of the boards.
Secure the longer boards to each side of the seat frame and secure the shorter boards to the back of the seat frame lined up with the center seat supports.
Add a heavy duty screw through the outside of the back leg into the outer back frame board.
Add two 2 1/2″ pocket hole screws through the inside of the back support frame boards into the arm rest (no pocket holes needed).
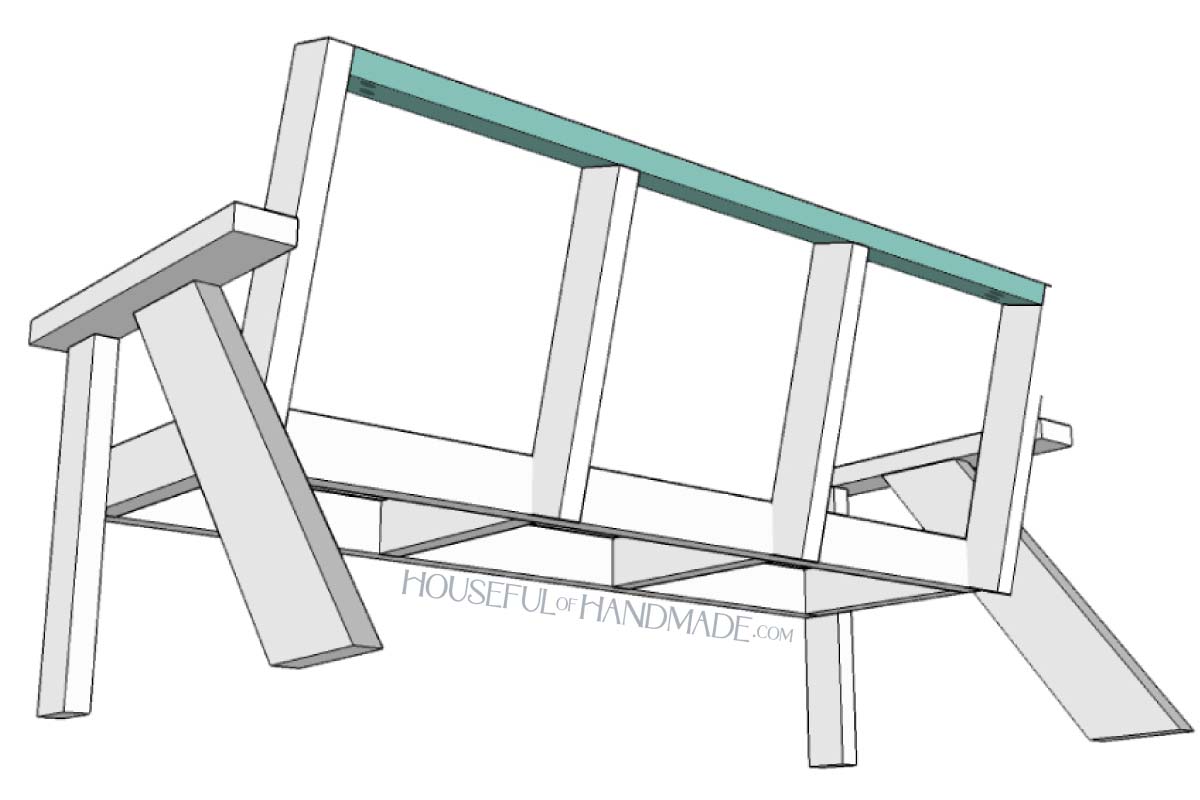
Add pocket holes to each end of the back frame top board.
Attach it to the top of the back frame support boards so it is flush with the top of the side boards and sits on top of the center boards. Secure with pocket hole screws in the holes in the center frame support boards.
Add heavy duty screw to the outside back frame boards into the back frame top.
STEP 4- Add seat slats
Add the 1×3 seat slats to the seat frame so they are flush with the edges of the seat frame and 1/2″ gap between boards.
Secure with wood glue and finishing nails.
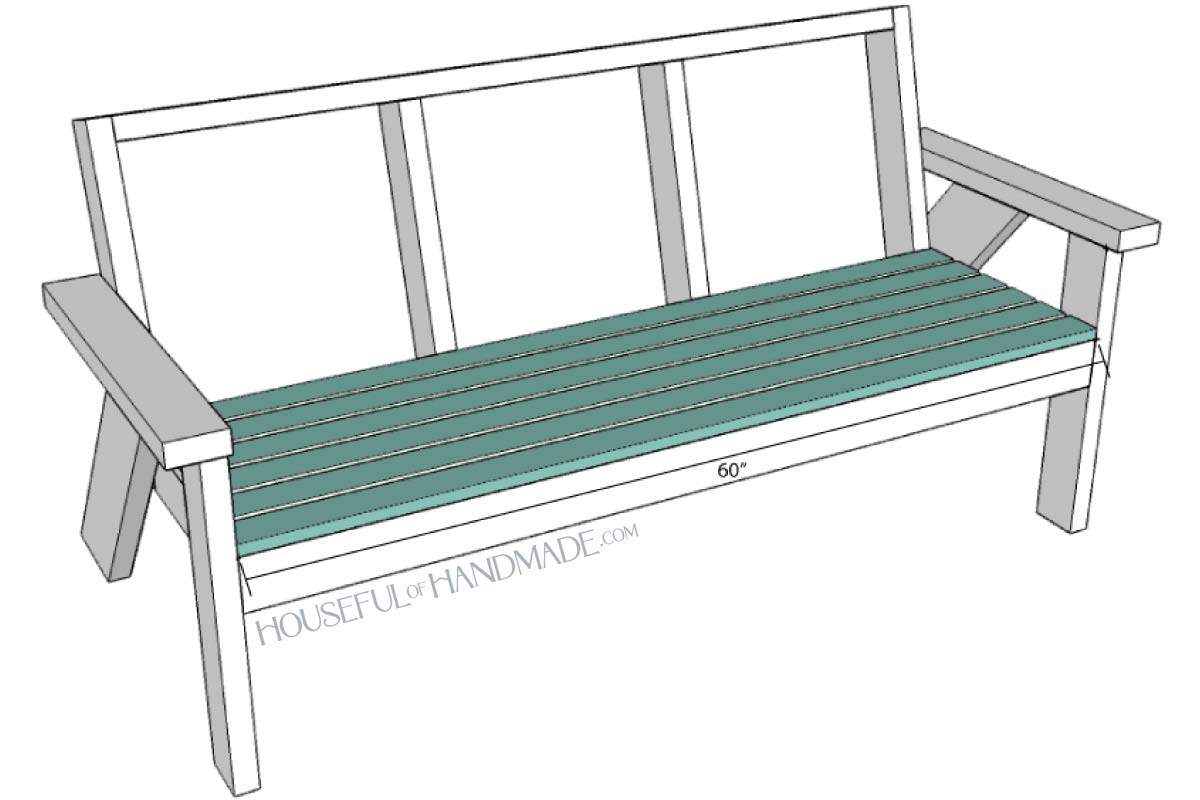
Then add the back slats to the back frame so they are flush with the edges of the seat frame and 1/2″ gap between boards.
Secure with wood glue and finishing nails.
STEP 5- Finish
Sand and stain the wood. Then seal it with an outdoor wood sealer to protect it from the elements.
I made sure to seal the entire sofa with 2 coats of an outdoor sparurethane. It is made to protect against UV and the weather.
This is the same outdoor sealer I used on the Pirate treasure chest I made 5 years ago and it still looks amazing.
You did it!
Premium plans include:
- Recommended Tools
- Shopping list
- Easy to read cut list table
- Cut diagrams
- Step-by-step instructions with 3D renderings
- Helpful resources
- BONUS: 3D SketchUp file
I'm happy to know our slatted outdoor sofa will last many years without me having to bring it in the garage through the winter.
Happy building!

This post is sponsored by Kreg Tools and their DIY project plan site BuildSomething. I only recommend products that I use and love and all opinions are 100% my own. Click here to read my full disclosure policy.