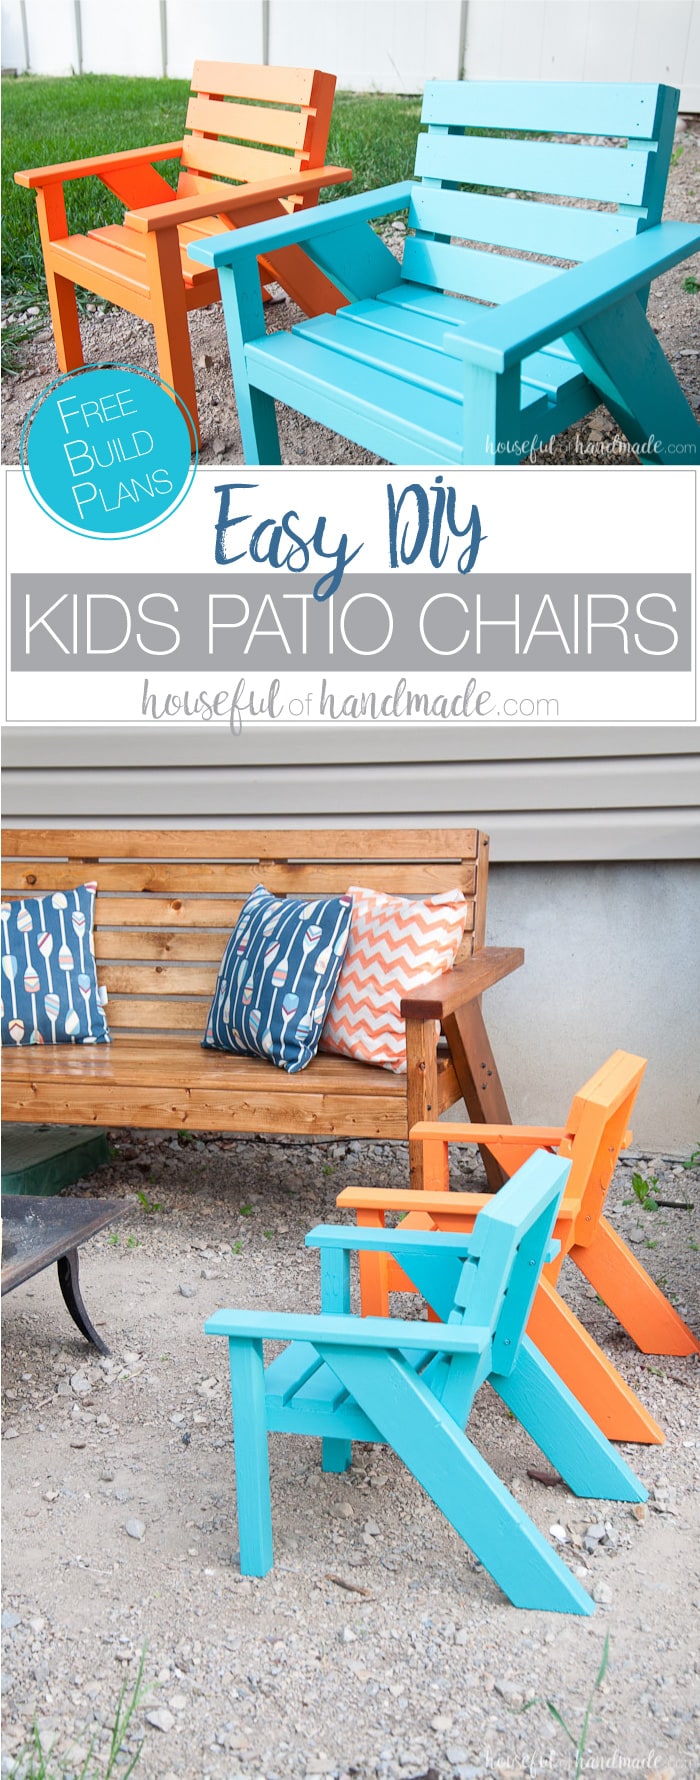
It officially feels like summer at our house. And now that we are spending most of our time outside, we needed a bit more seating for our patio.
Since we are loving our outdoor sofa, I decided to make some kids chairs to match. So I partnered with Kreg Jig and their new project plan site BuildSomething to bring you the free build plan for these easy DIY kids patio chairs.
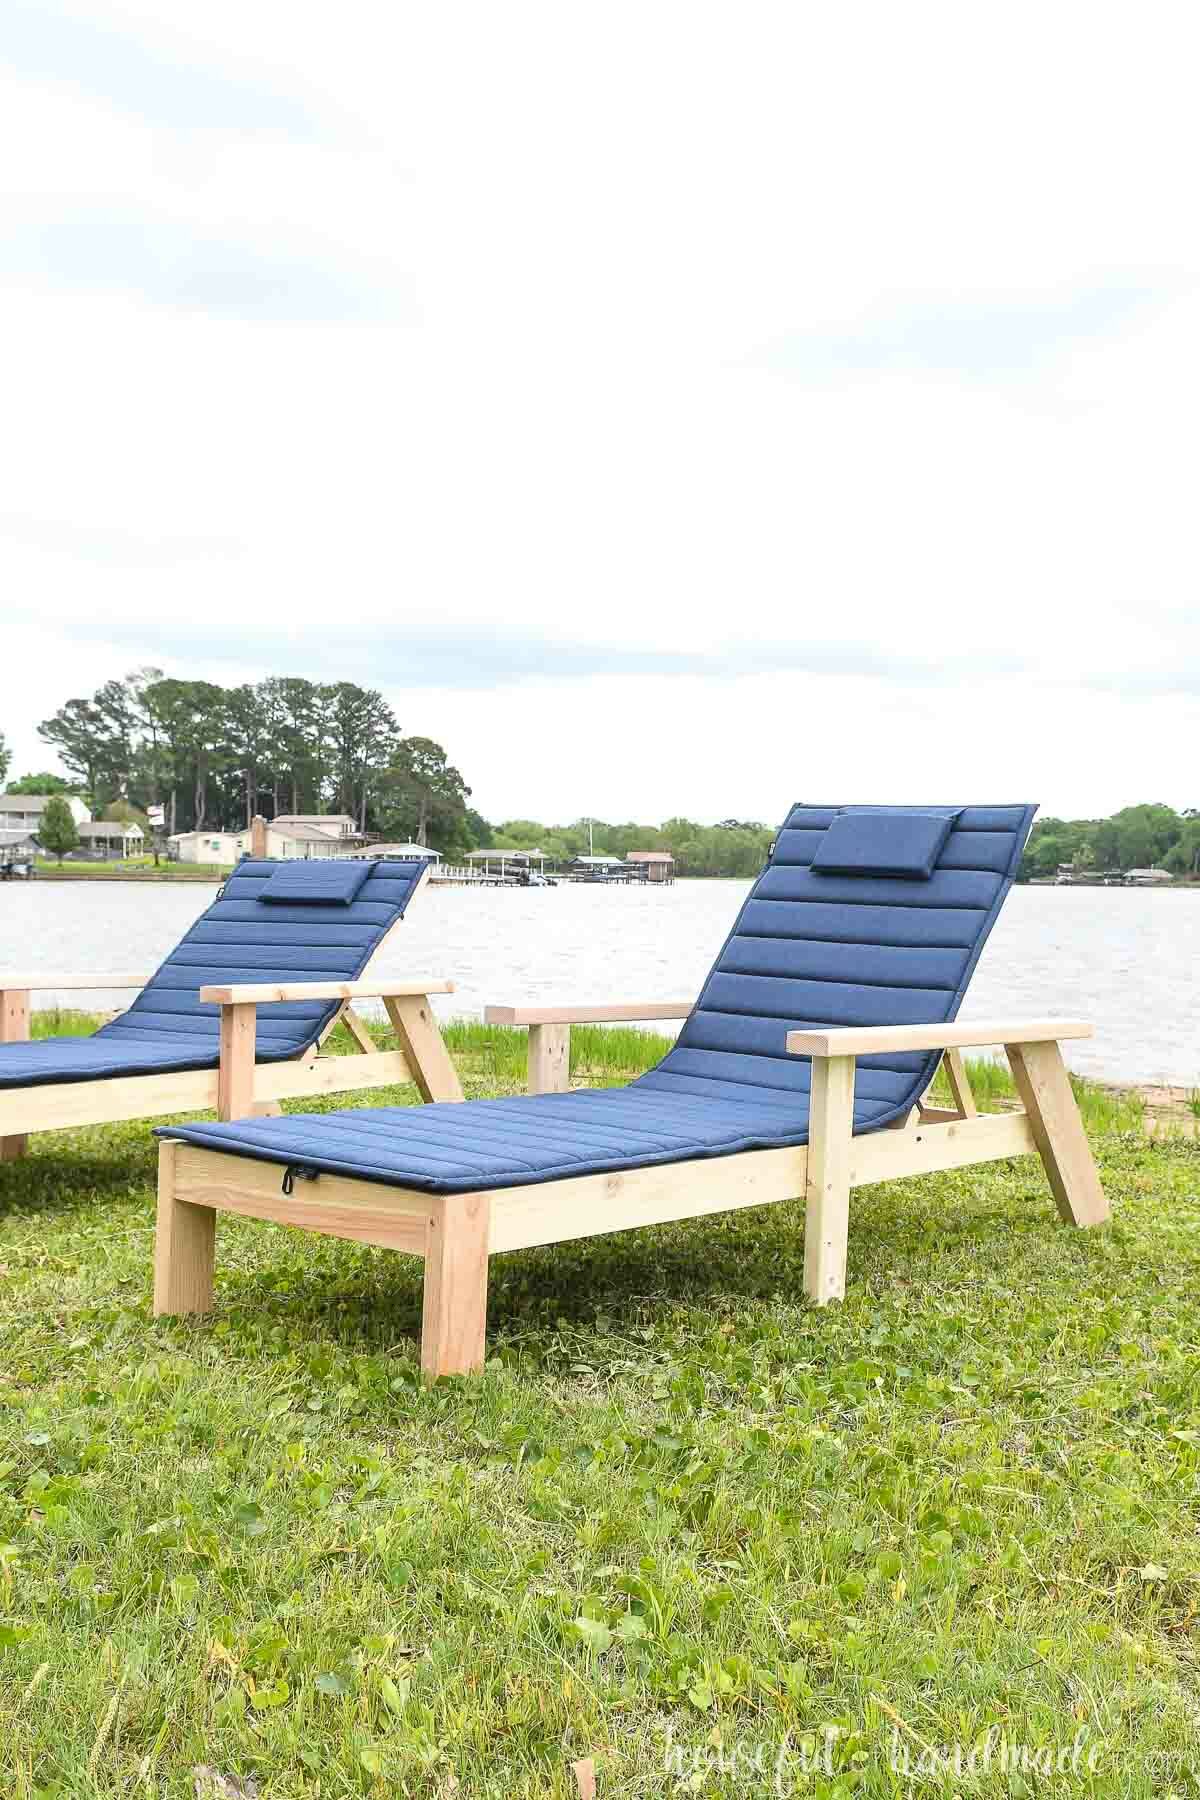
Then to round out all the seating, I also created these matching outdoor chairs for adults and these outdoor chaise lounge chairs. And now we have the plenty of seating for lazy days in the backyard!
This post may contain affiliate links. As an Amazon Associate I earn from qualifying purchases. Click here to read my full disclosure policy.
Now that the living room and stairway are “mostly” finished, I am focusing my attention on our backyard. We have been living with a make-shift patio for about 6 years now. We had the area leveled and some road-base played down to keep it from being just mud.
It’s been working okay, but I am dying for a real patio. However, I am not letting my lack of patio keep me from making the backyard of my dreams.
The kids love spending every waking moment outside. I love that they are not wasting away their summer watching TV or playing video games.
And whenever I have a break, I love to relax outside and watch them play. We have been enjoying our new sofa, but still needed more seating.
About 6 years ago I made 6 little Adirondack chairs and painted them to look like a rainbow. My mom confiscated 3 of them (she keeps insisting I just left them, but I remember her threatening bad things if I took them).
We had 3 of them at our house, and they were left out in the elements all year long. This spring, they were just falling apart and I decided it was time to make new ones.
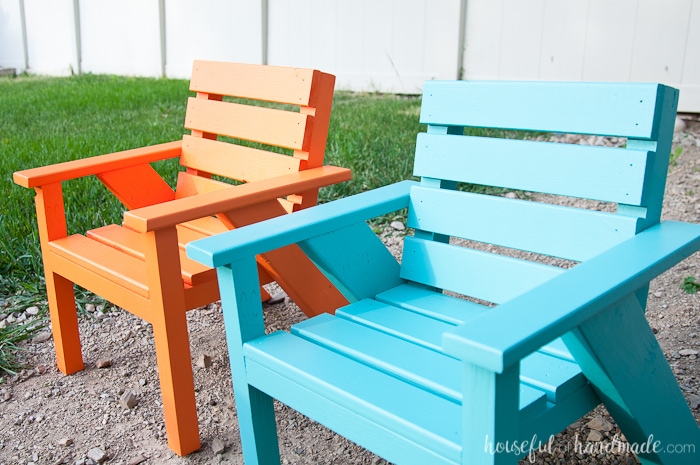
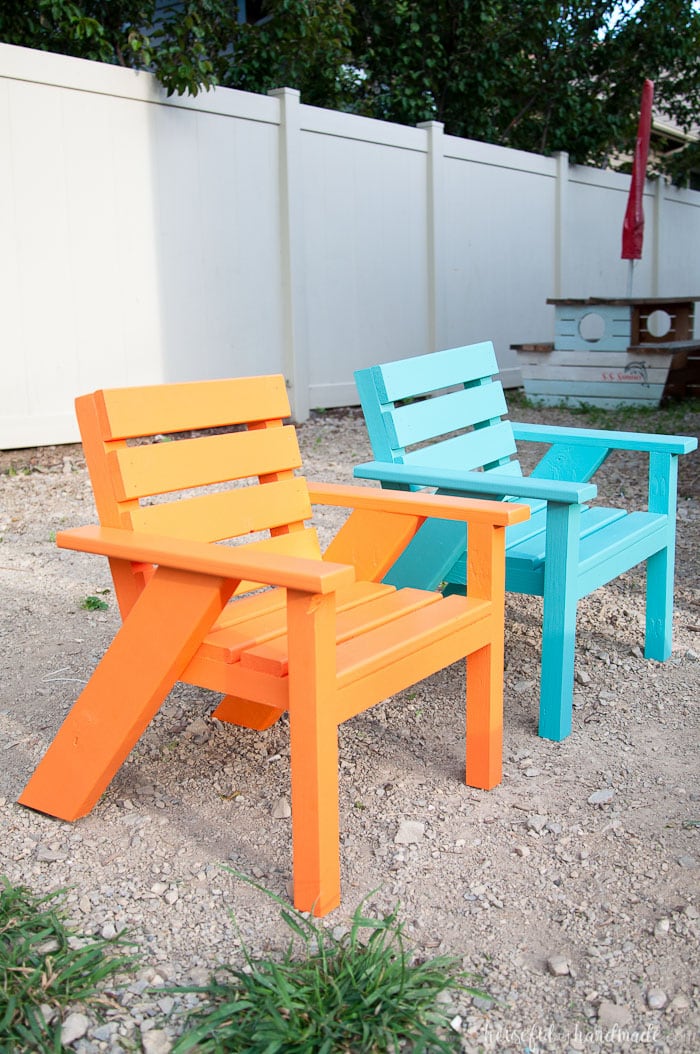
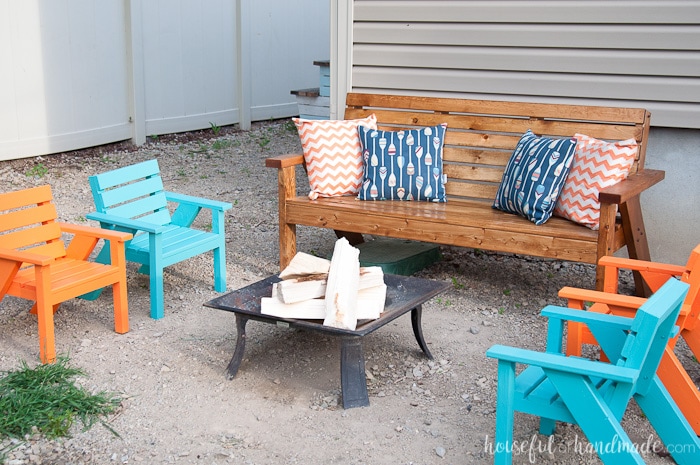
I decided to make 4 chairs, even though we only have 2 kids, because 3 were never enough. It’s so nice having extra little seats whenever we have friends over (and most of our friends also have 2 kiddos).
These easy DIY kids patio chairs were also made a little bigger to accommodate my growing children. I can actually fit in the chairs (surprisingly), but they are a little short to be comfortable for too long.
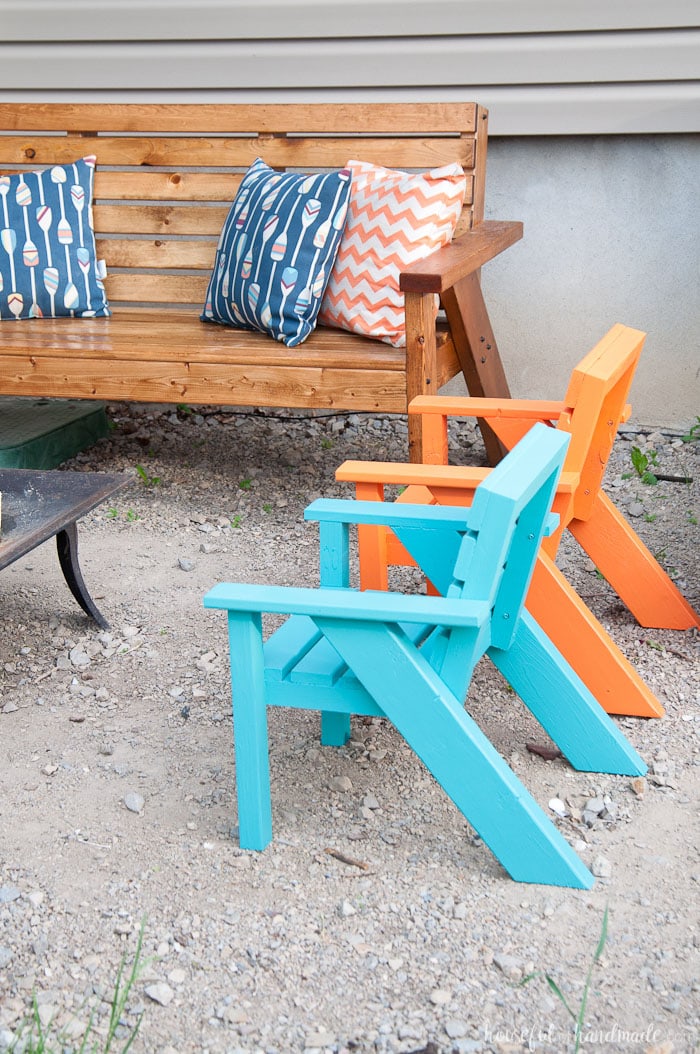
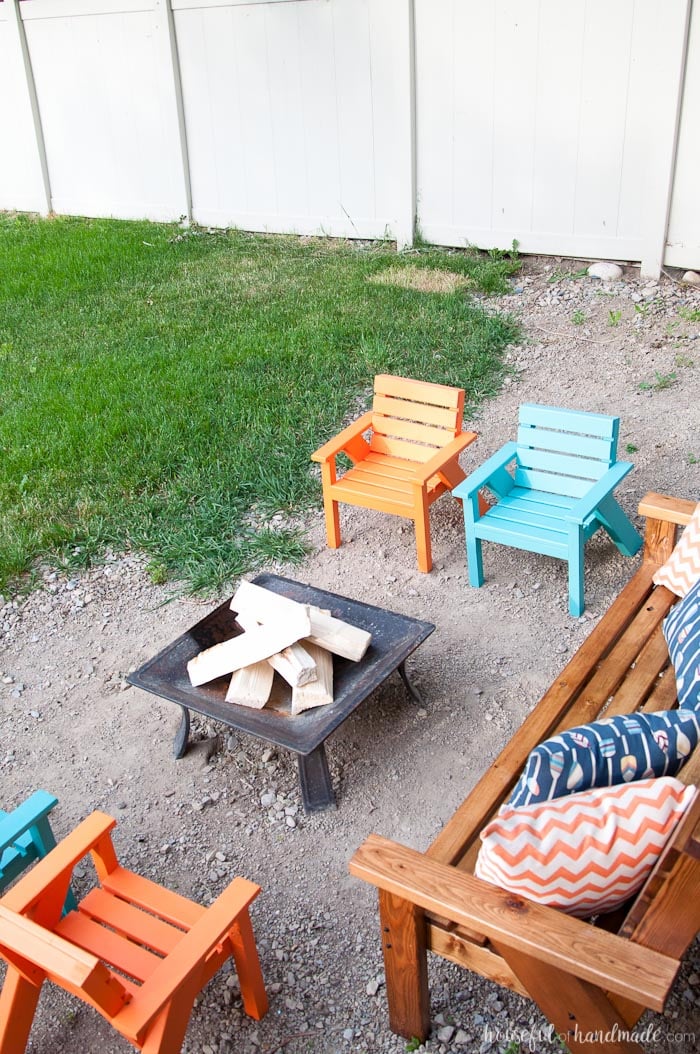
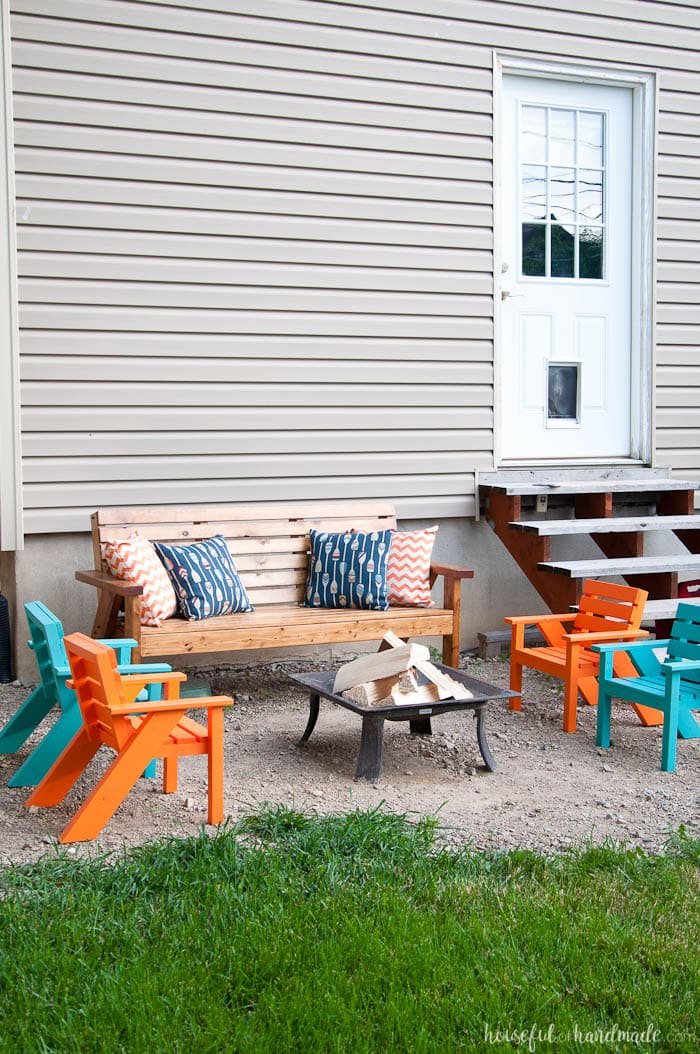
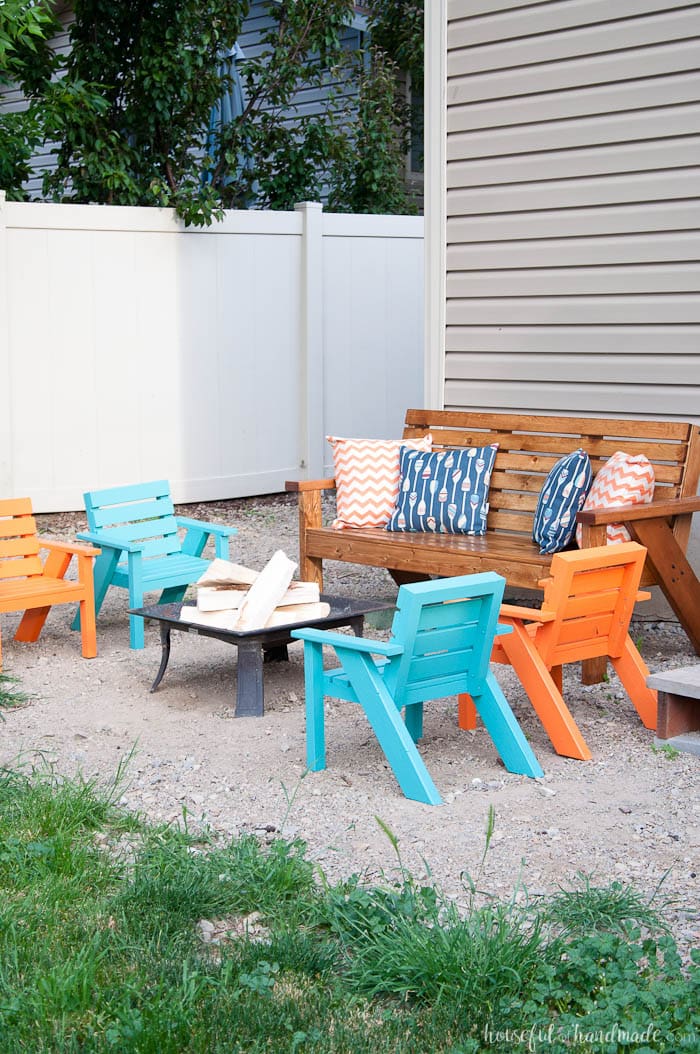
Then we created the perfect seating area in our “patio” area. The sofa and kids patio chairs surround our fire pit so we can enjoy lot of family fun this summer. The kids are beyond ready to light this thing up and toast some mallows!
But even if we are not cooking over an open fire, the seating area overlooks the grass and our little garden so I can relax and watch the kids play.
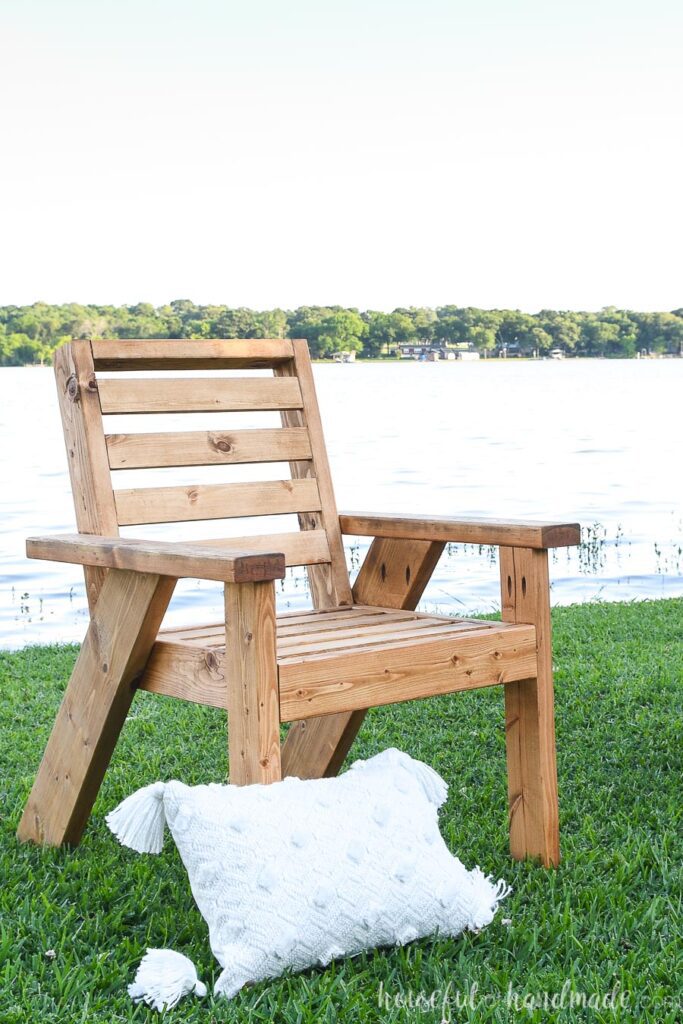
Matching Adult Sized Outdoor Chairs
We loved our kids chairs so much, I decided it was time to make an adult version!
These outdoor lounge chairs match the modern Adirondack look of the kids chairs, but are large enough for any adult. They are deep enough for comfy lounging all day.
Or for some serious relaxing, I also made a matching chaise lounge chair!
These outdoor chaise lounge chairs have and adjustable back so you can relax at 3 different angles or lay it totally flat.
Kids Patio Chairs Build Plans
I have partnered with Kreg Jig and their new project plan site BuildSomething to bring you the free build plan for these easy DIY kids patio chairs.
The Kreg Jig makes these chairs super sturdy and super fast & easy to put together. You can have an army of little chairs in an afternoon (unfortunately the painting takes way longer than the building).
Click here for the free build plans.
And click here for the chair back template.

And bonus, they are super inexpensive to make. For 4 chairs I only needed (6) 2x2s, (8) 1x3s and (2) 2×4 boards. Add in a few Kreg screws and some outdoor paint and my patio chairs only cost $15 each.
And I have lots of leftover outdoor paint for the kids playhouse I am building next!

Thank you to Kreg Tools and their DIY project plan site BuildSomething for sponsoring this post. I only recommend products that I use and love and all opinions are 100% my own. Click here to read my full disclosure policy.