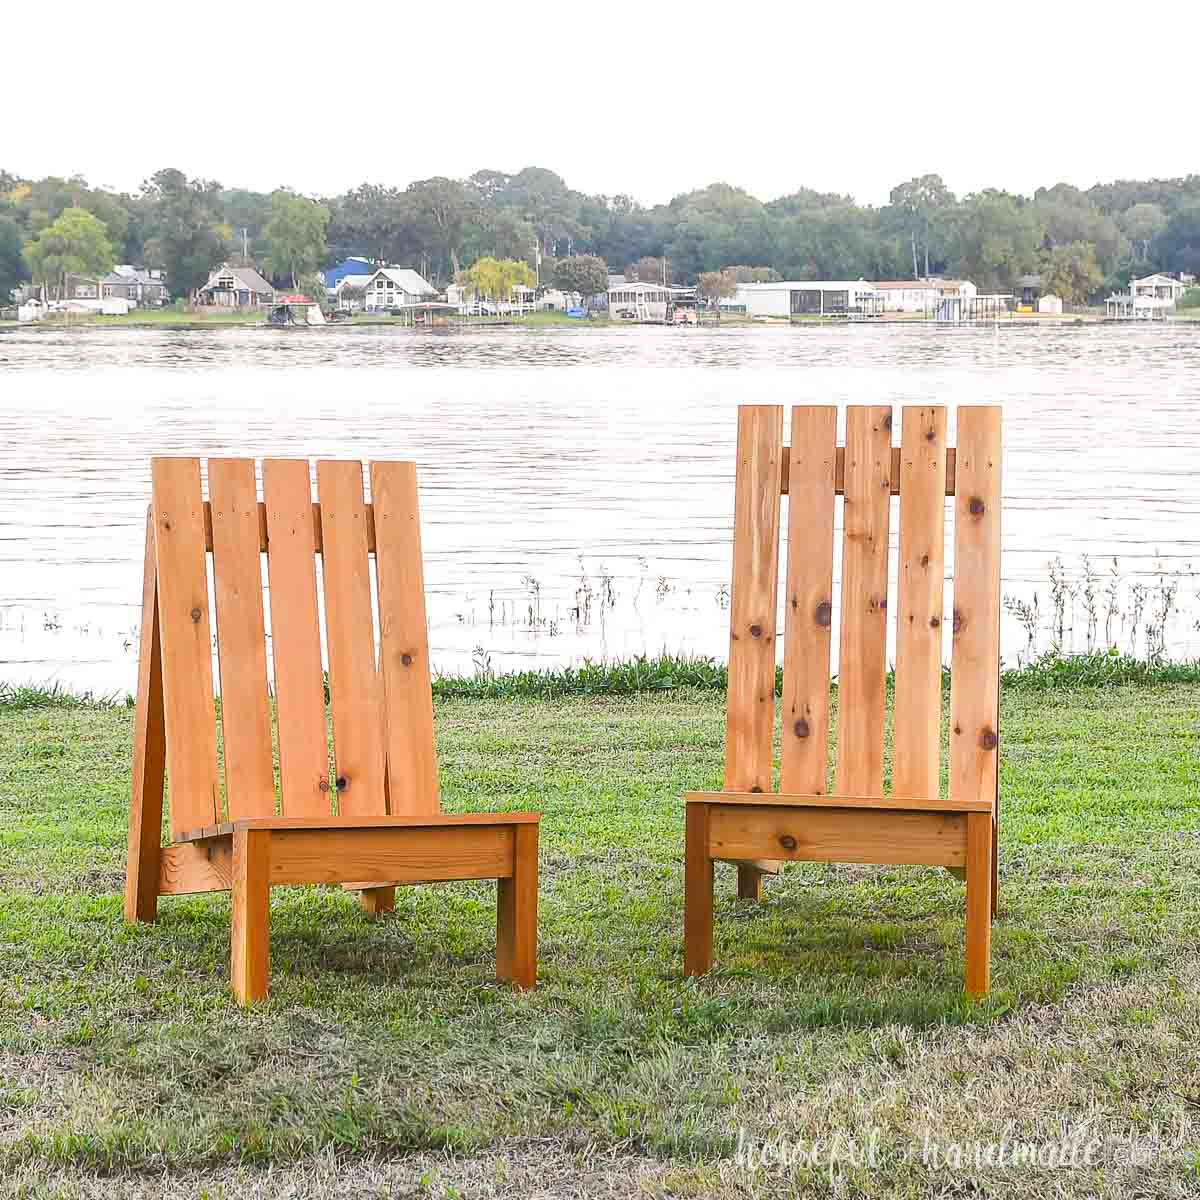
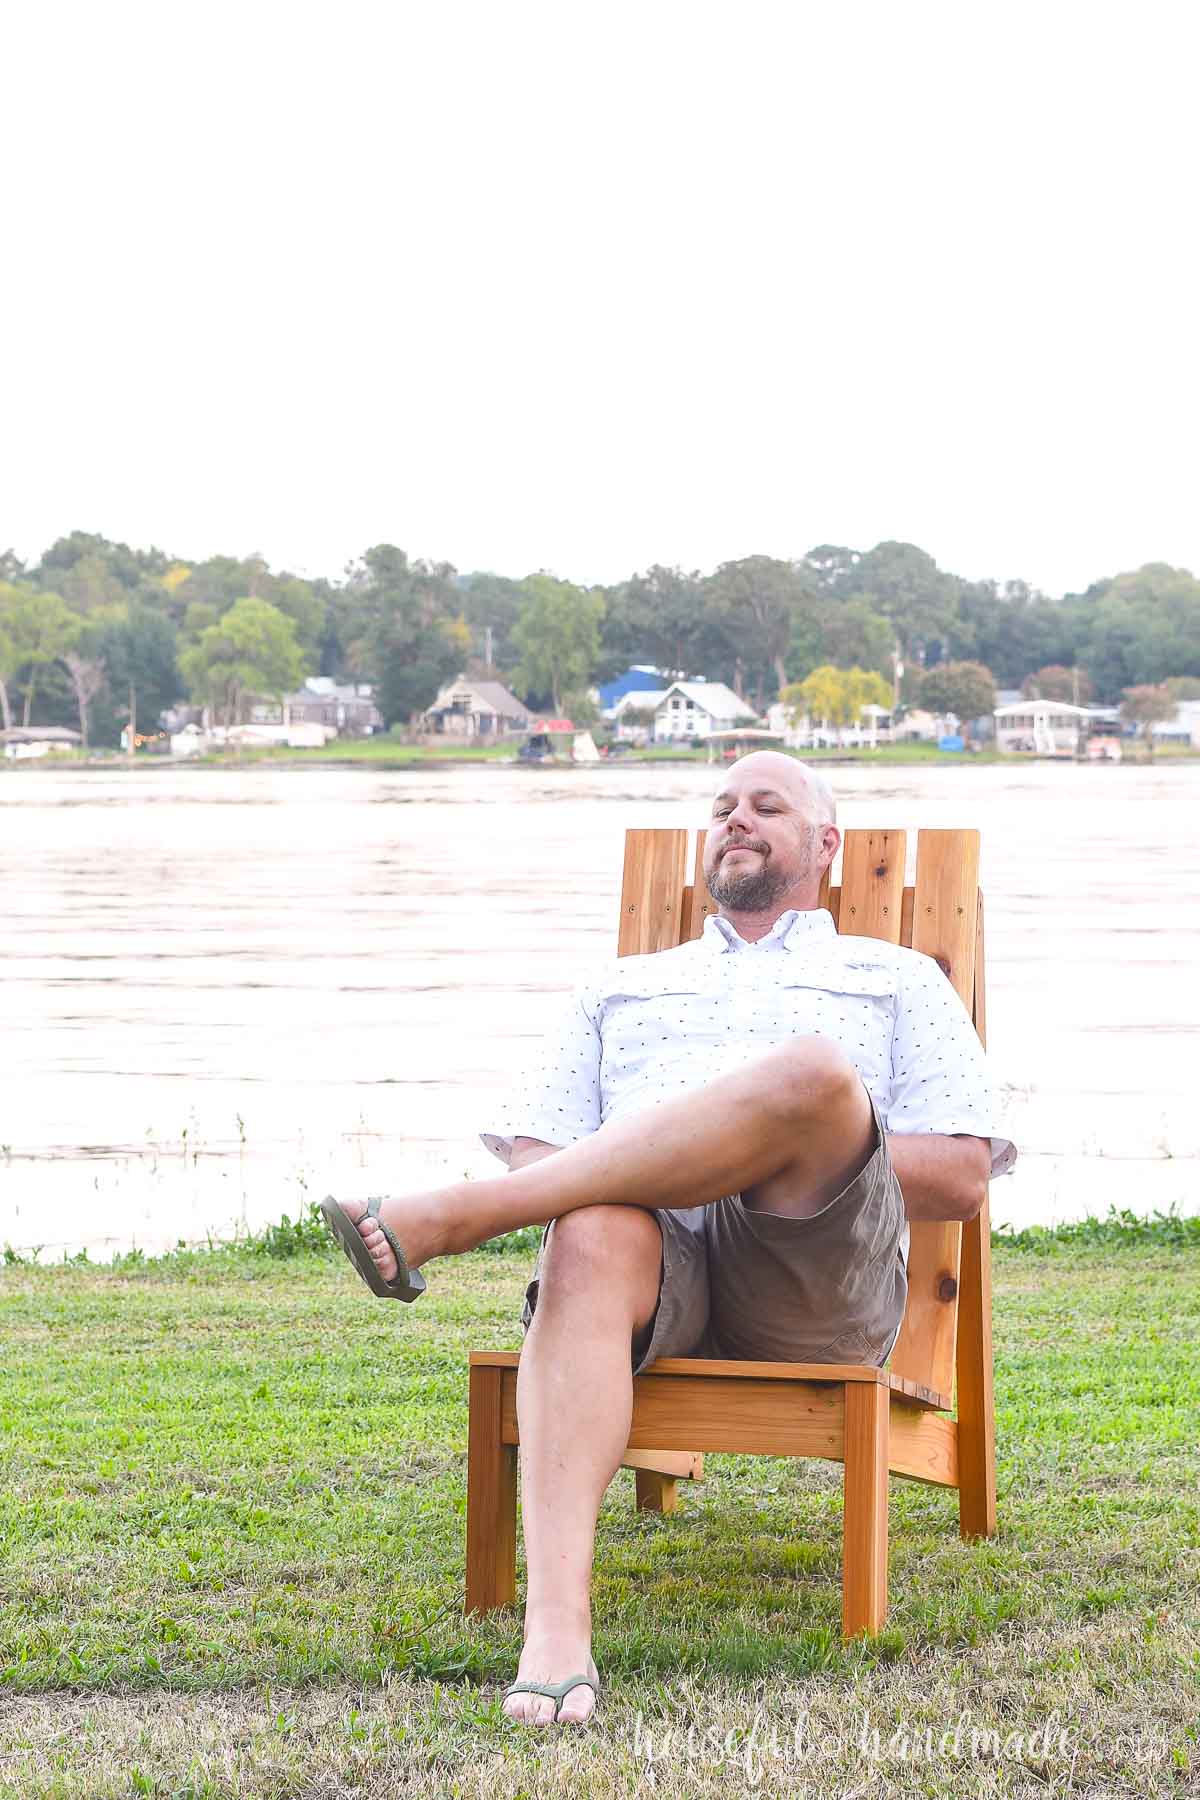
My husband loves the new modern Adirondack chairs I built a couple weeks ago, except for one thing. They were a little too small for his perfect relaxation.
He is 6’2″ tall so the back was not tall enough for him to rest his head.
So what is a wife to do? How about design and build an XL Adirondack chair so he can enjoy them as much as I do!
This post may contain affiliate links. As an Amazon Associate I earn from qualifying purchases. Click here to read my full disclosure policy.
And these larger outdoor chairs are so quick to make using only 3 tools: miter saw, circular saw and drill. They will be your new favorite summer build.
Adirondack Chair for Tall People
Adirondack chairs are perfect for relaxing outside. The low seat and reclined back are perfect for chilling all summer long.
But if you are taller than average, your chair might not have the support you need. So it’s time to build a bigger chair.
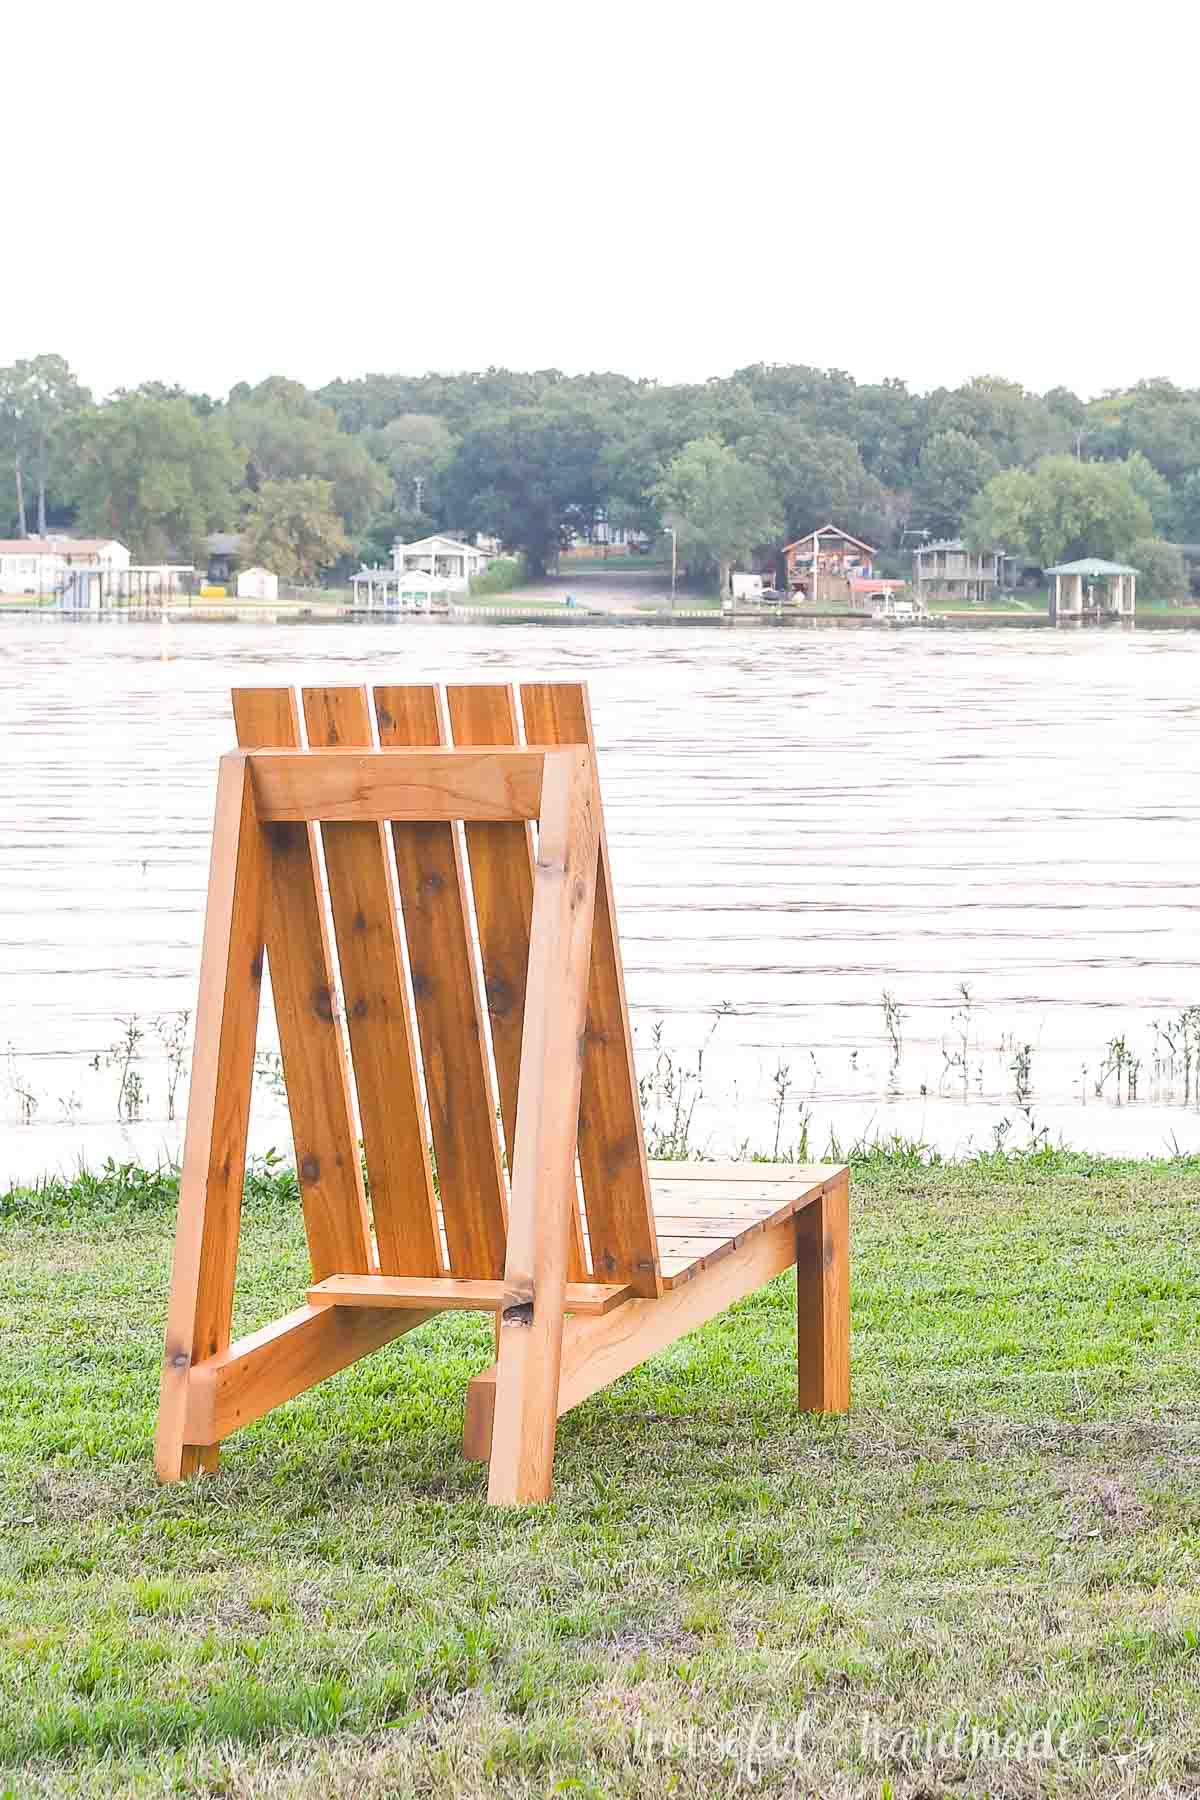
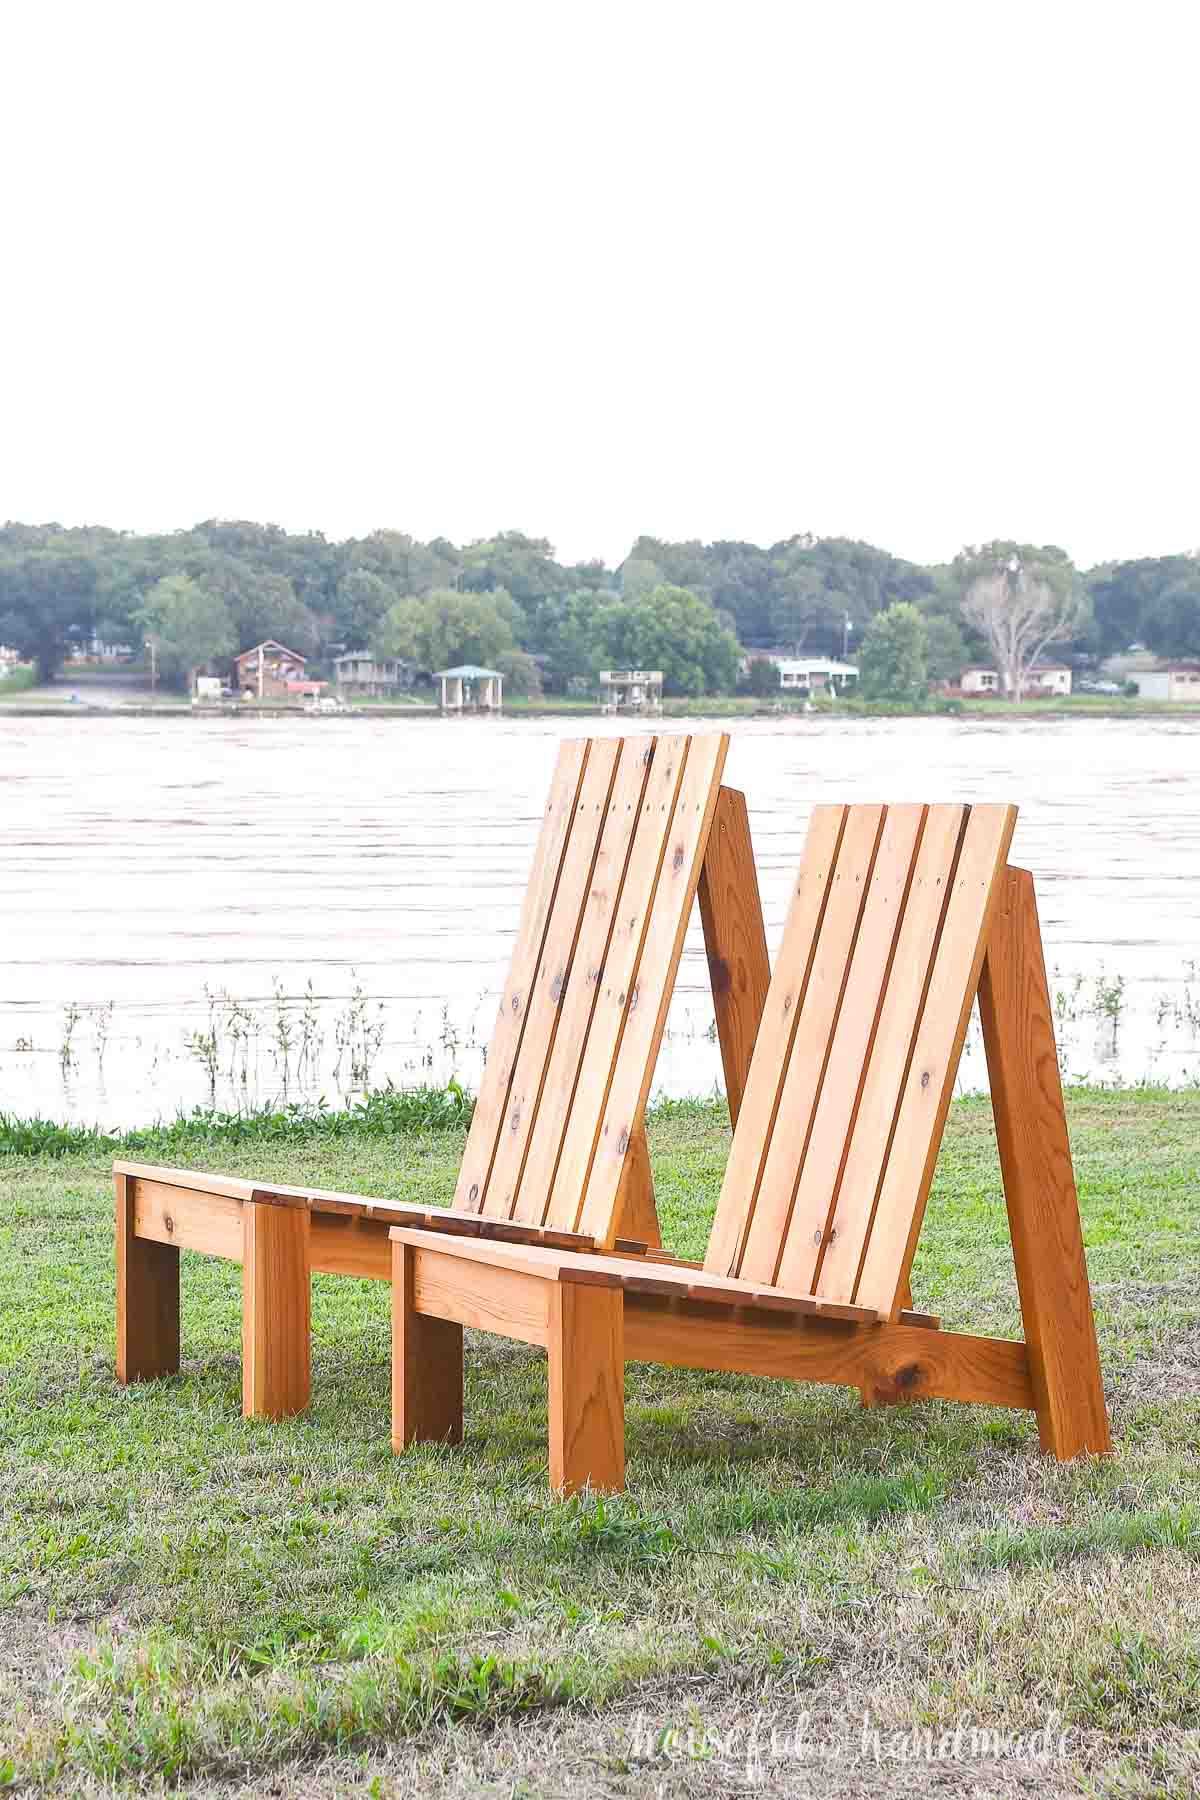
This chair has a taller back, fully supported by longer back legs. So that you can rest your head on the back of the seat.
And the seat is deeper than the standard chair so that your legs are more supported. This also brings the front of the XL Adirondack chair up higher, making it easier to sit down.
The regular and XL modern Adirondack chairs match perfectly so you can build a couple of each so everyone can relax in style.
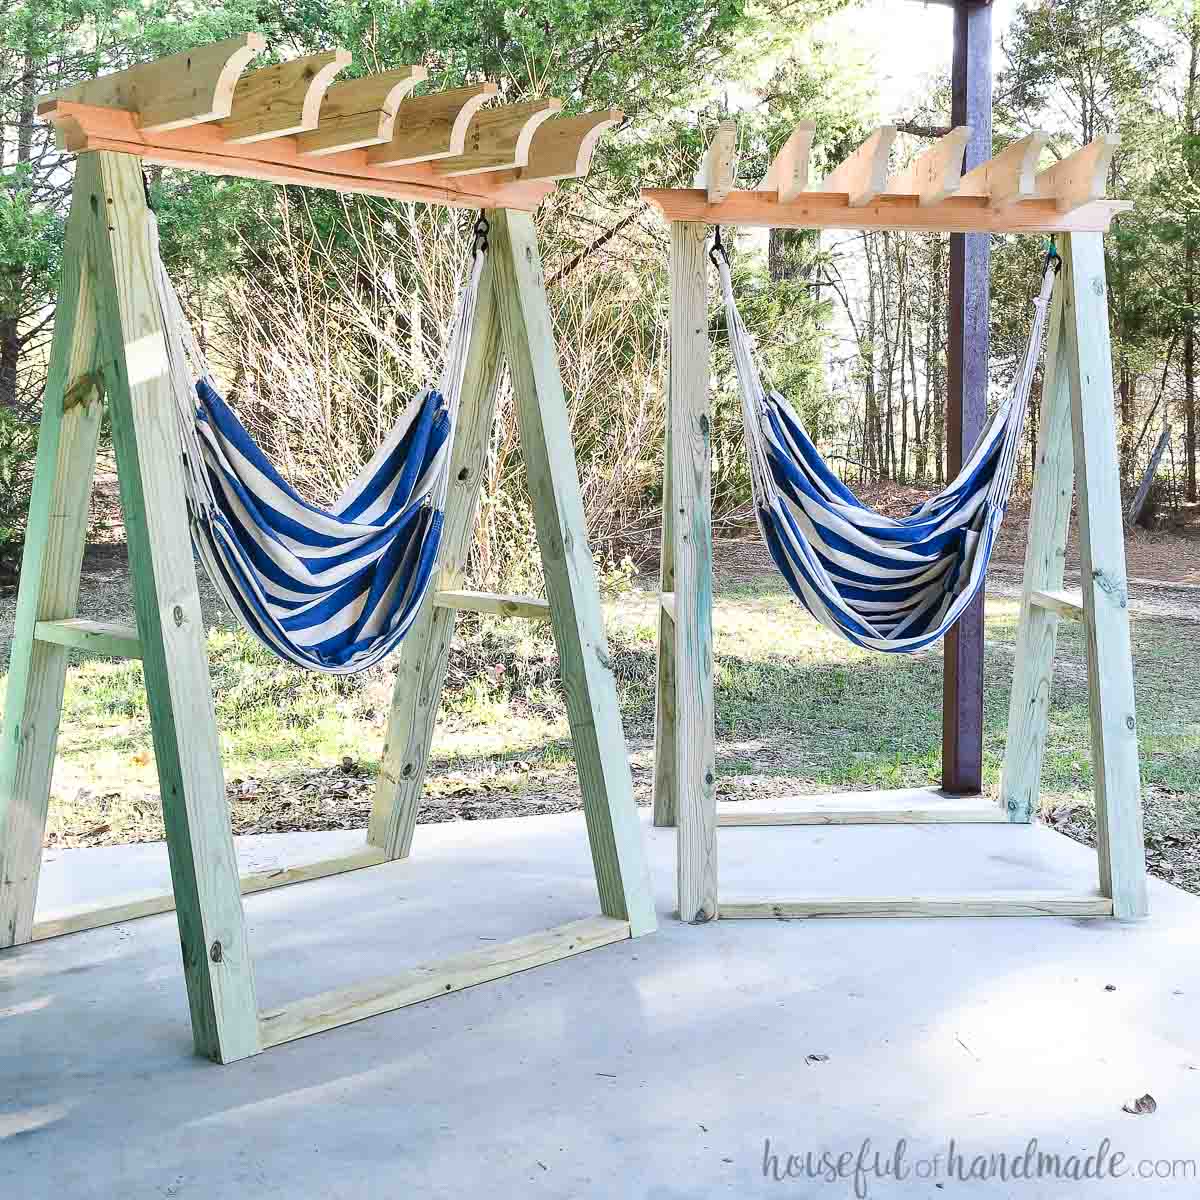
More Outdoor Seating Ideas
Make your outdoor space and extension of you home with lots of comfortable seating.


How to Build a Large Adirondack Chair
Tools & Materials
Recommended Tools:
- Miter saw
- I recently upgraded to this larger sliding miter saw (watch for it to go on sale), but all my projects before were built with this inexpensive miter saw that I loved.
- Circular saw
- Drill
- Impact driver (optional, but I love not having to switch bits with the drill)
- Speed square
- Multi-mark measuring tool
- Sander
Supplies:
- PDF Build Plans
- Wood products
- (2 1/4) 2×4 boards, 8′ long
- (4) 1×4 boards, 8′ long
- 2 1/2″ exterior wood screws
- 1 1/2″ exterior wood screws
- Outdoor wood glue
- Outdoor sealer
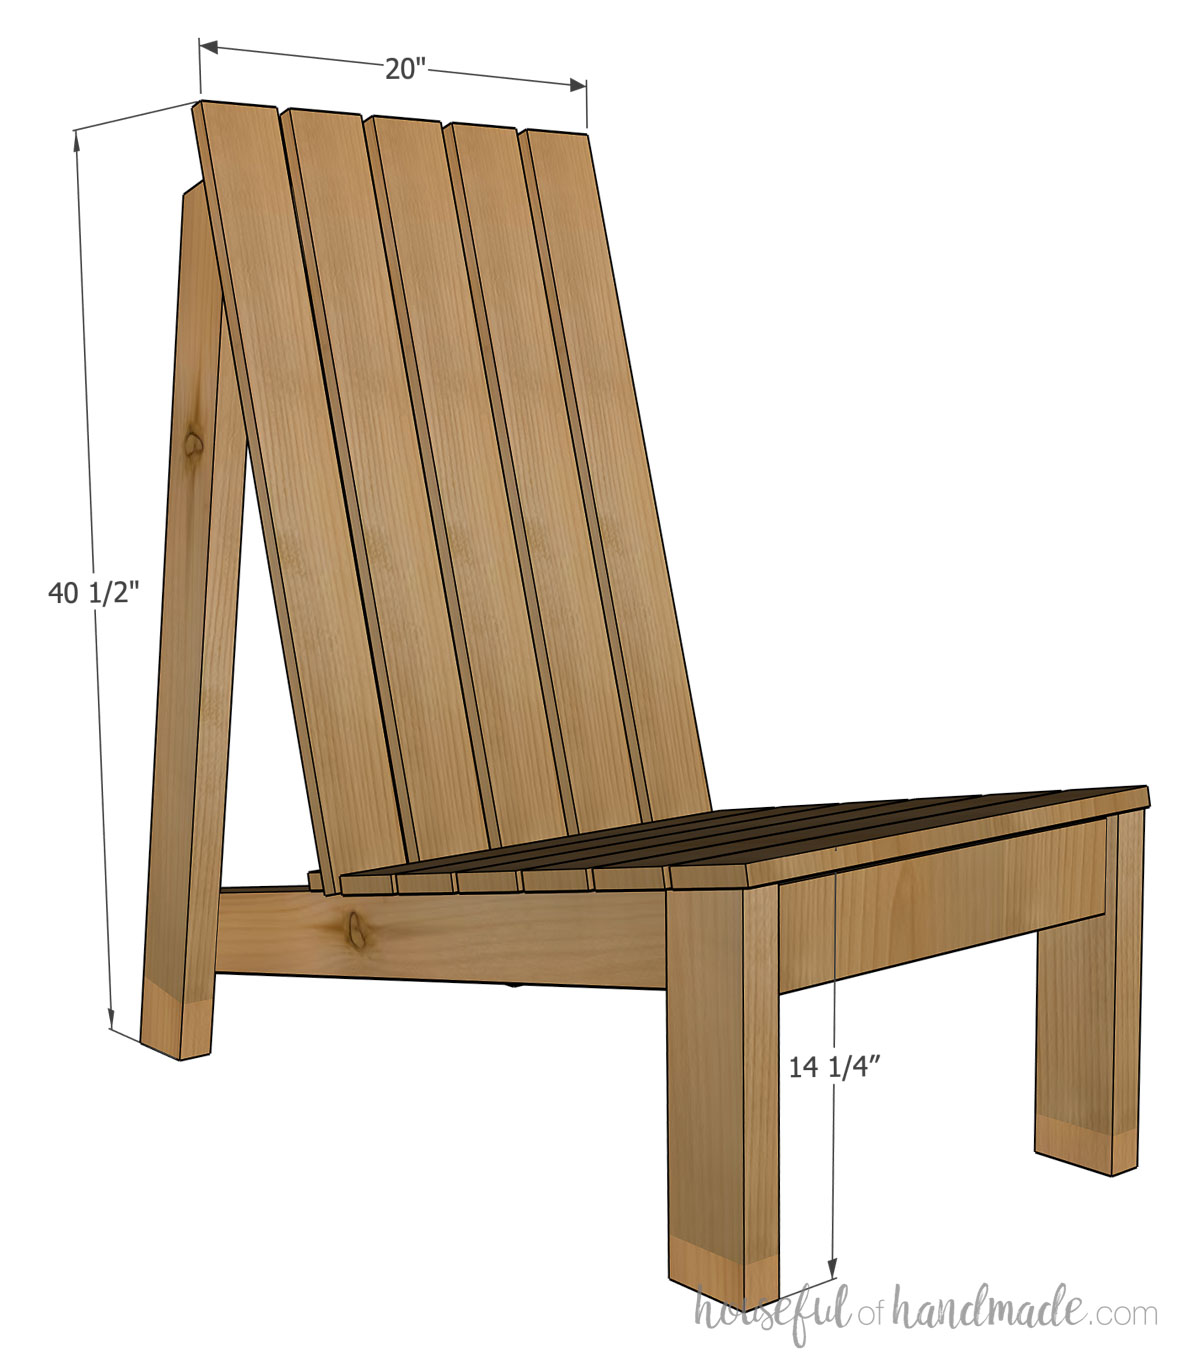
Overall Dimensions
The XL outdoor Adirondack chair is approximately 40 1/2″ tall and 39 1/4″ deep.
The front of the seat is 14 1/4″ up from the ground. The seat base is 20″ x 23″ and can fit a 20″ x 24″ seat cushion.
Cut List
Cut out the pieces according to the easy-to-read table in the PDF plans.

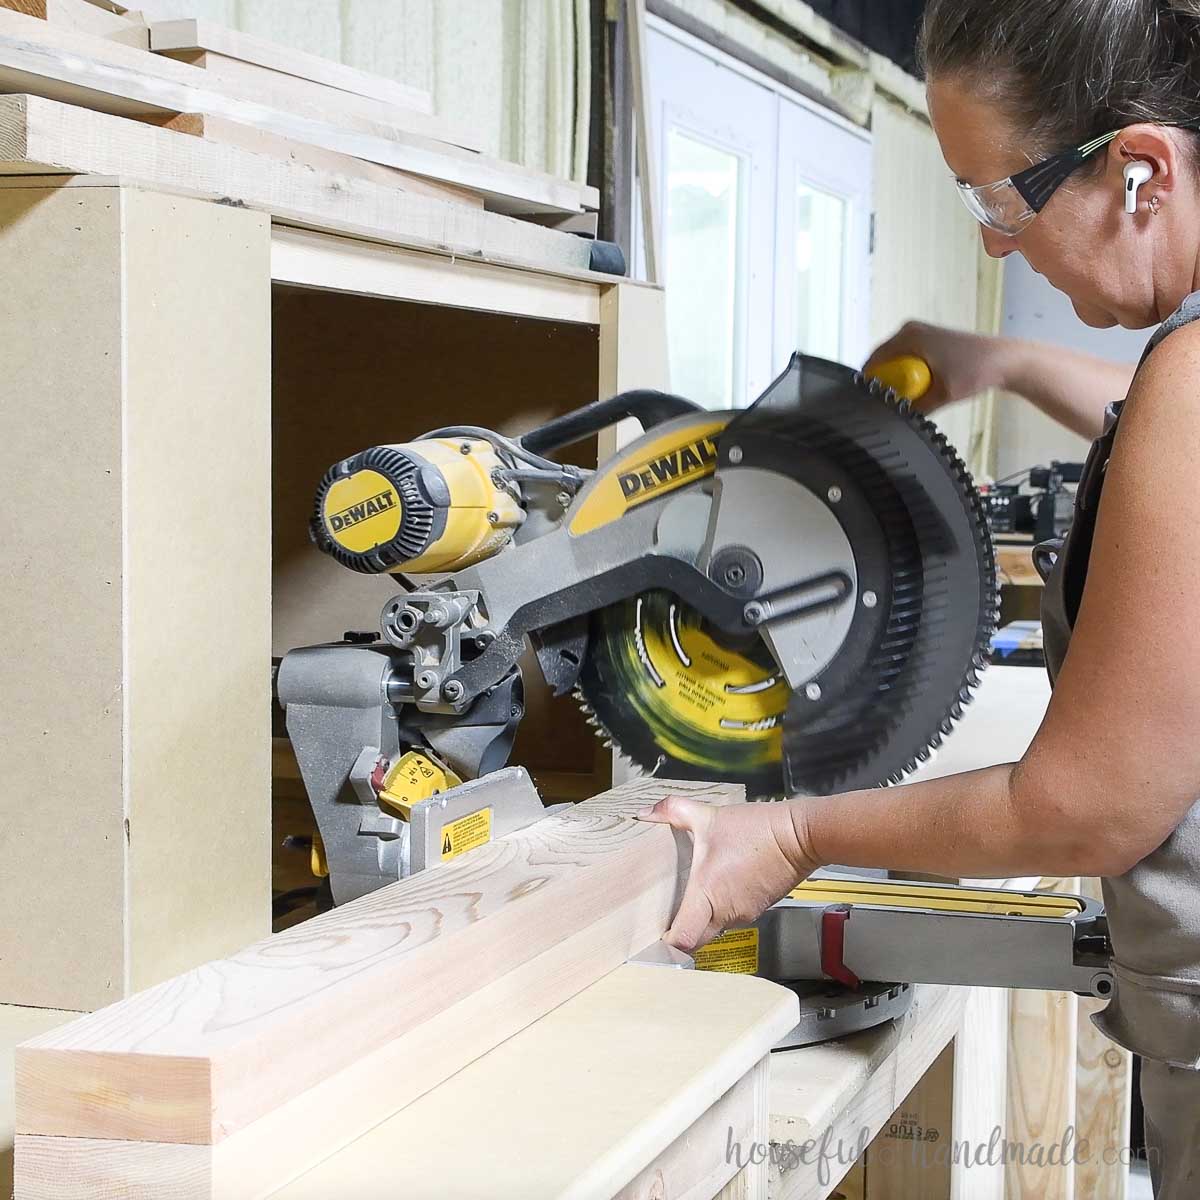
STEP 1- Cut the angled boards
Cut one side of both back leg boards at a 10 degree angle.
On the non-angled end of the board, measure in 1 15/16” from the corner opposite the long angled side and make a mark. Then measure down from the same corner 4 1/8” and make a mark.
Draw a line between the two marks, and cut the angle with a circular saw.
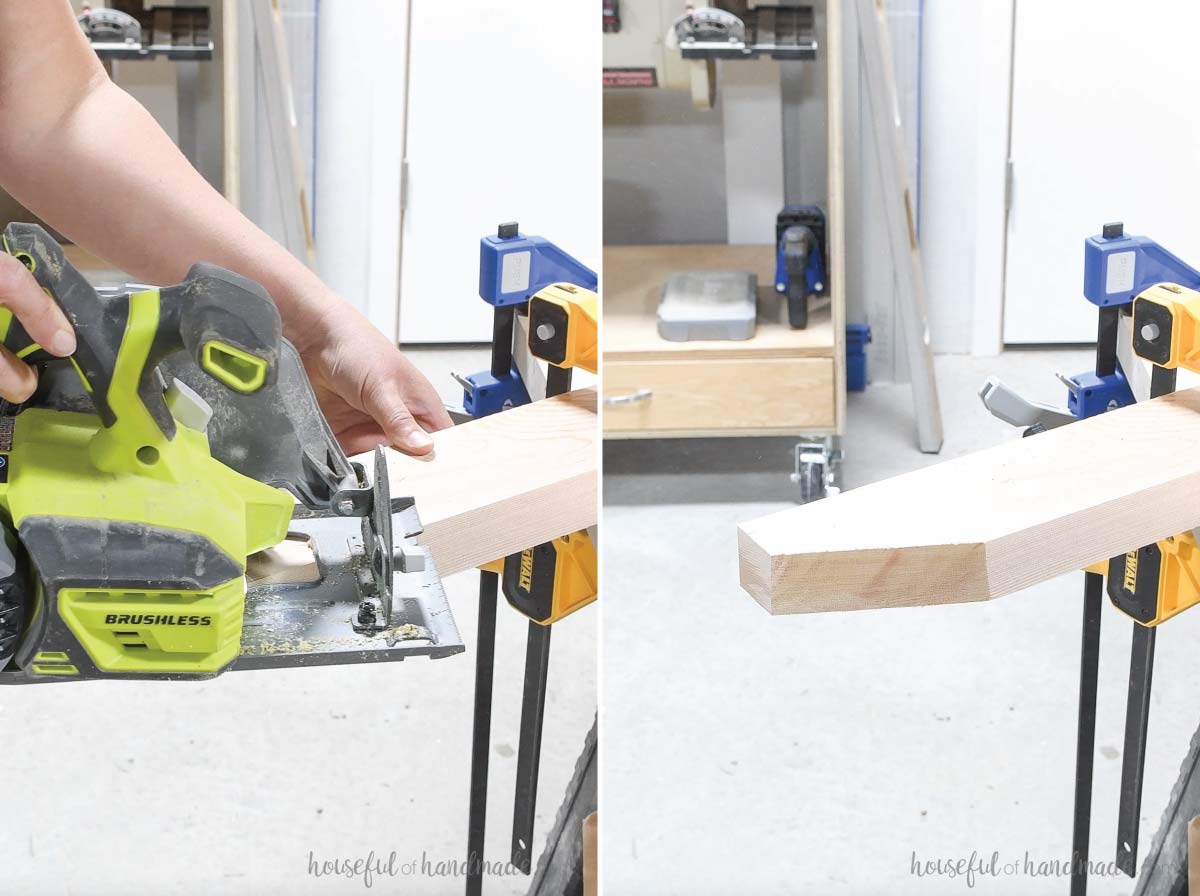
Use a square to mark a 90 degree angle from the newly cut angle. Then cut it off to create the top of the back leg board.
Repeat for the second leg piece.
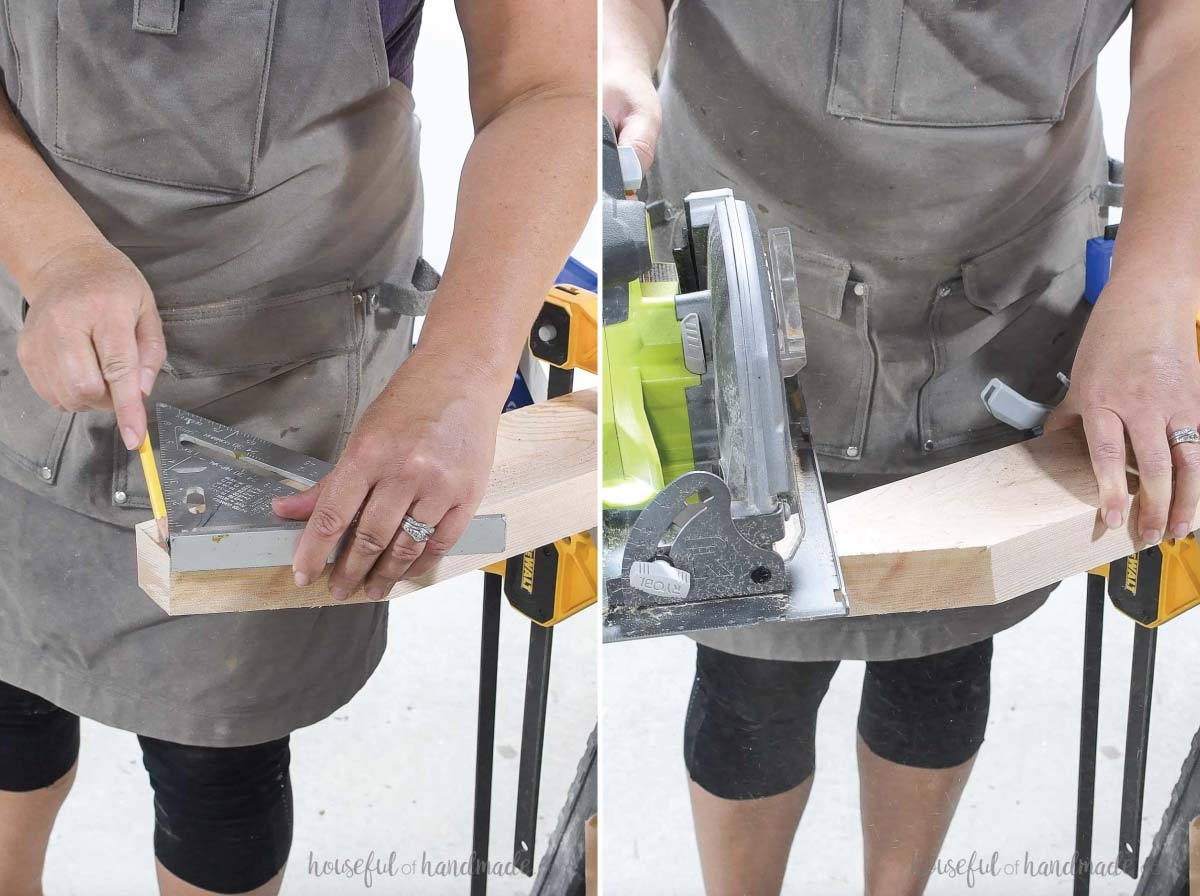
For the under seat boards, cut one end at a 10 degree angle and the other end at a 20 degree angle. I did this easily on the miter saw
Cut the angles according to the diagram in the PDF plans.
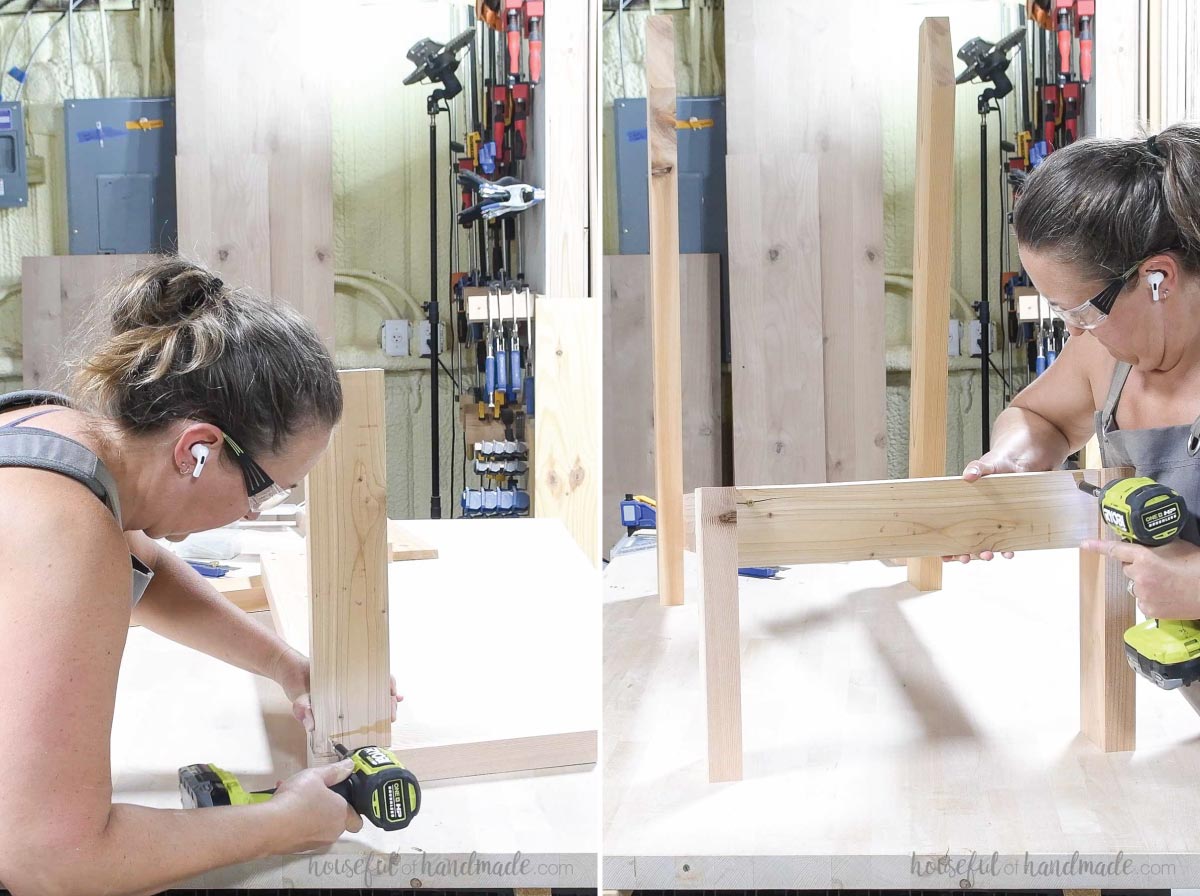
STEP 2- Build the XL chair frame
Lay the back and front leg down on a flat surface according to the 3D diagram in the premium plans. I used a 4′ level as a flat edge to properly line up the bottoms (just clamp it to your worktable).
Place the under seat board on top so the 10 degree angled side is back 1 1/4” from the front of the front leg and flush with the top, angled cut end.
Line the back up so the 20 degree angled side is 3 7/8” up from the inside of the back leg board and at a 10 degree angle. The back angled cut should be flush with the back of the back leg.
Secure with 2 1/2” screws.
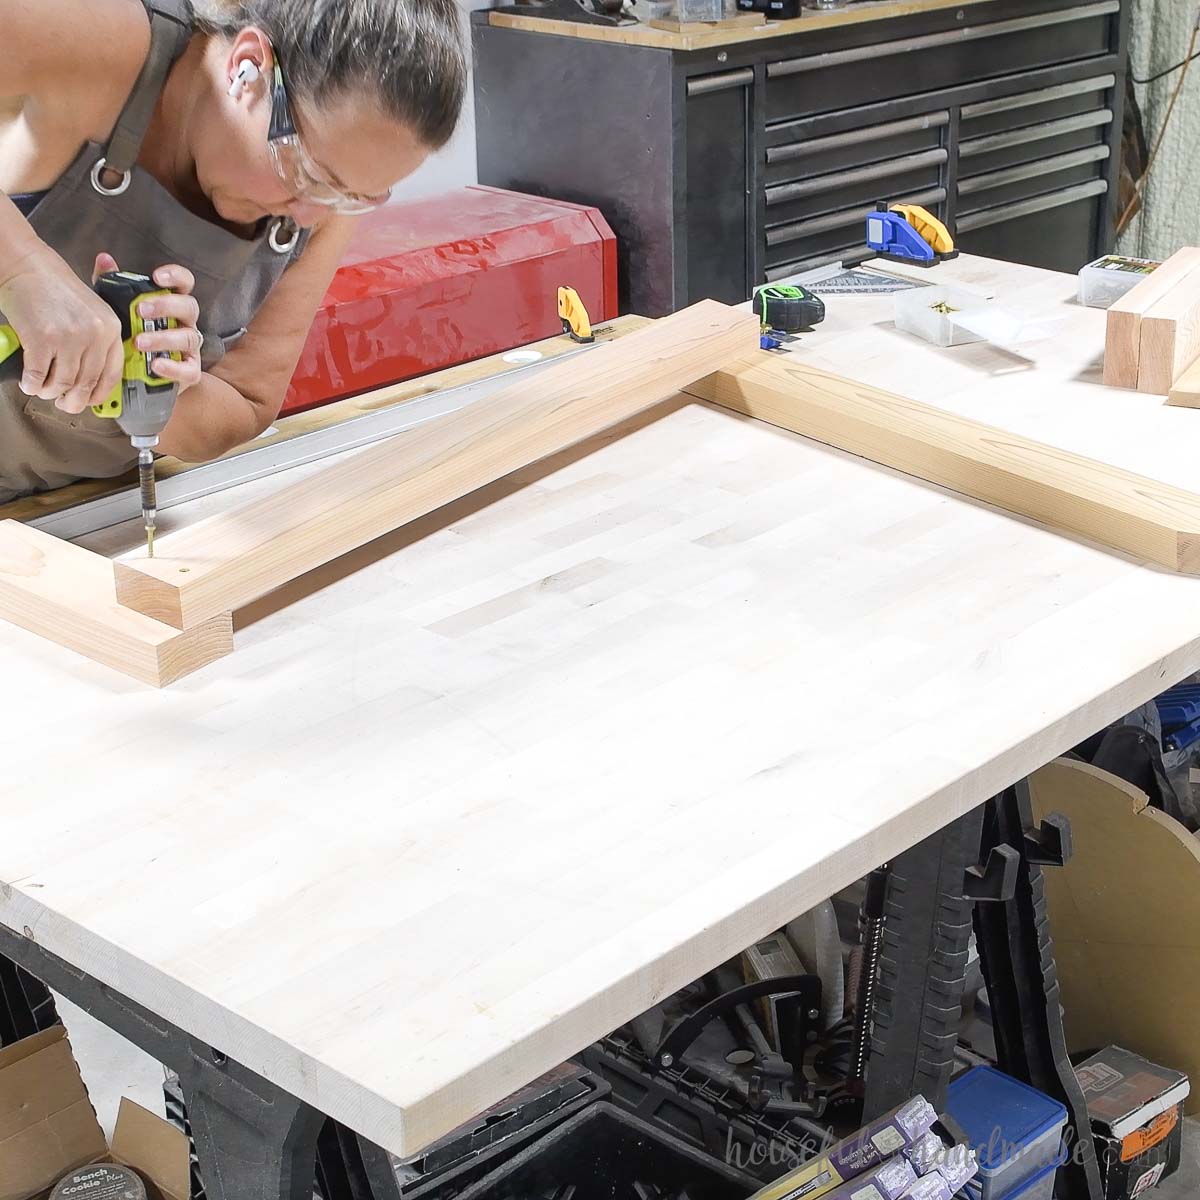
Then repeat for the other side, but make sure to mirror it.
I attached the under seat board to the legs with (2) screws on the front leg and (3) on the back.
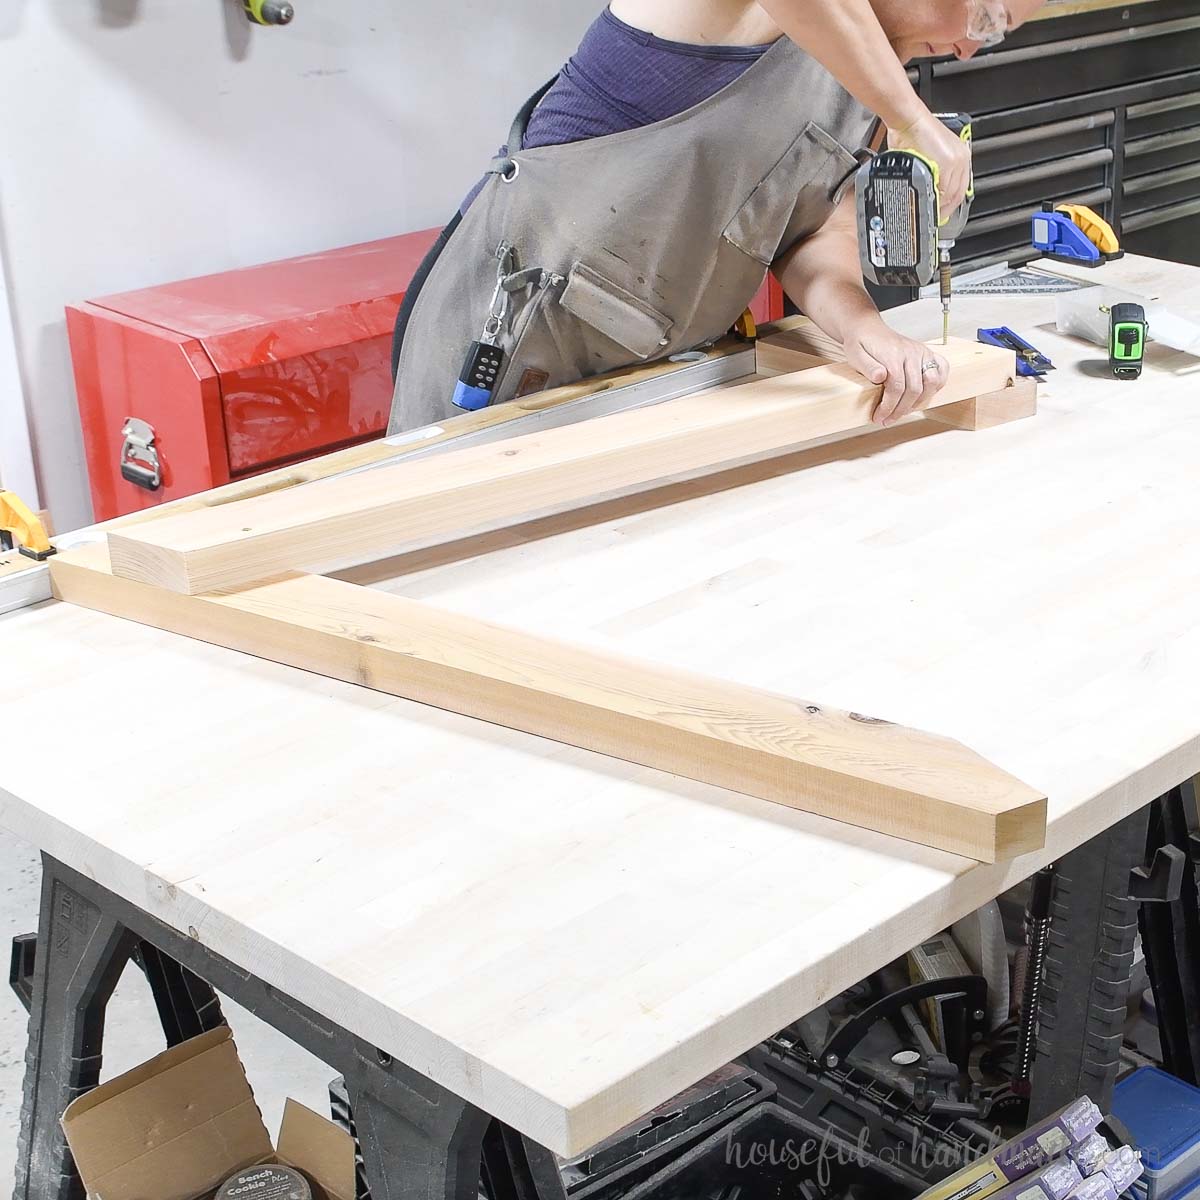
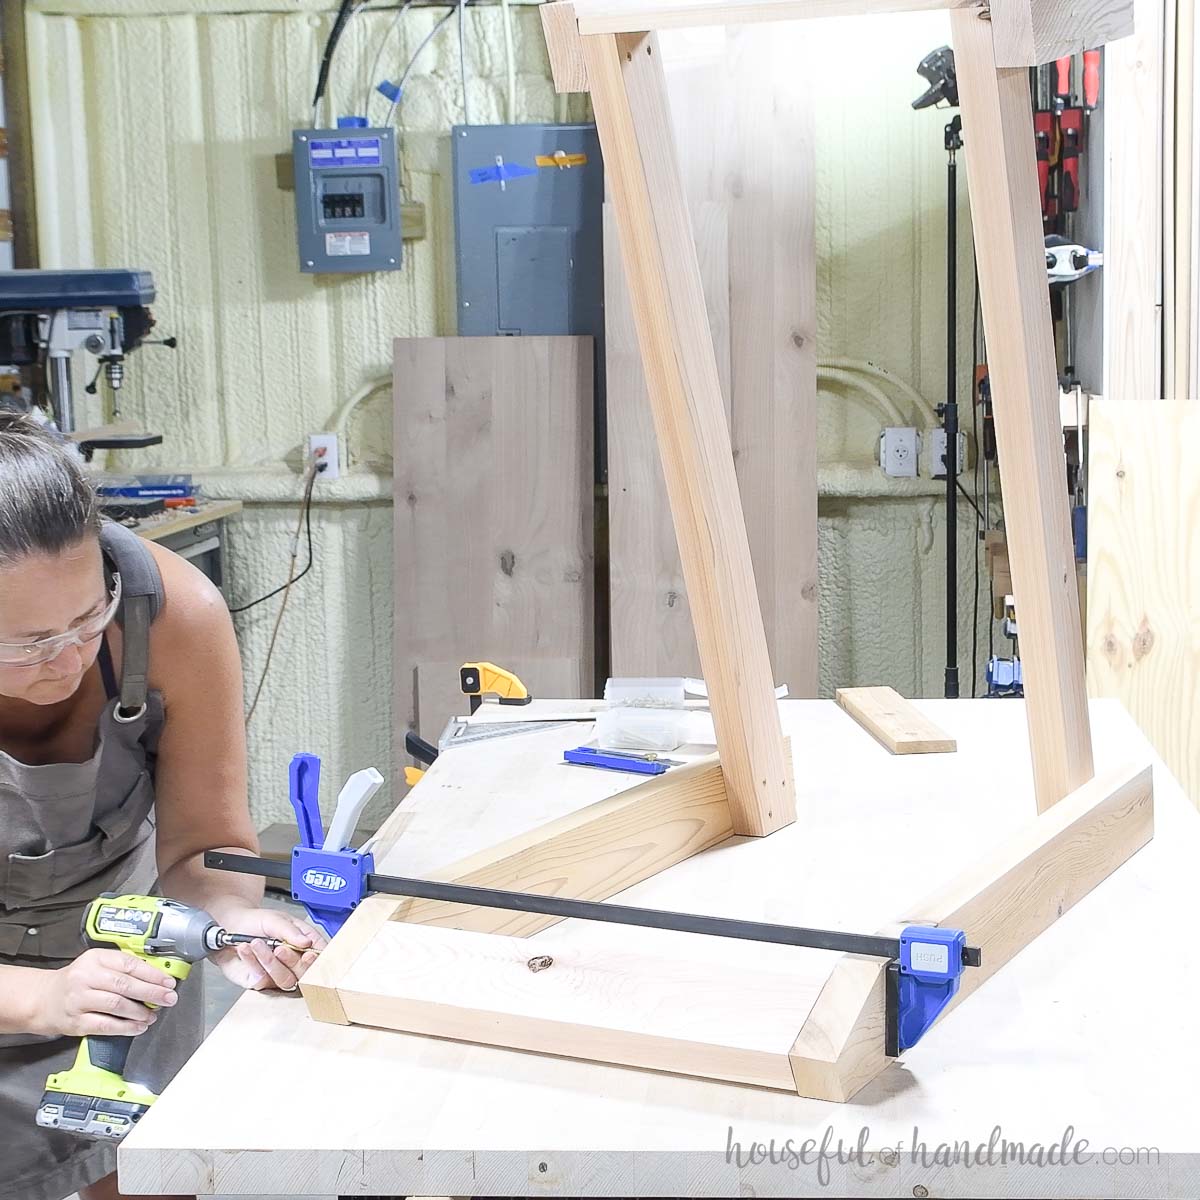
Attach the two sides together using the front seat support. Secure it to the front of the under seat boards.
The back corner should be flush with the top of the seat supports but the front will not be because of the angle. Attach with 1 1/2” screws.
Then attach the 2×4 back support board between the two back legs at the very top. It will be flush with the front angle and top angle cut with the circular saw earlier.
Secure it with 2 1/2” screws.
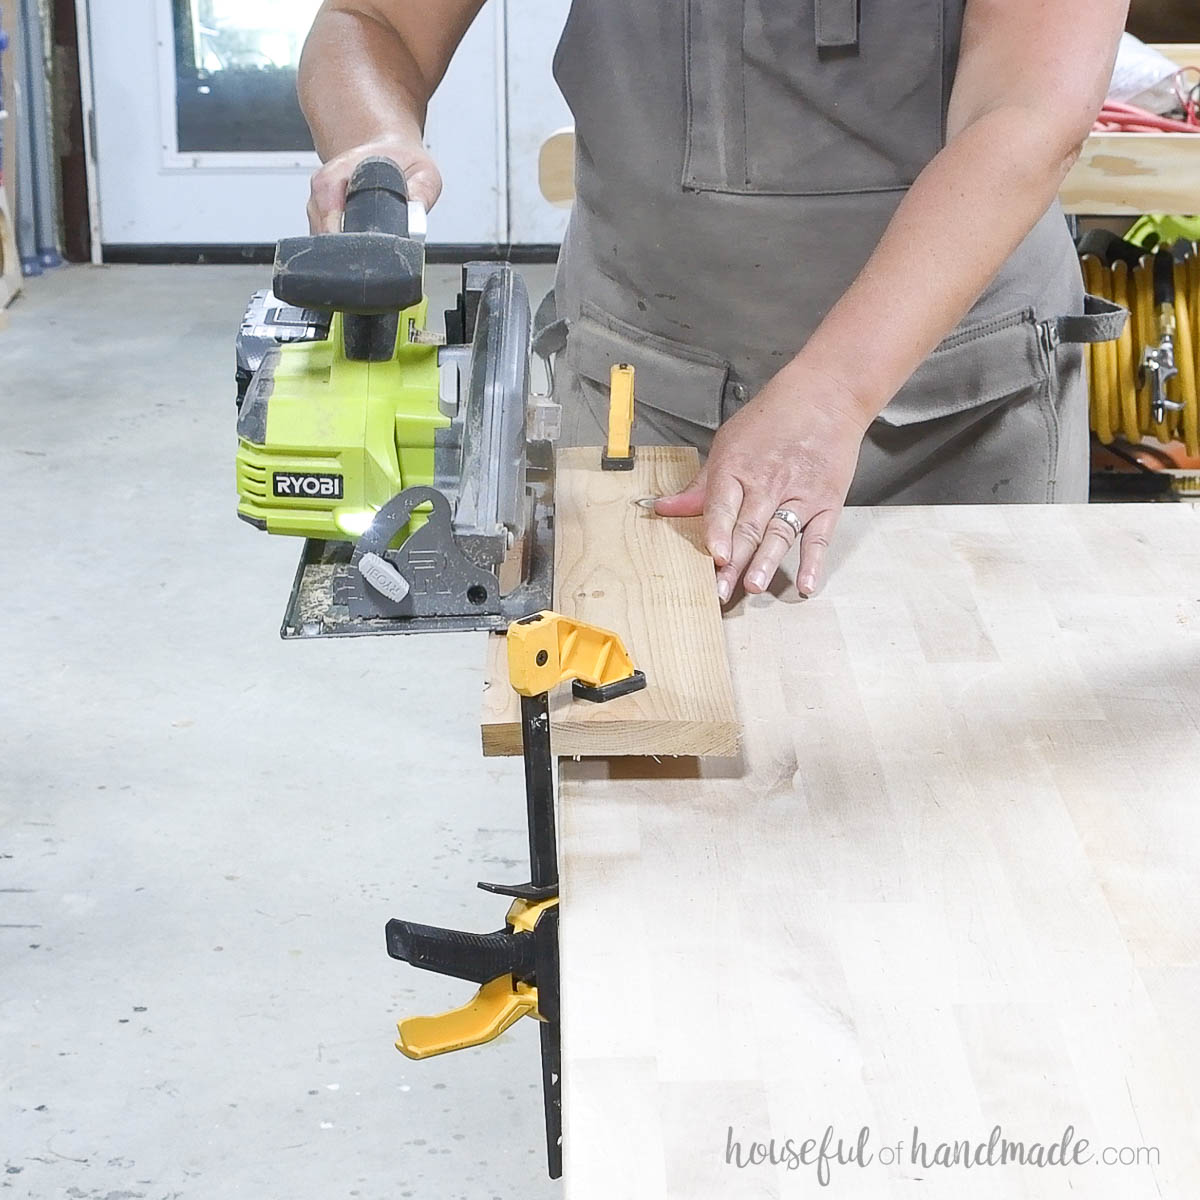
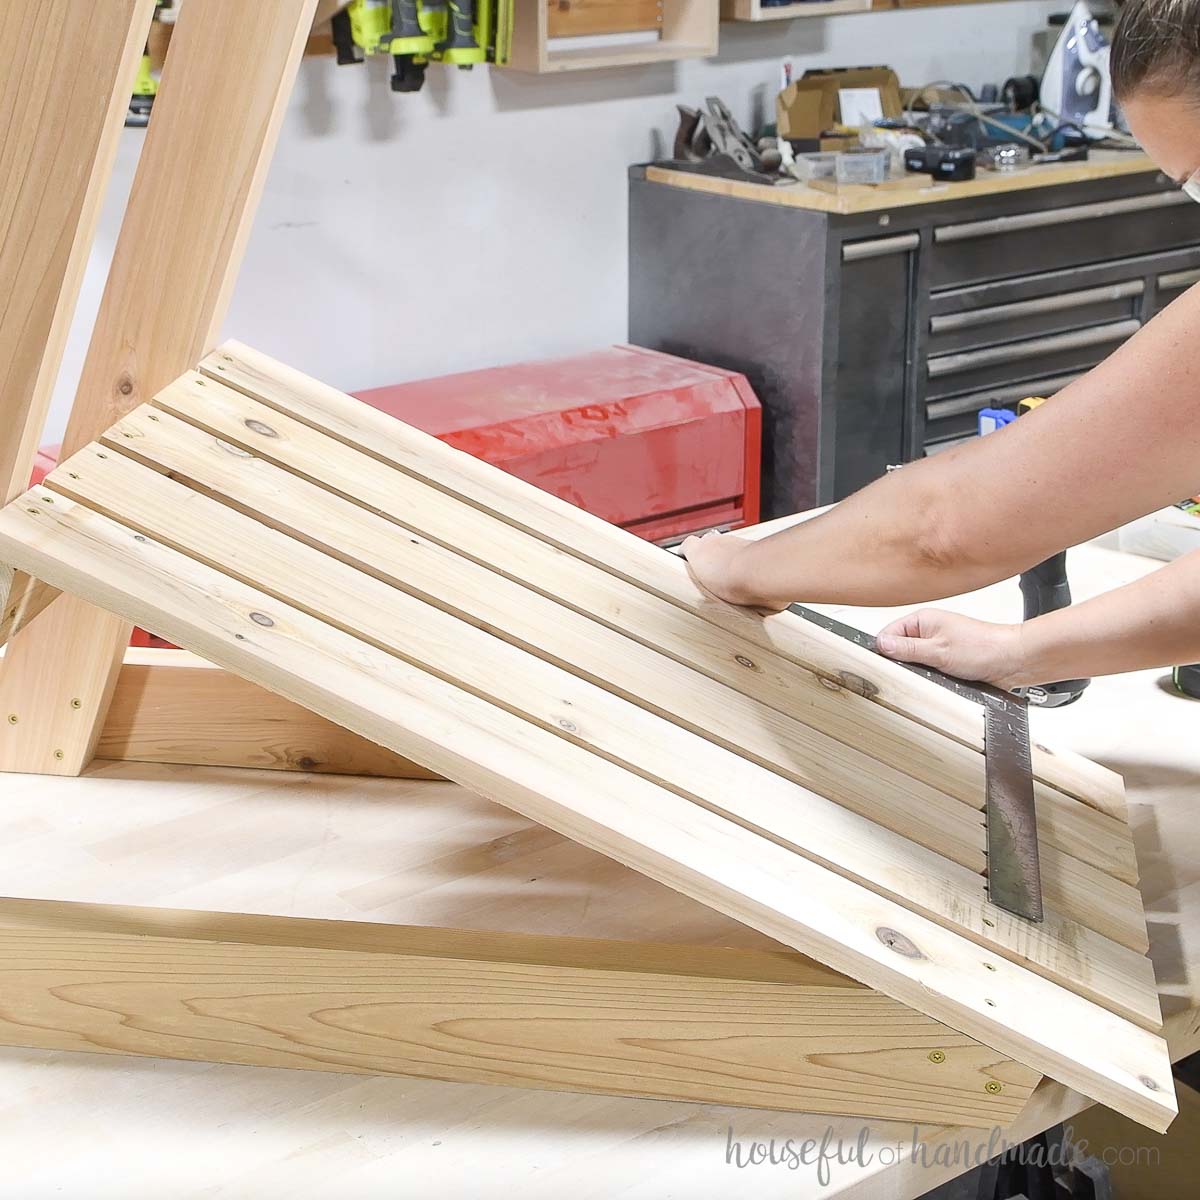
Rip the inside edge of the back slat support at a 5 degree angle with a circular saw.
I clamped a straight edge (I used a scrap board) to the top of my piece just to the side of the circular saw base to keep the cut straight.
Place the front of the board on the under seat support so it is set back 23 7/8” from the front of the leg board.
Attach to the under seat boards with 1 1/2” screws.
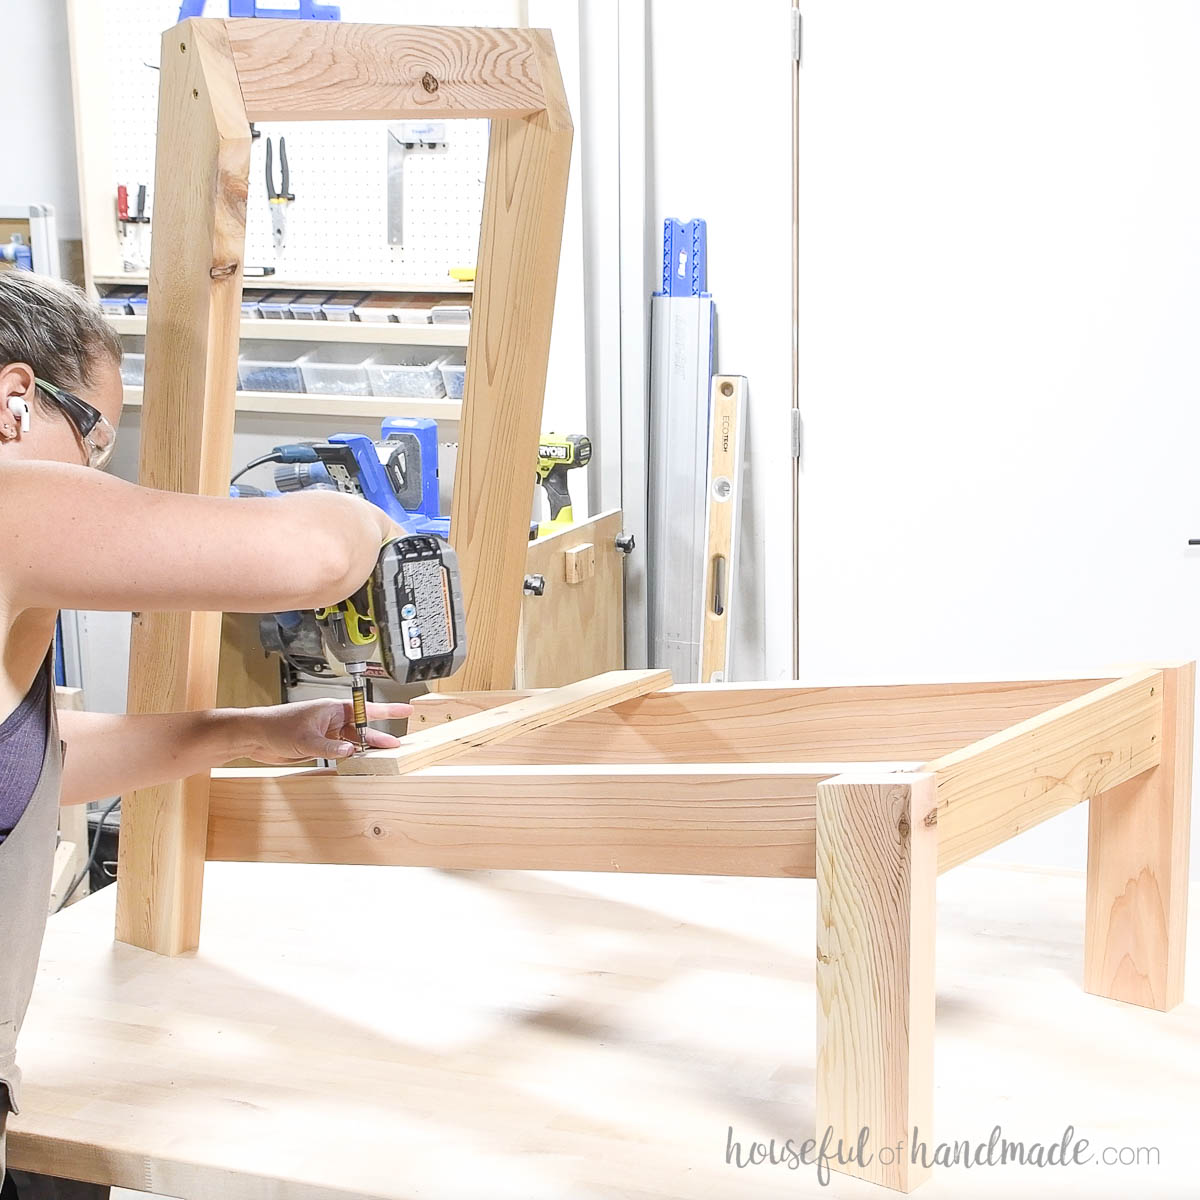
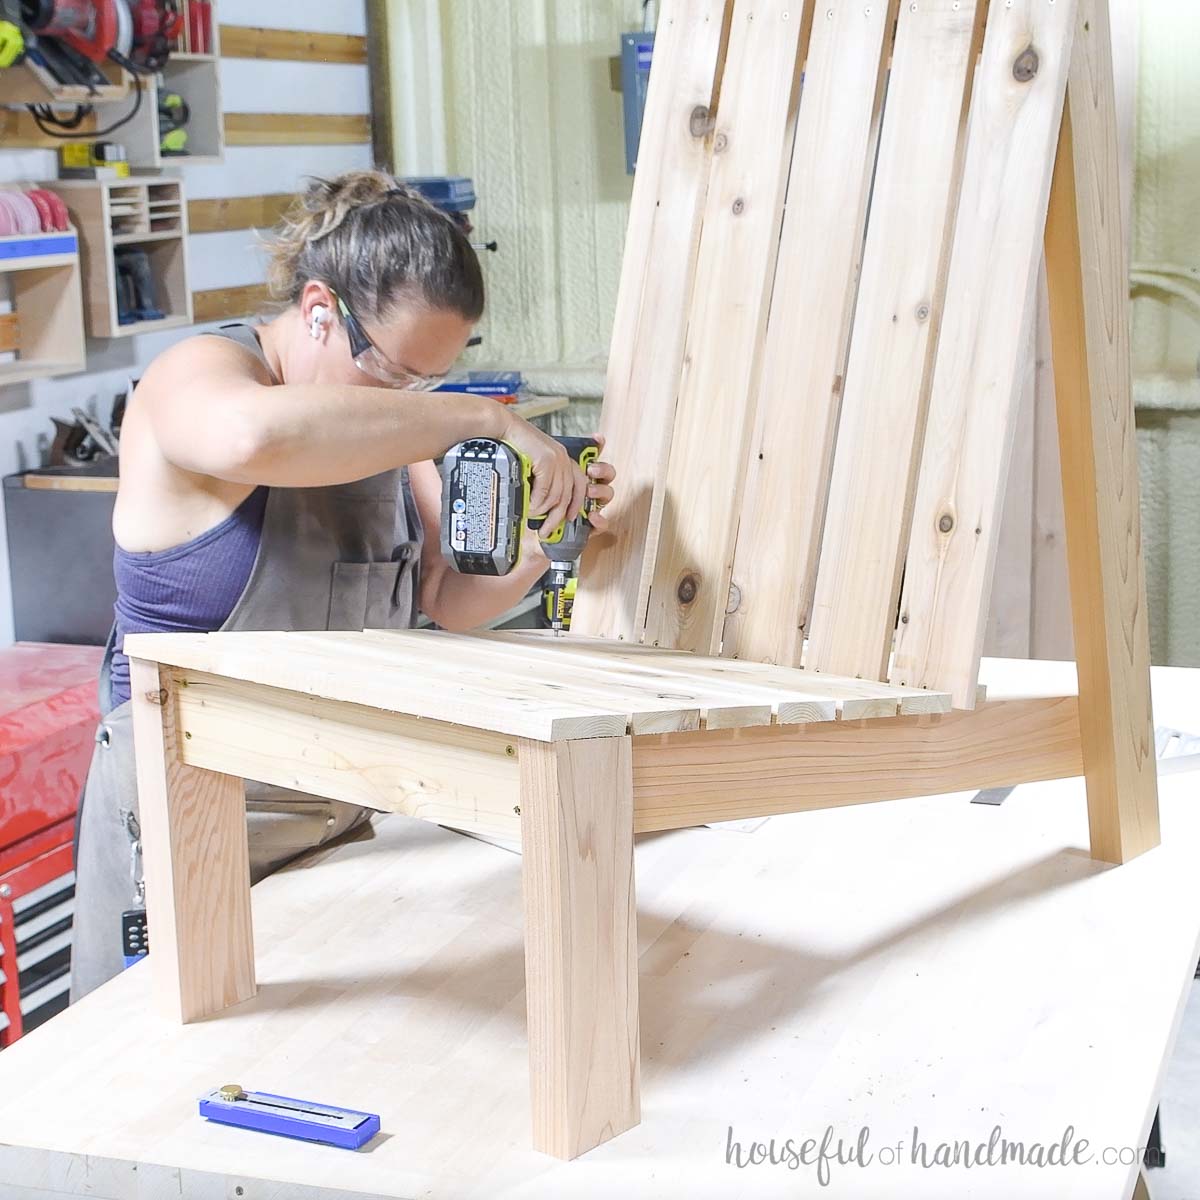
STEP 3- Attach seat slats
Line up the back slats so they are flush with the bottom of the back slat support and there is a 5/8” gap between the boards.
The outer slats will be flush with the edge of the back legs and hang over the edge of the back slat support 1 1/2”.
Secure with 1 1/2” screws, use (2) into the back slat support at the bottom and (2) into the back support toward the top.
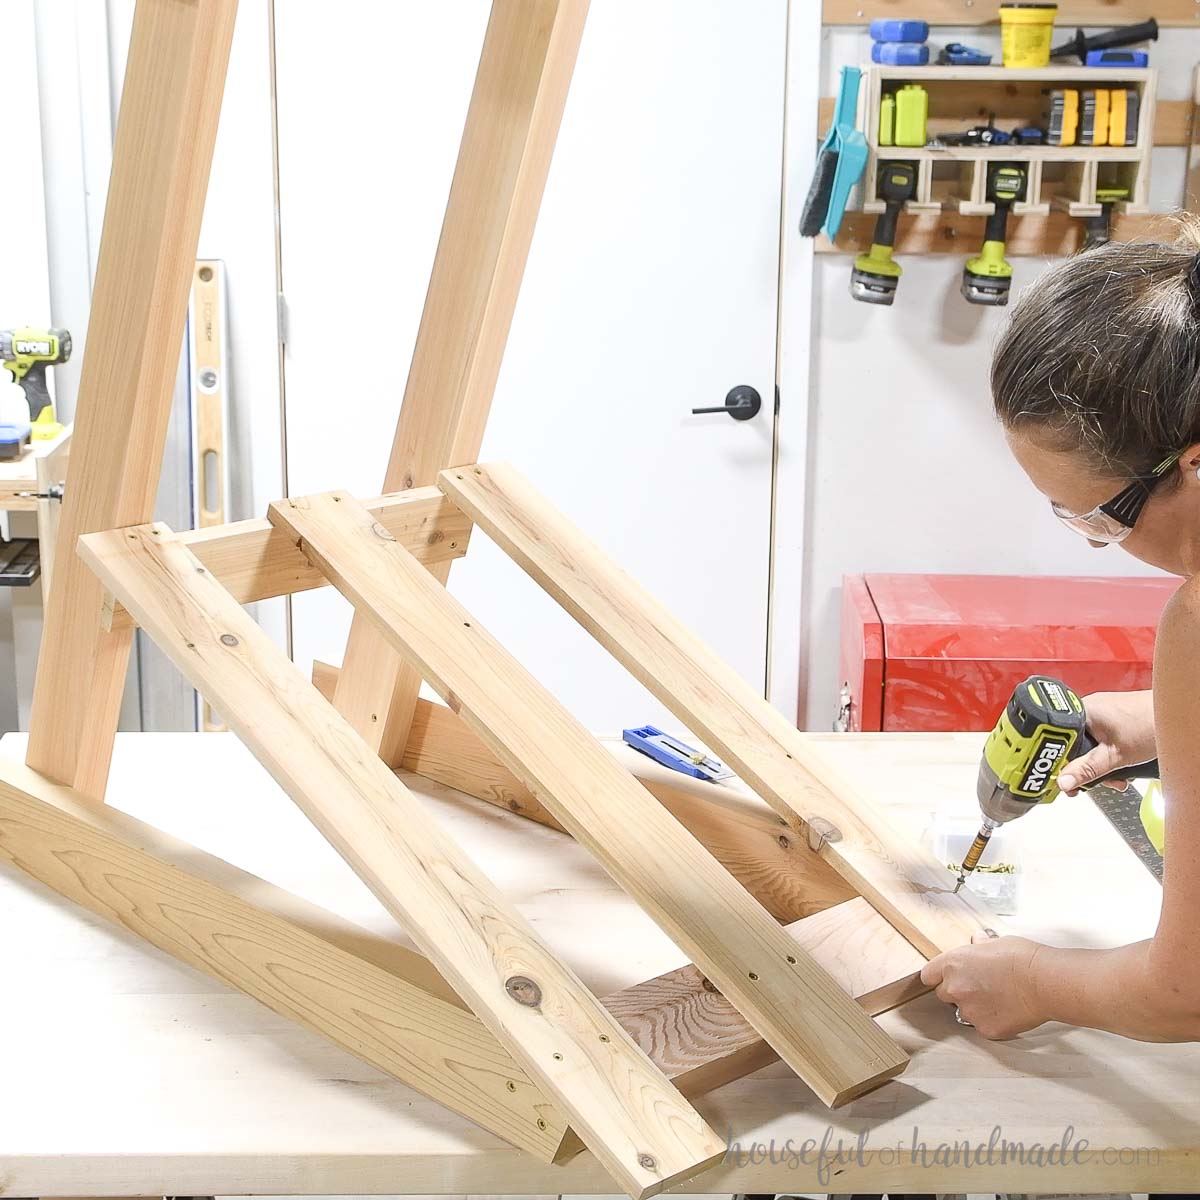
I used a square to make sure the screws were all in a straight line on the back of the seat to make it look professional and not DIY.
Once the back slats are all attached, add the seat slats.
Start with the front seat slat. It should be flush with the sides of the front legs and hang over the front of the leg 1/4”.
Secure into the under seat support board with 1 1/2″ screws.
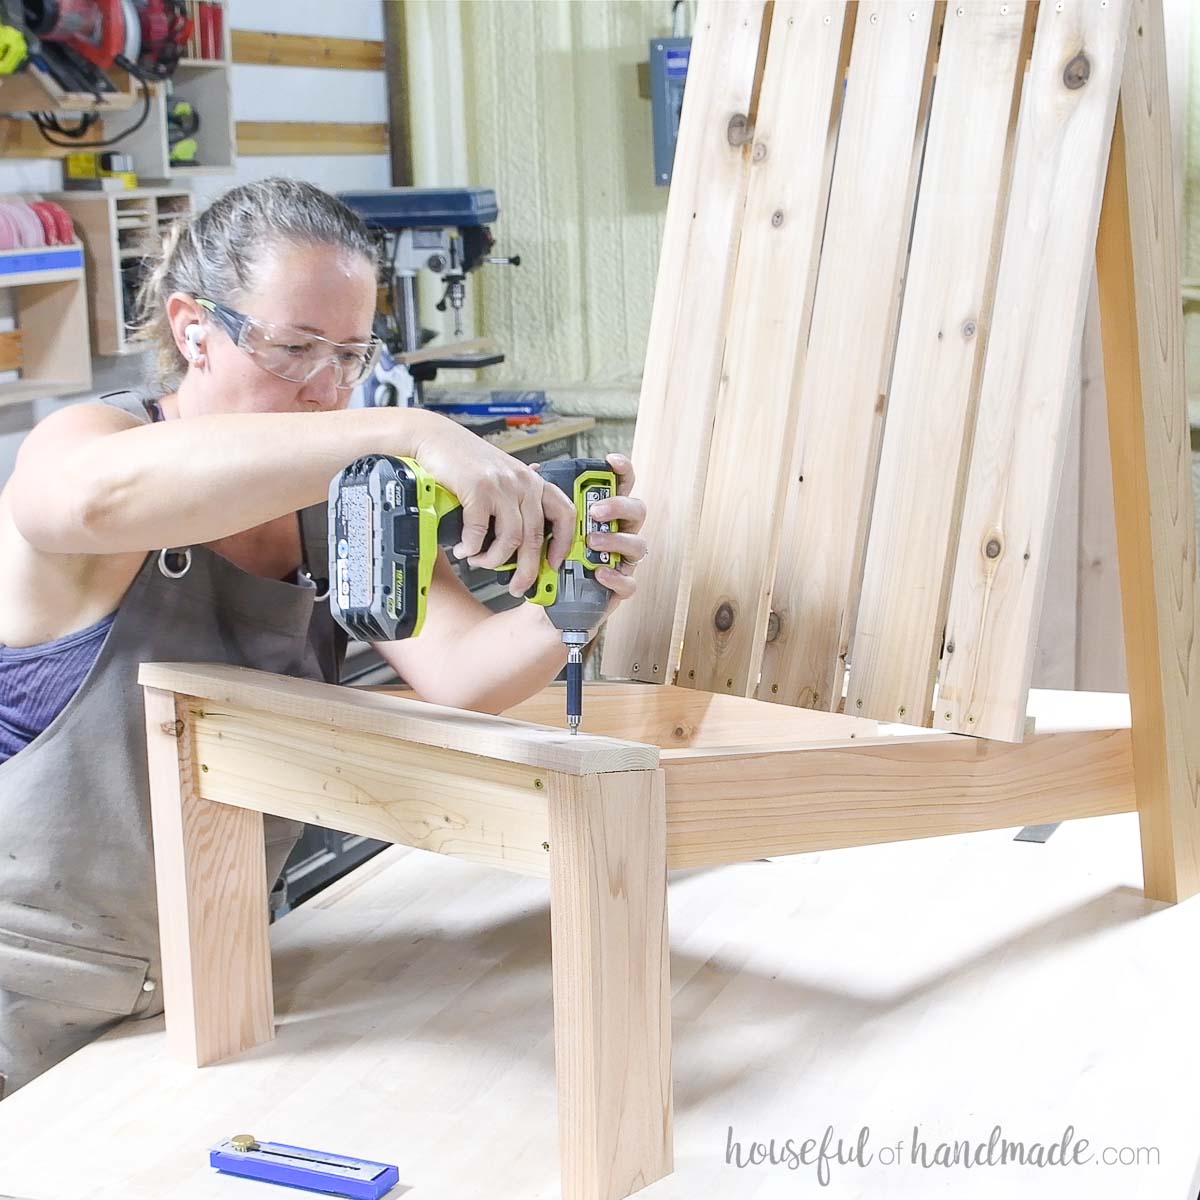
Line up the other 5 seat slat so they are 1 1/2” over the under seat support board on either side and there is a 3/8” gap between the boards.
Secure with 1 1/2” screws. Use (4) screws, (2) on each side, through each board into the under seat support pieces.
STEP 5- Finish
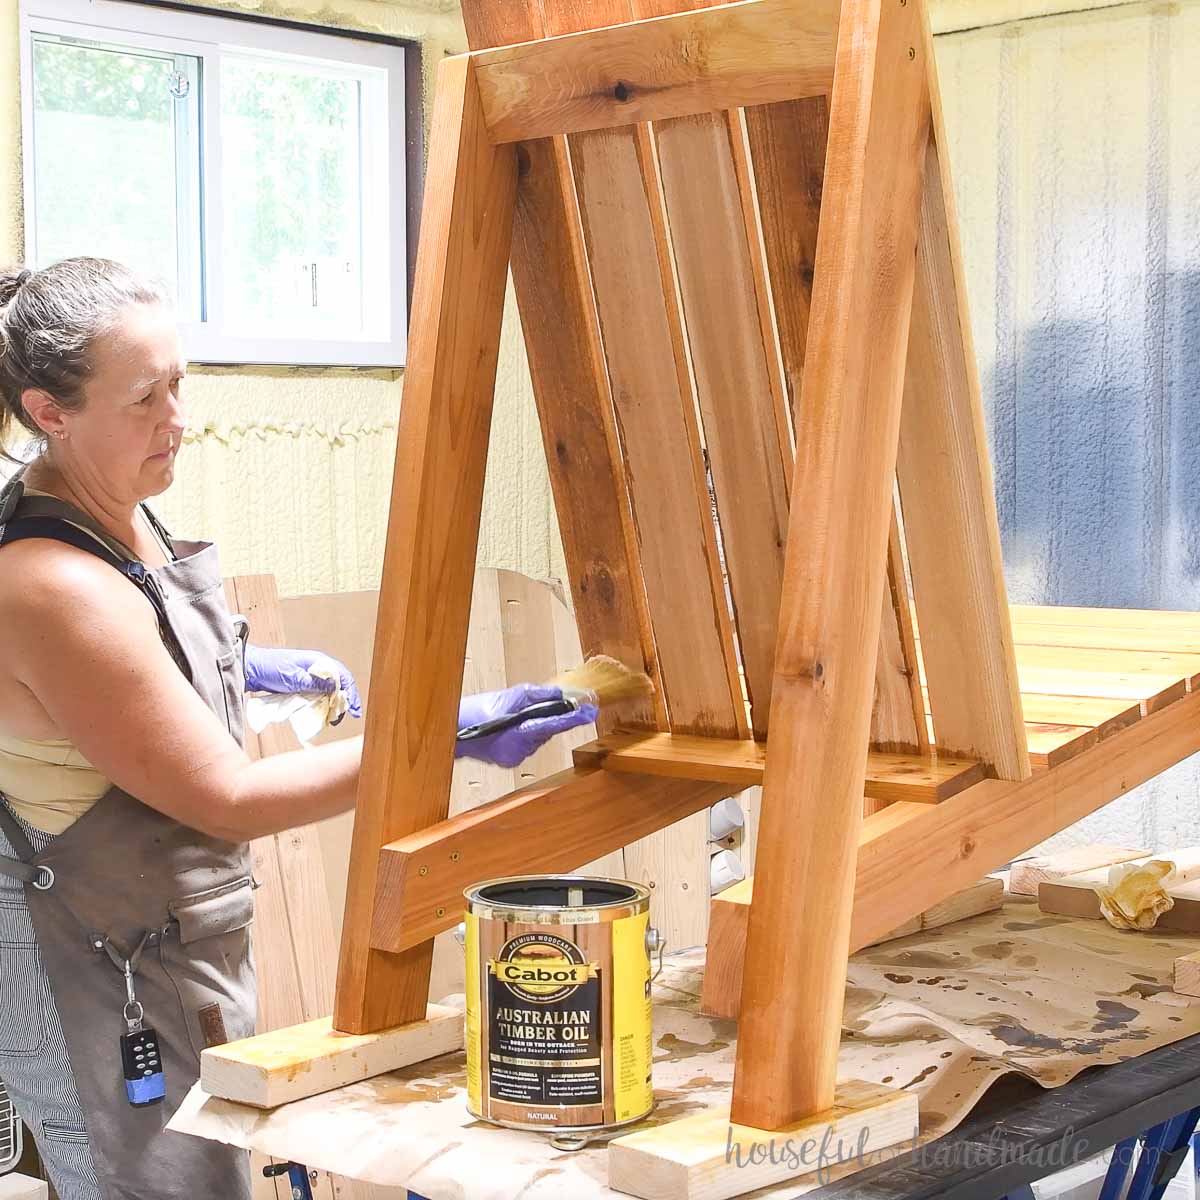
Sand your finished large chair, then seal it for outdoor use.
I used the same cedar wood sealed with Cabot Australian Timber Oil in Natural so they match the regular sized Adirondack chairs.
You did it!
Premium plans include:
- Recommended Tools
- Shopping list
- Easy to read cut list table
- Cut diagrams
- Step-by-step instructions with 3D renderings
- Helpful resources
- BONUS: 3D SketchUp file
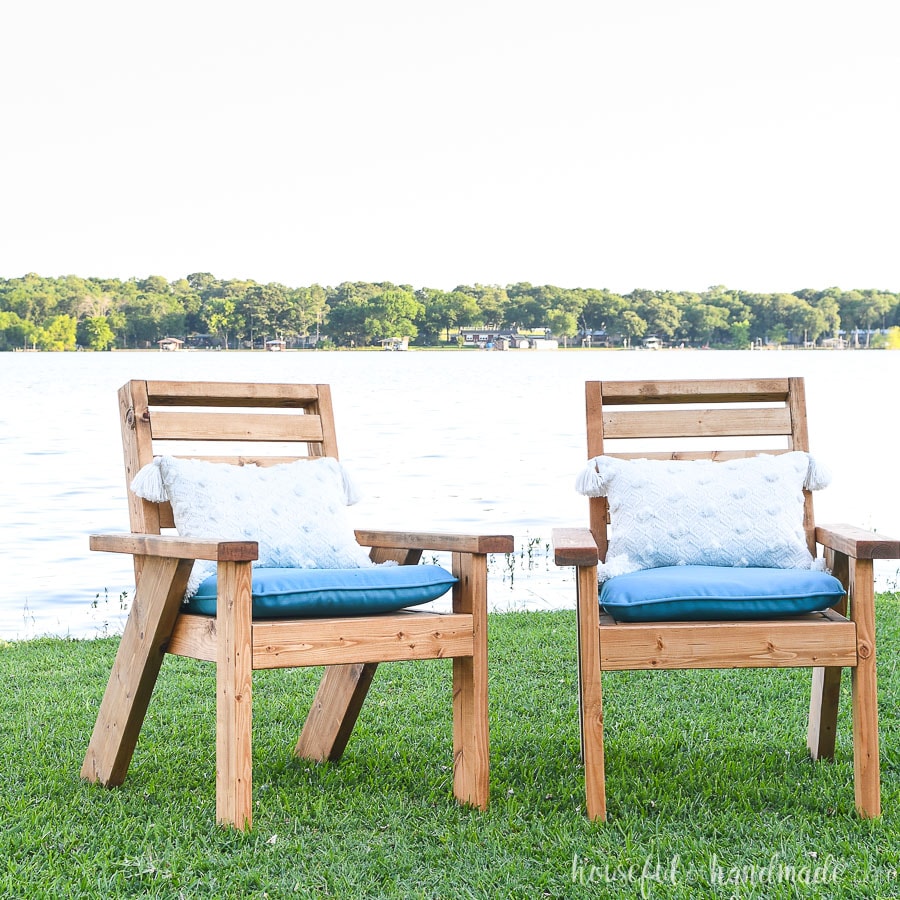
Add a 20” x 24” seat cushion if you prefer, but these chairs are great without them!
Happy building!
