Enjoy your outdoor space more with these outdoor dining table plans.
An easy to build large picnic table is the perfect way to add lots of entertaining space to your home.
A large picnic table with benches is a wonderful way to enjoy dinner outside with your guests.
This post may contain affiliate links. As an Amazon Associate I earn from qualifying purchases. Click here to read my full disclosure policy.
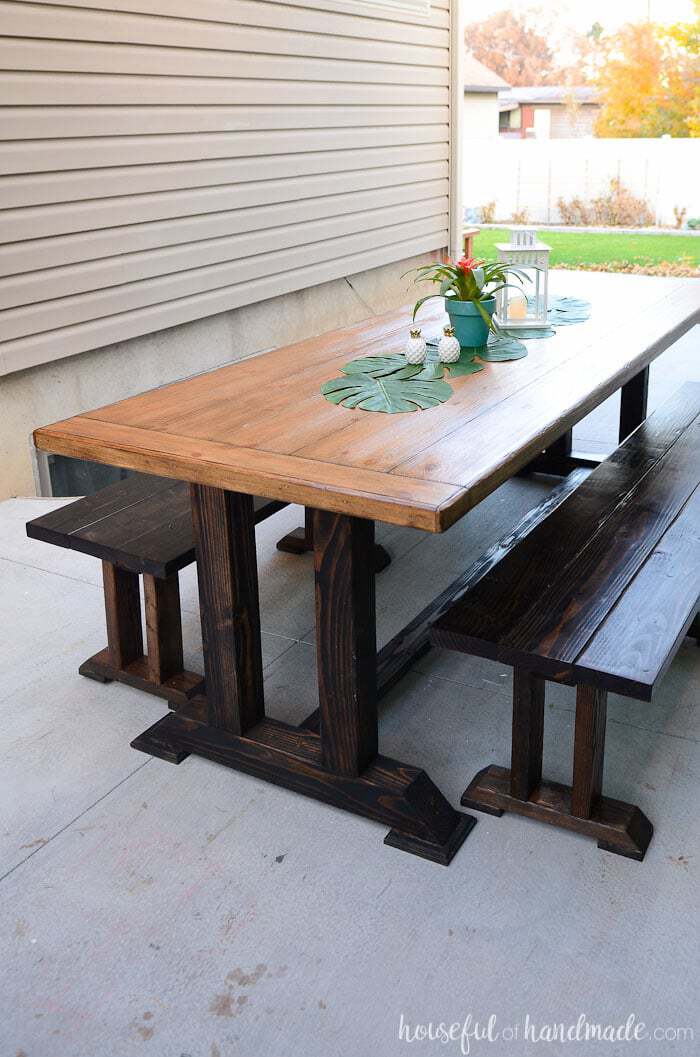
This beautiful rustic dining table has a strong base and matching dining benches creating seating for 8 or more people.
The final part of our tropical oasis was to create a place for our family to gather outside.
Our kids absolutely love eating dinner in the backyard, but until now, we didn’t have a way to do it.
We would try to enjoy meals outdoors by letting the kids eat on their nautical picnic table while the adults balanced plates on their laps. It just didn’t work. But not anymore…
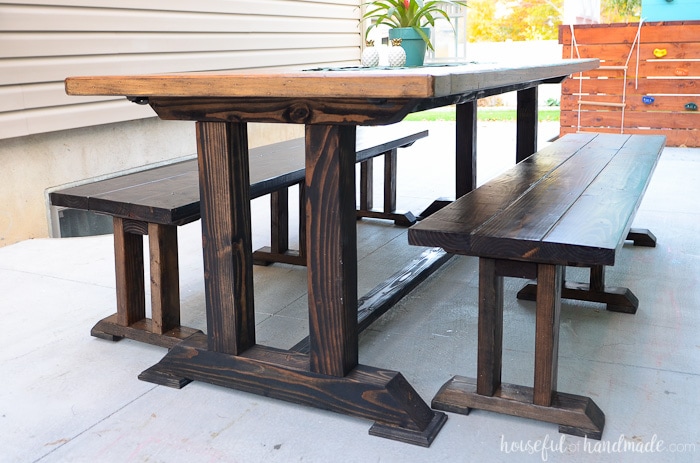
Now we have a beautiful place to have family meals outside!
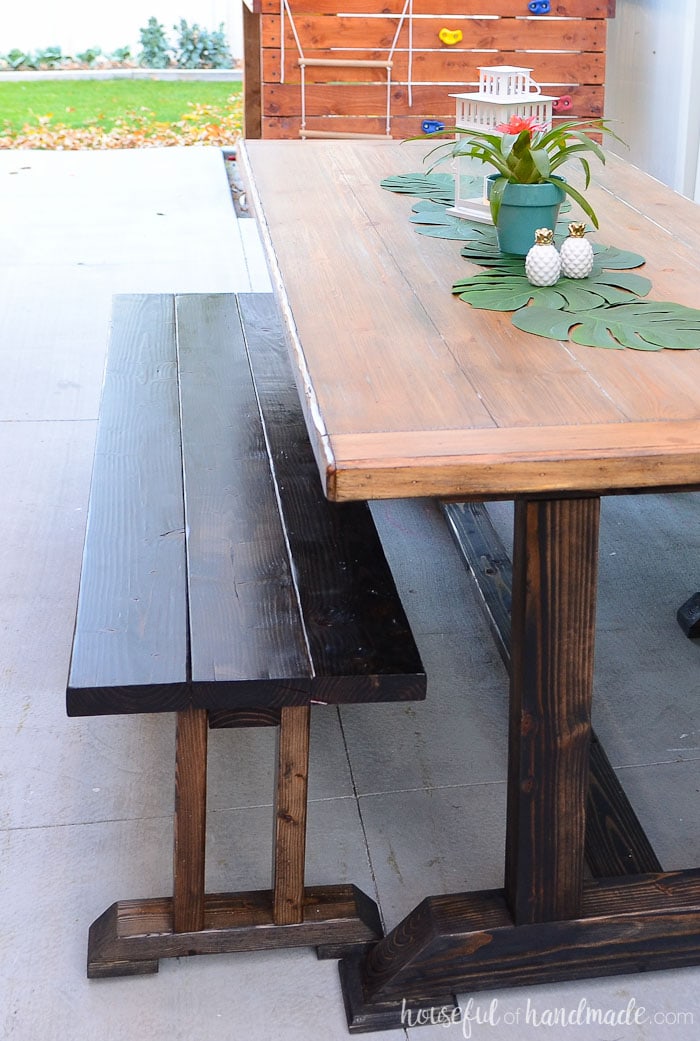
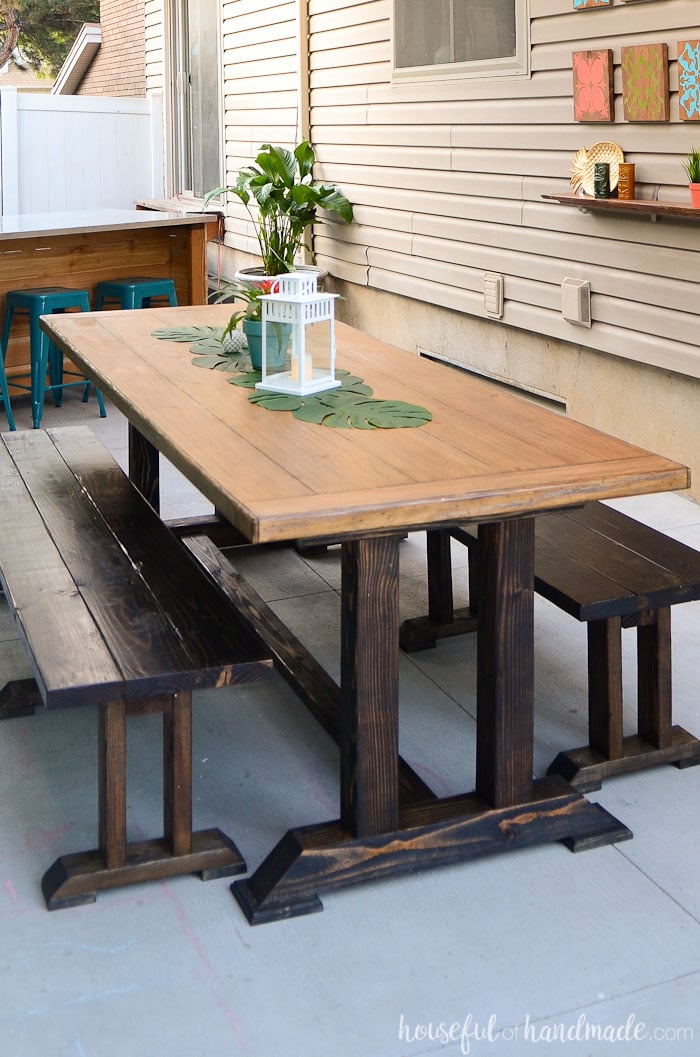
Our patio has been transformed into a beautiful dining space and at the center of it is this giant outdoor dining table. It’s the perfect place for the whole family to gather (with room for plenty more).
We even got the chance to enjoy some time outside this last weekend, including playing some card games. The patio is my new favorite place for family game night!

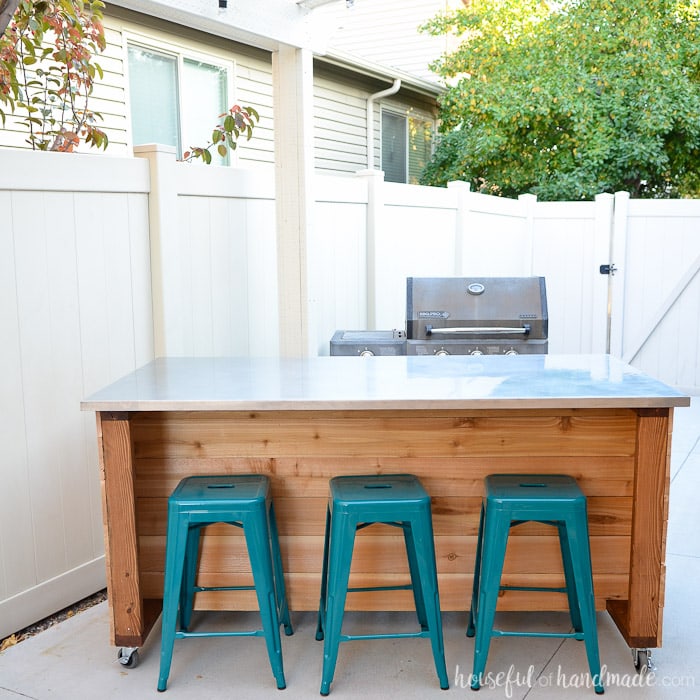
The table top was purchased from a local furniture store as a scratch & dent (just like the table top for our outdoor kitchen island).
I didn’t realize just how big it was until I finally pulled it out of storage to add the legs. This table top is 96″ x 38″.
So I built large, extra deep benches to go on either side. Now we can easily fit our family plus more and enjoy the new pergola.
The entire space is just coming together so great! I cannot wait to share the reveal with you in just a couple days.
And don’t miss out on the rest of the DIYs we used to create the perfect tropical oasis:
- Build a Patio Pergola attached to the House
- Installing a Clear Pergola Roof
- Outdoor Kitchen Island Build Plans
- Easy Tropical Wall Art DIY
UPDATE: Our high-end scratch & dent table top was not actually solid wood. It did not survive the winter without damage so I ripped it off the base (that did survive) and made a new top. See the new wood picnic table plans here.
More Amazing Outdoor Builds
Get your patio ready for hours outside with these DIY projects.


How To Build the Outdoor Dining Table
Tools & Materials
Recommended Tools:
- Miter saw
- Pocket hole jig
- Drill
- Impact driver (optional, but I love not having to switch bits with the drill)
- Measuring tape
- Carpenter’s square
- Sander
- Clamps
- Optional: Trim router
Supplies:
- PDF Build Plans
- Lumber
- (3) 4×4 boards, 8’ long
- (1) 1×6 board, 2’ long
- (3) 2×4 boards, 8’ long
- (1) 2×8 board, 8’ long
- (4) 2×10 boards, 8’ long
- Wood glue (use outdoor for an outdoor table)
- 1 1/4″ construction screws
- 2 1/2″ construction screws
- 4″ construction screws
- 2 1/2″ pocket hole screws
Cut List
Cut the pieces according to the easy to ready cut list in the premium PDF plans.

The 4×4 pieces for the leg tops and bottoms are cut with each end at 45 degree angle.
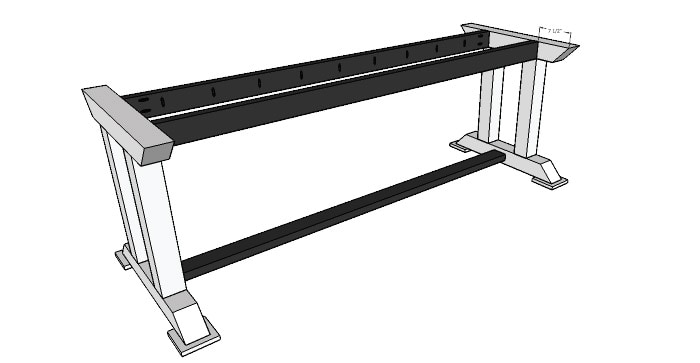
STEP 1- Make the base sides
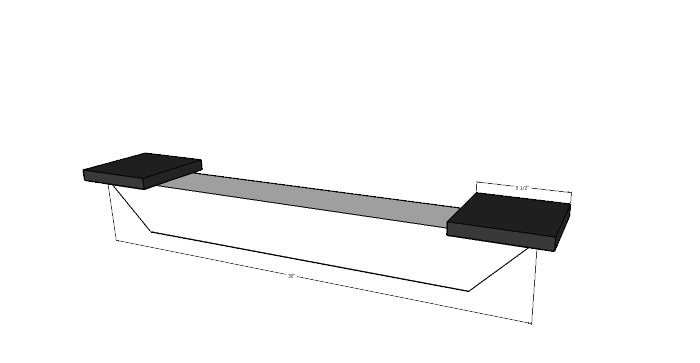
If you want to add a decorative top to the table feet, use a router to add a decorative edge to all 4 sides of all 4 feet.
Attach the feet to the bottom of the table leg bottoms with wood glue and 1 1/4″ construction screws.
Be careful not to attach the feet too close to the outside of the leg bottoms where it is angled or the screws will come through the top.
Repeat for the other table leg.
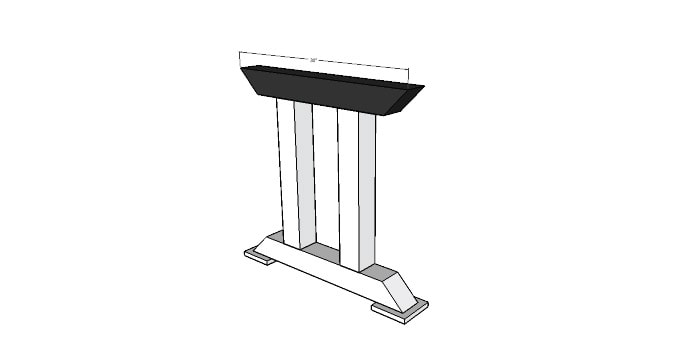
Attach the table leg posts to the top of the table leg bottoms. Space the posts so they are 8″ apart from each other and centered on the leg bottom.
Predrill 1″ deep holes in the bottom of the leg bottoms and secure the legs with 4″ screws through the predrilled holes into the leg posts.
Repeat for the other table leg.

Attach the table leg top to the top of the leg posts in the same manner as you attached the posts to the table leg bottoms.
Make sure the posts are 8″ apart and center on the leg top. Repeat for the other table leg.
STEP 2- Attach sides together
Build the table base by attaching the table top supports with pocket holes so they are flush with the outside of the table leg posts.
Add pocket holes to the top of the table top supports to attach the table top.
Attach the table leg support between the two table leg bottoms so they are centered on the table legs.
Secure them with 2 1/2″ pocket holes.
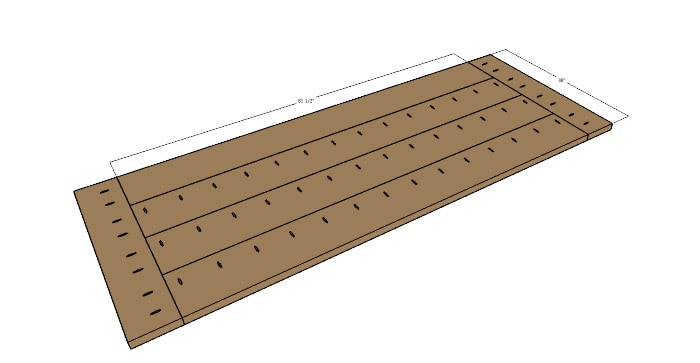
STEP 3- Build table top
Build the table top with pocket holes by attaching the 4 table top boards together along the length of the boards.
Then add the 2 table top ends to the ends with pocket holes.
Secure the table top to the table base with 2 1/2″ pocket hole screws.
Sand the final table. Then it is ready for you to finish.
If using your table outside, make sure to use outdoor approved stains and sealers.
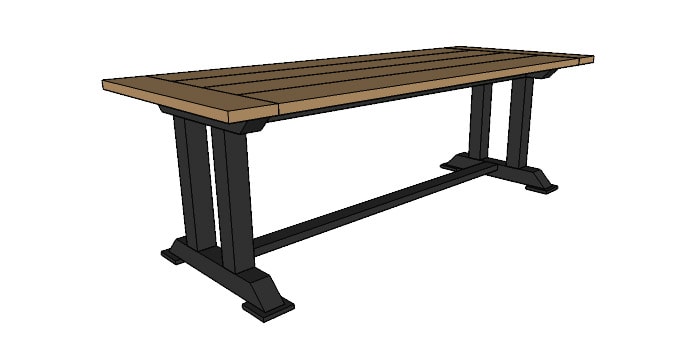
And you did it!
Premium plans include:
- Recommended Tools
- Shopping list
- Easy to read cut list table
- Cut diagrams
- Step-by-step instructions with 3D renderings
- Helpful resources
- BONUS: 3D SketchUp file
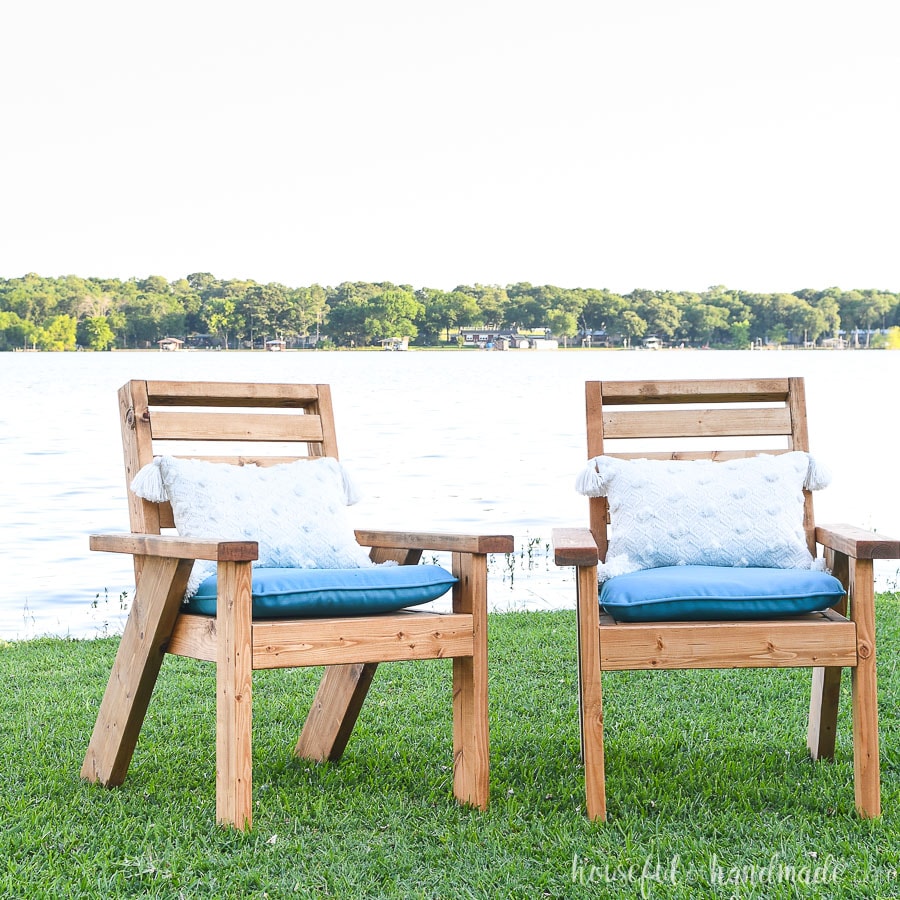
Now you can add some seating. I recommend these matching dining table benches.
I love that the benches are a budget friendly way to add tons of seating to our large dining table.
Then make sure to check out the complete patio reveal for all the patio DIYs.
Happy Building!
