If you are sick and tired of the cheap plastic hanging planters from the nursery that cannot hold up to the summer sun, you will love this new build plan!
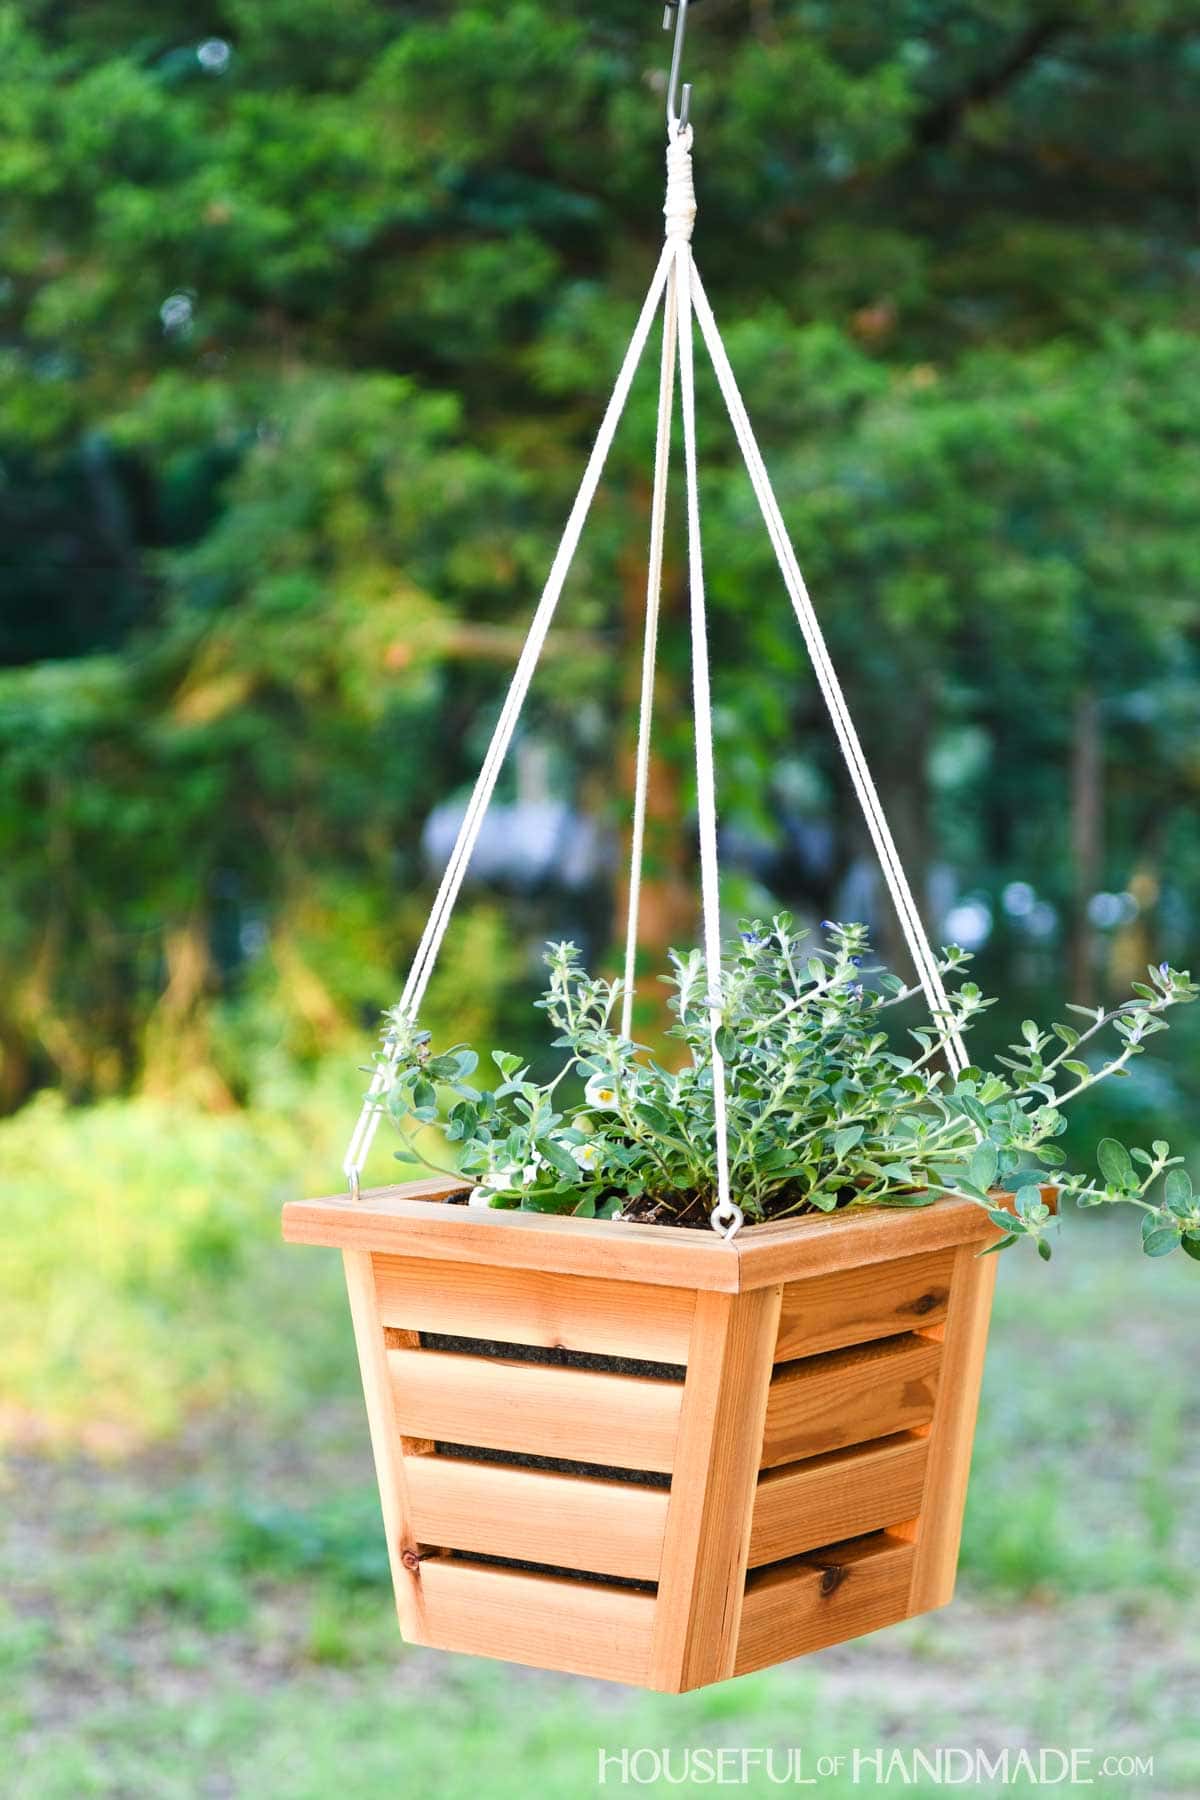
This simple wood hanging planter looks so high end. But it was made with just two 1×2 boards.
I partnered with Kreg Tools to bring this fun project to you for free! So grab your Kreg pocket hole jig and let’s get building.
This post may contain affiliate links. As an Amazon Associate I earn from qualifying purchases. Click here to read my full disclosure policy.
Cedar Hanging Basket
I used cedar boards to help my hanging planter last for years. And the cedar patina will only make it look more beautiful as time goes on.
At my local home improvement store, they did not have cedar 1×2 boards. But I was able to rip the two 1 1/2″ wide boards from one 1×4 board.
You can build the hanging basket out any wood you prefer. Just make sure to seal it for outdoor use to prevent the wood from breaking down.
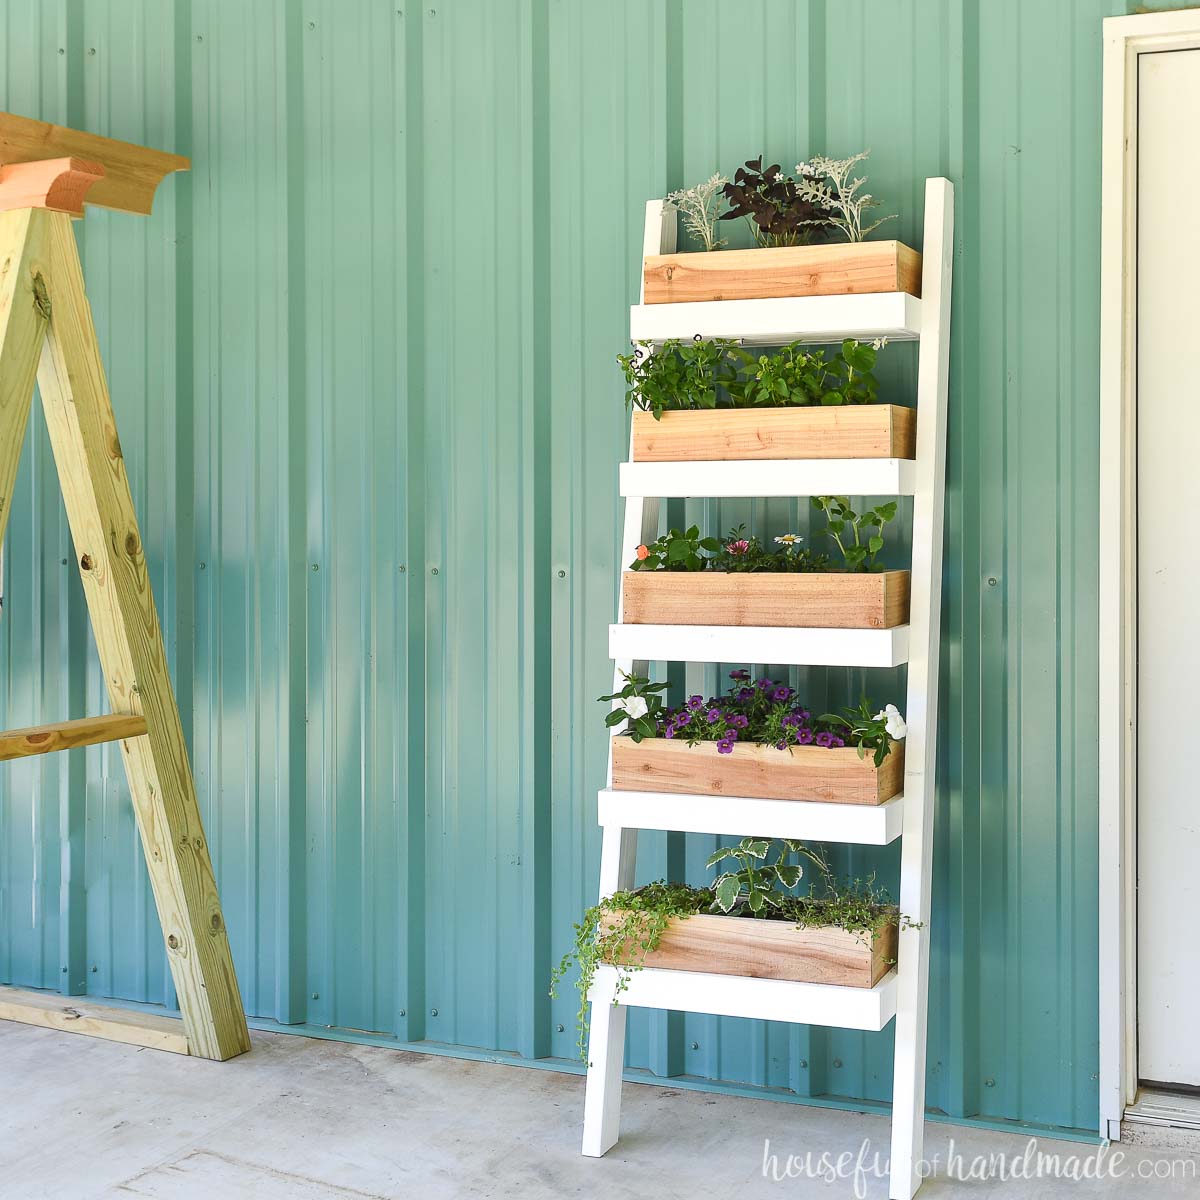
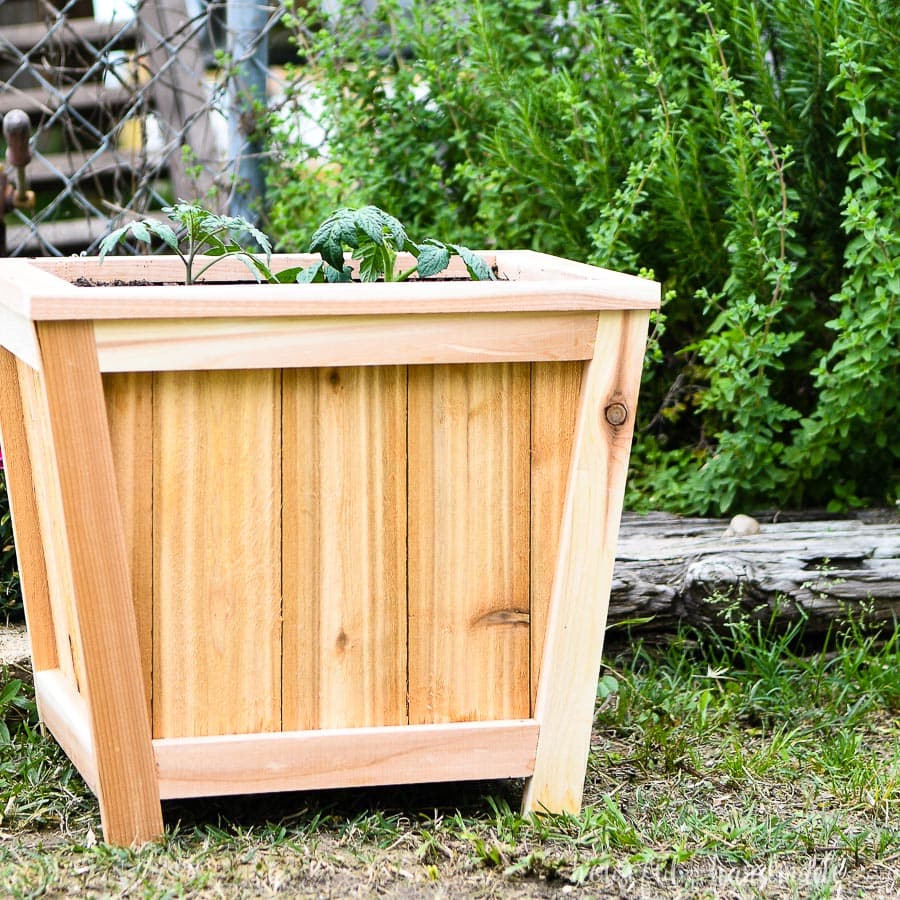
More DIY Gardening Ideas
Build yourself a green thumb with these other fun DIYs for the garden.
How to Build a Wooden Hanging Planter
Tools & Materials
Recommended Tools:
- Miter saw
- I recently upgraded to this sliding miter saw (watch for it to go on sale), but previously used this inexpensive miter saw that I love.
- Pocket hole jig
- For this project, the Kreg 320 jig was perfect for adding pocket holes to the angled 1×2 boards.
- Drill
- Impact driver (optional, but I love not having to switch bits with the drill)
- Speed square
- 90 degree drill adapter
- Stapler
- Sander
Supplies:
- Wood products
- (2) 1×2 boards, 8′ long
- 1 1/4″ Blue-kote pocket hole screws
- Outdoor wood glue
- (4) 1 1/2″ screw eyes
- Landscape fabric (~15″ x 20″)
- 16′ cording
- S-hook
- Super glue
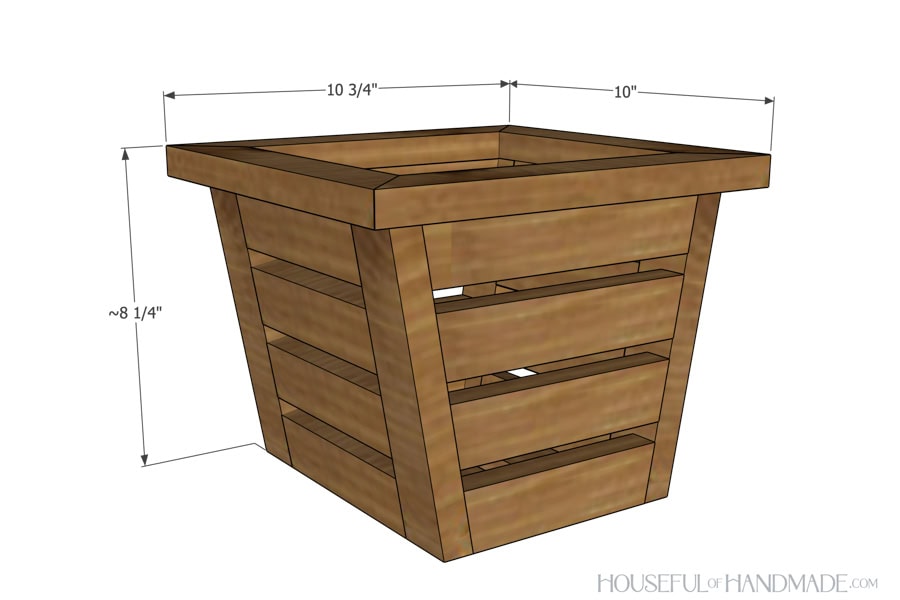
Overall Dimensions
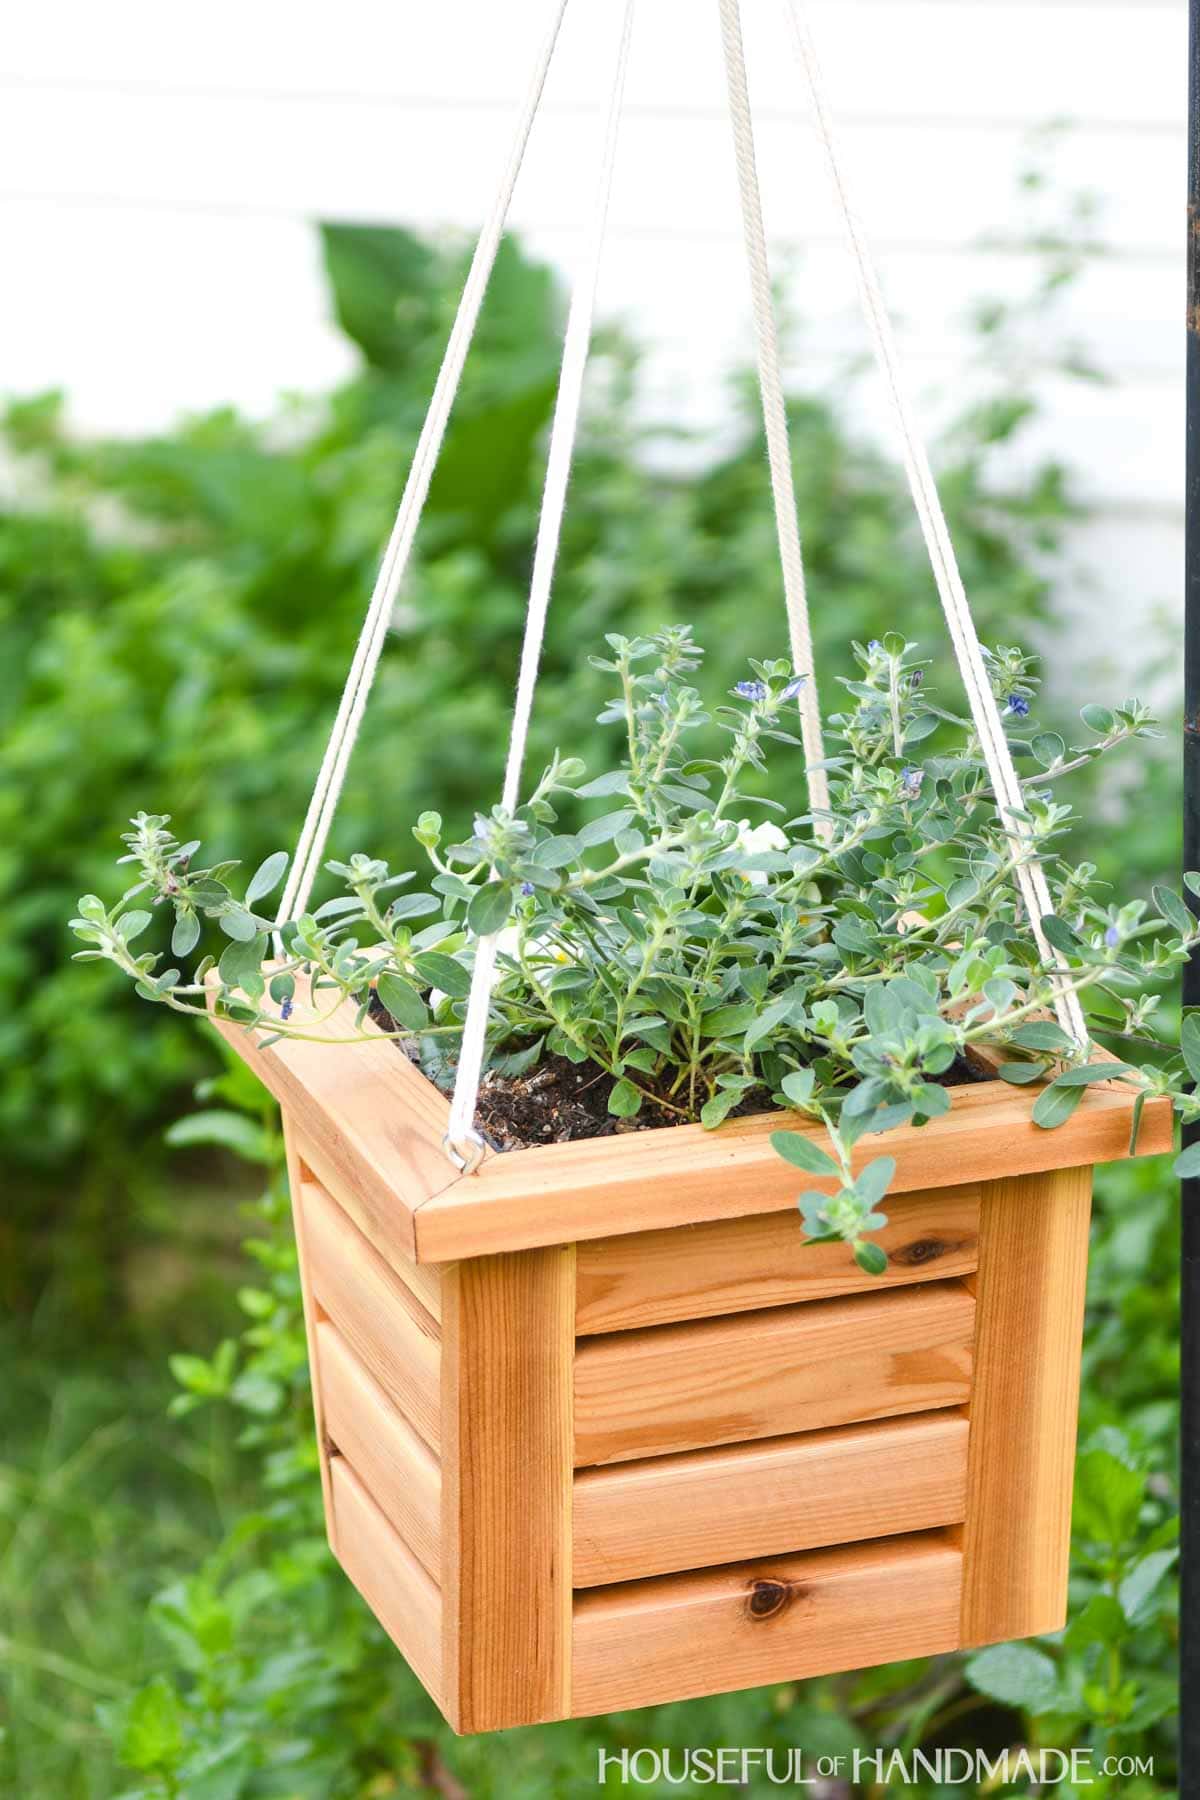
The finished basket is 10 3/4″ wide by 10″ deep and approximately 8 1/4″ tall. You can make the cord as long or as short as you prefer to adjust the hanging length.
Cut List
Cut out the pieces according to the free plans shared on Kregtool.com.
Use the miter saw to cut the tapered corner and front/back pieces at a 10 degree angle. Then cut the top frame pieces are cut a 45 degree miter.
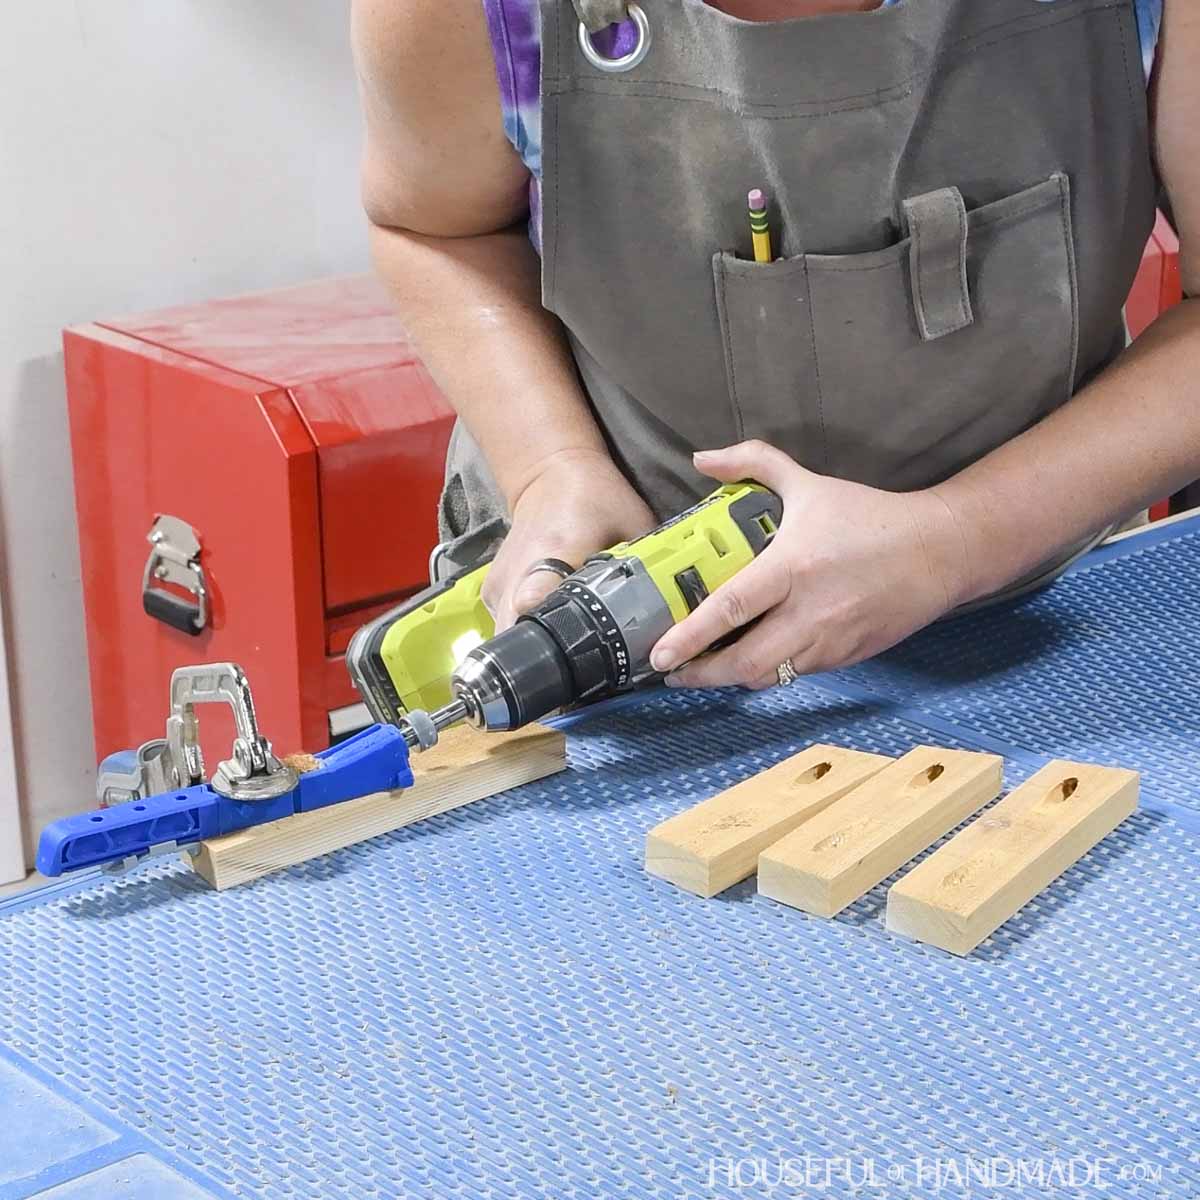
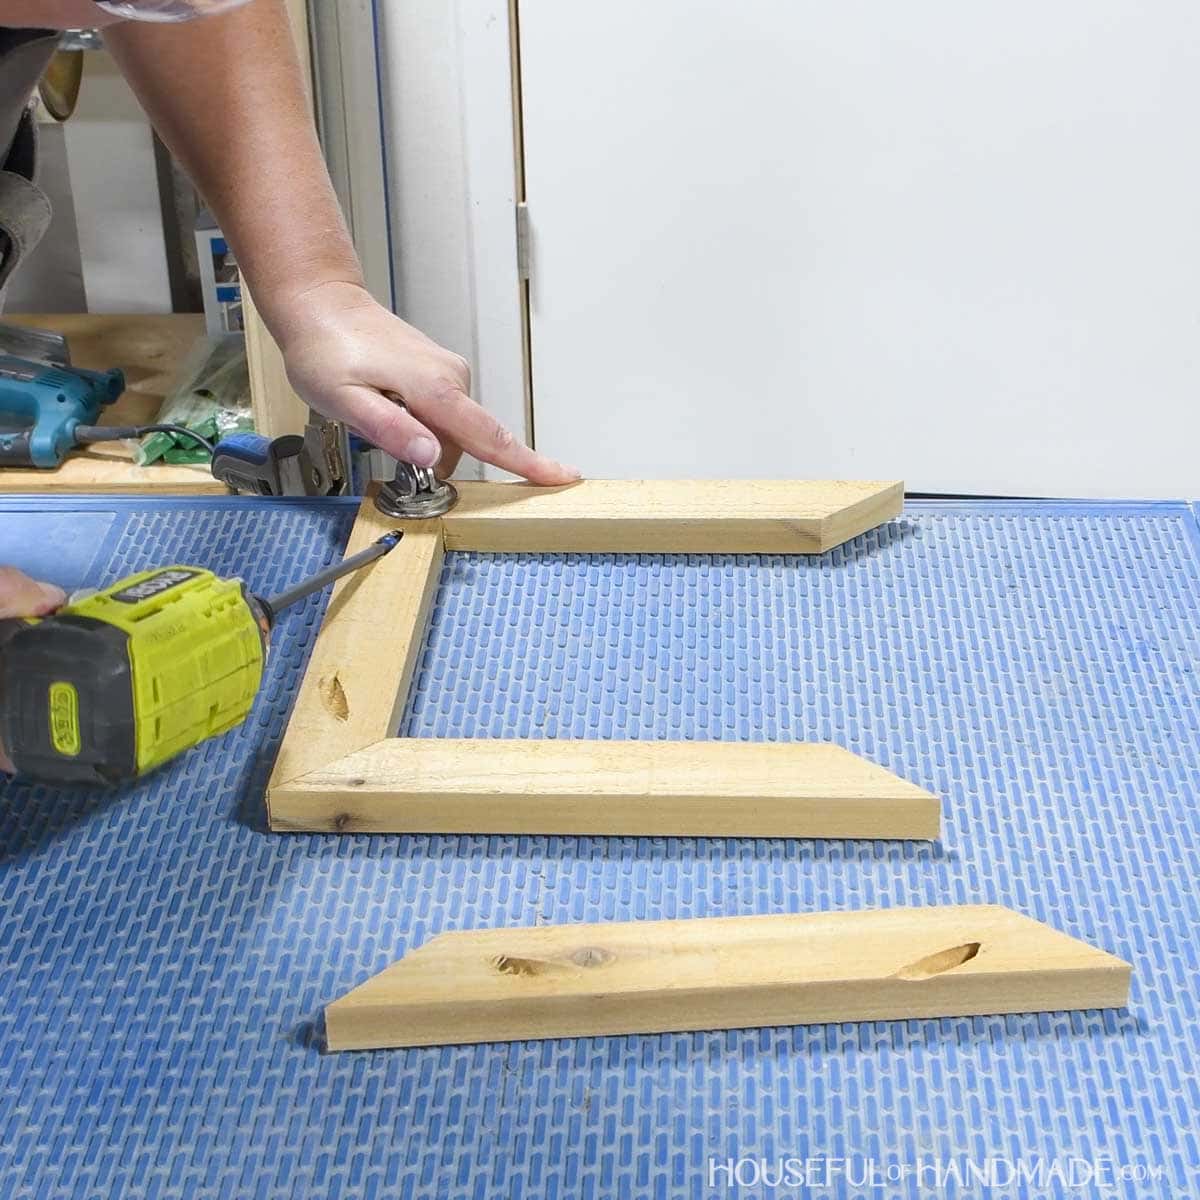
STEP 1- Assemble front/back
Set your pocket hole jig for 3/4″ thick material.
Drill 1 pocket hole in each end of the front/back top, 2nd, 3rd and bottom boards.
Learn to use the Kreg 320 Pocket Hole Jig here.
Attach the front/back top board between two corner pieces so it is flush with the front and top.
Then attach the front/back bottom so it is flush with the front and bottom. Secure with 1 1/4″ pocket hole screws and wood glue.
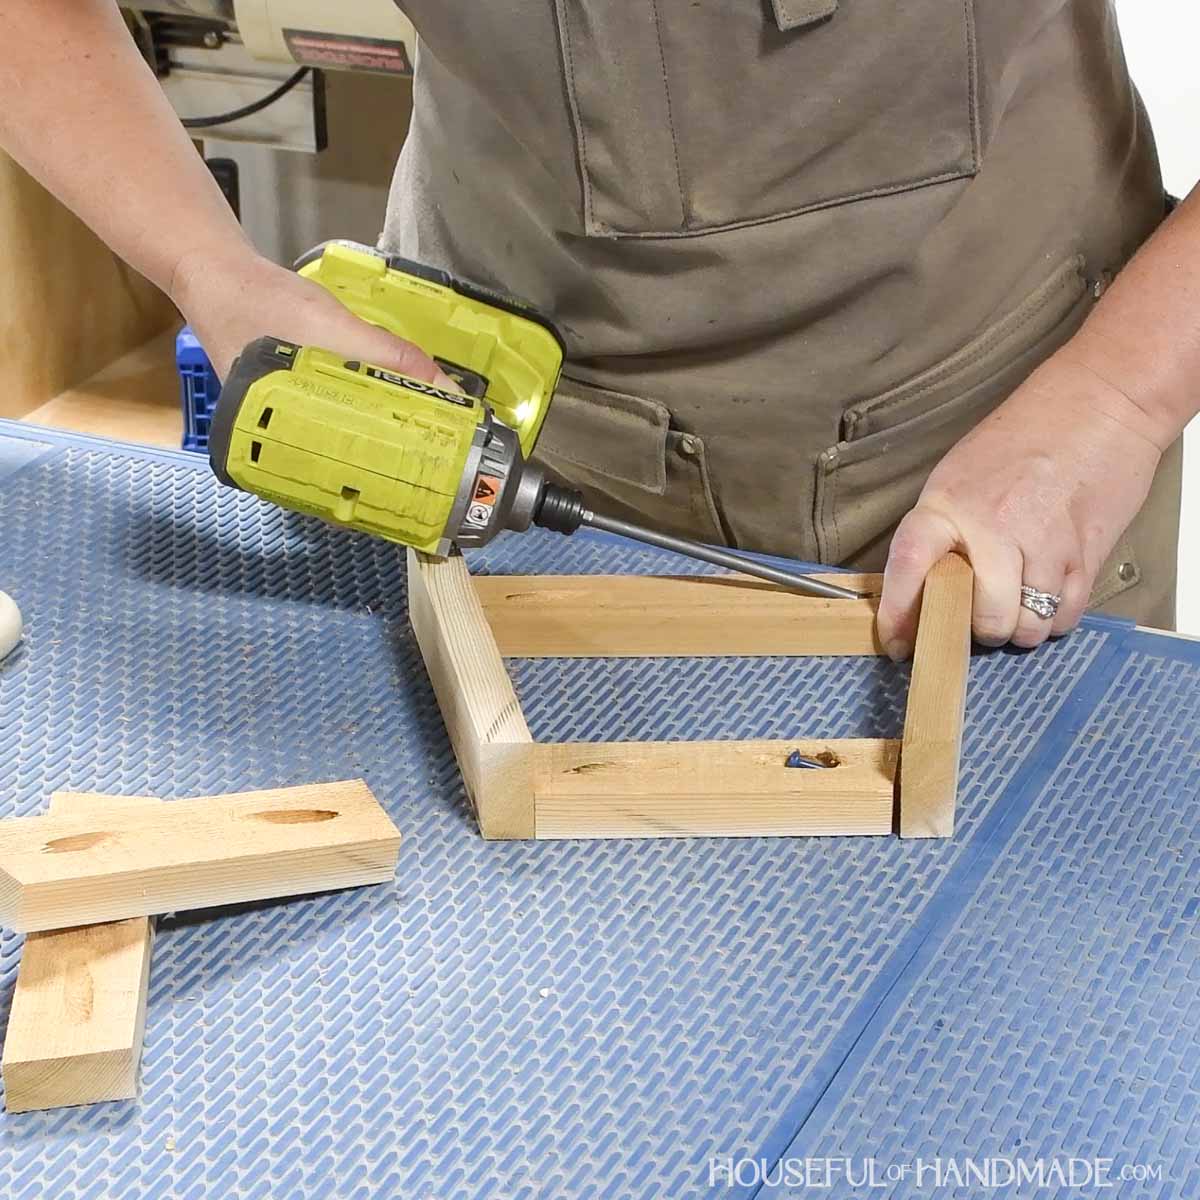
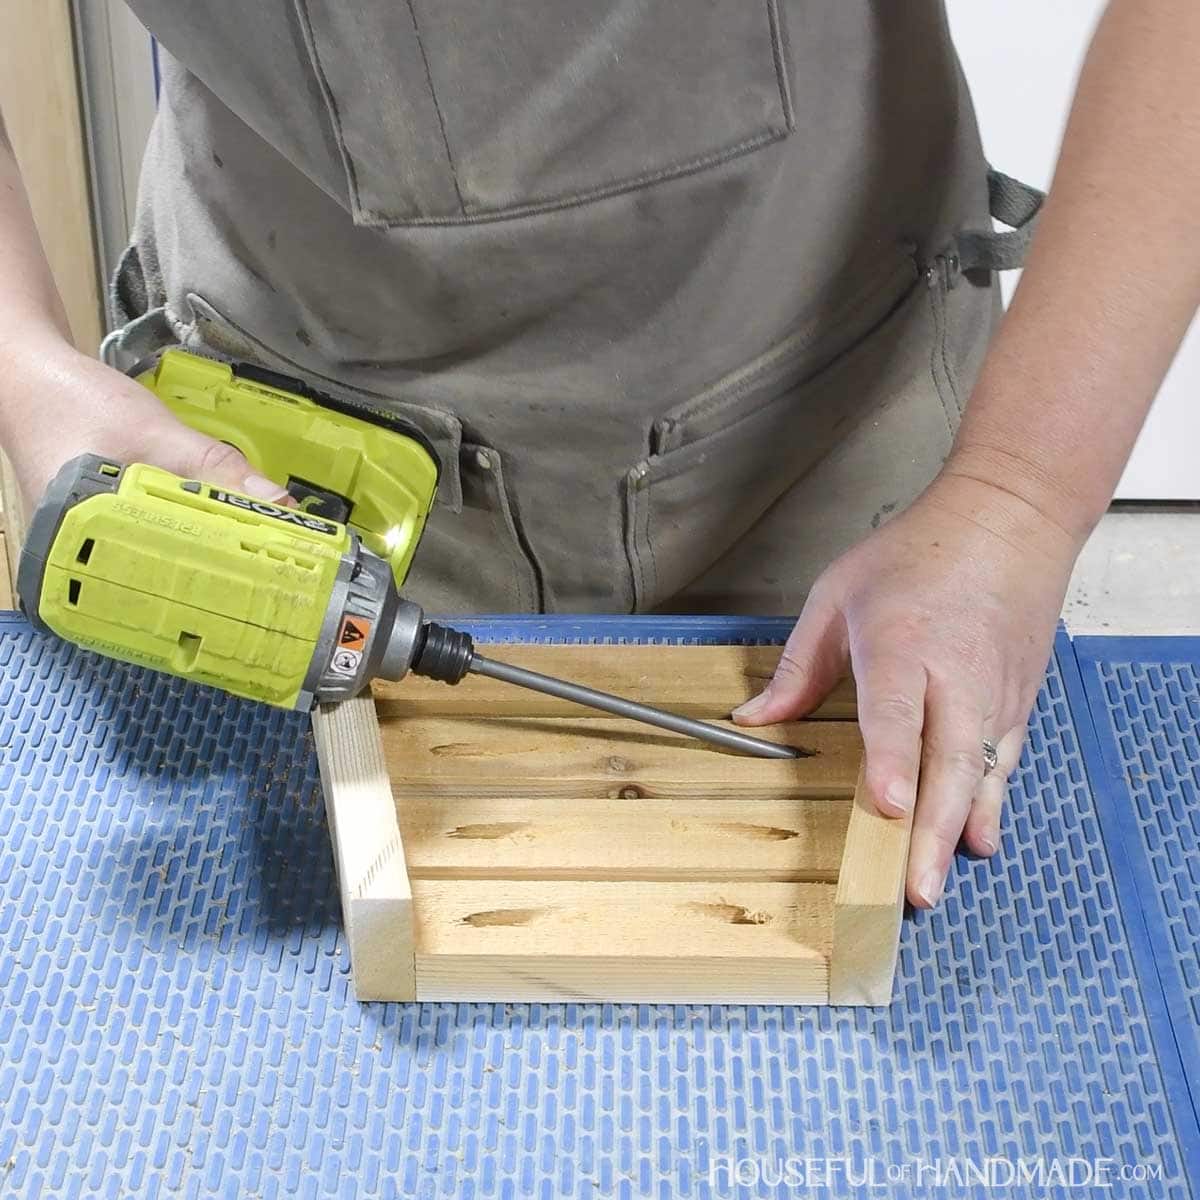
Next, attach the front/back 2nd and 3rd pieces spaced evenly between the top and bottom. Again secure with glue and 1 1/4 pocket hole screws.
Repeat so you have two assembled pieces for the front and back of the planter.
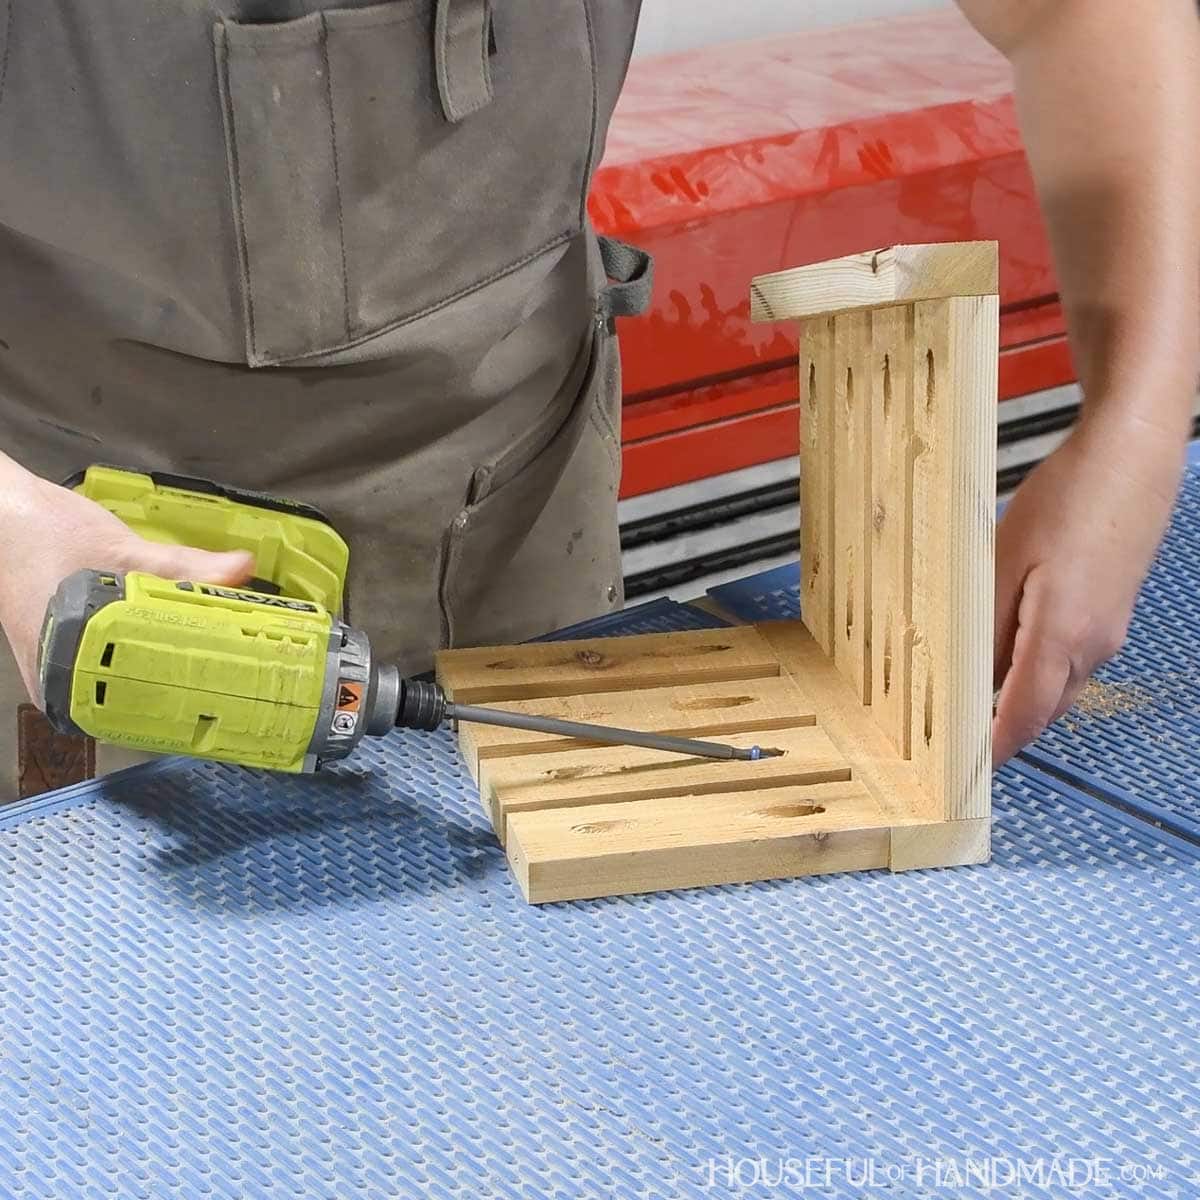
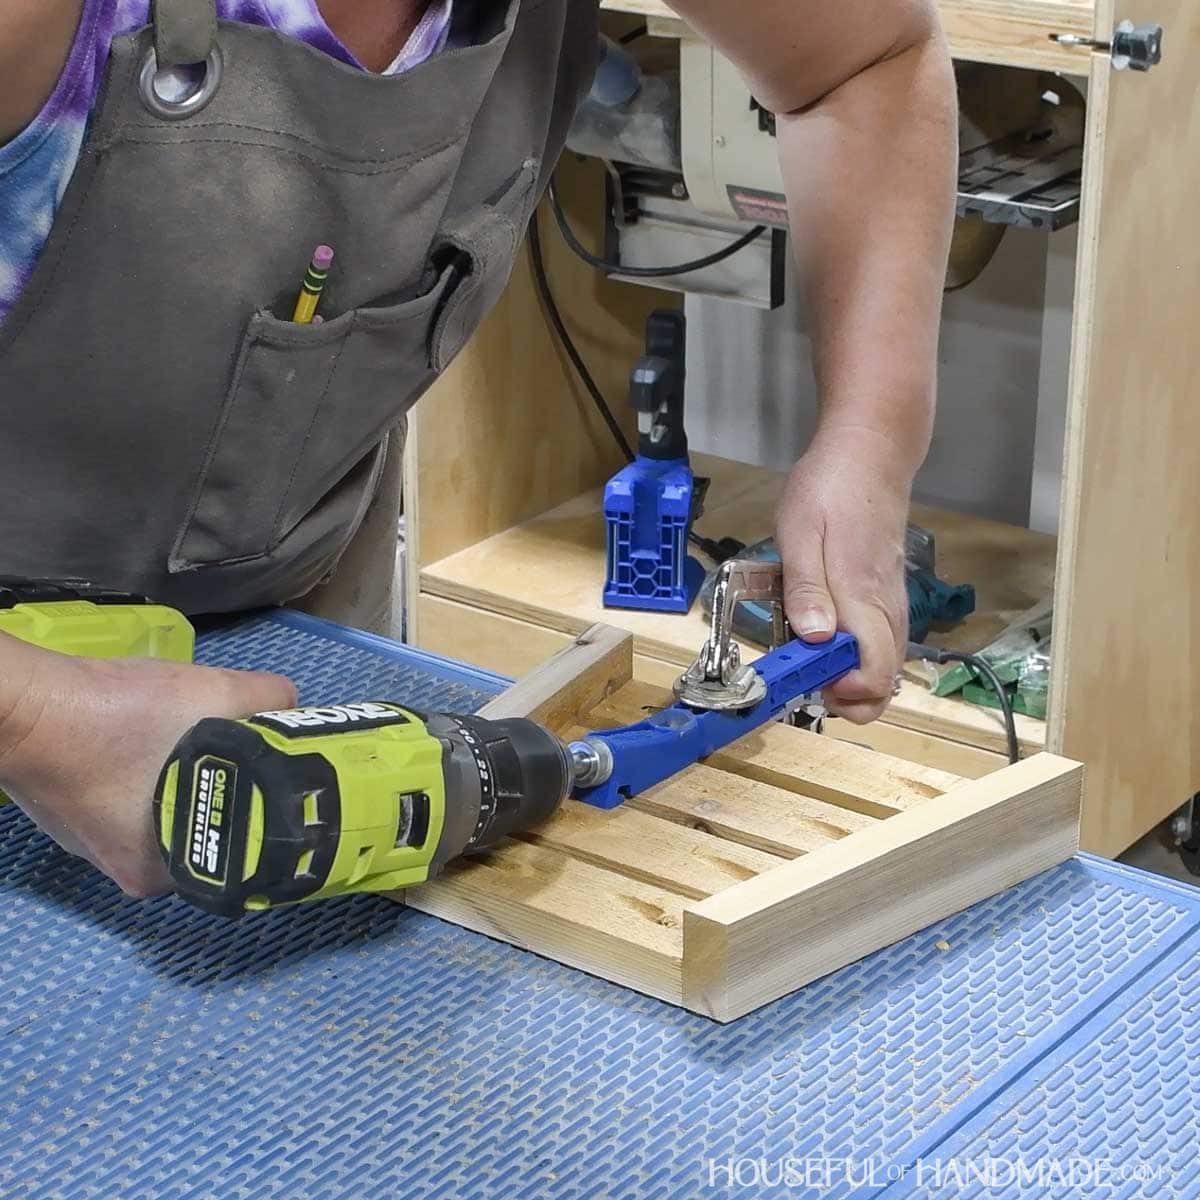
STEP 2- Attach sides
Drill 1 pocket hole set for 3/4″ thick material in both ends of all the side pieces.
Attach them to corner pieces so they are flush with the front.
Space the sides evenly along the corner pieces (you should have ~1/2″ between them) and secure with glue and 1 1/4″ pocket hole screws.
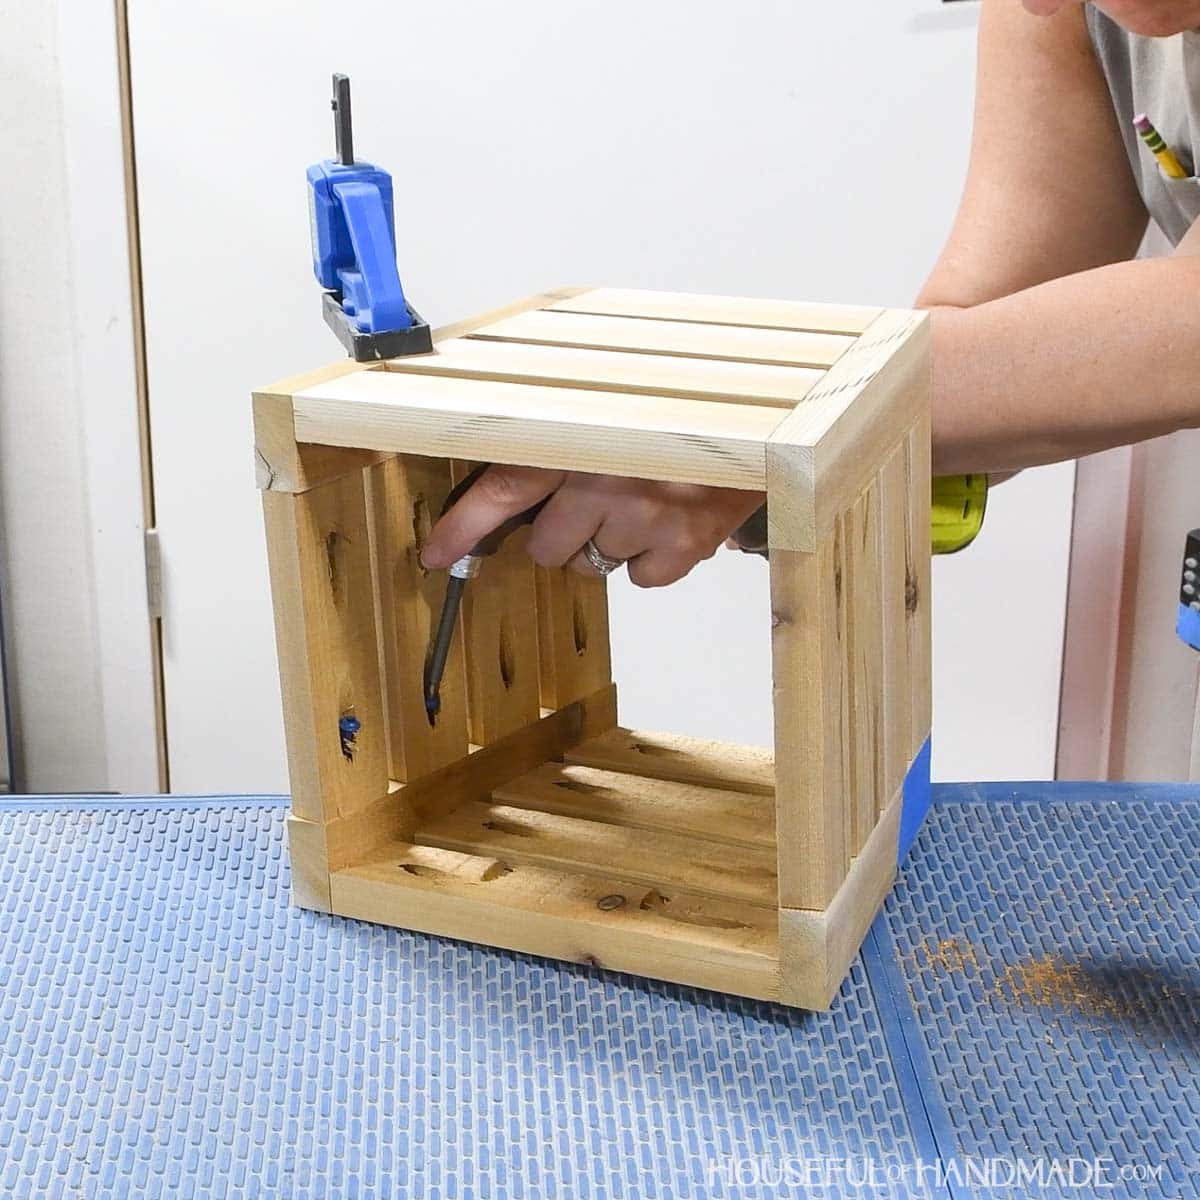
EXPERT TIP: You will need to use a 90° Pocket Hole Driver for driving screws inside the planter because it gets tight.
When attaching the sides to the back and closing in the planter, the regular pocket hole bit will not work. Use the 90° driver to drive the pocket holes in the small space.
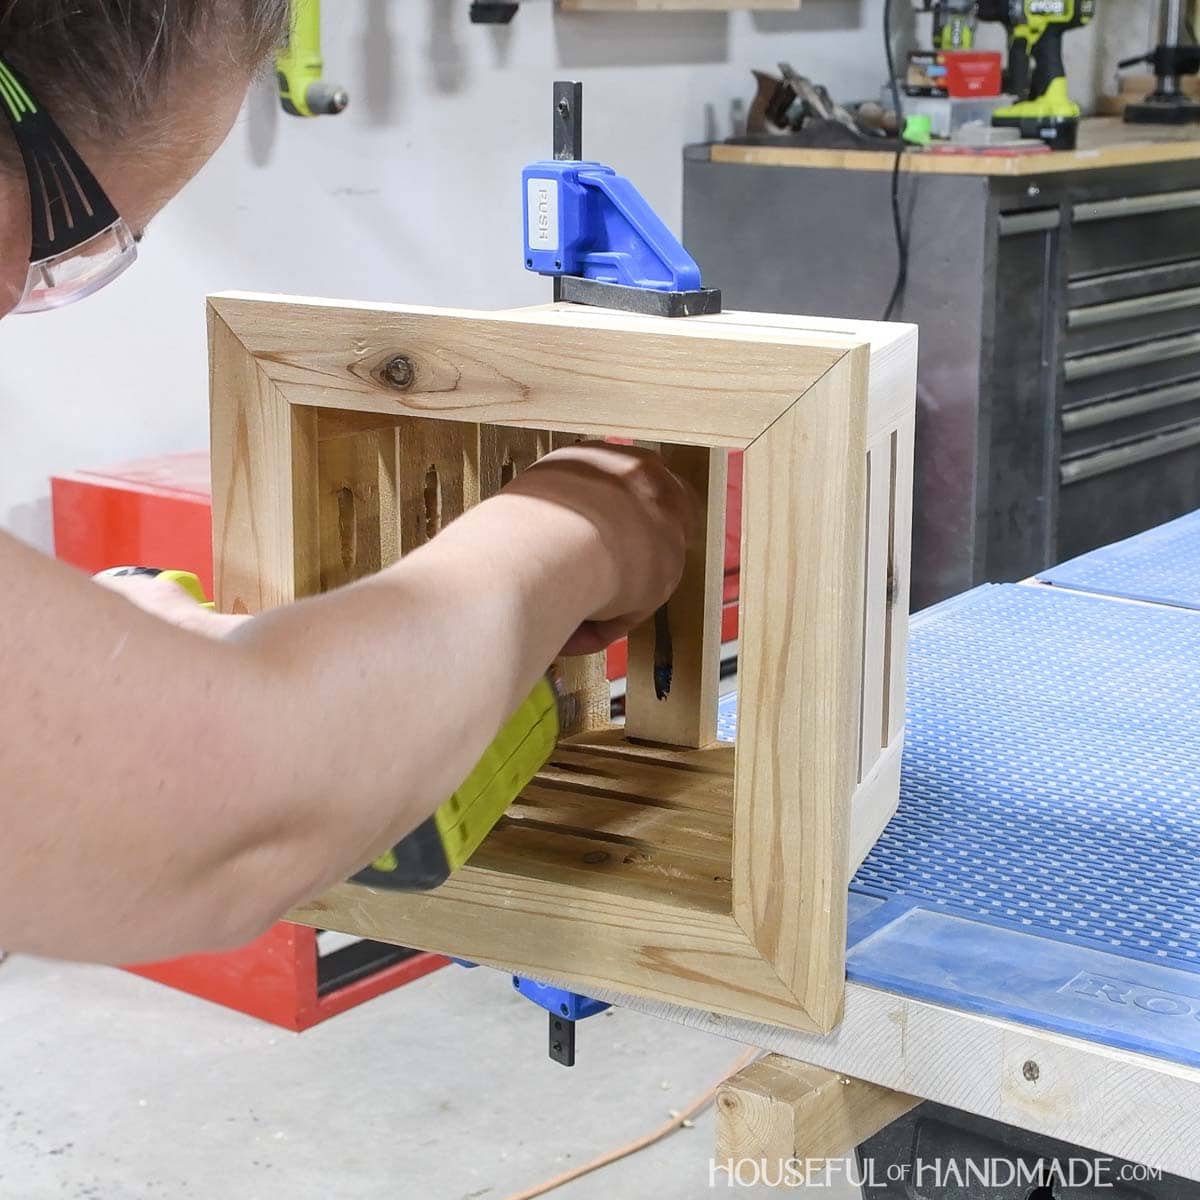
STEP 3- Add top frame
Add 1 pocket hole set for 3/4″ thick material in both ends of the Top frame side pieces.
Do not angle the pocket hole so it is 90° to the 45° miter cut or the edge of your pocket hole will cut into the outside edge of your board.
Instead angle the jig so the entire pocket hole is inside the 1×2 board.

Attach the sides between the Top frame front and back to create a rectangle with mitered corners.
Secure with wood glue and 1 1/4″ pocket hole screws.
Add 2 pocket holes to the top of the assembled front and back and 1 to each assembled side.
I did this to the front/back before attaching the sides. Then added the pocket hole to the sides once all assembled.
Lay the frame top down on your workbench. Then center the assembled planter on top of it.
Secure the frame to the planter with glue and 1 1/4″ pocket holes screws.
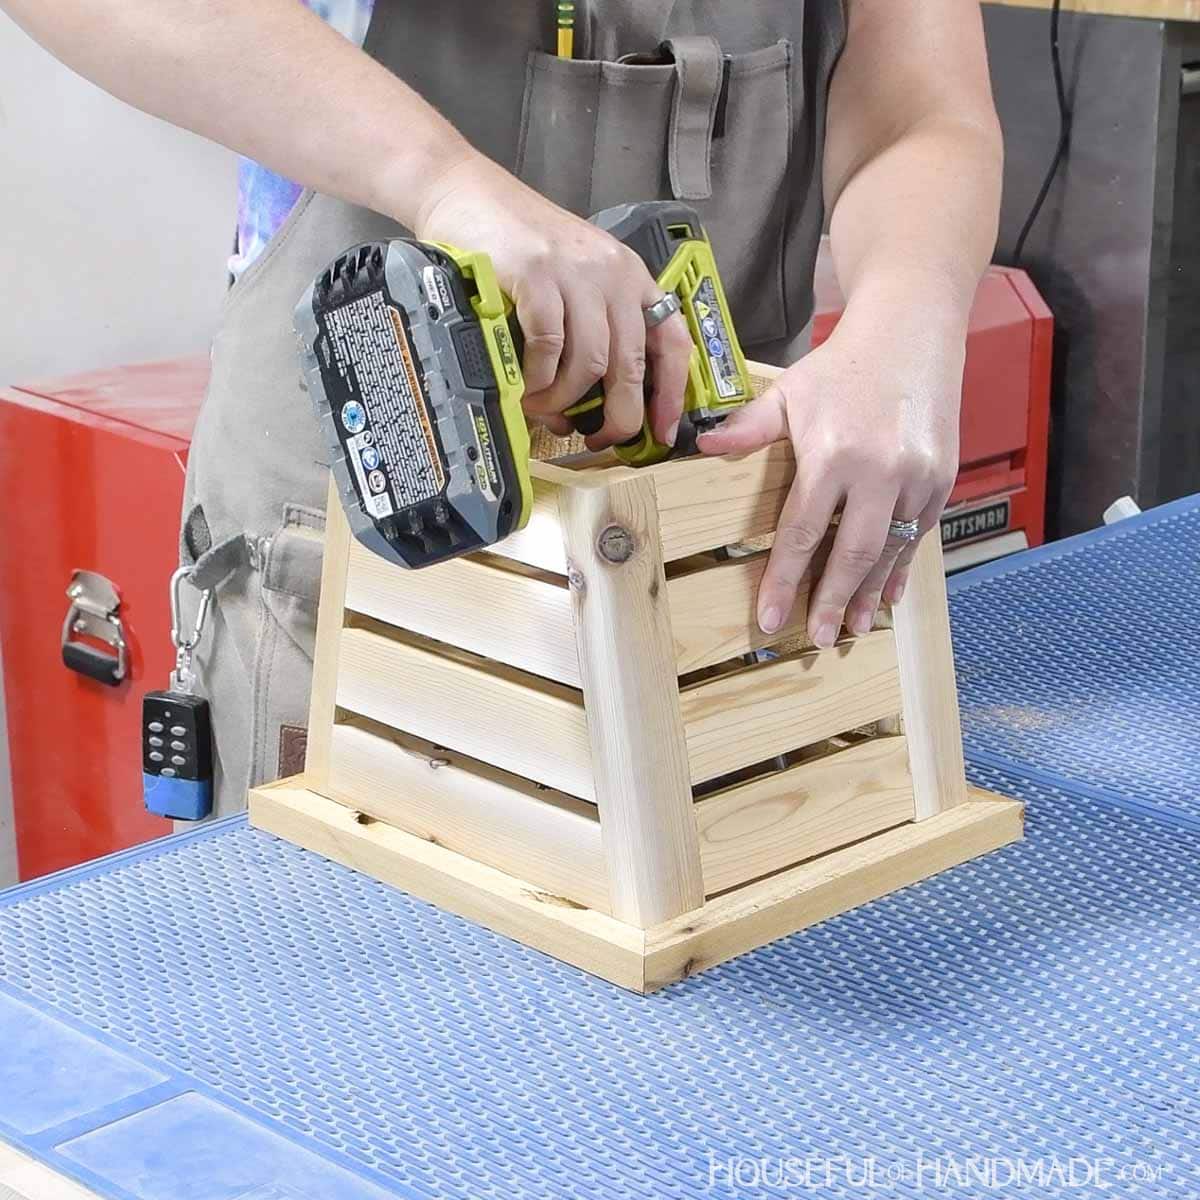
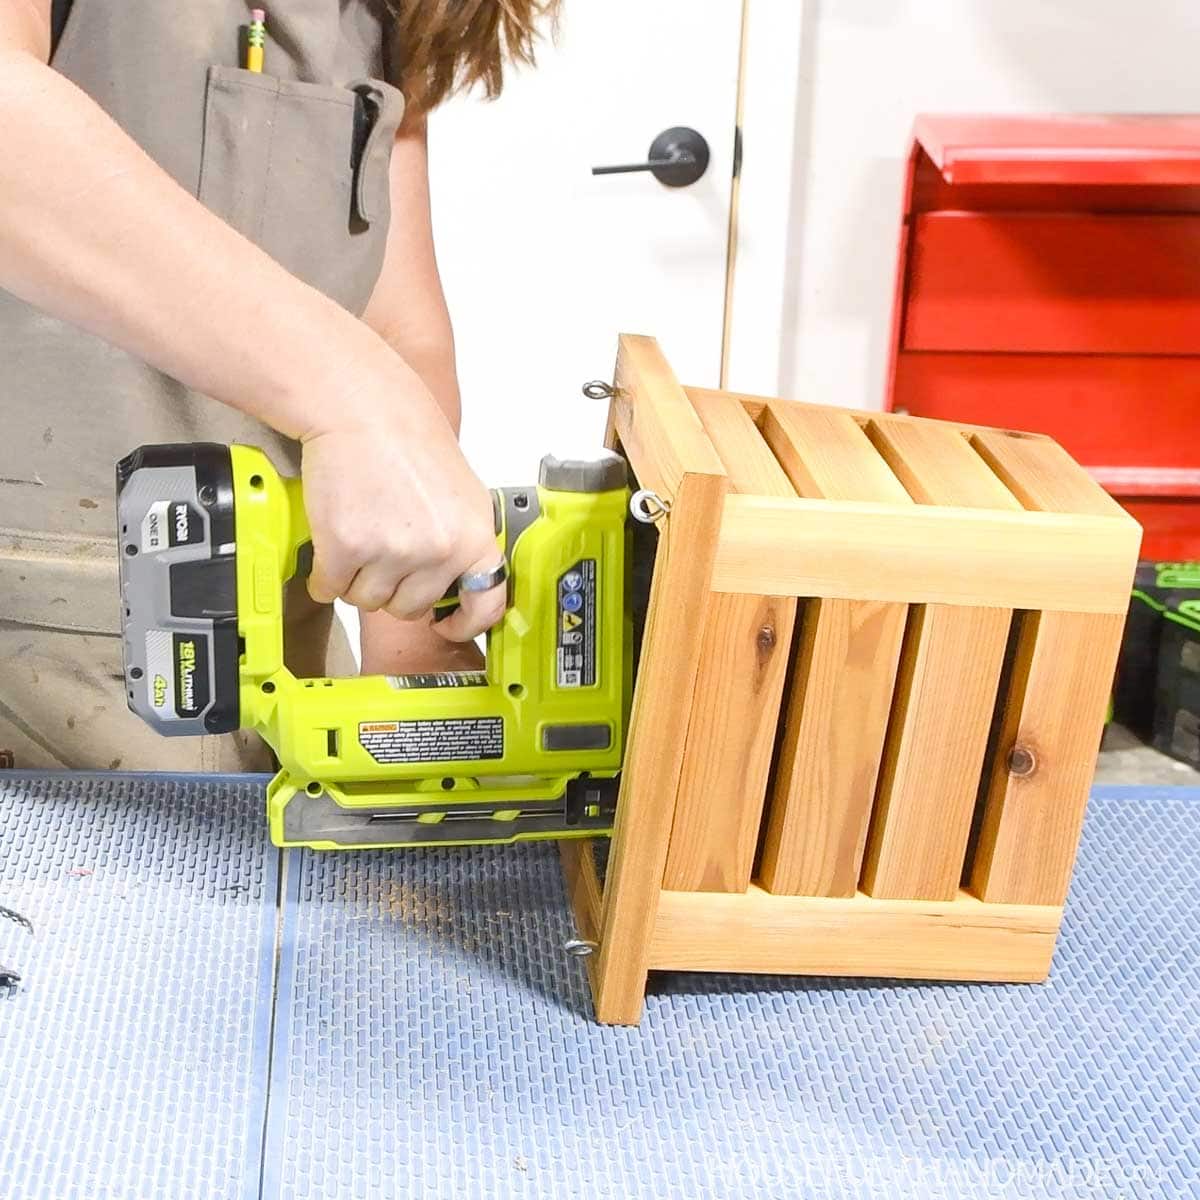
STEP 4- Attach bottom slats
Drill 1 pocket hole in each end of the bottom pieces.
Attach them to the bottom of the planter so they are attached to the front and back bottom pieces and spaced evenly.
Secure with glue and 1 1/4″ pocket hole screws. You will need the 90° driver to secure the pocket hole screws in the tight space.
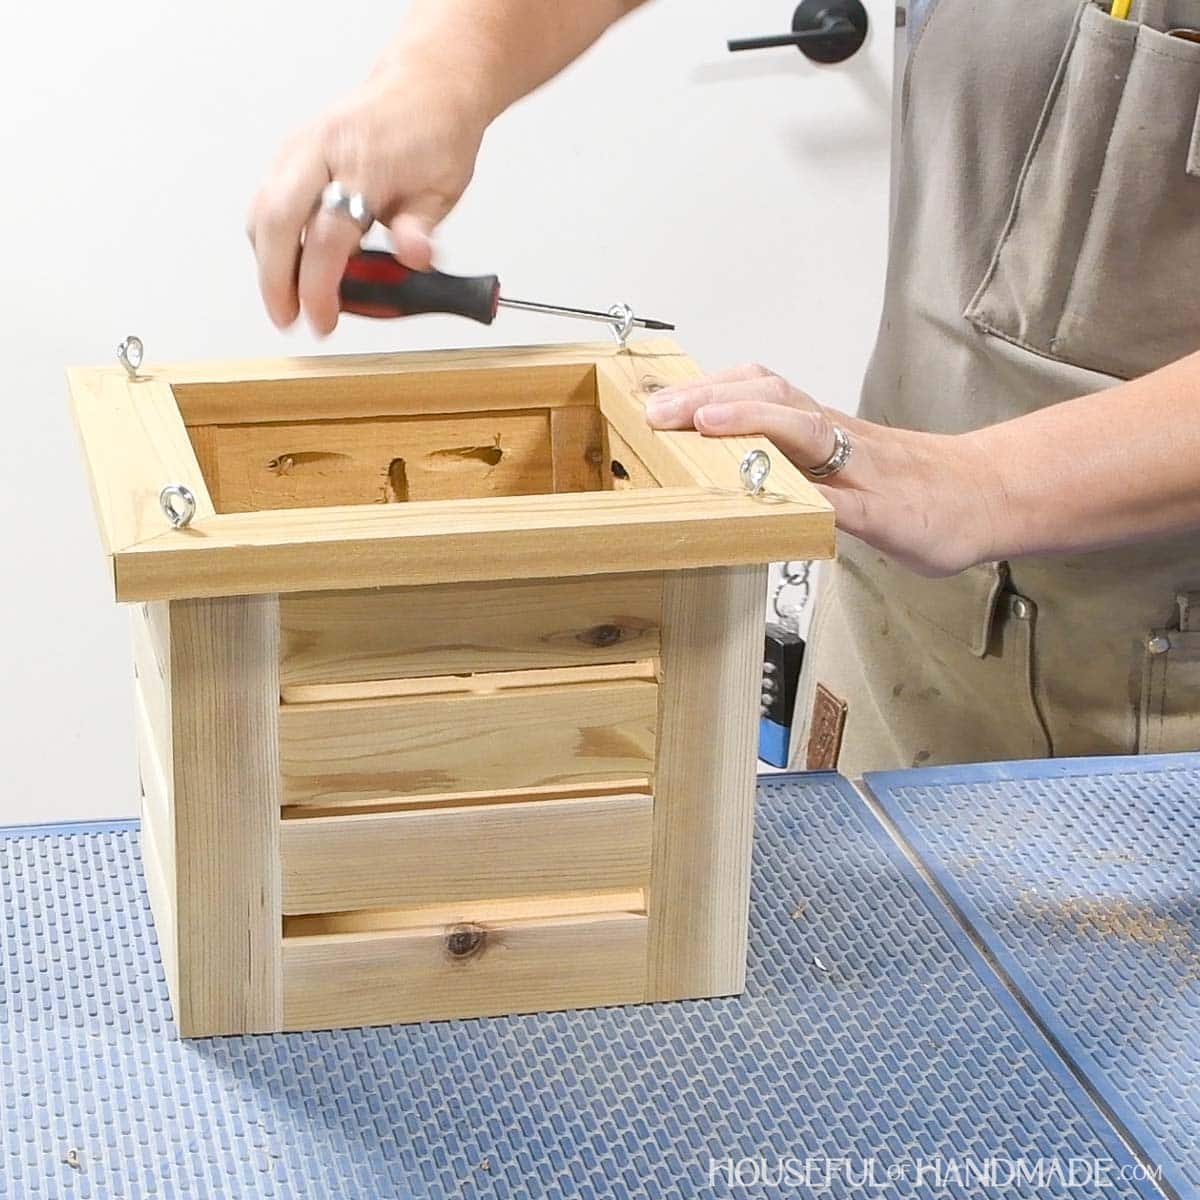
STEP 5- Add hanger and finish
Predrill holes then twist screw eyes into each corner of the top frame board so the eye hooks go into the corner pieces.
If you are planning to paint or seal your planter, I recommend doing it now before you add the landscape fabric and cord.
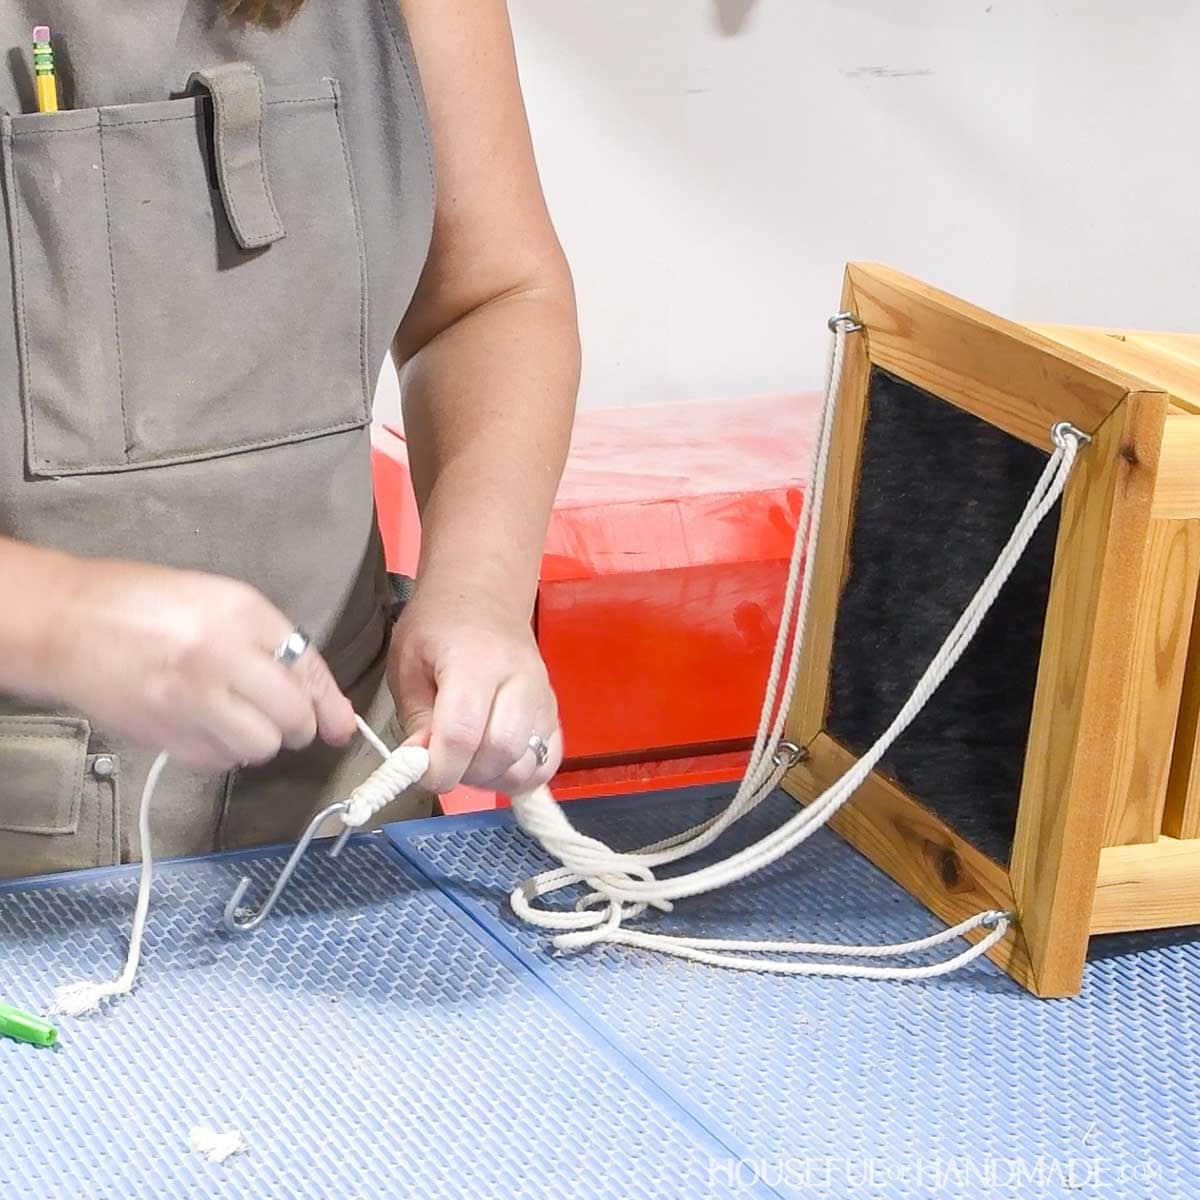
To prevent soil from falling through the slats, line the inside of the planter with landscape fabric.
I used 2 strips of fabric that overlapped in the bottom. Staple the fabric to the inside of the top frame to secure.
Cut 2 equal pieces of cording (I used two 80″ long pieces).
Tie the center of each piece to the bottom of an S-hook. Then feed them through the eye hooks in the planter and pull back to the S-hook.
Use a 10-12″ piece of cord and wrap it tightly around the cord right under the S-hook to enclose all the ends. Tie it off and secure ends with super glue.
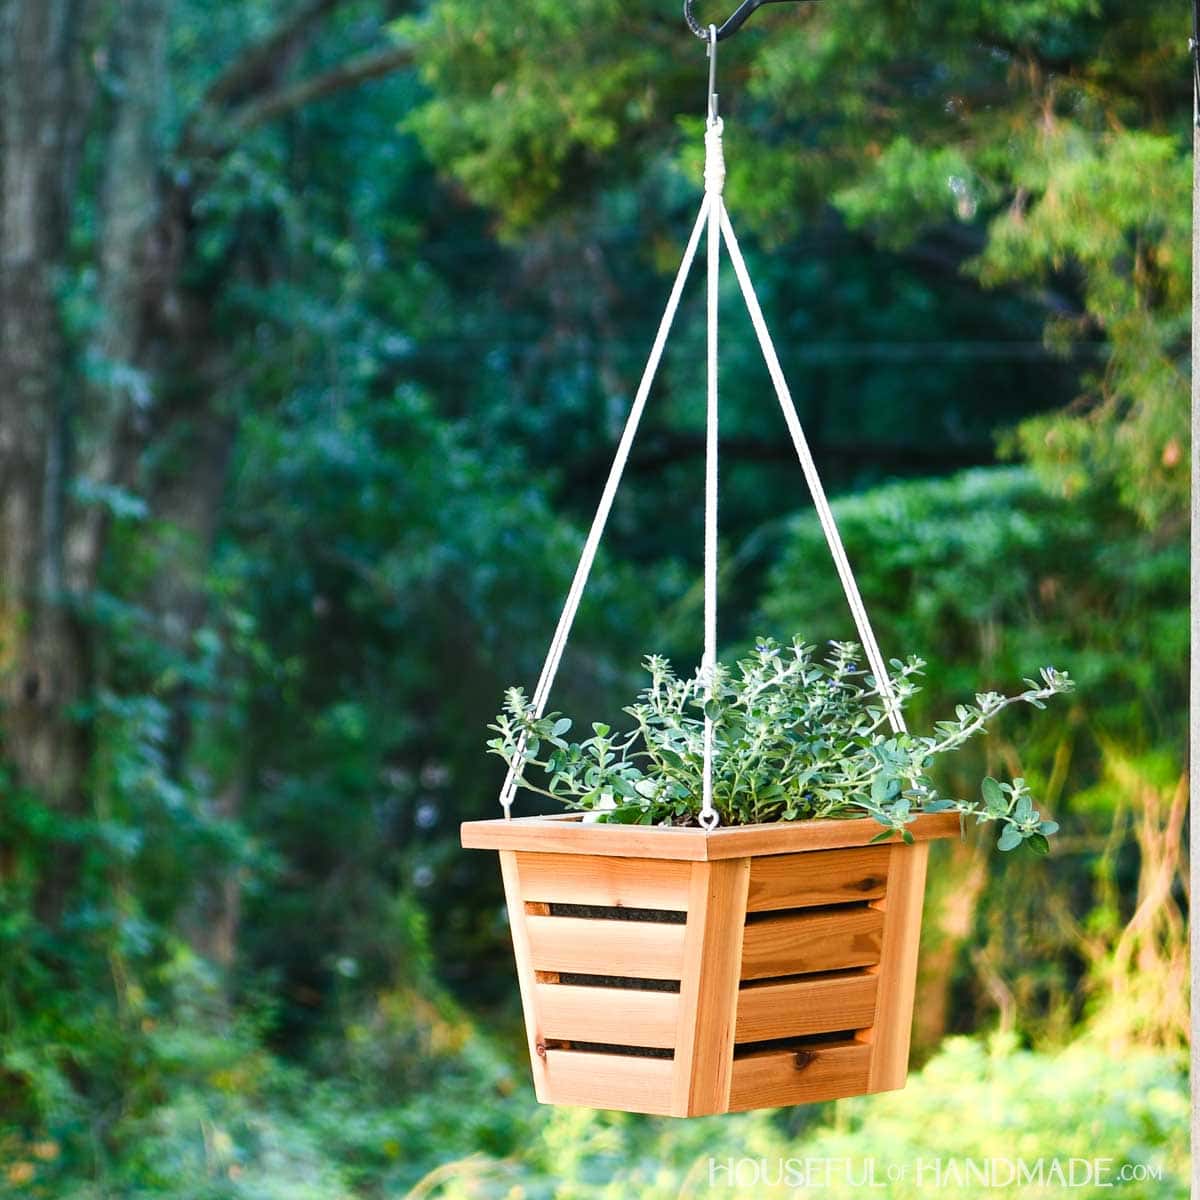
You did it!
Now you can add your favorite flowers or plants.
Then hang it up and enjoy your beautiful planter that will last way longer than the plastic ones from the nursery.
Happy building!
