Can you transform a kitchen from dark and outdated to bright and beautiful on a budget?
We have been hard at work on our budget farmhouse kitchen remodel and I am so excited to share what we have done. Including lots of tips & ideas to help you remodel your kitchen on a budget too.
It’s been 5 weeks since we ripped out our kitchen. We have had a blast (mostly) pushing ourselves hard to get a complete kitchen transformation done in such a short period of time as part of the One Room Challenge™ hosted by Calling it Home.
The sweet comments and love you have all shown have definitely helped to push us through when we were just dead tired!
This post may contain affiliate links. As an Amazon Associate I earn from qualifying purchases. Click here to read my full disclosure policy.

But sadly, there were just not enough hours in the day and not enough pots of coffee to allow us to finish. However, I am not letting it get me down because our budget farmhouse kitchen is mostly done and it is still super fabulous!
I want to say a huge thank you to the sponsors of our One Room Challenge™ kitchen transformation. Thanks to HomeRight, Jeffrey Court, Liberty Hardware, Kreg Jig and Behr for helping us DIY the perfect kitchen. Are you ready to see?
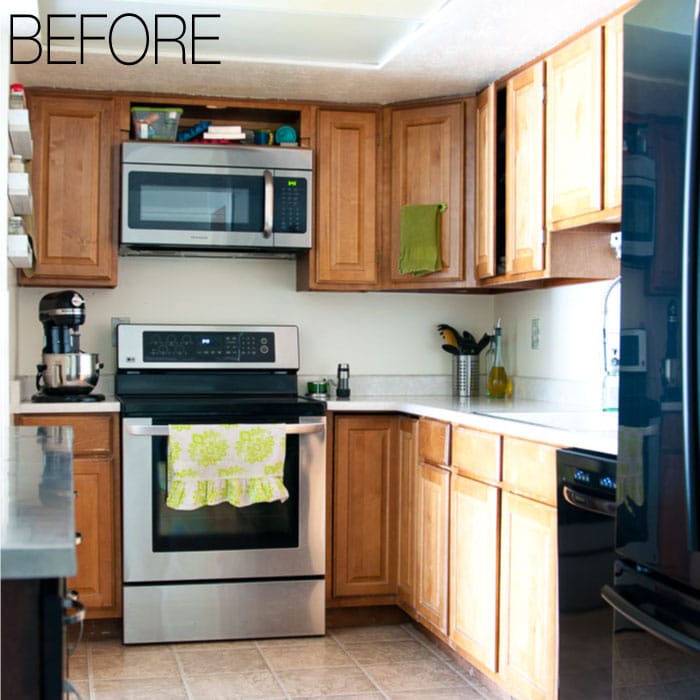
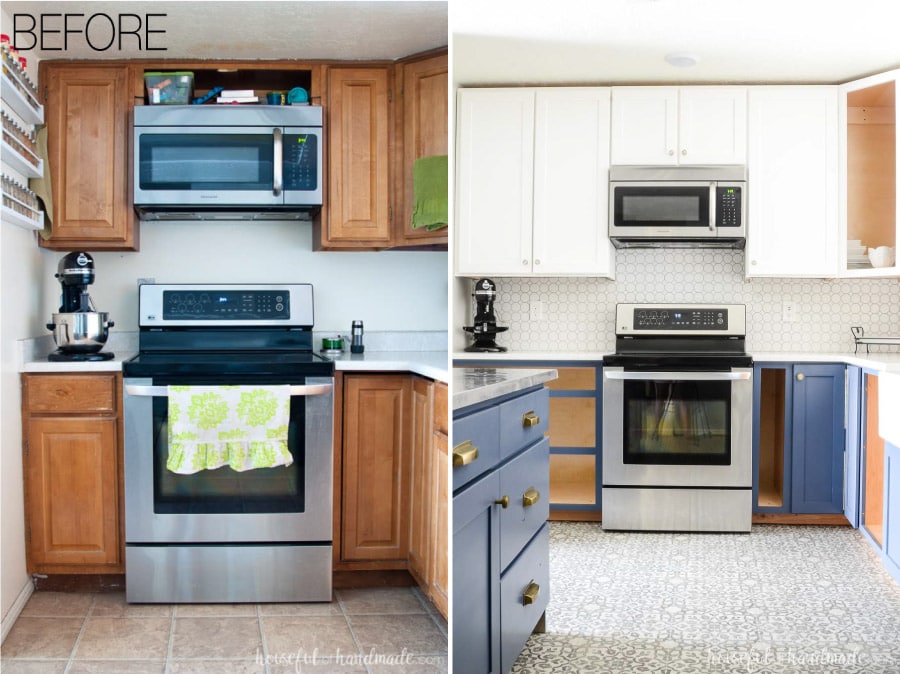
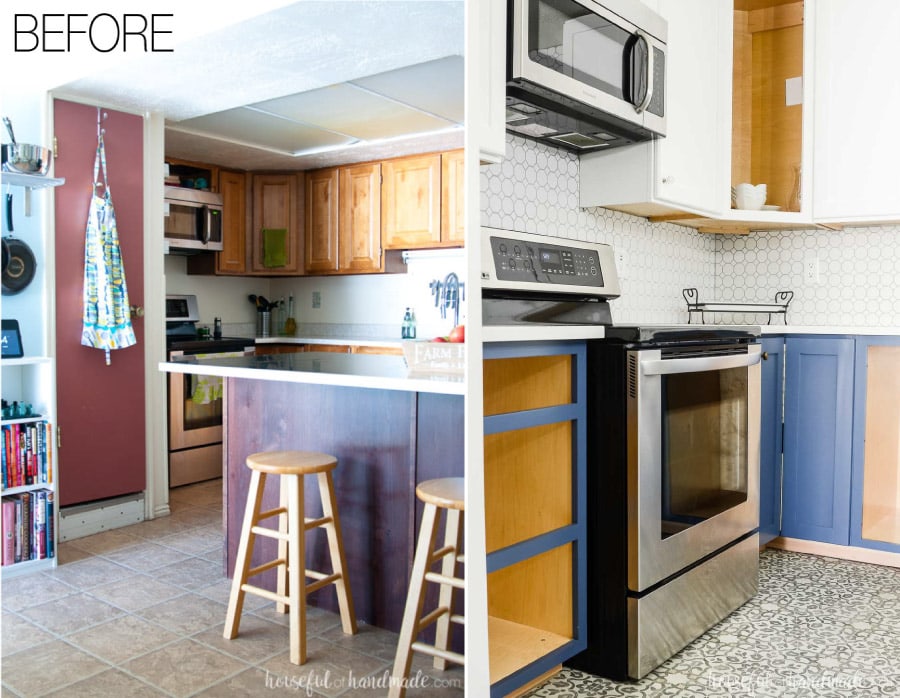
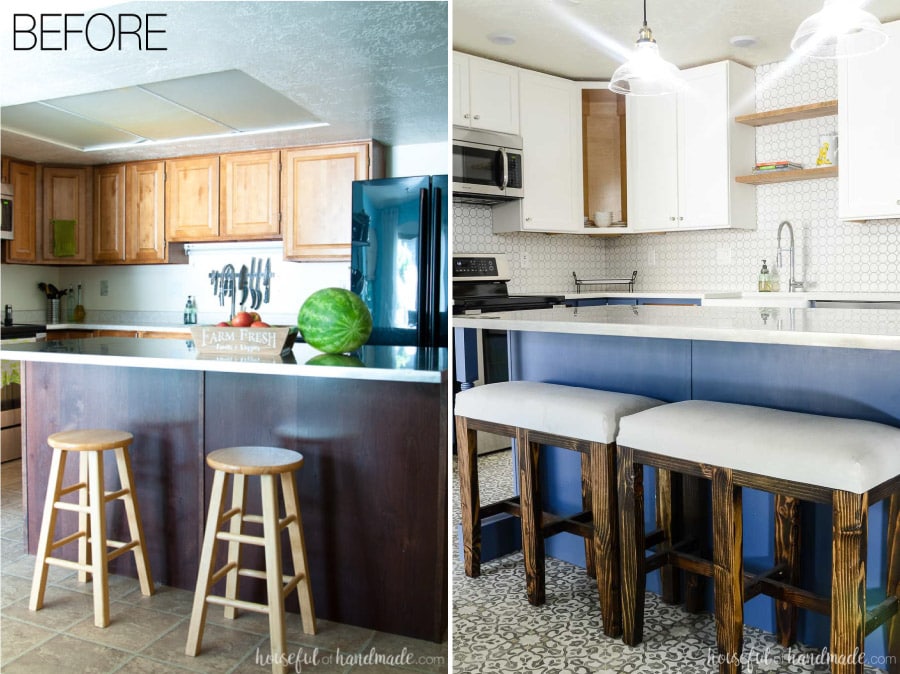
First we need to take a look back at what our kitchen looked like just 5 weeks ago.
It’s almost hard to remember the oak cabinets and dropped ceiling. And don’t get me started on those small, but deep, pantries. They were black holes for anything I wanted to forget about!
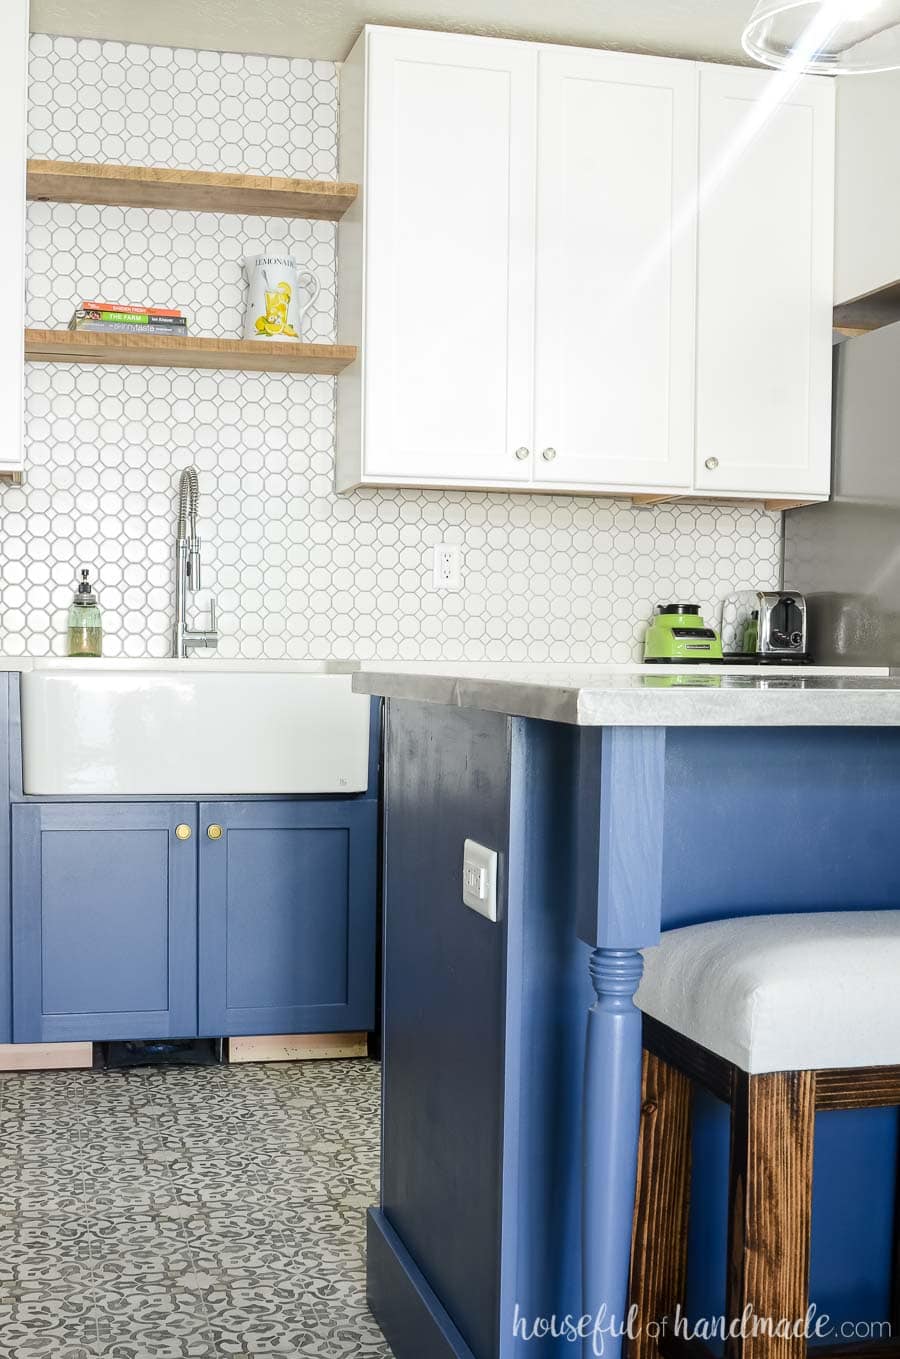
Now we have normal height ceilings. Eight feet has never felt so tall! And the new white cabinets go all the way up making those 8′ feel even taller.
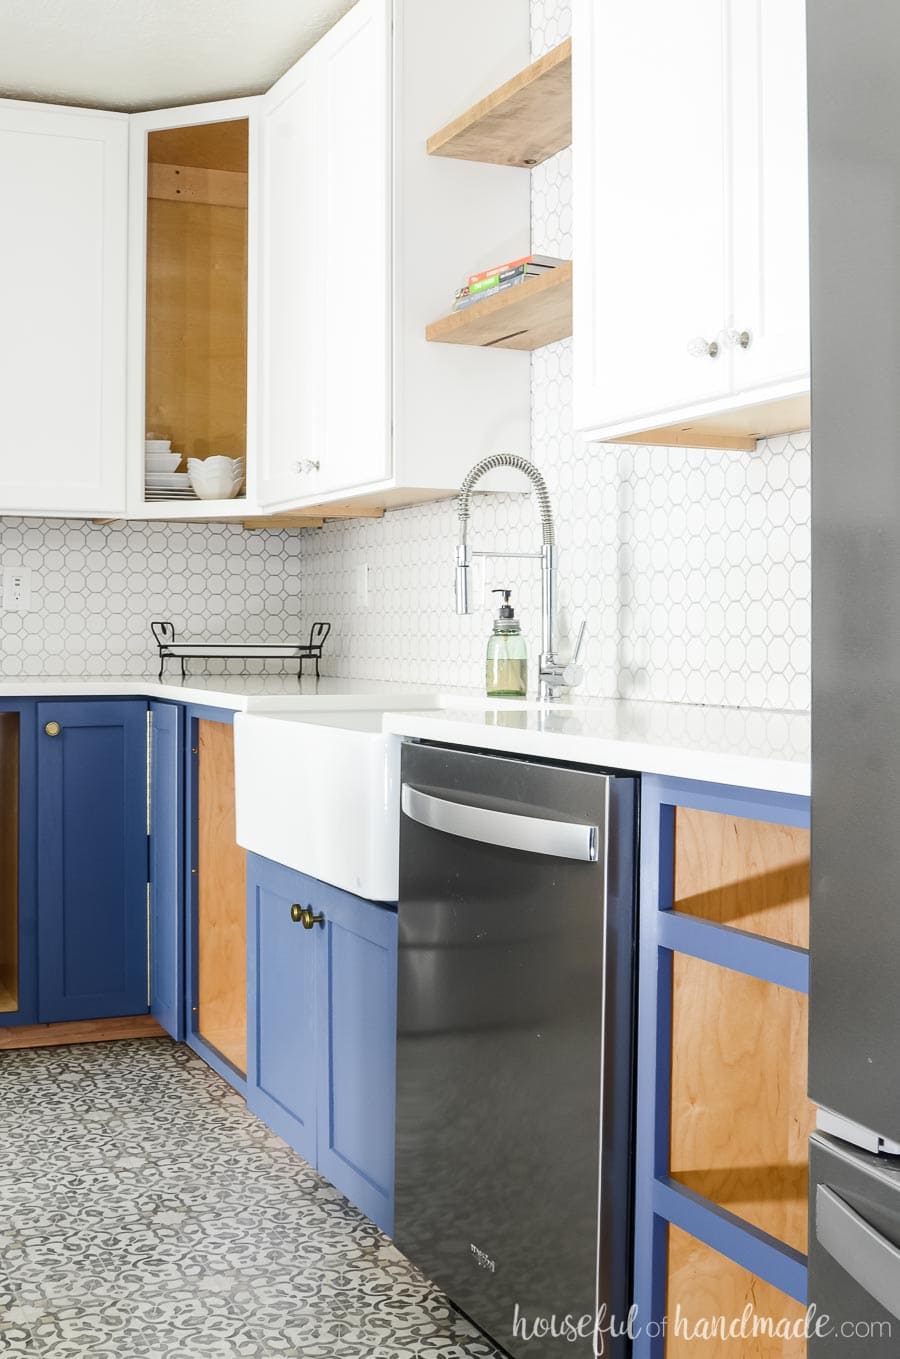
I had no idea that when we took that drop ceiling out our kitchen would feel twice as big. It’s amazing what an additional 14″ of head room can do.
I swear that are counters feel deeper and my husband swears there is more space between the wall cabinets and the kitchen island. We measured. Neither is true. But it sure feels like it!
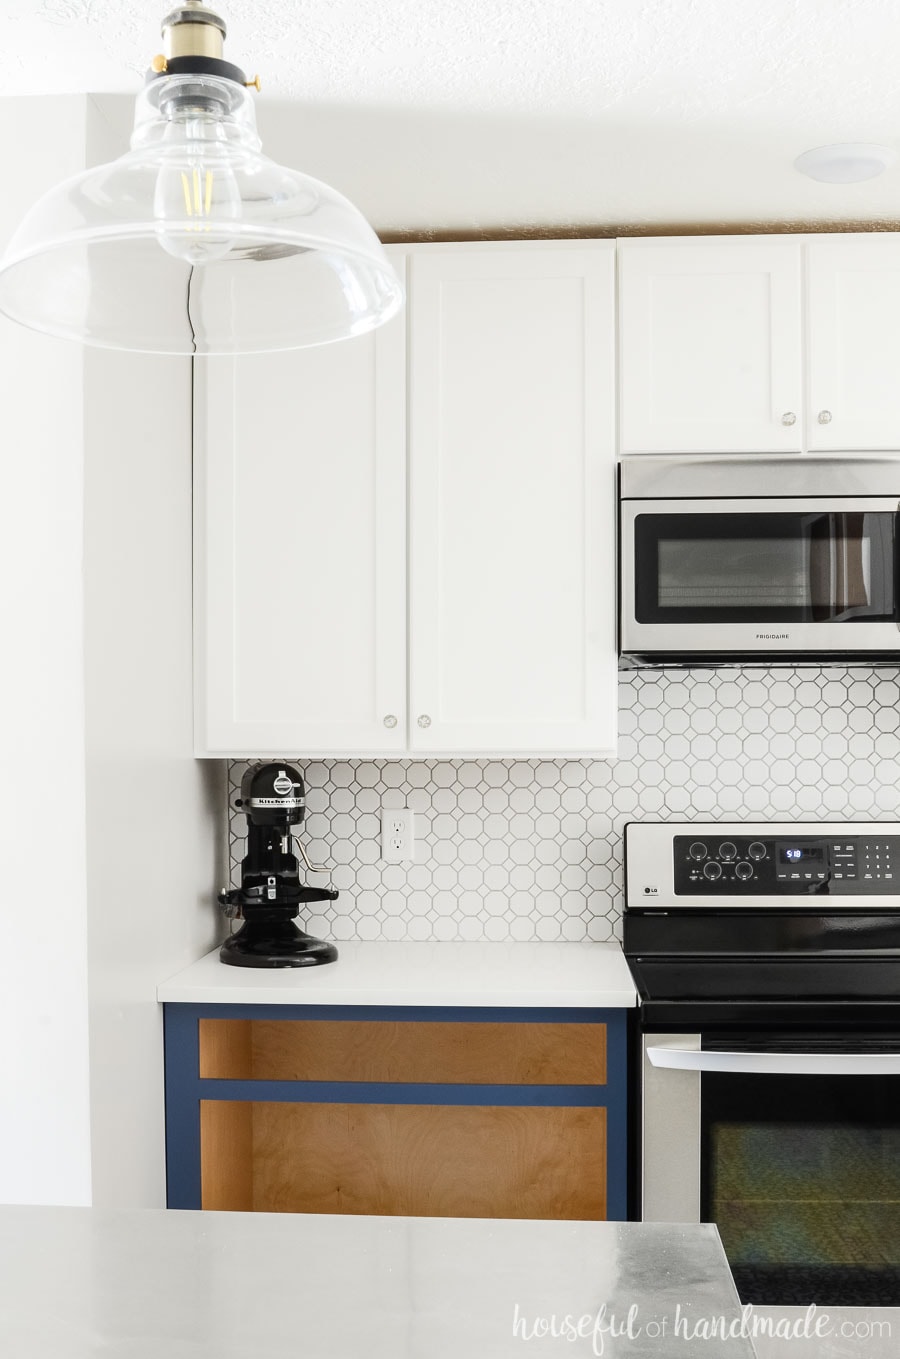
Most people think I am a bit crazy for taking out not only 1 but 2 pantries from our kitchen. But both our pantries were narrow and deep.
While they did store things, they also hid them very well. Once something made it to the back of one of those pantries, it was never coming back out again. Or at least until it was time for some spring cleaning.
Instead now we have 1 pantry, and while it is still 30″ deep, it will also have pull out shelves so nothing vanishes to the back.
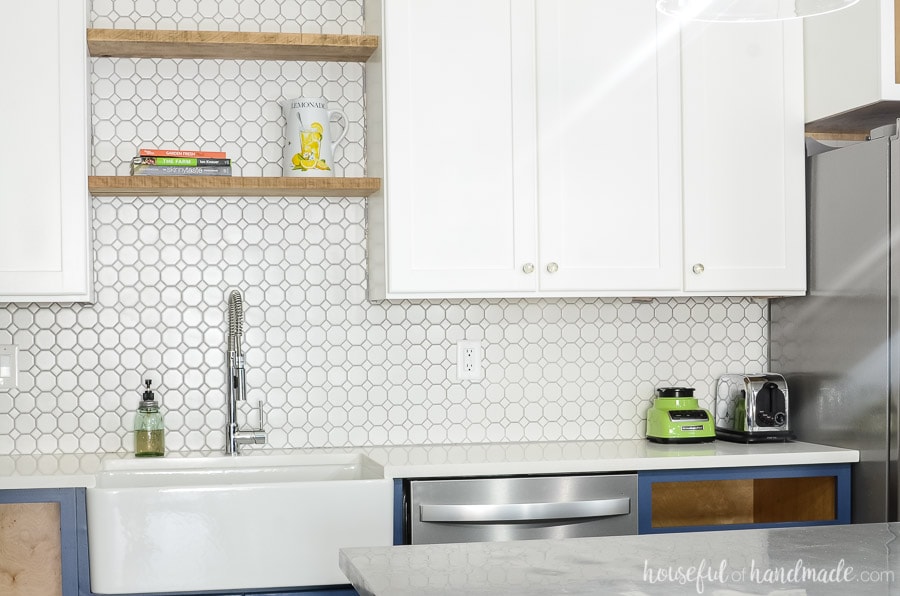
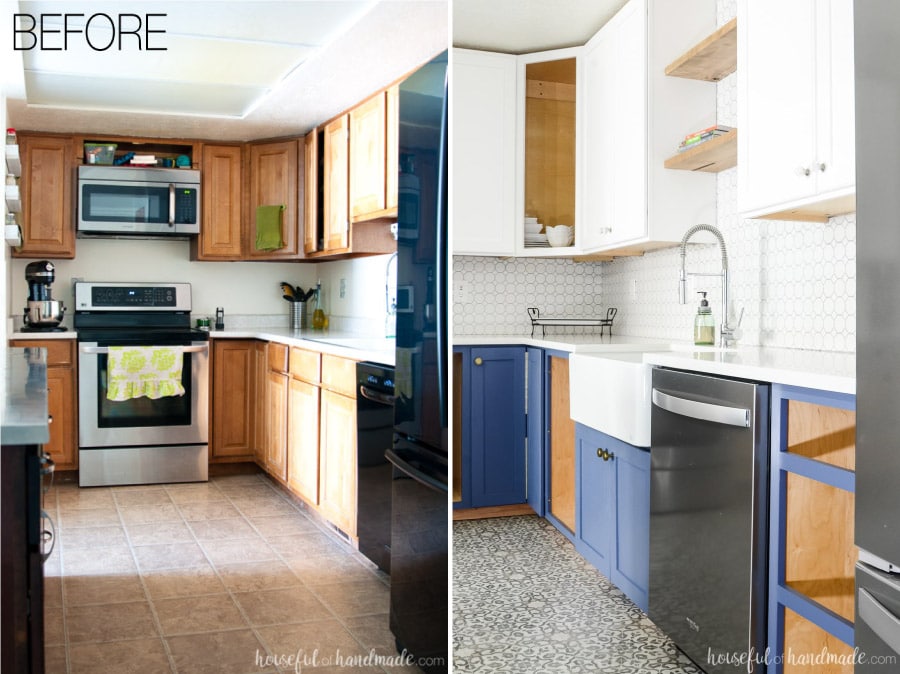
By taking out those two pantries, we were able to gain 5 additional feet of counter space!
We added 2 feet to the right of the sink. I never realized how amazing those 2 extra feet would be until now. Before we had our little drying rack and blender and the space was full. Now we have room for days. I could actually use this space to prepare food!
The other counter space was gained around the stove. We bumped the stove 8″ to the left to make room for a pull out spice drawer (also not quite done).
And then on the other side, instead of a tiny 8″ counter top that barely had room to store your spatula, we now have 35″ of counter space! It’s so big I can actually use my KitchenAid mixer here instead of always pulling it to the kitchen island.
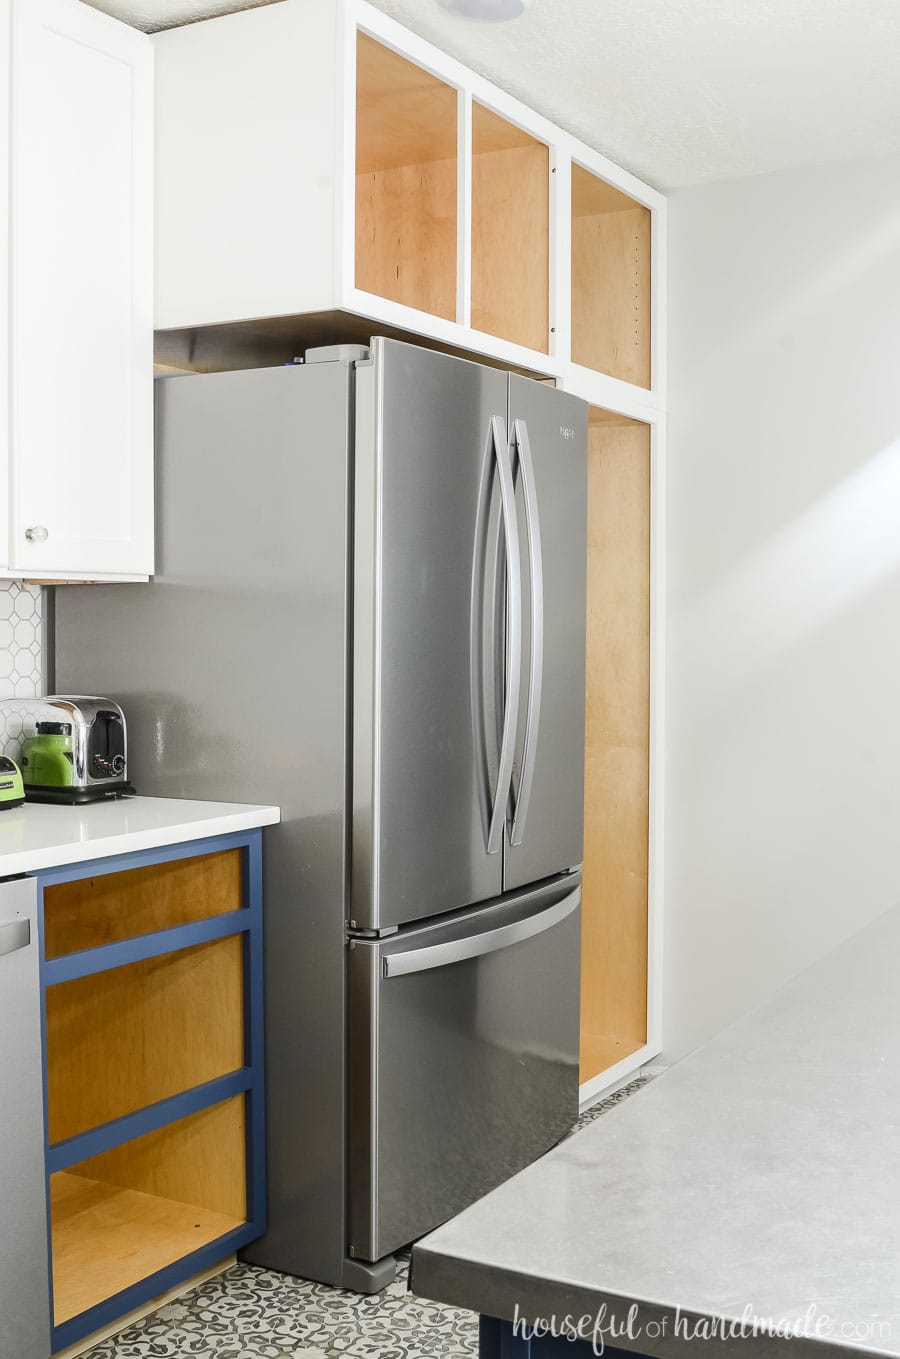
And this second pantry was used mostly to store appliances that I didn’t use too often. Things like my large crock pot, juicer, and specialty platters & cake plates.
With the large cabinet above our refrigerator, I still have a spot to store those items. And they are no more annoying to retrieve then in the back of a narrow pantry.
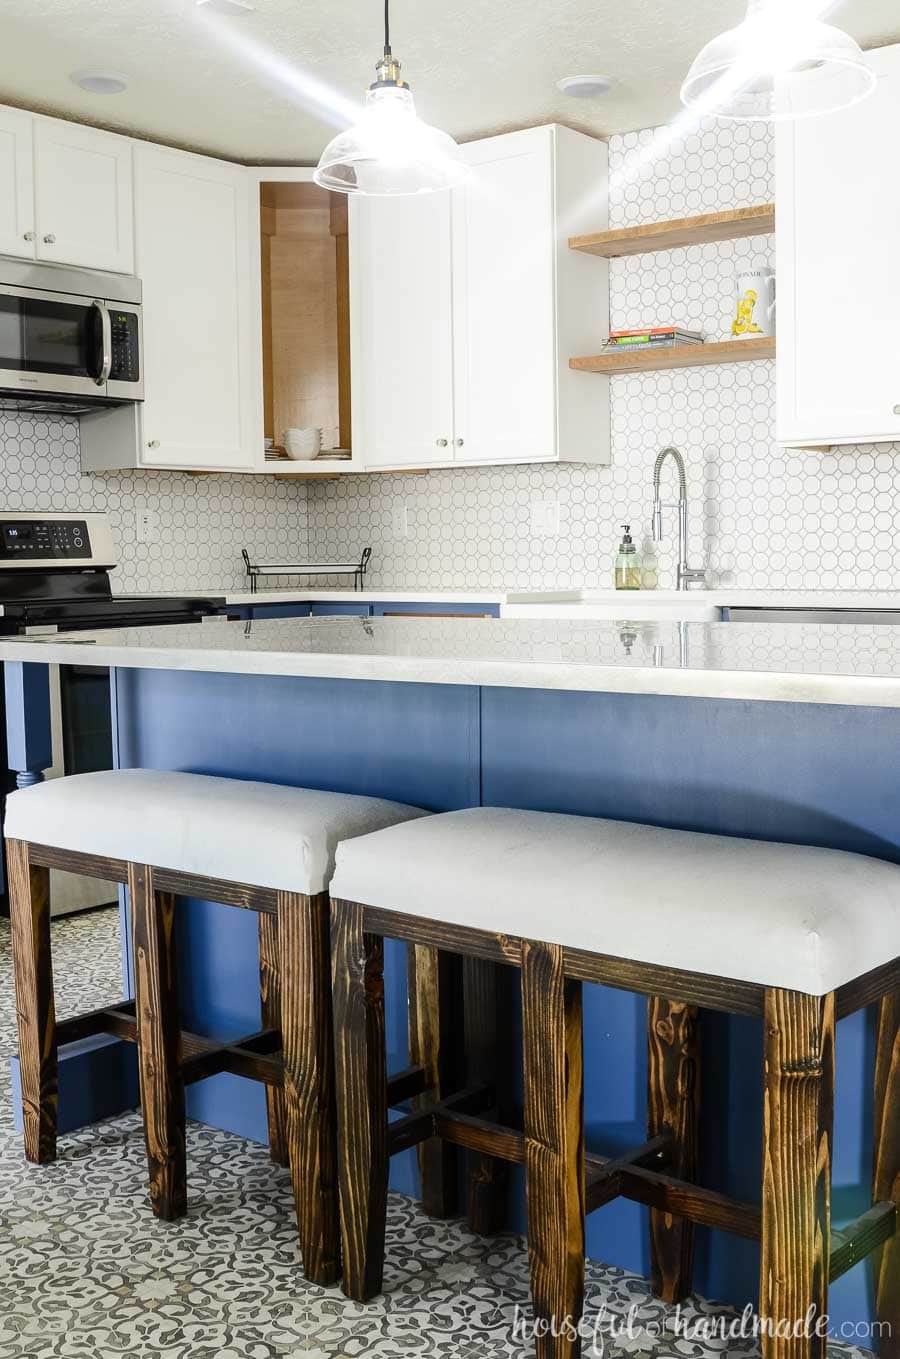
And don’t let us forget to talk about that kitchen island!
We replaced our island about 3 years ago as a trade with some cabinet guys. It was a piece that was made for another job, but didn’t end up working out.
The drawers were deep, the cabinets were built well, and we even had my dad install electrical outlets. So instead of replacing it, I decided to update it to match our new farmhouse kitchen.
You can see all the details on our farmhouse kitchen island makeover here.
If you haven’t been following along, you may not realize that one of the ways we were able to transform our kitchen on such a small budget (we came in under $10,000 for this complete gut job) was to build our own kitchen cabinets and doors.
Crazy right? Well, if someone asked me to do it again in just 5 weeks I would tell them absolutely no! That was a lot of work in such a short time (which is why it’s not done).
But if you can go a bit slower, building your own cabinets and cabinet doors gives you such an amazing feeling of pride and accomplishment. Every time I open a cupboard I think “Yeah, I made that!”
I would recommend building all the cabinets before demoing the old kitchen. Maybe leave one or two until after if you are waiting on exact measurements like I was.
Then you can get your kitchen back into mostly working order quickly. After the cabinet boxes are installed you can proceed with other things like flooring and countertops; geting your sink hooked up and working (such an amazing thing to have your kitchen sink back!); and then build the drawer boxes.
Your drawers can also work without cabinet doors if needed. Now you have a working kitchen again, just not as pretty if you cannot shut out the mess that usually hides behind those doors.
But then you can take your time building the doors and before you know it, you will have your own fantastic kitchen that you built yourself!
If you have ever thought about building your own kitchen, or even bathroom cabinets, I shared these resources during our kitchen remodel. And I promise to get more cabinet building posts ready to go soon. I have just been so busy working, there was not time for writing.
- Build Your Own Cabinets without Expensive Tools
- How to Paint Unfinished Cabinets
- Build Cabinet Doors with a Router Table
Now I want to talk about the fun stuff. Of course kitchens need to be functional, but they also can be pretty! Or dare I say beautiful?
It’s the little extras that really make a kitchen look high end, even when you are on a budget.
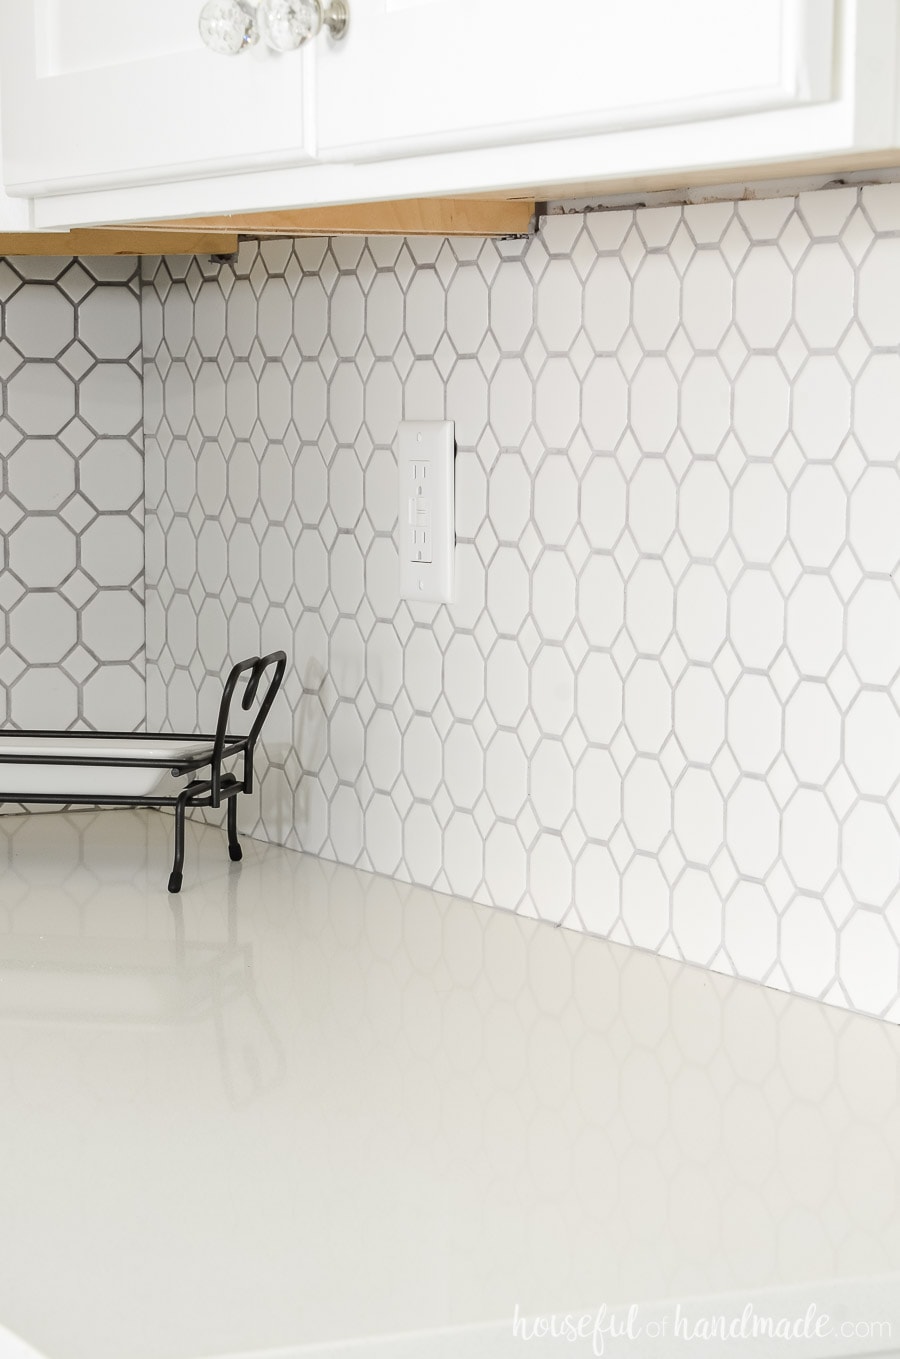
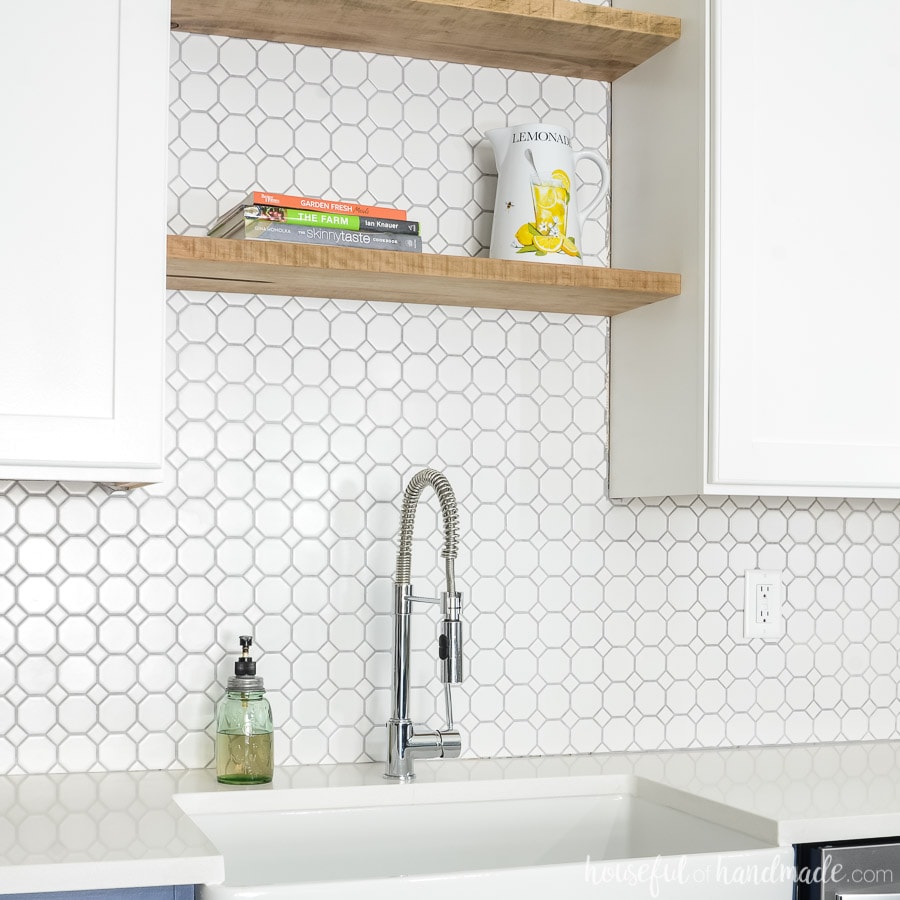
Instead of getting a 4″ backsplash installed with our quartz countertops, I opted to add a tile backsplash.
This Retro Octagon tile from Jeffrey Court can be purchased at the Home Depot. For only $220 (including grout and thin set) we were able transform the space with the beautiful tile. It makes a huge statement.
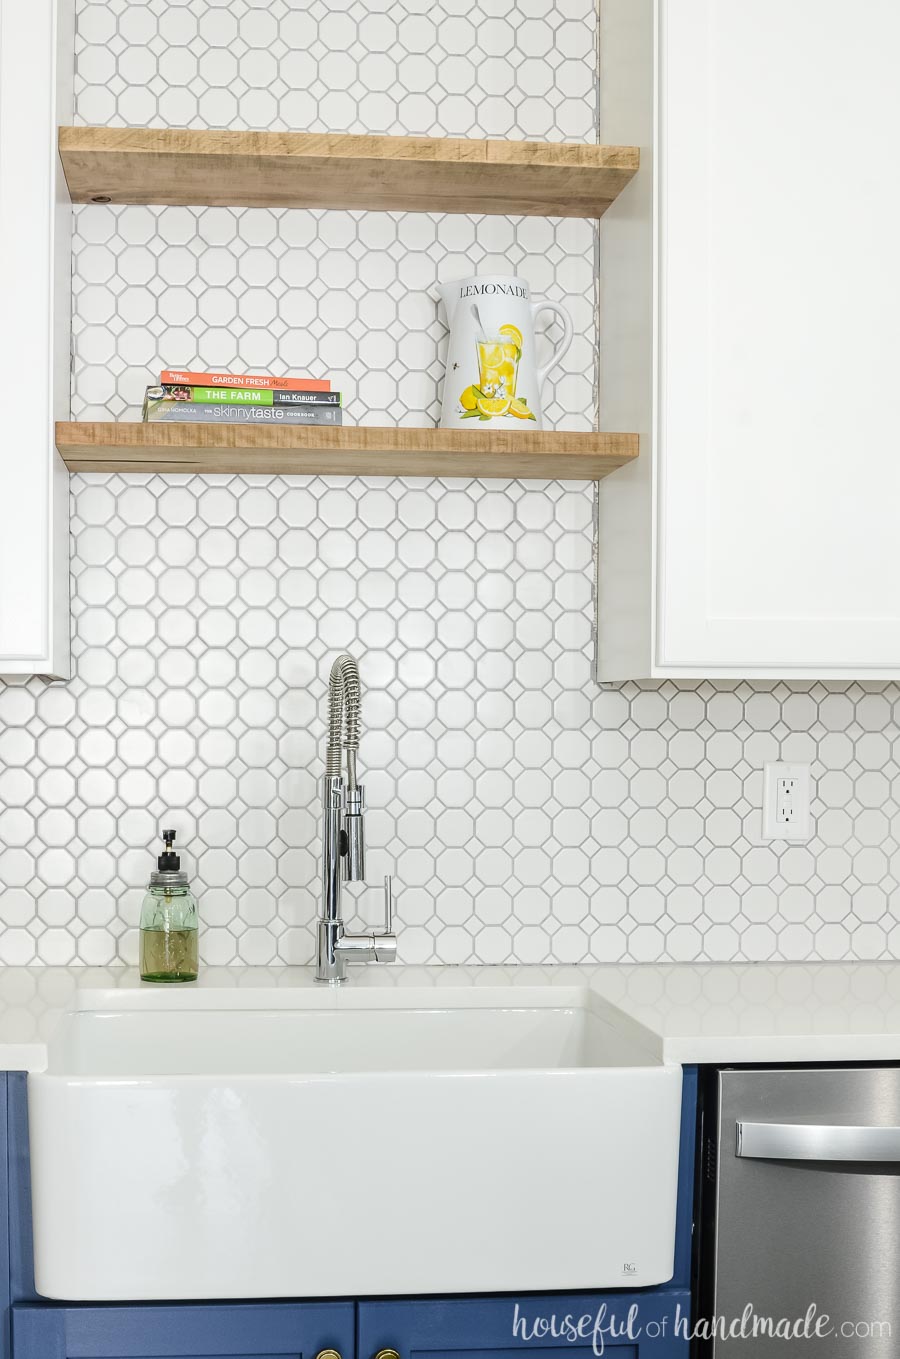
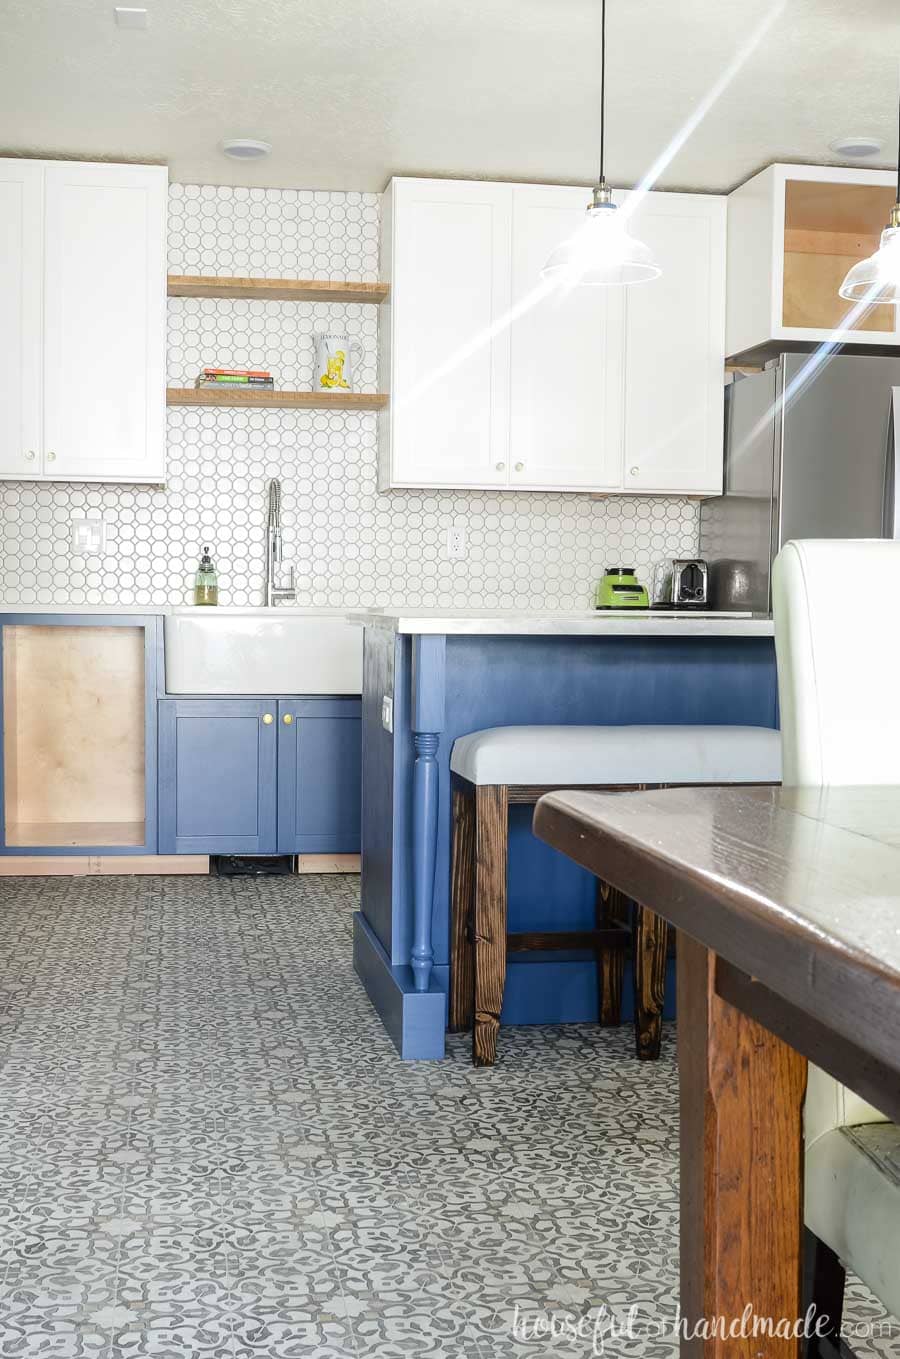
And by leaving out the wall cabinet above the sink area and adding 2 rustic floating shelves, we actually saved ourselves a lot of money!
I opted for 1 1/4″ thick slabs of maple for the floating shelves. The two pieces cost about $35 at the local lumber yard. Then I stained them with MinWax weathered oak stain to just give them a slight warm gray color and make the grain pop.
These shelves are so gorgeous and I cannot wait to fill them up with pretty things each season.
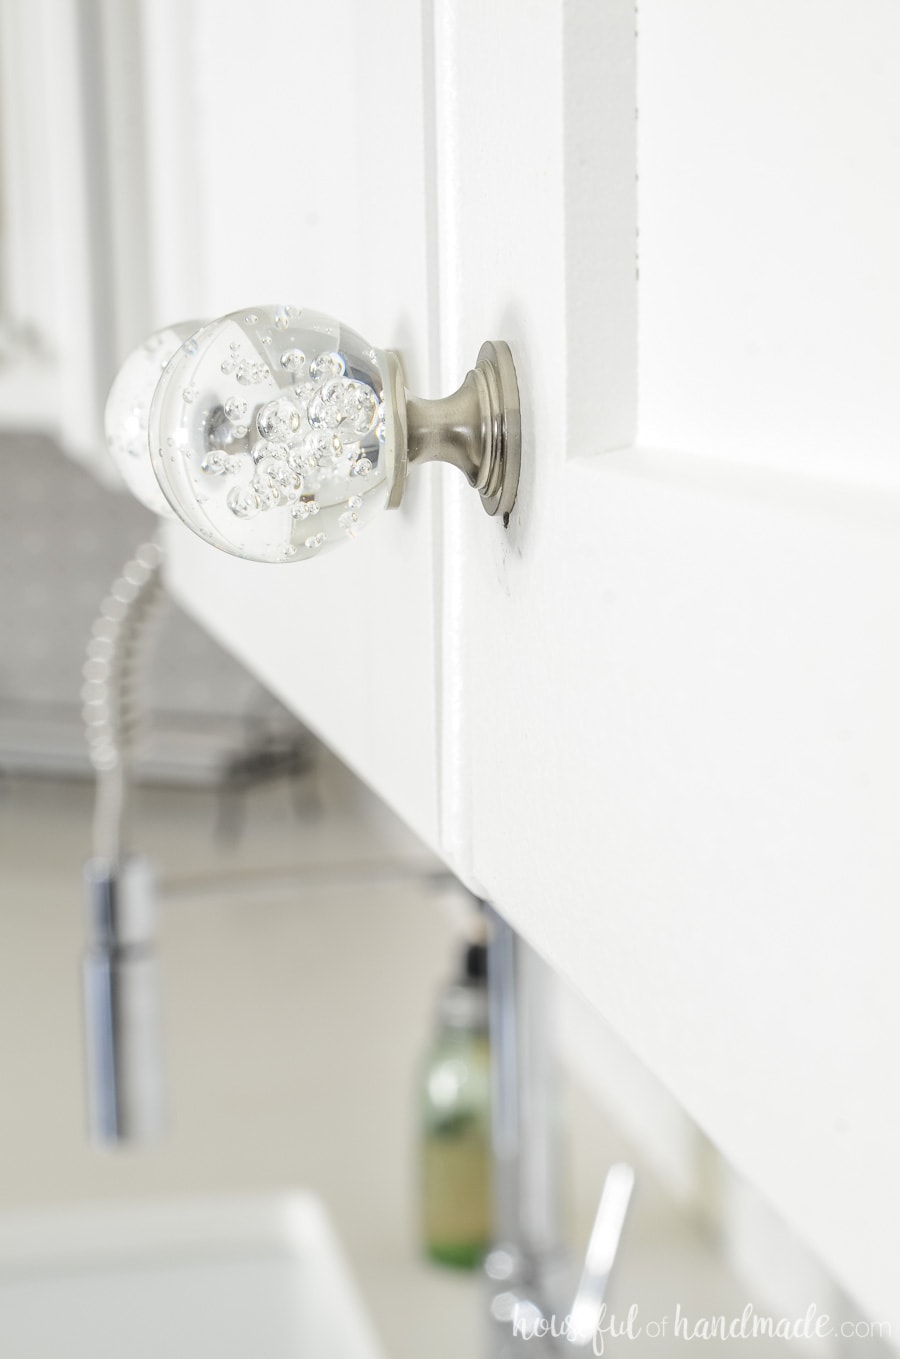
The other little extra that made a huge impact in our kitchen are the amazing knobs and pulls from Liberty Hardware.
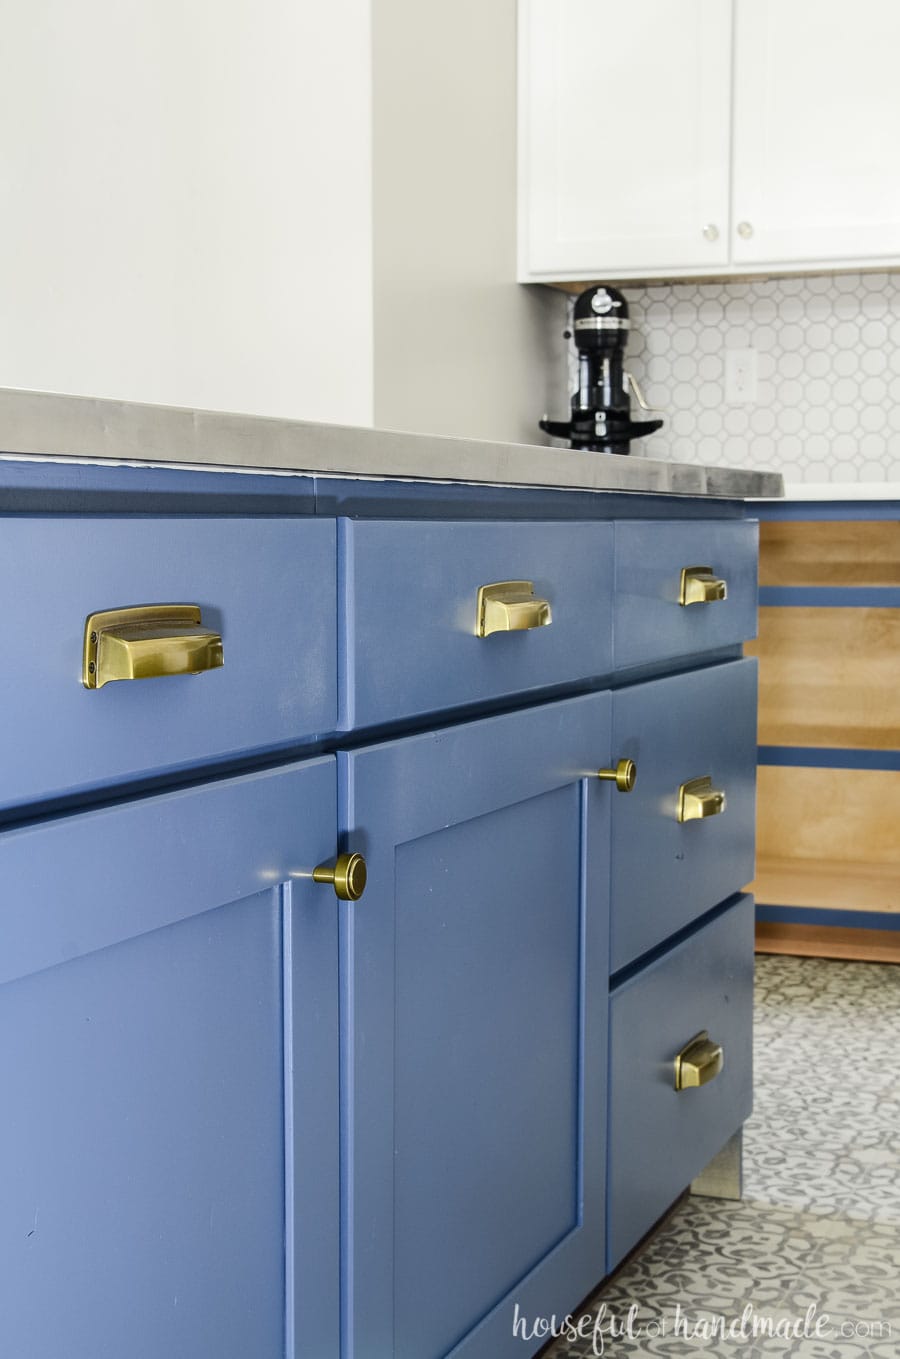
I wanted to do something a little different and use different hardware for the different colors of cabinets. I call it my interior design mullet. You know, feminine on top and party on the bottom 😉 .
But I truly love the Bubble Glass cabinet knobs on the Behr Polar Bear white doors. They are so clean and sweet.
To top of the Behr Durango Blue base cabinets, I chose Soft Industrial cabinet knobs and pulls in Bedford Brass.
I love the antique brass color with the grayish navy cabinets. And those gorgeous drawer pulls have the best details, including faux screws on the front. I just adore them!
And now let’t talk about the elephant in the room.
Okay, it’s not an elephant, but a huge, single basin, apron front sink. Swoon, I’m in love!
I was a little worried that the new sink was actually smaller than the old one we pulled out. But when you get rid of that center divider and add an inch or two to the depth, woozer, it gives you so much space!
But be warned, farmhouse sinks are not cheap! Since I knew I wanted one, and I knew I had to have a single basin one, I splurged.
Then of course we learned that you also need to buy a special flange for your garbage disposal, which can cost about 1/2 the price of the actually appliance. I think this is completely ridiculous.
But in the end, it was totally worth the extra dough. Now I cannot wait to bring in baskets of fresh vegetables from our garden and fill up our big, beautiful, sink.
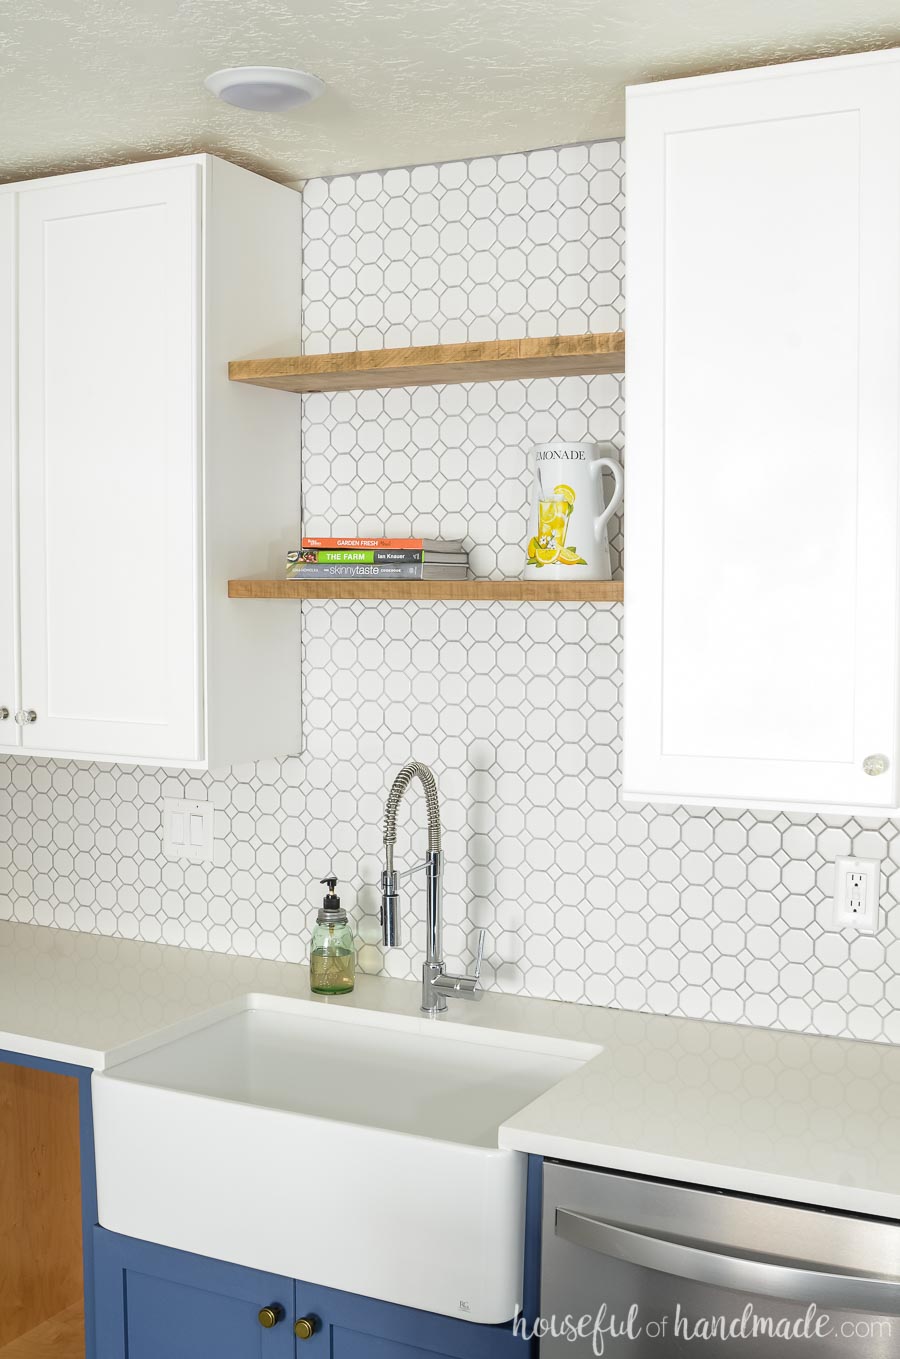
To save a bit of money, we reused our faucet. The faucet that was in kitchen when we moved in broke a few years back and I bought this new one. I still love it and knew the style would work perfect.
Faucets can be pricey so it was great saving a bit of money here. We also kept our black & stainless stove and microwave from before the remodel. And we only updated our fridge and dishwasher to fully stainless options.
Always trying to be budget conscious and since those worked great, I was happy to keep them.
I could talk on and on and on about our new kitchen, but really I should be trying to unpack the piles of boxes in every other room of our house. Those beautiful new cabinets are not going to fill themselves.
Then I am determined to install the drawers and finish off those other cabinet doors. Really, I have about 2 more weeks of work, including the little things like baseboards and grouting, before I can truly say our budget farmhouse kitchen remodel is done.
But I think I am going to put my feet up and enjoy a glass or wine because those projects will be there tomorrow.
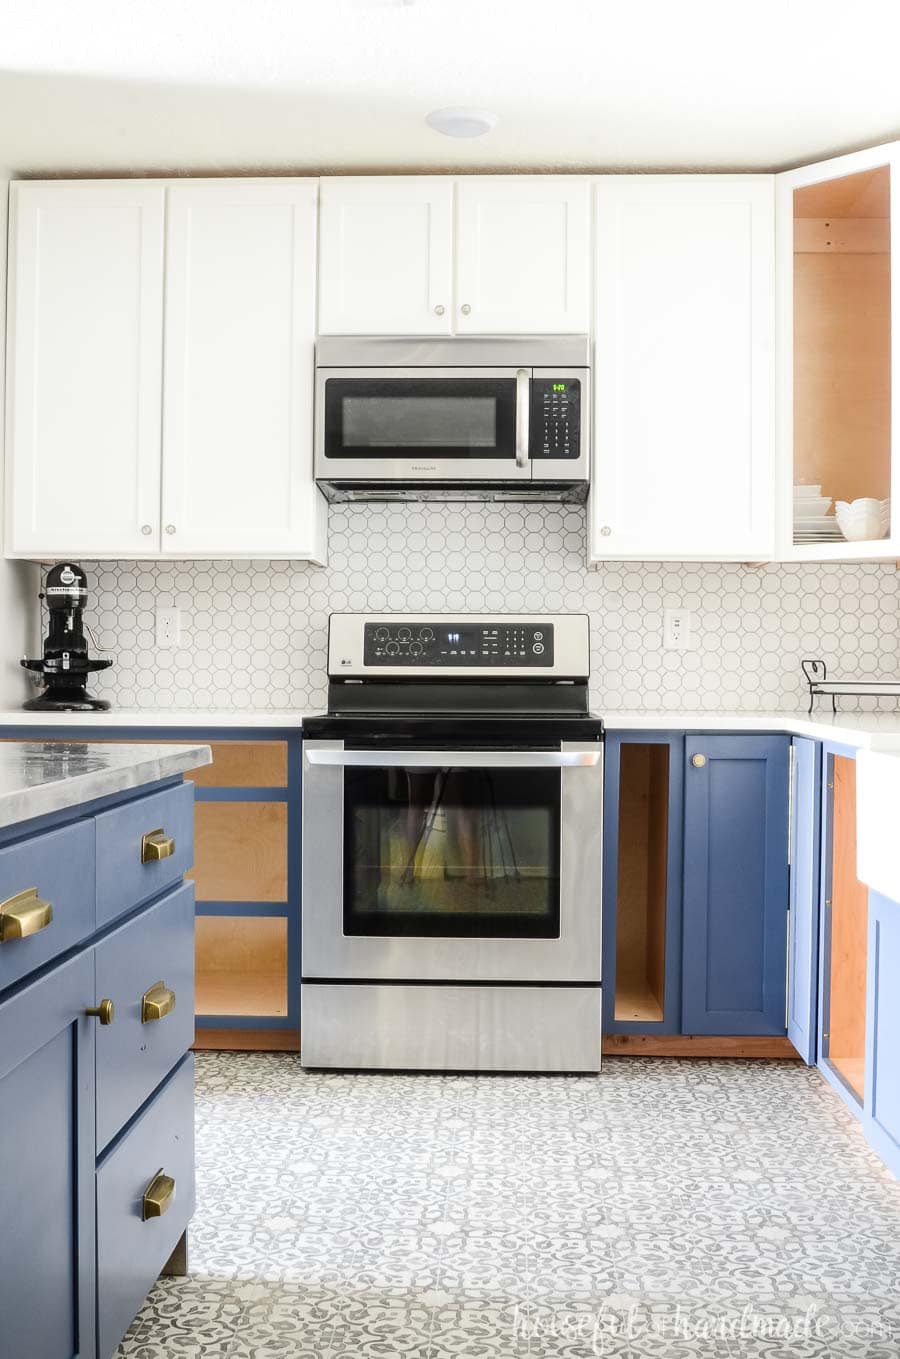
Source List:
- Upper cabinets: Polar Bear by Behr
- Base cabinets: Durango Blue by Behr
- Upper cabinet hardware: Bubble Glass Cabinet Knobs by Liberty Hardware
- Base cabinet hardware: Soft Industrial Cabinet Knob in Bedford Brass and Soft Industrial 3″ Cabinet Cup Pull in Bedford Brass by Liberty Hardware
- Countertops: Quartz in Linen by Arizona Tile
- Backsplash: Retro Octagon White Dot by Jeffrey Court with Delorean Gray grout
- Floor: Filigree Luxury Vinyl in Iron by Mannington
- Sink: Sutton 30″ Fireclay Sink by Finefixtures
And if I forgot anything, please let me know. My brain is getting a bit crazy with everything!
Don’t forget to visit the rest of the One Room Challenge reveals today too! There are so many amazing transformation to inspire you for days.

