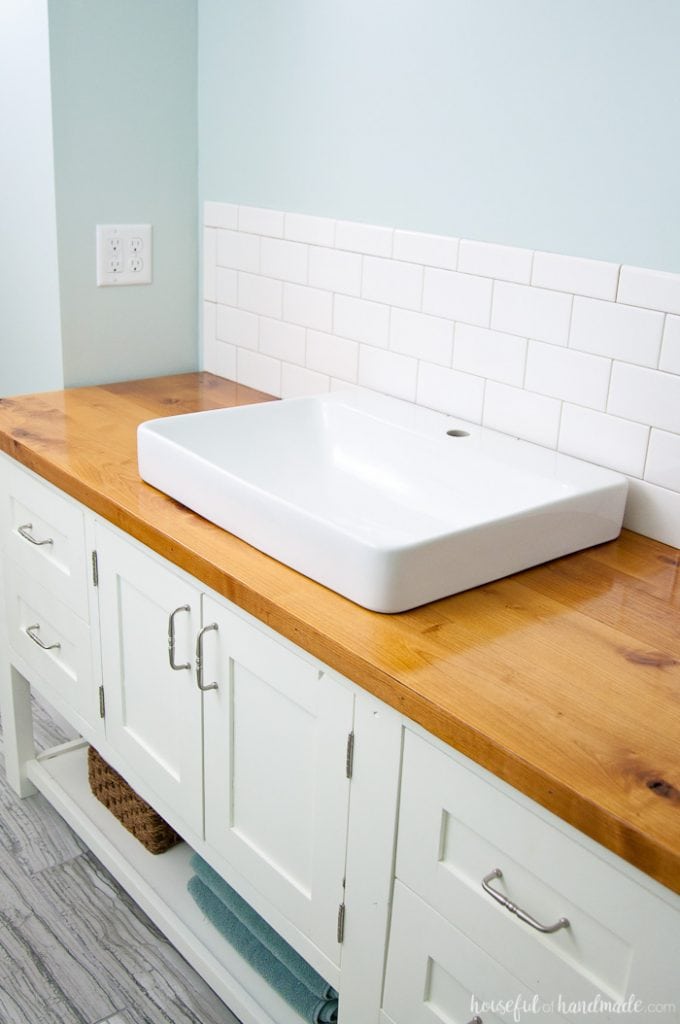
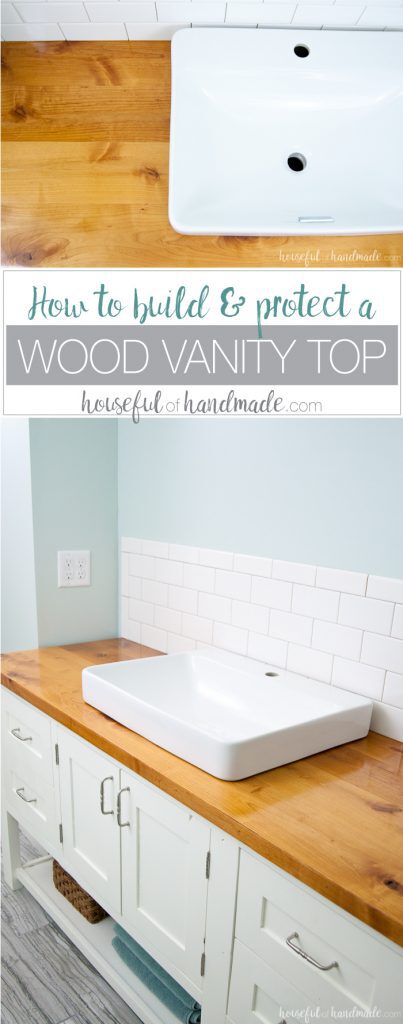
Don’t skimp on style to remodel a bathroom on a budget with this beautiful DIY wood vanity top.
I couldn’t be more excited to share today’s remodel update! A DIY bathroom renovation can sometimes take more time than planned. But this gorgeous wood vanity top was worth the wait.
It has been almost 8 years since we ripped out our tiny, dated, disgusting master bathroom. But today, we are one large step closer to having the spa-like bathroom of my dreams! And it started with learning how to build & seal our own vanity top.
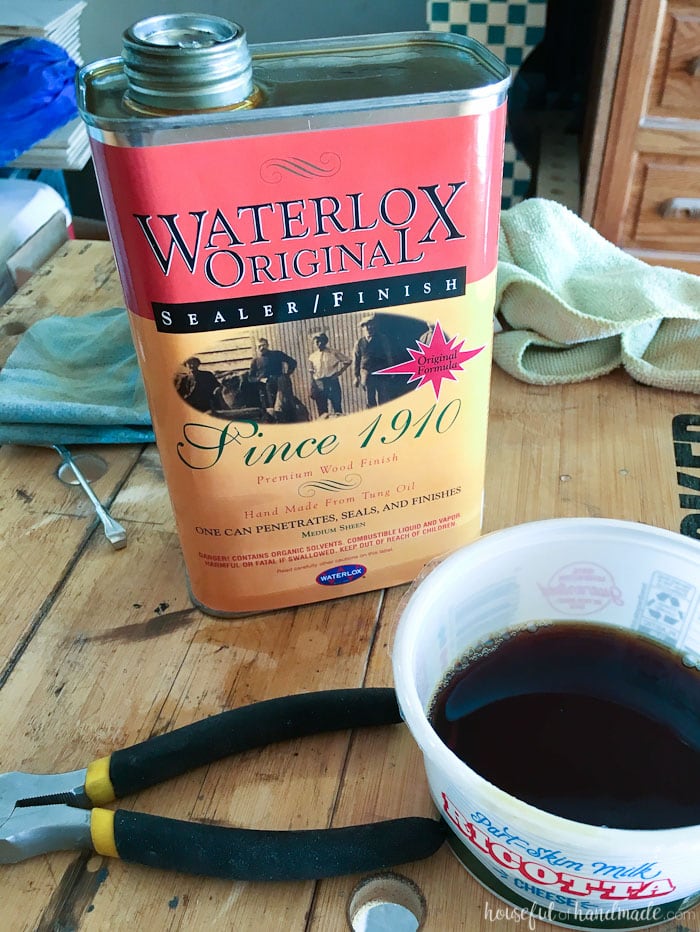
I partnered with Waterlox to use their Original Sealer to seal the wood bathroom countertop against all the water that comes with a bathroom.
This post may contain affiliate links. As an Amazon Associate I earn from qualifying purchases. Click here to read my full disclosure policy.
Spa Inspired Bathroom Design
When I was putting together the design board for our master bathroom, I knew I wanted a white vanity and white subway tile. But to add some warmth to the room I started looking at pictures of beautiful wood vanity tops and I was hooked!
The wood vanity top was the perfect way to add the rustic spa feel I was hoping for in our new bathroom. So now I had the design down, I needed to figure out how to DIY my perfect wood vanity top.
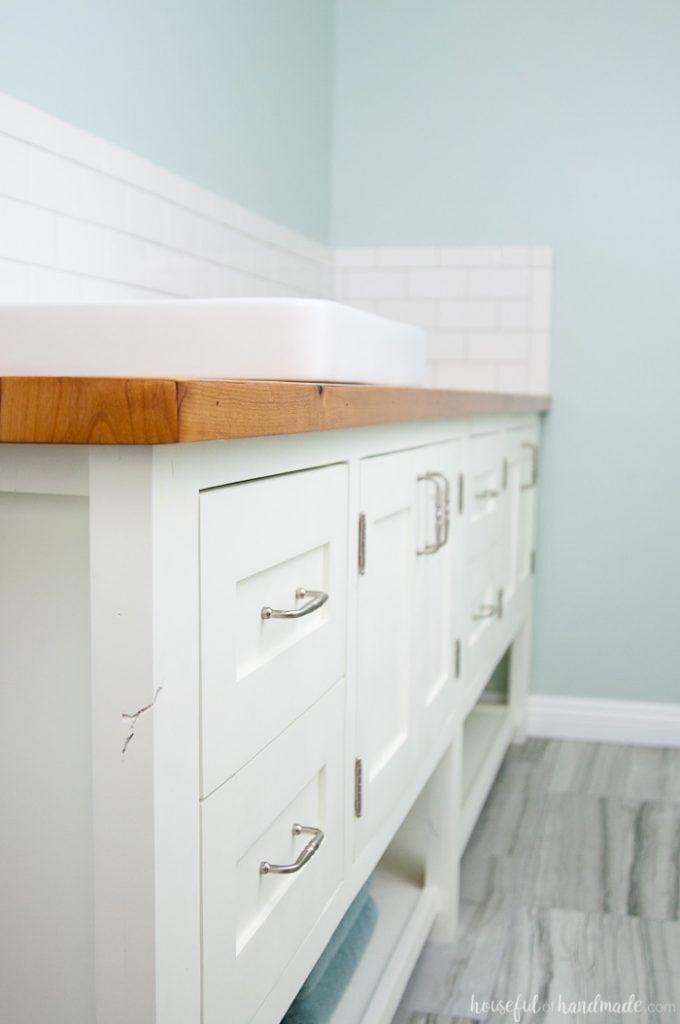
I knew building the vanity top would not be the issue, I have tackled much bigger projects (like the 8 foot double vanity build it was going on top of), but how do you protect a wood vanity top. I don’t know about you, but in our bathroom there is a lot of water!
I am sure banning the kids from going anywhere near my new master bathroom would help, but there will still be a lot more water than you should have around wood.
After many, many google searches I came across Waterlox Sealers & Finishes. Their Original formula has been around since 1910 and is made to penetrate the wood to offer a waterproof finish.
Unlike most wood finished that sit on top of the wood, Waterlox penetrates the wood.
I realized just how much the product soaked into the wood as I started layering it on the vanity top. Now that I had the right product, I was ready to build a wood vanity top and get this master bathroom done!
How Much Does a Wood Vanity Top Cost?
Now before we get into the nitty gritty of how to build & protect a wood vanity top, I want to talk budget. I am very budget conscious with our remodel.
When you have a whole house that needs to be redone, you need to be smart about how you spend your funds. One of the best parts about doing a wood vanity top with the Waterlox finish, it cost less than $150 for our 8 foot vanity top!
But it looks like it cost so much more. Compare that to around $800 for the same things in granite and this is definitely a win-win!
How long does a wood vanity top last?
It has been 3 years since we added our wood vanity top to our master bathroom and it still looks amazing! The Waterlox sealer did such a great job of protecting the vanity that we were excited to use it again in our new home.
And what better test for a waterproofing finish than on kitchen countertops? See how amazing it looks and learn how to build & seal wood countertops here. And we used a newer formula that has a matte finish.
Plus, you can use Waterlox on way more than just countertops! We just used it to protect the benches around our fire pit area and it looks amazing.
How to Build & Protect a Wood Vanity Top
Supplies:
- Waterlox Original Sealer & Finish
- 1/2″ plywood (a piece large enough for your vanity top)
- 3/4″ thick solid wood boards (enough cover your plywood)
- I used knotty alder for a harder (but budget friendly) wood and I love the knots in it. I used 4- 1×4 boards across the top and a 1×2 board for the edging along the front.
- Heavy duty construction adhesive made for wood
- 1″ wood screws
- 1 1/4″ wood screws
- Finishing nails
- Natural bristle brush
- Paint thinner
- Scrap wood
Build the vanity top
STEP 1- Cut and scribe plywood base
Start by measuring carefully, then cut a piece of plywood that would be the size of your vanity top, minus the 3/4″ edging on the front (and sides if needed).
I wanted the vanity top to hang over the front of the vanity 1″ so I cut my piece of wood 1/4″ bigger than the vanity.
EXPERT TIP:
Make sure to measure from the wall to the front of the vanity and measure in multiple spots along the vanity top since most walls are not perfectly straight.
Make sure the plywood is the largest measurement.
When I installed our vanity, I discovered our wall was very crooked and there was a 1/2″ difference from one end of the vanity to the other.
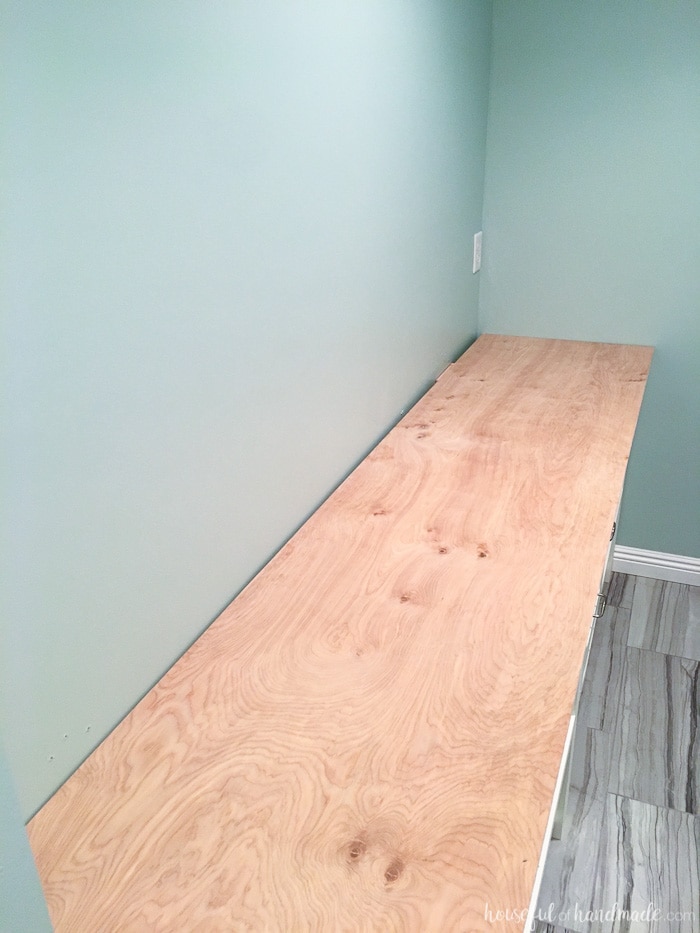
Once the plywood is cut, place it on top of the vanity. Make sure the plywood has an even overhang on the front of the vanity.
Now you will want to scribe the shape of the wall onto the plywood so you get a nice tight fit against the wall.
To do this, use a scrap piece of wood or paint stirrer and tape a pencil to it so the wood is flush against the wall and the pencil tip is at the edge of the wood at the widest gap.
Then keeping the wood flush against the wall, run the pencil along the entire piece of wood, drawing the line of the wall onto the plywood. Do this on any edge of the plywood that is going to be flush agains the wall.
Once you have your wall lines drawn on the plywood. Remove it and using a jig saw, cut along the lines. Now you have a piece of plywood that should fit nicely on top of your vanity.
STEP 2- Build wood top
UPDATE: The method I used of glueing the boards to the plywood is not recommended because it does not allow for wood movement.
The best method is to glue the pieces of wood together at the sides (like I did for these DIY wood kitchen countertops) and let that float on top of the plywood.
You can attach the plywood with a few screws & washer through large holes (like in the wood countertops post) to still allow wood movement.
I am still leaving the previous tutorial for reference, but this method will result in small gaps between the boards as the wood expands and contracts over time and with humidity changes.
It is time to add your solid wood to the top of the plywood now. I only had one side that was not against the wall so I started with that side and let the wood extend past the plywood on the other side.
When it was done, I just cut off the excess along my wall line with the jig saw. If both edges are going to be flush agains the wall you can do that on both sides.
Cut the edges that will not be against the wall at 45 degree angles. I cut the short edges on the ends of my 1×4 boards with my miter saw and I cut the long end of the board that would be on the front of the vanity with my table saw.
Add a line of construction adhesive to the underside of the wood board and then carefully line the bottom edges of the 45 degree angle with the top edges of the plywood. Clamp the board in place and secure with some 1″ wood screws from underneath.
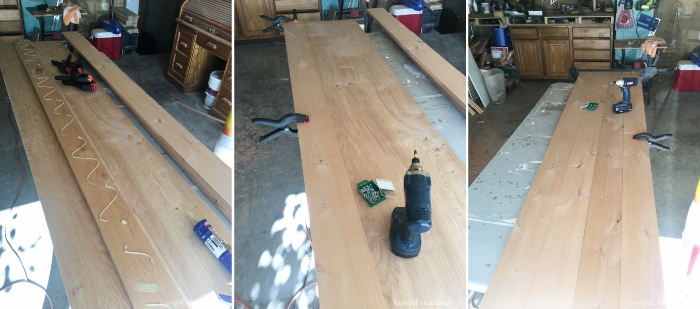
Now repeat with the remaining boards until you have covered your entire plywood with the solid wood boards. Make sure the cut the edges of any boards that will not be flush against the wall at a 45 degree angle.
Once all the top boards are secure, it is time to add the edge boards. Cut these boards at 45 degree angles to. I cut the 1×2 board for the very front of the vanity with my table saw.
For the sides, I cut 4 pieces of 1×4 boards 1 1/2″ wide (so they were the same as my 1×2 board), then mitered the top and used them to cover the side edges. I feel like it looks nicer to have the seam in the boards on the side the same as you do on the top. I made these cuts on my miter saw.
Using the construction adhesive and finishing nails, secure the edges to the vanity top. Make sure the miters match up nicely.
Let the adhesive dry well.
STEP 3- Cut top to fit & for sinks
Cut the excess boards off the sides that will be flush against the walls.
Flip the vanity over so the plywood is on top and use the plywood that was already cut to fit flush against the wall as a guide to cut away the excess boards.
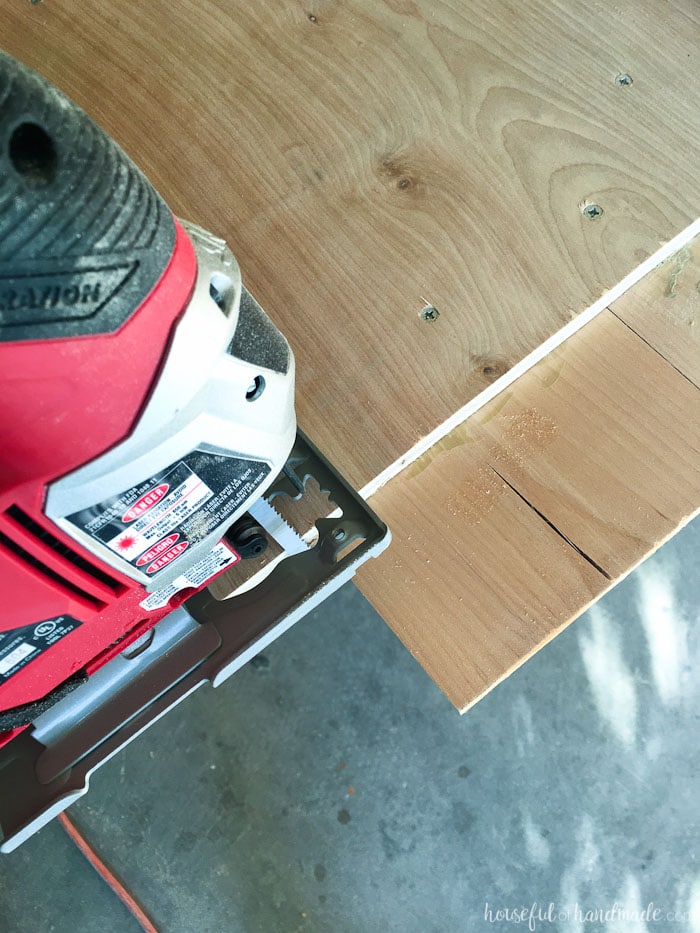
Then it is time to cut holes for your sink.
I chose to cut the holes before sealing the wood so that the edges where I would be cutting would be properly sealed too.
Obviously there will be more water around the sinks so this is a good precaution.
Use the cutting guide that comes with your sinks to cut the holes. Use a drill to make starter holes, then use a jig saw to finish the cutting.
STEP 4- Sand vanity top
Fill any holes with a stainable wood putty. I decided to leave the few holes left by the finishing nails to the edging because I love the homemade, rustic look of it.
Give your DIY vanity top a proper sanding.
Start with a coarse sandpaper, then step down to finer grit. Use a 100-150 grit sandpaper for the final sanding to make the surface ready to receive the Waterlox sealer.
After sanding, clean off the surface of your wood so you have no lingering dust.
I start with a good vacuuming, then use a microfiber cloth. Then I finish with a tack cloth. You can also use a lint-free cloth dampened with mineral spirits.
Seal the Vanity Top
If you want to stain your countertop, you need to do it before adding the sealer. The Waterlox TrueTone color infused Tung Oil stains are a great option that works with the sealer. You can see how each color looks on different species of wood here.
Now before we get into applying the Waterlox sealer & finish we need to talk about a few things. This finish is super awesome because it is a tung oil to penetrate the wood and a resin to seal and waterproof the wood. This special finish requires oxygen to cure.
If you are lucky enough to have a bathroom with windows, you can use a fan on low in the open window to bring in fresh oxygen to allow the Waterlox finish to cure. I am not that lucky. All of our bathrooms are completely window free.
So after reading all the instructions on the Waterlox website, I decided the best option would be to apply the finish to our vanity top in the garage and then install it after it was dry.
This plan worked well for us because the weather has been so nice, we were able to leave our garage door open all day (closing it at night). Each coat of finish was properly dried after 24 hours.
There was no wind so we didn’t have to worry about dust being blown into the finish before it dried. And most importantly, I didn’t have to worry about dripping the finish on my new tile floor or all over the vanity.
STEP 1- Apply the first coat
Now it’s time to add the first coat of Waterlox Sealer & Finish!
Pour some of the finish into a different container. Only pour out a little bit because it will start to set up when exposed to oxygen and you should never return unused finish back to the container or it can start to gel. Immediately put the plug back on the container to keep out oxygen.
I’m not going to lie, I was a bit scared to finally put sealer to the wood, but it went on like… well, like water. The finish is not thick like a polyurethane coating, but more like a stain.
Using a natural bristle brush, soak up a good amount of the sealer and brush it onto the wood. The wood will start to darken as the finish absorbs into the wood, bringing out the natural deeper tones of it.
Working with the grain, brush the finish onto the wood. Make sure to get all around the edging (even on the underside of it) and inside the sink holes. Feather out the strokes so you don’t end up with thick spots.
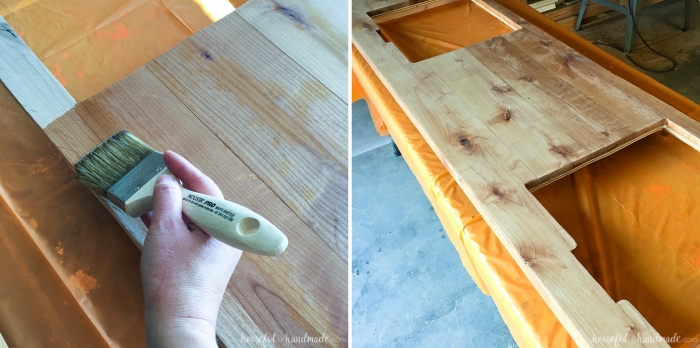
The first coat really soaked into the wood almost immediately. The wood looked wet, but not shiny at all.
Let the coat cure with good ventilation (in our case, leaving the garage door open) for 24 hours. If it is cold or humid or you have poor ventilation it can take longer than 24 hours to cure.
STEP 2- Apply remaining coats
When the first coat is fully dry, you can put on the second coat.
Because of the way the Waterlox finish is made to work, you do not even have to sand between coats, I just wiped it down with a lint-free cloth to make sure there was no dust on it before adding the new coat.
The second coat left a bit of sheen on the surface, but after the 24 hours was almost completely gone as it too had soaked into the wood. I was really impressed with how much it was truly penetrating the wood.
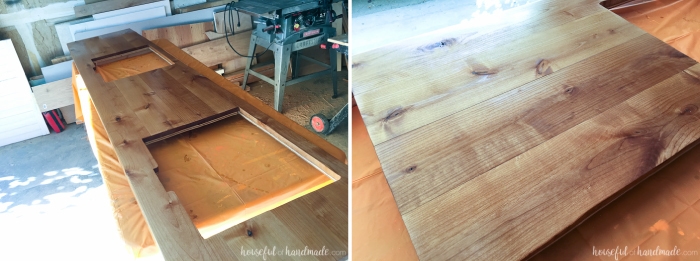
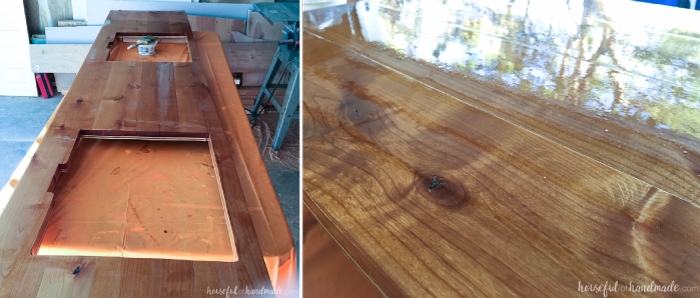
After 3 more coats, the surface had an almost glass-like film on the top of the entire vanity top. The whole surface had a sheen, that will dull to more of a satin sheen as the finish continues to cure.
After the 5th (and final) coat of Waterlox, we let the vanity cure in the garage for 48 hours before bringing it in the house to install.
It will continue to need adequate oxygen (which we will give it with open windows in the bedroom and fans) for about 30 days until the surface is fully cured. But I was eager to get it installed so we could continue on with the remodel.
Install the vanity top
To install the vanity top, I needed something on the vanity to attach the top to. Using some scrap wood, I cut some 1x3s with the ends at 45 degree angles to attach to the corners of the vanity.
I used my Kreg jig to add holes to these pieces of wood and secured them to the top corners of the vanity.
After installing, drill holes larger than the screw head into the center to attach the vanity top. This larger hole holds the vanity in place (with a washer) but still allows wood movement.
Carefully slide your new wood vanity top in place.
Use 1 1/4″ wood screws with washers to attach it to the wood corners. Now the vanity top is not going anywhere!
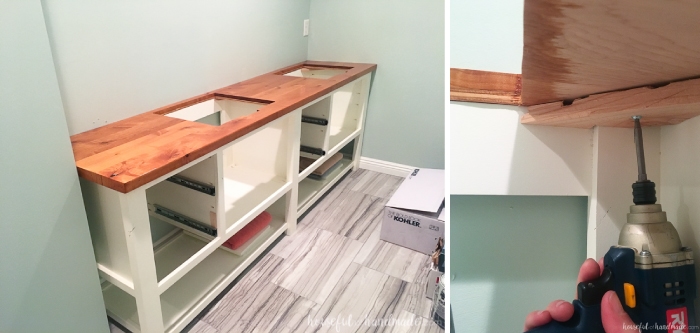
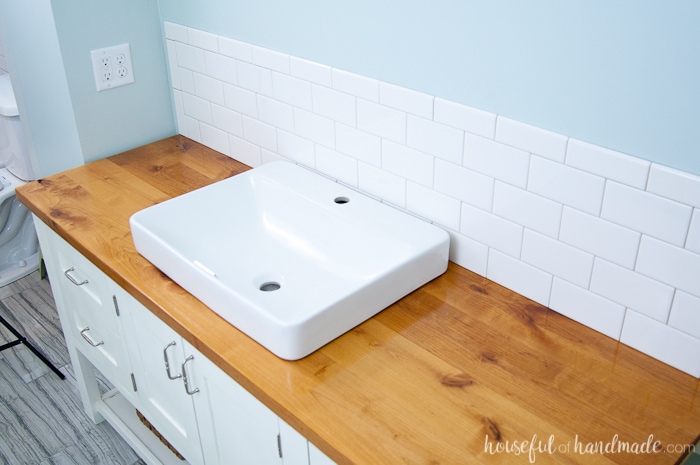
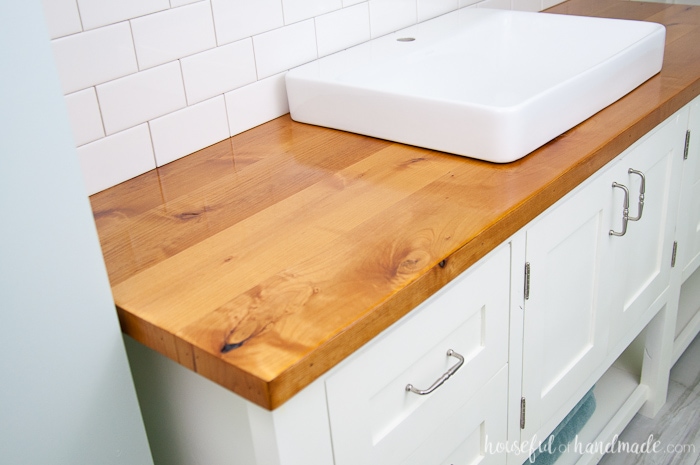
I couldn’t believe the difference the new wood vanity top had on our room.
It adds the warmth I was looking for in an otherwise white and gray bathroom. And it really does feel like a spa!
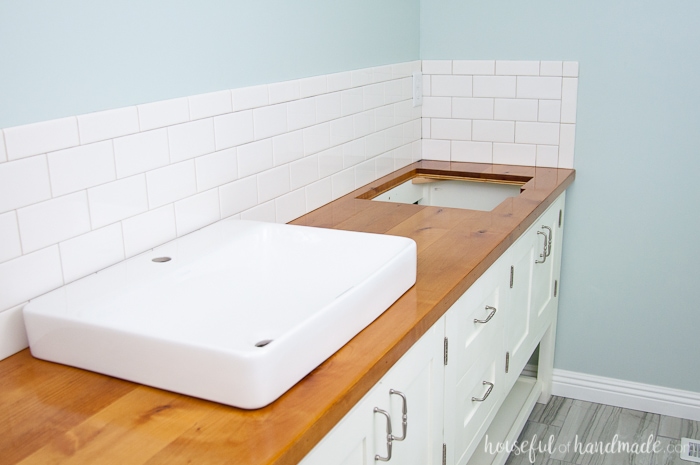
I was so eager to get the rest of the vanity finished, that I spent my Saturday night tiling the backsplash.
It only took me a couple hours and I am finally seeing the finished room come together.
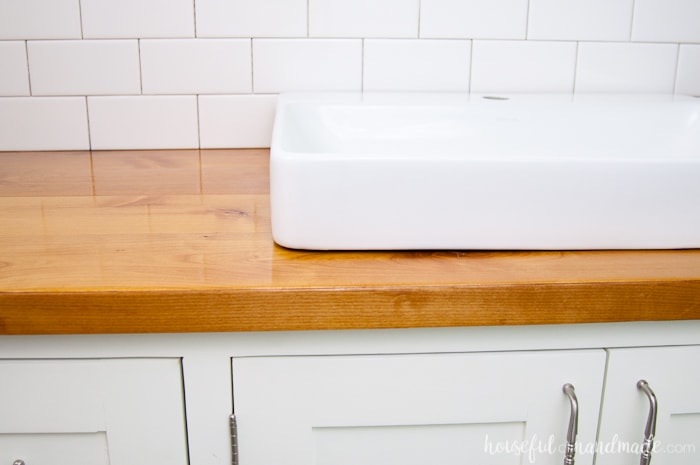
There is still a lot to do, if you look closely you will see that I need to grout the backsplash.
We also need to buy sink #2 and get them installed (I am just waiting until the backsplash is finished so it’s not in the way). But I just wanted to give you a sneak peak of what our DIY spa like bathroom will look like with our new wood vanity top.
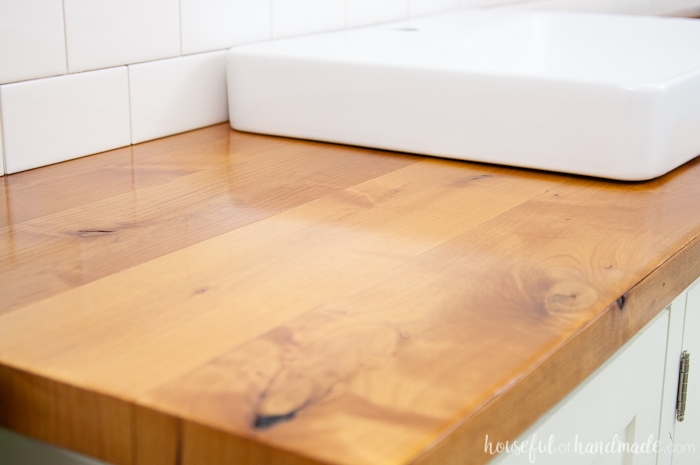
And don’t forget to check out Waterlox for your own DIY wood vanity top. I promise you will not be disappointed. I’m practically giddy with how awesome it looks 🙂
Now it’s time to go finish up that tile back splash so I can install that sink. I am beyond ready to be able to use my new bathroom!
Thank you to Waterlox for sponsoring this post. I only recommend products that I use and love and all opinions are 100% my own. Click here to read my full disclosure policy.
I’m looking to do something similar for remodeling our laundry room with a sink and I like this idea! What are your thoughts on using 2 sheets of plywood laminated together? It would take away the need to consider for wood movement, but I’m liking the look of the individual boards as well. Great work and thanks for sharing!
How does the wood hold up to dings and scratches?
With daily use it has help up very well. Keep in mind it was two adults using it. I have since made a kitchen counter top from wood as well. It had handled all the ware and tare of a family of 4 using the kitchen perfectly.
https://housefulofhandmade.com/build-seal-wood-countertops/
Thanks for the info. I do wish you had larger pictures vs. the tiny Pinterest image links. Did you have any issues with the wood being flat without using a planer?
It takes a bit more effort with out a planer, but you just take your time when choosing the wood. We have picked through literally over 1,000 pieces of lumber at this point but it makes the projects easier in the long run. I just checked the images on the post itself and they are standard size for web. Is there a specific detail you are trying to see?
I am glad that I came across your site, this looks like something that will be perfect for our guest bathroom. One question, would a curling iron on the wood countertop be a problem?
Once it is fully cured you should be okay. I have placed hot (not directly off the stove, but still hot) pots on my wood kitchen countertops (you can see them here) and they are fine. I have also used a curling iron on my bathroom countertops, with the kickstand up, and there are no marks.
Thanks for the post Kati! We jumped in and built TWO wood bathroom countertops this summer as we remodeled all three of our bathrooms. Question – the tops are fully cured with Waterlox. Have you found anything that is your favorite to clean them. So far, it’s just been mild soap and water for us. Wondered if that’s good or if something else might help keep them looking beautiful. I’d love to share our “after” photos with you!
Thanks!
JT
So glad you are loving your countertops! I am big on non-toxic cleaners so I use just soap as well, my favorite is Branch Basics, but you have to be careful to use it very low strength cause it is such a good cleaner. Since I don’t use hair products that can coat the countertop, I just use it at the streak free concentration with a microfiber cloth. If I want it disinfected, I use Force of Nature. Those are the only two cleaners I have in my home. And I would love to see photos! You can always email them to me or tag me on social.
Love the way they look and we are currently in a bathroom remodel. We want to do the wood top but want a darker color, after staining with the color we want will the Waterlox make it darker or stay the same color? May be a silly question but want to make sure.
Since different woods react differently, always test it on a scrap first! Waterlox just released some new color infused tung oil stains that can definitely be used under the Waterlox sealer. I used one on this dining table build.
Absolutely beautiful!
Which Waterlox products did you use. Only the “Original Sealer/Finish” or did you use the Universal sealer too? How’s the sheen after if fully cured? Hoping for not too high of a gloss but there are SO MANY options on Waterlox’s site.
For this project I used the Original Sealer/Finish only. It does have a decent gloss to it. But I just finished our kitchen countertops with their new H2OLOX finish (that used the Tung Oil Sealer as the base coat) in matte and it is a very low sheen finish. I love the way it turned out. You can see it here: How to Build & Seal Wood Countertops
@Brodie, sheen should be a lesser concern in my opinion. Lesser than the durability of the surface. Sheen can be lessened with wet sanding after final coat cures. Wet sanding can be done with wet/dry sandpaper or rottenstone or some other abrasive powder.
Beautiful job. The counter top is absolutely gorgeous. Another idea that worked for us is that we found a remnant piece of granite for 1/2 price. The wood is a great look and really warms up the space.
Thanks for the idea. Remnant pieces are definitely a great way to save money.
Beautiful countertop! Does the sink sit on top of the countertop? If so, why cut out the large hole on the wood?
Yes the sink sits on top, but the large hole is required for the sink to fit. All sinks come with a template that is needed to cut out of the countertop to fit.
@Kati, If the sink actually sits on top, why do you have to cut a large hole for the sink to fit? Why not just a small round hole for the drain? What am I missing here? thanks
I used the template that was provided by the sink that was used.
Did you build the bottom cabinet? Or buy it? I need to build my own because the space fir the vanity is only 12”
I built it! You can see all about it here: Mission Style Open Shelf Bathroom Vanity Build Plans.
What paint color did you use for the walls?
Hi Kelly, the paint color was kinda custom mixed. The first coat was too light so I added a slightly darker color to it. I mixed approximately 2 parts Juniper Breeze to 1 part Mountain Falls (both Behr paints).
This post is so amazing! I’m starting this project this weekend. Since you shouldn’t glue the boards to the plywood, what exactly is the purpose of the plywood other than using it to as a guide to make sure boards fit flush against the wall? I’m planning to use 2x4s without the trim along the front instead of 1x4s. Do we still need the plywood as support over the cabinet?
I used the plywood to add thickness and support to the 1x boards. If you are using 2×4 boards, you do not need it, but it might be easier to scribe the shape of the wall with a thin plywood or even cardboard template. Then you can transfer that to your build countertop to get a clean fit. Hope this helps! And please share pics when you have it done, I’d love to see.
I see you’ve had this beautiful looking counter top for a while, and we’re planning on doing one very similar in main bathroom. How has it handled the cleaning? How/what do you clean it?
(If you already answered this I’m sorry I went through comments and couldn’t find)
It is holding up great! I will note, I use very little product on my hair and face (never use hair spray) so I don’t tend to deal with product buildup on my bathroom surfaces. I have cleaned it with very mild natural cleaners and microfiber cloths only (I’ve used either Force of Nature, Branch Basics, or Norwex). I wouldn’t use a strong bathroom cleaner because it can strip the finish. I am definitely going to do another wood vanity top in my next house… someday. I love it that much!
Very good article thank you for that
Did you also seal the bottom of the wood as well or no? And when you recommend floating it on there instead do you mean not attaching it at all? Or just attaching it with a few screws only instead of glue. Looks great thanks for the good instructions.
I did not seal the bottom, just the top and cut edges. Hopefully the bottom never really gets any moisture. When I say floating, I would glue/attach the boards to each other. For easy attaching your can use dowels, biscuits or pocket holes. Then just put it on top of the plywood with maybe just a couple screws to secure. They also make fitting that allow for wood movement that you could look into.
Thank you so much for this! We are building our own vanity top and i wasn’t quite sure what to do. I was worried about keeping epoxy perfect while drying in the garage, so this is great! We found some really pretty wood at a salvage store and are wood gluing it to plywood. Hopefully it turns out as pretty as yours!
Using salvaged wood will be gorgeous! I don’t know if you saw some of my comments, but I learned a lot about wood since this project. You will have much better results if you do not glue the wood to the plywood. The wood boards and plywood will expand and contract differently. Glueing the wood to the plywood will cause a few cracks to develop between the boards. I would recommend glueing up the boards together and then just floating it over the plywood base so it can expand underneath it. Hope this helps and I would love to see pictures of your salvaged wood vanity top!
Could you tell me where the vanity base from from?
We built it. You can see all about it here: Mission Style Open Shelf Bathroom Vanity.
I just came across your site. We are actually building and are doing wood tops in our bathroom so. I had just begun to research for water proof items. This is so timely. Are you still pleased with the waterproofing. We are using walnut , ourselves. Your looks amazing
Also. Where did you find your base? Everywhere I look they have some kind of stone. I really prefer wood.
Thanks for sharing
I love the waterproofing. We have had our top for a few years now and it still looks great. Also, I am not sure what you mean by base?
I check out your site, just beautiful. I totally agree with your all ideas. I read so many amazing tips about your article. I enjoy it. Keep it up.
Hi,
I love this idea. Do you think you can stain the wood before sealing it?
I know Waterlox has tung oil stains that should work with their sealer. I would check with them.
Excellent project and write-up. Thank you! You’ve inspired me to build a top of my own. Seriously. Just need to decide what species I’ll go with…. The plywood base and edging are thing I probably wouldn’t thought to do, but should definitely make this a much more stable and quality project.
Thanks Karl! I would recommend that you glue and attach the wood top to each other and not glue it to the plywood (I am learning that the plywood and solid wood boards expand and contract differently). That way the boards can move on their own. I have a couple small gaps between my boards now after a year. But I still love how it looks and its a great top (and so much cheaper than other counter tops).
Ok, so it appears your vanity top would be over a year old by now. It is beautiful! Is it still holding up? Have you needed to reapply Waterlox? I’m planning on converting a dresser to a vanity and do not want to put a countertop over the dresser top. I want to put a sink similar to yours on the dresser. This would be for my teenage girls’ and guest bathroom. Just want to be sure it’ll last! Thanks for your insight!
Yes we have been using our vanity for just over a year and it still looks great. I try to not let puddles of water stay on the surface too long (I just wipe them off when my husband splashes with a towel). The only thing I would do differently (which may not apply to you), is to attach the wood boards to each other with wood glue and probably pocket holes and have them floating on the plywood top instead of attaching them to the plywood because the wood expands and contracts and I have a couple very small gaps. Other then that, I would recommend the Waterlox. It has held up nicely and looks great still.
Will varathane work also?
I’m not sure what you mean by Varathane? It is a brand. I use polyurethane on a lot of wood finishes to protect it. It might work on a vanity top, but what I liked about the Waterlox is that instead of sitting on top of the wood like the polyurethane, it soaks in to create a truly waterproof finish. If water got under your polyurethane finish it could still absorb into the wood causing problems. I do use spar-urethane for outdoor projects and it works well with the elements so maybe that could be an option.
I am confused what parts of the boards you cut at 45 degree angles. Can you explain?
I cut the boards that cover the edges of the plywood (the top and the front) so that they were mitered together making it look like one large chunky piece of wood. Does that make sense?
Hey! This is beautiful and We are going to try it out! How did you get your boards to sit side-by-side so well? I’m having trouble with gaps:(
Make sure you buy the straightest boards you can find. I talk about how I pick out my boards here: Beginners Guide to Buying Lumber. And if you have a friend with a fancy shop, you could smooth out the edges with a jointer or try to smooth them out on a table saw.
Hey! How is your vanity top holder up with this sealer? Did you stain your wood before sealing it or is this the color the sealer makes it? Also, why did you put holes in the corner pieces to attach the vanity to the top?
Hello Nikki! The vanity is holding up so nicely. The sealer is great. I did not stain the word before, the sealer just brought out the natural color of the wood. The holes are to attach the wood on the edge of the vanity to hide the plywood. I attached the top to the vanity from underneath. You could fill the holes, but I like the rustic look of exposed nail holes.
Your bathroom looks fantastic! I need to do something like this. You make it look so easy!
Thanks Jessa! I love how it turned out, and it really wasn’t too hard.
Love the plans! Could you share the model of that sink?
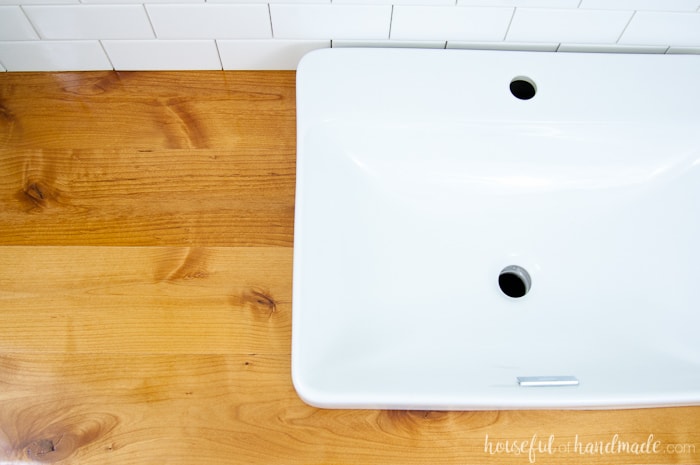
Of course Ian! It is the Kohler Vox rectangle vessel sink.
Very nice!
Thanks!
It looks amazing!! I’m with you, I like the natural, rustic look of wood and the warmth it adds to the space. You did such a great job making the countertop – and I can’t believe how much cheaper it was than a traditional store-bought countertop. We are starting our master bathroom reno sometime soon, i’ll have to keep this in mind!
Thank you Sarah! I love the way it turned out. It is absolutely beautiful.
We will be starting our master bath remodel soon. I love a wood top. Great idea. Thanks!
Thanks so much Amy! Good luck on your remodel.
AHH! This is so key! We had friends with a wood top kitchen counter and they weren’t sealed properly so they started rotting :S I’ll be sharing this with her
Thanks Ariel! Wood and water don’t play nice so the right sealer is definitely key. Hopefully they can fix their counters so they last for many more years!
Holy moly – I LOVE your new vanity top! What a great feeling to create such a beautiful piece all on your own. I actually plan to use a wood countertop when I redo our bathroom, and I’ve head about Waterlox, but never used it, so I’m glad to hear it’s a great product!
Thanks so much Jenny! I love the way it turned out. Waterlox was so easy to use and I couldn’t be happier with how it turned out. You should definitely try it. Good luck with the redo 🙂
What a great idea to make your own countertop, and I love the vanity too 🙂
Thanks Nicole! Making your own is so cost effective but I think it still turned out so beautiful.
This came out amazing, pinning for future reference!
Thanks so much Roxanne 🙂
What an absolutely beautiful vanity. That wood top is so pretty! Great job
Thank you Kristen! I love the natural wood tones in the bathroom.
KATI! This looks AMAZING! Awesome job! xoxo
Thanks Mary 🙂
I absolutely love the combination of bright white and wood tones. I have plans to remodel one of our bathrooms in the future, and I’d love to build a vanity like that! Pinning for future reference!
Thank you Vineta! The white with the wood is my favorite. Good luck with your bathroom remodel 😉
This is gorgeous, I also have wooded counter top for my island and laundry room, I was worried that the water would damage it but its been a year and so far it look the same.
Maria
Looks beautiful! And you make a great point. I would never have thought about using a penetrating sealer. Our bathroom definitely gets a lot of water as well. I am impressed you built that as well. Looks so good! Pinning. We have a bathroom remodel coming our way as well.
Thanks Rachel! The penetration sealer makes all the difference when it’s close to water.
It looks so amazing! I can’t believe you made that yourself! Love!
Thanks Samantha. It was a really easy DIY too. I am loving it so much.
It looks so good!! What a great project! Love all the white in your bathroom!
Thank you Meg! I knew I wanted a lot of white to give me a clean bright area. I couldn’t be happier!